Paper-Folding Ideas to Help Students Understand...
23
Paper-Folding Ideas to Help Students Understand High School Geometry Concepts 9-12 Workshop NCTM Annual Meeting Session 988 San Antonio, TX April 12, 2003 James R. Rahn Southern Regional High School, Manahawkin, NJ [email protected] [email protected] Website: http://jamesrahn.com
Transcript of Paper-Folding Ideas to Help Students Understand...

Paper-Folding Ideas to Help StudentsUnderstand High School Geometry Concepts
9-12 WorkshopNCTM Annual Meeting
Session 988San Antonio, TX
April 12, 2003James R. Rahn
Southern Regional High School, Manahawkin, [email protected]
[email protected] Website: http://jamesrahn.com
Page 2
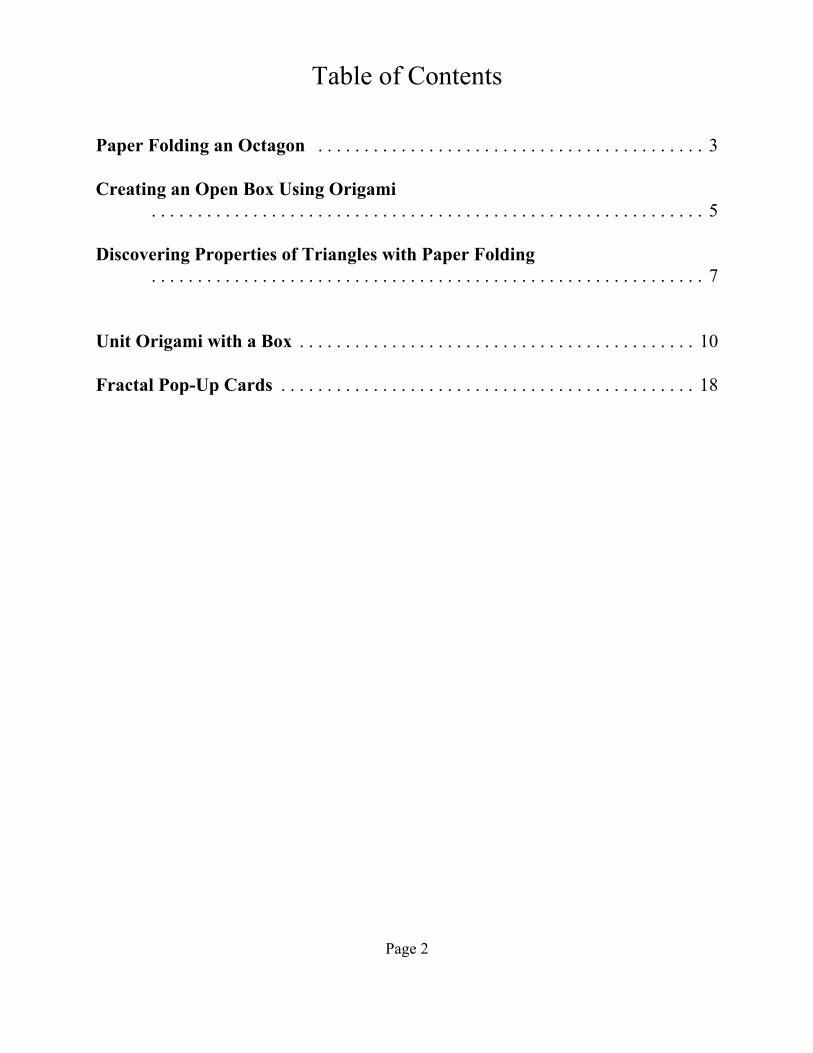
Table of Contents
Paper Folding an Octagon . . . . . . . . . . . . . . . . . . . . . . . . . . . . . . . . . . . . . . . . . . 3
Creating an Open Box Using Origami. . . . . . . . . . . . . . . . . . . . . . . . . . . . . . . . . . . . . . . . . . . . . . . . . . . . . . . . . . . . 5
Discovering Properties of Triangles with Paper Folding. . . . . . . . . . . . . . . . . . . . . . . . . . . . . . . . . . . . . . . . . . . . . . . . . . . . . . . . . . . . 7
Unit Origami with a Box . . . . . . . . . . . . . . . . . . . . . . . . . . . . . . . . . . . . . . . . . . . 10
Fractal Pop-Up Cards . . . . . . . . . . . . . . . . . . . . . . . . . . . . . . . . . . . . . . . . . . . . . 18

Page 3
Figure 7
Figure 8
Paper Folding an Octagon
Activity: To construct an octagon with 8 pieces of unit origami.
Materials: Use two colors, four pieces of each color.
Steps:
Step 1: Begin with a square piece of paper.
Step 2: Assume that the origin of an x, y coordinate system is in the center ofthe square.
Fold in half on the y axis. Open back to a square.Fold in half on the line y = x. Open back to asquare.Fold in half on the line y = -x. Open back to asquare.Identify the fractional parts of the square boundedby the folds.
See Figure 1
Step 3: Fold the “maximum point”, y = x to the origin.Describe the triangle formed by the fold.Fold the “maximum point”, y = -x to the origin.Describe the triangle in terms of the previoustriangle
See Figure 2

Page 4
Figure 9
Figure 10
Figure 11
Figure 12
Step 4: Fold in half on the y axis.Fold (0, -y) inside to meet point (x, 0). Describe the figure. What fractional part of the original square is its area? (See Figure 3)
Step 5: Place two parallelogram units in the sameposition, so that the close end is at the bottomright. There should then be an open end at the topleft. (Figure 4)
Step 6: Slide the top parallelogram into the open part ofthe bottom parallelogram, rotate the topparallelogram 45 degrees until the long side liesalong the inside fold. (Figure 5)
Two small isosceles right triangles should appearabove the inside parallelogram. (Figure 6)
Page 5
Figure 13
Figure 14
Figure 15
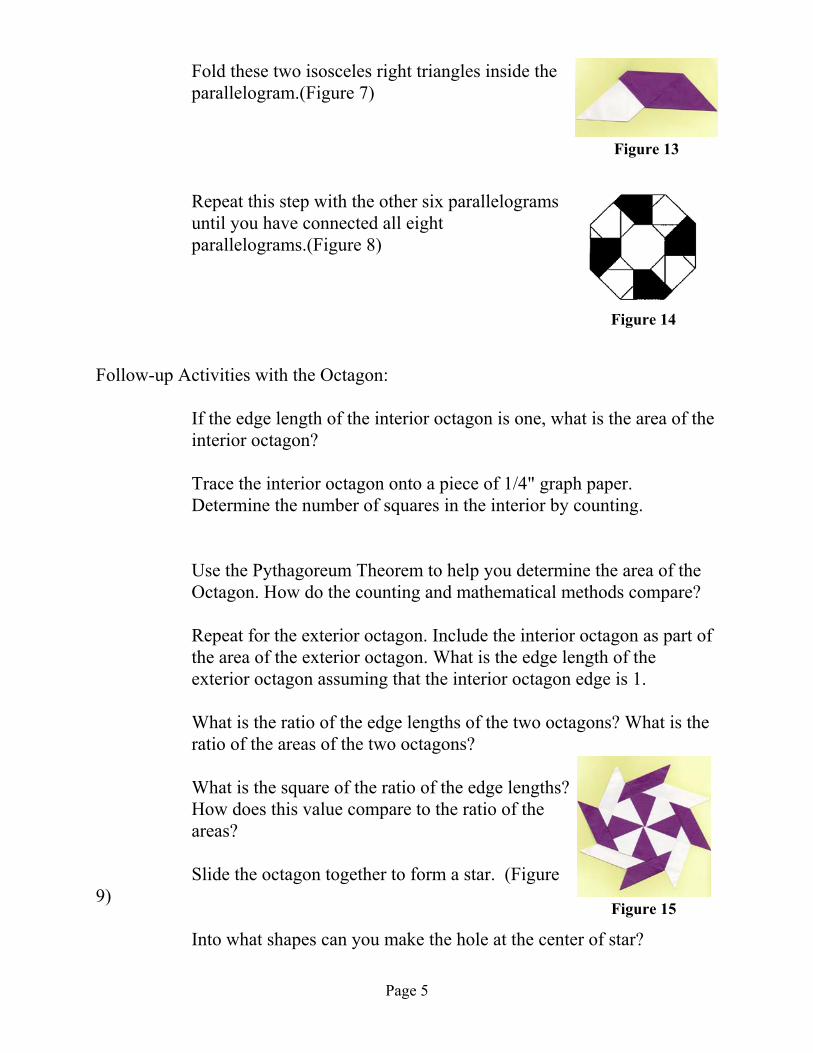
Fold these two isosceles right triangles inside theparallelogram.(Figure 7)
Repeat this step with the other six parallelogramsuntil you have connected all eightparallelograms.(Figure 8)
Follow-up Activities with the Octagon:
If the edge length of the interior octagon is one, what is the area of theinterior octagon?
Trace the interior octagon onto a piece of 1/4" graph paper.Determine the number of squares in the interior by counting.
Use the Pythagoreum Theorem to help you determine the area of theOctagon. How do the counting and mathematical methods compare?
Repeat for the exterior octagon. Include the interior octagon as part ofthe area of the exterior octagon. What is the edge length of theexterior octagon assuming that the interior octagon edge is 1.
What is the ratio of the edge lengths of the two octagons? What is theratio of the areas of the two octagons?
What is the square of the ratio of the edge lengths?How does this value compare to the ratio of theareas?
Slide the octagon together to form a star. (Figure9)
Into what shapes can you make the hole at the center of star?

Page 6
Creating an Open Box Using Origami
Activity: To create two different open boxes usingpaper-folding.
Materials: Two sheets of 8.5" x 11" paper.
Steps:
Step a: Fold paper in half so new paper is 8.5' x5.5". Leave folded. Fold should be atthe top.
Step b: Fold the paper again in half by bringingthe open side up to the fold. Leavefolded.
Step c: Fold the top right hand corner down toform an isosceles right triangle. Openthis fold.
Step d: Fold the bottom right hand corner up toform another isosceles right triangle. Open the fold.
Step e: Fold over the right side to form an Xinside a square. Open the fold. Repeat steps b, c, and d with the lefthand side.
Step f: Open the rectangle. Turn the rectangle until the open side is at thetop.
Step g: Fold one layer of the top left and right hand corners down to form an isosceles right triangle. Fold both layers from the bottom right andleft hand corners up to form two other isosceles right triangles.
Step h: Fold down the top from trapezoid to match the trapezoid at thebottom.

Page 7
Step i: This last fold forms a pocket. Reach in and pull open the box. Formthe edges of the box.
Step j: Reverse fold the diagonal and then fold backwards the isoscelestriangle to fit into the already formed pocket. Repeat this for bothsides.
You have formed an open box. What if you fold the paper the other way in step a.
Repeat steps a-j with the paper held the other direction.
Activities with the two boxes:
How does the volume ofthe one box compare to theother?
What are some of theways the two volumes canbe compared?
Can you compare the twovolumes algebraically?
If one sheet of normalpaper is cut in half, howwill the volume of theoriginal box compare withthe new box?
If the sheet of normalpaper is subdivided infourths, how will thevolume of the originalbox compare to the newbox?
What will the box look like if you use normal origami paper to make thebox? What shape will it be?
Activity from:Algebraic Thinking through Origami

Page 8
Mathematics Teaching in the Middle SchoolFebruary 2001.Discovering Properties of Triangles with Paper Folding
Activity: To fold the perpendicular bisectors, angle bisectors, and medians of atriangle.
Materials: Patty Paper, ruler, and pencil
Steps:
Step 1: Draw a large acute scalene triangle on your patty paper with a pencil.
Step 2: Make three copies of your triangle.
Step 3: Fold the patty paper to construct the perpendicular bisectors of eachside of your triangle.
Step 4: What do you notice about these three perpendicular bisectors? Markthis point of concurrency as the circumcenter, using the letter C.
Place a second patty paper over the triangle. Mark the distance fromthe circumcenter to one of the vertices. Compare this distance withthe distance to the other two vertices. How do they compare?
Step 5: Take another copy of your large acute scalene triangle and fold thethree angle bisectors.
Step 6: What do you notice about these three angle bisectors? Mark this pointof concurrency as the incenter, using the letter I.
Slide the edge of a second patty paper along one side of the acutetriangle until an adjacent perpendicular side of the patty paper passesthrough the triangle’s incenter. Mark this distance on the patty paper. Compare this marked distance with the distance to the other two sides.
Step 7: Take another copy of your large acute scalene triangle and fold thethree medians of the triangle.
Step 8: What do you notice about these three medians? Mark this point ofconcurrency as the centroid or center of mass, using the letter M.

Page 9
Step 9: Take another copy of your large acute scalene triangle and fold thethree altitudes.
Step 10: What do you notice about these three altitudes? Mark this point ofconcurrency as the orthocenter, using the letter O.
Step 11: Place the four triangles on top of each other and notice if points C, I,M, and O are all identical.
Step 12: Repeat steps 1-11 using a large obtuse scalene triangle. Place theobtuse trangle so it only takes up about ½ of the paper diagonally. Place the longest side of the triangle toward the middle of the paper.
Step 13: Repeat steps 1-11 using a large right scalene triangle. To create aright triangle, first fold a right angle, draw two sides on this rightangle and then add the hypotenuse.
Step 14: Repeat steps 1-11 using a large isosceles triangle.
Step 15: Repeat steps 1-11 using a large equilateral triangle.
Activities:
What can you describe about the position of the circumcenter of atriangle?
What can you describe about the position of the incenter of a triangle?
What can you describe about the position of a centroid of a triangle?
Do any of the four points line up to form a line? Which points line upto form Euler’s line?

Page 10
Unit Origami with a Box

Page 11

Page 12

Page 13

Page 14

Page 15

Page 16

Page 17

Page 18
Fractal Pop-Up Cards
Activity: To create three-dimensional pop-up cards and then study patternscreated through the construction.
Materials: Two pattern sheetsTwo backing sheetsGlue Sticks
Steps for Card 1:
Step 1: Fold the pattern sheet in half so the one set of line segments ends onthe fold. Notice there are 4 different length segments on the sheet. You will be cutting along the longest segment each time and thencompleting a reverse fold.
Step 2: Cut along the two longest line segments . Fold the center rectangle atthe end points of the next longest line segments.
Step 3: Open the card and reverse fold the rectangle inside.
Step 4: Repeat steps 2 and 3 for the next longest line segment. You have tworectangles that will need to be folded inside on this step.
Step 5: Repeat steps 2 and 3 for the next longest line segment. You will havefour rectangles that will need to be folded inside on this step. Becauseof the thickness of the paper you want to fold two rectangles at a time.Then complete the reverse folding.
Step 6: Repeat steps 2 and 3 for the next longest line segment. You will haveeight rectangles that will need to be folded inside on this step. Because of the thickness of the paper you want to fold two rectanglesat a time. Then complete the reverse folding.
Step 7: Glue a sheet of colored paper that is already folded in half to the backof the card. It is best to glue one side at a time. Once you have gluedboth sides, you can open the card to see a pop-up design.

Page 19
Activity Follow-up Questions:
Find the pattern created by this pop up card design.
Stage 1 2 3 4 5 6 n
Number of boxes
Total Number of allsize boxes
How are total number of all size boxes related to the Tower of Hanoi?
Steps to Card 2:
Step 1: Fold the pattern sheet in half so that three segments start on the fold. Notice there are three different length segments.
Step 2: Cut along the longest line segment that is in the center of thearrangement of line segments.
Step 3: Fold the left side at the base of the other line segments. Open the cardand reverse fold the rectangle inside the card.
Step 4: Repeat steps 2 and 3 by cutting along the second longest linessegment. You should have two middle sized line segments. One cutshould be through four layers of paper and one cut should be throughtwo layers of paper. This should create two places you can fold so thefold is at the base of shortest line segments. The rectangles should beon the left of each cut you just made. After you fold the rectangle,remember to reverse fold them inside the card.
Step 5: Repeat steps 2 and 3 by cutting along the shortest lines segment. Youshould have four shortest sized line segments. Each cut will bethrough a different number of layers. Fold all the rectangles on theleft of the cut you just made and then reverse fold them.
Step 6: Glue a sheet of colored paper that is already folded in half to the backof the card. It is best to glue one side at a time. Once you have gluedboth sides, you can open the card to see a pop-up design.
Step 7: (Optional) If you want to create another stage you can cut each step in
Page 20
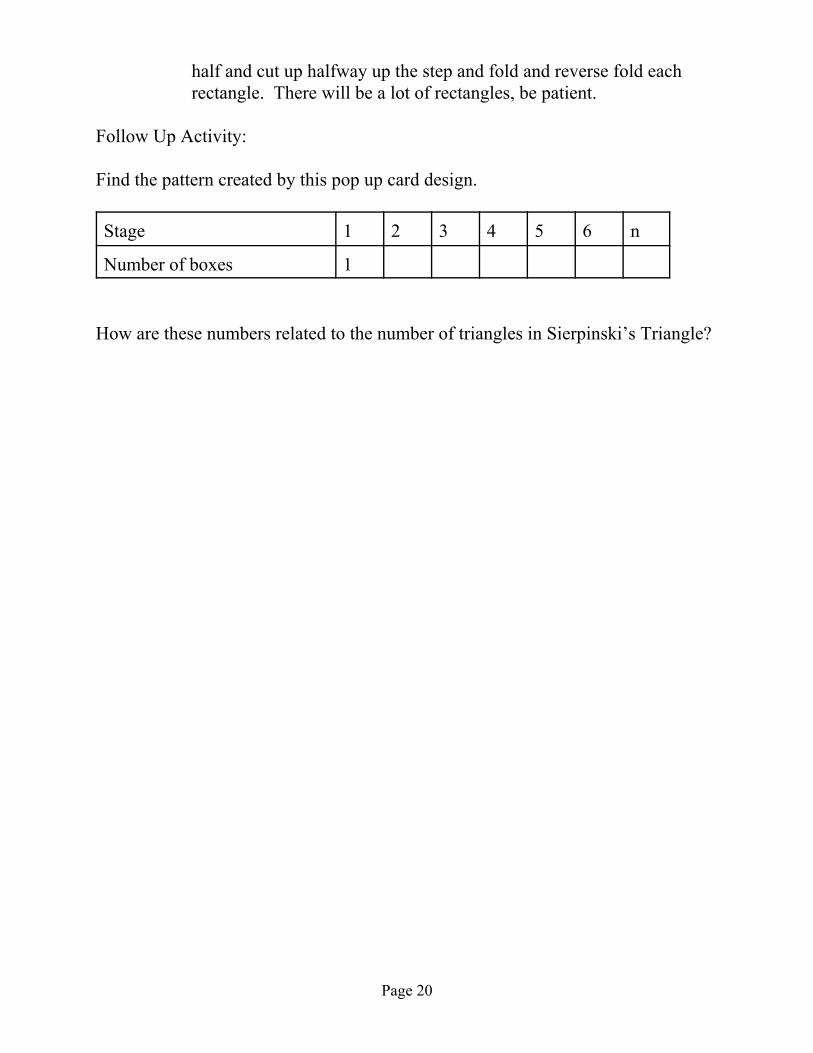
half and cut up halfway up the step and fold and reverse fold eachrectangle. There will be a lot of rectangles, be patient.
Follow Up Activity:
Find the pattern created by this pop up card design.
Stage 1 2 3 4 5 6 n
Number of boxes 1
How are these numbers related to the number of triangles in Sierpinski’s Triangle?

Page 21

Page 22

Page 23