P6 Progress Reporter
67
P6 Progress Reporter
-
Upload
shakil-memon -
Category
Documents
-
view
47 -
download
0
description
test
Transcript of P6 Progress Reporter

PP66 PPrrooggrreessss RReeppoorrtteerr


3
Contents
Getting Started ................................................................................................................................. 7
Introducing P6 Progress Reporter .................................................................................................... 9
What Can I Do with P6 Progress Reporter? ..................................................................................... 9
Log-in Options .................................................................................................................................. 11
Choosing a Different Display Language .................................................................................... 11 Logging in Without Downloading Large Description Files ........................................................ 11 Logging in a Different User Without Exiting P6 Progress Reporter ......................................... 11 Logging in for a Reporting Resource ......................................................................................... 12
Changing Password or Contact Information .................................................................................. 12
Selecting Display Formats for Durations, Units, and Dates.......................................................... 12
Selecting Your Start-Up View .......................................................................................................... 13
Views, Menus, Toolbars, and Icons ................................................................................................ 15
Timesheet View .......................................................................................................................... 17 What Can I Do in Timesheet View? ................................................................................... 17 Toolbar Icons and Shortcuts Keys: Timesheet View ......................................................... 17 Keyboard Navigation: Timesheet View .............................................................................. 18 Field Definitions: Timesheets View .................................................................................... 18
Activities View ............................................................................................................................. 21 What Can I Do in Activities View? ...................................................................................... 21 Toolbar Icons and Shortcut Keys: Activities View ............................................................. 21 Keyboard Navigation: Activities View ................................................................................ 22 Field Definitions: Activities View ........................................................................................ 22
Activity Details Tabs ................................................................................................................... 23 Menus ......................................................................................................................................... 23 Toolbar ........................................................................................................................................ 23 P6 Progress Reporter Icons ....................................................................................................... 25
Customizing Views ........................................................................................................................... 27
Customizing Timesheets and Activities Views .......................................................................... 27 Selecting Activity Data Columns ........................................................................................ 27 Resizing Columns ............................................................................................................... 27 Sorting Data ........................................................................................................................ 28 Resizing the Activity Data and Time Reporting Sections .................................................. 28 Choosing Timesheet Cell Colors ........................................................................................ 28 Displaying Tool Tips for Time Reporting Table Cells ......................................................... 28 Filtering the Activities View ................................................................................................ 29
Accessibility Features ................................................................................................................ 30 List of Accessibility Features ............................................................................................. 30 Keyboard Navigation Overview and Shortcuts ................................................................. 30 Keyboard Shortcuts for Menus and Menu Options .......................................................... 30
Keyboard Shortcuts for Global/General Navigation and Features .................................. 32
Displaying Tool Tips in Timesheets View ........................................................................... 33
Working in Timesheet View ............................................................................................................. 35
Overview of Timesheet View ........................................................................................................... 35

P6 Progress Reporter
4
Opening a Timesheet ...................................................................................................................... 35
Navigating in a Timesheet .............................................................................................................. 36
Adding Activities to a Timesheet .................................................................................................... 37
Assigning Yourself to an Activity ..................................................................................................... 37
Removing Activities from a Timesheet ........................................................................................... 38
Recording Actual Work Time on a Timesheet ................................................................................ 38
Adding or Viewing Timesheet Notes ............................................................................................... 39
Submitting a Timesheet .................................................................................................................. 39
Saving or Printing a Timesheet ....................................................................................................... 39
Closing a Timesheet ........................................................................................................................ 39
Viewing Activity Details.................................................................................................................... 39
Viewing Your Project List and Project Web Sites ........................................................................... 40
Searching for Data .......................................................................................................................... 40
Working with Activities and Details ................................................................................................. 41
Displaying a List of Your Activities .................................................................................................. 41
Filtering and Sorting the Activity List .............................................................................................. 41
Selecting Activity Data Columns ..................................................................................................... 42
Saving or Printing Your Activity List ................................................................................................ 42
Assigning Yourself to an Activity ..................................................................................................... 43
Viewing Activity Details.................................................................................................................... 43
Reporting Actual Work Time without a Timesheet ........................................................................ 44
Reporting Dates for an Activity ....................................................................................................... 45
Reporting Remaining Work Estimates ........................................................................................... 45
Reporting a Completed Assignment............................................................................................... 46
Viewing and Reporting Progress for Activity Steps ........................................................................ 46
Viewing and Sending Activity Feedback ......................................................................................... 47
Viewing Your Project List and Project Web Sites ........................................................................... 47
Searching for Data .......................................................................................................................... 47
Activity Details Tabs ........................................................................................................................ 48
Using the General Tab ............................................................................................................... 48 General Field Definitions ................................................................................................... 49
Using the Resources Tab ........................................................................................................... 50 Resource Field Definitions ................................................................................................. 51
Using the Steps Tab ................................................................................................................... 52 Steps Field Definitions ....................................................................................................... 53
Using the Notebook Tab ............................................................................................................ 53 Using the Relationships Tab ...................................................................................................... 53
Relationships Field Definitions .......................................................................................... 53 Using the WPs & Docs Tab ........................................................................................................ 54
WPs & Docs Field Definitions ............................................................................................ 54
Context-Sensitive Help .................................................................................................................... 57
P6 Progress Reporter Login Window .............................................................................................. 57
Add Activity window ......................................................................................................................... 57
Add Overhead Activity window ........................................................................................................ 58

Contents
5
Assign to New Activity window ........................................................................................................ 58
Change Password window .............................................................................................................. 59
Columns window ............................................................................................................................. 59
Login as Subordinate Resource window ........................................................................................ 60
Open Timesheet window ................................................................................................................. 60
Projects window ............................................................................................................................... 61
Resource Details window ................................................................................................................ 62
Timesheet Notes window ................................................................................................................ 62
Work Product and Document Details window ............................................................................... 62
Setting Your Preferences ................................................................................................................ 63
Time Units Tab ............................................................................................................................ 63 Dates Tab .................................................................................................................................... 64 User Setup Tab ........................................................................................................................... 64 Start Up Tab ................................................................................................................................ 64 Colors Tab ................................................................................................................................... 64 Timeframe Tab ........................................................................................................................... 64 Accessibility tab .......................................................................................................................... 65
Where to Get Support ..................................................................................................................... 65
Copyright ......................................................................................................................................... 66


7
Getting Started


9
Introducing P6 Progress Reporter
P6 Progress Reporter provides real-time communication capabilities between resources who perform
project tasks and project managers or team leaders who use P6 EPPM to plan and manage projects.
Team members working at diverse locations can connect directly to the project database via local or wide
area networks to report time on their activities and send related information. Project managers can
incorporate this data from resources into the project update cycle, relying on reported actuals and activity
status information to update the project and make informed decisions. Activity feedback features and
timesheet notes facilitate communication.
Tips
To refresh data at any time, choose File, Refresh Data, or press F5.
What Can I Do with P6 Progress Reporter?
Project team members can use P6 Progress Reporter to
report work time for assigned activities
view and update activity assignments and activity details
view activity notebooks and work products and documents
send and receive notes about activities and timesheets


11
Log-in Options
P6 Progress Reporter offers the following log-in options:
Choosing a Different Display Language (on page 11)
Logging in Without Downloading Large Description Files (on page 11)
Logging in a Different User Without Exiting P6 Progress Reporter (on page 11)
Logging in for a Reporting Resource (on page 12)
Choosing a Different Display Language
On the Login to Primavera P6 Progress Reporter window, the language is set to English by default. Choose
the language that you prefer to display for text in P6 Progress Reporter.
Note: Numeric separators are determined by the regional language setting on
your local computer.
Logging in Without Downloading Large Description Files
For Activity Details such as documents, description fields may contain a large amount of data, resulting in
large file sizes and uncomfortably long download times, in particular when using a low-speed connection. P6
Progress Reporter offers a low-speed connection log-in option that enables you to download description
field data as needed.
When you select the low-speed connection option, description fields that exceed the file size specified by
the server administrator, typically 2K, display a link so that you can download the data at a later time.
Description fields that do not exceed the specified size are downloaded at login. If you do not select the
low-speed option, all description fields are downloaded at login, regardless of size.
To log-in without downloading large description files
In the Login to Primavera P6 Progress Reporter window, mark the Low Speed Connection checkbox.
When you are ready to download data for a description field that contains a link, click the link. A message
displays to notify you of the file size.
Logging in a Different User Without Exiting P6 Progress Reporter
P6 Progress Reporter enables different users to log in separately to a single session without exiting the
module. This feature is useful in situations where project resources need to share a computer to report
timesheet information or review activity assignments.
Note: For security reasons, this feature is not available when using Single
Sign-On for log in authentication.
To log in with a different username, choose File, Login as a Different User (Alt+F+L). Choose Yes,
then type a username and password.

P6 Progress Reporter
12
Logging in for a Reporting Resource
If you are designated as a timesheet approval manager, have the required security privilege, and are
configured as a P6 Progress Reporter resource, you can log in to P6 Progress Reporter with your own
username and password to edit the timesheets of resources who report time to you. This feature is useful
in situations when a resource is unavailable and can not update a timesheet.
Note: Availability of this feature is controlled by an administrative setting. If you
require this feature and it is not available, contact your P6 administrator.
To log in as a reporting resource, choose File, Edit Subordinate Resources' Timesheets (Alt+F+E). You
can then select a resource and open the timesheet you want to view or edit.
Changing Password or Contact Information
To change your P6 Progress Reporter password
1) Choose File, User Preferences (Alt+F+U)
2) Choose the User Setup tab.
3) Type updated phone or e-mail information as necessary. To change your password, choose Password.
Note: Depending on your organization's requirements, a password policy might
be enabled by your P6 administrator. If the password policy is enabled, you must
enter at least eight characters for the password, and the password must contain
at least one alphabetic character and at least one numeric character. When the
password policy is not enabled, you can enter a minimum of zero and a maximum
of 20 alphanumeric characters.
Regardless of your organization's password policy settings, a message indicating the minimum password
requirements appears at the bottom of the Change Password window.
Tip
If P6 Progress Reporter is running with LDAP or Web Single SignOn authentication, you cannot change
your password.
Selecting Display Formats for Durations, Units, and Dates
P6 Professional and P6 calculates and stores time unit values as hours, but you can choose to display
durations and resource units in other time increments, such as days or weeks. You can also specify a format
for displaying dates, for example, in day, month, year sequence with time of day.
To choose a display format for units and durations
1) Choose File, User Preferences (Alt+F+U).
2) Choose the Time Units tab.
3) Choose from the following time format options. Refer to the Example area of the tab to preview your
selection.

Getting Started
13
Unit of Time - Choose the time increment you want to use for displaying resource units and activity
durations.
P6 Professional and P6 calculates and stores time unit values in hourly increments, when you choose to
display time unit fields in increments other than hours, P6 Progress Reporter converts durations and
resource units based on the the administrative settings defined by your P6 administrator.
Sub-Units - Choose this option to display the corresponding subunit for the selected Unit of Time.
Decimals - Choose the number of decimal places to display.
Resource Units/Time - Display units per time as a percentage or as units per duration, for example
h/d.
To choose a display format for units and durations
1) Choose File, User Preferences (Alt+F+U).
2) Choose the Dates tab.
3) Specify the date and time formats you want to use. The Sample section is revised as you choose options,
so you can preview your selections before saving them.
Selecting Your Start-Up View
If you are designated as a timesheet user, you can select whether you want to display the Timesheets or
Activities view when you log in.
1) Choose File, User Preferences (Alt+F+U).
2) Choose the Start Up tab.
3) Choose an option.
Start Up in Last Open window displays the view you were working in the last time you exited P6
Progress Reporter.


15
Views, Menus, Toolbars, and Icons
The primary elements of the P6 Progress Reporter interface are views, detail tabs, menus, and the toolbar.


17
Timesheet View
What Can I Do in Timesheet View?
Use the Timesheet view to report and review actual time spent on activities, to view and send feedback, or
notes, regarding the timesheet, and to submit time for approval, if required.
To quickly find a specific activity, you can search (Ctrl+F) based on the field, or column, that currently has
focus in the activity data section. See Searching for Data (on page 40).
To change the size of the activity data or time reporting sections of the spreadsheet, press F8, then press
arrow keys to resize. Press F6 to exit sizing.
For instruction on using these features, see Working in Timesheet View (on page 35).
Tips
This view is available only to resources who have been designated, by a P6 administrator, as timesheet
users. If you do not have access to this view and require it, contact your administrator.
The format of your timesheets, daily reporting or period reporting, is defined by an administrator.
To view the context menu (Shift+F10), your current focus must be in a timesheet activity data cell, not a time reporting cell.
Toolbar Icons and Shortcuts Keys: Timesheet View
Open a timesheet (Alt+F+O)
Close a timesheet (Alt+F+C)
Submit the currently open timesheet (Alt+F+S)
Switch to Activities view (F11)
View a list of projects you are assigned to (Alt+V+P)
Show or Hide Activity Details (Shift+F10+Down Arrow+Enter)
View or edit timesheet notes (Shift+F10+N)
Choose the activity data columns you want to see (Shift+F10+L)
Assign yourself to a new activity (Alt+A+N)
Add an activity to the currently open timesheet (Alt+A+A or Insert)
Note: If you are using a screen reader, Insert is not supported for this action.
Add an overhead activity to the currently open timesheet (Alt+A+O).
Remove the currently selected activity from the open timesheet (Alt+A+R or Delete)
Print or save a timesheet (Alt+A+G)

P6 Progress Reporter
18
Note: Because P6 Progress Reporter offers an option for administrators to add
up to two custom toolbar buttons, your toolbar might include buttons not
described here. Although both buttons are identified by the same icon, ,
administrators can configure customized text labels and tool tips for each button.
Custom buttons are used to launch a Web address specified by the
administrator.
For details about using this view to report actual work time and timesheet feedback to your time approval
manager, see Working in Timesheet view (on page 35).
Keyboard Navigation: Timesheet View
To move across table cells, press Tab or the left and right Arrow keys.
To move up or down in a table, press the up or down arrow keys.
To clear data in a cell, press the spacebar.
To navigate out of a table to other elements in the window, press Ctrl+Tab.
To sort a table, based on a specific column, Tab or Arrow to the column, then press Ctrl+Alt+A for ascending order or Ctrl+Alt+D for descending order.
To move focus to the first activity data cell of the first row, press Ctrl+1.
To move focus to the activity detail tabs, if displayed, press Ctrl+2.
To select the next activity in the timesheet, press Ctrl+J. To select the previous activity, press
Ctrl+K. These shortcuts are particularly useful when the current focus is in the Activity Details, since
it enables you to scroll through the activities as you review detail information across the tabs.
To move focus to the title bar, or timesheet header, press Ctrl+H. This shortcut is particularly
useful when your current focus is on details for a specific activity and you want to navigate to the time
reporting cells to record actuals for that activity. Using Ctrl+1 would change your activity selection to
the first activity, while using Ctrl+H maintains your selection and you can then use Ctrl+Tab to place focus in the time reporting cells..
Accessibility Tip: To display tool tips for Timesheet reporting cells, choose File, User Preferences
(Alt+F+U). On the Accessibility tab, mark the Display tool tips checkbox and choose OK. When using a
screen magnifier, these tool tips aid table cell identification.
Field Definitions: Timesheets View
The following are the default fields that appear in the Timesheets view window. To customize the data
columns that appear, place focus in an activity data cell (not a time reporting cell), then in the toolbar, click
(Shift+F10+L).
Activity Name
The name of the activity, which does not need to be unique within the project. You cannot remove the
Activity Name column when you customize the view.
The symbols in the leftmost column indicate the activity status:
Not Started
In Progress

Getting Started
19
Completed
In Review/Rejected
A yellow triangle in the status symbol indicates that you are the primary resource for that activity. For
example, indicates that you are the primary resource for an activity that is complete.
If the activity belongs to an inactive project or WBS, the icon is slightly shaded, . A project-level
preference determines whether you have view-only access to inactive activities. If you do have the
capability to view inactive activities, you will be able to view only those inactive activities that were added
to a timesheet when they were active.
Project ID
The unique identifier for the project to which the activity belongs.
Activity ID
The activity's unique identifier.
Role ID
If you were assigned a role for the activity, this is the unique identifier for that role.
Dated Time Reporting Columns
These columns display only if your timesheets are set for daily format.
To report work time for an activity, select the cell that corresponds to the activity and date for which
you want to enter time, then type a value. To enter overtime, type the number of regular hours followed
by a forward slash, then type the number of overtime hours. For example, to enter eight regular and three
overtime hours, type 8/3.
Note: An administrative setting determines whether you have the capability to
log overtime hours.
Total Hours
The total number of hours recorded for the activity. Total Hours are displayed only if your timesheets are
set up for daily reporting.
Actual Hours
Actual Hours displays only if your timesheets are set for period reporting.
To record work time for an activity, type the total hours worked for the activity during the reporting
period defined by the timesheet start and end date. The timesheet start and end dates are shown beneath
the toolbar.


21
Activities View
What Can I Do in Activities View?
Use the Activities view to see your activity assignments and brief details displayed in a table, or row and
column format. View a list of the projects these activities belong to and visit the project Web site, if
available.
You can filter the Activities view to focus on specific activities of interest, for example milestones only.
Additionally, you can customize the data columns that appear and display more extensive details below the
activity table. To quickly locate a specific activity, you can use the search capability, which enables you to
search for activities based on any data field currently displayed as a column. See Searching for Data (on
page 40).
If you have the appropriate preferences set by the administrator or project manager, you can assign
yourself to activities and view activities that belong to inactive projects or inactive WBS elements.
For instructions on using these features, see Working with Activities and Details (on page 41).
Tips
To ensure you are viewing the latest information from the project management database, press F5 to refresh the view.
A user preference enables you to specify a timeframe that determines which of your Not Started and
Completed activities are included in the view. The title bar beneath the toolbar reflects this timeframe.
Toolbar Icons and Shortcut Keys: Activities View
View a list of projects you are assigned to (Alt+V+P).
Show or Hide Activity Details (Shift+F10+Down Arrow, choose Activity Details).
Keyboard Tip: To navigate from the Activity table to the Details tabs. press Ctrl+Tab. Then, use the
arrow keys to navigate from tab to tab.
Choose the activity data columns you want to see (Shift+F10+L).
Filter the activities list (Alt+V+F).
Assign yourself to a new activity (Alt+A+N).
Switch to Timesheet view (F12).
Print or save an activity list (Alt+A+G).
Tip
Timesheet view is available only if you are required to use timesheets to report work on your activities.

P6 Progress Reporter
22
Note: Because P6 Progress Reporter offers an option for administrators to add
up to two custom toolbar buttons, your toolbar might include buttons not
described here. Although both buttons are identified by the same icon, ,
administrators can configure customized text labels and tool tips for each button.
Custom buttons are used to launch a Web address specified by the
administrator.
Keyboard Navigation: Activities View
To move across activity table cells, press Tab or the Arrow keys.
To move up or down in a table, press the up or down arrow keys.
To navigate out of the table to other elements in the window, press Ctrl+Tab.
To sort the table, based on a specific column, Tab or Arrow to the column, then press Ctrl+Alt+A for
ascending order or Ctrl+Alt+D for descending order.
To move focus to the first data cell of the first row, press Ctrl+1.
To move focus to the activity detail tabs, if displayed, press Ctrl+2.
To select the next activity in the list, press Ctrl+J. To select the previous activity, press Ctrl+K. These
shortcuts are particularly useful when the current focus is in the Activity Details, since it enables you to
scroll through the activities as you review detail information across the tabs.
To move focus to the title bar, or activity list header, press Ctrl+H.
Field Definitions: Activities View
This following are the default fields that appear in the Activities window.
To choose the data columns you want to see, select an activity, then right-click and choose Columns
(Shift+F10+L), or in the toolbar choose .
Activity Name
The name of the activity, which does not have to be unique. You can not remove this column from the
Activities view.
Activity ID
An identifier that is unique within the project.
Activity Status
The current status of the activity: Not Started , In Progress , In Review , Rejected , Completed
. If you are the primary resource, a yellow triangle appears on the icon, for example, Not Started appears
as . If the activity belongs to an inactive project or WBS, the icon is slightly shaded, . A project-level
preference determines whether you are able to view inactive activities.
An activity is In Review when the primary resource has marked it complete in P6 Progress Reporter, but
completion has not yet been confirmed by the person responsible for approving this status.

Getting Started
23
A Rejected activity is one that the primary resource marked as complete in P6 Progress Reporter, but the
complete status has been rejected by the person responsible for approving.
Start Date
The current start date of the activity. For a not-started activity, this is the planned start date. For a started
activity, this is the actual start date
Finish Date
The current finish date of the activity. For a not-started activity, this is the planned finish date. For an
in-progress activity, this is the remaining finish date. Once the activity is completed, this is the actual finish
date.
Primary
A read-only field that identifies whether you are the primary resource on the activity.
Activity Details Tabs
Use the detail tabs to view and edit dates, durations, actual units, remaining estimates, and steps and to
communicate with the project manager. You can also view notebooks, work products and documents, and
relationship details.
To show or hide Activity Details, on the toolbar choose (Shift+F10+Down Arrow+ Enter or
space).
You can view details for any activity you select in an open timesheet or in the Activities view.
Menus
Use the menu bar at the top of the P6 Progress Reporter main window to choose the view you want to
work with and to access features. The menu bar is fully accessible using only the keyboard. For details, see
Keyboard Shortcuts (see "Keyboard Navigation Overview and Shortcuts" on page 30).
In both the Timesheet and Activities view, a context menu is available, offering access to features and
customize options. To access the context menu, place focus in an activity data cell, not a time reporting cell,
and right-click (Shift+F10).
Toolbar
Toolbar icons provide quick access for you to
Switch between Timesheet (F12) and Activities (F11) views
Open timesheets (Alt+F+O)
Submit the currently open timesheet (Alt+F+S)
View a list of projects you are assigned to (Alt+V+P)
Show or Hide Activity Details (Shift+F10+Down Arrow+Enter)
View or edit timesheet notes (Shift+F10+N)

P6 Progress Reporter
24
Choose the activity data columns you want to see (Shift+F10+L)
Assign yourself to a new activity (Alt+A+N)
Add an activity to the currently open timesheet (Alt+A+A or Insert)
Add an overhead activity to the currently open timesheet (Alt+A+O)
Remove the currently selected activity from the open timesheet (Alt+A+R or Delete)
Note: Because P6 Progress Reporter offers an option for administrators to add
up to two custom toolbar buttons, your toolbar might include buttons not
described here. Although both buttons are identified by the same icon, ,
administrators can configure customized text labels and tool tips for each button.
Custom buttons are used to launch a Web address specified by the
administrator.

25
P6 Progress Reporter Icons
Toolbar Icons
icon function ico
n function
Display Timesheet view Display Activities view
Open a timesheet Submit the open timesheet
View your projects list Show or Hide activity details
View or add timesheet notes Select activity data columns
Assign resource to an activity Add an activity to a timesheet
Add an overhead activity to a timesheet Remove an activity from a timesheet
Launch a URL in an external browser
Other Icons
icon description ico
n description
Not Started activity In Progress Activity
Complete Activity
(with primary resource designation) Rejected Activity
Predecessor activity Successor activity
Activity step Completed activity step
Labor resource Primary resource
Nonlabor resource Material resource


27
Customizing Views
Customizing Timesheets and Activities Views
In Activities view and in the activity data section of a timesheet, you can choose the data columns you want
to see and resize and sort the columns.
Related Topics
Selecting Activity Data Columns ........................................................................................................... 27
Resizing Columns ...................................................................................................................................... 27
Sorting Data ................................................................................................................................................ 28
Resizing the Activity Data and Time Reporting Sections ................................................................ 28
Choosing Timesheet Cell Colors .......................................................................................................... 28
Displaying Tool Tips for Time Reporting Table Cells ...................................................................... 28
Filtering the Activities View .................................................................................................................... 29
Selecting Activity Data Columns
To select activity data columns:
1) With focus in an activity data cell, in the toolbar, click (Shift+F10+L).
2) To add one or more columns, choose them in the Available Columns list, then choose (F6). To
add all available columns, choose .
To remove one or more columns, choose them in the Selected Columns list, then choose (F6). To
remove all selected columns, choose .
Keyboard Tip: To add all columns, place focus in the Available Columns list or, to remove all columns,
place focus in the Selected Columns list. Then, press Alt+F6.
3) To specify the position in which a column appears, choose it in the Selected Columns list, then choose
(F7) or (Alt+F7) to change its position.
4) To preview your column selections without closing the Columns window, choose Apply (Alt+A).
5) To return to the standard column selections, choose Default (Alt+D).
6) When finished, choose OK (Alt+O).
Resizing Columns
To resize columns
In the column title bar, position the cursor on a vertical column separator, then click and drag.

P6 Progress Reporter
28
Sorting Data
To sort data
mouse - Click the title of the column you want to sort by. Click again to change the sort order.
keyboard - Tab or arrow to a cell in the sort column. To sort in ascending order, Press Ctrl+Alt+A, or for
descending sort, press Ctrl+Alt+D.
Resizing the Activity Data and Time Reporting Sections
In Timesheet view, you can adjust the width of the activity data and time reporting sections and choose the
timesheet cell colors.
To resize the activity data and time reporting sections
mouse - Click and drag the vertical separator between the sections
keyboard - Press F8. To widen the activity data, or left, section of the P6 Progress Reporter table, press
the right or down arrow. To widen the time reporting, or right, section of the P6 Progress Reporter table,
press the left or up arrow. To exit resize mode, press F6.
Choosing Timesheet Cell Colors
You can choose the colors you want to use to identify various elements of a timesheet, or you can chose
to ignore the P6 Progress Reporter module colors and use your operating system color definitions.
To choose timesheet cell colors
1) Choose File, User Preferences (Alt+F+U).
2) Choose the Colors tab.
3) To use your operating system colors, clear the custom colors checkbox.
To specify a color for a timesheet element, choose the color button next to its name, for
example Overhead Activities. In the Basic Colors field, select a new color, or, to define a custom color,
use the Red, Green, and Blue fields or scroll bars to specify the color percentages.
To use the module's default colors, choose Default (Alt+D).
Note: Shading for Non-work Cells is based on the calendar assigned to the
resource.
4) Choose OK (Alt+O).
Displaying Tool Tips for Time Reporting Table Cells
Tool tips are useful for identifying cell labels when using a screen magnifier.
1) Choose File, User Preferences (Alt+F+U).
2) Select the Accessibility tab.
3) Mark the Display tool tips checkbox and choose OK.

Getting Started
29
Filtering the Activities View
You can filter the Activities view based on activity status. Further, you can filter Not Started and Completed
activities so that only activities that fall within a certain timeframe are included in the list.
You can also choose to display or hide completed activity assignments in your open timesheets and on the
Activity Details Resources tab.
To filter the Activities view, select an activity. Right-click and choose Filter By (Alt+V+F) and one of the
following options.
All Activities (Alt+V+F+A)
Completed Activities (Alt+V+F+C)
In Progress/Not Started Activities (Alt+V+F+P)
Milestones (Alt+V+F+M)
In Review/Rejected Activities (Alt+V+F+R)
There are two circumstances in which an activity's status can be In Review.
An activity's status is In Review when the primary resource applies an Actual Finish to the activity, but
the Finish has not yet been confirmed by the person responsible for approving status. An activity's
status is also In Review if the project is set up to allow resources to change the status of their
assignments to Completed, but status review is required before an Actual Finish is applied to the
activity. In this case, once all resources assigned to the activity have changed their assignment status to
Completed and Apply Actuals is run, the activity is placed In Review.
A Rejected activity is one that had been In Review, but the Finish status has been rejected by the person
responsible for approving it.
The title bar beneath the toolbar identifies the current filter applied to the Activities view, for example, All
Activities. The dates displayed in the title bar reflect the timeframe filter applied to Not Started and
Completed activities.
Filter Not Started and Completed activities in lists
The filter you specify applies to the Activities view and to the list of activities that display when you use the
Add activities feature in the Timesheet view.
1) Choose File, User Preferences (Alt+F+U).
2) Choose the Timeframe tab.
For each activity status type, specify a number that defines the boundaries of the timeframe relative to
the current date. For example, 90 defines a timeframe 90 days before and 90 days after today.
Not Started activities with a planned start or planned finish date within the timeframe and Completed
activities with an actual finish date within the timeframe will be displayed.
To use the module's default timeframe, choose Default (Alt+D).
3) Choose OK (Alt+O)
Filter completed assignments in timesheets and Activity Details
1) Choose File, User Preferences (Alt+F+U).
2) Choose the Timeframe tab.
3) Mark or clear the Show Completed Resource Assignments checkbox.

P6 Progress Reporter
30
Accessibility Features
P6 Progress Reporter has been designed according to current Web accessibility standards and guidelines.
Related Topics
List of Accessibility Features .................................................................................................................. 30
Keyboard Navigation Overview and Shortcuts ................................................................................. 30
Displaying Tool Tips in Timesheets View ........................................................................................... 33
List of Accessibility Features
Full keyboard-only access. See Keyboard Shortcuts for Menus and Menu Options (on page 30).
Support for assistive technologies, including accessible exposure of interface elements, input focus, and
text information, as well as logical arrangement of interface elements and information for keyboard
navigation
Recommended structural markup of table columns and rows enables assistive technologies to accurately identify cell content for non-visual users
Respect for user-defined display preferences, such as color, contrast, and font size settings that are available as operating system accessibility options
Tool tip (see "Displaying Tool Tips in Timesheets View" on page 33) option aids table cell identification when using a screen magnifier
Avoidance of color alone to convey meaning
Keyboard Navigation Overview and Shortcuts
P6 Progress Reporter keyboard navigation adheres to the select-activate paradigm that enables you to use
the Tab or arrow keys to select an element, then press Enter or the spacebar to activate your selection.
Additionally some elements can be activated using the keyboard shortcuts, or access keys.
To open a menu, press Alt+ the menu shortcut key, for example Alt+A for the Action menu.
To scroll through menu options, press the arrow keys.
To select a menu option, highlight it, then press Enter or the spacebar.
To exit a menu without choosing an option, press Esc.
Related Topics
Keyboard Shortcuts for Menus and Menu Options .......................................................................... 30
Keyboard Shortcuts for Global/General Navigation and Features ............................................... 32
Keyboard Shortcuts for Menus and Menu Options
The keyboard shortcuts table organizes options by menu. Alternate keys are listed, if available; otherwise
this column is blank.

Getting Started
31
Note: Because they are specific to timesheet tasks, some menu options, such as
Submit Timesheet or Add Activity, are available only in Timesheet view.
Menu or Option Access Keys Alternate keys
File menu Alt+F F10
Open Timesheet Alt+F+O Ctrl+O
Close Timesheet Alt+F+C
Submit Timesheet Alt+F+S Ctrl+S, or
Shift+F10+S
Login as a Different User Alt+F+L
Edit Subordinate Resources'
Timesheets Alt+F+E
User Preferences Alt+F+U
Exit Alt+F+X Alt+F4
Action Menu Alt+A
Add activity Alt+A+A Insert, Shift+F10+A
Add Overhead Activity Alt+A+O
Remove Activity Alt+A+R Delete, Shift+F10+R
Assign to new activity Alt+A+N
Generate report Alt+A+G Ctrl+P
View menu Alt+V
Timesheets F12 Alt+V+T
Activities F11 Alt+V+A
Projects Alt+V+P
Activity Details Shift+F10+Down
Arrow+Enter
Columns Shift+F10+L Alt+V+L
Timesheet Notes Alt+V+N
Refresh Data Alt+V+R F5
Help menu Alt+H
Contents Alt+H+C F1
About (system info) Alt+H+A
Context menu
Note: Focus must be in
an activity data cell,
Shift+F10

P6 Progress Reporter
32
not in a time reporting cell.
Activity Details Shift+F10+Down
Arrow+Enter
Columns Shift+F10+L
Submit Timesheet Shift+F10+S
Add Activity Shift+F10+A
Add Overhead Activity Shift+F10+O
Remove Activity Shift+F10+R
Timesheet Notes Shift+F10+N
Keyboard Shortcuts for Global/General Navigation and Features
Action Access Keys Alternate Keys
Navigate across table cells Tab Arrow
Clear data in a timesheet table cell Spacebar
Navigate out of a table, list box, or
text box to other elements in the
window
Ctrl+Tab
Sort table data, based on a specific
column
Tab or Arrow to column. Press
Ctrl+Alt+A for ascending order
or Ctrl+Alt+D for descending
order.
Find data in a table, based on a specific
column field
Ctrl+F, specify criteria, then
Alt+N
In a timesheet or activity list, move
focus to the first cell of the first activity
row
Ctrl+1
Select the next activity in a timesheet
or activity list.
Ctrl+J
Select the previous activity In a
timesheet or activity list.
Ctrl+K
In Timesheets or Activities view when
activity details are displayed, move
focus to the detail tabs
Ctrl+2
In Timesheets or Activities view ,
move focus to the title bar
Ctrl+H
Change the size of the timesheet table F8+Arrow keys,
F6 to Exit sizing

Getting Started
33
Select or clear an option in focus (for
example, a radio button or checkbox)
Space
Review options in a list Arrow keys
In a tabbed window, navigate from one
tab to another
With focus on a tab name, press
the arrow keys
In a tabbed window, navigate among
elements on one tab
Tab
Add or Assign an element or Apply a
change
Alt+A
Close or Cancel out of a window Alt+C
In the Add Activity window, open the
Columns window
Alt+L
OK Alt+O
Confirm an action: Yes Alt+Y
Refuse an action: No Alt+N
View Help for the currently active
page or window
F1
View Help Contents Alt+H
Displaying Tool Tips in Timesheets View
A user preference option enables you to display tool tips for the time reporting cells of a timesheet.
To display tool tips for Timesheet reporting cells
1) Choose File, User Preferences (Alt+F+U).
2) Select the Accessibility tab.
3) Mark the Display tool tips checkbox and choose OK.


35
Overview of Timesheet View
You can open and view a timesheet and report actual work time if an administrator or project manager has
designated you as a timesheet user.
If you have not been designated as a timesheet user, the Timesheet view is not available to you. Depending
on the way your organization tracks actual work, you might be required to report actual work time on the
Activity Details Resources tab.
To display the Timesheet view, choose View, Timesheets (F12) or in the toolbar, click .
The administrator or project manager can set preferences that determine
Whether you record time on a daily basis or by reporting period, for example, report actual total hours
for a two-week period
The number of future timesheets you can access
If you have permission to record hours in unusual circumstances, for example, on a timesheet with a future date, or for Not Started or Completed activities
If you are required to submit timesheets for approval
Whether you have view-only access to activities that are inactive
If an activity belongs to an inactive project or WBS, its status icon is slightly shaded. For example, if you
are the primary resource for an inactive Not Started activity, the icon appears as . If you do have
the capability to view inactive activities, you will be able to view only those inactive activities that were
added to a timesheet when they were active. All timesheet total values (column, row, and grand total) include inactive activities.
To customize the Timesheet view, you can
Choose the activity data columns you want to see.
Resize and sort the columns.
Adjust the width of the activity data and time reporting sections.
Choose the timesheet cell colors.
Choose to display tool tips for time reporting cells, these tips are useful for identifying cell labels when using a screen magnifier.
For details about customizing the Timesheet view, see Customizing Timesheets and Activities Views (on
page 27).
Opening a Timesheet
1) In Timesheet view, choose File, Open Timesheet (Alt+F+O) or in the toolbar, click .
2) Select the timesheet you want to open. By default, the timesheet for the current period is selected.
Working in Timesheet View

P6 Progress Reporter
36
Note: If no timesheets are listed, none have been generated for you. Contact
your P6 administrator or project manager for assistance.
3) If you are opening a timesheet for the first time, select one of the following options:
Automatically add current activities to timesheet
This option adds all activities you are scheduled to work on during the timesheet date range.
If you want to add activities scheduled during the timesheet period, but for which you have completed
your work (an Actual Finish exists for your assignment), choose the Add completed resource
assignments option.
Manually add activities to timesheet
Use this option to select from a list of your activity assignments.
Copy activities from previous timesheet
This option automatically copies all activities included in the previous timesheet listed. This option is
not available if the previous timesheet is Not Started.
If you want to copy activities scheduled during the timesheet period, but for which you have completed
your work (an Actual Finish exists for your assignment), choose the Copy completed resource
assignments option. An administrative setting determines whether you are allowed to report actual
hours for completed assignments or activities.
To add your currently scheduled activities to the new timesheet, mark the Add current activities
checkbox.
Note: If a project's status has changed from active since the last timesheet,
activities for that project will not be copied from the previous timesheet.
4) If you chose the Manually add activities option, the Add Activity window opens. Select one or more
activities, choose Add (Alt+A), then Close (Alt+C).
Navigating in a Timesheet
To move across table cells, press Tab or the Arrow keys.
To move up or down in a table, press the up or down arrow keys.
To clear data in a cell, press the spacebar.
To navigate out of a table to other elements in the window, press Ctrl+Tab.
To sort a table, based on a specific column, Tab or Arrow to the column, then press Ctrl+Alt+A for
ascending order or Ctrl+Alt+D fro descending order.
To move focus to the first activity data cell of the first row, press Ctrl+1.
To move focus to the activity detail tabs, if displayed, press Ctrl+2.
To select the next activity in the timesheet, press Ctrl+J. To select the previous activity, press
Ctrl+K. These shortcuts are particularly useful when the current focus is in the Activity Details, since it
enables you to scroll through activities in the timesheet as you review detail information across various
tabs.

Working in Timesheet View
37
To move focus to the title bar, or timesheet header, press Ctrl+H. This shortcut is particularly useful
when your current focus is on details for a specific activity and you want to navigate to the time reporting
cells to record actuals for that activity. Using Ctrl+1 would change your activity selection to the first
activity, while using Ctrl+H maintains your selection and you can then use Ctrl+Tab to place focus in the
time reporting cells..
Accessibility Tip: To display tool tips for timesheet reporting cells, choose File, User Preferences
(Alt+F+U). On the Accessibility tab, mark the Display tool tips checkbox and choose OK. When using a
screen magnifier, these tool tips aid table cell identification.
To change the size of the activity data or time reporting sections of the spreadsheet, press F8, then press
arrow keys to resize. Press F6 to exit sizing.
Adding Activities to a Timesheet
1) To add a work activity, choose Action, Add Activity (Alt+A+A) or in the toolbar, click .
Note: You can also press the Insert key to add an activity. However, if you are
using a screen reader, Insert is not supported for this action.
To add an overhead activity, choose Action, Add Overhead Activity (Alt+A+O) or in the toolbar,
click .
2) Select one or more activities, then choose Add (Alt+A).
Note: Before selecting activities, choose View, Refresh Data (F5) to be certain
the activity list you choose from is up to date
3) When finished, Close (Alt+C) the window.
The Add Activity window lists all of your In Progress activities. For Not Started and Completed
activities, the list includes activities that fall within the time range specified in your user preferences. For
additional information about the Timeframe user preference, see Timeframe Tab (on page 64).
Assigning Yourself to an Activity
1) On the toolbar choose (Alt+A+N).
2) Select the project you want to assign yourself to.
To quickly find a project, you can search for it based on any of the listed fields: ID, name, or responsible
manager. See Searching for Data (on page 40).
Note: A project-level setting determines whether a project is listed so you can
assign yourself to its activities. If you need to assign yourself to a project that is
not listed, contact your project manager or P6 administrator.
3) In the Search for Activities section, choose one of the following options, then specify your search
criteria and choose Search (Alt+S).
P6 Progress Reporter
38
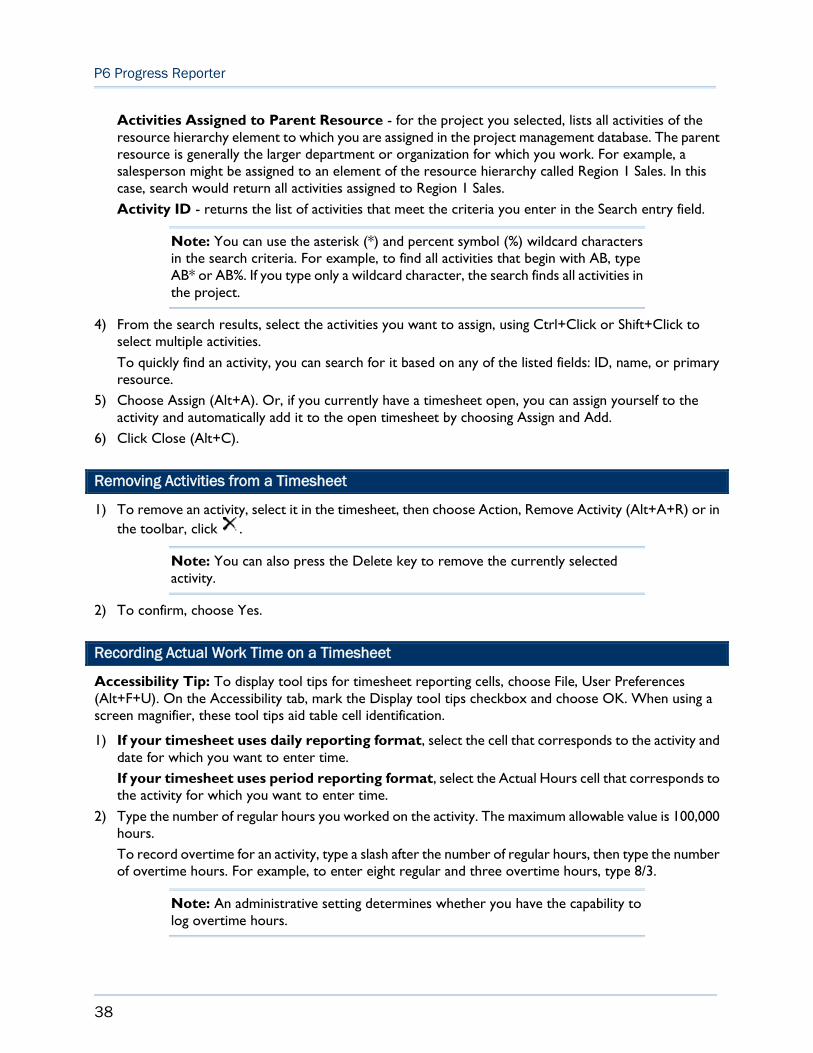
Activities Assigned to Parent Resource - for the project you selected, lists all activities of the
resource hierarchy element to which you are assigned in the project management database. The parent
resource is generally the larger department or organization for which you work. For example, a
salesperson might be assigned to an element of the resource hierarchy called Region 1 Sales. In this
case, search would return all activities assigned to Region 1 Sales.
Activity ID - returns the list of activities that meet the criteria you enter in the Search entry field.
Note: You can use the asterisk (*) and percent symbol (%) wildcard characters
in the search criteria. For example, to find all activities that begin with AB, type
AB* or AB%. If you type only a wildcard character, the search finds all activities in
the project.
4) From the search results, select the activities you want to assign, using Ctrl+Click or Shift+Click to
select multiple activities.
To quickly find an activity, you can search for it based on any of the listed fields: ID, name, or primary
resource.
5) Choose Assign (Alt+A). Or, if you currently have a timesheet open, you can assign yourself to the
activity and automatically add it to the open timesheet by choosing Assign and Add.
6) Click Close (Alt+C).
Removing Activities from a Timesheet
1) To remove an activity, select it in the timesheet, then choose Action, Remove Activity (Alt+A+R) or in
the toolbar, click .
Note: You can also press the Delete key to remove the currently selected
activity.
2) To confirm, choose Yes.
Recording Actual Work Time on a Timesheet
Accessibility Tip: To display tool tips for timesheet reporting cells, choose File, User Preferences
(Alt+F+U). On the Accessibility tab, mark the Display tool tips checkbox and choose OK. When using a
screen magnifier, these tool tips aid table cell identification.
1) If your timesheet uses daily reporting format, select the cell that corresponds to the activity and
date for which you want to enter time.
If your timesheet uses period reporting format, select the Actual Hours cell that corresponds to
the activity for which you want to enter time.
2) Type the number of regular hours you worked on the activity. The maximum allowable value is 100,000
hours.
To record overtime for an activity, type a slash after the number of regular hours, then type the number
of overtime hours. For example, to enter eight regular and three overtime hours, type 8/3.
Note: An administrative setting determines whether you have the capability to
log overtime hours.

Working in Timesheet View
39
To clear a cell value, press the spacebar or Delete.
If you finish an assignment, you can report your work as completed on the Activity Details Resources tab.
For more information, see Reporting a Completed Assignment (on page 46).
Adding or Viewing Timesheet Notes
1) Choose View, Timesheet Notes (Alt+V+N) or in the toolbar, click .
Note: When there are existing Notes for a timesheet, the icon is yellow; it is
white when there are no notes associated with the timesheet.
2) Type in the New Notes section, then choose Add (Alt+A). The most recently added notes display at
the top of the Notes History section.
3) When finished, choose Close (Alt+C).
Submitting a Timesheet
A P6 administrator or project manager specifies settings that determine whether you are required to
submit timesheets for approval. If your timesheets are set for auto-submission, the Submit current
timesheet feature will be unavailable.
Once you submit a timesheet, you will not be able to change it unless it is rejected by your time approval
manager. If a timesheet is rejected, you will receive a notification in P6 Progress Reporter to correct and
resubmit the timesheet.
To submit a timesheet, choose File, Submit Timesheet (Alt+F+S) or on the toolbar, click . Choose Yes to confirm.
Saving or Printing a Timesheet
You can export the contents of an open timesheet to an HTML file that you can save or print using the
features of your browser.
To save or print a timesheet, choose Action, Generate Report (Alt+A+G).
If a timesheet includes a large number of activity data columns, before the report file displays, you are
prompted to include only the first three columns in the report to ensure that it fits within the margins of a
printed page. All time reporting columns are always included in a timesheet report.
Closing a Timesheet
Choose File, Close Timesheet (Alt+F+C).
Viewing Activity Details
You can display details for any activity you select in the Activities view.

P6 Progress Reporter
40
To show or hide Activity Details, on the toolbar choose (Shift+F10+Down Arrow+ Enter or
space).
Activity Details are displayed on six tabs that include information such as start and finish dates, feedback
from the project manager, resource information, notebooks, step details, predecessor/successor
information, and work product and document details.
Keyboard Tips: To navigate among the Activity Detail tabs, place focus on the tab name, then press the
right or left arrow. To navigate among elements within a tab, press Tab. To activate an element, such as a
button, or choose a radio button or checkbox option, press the spacebar. OK = Alt+O. Cancel = Alt+C.
With focus in the detail tabs, you can press Ctrl+J and Ctrl+K to scroll through the activities in your activity
list so you can more easily review details for a number of activities. Ctrl+J selects the previous activity;
Ctrl+K selects the next activity.
For more information about each detail tab, see Activity Details Tabs (on page 48).
Viewing Your Project List and Project Web Sites
In the Activities and the Timesheet views, you can display a list of the projects you are currently assigned to
work on.
1) On the toolbar, click (Alt+V+P).
To quickly find a specific project, you can search (Ctrl+F) based on the field, or column, that currently
has focus in the Projects window. See Searching for Data (on page 40).
2) To launch a project's Web site, if available, select the project, then choose Launch (Alt+L).
To sort the projects list
mouse - Click the title of the column you want to sort by. Click again to change the sort order.
keyboard - Tab or arrow to a cell in the sort column. To sort in ascending order, Press Ctrl+Alt+A, or for
descending sort, press Ctrl+Alt+D.
Searching for Data
Within any P6 Progress Reporter pages or windows that present data in a row and column format, you can
search for specific items, based on a data field you select. For example, in the Open Timesheet window, you
can search for a timesheet based on Start Date or Status.
1) In any row, place focus in the column that corresponds to the field you want to search on.
2) Press Ctrl+F.
3) Specify the search criteria, then choose Find Next (Alt+N).
The first result is highlighted in the list. Pressing Find Next (Alt+N) cycles through the results, returning to
the beginning after you have reached the last result.

41
Displaying a List of Your Activities
In the Activities view, you can list the activities you are assigned to work on, along with basic details in a
table format. You can filter and sort the list and customize the data columns that appear. You can also
search for activities based on any of the detail fields currently displayed in the columns. For additional
information, see Searching for Data (on page 40).
To display the Activities view, choose View, Activities (F11) or in the toolbar, click .
Note: If you are not designated as a timesheet user, the Activities view is the
only view available to you, so it is displayed when you log in. In this case, the
option is not available in the View menu or on the toolbar
In the Activities view, you can also assign yourself to activities and display additional details for any activity
you select. If you are the primary resource on an activity, you can edit certain details.
Filtering and Sorting the Activity List
Unless you apply a filter, the Activities view lists all activities assigned to you. You can filter the view based
on activity status.
To filter the activity list, select an activity. Right-click and choose Filter By (Alt+V+F) and one of the
following options.
All Activities (Alt+V+F+A)
Completed Activities (Alt+V+F+C)
In Progress/Not Started Activities (Alt+V+F+P) Display of these activities is also filtered based on a timeframe you specify in User Preferences.
Milestones (Alt+V+F+M)
In Review/Rejected Activities (Alt+V+F+R)
There are two circumstances in which an activity's status can be In Review.
An activity's status is In Review when the primary resource applies an Actual Finish to the activity, but
the Finish has not yet been confirmed by the person responsible for approving status. An activity's
status is also In Review if the project is set up to allow resources to change the status of their
assignments to Completed, but status review is required before an Actual Finish is applied to the
activity. In this case, once all resources assigned to the activity have changed their assignment status to
Completed and Apply Actuals is run, the activity is placed In Review.
A Rejected activity is one that had been In Review, but the Finish status has been rejected by the person
responsible for approving it.
Working with Activities and Details

P6 Progress Reporter
42
Note: A project-level preference determines whether you have view-only
access to inactive activities. If an activity belongs to an inactive project or WBS,
its status icon is slightly shaded. For example, if you are the primary resource for
an inactive Not Started activity, the icon appears as .
Beneath the toolbar, a title bar identifies the current filter. This title bar also displays the timeframe used to
filter the display of Not Started and Completed activities, which you can specify as a user preference.
To filter Not Started and Completed activities
1) Choose File, User Preferences (Alt+F+U).
2) Choose the Timeframe tab.
3) For each activity status type, specify a number that defines the boundaries of the timeframe relative to
the current date. For example, 90 defines a timeframe 90 days before and 90 days after today.
Not Started activities with a planned start or planned finish within the timeframe and Completed
activities with an actual finish in the timeframe will be displayed.
To sort the activity list
Mouse - Click the title of the column you want to sort by. Click again to change the sort order.
Keyboard - Tab or arrow to a cell in the sort column. To sort in ascending order, Press Ctrl+Alt+ Up
Arrow, or for descending sort, press Ctrl+Alt+Down Arrow.
Selecting Activity Data Columns
To select activity data columns:
1) With focus in an activity data cell, in the toolbar, click (Shift+F10+L).
2) To add one or more columns, choose them in the Available Columns list, then choose (F6). To
add all available columns, choose .
To remove one or more columns, choose them in the Selected Columns list, then choose (F6). To
remove all selected columns, choose .
Keyboard Tip: To add all columns, place focus in the Available Columns list or, to remove all columns,
place focus in the Selected Columns list. Then, press Alt+F6.
3) To specify the position in which a column appears, choose it in the Selected Columns list, then choose
(F7) or (Alt+F7) to change its position.
4) To preview your column selections without closing the Columns window, choose Apply (Alt+A).
5) To return to the standard column selections, choose Default (Alt+D).
6) When finished, choose OK (Alt+O).
Saving or Printing Your Activity List
You can export the contents of your activity list to an HTML file that you can save or print using the
features of your browser.

Working with Activities and Details
43
To save or print an activity list, choose Action, Generate Report (Alt+A+G).
Assigning Yourself to an Activity
1) On the toolbar choose (Alt+A+N).
2) Select the project you want to assign yourself to.
To quickly find a project, you can search for it based on any of the listed fields: ID, name, or responsible
manager. See Searching for Data (on page 40).
Note: A project-level setting determines whether a project is listed so you can
assign yourself to its activities. If you need to assign yourself to a project that is
not listed, contact your project manager or P6 administrator.
3) In the Search for Activities section, choose one of the following options, then specify your search
criteria and choose Search (Alt+S).
Activities Assigned to Parent Resource - for the project you selected, lists all activities of the
resource hierarchy element to which you are assigned in the project management database. The parent
resource is generally the larger department or organization for which you work. For example, a
salesperson might be assigned to an element of the resource hierarchy called Region 1 Sales. In this
case, search would return all activities assigned to Region 1 Sales.
Activity ID - returns the list of activities that meet the criteria you enter in the Search entry field.
Note: You can use the asterisk (*) and percent symbol (%) wildcard characters
in the search criteria. For example, to find all activities that begin with AB, type
AB* or AB%. If you type only a wildcard character, the search finds all activities in
the project.
4) From the search results, select the activities you want to assign, using Ctrl+Click or Shift+Click to
select multiple activities.
To quickly find an activity, you can search for it based on any of the listed fields: ID, name, or primary
resource.
5) Choose Assign (Alt+A). Or, if you currently have a timesheet open, you can assign yourself to the
activity and automatically add it to the open timesheet by choosing Assign and Add.
6) Click Close (Alt+C).
Viewing Activity Details
You can display details for any activity you select in the Activities view.
To show or hide Activity Details, on the toolbar choose (Shift+F10+Down Arrow+ Enter or
space).
Activity Details are displayed on six tabs that include information such as start and finish dates, feedback
from the project manager, resource information, notebooks, step details, predecessor/successor
information, and work product and document details.

P6 Progress Reporter
44
Keyboard Tips: To navigate among the Activity Detail tabs, place focus on the tab name, then press the
right or left arrow. To navigate among elements within a tab, press Tab. To activate an element, such as a
button, or choose a radio button or checkbox option, press the spacebar. OK = Alt+O. Cancel = Alt+C.
With focus in the detail tabs, you can press Ctrl+J and Ctrl+K to scroll through the activities in your activity
list so you can more easily review details for a number of activities. Ctrl+J selects the previous activity;
Ctrl+K selects the next activity.
For more information about each detail tab, see Activity Details Tabs (on page 48).
Reporting Actual Work Time without a Timesheet
If you are not required to use timesheets to report actual work time for your activities, you can report
work time on the Activity Details Resources tab. Whether you are or are not required to use a timesheet
to report actual work time, you can use the Activity Details Resources tab to indicate that you have
completed an activity assignment.
If you are the primary resource for an activity, you can also report actuals for nonlabor and material
resources on this tab.
Note: You can also report estimates of remaining work on the Activity Details Resources tab. For
additional information, see Reporting Remaining Work Estimates (on page 45).
1) Select the activity in the Activities view or open timesheet.
2) On the toolbar choose (Shift+F10+Down Arrow+ Enter or space) to display Activity Details.
3) Choose the Resource tab.
4) In the Assigned Resources list, choose your name, or the nonlabor/material resource name.
5) In the Prior Actual Units field, type the hours worked on the activity. To enter hourly overtime, for
example, eight regular and three overtime hours, type 8/3.
The actual units you record are pending for the activity and can be modified by the project manager.
Depending on your organization's processes, the progress you report on this tab can be used to update
the project when actuals are applied.
6) To report that you have completed an assignment, mark the Completed checkbox. A project-level
option determines if you can record your assignments as completed. If this feature is not turned on, the
completed checkbox is disabled.
Tips
A P6 Progress Reporter user preference lets you choose to hide your completed assignments on the
Resources details tab and in your timesheets. If this preference is set to not display completed
assignments, "Filtering Completed Assignments" appears above the column headings on the Resources
tab and, when you mark the Completed checkbox, the assignment is immediately removed from the list on the Resources tab.
To quickly locate a specific activity or resource, use the search capability, which enables you to find items based on a displayed data field you select. See Searching for Data (on page 40).

Working with Activities and Details
45
Reporting Dates for an Activity
The Activity Details General tab displays the start and finish dates calculated for the activity. If you are the
primary resource, you can use this tab to report actual start and finish dates for an activity and to report the
date you expect work for the activity to be completed.
Note: You can report your estimate of remaining work on the Activity Details
Resources tab.
To report dates
1) Select the activity in the Activities view or open timesheet.
2) On the toolbar choose (Shift+F10+Down Arrow+ Enter or space) to display Activity Details.
3) Select the General tab.
4) For start and finish dates
Mark the Started or Finished checkbox, as appropriate. Then either type in the corresponding date
field, or choose the calendar button to select a date.
For expected finish date
In the Expected Finish Date field, type the date you expect work for the activity to be completed, or
choose the calendar button to select a date.
Reporting Remaining Work Estimates
The Activity Details Resources tab displays the number of remaining units calculated for an activity. For
your in progress activities, you can use this tab to report your estimate of remaining work. If you are the
primary resource for an activity, you can also report remaining work estimates for nonlabor and material
resources.
The estimates you enter are pending and can be modified by the project manager before actuals are applied
to the project.
A project-level administrative setting determines whether you estimate progress on started activities in
terms of New Remaining Units or Percent Complete.
To report estimates
1) Select the activity in the Activities view or open timesheet.
2) On the toolbar choose (Shift+F10+Down Arrow+ Enter or space) to display Activity Details.
3) Choose the Resources tab.
4) In the Assigned Resources list, choose your name, or the nonlabor/material resource name.
5) Record estimates in the format required by the project, either New Remaining Units or Percent
Complete. The field that displays reflects this setting.
In the New Remaining Units field, type the number of work periods you will need to complete the
activity.
In the Percent Complete field, type the percentage of work you have already completed for the activity.
The estimated values you record are pending for the activity and can be modified by the project manager
before actuals are applied to update the project.

P6 Progress Reporter
46
Tip
To quickly locate a specific activity or resource, use the search capability, which enables you to find items
based on a displayed data field you select. See Searching for Data (on page 40).
Reporting a Completed Assignment
The Activity Details Resources tab lists all resource assignments for an activity, along with details such as
remaining units. When you finish a work assignment, if your project allows, you can mark the assignment as
completed on the Resources tab.
To report a completed activity assignment
1) Select the activity in the Activities view or open timesheet.
2) On the toolbar choose (Shift+F10+Down Arrow+ Enter or space) to display Activity Details.
3) Choose the Resources tab.
4) In the Assigned Resources list, choose your name, then mark the Completed checkbox.
A project-level option determines if you are permitted to record your assignments as completed. If this
option is not turned on, the completed checkbox is disabled.
Note: A P6 Progress Reporter user preference lets you choose to hide your
completed assignments on the Resources details tab and in your timesheets. If
this preference is set to not display completed assignments, "Filtering Completed
Assignments" appears above the column headings on the Resources tab and,
when you mark the Completed checkbox, the assignment is immediately
removed from the list on the Resources tab.
Tip
To quickly locate a specific activity, use the search capability, which enables you to find items based on a
displayed data field you select. See Search for data (see "Searching for Data" on page 40).
Viewing and Reporting Progress for Activity Steps
The Activity Details Steps tab lists existing activity steps and their status.
1) Select the activity in the Activities view or open timesheet.
2) To display Activity Details, on the toolbar choose (Shift+F10+Down Arrow+ Enter or space).
3) Choose the Steps tab.
If you are the primary resource, you can identify steps that are completed by marking the checkbox on this
tab.
You can customize the data columns on the Steps tab to display percent complete and user defined fields.
If you are a primary resource with the appropriate administrative and security settings, you can edit user
defined fields associated with steps.
To customize the Steps data columns, select a step row or the Steps tab name and press Shift F10+Enter.
To edit a user defined field, select the field and type new data.

Working with Activities and Details
47
Keyboard Tips: To clear all data in a selected field, press F2+Delete. For a date UDF, to display the
calendar window, press Ctrl+F2.
Tip
To quickly locate a specific activity or step, use the search capability, which enables you to find items based
on a displayed data field you select. See Searching for Data (on page 40).
Viewing and Sending Activity Feedback
On the Activity Details General tab, all resources assigned to an activity can view notes sent by the project
manager.
If you are the primary resource, you can also send notes to the project manager. All resources assigned to
the activity can read notes recorded by the primary resource.
To view or send notes related to an activity
1) Select the activity in the Activities view or open timesheet.
2) On the toolbar choose (Shift+F10+Down Arrow+ Enter or space) to display Activity Details.
3) Select the General tab.
4) To send notes, choose Feedback to PM.
5) To view notes, choose Notes from PM.
Viewing Your Project List and Project Web Sites
In the Activities and the Timesheet views, you can display a list of the projects you are currently assigned to
work on.
1) On the toolbar, click (Alt+V+P).
To quickly find a specific project, you can search (Ctrl+F) based on the field, or column, that currently
has focus in the Projects window. See Searching for Data (on page 40).
2) To launch a project's Web site, if available, select the project, then choose Launch (Alt+L).
To sort the projects list
mouse - Click the title of the column you want to sort by. Click again to change the sort order.
keyboard - Tab or arrow to a cell in the sort column. To sort in ascending order, Press Ctrl+Alt+A, or for
descending sort, press Ctrl+Alt+D.
Searching for Data
Within any P6 Progress Reporter pages or windows that present data in a row and column format, you can
search for specific items, based on a data field you select. For example, in the Open Timesheet window, you
can search for a timesheet based on Start Date or Status.
1) In any row, place focus in the column that corresponds to the field you want to search on.
2) Press Ctrl+F.

P6 Progress Reporter
48
3) Specify the search criteria, then choose Find Next (Alt+N).
The first result is highlighted in the list. Pressing Find Next (Alt+N) cycles through the results, returning to
the beginning after you have reached the last result.
Activity Details Tabs
You can display activity details in the Timesheets and Activities views.
To show or hide Activity Details, on the toolbar choose (Shift+F10+Down Arrow+ Enter or space).
Activity detail information is organized on six tabs. All of the detail tabs, except General, display information
in a searchable row and column format. See Searching for Data (on page 40).
For each of your assigned activities, you can view all available information. If you are a primary resource, you
can also edit certain activity details.
On the General tab (see "Using the General Tab" on page 48), view dates, duration, and PM notes.
On the Resources tab (see "Using the Resources Tab" on page 50), view resource assignments and
report progress if you are not required to use a timesheet. You can also record estimates for remaining work and report when you have completed an assignment.
On the Steps tab (see "Using the Steps Tab" on page 52), view step details and report step progress.
On the Notebook tab (see "Using the Notebook Tab" on page 53), view activity notebooks and descriptions.
On the Relationships tab (see "Using the Relationships Tab" on page 53), view predecessors and
successors, including dates and status.
On the WPs & Docs tab (see "Using the WPs & Docs Tab" on page 54), view and edit documents and details.
Keyboard Tips: To navigate among the Activity Detail tabs, place focus on the tab name, then press the
right or left arrow. To navigate among elements within a tab, press Tab. To activate an element, such as a
button, or choose a radio button or checkbox option, press the spacebar. OK = Alt+O. Cancel = Alt+C.
With focus in the detail tabs, you can press Ctrl+J and Ctrl+K to scroll through the activities in your activity
list so you can more easily review details for a number of activities. Ctrl+J selects the previous activity;
Ctrl+K selects the next activity.
Related Topics
Using the General Tab ............................................................................................................................. 48
Using the Resources Tab......................................................................................................................... 50
Using the Steps Tab .................................................................................................................................. 52
Using the Notebook Tab ........................................................................................................................ 53
Using the Relationships Tab ................................................................................................................... 53
Using the WPs & Docs Tab .................................................................................................................... 54
Using the General Tab
Use the General tab to view dates and duration and to communicate with the project manager about the
activity.

Working with Activities and Details
49
If you are the primary resource for the activity, you can use the General tab to edit the start, finish and
expected finish dates.
Keyboard Tips: In the date selection window, when focus is in the daily calendar, to change the month,
press Page Up or Page Down; to change the year, press Ctrl+Page Up or Ctrl+Page Down. To move focus
from the daily calendar to the next available element in the window, press Ctrl+Tab. To select the year,
month, and time, when focus is on the corresponding element, use the arrow keys. To save and exit, press
Alt+S. To Cancel, press Alt+C.
All resources assigned to an activity can use the feedback and notes features.
To send a note about the activity, choose Feedback to PM.
To read notes from the project manager, choose Notes from PM.
Tip
Notes icons are yellow when information is available and white when no information has been recorded.
Related Topics
General Field Definitions ......................................................................................................................... 49
General Field Definitions
Activity ID
An identifier that is unique within the project.
Activity Name
The name of the activity, which does not need to be unique within the project.
WBS
The Work Breakdown Structure element to which the activity is assigned.
Started
Indicates whether work has started on the activity. If you are the primary resource, you can mark this
checkbox to indicate that work has begun.
Start Date
If you are the primary resource, you can specify the actual start date. For a not started activity, this is the
planned start date.
Keyboard Tip: In the date selection window, by default, focus is on the current start date. To change only
the day, tab to it, then press Ctrl+Enter.
Finished
Indicates whether work has finished for the activity. If you are the primary resource, you can mark this
checkbox to indicate that the activity is completed.

P6 Progress Reporter
50
If you mark an activity as Finished, a project-level setting determines whether an actual finish is applied to
the activity or if approval is first required. If approval is required, the activity status is In Review until the
project manager approves or rejects it. If the finish is approved, the activity status is Completed and an
actual finish date is applied to the activity. If the finish is rejected, the activity status is Rejected and the
Finished checkbox is unchecked.
Finish Date
If you are the primary resource, you can specify the actual finish date for a completed activity. For a not
started activity, this is the planned finish. For an in progress activity this is the remaining finish date
calculated by the scheduler.
Keyboard Tip: In the date selection window, by default, focus is on the current start date. To change only
the day, tab to it, then press Ctrl+Enter.
Planned Duration
The expected number of work periods required to complete the selected activity. Planned Duration
represents the amount of time the project manager expects it will take to complete the entire activity. It
does not reflect the amount of time you are expected to work on the activity.
Expected Finish Date
The date the activity's primary resource expects work for the activity to be completed. Only the primary
resource can edit this date for an in progress activity.
Suspend Date
The date on which the activity's progress stopped or is scheduled to stop.
Resume Date
The date on which a suspended activity can resume progress.
Using the Resources Tab
Use the Resources tab to
View a list of the resources assigned to an activity
Report time worked on an activity, if you do not use timesheets
Report estimates of remaining work for your activities
Report estimates of remaining work for a nonlabor or material resource, if you are the primary resource on an activity
Report completed assignments
To view contact information for a resource, highlight the resource in the list, then choose Details.
Related Topics
Resource Field Definitions ...................................................................................................................... 51

Working with Activities and Details
51
Resource Field Definitions
Resource
The name of the resource.
Remaining Units/Time
The rate at which the resource performs work for the activity, expressed as units per duration or a
percentage, depending on a preference you set. To set this preference, choose File, User Preferences
(Alt+F+U), then select the Time Units tab.
Role ID
The role ID assigned to the resource. A role is a job title or skill, for example, carpenter or quality
assurance inspector. Depending on the way a project has been set up, a resource could be assigned to the
same activity more than once, performing different roles.
Primary
Indicates if a resource is the primary resource for the selected activity.
Resource Type
Indicates whether the resource is labor, nonlabor, or material.
Start
The date the resource began or is scheduled to begin work for the selected activity.
Finish
The date the resource finished or is scheduled to finish work for the selected activity.
Cost Account
The Cost Account Name applied to the resource assignment.
Planned Units
The number of work units planned for this resource on the activity.
Prior Actual Units
The resource's regular and overtime units worked on the selected activity.
If you do not use timesheets, use this field to record time worked on the selected activity. In the
Assigned Resources area, select your name, then type your hours in the Prior Actual Units field. To enter
hourly overtime, for example, eight regular and three overtime hours, type 8/3.
If you are the activity's primary resource, use this field to record actual units for nonlabor and
material resources. In the Assigned Resources area, select the nonlabor resource, then type the units in the
Prior Actual Units field.

P6 Progress Reporter
52
Note: The actual units you record are pending for the activity and can be
modified by the project manager. Depending on your organization's processes,
the progress you report on this tab can be used to update the project when
actuals are applied.
Remaining Units
The number of work units the resource is still expected to perform for activity.
New Remaining Units or Percent Complete
Use this field to report estimates of remaining work. A project-level administrative setting determines
whether you estimate progress on started activities in terms of New Remaining Units or Percent
Complete.
For in progress activities, select your name in the Assigned Resources area, and use the available field to
report either the number of work periods you will need to complete the activity or the percentage of work
you have completed for the activity.
If you are the activity's primary resource, you can also record remaining work estimates for nonlabor and
material resources assigned to the activity.
Note: New remaining units or percent complete values you enter are pending
and can be modified by the project manager before actuals are applied to the
project.
Completed
Mark this checkbox to indicate that you have completed your work for an assignment. A project-level
option determines if you can record your assignments as completed. If this feature is not turned on, the
completed checkbox is disabled.
Tip
A P6 Progress Reporter user preference lets you choose to hide your completed assignments on the
Resources details tab and in your timesheets. If this preference is set to not display completed assignments,
"Filtering Completed Assignments" appears above the column headings on the Resources tab and, when
you mark the Completed checkbox, the assignment is immediately removed from the Resources tab.
Using the Steps Tab
Use the Steps tab to review existing activity steps and their status. You can customize the data columns on
the Steps tab to display percent complete and user defined fields.
If you are the primary resource, you can report steps as completed and, depending on administrative and
security settings, you can edit user defined fields (UDF) associated with steps.
To customize the Steps data columns, select a step row or the Steps tab name and press Shift F10+Enter.
To edit a user defined field, select the field and type new data.

Working with Activities and Details
53
Keyboard Tips: To clear all data in a selected field, press F2+Delete. For a date UDF, to display the
calendar window, press Ctrl+F2.
Related Topics
Steps Field Definitions .............................................................................................................................. 53
Steps Field Definitions
Name
The step name. which is unique for the activity. This is a read-only field.
Completed
If you are the primary resource, mark this checkbox to report that work for a step has completed.
Using the Notebook Tab
Use the Notebook tab to view notebook topics associated with the activity, along with descriptive text.
Using the Relationships Tab
On the Relationships tab, choose the appropriate option to view a list of the activity's predecessors or
successors, along with status, dates, and primary resource contact information.
Relationships Field Definitions
Activity ID
The unique identifier for the predecessor or successor activity.
Activity Name
The name of the predecessor or successor activity.
Project ID
The identifier for the project to which the predecessor or successor activity belongs.
Rel Type
The relationship type that exists between the selected activity and the predecessor or successor activity.
Relationship types are FF (Finish-to-Finish), FS (Finish-to-Start), SF (Start-to-Finish), and SS (Start-to-Start).
Lag
The amount of time between the start or finish of the selected activity and the start or finish of the
predecessor or successor.

P6 Progress Reporter
54
Status
The current status of the predecessor or successor activity: Not Started, In Progress, Completed, or In
Review/Rejected.
Start Date
For an activity that has started, this is the actual start date. For an activity that has not started, this is the
planned start date.
Finish Date
For an activity that is complete, this is the actual finish date. For an activity that is not finished, this is the
planned finish date.
Primary Resource
The name of the primary resource for the predecessor or successor activity.
The email address of the predecessor or successor activity's primary resource.
Office Phone
The phone number of the predecessor or successor activity's primary resource.
Using the WPs & Docs Tab
Use the WPs & Docs tab to view a list of activity documents, along with details such as author and review
status. If you are the primary resource you can edit certain document details.
Note: An administrative setting controls whether primary resources can edit
document details. If you require edit access and do not have it, contact the P6
administrator.
To display additional details and to view the document, choose Details.
If the document is stored in a public location, all assigned resources can open the document. Your edit
capabilities for publicly stored documents depend on the access privileges set by the author.
Related Topics
WPs & Docs Field Definitions ............................................................................................................... 54
WPs & Docs Field Definitions
Title
The title of the work product or document.

Working with Activities and Details
55
Status
The status of the work product or document, for example Under Review or On Hold.
Work Product
Indicates if the document has been designated as a work product
The following information appears when you select a document and choose the Details button.
Ref. No.
The reference number of the work product or document, if any.
Location
The path for the public storage location of the document file.
To view the document, choose Launch. You can modify the document if the author has granted editing
access.
If no public location has been specified for the document, this field is blank and the Launch button is
disabled.
Version
The version number of the work product or document. This field is updated manually by users who have
edit privileges for document details.
Author
The name of the author of the work product or document, if one has been specified.
Revision Date
The most recent revision date of the work product or document. This field is updated manually by users
who have edit privileges for document details.


57
P6 Progress Reporter Login Window
Overview
1) Type the username and password defined for you by the P6 administrator.
2) Select a Language.
3) To download large description fields as needed, rather than at log-in time, check the Low Speed
Connection checkbox.
4) Choose OK.
Add Activity window
Use the Add Activity window to add one or more of your activity assignments to an open timesheet. This
window lists all of your In Progress activities. For Not Started and Completed activities, the list includes
activities that fall within the time range specified in your user preferences. See Timeframe tab (on page
64).
To quickly find a specific activity, you can search (Ctrl+F) based on the field, or column, that currently has
focus in the Add Activity window. See Searching for Data (on page 40).
To add one or more activities, select them in the list, then choose Add (Alt+A). When finished, choose
Close (Alt+C).
Note: Before selecting activities, choose View, Refresh Data (F5) to be certain
the activity list you choose from is up to date
The following are the default fields that appear in the Add Activity window. To customize the data columns
that appear, choose Columns (Alt+L).
WBS
The code for the work breakdown structure (WBS) element to which an activity belongs.
Project ID
The unique identifier for the project to which the activity belongs.
Activity ID
The activity's unique identifier.
Activity Name
The name of the assigned activity, which does not need to be unique within the project.
Role ID
If you were assigned a role for the activity, this is the unique identifier for that role.
Context-Sensitive Help

P6 Progress Reporter
58
Activity Status
The current status of the activity: Not Started, In Progress, Completed, or In Review.
Add Overhead Activity window
Use the Add Overhead Activity window to add nonwork activities such as vacation to an open timesheet.
This window lists the types of overhead activities that have been defined by the administrator or project
manager.
To add one or more activities, select them in the list, then choose Add (Alt+A). When finished, choose
Close (Alt+C).
Note: To quickly find a specific activity, you can search (Ctrl+F) based on the
field, or column, that currently has focus in the Add Overhead Activity window.
See Searching for Data (on page 40).
Code
The overhead code, which is typically defined by the administrator.
Type
A description for the overhead code, typically defined by the administrator.
Assign to New Activity window
Use the Assign to New Activity window to add yourself as a resource for one or more activities. If you have
a timesheet open, you can choose to automatically add the new assignment to the open timesheet.
1) Select the project you want to assign yourself to.
To quickly find a project, you can search for it based on any of the listed fields: ID, name, or responsible
manager.
Note: A project-level setting determines whether a project is listed so you can
assign yourself to its activities. If you need to assign yourself to a project that is
not listed, contact your project manager or P6 administrator.
2) In the Search for Activities section, choose one of the following options, then specify your search
criteria and choose Search (Alt+S).
Activities Assigned to Parent Resource
For the project you selected, this option lists all activities of the resource hierarchy element to which
you are assigned in the project management database. The parent resource is generally the larger
department or organization for which you work. For example, a salesperson might be assigned to an
element of the resource hierarchy called Region 1 Sales. In this case, search would return all activities
assigned to Region 1 Sales.
Activity ID
For the project you selected, this option returns the list of activities that meet the criteria you enter in
the Search text field.

Context-Sensitive Help
59
Note: You can use the asterisk (*) and percent symbol (%) wildcard characters
in the search criteria. For example, to find all activities that begin with AB, type
AB* or AB%. If you type only a wildcard character, the search finds all activities in
the project.
3) From the search results, select the activities you want to assign, using Ctrl+Click or Shift+Click to
select multiple activities.
To quickly find an activity, you can search for it based on any of the listed fields: ID, name, or primary
resource.
4) Choose Assign (Alt+A). Or, if you currently have a timesheet open, you can assign yourself to the
activity and automatically add it to the open timesheet by choosing Assign and Add.
Search in the Project or Activity Results lists
1) In any row, place focus in the column that corresponds to the field you want to search on.
2) Press Ctrl+F.
3) Specify the search criteria, then choose Find Next (Alt+N).
The first result is highlighted in the list. Pressing Find Next (Alt+N) cycles through the results, returning
to the beginning after you have reached the last result.
Change Password window
Use the Change Password window to change your current password. Passwords are case-sensitive.
Depending on your organization's requirements, a password policy might be enabled by your P6
administrator. If the password policy is enabled, you must enter at least eight characters for the password,
and the password must contain at least one alphabetic character and at least one numeric character. When
the password policy is not enabled, you can enter a minimum of zero and a maximum of 20 alphanumeric
characters.
Regardless of your organization's password policy settings, a message indicating the minimum password
requirements appears at the bottom of the Change Password window.
To change your password:
1) Type your current password.
2) Type a new password, then type it again to confirm.
3) Choose OK (Alt+O).
Columns window
Use the columns window to choose the data columns you want to display for activities listed in your
timesheet, in the Activities view, or in the Add Activity window.
1) To add one or more columns, choose them in the Available Columns list, then choose (F6). To
add all available columns, choose .

P6 Progress Reporter
60
To remove one or more columns, choose them in the Selected Columns list, then choose (F6). To
remove all selected columns, choose .
Keyboard Tip: To add all columns, place focus in the Available Columns list or, to remove all columns,
place focus in the Selected Columns list. Press Alt+F6.
2) To specify the position in which a column appears, choose it in the Selected Columns list. To move it
up, choose (F7). To move it down, choose (Alt+F7).
3) To preview your column selections without closing the Columns window, choose Apply (Alt+A).
4) To return to the standard column selections, choose Default (Alt+D).
5) When finished, choose OK (Alt+O).
Login as Subordinate Resource window
If you are designated as a timesheet approval manager, you can use this window to log in and edit
timesheets for resources who report their work time to you.
Select the resource you want to log in for, then choose OK (Alt+O).
The Open Timesheet window displays so you can select the timesheet you want to view or edit.
Open Timesheet window
The Open Timesheet window lists the timesheets available to you. For quick access, the timesheet for the
current period is highlighted when the window opens. You can also search (Ctrl+F) based on the field, or
column, that currently has focus in the Open Timesheet window. See Searching for Data (on page 40).
Note: The number of future-period timesheets you can access is determined by
P6 Progress Reporter Administrator settings.
To open a timesheet, select it in the list. If opening the timesheet for the first time, choose how you want to add activities, then choose OK (Alt+O).
To sort the timesheet list
mouse - Click the title of the column you want to sort by. Click again to change the sort order.
keyboard - Tab or arrow to a cell in the sort column. For ascending sort, press Ctrl+Alt+A or for
descending, press Ctrl+Alt+D.
Start Date and End Date
The timesheet calendar range.
Status

Context-Sensitive Help
61
Timesheet status can be Not Started, Active, Submitted, Rejected, or Approved.
An Active timesheet is one that has been opened previously, but not submitted.
A Submitted timesheet is awaiting approval.
Automatically Add Current Activities to Timesheet
Adds your currently scheduled activities to the new timesheet.
Add Completed Resource Assignments
Adds activities that are ongoing during the timesheet period, but for which you have completed your work
(that is, an Actual Finish exists for your assignment)
Manually Add Activities to Timesheet
Lists your scheduled activities so you can select those you want to add.
Copy Activities from Previous Timesheet
Copies all activities included in the previous timesheet in the list. This option is not available when the
previous timesheet is Not Started.
Note: When copying activities from a previous timesheet, if a project's status
has changed from active, activities for that project will not be copied to the
timesheet you are opening.
Copy Completed Resource Assignments
Copies activities that are ongoing during the timesheet period, but for which you have completed your
work (that is, an Actual Finish exists for your assignment)
Add Current Activities
Adds your currently scheduled activities to the new timesheet.
Projects window
Use the Projects window to view a list of your current projects and to launch project Web sites. The
project ID and name are listed for each project, along with its URL, or Web site address, if one exists.
To quickly find a specific project, you can search (Ctrl+F) based on the field, or column, that currently
has focus in the Projects window. See Search for data
To sort the projects list
mouse - Click the title of the column you want to sort by. Click again to change the sort order.
keyboard - Tab or arrow to a cell in the sort column . To sort in ascending order, Press
Ctrl+Alt+A, or for descending sort, press Ctrl+Alt+D.
To launch a project's Web site, select the project, then choose Launch (Alt+L).

P6 Progress Reporter
62
Resource Details window
This window provides additional details about a resource you select on the Resources tab.
Specifically, this window displays contact information and the name of the role that the resource is fulfilling
on the activity. A role is a job title or skill. Depending on the way a project has been set up, a resource could
be assigned to the same activity more than once, performing different roles.
Timesheet Notes window
Use the Timesheet Notes window to view or attach notes for the currently open timesheet.
To add notes
Type in the New Notes section, then choose Add (Alt+A). The most recently added notes display at the top of the Notes History section.
When finished, choose Close (Alt+C).
Work Product and Document Details window
This window provides additional details about a document you select on the WPs & Docs tab and enables
you to view the document if it is available in a public location.
If you are the primary resource and you have the appropriate adimistrative setting, you can edit certain
document details. If you require edit access and do not have it, contact your P6 administrator.
All assigned resources can view a document that is stored in a public location; however, edit capabilities
depend on the access privileges set by the document author.
Field Definitions
Ref. No.
The reference number of the work product or document, if any.
Location
The path for the public storage location of the document file.
To view the document, choose Launch (Alt+L). You can modify the document if the author has
granted editing access.
If no public location has been specified for the document, this field is blank and the Launch button is
disabled.
Version
The version number of the work product or document. This field is updated manually by users who have
edit privileges for document details.
Author
The name of the author of the work product or document, if one has been specified.
Revision Date

Context-Sensitive Help
63
The most recent revision date of the work product or document. This field is updated manually by users
who have edit privileges for document details.
Setting Your Preferences
To perform the following tasks, choose the specified User Preference tab.
On the Time Units tab (on page 63), choose a display increment for units and durations
Choose a date display format on the Dates Tab (on page 64).
Edit your password or contact information on the User Setup Tab (on page 64).
Note: If P6 Progress Reporter is running with LDAP or Web Single SignOn
authentication, you can not change your password.
On the Start Up Tab (on page 64), select the view to display at log in. This tab appears only if you are designated as a timesheet user.
Customize timesheet cell colors on the Colors Tab (on page 64).This tab appears only if you are designated as a timesheet user.
On the Timeframe Tab (on page 64), specify a time range for displaying Not Started and Completed
activities in activity lists. Also, specify whether you want to display your completed assignments in open timesheets and on the Activity Details Resources tab.
On the Accessibility Tab (on page 65), choose to show or hide tool tips for time reporting spreadsheet cells.
Note: The Start Up and Colors tabs appear only if you are designated as a
timesheets user.
Keyboard Tips: To navigate among the User Preferences tabs, place focus on the tab name, then press
the up or down arrow. To navigate among elements within a tab, press Tab. To activate an element, such
as a button, or choose a radio button or checkbox option, press the spacebar. OK = Alt+O. Cancel =
Alt+C.
Time Units Tab
You can specify the following time format options
Unit of Time - Choose the time increment you want to use for displaying resource units and activity
durations.
Sub-Units - Choose this option to display the corresponding subunit for the selected Unit of Time.
Decimals - Choose the number of decimal places to display.
Resource Units/Time - Display units per time as a percentage or as units per duration, for example h/d.

P6 Progress Reporter
64
Dates Tab
Specify the date and time formats you want to use. The Sample section is revised as you make selections, so
you can preview your selections before saving them.
User Setup Tab
Use this tab to edit your office phone number, e-mail address, or login password.
Note that passwords are case-sensitive. Your resource name and login name are defined by an
administrator and cannot be edited.
Start Up Tab
Choose the view you want to display each time you log in.
Start Up in Last Open Window displays the view that was open when you last exited the module.
Colors Tab
Use this tab to specify the colors that identify various elements of a timesheet, or to override P6 Progress
Reporter colors and use your operating system color definitions.
To specify the cell color for a timesheet element, choose its color button.
In the Basic Colors field, select a new color or, to define a custom color, use the Red, Green, and Blue fields
to specify color percentages, then choose OK (Alt+O).
To reset all colors to the values defined by the administrator, choose Default.
Note: Shading for Non-work Cells is based on the calendar assigned to the
resource.
Timeframe Tab
Use this tab to filter your activity list by specifying a time range for displaying activities with a Not Started
or Completed status. This preference affects the Activities view and the list of activities displayed when you
use the Add Activity to timesheet feature.
P6 Progress Reporter uses your computer's system date and the number of days you specify to determine
the boundaries of the timeframe. For example, 90 defines a timeframe 90 days before and 90 days after
today. Not Started activities with a planned start or planned finish within the timeframe and Completed
activities with an actual finish in the timeframe will be displayed.
To change the current value, type a new value or use the arrow buttons to select.
To reset both options to the values defined by the administrator, choose Default.
Also use this tab to indicate whether you want to display your completed activity assignments in open
timesheets and Activity Details. When you choose to hide completed assignments, they no longer appear in
timesheets and they are removed from the list of assignments that appears on the Resources Details tab. An
assignment is considered complete if it has an actual finish date or if it has been marked Completed.

Where to Get Support
65
Accessibility tab
To display a tool tip that identifies the activity name and date corresponding to the current time reporting
cell, mark the checkbox. These tool tips are particularly useful for identifying individual time reporting cells
when using a screen magnifier.
If you have a question about using Oracle Primavera products that you or your network administrator
cannot resolve with information in the documentation or help, go to:
http://www.oracle.com/us/support/index.html
This page provides the latest information on contacting Oracle Global Customer Support and the support
renewals process.
Go to http://download.oracle.com/docs/cd/E17266_01/index.htm for the latest updates to the P6
EPPM 8.0 Documentation library.
Where to Get Support

66
Copyright © 1999, 2010, Oracle and/or its affiliates. All rights reserved.
The Programs (which include both the software and documentation) contain proprietary information; they
are provided under a license agreement containing restrictions on use and disclosure and are also
protected by copyright, patent, and other intellectual and industrial property laws. Reverse engineering,
disassembly, or decompilation of the Programs, except to the extent required to obtain interoperability
with other independently created software or as specified by law, is prohibited.
The information contained in this document is subject to change without notice. If you find any problems in
the documentation, please report them to us in writing. This document is not warranted to be error-free.
Except as may be expressly permitted in your license agreement for these Programs, no part of these
Programs may be reproduced or transmitted in any form or by any means, electronic or mechanical, for any
purpose.
The platform-specific hardware and software requirements included in this document were current when
this document was published. However, because new platforms and operating system software versions
might be certified after this document is published, review the certification matrix on the My Oracle
Support (formerly OracleMetaLink) Web site for the most up-to-date list of certified hardware platforms
and operating system versions. The My Oracle Support (formerly OracleMetaLink) Web site is available at
the following URL:
http://metalink.oracle.com/
or
http://support.oracle.com/
If the Programs are delivered to the United States Government or anyone licensing or using the Programs
on behalf of the United States Government, the following notice is applicable: U.S. GOVERNMENT
RIGHTS Programs, software, databases, and related documentation and technical data delivered to U.S.
Government customers are "commercial computer software" or "commercial technical data" pursuant to
the applicable Federal Acquisition Regulation and agency-specific supplemental regulations. As such, use,
duplication, disclosure, modification, and adaptation of the Programs, including documentation and
technical data, shall be subject to the licensing restrictions set forth in the applicable Oracle license
agreement, and, to the extent applicable, the additional rights set forth in FAR 52.227-19, Commercial
Computer Software -- Restricted Rights (June 1987). Oracle USA, Inc., 500 Oracle Parkway, Redwood
City, CA 94065.
The Programs are not intended for use in any nuclear, aviation, mass transit, medical, or other inherently
dangerous applications. It shall be the licensee's responsibility to take all appropriate fail-safe, backup,
redundancy and other measures to ensure the safe use of such applications if the Programs are used for
such purposes, and we disclaim liability for any damages caused by such use of the Programs.
Copyright

Copyright
67
Oracle and Primavera are registered trademarks of Oracle Corporation and/or its affiliates. Other names
may be trademarks of their respective owners. The Programs may provide links to Web sites and access to
content, products, and services from third parties. Oracle is not responsible for the availability of, or any
content provided on, third-party Web sites. You bear all risks associated with the use of such content. If
you choose to purchase any products or services from a third party, the relationship is directly between
you and the third party. Oracle is not responsible for: (a) the quality of third-party products or services; or
(b) fulfilling any of the terms of the agreement with the third party, including delivery of products or services
and warranty obligations related to purchased products or services. Oracle is not responsible for any loss
or damage of any sort that you may incur from dealing with any third party.
To view the P6 Commercial Notices and Disclosures for Documentation, go to the
\Documentation\<language>\Notices and Disclosures folder of the P6 physical media or download.