Orbix Installation Guide · 2 ORBIX Installation Guide Windows compiler names Table 1 shows the...
26
Orbix 6.3.11 Installation Guide
Transcript of Orbix Installation Guide · 2 ORBIX Installation Guide Windows compiler names Table 1 shows the...

Orbix 6.3.11
Installation Guide
ii
Micro FocusThe Lawn22-30 Old Bath RoadNewbury, Berkshire RG14 1QNUKhttp://www.microfocus.com
© Copyright 2014-2019 Micro Focus or one of its affiliates.
MICRO FOCUS, the Micro Focus logo and Orbix are trademarks or registered trademarks of Micro Focus or one of its affiliates.
All other marks are the property of their respective owners.
2019-01-31
Contents
Installation Prerequisites ......................................................1Before You Begin ......................................................................................1Operating Requirements ............................................................................2Disk Space Requirements...........................................................................3
Installing Orbix .....................................................................5Launching the Installer ..............................................................................5Installing with the GUI...............................................................................8Installing Silently ....................................................................................11Upgrading from Previous Versions of Orbix .................................................13Configuring your Environment...................................................................15Verifying the Installation ..........................................................................16Troubleshooting ......................................................................................18Further Information.................................................................................20
Uninstalling Orbix................................................................21Uninstalling on Windows ..........................................................................21Uninstalling on UNIX................................................................................21
Orbix Installation Guide i i i

iv Orbix Installation Guide
Installation PrerequisitesBefore you install Orbix, check the system requirements, and familiarize yourself with the steps involved in installing the product.
Before You Begin
See the Release NotesBefore installing, visit the documentation web page at: https://supportline.microfocus.com/productdoc.aspx, and read the Release Notes to check for updates to this Installation Guide.
OS/compiler patch levelsCustomers can use the stated minimum base levels for OS/compiler vendor patches that work with Orbix. It is the usual practice of the OS/compiler vendors that later patches are binary compatible with earlier patches.If for any reason you need to use higher patch levels, please confirm with the OS/compiler vendor that the patches are fully backward compatible with the set required by the Orbix product.
MigrationFor detailed information on migrating from Orbix Application Server Platform 6.0, 5.1, 5.0, Orbix 2000, and Orbix 3.3 to Orbix 6.3, please refer to the migration guides on the documentation web page at https://supportline.microfocus.com/productdoc.aspx.For details on migrating from previous versions of Orbix 6.3, see the Release Notes.
ORBIX Installation Guide 1

Windows compiler namesTable 1 shows the translation between Microsoft Windows VC names and Visual Studio compiler editions used in this guide. It also shows the version output by Microsoft C/C++ Compiler Driver (cl.exe).
Operating RequirementsFor the latest information on supported platforms, see:http://supportline.microfocus.com/prodavail.aspx
JavaIf you want to use the Administrator Web Console, you must have a JDK installed—a JRE is not sufficient.
WindowsIf you are installing on Windows and intending to develop systems in C++, you need Microsoft Visual Studio. You should install this before installing Orbix.If you are deploying an Orbix application, you need the Visual C++ Redistributable Package. Install the version of the Redistributable that matches the version of Visual Studio used to develop the application. These Redistributable Packages are available for download from Microsoft.
Table 1: Microsoft VC and Visual Studio Names
Visual Studio Edition VC Name Output by cl.exe
Visual Studio 2008 VC9 15.x.x
Visual Studio 2010 VC10 16.x.x
Visual Studio 2012 VC11 17.x.x
Visual Studio 2013 VC12 18.x.x
Visual Studio 2015 VC14 19.x.x
Visual Studio 2017 VC15 20.x.x
2 ORBIX Installation Guide

Disk Space RequirementsTable 2 lists the approximate amount of disk space (in MB) required to install Orbix 6.3.11.
Table 2: Disk Space Requirements
Orbix Installer
Orbix Standard Runtime(32-bit)
Orbix Standard Runtime(64-bit)
Orbix Standard
Dev. & Runtime
Orbix Enterprise Runtime(32-bit)
Orbix Enterprise Runtime(64-bit)
Orbix Enterprise
Dev. & Runtime
AIX (32-bit)
337 - 390 337 - 390
AIX(64-bit)
- 388 449 - 388 449
HP-UX(Itanium)
436 835 960 436 835 960
Linux 175 336 375 175 375 375
Solaris (SPARC)
208 417 462 208 417 462
Solaris 10, Solaris11(x86, x64)
200 409 454 200 409 454
Windows 32-bit (VS 2008)
124 - 171 124 - 171
Windows 64-bit (VS 2008)
- 140 187 - 140 187
Windows 32-bit (VS 2010)
124 - 171 124 - 171
Windows 64-bit (VS 2010)
- 135 183 - 135 183
Windows 32-bit (VS 2012)
124 - 170 124 - 170
Windows 64-bit (VS 2012)
- 134 181 - 134 181
Windows 32-bit (VS 2013)
124 - 171 124 - 171
Windows 64-bit (VS 2013)
- 134 181 - 134 181
ORBIX Installation Guide 3

Windows 32-bit (VS 2015)
123 - 169 123 - 169
Windows 64-bit (VS 2015)
- 133 180 - 133 180
Windows 32-bit (VS 2017)
123 - 168 123 - 168
Windows 64-bit (VS 2017)
- 133 180 - 133 180
Note: You also need an extra 10 MB for temporary work space in %TEMP% on Windows, and an extra 5 MB in /tmp on UNIX.If the required space is not available on /tmp, you can set a different partition for use by InstallAnywhere by setting the environment variable IATEMPDIR to point to this partition, for example: IATEMPDIR=/local2;export IATEMPDIR.
Table 2: Disk Space Requirements
Orbix Installer
Orbix Standard Runtime(32-bit)
Orbix Standard Runtime(64-bit)
Orbix Standard
Dev. & Runtime
Orbix Enterprise Runtime(32-bit)
Orbix Enterprise Runtime(64-bit)
Orbix Enterprise
Dev. & Runtime
4 ORBIX Installation Guide
Installing OrbixBefore you install Orbix 6.3, check the system requirements and familiarize yourself with the steps involved in installing the product.
Launching the InstallerThis section explains how to launch the Orbix installer. It includes the following sections:• Obtain the installer for your platform• Before running the installer• Running the installer• Installing on UNIX• Installation directory• Screen resolution
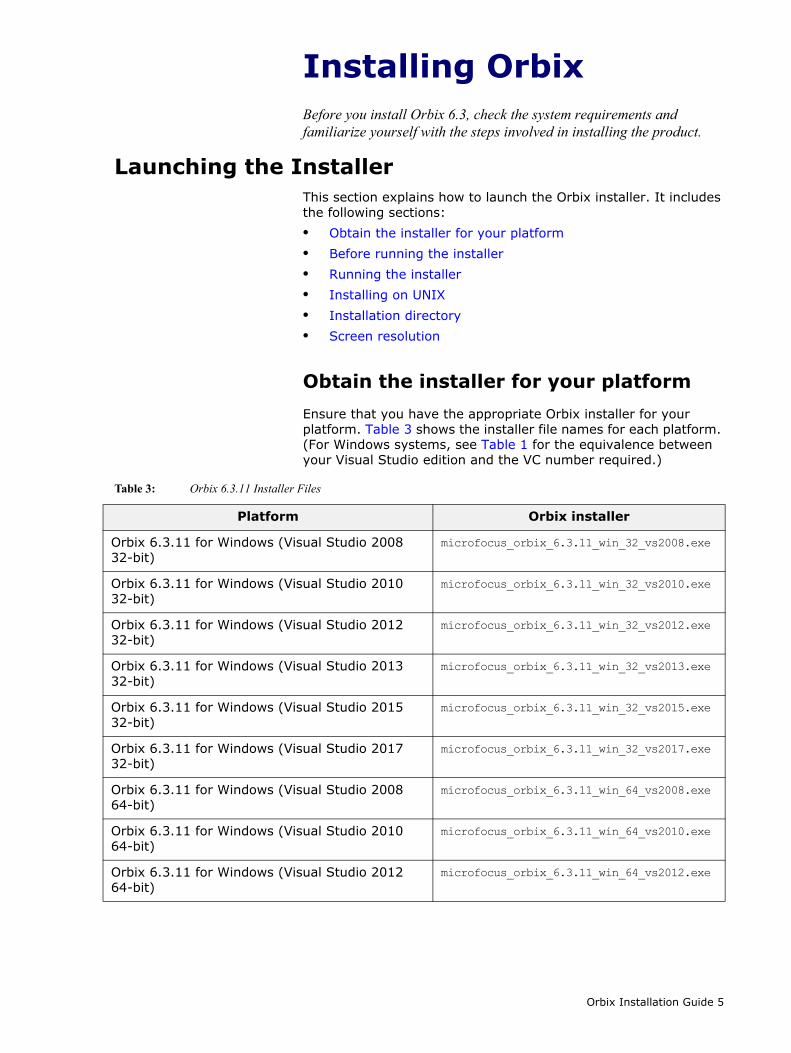
Obtain the installer for your platformEnsure that you have the appropriate Orbix installer for your platform. Table 3 shows the installer file names for each platform. (For Windows systems, see Table 1 for the equivalence between your Visual Studio edition and the VC number required.)
Table 3: Orbix 6.3.11 Installer Files
Platform Orbix installer
Orbix 6.3.11 for Windows (Visual Studio 2008 32-bit)
microfocus_orbix_6.3.11_win_32_vs2008.exe
Orbix 6.3.11 for Windows (Visual Studio 2010 32-bit)
microfocus_orbix_6.3.11_win_32_vs2010.exe
Orbix 6.3.11 for Windows (Visual Studio 2012 32-bit)
microfocus_orbix_6.3.11_win_32_vs2012.exe
Orbix 6.3.11 for Windows (Visual Studio 2013 32-bit)
microfocus_orbix_6.3.11_win_32_vs2013.exe
Orbix 6.3.11 for Windows (Visual Studio 2015 32-bit)
microfocus_orbix_6.3.11_win_32_vs2015.exe
Orbix 6.3.11 for Windows (Visual Studio 2017 32-bit)
microfocus_orbix_6.3.11_win_32_vs2017.exe
Orbix 6.3.11 for Windows (Visual Studio 2008 64-bit)
microfocus_orbix_6.3.11_win_64_vs2008.exe
Orbix 6.3.11 for Windows (Visual Studio 2010 64-bit)
microfocus_orbix_6.3.11_win_64_vs2010.exe
Orbix 6.3.11 for Windows (Visual Studio 2012 64-bit)
microfocus_orbix_6.3.11_win_64_vs2012.exe
Orbix Installation Guide 5
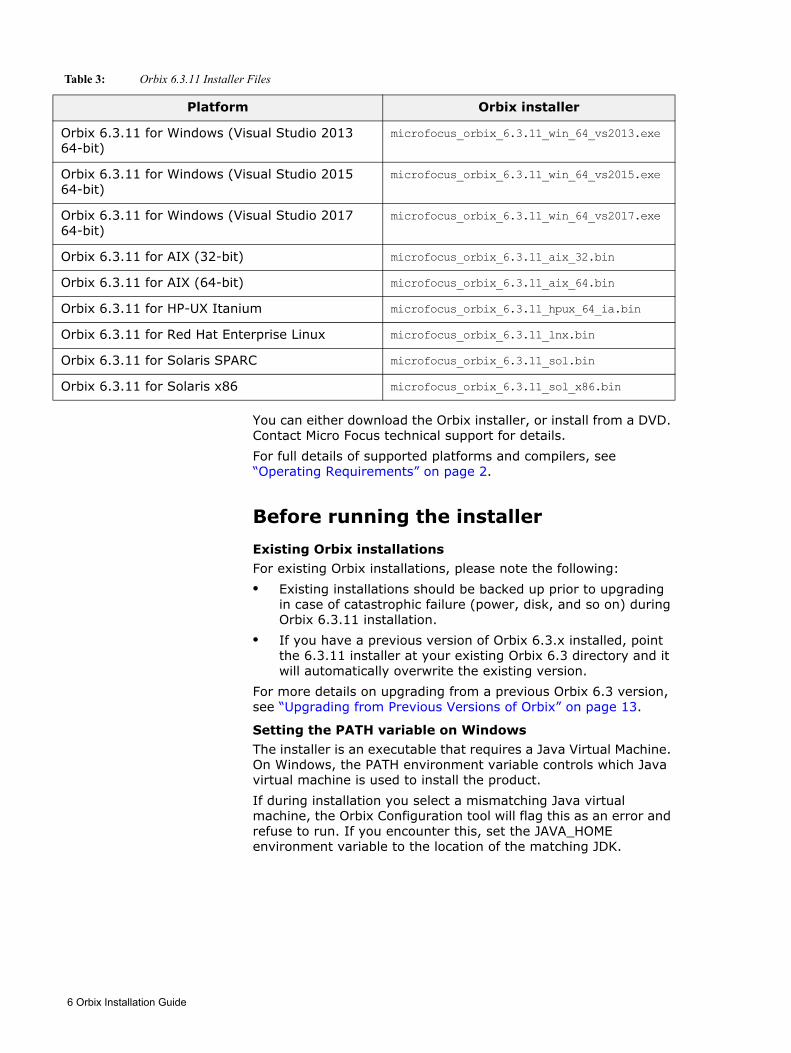
You can either download the Orbix installer, or install from a DVD. Contact Micro Focus technical support for details. For full details of supported platforms and compilers, see “Operating Requirements” on page 2.
Before running the installerExisting Orbix installationsFor existing Orbix installations, please note the following:• Existing installations should be backed up prior to upgrading
in case of catastrophic failure (power, disk, and so on) during Orbix 6.3.11 installation.
• If you have a previous version of Orbix 6.3.x installed, point the 6.3.11 installer at your existing Orbix 6.3 directory and it will automatically overwrite the existing version.
For more details on upgrading from a previous Orbix 6.3 version, see “Upgrading from Previous Versions of Orbix” on page 13.
Setting the PATH variable on WindowsThe installer is an executable that requires a Java Virtual Machine. On Windows, the PATH environment variable controls which Java virtual machine is used to install the product. If during installation you select a mismatching Java virtual machine, the Orbix Configuration tool will flag this as an error and refuse to run. If you encounter this, set the JAVA_HOME environment variable to the location of the matching JDK.
Orbix 6.3.11 for Windows (Visual Studio 2013 64-bit)
microfocus_orbix_6.3.11_win_64_vs2013.exe
Orbix 6.3.11 for Windows (Visual Studio 2015 64-bit)
microfocus_orbix_6.3.11_win_64_vs2015.exe
Orbix 6.3.11 for Windows (Visual Studio 2017 64-bit)
microfocus_orbix_6.3.11_win_64_vs2017.exe
Orbix 6.3.11 for AIX (32-bit) microfocus_orbix_6.3.11_aix_32.bin
Orbix 6.3.11 for AIX (64-bit) microfocus_orbix_6.3.11_aix_64.bin
Orbix 6.3.11 for HP-UX Itanium microfocus_orbix_6.3.11_hpux_64_ia.bin
Orbix 6.3.11 for Red Hat Enterprise Linux microfocus_orbix_6.3.11_lnx.bin
Orbix 6.3.11 for Solaris SPARC microfocus_orbix_6.3.11_sol.bin
Orbix 6.3.11 for Solaris x86 microfocus_orbix_6.3.11_sol_x86.bin
Table 3: Orbix 6.3.11 Installer Files
Platform Orbix installer
6 Orbix Installation Guide

Running the installerTo run the Orbix installer file, complete the following steps:1. Download the installer file into a temporary directory (for
example, \temp on Windows, or /tmp on UNIX).2. Run the installation executable to launch InstallAnywhere:
On UNIX, microfocus_orbix_6.3.11_<platform>.bin On Windows, microfocus_orbix_6.3.11_<version>.exe
3. Follow the instructions in “Installing with the GUI” on page 8.
Installing on UNIXThe following apply to UNIX operating systems:• The installer is a Java application that can be run in GUI or
console mode. By default, the installer runs in GUI mode. To run the installer in console mode, run it as follows: microfocus_orbix_6.3.11_<platform>.bin -i console
• If during the installation a warning message is issued, indicating there is not enough space on the file system to install Orbix: Check that the file system does indeed have enough
space. If it does, set the following environment variable and
re-run the installer:export CHECK_DISK_SPACE=OFF
Installation directoryWhen entering the pathname for your Orbix 6.3 installation, be sure to enter an absolute pathname, without wildcards. Do not use the ~ character in a UNIX pathname.
Screen resolutionTo use the Orbix 6.3 GUI, you should set your screen color depth to at least 256 colors.
Note: Spaces in directory paths are supported on Windows only. Spaces are not supported on UNIX platforms.
WARNING: No part of Orbix should be installed on an NFS-mounted file system. All Orbix services should be run with local persistent stores.
Orbix Installation Guide 7
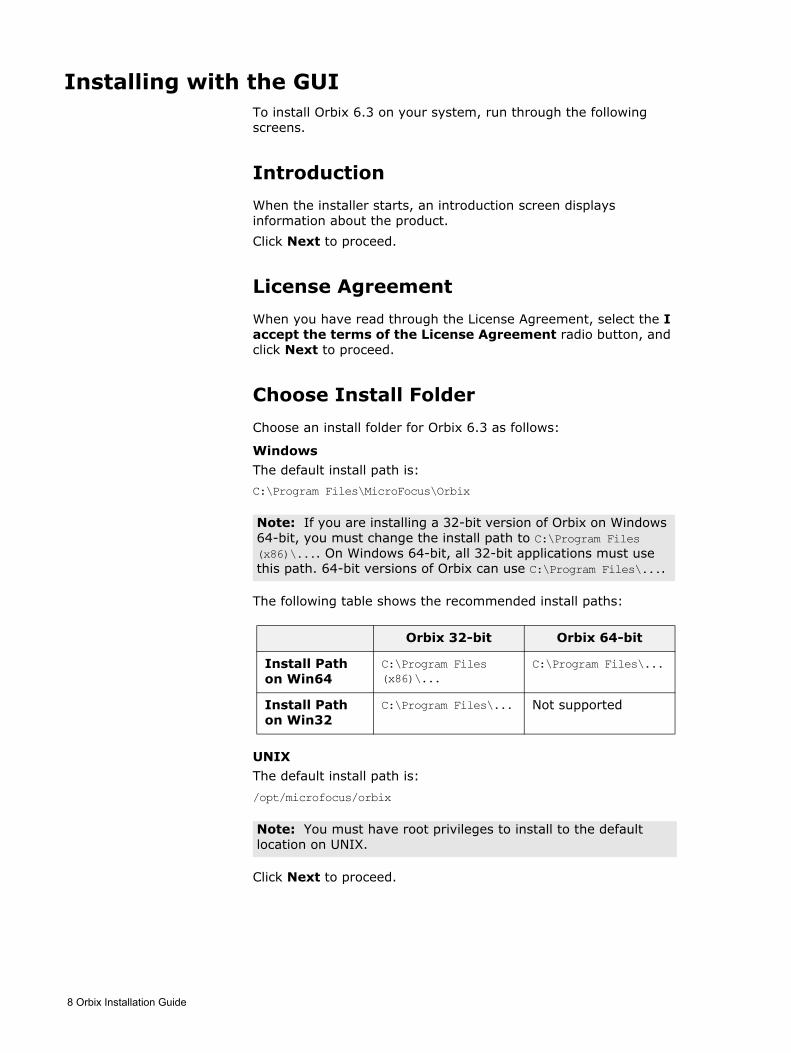
Installing with the GUITo install Orbix 6.3 on your system, run through the following screens.
IntroductionWhen the installer starts, an introduction screen displays information about the product.Click Next to proceed.
License AgreementWhen you have read through the License Agreement, select the I accept the terms of the License Agreement radio button, and click Next to proceed.
Choose Install FolderChoose an install folder for Orbix 6.3 as follows:
WindowsThe default install path is:C:\Program Files\MicroFocus\Orbix
The following table shows the recommended install paths:
UNIXThe default install path is:/opt/microfocus/orbix
Click Next to proceed.
Note: If you are installing a 32-bit version of Orbix on Windows 64-bit, you must change the install path to C:\Program Files (x86)\.... On Windows 64-bit, all 32-bit applications must use this path. 64-bit versions of Orbix can use C:\Program Files\....
Orbix 32-bit Orbix 64-bit
Install Path on Win64
C:\Program Files (x86)\...
C:\Program Files\...
Install Path on Win32
C:\Program Files\... Not supported
Note: You must have root privileges to install to the default location on UNIX.
8 Orbix Installation Guide
Choose Install Set to InstallChoose the product edition for which you have a license. If you are installing on a platform with both 32-bit and 64-bit versions, the options are:• Enterprise Edition with Development and Runtime• Enterprise Edition with Runtime (32-bit)• Enterprise Edition with Runtime (32-bit and 64-bit)• Standard Edition with Development and Runtime• Standard Edition with Runtime (32-bit)• Standard Edition with Runtime (32-bit and 64-bit)
If you are installing on a platform that is only 32-bit or only 64-bit, the options are:• Enterprise Edition with Development and Runtime• Enterprise Edition with Runtime• Standard Edition with Development and Runtime• Standard Edition with RuntimeIn these options:• Development and Runtime installs all Orbix 6.3
development and runtime components.• Runtime Only installs Orbix 6.3 runtime components only.Click Next to proceed.
Choose Java virtual machineUnder Environment Settings, you are also asked to choose a Java virtual machine for use by Orbix.Choose one and click Next to proceed.
Set JAVA_HOMEIn addition, if JAVA_HOME is not set, you are asked if you want to set it. JAVA_HOME is required for the Orbix Configuration tool, itconfigure, to run from the command line or from the Start menu shortcut.If you choose not to set JAVA_HOME, you must set it manually later.Click Next to proceed.
Note:• If you are installing a 32-bit only edition, make sure you are
using a 32-bit JDK. • If you are planning to use Java 8 on Solaris or Java 11 on any
platform, make sure to install an edition with 64-bit support, as these Java versions are 64-bit only.
Orbix Installation Guide 9
Environment SettingsThe following option only applies to Standard and Enterprise on Windows.You are prompted to set environment variables and must choose one of the following options:• Set the variables for all users.• Set the variables only for the current user.• I will set them manually later.
Click Next to proceed.
Pre-Installation SummaryReview the Pre-Installation Summary• If you are satisfied with the details, click Install.• If you want to change any of the details, click Previous.
After installingIf you have installed a Development and Runtime edition of Orbix 6.3, a browser is required when the installation completes. If the installer cannot find one it times out eventually with an error. However, the installation has completed. When the installation completes and a browser is available, a Welcome Page is automatically launched. This page contains links to the Release Notes, Tutorials and Demos, to help you get up and running quickly. To view the Welcome Page in the future, open the index.html file located in the OrbixInstallDir\asp\6.3\doc directory in a browser.
DocumentationOrbix 6.3 documentation is available on the Orbix documentation web page at: https://supportline.microfocus.com/productdoc.aspx.The online documentation is frequently updated, so check here for the latest version of the documentation.
Note:• If you plan to launch any Orbix domain service on
machine startup (you can configure such services later during deployment with itconfigure; see the Orbix Deployment Guide for details), select Set the variables for all users, as the system path needs to be set for the Windows services.
• You must have administrator privileges to set variables for all users on Windows.
10 Orbix Installation Guide
Installing SilentlySilent installations are installations that run without user interaction. The main advantage of this type of installation is that it allows you to automate the process of installing on more than one machine. In a normal (non-silent) installation, the installer receives necessary user input in the form of responses to questions posed in a GUI or on a console. In the case of a silent installation, you must provide this information in an installer.properties file. This section outlines how to install Orbix 6.3 silently and provides you with a sample installer.properties file. It is divided into the following subsections:• Sample installer.properties file• Installing silently on UNIX• Installing silently on Windows
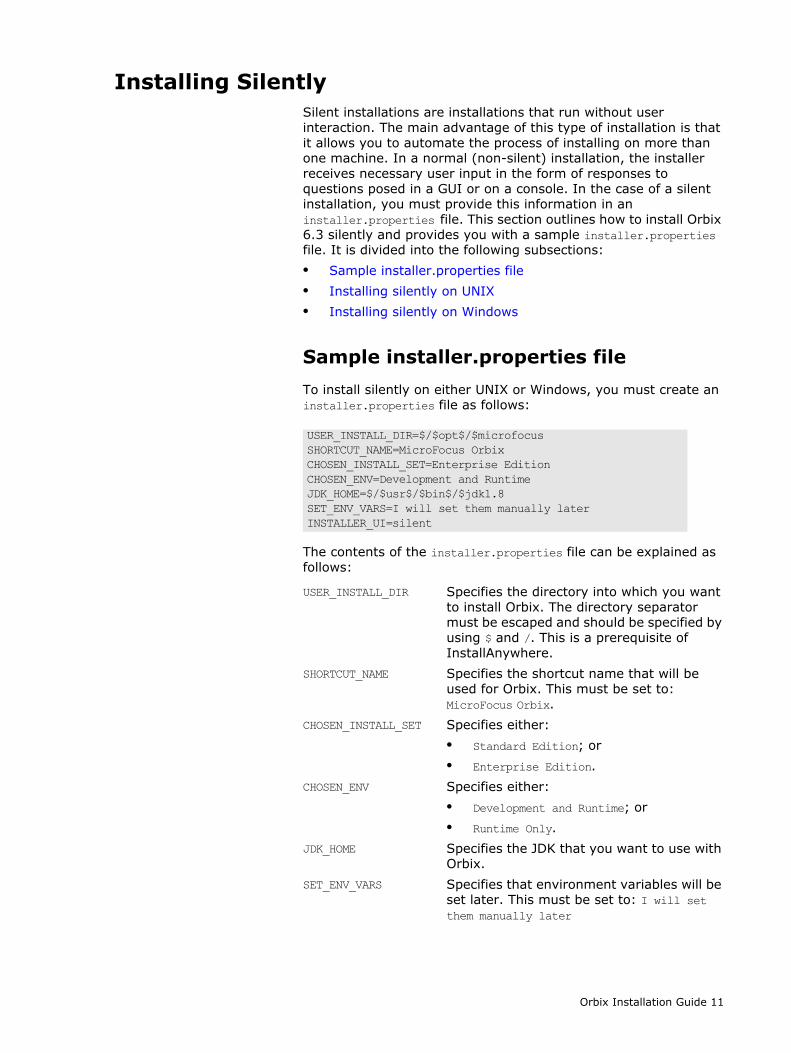
Sample installer.properties fileTo install silently on either UNIX or Windows, you must create an installer.properties file as follows:
The contents of the installer.properties file can be explained as follows:
USER_INSTALL_DIR=$/$opt$/$microfocusSHORTCUT_NAME=MicroFocus OrbixCHOSEN_INSTALL_SET=Enterprise EditionCHOSEN_ENV=Development and RuntimeJDK_HOME=$/$usr$/$bin$/$jdk1.8SET_ENV_VARS=I will set them manually laterINSTALLER_UI=silent
USER_INSTALL_DIR Specifies the directory into which you want to install Orbix. The directory separator must be escaped and should be specified by using $ and /. This is a prerequisite of InstallAnywhere.
SHORTCUT_NAME Specifies the shortcut name that will be used for Orbix. This must be set to: MicroFocus Orbix.
CHOSEN_INSTALL_SET Specifies either:• Standard Edition; or• Enterprise Edition.
CHOSEN_ENV Specifies either:• Development and Runtime; or• Runtime Only.
JDK_HOME Specifies the JDK that you want to use with Orbix.
SET_ENV_VARS Specifies that environment variables will be set later. This must be set to: I will set them manually later
Orbix Installation Guide 11
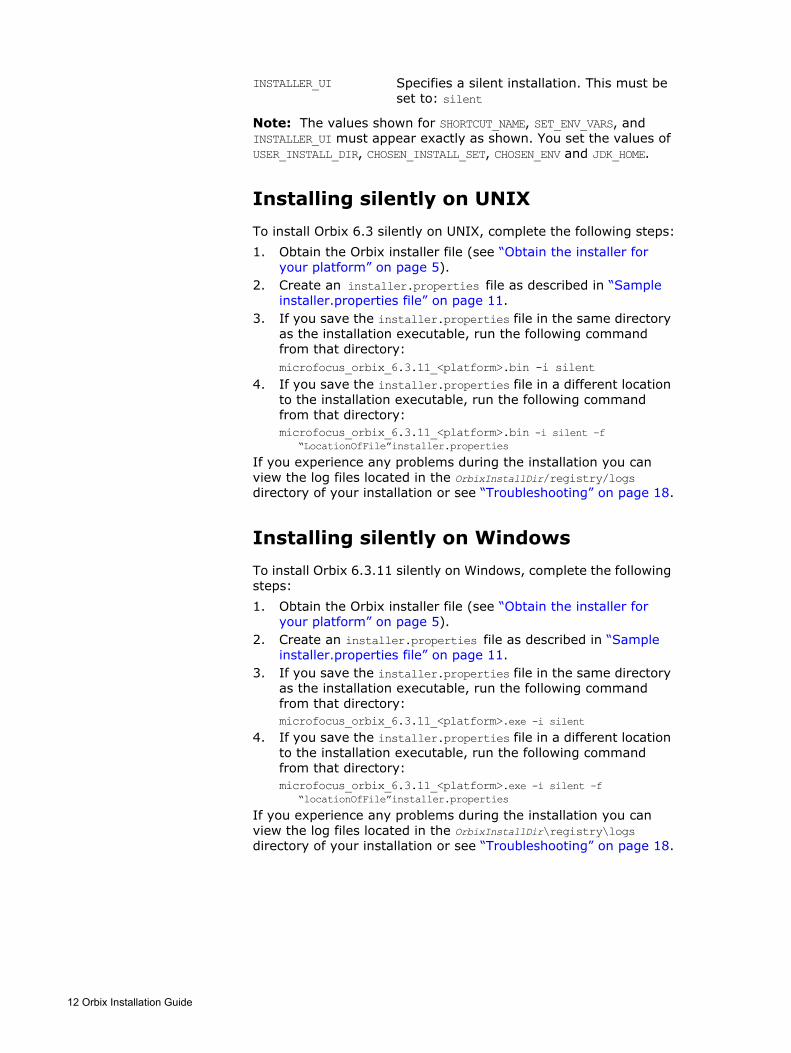
Note: The values shown for SHORTCUT_NAME, SET_ENV_VARS, and INSTALLER_UI must appear exactly as shown. You set the values of USER_INSTALL_DIR, CHOSEN_INSTALL_SET, CHOSEN_ENV and JDK_HOME.
Installing silently on UNIXTo install Orbix 6.3 silently on UNIX, complete the following steps:1. Obtain the Orbix installer file (see “Obtain the installer for
your platform” on page 5). 2. Create an installer.properties file as described in “Sample
installer.properties file” on page 11.3. If you save the installer.properties file in the same directory
as the installation executable, run the following command from that directory:microfocus_orbix_6.3.11_<platform>.bin -i silent
4. If you save the installer.properties file in a different location to the installation executable, run the following command from that directory:microfocus_orbix_6.3.11_<platform>.bin -i silent –f
“LocationOfFile”installer.properties
If you experience any problems during the installation you can view the log files located in the OrbixInstallDir/registry/logs directory of your installation or see “Troubleshooting” on page 18.
Installing silently on WindowsTo install Orbix 6.3.11 silently on Windows, complete the following steps:1. Obtain the Orbix installer file (see “Obtain the installer for
your platform” on page 5). 2. Create an installer.properties file as described in “Sample
installer.properties file” on page 11.3. If you save the installer.properties file in the same directory
as the installation executable, run the following command from that directory:microfocus_orbix_6.3.11_<platform>.exe -i silent
4. If you save the installer.properties file in a different location to the installation executable, run the following command from that directory:microfocus_orbix_6.3.11_<platform>.exe -i silent –f
“locationOfFile”installer.properties
If you experience any problems during the installation you can view the log files located in the OrbixInstallDir\registry\logs directory of your installation or see “Troubleshooting” on page 18.
INSTALLER_UI Specifies a silent installation. This must be set to: silent
12 Orbix Installation Guide
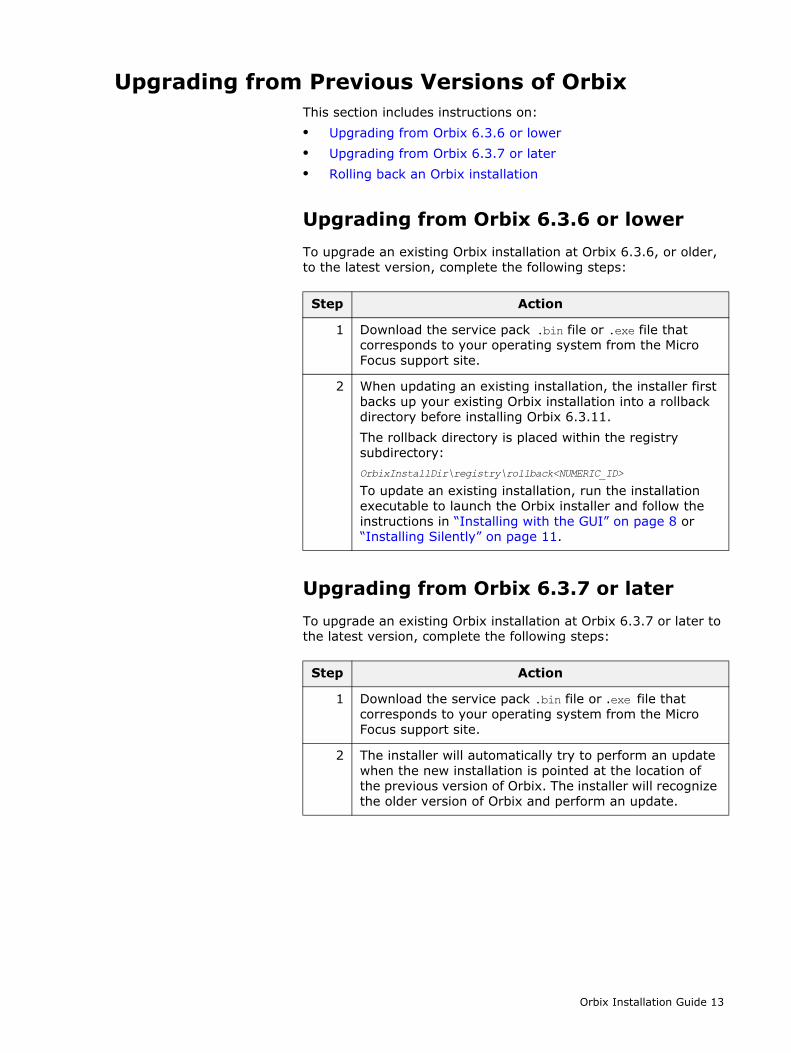
Upgrading from Previous Versions of OrbixThis section includes instructions on:• Upgrading from Orbix 6.3.6 or lower• Upgrading from Orbix 6.3.7 or later• Rolling back an Orbix installation
Upgrading from Orbix 6.3.6 or lowerTo upgrade an existing Orbix installation at Orbix 6.3.6, or older, to the latest version, complete the following steps:
Upgrading from Orbix 6.3.7 or laterTo upgrade an existing Orbix installation at Orbix 6.3.7 or later to the latest version, complete the following steps:
Step Action
1 Download the service pack .bin file or .exe file that corresponds to your operating system from the Micro Focus support site.
2 When updating an existing installation, the installer first backs up your existing Orbix installation into a rollback directory before installing Orbix 6.3.11.The rollback directory is placed within the registry subdirectory:OrbixInstallDir\registry\rollback<NUMERIC_ID>
To update an existing installation, run the installation executable to launch the Orbix installer and follow the instructions in “Installing with the GUI” on page 8 or “Installing Silently” on page 11.
Step Action
1 Download the service pack .bin file or .exe file that corresponds to your operating system from the Micro Focus support site.
2 The installer will automatically try to perform an update when the new installation is pointed at the location of the previous version of Orbix. The installer will recognize the older version of Orbix and perform an update.
Orbix Installation Guide 13

Rolling back an Orbix installationTo roll back to the Orbix installation that existed on your machine prior to installing the latest version of Orbix, do the following steps:
Note: This section is only relevant when an installation was upgraded from Orbix version 6.3.6 or lower.
Step Action
1 Remove the following directories from the OrbixInstallDir directory:• On Windows, remove the asp, bin, and lib
directories.• On UNIX, remove the asp, shlib, and lib directories.
2 Move the contents of the OrbixInstallDir\registry\rollback<NUMERIC_ID> to the OrbixInstallDir\ directory.
14 Orbix Installation Guide
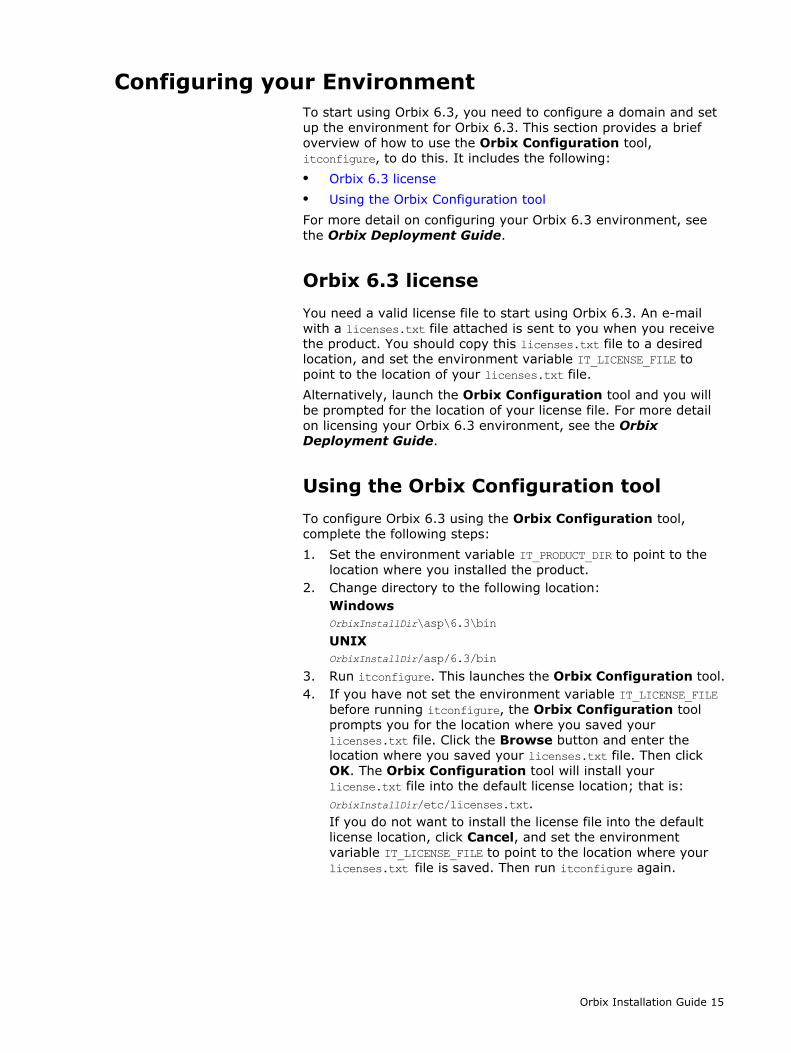
Configuring your EnvironmentTo start using Orbix 6.3, you need to configure a domain and set up the environment for Orbix 6.3. This section provides a brief overview of how to use the Orbix Configuration tool, itconfigure, to do this. It includes the following:• Orbix 6.3 license• Using the Orbix Configuration toolFor more detail on configuring your Orbix 6.3 environment, see the Orbix Deployment Guide.
Orbix 6.3 licenseYou need a valid license file to start using Orbix 6.3. An e-mail with a licenses.txt file attached is sent to you when you receive the product. You should copy this licenses.txt file to a desired location, and set the environment variable IT_LICENSE_FILE to point to the location of your licenses.txt file.Alternatively, launch the Orbix Configuration tool and you will be prompted for the location of your license file. For more detail on licensing your Orbix 6.3 environment, see the Orbix Deployment Guide.
Using the Orbix Configuration toolTo configure Orbix 6.3 using the Orbix Configuration tool, complete the following steps:1. Set the environment variable IT_PRODUCT_DIR to point to the
location where you installed the product.2. Change directory to the following location:
Windows OrbixInstallDir\asp\6.3\bin
UNIX OrbixInstallDir/asp/6.3/bin
3. Run itconfigure. This launches the Orbix Configuration tool.4. If you have not set the environment variable IT_LICENSE_FILE
before running itconfigure, the Orbix Configuration tool prompts you for the location where you saved your licenses.txt file. Click the Browse button and enter the location where you saved your licenses.txt file. Then click OK. The Orbix Configuration tool will install your license.txt file into the default license location; that is:OrbixInstallDir/etc/licenses.txt.If you do not want to install the license file into the default license location, click Cancel, and set the environment variable IT_LICENSE_FILE to point to the location where your licenses.txt file is saved. Then run itconfigure again.
Orbix Installation Guide 15
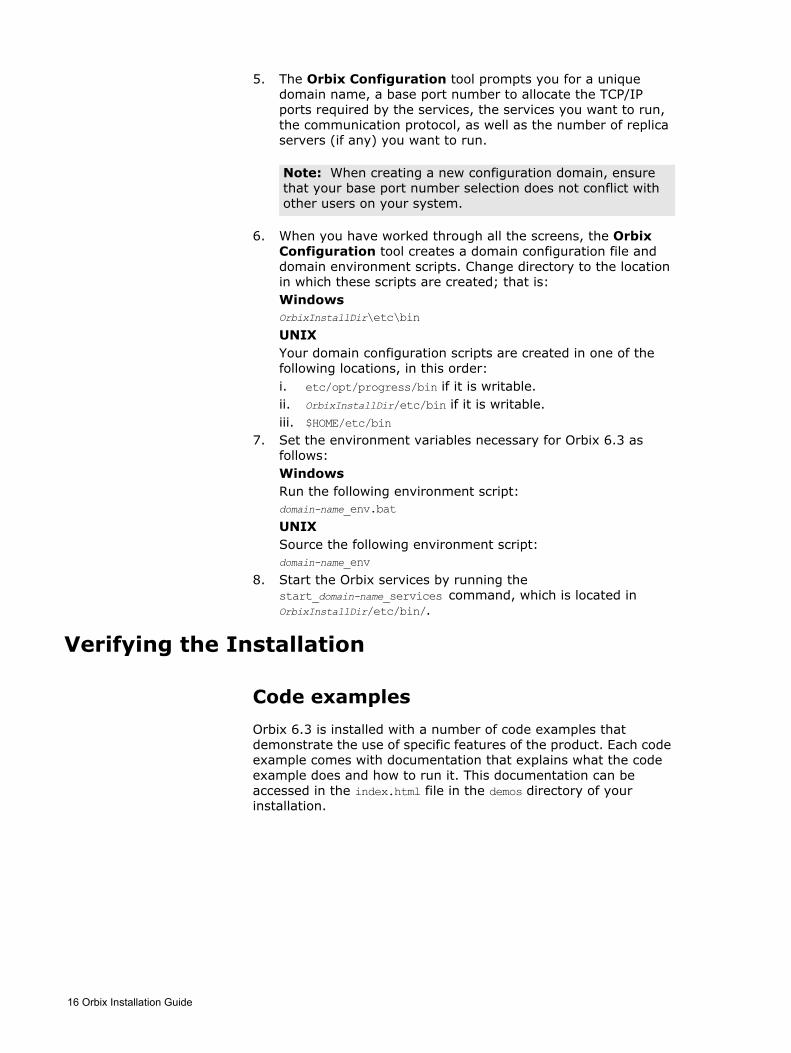
5. The Orbix Configuration tool prompts you for a unique domain name, a base port number to allocate the TCP/IP ports required by the services, the services you want to run, the communication protocol, as well as the number of replica servers (if any) you want to run.
6. When you have worked through all the screens, the Orbix Configuration tool creates a domain configuration file and domain environment scripts. Change directory to the location in which these scripts are created; that is:Windows OrbixInstallDir\etc\bin
UNIX Your domain configuration scripts are created in one of the following locations, in this order:i. etc/opt/progress/bin if it is writable.ii. OrbixInstallDir/etc/bin if it is writable.iii. $HOME/etc/bin
7. Set the environment variables necessary for Orbix 6.3 as follows:Windows Run the following environment script:domain-name_env.bat
UNIX Source the following environment script:domain-name_env
8. Start the Orbix services by running the start_domain-name_services command, which is located in OrbixInstallDir/etc/bin/.
Verifying the Installation
Code examplesOrbix 6.3 is installed with a number of code examples that demonstrate the use of specific features of the product. Each code example comes with documentation that explains what the code example does and how to run it. This documentation can be accessed in the index.html file in the demos directory of your installation.
Note: When creating a new configuration domain, ensure that your base port number selection does not conflict with other users on your system.
16 Orbix Installation Guide

Testing a CORBA development installationIf you have installed a Development and Runtime edition of Orbix 6.3, you can ensure that your Orbix installation is fully operational by running the simple demo located in the OrbixInstallDir/asp/6.3/demos/corba/orb directory. Further details on running the simple demo can be found in the README_CXX.txt and README_JAVA.txt files in the OrbixInstallDir/asp/6.3/demos/corba/orb directory.
Running the CORBA C++ Simple demoTo run the CORBA C++ simple demo, complete the following steps:1. In a command prompt (with the Orbix 6.3 environment set),
change directory to the demos/corba/orb/simple directory as follows:
2. Build the C++ programs:
3. Start the server:cd cxx_serverserver
4. Open another command prompt and start the client:cd cxx_client client
5. The client should return Done and then stop. The server must be stopped manually.
Note: If you have installed a runtime only edition, the demos/ directory is not present.
OS Type this: UNIX cd OrbixInstallDir/asp/6.3/demos/corba/orb/simple
Windows cd OrbixInstallDir\asp\6.3\demos\corba\orb\simple
OS Type this: UNIX make -e
Windows nmake -e
Note: The makefile assumes the default installation path. If you install the product elsewhere, you need to set the IT_PRODUCT_DIR environment variable to point to your installation, then use make -e (or its equivalent) to override make variables with the corresponding environment variables.
Orbix Installation Guide 17

Running the CORBA Java Simple demoTo run the CORBA Java simple demo, complete the following steps:1. Set JAVA_HOME to point to your JDK and set JAVA_HOME/bin in
your PATH.2. In a command prompt (with the Orbix 6.3 environment set),
change directory to the demos\corba\orb\simple directory as follows:
3. Build the Java programs as follows:itant
4. Start the server as follows:Windowsjava -classpath .\java\classes;"%CLASSPATH%" simple.ServerUNIXjava -classpath ./java/classes:"$CLASSPATH" simple.Server
5. Open another command prompt and start the client as follows:Windowsjava -classpath .\java\classes;"%CLASSPATH%" simple.ClientUNIXjava -classpath ./java/classes:"$CLASSPATH" simple.Client
6. The client should return Done and then stop. The server must be stopped manually.
The Orbix 6.3 ORB classes are used instead of the Sun classes, by setting the following properties in the demo code:
Troubleshooting
Debug windowTo view debug output from an installer:
OS Type this: UNIX cd OrbixInstallDir/asp/6.3/demos/corba/orb/simple
Windows cd OrbixInstallDir\asp\6.3\demos\corba\orb\simple
Note: If you are running with a version of JDK up to and including Java 8, add the following to your Java command line:-Djava.endorsed.dirs="<IT_PRODUCT_DIR>\lib\art\omg\1.3"
(The property java.endorsed.dirs is unsupported on Java 11.)
org.omg.CORBA.ORBClass=com.iona.corba.art.artimpl.ORBImplorg.omg.CORBA.ORBSingletonClass=com.iona.corba.art.artimpl.
ORBSingleton
18 Orbix Installation Guide

WindowsHold down the CTRL key immediately after launching the installer until a console window appears.
UNIX1. To enable debug output on UNIX, run the installer as follows:
LAX_DEBUG=true <installer_path>/microfocus_<platform>.bin
2. This will generate debug output to the console.
Orbix Installation Guide 19

Further Information
Documentation web siteOrbix 6.3 documentation is available to browse and to download on the documentation web page at: https://supportline.microfocus.com/productdoc.aspxThis documentation is frequently updated, so check here for the latest version of the documentation.
Release NotesSee the Release Notes at:https://supportline.microfocus.com/productdoc.aspx
InternationalizationIf you plan to deploy a CORBA ORB in C or C++ to handle characters other than Latin-1 (English, French, German, and other Western European languages), then some further configuration is required. Please refer to the Orbix Internationalization Guide for more information.
20 Orbix Installation Guide
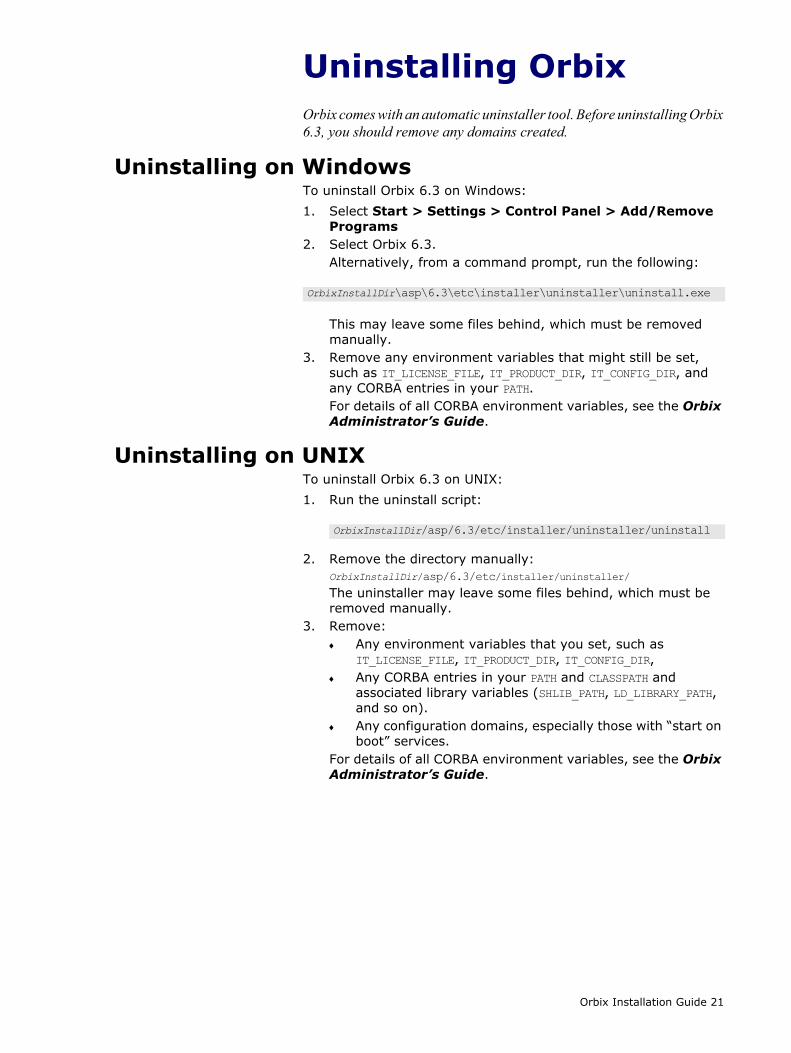
Uninstalling OrbixOrbix comes with an automatic uninstaller tool. Before uninstalling Orbix 6.3, you should remove any domains created.
Uninstalling on WindowsTo uninstall Orbix 6.3 on Windows:1. Select Start > Settings > Control Panel > Add/Remove
Programs2. Select Orbix 6.3.
Alternatively, from a command prompt, run the following:
This may leave some files behind, which must be removed manually.
3. Remove any environment variables that might still be set, such as IT_LICENSE_FILE, IT_PRODUCT_DIR, IT_CONFIG_DIR, and any CORBA entries in your PATH.For details of all CORBA environment variables, see the Orbix Administrator’s Guide.
Uninstalling on UNIXTo uninstall Orbix 6.3 on UNIX:1. Run the uninstall script:
2. Remove the directory manually:OrbixInstallDir/asp/6.3/etc/installer/uninstaller/
The uninstaller may leave some files behind, which must be removed manually.
3. Remove: Any environment variables that you set, such as
IT_LICENSE_FILE, IT_PRODUCT_DIR, IT_CONFIG_DIR, Any CORBA entries in your PATH and CLASSPATH and
associated library variables (SHLIB_PATH, LD_LIBRARY_PATH, and so on).
Any configuration domains, especially those with “start on boot” services.
For details of all CORBA environment variables, see the Orbix Administrator’s Guide.
OrbixInstallDir\asp\6.3\etc\installer\uninstaller\uninstall.exe
OrbixInstallDir/asp/6.3/etc/installer/uninstaller/uninstall
Orbix Installation Guide 21

22 Orbix Installation Guide