Oracle® Essbase Integration Services...Example of ODBC Settings for Microsoft SQL Server ..... 58...
216
Oracle® Essbase Integration Services System Administrator’s Guide RELEASE 11.1.2.1
Transcript of Oracle® Essbase Integration Services...Example of ODBC Settings for Microsoft SQL Server ..... 58...
Oracle® Essbase Integration Services
System Administrator’s Guide
RELEASE 11.1.2.1
Integration Services System Administrator’s Guide, 11.1.2.1
Copyright © 1998, 2011, Oracle and/or its affiliates. All rights reserved.
Authors: EPM Information Development Team
This software and related documentation are provided under a license agreement containing restrictions on use anddisclosure and are protected by intellectual property laws. Except as expressly permitted in your license agreement orallowed by law, you may not use, copy, reproduce, translate, broadcast, modify, license, transmit, distribute, exhibit,perform, publish, or display any part, in any form, or by any means. Reverse engineering, disassembly, or decompilationof this software, unless required by law for interoperability, is prohibited. The information contained herein is subject tochange without notice and is not warranted to be error-free. If you find any errors, please report them to us in writing.
If this software or related documentation is delivered to the U.S. Government or anyone licensing it on behalf of the U.S.Government, the following notice is applicable:
U.S. GOVERNMENT RIGHTS:Programs, software, databases, and related documentation and technical data delivered to U.S. Government customersare "commercial computer software" or "commercial technical data" pursuant to the applicable Federal AcquisitionRegulation and agency-specific supplemental regulations. As such, the use, duplication, disclosure, modification, andadaptation shall be subject to the restrictions and license terms set forth in the applicable Government contract, and, tothe extent applicable by the terms of the Government contract, the additional rights set forth in FAR 52.227-19, CommercialComputer Software License (December 2007). Oracle USA, Inc., 500 Oracle Parkway, Redwood City, CA 94065.
This software is developed for general use in a variety of information management applications. It is not developed orintended for use in any inherently dangerous applications, including applications which may create a risk of personalinjury. If you use this software in dangerous applications, then you shall be responsible to take all appropriate fail-safe,backup, redundancy, and other measures to ensure the safe use of this software. Oracle Corporation and its affiliatesdisclaim any liability for any damages caused by use of this software in dangerous applications.
Oracle is a registered trademark of Oracle Corporation and/or its affiliates. Other names may be trademarks of theirrespective owners.
This software and documentation may provide access to or information on content, products, and services from thirdparties. Oracle Corporation and its affiliates are not responsible for and expressly disclaim all warranties of any kind withrespect to third-party content, products, and services. Oracle Corporation and its affiliates will not be responsible for anyloss, costs, or damages incurred due to your access to or use of third-party content, products, or services.
Contents
Chapter 1. Using Essbase Integration Server . . . . . . . . . . . . . . . . . . . . . . . . . . . . . . . . . . . . . . . . . . . . . . . 11
Integration Server . . . . . . . . . . . . . . . . . . . . . . . . . . . . . . . . . . . . . . . . . . . . . . . . . . . . . 11
Starting Integration Server . . . . . . . . . . . . . . . . . . . . . . . . . . . . . . . . . . . . . . . . . . . . . . . 12
Running Integration Server as a Background Process on UNIX Systems . . . . . . . . . . . 13
Integration Server Startup Switches . . . . . . . . . . . . . . . . . . . . . . . . . . . . . . . . . . . . . 14
-? . . . . . . . . . . . . . . . . . . . . . . . . . . . . . . . . . . . . . . . . . . . . . . . . . . . . . . . . . . . 15
-A . . . . . . . . . . . . . . . . . . . . . . . . . . . . . . . . . . . . . . . . . . . . . . . . . . . . . . . . . . 15
-B . . . . . . . . . . . . . . . . . . . . . . . . . . . . . . . . . . . . . . . . . . . . . . . . . . . . . . . . . . 15
-C . . . . . . . . . . . . . . . . . . . . . . . . . . . . . . . . . . . . . . . . . . . . . . . . . . . . . . . . . . 15
-D . . . . . . . . . . . . . . . . . . . . . . . . . . . . . . . . . . . . . . . . . . . . . . . . . . . . . . . . . . 17
-E . . . . . . . . . . . . . . . . . . . . . . . . . . . . . . . . . . . . . . . . . . . . . . . . . . . . . . . . . . 17
-F . . . . . . . . . . . . . . . . . . . . . . . . . . . . . . . . . . . . . . . . . . . . . . . . . . . . . . . . . . 18
-I . . . . . . . . . . . . . . . . . . . . . . . . . . . . . . . . . . . . . . . . . . . . . . . . . . . . . . . . . . . 19
-L . . . . . . . . . . . . . . . . . . . . . . . . . . . . . . . . . . . . . . . . . . . . . . . . . . . . . . . . . . 19
-M . . . . . . . . . . . . . . . . . . . . . . . . . . . . . . . . . . . . . . . . . . . . . . . . . . . . . . . . . . 20
-N . . . . . . . . . . . . . . . . . . . . . . . . . . . . . . . . . . . . . . . . . . . . . . . . . . . . . . . . . . 21
-P . . . . . . . . . . . . . . . . . . . . . . . . . . . . . . . . . . . . . . . . . . . . . . . . . . . . . . . . . . 22
-Q . . . . . . . . . . . . . . . . . . . . . . . . . . . . . . . . . . . . . . . . . . . . . . . . . . . . . . . . . . 23
-R . . . . . . . . . . . . . . . . . . . . . . . . . . . . . . . . . . . . . . . . . . . . . . . . . . . . . . . . . . 23
-S . . . . . . . . . . . . . . . . . . . . . . . . . . . . . . . . . . . . . . . . . . . . . . . . . . . . . . . . . . . 24
-T . . . . . . . . . . . . . . . . . . . . . . . . . . . . . . . . . . . . . . . . . . . . . . . . . . . . . . . . . . 24
-U . . . . . . . . . . . . . . . . . . . . . . . . . . . . . . . . . . . . . . . . . . . . . . . . . . . . . . . . . . 25
Storing Startup Information in the Configuration File . . . . . . . . . . . . . . . . . . . . . . . . 25
Storing Startup Information in the Startup File (Windows Only) . . . . . . . . . . . . . . . . 26
Additional Configuration Parameters . . . . . . . . . . . . . . . . . . . . . . . . . . . . . . . . . . . . 28
Windows Configuration Parameters . . . . . . . . . . . . . . . . . . . . . . . . . . . . . . . . . 28
Windows and UNIX Configuration Parameters . . . . . . . . . . . . . . . . . . . . . . . . . 28
Reconnecting Integration Server and OLAP Metadata Catalog . . . . . . . . . . . . . . . . . . . . . 29
Shutting Down Integration Server . . . . . . . . . . . . . . . . . . . . . . . . . . . . . . . . . . . . . . . . . 30
Integration Server Log File . . . . . . . . . . . . . . . . . . . . . . . . . . . . . . . . . . . . . . . . . . . . . . . 30
Items Logged in Integration Server File . . . . . . . . . . . . . . . . . . . . . . . . . . . . . . . . . . . 31
Contents iii
Integration Server Log File Size . . . . . . . . . . . . . . . . . . . . . . . . . . . . . . . . . . . . . . . . 31
Data Load Error File . . . . . . . . . . . . . . . . . . . . . . . . . . . . . . . . . . . . . . . . . . . . . . . . . . . 32
Unicode . . . . . . . . . . . . . . . . . . . . . . . . . . . . . . . . . . . . . . . . . . . . . . . . . . . . . . . . . . . . 33
Unicode and Non-Unicode Application Modes . . . . . . . . . . . . . . . . . . . . . . . . . . . . 33
When to Use Unicode-Mode Applications . . . . . . . . . . . . . . . . . . . . . . . . . . . . . . . . 34
Unicode-Enabled Administration Tools . . . . . . . . . . . . . . . . . . . . . . . . . . . . . . . . . . 34
Enabling Regional Options for Multiple Languages . . . . . . . . . . . . . . . . . . . . . . . . . . . . . 35
Enabling Regional Options in Windows XP . . . . . . . . . . . . . . . . . . . . . . . . . . . . . . . 35
Enabling Regional Options in Windows 2003 . . . . . . . . . . . . . . . . . . . . . . . . . . . . . . 36
Creating Database User Aliases and Synonyms . . . . . . . . . . . . . . . . . . . . . . . . . . . . . . . . 37
Scheduling Jobs in UNIX . . . . . . . . . . . . . . . . . . . . . . . . . . . . . . . . . . . . . . . . . . . . . . . . 37
Starting the Windows Task Scheduler Service . . . . . . . . . . . . . . . . . . . . . . . . . . . . . . . . . 37
Chapter 2. Configuring Data Sources . . . . . . . . . . . . . . . . . . . . . . . . . . . . . . . . . . . . . . . . . . . . . . . . . . . . 39
About Data Source Configuration . . . . . . . . . . . . . . . . . . . . . . . . . . . . . . . . . . . . . . . . . 39
Server and Client Software and ODBC Connections . . . . . . . . . . . . . . . . . . . . . . . . . 40
Supported ODBC Drivers . . . . . . . . . . . . . . . . . . . . . . . . . . . . . . . . . . . . . . . . . . . . 40
Configuring Data Source Names on Windows Systems . . . . . . . . . . . . . . . . . . . . . . . . . . 41
Accessing ODBC Data Source Administrator in Windows . . . . . . . . . . . . . . . . . . . . . 42
Configuring DataDirect Wire Protocol Drivers in Windows . . . . . . . . . . . . . . . . . . . . 42
IBM DB2 UDB or DB2 OS/390 . . . . . . . . . . . . . . . . . . . . . . . . . . . . . . . . . . . . . 43
Oracle . . . . . . . . . . . . . . . . . . . . . . . . . . . . . . . . . . . . . . . . . . . . . . . . . . . . . . . 44
Testing DataDirect Wire Protocol Drivers on Windows . . . . . . . . . . . . . . . . . . . . . . . 44
Adding a Configuration File Entry for IBM DB2 OS/390 in Windows . . . . . . . . . . . . . 45
Configuring the DataDirect Text Driver on Windows . . . . . . . . . . . . . . . . . . . . . . . . 45
Configuring the SQL Server ODBC Driver for Microsoft SQL Server . . . . . . . . . . . . . 48
Configuring the Teradata ODBC Driver for Teradata . . . . . . . . . . . . . . . . . . . . . . . . 50
Editing a Data Source Name . . . . . . . . . . . . . . . . . . . . . . . . . . . . . . . . . . . . . . . . . . 51
Configuring Data Source Names on UNIX Systems . . . . . . . . . . . . . . . . . . . . . . . . . . . . . 51
Configuring Environment Variables . . . . . . . . . . . . . . . . . . . . . . . . . . . . . . . . . . . . . 52
Editing the odbc.ini File . . . . . . . . . . . . . . . . . . . . . . . . . . . . . . . . . . . . . . . . . . . . . 52
Examples of ODBC Settings for IBM DB2 UDB . . . . . . . . . . . . . . . . . . . . . . . . . 53
Example of ODBC Settings for IBM DB2 OS/390 . . . . . . . . . . . . . . . . . . . . . . . . 54
Example of ODBC Settings for Oracle . . . . . . . . . . . . . . . . . . . . . . . . . . . . . . . . 55
Example of ODBC Settings for Flat File Data Source . . . . . . . . . . . . . . . . . . . . . . 55
Example of ODBC Settings for Microsoft SQL Server . . . . . . . . . . . . . . . . . . . . . 58
Examples of ODBC Settings for Teradata . . . . . . . . . . . . . . . . . . . . . . . . . . . . . . 58
Creating IBM DB2 Bind Packages for DataDirect Wire Protocol DriverConnections . . . . . . . . . . . . . . . . . . . . . . . . . . . . . . . . . . . . . . . . . . . . . . . . . . . . . . 59
Adding a Configuration File Entry for IBM DB2 OS/390 . . . . . . . . . . . . . . . . . . . . . . 60
iv Contents
After Configuration of Data Source Names . . . . . . . . . . . . . . . . . . . . . . . . . . . . . . . . . . . 61
Connecting to Server Components and Data Sources . . . . . . . . . . . . . . . . . . . . . . . . . . . 61
Connecting to Integration Server . . . . . . . . . . . . . . . . . . . . . . . . . . . . . . . . . . . . . . . 62
Connecting to Essbase Server . . . . . . . . . . . . . . . . . . . . . . . . . . . . . . . . . . . . . . . . . . 63
Setting Connection Defaults . . . . . . . . . . . . . . . . . . . . . . . . . . . . . . . . . . . . . . . . . . 64
Connecting to Data Sources . . . . . . . . . . . . . . . . . . . . . . . . . . . . . . . . . . . . . . . . . . . 64
Mapping JDBC Data Sources for Windows (Teradata Only) . . . . . . . . . . . . . . . . . . . . . . 67
Mapping JDBC Data Sources for UNIX (Teradata Users Only) . . . . . . . . . . . . . . . . . . . . 68
Manually Configuring the Environment for UNIX Systems . . . . . . . . . . . . . . . . . . . . . . . 70
Chapter 3. Creating, Upgrading, and Deleting OLAP Metadata Catalogs . . . . . . . . . . . . . . . . . . . . . . . . . . . . 71
About OLAP Metadata Catalogs . . . . . . . . . . . . . . . . . . . . . . . . . . . . . . . . . . . . . . . . . . 71
Creating or Upgrading OLAP Metadata Catalogs . . . . . . . . . . . . . . . . . . . . . . . . . . . . . . 72
Creating Databases for OLAP Metadata Catalog Tables . . . . . . . . . . . . . . . . . . . . . . . 72
Creating or Upgrading OLAP Metadata Catalogs Automatically . . . . . . . . . . . . . . . . . 73
Creating OLAP Metadata Catalogs Manually . . . . . . . . . . . . . . . . . . . . . . . . . . . . . . 74
Upgrading OLAP Metadata Catalogs Manually . . . . . . . . . . . . . . . . . . . . . . . . . . . . . 75
SQL Scripts Used to Create and Upgrade Tables . . . . . . . . . . . . . . . . . . . . . . . . . 76
Proper Order of SQL Scripts . . . . . . . . . . . . . . . . . . . . . . . . . . . . . . . . . . . . . . . 77
Upgrading Tables in the OLAP Metadata Catalog . . . . . . . . . . . . . . . . . . . . . . . . 78
Mapping OLAP Metadata Catalogs . . . . . . . . . . . . . . . . . . . . . . . . . . . . . . . . . . . . . . . . 79
Deleting OLAP Metadata Catalogs . . . . . . . . . . . . . . . . . . . . . . . . . . . . . . . . . . . . . . . . . 79
Chapter 4. Tables in OLAP Metadata Catalog . . . . . . . . . . . . . . . . . . . . . . . . . . . . . . . . . . . . . . . . . . . . . . . 81
OLAP Metadata Catalog . . . . . . . . . . . . . . . . . . . . . . . . . . . . . . . . . . . . . . . . . . . . . . . . 81
Tables Relating to the OLAP Model . . . . . . . . . . . . . . . . . . . . . . . . . . . . . . . . . . . . . . . . 82
Tables Relating to the Metaoutline . . . . . . . . . . . . . . . . . . . . . . . . . . . . . . . . . . . . . . . . . 83
Tables Relating to Drill-Through . . . . . . . . . . . . . . . . . . . . . . . . . . . . . . . . . . . . . . . . . . 84
Tables Relating to Hybrid Analysis . . . . . . . . . . . . . . . . . . . . . . . . . . . . . . . . . . . . . . . . . 85
Miscellaneous Tables . . . . . . . . . . . . . . . . . . . . . . . . . . . . . . . . . . . . . . . . . . . . . . . . . . . 85
Chapter 5. Setting Up the Sample Applications . . . . . . . . . . . . . . . . . . . . . . . . . . . . . . . . . . . . . . . . . . . . . 87
Overview of Sample Applications . . . . . . . . . . . . . . . . . . . . . . . . . . . . . . . . . . . . . . . . . . 87
Preparing to Set Up the Standard Sample Application . . . . . . . . . . . . . . . . . . . . . . . . . . . 89
Setting Up the Standard Sample Application Automatically . . . . . . . . . . . . . . . . . . . . . . . 89
Setting Up the Standard Sample Application Manually . . . . . . . . . . . . . . . . . . . . . . . . . . 91
Setting Up the TBC Relational Data Source . . . . . . . . . . . . . . . . . . . . . . . . . . . . . . . . . . 92
Creating the TBC Database . . . . . . . . . . . . . . . . . . . . . . . . . . . . . . . . . . . . . . . . . . . 92
Creating Tables for the TBC Database . . . . . . . . . . . . . . . . . . . . . . . . . . . . . . . . . . . 92
Loading Data into the TBC Tables . . . . . . . . . . . . . . . . . . . . . . . . . . . . . . . . . . . . . . 93
Contents v

Setting Up the TBC_MD OLAP Metadata Catalog . . . . . . . . . . . . . . . . . . . . . . . . . . . . . 94
Creating the TBC_MD Database . . . . . . . . . . . . . . . . . . . . . . . . . . . . . . . . . . . . . . . 95
Creating Tables for the TBC_MD Database . . . . . . . . . . . . . . . . . . . . . . . . . . . . . . . 95
Using the XML Import Utility to Load Data into the TBC_MD Tables . . . . . . . . . . . . 97
Using XML Import to Load Metadata into TBC_MD . . . . . . . . . . . . . . . . . . . . . . . . 97
Setting Up the Hybrid Analysis Sample Application . . . . . . . . . . . . . . . . . . . . . . . . . . . . 99
Setting Up the Hybrid Analysis Sample Application on IBM DB2 . . . . . . . . . . . . . . . . 99
Running the Batch File on IBM DB2 . . . . . . . . . . . . . . . . . . . . . . . . . . . . . . . . 100
Importing the Sample OLAP Model and Metaoutline . . . . . . . . . . . . . . . . . . . . 101
Setting Up Hybrid Analysis Sample Application on Oracle . . . . . . . . . . . . . . . . . . . . 101
Running the Batch File . . . . . . . . . . . . . . . . . . . . . . . . . . . . . . . . . . . . . . . . . . 102
Importing the Sample OLAP Model and Metaoutline . . . . . . . . . . . . . . . . . . . . 103
Setting Up Hybrid Analysis Sample Application on Microsoft SQL Server . . . . . . . . . 103
Running the Batch File . . . . . . . . . . . . . . . . . . . . . . . . . . . . . . . . . . . . . . . . . . 104
Importing the Sample OLAP Model and Metaoutline . . . . . . . . . . . . . . . . . . . . 105
Setting Up Hybrid Analysis Sample Application on Teradata . . . . . . . . . . . . . . . . . . 105
Running the Batch File . . . . . . . . . . . . . . . . . . . . . . . . . . . . . . . . . . . . . . . . . . 106
Importing the Sample OLAP Model and Metaoutline . . . . . . . . . . . . . . . . . . . . 107
Setting Up the Unicode Sample Application . . . . . . . . . . . . . . . . . . . . . . . . . . . . . . . . . 108
Creating the Unicode TBC_U Database . . . . . . . . . . . . . . . . . . . . . . . . . . . . . . . . . 108
Creating the Unicode TBC_MD_U OLAP Metadata Catalog . . . . . . . . . . . . . . . . . . 109
Setting Up the Unicode Sample Application . . . . . . . . . . . . . . . . . . . . . . . . . . . . . . 109
Running the SQL File . . . . . . . . . . . . . . . . . . . . . . . . . . . . . . . . . . . . . . . . . . . 109
Importing the Unicode Sample Model and Metaoutline . . . . . . . . . . . . . . . . . . 110
After Setting Up the Sample Application . . . . . . . . . . . . . . . . . . . . . . . . . . . . . . . . . . . . 111
Viewing TBC Tables and Columns . . . . . . . . . . . . . . . . . . . . . . . . . . . . . . . . . . . . 111
Viewing OLAP Models . . . . . . . . . . . . . . . . . . . . . . . . . . . . . . . . . . . . . . . . . . . . . 111
Viewing Metaoutlines . . . . . . . . . . . . . . . . . . . . . . . . . . . . . . . . . . . . . . . . . . . . . . 112
Chapter 6. Working with Users, Locks, and Permissions . . . . . . . . . . . . . . . . . . . . . . . . . . . . . . . . . . . . . . 113
Working with Users . . . . . . . . . . . . . . . . . . . . . . . . . . . . . . . . . . . . . . . . . . . . . . . . . . 113
Working with Locks . . . . . . . . . . . . . . . . . . . . . . . . . . . . . . . . . . . . . . . . . . . . . . . . . . 114
Using Standard Access Mode . . . . . . . . . . . . . . . . . . . . . . . . . . . . . . . . . . . . . . . . . 114
Using Exclusive Access Mode . . . . . . . . . . . . . . . . . . . . . . . . . . . . . . . . . . . . . . . . . 114
Correcting Problems with Locks . . . . . . . . . . . . . . . . . . . . . . . . . . . . . . . . . . . . . . 115
Viewing Integration Services Users with Locks . . . . . . . . . . . . . . . . . . . . . . . . . . . . 115
Deleting Locks for Integration Services Users . . . . . . . . . . . . . . . . . . . . . . . . . . . . . 116
Working with Permissions . . . . . . . . . . . . . . . . . . . . . . . . . . . . . . . . . . . . . . . . . . . . . . 117
Viewing Permissions for OLAP Models . . . . . . . . . . . . . . . . . . . . . . . . . . . . . . . . . 117
vi Contents
Viewing Permissions for Metaoutlines . . . . . . . . . . . . . . . . . . . . . . . . . . . . . . . . . . 118
Chapter 7. Troubleshooting ODBC and Connections . . . . . . . . . . . . . . . . . . . . . . . . . . . . . . . . . . . . . . . . . 121
Common Connection Problems . . . . . . . . . . . . . . . . . . . . . . . . . . . . . . . . . . . . . . . . . 121
Database-Specific Problems . . . . . . . . . . . . . . . . . . . . . . . . . . . . . . . . . . . . . . . . . . . . . 123
ODBC and Connection Problems . . . . . . . . . . . . . . . . . . . . . . . . . . . . . . . . . . . . . . . . 123
Isolating Connection Problems . . . . . . . . . . . . . . . . . . . . . . . . . . . . . . . . . . . . . . . . . . 124
Testing the Database Client Connection to the Data Source . . . . . . . . . . . . . . . . . . . 126
Testing the ODBC Connection to the Data Source . . . . . . . . . . . . . . . . . . . . . . . . . 127
Testing ODBC on Windows Systems . . . . . . . . . . . . . . . . . . . . . . . . . . . . . . . . 127
Testing ODBC on UNIX Systems . . . . . . . . . . . . . . . . . . . . . . . . . . . . . . . . . . . 128
Testing the Integration Server Connection to the Data Source . . . . . . . . . . . . . . . . . 130
Testing the Integration Services Console Connection to the Data Source . . . . . . . . . 132
Testing the Integration Server Connection to Essbase Server . . . . . . . . . . . . . . . . . . 132
Testing the Integration Services Console Connection to Essbase Server . . . . . . . . . . . 134
Correcting Connection Problems . . . . . . . . . . . . . . . . . . . . . . . . . . . . . . . . . . . . . . . . . 134
User Name and Password Problems . . . . . . . . . . . . . . . . . . . . . . . . . . . . . . . . . . . . 135
Correcting Data Source Problems . . . . . . . . . . . . . . . . . . . . . . . . . . . . . . . . . . . . . 136
Correcting Database Client Problems . . . . . . . . . . . . . . . . . . . . . . . . . . . . . . . . . . . 137
Correcting ODBC Problems . . . . . . . . . . . . . . . . . . . . . . . . . . . . . . . . . . . . . . . . . 138
Correcting Integration Server Problems . . . . . . . . . . . . . . . . . . . . . . . . . . . . . . . . . 139
Correcting Integration Services Console Problems . . . . . . . . . . . . . . . . . . . . . . . . . 140
Using ODBC Tracing . . . . . . . . . . . . . . . . . . . . . . . . . . . . . . . . . . . . . . . . . . . . . . . . . 141
Using ODBC Tracing on Windows Systems . . . . . . . . . . . . . . . . . . . . . . . . . . . . . . 142
Using ODBC Tracing on UNIX Systems . . . . . . . . . . . . . . . . . . . . . . . . . . . . . . . . . 142
Chapter 8. Using Integration Services Shell . . . . . . . . . . . . . . . . . . . . . . . . . . . . . . . . . . . . . . . . . . . . . . . 145
Starting Integration Services Shell . . . . . . . . . . . . . . . . . . . . . . . . . . . . . . . . . . . . . . . . 145
Integration Services Shell . . . . . . . . . . . . . . . . . . . . . . . . . . . . . . . . . . . . . . . . . . . . . . . 146
SET and LOAD Commands . . . . . . . . . . . . . . . . . . . . . . . . . . . . . . . . . . . . . . . . . . 147
Informational Commands . . . . . . . . . . . . . . . . . . . . . . . . . . . . . . . . . . . . . . . . . . . 148
Command Syntax and Execution . . . . . . . . . . . . . . . . . . . . . . . . . . . . . . . . . . . . . . 148
Recording Member and Data Load Scripts . . . . . . . . . . . . . . . . . . . . . . . . . . . . . . . 149
Running Integration Services Shell Script and Batch Files . . . . . . . . . . . . . . . . . . . . 149
Running OLAP Command Script Files . . . . . . . . . . . . . . . . . . . . . . . . . . . . . . . . . . 149
Integration Services Shell Commands . . . . . . . . . . . . . . . . . . . . . . . . . . . . . . . . . . . . . . 150
LOGIN . . . . . . . . . . . . . . . . . . . . . . . . . . . . . . . . . . . . . . . . . . . . . . . . . . . . . . . . 151
STATUS . . . . . . . . . . . . . . . . . . . . . . . . . . . . . . . . . . . . . . . . . . . . . . . . . . . . . . . . 152
VERSION . . . . . . . . . . . . . . . . . . . . . . . . . . . . . . . . . . . . . . . . . . . . . . . . . . . . . . 152
SETLOCALE . . . . . . . . . . . . . . . . . . . . . . . . . . . . . . . . . . . . . . . . . . . . . . . . . . . . 152
Contents vii
SETSOURCE . . . . . . . . . . . . . . . . . . . . . . . . . . . . . . . . . . . . . . . . . . . . . . . . . . . . 153
SETTARGET . . . . . . . . . . . . . . . . . . . . . . . . . . . . . . . . . . . . . . . . . . . . . . . . . . . . 153
SETCATALOG . . . . . . . . . . . . . . . . . . . . . . . . . . . . . . . . . . . . . . . . . . . . . . . . . . . 154
LOADMEMBER . . . . . . . . . . . . . . . . . . . . . . . . . . . . . . . . . . . . . . . . . . . . . . . . . . 154
LOADDATA . . . . . . . . . . . . . . . . . . . . . . . . . . . . . . . . . . . . . . . . . . . . . . . . . . . . 157
LOADALL . . . . . . . . . . . . . . . . . . . . . . . . . . . . . . . . . . . . . . . . . . . . . . . . . . . . . . 159
LOGOUT . . . . . . . . . . . . . . . . . . . . . . . . . . . . . . . . . . . . . . . . . . . . . . . . . . . . . . . 162
SHUTDOWN . . . . . . . . . . . . . . . . . . . . . . . . . . . . . . . . . . . . . . . . . . . . . . . . . . . . 163
EXIT . . . . . . . . . . . . . . . . . . . . . . . . . . . . . . . . . . . . . . . . . . . . . . . . . . . . . . . . . . 163
Peforming Member Loads Using Integration Services Shell . . . . . . . . . . . . . . . . . . . . . . 163
Loading Data Using Integration Services Shell . . . . . . . . . . . . . . . . . . . . . . . . . . . . . . . . 164
Chapter 9. Naming Restrictions for Essbase Applications, Databases, and Members . . . . . . . . . . . . . . . . . . 165
Naming Restrictions for Applications and Databases . . . . . . . . . . . . . . . . . . . . . . . . . . . 165
Naming Restrictions for Dimensions, Members, and Aliases . . . . . . . . . . . . . . . . . . . . . 166
Using Dimension and Member Names in Calculation Scripts, Report Scripts, Formulas, andFilters . . . . . . . . . . . . . . . . . . . . . . . . . . . . . . . . . . . . . . . . . . . . . . . . . . . . . . . . . . . . . 168
Appendix A. Return Codes and Error Messages . . . . . . . . . . . . . . . . . . . . . . . . . . . . . . . . . . . . . . . . . . . . 169
OLAPICMD Session Return Codes . . . . . . . . . . . . . . . . . . . . . . . . . . . . . . . . . . . . . . . 169
Member Load Error Messages . . . . . . . . . . . . . . . . . . . . . . . . . . . . . . . . . . . . . . . . . . . 170
Data Load Error Messages . . . . . . . . . . . . . . . . . . . . . . . . . . . . . . . . . . . . . . . . . . . . . . 173
Drill-Through Report Error Messages . . . . . . . . . . . . . . . . . . . . . . . . . . . . . . . . . . . . . 174
Miscellaneous Error Messages . . . . . . . . . . . . . . . . . . . . . . . . . . . . . . . . . . . . . . . . . . . 175
Essbase Error Messages Generated During Data Loads . . . . . . . . . . . . . . . . . . . . . . . . . . 176
Appendix B. Integration Services Limits and Guidelines . . . . . . . . . . . . . . . . . . . . . . . . . . . . . . . . . . . . . . 179
Artifact Limits . . . . . . . . . . . . . . . . . . . . . . . . . . . . . . . . . . . . . . . . . . . . . . . . . . . . . . 179
Source Database Artifact Naming Limits . . . . . . . . . . . . . . . . . . . . . . . . . . . . . . . . . . . 182
Setting the Compression Dimension . . . . . . . . . . . . . . . . . . . . . . . . . . . . . . . . . . . . . . 183
Guidelines . . . . . . . . . . . . . . . . . . . . . . . . . . . . . . . . . . . . . . . . . . . . . . . . . . . . . . 183
Hybrid Analysis Guidelines . . . . . . . . . . . . . . . . . . . . . . . . . . . . . . . . . . . . . . . . . . . . . 183
Data Source Guidelines . . . . . . . . . . . . . . . . . . . . . . . . . . . . . . . . . . . . . . . . . . . . . 183
Dimensions Guidelines . . . . . . . . . . . . . . . . . . . . . . . . . . . . . . . . . . . . . . . . . . . . . 184
Members Guidelines . . . . . . . . . . . . . . . . . . . . . . . . . . . . . . . . . . . . . . . . . . . . . . . 184
Spreadsheet Guidelines . . . . . . . . . . . . . . . . . . . . . . . . . . . . . . . . . . . . . . . . . . . . . 185
Operations Guidelines . . . . . . . . . . . . . . . . . . . . . . . . . . . . . . . . . . . . . . . . . . . . . . 185
Limitations on Transformation Rules with Hybrid Analysis . . . . . . . . . . . . . . . . . . . 185
Transformations Not Supported by Hybrid Analysis . . . . . . . . . . . . . . . . . . . . . . . . 185
Limitations on Using Formulas with Hybrid Analysis . . . . . . . . . . . . . . . . . . . . . . . 186
viii Contents
Unsupported Essbase Functions in Hybrid Analysis . . . . . . . . . . . . . . . . . . . . . 186
Using Advanced Relational Access . . . . . . . . . . . . . . . . . . . . . . . . . . . . . . . . . . . . . . . . 187
Advanced Relational Access Guidelines . . . . . . . . . . . . . . . . . . . . . . . . . . . . . . . . . 188
General Guidelines . . . . . . . . . . . . . . . . . . . . . . . . . . . . . . . . . . . . . . . . . . . . . 188
Data Source Guidelines . . . . . . . . . . . . . . . . . . . . . . . . . . . . . . . . . . . . . . . . . . 188
Dimension Guidelines . . . . . . . . . . . . . . . . . . . . . . . . . . . . . . . . . . . . . . . . . . . 189
Member Guidelines . . . . . . . . . . . . . . . . . . . . . . . . . . . . . . . . . . . . . . . . . . . . 189
Unsupported Data Types . . . . . . . . . . . . . . . . . . . . . . . . . . . . . . . . . . . . . . . . . 190
Essbase Databases and Advanced Relational Access . . . . . . . . . . . . . . . . . . . . . . . . . 190
Different Values Loaded in Ragged Hierarchies . . . . . . . . . . . . . . . . . . . . . . . . . 190
Drill-through Report Guidelines . . . . . . . . . . . . . . . . . . . . . . . . . . . . . . . . . . . . . . . . . 190
Unicode Guidelines . . . . . . . . . . . . . . . . . . . . . . . . . . . . . . . . . . . . . . . . . . . . . . . . . . . 192
Duplicate Member Names Guidelines . . . . . . . . . . . . . . . . . . . . . . . . . . . . . . . . . . . . . 192
Dimensions in Duplicate Outlines . . . . . . . . . . . . . . . . . . . . . . . . . . . . . . . . . . . . . 192
Members in Duplicate Outlines . . . . . . . . . . . . . . . . . . . . . . . . . . . . . . . . . . . . . . . 192
Other Guidelines for Duplicate Outlines . . . . . . . . . . . . . . . . . . . . . . . . . . . . . . . . . 193
Glossary . . . . . . . . . . . . . . . . . . . . . . . . . . . . . . . . . . . . . . . . . . . . . . . . . . . . . . . . . . . . . . . . . . . . . . . 195
Index . . . . . . . . . . . . . . . . . . . . . . . . . . . . . . . . . . . . . . . . . . . . . . . . . . . . . . . . . . . . . . . . . . . . . . . . . 203
Contents ix

x Contents
1Using Essbase Integration Server
In This Chapter
Integration Server .. . . . . . . . . . . . . . . . . . . . . . . . . . . . . . . . . . . . . . . . . . . . . . . . . . . . . . . . . . . . . . . . . . . . . . . . . . . . . . . . . . . . . . . . .11
Starting Integration Server .. . . . . . . . . . . . . . . . . . . . . . . . . . . . . . . . . . . . . . . . . . . . . . . . . . . . . . . . . . . . . . . . . . . . . . . . . . . . . . .12
Reconnecting Integration Server and OLAP Metadata Catalog ... . . . . . . . . . . . . . . . . . . . . . . . . . . . . . . . . . . . . .29
Shutting Down Integration Server .. . . . . . . . . . . . . . . . . . . . . . . . . . . . . . . . . . . . . . . . . . . . . . . . . . . . . . . . . . . . . . . . . . . . . . .30
Integration Server Log File.. . . . . . . . . . . . . . . . . . . . . . . . . . . . . . . . . . . . . . . . . . . . . . . . . . . . . . . . . . . . . . . . . . . . . . . . . . . . . . . .30
Data Load Error File.. . . . . . . . . . . . . . . . . . . . . . . . . . . . . . . . . . . . . . . . . . . . . . . . . . . . . . . . . . . . . . . . . . . . . . . . . . . . . . . . . . . . . . .32
Unicode ... . . . . . . . . . . . . . . . . . . . . . . . . . . . . . . . . . . . . . . . . . . . . . . . . . . . . . . . . . . . . . . . . . . . . . . . . . . . . . . . . . . . . . . . . . . . . . . . . . .33
Enabling Regional Options for Multiple Languages ... . . . . . . . . . . . . . . . . . . . . . . . . . . . . . . . . . . . . . . . . . . . . . . . . . .35
Creating Database User Aliases and Synonyms ... . . . . . . . . . . . . . . . . . . . . . . . . . . . . . . . . . . . . . . . . . . . . . . . . . . . . .37
Scheduling Jobs in UNIX ... . . . . . . . . . . . . . . . . . . . . . . . . . . . . . . . . . . . . . . . . . . . . . . . . . . . . . . . . . . . . . . . . . . . . . . . . . . . . . . .37
Starting the Windows Task Scheduler Service... . . . . . . . . . . . . . . . . . . . . . . . . . . . . . . . . . . . . . . . . . . . . . . . . . . . . . . . .37
This chapter describes starting and stopping Essbase Integration Server and how to view its logfile.
Integration ServerIntegration Server is multithreaded server software that is the bridge between the data source,OLAP Metadata Catalog, and Essbase Server. Oracle Essbase Integration Services performsseveral tasks:
l Retrieves OLAP model and metaoutline information from OLAP Metadata Catalog
l Generates SQL statements
l Retrieves data from external sources
l Loads members and data into the Oracle Essbase database
Integration Server must be running if you want to use Integration Services Console (the graphicaluser interface) or Integration Services Shell (the command line interface).
Integration Server 11
Starting Integration ServerBefore starting Integration Server, verify all required components are running. Thesecomponents need not be on your local computer. Also, verify that these components are running:
l The relational database management system (RDBMS) with the relational data sourcecontaining the OLAP Metadata Catalog where the metadata is stored
l One or more RDBMSs containing the relational data sources you want to use to create ormodify an OLAP model or metaoutline
Essbase Server must be running if you create, change, or load data into an Essbase database orif you want to preview an Essbase database outline.
You can start Integration Server using several methods:
l From a DOS command prompt
l From a UNIX command prompt
l From the Windows Desktop Start menu
l As a Windows service
Note: To start Integration Server as a Windows service, you must have configured it as aWindows service during the configuration process. See the Oracle Hyperion EnterprisePerformance Management System Installation and Configuration Guide.
ä To start Integration Server from DOS:
1 At the command line, type the startup.bat command.
The startup.bat command ensures the environment is set correctly and that properPATH and CLASSPATH settings are used when starting Integration Server.
2 If you want to change a default startup switch, add the switch to the ais.cfg file or thestartup.bat file.
3 If you want to change a default configuration parameter, add the parameter to the ais.cfg file.
See “Storing Startup Information in the Configuration File” on page 25 and “Storing StartupInformation in the Startup File (Windows Only)” on page 26 for information on adding startupswitches and configuration parameters to files.
ä To start Integration Server from UNIX:
1 Type is.sh .
2 Type the executable name on the command line, for example, type
olapisvr
Note: If Integration Server does not start when olapisvr is executed from the commandline, the operating system path may not be updated correctly. See the Oracle HyperionEnterprise Performance Management System Installation and Configuration Guide.
12 Using Essbase Integration Server

3 If you want to change a default startup switch, type the command syntax after the olapisvr commandor add the switches to the ais.cfg file.
See “Storing Startup Information in the Configuration File” on page 25 and “StoringStartup Information in the Startup File (Windows Only)” on page 26 for information onadding startup switches to these files.
Values for startup switches entered at the command line override startup switch valuesstored in the ais.cfg file.
When entering parameters for startup switches at the command line, enclose path namesthat contain spaces in quotation marks (" "). The following example illustrates the syntaxfor passing the -E and -M options:
olapisvr -E"c:\my logs\eislog" -M"c:\ess\bin\essbase.mdb"
ä To start Integration Server from the Windows Desktop Start menu:
1 Click Start.
2 Select All Programs, then Oracle EPM System, then Essbase, then Integration Services, then Server.
If startup switch settings are stored in startup.bat or ais.cfg, the settings instartup.bat override the settings in ais.cfg when Integration Server is started from theWindows Desktop Start menu.
ä To start Integration Server as a Windows service:
1 Access the Services dialog box in Windows.
2 Double-click Essbase Integration Server to start the service.
The Service Control message box is displayed. After a few seconds it is removed, and theStatus field entry for Integration Server is changed to Started.
3 If you want to change any default startup switches or configuration parameters, add the switches to theais.cfg file or the startup.bat file.
Running Integration Server as a Background Process on UNIXSystems
ä To run Integration Server in the background, modify ais_start or type the followingcommands
.is.shnohup olapisvr &
Note: If you choose to run Integration Server by using the above commands, ensure you haveconfigured your environment.
The nohup command keeps the Integration Server program running even if you log off. Theampersand (&) suffix makes the program a background process.
Starting Integration Server 13
Caution! To allow the Integration Services Console client to create OLAP models andmetaoutlines, you must run Integration Server and keep it running while any clientsare connected to it.
When you start Integration Server, it begins writing to the log, olapisvr.log, in the logdirectory. To write to a log on another directory, specify the log name in ais_start or type thefollowing command:
olapisvr -Emydir/mylog
Note: Do not type the .log file extension. The .log extension is automatically appended to thename that you type for the log.
Integration Server Startup SwitchesThis topic lists the switches and configuration parameters used to change default settings whenstarting Integration Server. The switches can be used from the command line, added to thestartup.bat file, or stored in the ais.cfg file.
l -?
l -A
l -C
l -D
l -E
l -F
l -I
l [K]
l -L
l -M
l -N
l -P
l -R
l -S
l -T
l -U
l [V]
For information on storing startup switches in startup.bat or ais.cfg, see “Storing StartupInformation in the Configuration File” on page 25 and “Storing Startup Information in theStartup File (Windows Only)” on page 26.
14 Using Essbase Integration Server
The following topics describe the default switches.
-?To view a list of available switches for starting Integration Server.
-ATo ignore the parent of a given member when updating OLAP intersections during a drill-through operation.
To ignore parents when updating OLAP intersections, do one of the following:
l In Windows, add -AY to the startup.bat file.
l In UNIX, type -AY when you start Integration Server.
l In Windows or UNIX, add [A]=Y to the ais.cfg file.
By default, Integration Server sets the value at N so that parents are not ignored when updatingOLAP intersections. If a parent is ignored during an update of OLAP intersections, subsequentdrill-through operations cannot be performed on any shared members related to that parent.
In Windows:
In the startup.bat file, to ignore the parent of a given member when updating OLAPintersections during a drill-through operation, add -AY after "C:\Oracle\Middleware\EPMSystem11R1\products\Essbase\eis\server\bin\olapisvr.exe". For example:
"C:\Oracle\Middleware\EPMSystem11R1\products\Essbase\eis\server\bin\olapisvr.exe" -AY
In UNIX:
To ignore the parent of a given member when updating OLAP intersections during a drill-through operation, type:
olapisvr -AY
In Windows or UNIX:
In the ais.cfg file, this parameter is specified in the following format:
[A]=Y
-B
Note: -B is no longer available.
-CTo set the number of records that Integration Server commits to Essbase:
l In Windows, add -Cnumber_of_records to the startup.bat file.
Starting Integration Server 15
l In UNIX, type -Cnumber of records when you start Integration Server.
l In Windows or UNIX, add [C]=number_of_records to the ais.cfg file.
The default setting is all records.
-C can be used with the -N switch.
Note: -C should not be used in operations involving aggregate storage.
-C is often used in testing environments. The recommended setting for testing purposes is 5,000to 10,000 records. After you have completed testing, shut down Integration Server to revert tothe default setting, or reset to the limit allowed by DATAERRORLIMIT.
When -C is used with the DATAERRORLIMIT setting in the essbase.cfg file, you canmaximize the number of records written to dataload.txt, the data load error file. For example,if you set DATAERRORLIMIT to 65,000, the maximum number of error records allowed in theEssbase log, and then set -C to 65,000 or less, you will be able to view all error records allowedby Essbase.
Note: If you have included a setting for testing purposes for -C in ais.cfg, be sure to edit the fileto clear the ais.cfg file so that it will change the setting back to “all records.”
Setting a smaller number of records during testing enables you to see data load errorsincrementally, providing you an opportunity to correct problems before continuing. Resettingthe number of records to the default of all records results in faster performance.
There is no limit to the number of records that Integration Server can transfer to Essbase duringa data load. If, however, you experience memory problems during a data load, set -C to a smallervalue.
Note: The setting of -C does not apply to member loads.
In Windows:
For example, in the startup.bat file, to set the number of records that Integration Serverincrementally transfers to Essbase during a data load to 5,000, add -C5000 after "C:\Oracle\Middleware\EPMSystem11R1\products\Essbase\eis\server\bin
\olapisvr.exe". For example:
"C:\Oracle\Middleware\EPMSystem11R1\products\Essbase\eis\server\bin\olapisvr.exe" -C5000
In UNIX:
For example, to set the number of records that Integration Server incrementally transfers toEssbase during a data load to 5,000, type:
olapisvr -C5000
In Windows or UNIX:
16 Using Essbase Integration Server
For example, to set the number of records that Integration Services incrementally transfers toEssbase during a data load to 5,000, in the ais.cfg file, type:
[C]=5000
-DTo specify whether or not to add the DISTINCT clause to the SELECT statement of drill-throughSQL.
The default behavior adds the DISTINCT clause. To not add the DISTINCT clause:
l In Windows, add -DN to the startup.bat file.
l In UNIX, type -DN when you start Integration Server.
l In Windows or UNIX, add [D]=N to the ais.cfg file.
In Windows:
In the startup.bat file, to specify that the DISTINCT clause should not be added to drill-through queries, add -DN after "C:\Oracle\Middleware\EPMSystem11R1\products\Essbase\eis\server\bin\olapisvr.exe". For example:
"C:\Oracle\Middleware\EPMSystem11R1\products\Essbase\eis\server\bin\olapisvr.exe" -DN
Any value other than -DN or no value specifies that the DISTINCT clause should always beadded to drill-through SQL.
In UNIX:
To specify that the DISTINCT clause should not be added to drill-through queries, type:
olapisvr -DN
In Windows or UNIX:
In the ais.cfg file, this parameter is specified in the following format:
[D]=N
-ETo give the log file a different name:
l In Windows, add -Elog_file_name to the startup.bat file.
l In UNIX, type -Elog_file_name when you start Integration Server.
l In Windows or UNIX, add [E]=log_file_name to the ais.cfg file.
The .log extension is added automatically. The default name and location is products\logs\eis\olapisvr.log.
In Windows:
Starting Integration Server 17
In the startup.bat file, to name the log file myserver.log and put it in the temp directoryon Windows, add -Ec:\temp\myserver after "C:\Oracle\Middleware\EPMSystem11R1\products\Essbase\eis\server\bin\olapisvr.exe". For example:
"C:\Oracle\Middleware\EPMSystem11R1\products\Essbase\eis\server\bin\olapisvr.exe -E"c:\temp\myserver
Do not type the .log file extension. The .log extension is automatically appended to the nameyou type for the log.
Always enclose path names that contain spaces with quotation marks (" "); for example, type:
"C:\Oracle\Middleware\EPMSystem11R1\products\Essbase\eis\server\bin\olapisvr.exe" -I -E"c:\program files\eis\myserver"
In UNIX:
To name the log file myserver.log and put it in a temp directory on UNIX, type
olapisvr -E/vol1/temp/eislog
Enclose path names that contain spaces in quotation marks (" "); for example, type:
olapisvr -E"/vol1/temp/eis log"
In Windows or UNIX:
In the ais.cfg file, this parameter is specified in the following format:
[E]=c:\temp\myserver
or
[E]=c:\program files\eis\myserver
Note: In the ais.cfg file, you do not need to type quotation marks around path names thatcontain spaces.
-FTo specify whether to add parentheses around user-defined drill-through filters. See EssbaseSpreadsheet Add-in help.
The default is not to add parentheses around user-defined drill-through filters. To addparentheses:
l In Windows, add -FY to the startup.bat file.
l In UNIX, type -FY when you start Integration Server.
l In Windows or UNIX, add [F]=Y to the ais.cfg file.
In Windows:
In the startup.bat file, to specify that parentheses should be added around user-defined drill-through filters, add -FY after "C:\Oracle\Middleware\EPMSystem11R1\products\Essbase\eis\server\bin\olapisvr.exe". For example:
"C:\Oracle\Middleware\EPMSystem11R1\products\Essbase\eis\server\bin\olapisvr.exe" -FY
18 Using Essbase Integration Server
Any other value or no value specifies that parentheses should not be added around user-defineddrill-through filters.
In UNIX:
To specify that parentheses should be added around user-defined drill-through filters, type:
olapisvr -FY
In Windows or UNIX:
In the ais.cfg file, this parameter is specified in the following format:
[F]=Y
-ITo prevent Integration Server from shutting down as a service on Windows after you log off,add -I to the startup.bat file.
When you run Integration Server as a service on Windows, Oracle recommends you use -I.
Note: This startup switch is applicable only in Windows environments.
Note: -I cannot be entered in the ais.cfg file. It can only be specified in the startup.batfile.
In Windows:
In the startup.bat file, to prevent Integration Server from shutting down as a service, add -Iafter "C:\Oracle\Middleware\EPMSystem11R1\products\Essbase\eis\server\bin\olapisvr.exe". For example:
"C:\Oracle\Middleware\EPMSystem11R1\products\Essbase\eis\server\bin\olapisvr.exe" -I
-LTo set the level of detail of the messages that Integration Server logs:
l In Windows, add -Llevel to the startup.bat file.
l In UNIX, type -Llevel when you start Integration Server.
l In Windows or UNIX, add [L]=I to the ais.cfg file.
The default level is 2. You can specify the following levels:
l 0
To log all debug messages and the ODBC SQL generated by Integration Server; generate thedataloadrecord.txt file, listing the first 1,000 records, which may include successfullyloaded records and rejected records; and create the hisdld.rul file consisting of the namesof the dimensions loaded followed by the leaf node number of each dimension or member
Starting Integration Server 19

l 2
To log all informational messages and some of the ODBC SQL generated by IntegrationServer
l 3
To log all warnings
l 4
To log all noncritical errors
l 7
To log all critical errors where Integration Server terminates the command
l 8
To log all critical server errors
The recommended level setting is 2 or 3.
In Windows:
In the startup.bat file, to use the highest level of logging, add -L0 after "C:\Oracle\Middleware\EPMSystem11R1\products\Essbase\eis\server\bin
\olapisvr.exe". For example:
"C:\Oracle\Middleware\EPMSystem11R1\products\Essbase\eis\server\bin\olapisvr.exe" -L0
In UNIX:
To use the highest level of logging, type:
olapisvr -L0
In Windows or UNIX:
In the ais.cfg file, this switch is specified in the following format:
[L]=0
-MTo specify the location of the Essbase message database file if the file is moved to a new location:
l In Windows, add -Mpath\essbase.mdb to the startup.bat file.
l In UNIX, type -Mpath\essbase.mdb when you start Integration Server.
l In Windows, add [M]=path\essbase.mdb to the ais.cfg file.
The default location is products\products\Essbase\eis\server\bin\essbase.mdb.
In Windows:
In the startup.bat file, to specify the new location of the Essbase message database file asessbasemsg\bin, add -Mc:\essbasemsg\bin\essbase.mdb after "C:\Oracle
20 Using Essbase Integration Server

\Middleware\EPMSystem11R1\products\Essbase\eis\server\bin
\olapisvr.exe". For example:
"C:\Oracle\Middleware\EPMSystem11R1\products\Essbase\eis\server\bin\olapisvr.exe" -Mc:\essbasemsg\bin\essbase.mdb
Always enclose path names that contain spaces with quotation marks (" "); for example, type:
"C:\Oracle\Middleware\EPMSystem11R1\products\Essbase\eis\server\bin\olapisvr.exe" -M"c:\eis svr\bin\essbase.mdb"
In UNIX:
To specify the new location of essbase.mdb as essbasemsg\bin, type:
olapisvr -M/vol1/essbasemsg/bin/essbase.mdb
Enclose path names that contain spaces with quotation marks (" "); for example:
olapisvr -M"/vol1/essbase msg/bin/essbase.mdb"
In Windows or UNIX:
In the ais.cfg file, this parameter is specified in the following format:
[M]=c:\eissvr\bin\essbase.mdb
or
[M]=c:\ess svr\bin\essbase.mdb
Note: In the ais.cfg file, you do not need to add quotation marks around path names thatcontain spaces.
-NTo specify the number of threads Integration Server uses when sending data to Essbase duringa data load, do one of the following:
l In Windows, add -N to the startup.bat file.
l In UNIX, type -Nnumber_of_threads when you start Integration Server.
l In Windows or UNIX, add [N]=number_of_threads to the ais.cfg file.
The default setting is 1 thread.
-N may be used with -C.
-N controls the number of threads allocated to data load optimization. Usually, users start with2 threads and adjust according to the environment.
In Windows:
In the startup.bat file, to set the number of threads to 2, add -N2 after "C:\Oracle\Middleware\EPMSystem11R1\products\Essbase\eis\server\bin
\olapisvr.exe". For example:
"C:\Oracle\Middleware\EPMSystem11R1\products\Essbase\eis\server\bin\olapisvr.exe" -N2
Starting Integration Server 21
In UNIX:
To set the number of threads to 2, type:
olapisvr -N2
In Windows or UNIX:
In the ais.cfg file, this parameter is specified in the following format:
[N]=2
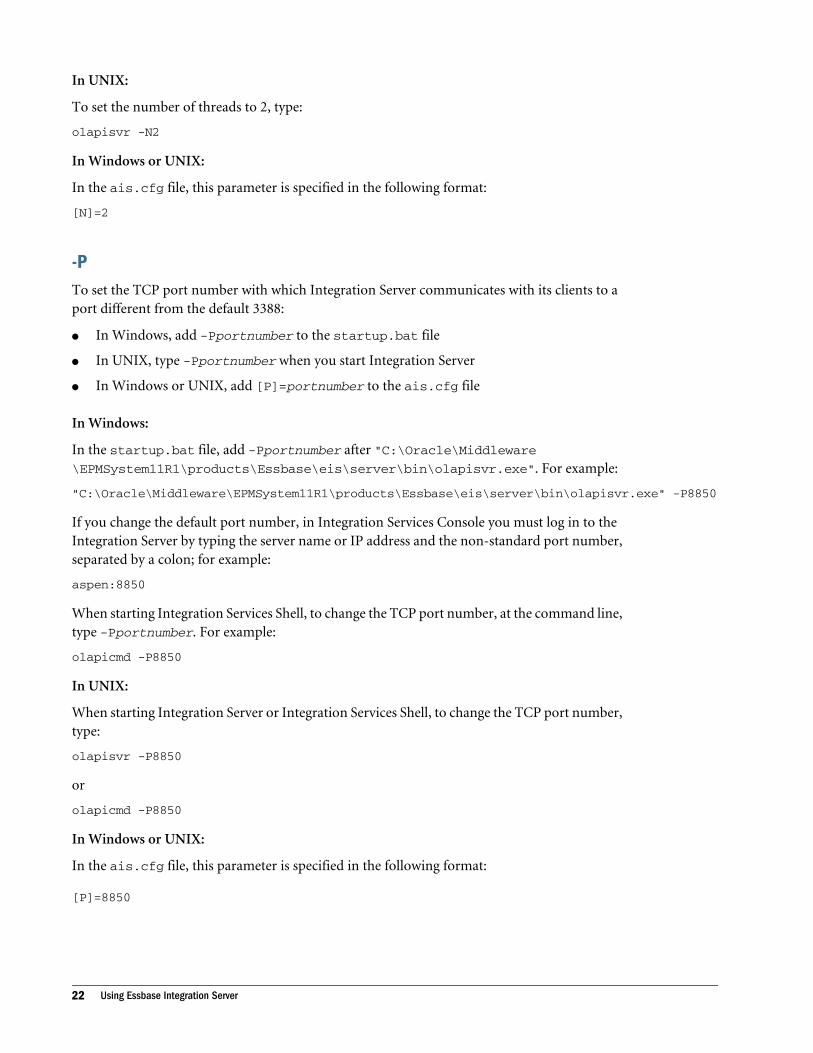
-PTo set the TCP port number with which Integration Server communicates with its clients to aport different from the default 3388:
l In Windows, add -Pportnumber to the startup.bat file
l In UNIX, type -Pportnumber when you start Integration Server
l In Windows or UNIX, add [P]=portnumber to the ais.cfg file
In Windows:
In the startup.bat file, add -Pportnumber after "C:\Oracle\Middleware\EPMSystem11R1\products\Essbase\eis\server\bin\olapisvr.exe". For example:
"C:\Oracle\Middleware\EPMSystem11R1\products\Essbase\eis\server\bin\olapisvr.exe" -P8850
If you change the default port number, in Integration Services Console you must log in to theIntegration Server by typing the server name or IP address and the non-standard port number,separated by a colon; for example:
aspen:8850
When starting Integration Services Shell, to change the TCP port number, at the command line,type -Pportnumber. For example:
olapicmd -P8850
In UNIX:
When starting Integration Server or Integration Services Shell, to change the TCP port number,type:
olapisvr -P8850
or
olapicmd -P8850
In Windows or UNIX:
In the ais.cfg file, this parameter is specified in the following format:
[P]=8850
22 Using Essbase Integration Server
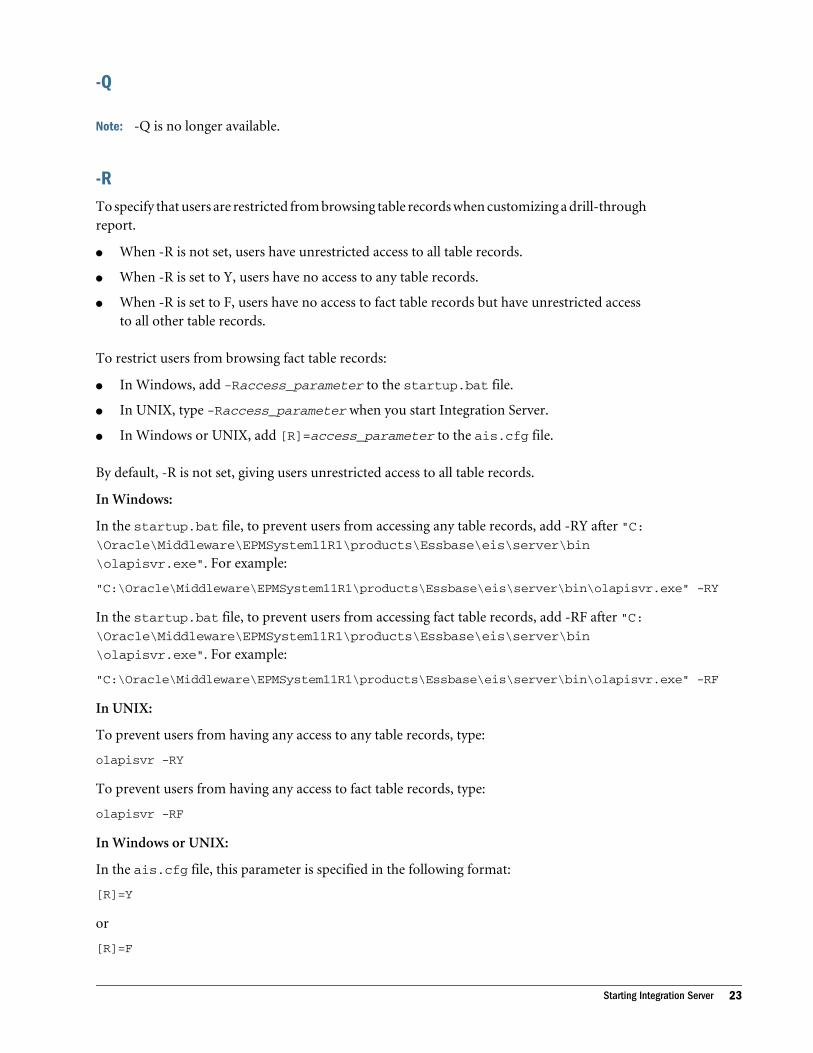
-Q
Note: -Q is no longer available.
-RTo specify that users are restricted from browsing table records when customizing a drill-throughreport.
l When -R is not set, users have unrestricted access to all table records.
l When -R is set to Y, users have no access to any table records.
l When -R is set to F, users have no access to fact table records but have unrestricted accessto all other table records.
To restrict users from browsing fact table records:
l In Windows, add -Raccess_parameter to the startup.bat file.
l In UNIX, type -Raccess_parameter when you start Integration Server.
l In Windows or UNIX, add [R]=access_parameter to the ais.cfg file.
By default, -R is not set, giving users unrestricted access to all table records.
In Windows:
In the startup.bat file, to prevent users from accessing any table records, add -RY after "C:\Oracle\Middleware\EPMSystem11R1\products\Essbase\eis\server\bin
\olapisvr.exe". For example:
"C:\Oracle\Middleware\EPMSystem11R1\products\Essbase\eis\server\bin\olapisvr.exe" -RY
In the startup.bat file, to prevent users from accessing fact table records, add -RF after "C:\Oracle\Middleware\EPMSystem11R1\products\Essbase\eis\server\bin
\olapisvr.exe". For example:
"C:\Oracle\Middleware\EPMSystem11R1\products\Essbase\eis\server\bin\olapisvr.exe" -RF
In UNIX:
To prevent users from having any access to any table records, type:
olapisvr -RY
To prevent users from having any access to fact table records, type:
olapisvr -RF
In Windows or UNIX:
In the ais.cfg file, this parameter is specified in the following format:
[R]=Y
or
[R]=F
Starting Integration Server 23

-STo specify the stack size in megabytes of each thread that Integration Server creates:
l In Windows, add -Sstacksize_in_megabytes to the startup.bat file.
l In UNIX, type -Sstacksize_in_megabytes when you start Integration Server.
l In Windows or UNIX, add [S]=stacksize_in_megabytes to the ais.cfg file.
For Windows and Solaris, no stack size setting is required. For AIX, the default stack size settingis 3 MB; for HP-UX, the default stack size setting is 8 MB.
In Windows:
In the startup.bat file, to set the stack size that Integration Server creates to 1 MB, add -S1after "C:\Oracle\Middleware\EPMSystem11R1\products\Essbase\eis\server\bin\olapisvr.exe". For example:
"C:\Oracle\Middleware\EPMSystem11R1\products\Essbase\eis\server\bin\olapisvr.exe" -S1
In UNIX:
To set the stack size that Integration Server creates to 2 MB, type:
olapisvr -S2
In Windows or UNIX:
In the ais.cfg file, this parameter is specified in the following format:
[S]=2
-TTo set the number of network listeners that Integration Server starts:
l In Windows, add -Tnumber to the startup.bat file
l In UNIX, type -Tnumber when you start Integration Server
l In Windows or UNIX, add [T]=number to the ais.cfg file
The default (and recommended) number is 10.
Network listeners receive requests from Integration Services Console. Integration Serverautomatically adds and subtracts listeners as needed, so the number of listeners set at startupdoes not limit the number of users that can connect to an Integration Server.
In Windows:
In the startup.bat file, to set the number of network listeners that Integration Server startsto 17, add -T17 after "C:\Oracle\Middleware\EPMSystem11R1\products\Essbase\eis\server\bin\olapisvr.exe". For example:
"C:\Oracle\Middleware\EPMSystem11R1\products\Essbase\eis\server\bin\olapisvr.exe" -T17
In UNIX:
To set the number of network listeners Integration Server starts to 17, type:
24 Using Essbase Integration Server
olapisvr -T17
In Windows or UNIX:
In the ais.cfg file, -T is specified in the following format:
[T]=17
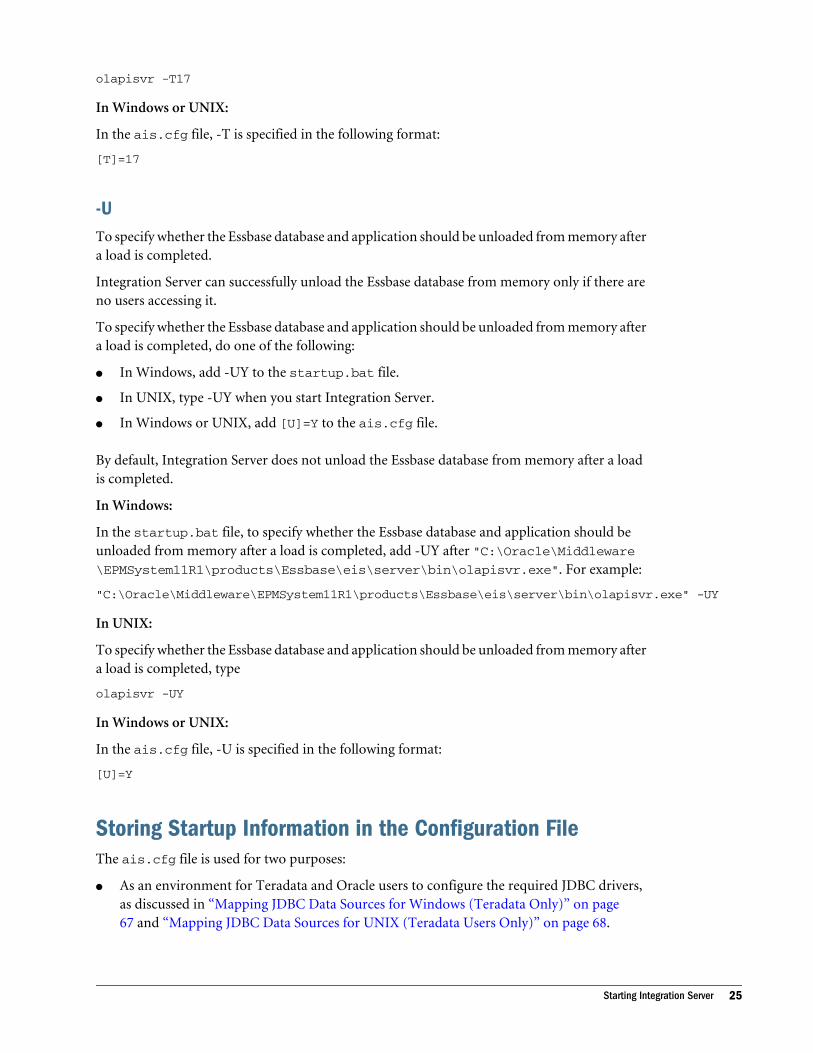
-UTo specify whether the Essbase database and application should be unloaded from memory aftera load is completed.
Integration Server can successfully unload the Essbase database from memory only if there areno users accessing it.
To specify whether the Essbase database and application should be unloaded from memory aftera load is completed, do one of the following:
l In Windows, add -UY to the startup.bat file.
l In UNIX, type -UY when you start Integration Server.
l In Windows or UNIX, add [U]=Y to the ais.cfg file.
By default, Integration Server does not unload the Essbase database from memory after a loadis completed.
In Windows:
In the startup.bat file, to specify whether the Essbase database and application should beunloaded from memory after a load is completed, add -UY after "C:\Oracle\Middleware\EPMSystem11R1\products\Essbase\eis\server\bin\olapisvr.exe". For example:
"C:\Oracle\Middleware\EPMSystem11R1\products\Essbase\eis\server\bin\olapisvr.exe" -UY
In UNIX:
To specify whether the Essbase database and application should be unloaded from memory aftera load is completed, type
olapisvr -UY
In Windows or UNIX:
In the ais.cfg file, -U is specified in the following format:
[U]=Y
Storing Startup Information in the Configuration FileThe ais.cfg file is used for two purposes:
l As an environment for Teradata and Oracle users to configure the required JDBC drivers,as discussed in “Mapping JDBC Data Sources for Windows (Teradata Only)” on page67 and “Mapping JDBC Data Sources for UNIX (Teradata Users Only)” on page 68.
Starting Integration Server 25
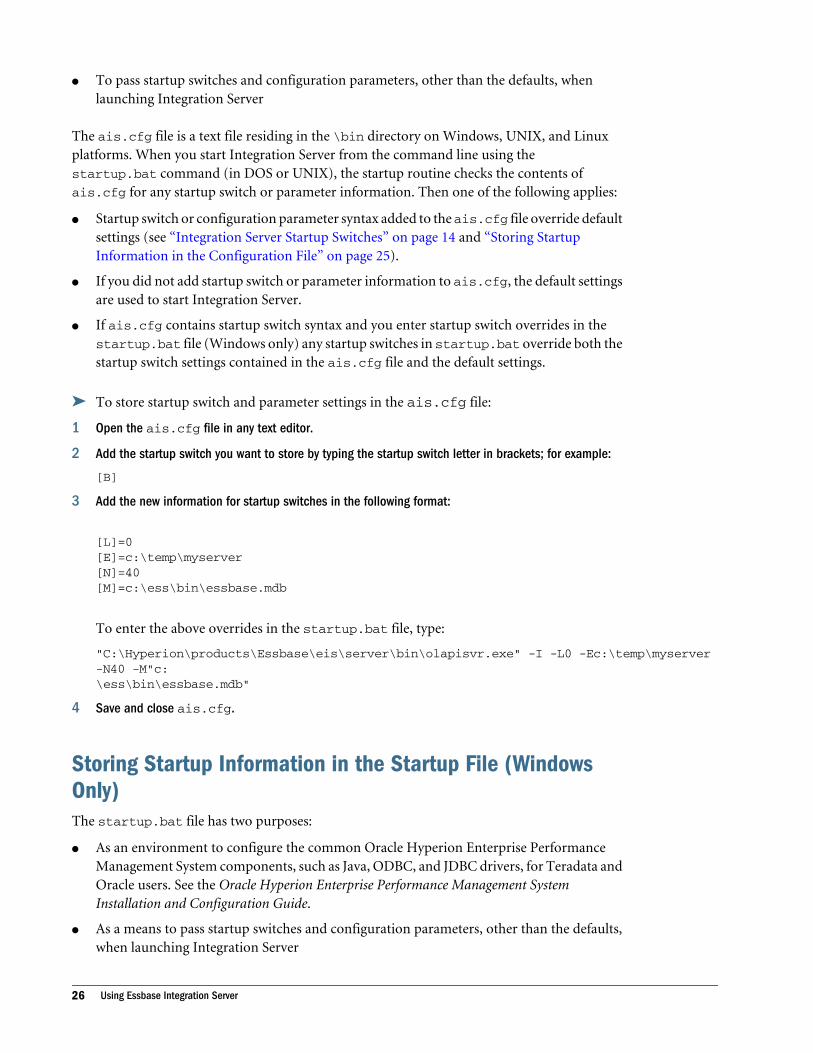
l To pass startup switches and configuration parameters, other than the defaults, whenlaunching Integration Server
The ais.cfg file is a text file residing in the \bin directory on Windows, UNIX, and Linuxplatforms. When you start Integration Server from the command line using thestartup.bat command (in DOS or UNIX), the startup routine checks the contents ofais.cfg for any startup switch or parameter information. Then one of the following applies:
l Startup switch or configuration parameter syntax added to the ais.cfg file override defaultsettings (see “Integration Server Startup Switches” on page 14 and “Storing StartupInformation in the Configuration File” on page 25).
l If you did not add startup switch or parameter information to ais.cfg, the default settingsare used to start Integration Server.
l If ais.cfg contains startup switch syntax and you enter startup switch overrides in thestartup.bat file (Windows only) any startup switches in startup.bat override both thestartup switch settings contained in the ais.cfg file and the default settings.
ä To store startup switch and parameter settings in the ais.cfg file:
1 Open the ais.cfg file in any text editor.
2 Add the startup switch you want to store by typing the startup switch letter in brackets; for example:
[B]
3 Add the new information for startup switches in the following format:
[L]=0[E]=c:\temp\myserver[N]=40[M]=c:\ess\bin\essbase.mdb
To enter the above overrides in the startup.bat file, type:
"C:\Hyperion\products\Essbase\eis\server\bin\olapisvr.exe" -I -L0 -Ec:\temp\myserver -N40 -M"c:\ess\bin\essbase.mdb"
4 Save and close ais.cfg.
Storing Startup Information in the Startup File (WindowsOnly)The startup.bat file has two purposes:
l As an environment to configure the common Oracle Hyperion Enterprise PerformanceManagement System components, such as Java, ODBC, and JDBC drivers, for Teradata andOracle users. See the Oracle Hyperion Enterprise Performance Management SystemInstallation and Configuration Guide.
l As a means to pass startup switches and configuration parameters, other than the defaults,when launching Integration Server
26 Using Essbase Integration Server
The startup.bat file is a text file residing in the eis\server\bin directory. When you startIntegration Server as a Windows service, the startup routine checks the contents ofstartup.bat for any startup switch information. Then the startup routine checks ais.cfgfor any startup switch and configuration parameter information. Then one of the followingapplies:
l Startup switch syntax added to the startup.bat file (Windows only), override defaultsettings (see “Integration Server Startup Switches” on page 14).
l If you added startup switch or configuration parameter syntax only to the ais.cfg file,those settings that you added override the default settings for those switches and parameters(see “Integration Server Startup Switches” on page 14 and “Storing Startup Information inthe Configuration File” on page 25).
l If you did not add startup switch or parameter information to startup.bat or ais.cfg,the default settings (see “Integration Server Startup Switches” on page 14 and “StoringStartup Information in the Configuration File” on page 25) are used to start IntegrationServer.
ä To store startup switch settings in the startup.bat file:
1 Open the startup.bat file in any text editor.
2 If you want to change a default startup switch, type the command syntax in the line that calls theIntegration Server.
The values for startup switches that you enter into startup.bat override any startup switchvalues you have stored in the ais.cfg file.
When entering parameters for startup switches in startup.bat, enclose path names thatcontain spaces in quotation marks (" "). The following example illustrates the syntax forpassing the -L, -E, -M, -N options:
"C:\Hyperion\eis serv\bin\olapisvr.exe" -I -L0 -Ec:\temp\myserver -N40 -M"c:\ess svr\bin\essbase.mdb"
Note: In the startup.bat file, the above syntax should be entered all on one line.
You can only enter startup switch information into startup.bat. Configurationparameters must be entered in ais.cfg.
3 Save and close startup.bat.
Starting Integration Server 27
Additional Configuration Parameters
Subtopics
l Windows Configuration Parameters
l Windows and UNIX Configuration Parameters
Add the configuration parameters specified in this topic to the ais.cfg file to change the defaultconfiguration settings described in “Storing Startup Information in the Configuration File” onpage 25.
Windows Configuration ParametersThe configuration parameters described in this section can only be specified in the ais.cfg filethat is installed on Windows. These parameters cannot be specified in the startup.bat file, atthe command line, or in the ais.cfg file that is installed with the UNIX version of IntegrationServer.
[K]
To specify whether to display the primary keys in an OLAP model. The default behavior is notto display the primary keys in an OLAP model.
If you want to display the primary keys in an OLAP model, add [K]=Y to the ais.cfg file.
In Windows:
In the ais.cfg file, this parameter is specified in the following format:
[K]=Y
[V]
To specify whether Integration Server automatically validates an OLAP model or metaoutlinewhen a Save or Save As operation is performed. The default behavior is for Integration Serverto validate an OLAP model or metaoutline before saving it.
If you want to disable automatic OLAP model and metaoutline validation, add [V]=0 to theais.cfg file.
In Windows:
In the ais.cfg file, this parameter is specified in the following format:
[V]=0
Windows and UNIX Configuration ParametersThe configuration parameter described in this section can be specified in the ais.cfg file thatis installed on Windows and UNIX. This parameter cannot be specified in the startup.batfile or at the command line.
28 Using Essbase Integration Server
[ADDDUPLICATESFORASO]
To allow addition of duplicate data records when using an aggregate storage database. The defaultbehavior is to set the data load option in aggregate storage to not allow duplicate records.
To allow duplicate data records when using an aggregate storage database, add[ADDDUPLICATESFORASO]=Y to the ais.cfg file.
In Windows and UNIX:
In the ais.cfg file, this parameter is specified in the following format:
[ADDDUPLICATESFORASO]=Y
[UNIFORMVALUEFORMAT]
To obtain correct results when an aggregate storage database contains duplicate records withdifferent values. In the following example, duplicate records at the intersection of SKU,MONTH, and STATE show different results for SALES:
SKU MONTH STATE SALES100–10 JAN CA 389.99999999999994100–10 JAN CA 390
When a database contains duplicate records with different values, data loads are terminated withan error; for example:
IS Error(EssLoadBufferTerm): Data load failed: input contains different values for the same cell [(Jan, Sales, 100-20, Florida): 389.99999999999994 / 390] 1270089
When you add the [UNIFORMVALUEFORMAT] parameter to the ais.cfg file, data loadresults for measures are rounded up or down as appropriate to six decimal places (0.000000),ensuring that the duplicate records will have the same value.
Using the same data from the example above, the results would be:
SKU MONTH STATE SALES100–10 JAN CA 390.000000100–10 JAN CA 390.000000
To enable uniform value formatting, add [UNIFORMVALUEFORMAT]=Y to the ais.cfg file
In Windows and UNIX:
In the ais.cfg file, this parameter is specified in the following format:
[UNIFORMVALUEFORMAT]=Y
Reconnecting Integration Server and OLAP MetadataCatalogIf you lose the connection to Integration Server and OLAP Metadata Catalog, you can reconnectdirectly from Integration Services Console without losing unsaved work.
Reconnecting Integration Server and OLAP Metadata Catalog 29
ä To reconnect to Integration Server:
1 Start Integration Server using any method described in “Starting Integration Server” on page 12.
2 In the Integration Services Console, select Connections, then OLAP Metadata Catalog, thenReconnect.
Note: The connection is made implicitly; no messages are displayed.
Shutting Down Integration ServerAfter using Integration Server, shut it down using any of several methods.
Note: Always close Integration Services Console before shutting down Integration Server.
ä To shut down Integration Server from the command line, either close the Integration Serverwindow, or use Integration Services Shell:
l On Windows platforms, close the Integration Server window.
l Issue the SHUTDOWN command in Integration Services Shell.
See “Integration Services Shell Commands” on page 150.
ä To shut down Integration Server from the Windows desktop:
1 Right-click the button representing Integration Server in the Windows task bar.
2 Select Close.
ä To shut down Integration Server as a Windows service:
1 Access the Services dialog box in Windows.
2 Locate Essbase Integration Server in the list of services.
3 Right-click Essbase Integration Server and select Stop.
Integration Server Log FileBy default, the Integration Server log file is named olapisvr.log and is located in theproducts\logs\eis directory. View it from Integration Services Console by selecting the ViewLog File option from the Tools menu to launch the Server Log file dialog box, or openolapisvr.log in any text editor. To create the log file with a different location or name, use -E. See “Integration Server Startup Switches” on page 14.
30 Using Essbase Integration Server

Items Logged in Integration Server FileItems are logged in the Integration Server log file, depending on the logging level you set whenyou start Integration Server:
l Processing messages
l Member load error messages
l Settings for switches used to start Integration Server from the command line or as a Windowsservice
l Two copies of each SQL statement generated to access the data source as follows:
m The first statement is in the SQL dialect understood by the ODBC driver and is generatedby Integration Server.
m The second statement is generated by the ODBC driver and is translated by the driverinto the dialect of SQL understood by the data source being accessed.
l Integration Services Shell commands used to perform an action
l Connection information
l Load status
l Names of any metaoutline running
l Other informational messages
When a user accesses a drill-through report using Essbase Spreadsheet Add-in, items related tothe drill-through report are also logged:
l Drill-through report name
l Metaoutline with which this drill-through report is associated
l Essbase Server computer being accessed
l Essbase application and database
l User accessing drill-through report
See “Integration Server Startup Switches” on page 14.
Integration Server error message text is located in products\Essbase\eis\server\bin\error.txt on Windows systems; products/Essbase/eis/server/bin/error.txt onUNIX.
Essbase error message text is located in products\Essbase\eis\server\bin\message.txt on Windows systems; products/Essbase/eis/server/bin/message.txt on UNIX.
Integration Server Log File SizeYour server log file will grow to a maximum of 50 megabytes in size. Then it will be truncatedto 10 megabytes with the most recent 10 megabytes of entries being retained. The log file willagain grow to 50 megabytes before it is truncated.
Integration Server Log File 31
Change the default settings by specifying LOGFILEMIN and LOGFILEMAX in the ais.cfgfile, for example:
[LOGFILEMIN] = 20[LOGFILEMAX] = 60
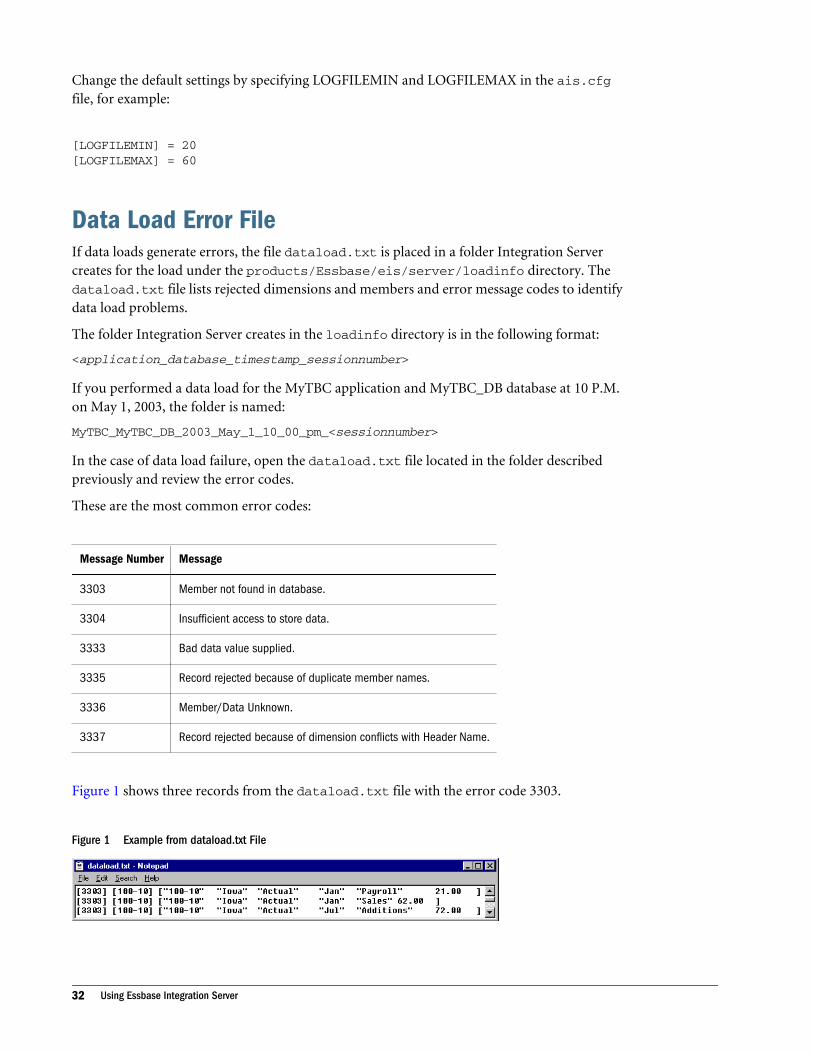
Data Load Error FileIf data loads generate errors, the file dataload.txt is placed in a folder Integration Servercreates for the load under the products/Essbase/eis/server/loadinfo directory. Thedataload.txt file lists rejected dimensions and members and error message codes to identifydata load problems.
The folder Integration Server creates in the loadinfo directory is in the following format:
<application_database_timestamp_sessionnumber>
If you performed a data load for the MyTBC application and MyTBC_DB database at 10 P.M.on May 1, 2003, the folder is named:
MyTBC_MyTBC_DB_2003_May_1_10_00_pm_<sessionnumber>
In the case of data load failure, open the dataload.txt file located in the folder describedpreviously and review the error codes.
These are the most common error codes:
Message Number Message
3303 Member not found in database.
3304 Insufficient access to store data.
3333 Bad data value supplied.
3335 Record rejected because of duplicate member names.
3336 Member/Data Unknown.
3337 Record rejected because of dimension conflicts with Header Name.
Figure 1 shows three records from the dataload.txt file with the error code 3303.
Figure 1 Example from dataload.txt File
32 Using Essbase Integration Server
UnicodeSharing data across national and language boundaries is a challenge for multi-nationalbusinesses. Traditionally, each computer stores and renders text based on its locale specification.A locale identifies the local language and cultural conventions such as the formatting of currencyand dates, sort order of the data, and the character set encoding to be used on the computer.The encoding of a character set refers to the specific set of bit combinations used to store thecharacter text as data, as defined by a code page or an encoding format. In Essbase, code pagesmap characters to bit combinations for non-Unicode encodings.
Because different encodings can map the same bit combination to different characters, a filecreated on one computer can be misinterpreted by another computer that has a different locale.
The Unicode Standard was developed to enable computers with different locales to sharecharacter data. Unicode provides encoding forms with thousands of bit combinations, enoughto support the character sets of multiple languages simultaneously. By combining all charactermappings into a single encoding form, Unicode enables users to correctly view character datacreated on computers with different locale settings.
Users whose computers are set up in different languages can work with the same database. Forexample, using alias tables in their respective languages, users in Taiwan can view databasereports displaying Chinese characters while users in France can view the same reports in Frenchcharacters.
User-defined character sets (UDC) are not supported and the Chinese National Standard GB18030-2000 is not supported.
Note: For information on using Unicode in Essbase, see the Oracle Essbase DatabaseAdministrator's Guide.
Unicode and Non-Unicode Application ModesApplications are designated as Unicode-mode applications or non-Unicode-mode applications.
Unicode-mode applications support multiple character sets. Integration Services uses the UTF-8encoding form to interpret and store character text. Character-based artifacts in Unicode-modeapplications, such as member and alias names, can include characters from different languages.
Clients working with Unicode-mode applications can have different locales than Essbase Server.For example, client computers with Japanese locales and client computers with German localescan work with the same Unicode-mode application on an Essbase Server that has a Spanishlocale.
Non-Unicode-mode applications support one character set that is defined by a locale value, whichmust be the same for Essbase Server and all non-Unicode clients that work with the non-Unicode-mode applications. Both Unicode-mode and non-Unicode-mode applications canreside on the same Essbase Server.
Note: You cannot convert a Unicode-mode application to non-Unicode mode.
Unicode 33
When to Use Unicode-Mode ApplicationsConsider working with Unicode-mode applications only if you have any of the followingsituations:
l You need to enable users with different languages to view, in their own languages andcharacter sets, information from a common database. For example, using alias tables inJapanese and German, users in Japan and Germany could view, in their own languages,information about a common product set.
l You need to handle artifact names longer than non-Unicode-mode applications support.For example, application and database names need to be larger than eight characters or, ifyou are working with a multi-byte character set, you need to handle more characters inartifact names.
l You have experienced what is called the “round-trip” problem. The round-trip problem canoccur in communications between multi-byte operating systems and application programswhere two different bit values can map to the same character. As Java applications, OracleEssbase Administration Services and Oracle Hyperion Provider Services always work inUnicode. No encoding conversions occur when these clients work with Unicode-modeapplications and UTF-8-encoded text files; hence no round-trip conversion errors.
When deciding on using Unicode-mode applications, you should also consider the followingpoints:
l Using non-Unicode text files with Unicode-mode applications requires an understandingof locales and care in managing to them. To prevent errors that could cause databasecorruption, using UTF-8-encoded files is recommended. For details, see the Oracle EssbaseDatabase Administrator's Guide.
l To work with Unicode-mode applications, custom client applications that were written tosupport non-Unicode-mode applications must be built to use the longer string lengths usedby Unicode-mode applications. This may be a simple re-build or may involve re-programming, depending on the design of the applications. Also, depending on how theyare coded, the new client applications may require more memory.
Unicode-Enabled Administration ToolsOracle provides Administration Services and MaxL to administer Unicode-mode applications.The main administration activities include, in addition to the normal Essbase administrationactivities, changing the Unicode-related mode of the Essbase Server to enable or disable creationof Unicode-mode applications, creation of Unicode-mode applications, migration of non-Unicode-mode applications to Unicode mode, and viewing the Unicode-related status of serversand applications.
34 Using Essbase Integration Server

Enabling Regional Options for Multiple Languages
Subtopics
l Enabling Regional Options in Windows XP
l Enabling Regional Options in Windows 2003
When you enable the appropriate languages in Windows, Integration Services Console candisplay OLAP model and metaoutline elements in the languages of the source database.Integration Services Console uses the settings you configure in Windows to display languages.
Enabling Regional Options in Windows XP
ä To enable the Regional and Language Options in Windows XP:
1 In the Windows taskbar, select Start, then, Settings, then Control Panel and double-click Regionaland Language Options.
The Regional Options tab of the Regional and Language Options dialog box is displayed.
2 In the Standards and formats frame, from the drop-down list, select the appropriate language to usefor formatting items such as numbers, currencies, time, and dates.
In most cases, you set this language to match your location.
3 Click the Languages tab and click the Details button.
The Text Services and Input Languages dialog box is displayed.
4 In the Installed services frame, click Add.
5 In the Input Languages list, select the language that you want to add and select the check box for thetype of text service you want to install.
For example, you may select Cyrillic to display Russian characters or Simplified Chinese andTraditional Chinese to display Chinese characters.
6 If the languages that you need do not appear in the Input Languages frame, or if you want to add aspecific code page to a language, click the Advanced tab and perform the following tasks:
a. In the Code page conversion tables frame, select the appropriate code page conversiontables.
Select the code page tables that correspond to the languages that you want to display onthe Integration Services Console computer.
b. Click Apply.
7 Click OK to close the Regional Language and Options dialog box.
For more information on Windows Regional Language and Options, refer to the WindowsXP documentation.
Enabling Regional Options for Multiple Languages 35
Enabling Regional Options in Windows 2003
ä To enable the Regional and Language Options in Windows 2003:
1 In the Windows taskbar, select Start, then Control Panel and double-click Regional and LanguageOptions.
The Regional Options tab of the Regional and Language Options dialog box is displayed.
2 In the Standards and formats frame, from the drop-down list, select the appropriate language to usefor formatting items such as numbers, currencies, time, and dates.
In most cases, you set this language to match your location.
3 Click the Languages tab and click the Details button.
The Text Services and Input Languages dialog box is displayed.
4 In the Default input language drop-down list, select the installed input language to use.
5 If the language you want does not appear in the Default input language drop-down list, click Add inthe Installed services frame.
The Add Input Language dialog box is displayed.
6 In the Input languages list, select the language that you want to add.
7 In the Keyboard layout/IME list, select the check box for the type of text service you want to install andclick OK.
For example, you may select Cyrillic to display Russian characters or Simplified Chinese andTraditional Chinese to display Chinese characters.
8 Optional: If the languages that you need do not appear in the Add input languages dialog box, or if youwant to add a specific code page to a language, perform the following steps:
a. Click Cancel to close both the Add input languages dialog box.
b. Click Cancel to close the Text Services and Languages dialog box.
c. In the Regional and Language Options dialog box, click the Advanced tab.
d. In the Code page conversion tables frame, select the appropriate code page conversiontables.
Select the code page tables that correspond to the languages that you want to display onthe Integration Services Console computer.
e. Click Apply.
9 Click OK to close the Regional Language and Options dialog box.
For more information on Windows Regional Language and Options, refer to the Windows2003 documentation.
36 Using Essbase Integration Server

Creating Database User Aliases and SynonymsWhen using the sample application, you must connect to TBC_MD as user TBC unless you setup your user name as an alias or synonym for TBC.
l On Microsoft SQL Server, make your login user name an alias of TBC.
l On IBM DB2 and Oracle, log in with your user name and password, and create synonymsthat map to the tables in TBC_MD.
This user alias or table synonym enables you to access a table that is qualified by TBC becauseit was created by the TBC user; for example, TBC.MO_INFO in the TBC_MD OLAP MetadataCatalog.
For more information, see the documentation for the RDBMS you are using.
Scheduling Jobs in UNIX
ä To schedule jobs, perform the following steps:
1 Set up the $ENV variable to a file that initializes the environment for Integration Services, includingrunning is.sh.
2 Give authorization to the Integration Services user to schedule jobs using the cron scheduling daemon.
After the configurations are complete, you can access the relational data source to create anOLAP Metadata Catalog and—if you choose—to set up the sample application. For moreinformation about creating the OLAP Metadata Catalog, see Chapter 3, “Creating, Upgrading,and Deleting OLAP Metadata Catalogs” For more information about setting up the sampleapplication, see Chapter 5, “Setting Up the Sample Applications.”
Starting the Windows Task Scheduler ServiceIntegration Services uses the Task Scheduler service for the Windows platforms to performscheduled member and data loads. To allow loads to be scheduled, you must ensure that bothof these conditions are met:
l The Task Scheduler service must be started on the computer that runs Essbase IntegrationServer.
l The Task Scheduler service is enabled to start automatically each time the computer thatruns Essbase Integration Server is started.
ä To start the Windows Task Scheduler service:
1 On the Windows desktop, click Start.
2 Select Control Panel.
3 In the Control Panel window, click Administrative Tools.
Creating Database User Aliases and Synonyms 37
4 In the Administrative Tools window, double-click the Services icon.
5 In the list of services, locate Task Scheduler and verify that the entry in the Status column is Startedand the entry in the Startup type column is Automatic.
If you must change one or both entries, this is the process:
a. Double-click Task Scheduler.
b. In the Task Scheduler Properties dialog box, select the General tab.
c. Under Startup type, select Automatic.
d. To start the service, click Start in the Task Scheduler Properties dialog box.
38 Using Essbase Integration Server
2Configuring Data Sources
In This Chapter
About Data Source Configuration ... . . . . . . . . . . . . . . . . . . . . . . . . . . . . . . . . . . . . . . . . . . . . . . . . . . . . . . . . . . . . . . . . . . . . .39
Configuring Data Source Names on Windows Systems ... . . . . . . . . . . . . . . . . . . . . . . . . . . . . . . . . . . . . . . . . . . . . .41
Configuring Data Source Names on UNIX Systems ... . . . . . . . . . . . . . . . . . . . . . . . . . . . . . . . . . . . . . . . . . . . . . . . . . .51
After Configuration of Data Source Names ... . . . . . . . . . . . . . . . . . . . . . . . . . . . . . . . . . . . . . . . . . . . . . . . . . . . . . . . . . . .61
Connecting to Server Components and Data Sources ... . . . . . . . . . . . . . . . . . . . . . . . . . . . . . . . . . . . . . . . . . . . . . .61
Mapping JDBC Data Sources for Windows (Teradata Only).. . . . . . . . . . . . . . . . . . . . . . . . . . . . . . . . . . . . . . . . . . .67
Mapping JDBC Data Sources for UNIX (Teradata Users Only) .. . . . . . . . . . . . . . . . . . . . . . . . . . . . . . . . . . . . . . . .68
Manually Configuring the Environment for UNIX Systems ... . . . . . . . . . . . . . . . . . . . . . . . . . . . . . . . . . . . . . . . . . . .70
To create OLAP models or build metaoutlines, you must connect Integration Services to adatabase that contains metadata (the OLAP Metadata Catalog database) and to a database inwhich needed users’ data is stored (the Data Source database). To make these connections, youmust configure a data source name for an OLAP Metadata Catalog database and a Data Sourcedatabase. You do this by mapping a supported Open Database Connectivity (ODBC) driver toeach database.
Note: You are not required to use two different databases for your Data Source database andOLAP Metadata Catalog database. Additionally, you are not required to use two differentdata source names to connect to the Data Source database and OLAP Metadata Catalogdatabase if the two databases reside in the same database.
About Data Source ConfigurationIn Integration Services, a data source name must be configured for the source database or flatfiles that contains users’ data (the Data Source database). A data source must also be configuredfor the relational database that contains the OLAP Metadata Catalog. Databases, including anOLAP Metadata Catalog, can run on any supported platform, provided that you have the ODBCdriver and, in some cases, the database client software needed to access them.
The Integration Services installation program installs DataDirect ODBC driver files that you useto configure data source names for both the Data Source database and OLAP Metadata Catalogdatabase.
About Data Source Configuration 39
If database client software is required, the relational database management system (RDBMS)should include one of the database clients listed in the Oracle Hyperion Enterprise PerformanceManagement System Certification Matrix (http://www.oracle.com/technology/software/products/ias/files/fusion_certification.html)>. If your configuration requires database clientsoftware, ensure that the versions of the database client and the RDBMS are compatible.
This chapter provides information on how to configure ODBC drivers. For information on howto install and configure database client software, see the RDBMS documentation.
Note: Integration Services does not support data source table names and column names thatcontain spaces or special characters, such as a period (.). See Appendix B, “IntegrationServices Limits and Guidelines” for a complete listing of the unsupported characters.
On Windows, use the ODBC Administrator to configure ODBC data sources. All ODBC datasource names are configured only on the computer that runs Essbase Integration Server.
Note: If a supported ODBC driver is already mapped to a Data Source database, you do notneed to map it again. In this case, you need to map a supported ODBC driver only to theOLAP Metadata Catalog database.
Server and Client Software and ODBC ConnectionsIntegration Server runs on Windows, AIX, HP-UX, Solaris, or Red Hat Enterprise Linux. Youmust install Integration Server software, including ODBC drivers, and if required, database clientsoftware on the Integration Server computer.
Integration Services client software runs on Windows. You must install the Integration ServicesConsole software on Integration Services client computers.
Configure the ODBC connections to the Data Source database and the OLAP Metadata Catalogdatabase only on the computer running Integration Server. You do not need to configure ODBCconnections on Integration Services client computers.
Supported ODBC DriversFor a complete list of supported ODBC drivers by platform, see the Oracle Hyperion EnterprisePerformance Management System Installation and Configuration Guide, available on the OracleTechnical Network.
For detailed information on the DataDirect Wire Protocol drivers provided with IntegrationServices, see the DataDirect Connect ODBC Reference in PDF format in the products\common\ODBC\Merant\6.0\books (for Windows) directory or products/common/ODBC/Merant/6.0/books (for UNIX) directory. Use Adobe Acrobat Reader, which is available for freedownload at www.adobe.com) to read the PDF files.
40 Configuring Data Sources

Configuring Data Source Names on Windows SystemsTo configure data source names on Windows systems, you must start ODBC Administrator andthen map an ODBC driver to one or more relational databases or flat file data sources that youwill use for creating and storing OLAP models and metaoutlines. Run the ODBC Administratorutility from the Windows Control Panel.
Note: Integration Services does not support data source table names and column names thatcontain spaces or special characters, such as a period (.). See Appendix B, “IntegrationServices Limits and Guidelines” for a complete list of the unsupported characters.
The procedures in the following sections show you how to configure data source names to createconnections to databases. The examples in the procedures use a database named TBC as thesample Data Source database and a database named TBC_MD as the sample OLAP MetadataCatalog database.
For each site-specific data source name that you configure, obtain the following informationfrom your database administrator:
l The name of the relational database or flat file data source for which you want to configurea data source name
For example, in the sample application, TBC is the name of the Data Source database;TBC_MD is the name of the OLAP Metadata Catalog database.
l IP address or name of the computer on which the database tables are stored
You can enter either an alphabetic computer name (for example, sequoia), or an IP address(for example, 172.0.0.125).
In the sample application, if you are configuring a data source name for the TBC database,use the IP address of the computer where the TBC database tables are stored. If you areconfiguring a data source name for the TBC_MD database (the sample OLAP MetadataCatalog database), use the IP address of the computer where the TBC_MD tables are stored.
l Port number on which your database listens
For clarity in presenting the sample application in Integration Services Console, the sampleData Source database and sample OLAP Metadata Catalog database are two separatedatabases that use two different data source names.
If your data is stored in a relational database, you are not required to use two differentdatabases for your Data Source database and OLAP Metadata Catalog database.Additionally, you are not required to use two different data source names to connect to yourData Source database and OLAP Metadata Catalog database if all the tables reside in thesame database.
If your data is stored in one or more flat files, you must still use a relational database whensetting up your OLAP Metadata Catalog database.
Configuring Data Source Names on Windows Systems 41

Note: If you plan to use flat files as data sources, you must configure their Data Source Name(DSN). See “Configuring the DataDirect Text Driver on Windows” on page 45 fordetailed instructions.
Accessing ODBC Data Source Administrator in WindowsFor any RDBMS, you must access the Windows ODBC Data Source Administrator to begin thedata source name configuration process.
ä To access the Administrator:
1 On the Windows desktop, select Start, then Settings, then Control Panel to open the Control Panelwindow.
2 In the Control Panel window, double-click the Administrative Tools icon, and then double-click theData Sources (ODBC) icon to open the ODBC Data Source Administrator dialog box.
3 In the ODBC Data Source Administrator dialog box, click the System DSN tab.
Configuring DataDirect Wire Protocol Drivers in WindowsUse the following procedures to configure a data source name for your Data Source databaseusing a DataDirect Wire Protocol driver for Oracle, IBM DB2. Then repeat the procedure toconfigure a data source name for the relational database that you want to use as your OLAPMetadata Catalog database.
Before beginning the configuration procedure, perform the procedure in “Accessing ODBC DataSource Administrator in Windows” on page 42.
Note: You may repeat the configuration procedure to create any number of data source namesto relational Data Source databases or OLAP Metadata Catalog databases.
ä To configure a data source name:
1 In the ODBC Data Source Administrator, click Add to open the Create New Data Source dialog box.
2 In the driver list box of the Create New Data Source dialog box, select the appropriate Wire Protocoldriver for your RDBMS, and click Finish.
The Wire Protocol Driver Setup dialog box for your RDBMS is displayed.
3 In the Data Source Name text box, type the name that you want to use for this data source connection.
In the sample application, TBC is the data source name used to connect to the Data Sourcedatabase called TBC; TBC_MD is the data source name used to connect to the sample OLAPMetadata Catalog database called TBC_MD.
4 Optional: If you want to record a description, in the Description text box, type a description that indicateshow you use this data source name.
For example, you might type the following to describe the My Business database:
42 Configuring Data Sources
Customers, products, markets
You might type the following to describe the sample application database:
Sample relational data source
You might type the following to describe the sample OLAP Metadata Catalog database:
Sample OLAP Metadata Catalog
5 Make the necessary entries to configure data source names by completing the set of steps appropriateto your RDBMS.
Refer to the following sections for the specific configuration instructions for your RDBMS:
l “IBM DB2 UDB or DB2 OS/390” on page 43
l “Oracle” on page 44
6 Test the connection by following the procedures in “Testing DataDirect Wire Protocol Drivers on Windows”on page 44.
When you finish testing, repeat Step 2 through Step 5 to configure a data source name for anOLAP Metadata Catalog database.
IBM DB2 UDB or DB2 OS/390
ä Perform the following steps to configure the Wire Protocol driver for IBM DB2 UDB or OS/390:
1 In the IP Address text box, type the address (either the computer name or the numeric IP address) ofthe computer where the database tables are stored.
2 In the Tcp Port text box, type the port number on which the IBM DB2 database server listens.
l If you are using IBM DB2 UDB, the default port number is 50000.
l If you are using IBM DB2 OS/390, the default port number is 446.
3 If you are using IBM DB2 UDB, in the Database Name text box, type the name of the database for whichyou want to create this data source name.
4 If you are using IBM DB2 OS/390, perform the following actions:
a. In the Location text box, type the IBM DB2 location name as defined during the IBMDB2 OS/390 installation.
b. In the Collection text box, type the name that identifies a logical group of databaseobjects (the default is DATADIRECT00).
Note: For IBM DB2 OS/390, you configure a data source name for the Data Sourcedatabase only. You cannot configure a data source name for the OLAP MetadataCatalog database. OLAP Metadata Catalog functionality is not supported in IBMDB2 OS/390.
Configuring Data Source Names on Windows Systems 43
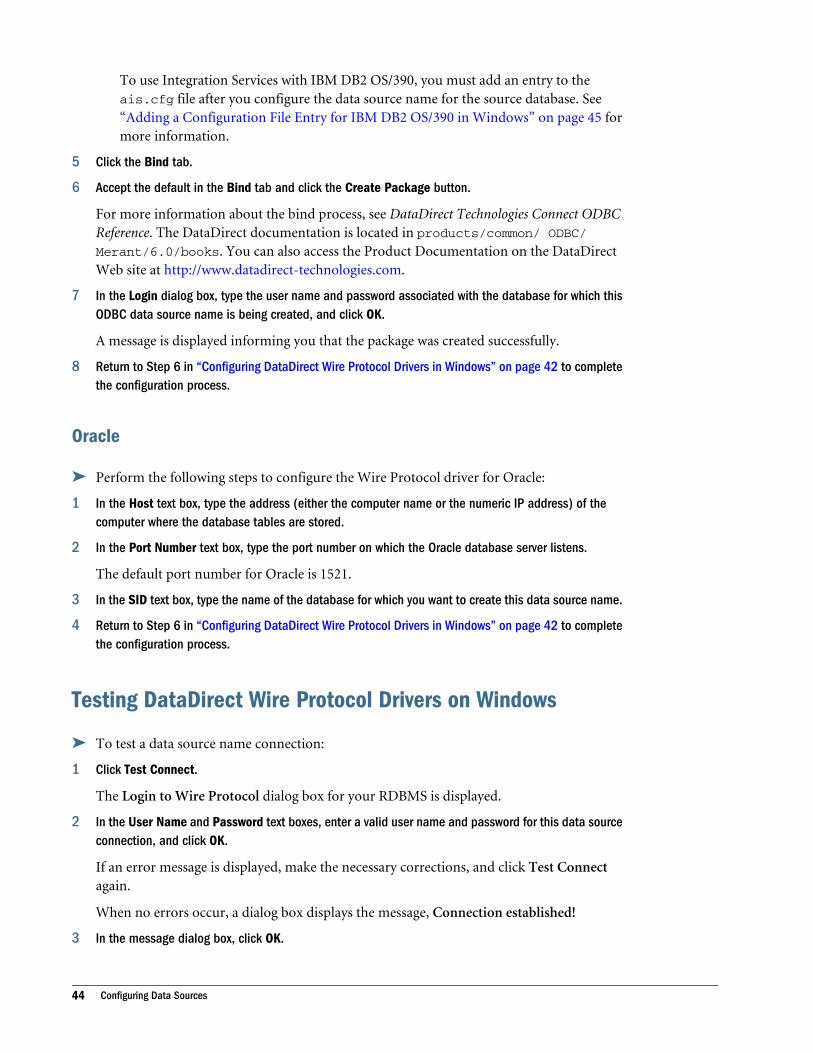
To use Integration Services with IBM DB2 OS/390, you must add an entry to theais.cfg file after you configure the data source name for the source database. See“Adding a Configuration File Entry for IBM DB2 OS/390 in Windows” on page 45 formore information.
5 Click the Bind tab.
6 Accept the default in the Bind tab and click the Create Package button.
For more information about the bind process, see DataDirect Technologies Connect ODBCReference. The DataDirect documentation is located in products/common/ ODBC/Merant/6.0/books. You can also access the Product Documentation on the DataDirectWeb site at http://www.datadirect-technologies.com.
7 In the Login dialog box, type the user name and password associated with the database for which thisODBC data source name is being created, and click OK.
A message is displayed informing you that the package was created successfully.
8 Return to Step 6 in “Configuring DataDirect Wire Protocol Drivers in Windows” on page 42 to completethe configuration process.
Oracle
ä Perform the following steps to configure the Wire Protocol driver for Oracle:
1 In the Host text box, type the address (either the computer name or the numeric IP address) of thecomputer where the database tables are stored.
2 In the Port Number text box, type the port number on which the Oracle database server listens.
The default port number for Oracle is 1521.
3 In the SID text box, type the name of the database for which you want to create this data source name.
4 Return to Step 6 in “Configuring DataDirect Wire Protocol Drivers in Windows” on page 42 to completethe configuration process.
Testing DataDirect Wire Protocol Drivers on Windows
ä To test a data source name connection:
1 Click Test Connect.
The Login to Wire Protocol dialog box for your RDBMS is displayed.
2 In the User Name and Password text boxes, enter a valid user name and password for this data sourceconnection, and click OK.
If an error message is displayed, make the necessary corrections, and click Test Connectagain.
When no errors occur, a dialog box displays the message, Connection established!
3 In the message dialog box, click OK.
44 Configuring Data Sources
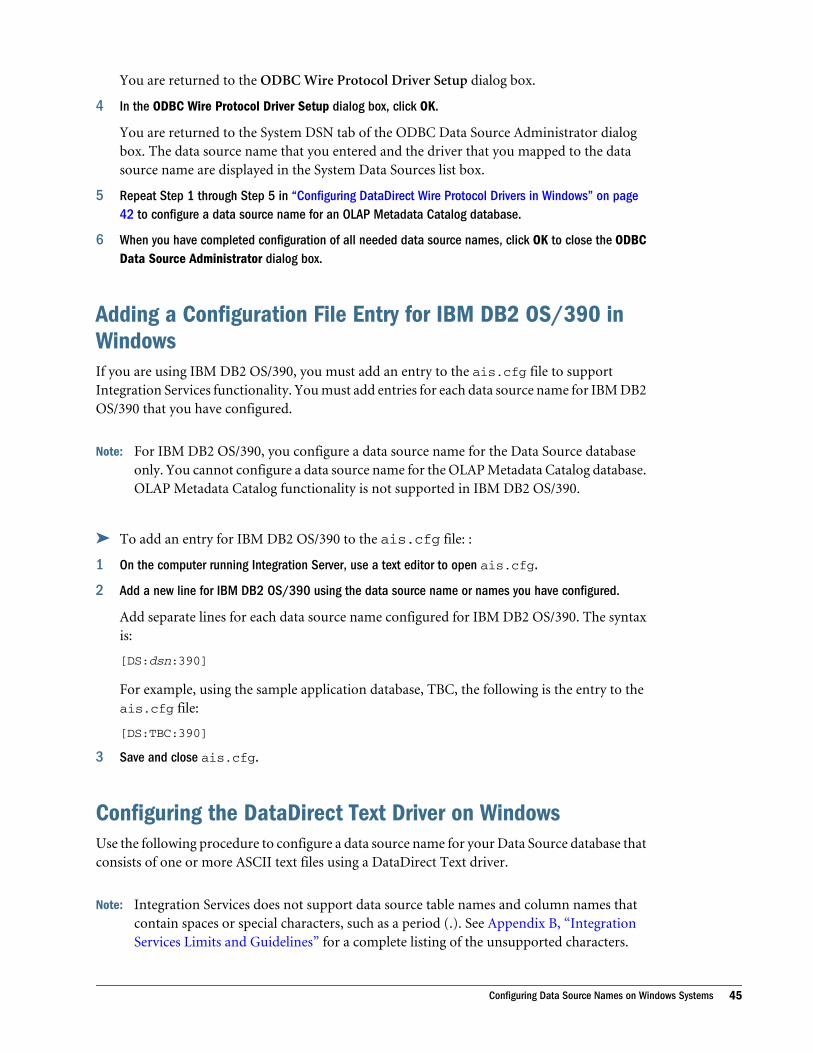
You are returned to the ODBC Wire Protocol Driver Setup dialog box.
4 In the ODBC Wire Protocol Driver Setup dialog box, click OK.
You are returned to the System DSN tab of the ODBC Data Source Administrator dialogbox. The data source name that you entered and the driver that you mapped to the datasource name are displayed in the System Data Sources list box.
5 Repeat Step 1 through Step 5 in “Configuring DataDirect Wire Protocol Drivers in Windows” on page42 to configure a data source name for an OLAP Metadata Catalog database.
6 When you have completed configuration of all needed data source names, click OK to close the ODBCData Source Administrator dialog box.
Adding a Configuration File Entry for IBM DB2 OS/390 inWindowsIf you are using IBM DB2 OS/390, you must add an entry to the ais.cfg file to supportIntegration Services functionality. You must add entries for each data source name for IBM DB2OS/390 that you have configured.
Note: For IBM DB2 OS/390, you configure a data source name for the Data Source databaseonly. You cannot configure a data source name for the OLAP Metadata Catalog database.OLAP Metadata Catalog functionality is not supported in IBM DB2 OS/390.
ä To add an entry for IBM DB2 OS/390 to the ais.cfg file: :
1 On the computer running Integration Server, use a text editor to open ais.cfg.
2 Add a new line for IBM DB2 OS/390 using the data source name or names you have configured.
Add separate lines for each data source name configured for IBM DB2 OS/390. The syntaxis:
[DS:dsn:390]
For example, using the sample application database, TBC, the following is the entry to theais.cfg file:
[DS:TBC:390]
3 Save and close ais.cfg.
Configuring the DataDirect Text Driver on WindowsUse the following procedure to configure a data source name for your Data Source database thatconsists of one or more ASCII text files using a DataDirect Text driver.
Note: Integration Services does not support data source table names and column names thatcontain spaces or special characters, such as a period (.). See Appendix B, “IntegrationServices Limits and Guidelines” for a complete listing of the unsupported characters.
Configuring Data Source Names on Windows Systems 45
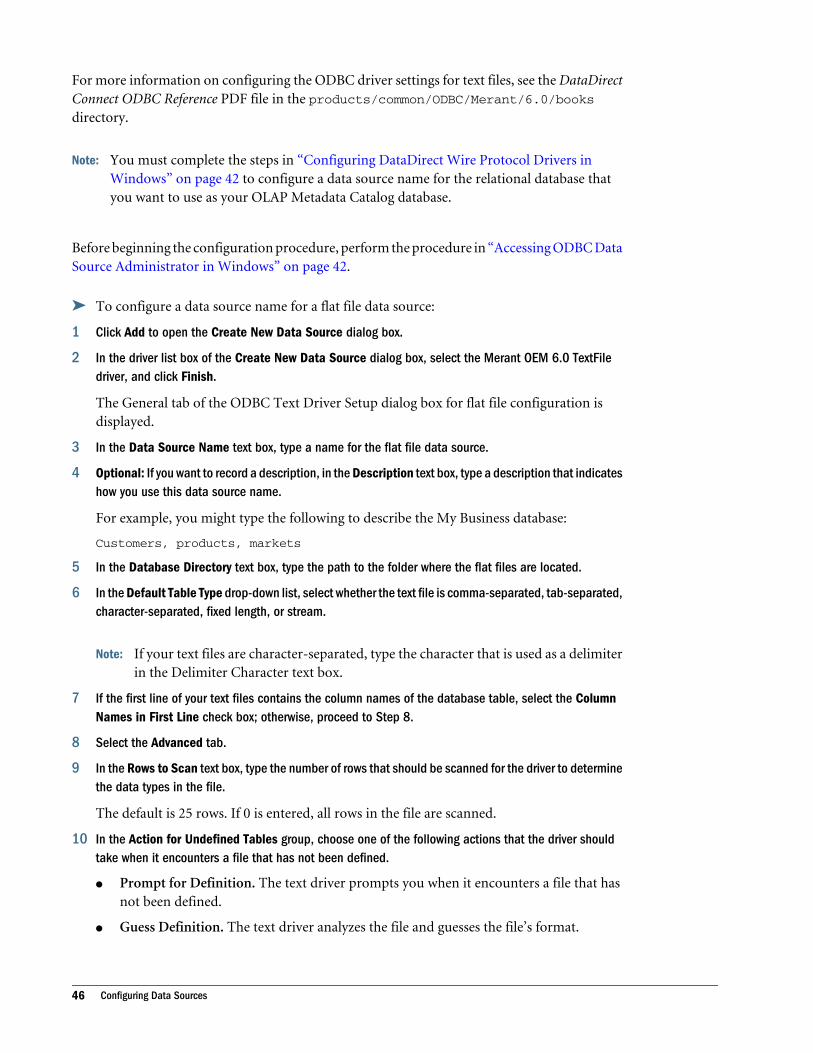
For more information on configuring the ODBC driver settings for text files, see the DataDirectConnect ODBC Reference PDF file in the products/common/ODBC/Merant/6.0/booksdirectory.
Note: You must complete the steps in “Configuring DataDirect Wire Protocol Drivers inWindows” on page 42 to configure a data source name for the relational database thatyou want to use as your OLAP Metadata Catalog database.
Before beginning the configuration procedure, perform the procedure in “Accessing ODBC DataSource Administrator in Windows” on page 42.
ä To configure a data source name for a flat file data source:
1 Click Add to open the Create New Data Source dialog box.
2 In the driver list box of the Create New Data Source dialog box, select the Merant OEM 6.0 TextFiledriver, and click Finish.
The General tab of the ODBC Text Driver Setup dialog box for flat file configuration isdisplayed.
3 In the Data Source Name text box, type a name for the flat file data source.
4 Optional: If you want to record a description, in the Description text box, type a description that indicateshow you use this data source name.
For example, you might type the following to describe the My Business database:
Customers, products, markets
5 In the Database Directory text box, type the path to the folder where the flat files are located.
6 In the Default Table Type drop-down list, select whether the text file is comma-separated, tab-separated,character-separated, fixed length, or stream.
Note: If your text files are character-separated, type the character that is used as a delimiterin the Delimiter Character text box.
7 If the first line of your text files contains the column names of the database table, select the ColumnNames in First Line check box; otherwise, proceed to Step 8.
8 Select the Advanced tab.
9 In the Rows to Scan text box, type the number of rows that should be scanned for the driver to determinethe data types in the file.
The default is 25 rows. If 0 is entered, all rows in the file are scanned.
10 In the Action for Undefined Tables group, choose one of the following actions that the driver shouldtake when it encounters a file that has not been defined.
l Prompt for Definition. The text driver prompts you when it encounters a file that hasnot been defined.
l Guess Definition. The text driver analyzes the file and guesses the file’s format.
46 Configuring Data Sources

Note: The options in the Return Additional Tables group are not supported.
11 Complete the following steps to define the structure of your data source text files:
a. Click the Define button to display the Define File dialog box.
b. Navigate to the folder that contains your data source text files.
c. Select a text file to define and click Open to display the Define Table dialog box.
d. In the Table text box, type a table name to associate with this text file.
The table name you define is the table name that will be displayed in the left frame ofthe OLAP Model main window.
e. If the first line of text in the file contains the column names, select the Column Namesin the First Line check box.
If the first line of the text file does not contain the column names, then do not select thischeck box.
f. From the Table Type drop-down list, select the delimiter that is used in the text file.
g. If you select Character in the Table Type drop-down list in Step f, specify the characterin the Delimiter Character text box.
You can specify any printable character except single and double quotation marks.
h. In the Decimal Symbol text box, specify either a comma or period as a decimal separatorto use when data is stored.
12 Perform one of the following actions to define the column names:
l If you specified in Step 11f that your text files were comma-separated, tab-separated, orcharacter-separated, click the Guess button to have the text driver guess at the columnnames and display them in the list box under Column Information.
l If you specified in Step 11f that your text files were fixed-length or stream type, click theParse button to display the Parse Table dialog box, where you define the table columnnames.
For more information on using the Parse Table dialog box, see the DataDirect ConnectODBC Reference. You can also view the DataDirect online help by clicking the Helpbutton in the Parse Table dialog box.
l If you want to define the values and fields for each column manually, click Add to addthe column name to the list box under Column Information.
For each table that you add manually, you must specify the data type, data mask (whereappropriate), column precision, column scale, length, and offset. For more informationon these settings, see the DataDirect Connect ODBC Reference. You can also view theDataDirect online help by clicking the Help button in the Define Table dialog box.
13 Optional: Modify or delete any of the existing column definitions by selecting a column name in the listbox under Column Definition and clicking the Modify or Remove button.
14 Click OK to define the table.
15 Complete Step 11 through Step 14 for each data source table that you want to define.
Configuring Data Source Names on Windows Systems 47
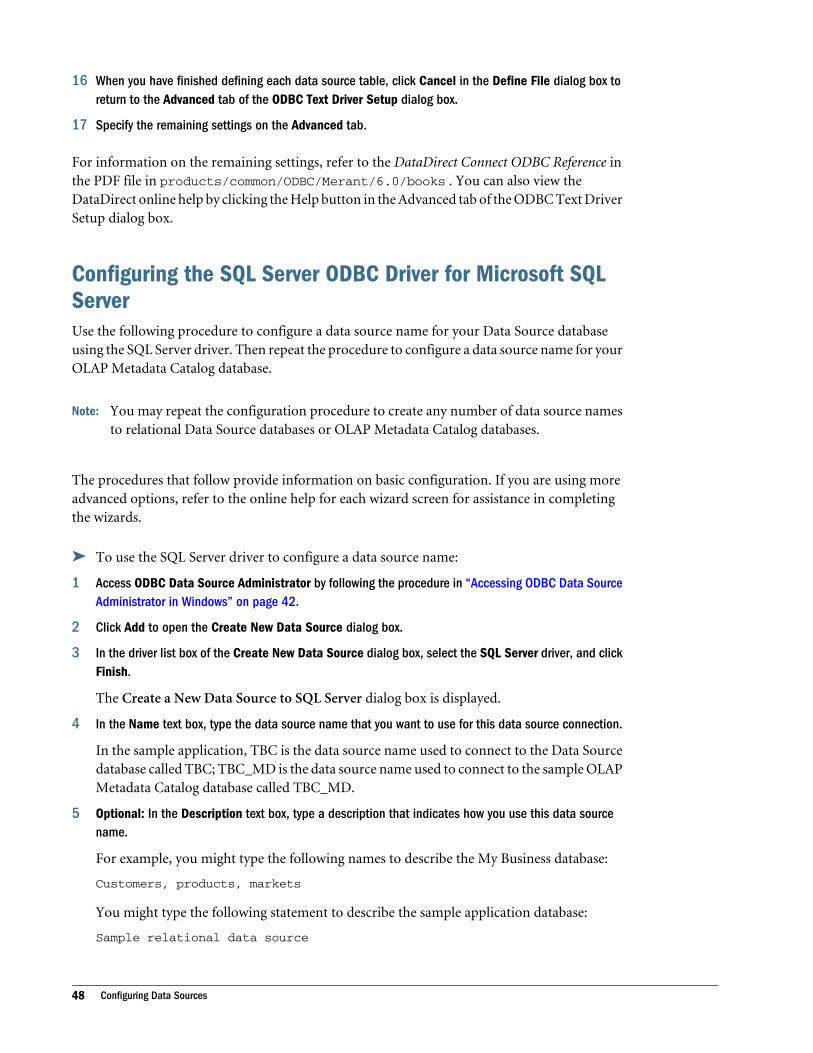
16 When you have finished defining each data source table, click Cancel in the Define File dialog box toreturn to the Advanced tab of the ODBC Text Driver Setup dialog box.
17 Specify the remaining settings on the Advanced tab.
For information on the remaining settings, refer to the DataDirect Connect ODBC Reference inthe PDF file in products/common/ODBC/Merant/6.0/books . You can also view theDataDirect online help by clicking the Help button in the Advanced tab of the ODBC Text DriverSetup dialog box.
Configuring the SQL Server ODBC Driver for Microsoft SQLServerUse the following procedure to configure a data source name for your Data Source databaseusing the SQL Server driver. Then repeat the procedure to configure a data source name for yourOLAP Metadata Catalog database.
Note: You may repeat the configuration procedure to create any number of data source namesto relational Data Source databases or OLAP Metadata Catalog databases.
The procedures that follow provide information on basic configuration. If you are using moreadvanced options, refer to the online help for each wizard screen for assistance in completingthe wizards.
ä To use the SQL Server driver to configure a data source name:
1 Access ODBC Data Source Administrator by following the procedure in “Accessing ODBC Data SourceAdministrator in Windows” on page 42.
2 Click Add to open the Create New Data Source dialog box.
3 In the driver list box of the Create New Data Source dialog box, select the SQL Server driver, and clickFinish.
The Create a New Data Source to SQL Server dialog box is displayed.
4 In the Name text box, type the data source name that you want to use for this data source connection.
In the sample application, TBC is the data source name used to connect to the Data Sourcedatabase called TBC; TBC_MD is the data source name used to connect to the sample OLAPMetadata Catalog database called TBC_MD.
5 Optional: In the Description text box, type a description that indicates how you use this data sourcename.
For example, you might type the following names to describe the My Business database:
Customers, products, markets
You might type the following statement to describe the sample application database:
Sample relational data source
48 Configuring Data Sources

You might type the following statement to describe the sample OLAP Metadata Catalogdatabase:
Sample OLAP Metadata Catalog
6 In the Server text box, type the address (either the computer name or the numeric IP address) of thecomputer where the database tables are stored.
7 Click Next.
The second wizard screen is displayed.
8 Select the appropriate option button for the method to use for verifying login IDs:
l With Window NT authentication using the network login ID.
l With SQL Server authentication using a login ID and password entered by the user.
9 Optional: If you are using a network library other than TCP/IP (the default) to connect to the databaseserver, perform the following steps:
a. Click the Client Configuration button.
b. In the Network libraries list, select the appropriate option button for the library thatyou are using to connect to the database server computer, and click OK.
You are returned to the second wizard screen.
10 Optional: Select the Connect to SQL Server to obtain default settings for the additionalconfiguration check box.
When this check box is selected, the driver obtains default settings from Microsoft SQLServer that it uses to complete additional setup screens in the wizard.
When this check box is clear, the driver uses standard defaults to complete the additionalsetup screens in the wizard.
11 Click Next.
The third wizard screen is displayed.
12 Select the Change the default database to check box and then type or select the name of the databasefor which you want to create this data source name.
For example, in the sample application, TBC is the name of the Data Source database;TBC_MD is the name of the OLAP Metadata Catalog database.
13 Click Next.
The fourth wizard screen is displayed.
14 Make any entries appropriate to your system configuration and click Finish.
15 Repeat Step 2 through Step 14 to configure a data source name for an OLAP Metadata Catalog.
16 When you have completed configuring all needed data sources, click OK to close the ODBC Data SourceAdministrator dialog box.
Configuring Data Source Names on Windows Systems 49
Configuring the Teradata ODBC Driver for TeradataUse the following procedure to configure a data source name for your Data Source databaseusing the Teradata driver. Then repeat the procedure to configure a data source name for therelational database that you want to use as your OLAP Metadata Catalog database.
Note: You may repeat the configuration procedure to create any number of data source namesto Data Source databases or OLAP Metadata Catalog databases.
ä To configure a data source name:
1 Access the ODBC Data Source Administrator by following the procedure in “Accessing ODBC DataSource Administrator in Windows” on page 42.
2 Click Add to open the Create New Data Source dialog box.
3 In the driver list box of the Create New Data Source dialog box, select Teradata, and click Finish.
The ODBC Driver Setup for Teradata RDBMS dialog box is displayed.
4 In the Name text box, type the data source name that you want to use for this data source connection.
In the sample application, TBC is the data source name used to connect to the Data Sourcedatabase called TBC; TBC_MD is the data source name used to connect to the sample OLAPMetadata Catalog database called TBC_MD.
5 Optional: In the Description text box, type an description that indicates how you use this data sourcename.
For example, you might type the following to describe the My Business database:
Customers, products, markets
You might type the following to describe the sample application database:
Sample relational data source
You might type the following to describe the sample OLAP Metadata Catalog database:
Sample OLAP Metadata Catalog
6 In the Teradata Server Info text box, type the address (either the computer name or the numeric IPaddress) of the computer where the database tables are stored.
7 In the Default Database text box, type the name of the database for which you want to create this datasource name.
For example, in the sample application, TBC is the name of the Data Source database;TBC_MD is the name of the OLAP Metadata Catalog database.
8 Optional: Enable the X Views option for Teradata.
You can limit the number of data sources displayed in the left frame of an OLAP Modelmain window based on the security of the Teradata user ID that was used to connect. Followsteps a through c to enable the X Views option:
a. Click the Options button.
50 Configuring Data Sources
b. Check the Use X Views check box.
c. Click OK to return to the ODBC Driver Setup for Teradata RDBMS dialog box.
9 Click OK to return to the System DSN tab of the ODBC Data Source Administrator dialog box.
The data source name that you entered and the driver that you mapped to it are displayedin the System Data Sources list box.
10 Repeat Step 2 through Step 9 above to configure a data source name for an OLAP Metadata Catalog.
Note: You may repeat the above procedure to create any number of data source connectionsto relational data sources or OLAP Metadata Catalogs.
11 When you have completed configuring all needed data sources, click OK to close the ODBC Data SourceAdministrator dialog box.
Editing a Data Source Name
ä To edit configuration information for a data source name:
1 Access the ODBC Data Source Administrator by following the procedures in “Accessing ODBC DataSource Administrator in Windows” on page 42.
2 Select the data source name and click Configure to open the driver setup dialog box or wizard specificto your RDBMS.
3 Correct any information that you want to change.
Configuring Data Source Names on UNIX SystemsODBC Administrator is not available on UNIX systems. On AIX, HP-UX, Solaris, and Linux,you must manually set environment variables and edit the odbc.ini file. You can edit theodbc.ini file (using a text editor such as vi) to configure, add, or change data sources names,and to add or change drivers.
Note: Integration Services does not support data source table names and column names thatcontain spaces or special characters, such as a period (.). See Appendix B, “IntegrationServices Limits and Guidelines” for a complete listing of the unsupported characters.
Flat File Data Sources: If you are using a flat file data source, you must define the structure ofthe text files in your data source in a QETXT.INI file. The process for creating the QETXT.INIfile for UNIX operating systems is described in the DataDirect Connect ODBC Reference in thePDF file in products/common/ODBC/Merant/6.0/books.
Configuring Data Source Names on UNIX Systems 51
Configuring Environment VariablesOn UNIX systems, you must set environment variables to enable access to ODBC corecomponents. The is.sh and is.csh shell scripts that set the required variables are providedin the Integration Services home directory.
You must run one of the scripts before starting Integration Server and using ODBC to connectto Data Source databases and OLAP Metadata Catalog databases. You can include the scripts inthe login script for the user name that you use to run Integration Server.
Teradata: If you are using Teradata drivers, you must set environment variables to point to thelocation of the installed drivers.
Note: Use the env command to verify environment settings.
Editing the odbc.ini FileYou configure data source names for a Data Source database or OLAP Metadata Catalog databasein an odbc.ini file. In one section of the file, add a name and description for the ODBC datasource. In a separate, newly created section of the file, provide the ODBC driver path, file name,and all other required driver settings.
The Integration Services installation program installs a sample odbc.ini file in theproducts/common/ODBC/Merant/6.0 directory. The file contains generic ODBC connectionand configuration information for supported ODBC drivers. Use the file as a starting point tomap the ODBC drivers that you use to the Data Source database and OLAP Metadata Catalogdatabase.
IBM DB2: For each server computer to which you are connecting using the DataDirect WireProtocol driver, you must create a bind package. DataDirect supplies a program that creates thebind package for you. See “Creating IBM DB2 Bind Packages for DataDirect Wire ProtocolDriver Connections” on page 59 for instructions on using the DataDirect-supplied program.
Teradata: When configuring a data source name, the data source description must be set totdata.sl (HP-UX) or tdata.so (AIX and Solaris). Specific examples for AIX, HP-UX, andSolaris operating systems are shown in “Examples of ODBC Settings for Teradata” on page58.
Tip: The procedure in this section shows you how to configure a data source name by manuallyediting the odbc.ini file.
Note: If you use a file other than the odbc.ini file (located by default in products/common/ODBC/Merant/6.0), be sure to set the ODBCINI environment variable to the name ofthe file that you use.
ä To add an ODBC data source to an odbc.ini file:
1 On the computer running Integration Server, open the odbc.ini file by using a text editor such as vi.
52 Configuring Data Sources
2 Locate the section starting with [ODBC Data Sources] and add a new line with the data sourcename and description; for example:
mydata=data source for analysis
To minimize confusion, the data source name can match the name of the database in theRDBMS.
3 Add a new section to the file by creating a new line with the new data source name enclosed in brackets;for example:
[mydata]
4 On the lines following the data source name, add the full path and file name for the ODBC driver requiredfor this data source and any other required ODBC driver information.
Use the examples shown in the following sections as guidelines for specific RDBMSs.
Note: Ensure that the ODBC driver file actually exists in the location that you specify forthe Driver= setting.
5 Add a new section to the file by creating a new line with ODBC enclosed in brackets; for example:
[ODBC]
6 Under the [ODBC] heading, add the full path to the location where the /lib and /messagesdirectories are contained.
Use the examples shown in the following sections as guidelines for specific RDBMSs.
7 When you finish editing odbc.ini, save the file and exit the text editor.
For information about the odbc.ini file and the ODBC driver settings for each RDBMS or flatfile data source, see the DataDirect Connect ODBC Reference in the PDF file and the Readme filesin the products/common/ODBC/Merant/6.0/books directory. For information aboutvendor-supplied ODBC driver settings, refer to the installation documentation for the vendor-supplied ODBC drivers.
Flat File Data Sources: If you are using a flat file data source, you must define the structure ofthe text files in your data source in a QETXT.INI file. The process for creating the QETXT.INIfile for UNIX operating systems is described in the DataDirect Connect ODBC Reference in thePDF file in products/common/ODBC/Merant/6.0/books.
Examples of ODBC Settings for IBM DB2 UDBThe following example illustrates how you might edit odbc.ini to connect to a Data Sourcedatabase, such as db2data on IBM DB2 version 8.2 (on AIX), using a DataDirect Wire Protocoldriver. You can make a separate entry to connect to the OLAP Metadata Catalog database.
Use the vi $ODBCINI command to edit the odbc.ini file and insert the following statements:
[ODBC Data Sources]db2data=DB2 Source Data on AIX...[db2data]Driver=/EPM_ORACLE_HOME/common/ODBC/Merant/6.0/Drivers/ardb222.so
Configuring Data Source Names on UNIX Systems 53
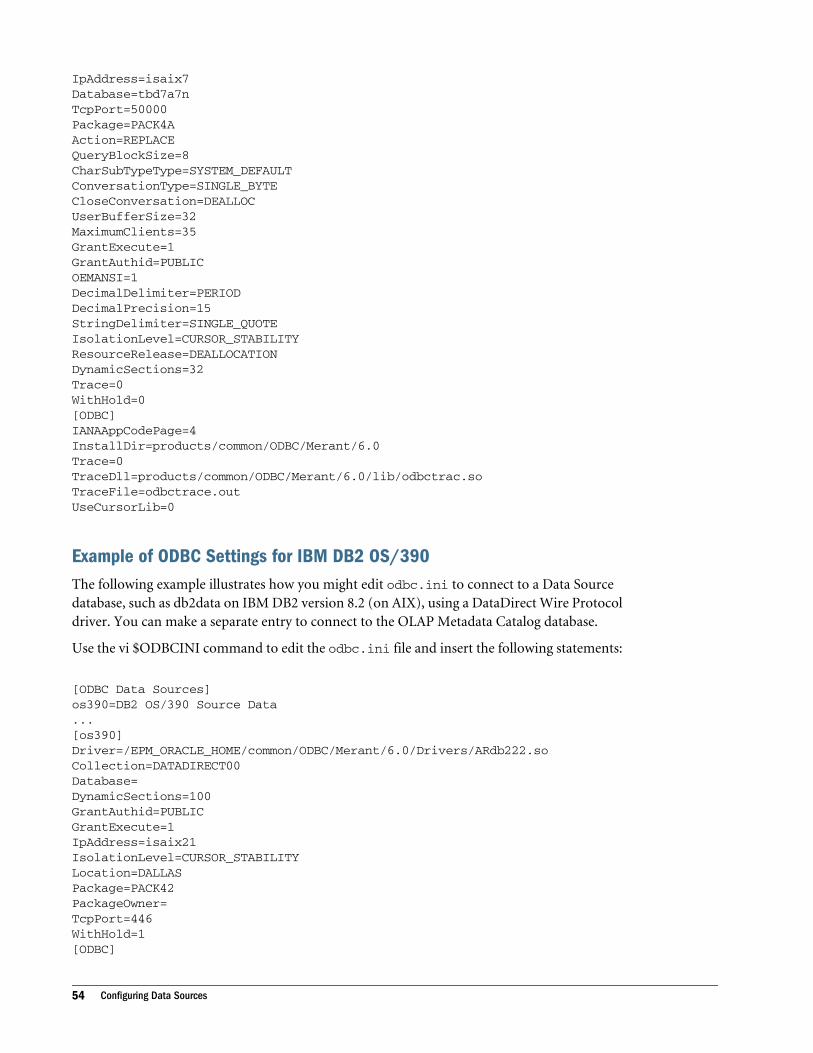
IpAddress=isaix7Database=tbd7a7nTcpPort=50000Package=PACK4AAction=REPLACEQueryBlockSize=8CharSubTypeType=SYSTEM_DEFAULTConversationType=SINGLE_BYTECloseConversation=DEALLOCUserBufferSize=32MaximumClients=35GrantExecute=1GrantAuthid=PUBLICOEMANSI=1DecimalDelimiter=PERIODDecimalPrecision=15StringDelimiter=SINGLE_QUOTEIsolationLevel=CURSOR_STABILITYResourceRelease=DEALLOCATIONDynamicSections=32Trace=0WithHold=0[ODBC]IANAAppCodePage=4InstallDir=products/common/ODBC/Merant/6.0Trace=0TraceDll=products/common/ODBC/Merant/6.0/lib/odbctrac.soTraceFile=odbctrace.outUseCursorLib=0
Example of ODBC Settings for IBM DB2 OS/390The following example illustrates how you might edit odbc.ini to connect to a Data Sourcedatabase, such as db2data on IBM DB2 version 8.2 (on AIX), using a DataDirect Wire Protocoldriver. You can make a separate entry to connect to the OLAP Metadata Catalog database.
Use the vi $ODBCINI command to edit the odbc.ini file and insert the following statements:
[ODBC Data Sources]os390=DB2 OS/390 Source Data...[os390]Driver=/EPM_ORACLE_HOME/common/ODBC/Merant/6.0/Drivers/ARdb222.soCollection=DATADIRECT00Database=DynamicSections=100GrantAuthid=PUBLICGrantExecute=1IpAddress=isaix21IsolationLevel=CURSOR_STABILITYLocation=DALLASPackage=PACK42PackageOwner=TcpPort=446WithHold=1[ODBC]
54 Configuring Data Sources
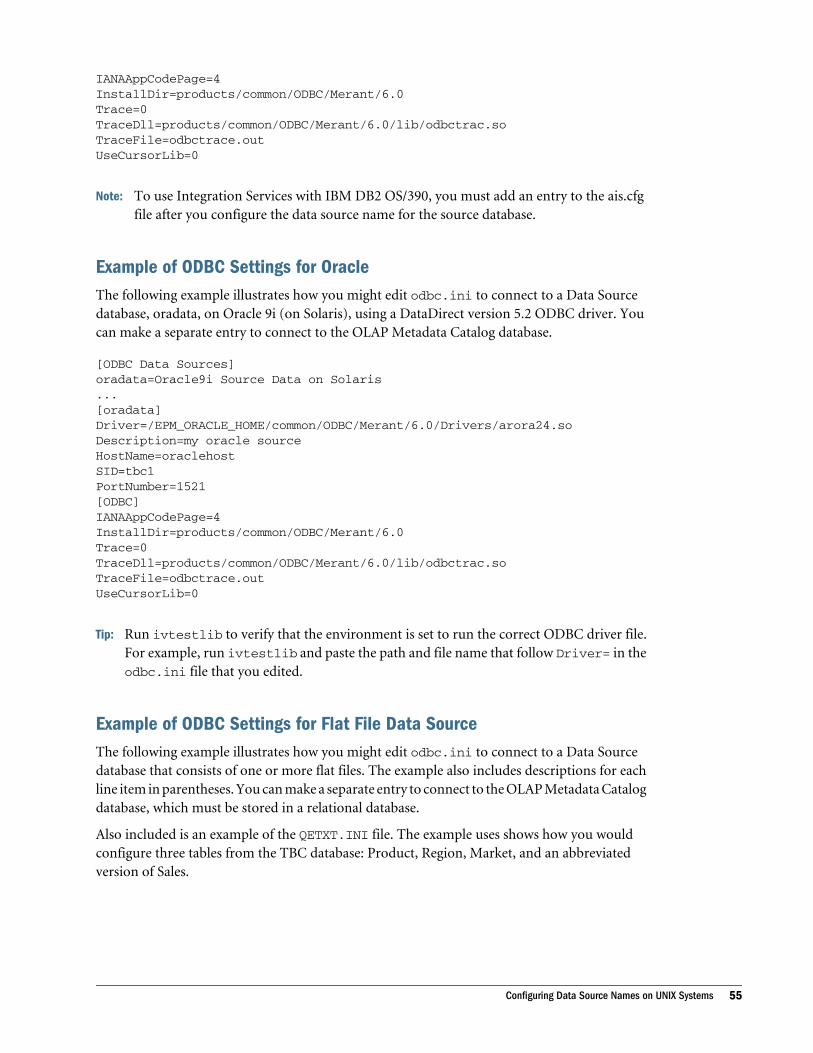
IANAAppCodePage=4InstallDir=products/common/ODBC/Merant/6.0Trace=0TraceDll=products/common/ODBC/Merant/6.0/lib/odbctrac.soTraceFile=odbctrace.outUseCursorLib=0
Note: To use Integration Services with IBM DB2 OS/390, you must add an entry to the ais.cfgfile after you configure the data source name for the source database.
Example of ODBC Settings for OracleThe following example illustrates how you might edit odbc.ini to connect to a Data Sourcedatabase, oradata, on Oracle 9i (on Solaris), using a DataDirect version 5.2 ODBC driver. Youcan make a separate entry to connect to the OLAP Metadata Catalog database.
[ODBC Data Sources]oradata=Oracle9i Source Data on Solaris...[oradata]Driver=/EPM_ORACLE_HOME/common/ODBC/Merant/6.0/Drivers/arora24.soDescription=my oracle sourceHostName=oraclehostSID=tbc1PortNumber=1521[ODBC]IANAAppCodePage=4InstallDir=products/common/ODBC/Merant/6.0Trace=0TraceDll=products/common/ODBC/Merant/6.0/lib/odbctrac.soTraceFile=odbctrace.outUseCursorLib=0
Tip: Run ivtestlib to verify that the environment is set to run the correct ODBC driver file.For example, run ivtestlib and paste the path and file name that follow Driver= in theodbc.ini file that you edited.
Example of ODBC Settings for Flat File Data SourceThe following example illustrates how you might edit odbc.ini to connect to a Data Sourcedatabase that consists of one or more flat files. The example also includes descriptions for eachline item in parentheses. You can make a separate entry to connect to the OLAP Metadata Catalogdatabase, which must be stored in a relational database.
Also included is an example of the QETXT.INI file. The example uses shows how you wouldconfigure three tables from the TBC database: Product, Region, Market, and an abbreviatedversion of Sales.
Configuring Data Source Names on UNIX Systems 55

Note: Integration Services does not support data source table names and column names thatcontain spaces or special characters, such as a period (.). See Appendix B, “IntegrationServices Limits and Guidelines” for a complete listing of the unsupported characters.
Note: You must use a relational database as your OLAP Metadata Catalog database andconfigure it as described in “Editing the odbc.ini File” on page 52.
[ODBC Data Sources]tbc_ff=TBC flat file data source...[tbc_ff]Driver=/EPM_ORACLE_HOME/common/ODBC/Merant/6.0/Drivers/ARtxt24.so (location of a driver)Description=DataDirect 5.2 TextFile(*.*)AllowUpdateAndDelete=0 (a variable edited by user)ApplicationUsingThreads=1 (a variable edited by user)CacheSize=64 (a variable edited by user)CenturyBoundary=20 (a variable edited by user)Database=/EPM_ORACLE_HOME/flat_files/stream (a data file location)DataFileExtension=TXT (a variable edited by user, default is TXT)DecimalSymbol=. (a variable edited by user, default is dot(.))Delimiter=~ (a variable edited by user)FileOpenCache=0 (a variable edited by user)FirstLineNames=1 (a variable edited by user)IntlSort=1 (a variable edited by user)ScanRows=5 (a variable edited by user)TableType=Character (a variable edited by user)UndefinedTable=GUESS (a variable edited by user)[ODBC]IANAAppCodePage=4InstallDir=products/common/ODBC/Merant/6.0Trace=0TraceDll=products/common/ODBC/Merant/6.0/Drivers/odbctrac.soTraceFile=odbctrace.outUseCursorLib=0
For more information on editing the ODBC.INI file in UNIX to configure a flat file data sourcesee the DataDirect Connect ODBC Reference in PDF format in products/common/ODBC/Merant/6.0/books/odbcref.
Example of QETXT.INI for Flat File Data Sources
The following is an example of the QETXT.INI file. The example shows how you would configurethree tables from the TBC database: Product, Region, Market, and an abbreviated version ofSales.
[Defined Tables]PRODUCT.txt=ProductREGION.txt=REGIONSALESFACTSHORT.txt=SalesFactShortMARKET.txt=Market[Product]
56 Configuring Data Sources

FILE=PRODUCT.txtFLN=1TT=CommaCharset=ANSIDS=.FIELD1=PRODUCTID,NUMERIC,9,0,9,0,FIELD2=FAMILYID,NUMERIC,8,0,8,0,FIELD3=SKU,VARCHAR,6,0,6,0,FIELD4=SKUNAME,VARCHAR,18,0,18,0,FIELD5=CAFFIENATED,VARCHAR,11,0,11,0,FIELD6=OUNCES,NUMERIC,6,0,6,0,FIELD7=PKGTYPE,VARCHAR,7,0,7,0,FIELD8=INTRODATE,DATE,10,0,10,0,yyyy/m/d[REGION]FILE=REGION.txtFLN=0TT=CommaCharset=ANSIDS=[SalesFactShort]FILE=SALESFACTSHORT.txtFLN=1TT=CommaCharset=ANSIDS=.FIELD1=STATEID,NUMERIC,7,0,7,0,FIELD2=PRODUCTID,NUMERIC,9,0,9,0,FIELD3=SCENARIOID,NUMERIC,10,0,10,0,FIELD4=SUPPLIERID,NUMERIC,10,0,10,0,FIELD5=TRANSDATE,DATE,10,0,10,0,yyyy/m/dFIELD6=SALES,NUMERIC,7,2,6,0,FIELD7=COGS,NUMERIC,6,2,6,0,FIELD8=MARKETING,NUMERIC,11,2,9,0,FIELD9=PAYROLL,NUMERIC,9,2,7,0,FIELD10=MISC,NUMERIC,6,2,4,0,FIELD11=OPENINGINVENTORY,NUMERIC,18,2,16,0,FIELD12=ADDITIONS,NUMERIC,11,2,9,0,[Market]FILE=MARKET.txtFLN=1TT=CommaCharset=ANSIDS=.FIELD1=STATEID,NUMERIC,7,0,7,0,FIELD2=REGIONID,NUMERIC,8,0,8,0,FIELD3=STATE,VARCHAR,13,0,13,0,FIELD4=POPULATIONID,NUMERIC,12,0,12,0,
For more information on creating the QETXT.INI file in UNIX to configure tables for a flat filedata source see the DataDirect Connect ODBC Reference in PDF format in products/common/ODBC/Merant/6.0/books/odbcref.
Configuring Data Source Names on UNIX Systems 57

Example of ODBC Settings for Microsoft SQL ServerThe following example illustrates how you might edit odbc.ini to connect to a Data Sourcedatabase, such as sqldata, on Microsoft SQL Server 2005 (on HP-UX), using a vendor-suppliedODBC driver. You can make a separate entry to connect to the OLAP Metadata Catalog database.
[ODBC Data Sources]sqldata=SQL Server 2005 Source Data on HP-UX...[sqldata]Driver=/EPM_ORACLE_HOME/common/ODBC/Merant/6.0/Drivers/ARsqls24.soDescription=SQL Server 2005 DriverDatabase=sqldataAddress=isqa17,1433QuotedId=NoAnsiNPW=No[ODBC]IANAAppCodePage=4InstallDir=products/common/ODBC/Merant/6.0Trace=0TraceDll=products/common/ODBC/Merant/6.0/lib/odbctrac.soTraceFile=odbctrace.outUseCursorLib=0
Examples of ODBC Settings for Teradata
The following example illustrates how you might edit odbc.ini to connect to a Data Sourcedatabase, tbc, on Teradata (on AIX), using the Teradata ODBC driver. You can make a separateentry to connect to the OLAP Metadata Catalog database. The data source description in [ODBCData Sources] must be set to tdata.so.
[ODBC Data Sources]tbc=tdata.so...[tbc]Driver=/usr/odbc/drivers/tdata.soDescription=NCR 3600 running Teradata V2R5DBCName=139.64.140.45DefaultDatabase=tbcUseXViews=Yes[ODBC]IANAAppCodePage=4InstallDir=products/common/ODBC/Merant/6.0Trace=0TraceDll=products/common/ODBC/Merant/6.0/lib/odbctrac.soTraceFile=odbctrace.outUseCursorLib=0
HP-UX
The following example illustrates how you might edit odbc.ini to connect to the same DataSource database, tbc, on Teradata (on HP-UX), using the Teradata ODBC driver. You can makea separate entry to connect to the OLAP Metadata Catalog database. The data source descriptionin [ODBC Data Sources] must be set to tdata.sl.
58 Configuring Data Sources
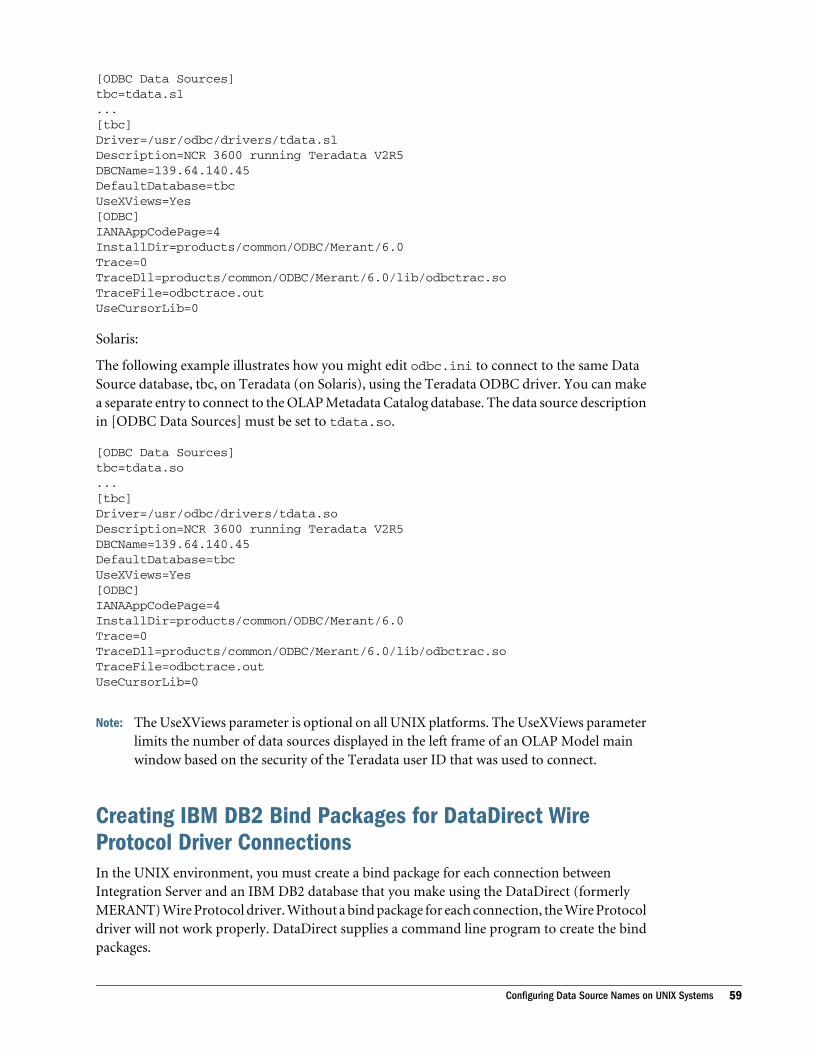
[ODBC Data Sources]tbc=tdata.sl...[tbc]Driver=/usr/odbc/drivers/tdata.slDescription=NCR 3600 running Teradata V2R5DBCName=139.64.140.45DefaultDatabase=tbcUseXViews=Yes[ODBC]IANAAppCodePage=4InstallDir=products/common/ODBC/Merant/6.0Trace=0TraceDll=products/common/ODBC/Merant/6.0/lib/odbctrac.soTraceFile=odbctrace.outUseCursorLib=0
Solaris:
The following example illustrates how you might edit odbc.ini to connect to the same DataSource database, tbc, on Teradata (on Solaris), using the Teradata ODBC driver. You can makea separate entry to connect to the OLAP Metadata Catalog database. The data source descriptionin [ODBC Data Sources] must be set to tdata.so.
[ODBC Data Sources]tbc=tdata.so...[tbc]Driver=/usr/odbc/drivers/tdata.soDescription=NCR 3600 running Teradata V2R5DBCName=139.64.140.45DefaultDatabase=tbcUseXViews=Yes[ODBC]IANAAppCodePage=4InstallDir=products/common/ODBC/Merant/6.0Trace=0TraceDll=products/common/ODBC/Merant/6.0/lib/odbctrac.soTraceFile=odbctrace.outUseCursorLib=0
Note: The UseXViews parameter is optional on all UNIX platforms. The UseXViews parameterlimits the number of data sources displayed in the left frame of an OLAP Model mainwindow based on the security of the Teradata user ID that was used to connect.
Creating IBM DB2 Bind Packages for DataDirect WireProtocol Driver ConnectionsIn the UNIX environment, you must create a bind package for each connection betweenIntegration Server and an IBM DB2 database that you make using the DataDirect (formerlyMERANT) Wire Protocol driver. Without a bind package for each connection, the Wire Protocoldriver will not work properly. DataDirect supplies a command line program to create the bindpackages.
Configuring Data Source Names on UNIX Systems 59
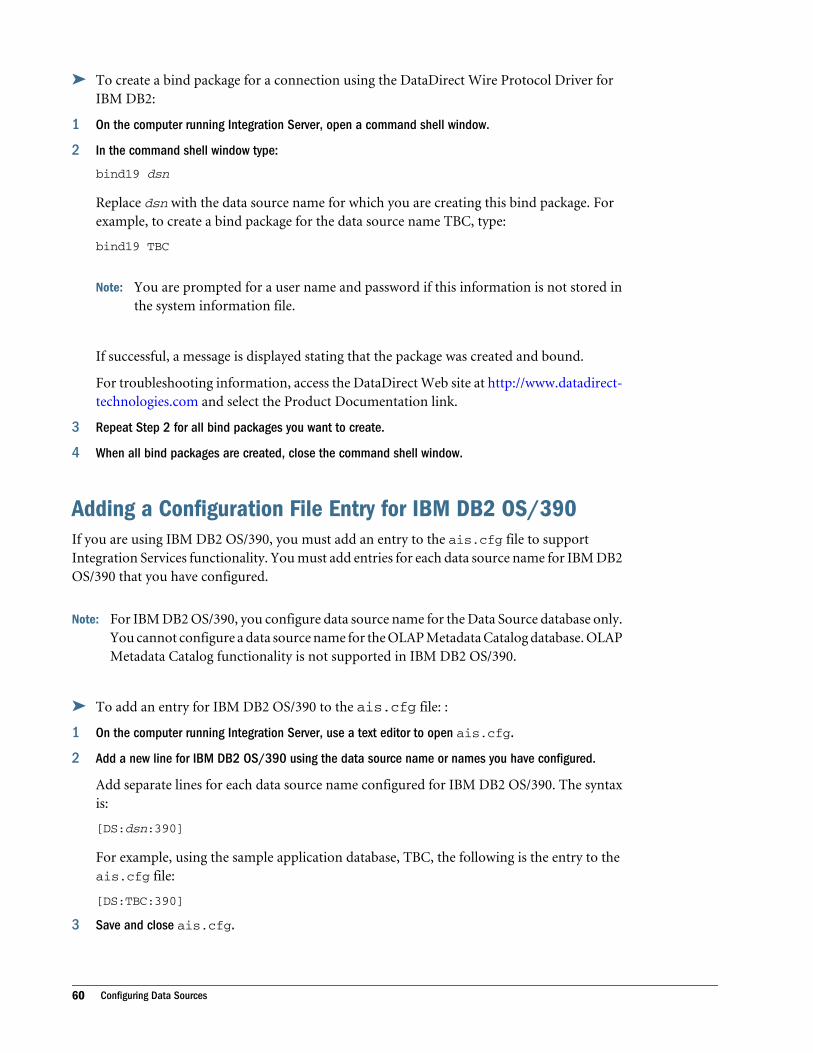
ä To create a bind package for a connection using the DataDirect Wire Protocol Driver forIBM DB2:
1 On the computer running Integration Server, open a command shell window.
2 In the command shell window type:
bind19 dsn
Replace dsn with the data source name for which you are creating this bind package. Forexample, to create a bind package for the data source name TBC, type:
bind19 TBC
Note: You are prompted for a user name and password if this information is not stored inthe system information file.
If successful, a message is displayed stating that the package was created and bound.
For troubleshooting information, access the DataDirect Web site at http://www.datadirect-technologies.com and select the Product Documentation link.
3 Repeat Step 2 for all bind packages you want to create.
4 When all bind packages are created, close the command shell window.
Adding a Configuration File Entry for IBM DB2 OS/390If you are using IBM DB2 OS/390, you must add an entry to the ais.cfg file to supportIntegration Services functionality. You must add entries for each data source name for IBM DB2OS/390 that you have configured.
Note: For IBM DB2 OS/390, you configure data source name for the Data Source database only.You cannot configure a data source name for the OLAP Metadata Catalog database. OLAPMetadata Catalog functionality is not supported in IBM DB2 OS/390.
ä To add an entry for IBM DB2 OS/390 to the ais.cfg file: :
1 On the computer running Integration Server, use a text editor to open ais.cfg.
2 Add a new line for IBM DB2 OS/390 using the data source name or names you have configured.
Add separate lines for each data source name configured for IBM DB2 OS/390. The syntaxis:
[DS:dsn:390]
For example, using the sample application database, TBC, the following is the entry to theais.cfg file:
[DS:TBC:390]
3 Save and close ais.cfg.
60 Configuring Data Sources
After Configuration of Data Source NamesAfter you configure data source names for the Data Source database and OLAP Metadata Catalogdatabase, you can connect to databases from Integration Services. You can then create, modify,and save OLAP models and metaoutlines. For information on viewing TBC tables, columns,OLAP models, and metaoutlines in Integration Services Console, see “Viewing TBC Tables andColumns ” on page 111.
If you plan to use flat (text) files as data source, you must set up data source names for thosefiles. See “Configuring Data Source Names on Windows Systems” on page 41“Configuring DataSource Names on UNIX Systems” on page 51.
Note: The SQL Server ODBC driver may time out during a call to an SQL Server database,particularly during a data load. If a timeout occurs, try again when the database is notbusy. Increasing the driver time-out period may avoid this problem. For moreinformation, see the ODBC documentation for the driver that you are using.
For more information on ODBC connection problems and solutions, see Chapter 7,“Troubleshooting ODBC and Connections”.
Connecting to Server Components and Data SourcesWhether you are installing Integration Services for the first time or upgrading from a previousrelease, after you start the console, the OLAP Metadata Catalog Setup dialog box is displayed.Using this dialog box, you can either create a catalog or upgrade an existing catalog.
Note: An OLAP Metadata Catalog must be created and configured before you can connect toit. For information on configuring a relational data source for an OLAP Metadata Catalog,see Oracle Hyperion Enterprise Performance Management System Installation andConfiguration Guide. For information on creating OLAP Metadata Catalogs, seeChapter 3, “Creating, Upgrading, and Deleting OLAP Metadata Catalogs.”
After the process of creating or upgrading an OLAP Metadata Catalog is complete, you can beginto create OLAP models and metaoutlines. You must connect to Integration Server, to an externaldata source, and to the OLAP Metadata Catalog where you want to store the OLAP models andmetaoutlines that you create.
To use Integration Services Console to perform data loads, member loads, or member and dataloads, you must connect the client software to an additional server component, Essbase Server.
You are prompted by the Login dialog box to connect to an Integration Server and an OLAPMetadata Catalog. Optionally, in the Login dialog box, you can also connect to an instance ofEssbase Server and create default connection settings for both server components.
For information on troubleshooting connections to server components, see Chapter 7,“Troubleshooting ODBC and Connections”.
After Configuration of Data Source Names 61
Connecting to Integration ServerIntegration Server manages access to OLAP Metadata Catalogs and to data sources. A catalogstores information that defines the external data source and the structure of OLAP model andmetaoutline elements. To create an OLAP model or a metaoutline, you must connect toIntegration Server.
Note: The Integration Server system administrator must provide a user name and password toan OLAP Metadata Catalog before you can connect to the server.
Note: It is highly recommended that you do not connect the Integration Server and IntegrationServices Console via a wide area network (WAN). Doing so may cause severe performancedegradation.
ä To connect to Integration Server:
1 To display the Login dialog box from the OLAP Model main window of the Integration Services Console,select Connections, then OLAP Metadata Catalog, then Connect.
Note: The Login dialog box is displayed automatically when you start Integration ServicesConsole. You can redisplay the Login dialog box by using the procedures describedin this topic.
2 In the Server drop-down list under Integration Services, enter or select the name or IP address of anIntegration Server computer; for example, cypress.
If the port number on which Essbase Integration Server communicates with the console hasbeen set to a value other than the default, you must type the server name or IP address andtype the nonstandard port number, separated by a colon; for example:
cypress:3390
3 In the OLAP Metadata Catalog drop-down list, select the data source name of an OLAP MetadataCatalog; for example, TBC_MD for the sample TBC (The Beverage Company) catalog database.
Oracle:TBC_MD
4 In the Code Page drop-down list box, select the code page of the language you want to use during thecurrent Integration Services Console session.
The code page is a portion of the locale which identifies the local language and culturalconventions such as the formatting of currency and dates and the sort order of data.
5 In the User Name drop-down list box under Integration Services, type or select your user name.
It is necessary to type a user name the first time it is used. After a user is successfully connectedto Integration Services, the user name is then displayed in the User Name drop-down list.
6 In the Password text box under Essbase Integration Server, type your password.
Note: Use the same user name and password that you use to connect directly to the databaseserver and to access the database that contains the OLAP Metadata Catalog.
62 Configuring Data Sources
7 Click OK or enter information for connecting to an instance of Essbase Server.
Connecting to Essbase ServerEssbase Server creates and manages Essbase databases. You do not have to connect IntegrationServices Console to Essbase Server to create an OLAP model or metaoutline, but you mustconnect to Essbase Server to view a sample Essbase outline or to load members or data into anEssbase database.
In the Login dialog box, you can specify the information for connecting to Essbase Server, butIntegration Services Console does not connect to Essbase Server until you attempt to view asample Essbase outline or to load members or data.
If you plan to use Essbase Integration Services Console on a client computer that is outside thefirewall for your network, and the console requires that Integration Server and Essbase Serverbe located inside the firewall for your network, you must log on to Essbase Server with a nameor an IP address that connects from both sides of the firewall. The system administrator providesyou with this name or IP address.
Note: The system administrator for Essbase Server must provide you with a user name andpassword before you can connect.
ä To set connection information for an instance of Essbase Server:
1 In the OLAP Metaoutline main window, select Connections, then OLAP Metadata Catalog, thenConnect to display the Login dialog box.
Note: The Login dialog box is displayed automatically when you start Integration ServicesConsole. You can redisplay the Login dialog box at any time while working in theOLAP Metaoutline main window by using the procedures described in this topic.
2 In the Server text box under Essbase Server, type or select the name of a computer that is runningEssbase Server; for example, sequoia.
Note: If you are using Integration Services Console on a client computer that is outside thefirewall for your network, and you require access to instances of Integration Serverand Essbase Server located inside the firewall for your network, be sure to use a nameor an IP address for the instance of Essbase Server that is accessible from both sidesof the firewall.
3 In the User Name drop-down list box under Essbase Server, type or select your Essbase user name.
It is necessary to type a user name the first time it is used. After a user is successfully connectedto Essbase Server, the user name is then displayed in the User Name drop-down list.
4 In the Password text box under Essbase Server, type your Essbase password.
5 Click OK.
Connecting to Server Components and Data Sources 63
Setting Connection DefaultsIf you typically use a specific instance of Integration Server, OLAP Metadata Catalog, and EssbaseServer, you can save the settings as the default. After you set default connection information,you can reuse these settings without reentering the information.
If you use multiple instances of Integration Server and OLAP Metadata Catalogs, you can alsoset multiple relationships and select the appropriate one to use so that you do not need to reenterthe information.
ä To set connection defaults:
1 To display the Login dialog box, in the OLAP Model main window or OLAP Metaoutline main window,select Connections, then OLAP Metadata Catalog, then Connect.
2 In the Login dialog box, click Set Login Defaults.
The Set Login Defaults dialog box is displayed.
3 In the Server text box, type or select the name of an Integration Server computer; for example, cypress.
4 In the OLAP Metadata Catalog text box, type or select the name of an OLAP Metadata Catalog; forexample, TBC_MD for the sample TBC database.
5 In the Code Page drop-down list box, select the code page of the language you want to use for thisIntegration Services Console session.
The code page is a portion of the locale which identifies the local language and culturalconventions such as the formatting of currency and dates and the sort order of data.
6 In the User Name text box, type or select a user name for the OLAP Metadata Catalog.
7 Take one of the following actions:
l To set the connection defaults, click Set Default.
l To save the connection information without setting the information as the default, clickAdd to List.
8 In the Default Server text box, type or select the name of an Essbase Server computer; for example,cypress.
9 In the Default User Name text box, type or select a user name for the instance of Essbase Server; forexample, TBC.
10 Click OK to return to the Login dialog box.
Connecting to Data SourcesA data source is an external data repository—typically a large database—whose data you wantto analyze by using Essbase. You must connect Integration Services to all data sources that youplan to use in creating OLAP models and metaoutlines and in loading data into an Essbasedatabase.
Note: You can connect to more than one relational data source to create OLAP models.
64 Configuring Data Sources

ä To connect to a data source:
1 In the Integration Services Console Welcome dialog box, click the appropriate icon to create a new OLAPmodel or metaoutline. Alternatively, select the Existing or Recent tab and double-click an OLAP modelor metaoutline to open it for editing.
The Data Source dialog box is displayed.
2 In the Data Source drop-down list, select the data source to be used; for example, TBC in the sampleapplication.
An ODBC data source must be created on the computer that is running Integration Serverfor any external data sources that you want to use. If the data source that you need is notvisible in the scroll list, contact the Integration Services system administrator.
For more information about troubleshooting server and data source connections, seeChapter 7, “Troubleshooting ODBC and Connections”.
The following example is a Net Service Name stanza that defines TBC in the tnsnames.orafile:
TBC = (DESCRIPTION = (ADDRESS_LIST = (ADDRESS = (PROTOCOL = TCP)(HOST = labmachine2)(PORT = 1521)) ) (CONNECT_DATA = (SERVICE_NAME = orasid) ) )
For Oracle using onames, in the example above, TBC is the Schema Name used to connectto an Oracle database. This is the database identifier that you use when you are using SQL*Plus to connect to a database.
DataDirect Drivers: If you are using DataDirect drivers with Oracle, pick a data source namefrom the Data Source drop-down list.
3 In the Code Page drop-down list box, select the code page of the language you want to use during thecurrent Integration Services Console session, and click OK.
The code page is a portion of the locale which identifies the local language and culturalconventions such as the formatting of currency and dates and the sort order of data.
4 In the User Name drop-down list box, type or select your user name.
Note: If you are using a flat file data source, no user name is required.
5 In the Password text box, type your password.
Note: If you are using a flat file data source, no password is required.
6 Click OK.
The left frame of the OLAP Model main window initially displays information about thefirst data source to which you connected. Data source information is displayed hierarchicallyby data source name and owner name.
Connecting to Server Components and Data Sources 65
For each owner name, data is further sorted and organized by tables, views, and synonyms.You can use the listed source tables to create an OLAP model or use additional source tablesby connecting to other data sources.
Information about subsequent data sources to which you connect is displayed in the samemanner as information about the first connected data source was displayed; that is, by datasource name and owner name, then tables, views, and synonyms.
Expand the plus sign, , to display tables, views, and synonyms contained in the data source.
If you want to connect to additional data sources, complete the steps in the followingprocedure:
ä To connect to additional data sources:
1 Select Connections, then Add Data Sources.
The Data Source dialog box is displayed. You can connect to any number of available datasources without closing this dialog box.
2 In the Data Source drop-down list, select the additional data source to which you want to connect.
If you are using DataDirect drivers with Oracle, pick a data source name from the DataSource drop-down list.
3 In the Code Page drop-down list box, select the code page of the language you want to use during thecurrent Integration Services Console session, and click OK.
4 In the User Name drop-down list box, type or select your user name.
It is necessary to type a user name the first time it is used. After a user is successfully connectedto a data source, the user name is then displayed in the User Name drop-down list.
Note: If you are using a flat file data source, no user name is required.
5 In the Password text box, type your password and click Connect.
Note: If you are using a flat file data source, no password is required.
The left frame of the OLAP Model main window displays information about the data sourceto which you just connected along with information about the first data source to whichyou connected.
6 Repeat Step 2 through Step 3 for each data source to which you want to connect.
As you connect to additional data sources, the left frame of the OLAP Model main windowdisplays information about all data sources to which you are connected.
7 When you finish connecting to all appropriate data sources, click Close.
66 Configuring Data Sources
Mapping JDBC Data Sources for Windows (TeradataOnly)Teradata users must map a JDBC data source to a relational database in the ais.cfg file inorder to use the XML Import/Export feature of Integration Services. Teradata requires JDBCType 3 .
To map a data source, edit the ais.cfg file (located in EPM_ORACLE_HOME\products\Essbase\eis\server\bin) using any text editor. If the ais.cfg file does not exist, use atext editor to create and edit it, then save it in EPM_ORACLE_HOME\products\Essbase\eis\server\bin.
Multiple OLAP Metadata Catalogs can be mapped under the [JDBC DSN] heading. If you wantto comment out certain data sources in a list of data sources, insert the pound sign (#) as thefirst character in a line. (See the data source mapping examples that follow.)
The following syntax provides usage guidelines for editing ais.cfg to connect to a Teradata oran Oracle relational data source.
Syntax
[JDBC DSN]<Teradata ODBC DSN>:<Gateway Host>:<Port # on Gateway>/<Server Host>oracle:<tnsname | oname>:<host name>:<port #>:<SID>
Command Description
[JDBC DSN] (Required) Available by default
For Teradata:
Teradata ODBC DSN The name of the Teradata data source used as the OLAP Metadata Catalog in Integration Services
Gateway Host The host on which the Teradata Gateway program is running
Port # on Gateway Port number of the Gateway host
Server Host The host on which the Teradata server resides
For Oracle:
tnsname The name of the Oracle Net Service Name (found in $ORACLE_HOME/network/ admin/tnsnames.ora) usedas the OLAP Metadata Catalog in Integration Services
oname The Schema Name used to connect to an Oracle database if you are using onames instead of tnsnames
This is the database identifier that you use when you connect to the database using SQL*Plus.
host name The host on which the Oracle server is installed or running
port # Port number of the host on which the Oracle server is configured
SID The server identifier for Oracle on host <host name>
In the following examples for mapping a JDBC data source for Teradata and Oracle, note thatthe pound sign (#) at the beginning of a line indicates that the line has been commented out.
Mapping JDBC Data Sources for Windows (Teradata Only) 67

Example of JDBC Type 3 Settings for Teradata
[JDBC DSN]td_catalog_dsn:labmachine1:6063/teradataServer#tbc_md:labmachine1:6063/tera1td_tbc_md:labmachine1/6063:tera1
Example of JDBC Type 4 Settings for Oracle
[JDBC DSN]oracle:ora_tbc_md:labmachine2:1521:orasid#oracle:tbc_md:labmachine2:1521:orasid
When using Oracle with tnsnames, if the definitions for tnsname, host name, port #, and SIDelements do not match the corresponding elements of a Net Service Name stanza in thetnsnames.ora file, a Java environment error will be the result. The preceding JDBC settingsexample is built using the elements in the following tnsnames.ora stanza:
ora_tbc_md = (DESCRIPTION = (ADDRESS_LIST = (ADDRESS = (PROTOCOL = TCP)(HOST = labmachine2)(PORT = 1521)) ) (CONNECT_DATA = (SERVICE_NAME = orasid) ) )
When using Oracle with onames, in the example above, ora_tbc_md is the Schema Name usedto connect to an Oracle database. This is the database identifier you use when you are connectingto the database using SQL*Plus.
Mapping JDBC Data Sources for UNIX (Teradata UsersOnly)Teradata users must map a JDBC data source to a relational database in the ais.cfg file inorder to use the XML Import/Export feature of Integration Services. Teradata requires JDBCType 3 .
To map a data source, edit the ais.cfg file (located in products/Essbase/eis/server/bin) using any text editor. If the ais.cfg file does not exist, use a text editor to create and editit, and then save it in products/Essbase/eis/server/bin.
Multiple OLAP Metadata Catalogs can be mapped under the [JDBC DSN] heading. If you wantto comment out certain data sources in a list of data sources, insert the pound sign (#) as thefirst character in a line. (See the data source mapping examples that follow.)
The following syntax provides usage examples for editing ais.cfg to connect to a Teradata oran Oracle relational data source.
Syntax
[JDBC DSN]<Teradata ODBC DSN>:<Gateway Host>/<Port # on Gateway>/<Server Host>oracle:<tnsname | oname>:<host name>:<port #>:<SID>
68 Configuring Data Sources
Command Description
[JDBC DSN] (Required) Available by default
For Teradata:
Teradata ODBC DSN The name of the Teradata data source used as the OLAP Metadata Catalog in Integration Services
Gateway Host The host on which the Teradata JDBC Type 3 driver is configured and the Jserver is running
Port # on Gateway Port number of the Gateway host
Server Host The host on which the Teradata server resides
For Oracle:
tnsname The name of the Oracle Net Service Name (found in $ORACLE_HOME/network/ admin/tnsnames.ora) usedas the OLAP Metadata Catalog in Integration Services
oname The Schema Name used to connect to an Oracle database if you are using onames instead of tnsnames
This is the database identifier that you use when you are using SQL *Plus to connect to the database.
host name The host on which the Oracle server is installed and running
port # Port number of the host on which the Oracle server is configured
SID The server identifier for Oracle on host <host name>
In the following examples for mapping a JDBC data source for Teradata and Oracle, note thatthe pound sign (#) at the beginning of a line indicates that the line has been commented out.
Example of JDBC Type 3 Settings for Teradata
[JDBC DSN]td_catalog_dsn:labmachine1:6063/teradataServer#tbc_md:labmachine1:6063/tera1td_tbc_md:labmachine1:6063:tera1/
Example of JDBC Type 4 Settings for Oracle
[JDBC DSN]oracle:ora_tbc_md:labmachine2:1521:orasid#oracle:tbc_md:labmachine2:1521:orasid
When using Oracle with tnsnames, if the definitions for tnsname, host name, port #, and SIDelements do not match the corresponding elements of a Net Service Name stanza in thetnsnames.ora file, a Java environment error results. The preceding JDBC settings example is builtusing the elements in the following tnsnames.ora stanza:
ora_tbc_md = (DESCRIPTION = (ADDRESS_LIST = (ADDRESS = (PROTOCOL = TCP)(HOST = labmachine2)(PORT = 1521)) (CONNECT_DATA = (SERVICE_NAME = orasid) )
Mapping JDBC Data Sources for UNIX (Teradata Users Only) 69
When using Oracle with onames, in the example above, ora_tbc_md is the Schema Name usedto connect to an Oracle database. This is the database identifier that you use when you are usingSQL*Plus to connect to a database.
Manually Configuring the Environment for UNIXSystemsAfter you install server products on any UNIX platform, you can manually configure theenvironment for the user to allow Essbase Integration Server to run and access the relationaldata source.
Note: Running ais_start automatically configures your environment.
The steps to configure your environment include configuring the user login scripts to run theis.sh (or) is.csh file and update the environment variables for Essbase Integration Server.
70 Configuring Data Sources
3Creating, Upgrading, andDeleting OLAP Metadata
Catalogs
In This Chapter
About OLAP Metadata Catalogs ... . . . . . . . . . . . . . . . . . . . . . . . . . . . . . . . . . . . . . . . . . . . . . . . . . . . . . . . . . . . . . . . . . . . . . . .71
Creating or Upgrading OLAP Metadata Catalogs... . . . . . . . . . . . . . . . . . . . . . . . . . . . . . . . . . . . . . . . . . . . . . . . . . . . . .72
Mapping OLAP Metadata Catalogs ... . . . . . . . . . . . . . . . . . . . . . . . . . . . . . . . . . . . . . . . . . . . . . . . . . . . . . . . . . . . . . . . . . . . .79
Deleting OLAP Metadata Catalogs ... . . . . . . . . . . . . . . . . . . . . . . . . . . . . . . . . . . . . . . . . . . . . . . . . . . . . . . . . . . . . . . . . . . . .79
Before you run Integration Services, you must create an OLAP Metadata Catalog to store theOLAP models that you create and the metaoutlines that you build from the OLAP models.
Note: If you intend to use the Sample application to acquaint yourself with Integration Services,skip to Chapter 5, “Setting Up the Sample Applications.” The Sample application has itsown relational data source, OLAP Metadata Catalog, OLAP model, and metaoutline.Return to this chapter when you are ready to use a relational data source to build OLAPmodels and metaoutlines. It is recommended that you use the automatic installationprocess to install the Sample applications. See “Setting Up the Standard SampleApplication Automatically” on page 89.
This chapter tells you what to consider before you create an OLAP Metadata Catalog in arelational database. You can create the catalog either automatically, through the use ofIntegration Services Console, or manually. You can also manually create a Unicode-enabledOLAP Metadata Catalog. For manual creation of an OLAP Metadata Catalog, this chapter liststhe SQL scripts that you must run to create tables for the catalog. The procedures in this chapterassume that you know how to create tables by running SQL scripts.
About OLAP Metadata CatalogsAn OLAP Metadata Catalog is a database that consists of 33 tables in which Integration Servicesstores OLAP models and metaoutlines.
For a complete list of supported RDBMSs, see Oracle Hyperion Enterprise PerformanceManagement System Certification Matrix (http://www.oracle.com/technology/software/products/ias/files/fusion_certification.html)>.
You can run the RDBMS for an OLAP Metadata Catalog on any supported platform as long asyou have the ODBC driver and database client software required to connect to the catalog from
About OLAP Metadata Catalogs 71

the computer that runs Essbase Integration Server. You can also run the RDBMS for therelational data source that you use to create OLAP models and build metaoutlines on anysupported platform, if you have the ODBC driver and database client software required to accessthe data source. For a detailed matrix of specifically supported databases and ODBC drivers, seeOracle Hyperion Enterprise Performance Management System Certification Matrix (http://www.oracle.com/technology/software/products/ias/files/fusion_certification.html)>.
The RDBMS for the OLAP Metadata Catalog can be different from the RDBMS for the relationaldata source, and the platforms for the two RDBMSs do not need to be the same.
You can have more than one OLAP Metadata Catalog and, by using the XML Import/Exportutility, you can move OLAP models and metaoutlines from one OLAP Metadata Catalog toanother OLAP Metadata Catalog.
Creating or Upgrading OLAP Metadata CatalogsTo create an OLAP Metadata Catalog, you must have permission to create tables in the databaseor have whatever similar access privileges are required by the RDBMS that you are using.
Note: Microsoft SQL Server—The tables in a catalog are not accessible if they are created by auser that does not have db_owner privileges.
ä To create an OLAP Metadata Catalog:
1 Create a database for OLAP Metadata Catalog tables using the applicable RDBMS utility.
See “Creating Databases for OLAP Metadata Catalog Tables” on page 72.
2 Take one of the following actions:
l Create an OLAP Metadata Catalog automatically by using Integration Services Console(see “Creating or Upgrading OLAP Metadata Catalogs Automatically” on page 73).
l Create tables for the OLAP Metadata Catalog database by running SQL scripts (see“Creating OLAP Metadata Catalogs Manually” on page 74).
Creating Databases for OLAP Metadata Catalog TablesCreate a database for the OLAP Metadata Catalog tables by using the applicable RDBMS utility,in the same way that you create any database.
l Create a database device or tablespace
l Allot 30 MB for storage
l Create user names and passwords, if needed
l Grant user privileges or permissions
72 Creating, Upgrading, and Deleting OLAP Metadata Catalogs
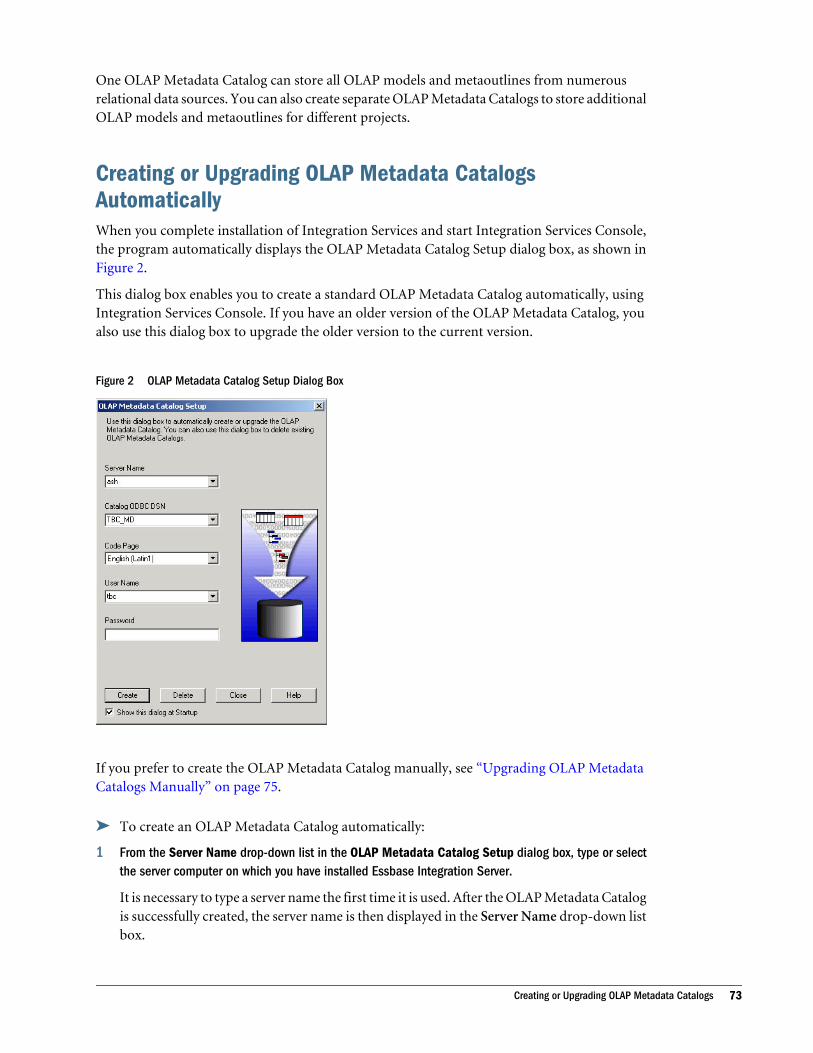
One OLAP Metadata Catalog can store all OLAP models and metaoutlines from numerousrelational data sources. You can also create separate OLAP Metadata Catalogs to store additionalOLAP models and metaoutlines for different projects.
Creating or Upgrading OLAP Metadata CatalogsAutomaticallyWhen you complete installation of Integration Services and start Integration Services Console,the program automatically displays the OLAP Metadata Catalog Setup dialog box, as shown inFigure 2.
This dialog box enables you to create a standard OLAP Metadata Catalog automatically, usingIntegration Services Console. If you have an older version of the OLAP Metadata Catalog, youalso use this dialog box to upgrade the older version to the current version.
Figure 2 OLAP Metadata Catalog Setup Dialog Box
If you prefer to create the OLAP Metadata Catalog manually, see “Upgrading OLAP MetadataCatalogs Manually” on page 75.
ä To create an OLAP Metadata Catalog automatically:
1 From the Server Name drop-down list in the OLAP Metadata Catalog Setup dialog box, type or selectthe server computer on which you have installed Essbase Integration Server.
It is necessary to type a server name the first time it is used. After the OLAP Metadata Catalogis successfully created, the server name is then displayed in the Server Name drop-down listbox.
Creating or Upgrading OLAP Metadata Catalogs 73

2 From the Catalog ODBC DSN drop-down list, select the Data Source Name for the OLAP MetadataCatalog that you are creating.
Note: You must create the database in which you will store the OLAP Metadata Catalog,assign the appropriate user permissions, and configure the ODBC connection beforeyou can create the catalog.
3 In the Code Page drop-down list box, select the code page that corresponds to the code page of therelational database that will be used as the OLAP Metadata Catalog.
The code page is a portion of the locale which identifies the local language and culturalconventions such as the formatting of currency and dates and the sort order of data.
4 In the User Name drop-down list, select or type the user name to which you have assigned permissionto access the database in which the OLAP Metadata Catalog will be stored.
5 In the Password text box, type the password for the user name to which you have assigned permissionto access the database in which the OLAP Metadata Catalog will be stored.
6 If you want the OLAP Metadata Catalog Setup dialog box to be displayed automatically each time youstart Integration Services Console, leave the Show this dialog at Startup check box selected.
If you do not select the “Show this dialog at Startup” check box, you can access the “OLAPMetadata Catalog Setup” dialog box from the console by selecting Tools, then CreateCatalog.
If an OLAP model or metaoutline is open when you select Tools, then Create Catalog, youare prompted to disconnect from the current catalog (Connections, then OLAP MetadataCatalog, then Disconnect). Note that disconnecting from an OLAP Metadata Catalog causesthe open OLAP model or metaoutline to close.
7 Click Create.
Integration Services Console creates the OLAP Metadata Catalog automatically.
Note: If you are migrating from a previous release of Integration Services, the OLAPMetadata Catalog auto-creation process upgrades the existing OLAP MetadataCatalog.
Creating OLAP Metadata Catalogs ManuallyIf you choose to create the OLAP Metadata Catalog manually, you must run SQL scripts by usingthe same utility program that you normally use to create tables.
The scripts that you use to create the tables for a non-Unicode OLAP Metadata Catalog arenamed:
oc_create_database_name.sql
The scripts that you use to create the tables for a Unicode OLAP Metadata Catalog are named:
oc_create_database_name_unicode.sql
74 Creating, Upgrading, and Deleting OLAP Metadata Catalogs
These scripts are listed in Table 1 on page 77, along with the utility programs with which theyhave been tested.
Note: strongly recommends that you use the automatic installation process to create the OLAPMetadata Catalog (see “Creating or Upgrading OLAP Metadata Catalogs Automatically”on page 73).
ä To create tables for the OLAP Metadata Catalog database manually:
1 Start the utility program.
2 Connect to the database that you created for the OLAP Metadata Catalog.
3 Open the appropriate SQL script file in the ocscript directory.
4 Run the SQL script to build the tables.
On Microsoft SQL Server, you receive a message that you did not create data or rows. Thismessage is normal because you created only tables and columns.
5 Verify that you have created the OLAP Metadata Catalog tables.
For example, type a command such as:
SELECT * FROM JOIN_HINTS
or, start the applicable RDBMS utility program and verify that the OLAP Metadata Cataloghas the new tables.
6 Close the utility program.
Upgrading OLAP Metadata Catalogs ManuallyIf you have OLAP Metadata Catalogs from an earlier release of Integration Services and youchoose not to use the automatic creation-upgrade process, you must upgrade the existing OLAPMetadata Catalogs manually. You cannot use the existing catalogs with the new release ofIntegration Services until the catalogs are upgraded.
Note: If you use Integration Services Console to create an OLAP Metadata Catalogautomatically, the system upgrades existing OLAP Metadata Catalogs and you do notneed to upgrade them manually (see “Creating or Upgrading OLAP Metadata CatalogsAutomatically” on page 73). recommends that you use the automatic process to createthe OLAP Metadata Catalog.
You manually upgrade the tables of an OLAP Metadata Catalog by running the SQL scripts thatuse the same database utility program that you typically use to create tables. The SQL scripts toupgrade tables for the OLAP Metadata Catalog are in the ocscript directory where you installedIntegration Services. The upgrade scripts are named oc_upgrade*_ database_name.sql andare listed in Table 1 on page 77, along with the utility programs with which they have beentested.
Creating or Upgrading OLAP Metadata Catalogs 75
Note: If you manually rebuild an OLAP Metadata Catalog, you must drop (delete) the catalogtables by using oc_drop*database_name.sql. Then you create the OLAP MetadataCatalog tables by using oc_create*database_name.sql. If you choose to rebuild acatalog manually, it is not necessary to run any upgrade scripts.
Caution! If you drop (delete) an OLAP Metadata Catalog, you also delete the OLAP modelsand metaoutlines that it contains.
The following topics discuss various aspects of upgrading OLAP Metadata Catalogs manually:
l “SQL Scripts Used to Create and Upgrade Tables” on page 76
l “Proper Order of SQL Scripts” on page 77
l “Upgrading Tables in the OLAP Metadata Catalog” on page 78
SQL Scripts Used to Create and Upgrade TablesThe SQL scripts to create tables for the OLAP Metadata Catalog (listed in Table 1) are locatedin the ocscript directory where you installed Integration Services.
Integration Services provides SQL scripts for each supported RDBMS:
l oc_create_database_name.sql to build tables
l oc_drop_database_name.sql to drop tables
l oc_upgrade20_database_name.sql to upgrade tables from Integration Services Release1.x to 2.0 (does not apply to Teradata users)
l oc_upgrade61_database_name.sql to upgrade tables from Integration Services Release2.0 to 6.1 (does not apply to Teradata users)
l oc_upgrade65_database_name.sql to upgrade tables from Integration Services Release6.1 to 6.5
l oc_upgrade651_database_name.sql to upgrade tables from Integration ServicesRelease 6.5 to 6.5.1
Note: If you need to rebuild an OLAP Metadata Catalog, you must drop (delete) the catalogtables before you build them. Remember that if you drop an OLAP Metadata Catalog,you also delete the OLAP models and metaoutlines that it contains.
The utilities listed in Table 1 have been tested to work with the SQL scripts.
76 Creating, Upgrading, and Deleting OLAP Metadata Catalogs

Table 1 SQL Scripts for Creating an OLAP Metadata Catalog
Database SQL Script Utility Program
IBM DB2 oc_create_db2.sql
oc_drop_db2.sql
oc_upgrade20_db2.sql
oc_upgrade61_db2.sql
oc_upgrade65_db2.sql
oc_upgrade651_db2.sql
IBM DB2 Command Center or >DB2 -tvf
Oracle oc_create_oracle.sql
oc_drop_oracle.sql
oc_upgrade20_oracle.sql
oc_upgrade61_oracle.sql
oc_upgrade65_oracle.sql
oc_upgrade651_oracle.sql
oc_create_oracle_unicode.sql
oc_create_oracle9i_unicode.sql
SQL*Plus
Microsoft SQL Server oc_create_sqlsrv.sql
oc_drop_sqlsrv.sql
oc_upgrade20_sqlsrv.sql
oc_upgrade61_sqlsrv.sql
oc_upgrade65_sqlsrv.sql
oc_upgrade651_sqlsrv.sql
Query Analyzer
(Microsoft SQL Server 7.0 and 2005)
Teradata oc_create_teradata.sql
oc_drop_teradata.sql
oc_upgrade65_teradata.sql
oc_upgrade651_teradata.sql
BTEQ
Proper Order of SQL ScriptsIf you choose to upgrade the OLAP Metadata Catalog manually, you must run the SQL scriptsin successive release order beginning with the upgrade script applicable to your current release.This is necessary because most releases make different changes to the catalog, and changes ofone release are predicated on the changes of the preceding release. However, some releases ofIntegration Services (Release 6.2 and Releases 6.5.2, 6.5.3, 6.5.4, 7.0, and 7.1) do not require any
Creating or Upgrading OLAP Metadata Catalogs 77
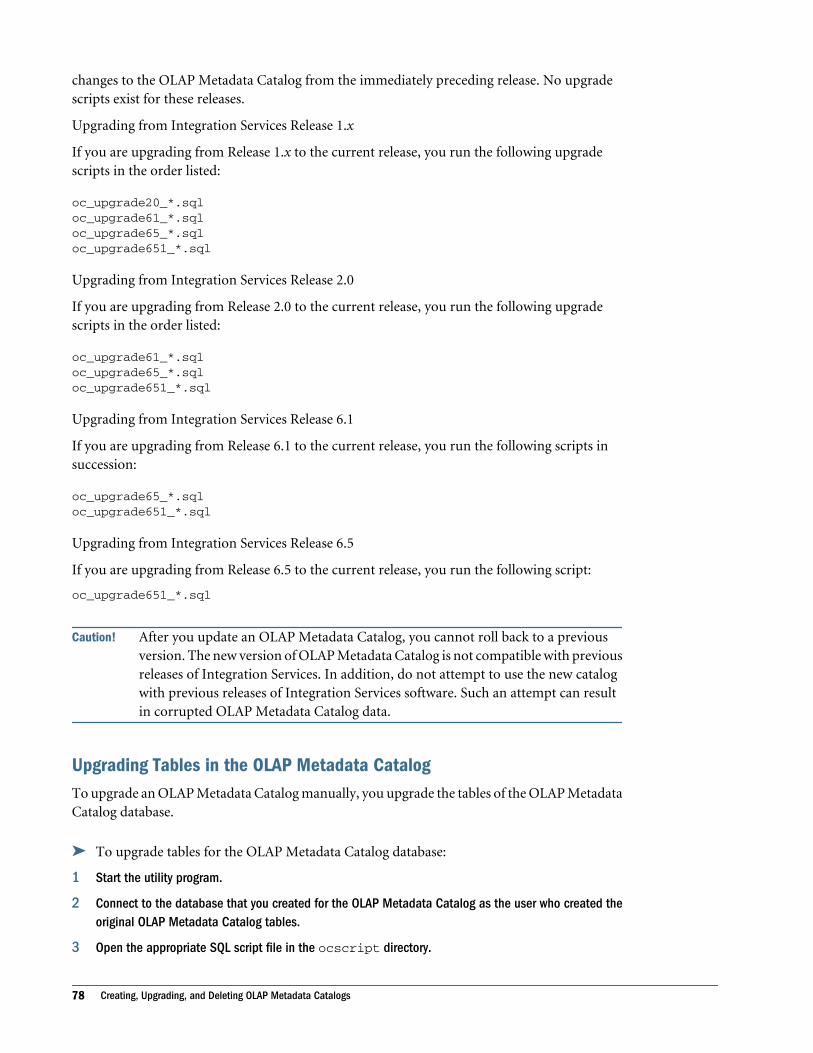
changes to the OLAP Metadata Catalog from the immediately preceding release. No upgradescripts exist for these releases.
Upgrading from Integration Services Release 1.x
If you are upgrading from Release 1.x to the current release, you run the following upgradescripts in the order listed:
oc_upgrade20_*.sqloc_upgrade61_*.sqloc_upgrade65_*.sqloc_upgrade651_*.sql
Upgrading from Integration Services Release 2.0
If you are upgrading from Release 2.0 to the current release, you run the following upgradescripts in the order listed:
oc_upgrade61_*.sqloc_upgrade65_*.sqloc_upgrade651_*.sql
Upgrading from Integration Services Release 6.1
If you are upgrading from Release 6.1 to the current release, you run the following scripts insuccession:
oc_upgrade65_*.sqloc_upgrade651_*.sql
Upgrading from Integration Services Release 6.5
If you are upgrading from Release 6.5 to the current release, you run the following script:
oc_upgrade651_*.sql
Caution! After you update an OLAP Metadata Catalog, you cannot roll back to a previousversion. The new version of OLAP Metadata Catalog is not compatible with previousreleases of Integration Services. In addition, do not attempt to use the new catalogwith previous releases of Integration Services software. Such an attempt can resultin corrupted OLAP Metadata Catalog data.
Upgrading Tables in the OLAP Metadata CatalogTo upgrade an OLAP Metadata Catalog manually, you upgrade the tables of the OLAP MetadataCatalog database.
ä To upgrade tables for the OLAP Metadata Catalog database:
1 Start the utility program.
2 Connect to the database that you created for the OLAP Metadata Catalog as the user who created theoriginal OLAP Metadata Catalog tables.
3 Open the appropriate SQL script file in the ocscript directory.
78 Creating, Upgrading, and Deleting OLAP Metadata Catalogs

See “SQL Scripts Used to Create and Upgrade Tables” on page 76.
4 Run the SQL script (or scripts, if applicable) to upgrade the tables.
See “Proper Order of SQL Scripts” on page 77.
On Microsoft SQL Server, you receive a message that you did not create data or rows. Thismessage is normal because you created only tables and columns.
5 Verify that the new tables have been added to the existing OLAP Metadata Catalog.
You can verify this by entering a command, for example:
SELECT * FROM OM_DESCRIPTION
or, you can start the applicable RDBMS utility program and verify that the OLAP MetadataCatalog has the new tables.
6 Close the utility program.
Mapping OLAP Metadata CatalogsAfter you create an OLAP Metadata Catalog manually, you must map the catalog to a supportedODBC driver.
For information about supported ODBC drivers, see Oracle Hyperion Enterprise PerformanceManagement System Certification Matrix (http://www.oracle.com/technology/software/products/ias/files/fusion_certification.html)>. For information about configuring OLAPMetadata Catalog as an ODBC data source, see Chapter 2, “Configuring Data Sources”.
Note: If you attempt to access a Microsoft SQL Server database with the Microsoft native ODBCdriver and you do not have access permission, SQL Server connects you to the defaultdatabase without notifying you.
Deleting OLAP Metadata CatalogsYou can delete an existing OLAP Metadata Catalog at any time.
Caution! Remember that if you delete an OLAP Metadata Catalog, you also delete the OLAPmodels and metaoutlines that it contains.
ä To delete an OLAP Metadata Catalog:
1 From either the OLAP Model or OLAP Metaoutline main window, select Tools, then Create Catalog todisplay the OLAP Metadata Catalog Setup dialog box, as shown in Figure 2 on page 73.
2 From the Server Name drop-down list, select the appropriate Essbase Integration Server computer.
3 From the Catalog ODBC DSN drop-down list, select the Data Source Name for the OLAP MetadataCatalog that you want to delete.
Mapping OLAP Metadata Catalogs 79
4 In the User Name drop-down list, select or type your user name.
5 In the Password text box, type your password.
6 Click Yes to the confirmation prompt to delete the catalog.
If the OLAP Metadata Catalog that you are attempting to delete is currently in use, you areprompted to disconnect from the current catalog (Connections, then OLAP MetadataCatalog, then Disconnect). You must disconnect before you can delete the catalog.
Note: Disconnecting from an OLAP Metadata Catalog causes the open OLAP model ormetaoutline to close.
80 Creating, Upgrading, and Deleting OLAP Metadata Catalogs
4Tables in OLAP Metadata
Catalog
In This Chapter
OLAP Metadata Catalog ... . . . . . . . . . . . . . . . . . . . . . . . . . . . . . . . . . . . . . . . . . . . . . . . . . . . . . . . . . . . . . . . . . . . . . . . . . . . . . . . .81
Tables Relating to the OLAP Model.. . . . . . . . . . . . . . . . . . . . . . . . . . . . . . . . . . . . . . . . . . . . . . . . . . . . . . . . . . . . . . . . . . . . . .82
Tables Relating to the Metaoutline ... . . . . . . . . . . . . . . . . . . . . . . . . . . . . . . . . . . . . . . . . . . . . . . . . . . . . . . . . . . . . . . . . . . . .83
Tables Relating to Drill-Through... . . . . . . . . . . . . . . . . . . . . . . . . . . . . . . . . . . . . . . . . . . . . . . . . . . . . . . . . . . . . . . . . . . . . . . . .84
Tables Relating to Hybrid Analysis .. . . . . . . . . . . . . . . . . . . . . . . . . . . . . . . . . . . . . . . . . . . . . . . . . . . . . . . . . . . . . . . . . . . . . .85
Miscellaneous Tables ... . . . . . . . . . . . . . . . . . . . . . . . . . . . . . . . . . . . . . . . . . . . . . . . . . . . . . . . . . . . . . . . . . . . . . . . . . . . . . . . . . . .85
OLAP Metadata Catalog is a relational database that contains OLAP models, metaoutlines, andthe information necessary to retrieve the required data from the data source. You can installOLAP Metadata Catalog in any supported RDBMS. See the Oracle Hyperion EnterprisePerformance Management System Certification Matrix (http://www.oracle.com/technology/software/products/ias/files/fusion_certification.html)> for a complete list of supporteddatabases.
This chapter describes the tables in OLAP Metadata Catalog.
OLAP Metadata CatalogOLAP Metadata Catalog contains a collection of related tables. The tables provide a place foryou to store OLAP models and metaoutlines. When you load members or data into an Essbasedatabase, Integration Services retrieves the information stored in OLAP Metadata Catalog todetermine:
l What data to retrieve from the data source
l What operations to perform on the data
l How to load the data into the Essbase database
Regularly back up the database that contains OLAP Metadata Catalog so that you can restoreOLAP Metadata Catalog from backups if it becomes corrupted. Use one of the procedures inTable 2, depending on what OLAP Metadata Catalog component you want to restore.
Caution! It is strongly recommended that you do not alter the table names or data in OLAPMetadata Catalog with tools other than Integration Services.
OLAP Metadata Catalog 81
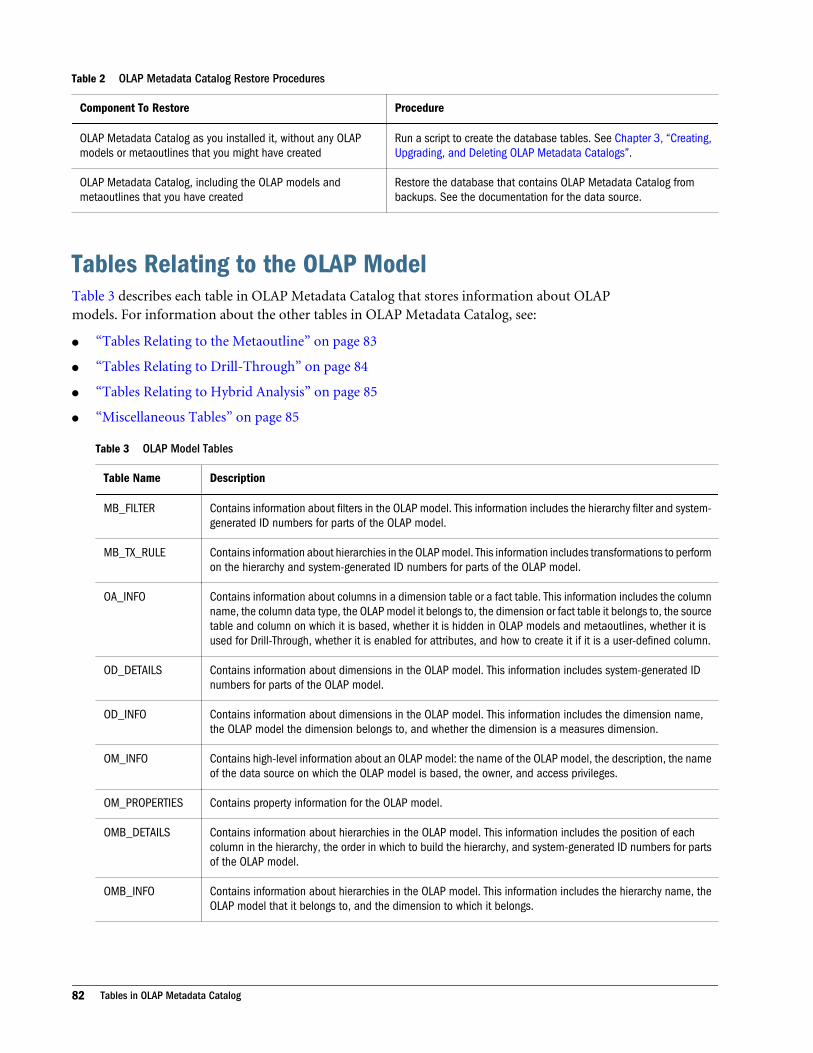
Table 2 OLAP Metadata Catalog Restore Procedures
Component To Restore Procedure
OLAP Metadata Catalog as you installed it, without any OLAPmodels or metaoutlines that you might have created
Run a script to create the database tables. See Chapter 3, “Creating,Upgrading, and Deleting OLAP Metadata Catalogs”.
OLAP Metadata Catalog, including the OLAP models andmetaoutlines that you have created
Restore the database that contains OLAP Metadata Catalog frombackups. See the documentation for the data source.
Tables Relating to the OLAP ModelTable 3 describes each table in OLAP Metadata Catalog that stores information about OLAPmodels. For information about the other tables in OLAP Metadata Catalog, see:
l “Tables Relating to the Metaoutline” on page 83
l “Tables Relating to Drill-Through” on page 84
l “Tables Relating to Hybrid Analysis” on page 85
l “Miscellaneous Tables” on page 85
Table 3 OLAP Model Tables
Table Name Description
MB_FILTER Contains information about filters in the OLAP model. This information includes the hierarchy filter and system-generated ID numbers for parts of the OLAP model.
MB_TX_RULE Contains information about hierarchies in the OLAP model. This information includes transformations to performon the hierarchy and system-generated ID numbers for parts of the OLAP model.
OA_INFO Contains information about columns in a dimension table or a fact table. This information includes the columnname, the column data type, the OLAP model it belongs to, the dimension or fact table it belongs to, the sourcetable and column on which it is based, whether it is hidden in OLAP models and metaoutlines, whether it isused for Drill-Through, whether it is enabled for attributes, and how to create it if it is a user-defined column.
OD_DETAILS Contains information about dimensions in the OLAP model. This information includes system-generated IDnumbers for parts of the OLAP model.
OD_INFO Contains information about dimensions in the OLAP model. This information includes the dimension name,the OLAP model the dimension belongs to, and whether the dimension is a measures dimension.
OM_INFO Contains high-level information about an OLAP model: the name of the OLAP model, the description, the nameof the data source on which the OLAP model is based, the owner, and access privileges.
OM_PROPERTIES Contains property information for the OLAP model.
OMB_DETAILS Contains information about hierarchies in the OLAP model. This information includes the position of eachcolumn in the hierarchy, the order in which to build the hierarchy, and system-generated ID numbers for partsof the OLAP model.
OMB_INFO Contains information about hierarchies in the OLAP model. This information includes the hierarchy name, theOLAP model that it belongs to, and the dimension to which it belongs.
82 Tables in OLAP Metadata Catalog
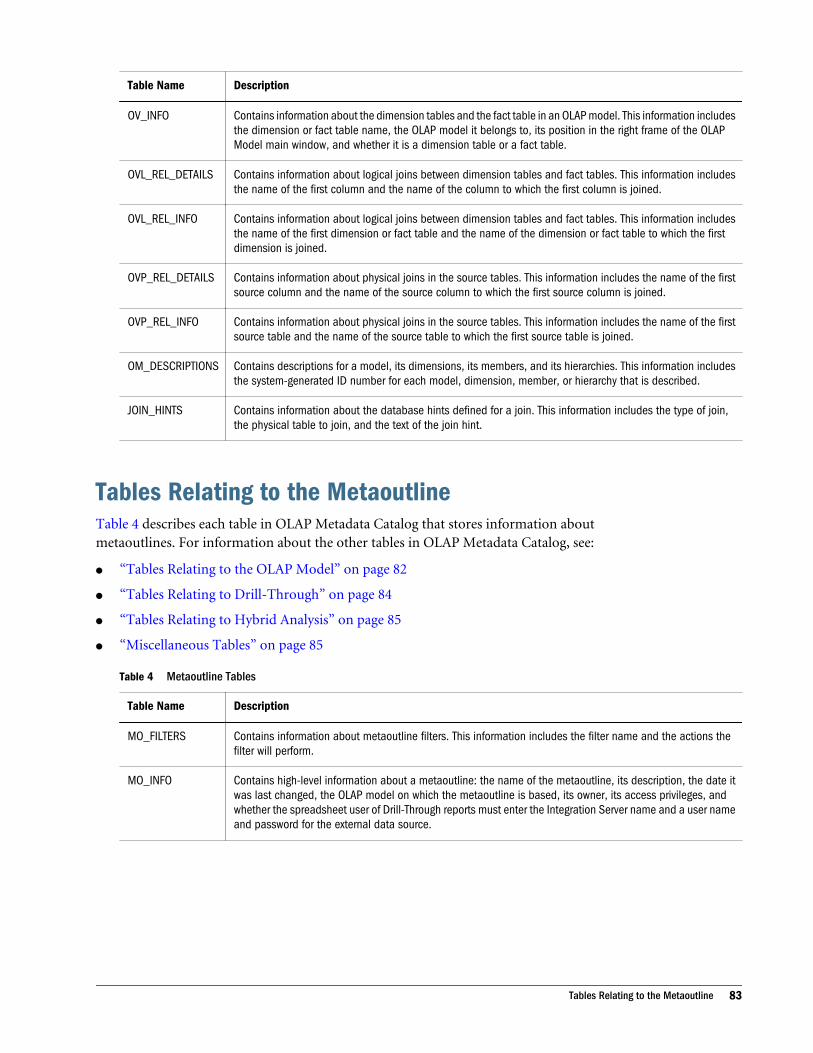
Table Name Description
OV_INFO Contains information about the dimension tables and the fact table in an OLAP model. This information includesthe dimension or fact table name, the OLAP model it belongs to, its position in the right frame of the OLAPModel main window, and whether it is a dimension table or a fact table.
OVL_REL_DETAILS Contains information about logical joins between dimension tables and fact tables. This information includesthe name of the first column and the name of the column to which the first column is joined.
OVL_REL_INFO Contains information about logical joins between dimension tables and fact tables. This information includesthe name of the first dimension or fact table and the name of the dimension or fact table to which the firstdimension is joined.
OVP_REL_DETAILS Contains information about physical joins in the source tables. This information includes the name of the firstsource column and the name of the source column to which the first source column is joined.
OVP_REL_INFO Contains information about physical joins in the source tables. This information includes the name of the firstsource table and the name of the source table to which the first source table is joined.
OM_DESCRIPTIONS Contains descriptions for a model, its dimensions, its members, and its hierarchies. This information includesthe system-generated ID number for each model, dimension, member, or hierarchy that is described.
JOIN_HINTS Contains information about the database hints defined for a join. This information includes the type of join,the physical table to join, and the text of the join hint.
Tables Relating to the MetaoutlineTable 4 describes each table in OLAP Metadata Catalog that stores information aboutmetaoutlines. For information about the other tables in OLAP Metadata Catalog, see:
l “Tables Relating to the OLAP Model” on page 82
l “Tables Relating to Drill-Through” on page 84
l “Tables Relating to Hybrid Analysis” on page 85
l “Miscellaneous Tables” on page 85
Table 4 Metaoutline Tables
Table Name Description
MO_FILTERS Contains information about metaoutline filters. This information includes the filter name and the actions thefilter will perform.
MO_INFO Contains high-level information about a metaoutline: the name of the metaoutline, its description, the date itwas last changed, the OLAP model on which the metaoutline is based, its owner, its access privileges, andwhether the spreadsheet user of Drill-Through reports must enter the Integration Server name and a user nameand password for the external data source.
Tables Relating to the Metaoutline 83

Table Name Description
MO_PROPERTIES Contains information about metaoutline properties. This information includes the name and value ofmetaoutline properties, the name of the source table and column that Integration Services uses to assign theproperties, the numeric range that represents a range specified by the user, Global Settings properties, andsort order.
Sort order is based on a column in the data source, including columns not present in the OLAP model ormetaoutline. Sort order can be ascending or descending.
Also contains information on association of attributes (by level or by name) to base dimensions.
MOD_ATTRIBUTES Contains information about attribute dimensions, such as attribute dimension type, alias names, andtransformation rules.
MOD_INFO Contains information about dimensions in a metaoutline. This information includes the dimension name, theOLAP dimension with which it is associated (unless it is a user-defined dimension), the type of dimension (auser-defined dimension, a measures dimension, a standard dimension, or an attribute dimension), and howmembers are positioned within the dimension.
MS_INFO Contains information about members in a metaoutline. This information includes the name of the member,the dimension to which it belongs, whether it is a user-defined member or a standard member, the OLAP tablewith which it is associated, the OLAP model column with which it is associated, the name of its parent, how itis positioned with its siblings, and the database measure with which it is associated (if it is a user-definedmember).
MS_PREDICATES Contains information about members in a metaoutline. This information includes member filters.
MS_TX_RULE Contains information about members in a metaoutline. This information includes member transformation rules.
MSR_INFO Contains information about database measures in a metaoutline. This information includes the name of themeasure, the OLAP model table with which it is associated, the OLAP model column with which it is associated,and how it is positioned with its siblings.
MSR_PREDICATES Contains information about database measures in a metaoutline. This information includes measure filters.
MSR_TX_RULE Contains information about database measures in a metaoutline. This information includes the name anddefinition of measure transformation rules.
MO_DESCRIPTIONS Contains descriptions for a metaoutline, its filters, its dimensions, and its members. This information includesthe system-generated ID number for each metaoutline, filter, dimension, or member that is described.
Tables Relating to Drill-ThroughDrill-through reports are created in the OLAP Metaoutline main window of the IntegrationServices Console (refer to online help for information on creating drill-through reports). Thesereports enable Essbase Spreadsheet Add-in users to view data in the data source database that isnot stored in the Essbase database.
Table 5 describes each table in OLAP Metadata Catalog that stores information about drill-through reports. For information about the other tables in OLAP Metadata Catalog, see:
l “Tables Relating to the OLAP Model” on page 82
l “Tables Relating to the Metaoutline” on page 83
l “Tables Relating to Hybrid Analysis” on page 85
84 Tables in OLAP Metadata Catalog
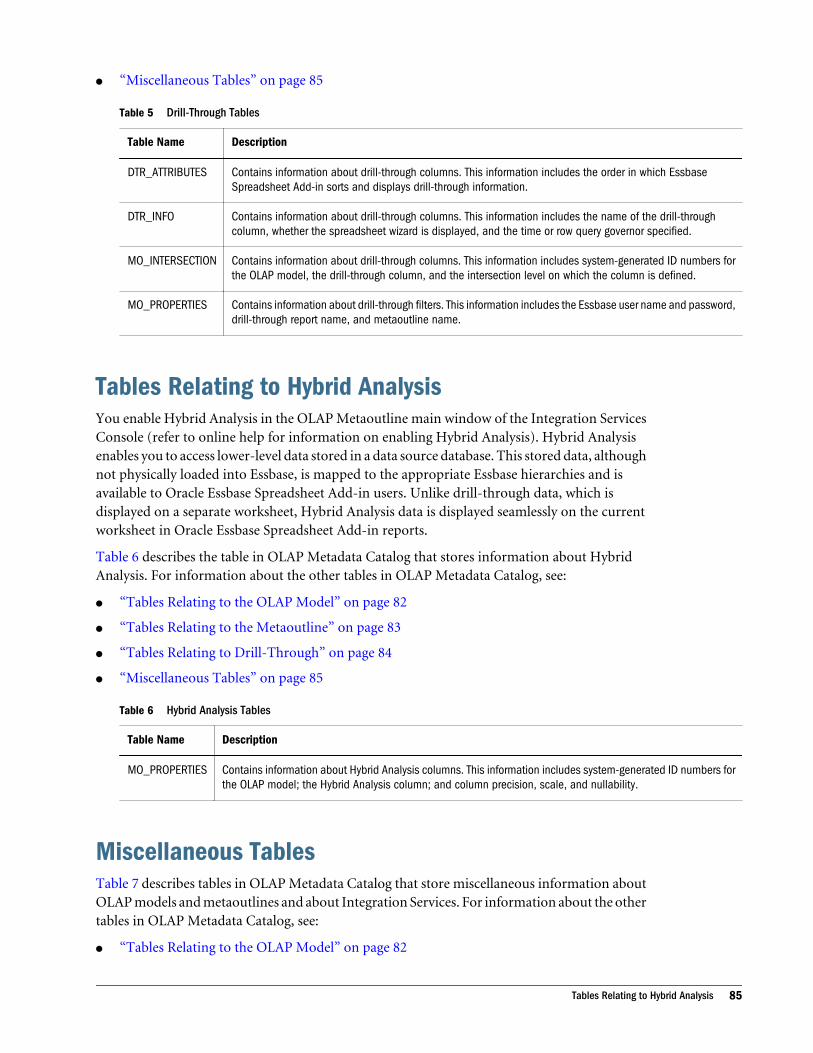
l “Miscellaneous Tables” on page 85
Table 5 Drill-Through Tables
Table Name Description
DTR_ATTRIBUTES Contains information about drill-through columns. This information includes the order in which EssbaseSpreadsheet Add-in sorts and displays drill-through information.
DTR_INFO Contains information about drill-through columns. This information includes the name of the drill-throughcolumn, whether the spreadsheet wizard is displayed, and the time or row query governor specified.
MO_INTERSECTION Contains information about drill-through columns. This information includes system-generated ID numbers forthe OLAP model, the drill-through column, and the intersection level on which the column is defined.
MO_PROPERTIES Contains information about drill-through filters. This information includes the Essbase user name and password,drill-through report name, and metaoutline name.
Tables Relating to Hybrid AnalysisYou enable Hybrid Analysis in the OLAP Metaoutline main window of the Integration ServicesConsole (refer to online help for information on enabling Hybrid Analysis). Hybrid Analysisenables you to access lower-level data stored in a data source database. This stored data, althoughnot physically loaded into Essbase, is mapped to the appropriate Essbase hierarchies and isavailable to Oracle Essbase Spreadsheet Add-in users. Unlike drill-through data, which isdisplayed on a separate worksheet, Hybrid Analysis data is displayed seamlessly on the currentworksheet in Oracle Essbase Spreadsheet Add-in reports.
Table 6 describes the table in OLAP Metadata Catalog that stores information about HybridAnalysis. For information about the other tables in OLAP Metadata Catalog, see:
l “Tables Relating to the OLAP Model” on page 82
l “Tables Relating to the Metaoutline” on page 83
l “Tables Relating to Drill-Through” on page 84
l “Miscellaneous Tables” on page 85
Table 6 Hybrid Analysis Tables
Table Name Description
MO_PROPERTIES Contains information about Hybrid Analysis columns. This information includes system-generated ID numbers forthe OLAP model; the Hybrid Analysis column; and column precision, scale, and nullability.
Miscellaneous TablesTable 7 describes tables in OLAP Metadata Catalog that store miscellaneous information aboutOLAP models and metaoutlines and about Integration Services. For information about the othertables in OLAP Metadata Catalog, see:
l “Tables Relating to the OLAP Model” on page 82
Tables Relating to Hybrid Analysis 85
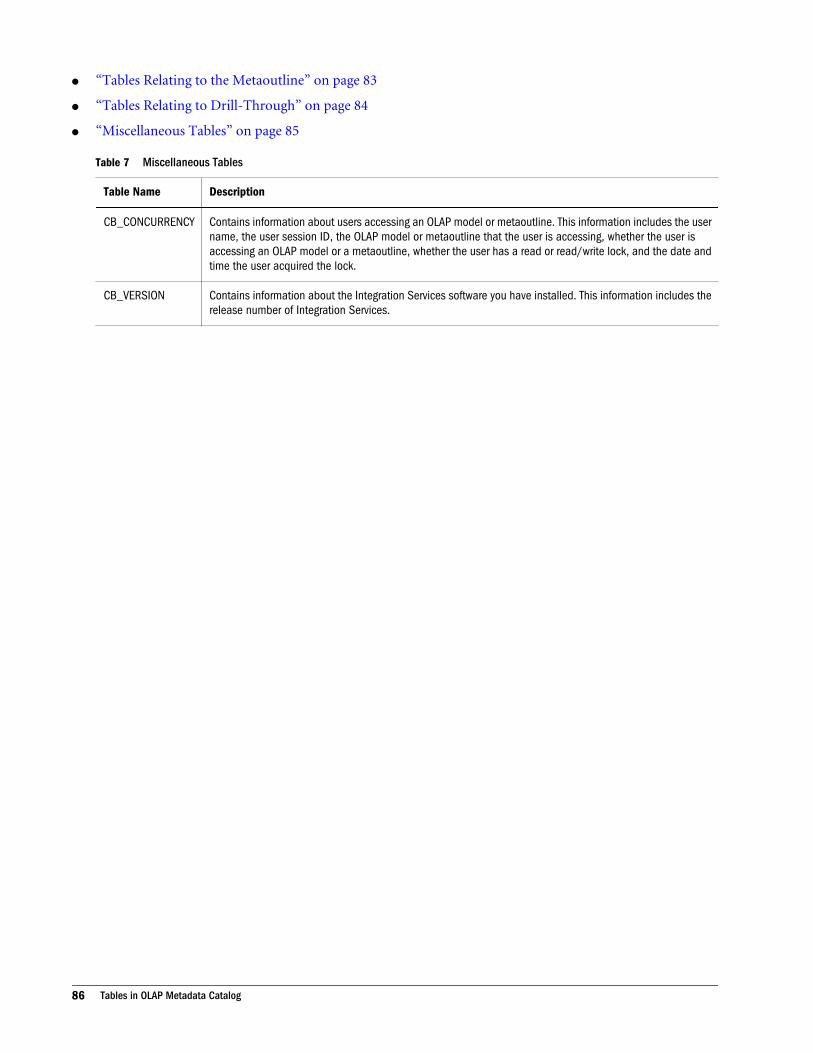
l “Tables Relating to the Metaoutline” on page 83
l “Tables Relating to Drill-Through” on page 84
l “Miscellaneous Tables” on page 85
Table 7 Miscellaneous Tables
Table Name Description
CB_CONCURRENCY Contains information about users accessing an OLAP model or metaoutline. This information includes the username, the user session ID, the OLAP model or metaoutline that the user is accessing, whether the user isaccessing an OLAP model or a metaoutline, whether the user has a read or read/write lock, and the date andtime the user acquired the lock.
CB_VERSION Contains information about the Integration Services software you have installed. This information includes therelease number of Integration Services.
86 Tables in OLAP Metadata Catalog
5Setting Up
the Sample Applications
In This Chapter
Overview of Sample Applications... . . . . . . . . . . . . . . . . . . . . . . . . . . . . . . . . . . . . . . . . . . . . . . . . . . . . . . . . . . . . . . . . . . . . . .87
Preparing to Set Up the Standard Sample Application... . . . . . . . . . . . . . . . . . . . . . . . . . . . . . . . . . . . . . . . . . . . . . .89
Setting Up the Standard Sample Application Automatically.. . . . . . . . . . . . . . . . . . . . . . . . . . . . . . . . . . . . . . . . . .89
Setting Up the Standard Sample Application Manually .. . . . . . . . . . . . . . . . . . . . . . . . . . . . . . . . . . . . . . . . . . . . . . .91
Setting Up the TBC Relational Data Source ... . . . . . . . . . . . . . . . . . . . . . . . . . . . . . . . . . . . . . . . . . . . . . . . . . . . . . . . . . .92
Setting Up the TBC_MD OLAP Metadata Catalog ... . . . . . . . . . . . . . . . . . . . . . . . . . . . . . . . . . . . . . . . . . . . . . . . . . . . .94
Setting Up the Hybrid Analysis Sample Application ... . . . . . . . . . . . . . . . . . . . . . . . . . . . . . . . . . . . . . . . . . . . . . . . . .99
Setting Up the Unicode Sample Application ... . . . . . . . . . . . . . . . . . . . . . . . . . . . . . . . . . . . . . . . . . . . . . . . . . . . . . . . 108
After Setting Up the Sample Application ... . . . . . . . . . . . . . . . . . . . . . . . . . . . . . . . . . . . . . . . . . . . . . . . . . . . . . . . . . . . 111
This chapter tells you what to consider before and after you set up the standard sampleapplication, whether automatically or manually. For manual setup, the topics in this chapterdetail which scripts and batch files you must run to create and load the TBC database and theTBC_MD OLAP Metadata Catalog.
The procedures in this chapter assume that you know how to create a database using a relationaldatabase management system (RDBMS). For manual setup, the procedures assume that youknow how to create tables and load them with data running SQL scripts, batch files, and shellscripts. For information on these topics, see the documentation for the RDBMS that you areusing.
Overview of Sample ApplicationsIntegration Services provides sample applications that consists of the following features:
l A database for a fictitious company called The Beverage Company (TBC)
l A sample OLAP model and metaoutline created from the TBC database
l A Hybrid Analysis-enabled OLAP model and metaoutline
l A special OLAP Metadata Catalog to store the sample OLAP models and metaoutlines andany additional OLAP models and metaoutlines that you create using the sample data
Preparing the sample application consists of three tasks:
l Setting up the standard sample application
Overview of Sample Applications 87
l Optional: Setting up the Hybrid Analysis sample application
l Optional: Setting up the Unicode sample application
You can set up the standard sample application automatically using Integration Services Console(see “Setting Up the Standard Sample Application Automatically” on page 89), or you can setup the standard sample application manually (“Setting Up the Standard Sample ApplicationManually” on page 91. Using either method, setting up the standard sample applicationinvolves two main tasks:
l You create two relational databases: one for the data in the TBC sample application and onefor the OLAP Metadata Catalog database (TBC_MD).
Note: Creating the relational databases is a manual task that you must perform prior tosetting up the standard sample application, regardless of whether you choose theautomatic or manual method.
l You then create tables in each of these databases and load data into them, using scriptsprovided with Integration Services. You can create tables either automatically, through theuse of Integration Services Console, or manually.
When you finish setting up the standard sample application, the OLAP Metadata Catalogdatabase (TBC_MD) will contain an OLAP model (TBC Model) and a metaoutline (TBCMetaoutline) based on data in the sample TBC relational data source.
You create the Hybrid Analysis sample application manually by completing the tasks in “SettingUp the Hybrid Analysis Sample Application” on page 99. Upon completion of these tasks, thesample TBC relational data source will contain Hybrid Analysis data. The OLAP MetadataCatalog will contain a Hybrid Analysis-enabled OLAP model (HA TBC Model) and metaoutline(HA TBC Metaoutline).
You create the Unicode sample application manually by completing the tasks in “Setting Up theUnicode Sample Application” on page 108. Upon completion of these tasks, the sample TBC_Urelational data source will contain Unicode enabled data. The Unicode TBC_MD_U OLAPMetadata Catalog will contain Unicode-enabled OLAP model (TBC_Model_Unicode) andmetaoutline (TBC_Metaoutline_Unicode).
Caution! If you have installed the sample application from a previous release of IntegrationServices, you should back up and preserve your existing sample database, OLAPMetadata Catalog, and the OLAP models and metaoutlines that OLAP MetadataCatalog contains. You can then upgrade your existing catalog to be compatible withthe current release of the software (see “Upgrading OLAP Metadata CatalogsManually” on page 75). You cannot, however, store newly created OLAP models andmetaoutlines in your previous catalog.
88 Setting Up the Sample Applications

Preparing to Set Up the Standard Sample ApplicationBefore you set up the standard sample application, you must install the database client softwarefor a supported RDBMS. When setting up the standard sample application, you must use acomputer on which the server component of Integration Services (Essbase Integration Server)and the necessary database client software are both installed. For more information, see “SettingUp the Standard Sample Application Automatically” on page 89.
For manual setup of the standard sample application, the standard sample application scriptsdo not have to be installed on the same computer that you are using, but you must be able toaccess the script files.
Note: strongly recommends that you use the automatic installation process to install thestandard sample applications (see “Setting Up the Standard Sample ApplicationAutomatically” on page 89).
If you choose to set up the standard sample application manually, refer to Table 8 and also verifythat the appropriate client utility program is installed.
Table 8 Required Utilities for Setting Up the Standard Sample Application
Database Utility Programs
IBM DB2 UDB IBM DB2 Command Window or >DB2 -tvf
Microsoft SQL Server Query Analyzer
Oracle SQL*Plus
Teradata BTEQ
The remainder of this chapter assumes that you have installed the required database clientsoftware.
Setting Up the Standard Sample ApplicationAutomaticallyAfter you have completed the Integration Services installation process, you can choose to installeither or both the OLAP Metadata Catalog and the standard sample application. The systemfirst displays the OLAP Metadata Catalog Setup dialog box to enable automatic setup of thecatalog (see “Creating or Upgrading OLAP Metadata Catalogs Automatically” on page 73).
Whether or not you choose to create the OLAP Metadata Catalog automatically, you can chooseto create the standard sample application automatically, after you finish creating the OLAPMetadata Catalog. You can create the standard sample application quickly and easily using theautomatic feature. You are encouraged to use this convenient feature, but if you choose manualsetup, see “Setting Up the Standard Sample Application Manually” on page 91 for detailedprocedures.
Preparing to Set Up the Standard Sample Application 89
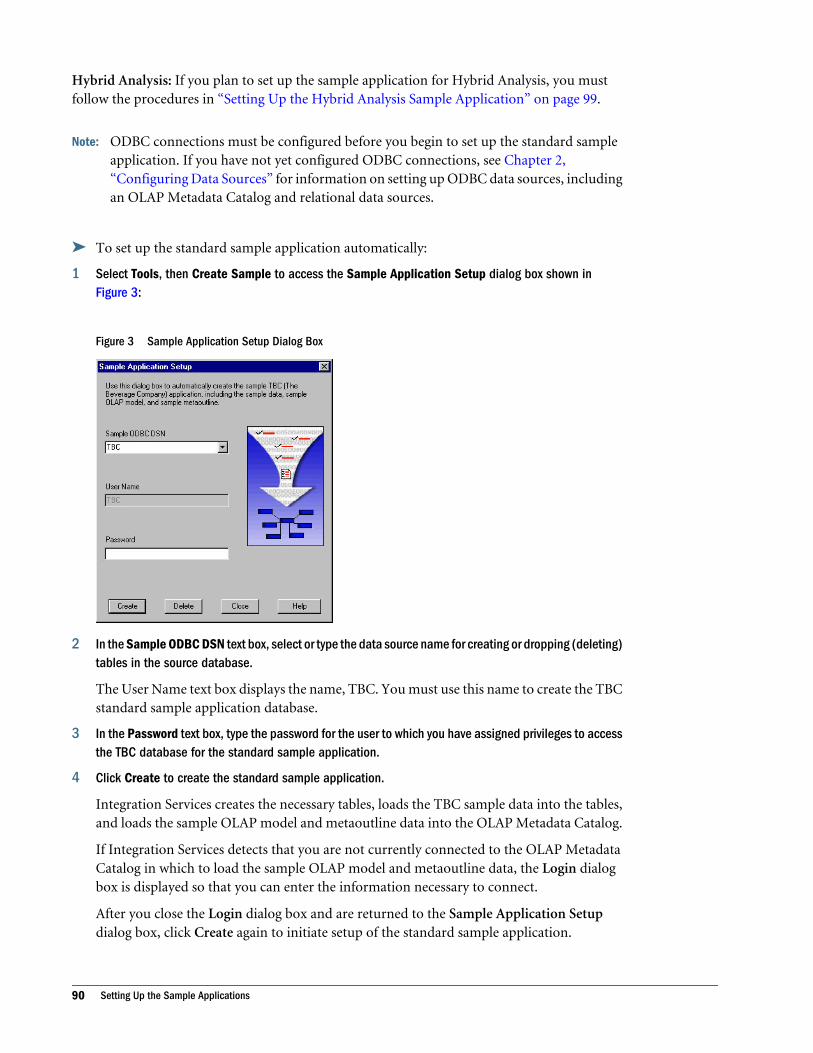
Hybrid Analysis: If you plan to set up the sample application for Hybrid Analysis, you mustfollow the procedures in “Setting Up the Hybrid Analysis Sample Application” on page 99.
Note: ODBC connections must be configured before you begin to set up the standard sampleapplication. If you have not yet configured ODBC connections, see Chapter 2,“Configuring Data Sources” for information on setting up ODBC data sources, includingan OLAP Metadata Catalog and relational data sources.
ä To set up the standard sample application automatically:
1 Select Tools, then Create Sample to access the Sample Application Setup dialog box shown inFigure 3:
Figure 3 Sample Application Setup Dialog Box
2 In the Sample ODBC DSN text box, select or type the data source name for creating or dropping (deleting)tables in the source database.
The User Name text box displays the name, TBC. You must use this name to create the TBCstandard sample application database.
3 In the Password text box, type the password for the user to which you have assigned privileges to accessthe TBC database for the standard sample application.
4 Click Create to create the standard sample application.
Integration Services creates the necessary tables, loads the TBC sample data into the tables,and loads the sample OLAP model and metaoutline data into the OLAP Metadata Catalog.
If Integration Services detects that you are not currently connected to the OLAP MetadataCatalog in which to load the sample OLAP model and metaoutline data, the Login dialogbox is displayed so that you can enter the information necessary to connect.
After you close the Login dialog box and are returned to the Sample Application Setupdialog box, click Create again to initiate setup of the standard sample application.
90 Setting Up the Sample Applications
If, after clicking Create, Integration Services detects either an existing sample data source oran existing sample OLAP model and metaoutline in the OLAP Metadata Catalog, you areprompted with the message that tables already exist in the database. Click OK to return tothe Sample Application Setup dialog box to reenter information, or click Delete to deletethe existing standard sample application data.
If you click Delete, your existing OLAP Metadata Catalog sample OLAP models andmetaoutlines will be deleted and replaced with the sample OLAP model and metaoutlinefor the current release.
After you have completed creation of the Integration Services standard sample application, youare ready to begin working with Integration Services Console to create your own sample OLAPmodels and metaoutlines.
Setting Up the Standard Sample Application ManuallyTo set up the standard sample application manually, you begin by creating two databases in asupported RDBMS: TBC (the sample database) and TBC_MD (an OLAP Metadata Catalog).You then create tables in each of these databases and load data into them, using scripts providedwith Integration Services. The names and directory locations of these scripts are detailed in thetopics that follow.
Note: strongly recommends that you use the automatic installation process to install thestandard sample applications (see “Setting Up the Standard Sample ApplicationAutomatically” on page 89).
After you create the TBC and TBC_MD databases in a supported RDBMS, you use several scriptsand files to create the standard sample application:
l A script for creating the TBC sample database tables
This script is located in the samples\tbcdbase directory.
l A script for loading the TBC sample database data
This script is located in the samples\tbcdbase directory.
l A script for creating the TBC_MD OLAP Metadata Catalog database tables
This script is located in the ocscript directory.
l XML files for importing a sample OLAP model and metaoutline in the TBC_MD OLAPMetadata Catalog database
These XML files are located in the samples\tbcmodel directory.
The scripts for creating the standard sample application and OLAP Metadata Catalog areinstalled with the server software during Integration Services installation. Different versions ofthe scripts are provided for each of the supported RDBMSs.
Setting Up the Standard Sample Application Manually 91
Note: Some of the standard sample application scripts require slightly different procedures,depending on the RDBMS that you are using.
Setting Up the TBC Relational Data SourceThe relational data source for the standard sample application is TBC.
Note: To create a database, you must have database administrator or similar access privilegesrequired by the RDBMS that you are using.
ä To set up TBC relational data source:
1 Create the TBC database using an RDBMS.
For more information, see “Creating the TBC Database” on page 92.
2 Create tables for the TBC database by running SQL scripts.
For instructions, see “Creating Tables for the TBC Database” on page 92.
3 Load data into the TBC database by running SQL scripts.
For instructions, see “Loading Data into the TBC Tables” on page 93.
Creating the TBC DatabaseCreate the TBC database in the same way that you create any database using an RDBMS:
l Create a database device or tablespace named TBC.
l Allot 20 MB for storage.
l Create a user TBC who can drop and create tables.
l Grant user privileges or permissions to create and drop tables.
Caution! The user TBC must create the tables for the TBC database, or portions of thestandard sample application will not work.
Creating Tables for the TBC DatabaseCreate tables for the TBC database with the same utility program that you typically use to createtables by running SQL scripts.
The standard sample application SQL scripts needed to create tables for the TBC database arein the samples\tbcdbase directory where you installed Integration Server.
The utilities listed in Table 9 have been tested to work with the SQL scripts:
92 Setting Up the Sample Applications
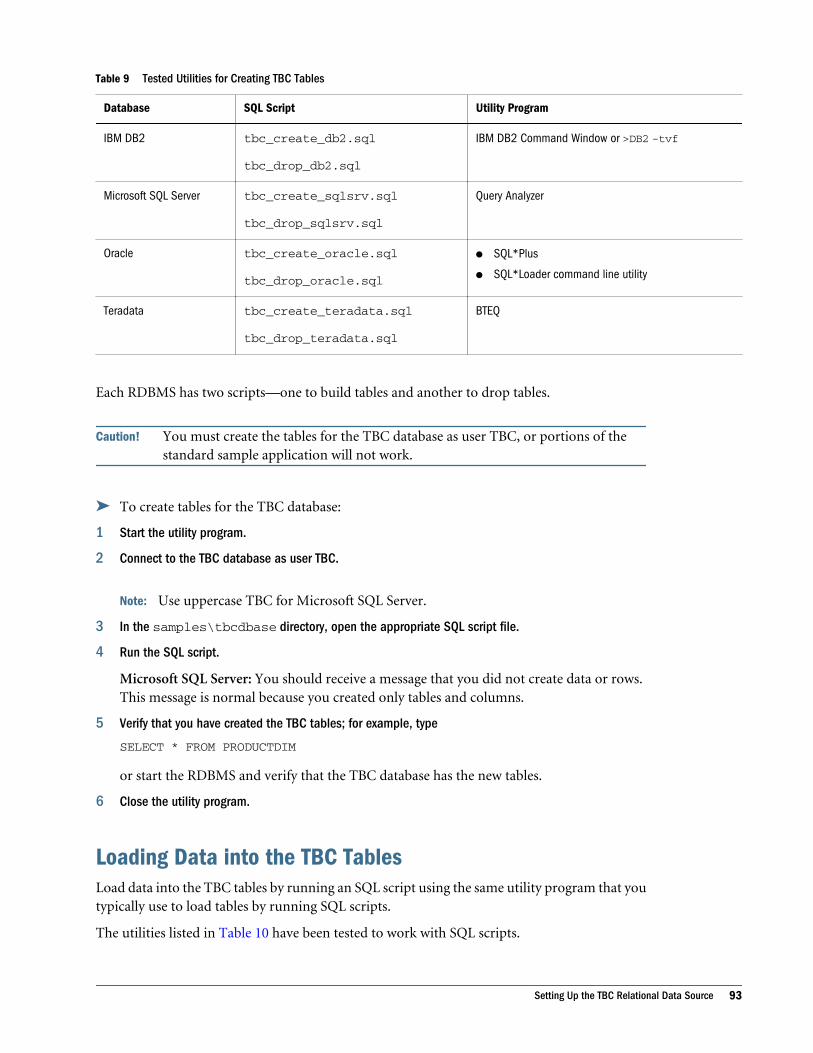
Table 9 Tested Utilities for Creating TBC Tables
Database SQL Script Utility Program
IBM DB2 tbc_create_db2.sql
tbc_drop_db2.sql
IBM DB2 Command Window or >DB2 -tvf
Microsoft SQL Server tbc_create_sqlsrv.sql
tbc_drop_sqlsrv.sql
Query Analyzer
Oracle tbc_create_oracle.sql
tbc_drop_oracle.sql
l SQL*Plus
l SQL*Loader command line utility
Teradata tbc_create_teradata.sql
tbc_drop_teradata.sql
BTEQ
Each RDBMS has two scripts—one to build tables and another to drop tables.
Caution! You must create the tables for the TBC database as user TBC, or portions of thestandard sample application will not work.
ä To create tables for the TBC database:
1 Start the utility program.
2 Connect to the TBC database as user TBC.
Note: Use uppercase TBC for Microsoft SQL Server.
3 In the samples\tbcdbase directory, open the appropriate SQL script file.
4 Run the SQL script.
Microsoft SQL Server: You should receive a message that you did not create data or rows.This message is normal because you created only tables and columns.
5 Verify that you have created the TBC tables; for example, type
SELECT * FROM PRODUCTDIM
or start the RDBMS and verify that the TBC database has the new tables.
6 Close the utility program.
Loading Data into the TBC TablesLoad data into the TBC tables by running an SQL script using the same utility program that youtypically use to load tables by running SQL scripts.
The utilities listed in Table 10 have been tested to work with SQL scripts.
Setting Up the TBC Relational Data Source 93
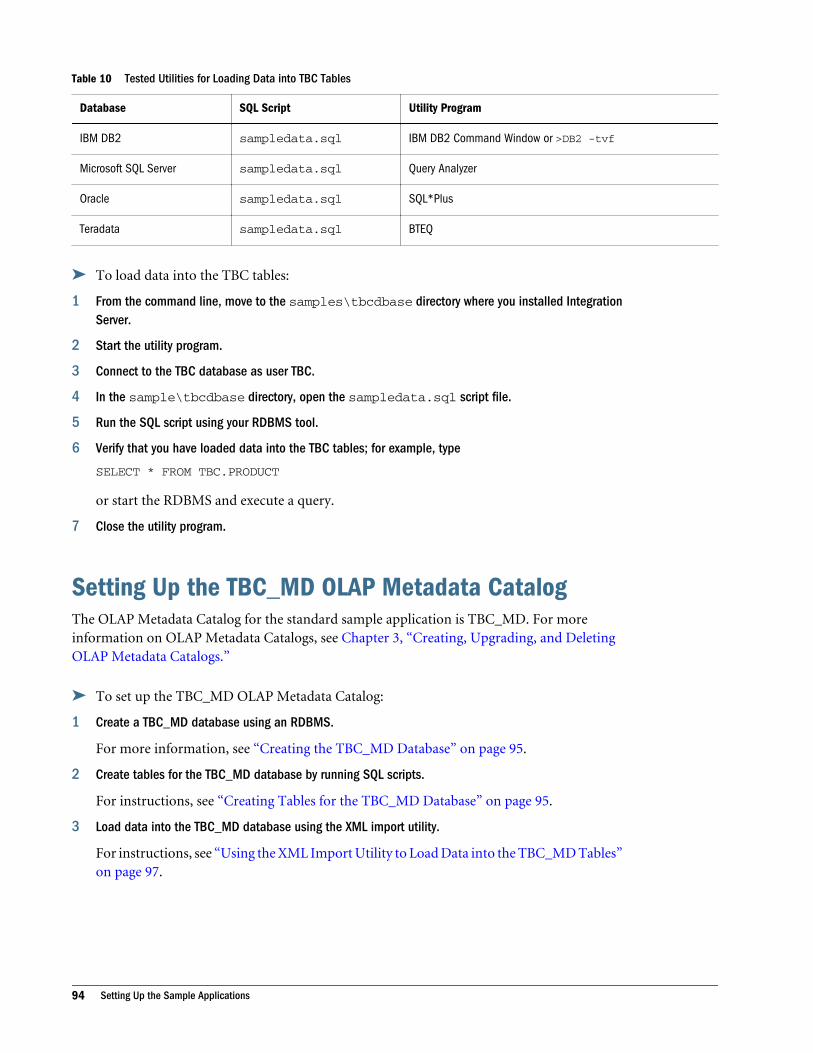
Table 10 Tested Utilities for Loading Data into TBC Tables
Database SQL Script Utility Program
IBM DB2 sampledata.sql IBM DB2 Command Window or >DB2 -tvf
Microsoft SQL Server sampledata.sql Query Analyzer
Oracle sampledata.sql SQL*Plus
Teradata sampledata.sql BTEQ
ä To load data into the TBC tables:
1 From the command line, move to the samples\tbcdbase directory where you installed IntegrationServer.
2 Start the utility program.
3 Connect to the TBC database as user TBC.
4 In the sample\tbcdbase directory, open the sampledata.sql script file.
5 Run the SQL script using your RDBMS tool.
6 Verify that you have loaded data into the TBC tables; for example, type
SELECT * FROM TBC.PRODUCT
or start the RDBMS and execute a query.
7 Close the utility program.
Setting Up the TBC_MD OLAP Metadata CatalogThe OLAP Metadata Catalog for the standard sample application is TBC_MD. For moreinformation on OLAP Metadata Catalogs, see Chapter 3, “Creating, Upgrading, and DeletingOLAP Metadata Catalogs.”
ä To set up the TBC_MD OLAP Metadata Catalog:
1 Create a TBC_MD database using an RDBMS.
For more information, see “Creating the TBC_MD Database” on page 95.
2 Create tables for the TBC_MD database by running SQL scripts.
For instructions, see “Creating Tables for the TBC_MD Database” on page 95.
3 Load data into the TBC_MD database using the XML import utility.
For instructions, see “Using the XML Import Utility to Load Data into the TBC_MD Tables”on page 97.
94 Setting Up the Sample Applications
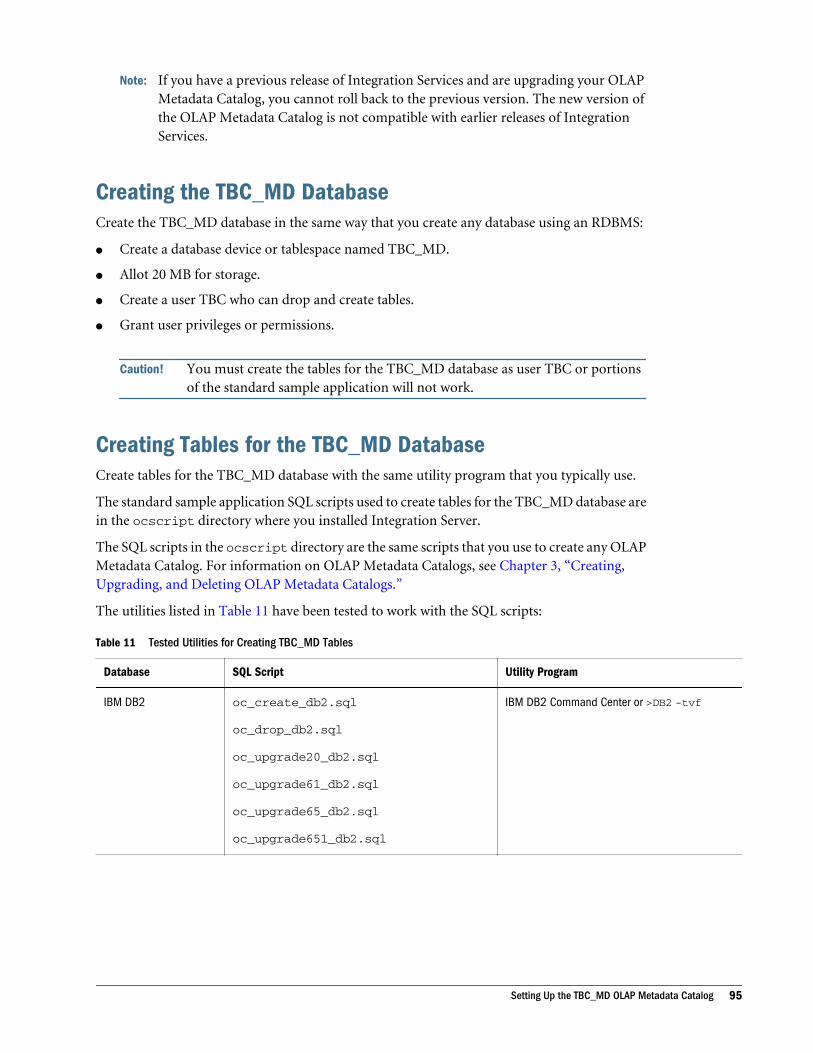
Note: If you have a previous release of Integration Services and are upgrading your OLAPMetadata Catalog, you cannot roll back to the previous version. The new version ofthe OLAP Metadata Catalog is not compatible with earlier releases of IntegrationServices.
Creating the TBC_MD DatabaseCreate the TBC_MD database in the same way that you create any database using an RDBMS:
l Create a database device or tablespace named TBC_MD.
l Allot 20 MB for storage.
l Create a user TBC who can drop and create tables.
l Grant user privileges or permissions.
Caution! You must create the tables for the TBC_MD database as user TBC or portionsof the standard sample application will not work.
Creating Tables for the TBC_MD DatabaseCreate tables for the TBC_MD database with the same utility program that you typically use.
The standard sample application SQL scripts used to create tables for the TBC_MD database arein the ocscript directory where you installed Integration Server.
The SQL scripts in the ocscript directory are the same scripts that you use to create any OLAPMetadata Catalog. For information on OLAP Metadata Catalogs, see Chapter 3, “Creating,Upgrading, and Deleting OLAP Metadata Catalogs.”
The utilities listed in Table 11 have been tested to work with the SQL scripts:
Table 11 Tested Utilities for Creating TBC_MD Tables
Database SQL Script Utility Program
IBM DB2 oc_create_db2.sql
oc_drop_db2.sql
oc_upgrade20_db2.sql
oc_upgrade61_db2.sql
oc_upgrade65_db2.sql
oc_upgrade651_db2.sql
IBM DB2 Command Center or >DB2 -tvf
Setting Up the TBC_MD OLAP Metadata Catalog 95
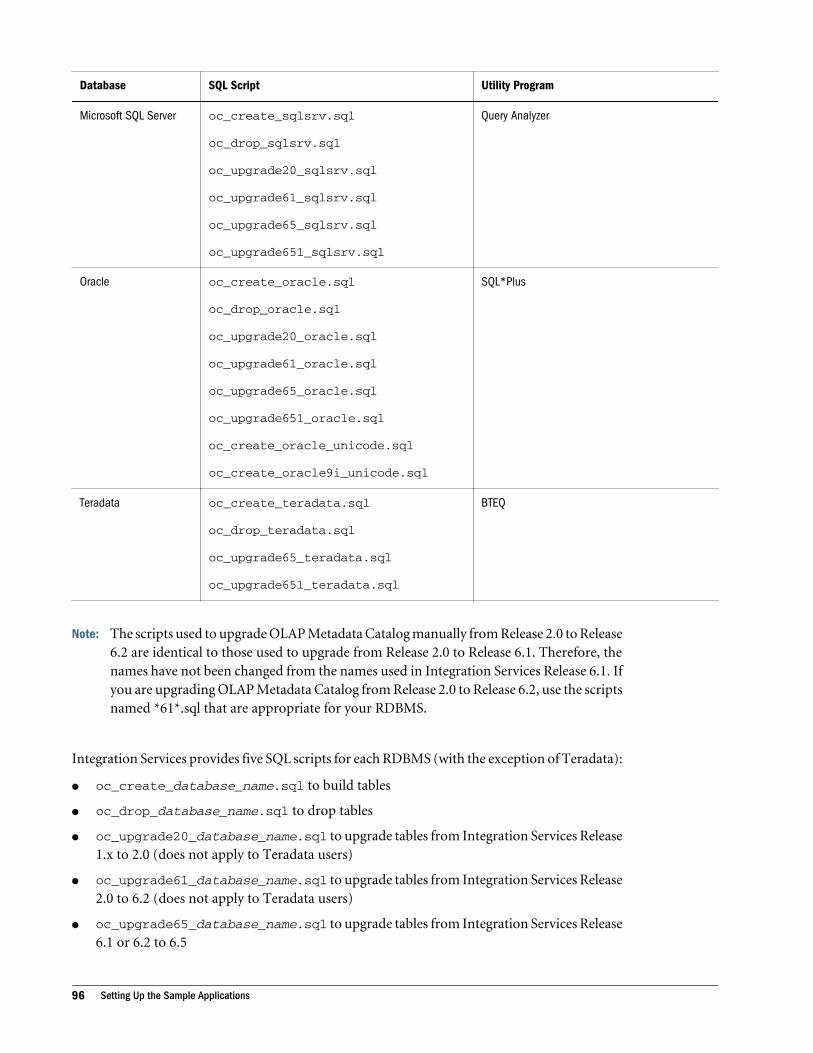
Database SQL Script Utility Program
Microsoft SQL Server oc_create_sqlsrv.sql
oc_drop_sqlsrv.sql
oc_upgrade20_sqlsrv.sql
oc_upgrade61_sqlsrv.sql
oc_upgrade65_sqlsrv.sql
oc_upgrade651_sqlsrv.sql
Query Analyzer
Oracle oc_create_oracle.sql
oc_drop_oracle.sql
oc_upgrade20_oracle.sql
oc_upgrade61_oracle.sql
oc_upgrade65_oracle.sql
oc_upgrade651_oracle.sql
oc_create_oracle_unicode.sql
oc_create_oracle9i_unicode.sql
SQL*Plus
Teradata oc_create_teradata.sql
oc_drop_teradata.sql
oc_upgrade65_teradata.sql
oc_upgrade651_teradata.sql
BTEQ
Note: The scripts used to upgrade OLAP Metadata Catalog manually from Release 2.0 to Release6.2 are identical to those used to upgrade from Release 2.0 to Release 6.1. Therefore, thenames have not been changed from the names used in Integration Services Release 6.1. Ifyou are upgrading OLAP Metadata Catalog from Release 2.0 to Release 6.2, use the scriptsnamed *61*.sql that are appropriate for your RDBMS.
Integration Services provides five SQL scripts for each RDBMS (with the exception of Teradata):
l oc_create_database_name.sql to build tables
l oc_drop_database_name.sql to drop tables
l oc_upgrade20_database_name.sql to upgrade tables from Integration Services Release1.x to 2.0 (does not apply to Teradata users)
l oc_upgrade61_database_name.sql to upgrade tables from Integration Services Release2.0 to 6.2 (does not apply to Teradata users)
l oc_upgrade65_database_name.sql to upgrade tables from Integration Services Release6.1 or 6.2 to 6.5
96 Setting Up the Sample Applications
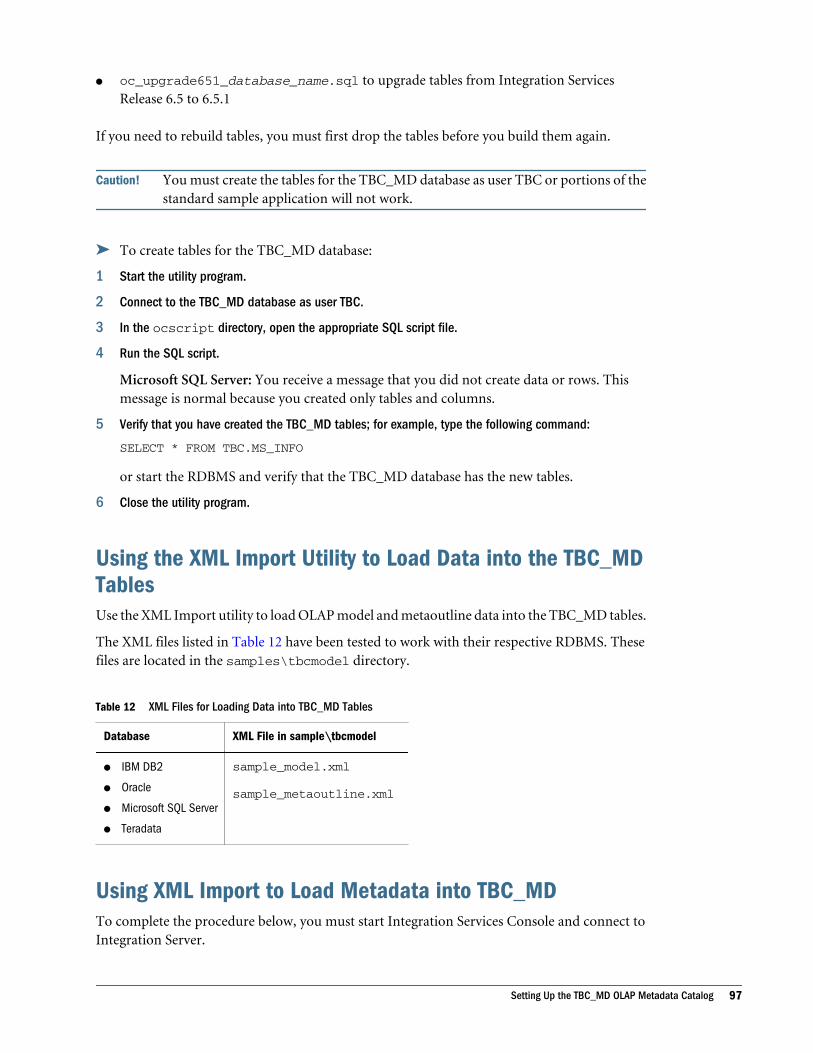
l oc_upgrade651_database_name.sql to upgrade tables from Integration ServicesRelease 6.5 to 6.5.1
If you need to rebuild tables, you must first drop the tables before you build them again.
Caution! You must create the tables for the TBC_MD database as user TBC or portions of thestandard sample application will not work.
ä To create tables for the TBC_MD database:
1 Start the utility program.
2 Connect to the TBC_MD database as user TBC.
3 In the ocscript directory, open the appropriate SQL script file.
4 Run the SQL script.
Microsoft SQL Server: You receive a message that you did not create data or rows. Thismessage is normal because you created only tables and columns.
5 Verify that you have created the TBC_MD tables; for example, type the following command:
SELECT * FROM TBC.MS_INFO
or start the RDBMS and verify that the TBC_MD database has the new tables.
6 Close the utility program.
Using the XML Import Utility to Load Data into the TBC_MDTablesUse the XML Import utility to load OLAP model and metaoutline data into the TBC_MD tables.
The XML files listed in Table 12 have been tested to work with their respective RDBMS. Thesefiles are located in the samples\tbcmodel directory.
Table 12 XML Files for Loading Data into TBC_MD Tables
Database XML File in sample\tbcmodel
l IBM DB2
l Oracle
l Microsoft SQL Server
l Teradata
sample_model.xml
sample_metaoutline.xml
Using XML Import to Load Metadata into TBC_MDTo complete the procedure below, you must start Integration Services Console and connect toIntegration Server.
Setting Up the TBC_MD OLAP Metadata Catalog 97
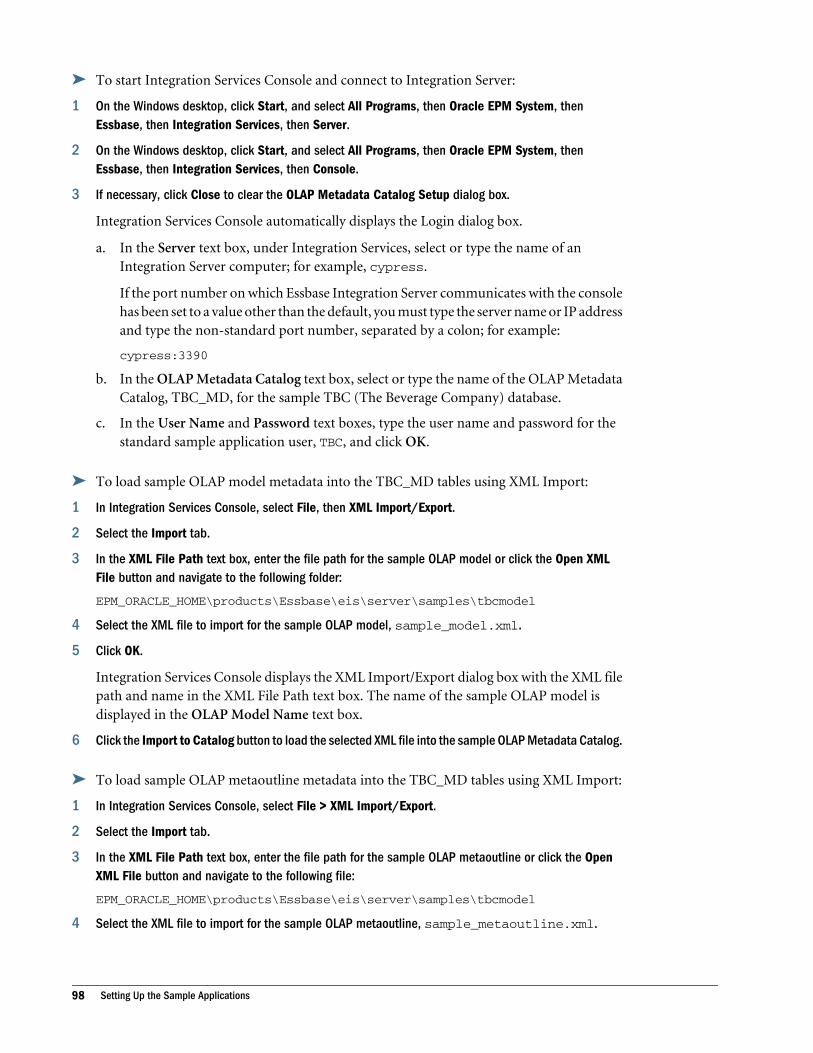
ä To start Integration Services Console and connect to Integration Server:
1 On the Windows desktop, click Start, and select All Programs, then Oracle EPM System, thenEssbase, then Integration Services, then Server.
2 On the Windows desktop, click Start, and select All Programs, then Oracle EPM System, thenEssbase, then Integration Services, then Console.
3 If necessary, click Close to clear the OLAP Metadata Catalog Setup dialog box.
Integration Services Console automatically displays the Login dialog box.
a. In the Server text box, under Integration Services, select or type the name of anIntegration Server computer; for example, cypress.
If the port number on which Essbase Integration Server communicates with the consolehas been set to a value other than the default, you must type the server name or IP addressand type the non-standard port number, separated by a colon; for example:
cypress:3390
b. In the OLAP Metadata Catalog text box, select or type the name of the OLAP MetadataCatalog, TBC_MD, for the sample TBC (The Beverage Company) database.
c. In the User Name and Password text boxes, type the user name and password for thestandard sample application user, TBC, and click OK.
ä To load sample OLAP model metadata into the TBC_MD tables using XML Import:
1 In Integration Services Console, select File, then XML Import/Export.
2 Select the Import tab.
3 In the XML File Path text box, enter the file path for the sample OLAP model or click the Open XMLFile button and navigate to the following folder:
EPM_ORACLE_HOME\products\Essbase\eis\server\samples\tbcmodel
4 Select the XML file to import for the sample OLAP model, sample_model.xml.
5 Click OK.
Integration Services Console displays the XML Import/Export dialog box with the XML filepath and name in the XML File Path text box. The name of the sample OLAP model isdisplayed in the OLAP Model Name text box.
6 Click the Import to Catalog button to load the selected XML file into the sample OLAP Metadata Catalog.
ä To load sample OLAP metaoutline metadata into the TBC_MD tables using XML Import:
1 In Integration Services Console, select File > XML Import/Export.
2 Select the Import tab.
3 In the XML File Path text box, enter the file path for the sample OLAP metaoutline or click the OpenXML File button and navigate to the following file:
EPM_ORACLE_HOME\products\Essbase\eis\server\samples\tbcmodel
4 Select the XML file to import for the sample OLAP metaoutline, sample_metaoutline.xml.
98 Setting Up the Sample Applications
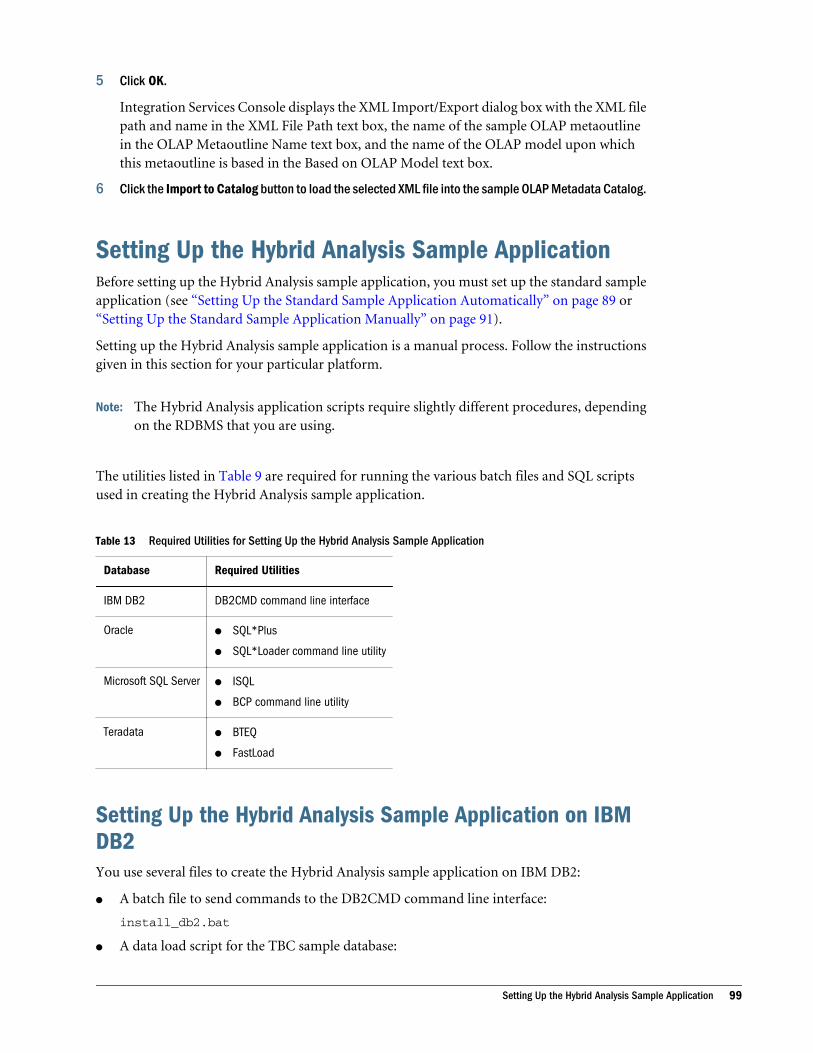
5 Click OK.
Integration Services Console displays the XML Import/Export dialog box with the XML filepath and name in the XML File Path text box, the name of the sample OLAP metaoutlinein the OLAP Metaoutline Name text box, and the name of the OLAP model upon whichthis metaoutline is based in the Based on OLAP Model text box.
6 Click the Import to Catalog button to load the selected XML file into the sample OLAP Metadata Catalog.
Setting Up the Hybrid Analysis Sample ApplicationBefore setting up the Hybrid Analysis sample application, you must set up the standard sampleapplication (see “Setting Up the Standard Sample Application Automatically” on page 89 or“Setting Up the Standard Sample Application Manually” on page 91).
Setting up the Hybrid Analysis sample application is a manual process. Follow the instructionsgiven in this section for your particular platform.
Note: The Hybrid Analysis application scripts require slightly different procedures, dependingon the RDBMS that you are using.
The utilities listed in Table 9 are required for running the various batch files and SQL scriptsused in creating the Hybrid Analysis sample application.
Table 13 Required Utilities for Setting Up the Hybrid Analysis Sample Application
Database Required Utilities
IBM DB2 DB2CMD command line interface
Oraclel SQL*Plus
l SQL*Loader command line utility
Microsoft SQL Serverl ISQL
l BCP command line utility
Teradatal BTEQ
l FastLoad
Setting Up the Hybrid Analysis Sample Application on IBMDB2You use several files to create the Hybrid Analysis sample application on IBM DB2:
l A batch file to send commands to the DB2CMD command line interface:
install_db2.bat
l A data load script for the TBC sample database:
Setting Up the Hybrid Analysis Sample Application 99

ha_create_db2.sql
l An XML file that you use to import a sample OLAP model into the TBC_MD OLAPMetadata Catalog database:
HA_TBC_Model.xml
l An XML file that you use to import a sample metaoutline into the TBC_MD OLAP MetadataCatalog database:
HA_TBC_Metaoutline.xml
l A text file containing sample data:
ha_sampledata.txt
Setting up the Hybrid Analysis sample application on IBM DB2 consists of performing thefollowing tasks:
l Running the batch file install_db2.bat
l Importing the sample OLAP model and metaoutline
Note: Before setting up the Hybrid Analysis Sample Application on IBM DB2, verify thatthe DB2CMD command line interface is installed.
Running the Batch File on IBM DB2The first task in setting up the Hybrid Analysis sample application on IBM DB2 consists ofrunning the install_db2.bat file. This batch file creates tables in the sample database, loadsmetadata into the dimension tables, and loads sample data into the fact table.
Run the install_db2.bat file located in:
EPM_ORACLE_HOME\products\Essbase\eis\server\Samples\tbcdbase
This batch file sends SQL commands to the DB2CMD command line interface.
Pass the following three parameters to install_db2.bat:
l The user ID that you use to connect with IBM DB2
l Your password
l The IBM DB2 database name
The install_db2.bat file runs the DB2CMD command line interface, which executes theha_create_db2.sql load script file. This script file performs the following tasks:
l Deletes any existing tables in the sample TBC database
l Creates a new set of tables in the TBC database
l Inserts records into the dimension tables
l Creates the ha_results_createtables.txt file
l Loads the sample data into the fact table
100 Setting Up the Sample Applications
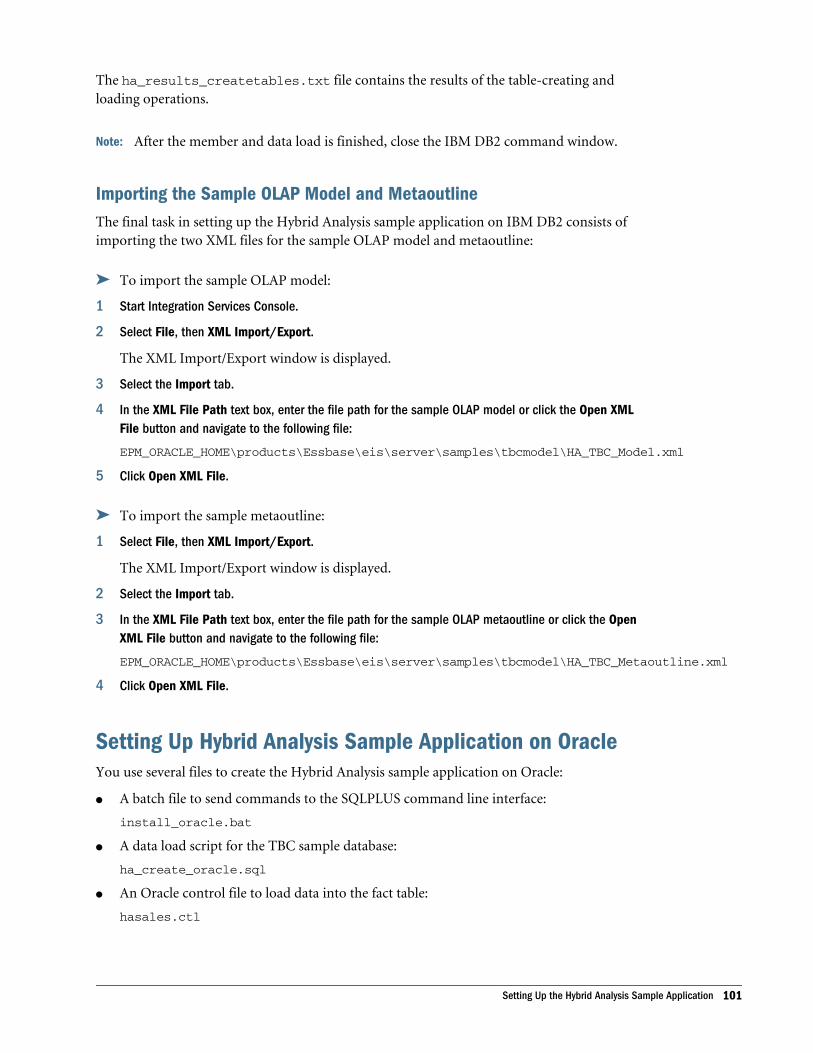
The ha_results_createtables.txt file contains the results of the table-creating andloading operations.
Note: After the member and data load is finished, close the IBM DB2 command window.
Importing the Sample OLAP Model and MetaoutlineThe final task in setting up the Hybrid Analysis sample application on IBM DB2 consists ofimporting the two XML files for the sample OLAP model and metaoutline:
ä To import the sample OLAP model:
1 Start Integration Services Console.
2 Select File, then XML Import/Export.
The XML Import/Export window is displayed.
3 Select the Import tab.
4 In the XML File Path text box, enter the file path for the sample OLAP model or click the Open XMLFile button and navigate to the following file:
EPM_ORACLE_HOME\products\Essbase\eis\server\samples\tbcmodel\HA_TBC_Model.xml
5 Click Open XML File.
ä To import the sample metaoutline:
1 Select File, then XML Import/Export.
The XML Import/Export window is displayed.
2 Select the Import tab.
3 In the XML File Path text box, enter the file path for the sample OLAP metaoutline or click the OpenXML File button and navigate to the following file:
EPM_ORACLE_HOME\products\Essbase\eis\server\samples\tbcmodel\HA_TBC_Metaoutline.xml
4 Click Open XML File.
Setting Up Hybrid Analysis Sample Application on OracleYou use several files to create the Hybrid Analysis sample application on Oracle:
l A batch file to send commands to the SQLPLUS command line interface:
install_oracle.bat
l A data load script for the TBC sample database:
ha_create_oracle.sql
l An Oracle control file to load data into the fact table:
hasales.ctl
Setting Up the Hybrid Analysis Sample Application 101
l An XML file that you use to import a sample OLAP model into the TBC_MD OLAPMetadata Catalog database:
HA_TBC_Model.xml
l An XML file you use to import a sample metaoutline into the TBC_MD OLAP MetadataCatalog database:
HA_TBC_Metaoutline.xml
l A text file containing sample data:
ha_sampledata.txt
Setting up the Hybrid Analysis sample application on Oracle consists of performing the followingtasks:
l Running the batch file install_oracle.bat
l Importing the sample OLAP model and metaoutline
Note: Before setting up the Hybrid Analysis Sample Application on Oracle, verify thatSQL*PLUS and SQLLDR command line interfaces are installed.
Running the Batch FileThe first task in setting up the Hybrid Analysis sample application on Oracle consists of runningthe install_oracle.bat file. This batch file creates tables in the sample database, loadsmetadata into the dimension tables, and loads sample data into the fact table.
Run the install_oracle.bat file located in:
EPM_ORACLE_HOME\products\Essbase\eis\server\samples\tbcdbase
This batch file sends SQL commands to the SQL*PLUS command line interface.
Pass the following three parameters to install_oracle.bat :
l The user ID that you use to connect with Oracle
l Your password
l The Oracle service name as defined in the TNSNAMES.ORA file
Metadata Load Script
The install_oracle.bat file runs the SQLPLUS command line interface, which executes theha_create_oracle.sql metadata load script file. This script file performs the following tasks:
l Deletes any existing tables in the sample TBC database
l Creates a new set of tables in the TBC database
l Inserts records into the dimension tables
l Creates the ha_results_createtables.txt file
The ha_results_createtables.txt file contains the results of the table-creating operation.
102 Setting Up the Sample Applications
Sample Data Load Script
After loading the metadata into the dimension tables, the install_oracle.bat file runs theSQLLDR command line interface, which performs the following tasks:
l Loads the sample data into the fact table
l Creates the ha_results_loadfact.txt file
The ha_results_loadfact.txt file contains the results of the data-loading operation.
Importing the Sample OLAP Model and MetaoutlineThe final task in setting up the Hybrid Analysis sample application on Oracle consists ofimporting the two XML files for the sample OLAP model and metaoutline:
ä To import the sample OLAP model:
1 Start Integration Services Console.
2 Select File > XML Import/Export.
The XML Import/Export dialog box is displayed.
3 Select the Import tab.
4 In the XML File Path text box, enter the file path for the sample OLAP model or click the Open XMLFile button and navigate to the following file:
EPM_ORACLE_HOME\products\Essbase\eis\server\samples\tbcmodel\HA_TBC_Model.xml
5 Click Open XML File.
ä To import the sample metaoutline:
1 Select File > XML Import/Export.
The XML Import/Export dialog box is displayed.
2 Select the Import tab.
3 In the XML File Path text box, enter the file path for the sample OLAP metaoutline or click the OpenXML File button and navigate to the following file:
EPM_ORACLE_HOME\products\Essbase\eis\server\Samples\tbcmodel\HA_TBC_Metaoutline.xml
4 Click Open XML File.
Setting Up Hybrid Analysis Sample Application on MicrosoftSQL ServerSeveral files are used to create the Hybrid Analysis sample application on Microsoft SQL Server:
l A batch file to send commands to MS Interface SQL (ISQL):
install_sqlsrv.bat
l A data load script for the TBC sample database:
Setting Up the Hybrid Analysis Sample Application 103
ha_create_sqlsrv.sql
l An XML file that you use to import a sample OLAP model into the TBC_MD OLAPMetadata Catalog database:
HA_TBC_Model.xml
l An XML file that you use to import a sample metaoutline into the TBC_MD OLAP MetadataCatalog database:
HA_TBC_Metaoutline.xml
l A text file containing sample data:
ha_sampledata.txt
Setting up the Hybrid Analysis sample application on Microsoft SQL Server consists ofperforming the following tasks:
l Running the install_sqlsrv.bat batch file
l Importing the sample OLAP model and metaoutline
Note: Before setting up the Hybrid Analysis Sample Application on Microsoft SQL Server,verify that you have ISQL and BCP (Bulk Copy) installed. These utilities were mostlikely included when you installed SQL Server Client.
Running the Batch FileTo set up the Hybrid Analysis sample application on Microsoft SQL Server, you first run theinstall_sqlsrv.bat file. This batch file creates tables in the sample database, loads metadatainto the dimension tables, and loads sample data into the fact table. Run theinstall_sqlsrv.bat file located in:
EPM_ORACLE_HOME\products\Essbase\eis\server\Samples\tbcdbase
This file sends commands to the Interface SQL (ISQL) command line interface. These commandsinstall the sample application to the sample database TBC.
Pass the following three parameters to install_sqlsrv.bat:
l The user ID that you use to connect with the Microsoft SQL Server (TBC)
l Your password
l The Microsoft SQL Server name (name of machine where the SQL Server is installed)
Metadata Load Script
The install_sqlsrv.bat file runs the ISQL utility, which executes theha_create_sqlsrv.sql metadata load script file. This file performs the following tasks:
l Deletes any existing tables in the sample TBC database
l Creates a new set of tables in the TBC database
l Inserts records into the dimension tables
104 Setting Up the Sample Applications
l Creates the ha_results_createtables.txt file
The ha_results_createtables.txt file contains the results of the table-creating operation.
Sample Data Load Script
After loading the metadata into the dimension tables, the install_sqlsrv.bat file runs theBCP (Bulk Copy) utility which performs the following tasks:
l Loads the sample data into the fact table
l Creates the ha_results_loadfact.txt file
The ha_results_loadfact.txt file contains the results of the data-loading operation.
Importing the Sample OLAP Model and MetaoutlineThe final task in setting up the Hybrid Analysis sample application on Microsoft SQL Serverconsists of importing the two XML files for the sample OLAP model and metaoutline:
ä To import the sample OLAP model:
1 Start Integration Services Console.
2 Select File > XML Import/Export.
The XML Import/Export dialog box is displayed.
3 Select the Import tab.
4 In the XML File Path text box, enter the file path for the sample OLAP model or click the Open XMLFile button and navigate to the following file:
EPM_ORACLE_HOME\products\Essbase\eis\server\samples\tbcmodel\HA_TBC_Model.xml
5 Click Open XML File.
ä To import the sample metaoutline:
1 Select File > XML Import/Export.
The XML Import/Export dialog box is displayed.
2 Select the Import tab.
3 In the XML File Path text box, enter the file path for the sample OLAP metaoutline or click the OpenXML File button and navigate to the following file:
EPM_ORACLE_HOME\products\Essbase\eis\server\Samples\tbcmodel\HA_TBC_Metaoutline.xml
4 Click Open XML File.
Setting Up Hybrid Analysis Sample Application on TeradataSeveral files create the Hybrid Analysis sample application on Teradata:
Setting Up the Hybrid Analysis Sample Application 105
l A batch file to send commands to MS Interface SQL (ISQL):
install_teradata.bat
l A data load script for the TBC sample database:
ha_create_teradata.sql
l An SQL file to add constraints to the fact table after the data load has been completed:
ha_altertable_teradata.sql
l A FastLoad script file, which loads data to the fact table:
ha_fastload_teradata.sql
l An XML file that you use to import a sample OLAP model into the TBC_MD OLAPMetadata Catalog database:
HA_TBC_Model.xml
l An XML file that you use to import a sample metaoutline into the TBC_MD OLAP MetadataCatalog database:
HA_TBC_Metaoutline.xml
l A text file containing sample data:
ha_sampledata.txt
Setting up the Hybrid Analysis sample application on Microsoft SQL Server consists ofperforming the following tasks:
l Running the batch file install_teradata.bat
l Importing the sample OLAP model and metaoutline
Note: Before setting up the Hybrid Analysis Sample Application on Teradata, verify thatthe BTEQ and FastLoad utilities are installed.
Running the Batch FileThe first task in setting up the Hybrid Analysis sample application on Teradata consists ofrunning the install_teradata.bat file. This batch file creates tables in the sample database,loads metadata into the dimension tables, loads sample data into the fact table, and addsconstraints to the fact table.
Run the install_teradata.bat file located in:
EPM_ORACLE_HOME\products\Essbase\eis\server\Samples\tbcdbase
This batch file sends SQL commands to the BTEQ command line interface.
Pass the following three required parameters to install_teradata.bat:
l The user ID that you use to connect with Teradata
l Your password
l The Teradata database name (DBC)
106 Setting Up the Sample Applications
You can also pass, as an optional parameter, the database name where you want to install thesample application. (The default database is TBC.)
Metadata Load Script
The install_teradata.bat file runs the BTEQ utility, which executes theha_create_teradata.sql metadata load script file. This script file performs the followingtasks:
l Deletes any existing tables in the sample TBC database
l Creates a new set of tables in the TBC database
l Inserts records into the dimension tables
l Creates the ha_results_createtables.txt file
The ha_results_createtables.txt file contains the results of the table-creating operation.
Sample Data Load Script
After loading the metadata into the dimension tables, the install_teradata.bat file runsthe FastLoad utility, which performs the following tasks:
l Loads the sample data into the fact table using the ha_fastload_teradata.txt file
l Creates the ha_results_loadfact.txt file
The ha_results_loadfact.txt file contains the results of the data-loading operation.
Alter Table Script
After loading the sample data into the fact table, the install_teradata.bat file runs theBTEQ utility, which executes the ha_altertable_teradata.sql alter table script file. Thisscript file performs the following tasks:
l Deletes a few tables no longer needed in the sample TBC database
l Creates indexes and places constraints on the fact table
l Creates the ha_results_altertables.txt file
The ha_results_altertables.txt file contains the results of the table-altering operation.
Importing the Sample OLAP Model and MetaoutlineThe final task in setting up the Hybrid Analysis sample application on Teradata consists ofimporting the two XML files for the sample OLAP model and metaoutline:
ä To import the sample OLAP model:
1 Start Integration Services Console.
Setting Up the Hybrid Analysis Sample Application 107
2 Select File>XML Import/Export.
The XML Import/Export window is displayed.
3 Select the Import tab.
4 In the XML File Path text box, enter the file path for the sample OLAP model or click the Open XMLFile button and navigate to the following file:
EPM_ORACLE_HOME\products\Essbase\eis\server\Samples\tbcmodel\HA_TBC_Model.xml
5 Click Open XML File.
ä To import the sample metaoutline:
1 Select File>XML Import/Export.
The XML Import/Export window is displayed.
2 Select the Import tab.
3 In the XML File Path text box, enter the file path for the sample OLAP metaoutline or click the OpenXML File button and navigate to the following file:
EPM_ORACLE_HOME\products\Essbase\eis\server\Samples\tbcmodel\HA_TBC_Metaoutline.xml
4 Click Open XML File.
Setting Up the Unicode Sample ApplicationSetting up the Unicode sample application is a manual process.
Note: The Unicode sample application in Integration Services is supported only on Oraclerelational database management systems (RDBMSs).
The utilities listed in Table 14 are required for running the various batch files and SQL scriptsused in creating the Unicode sample application.
Table 14 Required Utilities for Setting Up the Unicode Sample Application
Database Required Utilities
Oraclel SQL*Plus
l SQL*Loader command line utility
Creating the Unicode TBC_U DatabaseCreate the Unicode TBC_U database in the same way that you create any database using anRDBMS:
l Create a database device or tablespace named TBC_U.
l Allot 20 MB for storage.
108 Setting Up the Sample Applications
l Create a user TBC_U who can drop and create tables.
l Grant user privileges or permissions to create and drop tables.
Caution! You should create the tables for the Unicode-enabled database as user TBC_U,or portions of the Unicode sample application may not work.
Creating the Unicode TBC_MD_U OLAP Metadata CatalogCreate the Unicode TBC_MD_U OLAP Metadata Catalog by following the steps in “Setting Upthe TBC_MD OLAP Metadata Catalog” on page 94, using the file oc_create_database_name_unicode.sql.
Setting Up the Unicode Sample Application
Note: The Unicode sample application in Integration Services is supported only on Oraclerelational database management systems (RDBMSs).
You use several files to create the Unicode sample application:
l A table creation and data load script for the Unicode sample database:
tbc_create_database_name_unicode.sql
l An XML file that you use to import a sample OLAP model into the TBC_MD_UnicodeOLAP Metadata Catalog database:
TBC_Model_Unicode.xml
l An XML file that you use to import a sample metaoutline into the TBC_MD_Unicode OLAPMetadata Catalog database:
TBC_Metaoutline_Unicode.xml
Setting up the Unicode sample application consists of performing the following tasks:
l Running the SQL file tbc_create_database_name_unicode.sql
l Importing the Unicode sample model
l Importing the Unicode sample metaoutline
Running the SQL FileThe first task in setting up the Unicode sample application consists of running thetbc_create_database_name_unicode.sql file using one of the utilities listed in Table 14 on page108.
Note: Ensure you have created a Unicode-enabled database for your sample application asdescribed in “Creating the Unicode TBC_U Database” on page 108.
Setting Up the Unicode Sample Application 109

Run the tbc_create_database_name_unicode.sql file located in:
EPM_ORACLE_HOME\products\Essbase\eis\server\samples\tbcdbase\
The tbc_create_database_name_unicode.sql file performs the following tasks:
l Deletes any existing tables in the Unicode sample database
l Creates a new set of tables in the Unicode sample database
l Loads Unicode sample metadata into the dimension tables
l Loads Unicode sample data into the fact table
Importing the Unicode Sample Model and MetaoutlineThe final task in setting up the Unicode sample application consists of importing the XML filefor the Unicode sample model:
ä To import the Unicode sample OLAP model:
1 Start Integration Services Console and log in to the Unicode catalog.
2 Select File>XML Import/Export.
The XML Import/Export dialog box is displayed.
3 Select the Import tab.
4 In the XML File Path text box, enter the file path for the Unicode sample OLAP model or click the OpenXML File button and navigate to the following file:
eis\server\samples\tbcmodel\TBC_Model_Unicode.xml
5 Select the file and click Import to Catalog.
A message is displayed when the import is complete.
6 Click OK.
ä To import the Unicode sample metaoutline:
1 If necessary, select File>XML Import/Export.
The XML Import/Export dialog box is displayed.
2 Select the Import tab.
3 In the XML File Path text box, enter the file path for the Unicode sample metaoutline or click the OpenXML File button and navigate to the following file:
EPM_ORACLE_HOME\products\Essbase\eis\server\Samples\tbcmodel\TBC_Metaoutline_Unicode.xml
4 Select the file and click Import to Catalog.
A message is displayed when the import is complete.
5 Click OK.
6 Click Close to close the XML Import/Export dialog box.
110 Setting Up the Sample Applications

After Setting Up the Sample ApplicationYou must connect to both TBC and TBC_MD from Integration Services Console to create,modify, and store TBC OLAP models and TBC metaoutlines. To make these connections, eachdatabase (TBC and TBC_MD) must be mapped to a supported ODBC driver, as described inChapter 2, “Configuring Data Sources”.
When you connect to Integration Services Console, you can view TBC columns, tables, OLAPmodels, and metaoutlines in Integration Services Console. For more information, see “ViewingTBC Tables and Columns ” on page 111.
Note: You must connect to TBC and TBC_MD as user TBC unless you create user name aliasesor synonyms in the RDBMS.
Viewing TBC Tables and Columns After you set up the sample application and configure TBC and TBC_MD by mapping them tosupported ODBC drivers, you can view TBC tables and columns in Integration Services Console.
ä To see TBC tables and columns in the left frame of Integration Services Console:
1 Start Integration Server.
2 Start Integration Services Console.
3 In a blank Integration Services Console window, select Connections, then OLAP Metadata Catalog,then Connect, and connect to the OLAP Metadata Catalog, TBC_MD.
4 In the New tab, double-click the OLAP Model icon.
5 In the Data Source dialog box, connect to the TBC sample database.
Viewing OLAP ModelsAfter you set up the sample application and configure TBC and TBC_MD by mapping them tosupported ODBC drivers, you can view OLAP models in Integration Services Console.
ä To see the OLAP model (TBC Model) in the right frame of Integration Services Console:
1 Start Integration Server.
2 Start Integration Services Console.
3 If the Login dialog box is not already displayed, in a blank Integration Services Console window, selectConnections, then OLAP Metadata Catalog, then Connect.
4 Connect to the OLAP Metadata Catalog TBC_MD.
5 Click the Existing tab, select TBC Model, and click Open.
Hybrid Analysis: To view the Hybrid Analysis-enabled OLAP model, select HA TBCModel.
After Setting Up the Sample Application 111
Duplicate Member (Oracle only): To view the Duplicate Member-enabled OLAP model,select Duplicate Member TBC Model.
6 In the Data Source dialog box, connect to the TBC sample database.
Viewing MetaoutlinesAfter you set up the sample application and configure TBC and TBC_MD by mapping them tosupported ODBC drivers, you can view metaoutlines in Integration Services Console.
ä To see the metaoutline (TBC Metaoutline) in the right frame of Integration Services Console:
1 Start Integration Server.
2 Start Integration Services Console.
3 If the Login dialog box is not already displayed, in a blank Integration Services Console window, selectConnections, then OLAP Metadata Catalog, then Connect.
4 Connect to the OLAP Metadata Catalog TBC_MD.
5 Click the Existing tab, then click the plus symbol (+) to the left of TBC Model to expand the view, andselect TBC Metaoutline.
Hybrid Analysis: To view the Hybrid Analysis-enabled metaoutline, click the plus symbol(+) to the left of HA TBC Model to expand the view, and select HA TBC Metaoutline.
Duplicate Member (Oracle only): To view the Duplicate Member-enabled metaoutline,click the plus symbol (+) to the left of Sample_duplicate member to expand the view, andselect Duplicate Member TBC Metaoutline.
6 Click Open.
The Data Source dialog box is displayed.
7 In the Data Source dialog box, connect to the TBC sample database.
112 Setting Up the Sample Applications
6Working with Users, Locks, and
Permissions
In This Chapter
Working with Users.. . . . . . . . . . . . . . . . . . . . . . . . . . . . . . . . . . . . . . . . . . . . . . . . . . . . . . . . . . . . . . . . . . . . . . . . . . . . . . . . . . . . . . 113
Working with Locks ... . . . . . . . . . . . . . . . . . . . . . . . . . . . . . . . . . . . . . . . . . . . . . . . . . . . . . . . . . . . . . . . . . . . . . . . . . . . . . . . . . . . 114
Working with Permissions ... . . . . . . . . . . . . . . . . . . . . . . . . . . . . . . . . . . . . . . . . . . . . . . . . . . . . . . . . . . . . . . . . . . . . . . . . . . . . 117
This chapter describes how to view information about users, OLAP models, and metaoutlinesin OLAP Metadata Catalog. It also describes how to clear locks and change permissions on OLAPmodels and metaoutlines.
See Chapter 4, “Tables in OLAP Metadata Catalog.”
Working with UsersWhen working with Integration Services, you must manage access for three types of users:
l Integration Services users who can access OLAP models and metaoutlines stored in OLAPMetadata Catalogs. (Integration Services users are the database users defined in the datasource that contains the OLAP Metadata Catalog that you are using.)
l Essbase users who can access the Essbase database that you create from a metaoutline
l Source database and data warehouse users who can access the tables and views in the specifiedsource database or data warehouse
Use the tools provided with each data source to manage each set of users. Consult the data sourcedocumentation if you are not sure how to perform any of the following tasks:
l Create new users
l View a list of available users
l Change the permissions for users
l Delete current users
l Disconnect users
Working with Users 113

Working with LocksYou can use either of two methods for opening an OLAP model or metaoutline in IntegrationServices Console: standard access mode (the default mode) and exclusive access mode. The locksthat are established by these different modes are specific to Integration Services and arecompletely separate from the locking performed by the data source database.
Tip: If you plan only to view an OLAP model or metaoutline, use standard access mode. If youplan to edit an OLAP model or metaoutline, use exclusive access mode.
Using Standard Access ModeWhen you open an OLAP model in standard access mode, Integration Services gives you a readlock on that OLAP model. When you open a metaoutline in standard access mode, IntegrationServices gives you a read lock on that metaoutline and a read lock on the OLAP model on whichthe metaoutline is based. Multiple users can have read locks on the same OLAP model ormetaoutline at the same time.
When you save an OLAP model or metaoutline in standard access mode, Integration Servicesupgrades the read lock to a write lock for the duration of the save. After Integration Servicessaves the changes to the OLAP model or metaoutline, the lock reverts back to a read lock.However, if other users have the OLAP model or metaoutline open, your changes are not updatedfor the other users until they reopen the document.
In addition, if other users have the OLAP model or metaoutline open at the same time as youdo, they can edit and save it, thereby overwriting your changes. Using exclusive access modeprevents users from overwriting your changes. See “Using Exclusive Access Mode” on page114.
ä If you opened and edited an OLAP model or metaoutline in standard access mode, and areconcerned that other users may overwrite your changes, perform one of the followingactions:
l Save the OLAP model or metaoutline using a different name. See Integration ServicesConsole Help.
l If you have not yet started editing the document or have entered only a few changes, closethe OLAP model or metaoutline and then reopen it using exclusive access mode and reapplythe changes.
l Contact the users with read locks and ask them to close the OLAP model or metaoutline.To view a list of users with read locks, see “Viewing Integration Services Users with Locks”on page 115.
Using Exclusive Access ModeOpening an OLAP model or metaoutline in exclusive access mode eliminates the risk of otherusers overwriting your changes. When you open an OLAP model in exclusive access mode,
114 Working with Users, Locks, and Permissions

Integration Services gives you a write lock on that OLAP model that remains in effect until youclose the model. When you open a metaoutline in exclusive access mode, Integration Servicesgives you a write lock on that metaoutline and a read lock on the OLAP model on which themetaoutline is based that remains in effect until you close the metaoutline. While you have anOLAP model or metaoutline open in exclusive access mode, other users can open and view thedocuments, but they cannot save them.
Correcting Problems with LocksDue to the complex nature of Integration Services and the other software components withwhich it interacts, you may experience problems that result in locks not being released fromOLAP models or metaoutlines. Unreleased locks can result in an inability to save, even if noother users are on the system. Unreleased locks can also prevent you from opening an OLAPmodel or metaoutline.
If you suspect that unreleased locks remain from previous sessions, delete the locks by selectingServers, then OLAP Metadata Catalog, then Delete Locks. Deleting locks from the menu removesonly your locks; it does not delete locks held by other users.
If you suspect that unreleased locks remain from other user sessions, check to see which usershave locks. See “Viewing Integration Services Users with Locks” on page 115. If you areconvinced that some or all of the locks are from terminated user sessions, delete them. See“Deleting Locks for Integration Services Users” on page 116.
Viewing Integration Services Users with LocksThe CB_CONCURRENCY table in OLAP Metadata Catalog contains information about theusers who access OLAP models and metaoutlines. This table contains the following columns:
l CB_USER_NAME: the name of the user accessing the OLAP model or metaoutline; forexample, sa.
l CB_USER_SESSION_ID: a system-generated reference number that uniquely identifies anediting session
l CB_OBJECT_ID: an OLAP model or metaoutline number
l CB_OBJECT_TYPE: a type reference that indicates whether the user is accessing an OLAPmodel or a metaoutline
m The number 1 represents an OLAP model.
m The number 2 represents a metaoutline.
l CB_OBJECT_LOCK: a lock reference number that indicates whether the user has a read orwrite lock
m The number 1 represents a read lock.
m The number 2 represents a write lock.
l CB_LOCK_TIMESTAMP: the date and time that the user acquired the lock
Working with Locks 115

ä To determine which users are accessing a specific OLAP model or metaoutline:
1 Enter the following SELECT statement in the OLAP Metadata Catalog database, using the tools for thedata source you are using:
SELECT CB_USER_NAME, CB_OBJECT_ID, CB_OBJECT_TYPE, CB_OBJECT_LOCK, CB_LOCK_TIMESTAMPFROM CB_CONCURRENCY
2 View the results.
In the following example, the sa user is the only user currently accessing an OLAP modelor metaoutline. The sa user has two read locks on one OLAP model and one read lock eachon two different metaoutlines.
CB_USER_NAME CB_OBJECT_ID CB_OBJECT_TYPE CB_OBJECT_LOCK CB_LOCK_TIMESTAMP------------ ------------ -------------- -------------- -----------------sa 889844639 1 1 Apr 9 2004 4:43PMsa 889845263 2 1 Apr 9 2004 4:43PMsa 889844639 1 1 Apr 9 2004 5:20PMsa 892167813 2 1 Apr 9 2004 5:20PM (4 row(s) affected)
You can determine the following information from the sample CB_CONCURRENCY tableshown in the preceding list:
l The first row of the results tells you that the sa user (CB_USER_NAME = sa) has a readlock (CB_OBJECT_LOCK = 1) on an OLAP model (CB_OBJECT_TYPE = 1) with anID of 889844639.
l The second row of the results tells you that the sa user (CB_USER_NAME = sa) has aread lock (CB_OBJECT_LOCK = 1) on a metaoutline (CB_OBJECT_TYPE = 2) withan ID of 889845263.
l The third row of the results tells you that the sa user (CB_USER_NAME = sa) has aread lock (CB_OBJECT_LOCK = 1) on an OLAP model (CB_OBJECT_TYPE = 1) withan ID of 889844639.
l The fourth row of the results tells you that the sa user (CB_USER_NAME = sa) has aread lock (CB_OBJECT_LOCK = 1) on a metaoutline (CB_OBJECT_TYPE = 2) withan ID of 892167813.
When you open a metaoutline, you receive a read lock on the metaoutline and on the OLAPmodel on which it is based; therefore, you can assume that the sa user is working on two differentmetaoutlines based on the same OLAP model.
Deleting Locks for Integration Services UsersIf you are certain that the other users who have read or write locks on an OLAP model or ametaoutline that you want to save do not need their locks, delete their locks from theCB_CONCURRENCY table.
Caution! Make sure the users do not need their locks before you delete the locks.
116 Working with Users, Locks, and Permissions

ä To delete read and write locks on OLAP models or metaoutlines:
1 Determine which users have locks.
See “Viewing Integration Services Users with Locks” on page 115.
2 Delete the rows containing the unwanted locks.
For example, to delete all locks held by the sa user, issue the following DELETE statementin the OLAP Metadata Catalog database, using the tools for the data source:
DELETE FROM CB_CONCURRENCY WHERE CB_USER_NAME = 'sa'
Working with PermissionsWhen you save an OLAP model or metaoutline for the first time, you determine what read orwrite permissions other users have. Integration Services supports the following kinds ofpermissions:
l Allow read/write access for other users. This setting permits all other users to read and writeto the OLAP model or metaoutline. This setting is the default.
l Allow read access for other users. This setting permits all other users to read but not writeto the OLAP model or metaoutline; that is, other users cannot save changes to the OLAPmodel or metaoutline.
l Disallow all access for other users. This setting denies all other users read or write permissionto the OLAP model or metaoutline. You are the only user who can read or write to it.
ä To change the permissions of an OLAP model or metaoutline, take one of the followingactions:
l Change the OLAP model properties in Integration Services Console. See the IntegrationServices Console Help.
l Save the metaoutline with a different name by selecting File, then Save As. See the IntegrationServices Console Help.
l To edit tables containing the permissions for the OLAP model or metaoutline, use the toolsprovided with the data source that contains OLAP Metadata Catalog. See “ViewingPermissions for OLAP Models” on page 117 or “Viewing Permissions for Metaoutlines” onpage 118.
Viewing Permissions for OLAP ModelsInformation about the permissions that are set for OLAP models and metaoutlines is stored inOLAP Metadata Catalog. View this information by selecting the appropriate columns from tablesin OLAP Metadata Catalog.
The OM_INFO table in OLAP Metadata Catalog contains information about OLAP models,including the following columns which are relevant to permissions:
l MODEL_ID: a system-generated reference number.
Working with Permissions 117
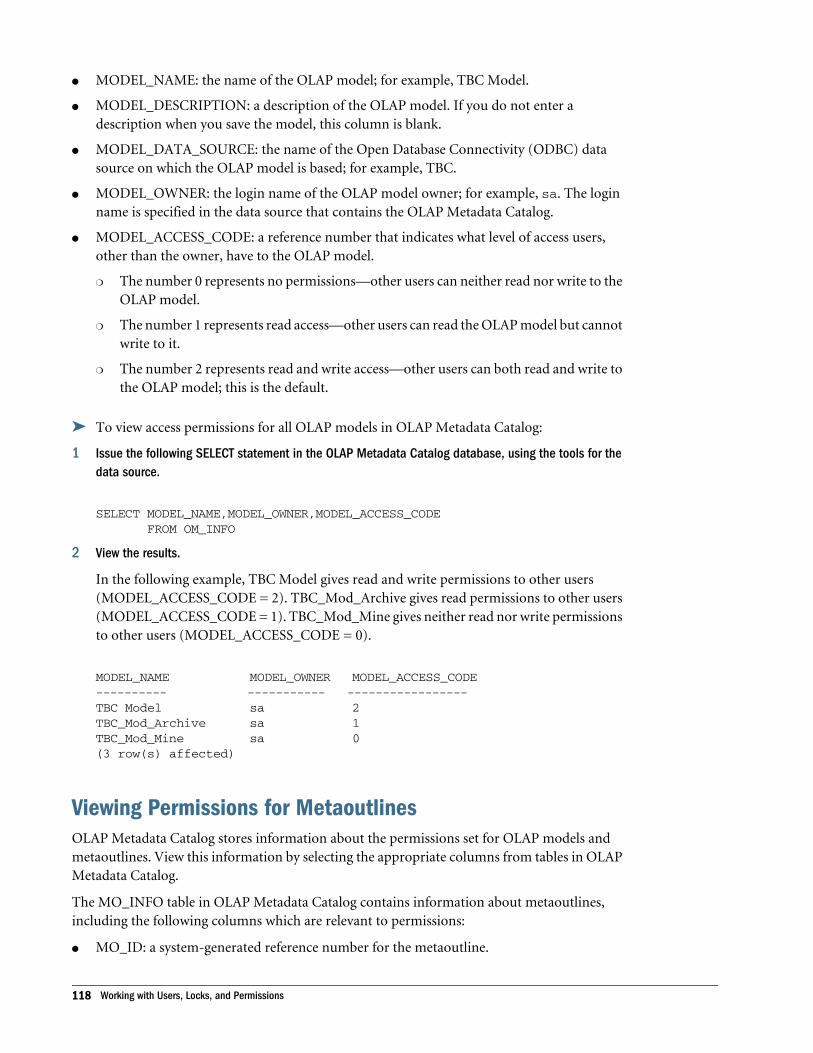
l MODEL_NAME: the name of the OLAP model; for example, TBC Model.
l MODEL_DESCRIPTION: a description of the OLAP model. If you do not enter adescription when you save the model, this column is blank.
l MODEL_DATA_SOURCE: the name of the Open Database Connectivity (ODBC) datasource on which the OLAP model is based; for example, TBC.
l MODEL_OWNER: the login name of the OLAP model owner; for example, sa. The loginname is specified in the data source that contains the OLAP Metadata Catalog.
l MODEL_ACCESS_CODE: a reference number that indicates what level of access users,other than the owner, have to the OLAP model.
m The number 0 represents no permissions—other users can neither read nor write to theOLAP model.
m The number 1 represents read access—other users can read the OLAP model but cannotwrite to it.
m The number 2 represents read and write access—other users can both read and write tothe OLAP model; this is the default.
ä To view access permissions for all OLAP models in OLAP Metadata Catalog:
1 Issue the following SELECT statement in the OLAP Metadata Catalog database, using the tools for thedata source.
SELECT MODEL_NAME,MODEL_OWNER,MODEL_ACCESS_CODE FROM OM_INFO
2 View the results.
In the following example, TBC Model gives read and write permissions to other users(MODEL_ACCESS_CODE = 2). TBC_Mod_Archive gives read permissions to other users(MODEL_ACCESS_CODE = 1). TBC_Mod_Mine gives neither read nor write permissionsto other users (MODEL_ACCESS_CODE = 0).
MODEL_NAME MODEL_OWNER MODEL_ACCESS_CODE---------- ----------- -----------------TBC Model sa 2TBC_Mod_Archive sa 1TBC_Mod_Mine sa 0(3 row(s) affected)
Viewing Permissions for MetaoutlinesOLAP Metadata Catalog stores information about the permissions set for OLAP models andmetaoutlines. View this information by selecting the appropriate columns from tables in OLAPMetadata Catalog.
The MO_INFO table in OLAP Metadata Catalog contains information about metaoutlines,including the following columns which are relevant to permissions:
l MO_ID: a system-generated reference number for the metaoutline.
118 Working with Users, Locks, and Permissions
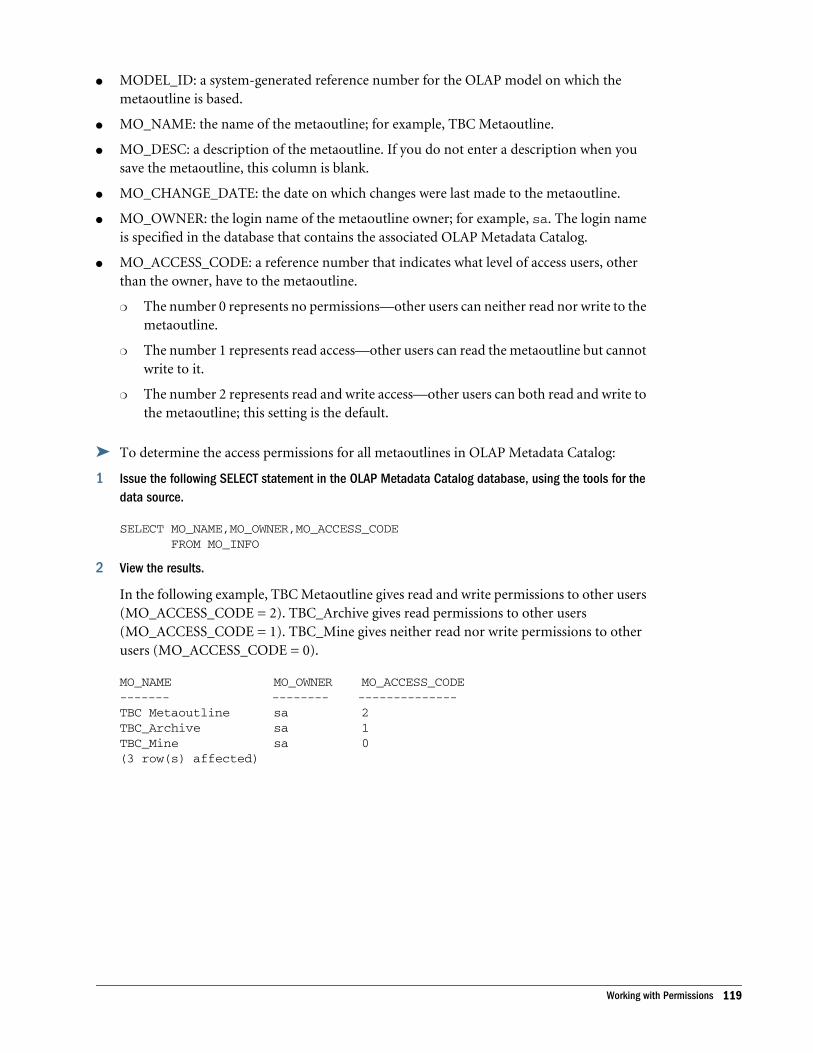
l MODEL_ID: a system-generated reference number for the OLAP model on which themetaoutline is based.
l MO_NAME: the name of the metaoutline; for example, TBC Metaoutline.
l MO_DESC: a description of the metaoutline. If you do not enter a description when yousave the metaoutline, this column is blank.
l MO_CHANGE_DATE: the date on which changes were last made to the metaoutline.
l MO_OWNER: the login name of the metaoutline owner; for example, sa. The login nameis specified in the database that contains the associated OLAP Metadata Catalog.
l MO_ACCESS_CODE: a reference number that indicates what level of access users, otherthan the owner, have to the metaoutline.
m The number 0 represents no permissions—other users can neither read nor write to themetaoutline.
m The number 1 represents read access—other users can read the metaoutline but cannotwrite to it.
m The number 2 represents read and write access—other users can both read and write tothe metaoutline; this setting is the default.
ä To determine the access permissions for all metaoutlines in OLAP Metadata Catalog:
1 Issue the following SELECT statement in the OLAP Metadata Catalog database, using the tools for thedata source.
SELECT MO_NAME,MO_OWNER,MO_ACCESS_CODE FROM MO_INFO
2 View the results.
In the following example, TBC Metaoutline gives read and write permissions to other users(MO_ACCESS_CODE = 2). TBC_Archive gives read permissions to other users(MO_ACCESS_CODE = 1). TBC_Mine gives neither read nor write permissions to otherusers (MO_ACCESS_CODE = 0).
MO_NAME MO_OWNER MO_ACCESS_CODE------- -------- --------------TBC Metaoutline sa 2TBC_Archive sa 1TBC_Mine sa 0(3 row(s) affected)
Working with Permissions 119

120 Working with Users, Locks, and Permissions
7Troubleshooting ODBC and
Connections
In This Chapter
Common Connection Problems... . . . . . . . . . . . . . . . . . . . . . . . . . . . . . . . . . . . . . . . . . . . . . . . . . . . . . . . . . . . . . . . . . . . . . . 121
Database-Specific Problems... . . . . . . . . . . . . . . . . . . . . . . . . . . . . . . . . . . . . . . . . . . . . . . . . . . . . . . . . . . . . . . . . . . . . . . . . . 123
ODBC and Connection Problems ... . . . . . . . . . . . . . . . . . . . . . . . . . . . . . . . . . . . . . . . . . . . . . . . . . . . . . . . . . . . . . . . . . . . . 123
Isolating Connection Problems ... . . . . . . . . . . . . . . . . . . . . . . . . . . . . . . . . . . . . . . . . . . . . . . . . . . . . . . . . . . . . . . . . . . . . . . 124
Correcting Connection Problems ... . . . . . . . . . . . . . . . . . . . . . . . . . . . . . . . . . . . . . . . . . . . . . . . . . . . . . . . . . . . . . . . . . . . . 134
Using ODBC Tracing... . . . . . . . . . . . . . . . . . . . . . . . . . . . . . . . . . . . . . . . . . . . . . . . . . . . . . . . . . . . . . . . . . . . . . . . . . . . . . . . . . . . 141
Integration Services requires several layers of software components to connect to data sourcesand load data into Essbase databases. Each of the components must be configured properly torun and communicate with each other. Consequently, diagnosing and correcting connectionproblems in the system can be challenging.
This chapter assists you in isolating and correcting connection problems that can occur duringthe operation of Integration Services. The first topic of this chapter lists common causes forconnection problems. The subsequent topics outline a strategy for isolating and correctingconnection problems not addressed by the common problems list.
This chapter assumes that you know how to perform basic database administration tasks, suchas using a database client utility program to connect to a database server, navigating directoriesusing a command prompt, and editing configuration files.
Common Connection ProblemsIf you have problems connecting to OLAP Metadata Catalog or to the external data source withEssbase Integration Services Console, review the following list of common problems:
l Are you using the correct user name and password?
m Does the user name you used have the correct privileges to access both OLAP MetadataCatalog and the data source at the database level?
m If you are trying to connect to OLAP Metadata Catalog, did you use the same user nameand password as the user who created the tables in OLAP Metadata Catalog?
If you create an OLAP Metadata Catalog when logged in as one user name, you cannotaccess the tables in OLAP Metadata Catalog using a different user name unless you create
Common Connection Problems 121
an alias for the user name (for Microsoft SQL Server) or synonyms for the tables (forIBM DB2 and Oracle).
l Are all required components up and running?
m Essbase Integration Server
m The database servers that manage OLAP Metadata Catalog and the data source databases
m The data source database listener for OLAP Metadata Catalog and the data source
l Is the database client software installed and configured on the computer where IntegrationServer is installed?
m Do the database client software utility programs, such as the command-line SQL utility,run? Can you connect to databases with them?
m Does the user who starts Integration Server have the correct environment variables setand the necessary access privileges to run the database client software?
m Are the required environment variables for the database client software, such as the path(and the library path on UNIX), configured on the computer where Integration Serveris installed?
On UNIX, use ivtestlib (32-bit) or ddtestlib (64-bit) to confirm that the librarypath contains all files required by the open database connectivity (ODBC) driver.
o ivtestlib is located in common/odbc/Merant/6.0/bin
o ddtestlib is located in common/odbc64/Merant/6.0/bin
m If necessary, is the bin directory for each database in the operating system path of theuser who is running Integration Server?
m Does the ODBC data source name (DSN) configuration identify the name of the datasource client?
l Are OLAP Metadata Catalog and the data source configured as ODBC data sources on theIntegration Server computer? For information on configuring ODBC data sources, seeChapter 2, “Configuring Data Sources”.
l Are you using the ODBC data source names for OLAP Metadata Catalog and the data sourcedatabases as configured on the Integration Server computer? Do not assume that the datasource database name is the same as the ODBC data source name for that database.
l Are you experiencing time-out problems when connecting to the external data source?
Wait and retry the action when the data source is less busy. To avoid the problem, increasethe ODBC driver time-out limit using ODBC Administrator on Windows systems. See theODBC documentation.
l Did you create tables in OLAP Metadata Catalog? For information on creating tables for thecatalog, see Chapter 3, “Creating, Upgrading, and Deleting OLAP Metadata Catalogs”.
l Are you having problems related to ODBC while you are creating an Essbase outline? If so,turn on tracing, perform the action again, and analyze the results in the tracing log file. See“Using ODBC Tracing on Windows Systems” on page 142.
122 Troubleshooting ODBC and Connections
If you experience problems connecting to the data source, view the log for the data source forinformation about why the connection failed. See your data source documentation.
If none of the above steps help, review the list of database-specific problems in “Database-SpecificProblems” on page 123.
Database-Specific ProblemsIf you have problems connecting to OLAP Metadata Catalog or to the external data source withIntegration Services Console, review the following list of common problems for specificdatabases:
l IBM DB2: You may be required to bind the database driver to a IBM DB2 server that ismanaging the databases you want. See the IBM DB2 installation documentation.
l Microsoft SQL Server: If you try to access a Microsoft SQL Server database with theMicrosoft-supplied ODBC driver when you do not have access permission, SQL Serverconnects you to the default database and does not notify you. Configure the ODBC DSN touse the database that you want to access. See the Microsoft SQL Server documentation.
If none of the previous suggestions help, proceed to “ODBC and Connection Problems” on page123 for an overview of connection problems, then see “Isolating Connection Problems” on page124.
ODBC and Connection ProblemsIntegration Services Console must pass through three layers of software components to contacta data source: Integration Server, ODBC, and the database client software. Failure within orbetween any of these components can cause a lack of communication between IntegrationServices Console and the data source.
In some cases, the error messages received in Integration Services Console may not containsufficient information for you to diagnose and resolve the problem, and you must go to theIntegration Server to get more information and find a resolution.
The three main categories of problems that break the lines of communication betweenIntegration Services Console and the data source are:
l Software component problems:
m The components of Integration Services or the data source are not installed or areinstalled on the wrong computer.
m The components do not run because they are not set up properly.
m The components stopped running or were never started.
m The components are not compatible with the operating system.
m The versions of the different components are not compatible with each other.
l Configuration and communication problems:
Database-Specific Problems 123

m The software components are not properly configured to communicate with each other.
m User names, passwords, and permissions are configured or used inconsistently acrossthe components and computers.
m The communication interfaces of the software components are incompatible with eachother.
m Changes to components, databases, users, or permissions have put the softwarecomponents out of sync with each other.
l Network and security problems:
m A physical network path does not exist between the computers that must communicatewith each other.
m One or both computers attempting to communicate do not have the TCP/IP networkprotocol installed or configured.
m The computer attempting to contact another computer does not have access toaddressing information, such as a domain name server (DNS).
m Security systems prevent all communication or certain types of communication betweenthe computers that must talk with each other. For example, this is the case when clientand server computers are separated by a firewall.
Isolating Connection ProblemsIf the list under “Common Connection Problems” on page 121 and your own knowledge fail todiagnose the connection problem, the recommended strategy is to test the components andconnections starting at the data source and backtracking through the connections to IntegrationServices Console.
The client software must pass through three layers of components to connect to the data sourcecontaining OLAP Metadata Catalog and the data source, as illustrated in Figure 4.
124 Troubleshooting ODBC and Connections
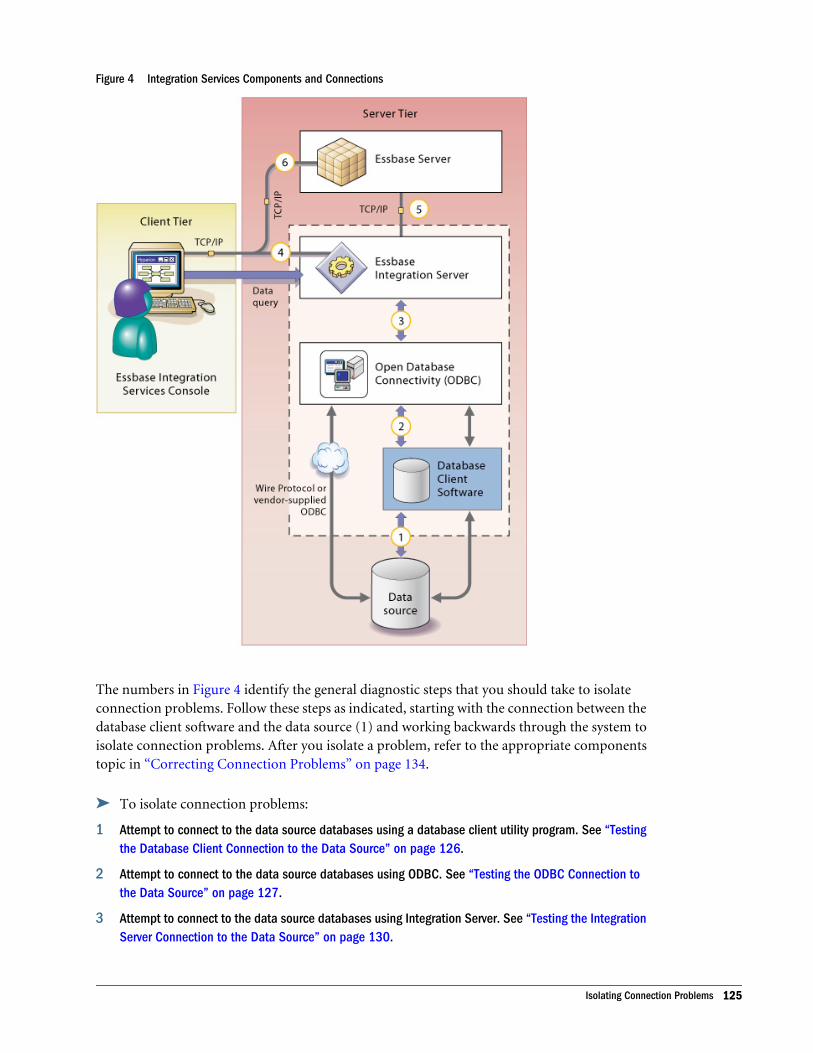
Figure 4 Integration Services Components and Connections
The numbers in Figure 4 identify the general diagnostic steps that you should take to isolateconnection problems. Follow these steps as indicated, starting with the connection between thedatabase client software and the data source (1) and working backwards through the system toisolate connection problems. After you isolate a problem, refer to the appropriate componentstopic in “Correcting Connection Problems” on page 134.
ä To isolate connection problems:
1 Attempt to connect to the data source databases using a database client utility program. See “Testingthe Database Client Connection to the Data Source” on page 126.
2 Attempt to connect to the data source databases using ODBC. See “Testing the ODBC Connection tothe Data Source” on page 127.
3 Attempt to connect to the data source databases using Integration Server. See “Testing the IntegrationServer Connection to the Data Source” on page 130.
Isolating Connection Problems 125

4 Attempt to connect to the data source databases using Integration Services Console. See “Testing theIntegration Services Console Connection to Essbase Server” on page 134.
5 Attempt to connect to Essbase Server using Integration Server. See “Testing the Integration ServerConnection to Essbase Server” on page 132.
6 Attempt to connect to Essbase Server using Integration Services Console. See “Testing the IntegrationServer Connection to Essbase Server” on page 132.
Testing the Database Client Connection to the Data SourceIf your ODBC connections require database client software, the first step toward isolatingconnection problems in Integration Services is to attempt to connect the database client softwareto the data source that you are using. After you have verified that these components arecommunicating properly, you have a good base from which to test the remainder of theconnection chain.
The most likely cause of a connection failure at this point is that the database client softwareenvironment variables are not included in the login script for the user who runs the IntegrationServer program.
ä To test the database client connection to the data source:
1 Log on to the computer running Integration Server as the user who starts the Integration Server program(typically, hyperion).
Note: Logging on as a different user, such as an administrative user, may fail to revealproblems in the configuration.
2 Start a database client utility program with which you can use SQL statements to connect to and querydatabases, such as a command-line SQL utility.
If the database client utility does not start, check to make sure that the client software isinstalled and the required environment variables are set. See “Correcting Database ClientProblems” on page 137.
3 Connect to the OLAP Metadata Catalog database in the data source using a valid database user account.
If the connection fails, try to connect as a user who you know has access permission, suchas an administrative user. If the administrative connection succeeds, check the other useraccounts and permissions in the data source for the OLAP Metadata Catalog database, andcarefully check user accounts with connection problems. See, “Correcting Data SourceProblems” on page 136.
4 Execute an SQL select statement against a table in the OLAP Metadata Catalog database; for example,if you are connected to the sample OLAP Metadata Catalog, type
SELECT * FROM TBC.OV_INFO
If the select statement fails, check the permissions for the user name you are using to connectto the data source. See “Correcting Data Source Problems” on page 136. Also, check thatthe version of the database client software you are using is compatible with the version ofthe data source. See “Correcting Database Client Problems” on page 137.
126 Troubleshooting ODBC and Connections

5 After you have successfully completed the preceding steps, try connecting to OLAP Metadata Catalogfrom Integration Services Console.
See “Testing the Integration Services Console Connection to the Data Source” on page132. If the connection fails, proceed to “Testing the ODBC Connection to the Data Source”on page 127.
If you still cannot complete a connection and select statement with the user who runsIntegration Server, contact technical support for the data source.
6 Repeat Step 3 through Step 5 for the data source database.
After you have successfully connected to OLAP Metadata Catalog, you can rule out setupand environment problems on the Integration Server computer and concentrate onproblems specific to the data source database, including required database server names,database names, user names, passwords, and access permissions.
Testing the ODBC Connection to the Data SourceAfter you have established that the database client software and data source are communicatingproperly (if applicable), the next step in isolating connection problems is to test the ODBCconnection to the data source databases.
On Windows systems, use ODBC Administrator to test connections to the data source databases.On UNIX, manually inspect the ODBC configuration files using ivtestlib (for 32-bit) or ddtestlib (for 64-bit) provided in the appropriate ODBC directory under common. You canalso use third-party utilities included with your data source.
On UNIX systems, the most likely causes for problems in the ODBC component are that theenvironment variables for ODBC are not set up or that the odbc.ini file is not configuredproperly.
ODBC tracing can also be used to track down connection problems. See “Using ODBC Tracing”on page 141.
Testing ODBC on Windows Systems
ä To test ODBC connections to the data source databases:
1 On the Windows desktop, select Start, then Settings, then Control Panel to open the Control Panelwindow.
2 In the Control Panel window, double-click the Administrative Tools icon, and then double-click theData Sources (ODBC) icon.
3 In the ODBC Data Source Administrator dialog box, click the System DSN tab.
4 In the System Data Sources list, select the data source created for OLAP Metadata Catalog or the datasource database, and click Configure.
A data source configuration dialog box is displayed. Depending on the data source and thedriver that you are using, you may be asked to log on to the database immediately, or youmay be asked to review all the settings before testing the connection. In either case, after
Isolating Connection Problems 127
attempting to log on to the database, observe the resulting message boxes to determine ifyou connected to the data source successfully.
Note: To be accessible from other computers, ODBC data sources must be configured asSystem DSNs, not User DSNs.
5 If you cannot connect to the database, check the Integration Server name, database name, user name,and password information for accuracy, and make sure that you are using the correct ODBC driver forthe data source.
See “Correcting ODBC Problems” on page 138.
6 After you have successfully completed the preceding steps, try connecting to the data source fromIntegration Services Console.
See “Testing the Integration Services Console Connection to the Data Source” on page132.
If the connection from Integration Services Console fails, proceed to “Testing the IntegrationServer Connection to the Data Source” on page 130.
Testing ODBC on UNIX SystemsOn UNIX systems, you must manually inspect the configuration files for ODBC or use an datasource utility to perform thorough testing. These configuration files include the login scriptsthat set the environment variables for ODBC and the odbc.ini file. See the documentation forthe data source or the ODBC driver.
ä To inspect the login script files:
1 Log on to the computer that runs Integration Server as the user who starts the Integration Server software.
2 In the current home directory, find the main login script file (typically, .profile for Korn Shell andBourne Shell users, .login for C Shell users) and open it in a text editor.
Note: The primary login script file may be named differently, depending on the UNIXoperating system and the system administrator.
3 Check the main login script file for the inclusion of the Integration Services script (is.sh oris.csh).
If one of these scripts is included in the main login script, make sure that the inclusion ofthe script file name follows the syntax for executing a script file within another script, andthat the script file is specified with a complete directory path. See “Correcting ODBCProblems” on page 138.
Note: If you make a change to the login scripts, log out and then log back on to reset theenvironment variables.
4 After completing the preceding steps, test the connection by following the steps listed in “Testing theIntegration Services Console Connection to Essbase Server” on page 134.
128 Troubleshooting ODBC and Connections
If you cannot make a connection, proceed to “Testing the Integration Server Connection tothe Data Source” on page 130.
ä To inspect the odbc.ini file:
1 Log on to the computer that runs Integration Server as the user who starts the Integration Server software.
2 To determine the location of the odbc.ini file, type
echo $ODBCINI
If this command does not display a file name and directory location, then you have notincluded the Integration Services script in the login script for the user. See “CorrectingIntegration Server Problems” on page 139.
3 Move to the directory specified by $ODBCINI and open the odbc.ini file with a text editor.
4 Ensure that you are using the exact file name and directory that you have set. For example, type vi$ODBCINI to display the file name and path of the $ODBCINI environment variable.
5 Check that the name of the data sources you are using with Integration Services are listed in the ODBCData Sources section; for example:
[ODBC Data Sources]TBC_MD=Essbase Integration Services sample catalogTBC=Essbase Integration Services sample database
6 For each data source, check that there is a section starting with the name listed in the ODBC DataSources section, enclosed in brackets; for example:
For Oracle:
[myoracle]Driver= products/common/ODBC/Merant/6.0/Drivers/ARor819.soDescription=my oracle sourceServerName=mytnsServerName
For IBM DB2:
[TBC_MD]Driver= products/common/ODBC/Merant/6.0/Drivers/ARdb219.soDescription=DB2 database for sample testing
7
Within the section for each data source, verify that an ODBC driver file is specified.
a. Make sure that the driver file exists by exiting the text editor and attempting to get adirectory listing for that file; for example:
ls /home/db2inst1/sqllib/lib/db2.so
b. If the file is listed, use ivtestlib (32-bit) or ddtestlib (64-bit) to check the actualname and location of the driver, then make the appropriate changes to the odbc.inifile.
Isolating Connection Problems 129

Tip: Copy the directory and file name for the driver from the odbc.ini file and pasteit into an ls command.
8 Within the section for each data source, verify that the database name, computer name, and otherrequired information are specified.
See “Correcting ODBC Problems” on page 138.
Testing the Integration Server Connection to the Data SourceAfter verifying the connections between the ODBC, the database client, and the data source, thenext step in isolating a connection problem is to connect to the data source databases fromIntegration Server. Test this connection by running Integration Services Shell on the samecomputer that runs Integration Server. See Chapter 8, “Using Integration Services Shell.”
Note: The following procedure uses the sample OLAP Metadata Catalog and sample database.For your tests, substitute the OLAP Metadata Catalog and data source information youare using.
This test uses the LOADMEMBER command to test connections. When the loadmember startsa load, it attempts to make connections in the following order:
1. Data source, using ODBC
2. OLAP Metadata Catalog, using ODBC
3. Essbase Server, using TCP/IP
In this test, you set up these connections one at a time and execute a LOADMEMBER commandeach time. By examining the errors each time, you can determine which connections aresuccessful.
ä To test the Integration Server connection to the data source:
1 Verify that Integration Server is running.
If Integration Server is not running, start it. If Integration Server will not start, check thatthe Integration Services environment variables are set. See “Correcting Integration ServerProblems” on page 139.
2 On the same computer that is running Integration Server, start Integration Services Shell at a commandprompt by typing
olapicmd
If Integration Services Shell does not start, make sure that the software is installed and thatthe Integration Services environment variables are set. See “Correcting Integration ServerProblems” on page 139.
3 At the Integration Services Shell command prompt, use the login command to connect to the IntegrationServer computer; for example, type
login cypress
130 Troubleshooting ODBC and Connections
4 Check the release of Integration Services by typing
version
Make sure that the version of the product you are using is compatible with the ODBC driversand the version ofEssbase you are using. For information on component compatibility, seeOracle Hyperion Enterprise Performance Management System Installation Start Here.
5 Set the data source to the sample data source by typing
setsource "DSN=TBC;CODEPAGE=English_UnitedStates.Latin1@Binary;UID=TBC;PWD=password"
The DSN parameter requires the ODBC data source name, which may be different from thedatabase name in the data source.
6 Set OLAP Metadata Catalog to the sample OLAP Metadata Catalog by typing
setcatalog "DSN=TBC_MD;CODEPAGE=English_UnitedStates.Latin1@Binary;UID=TBC;PWD=password"
The DSN parameter requires the ODBC data source name, which may differ from the OLAPMetadata Catalog database name in the data source.
7 Set the instance of Essbase Server to which you want to connect by typing
settarget "DSN=sequoia;UID=TBC;PWD=password;"
8 Test the connection to the data source database. Attempt to perform a member load by typing
loadmember "APP=OLAP_TBC;DBN=Basic;OTL=TBC Metaoutline;"
9 Check the status of the preceding command by typing
status
During a member load, Integration Services Shell connects first to the data source and thento OLAP Metadata Catalog. If the connection to the catalog is unsuccessful, the message “ISError: Unable to log in to Catalog” is displayed. If the connection to the data source fails,the message “IS Error: Unable to login to Datasource” is displayed.
If the connection to the data source failed, verify the ODBC data source name, user name,and password. If the connection continues to fail, see “Correcting Integration ServerProblems” on page 139 and “Correcting ODBC Problems” on page 138. Repeat Step 4through Step 8 of this procedure to retest the connection. When you successfully connectto the data source, continue to the next step.
10 Test the connection to the OLAP Metadata Catalog database by attempting to perform a member load.Type:
loadmember "APP=OLAP_TBC;DBN=Basic;OTL=TBC Metaoutline;"
11 Check the status of the preceding command by typing
status
During a member load, Integration Services Shell connects to OLAP Metadata Catalog andthen to the Essbase Server. If the connection to OLAP Metadata Catalog is successful, themessage “IS Error: Unable to login to Essbase Server” is displayed. If the connection to OLAPMetadata Catalog fails, the message “IS Error: Unable to login to Catalog” is displayed.
Isolating Connection Problems 131
If the connection to OLAP Metadata Catalog failed, verify the ODBC data source name, username, and password. If the connection continues to fail, see “Correcting Integration ServerProblems” on page 139 and “Correcting ODBC Problems” on page 138. Repeat Step 9 andStep 10 of this procedure to retest the connection. When you successfully connect to OLAPMetadata Catalog, continue to the next step.
12 Test the connection from Integration Services Console to the data source by proceeding to “Testing theIntegration Services Console Connection to the Data Source” on page 132.
Testing the Integration Services Console Connection to theData SourceAfter you have corrected problems with the components that enable Integration ServicesConsole to connect to the data source, attempt a connection from the console to an OLAPMetadata Catalog and a database in the data source to prove the corrections are successful. Toisolate possible computer-to-computer connection problems, run Integration Services Consoleon a different computer than the one running Integration Server.
ä To test the Integration Services Console connection to the data source:
1 Verify that Integration Server is running.
If Integration Server is not running, start it. If Integration Server will not start, check thatthe Integration Services environment variables are set. See “Correcting Integration ServerProblems” on page 139.
2 On a computer other than the one running Integration Server, start Integration Services Console.
3 Connect to the Integration Server computer and OLAP Metadata Catalog; for example, cypress andTBC_MD.
If the connection fails, verify that you have specified the correct ODBC data source namefor the OLAP Metadata Catalog database and the correct Integration Server computer name.Also verify that you specified the correct user name and password for the OLAP MetadataCatalog database on the data source. See “Correcting Integration Services ConsoleProblems” on page 140.
4 After connecting to OLAP Metadata Catalog, open an OLAP model and connect to the data source forthe OLAP model.
If the connection fails, verify that you have specified the correct ODBC data source namefor the data source and the correct Integration Server computer name. Also verify that youspecified the correct user name and password for the data source database on the data source.See “Correcting Integration Services Console Problems” on page 140.
Testing the Integration Server Connection to Essbase ServerWhen isolating connection problems between Integration Server and Essbase Server, useIntegration Services Shell to establish a connection to a data source and OLAP Metadata Catalog,and then attempt to load members into an Essbase database.
132 Troubleshooting ODBC and Connections
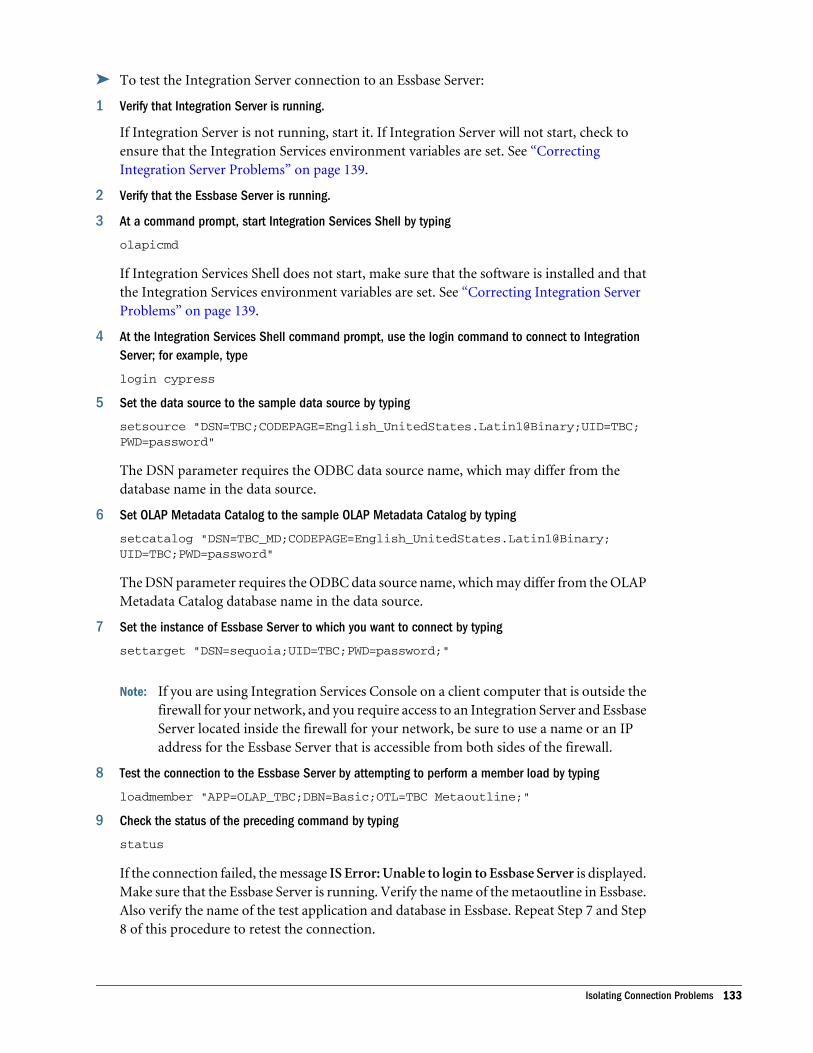
ä To test the Integration Server connection to an Essbase Server:
1 Verify that Integration Server is running.
If Integration Server is not running, start it. If Integration Server will not start, check toensure that the Integration Services environment variables are set. See “CorrectingIntegration Server Problems” on page 139.
2 Verify that the Essbase Server is running.
3 At a command prompt, start Integration Services Shell by typing
olapicmd
If Integration Services Shell does not start, make sure that the software is installed and thatthe Integration Services environment variables are set. See “Correcting Integration ServerProblems” on page 139.
4 At the Integration Services Shell command prompt, use the login command to connect to IntegrationServer; for example, type
login cypress
5 Set the data source to the sample data source by typing
setsource "DSN=TBC;CODEPAGE=English_UnitedStates.Latin1@Binary;UID=TBC;PWD=password"
The DSN parameter requires the ODBC data source name, which may differ from thedatabase name in the data source.
6 Set OLAP Metadata Catalog to the sample OLAP Metadata Catalog by typing
setcatalog "DSN=TBC_MD;CODEPAGE=English_UnitedStates.Latin1@Binary;UID=TBC;PWD=password"
The DSN parameter requires the ODBC data source name, which may differ from the OLAPMetadata Catalog database name in the data source.
7 Set the instance of Essbase Server to which you want to connect by typing
settarget "DSN=sequoia;UID=TBC;PWD=password;"
Note: If you are using Integration Services Console on a client computer that is outside thefirewall for your network, and you require access to an Integration Server and EssbaseServer located inside the firewall for your network, be sure to use a name or an IPaddress for the Essbase Server that is accessible from both sides of the firewall.
8 Test the connection to the Essbase Server by attempting to perform a member load by typing
loadmember "APP=OLAP_TBC;DBN=Basic;OTL=TBC Metaoutline;"
9 Check the status of the preceding command by typing
status
If the connection failed, the message IS Error: Unable to login to Essbase Server is displayed.Make sure that the Essbase Server is running. Verify the name of the metaoutline in Essbase.Also verify the name of the test application and database in Essbase. Repeat Step 7 and Step8 of this procedure to retest the connection.
Isolating Connection Problems 133

After you can connect successfully to the Essbase Server, proceed to “Testing the IntegrationServices Console Connection to Essbase Server” on page 134.
Testing the Integration Services Console Connection toEssbase ServerWhen isolating the connection problems between Integration Services Console and EssbaseServer, connect to OLAP Metadata Catalog and a data source, and then attempt to load membersinto an Essbase database.
Note: The following procedure uses the sample application, including the sample database,OLAP Metadata Catalog, OLAP model, and metaoutline. For your tests, substitute theapplication and databases you are using.
ä To test the Integration Services Console connection to an Essbase Server:
1 Verify that Integration Server is running.
2 Verify that Essbase Server is running.
3 Start Integration Services Console.
4 From Integration Services Console, connect to the Integration Server computer and OLAP MetadataCatalog; for example, cypress and TBC_MD.
5 After connecting to OLAP Metadata Catalog, open a metaoutline and connect to the data source for themetaoutline; for example, TBC Metaoutline and TBC.
6 Start a member load by selecting Outline, then Member Load.
7 If prompted, provide the name of the Essbase Server, user name, and password.
If the Essbase Application and Database dialog box is displayed, the connection is successful.If the connection failed, verify that you have entered the correct computer name for theEssbase Server and the correct user name and password. See the Essbase documentation.
If the Essbase Server is located on a large network, you may need to provide a more specificserver name address, such as “cypress.hyperion.com” rather than simply “cypress.”
Note: If you are using Integration Services Console on a client computer that is outside thefirewall for your network, and you require access to an Integration Server and EssbaseServer located inside the firewall for your network, be sure to use a name or an IPaddress for the Essbase Server that is accessible from both sides of the firewall.
Correcting Connection ProblemsIn correcting connection problems with Integration Services, consider both component-leveland system-level problems. The following topics list possible problems and areas forinvestigation within the software components of an Integration Services system.
134 Troubleshooting ODBC and Connections
To correct system-level problems that can occur across software components, review thefollowing issues:
l Are all user names and passwords being used consistently across all the components andcomputer user accounts? See “User Name and Password Problems” on page 135.
l Do all user accounts used in the system have the appropriate permissions and privileges?
System administrators typically use highly privileged administrative accounts when settingup and testing a system. After the system is set up, users with fewer privileges may be unableto use the system successfully. Check permissions on the following components:
m User account on the client computer
m User account on the Integration Server computer
m OLAP Metadata Catalog database
m Data source database
m User account for the Essbase Server
l Are the software components using adequate addressing to identify the computers to whichthey are connecting?
Depending on the size and configuration of the computer network, it may be necessary touse a fully-qualified host address to connect to a particular computer. For example, insteadof the host name “cypress,” the complete host name “cypress.mydivision.mycompany.com”may be required. Alternatively, you might need to use the IP address number for the servercomputer; for example, 127.0.0.1.
l Is the user who starts Integration Server (for example, hyperion) configured to run all therequired software?
The user (for example, hyperion) must have all required environment variables set and musthave permissions to run all the following software components:
m Integration Server
m ODBC software
m Database client software
m Data source server (this may not be required)
User Name and Password ProblemsConsistent use of user names and passwords is often a problem in installing, configuring, andusing Integration Services, because of the numerous software components and computers thatmake up the system.
Tip: During installation, configuration, and testing, keep a list of all user names and passwordsthat you use to create or to modify the system, including the applications with which theuser names and passwords are associated and the purpose of each application.
Correcting Connection Problems 135

In a smaller, single-server implementation of Integration Services, where Integration Server,Essbase Server, and the data source are all run on a single computer, you must manage five username and password sets and use them consistently:
l User account on the Integration Services client computer
l User account on the computer that runs all the server software
l OLAP Metadata Catalog database in the data source
l Data source database in the data source
l Essbase Server software
In a fully distributed, three-server implementation, where Integration Server, Essbase Server,and the data source are all run on separate computers, you must manage seven user name andpassword sets and use them consistently:
l User account on the Integration Services client computer
l User account on the computer that runs Integration Server
l User account on the computer that runs the data source
l OLAP Metadata Catalog database in the data source
l Data source database
l User account on the computer that runs Essbase Server
l Essbase Server software
Adding aliases or synonyms to the data source databases adds to the number of user name andpassword sets you must manage.
Tip: During installation and connection testing, use a single set of user names and passwords toavoid confusion. Add user aliases or synonyms after the system is configured and running.
Correcting Data Source ProblemsTo correct problems connecting to the data source, investigate the following possible causes:
l Is the data source server computer and software running? Has the server locked up, stopped,or failed?
l Is the data source software installed? Are all components required for ODBC connectionsinstalled?
Some data sources may require additional software components beyond the basic serversoftware to enable ODBC connections. The database client software is usually required onthe computer that connects to the data source server using ODBC and also may be requiredon the data source server computer.
l Do the OLAP Metadata Catalog and data source databases to which you are trying to connectexist? Have the tables for OLAP Metadata Catalog been created?
136 Troubleshooting ODBC and Connections
You can create the OLAP Metadata Catalog tables either automatically or by using thecreation scripts provided with Integration Services. See Chapter 3, “Creating, Upgrading,and Deleting OLAP Metadata Catalogs”.
l What are the exact names of the OLAP Metadata Catalog and data source databases? Arethe names case-sensitive?
l Does the user name that you are using to connect to the data source have adequatepermissions to access the database? Does the user have read and write permissions?
For the OLAP Metadata Catalog database, users need full read and write permissions. Forthe data source database, users need read-only permissions.
l If the data source server is on a computer by itself, is there a corresponding user account onthe computer for the user names you are using to connect to the databases?
To allow connections to the database server from other computers, you may need to set upuser accounts on the data source server computer, separate from the database users youcreate.
l Does the data source require any addressing beyond the name of the database if you areusing the database client software or ODBC to connect?
Some data sources may have specific naming requirements for connecting to their databases,including different naming conventions for third-party applications (such as IntegrationServices). See the documentation for the data source.
Correcting Database Client ProblemsIf you have problems connecting to the data source from the database client software, investigatethe following possible causes:
l Is the database client software installed? Are all database client components required for theODBC connections installed?
To enable ODBC connections, some database client software may require additionalsoftware components beyond the basic server software. The database client software usuallyis required on the computer that uses ODBC to connect to the data source server and mayalso be required on the data source server computer.
l Is the database client software compatible with the data source?
Earlier or later versions of the database client software may not work with the data sourceversion that you are running. See your data source documentation.
l Do the database client software utilities, such as the command-line SQL interface, start? Dothey start when you are logged on as the user who runs Integration Server?
When you run the database client software, the user account must have the appropriate fileaccess permissions and must have set the path and other environment variables. Verify thatthe user who runs Integration Server (typically, hyperion) is configured to run the databaseclient software.
On UNIX systems, a script file is usually provided by the data source vendor to set therequired environment variables and should be included in the main user login script. If you
Correcting Connection Problems 137
include one of these files in the main login script, make sure that you specify a completedirectory path and that you follow the syntax for executing a script file within a script.
l Are the data source server names, database names, user names, and passwords specifiedcorrectly?
Make sure you are using the correct names, including the exact spelling, uppercase orlowercase letters, and any required data source-specific identification syntax. See“Correcting Data Source Problems” on page 136.
l Is the database client software configured correctly?
File access permissions, path, and other environment variables must be set for the user whoruns the database client software. Additional configuration steps also may be required forspecific database clients.
See the installation documentation for the database client software.
IBM DB2: You may be required to bind the database client software utilities to the IBM DB2databases. See the IBM DB2 installation documentation.
Oracle: The database name for Oracle databases can be specified in a tnsnames.ora file,which must be configured by the database administrator. See the Oracle installationdocumentation.
In the sqlhosts file, you must specify a TCP protocol for your operating system as follows:
m AIX and HP-UX: onsoctcp
m Solaris: ontlitcp
Correcting ODBC ProblemsTo correct problems using ODBC to connect to the data source, investigate the following possiblecauses:
l Is the ODBC software installed? Are all required ODBC components installed?
On Windows systems, make sure the ODBC core components and any required drivers areinstalled. On UNIX systems, the Integration Services setup program installs the requiredODBC core components if you choose to install the DataDirect ODBC drivers.
l Is the ODBC driver compatible with the data source? Is the driver compatible with theoperating system?
Verify that the ODBC driver you are using is supported by Integration Services by referringto the Oracle Hyperion Enterprise Performance Management System Certification Matrix(http://www.oracle.com/technology/software/products/ias/files/fusion_certification.html)>.
l Are the data source server names, database names, user names, and passwords specifiedcorrectly in the ODBC data source?
Make sure you are using the correct names, including the exact spelling, uppercase orlowercase letters, and any required data source-specific identification syntax. On Windows
138 Troubleshooting ODBC and Connections

systems, configure ODBC data sources by using ODBC Administrator. On UNIX systems,configure ODBC data sources by editing the odbc.ini file manually.
IBM DB2: On Windows systems, the IBM DB2 Client Configuration Assistant shows theODBC DSN.
See “Correcting Data Source Problems” on page 136.
l On UNIX systems, have you specified the full path and file name of the ODBC driver forthe data source in the odbc.ini file? Does the ODBC driver actually exist in the specifieddirectory? Can ivtestlib (32-bit) or ddtestlib (64-bit) load it?
Try copying the driver path and file name from the odbc.ini file and pasting it into an lscommand. If the file is not listed when you execute the command, check the accuracy of thedriver path and file name in the odbc.ini file.
l Are any parameters missing in the ODBC data source configuration?
On Windows systems, make sure you have filled in all required parameters for the datasource in ODBC Administrator. On UNIX systems, the Integration Services installationprovides a sample odbc.ini file, which may not include data source parameters requiredfor the data source that you are using. For information on required data source-specificODBC driver parameters, see the ODBC documentation provided with Integration Services.For examples of odbc.ini file configurations for the supported data source platforms, seethe Chapter 2, “Configuring Data Sources.”.
l Can other applications connect to the data source by using ODBC?
If you can identify another application that is successfully using ODBC to connect todatabases on the data source, analyze the configuration of the computer from which theconnection is made and use it as a model for the computer connections you are trying tofix.
Note: Most data source vendors provide utilities to test ODBC connections. Forinformation, see the documentation for the data source.
If the preceding checks do not enable you to correct the problems connecting from ODBC tothe data source, try using ODBC tracing to isolate the problem. See “Using ODBC Tracing” onpage 141.
Correcting Integration Server ProblemsTo correct problems connecting to the data source from Integration Server, investigate thefollowing possible causes:
l Is Integration Server installed? Are all the required Integration Server components installed?
The following components must be installed to have a functional instance of IntegrationServer:
m Integration Server software
Correcting Connection Problems 139
m Related base components (on UNIX, these components are included as part ofIntegration Server software)
m DataDirect ODBC drivers (unless ODBC and drivers are already installed)
l Is Integration Server running? Is it configured properly?
Start Integration Server by opening a command prompt window and typing olapisvr .
If Integration Server does not start, review the following possible problems:
m Are the required environment variables set? Are they set for the correct user name?
On Windows systems, if you decide not to enable the setup program to updateenvironment variables automatically, you must update the variables manually.
On UNIX systems, a script file (is.sh or is.csh) that sets environment variables mustbe included in the login script of the user who starts Integration Server.
m What release of Essbase is installed?
If an incompatible version of Essbase is installed on the same computer as IntegrationServer and the \essbase\bin directory is in the current path, Integration Server doesnot start. For information on compatible versions of Essbase, see the Oracle HyperionEnterprise Performance Management System Installation Start Here.
m Is port 3388 in use?
Integration Server uses port 3388 to communicate with the Integration Services clientsoftware. If this port is being used by another program, Integration Server does not start.
m On UNIX, is more than one copy of olapisvr running? If so, all servers except one willhang indefinitely. To correct the problem, run the following command to display allprograms that are currently running:
ps -fe | grep olapisvr
Many of the problems related to Integration Server not working properly may be traced toconfiguration steps that you may have missed. See the Oracle Hyperion Enterprise PerformanceManagement System Installation and Configuration Guide.
Correcting Integration Services Console ProblemsIf you have problems connecting to the data source from Integration Services Console and haveruled out problems with the data source, database client, ODBC, and Integration Server, theproblem likely originates in the Integration Services Console component.
To correct problems connecting to the data source from the console, investigate the followingpossible causes:
l Is Integration Services Console installed? Are all required components installed?
The following components must be installed to have a functional Integration ServicesConsole client:
m Integration Services Console software
140 Troubleshooting ODBC and Connections
m Related base components
l Is the Integration Services Console configured properly?
Make sure the required environment variables are set. Run the Oracle's Hyperion EnterprisePerformance Management System Configurator as described in the Oracle HyperionEnterprise Performance Management System Installation and Configuration Guide.
l Are the Integration Server computer name, ODBC data source names, user names, andpasswords specified correctly?
For the Integration Server computer name, verify that you are using the correct spelling anduppercase and lowercase letters for the server name. For OLAP Metadata Catalog and thedata source, make sure you are using an ODBC data source name, which may be differentfrom the data source database name.
Note: The user names and passwords for the OLAP Metadata Catalog database may bedifferent from the data source. Verify that you are using the correct login informationfor each database.
See “Correcting Data Source Problems” on page 136.
l Does the user account with which you are running Integration Services Console havepermission to connect to the computer running Integration Server?
You must have a user account and appropriate access permissions on the server computerrunning Integration Server.
l If you have Integration Server installed on more than one computer, have you specified thecorrect server name?
A particular Integration Server may not be set up to access the same OLAP Metadata Catalogsand data sources used by other servers.
l Are you using adequate addressing to identify the Integration Server computer?
Depending on the size and configuration of the computer network, it may be necessary to usea fully-qualified host address to connect to a particular computer. For example, instead of thehost name “cypress,” the complete host name “cypress.mydivision.mycompany.com” may berequired. Alternatively, you might need to use the IP address number for the server computer;for example, 127.0.0.1.
Using ODBC TracingIf you do not have access to ODBC testing utilities or third-party applications that use ODBC,tracking down ODBC problems can be difficult. Using the tracing utility provided with ODBCcan help identify and resolve connection problems.
Using ODBC Tracing 141
Using ODBC Tracing on Windows SystemsOn Windows systems, if you cannot connect to the data source or OLAP Metadata Catalog, usethe tracing utility in ODBC Administrator to learn which ODBC call is failing.
ä To use the tracing utility in ODBC Administrator:
1 Start ODBC Administrator on the computer running Integration Server.
2 Click the Tracing tab, specify a log file for the tracing utility, then click Start Tracing Now.
Note: Tracing quickly creates a large log file. Disable tracing when you are finished: On theTracing tab, click Stop Tracing Now.
3 Start Integration Server and Integration Services Console.
4 From Integration Services Console, selectConnections , then OLAP Metadata Catalog, then Connect,and try to connect to OLAP Metadata Catalog.
5 If you can connect to OLAP Metadata Catalog, open an OLAP model and try to connect to a data source.
6 If you cannot connect to OLAP Metadata Catalog (step 4) or to a data source (step 5), see the file thatyou specified as the log file in the root directory.
If necessary, share the information in the log file with Oracle Technical Support to help solvethe connectivity problem.
Using ODBC Tracing on UNIX SystemsOn UNIX systems, if you cannot connect to the data source or OLAP Metadata Catalog, use thetracing to learn which ODBC call is failing. On UNIX systems, you must edit the odbc.ini fileto enable and disable ODBC tracing.
ä To use ODBC tracing on UNIX systems:
1 On the computer running Integration Server, open the odbc.ini file by using a text editor such as vi.
2 Find the section starting with [ODBC], as shown in the following example:
[ODBC]Trace=0TraceFile=odbctrace.outTraceDll=/export/home/users/hyperion/is/odbclib/odbctrac.soInstallDir=/export/home/users/hyperion/is/odbclib
3 Set the Trace setting to 1 to enable ODBC tracing.
Note: Tracing quickly creates a large log file. Disable tracing when you are finished by settingthe Trace parameter to 0.
4 Start Integration Server and Integration Services Console.
5 From Integration Services Console, select Connections , then OLAP Metadata Catalog, then Connect,and try to connect to OLAP Metadata Catalog.
142 Troubleshooting ODBC and Connections

6 If you can connect to OLAP Metadata Catalog, open an OLAP model and try to connect to a data source.
7 If you cannot connect to OLAP Metadata Catalog step 5or to a data source step 6, read theodbctrace.out file.
If necessary, share the information in the log file with Oracle Technical Support to help solvethe connectivity problem.
Using ODBC Tracing 143

144 Troubleshooting ODBC and Connections
8Using Integration Services Shell
In This Chapter
Starting Integration Services Shell . . . . . . . . . . . . . . . . . . . . . . . . . . . . . . . . . . . . . . . . . . . . . . . . . . . . . . . . . . . . . . . . . . . . . 145
Integration Services Shell . . . . . . . . . . . . . . . . . . . . . . . . . . . . . . . . . . . . . . . . . . . . . . . . . . . . . . . . . . . . . . . . . . . . . . . . . . . . . . . 146
Integration Services Shell Commands ... . . . . . . . . . . . . . . . . . . . . . . . . . . . . . . . . . . . . . . . . . . . . . . . . . . . . . . . . . . . . . . 150
Peforming Member Loads Using Integration Services Shell. . . . . . . . . . . . . . . . . . . . . . . . . . . . . . . . . . . . . . . . . . 163
Loading Data Using Integration Services Shell . . . . . . . . . . . . . . . . . . . . . . . . . . . . . . . . . . . . . . . . . . . . . . . . . . . . . . . . 164
This chapter describes the commands supported by Essbase Integration Services Shell, thecommand-line tool provided with Integration Services. The majority of these commandsprovide the same functionality available through Essbase Integration Services Console. You useIntegration Services Shell commands and scripts to create Essbase outlines and loadEssbasedatabases.
If you schedule member or data loads using Integration Services Console, Integration Servicesautomatically creates an Integration Services Shell batch file and a corresponding .cbs file inthe Batch directory. You can modify and reuse the.cbs file for future member and data loads.
Starting Integration Services ShellBefore you start Integration Services Shell, make sure that the following programs are running.These programs can be on network server computers and do not need to be on your localcomputer to be available to Integration Services Shell:
l A database that contains the OLAP Metadata Catalog where the metadata is stored
l One or more data sources that you want to use to create OLAP models and metaoutlines
l Essbase Integration Server
See “Starting Integration Server” on page 12.
l Essbase Server
See the Oracle Hyperion Enterprise Performance Management System Installation andConfiguration Guide.
ä To start Integration Services Shell, use one of the following methods:
l From the Windows Start menu, select All Programs, then Oracle EPM System, then Essbase,then Integration Services, then Shell.
Starting Integration Services Shell 145

l Enter the executable name on the command line; for example, type
olapicmd
l To set the TCP port number with which Essbase Integration Server communicates with itsclients to a port different from the default 3388, enter the executable name and -Pportnumber when you start Integration Services Shell; for example, type
olapicmd -P3390
Note: If Integration Services Shell does not start when olapicmd is executed from thecommand line, the operating system path may not be updated correctly. See the OracleHyperion Enterprise Performance Management System Installation and ConfigurationGuide.
The Integration Services Shell window opens, as shown in Figure 5:
Figure 5 Essbase Integration Services Shell Window
In the Integration Services Shell window, enter commands at the command prompt. Forexample, type the following commands:
l Type login machine_name to log on to a server running on the same machine.
l Type shutdown to stop the server.
l Type exit to stop Integration Services Shell.
l Type help to get a list of Integration Services Shell commands.
Integration Services ShellIntegration Services Shell is a command-line tool that enables you to access Integration Serverto perform operations on an Essbase outline and the data in anEssbase database.
With Integration Services Shell, you can perform server operations at the command line in eitherbatch or interactive mode.
l Batch mode. To automate routine server maintenance and diagnostic tasks, write a scriptor batch file and run it from the command line.
Batch mode is convenient if you use a particular series of commands frequently or if the taskrequires many commands.
l Interactive mode. To perform tasks interactively, enter OLAP commands at the commandline.
146 Using Integration Services Shell
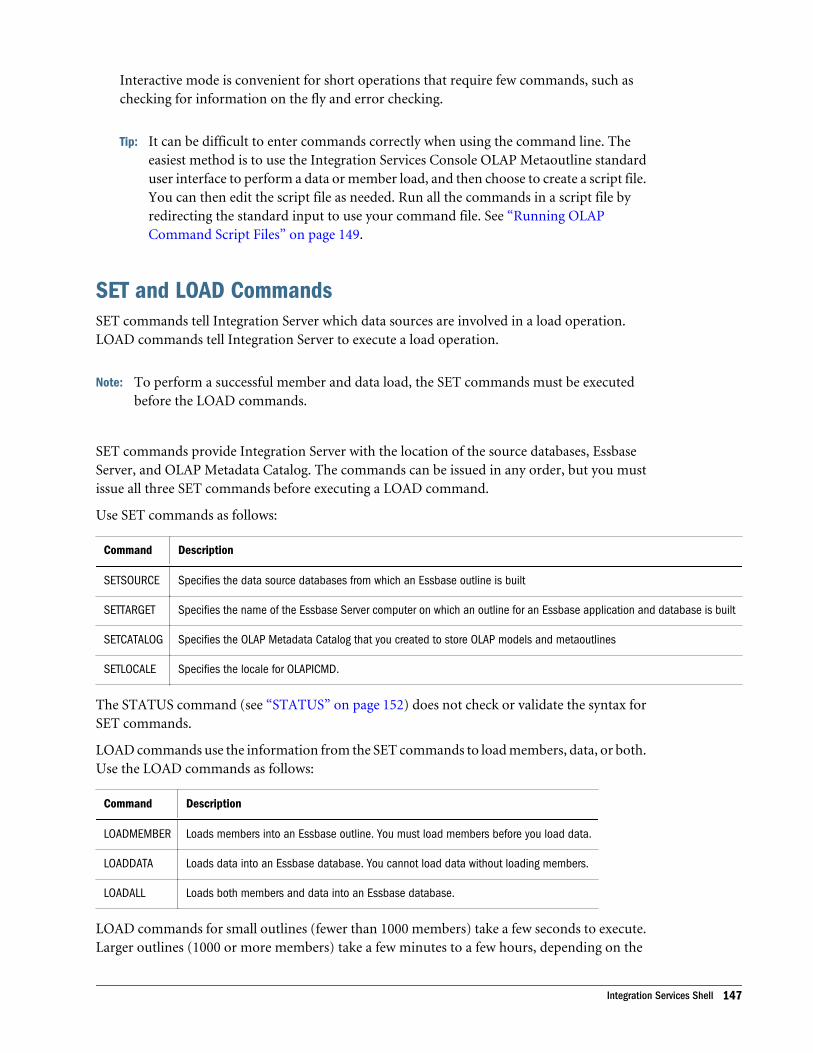
Interactive mode is convenient for short operations that require few commands, such aschecking for information on the fly and error checking.
Tip: It can be difficult to enter commands correctly when using the command line. Theeasiest method is to use the Integration Services Console OLAP Metaoutline standarduser interface to perform a data or member load, and then choose to create a script file.You can then edit the script file as needed. Run all the commands in a script file byredirecting the standard input to use your command file. See “Running OLAPCommand Script Files” on page 149.
SET and LOAD CommandsSET commands tell Integration Server which data sources are involved in a load operation.LOAD commands tell Integration Server to execute a load operation.
Note: To perform a successful member and data load, the SET commands must be executedbefore the LOAD commands.
SET commands provide Integration Server with the location of the source databases, EssbaseServer, and OLAP Metadata Catalog. The commands can be issued in any order, but you mustissue all three SET commands before executing a LOAD command.
Use SET commands as follows:
Command Description
SETSOURCE Specifies the data source databases from which an Essbase outline is built
SETTARGET Specifies the name of the Essbase Server computer on which an outline for an Essbase application and database is built
SETCATALOG Specifies the OLAP Metadata Catalog that you created to store OLAP models and metaoutlines
SETLOCALE Specifies the locale for OLAPICMD.
The STATUS command (see “STATUS” on page 152) does not check or validate the syntax forSET commands.
LOAD commands use the information from the SET commands to load members, data, or both.Use the LOAD commands as follows:
Command Description
LOADMEMBER Loads members into an Essbase outline. You must load members before you load data.
LOADDATA Loads data into an Essbase database. You cannot load data without loading members.
LOADALL Loads both members and data into an Essbase database.
LOAD commands for small outlines (fewer than 1000 members) take a few seconds to execute.Larger outlines (1000 or more members) take a few minutes to a few hours, depending on the
Integration Services Shell 147

amount of data being loaded, the configuration of the metaoutline, and the computer systemcapabilities. After executing LOAD commands, wait a few seconds until the command prompt(->) is displayed and then use the STATUS command to check the success or failure of thecommand execution.
See “Peforming Member Loads Using Integration Services Shell” on page 163 for a samplesequence of commands for loading members.
See “Loading Data Using Integration Services Shell” on page 164 for a sample sequence ofcommands for loading data.
Informational CommandsThe STATUS and VERSION commands provide processing status and system release versioninformation for you and can be used at any time in the sequence of command execution.
Command Syntax and ExecutionIntegration Services Shell commands are not case-sensitive, but named data sources, user IDs,and passwords might be case-sensitive, depending on the operating system and the data sourceyou are using. Enter the syntax exactly as shown in this chapter for each command. Keywordparameters can appear in any order.
The commands require semicolons and parameters such as data source name (DSN), code page(CODEPAGE), user ID (UID), and password (PWD) to separate the command into statementsthat indicate what kind of information you are providing; for example:
SETSOURCE "DSN=database;CODEPAGE=English_UnitedStates.Latin1@Binary;UID=Smith;PWD=password;"
You must separate the statements with a semicolon. The final semicolon is optional. Do not usesemicolons as part of data source names, because Integration Services Shell recognizessemicolons as field separators. It is recommended that you use double quotation marks aroundthe parameters, as shown in the preceding example.
In this guide, all optional syntax parameters are indicated by their enclosure in brackets [ ];however, do not type the brackets when you enter the commands.
Press Enter to execute the commands.
Note: If you are unsure of a specific syntax, use Integration Services Console to schedule memberor data loads, or to create load scripts. An Integration Services Shell batch file and acorresponding .cbs file are created automatically in the eis\server\Batch directory.You can reference, modify, and reuse the .cbs file for future member and data loads. Inthe Schedule Essbase Load dialog box, be sure to check the Save Script Only option insteadof the Schedule option. See “Recording Member and Data Load Scripts” on page 149.
148 Using Integration Services Shell

Recording Member and Data Load ScriptsIf you are creating scripts to perform loads or other tasks, you may want a script generated byIntegration Services to use as a model or you may want to check your script syntax for OpenDatabase Connectivity (ODBC) data source connection details. Record a load script withIntegration Services by performing a load and recording the load script to a script file.
ä To record a load script:
1 Start Integration Services Console and open a metaoutline.
2 Select Outline > and one of the following menu items:
l Member Load
l Data Load
l Member and Data Load
3 In the Essbase Application and Database dialog box, type or select the appropriate application anddatabase names.
4 Click Next to display the Schedule Essbase Load dialog box.
5 Save the load to a script file by clicking Only Save Load Script and then click Save Scripts.
6 In the Save Script As dialog box, type a name for the script that you want to save, and then click OK.
7 Click Finish to start the load or to complete scheduling of the load.
Running Integration Services Shell Script and Batch FilesIf you use a series of commands frequently or you must enter many commands to complete atask, you can automate the task with a script or batch file. Both are text files.
l A script file (.cbs extension) contains Integration Services Shell commands. You can runa script file from the operating system command line or from within an operating systembatch file.
l On Windows platforms, a batch file (.bat extension) is an operating system file that callsmultiple Integration Services Shell scripts and is used to run multiple sessions of IntegrationServices Shell commands. You can run a batch file on the server from the operating systemprompt.
l On UNIX, shell scripts are used in place of batch or script files.
When you run a script file, Integration Services Shell executes the commands in the orderspecified in the script until the program reaches the end of the file.
Running OLAP Command Script FilesEnter the following command at the command prompt to run a script file in Integration ServicesShell:
olapicmd -fscriptFileName [> logFileName]
Integration Services Shell 149
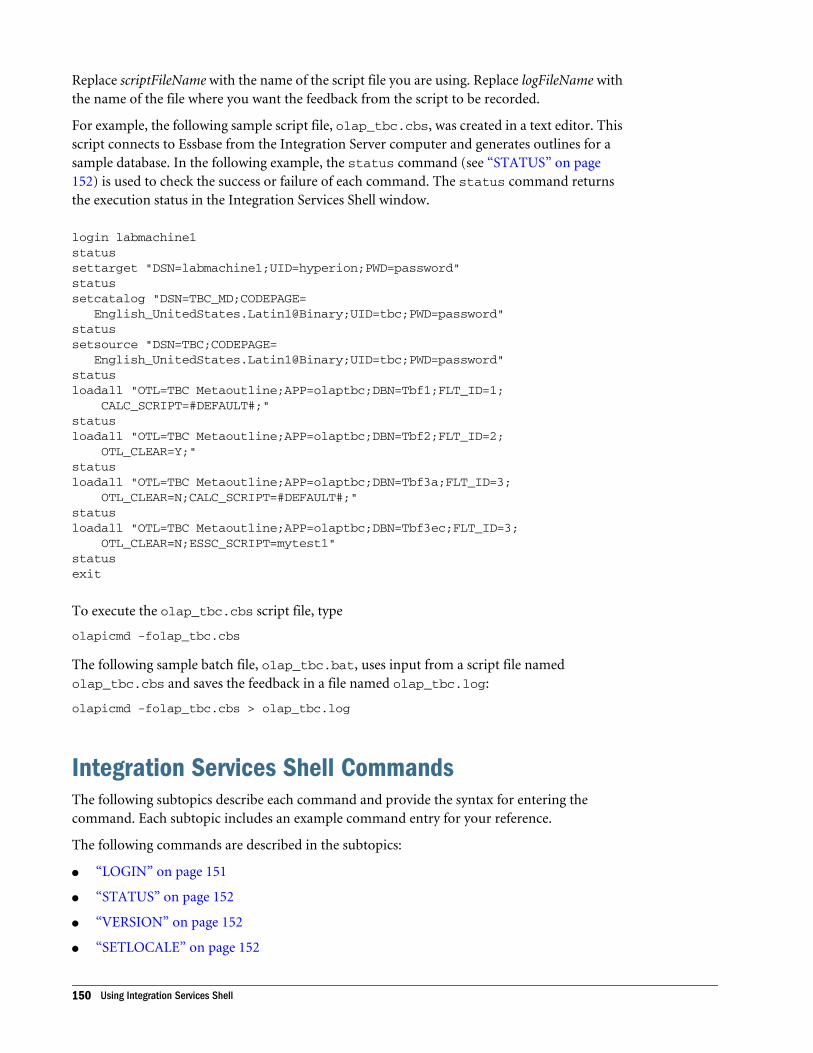
Replace scriptFileName with the name of the script file you are using. Replace logFileName withthe name of the file where you want the feedback from the script to be recorded.
For example, the following sample script file, olap_tbc.cbs, was created in a text editor. Thisscript connects to Essbase from the Integration Server computer and generates outlines for asample database. In the following example, the status command (see “STATUS” on page152) is used to check the success or failure of each command. The status command returnsthe execution status in the Integration Services Shell window.
login labmachine1statussettarget "DSN=labmachine1;UID=hyperion;PWD=password"statussetcatalog "DSN=TBC_MD;CODEPAGE= English_UnitedStates.Latin1@Binary;UID=tbc;PWD=password"statussetsource "DSN=TBC;CODEPAGE= English_UnitedStates.Latin1@Binary;UID=tbc;PWD=password"statusloadall "OTL=TBC Metaoutline;APP=olaptbc;DBN=Tbf1;FLT_ID=1; CALC_SCRIPT=#DEFAULT#;"statusloadall "OTL=TBC Metaoutline;APP=olaptbc;DBN=Tbf2;FLT_ID=2; OTL_CLEAR=Y;"statusloadall "OTL=TBC Metaoutline;APP=olaptbc;DBN=Tbf3a;FLT_ID=3; OTL_CLEAR=N;CALC_SCRIPT=#DEFAULT#;"statusloadall "OTL=TBC Metaoutline;APP=olaptbc;DBN=Tbf3ec;FLT_ID=3; OTL_CLEAR=N;ESSC_SCRIPT=mytest1"statusexit
To execute the olap_tbc.cbs script file, type
olapicmd -folap_tbc.cbs
The following sample batch file, olap_tbc.bat, uses input from a script file namedolap_tbc.cbs and saves the feedback in a file named olap_tbc.log:
olapicmd -folap_tbc.cbs > olap_tbc.log
Integration Services Shell CommandsThe following subtopics describe each command and provide the syntax for entering thecommand. Each subtopic includes an example command entry for your reference.
The following commands are described in the subtopics:
l “LOGIN” on page 151
l “STATUS” on page 152
l “VERSION” on page 152
l “SETLOCALE” on page 152
150 Using Integration Services Shell
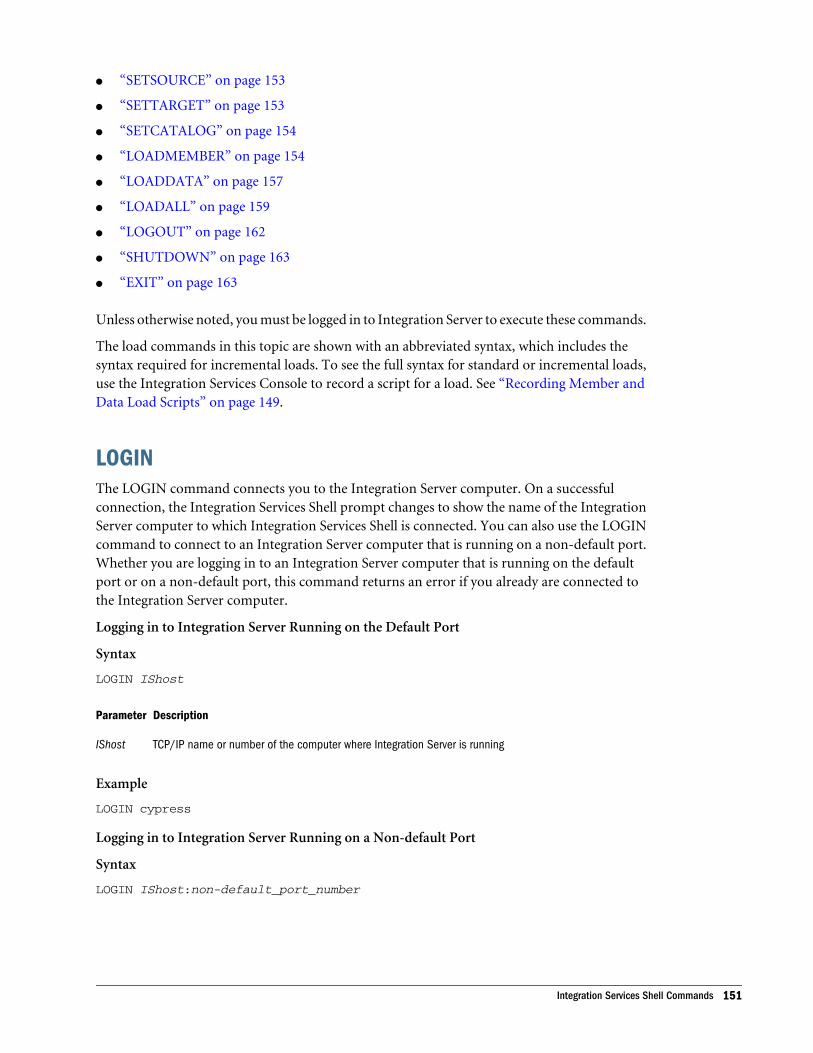
l “SETSOURCE” on page 153
l “SETTARGET” on page 153
l “SETCATALOG” on page 154
l “LOADMEMBER” on page 154
l “LOADDATA” on page 157
l “LOADALL” on page 159
l “LOGOUT” on page 162
l “SHUTDOWN” on page 163
l “EXIT” on page 163
Unless otherwise noted, you must be logged in to Integration Server to execute these commands.
The load commands in this topic are shown with an abbreviated syntax, which includes thesyntax required for incremental loads. To see the full syntax for standard or incremental loads,use the Integration Services Console to record a script for a load. See “Recording Member andData Load Scripts” on page 149.
LOGINThe LOGIN command connects you to the Integration Server computer. On a successfulconnection, the Integration Services Shell prompt changes to show the name of the IntegrationServer computer to which Integration Services Shell is connected. You can also use the LOGINcommand to connect to an Integration Server computer that is running on a non-default port.Whether you are logging in to an Integration Server computer that is running on the defaultport or on a non-default port, this command returns an error if you already are connected tothe Integration Server computer.
Logging in to Integration Server Running on the Default Port
Syntax
LOGIN IShost
Parameter Description
IShost TCP/IP name or number of the computer where Integration Server is running
Example
LOGIN cypress
Logging in to Integration Server Running on a Non-default Port
Syntax
LOGIN IShost:non-default_port_number
Integration Services Shell Commands 151
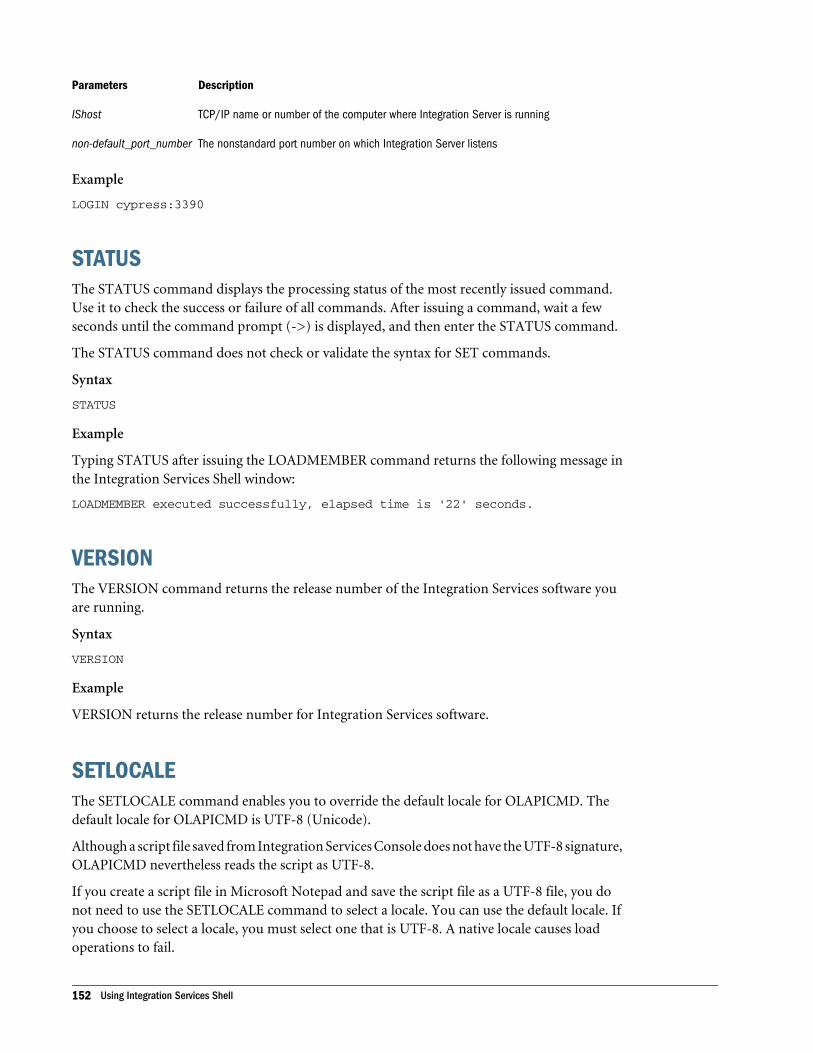
Parameters Description
IShost TCP/IP name or number of the computer where Integration Server is running
non-default_port_number The nonstandard port number on which Integration Server listens
Example
LOGIN cypress:3390
STATUSThe STATUS command displays the processing status of the most recently issued command.Use it to check the success or failure of all commands. After issuing a command, wait a fewseconds until the command prompt (->) is displayed, and then enter the STATUS command.
The STATUS command does not check or validate the syntax for SET commands.
Syntax
STATUS
Example
Typing STATUS after issuing the LOADMEMBER command returns the following message inthe Integration Services Shell window:
LOADMEMBER executed successfully, elapsed time is '22' seconds.
VERSIONThe VERSION command returns the release number of the Integration Services software youare running.
Syntax
VERSION
Example
VERSION returns the release number for Integration Services software.
SETLOCALEThe SETLOCALE command enables you to override the default locale for OLAPICMD. Thedefault locale for OLAPICMD is UTF-8 (Unicode).
Although a script file saved from Integration Services Console does not have the UTF-8 signature,OLAPICMD nevertheless reads the script as UTF-8.
If you create a script file in Microsoft Notepad and save the script file as a UTF-8 file, you donot need to use the SETLOCALE command to select a locale. You can use the default locale. Ifyou choose to select a locale, you must select one that is UTF-8. A native locale causes loadoperations to fail.
152 Using Integration Services Shell
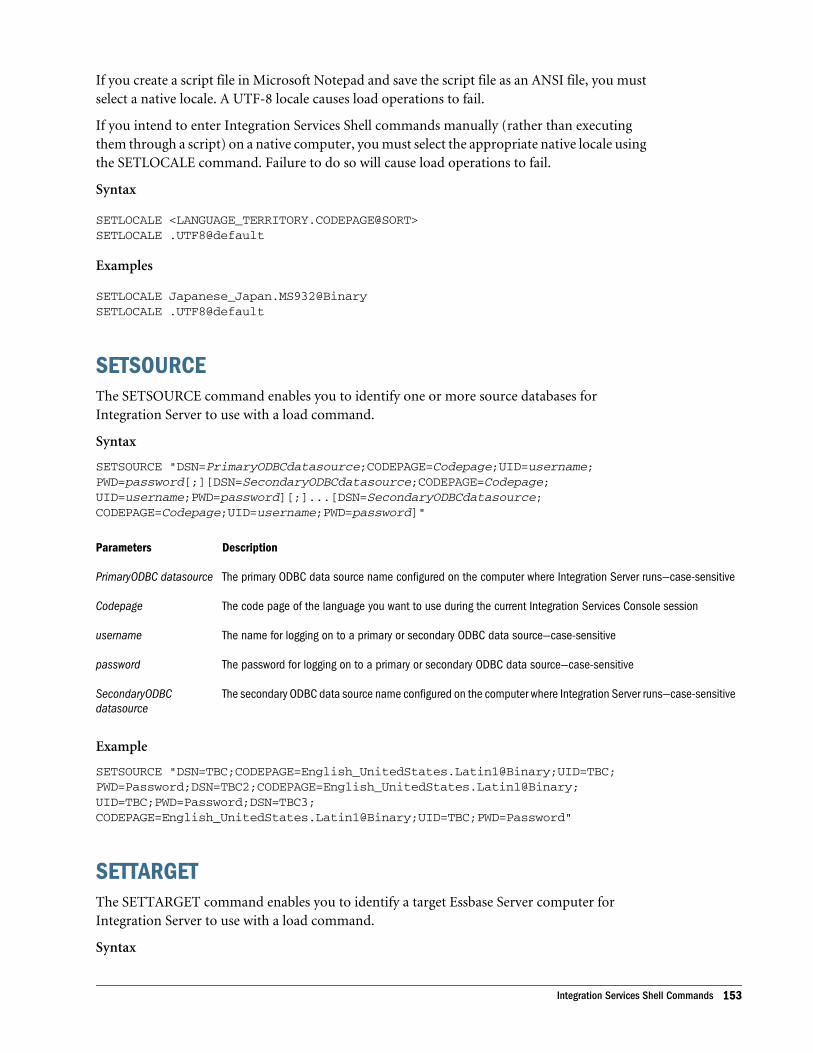
If you create a script file in Microsoft Notepad and save the script file as an ANSI file, you mustselect a native locale. A UTF-8 locale causes load operations to fail.
If you intend to enter Integration Services Shell commands manually (rather than executingthem through a script) on a native computer, you must select the appropriate native locale usingthe SETLOCALE command. Failure to do so will cause load operations to fail.
Syntax
SETLOCALE <LANGUAGE_TERRITORY.CODEPAGE@SORT>SETLOCALE .UTF8@default
Examples
SETLOCALE Japanese_Japan.MS932@BinarySETLOCALE .UTF8@default
SETSOURCEThe SETSOURCE command enables you to identify one or more source databases forIntegration Server to use with a load command.
Syntax
SETSOURCE "DSN=PrimaryODBCdatasource;CODEPAGE=Codepage;UID=username;PWD=password[;][DSN=SecondaryODBCdatasource;CODEPAGE=Codepage;UID=username;PWD=password][;]...[DSN=SecondaryODBCdatasource;CODEPAGE=Codepage;UID=username;PWD=password]"
Parameters Description
PrimaryODBC datasource The primary ODBC data source name configured on the computer where Integration Server runs—case-sensitive
Codepage The code page of the language you want to use during the current Integration Services Console session
username The name for logging on to a primary or secondary ODBC data source—case-sensitive
password The password for logging on to a primary or secondary ODBC data source—case-sensitive
SecondaryODBCdatasource
The secondary ODBC data source name configured on the computer where Integration Server runs—case-sensitive
Example
SETSOURCE "DSN=TBC;CODEPAGE=English_UnitedStates.Latin1@Binary;UID=TBC;PWD=Password;DSN=TBC2;CODEPAGE=English_UnitedStates.Latin1@Binary;UID=TBC;PWD=Password;DSN=TBC3;CODEPAGE=English_UnitedStates.Latin1@Binary;UID=TBC;PWD=Password"
SETTARGETThe SETTARGET command enables you to identify a target Essbase Server computer forIntegration Server to use with a load command.
Syntax
Integration Services Shell Commands 153

SETTARGET DSN=EssbaseServicesdataservername;UID=username;PWD=password[;]
Parameters Description
EssbaseServices dataservername The TCP/IP name or number of the computer where Essbase Server is running
username The name for logging on to Essbase Server
password The password for logging on to Essbase Server—case-sensitive
Example
SETTARGET "DSN=FIG;UID=TBC;PWD=Password"
SETCATALOGThe SETCATALOG command enables you to identify an OLAP Metadata Catalog database forIntegration Services to use with a load command.
Syntax
SETCATALOG DSN=ODBCdatasource;CODEPAGE=Codepage;UID=username;PWD=password[;]
Parameters Description
ODBCdatasource The ODBC data source name configured on the computer where Integration Server runs—case-sensitive
Codepage The code page of the language you want to use during the current Integration Services Console session
username The name for logging on to the ODBC data source—case-sensitive
password The password for logging on to the ODBC data source—case-sensitive
Example
SETCATALOG "DSN=TBC_MD;CODEPAGE=English_UnitedStates.Latin1@Binary;UID=Fred;PWD=Password"
LOADMEMBERThe LOADMEMBER command initiates a member load operation on Integration Server. Theload environment must be set up properly before you invoke the LOADMEMBER command.To set up the load environment, issue the SET commands in any order. See “SET and LOADCommands” on page 147.
To learn the status of the member load invoked by the LOADMEMBER command, wait untilyou see the command prompt (->), then use the STATUS command.
Syntax
LOADMEMBER "OTL=Metaoutline;APP=Essbase Application;DBN=Essbase Database;[FLT_ID_MEMBER=Member_Load_Filter_ID;][DELETE_DB=Delete and Restore Database Y|N;][OTL_CLEAR=Delete All Members First Y|N;]
154 Using Integration Services Shell

[INCUPD=DimID-MbrID,DimID-MbrID,...DimID-MbrID;][INCUPD_MEMBER=Dynamic Restructuring Member Load Options;][ATTR_UPDATE_LEVEL=Attribute Update Level;][@@USERS=Username List;][ESSCMD_SCRIPT=Esscmd Script File;][UNICODE=Create Unicode Application][UPDATE_DTDATA_ONLY=Update Drill-Through Data Only Y/N]"
Parameters Description
Metaoutline The name of the metaoutline—case-sensitive. This metaoutline is used to extract data and create an Essbase outline.
EssbaseApplication
The name of the Essbase application on the target Essbase Server computer where the Essbase outline is created.
Essbase Database The name of the Essbase database on the target Essbase Server computer. Integration Server applies this name to theEssbase outline.
Member LoadFilter ID
Optional. You can specify a member load filter ID to use when loading members. If you do not specify a filter ID, thedefault name (*DEFAULT) is used. The default filter ID is 1; any additional filters are numbered sequentially, starting withthe number 2. For information about creating filters, see the Integration Services Console Help.
Delete andRestore Database
Optional. The Delete and Restore Database parameter directs whether Integration Server should delete all members inthe Essbase database before performing a member load. The default is N (No).
This is the format:
DELETE_DB=[Y|N]
When this option is selected (DELETE_DB=Y), the options Delete All Members First, Modify Essbase Users, andIncremental Update cannot be used.
Values are as follows:
Y Delete and restore (re-create) theEssbase database during the member load process.
N Do not delete and restore the Essbase database (this is the default).
Delete AllMembers First
Optional. When the Delete All Members First parameter is selected (OTL_CLEAR=Y), Integration Server removes allmembers from the existing database and then re-creates the database by using the members in the metaoutline.
This process is slower than creating or updating an Essbase outline without deleting the members; therefore, do notdelete all members first unless it is necessary. You should delete all members if, for example, you know that somemembers have been removed from the OLAP metaoutline and you want to build an Essbase outline containing a smallerset of members. The default is N (No).
This is the format:
OTL_CLEAR=[Y|N]
Values are as follows:
Y Remove all members from the existing database and then re-create the database by using the members in themetaoutline.
N Do not remove members from the existing database; only update the Essbase database (this is the default).
Integration Services Shell Commands 155

Parameters Description
DimID-MbrID,DimID-MbrID,...DimID-MbrID
Optional. Incremental Upate. The level at which dimensions are updated during an incremental member load. The formatis:
INCUPD=DimID-MbrID,DimID-MbrID,...DimID-MbrID;[;]
Values for incremental update are as follows:
l DimID represents the dimension ID of the dimension to which the incremental update applies.
l MbrID represents the member ID of the level zero member of the hierarchy to which the incremental update applies.
DynamicRestructuringMember LoadOptions
Optional. Specify 1, 2, 3, or 4. Dynamic restructuring member load options set the parameters for restructuring thedatabase during a member load. The option that you select affects any subsequent data loads.
Values are as follows:
1 Preserve all data. Select to preserve all existing data that applies to the changed outline when restructuring occurs.This is the default (INCUPD_MEMBER=1).
2 Discard all data. Select to clear all data from the database.
3 Preserve level 0 data. Select to preserve data only for level zero members.
This is the optimal restructure option if you change the source database and need to recalculate the data, and if all datarequired for the calculation is in level zero members.
Selecting this option deletes all upper-level blocks before restructuring. This reduces the disk space for restructuring andimproves calculation time when the database is recalculated. The upper-level blocks are re-created when you calculatethe database.
4 Preserve input data. Select to preserve only those blocks containing data that is loaded. Many applications containdata that is entered at parent levels. Selecting this option prevents deletion of any blocks that are created by data load,whether they are non-level zero or level zero (leaf member) blocks.
Attribute UpdateLevel
Optional. Use with the Incremental Update parameter. The level at which attribute dimensions are updated when amember load is performed. Values are as follows:
0 Delete all attribute dimensions after the member load is performed.
1 Do not update existing attribute dimensions while updating other types of dimensions (for example: standard, time,or measures dimensions) during a member load.
2 Update all existing attribute dimensions and add new attribute dimensions during a member load.
Username List Optional. Lists all user IDs that can access the Essbase application and database into which you are loading the members.Commas separate user IDs. For example, @@USERS="admin","ljones","ksmith".
Esscmd Script File Optional. The name of an ESSCMD script. The script that you define instructs Essbase to perform specified actions onthe Essbase database. These actions might include changing a member tag or loading data from a worksheet into user-defined members after you load the data from the data source. The ESSCMD script must be in the eis/server/esscript directory.
Create UnicodeApplication
Optional. You can specify that a Unicode application is created on Essbase Server. The default is that no Unicodeapplication is created.
This parameter cannot be overwritten. For example, if a previous application exists and you are overwriting that applicationwith the current member load, you cannot overwrite the original Unicode or non-Unicode setting.
This is the format:
UNICODE=[Y|N]
For example:
UNICODE=Y
156 Using Integration Services Shell
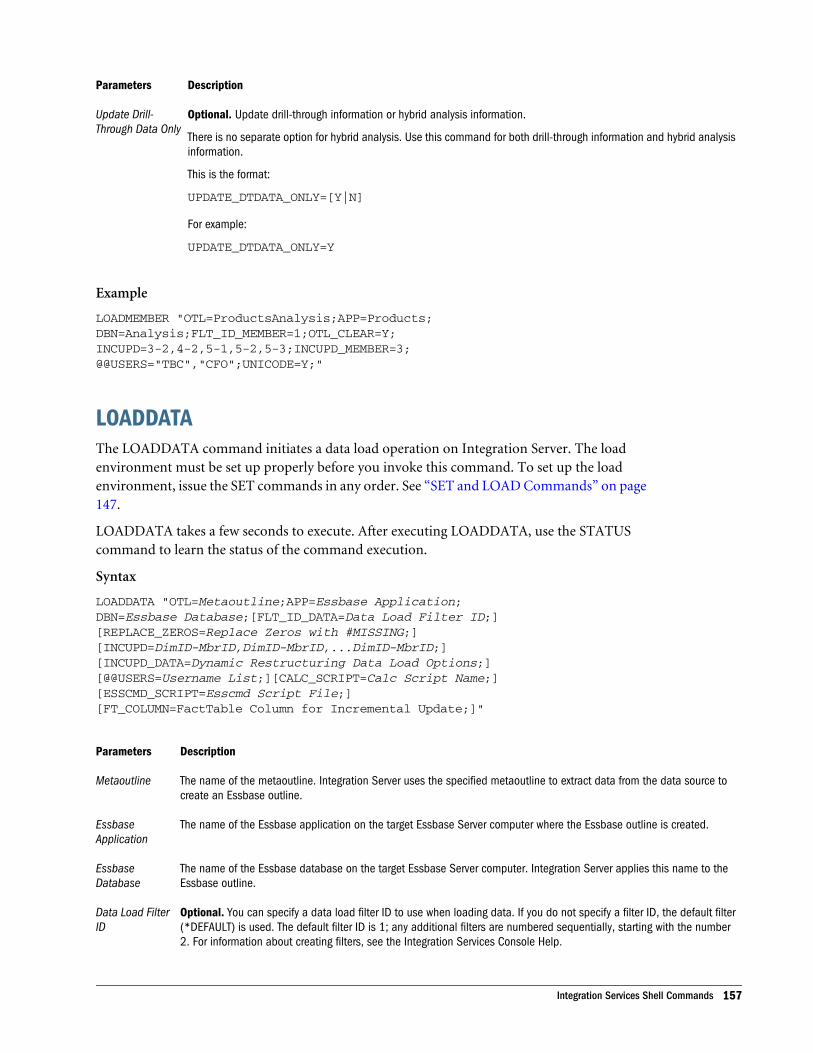
Parameters Description
Update Drill-Through Data Only
Optional. Update drill-through information or hybrid analysis information.
There is no separate option for hybrid analysis. Use this command for both drill-through information and hybrid analysisinformation.
This is the format:
UPDATE_DTDATA_ONLY=[Y|N]
For example:
UPDATE_DTDATA_ONLY=Y
Example
LOADMEMBER "OTL=ProductsAnalysis;APP=Products;DBN=Analysis;FLT_ID_MEMBER=1;OTL_CLEAR=Y;INCUPD=3-2,4-2,5-1,5-2,5-3;INCUPD_MEMBER=3;@@USERS="TBC","CFO";UNICODE=Y;"
LOADDATAThe LOADDATA command initiates a data load operation on Integration Server. The loadenvironment must be set up properly before you invoke this command. To set up the loadenvironment, issue the SET commands in any order. See “SET and LOAD Commands” on page147.
LOADDATA takes a few seconds to execute. After executing LOADDATA, use the STATUScommand to learn the status of the command execution.
Syntax
LOADDATA "OTL=Metaoutline;APP=Essbase Application;DBN=Essbase Database;[FLT_ID_DATA=Data Load Filter ID;][REPLACE_ZEROS=Replace Zeros with #MISSING;][INCUPD=DimID-MbrID,DimID-MbrID,...DimID-MbrID;][INCUPD_DATA=Dynamic Restructuring Data Load Options;][@@USERS=Username List;][CALC_SCRIPT=Calc Script Name;][ESSCMD_SCRIPT=Esscmd Script File;][FT_COLUMN=FactTable Column for Incremental Update;]"
Parameters Description
Metaoutline The name of the metaoutline. Integration Server uses the specified metaoutline to extract data from the data source tocreate an Essbase outline.
EssbaseApplication
The name of the Essbase application on the target Essbase Server computer where the Essbase outline is created.
EssbaseDatabase
The name of the Essbase database on the target Essbase Server computer. Integration Server applies this name to theEssbase outline.
Data Load FilterID
Optional. You can specify a data load filter ID to use when loading data. If you do not specify a filter ID, the default filter(*DEFAULT) is used. The default filter ID is 1; any additional filters are numbered sequentially, starting with the number2. For information about creating filters, see the Integration Services Console Help.
Integration Services Shell Commands 157
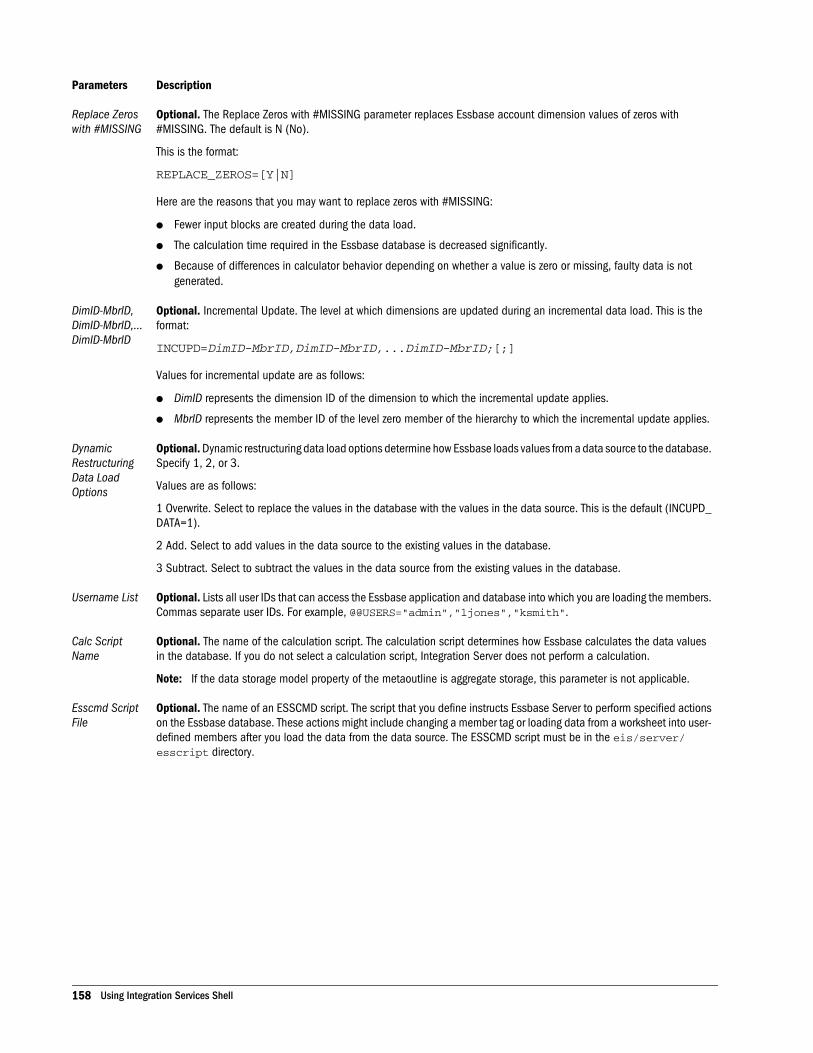
Parameters Description
Replace Zeroswith #MISSING
Optional. The Replace Zeros with #MISSING parameter replaces Essbase account dimension values of zeros with#MISSING. The default is N (No).
This is the format:
REPLACE_ZEROS=[Y|N]
Here are the reasons that you may want to replace zeros with #MISSING:
l Fewer input blocks are created during the data load.
l The calculation time required in the Essbase database is decreased significantly.
l Because of differences in calculator behavior depending on whether a value is zero or missing, faulty data is notgenerated.
DimID-MbrID,DimID-MbrID,...DimID-MbrID
Optional. Incremental Update. The level at which dimensions are updated during an incremental data load. This is theformat:
INCUPD=DimID-MbrID,DimID-MbrID,...DimID-MbrID;[;]
Values for incremental update are as follows:
l DimID represents the dimension ID of the dimension to which the incremental update applies.
l MbrID represents the member ID of the level zero member of the hierarchy to which the incremental update applies.
DynamicRestructuringData LoadOptions
Optional. Dynamic restructuring data load options determine how Essbase loads values from a data source to the database.Specify 1, 2, or 3.
Values are as follows:
1 Overwrite. Select to replace the values in the database with the values in the data source. This is the default (INCUPD_DATA=1).
2 Add. Select to add values in the data source to the existing values in the database.
3 Subtract. Select to subtract the values in the data source from the existing values in the database.
Username List Optional. Lists all user IDs that can access the Essbase application and database into which you are loading the members.Commas separate user IDs. For example, @@USERS="admin","ljones","ksmith".
Calc ScriptName
Optional. The name of the calculation script. The calculation script determines how Essbase calculates the data valuesin the database. If you do not select a calculation script, Integration Server does not perform a calculation.
Note: If the data storage model property of the metaoutline is aggregate storage, this parameter is not applicable.
Esscmd ScriptFile
Optional. The name of an ESSCMD script. The script that you define instructs Essbase Server to perform specified actionson the Essbase database. These actions might include changing a member tag or loading data from a worksheet into user-defined members after you load the data from the data source. The ESSCMD script must be in the eis/server/esscript directory.
158 Using Integration Services Shell
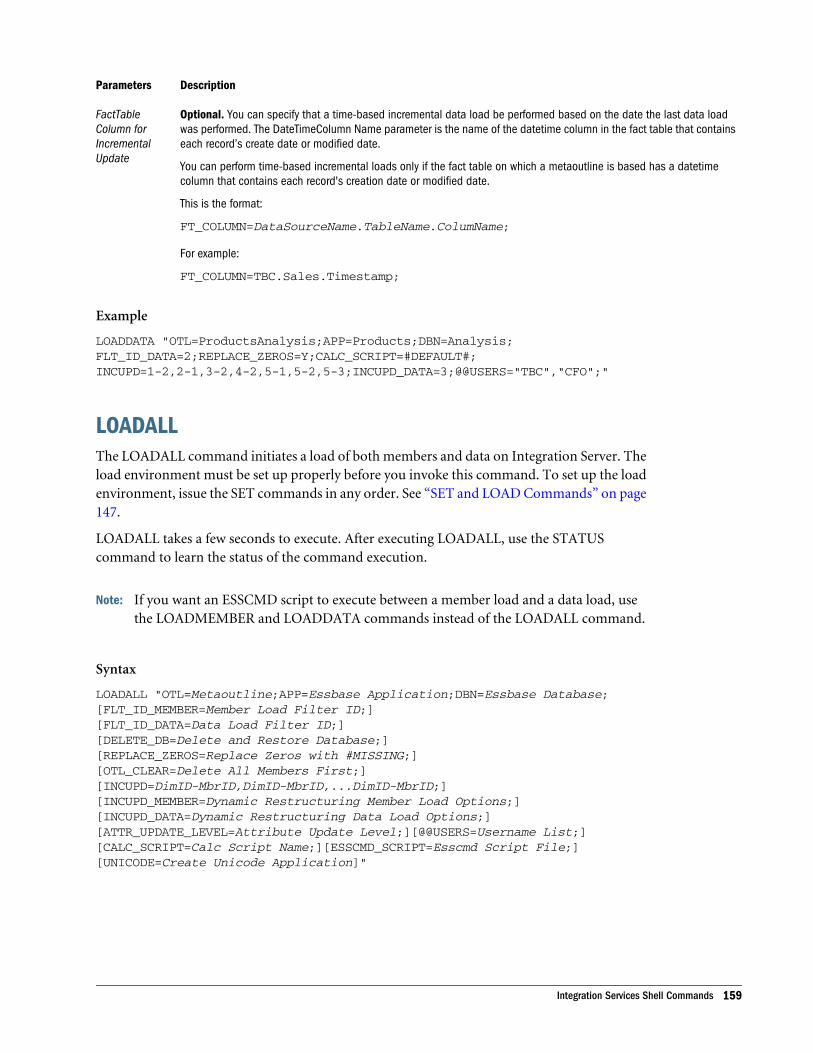
Parameters Description
FactTableColumn forIncrementalUpdate
Optional. You can specify that a time-based incremental data load be performed based on the date the last data loadwas performed. The DateTimeColumn Name parameter is the name of the datetime column in the fact table that containseach record’s create date or modified date.
You can perform time-based incremental loads only if the fact table on which a metaoutline is based has a datetimecolumn that contains each record's creation date or modified date.
This is the format:
FT_COLUMN=DataSourceName.TableName.ColumName;
For example:
FT_COLUMN=TBC.Sales.Timestamp;
Example
LOADDATA "OTL=ProductsAnalysis;APP=Products;DBN=Analysis;FLT_ID_DATA=2;REPLACE_ZEROS=Y;CALC_SCRIPT=#DEFAULT#;INCUPD=1-2,2-1,3-2,4-2,5-1,5-2,5-3;INCUPD_DATA=3;@@USERS="TBC","CFO";"
LOADALLThe LOADALL command initiates a load of both members and data on Integration Server. Theload environment must be set up properly before you invoke this command. To set up the loadenvironment, issue the SET commands in any order. See “SET and LOAD Commands” on page147.
LOADALL takes a few seconds to execute. After executing LOADALL, use the STATUScommand to learn the status of the command execution.
Note: If you want an ESSCMD script to execute between a member load and a data load, usethe LOADMEMBER and LOADDATA commands instead of the LOADALL command.
Syntax
LOADALL "OTL=Metaoutline;APP=Essbase Application;DBN=Essbase Database;[FLT_ID_MEMBER=Member Load Filter ID;][FLT_ID_DATA=Data Load Filter ID;][DELETE_DB=Delete and Restore Database;][REPLACE_ZEROS=Replace Zeros with #MISSING;][OTL_CLEAR=Delete All Members First;][INCUPD=DimID-MbrID,DimID-MbrID,...DimID-MbrID;][INCUPD_MEMBER=Dynamic Restructuring Member Load Options;][INCUPD_DATA=Dynamic Restructuring Data Load Options;][ATTR_UPDATE_LEVEL=Attribute Update Level;][@@USERS=Username List;][CALC_SCRIPT=Calc Script Name;][ESSCMD_SCRIPT=Esscmd Script File;][UNICODE=Create Unicode Application]"
Integration Services Shell Commands 159

Parameters Description
Metaoutline The name of the metaoutline. Integration Server uses the specified metaoutline to extract data from the data source tocreate an Essbase outline.
EssbaseApplication
The name of the Essbase application on the target Essbase Server computer where the Essbase outline is created.
Essbase Database The name of the Essbase database on the target Essbase Server computer. Integration Server applies this name to theEssbase outline.
Member LoadFilter ID
Optional. You can specify a member load filter ID to use when loading members. If you do not specify a filter ID, thedefault name (*DEFAULT) is used. The default filter ID is 1; any additional filters are numbered sequentially, startingwith the number 2. For information about creating filters, see the Integration Services Console Help.
Data Load Filter ID Optional. You can specify a data load filter ID to use when loading data. If you do not specify a filter ID, the default filter(*DEFAULT) is used. The default filter ID is 1; any additional filters are numbered sequentially, starting with the number2. For information about creating filters, see the Integration Services Console Help.
Delete andRestore Database
Optional. The Delete and Restore Database parameter directs whether Integration Server should delete all members inthe Essbase database before performing a member load. The default is N (No).
This is the format:
DELETE_DB=[Y|N]
When this option is selected (DELETE_DB=Y), the options Delete All Members First, Modify Essbase Users, andIncremental Update cannot be used.
Values are as follows:
Y Delete and restore (re-create) the Essbase database during the member load process.
N Do not delete and restore the Essbase database (this is the default).
Replace Zeros with#MISSING
Optional. The Replace Zeros with #MISSING parameter replaces Essbase account dimension values of zeros with#MISSING. The default is N (No).
This is the format:
REPLACE_ZEROS=[Y|N]
Here are the reasons that you may want to replace zeros with #MISSING:
l Fewer input blocks are created during the data load.
l The calculation time required in the Essbase database is decreased significantly.
l Because of differences in calculator behavior depending on whether a value is zero or missing, faulty data is notgenerated.
160 Using Integration Services Shell

Parameters Description
Delete AllMembers First
Optional. When the Delete All Members First parameter is selected (OTL_CLEAR=Y), Integration Server removes allmembers from the existing database and then re-creates the database by using the members in the metaoutline.
This process is slower than creating or updating an Essbase outline without deleting the members; therefore, do notdelete all members first unless it is necessary. You should delete all members if, for example, you know that somemembers have been removed from the OLAP metaoutline and you want to build an Essbase outline containing a smallerset of members. The default is N (No).
This is the format:
OTL_CLEAR=[Y|N]
Values are as follows:
Y Remove all members from the existing database and then re-create the database by using the members in themetaoutline.
N Do not remove members from the existing database; only update the Essbase database (this is the default).
DimID-MbrID,DimID-MbrID,...DimID-MbrID
Optional. Incremental Update. The level at which dimensions are updated during an incremental member and data load.This is the format:
INCUPD=DimID-MbrID,DimID-MbrID,...DimID-MbrID;[;]
Values for incremental update are as follows:
l DimID represents the dimension ID of the dimension to which the incremental update applies.
l MbrID represents the member ID of the level zero member of the hierarchy to which the incremental update applies.
DynamicRestructuringMember LoadOptions
Optional. Specify 1, 2, 3, or 4. Dynamic restructuring member load options set the parameters for restructuring thedatabase during a member load. The option that you select affects any subsequent data loads.
Values are as follows:
1 Preserve all data. Select to preserve all existing data that applies to the changed outline when restructuring occurs.This is the default (INCUPD_MEMBER=1).
2 Discard all data. Select to clear all data from the database.
3 Preserve level 0 data. Select to preserve data only for level zero members.
This is the optimal restructure option if you change the source database and need to recalculate the data, and if all datarequired for the calculation is in level zero members.
Selecting this option deletes all upper-level blocks before restructuring. This reduces the disk space for restructuring andimproves calculation time when the database is recalculated. The upper-level blocks are re-created when you calculatethe database.
4 Preserve input data. Select to preserve only those blocks containing data that is loaded. Many applications containdata that is entered at parent levels. Selecting this option prevents deletion of any blocks that are created by data load,whether they are non-level zero or level zero (leaf member) blocks.
DynamicRestructuring DataLoad Options
Optional. Dynamic restructuring data load options determine how Essbase loads values from a data source to thedatabase. Specify 1, 2, or 3. This is the default (INCUPD_DATA=1).
Values are as follows:
1 Overwrite. Select to replace the values in the database with the values in the data source.
2 Add. Select to add values in the data source to the existing values in the database.
3 Subtract. Select to subtract the values in the data source from the existing values in the database.
Integration Services Shell Commands 161
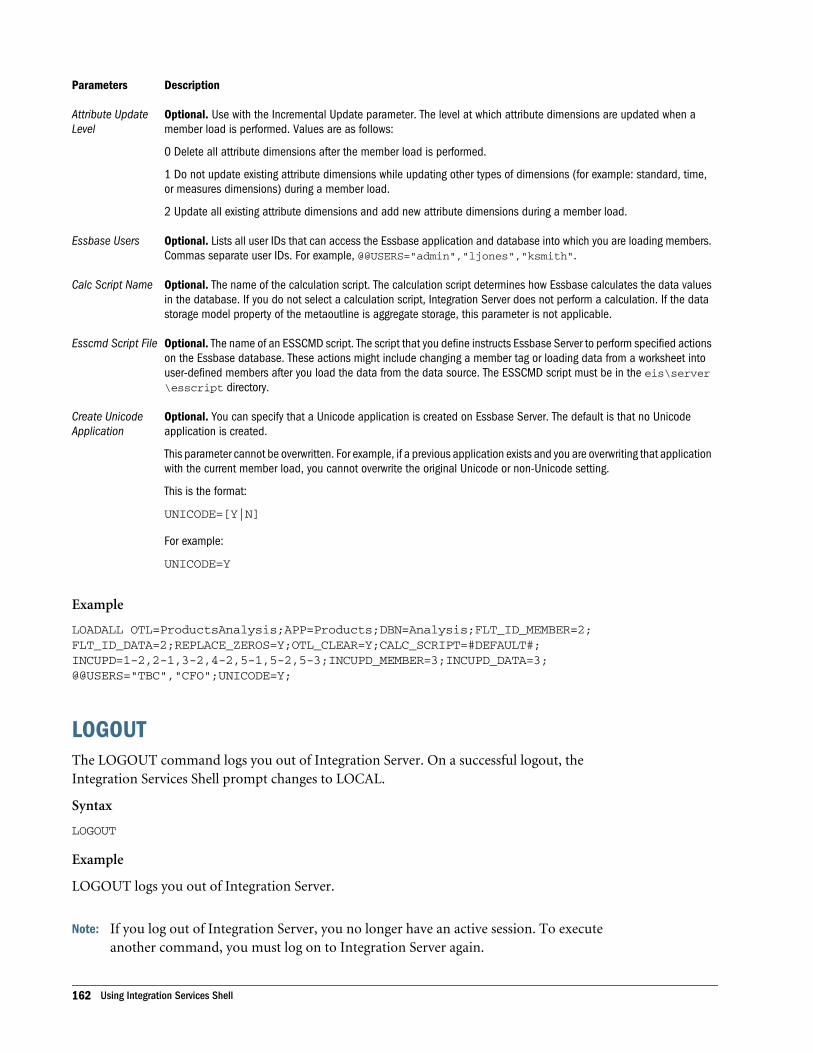
Parameters Description
Attribute UpdateLevel
Optional. Use with the Incremental Update parameter. The level at which attribute dimensions are updated when amember load is performed. Values are as follows:
0 Delete all attribute dimensions after the member load is performed.
1 Do not update existing attribute dimensions while updating other types of dimensions (for example: standard, time,or measures dimensions) during a member load.
2 Update all existing attribute dimensions and add new attribute dimensions during a member load.
Essbase Users Optional. Lists all user IDs that can access the Essbase application and database into which you are loading members.Commas separate user IDs. For example, @@USERS="admin","ljones","ksmith".
Calc Script Name Optional. The name of the calculation script. The calculation script determines how Essbase calculates the data valuesin the database. If you do not select a calculation script, Integration Server does not perform a calculation. If the datastorage model property of the metaoutline is aggregate storage, this parameter is not applicable.
Esscmd Script File Optional. The name of an ESSCMD script. The script that you define instructs Essbase Server to perform specified actionson the Essbase database. These actions might include changing a member tag or loading data from a worksheet intouser-defined members after you load the data from the data source. The ESSCMD script must be in the eis\server\esscript directory.
Create UnicodeApplication
Optional. You can specify that a Unicode application is created on Essbase Server. The default is that no Unicodeapplication is created.
This parameter cannot be overwritten. For example, if a previous application exists and you are overwriting that applicationwith the current member load, you cannot overwrite the original Unicode or non-Unicode setting.
This is the format:
UNICODE=[Y|N]
For example:
UNICODE=Y
Example
LOADALL OTL=ProductsAnalysis;APP=Products;DBN=Analysis;FLT_ID_MEMBER=2;FLT_ID_DATA=2;REPLACE_ZEROS=Y;OTL_CLEAR=Y;CALC_SCRIPT=#DEFAULT#;INCUPD=1-2,2-1,3-2,4-2,5-1,5-2,5-3;INCUPD_MEMBER=3;INCUPD_DATA=3;@@USERS="TBC","CFO";UNICODE=Y;
LOGOUTThe LOGOUT command logs you out of Integration Server. On a successful logout, theIntegration Services Shell prompt changes to LOCAL.
Syntax
LOGOUT
Example
LOGOUT logs you out of Integration Server.
Note: If you log out of Integration Server, you no longer have an active session. To executeanother command, you must log on to Integration Server again.
162 Using Integration Services Shell
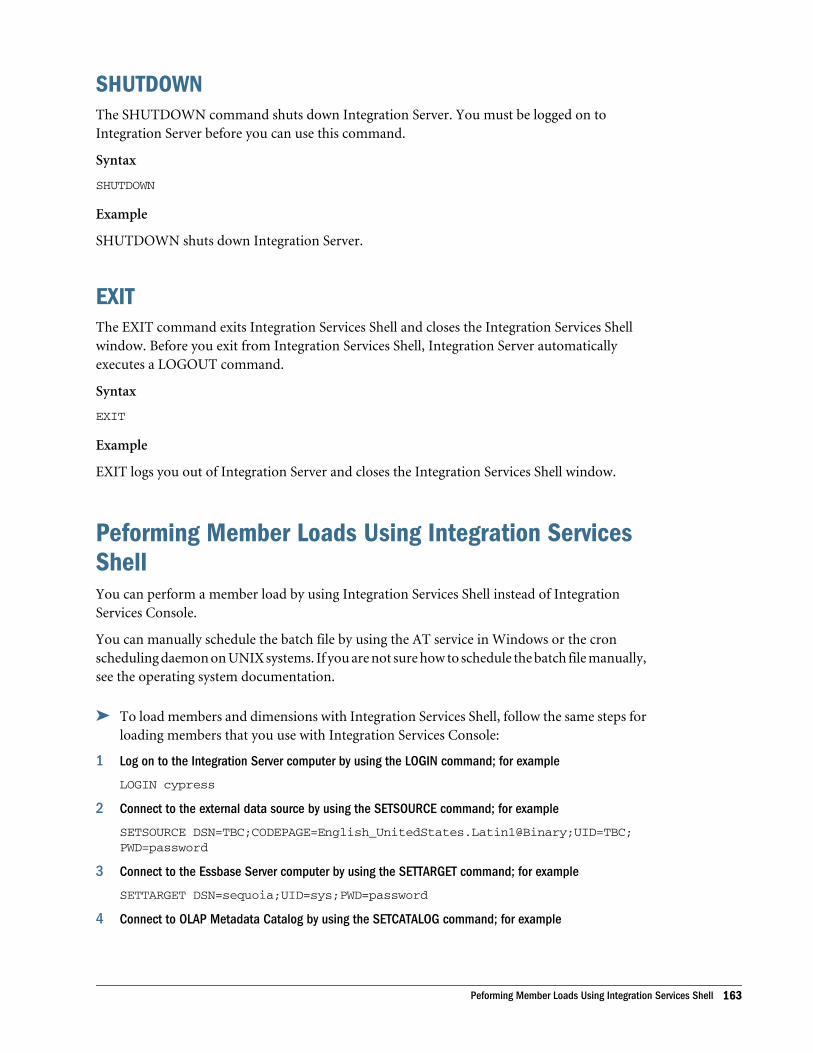
SHUTDOWNThe SHUTDOWN command shuts down Integration Server. You must be logged on toIntegration Server before you can use this command.
Syntax
SHUTDOWN
Example
SHUTDOWN shuts down Integration Server.
EXITThe EXIT command exits Integration Services Shell and closes the Integration Services Shellwindow. Before you exit from Integration Services Shell, Integration Server automaticallyexecutes a LOGOUT command.
Syntax
EXIT
Example
EXIT logs you out of Integration Server and closes the Integration Services Shell window.
Peforming Member Loads Using Integration ServicesShellYou can perform a member load by using Integration Services Shell instead of IntegrationServices Console.
You can manually schedule the batch file by using the AT service in Windows or the cronscheduling daemon on UNIX systems. If you are not sure how to schedule the batch file manually,see the operating system documentation.
ä To load members and dimensions with Integration Services Shell, follow the same steps forloading members that you use with Integration Services Console:
1 Log on to the Integration Server computer by using the LOGIN command; for example
LOGIN cypress
2 Connect to the external data source by using the SETSOURCE command; for example
SETSOURCE DSN=TBC;CODEPAGE=English_UnitedStates.Latin1@Binary;UID=TBC;PWD=password
3 Connect to the Essbase Server computer by using the SETTARGET command; for example
SETTARGET DSN=sequoia;UID=sys;PWD=password
4 Connect to OLAP Metadata Catalog by using the SETCATALOG command; for example
Peforming Member Loads Using Integration Services Shell 163
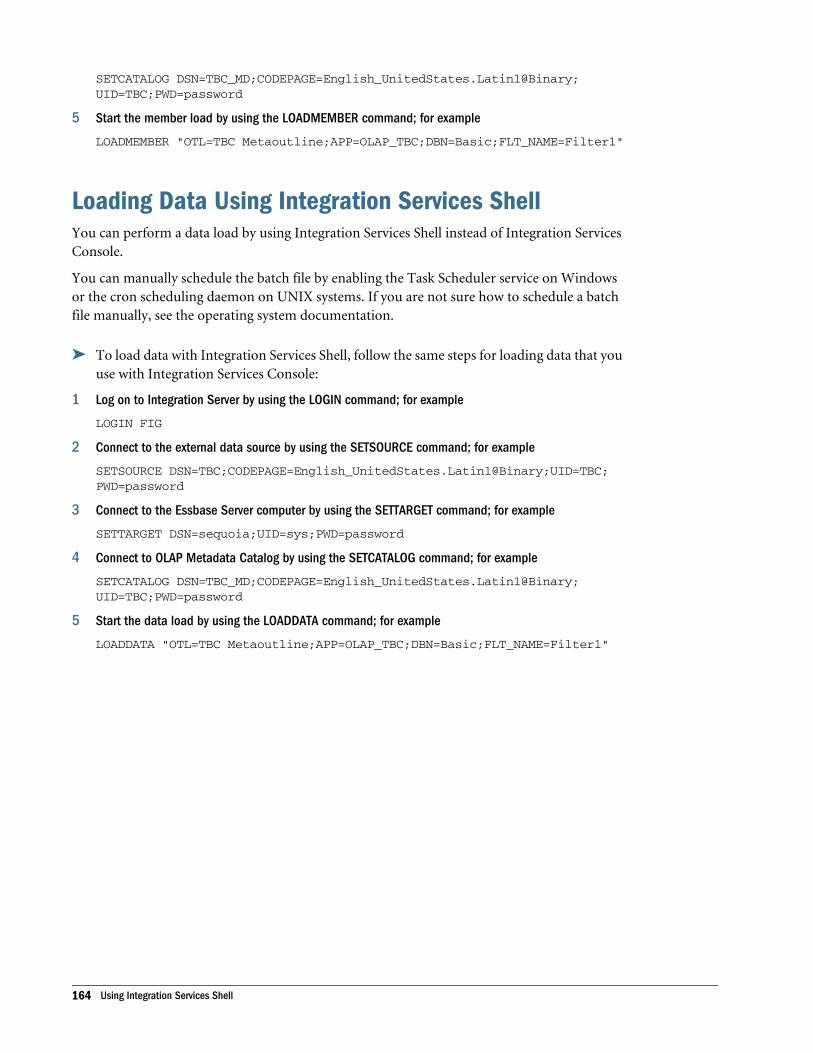
SETCATALOG DSN=TBC_MD;CODEPAGE=English_UnitedStates.Latin1@Binary;UID=TBC;PWD=password
5 Start the member load by using the LOADMEMBER command; for example
LOADMEMBER "OTL=TBC Metaoutline;APP=OLAP_TBC;DBN=Basic;FLT_NAME=Filter1"
Loading Data Using Integration Services ShellYou can perform a data load by using Integration Services Shell instead of Integration ServicesConsole.
You can manually schedule the batch file by enabling the Task Scheduler service on Windowsor the cron scheduling daemon on UNIX systems. If you are not sure how to schedule a batchfile manually, see the operating system documentation.
ä To load data with Integration Services Shell, follow the same steps for loading data that youuse with Integration Services Console:
1 Log on to Integration Server by using the LOGIN command; for example
LOGIN FIG
2 Connect to the external data source by using the SETSOURCE command; for example
SETSOURCE DSN=TBC;CODEPAGE=English_UnitedStates.Latin1@Binary;UID=TBC;PWD=password
3 Connect to the Essbase Server computer by using the SETTARGET command; for example
SETTARGET DSN=sequoia;UID=sys;PWD=password
4 Connect to OLAP Metadata Catalog by using the SETCATALOG command; for example
SETCATALOG DSN=TBC_MD;CODEPAGE=English_UnitedStates.Latin1@Binary;UID=TBC;PWD=password
5 Start the data load by using the LOADDATA command; for example
LOADDATA "OTL=TBC Metaoutline;APP=OLAP_TBC;DBN=Basic;FLT_NAME=Filter1"
164 Using Integration Services Shell
9Naming Restrictions for Essbase
Applications, Databases, andMembers
In This Chapter
Naming Restrictions for Applications and Databases ... . . . . . . . . . . . . . . . . . . . . . . . . . . . . . . . . . . . . . . . . . . . . . 165
Naming Restrictions for Dimensions, Members, and Aliases ... . . . . . . . . . . . . . . . . . . . . . . . . . . . . . . . . . . . . . 166
Using Dimension and Member Names in Calculation Scripts, Report Scripts, Formulas, and Filters.. . . . . . . . . . . . . . . . . . . . . . . . . . . . . . . . . . . . . . . . . . . . . . . . . . . . . . . . . . . . . . . . . . . . . . . . . . . . . . . . . . . . . . . . . . . . . . . . . . . . . . . . . . . . 168
This chapter describes the rules for naming applications, databases, dimensions, members, andaliases in Essbase. For detailed information on creating Essbase applications and databases, seethe Essbase product documentation.
Naming Restrictions for Applications and DatabasesWhen naming applications and databases, follow these rules:
l Use no more than 8 bytes when naming non-Unicode-mode applications and databases;use no more than 30 characters when naming Unicode-mode applications and databases.
l Do not use spaces anywhere in the name.
l Do not use the following special characters anywhere in the name:
* asterisk + plus
\ back slash ? question mark
[] brackets “ quotation marks
: colon ; semicolon
, comma ' apostrophe
= equals / forward slash
> greater than tabs
< less than | vertical bar
. period
l For aggregate storage databases only, do not use any of the following words as applicationor database names:
Naming Restrictions for Applications and Databases 165
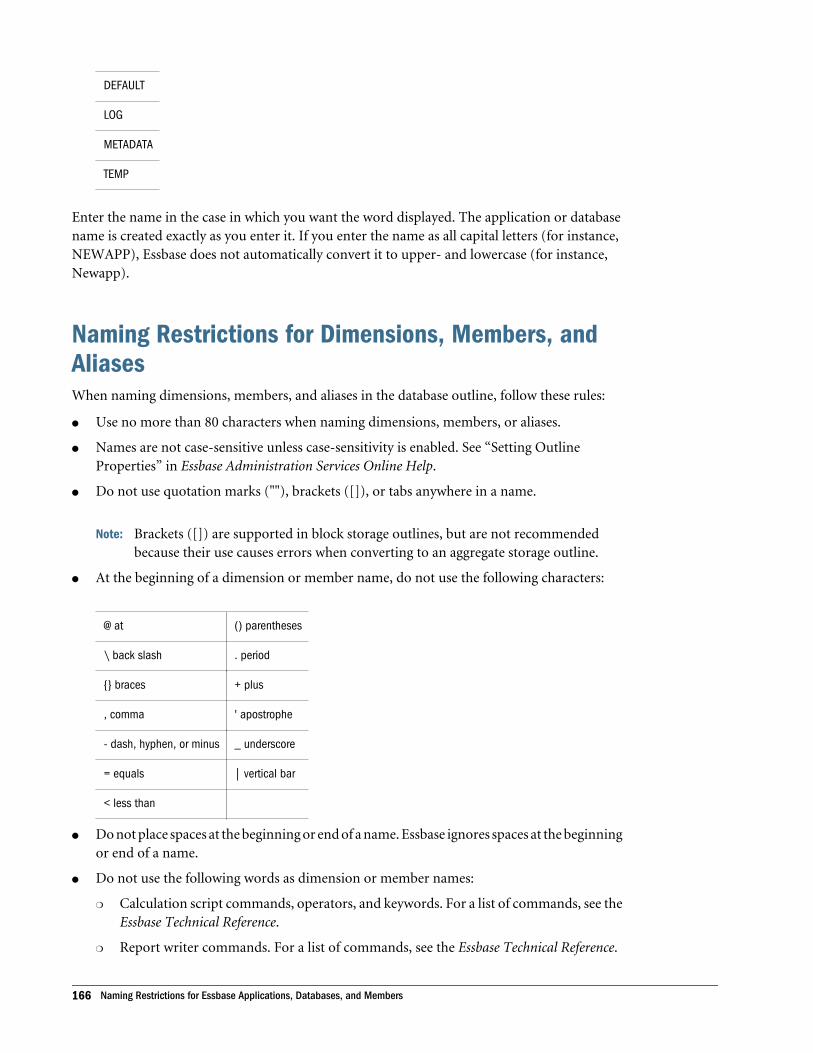
DEFAULT
LOG
METADATA
TEMP
Enter the name in the case in which you want the word displayed. The application or databasename is created exactly as you enter it. If you enter the name as all capital letters (for instance,NEWAPP), Essbase does not automatically convert it to upper- and lowercase (for instance,Newapp).
Naming Restrictions for Dimensions, Members, andAliasesWhen naming dimensions, members, and aliases in the database outline, follow these rules:
l Use no more than 80 characters when naming dimensions, members, or aliases.
l Names are not case-sensitive unless case-sensitivity is enabled. See “Setting OutlineProperties” in Essbase Administration Services Online Help.
l Do not use quotation marks (""), brackets ([]), or tabs anywhere in a name.
Note: Brackets ([]) are supported in block storage outlines, but are not recommendedbecause their use causes errors when converting to an aggregate storage outline.
l At the beginning of a dimension or member name, do not use the following characters:
@ at () parentheses
\ back slash . period
{} braces + plus
, comma ' apostrophe
- dash, hyphen, or minus _ underscore
= equals | vertical bar
< less than
l Do not place spaces at the beginning or end of a name. Essbase ignores spaces at the beginningor end of a name.
l Do not use the following words as dimension or member names:
m Calculation script commands, operators, and keywords. For a list of commands, see theEssbase Technical Reference.
m Report writer commands. For a list of commands, see the Essbase Technical Reference.
166 Naming Restrictions for Essbase Applications, Databases, and Members
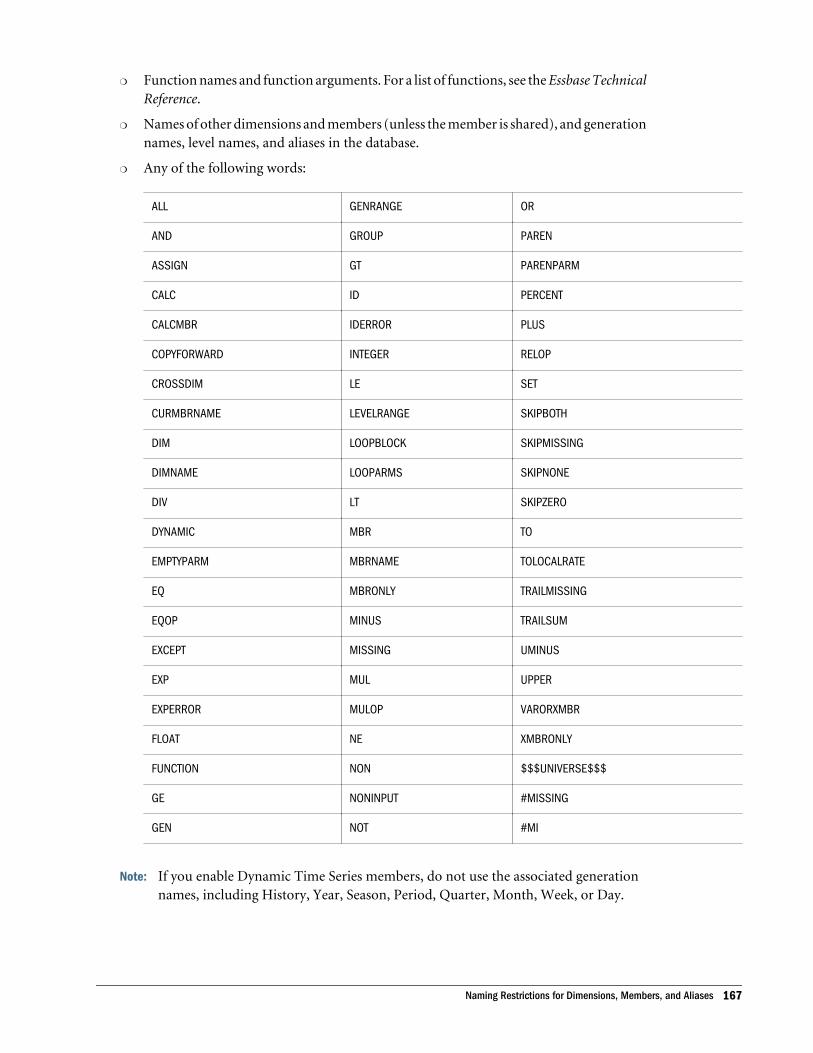
m Function names and function arguments. For a list of functions, see the Essbase TechnicalReference.
m Names of other dimensions and members (unless the member is shared), and generationnames, level names, and aliases in the database.
m Any of the following words:
ALL GENRANGE OR
AND GROUP PAREN
ASSIGN GT PARENPARM
CALC ID PERCENT
CALCMBR IDERROR PLUS
COPYFORWARD INTEGER RELOP
CROSSDIM LE SET
CURMBRNAME LEVELRANGE SKIPBOTH
DIM LOOPBLOCK SKIPMISSING
DIMNAME LOOPARMS SKIPNONE
DIV LT SKIPZERO
DYNAMIC MBR TO
EMPTYPARM MBRNAME TOLOCALRATE
EQ MBRONLY TRAILMISSING
EQOP MINUS TRAILSUM
EXCEPT MISSING UMINUS
EXP MUL UPPER
EXPERROR MULOP VARORXMBR
FLOAT NE XMBRONLY
FUNCTION NON $$$UNIVERSE$$$
GE NONINPUT #MISSING
GEN NOT #MI
Note: If you enable Dynamic Time Series members, do not use the associated generationnames, including History, Year, Season, Period, Quarter, Month, Week, or Day.
Naming Restrictions for Dimensions, Members, and Aliases 167
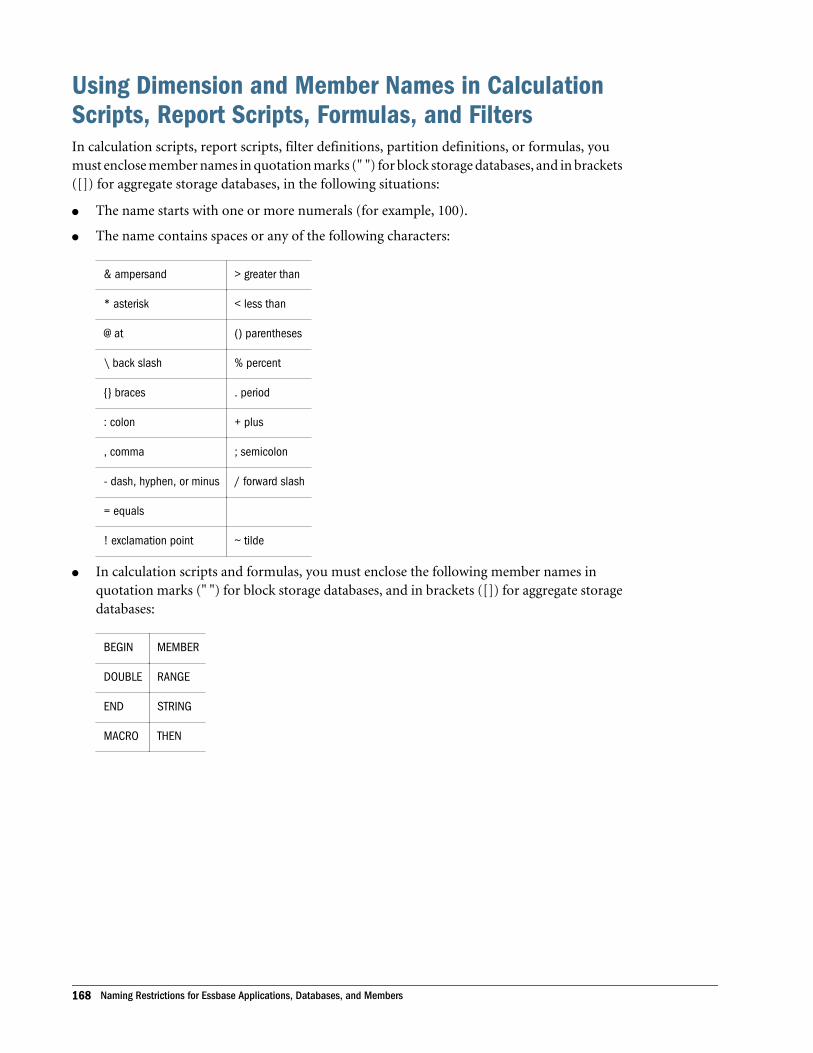
Using Dimension and Member Names in CalculationScripts, Report Scripts, Formulas, and FiltersIn calculation scripts, report scripts, filter definitions, partition definitions, or formulas, youmust enclose member names in quotation marks (" ") for block storage databases, and in brackets([]) for aggregate storage databases, in the following situations:
l The name starts with one or more numerals (for example, 100).
l The name contains spaces or any of the following characters:
& ampersand > greater than
* asterisk < less than
@ at () parentheses
\ back slash % percent
{} braces . period
: colon + plus
, comma ; semicolon
- dash, hyphen, or minus / forward slash
= equals
! exclamation point ~ tilde
l In calculation scripts and formulas, you must enclose the following member names inquotation marks (" ") for block storage databases, and in brackets ([]) for aggregate storagedatabases:
BEGIN MEMBER
DOUBLE RANGE
END STRING
MACRO THEN
168 Naming Restrictions for Essbase Applications, Databases, and Members
AReturn Codes and
Error Messages
In This Appendix
OLAPICMD Session Return Codes ... . . . . . . . . . . . . . . . . . . . . . . . . . . . . . . . . . . . . . . . . . . . . . . . . . . . . . . . . . . . . . . . . . . . 169
Member Load Error Messages ... . . . . . . . . . . . . . . . . . . . . . . . . . . . . . . . . . . . . . . . . . . . . . . . . . . . . . . . . . . . . . . . . . . . . . . . 170
Data Load Error Messages ... . . . . . . . . . . . . . . . . . . . . . . . . . . . . . . . . . . . . . . . . . . . . . . . . . . . . . . . . . . . . . . . . . . . . . . . . . . . 173
Drill-Through Report Error Messages ... . . . . . . . . . . . . . . . . . . . . . . . . . . . . . . . . . . . . . . . . . . . . . . . . . . . . . . . . . . . . . . . . 174
Miscellaneous Error Messages... . . . . . . . . . . . . . . . . . . . . . . . . . . . . . . . . . . . . . . . . . . . . . . . . . . . . . . . . . . . . . . . . . . . . . . . 175
Essbase Error Messages Generated During Data Loads ... . . . . . . . . . . . . . . . . . . . . . . . . . . . . . . . . . . . . . . . . . . 176
This appendix provides a partial list of the return codes and error messages generated by EssbaseIntegration Server and Essbase Server. Return codes and error messages are grouped into twocategories: return codes and errors generated by Integration Server and errors generated byEssbase Server for member and data loads.
The complete lists of OLAPICMD return codes (unixrtcd.txt and winrtcd.txt) are locatedin eis/server/docs on UNIX and eis\server\docs on Windows.
The complete list of Integration Server error messages is located in eis/server/bin/error.txt on UNIX and eis\server\bin\error.txt on Windows.
For errors generated by Essbase for member and data loads, see “Essbase Error MessagesGenerated During Data Loads” on page 176.
OLAPICMD Session Return CodesAt the end of an Integration Services Shell (OLAPICMD) session, OLAPICMD may return acode generated by Integration Server. This return code may be a status code or may be an errorcode.
To interpret the meaning of a return code, refer to the unixrtcd.txt file or thewinrtcd.txt file. The unixrtcd.txt file is located in the eis/server/docs directory onUNIX, and the winrtcd.txt file is located in the eis\server\docs directory on Windows.
l The unixrtcd.txt file lists the return codes for UNIX, the corresponding Windows returncode, and the associated message text. Because of a limitation in the number of return codevalues available for use on UNIX, some code numbers are used more than once. When youlook up a return code number and find that it is used multiple times, you need to examinethe messages for all instances of that return code number. Then you need to determine which
OLAPICMD Session Return Codes 169

message applies to your situation by understanding the context in which the problemoccurred.
l The winrtcd.txt file lists the return codes for Windows and the associated message text.The return code values in Windows are unique.
Table 15 shows examples of return codes on UNIX that are used more than once. Italicized wordsrepresent variable names inserted in the message text. Refer to the return code value and makea note of it in case you need to contact Oracle Technical Support with a problem.
For the complete list of return codes, refer to the unixrtcd.txt (located in the eis/server/docs directory on UNIX) and the winrtcd.txt file (located in the eis\server\docsdirectory on Windows).
Table 15 Examples of Multiple Instances of Integration Services Shell (OLAPICMD) Return Code Values for UNIX
UNIX Return Code Windows Return Code Message Contents
061 1195069 Failed to add Essbase member member_name (DUPLICATE, ignored).
061 1195325 There must be an active session to process this command.
061 2003005 Data source error. Could not locate the metadata attributes.
069 1195077 Failed to create a local context.
069 1195333 ODBC Error. Encountered unknown ODBC exception while opening database.
094 1195358 Failed to get user attributes.
094 2002014 Cube builder error. Client request error. Invalid number of parameters.
Member Load Error MessagesTable 16 lists some of the error messages that Integration Server may generate during a memberload. Italicized words represent variable names inserted in the error message. Refer to the errormessage number in the first column and make a note of it if you need to contact TechnicalSupport with a problem.
Table 16 Essbase Integration Server Member Load Error Messages
Windows MessageNumber Message Content
1195049 Detected metadata join problem (table.column < - > table.column).
1195050 Encountered unknown ODBC exception while opening database. Aborting the command.
1195064 Failed to add database Essbase database.
1195065 Failed to add dimension dimension.
1195066 Failed to add Essbase member member (%d).
170 Return Codes and Error Messages
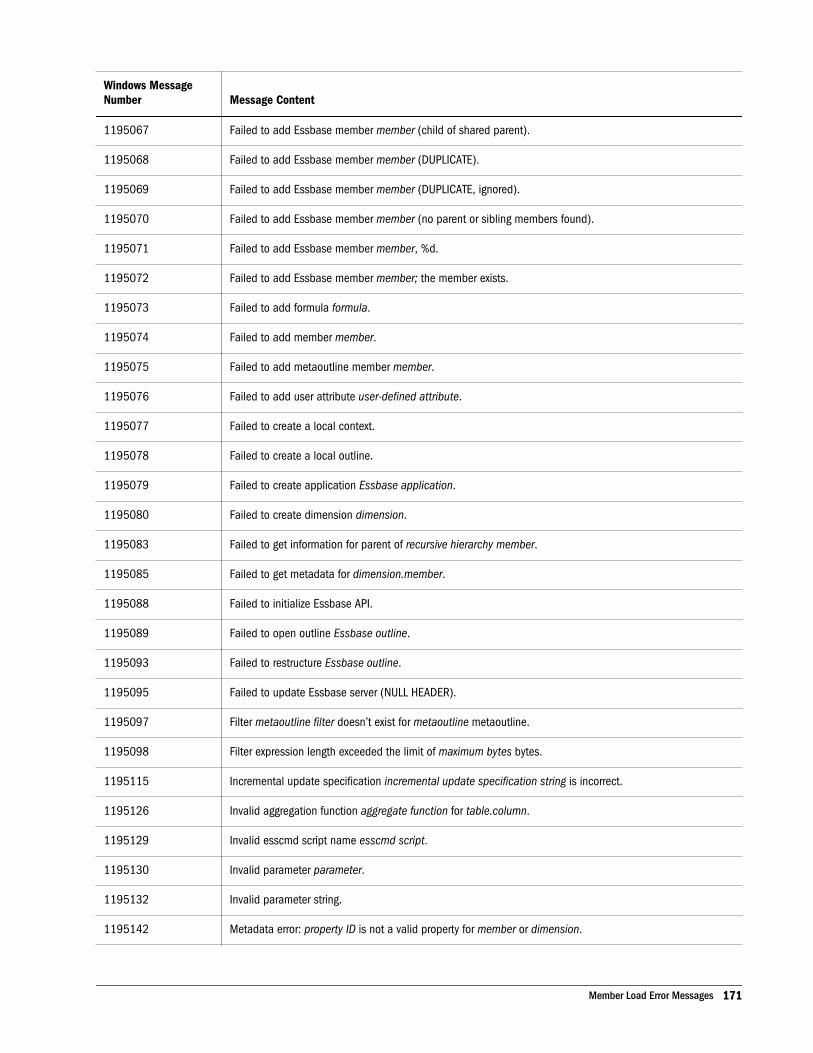
Windows MessageNumber Message Content
1195067 Failed to add Essbase member member (child of shared parent).
1195068 Failed to add Essbase member member (DUPLICATE).
1195069 Failed to add Essbase member member (DUPLICATE, ignored).
1195070 Failed to add Essbase member member (no parent or sibling members found).
1195071 Failed to add Essbase member member, %d.
1195072 Failed to add Essbase member member; the member exists.
1195073 Failed to add formula formula.
1195074 Failed to add member member.
1195075 Failed to add metaoutline member member.
1195076 Failed to add user attribute user-defined attribute.
1195077 Failed to create a local context.
1195078 Failed to create a local outline.
1195079 Failed to create application Essbase application.
1195080 Failed to create dimension dimension.
1195083 Failed to get information for parent of recursive hierarchy member.
1195085 Failed to get metadata for dimension.member.
1195088 Failed to initialize Essbase API.
1195089 Failed to open outline Essbase outline.
1195093 Failed to restructure Essbase outline.
1195095 Failed to update Essbase server (NULL HEADER).
1195097 Filter metaoutline filter doesn’t exist for metaoutline metaoutline.
1195098 Filter expression length exceeded the limit of maximum bytes bytes.
1195115 Incremental update specification incremental update specification string is incorrect.
1195126 Invalid aggregation function aggregate function for table.column.
1195129 Invalid esscmd script name esscmd script.
1195130 Invalid parameter parameter.
1195132 Invalid parameter string.
1195142 Metadata error: property ID is not a valid property for member or dimension.
Member Load Error Messages 171
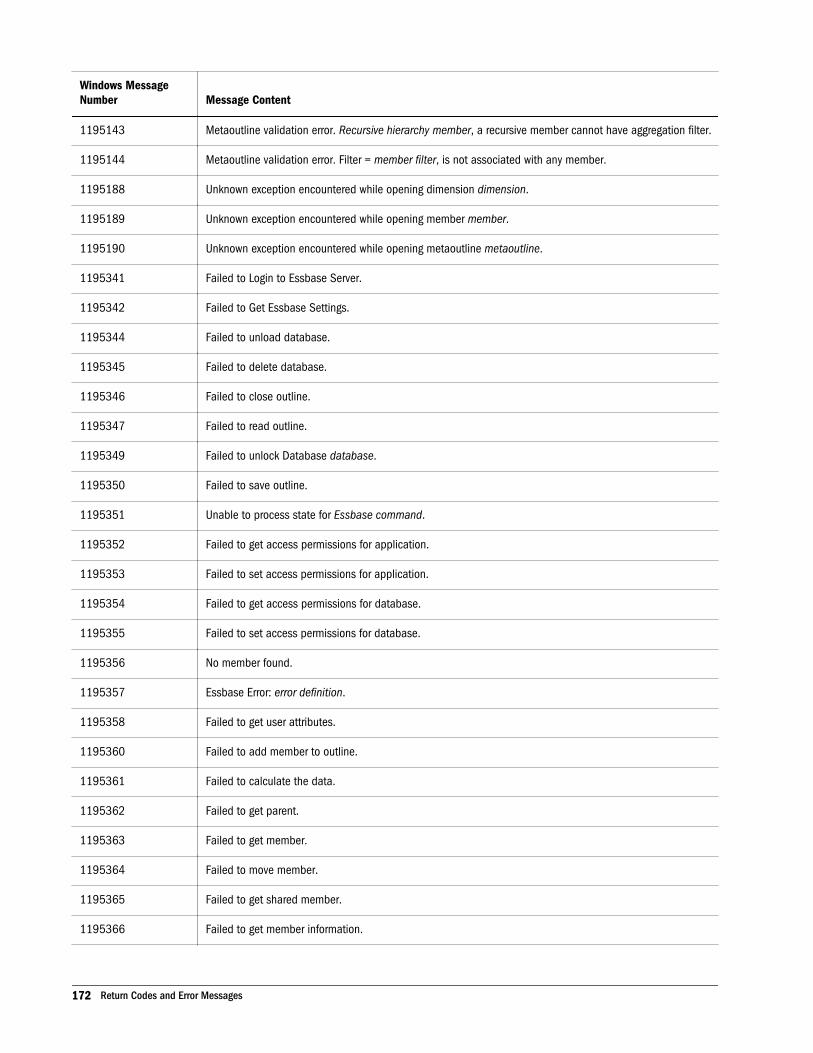
Windows MessageNumber Message Content
1195143 Metaoutline validation error. Recursive hierarchy member, a recursive member cannot have aggregation filter.
1195144 Metaoutline validation error. Filter = member filter, is not associated with any member.
1195188 Unknown exception encountered while opening dimension dimension.
1195189 Unknown exception encountered while opening member member.
1195190 Unknown exception encountered while opening metaoutline metaoutline.
1195341 Failed to Login to Essbase Server.
1195342 Failed to Get Essbase Settings.
1195344 Failed to unload database.
1195345 Failed to delete database.
1195346 Failed to close outline.
1195347 Failed to read outline.
1195349 Failed to unlock Database database.
1195350 Failed to save outline.
1195351 Unable to process state for Essbase command.
1195352 Failed to get access permissions for application.
1195353 Failed to set access permissions for application.
1195354 Failed to get access permissions for database.
1195355 Failed to set access permissions for database.
1195356 No member found.
1195357 Essbase Error: error definition.
1195358 Failed to get user attributes.
1195360 Failed to add member to outline.
1195361 Failed to calculate the data.
1195362 Failed to get parent.
1195363 Failed to get member.
1195364 Failed to move member.
1195365 Failed to get shared member.
1195366 Failed to get member information.
172 Return Codes and Error Messages
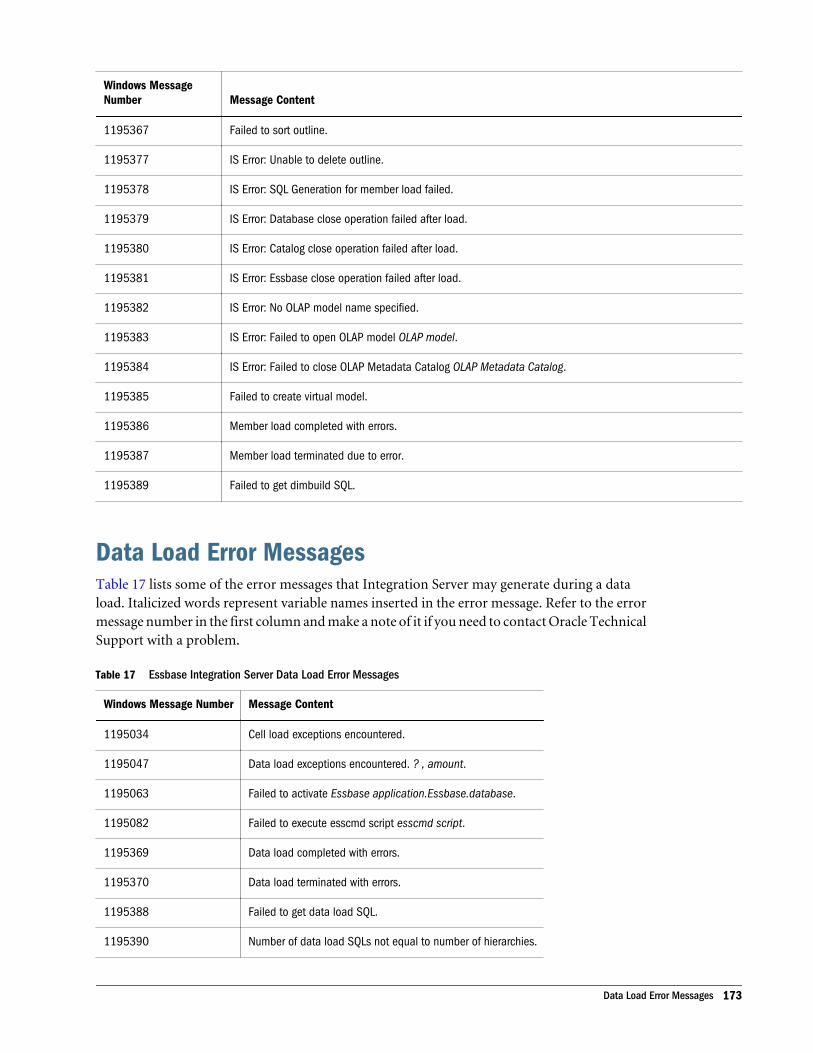
Windows MessageNumber Message Content
1195367 Failed to sort outline.
1195377 IS Error: Unable to delete outline.
1195378 IS Error: SQL Generation for member load failed.
1195379 IS Error: Database close operation failed after load.
1195380 IS Error: Catalog close operation failed after load.
1195381 IS Error: Essbase close operation failed after load.
1195382 IS Error: No OLAP model name specified.
1195383 IS Error: Failed to open OLAP model OLAP model.
1195384 IS Error: Failed to close OLAP Metadata Catalog OLAP Metadata Catalog.
1195385 Failed to create virtual model.
1195386 Member load completed with errors.
1195387 Member load terminated due to error.
1195389 Failed to get dimbuild SQL.
Data Load Error MessagesTable 17 lists some of the error messages that Integration Server may generate during a dataload. Italicized words represent variable names inserted in the error message. Refer to the errormessage number in the first column and make a note of it if you need to contact Oracle TechnicalSupport with a problem.
Table 17 Essbase Integration Server Data Load Error Messages
Windows Message Number Message Content
1195034 Cell load exceptions encountered.
1195047 Data load exceptions encountered. ? , amount.
1195063 Failed to activate Essbase application.Essbase.database.
1195082 Failed to execute esscmd script esscmd script.
1195369 Data load completed with errors.
1195370 Data load terminated with errors.
1195388 Failed to get data load SQL.
1195390 Number of data load SQLs not equal to number of hierarchies.
Data Load Error Messages 173

Drill-Through Report Error MessagesDrill-through reports are created using the Integration Services Console OLAP Metaoutlinestandard user interface and are viewed using Essbase Spreadsheet Add-in for Excel or Lotus 123or any other Hyperion drill-through client.
Table 18 lists some of the error messages that Integration Server may generate to Essbase usersviewing drill-through reports. Italicized words represent variable names inserted in the errormessage. Refer to the error message number in the first column and make a note of it if you needto contact Oracle Technical Support with a problem.
Table 18 Essbase Integration Server Drill-Through Report Error Messages
Windows MessageNumber Message Content
1195081 Failed to enable DTS Member member.
1195087 Failed to get the universal member handle.
1195125 Intersection element member does not exist in table.column.
1195131 Invalid parameter count for the drill-through request. Aborting...
1195153 Received NULL pointer in DTAttributes( ) for Report = Drill-Through report.
1195154 Received NULL pointer in GetDTData ( ) for Report = Drill-Through report.
1195155 Received NULL pointer in GetDTDomain ( ).
1195156 Received NULL pointer in GetDTReport ( ).
1195157 Received NULL pointer in SetDTReport ( ).
1195183 Too many Drill-Through reports defined (exceeded Essbase metadata size limit). Drill-Through is disabled forthis outline.
1195186 Unknown exception in GetDTReport ( ).
1195359 Essbase Error: Invalid Drill-Through Metadata.
1195369 IS Error: Data load completed with errors.
1195370 IS Error: Data load terminated due to errors.
1195371 IS Error: Unable to log in to data source.
1195372 IS Error: Unable to log in to OLAP Metadata Catalog.
1195373 IS Error: Unable to log in to Essbase Server.
1195374 IS Error: Unable to read Metaoutline information.
1195375 IS Error: Data calculation failed.
1195376 IS Error: Esscmd script execution failed.
174 Return Codes and Error Messages

Miscellaneous Error MessagesTable 19 lists some of the miscellaneous error messages that Integration Server may generateduring OLAP model and metaoutline creation and during data and member loads. Italicizedwords represent variable names inserted in the error message. Refer to the error message numberin the first column and make a note of it if you need to contact Oracle Technical Support witha problem.
Table 19 Essbase Integration Server Miscellaneous Error Messages
Windows MessageNumber Message Contents
1195004 Metaoutline failed validation. Database measures not specified.
1195007 Add job failed.
1195017 Syntax Syntax error at character location in the filter expression filter.
1195018 Member cannot have aggregation filter. Only leaf members can have aggregation filters.
1195054 Error message unavailable for this error.
1195057 Essbase server on Essbase server computer is not enabled with Integration Services option. Please inform yoursystem administrator.
1195084 Failed to get job info (OS error Job-ID).
1195086 Failed to get the ODBC message.
1195090 Failed to remove temporary batch file (OS error operating system error).
1195091 Failed to remove job (OS error operating system error).
1195092 Failed to remove old job (OS error operating system error).
1195094 Failed to schedule job (OS error operating system error).
1195096 Fatal error.
1195124 Internal system error. Please contact Technical Support with the error number 1999999.
1195127 Invalid command line option OLAP Integration Server switch.
1195128 Invalid datatype specification data type.
1195133 Invalid session identifier; please log in to Integration Services again.
1195159 Replace Failed member transformation.
1195185 Trying to access invalid memory. Contact Technical Support.
1195187 Unknown ODBC exception encountered while closing database.
1195206 Syntax Syntax error at character location in the filter expression filter.
1195207 Integration Services is already running on this machine.
Miscellaneous Error Messages 175
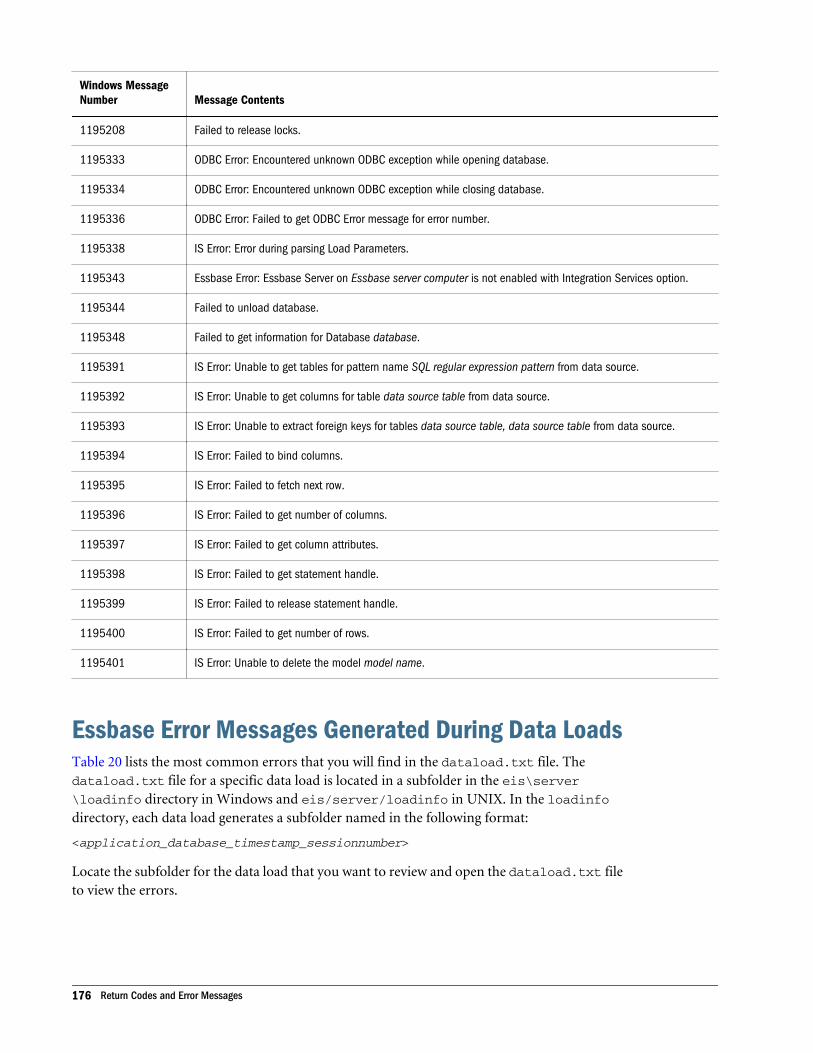
Windows MessageNumber Message Contents
1195208 Failed to release locks.
1195333 ODBC Error: Encountered unknown ODBC exception while opening database.
1195334 ODBC Error: Encountered unknown ODBC exception while closing database.
1195336 ODBC Error: Failed to get ODBC Error message for error number.
1195338 IS Error: Error during parsing Load Parameters.
1195343 Essbase Error: Essbase Server on Essbase server computer is not enabled with Integration Services option.
1195344 Failed to unload database.
1195348 Failed to get information for Database database.
1195391 IS Error: Unable to get tables for pattern name SQL regular expression pattern from data source.
1195392 IS Error: Unable to get columns for table data source table from data source.
1195393 IS Error: Unable to extract foreign keys for tables data source table, data source table from data source.
1195394 IS Error: Failed to bind columns.
1195395 IS Error: Failed to fetch next row.
1195396 IS Error: Failed to get number of columns.
1195397 IS Error: Failed to get column attributes.
1195398 IS Error: Failed to get statement handle.
1195399 IS Error: Failed to release statement handle.
1195400 IS Error: Failed to get number of rows.
1195401 IS Error: Unable to delete the model model name.
Essbase Error Messages Generated During Data LoadsTable 20 lists the most common errors that you will find in the dataload.txt file. Thedataload.txt file for a specific data load is located in a subfolder in the eis\server\loadinfo directory in Windows and eis/server/loadinfo in UNIX. In the loadinfodirectory, each data load generates a subfolder named in the following format:
<application_database_timestamp_sessionnumber>
Locate the subfolder for the data load that you want to review and open the dataload.txt fileto view the errors.
176 Return Codes and Error Messages

Table 20 Essbase Messages Generated During Loads
Message Number Message Contents
3303 Member not found in database.
3304 Insufficient access to store data.
3333 Bad data value supplied.
3335 Record rejected because of duplicate member names.
3336 Member/Data unknown.
3337 Record rejected because of dimension conflicts with Header Name.
Essbase Error Messages Generated During Data Loads 177

178 Return Codes and Error Messages
BIntegration Services Limits and
Guidelines
In This Appendix
Artifact Limits.. . . . . . . . . . . . . . . . . . . . . . . . . . . . . . . . . . . . . . . . . . . . . . . . . . . . . . . . . . . . . . . . . . . . . . . . . . . . . . . . . . . . . . . . . . . . 179
Source Database Artifact Naming Limits .. . . . . . . . . . . . . . . . . . . . . . . . . . . . . . . . . . . . . . . . . . . . . . . . . . . . . . . . . . . . . 182
Setting the Compression Dimension ... . . . . . . . . . . . . . . . . . . . . . . . . . . . . . . . . . . . . . . . . . . . . . . . . . . . . . . . . . . . . . . . . 183
Hybrid Analysis Guidelines ... . . . . . . . . . . . . . . . . . . . . . . . . . . . . . . . . . . . . . . . . . . . . . . . . . . . . . . . . . . . . . . . . . . . . . . . . . . . 183
Using Advanced Relational Access... . . . . . . . . . . . . . . . . . . . . . . . . . . . . . . . . . . . . . . . . . . . . . . . . . . . . . . . . . . . . . . . . . . 187
Drill-through Report Guidelines ... . . . . . . . . . . . . . . . . . . . . . . . . . . . . . . . . . . . . . . . . . . . . . . . . . . . . . . . . . . . . . . . . . . . . . . 190
Unicode Guidelines ... . . . . . . . . . . . . . . . . . . . . . . . . . . . . . . . . . . . . . . . . . . . . . . . . . . . . . . . . . . . . . . . . . . . . . . . . . . . . . . . . . . . 192
Duplicate Member Names Guidelines ... . . . . . . . . . . . . . . . . . . . . . . . . . . . . . . . . . . . . . . . . . . . . . . . . . . . . . . . . . . . . . . 192
This appendix describes Integration Services artifacts and database naming limits; HybridAnalysis, Drill-through, and Unicode guidelines.
You should be familiar with these limits and guidelines before you begin using IntegrationServices.
For restrictions and guidelines on naming artifacts, see Chapter 9, “Naming Restrictions forEssbase Applications, Databases, and Members.” See also Integration Services Console onlinehelp.
Artifact LimitsTable 21 contains a list of limits that you may encounter when creating or manipulatingIntegration Services artifacts.
Table 21 Artifacts and Limits
Artifact Limit for Applications
Names and Related Fields
Alias name Non-Unicode application limit: 80 bytes
Unicode-mode application limit: 80 characters
Alias table name Non-Unicode application limit: 30 bytes
Unicode-mode application limit: 30 characters
Artifact Limits 179
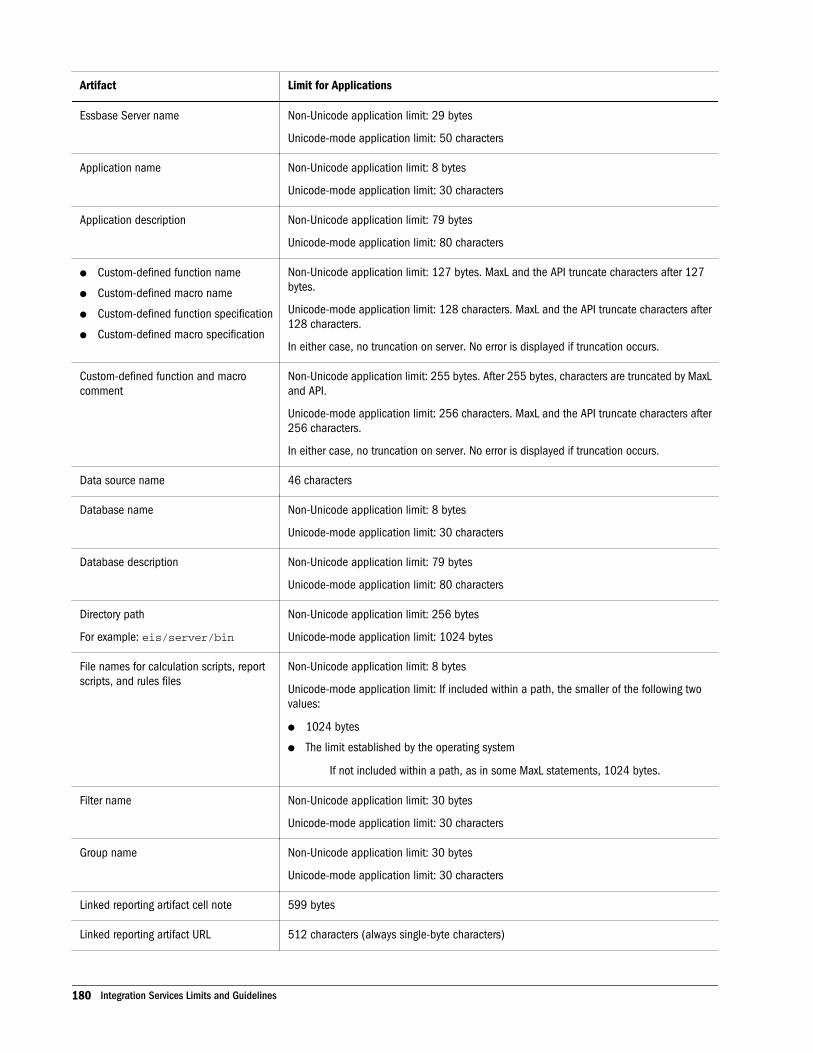
Artifact Limit for Applications
Essbase Server name Non-Unicode application limit: 29 bytes
Unicode-mode application limit: 50 characters
Application name Non-Unicode application limit: 8 bytes
Unicode-mode application limit: 30 characters
Application description Non-Unicode application limit: 79 bytes
Unicode-mode application limit: 80 characters
l Custom-defined function name
l Custom-defined macro name
l Custom-defined function specification
l Custom-defined macro specification
Non-Unicode application limit: 127 bytes. MaxL and the API truncate characters after 127bytes.
Unicode-mode application limit: 128 characters. MaxL and the API truncate characters after128 characters.
In either case, no truncation on server. No error is displayed if truncation occurs.
Custom-defined function and macrocomment
Non-Unicode application limit: 255 bytes. After 255 bytes, characters are truncated by MaxLand API.
Unicode-mode application limit: 256 characters. MaxL and the API truncate characters after256 characters.
In either case, no truncation on server. No error is displayed if truncation occurs.
Data source name 46 characters
Database name Non-Unicode application limit: 8 bytes
Unicode-mode application limit: 30 characters
Database description Non-Unicode application limit: 79 bytes
Unicode-mode application limit: 80 characters
Directory path
For example: eis/server/bin
Non-Unicode application limit: 256 bytes
Unicode-mode application limit: 1024 bytes
File names for calculation scripts, reportscripts, and rules files
Non-Unicode application limit: 8 bytes
Unicode-mode application limit: If included within a path, the smaller of the following twovalues:
l 1024 bytes
l The limit established by the operating system
If not included within a path, as in some MaxL statements, 1024 bytes.
Filter name Non-Unicode application limit: 30 bytes
Unicode-mode application limit: 30 characters
Group name Non-Unicode application limit: 30 bytes
Unicode-mode application limit: 30 characters
Linked reporting artifact cell note 599 bytes
Linked reporting artifact URL 512 characters (always single-byte characters)
180 Integration Services Limits and Guidelines

Artifact Limit for Applications
Member comment field Non-Unicode application limit: 255 bytes
Unicode-mode application limit: 256 characters
Member comment field (extended) 8192 bytes
Member name Non-Unicode application limit: 80 bytes
Unicode-mode application limit: 80 characters
OLAP model name 80 characters
OLAP metaoutline name 80 characters
Password Non-Unicode application limit: 100 bytes
Unicode-mode application limit: 100 characters
Substitution variable name 80 bytes
Substitution variable value 255 bytes
Trigger name 30 bytes
User-defined query No limitations
User names Non-Unicode application limit: 30 bytes
Unicode-mode application limit: 30 characters
Variable names 32 bytes
Data Load and Dimension Building Limits
Data load query No limitations
Member load query No limitations
Number of alias tables associated with ametaoutline
9, including the Default alias table
Number of error messages written to a dataload or dimension build error log(DATAERRORLIMIT in essbase.cfg)
Default 1000, minimum 1, maximum 65000
Selection and rejection criteria Number of characters that describe selection and rejection criteria: combination of all criterialimited to 32 KB
Other Limits
Caches: data, data file, index 2 GB
Formula sizel Created in Formula Editor: 64 KB. Formulas in calculation scripts are not subject to this
limit.
l Created in MaxL, using multi-byte characters: 40 KB.
Formulas in calculation scripts are not subject to these limits.
Artifact Limits 181

Artifact Limit for Applications
Number of security filters Per Essbase Server, 65535
Per Essbase database, 32290
Number of users 30,000. Errors can occur if you create more than 30,000 users.
Number of members in an Essbase outline Approximately 1,000,000 explicitly defined in an Essbase outline for block storage
Approximately 20,000,000 explicitly defined in an Essbase outline for aggregate storage
Hybrid Analysis and some uses of partitions enable access to many more members than areexplicitly listed in an outline, the actual number of members accessible through the databaseis much higher.
Longer names, which often occur if multi-byte characters are used, decrease the number ofmembers that are allowed.
Source Database Artifact Naming LimitsIntegration Services does not support source database table names and column namescontaining the characters listed in Table 22.
Note: Table names may contain blank spaces. Column names may contain blank spaces andquestion marks.
Note: Table and column names may be greater than 30 characters in length.
Table 22 Unsupported Characters in Table and Column Names
Character Description Character Description
“ quotation mark ( ) parenthesis
& ampersand . period
, comma | vertical pipe
= equal sign ' single quotation mark
@ at sign \ backslash
# pound sign / forward slash
\t Tab character : colon
blank space * asterisk
+ plus sign ? question mark
- dash, minus sign, or hyphen < less than sign
182 Integration Services Limits and Guidelines
Character Description Character Description
{ } braces > more than sign
Setting the Compression DimensionIn aggregate storage databases, the size of the compressed database changes depending on whichdimension is specified as the compression dimension, and can affect retrieval performance.
When the data model property is set to aggregate storage, the Accounts dimension is specifiedas the compression dimension by default. However, you may determine that another dimensionis the optimal choice for compression. Using the Compression Dimension check box, you canspecify any single dimension as the compression dimension.
After performing a data load, use Administration Services Console or MaxL to view detailedcompression and query statistics for your database.
Guidelinesl The compression dimension option is ignored if the outline is being built with Essbase
versions earlier than 9.3. In versions less than 9.3, the Accounts dimension is tagged as thecompression dimension internally.
l The following dimensions cannot be specified as the compression dimension:
m Multiple hierarchy dimensions
m Attribute dimensions
m A base dimension with an attribute association
l If you tag a compression dimension with an Outline Hierarchy Information option otherthan “Dynamic at Dimension Level,” that dimension will be tagged as a dynamic dimensionwhen it is loaded into Essbase.
l The compressions dimension option applies to metaoutlines specified for aggregate storageonly. To facilitate switching between aggregate and block data storage models, the option isalways available, whether the metaoutline is specified for block storage or aggregate storage.If the metaoutline is specified for block storage, this option is ignored.
Hybrid Analysis GuidelinesYou should be familiar with the Hybrid Analysis guidelines covered in this section.
Data Source Guidelinesl A single Essbase database can be associated with only one hybrid analysis relational data
source.
Setting the Compression Dimension 183
l A hybrid analysis data source can consist of only one relational database.
l Hybrid Analysis supports data that is stored using either block storage or aggregate storage.
l Hybrid Analysis supports Unicode-enabled data sources.
Dimensions Guidelinesl Hybrid Analysis is not supported on accounts dimensions.
l If the time dimension contains hybrid analysis-enabled members, the time dimension doesnot support Dynamic Time Series.
l Hybrid Analysis is not supported on user-defined dimensions.
l In an outline that is hybrid analysis-enabled, you can perform operations and analyses ondimensions that have attributes attached to one or more levels. The attribute dimensionshould be fully loaded into Essbase.
l Only the first hierarchy of a dimension with alternate hierarchies can have members enabledfor hybrid analysis on its lowest levels.
l When building a dimension that is enabled for hybrid analysis, you must ensure that thecolumn in the data source table that contributes to the leaf level of the Essbase portion ofthe dimension is non-nullable.
Members Guidelinesl Only the lowest level members of a dimension can be enabled for hybrid analysis.
l You should not rename a hybrid analysis-enabled member. If you rename a member, themember may not be retrieved the next time you perform a drill-through operation.
l Hybrid Analysis supports only parent-child prefixing on member names.
l Essbase does not support aliases for members that are enabled for hybrid analysis.
l Hybrid Analysis does not support scaling of measures dimension members using any of theoperators + (addition), - (subtraction), * (multiplication), and / (division). If you use thescaling operators, drill-through queries into hybrid analysis data may show a mismatchbetween aggregated level-0 values in the Essbase database and the corresponding detailvalues in your data source.
l Essbase ignores all member properties, such as formulas, UDAs, and aliases for membersthat are enabled for hybrid analysis.
l You can associate an attribute member with a member enabled for hybrid analysis but youmust make the association by metaoutline member name and not by level.
l Essbase supports drill-through operations defined on members that are enabled for HybridAnalysis.
l You cannot apply properties of the Account Info tab to Hybrid Analysis members.Specifically, Time Balance, Skip, Variance Reporting, or Currency Conversion propertiesare not supported for Hybrid Analysis-enabled members.
184 Integration Services Limits and Guidelines

Spreadsheet Guidelinesl Hybrid Analysis does not return numeric data in a spreadsheet if the member from the
Accounts dimension is part of a ragged hierarchy.
l Hybrid Analysis is not supported with the Member Selection feature. You cannot selectHybrid Analysis members from the Member Selection dialog box.
l If you have multiple levels of hybrid analysis members in your outline, performing a zoomout operation on the bottom level hybrid analysis member takes you directly to the Essbaseparent member, bypassing all other hybrid analysis levels.
Operations Guidelinesl Hybrid Analysis supports Dynamic Time Series.
l Essbase requires the OLAP Metadata Catalog created in Integration Services in order to drilldown in a hybrid analysis data source.
l Hybrid Analysis does not support transparent, replicated, or linked partitions.
l Hybrid Analysis supports recursive hierarchies.
Limitations on Transformation Rules with Hybrid AnalysisHybrid Analysis sets the following limitations on transformation rules:
l A database value cannot have a separator character that is the same as the one used for theprefix or suffix.
l A member name cannot be more than 80 characters (excluding blanks).
l A prefix or suffix must always have a separator associated with it.
l The data source database value cannot have trailing blanks.
l If spaces are converted to underscores during a transformation, then the Hybrid AnalysisManager assumes there are no underscores present in the database value.
l The use of all ancestors as a prefix or as a suffix is not supported.
Transformations Not Supported by Hybrid AnalysisHybrid Analysis does not support the following transformations:
l Dropping spaces from around a member name
l Applying a prefix without a separator
l Applying names prefixes for all parents with or without a separator
l Applying a suffix without a separator
l Applying all suffixes of parent names with or without a separator
l Applying scaling to measures
Hybrid Analysis Guidelines 185
Limitations on Using Formulas with Hybrid AnalysisFormulas used with hybrid analysis-enabled members are subject to the following limitations:
l Formulas are supported only on a measures dimension.
l Formulas cannot be attached to relational members.
l Formulas cannot reference a relational member by name.
l Member set functions (such as @CHILDREN and @DESCENDANTS), which generatemember lists in a formula, execute only in the Essbase portion of the outline.
If a formula contains one or more functions that are not supported by Hybrid Analysis, Essbasereturns the following error message:
Error executing formula for member
[member-name-to-which-formula-is-attached] (line [line# where the offending function appears inside the formula): function [Name of the offending function] cannot be used in Hybrid Analysis.
Unsupported Essbase Functions in Hybrid AnalysisHybrid Analysis does not support all Essbase functions. The following topics specify thecategories of significant Essbase functions not supported by Hybrid Analysis.
Relationship Functions
Hybrid Analysis does not support functions that look up specific values in the database basedon current cell location and a series of parameters. Examples:
@ANCEST @SPARENT
@SANCEST @CURLEV
@PARENT @CURGEN
Member Condition Functions That Use Boolean Test
Hybrid Analysis does not support functions used to specify member conditions. Examples:
@ISIANCEST @ISLEV
@ISIPARENT @ISSAMEGEN
@ISISIBLING @ISUDA
186 Integration Services Limits and Guidelines

Range Functions
Hybrid Analysis does not support functions that take a range of members as arguments. Ratherthan return a single value, these functions calculate a series of values internally based on therange specified. Examples:
@PRIOR @MOVAVG
@SHIFT @ALLOCATE
@PRIORS @MDALLOCATE
@SHIFTS @VAR
@NEXT @VARPER
@MDSHIFT @MEDIAN
@MOVSUM @RANK
Attribute Functions
Hybrid Analysis does not support any Essbase functions that deal with attributes. Examples:
@ATTRIBUTEVAL @WITHATTR
@ATTRIBUTESVAL
Current Member and XREF
Hybrid Analysis does not support the following functions used to determine whether the currentmember is the member being specified:
@CURRMBR @XREF
Using Advanced Relational AccessBy default, when Integration Server creates an Essbase outline, it loads, or builds, all memberlevels specified in the metaoutline into a multidimensional database. You can, however, setIntegration Server to build to a specified member level (Hybrid Analysis) or build only to thedimension level (Advanced Relational Access). Building down to a specified level produces asmaller Essbase outline and a smaller multidimensional database. Smaller databases can be usefulfor users with limited disk space who do not need to see the lowest level of detail.
Integration Services uses Advanced Relational Access to give Essbase end users direct access todata from relational databases or data warehouses. This feature enables users to perform onlineanalytical processing (OLAP) on very large data sets.
In Integration Services Console, Advanced Relational Storage is enabled at the metaoutline level.When the Relational Storage option is selected, all members of all non-accounts dimensions are
Using Advanced Relational Access 187
automatically enabled for relational storage. Alternatively, you can enable relational storage onselected non-accounts dimensions.
When a metaoutline is enabled for Advanced Relational Access, end users are able to querydirectly on relationally-stored members. Essbase Server issues SQl queries to retrieve data fromthe database or data warehouse. All members of the dimension are accessed directly from therelational data source.
Note: For detailed information on enabling Advanced Relational Access, see Integration ServicesConsole online help.
Advanced Relational Access GuidelinesWhen users construct Advanced Relational Access queries, the points outlined in the followingsections should be noted.
General GuidelinesHere are general guidelines to keep in mind when using Advanced Relational Access:
l Only outlines that are valid for aggregate storage can be Advanced Relational Access outlines.Block storage is not supported.
l Dynamic Time Series members are not supported.
l Advanced Relational Access requires MDX formulas.
Note: An MDX query made against a ragged hierarchy in an Essbase cube returns data resultsthat can differ significantly from the results obtained when the same MDX query ismade against a ragged hierarchy in an Advanced Relational Access cube. See thesection “Different Values Loaded in Ragged Hierarchies” on page 190.
l Members enabled for Advanced Relational Access are shown in Administration ServicesConsole Outline Viewer but are not shown in the Outline Editor.
l A Time dimension from the Fact table is not supported. strongly recommends that youcreate a separate Time dimension table with time data only.
l When there are multiple measures defined in a metaoutline, consolidation at the highestlevel is based on the first measure only.
Data Source GuidelinesHere are guidelines to keep in mind when considering your data source for Advanced RelationalAccess:
l Advanced Relational Access cannot be enabled in metaoutlines that are connected tomultiple data sources.
l Star and snowflake schemas are supported.
188 Integration Services Limits and Guidelines
l Teradata RDBMS provides different types of SQL date types, but Advanced Relational Accessonly supports the ‘DATE’ SQL date type.
Dimension GuidelinesHere are guidelines to keep in mind when working with dimensions in Advanced RelationalAccess:
l Advanced Relational Access does not support recursive dimensions/hierarchies.
l Alternate hierarchies in standard dimensions are not allowed.
l Attribute dimensions are ignored.
l User-defined dimensions are not supported.
l When a dimension is enabled for relational storage, Integration Server builds only to thedimension level. All members of the dimension are accessed directly from the relational datasource.
l Accounts dimension must be created from the fact table.
l For the accounts dimension, no hierarchy is supported. All members should be of generation2.
l Aliases are not supported.
Member GuidelinesHere are guidelines to keep in mind when working with members in Advanced Relational Access:
l The first member of the accounts dimension must be a base or stored measure. It cannot bea user-defined member.
l Aliases are not supported.
l Duplicate members are not supported.
l Shared members are not supported.
l Relational members are not automatically expanded when part of an outline is expanded.To view the relational members, you must manually click the member node containing therelational members.
l Relational members are not automatically collapsed when part of an outline is collapsed. Tocollapse the relational members, you must manually click the member node containing therelational members.
l In Integration Services Console, you can specify multiple sort order columns for eachgeneration, selecting ascending or descending order.
l In Integration Services Console, you can associate a key column with each generation nameand tag the key column as unique.
Using Advanced Relational Access 189

Unsupported Data TypesThe following data types are not supported in Advanced Relational Access:
l IBM DB2: REAL
l Oracle: NCHAR and NVARCHAR2
l Microsoft SQL Server: TINYINT and SMALLINIT
Note: The data types TINYINT and SMALLINT cannot be used as a measure; however, theycan be used as members.
l Teradata: FLOAT
Note: Your member set column names should not be based on columns of FLOAT datatypes.
Essbase Databases and Advanced Relational AccessWhen you use Advanced Relational Access, your Essbase database has the followingcharacteristics:
l The accounts dimension completely resides in Essbase.
l For all non-accounts dimensions, only the root members (the dimension level) reside in theEssbase database. All other non-accounts members are accessed directly from the relationaldatabase.
Different Values Loaded in Ragged HierarchiesThere is a significant difference in the way Advanced Relational Access and Essbase perform dataloads in ragged hierarchies. Because of this difference, separate queries made against a raggedhierarchy can display different consolidation totals.
Essbase loads values in the upper-level members of a ragged hierarchy only when the level 0members are non-null. Advanced Relational Access, however, loads values in the upper levelmembers of the ragged hierarchy regardless of the value in the level 0 member.
Drill-through Report GuidelinesYou should be familiar with these drill-through report guidelines:
l Drill-through operations cannot be performed on a Unicode Essbase database.
l Drill-through reports may be directed to an alternate Integration Server. Select the alternateserver in the OLAP Metaoutline Properties dialog box in Integration Services Console.
l Drill-through operations can be performed with Dynamic Time Series.
l Drill-through operations can be performed on an alternate data source. An alternate datasource is a source other than the primary or secondary data source used to create a
190 Integration Services Limits and Guidelines

metaoutline. The alternate data source must contain the same data structure, includingcolumn names and data types, as the primary or secondary data source originally used tocreate the report. Drill-through operations can be performed on an alternate data sourcethat is in a second language.
l Integration Services is not capable of processing drill-through report requests from morethan one instance of Essbase running on one server. In order for Integration Services tosuccessfully process requests for drill-through reports from instances of Essbase running onnon-standard Agent ports, an essbase.cfg file with the non-standard AGENTPORT settingmust be present in eis/server/bin at the time Integration Services is started.
l If you create drill-through reports for a metaoutline based on multiple data sources, the SQLused for each drill-through report cannot include a join across a data source boundary; thatis, each drill-through report can be based on only one data source. A metaoutline can containmultiple drill-through reports but all must be based on a single data source.
l Multi-cell drill-through is supported under the following conditions:
m All members selected for multi-cell drill-through come from same physical table andcolumn in the database.
m All members selected for multi-cell drill-through come from the same level in themetaoutline.
m The selected members cannot come from more than one hierarchy.
l The metaoutline in which you are designing a drill-through report cannot contain alternaterecursive hierarchies. For example, you cannot insert the same member from a recursivehierarchy into a dimension more than once.
l You cannot use the $$ substitution variable in the template SQL (user-defined SQL) for adrill-through report when the intersection level of the dimension is defined at Generation1 and the dimension is built from a parent/child table.
l Oracle does not recommend using Drill-Through Template SQL for OLAP metaoutlinesthat support duplicate member names. Integration Server generates special tags internallyto uniquely identify the duplicate members.
If you still choose to use Drill-through Template SQL with OLAP metaoutlines that supportduplicate member names, refer to the Essbase Integration Services Online Help for guidelines.
l Drill-through operations can be performed on an database containing multibyte charactersets.
l There is a limit to the amount of information that can be stored in the Universal MemberComments (UMC) of an Essbase outline, meaning that users can typically store informationfor about 40 to 50 drill-through reports only. Because of this limitation, Oracle recommendsthat users design their drill-through reports so that the total number of reports is kept tounder 40.
l In the following scenarios, drill-through operations may not work even after using the“Update Drill-through Data” command:
m If you created an Essbase application and database using Integration Services, and thenmodified it using another tool, such as Administration Services.
Drill-through Report Guidelines 191
m If you have created an Essbase application and database using another tool, such asOracle Essbase Administration Services.
Unicode Guidelinesl You must use the manual catalog creation procedures to create a Unicode-enabled OLAP
Metadata Catalog, as described in Chapter 3, “Creating, Upgrading, and Deleting OLAPMetadata Catalogs”.
l Drill-through operations are not supported on a Unicode Essbase database.
l Integration Services does not support Unicode databases in Microsoft SQL Server RDBMS.
l If the database is UTF-8 but you are using only one language, select the UTF-8 option fromthe Code Page drop-down list whenever you access the database with the Login, OLAPMetadata Catalog Setup, Set Login Defaults, and Data Source dialog boxes.
Duplicate Member Names GuidelinesWhen a metaoutline is loaded into Essbase Server, an Essbase outline is usually created with eachmember name being unique. This is the default behavior of Integration Server. You can changethis default and specify a metaoutline that, when loaded into an Essbase database, creates anEssbase outline containing duplicate (non-unique) member names, as shown in the followingexample:
US-->Massachusetts-->Springfield
US-->Missouri-->Springfield
Oracle Essbase Integration Services generates a unique internal identifier, which is applied toany duplicate member name in a metaoutline. This process enables support for duplicatemember names during member loads, data loads, and drill-through operations.
When using duplicate member names, keep in mind the guidelines described in the sections thatfollow:
Dimensions in Duplicate Outlinesl Dimension names must be unique.
l In a dimension, a user-defined member cannot have the same name as a measure.
Members in Duplicate Outlinesl Duplicate member names are not allowed under the same parent. This is also true for user-
defined members.
l A member cannot have children with duplicate names.
l Duplicate members may be shared or non-shared members.
192 Integration Services Limits and Guidelines
l Duplicate members are supported in both aggregate storage and block storage.
l Duplicate member names are not supported if there are multiple data sources.
l Duplicate member names support duplicate aliases.
Other Guidelines for Duplicate Outlinesl Drill-through operations containing duplicate member names are supported.
l Oracle does not recommend using user-defined data load SQL or Drill-Through TemplateSQL for metaoutlines that support duplicate member names. Integration Server generatesspecial tags internally to uniquely identify the duplicate members.
If you still choose to override data load SQL commands, exercise caution. You may haverecords rejected in error. It is especially recommended that you not change column namesin SQL.
If you still choose to use Drill-through Template SQL with OLAP metaoutlines that supportduplicate member names, refer to the Essbase Integration Services Online Help for guidelines.
l Duplicate outlines support MDX commands.
Note: For detailed information on creating an Oracle Essbase outline with duplicatemember names, see Integration Services Console online help.
Duplicate Member Names Guidelines 193

194 Integration Services Limits and Guidelines
Glossary
#MISSING See missing data.
accounts dimension A dimension type that makes accounting
intelligence available. Only one dimension can be defined
as Accounts.
Add Joins mode In Essbase Integration Services, a state in
which you can draw lines to define joins between objects in
the OLAP model.
Advanced Relational Access The integration of a relational
database with an Essbase multidimensional database so that
all data remains in the relational database and is mapped to
summary-level data in the Essbase database.
aggregate cell A cell comprising several cells. For example, a
data cell that uses Children(Year) expands to four cells
containing Quarter 1, Quarter 2, Quarter 3, and Quarter 4
data.
aggregate storage database The database storage model
designed to support large-scale, sparsely distributed data
which is categorized into many, potentially large
dimensions. Upper level members and formulas are
dynamically calculated, and selected data values are
aggregated and stored, typically with improvements in
overall aggregation time.
aggregate view A collection of aggregate cells based on the
levels of the members within each dimension. To reduce
calculation time, values are pre-aggregated and stored as
aggregate views. Retrievals start from aggregate view totals
and add up from there.
aggregation The process of rolling up and storing values in
an aggregate storage database; the stored result of the
aggregation process.
aggregation level See consolidation level.
alias column In Essbase Integration Services, a column in the
data source that contains the aliases for a member level in
the metaoutline.
alias table A table that contains alternate names for
members.
alternate hierarchy A hierarchy of shared members. An
alternate hierarchy is based upon an existing hierarchy in a
database outline, but has alternate levels in the dimension.
An alternate hierarchy allows the same data to be seen from
different points of view.
alternate name See alias.
ancestor A branch member that has members below it. For
example, the members Qtr2 and 2006 are ancestors of the
member April.
application 1) A software program designed to run a specific
task or group of tasks such as a spreadsheet program or
database management system; 2) A related set of dimensions
and dimension members that are used to meet a specific set
of analytical requirements, reporting requirements, or both.
Architect See Essbase Integration Services Console.
attribute A characteristic of a dimension member. For
example, Employee dimension members may have
attributes of Name, Age, or Address. Product dimension
members can have several attributes, such as a size and
flavor.
base dimension A standard dimension that is associated with
one or more attribute dimensions. For example, assuming
products have flavors, the Product dimension is the base
dimension for the Flavors attribute dimension.
block The primary storage unit which is a multidimensional
array representing the cells of all dense dimensions.
Glossary 195

block storage database The Essbase database storage model
categorizing and storing data based on the sparsity of data
values defined in sparse dimensions. Data values are stored
in blocks, which exist only for sparse dimension members
for which there are values.
branch A member of a hierarchy that may or may not
contain leaf members.
Builder See Essbase Integration Services Console.
catalog See OLAP Metadata Catalog.
cell 1) The data value at the intersection of dimensions in a
multidimensional database; the intersection of a row and a
column in a worksheet; 2) A logical group of nodes
belonging to one administrative domain.
child A member with a parent above it in the database
outline.
code page A mapping of bit combinations to a set of text
characters. Different code pages support different sets of
characters. Each computer contains a code page setting for
the character set requirements of the language of the
computer user. In the context of this document, code pages
map characters to bit combinations for non-Unicode
encodings. See also encoding.
Command Interface See Essbase Integration Services Shell.
concatenation An operation that joins two characters or
strings in the order specified, forming one string whose
length is equal to the sum of the lengths of the two characters
or strings. For example, the strings "New York " and
"Library", when concatenated, become "New York Library".
condition In relational databases, a data extraction criterion.
For example, you can apply a condition to extract only the
data that begins with the letter A.
consolidation The process of aggregating data from
dependent entities to parent entities. For example, if the
dimension Year consists of the members Qtr1, Qtr2, Qtr3,
and Qtr4, its consolidation is Year.
consolidation level The top of an aggregation hierarchy or any
branch or sub-branch below the top, including the input
(leaf) portion of the hierarchy.
currency conversion A process that converts currency values
in a database from one currency into another. For example,
to convert one U. S. dollar into the European euro, the
exchange rate (for example, 0.923702) is multiplied by the
dollar (1* 0.923702). After conversion, the European euro
amount is .92.
data cleansing The process of making inconsistent data
consistent. Examples of inconsistent data are data in which
some values are incorrect or not of the correct data type.
data load rules A set of criteria that determines how to load
data from a text-based file, a spreadsheet, or a relational data
set into a database.
data value See cell.
database outline See outline.
DateTime transformation A set of instructions that defines how
to change or reformat a relational database DateTime data
type to your choice of date format.
denormalization The process of adding redundancy to data in
a database, typically by joining tables to form more complete
sets of data in the individual tables. This process is
performed for the purpose of increasing data retrieval
performance. Contrast with normalization.
dense dimension In block storage databases, a dimension
likely to contain data for every combination of dimension
members. For example, time dimensions are often dense
because they can contain all combinations of all members.
Contrast with sparse dimension.
descendant Any member below a parent in the database
outline. In a dimension that includes years, quarters, and
months, the members Qtr2 and April are descendants of the
member Year.
detail member See leaf member.
dimension A data category used to organize business data for
the retrieval and preservation of values. Dimensions usually
contain hierarchies of related members grouped within
them. For example, a Year dimension often includes
members for each time period, such as quarters and months.
dimension branch A collection of dimension tables organized
in a hierarchical structure, with one of the dimension tables
joined directly to the fact table. A dimension branch defines
a single, potential dimension in an Essbase Integration
Services metaoutline.
196 Glossary

dimension build rules In Essbase, a set of operations similar to
data load rules. Instead of loading data, the dimension build
rules modify the outline based on data in the external data
source file.
dimension table 1) A table that includes numerous attributes
about a specific business process; 2) In Essbase Integration
Services, a container in the OLAP model for one or more
relational tables that define a potential dimension in
Essbase.
dimension type A dimension property that enables the use of
predefined functionality. Dimensions tagged as time have a
predefined calendar functionality.
drill-through report Direct access by Spreadsheet Add-in users
to data stored in the relational data source. Defined in
Essbase Integration Services, a drill-through report is based
on intersection levels (member sets) that Spreadsheet Add-
in users double-click to view detail information that is not
stored in the Essbase database.
duplicate member The second occurrence of a member name
in a data source. Users can determine whether Essbase
Integration Server supports duplicate members, ignores
duplicate members, or adds them as shared members. See
also shared member.
duplicate member name Multiple occurrences of a member
name in a database, with each occurrence representing a
different member. For example, a database has two
members named New York. One member represents New
York state and the other member represents New York city.
duplicate member outline A database outline containing
duplicate member names.
Dynamic Calc and Store members Members in a block storage
outline that Essbase calculates only upon the first retrieval
of the value. Essbase then stores the calculated value in the
database. Subsequent retrievals do not require calculating.
Dynamic Calc members Members in a block storage outline
that Essbase calculates only at retrieval time. Essbase
discards calculated values after completing the retrieval
request.
dynamic calculation In Essbase, a calculation that occurs only
when you retrieve data on a member that is tagged as
Dynamic Calc or Dynamic Calc and Store. The member's
values are calculated at retrieval time instead of being
precalculated during batch calculation.
Dynamic Time Series A process that performs period-to-date
reporting in block storage databases.
encoding A method for mapping bit combinations to
characters for creating, storing, and displaying text. Each
encoding has a name; for example, UTF-8. Within an
encoding, each character maps to a specific bit combination;
for example, in UTF-8, uppercase A maps to HEX41. See
also code page, locale.
Essbase Integration Server The server component of the
Essbase Integration Services product family. Essbase
Integration Services uses the information stored in the
OLAP Metadata Catalog to extract the dimension names
and members names needed to build an Essbase outline
from the data source. When the Essbase outline is complete,
Integration Server extracts data from the data source,
performs the operations specificed in the metaoutline, and
loads the data into the Essbase database.
Essbase Integration Services Console The client component of
the Essbase Integration Services product family. This
graphic interface tool is used to create OLAP models and
metaoutlines, and to load data into an Essbase database.
Essbase Integration Services Shell In Essbase Integration
Services, a command-line tool that you can use to perform
common operations on the Essbase outline and the data in
the Essbase database. For example, you can use the
LOADDATA command to load data.
Essbase OLAP Server See Essbase Server.
Essbase outline See outline.
Essbase Services database A repository of data within Essbase
that contains a multidimensional data storage array. Each
database consists of a defined storage structure (a database
outline), data, security definitions, and other associated
files, such as calc scripts or data load rules. See also
application.
essbase.cfg An optional configuration file for Essbase.
Administrators may edit this file to customize Essbase
Server functionality. Some configuration settings may also
be used with Essbase clients to override Essbase Server
settings.
ESSLANG The Essbase environment variable that defines the
encoding used to interpret text characters. See also
encoding.
Glossary 197
fact table A container for one or more relational tables that
define the data values for each dimension intersection in the
OLAP model. For example, if the OLAP model contains
Products, Region, and Year dimensions, the fact table might
include data values for the number of units of Product A
sold in New York in January.
file delimiter A character, such as a comma or tab, that
separates fields in a data source.
filter A constraint on data sets that restricts values to specific
criteria; for example, to exclude certain tables, metadata, or
values, or to control access.
foreign key In relational databases, a column whose data
values correspond to the values of a key column in another
relational table. See also key column, primary key.
generation A layer in a hierarchical tree structure that defines
member relationships in a database. Generations are
ordered incrementally from the top member of the
dimension (generation 1) down to the child members. Use
the unique generation name to identify a layer in the
hierarchical tree structure.
Hybrid Analysis An analysis mapping low-level data stored in
a relational database to summary-level data stored in
Essbase, combining the mass scalability of relational systems
with multidimensional data.
Hyperion Integration Server Desktop See Essbase Integration
Services Console.
index 1) In Essbase, a method of retrieving data based on
sparse dimensions. Also refers to the index files, collectively;
2) In relational databases, pointers that are logically
arranged by the values of a key. Indexes optimize access to
relational data.
index cache In Essbase, a buffer in memory that holds index
pages.
index entry In Essbase, a pointer to an intersection of sparse
dimensions. Each index entry points to a block on disk and
locates a particular cell within the block by means of an
offset.
index file In Essbase, a file used to store data retrieval
information. It resides on disk and contains index pages.
index page In Essbase, a subdivision of an index file
containing entries that point to data blocks.
input data Any data that is loaded from a data source and is
not generated by calculation.
integrity constraint In relational databases, a rule stating that
each row should have an entry for each required key
column.
Intelligent Help In Essbase Integration Services, procedural
help displayed in a dockable window that accompanies the
OLAP Model and OLAP Metaoutline main windows.
Intelligent Help provides numbered procedures and links
to new automatic-detection options and frequently used
functions.
intersection level In Essbase Spreadsheet Add-in, an Essbase
member combination that defines a specific value. For
example, the member combination Actual, Root Beer, Sales,
Jan, East represents the actual January sales value for root
beer in the Eastern region.
join A link between two relational database tables or topics
based on common content in a column or row. A join
typically occurs between identical or similar items within
different tables or topics. For example, a record in the
Customer table is joined to a record in the Orders table
because the Customer ID value is the same in each table.
join columns In Essbase Integration Services, two relational
table columns that are joined from one table to another.
key column In relational databases, a column or columns that
form a unique identifier for each row. For example,
EMPLOYEE_ID might be a key column.
left frame (1) In the Essbase Integration Services Console
OLAP Metaoutline main window, the area on the left that
enables you to view a list of dimensions previously defined
in the OLAP model. (2) In the OLAP Model main window,
the area on the left that displays a list of the tables and views
available in a source relational database.
level A layer in a hierarchical tree structure that defines
database member relationships. Levels are ordered from the
bottom dimension member (level 0) up to the parent
members.
level 0 block A data block for combinations of sparse, level 0
members.
level 0 member A member that has no children.
198 Glossary

load member In Essbase Integration Services, a member in a
user-defined dimension into which data is loaded. Only
user-defined dimensions require load members. For all non
user-defined dimensions, Essbase Integration Server knows
how to load members and data into the Essbase database.
load properties In Essbase Integration Services, a set of rules
that determine what actions the product performs on
member level names and data as they are loaded.
locale A computer setting that specifies a location's
language, currency and date formatting, data sort order, and
the character set encoding used on the computer. Essbase
uses only the encoding portion. See also encoding,
ESSLANG.
logical column In Essbase Integration Services, a column
created by manipulating the data in one or more physical
columns. Contrast with physical column. See also column.
logical table In relational databases, a table created by
manipulating columns from one or more physical tables.
The logical table is only a view of the data; the columns
remain stored in the original tables and are not physically
duplicated in the logical table. Contrast with physical table.
See also view.
mathematical operator A symbol that defines how data is
calculated in formulas and outlines. Can be any of the
standard mathematical or Boolean operators; for example,
+, -, *, /, and %.
MDDB See multidimensional database.
measures Data values that a user wants to track, such as
Unit_Price and Discount. By default, measures values map
to the accounts dimension in the OLAP model, which maps
to the measure dimension in the OLAP metaoutline, which
in turn maps to the accounts dimension in the Essbase
outline.
measures dimension In Essbase Integration Services, a
dimension that, by default, maps to the accounts dimension
in the Essbase outline.
member A discrete component within a dimension. A
member identifies and differentiates the organization of
similar units. For example, a time dimension might include
members Jan, Feb, and Qtr1.
member combination In Essbase, a list of member names used
to specify a set of data at the intersection of two or more
dimensions. A member combination is specified by using
the cross-dimensional operator -> (a hyphen followed by a
right-angle bracket). For example, the actual sales data for
the month of January in Sample Basic is Sales->Jan-
>Actual.
member level A hierarchical level of detail within a
dimension. For example, in a dimension that defines
geographic areas by nation, which are then subdivided into
provinces, the nation and province categories each
represent a member level. A member level corresponds to a
level in an Essbase outline. The measures dimension
contains actual members that are also member levels.
member load In Essbase Integration Services, the process of
adding dimensions and members (without data) to Essbase
outlines.
metadata A set of data that defines and describes the
properties and attributes of the data stored in a database or
used by an application. Examples of metadata are
dimension names, member names, properties, time
periods, and security.
metaoutline In Essbase Integration Services, a template
containing the structure and rules for creating an Essbase
outline from an OLAP model.
missing data (#MISSING) A marker indicating that data in the
labeled location does not exist, contains no value, or was
never entered or loaded. For example, missing data exists
when an account contains data for a previous or future
period but not for the current period.
Move mode In Essbase Integration Services, a state in which
you can pick up, move, and drop objects in the OLAP Model
main window.
multidimensional Describes a method of referencing data
through three or more dimensions. An individual data value
is the intersection of one member from each dimension.
multidimensional database A method of organizing, storing,
and referencing data through three or more dimensions. An
individual value is the intersection point for a set of
dimensions. Contrast with relational database.
Glossary 199
normalization The process of grouping and removing
redundancy from data so that each entity is in its
appropriate place in the database and only in its appropriate
place. Contrast with denormalization.
numeric transformation In Essbase Integration Services, a set
of instructions that define how to change or reformat a
relational database numeric field type. For example, you
may choose to divide numeric data by 100.
ODBC Open Database Connectivity. A database access
method used from any application regardless of how the
database management system (DBMS) processes the
information.
OLAP Architect See Essbase Integration Services Console.
OLAP Builder See Essbase Integration Services Console.
OLAP Catalog See OLAP Metadata Catalog.
OLAP Command Interface See Essbase Integration Services
Shell
OLAP Integration Server See Essbase Integration Server.
OLAP Metadata Catalog In Essbase Integration Services, a
relational database containing metadata describing the
nature, source, location, and type of data that is pulled from
the relational data source.
OLAP model In Essbase Integration Services, a logical model
(star schema) that is created from tables and columns in a
relational database. The OLAP model is then used to
generate the structure of a multidimensional database. See
also online analytical processing (OLAP).
OLTP See online transaction processing.
online analytical processing (OLAP) A multidimensional,
multiuser, client-server computing environment for users
who analyze consolidated enterprise data in real time. OLAP
systems feature drill-down, data pivoting, complex
calculations, trend analysis, and modeling.
online transaction processing (OLTP) OLTP applications are
commonly referred to as data capture, data entry, or data
collection applications. OLTP applications enable an
organization to capture the large amounts of data resulting
from its daily activities but provide limited capability for
reporting on the data.
Open Database Connectivity (ODBC) Standardized application
programming interface (API) technology that allows
applications to access multiple third-party databases.
outline The database structure of a multidimensional
database, including all dimensions, members, tags, types,
consolidations, and mathematical relationships. Data is
stored in the database according to the structure defined in
the outline.
pass-through transformations In Essbase Integration Services,
a feature that allows you to use functions specific to your
relational database management system (RDBMS) to
extract data values for columns. You can provide a
statement that Essbase Integration Server passes through to
your RDBMS as a part of the SQL SELECT statement. You
provide the statement as a property of a column and the
pass-through feature returns a value for the column.
permission A special privilege that must be assigned to users
or groups to enable them to access or modify secure data.
Permissions include Read, Read/Write and None.
physical column A column that is stored in a relational
database. See also column. Contrast with logical column.
physical table A combination of rows and columns stored in
a relational database. Contrast with logical table.
pointer In relational databases, a data element indicating the
location of data in storage.
primary dimension table A dimension table that joins directly
to the fact table. Additional dimension tables may join to
the primary dimension table to create a dimension branch.
primary key In relational databases, a column (key) that
uniquely identifies a row. For example, Employee_ID.
query governor An Essbase Integration Server parameter or
Essbase Server configuration setting that controls the
duration and size of queries made to data sources.
record A set of information in a data source. Records are
composed of fields, each of which contains one item of
information. A set of records constitutes a table. A single
record constitutes a row in the table. For example, a table
containing personnel information might contain records
(rows) that have three fields: a NAME field, an ADDRESS
field, and a PHONE_NUMBER field.
200 Glossary

recursive table A relational source table that contains
information in one row that is a parent or child of
information in another row. For example, in a relational
source table containing the columns EMPLOYEE_ID,
NAME, and MANAGER_ID, the columns EMPLOYEE_ID
and MANAGER_ID are recursive because MANAGER_ID
refers back to the EMPLOYEE_ID. Using Essbase
Integration Services, you can build an Essbase outline
hierarchy from a recursive source table.
relational database A type of database that stores data in
related two-dimensional tables. Contrast with
multidimensional database.
restructure In Essbase, an operation to regenerate or rebuild
the database index and, in some cases, the data files.
right frame In the Essbase Integration Services Console
OLAP Metaoutline main window, the area on the right, in
which you build a metaoutline. In the OLAP Model main
window, the area on the right, in which you build an OLAP
model.
roll-up See consolidation.
schema In relational databases, a logical model that
represents the data and the relationships between the data.
shared member A member that shares storage space with
another member of the same name, preventing duplicate
calculation of members that occur multiple times in an
Essbase outline.
Shared Services Registry The part of the Shared Services
repository that manages EPM System deployment
information for most EPM System products, including
installation directories, database settings, computer names,
ports, servers, URLs, and dependent service data.
sibling A child member at the same generation as another
child member and having the same immediate parent. For
example, the members Florida and New York are children
of East and each other's siblings.
sparse dimension In block storage databases, a dimension
unlikely to contain data for all member combinations when
compared to other dimensions. Contrast with dense
dimension. For example, not all customers have data for all
products.
SQL See Structured Query Language.
SQL Override In Essbase Integration Services, a function that
enables editing of the standard SQL statements generated
by Integration Server for drill-through reports. ODBC SQL,
Native SQL, and stored procedures can be used when
editing the standard SQL. The edited, user-defined SQL can
be selected to improve data load performance when loading
data into an Essbase database.
staging area A database that you create to meet the needs of
a specific application. A staging area is a snapshot or
restructured version of one or more RDBMS.
standard dimension A dimension that is not an attribute
dimension.
star schema A logical model that represents your relational
data in a form that mirrors that of OLAP data. A star schema
contains a fact table and one or more dimension tables.
string A sequence of characters treated as a unit.
Structured Query Language (SQL) A computer language used to
access data in relational databases.
synonym An alternate name for an object, such as a table or
a view, in a relational database management system
(RDBMS). Some RDBMSs use the term "alias" to refer to a
synonym. Not all RDBMSs support synonyms.
table In relational databases, a form of data storage in which
data is stored in records comprised of fields. Each record is
defined by a unique, or primary, key.
transformation rules In Essbase Integration Services, a set of
instructions that define how to change or reformat the
member names and data you extract from the source
relational database.
two-pass An Essbase property that is used to recalculate
members that are dependent on the calculated values of
other members. Two-pass members are calculated during a
second pass through the outline.
unary operator A mathematical indicator (+, -, *, /, %)
associated with an outline member. The unary operator
defines how the member is calculated during a database roll-
up.
Unicode-mode application An Essbase application wherein
character text is encoded in UTF-8, enabling users with
computers set up for different languages to share
application data.
Glossary 201
union An SQL command that is a type of join that combines
the results of two SELECT statements. A union is often used
to merge lists of values contained in two tables.
user-defined attribute (UDA) An attribute, associated with
members of an outline to describe a characteristic of the
members, that can be used to return lists of members that
have the specified associated UDA.
user-defined dimension Dimensions that you explicitly create
in Essbase Integration Services, rather than dimensions
obtained or built from the relational data source.
user-defined member Members that you explicitly create in
Essbase Integration Services, rather than obtaining and
building them from the relational data source.
user-defined tables Logical tables that you create in Essbase
Integration Services, rather than in the RDBMS. These
virtual tables, which behave as standard RDBMS views, can
be used anywhere regular RDBMS tables or views are used.
User-defined tables enable you to create and to edit OLAP
models without altering your relational schema or
modifying the SQL generated by Integration Services.
validation (1) In Essbase, a process of checking a rules file
against the outline to make sure the rules file is valid. (2) In
Essbase Integration Services, a process of checking the
OLAP model and metaoutline.
view In relational databases, logical table created by
combining columns from one or more tables. A view can
contain metadata and formatting information to query an
OLAP data source.
virtual tables See user-defined tables.
virtual views See user-defined tables.
write-back The ability for a retrieval client, such as a
spreadsheet, to update a database value.
XML Import/Export In Essbase Integration Services, a function
that enables importing data into and exporting data from
an OLAP Metadata Catalog in Extended Markup Language
(XML) file format. Both OLAP models and metaoutlines
can be saved as XML files and imported into other OLAP
Metadata Catalogs.
202 Glossary
Index
Symbols& (ampersand), 13/eis/server/samples/tbcdbase, 110
Aaccess
codes, for metaoutlines, 119codes, for OLAP models, 118exclusive access mode, 114multi-user, 114privileges, common problems, 122problems, correcting, 134setting, 117standard access mode, 114
accessingdata sources, 121OLAP Metadata Catalog, 121, 123servers and databases, troubleshooting, 121
accessing, servers and databases, 61accounts
problems in the RDBMS, 126user, administrative, 126user, problems, 135
ADDDUPLICATESFORASO (ais.cfg parameter), 29adding data source to odbc.ini, 45, 52, 60administration tools, Unicode-enabled, 34administrative accounts, using, 126aggregate storage, 184ais.cfg
IBM DB2 OS/390 configuration parameter (forUNIX), 60
IBM DB2 OS/390 configuration parameter (forWindows), 45
ais.cfg file, 12, 13described, 25JDBC data source mapping, 67, 68storing startup switch settings, 26
ais.cfg file parameters, 28ADDDUPLICATESFORASO, 29UNIFORMVALUEFORMAT, 29
aliases, 37ampersand, 13Anaytic Services, testing connection from Integration
Server to Essbase Server, 132application, non-Unicode mode, 33applications, Unicode-mode, defined, 33artifact limits for source databases, 182artifact limits in Integration Services, 179AT service, 163, 164
Bbacktracking connection problems, 124backups, OLAP Metadata Catalog, 81bat extension files, 149batch files
for loading TBC database, 93Integration Services Shell and, 146running, 149running Integration Services Shell scripts with,
149scheduling manually, 163, 164
batch mode, Integration Services Shell, 146binding, requirement for IBM DB2 databases, 138block storage, 184brackets, in Integration Services Shell syntax, 148building
OLAP Metadata Catalog, 71sample application, 87
CCB_CONCURRENCY table
column descriptions, 115defined, 86
CB_OBJECT_TYPE column, data defined, 115
A B C D E F G H I J L M N O P Q R S T U V W X
Index 203
CB_VERSION table, 86cbs extension files, 149checking
common connection problems, 121release number of Integration Services, 131script syntax for loads, 149
client programs, custom, 34client software
port number, 140problems, correcting, 140RDBMS, common problems, 122RDBMS, correcting problems, 137RDBMS, required, 40troubleshooting, 121
code page, defined, 33codes, access
for metaoutlines, 119for OLAP models, 118
columns, viewing in sample application, 111Command Center, 77command line
Integration Services Shell, 146loading data from, 164loading members from, 163
command syntax, Integration Services Shell, 148Command Window, IBM DB2, 89command-line interface, using, 145commands, Integration Services Shell, 150commands, status of, 152committing records during data load, 15common problems
areas of failure, 123database-specific, 123with connections, 121
communication problems, 123compatibility
between RDBMS and RDBMS client, 137ODBC drivers, 138problems with product versions, 131
components, software, common problems, 122, 123compression dimension, 183concurrent users, 115configuration parameters, 28
ADDDUPLICATESFORASO, 29automatic validation, 28display primary keys, 28UNIFORMVALUEFORMAT, 29
configuration problems (ODBC), 123configuring
data sources on UNIX, 51data sources on Windows, 41ODBC (Open Database Connectivity) data sources,
39ODBC computer location, 40ODBC data sources on UNIX, 51ODBC data sources on Windows, 41odbc.ini file, 51, 52
connectingdatabase client to RDBMS, 126problems with data source, 121, 123problems with OLAP Metadata Catalog, 121, 123setting defaults, 64to Essbase Server, 63to Integration Server, 62to OLAP Metadata Catalog, 62to relational data sources, 61, 64to servers and databases, 61
connectionsareas of failure, 123common problems, 121isolating problems, 124LOADMEMBER command, 130OLAP Metadata Catalog, 121, 123path through components, 125problems, correcting, 134problems, diagnosing, 123problems, isolating, 124testing, 127, 132troubleshooting, 121
correctingconnection problems, 121, 134data source problems, 138database client problems, 137Integration Server problems, 139Integration Services Console problems, 140ODBC problems, 121, 138password problems, 135RDBMS problems, 136user name problems, 135
creatingdatabase for TBC, 92, 108database for TBC_MD, 95ODBC server software data sources, 39OLAP Metadata Catalog automatically, 73
A B C D E F G H I J L M N O P Q R S T U V W X
204 Index
OLAP Metadata Catalog manually, 74, 77OLAP Metadata Catalog tables, 72OLAP Metadata Catalogs, 71, 72sample application, 87tables for TBC database, 93TBC database, 92
critical server error messages, 20cron scheduling daemon, 37, 163
Ddata loads
checking script syntax, 149command line and, 164enabling scheduled loads, 37error messages, 173incremental, script syntax, 151Integration Services Shell and, 163, 164LOADALL command, 159LOADDATA command, 157OLAP Metadata Catalog and, 11, 81scripts, recording, 149time required, 147with TBC sample application tables, 93
data migrationOLAP Metadata Catalog, 75
data sourcesaccessing, 121adding to odbc.ini (UNIX), 45, 52, 60configuring, 39configuring on UNIX systems, 51configuring on Windows systems, 41connecting to, 61, 64, 163, 164connection problems, 121, 123connections to, diagram, 125identifying before loading, 153problems, correcting, 138setting up TBC, 92
data warehouse, 113data, retrieving, 11database (source), artifact limits, 182database client software
environment problems, 126, 137information, 40problems, correcting, 137testing connection to RDBMS, 126
database client software, common problems, 122database scripts
for OLAP Metadata Catalog, 76for TBC database, 92for TBC_MD database, 95
database serverscommon problems, 122problems, correcting, 136
database users, source, 113databases
configuring for ODBC, 39connecting to, 61connections to, diagram, 125OLAP Metadata Catalog, requirements, 72TBC, creating, 92, 108TBC, requirements, 92, 95, 108TBC_MD, creating, 94, 95TBC_MD, requirements, 95user aliases and synonyms, 37vendor-specific problems, 123
DataDirect Text driverconfiguring on UNIX., 55–57configuring on Windows, 45–48
DataDirect, ODBC driver problems, correcting, 138dataload.txt file, 32DB2. See IBM DB2ddtestlib, 139ddtestlib program, 127debug messages, 19defaults
for connections, setting, 64login, setting, 64
Delete Locks command, 115deleting
Integration Server users, 113locks, 115, 116OLAP Metadata Catalog, 79OLAP Metadata Catalog tables, 76read and write locks, 116TBC database tables, 92TBC_MD database tables, 95users, 113
diagnosing problems (connections, ODBC), 121diagram, connections path, 125dialog boxes
Login, 62, 98OLAP Metadata Catalog Setup, 73Sample Application Setup, 90Set Login Defaults, 64
A B C D E F G H I J L M N O P Q R S T U V W X
Index 205

directoriessample application scripts, 91, 101TBC data load script, 91, 99, 101, 103, 106, 109TBC table creation script, 91, 99, 101, 103, 106TBC_MD data load script, 91TBC_MD table creation script, 91, 100, 102, 104,
106, 109disconnecting, users, 113displaying primary keys in OLAP models, 28DISTINCT clause in drill-through SQL, 17DNS, problems, 124domain name server, problems, 124drill-through reports
error messages, 174guidelines, 190limits, 190tables relating to, 84
driver file, ODBC, specifying on UNIX, 129drivers, ODBC, problems, 138dropping tables
OLAP Metadata Catalog, 76TBC database, 92TBC_MD database, 95
DTR_ATTRIBUTES table, 85DTR_INFO table, 85
Eediting
configuration for a data source, 51odbc.ini file, 52
enablingregional options, 35regional options in Windows 2003, 36regional options in Windows XP, 35scheduled loads on UNIX, 37scheduled loads on Windows, 37
encoding, defined, 33environment variables
common problems, 122for database client, problems, 126, 137for ODBC on UNIX, 52ODBC problems, 127
error messagesdata load, 173drill-through reports, 174member load, 170miscellaneous server messages, 175
setting logging level, 19Essbase
Essbase Server, connecting to, 63, 164message file, 31server name problems, 135server, message database, 20unsupported functions in Hybrid Analysis, 186users, defined, 113
Essbase Integration Serverrunning in background, 13
Essbase message.txt file, 31Essbase Server
connecting to, 63connection defaults, setting, 64setting connection information for, 63
Essbase Server, connecting to, 163Essbase Server, target data server, specifying, 153Essbase Services
relationship to Integration Server, 11essbase.mdb file, 20examples, odbc.ini files, 53–59, 58, 59exclusive access mode, 114executable name
for Integration Server, 12for Integration Services Shell, 146
EXIT command, 163extra locks
deleting, 116viewing, 115
Ffile name, Essbase messages file, 17file names, 20fixing.. See troubleshooting
Gguidelines for drill-through reports, 190guidelines for Hybrid Analysis, 183
Hhost names, problems, 135Hybrid Analysis
enabling in manual sample application setup, 87guidelines, 183limits on transformation rules, 185required utilities for sample application setup, 99
A B C D E F G H I J L M N O P Q R S T U V W X
206 Index

sample application for IBM DB2, 99sample application for Microsoft SQL Server, 103sample application for Oracle, 101sample application for Teradata, 105sample application setup, 99transformations not supported, 185unsupported Essbase functions, 186viewing the metaoutline, 112viewing the OLAP model, 111
Hybrid Analysis, defined, 85Hybrid Analysis, tables relating to, 85hyperion user name, permissions required, 37
IIBM DB2
-tvf utility, 77, 89Command Center utility, 77Command Window, 89common problems, 123configuring the Wire Protocol driver on Windows,
43database binding requirement, 138odbc.ini file example (UNIX), 53
IBM DB2 OS/390ais.cfg entry for Windows, 45configuration parameter in ais.cfg (for UNIX), 60configuration parameter in ais.cfg (for Windows),
45default port number, 43odbc.ini file example (UNIX), 54
ignore parent during drill-through, 15incompatibility, problems with product versions,
131incremental loads
LOADALL command, 159LOADDATA command, 157LOADMEMBER command, 154script syntax, 151
informational messages, 20installation
manual steps, UNIX, 70installing
OLAP Metadata Catalog, 71Integration Server
common problems, 121connecting to, 62connection defaults, setting, 64
defined, 11determining user access, 116error message file, 31error messages, 169executable name, 12executable name in UNIX, 12log files, 30logging on to, 151, 163, 164logging out of, 162message file, 31OLAP Metadata Catalog, information in, 81olapisvr file, 12port number, 22, 140, 146prerequisites for, 12problems, correcting, 139reconnecting to, 30server problems, 135shutting down, 30, 163starting, 12, 30starting as a Windows service, 13starting from the command line, 12starting from the Windows Desktop, 13startup switches, 14startup.bat file, 12stopping, 30stopping as a Windows Service, 30stopping from command line, 30stopping from Windows Desktop, 30switches, 14testing connection to Essbase Server, 132testing connection to RDBMS, 130users, defined, 113
Integration Server usersdeleting, 113disconnecting, 113multiple, 115viewing locks, 115
Integration Servicesartifact limits, 179connection path, diagram, 125release number, checking, 131
Integration Services Consolecommon problems, 121port number, 22, 140, 146problems, correcting, 140testing connection to Essbase Server, 134testing connection to RDBMS, 132
A B C D E F G H I J L M N O P Q R S T U V W X
Index 207
Integration Services Shellasynchronous commands, 152batch mode, 146command syntax, 148commands, list, 150description, 146executable name, 146executing commands, 148interactive mode, 146loading data with, 164loading members with, 163running scripts with, 149starting, 145using, 145using to test connections, 130
Integration Services Shell commandsEXIT, 163LOADALL, 159LOADDATA, 157LOADMEMBER, 154LOGIN, 151LOGOUT, 162SETCATALOG, 154SETSOURCE, 153SETTARGET, 153SHUTDOWN, 163STATUS, 152syntax, 148VERSION, 152
Integration Services userscreating, 113viewing, 113
interactive mode, Integration Services Shell, 146is.csh file, using, 128is.sh file, using, 128isolating, connection problems, overview, 124ivtestlib, 139ivtestlib program, 127
JJDBC driver
mapping a data source for Teradata, 67, 68JOIN_HINTS table, 83
Llc*.sql files, 97
ld*.sql files, 93levels of access permissions, 118library path, common problems, 122limits
drill-through report guidelines, 190Hybrid Analysis guidelines, 183Integration Services artifacts, 179source database artifacts, 182transformation rules with Hybrid Analysis, 185transformations not supported by Hybrid Analysis,
185unsupported Essbase functions in Hybrid Analysis,
186listeners, setting, 24LOAD commands, 147LOADALL command, described, 147, 159LOADDATA command
described, 147, 157example of, 164
loadingdata, time required, 147from the command line, 164Integration Services Shell and, 163, 164OLAP Metadata Catalog and, 11, 81test, members into Essbase database, 132
loading datainto TBC database, 93into TBC_MD database using XML Import utility,
97LOADMEMBER command
connections made by, 130described, 147, 154example of, 164using to test connections, 130
loads, scheduled, enabling, 37locale, defined, 33locks
deleting, 115, 116exclusive access mode, 114metaoutlines, 114OLAP models, 114read, deleting, 116read, viewing, 116standard access mode, 114storage location in the OLAP Metadata Catalog,
115timestamps and, 115
A B C D E F G H I J L M N O P Q R S T U V W X
208 Index
unreleased, 115viewing, 115working with, 113, 114write, deleting, 116write, viewing, 116
log fileschanging name and location, 17contents, 30Integration Server, viewing, 30messages recording level, 19
logging level, 20logging on, to servers and databases, 61LOGIN command
described, 151example of, 163, 164
login defaults, setting, 64Login dialog box, 62, 98login problems, correcting, 135login script
diagnosing problems, 128problems, 126
LOGOUT command, 162
Mmanaging
locks and permissions, 113user names and passwords, 135
manual steps, UNIX installation, 70MB_FILTER table, 82MB_TX_RULE table, 82member loads
checking script syntax, 149command line, 163, 164enabling scheduled loads, 37error messages, 170LOADMEMBER command, 154OLAP Metadata Catalog and, 11, 81scripts, recording, 149
Merant.. See DataDirect, ODBC driver problems,correcting
message file, Essbase, 31message file, Integration Server, 31messages, debug, 19messages, error, 169Metadata Catalog, creating Unicode, 74metaoutlines
access codes, 119
access permissions, 117locks, 114opening in exclusive access mode, 114opening in standard access mode, 114overwriting, 114permissions, viewing, 118restoring, 82tables in OLAP Metadata Catalog, 83users, 115validating automatically, 28
Microsoft SQL Serverexample odbc.ini file on UNIX, 58Query Analyzer utility, 77, 89
Microsoft SQL Server driver, configuring onWindows, 48–49
Microsoft SQL Server, common problems, 123migration
OLAP Metadata Catalog, 75MO_ACCESS_CODE column, data defined, 119MO_DESCRIPTIONS table, 84MO_FILTERS table, 83MO_INFO table, 83, 118MO_INTERSECTION table, 85MO_PROPERTIES table, 84, 85MOD_ATTRIBUTES table, 84MOD_INFO table, 84MODEL_ACCESS_CODE column, data defined, 118MS_INFO table, 84MS_PREDICATES table, 84MS_TX_RULE table, 84MSR_INFO table, 84MSR_PREDICATES table, 84MSR_TX_RULE table, 84multi-threaded server, 11multi-user access, 114
Nnames, server problems, 135network listeners, setting, 24network problems, 124non-critical error messages, 20non-Unicode-mode application, defined, 33
OOA_INFO table, 82oc*_upgrd20.sql files, 74, 75
A B C D E F G H I J L M N O P Q R S T U V W X
Index 209
oc_create_*.sql files, 77oc_create_*_unicode.sql files, 95, 96oc_drop_*.sql files, 77oc_upgrade20_*.sql files, 77oc_upgrade61_*.sql files, 77oc_upgrade651_*.sql files, 77oc_upgrade65_*.sql files, 77ocscript directory, contents of, 76OD_DETAILS table, 82OD_INFO table, 82ODBC
common problems, 122driver compatibility, 138driver file, specifying on UNIX, 129environment problems, 126problems, correcting, 138testing connection to RDBMS, 127testing on UNIX, 128testing on Windows, 127tracing on UNIX, 142tracing utility, using, 141troubleshooting, 121
ODBC (Open Database Connectivity)configuring data sources, 39configuring, which computer, 40data sources, odbc.ini file heading, 53environment variables on UNIX, 52required database client software, 40
ODBC Administrator, 41, 42, 127ODBC Data Sources, odbc.ini file section, 129ODBC drivers
adding data source to odbc.ini file on UNIX, 52configuring DataDirect Text driver on UNIX, 55–
57configuring DataDirect Text driver on Windows,
45–48configuring IBM DB2 OS/390 on UNIX, 54configuring IBM DB2 OS/390 on Windows, 43configuring IBM DB2 UDB Wire Protocol on
UNIX, 53configuring IBM DB2 UDB Wire Protocol on
Windows, 43configuring Microsoft SQL Server driver on UNIX,
58configuring Microsoft SQL Server driver on
Windows, 48, 49configuring on UNIX, 51–59
configuring on Windows, 41–51configuring Oracle Wire Protocol on UNIX, 55configuring Oracle Wire Protocol on Windows, 44configuring SQL Server driver on Windows, 48–
49configuring Teradata driver on AIX, 58configuring Teradata driver on HP-UX, 58configuring Teradata driver on Solaris, 59configuring Teradata driver on Windows, 50–51configuring the odbc.ini file on UNIX, 52configuring Wire Protocol drivers on Windows,
42–43editing a data source name on Windows, 51testing Wire Protocol drivers on Windows, 44
odbc.ini fileadding a data source to, 45, 52, 60bracketed headings, 53common problems, 127configuring data sources, 52editing, 51IBM DB2 example, 53IBM DB2 OS/390 example, 54inspecting for problems, 129Microsoft SQL Server example, 58Oracle example, 55Teradata example, 58, 59Teradata example on AIX, 58Teradata example on HP-UX, 58Teradata example on Solaris, 59Trace parameter, 142
ODBCINI variable, 129OLAP Command Script files, 149OLAP Metadata Catalog
accessing, 113backups, 81connecting to, 62, 163, 164connection defaults, setting, 64connection problems, 121, 123creating, 71creating automatically, 73creating tables for manually, 74, 77data migration, 75database platforms supported, 71database requirements, 72deleting, 79deleting locks, 116deleting tables, 74, 77
A B C D E F G H I J L M N O P Q R S T U V W X
210 Index
drill-through tables in, 84Hybrid Analysis tables in, 85identifying before loading, 154information, 71Integration Server and, 11manual editing, 81metaoutline tables, 83OLAP model tables, 82post-setup steps, 79problems, database level, 136recovery, 81upgrading, 75viewing permissions, 118
OLAP Metadata Catalog Setup dialog box, 73OLAP metaoutlines, viewing in sample application,
111, 112OLAP models
access codes, 119access permissions, 117accessing, 113displaying primary keys, 28locks, 114opening in exclusive access mode, 114opening in standard access mode, 114overwriting, 114permissions, viewing, 117restoring, 82tables in OLAP Metadata Catalog, 82users, 115, 116
OLAP models, viewing in sample application, 111OLAPICMD program
problems, 130starting, 146
olapisrv.log file, 14olapisvr file, using to start Integration Server, 12OLAPISVR program
command-line switches, 14starting in UNIX, 12starting using startup.bat file, 12
olapisvr.log file, specifying location, 17OM_DESCRIPTION table, 83OM_INFO table, 82, 117OM_PROPERTIES table, 82OMB_DETAILS table, 82OMB_INFO table, 82open database connectivity. See ODBC (Open
Database Connectivity)
opening metaoutlines, options, 114opening OLAP models, options, 114Oracle
configuring the Wire Protocol driver on Windows,44
odbc.ini file example, 55SQL*Loader, 93SQL*Plus, 77, 89tnsnames.ora file, 138
orphaned locks, deleting, 115, 116OV_INFO table, 83overwriting, OLAP models and metaoutlines,
problem, 114OVL_REL_DETAILS table, 83OVL_REL_INFO table, 83OVP_REL_DETAILS table, 83OVP_REL_INFO table, 83
Pparentheses, adding to drill-through filters, 18password problems, 121, 135permissions
changing, 117for metaoutlines, 117, 118for OLAP models, 117problems in the RDBMS, 126required for hyperion user, 37shutting down Integration Server, 163viewing, 117working with, 113
port 3388, 22, 140, 146prerequisites
for Integration Server, 12Integration Services Shell, 145
primary data source, 153privileges, common problems, 122problems
starting Integration Server, 12system-level, 134TCP/IP, 124with connections, correcting, 121, 123with ODBC, correcting, 121, 123, 137
profile file, 128
A B C D E F G H I J L M N O P Q R S T U V W X
Index 211
QQuery Analyzer utility (Microsoft SQL Server), 77,
89
RRDBMS
client problems, correcting, 137common problems, 122problems, correcting, 136server name problems, 135testing connection from database client, 126testing connection from Integration Server, 130testing connection from Integration Services
Console, 132testing connection to ODBC, 127testing ODBC connection on UNIX, 128testing ODBC connection on Windows, 127user account problems, 126
read access, setting, 117read locks
deleting, 116viewing, 116
rebuilding tables, 76reconnecting to Integration Server, 30recording data load scripts, 149recording scripts, 149records, committing during data load, 15recovery, OLAP Metadata Catalog, 81regional options
enabling, 35enabling in Windows 2003, 36enabling in Windows XP, 35
relational database management system.. See RDBMSrelational databases
client software required, 40connections to, diagram, 125problems, correcting, 136user aliases and synonyms, 37
releasescompatibility problems, 131determining for Integration Services, 152
removingOLAP Metadata Catalog, 79OLAP Metadata Catalog tables, 76TBC database tables, 92TBC_MD database tables, 95
restoring
metaoutlines, 82OLAP Metadata Catalogs, 81OLAP models, 82
restricting access to table records, 23rights, problems in the RDBMS, 126round-trip problem, Unicode as solution, 34running
Integration Server, 12, 30Integration Services Shell, 145scripts with Integration Services Shell, 149
Ssample application
creating, 87creating for Hybrid Analysis, 99creating for Unicode, 108preparation steps, 89setting up automatically, 89setting up manually, 91Unicode (Oracle only), 108viewing, 111, 112
Sample Application Setup dialog box, 90sample database, TBC, 88samples\\tbcdbase directory, contents of, 92scheduled loads, enabling on UNIX, 37scheduling, batch files for loads, 163, 164scripts
for loading Hybrid Analysis data, 93for loading TBC database, 93for loading TBC_MD database, 97for OLAP Metadata Catalog, 76for TBC database, 92for TBC_MD database, 95incremental loads, syntax, 151location, sample application, 91, 101member and data loads, recording, 149running with Integration Services Shell, 149
secondary data source, 153security
access permissions, 117locks, 114problems, 124
semicolons, in Integration Services Shell syntax, 148server problems, 135server software
port number, 140problems, correcting, 139
A B C D E F G H I J L M N O P Q R S T U V W X
212 Index
troubleshooting, 121Servers menu, OLAP Metadata Catalog, Delete Locks
command, 115servers, connecting to, 61SET commands, 147Set Login Defaults dialog box, 64SETCATALOG command
described, 147, 154example of, 163, 164
SETLOCALE command, described, 147SETSOURCE command
described, 147, 153example of, 163, 164
SETTARGET commanddescribed, 147, 153example of, 163, 164
settingconnection defaults, 64connection information for Essbase Server, 63data source, 163, 164Essbase Server, 163, 164network listeners, 24OLAP Metadata Catalog, 154, 163, 164primary data source, 153secondary data source, 153target Essbase Server, 153
shell scriptsfor loading TBC database, 93
SHUTDOWN command, 30, 163shutting down Integration Server, 30, 163software components
common problem areas, 123connection problems, 122
source database users, 113source database, artifact limits, 182SQL scripts
for loading TBC database, 93for OLAP Metadata Catalog, 76, 77for TBC database, 92for TBC_MD database, 95location, sample application, 91, 101
SQL Server. See Microsoft SQL ServerSQL Server driver, configuring on Windows, 48–49SQL*Loader, 93SQL*Plus, 77, 89stack size of thread, specifying, 24standard access mode, 114
startingIntegration Server, 12, 30Integration Server, methods, 12Integration Server, programs necessary, 12Integration Services Shell, 145schedule services on Windows, 37
startup switches for Integration Server, 14startup.bat file, 12, 13
described, 26storing startup switch settings, 27using to start Integration Server, 12
STATUS command, described, 148, 152stopping Integration Server, 30storage
metaoutline, 81OLAP model, 81
switches, for OLAPISVR, 14synonyms, 37syntax, Integration Services Shell commands, 148system-level problems, 134
Ttables
creating for OLAP Metadata Catalog manually, 74,77
creating for TBC database, 92creating for TBC_MD database, 95drill-through, 84Hybrid Analysis, 85metaoutline, 83miscellaneous, 85OLAP model, 82read-only, 81rebuilding tables, 76restricting access, 23upgrading for OLAP Metadata Catalog, 75
tables, viewing in sample application, 111Task Scheduler service
Windows 2003, starting, 37TBC
data load script location, 91, 99, 101, 103, 106, 109database requirements, 92, 95, 108database, creating tables for, 92, 93database, viewing, 111, 112loading data into, 93sample database, 88setting up relational data source, 92
A B C D E F G H I J L M N O P Q R S T U V W X
Index 213
table creation script location, 91, 99, 101, 103, 106viewing columns in, 111viewing metaoutline in, 112viewing OLAP model in, 111viewing tables in, 111
TBC Metaoutlineinformation, 88viewing, 111, 112
TBC Modelinformation, 88viewing, 111, 112
tbc_create_database_name_unicode.sql file, 110TBC_MD
data load script location, 91database requirements, 95database, creating, 94database, creating tables for, 95loading data into using XML Import, 97sample OLAP Metadata Catalog, 88table creation script location, 91, 100, 102, 104,
106, 109TBC_Model_Unicode.xml, 110TCP/IP problems, 124Teradata
example odbc.ini file for AIX, 58example odbc.ini file for HP-UX, 58example odbc.ini file for Solaris, 59mapping a JDBC driver, 67, 68odbc.ini file example, 58, 59
Teradata ODBC driver, configuring on Windows, 50–51
testingconnections, overview, 124database client, 126Integration Server connection to Essbase Server,
132Integration Server connection to RDBMS, 130Integration Services Console connection to
RDBMS, 132Integration Services Console to Essbase Server,
134ODBC connection to RDBMS, 127ODBC on UNIX, 128ODBC on Windows, 127
Text driverconfiguring on UNIX, 55–57configuring on Windows, 45–48
threadsspecifying number during data load, 21specifying stack size, 24
timestamp, locks and, 115tnsnames.ora file, 138Trace parameter, odbc.ini file, 142tracing utility
ODBC for UNIX, 142ODBC for Windows, 142
transformation rules, limits with Hybrid Analysis,185
transformations not supported by Hybrid Analysis,185
troubleshootingconnections, 121ODBC, 121system-level problems, 134TCP/IP, 124
turning off Integration Server, 30
UUnicode
administration tools, 34application modes, 33creating OLAP Metadata Catalog, 74features not supported, 33parameter in LOADALL command, 159, 162parameter in LOADMEMBER command, 155,
156required utilities for sample application setup, 108sample application for IBM DB2, 109sample application setup, 108viewing the metaoutline, 112viewing the OLAP model, 112
Unicode-enabledadministration tools, 34parameter in LOADALL command, 159, 162parameter in LOADMEMBER command, 155,
156Unicode-mode application, defined, 33UNIFORMVALUEFORMAT (ais.cfg parameter), 29UNIX
environment variables for ODBC, 52environment variables, configuring, 52manual installation steps, 70ODBC data sources, configuring, 51ODBC environment variables, 52
A B C D E F G H I J L M N O P Q R S T U V W X
214 Index

ODBC tracing, 142scheduled loads, enabling, 37testing ODBC, 128
unload database and application from memory, 25unreleased locks, deleting, 115, 116upgrading
OLAP Metadata Catalog, 75user accounts, administrative, 126user aliases, 37user names
locks and, 115problems with, 121, 135
user synonyms, 37users
deleting, 113disconnecting, 113Essbase, defined, 113Integration Server, defined, 113managing permissions and locks, 113multiple, 115source database users, 113
UTF-8 encoding, 33
Vvalidation of metaoutlines, 28variables.. See environment variablesVERSION command, described, 148, 152versions, compatibility problems, 131vi program, 52viewing
log files, 30permissions for metaoutlines, 118permissions for OLAP models, 117
viewing sample application, 111, 112
Wwarning messages, 20wide area network (WAN), 62Windows
ODBC testing, 127ODBC tracing, 142testing ODBC, 127
Windows 2003enabling regional options, 36Task Scheduler service, starting, 37
Windows service
Task Scheduler, starting, 37using -I parameter, 19using to start Integration Server, 13using to stop Integration Server, 30
Windows XPenabling regional options, 35ODBC Administrator, 41
write access, setting, 117write locks
deleting, 116viewing, 116
XXML files for loading TBC_MD database, 97XML Import for loading TBC_MD database, 97
A B C D E F G H I J L M N O P Q R S T U V W X
Index 215

A B C D E F G H I J L M N O P Q R S T U V W X
216 Index