
Oracle Database Migration with an Oracle GoldenGate Hub ... · Reduced Oracle GoldenGate resource...
56
1 | ORACLE DATABASE MIGRATION WITH AN ORACLE GOLDENGATE HUB CONFIGURATION Oracle Database Migration with an Oracle GoldenGate Hub Configuration ORACLE WHITE PAPER | AUGUST 2019
Transcript of Oracle Database Migration with an Oracle GoldenGate Hub ... · Reduced Oracle GoldenGate resource...
1 | ORACLE DATABASE MIGRATION WITH AN ORACLE GOLDENGATE HUB CONFIGURATION
Oracle Database Migration with an Oracle GoldenGate Hub Configuration O R A C L E W H I T E P A P E R | A U G U S T 2 0 1 9

2 | ORACLE DATABASE MIGRATION WITH AN ORACLE GOLDENGATE HUB CONFIGURATION
Table of Contents
Introduction 5
Configuration Overview 6
Oracle GoldenGate 6
Oracle GoldenGate Hub 7
Target Database Instantiation 10
Naming Conventions Used Throughout This Paper 10
Configuration Pre-Requisites 11
Evaluate Source Database Support for Oracle GoldenGate 11
Source Database Configuration 12 Oracle Net Connectivity 13 Oracle GoldenGate Database Administrator Account 14
Target Database Configuration 15 Create the Target Database 15 Set Database Initialization Parameters 15 Create GoldenGate Administrator Database Account 16 Create the Database Directory Object 16 Create a Database Link to the Source Database (Optional) 16
Oracle GoldenGate Hub Configuration 16
Install Oracle Client Software 17
Install Oracle GoldenGate Software 18
Install NGINX Reverse Proxy Server 18
Configure an Oracle GoldenGate Microservices Deployment 20
Configure NGINX Reverse Proxy 22
Oracle GoldenGate Configuration 24
Create the Source GoldenGate Credentials 24 Preparing the Oracle Net Configuration Files 24 Create GoldenGate Database Credentials 25
Create the Heartbeat Table on the Source Database 26
Prepare the Source Database Schemas for Instantiation 28
Create and Start the GoldenGate Extract Process 29
Create Autostart Tasks 32
Monitor the Source Database for Long Running Transactions 34
Target Database Instantiation 35

3 | ORACLE DATABASE MIGRATION WITH AN ORACLE GOLDENGATE HUB CONFIGURATION
Oracle RMAN Duplicate Database 35
Oracle Data Pump Export/Import 36
Complete the Oracle GoldenGate Configuration 36
Create the Target Database GoldenGate Credentials 36
Create the Target Database GoldenGate Checkpoint Table 36
Create Heartbeat Tables on the Target Database 38
Create the Oracle GoldenGate Replicat 38 Creating the Replicat for an RMAN Instantiation 39 Creating the Replicat for a Data Pump Instantiation 40
Assign the Autostart Task to Replicat 40
Monitor GoldenGate Replication 41
Testing the Migrated Database 42
Suspend Replication 42
Create a Guaranteed Restore Point (GRP) 43
Validate the Target Database 43
Flashback the Target Database 44 a. Shut down the database. 44 b. Flashback the database. 44 c. Start the database 44
Drop the Guaranteed Restore Point 44
Resume Replication 44
Switch Over to the Migrated Database 45
Determine Whether GoldenGate Replication Lag is Acceptably Low 45
Stop Transactions From Starting on the Source Database 45
Verify That Extract Has Completed Outstanding Transactions 45
Stop the Extract 46
Wait for Replicat to Apply All Trail File Data 46
Switch Over to the Target Database 46
Removing the GoldenGate Configuration 47
Drop the GoldenGate Processes 47
Remove the Autostart Tasks 47
Drop the Heartbeat Tables on the Target Database 47
Drop the Checkpoint Table 48
Remove the GoldenGate Credentials 48
4 | ORACLE DATABASE MIGRATION WITH AN ORACLE GOLDENGATE HUB CONFIGURATION
Appendix A – Example Oracle GoldenGate Deployment Creation Response Files 49
Appendix B – Example Start and Stop Oracle GoldenGate Deployment Scripts 52
Starting the Oracle GoldenGate Deployments 52
Stopping the Oracle GoldenGate Deployments 52

5 | ORACLE DATABASE MIGRATION WITH AN ORACLE GOLDENGATE HUB CONFIGURATION
Introduction
This Oracle GoldeGate Maximum Availability Architecture (MAA) migration solution provides step-by-
step instructions to set up and migrate any 11g Release 2 and later Oracle database, from any system
platform (e.g. AIX, HP UX, Linux), from a single tenant to a multitenant architecture, or from a
database not using Transparent Data Encryption (TDE) to a TDE database. These same MAA best
practices are generally applicable while migrating between on-premises or cloud source and target
database systems, although cloud-specific details will be outlined in a separate paper.
This MAA solution uses a new Oracle GoldenGate Hub solution that delivers the following advantages:
Minimal to zero downtime
Cross database versions support
Cross platform support
Single tenant or multitenant agnostic
Reduced Oracle GoldenGate resource impact on the source and target database systems
The Oracle GoldenGate Hub architecture can be used for multiple Oracle Database migrations.
The diagram below shows the high-level migration flow presented in this white paper:

6 | ORACLE DATABASE MIGRATION WITH AN ORACLE GOLDENGATE HUB CONFIGURATION
Configuration Overview
This section introduces the Oracle GoldenGate configuration with Oracle GoldenGate Microservices Architecture.
Oracle GoldenGate
Oracle GoldenGate provides real-time, log-based change data capture and delivery between homogenous and
heterogeneous systems. This technology enables you to construct a cost-effective and low-impact real-time data
integration and continuous availability solution.
Oracle GoldenGate replicates data from committed transactions with transaction integrity and minimal overhead on
your existing infrastructure. The architecture supports multiple data replication topologies such as one-to-many,
many-to-many, cascading, and bidirectional. Its wide variety of use cases includes real-time business intelligence;
query offloading; zero-downtime upgrades and migrations; and active-active databases for data distribution, data
synchronization, and high availability.
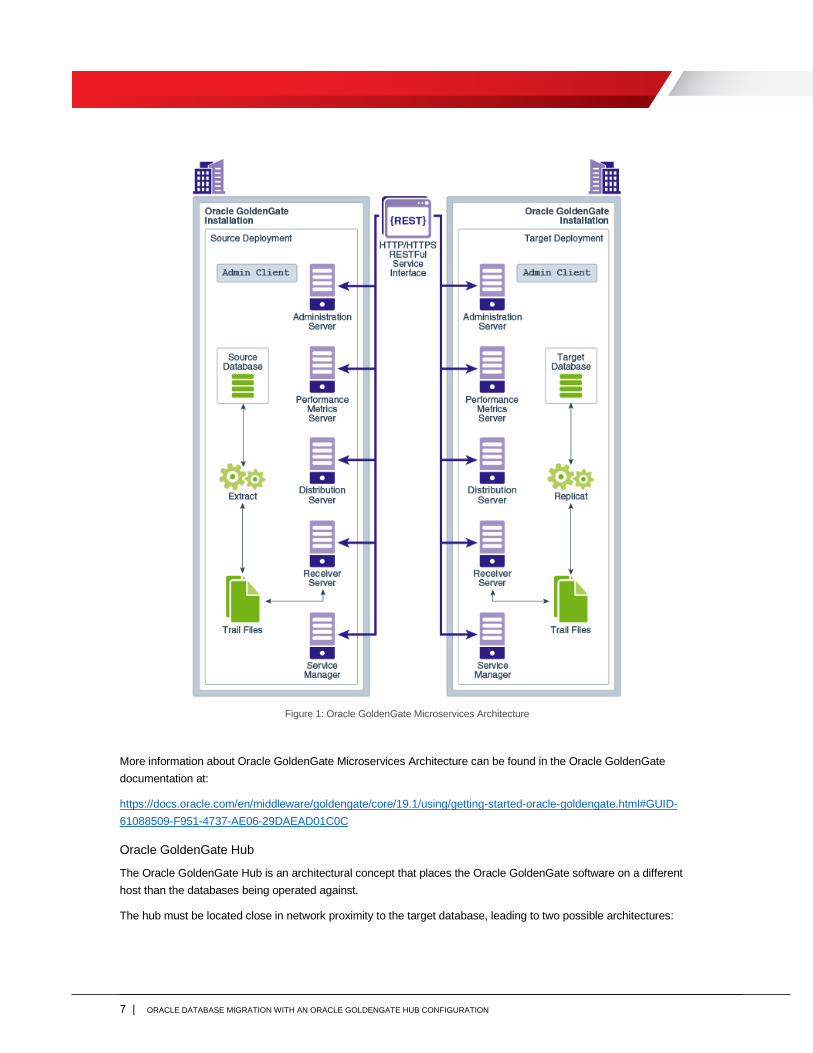
Oracle GoldenGate Microservices Architecture was introduced in Oracle GoldenGate release 12.3, as a new
administration architecture that provides REST-enabled services as part of the Oracle GoldenGate environment.
The REST-enabled services provide remote configuration, administration, and monitoring through HTML5 web
pages, command-line interfaces, and APIs. Figure 1 shows the Oracle GoldenGate Microservices Architecture.
7 | ORACLE DATABASE MIGRATION WITH AN ORACLE GOLDENGATE HUB CONFIGURATION
Figure 1: Oracle GoldenGate Microservices Architecture
More information about Oracle GoldenGate Microservices Architecture can be found in the Oracle GoldenGate
documentation at:
https://docs.oracle.com/en/middleware/goldengate/core/19.1/using/getting-started-oracle-goldengate.html#GUID-
61088509-F951-4737-AE06-29DAEAD01C0C
Oracle GoldenGate Hub
The Oracle GoldenGate Hub is an architectural concept that places the Oracle GoldenGate software on a different
host than the databases being operated against.
The hub must be located close in network proximity to the target database, leading to two possible architectures:

8 | ORACLE DATABASE MIGRATION WITH AN ORACLE GOLDENGATE HUB CONFIGURATION
1. Separate GoldenGate Hub server – The GoldenGate software and processes run on a separate server,
shown in figure 2. Oracle client software for both the source and target database versions are required on the
GoldenGate hub. One advantage of this architecture is that it isolates a lot of the GoldenGate resource usage
off of the source and target database servers. Another advantage of the GoldenGate Hub server is that it can
be used for multiple database migrations. The disadvantage is that an additional server needs allocating with
sufficient memory, CPU, I/O and network bandwidth to handle all of the GoldenGate traffic.
Figure 2: Oracle GoldenGate Hub architecture running on a dedicated server
2. Oracle GoldenGate Hub co-located on the target database server – The GoldenGate software and
processes run on the target database host, shown in figure 3. This topology is recommended in cases where
the database is migrated to a much more powerful server or server with ample resources (CPU, memory, and
I/O) that can be used by Oracle GoldenGate. Additional Oracle client software is required to match the source

9 | ORACLE DATABASE MIGRATION WITH AN ORACLE GOLDENGATE HUB CONFIGURATION
database version, if different to the target database version. The advantage to this architecture is that it
removes much of the GoldenGate resource usage from the source database host and does not require an
additional dedicated server. This is appropriate solution if migrating to a brand new server with ample
resources. The disadvantage is that the target database host must have enough resources for GoldenGate and
the target database.
Figure 3: Oracle GoldenGate Hub running on the target database server
Oracle GoldenGate release 19c or later is required when following the instructions provided in this paper. The latest
version of Oracle GoldenGate can be downloaded from:
http://www.oracle.com/technetwork/middleware/goldengate/downloads/index.html
10 | ORACLE DATABASE MIGRATION WITH AN ORACLE GOLDENGATE HUB CONFIGURATION
Target Database Instantiation
Before replicating data between the source and target databases with Oracle GoldenGate, both databases must
contain the replicated objects in a consistent state such that they won’t cause data conflicts when Replicat applies
changes. The method of target database instantiation is driven by the source and target Oracle Database version,
the endianness of operating system of the database server, and any major database structure differences, such as
migrating to an encrypted or multitenant database.
The following instantiation methods are discussed in this paper:
1. RMAN duplicate database – The source database can be duplicated by RMAN when the source and
destination database versions of Oracle are the same, along with the same platform endian format. This
instantiation method is the fastest way to instantiate the target database.
2. Data Pump export/import – The source database is exported using Oracle Data Pump and imported into
an empty target database. This instantiation method is required when the source and destination Oracle
database versions are different, the platform endian format is different, or there is a database structure
change, such as migrating from single tenant to multitenant architecture or to an encrypted database.
In both of the above cases the source database is online throughout the instantiation.
During the instantiation window it is recommended that you avoid certain database operations to provide the most
optimal environment for fast database replication. The following should be avoiding during the database migration:
1. Data Definition Language (DDL) – When DDL is being replicated the Replicat will serialize data to
ensure that there are no locking issues between DML and DDL on the same objects.
2. Large batch DML – Running large batch operations, like a single transaction that affects multi-millions of
rows, can slow down replication rates.
The two different instantiation methods are described in detail in the Target Database Instantiation section.
Naming Conventions Used Throughout This Paper
Throughout this paper, examples are provided for REST API endpoints to manage the Oracle GoldenGate
configuration using two deployments (SOURCE and TARGET). The REST API is used so that the commands can
easily be integrated into an automated database migration script. The script can be run locally or remotely from any
server with access to the GoldenGate Hub with curl and python installed. Alternatively, you can use Admin Client
commands to manage the GoldenGate Hub. Admin Client is a standalone command-line interface used to create
and manage GoldenGate replication. Refer to the Command Line Interface Reference for Oracle GoldenGate for
Admin Client commands:
https://docs.oracle.com/en/middleware/goldengate/core/19.1/gclir/index.html
Here is an example of key arguments given in the GoldenGate REST APIs used throughout this paper:
$ curl -s –K access.cfg https://<GG Hub>/<Deployment
Name>/adminsrvr/services/v2/credentials/goldengate -XGET | python -m json.tool
access.cfg: To prevent the GoldenGate administrator account name and password from being exposed on the
command line, it is recommended that you include the user name and password in a configuration file, which is
read by curl.

11 | ORACLE DATABASE MIGRATION WITH AN ORACLE GOLDENGATE HUB CONFIGURATION
Example:
user = "oggadmin:password"
GG Hub: The hostname or IP address of the GoldenGate Hub server. For example, gghub-server.
Deployment Name: This is the name of the Oracle GoldenGate deployment. For example, SOURCE or TARGET.
Example:
$ curl -s –K access.cfg https://gghub-
server/SOURCE/adminsrvr/services/v2/credentials/goldengate -XGET | python -m
json.tool
The example Extract name used in this paper is EXT1 and the Replicat is called REP1.
The REST calls can be made from either the Oracle GoldenGate Hub, or any machine that can access the
GoldenGate hub through the HTTPS protocol.
Configuration Pre-Requisites
Evaluate Source Database Support for Oracle GoldenGate
Oracle GoldenGate has a number of requirements of the source database, detailed below.
Database patch requirements
It is a best practice to apply the latest bundle patch and PSU (Patch Set Update) on both the source and target
databases. The full recommended patch list can be found in My Oracle Support note 2193391.1, which covers
database versions 11.2.0.4 onwards.
It is recommended that you also apply the patch for bug 28849751 to the source database if network round trip
latency between the source database and GoldenGate Hub is greater than 8ms, and if the latest database bundle
patch or PS/CPU (Critical Patch Update) does not include it.
Data type support
On the source database use the dictionary view DBA_GOLDENGATE_SUPPORT_MODE to determine if there are any
objects that are not fully supported for extraction by Oracle GoldenGate due to data type replication limitations.
SQL> SELECT owner, object_name FROM DBA_GOLDENGATE_SUPPORT_MODE
WHERE support_mode NOT IN ('FULL',’ID_KEY’);
Any tables that are listed in the above query must be excluded from capture using the GoldenGate Extract
parameter TABLEEXCLUDE owner.object_name. These objects must be manually copied to the target database
at the end of the database migration process.
Refer to the Oracle GoldenGate documentation for a list of unsupported data types for integrated Extract:
https://docs.oracle.com/en/middleware/goldengate/core/19.1/oracle-db/1-understanding-whats-
supported.html#GUID-110CD372-2F7E-4262-B8D2-DC0A80422806

12 | ORACLE DATABASE MIGRATION WITH AN ORACLE GOLDENGATE HUB CONFIGURATION
Find more details about the GoldenGate TABLEEXCLUDE parameter at:
https://docs.oracle.com/en/middleware/goldengate/core/19.1/reference/index.html
3. Row uniqueness
Oracle GoldenGate requires a unique row identifier on the source and target tables to locate the correct target rows
for replicated updates and deletes.
This is normally taken care of with primary key or unique key indexes. If there are tables identified that do not have
any such keys, GoldenGate must construct a pseudo key that contains all of the allowable columns in the table,
excluding virtual columns, UDTs, function-based columns, extended (32K) VARCHAR2/NVARCHAR2 columns, and
any columns that are explicitly excluded from the Oracle GoldenGate configuration by an Oracle GoldenGate user.
If the source database is version 12g Release 2 or later, use the data dictionary view
DBA_GOLDENGATE_NOT_UNIQUE to identify all of the tables that do not have a primary key or non-null unique
columns.
You can define a substitute key if the table has columns that always contain unique values. You define this
substitute key by including a KEYCOLS clause within the Extract TABLE parameter and the Replicat MAP parameter.
The specified key will override any existing primary or unique key that Oracle GoldenGate finds.
Refer to the Oracle GoldenGate documentation for more details about ensuring row uniqueness in source tables.
https://docs.oracle.com/en/middleware/goldengate/core/19.1/oracle-db/additional-oracle-goldengate-configuration-
considerations.html#GUID-644099C5-8950-496C-8592-446FB1566AFD
Source Database Configuration
The source database prerequisites are described in the MAA white paper “Oracle GoldenGate Performance Best
Practices” at https://www.oracle.com/technetwork/database/availability/maa-gg-performance-1969630.pdf under
"Configuring the Source Database” section. The key prerequisites are:
Enable ARCHIVELOG mode for the database.
Enable database force logging to ensure that all changes are found in the redo by the Oracle GoldenGate
Extract process.
Enable database minimal supplemental logging. Additional schema level supplemental logging for
replicated objects also required.
Configure the streams pool with the initialization parameter STREAMS_POOL_SIZE.
Enable GoldenGate replication by enabling the initialization parameter
ENABLE_GOLDENGATE_REPLICATION.
Install the UTL_SPADV package for integrated Extract performance analysis.

13 | ORACLE DATABASE MIGRATION WITH AN ORACLE GOLDENGATE HUB CONFIGURATION
Additionally, there are two more items that need configuring:
Oracle Net Connectivity
Oracle Net connectivity should be optimized to provide the best performance for the remote GoldenGate Extract
running on the hub. This can be done by creating a separate Oracle Net Listener on the source database host,
which also serves not to interfere with the current production listener service.
It is recommended that you set the source database listener to use a higher SDU size due to performance
improvements with a remote GoldenGate Extract. Please note that even though the listener is setting the maximum
possible SDU size, the smallest size will be used if requested by the client. For example, if the listener sets SDU to
2MB but the client requests the default 8KB SDU, the connection to the database will use an 8KB SDU size. The
maximum value for the SDU size for Oracle Database 11g Release 2 is 64KB (65536 bytes), and for later database
releases the maximum value is 2MB (2097152 bytes).
It is recommended that you use Oracle Net or Secure Sockets Layer (SSL) encryption for connections to the source
database. Refer to the Oracle Database Security Guide for more information about SSL with Oracle Net:
https://docs.oracle.com/en/database/oracle/oracle-database/19/dbseg/configuring-secure-sockets-layer-
authentication.html#GUID-6AD89576-526F-4D6B-A539-ADF4B840819F
Create a separate listener for the sole purpose of the database migration. Creating a separate TNS_ADMIN directory
on the source database host ensures separation between the current and newly configured migration listener. This
new TNS_ADMIN directory will contain our sqlnet.ora and listener.ora parameter files. The following
example sqlnet.ora and listener.ora files are configured with SSL and an increased SDU size for Oracle
Database 12g Release 1 and later:
sqlnet.ora
SQLNET.IGNORE_ANO_ENCRYPTION_FOR_TCPS = TRUE
SQLNET.WALLET_OVERRIDE = FALSE
SQLNET.EXPIRE_TIME = 10
WALLET_LOCATION =
(SOURCE=(METHOD=FILE)(METHOD_DATA=(DIRECTORY=/u01/oracle/tcps_wallets)))
SSL_VERSION = 1.2
# Parameters required for Net encryption if not using SSL Authentication, replacing
# the above parameters:
# SQLNET.ENCRYPTION_SERVER = accepted
# SQLNET.ENCRYPTION_TYPES_SERVER= (AES256)
DEFAULT_SDU_SIZE = 2097152
listener.ora
Migration =
(DESCRIPTION_LIST =
(DESCRIPTION =
(SDU = 2097152)
(ADDRESS = (PROTOCOL = TCPS)(HOST = <source database host>)(PORT = 2484))
)
)

14 | ORACLE DATABASE MIGRATION WITH AN ORACLE GOLDENGATE HUB CONFIGURATION
SID_LIST_Migration = (SID_LIST = (SID_DESC = (SDU = 2097152) (SID_NAME =
<ORACLE_SID>) (ORACLE_HOME = <ORACLE_HOME>)))
If the source database is Oracle RAC, configure the migration listener on all cluster nodes running instances for the
database. This way, if one instance goes down during the migration, the service can migrate to a surviving instance.
Configure the SSL wallet on all Oracle RAC nodes.
To start/stop/status the migration listener, make sure the following environment variables are set and then issue the
listed commands:
export ORACLE_HOME=<oracle home directory>
export PATH=$PATH:$ORACLE_HOME/bin
export TNS_ADMIN=<TNS admin directory>
To start the listener:
$ lsnrctl start Migration
To stop the listener:
$ lsnrctl stop Migration
To get the current status of the listener:
$ lsnrctl status Migration
Oracle GoldenGate Database Administrator Account
If the source database is currently part of a GoldenGate configuration the GoldenGate administrator account may
already exist. If the user already exists, you need to confirm the permissions are correctly granted, and if not grant
them.
If no GoldenGate administrator user exists, the user must be created, and the recommended username is GGADMIN
for single tenant and PDBs, and C##GGADMIN for a CDB database.
Verify the Existence of an Oracle GoldenGate Administrator Account
If you are using Oracle Multitenant, also check for all PDBs, using a statement similar to the following example:
SQL> SELECT name, username FROM cdb_goldengate_privileges a, v$pdbs b
WHERE a.con_id = b.con_id UNION SELECT decode(a.con_id,1,'CDB ROOT'), username
FROM cdb_goldengate_privileges a, v$pdbs b WHERE a.con_id=1;
For a single tenant database use the following example:
SQL> SELECT username FROM dba_goldengate_privileges;
These queries should return no rows if GoldenGate has never been configured on the database.
If a GoldenGate administrator user already exists, it should be used for the database migration GoldenGate
configuration. Make sure the permissions listed below are granted to the current GoldenGate administrator account.
Throughout this white paper the database GoldenGate administrator account will always be named GGADMIN.
Use the following example to create a new GoldenGate administrator account.
15 | ORACLE DATABASE MIGRATION WITH AN ORACLE GOLDENGATE HUB CONFIGURATION
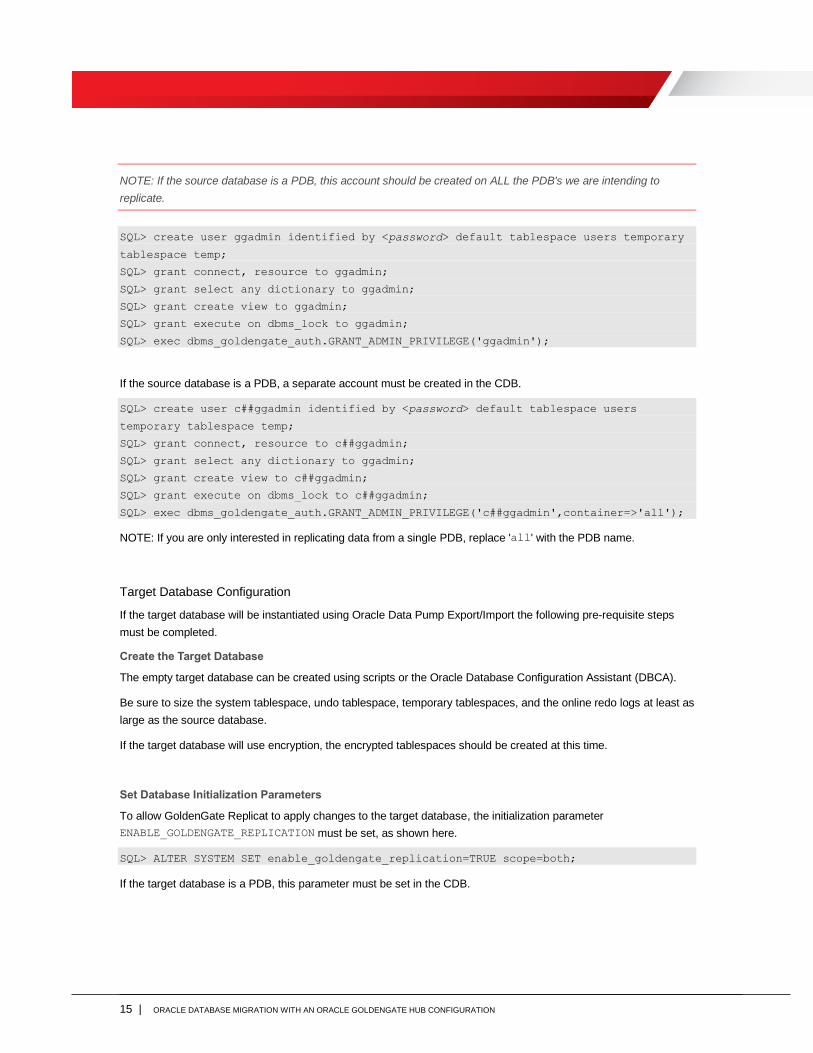
NOTE: If the source database is a PDB, this account should be created on ALL the PDB's we are intending to
replicate.
SQL> create user ggadmin identified by <password> default tablespace users temporary
tablespace temp;
SQL> grant connect, resource to ggadmin;
SQL> grant select any dictionary to ggadmin;
SQL> grant create view to ggadmin;
SQL> grant execute on dbms_lock to ggadmin;
SQL> exec dbms_goldengate_auth.GRANT_ADMIN_PRIVILEGE('ggadmin');
If the source database is a PDB, a separate account must be created in the CDB.
SQL> create user c##ggadmin identified by <password> default tablespace users
temporary tablespace temp;
SQL> grant connect, resource to c##ggadmin;
SQL> grant select any dictionary to ggadmin;
SQL> grant create view to c##ggadmin;
SQL> grant execute on dbms_lock to c##ggadmin;
SQL> exec dbms_goldengate_auth.GRANT_ADMIN_PRIVILEGE('c##ggadmin',container=>'all');
NOTE: If you are only interested in replicating data from a single PDB, replace 'all' with the PDB name.
Target Database Configuration
If the target database will be instantiated using Oracle Data Pump Export/Import the following pre-requisite steps
must be completed.
Create the Target Database
The empty target database can be created using scripts or the Oracle Database Configuration Assistant (DBCA).
Be sure to size the system tablespace, undo tablespace, temporary tablespaces, and the online redo logs at least as
large as the source database.
If the target database will use encryption, the encrypted tablespaces should be created at this time.
Set Database Initialization Parameters
To allow GoldenGate Replicat to apply changes to the target database, the initialization parameter
ENABLE_GOLDENGATE_REPLICATION must be set, as shown here.
SQL> ALTER SYSTEM SET enable_goldengate_replication=TRUE scope=both;
If the target database is a PDB, this parameter must be set in the CDB.
16 | ORACLE DATABASE MIGRATION WITH AN ORACLE GOLDENGATE HUB CONFIGURATION
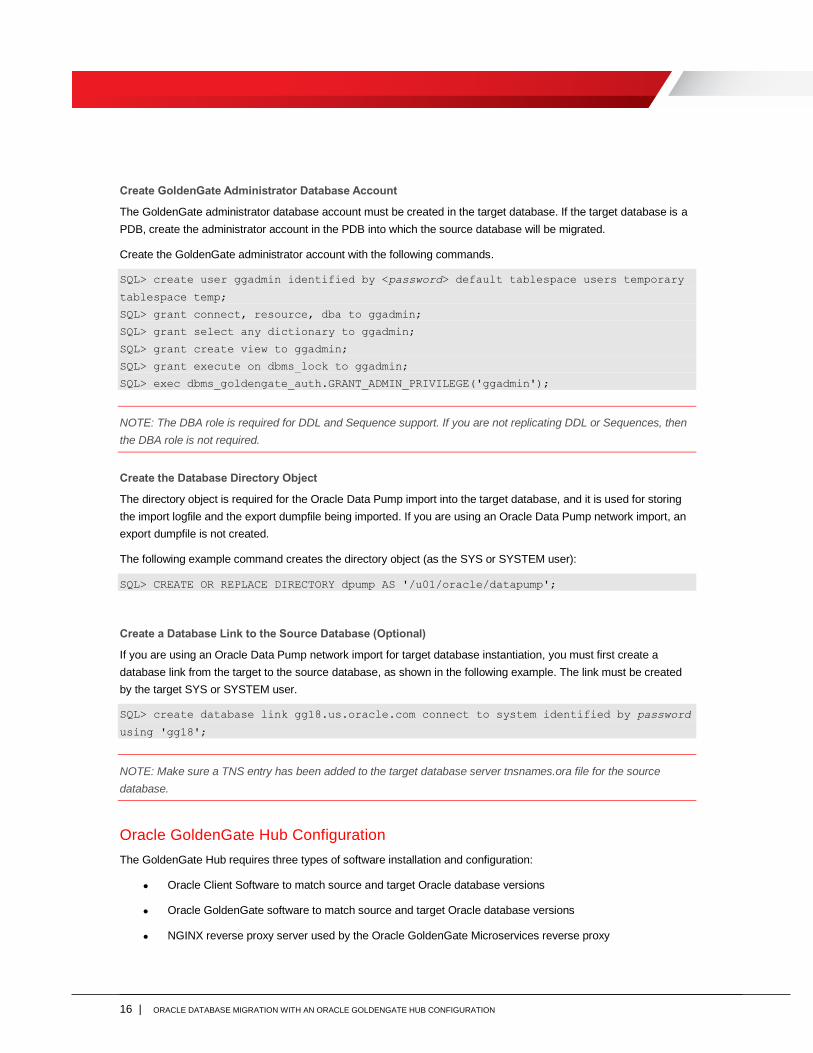
Create GoldenGate Administrator Database Account
The GoldenGate administrator database account must be created in the target database. If the target database is a
PDB, create the administrator account in the PDB into which the source database will be migrated.
Create the GoldenGate administrator account with the following commands.
SQL> create user ggadmin identified by <password> default tablespace users temporary
tablespace temp;
SQL> grant connect, resource, dba to ggadmin;
SQL> grant select any dictionary to ggadmin;
SQL> grant create view to ggadmin;
SQL> grant execute on dbms_lock to ggadmin;
SQL> exec dbms_goldengate_auth.GRANT_ADMIN_PRIVILEGE('ggadmin');
NOTE: The DBA role is required for DDL and Sequence support. If you are not replicating DDL or Sequences, then
the DBA role is not required.
Create the Database Directory Object
The directory object is required for the Oracle Data Pump import into the target database, and it is used for storing
the import logfile and the export dumpfile being imported. If you are using an Oracle Data Pump network import, an
export dumpfile is not created.
The following example command creates the directory object (as the SYS or SYSTEM user):
SQL> CREATE OR REPLACE DIRECTORY dpump AS '/u01/oracle/datapump';
Create a Database Link to the Source Database (Optional)
If you are using an Oracle Data Pump network import for target database instantiation, you must first create a
database link from the target to the source database, as shown in the following example. The link must be created
by the target SYS or SYSTEM user.
SQL> create database link gg18.us.oracle.com connect to system identified by password
using 'gg18';
NOTE: Make sure a TNS entry has been added to the target database server tnsnames.ora file for the source
database.
Oracle GoldenGate Hub Configuration
The GoldenGate Hub requires three types of software installation and configuration:
Oracle Client Software to match source and target Oracle database versions
Oracle GoldenGate software to match source and target Oracle database versions
NGINX reverse proxy server used by the Oracle GoldenGate Microservices reverse proxy

17 | ORACLE DATABASE MIGRATION WITH AN ORACLE GOLDENGATE HUB CONFIGURATION
The following sections provide details about the required software installations.
Install Oracle Client Software
Oracle GoldenGate requires libraries that are installed as part of the Oracle Client Runtime installation. The client
software version installed must be the same release number as the database that GoldenGate will be connected to.
For example, if the source is Oracle Database 12c Release 2, and the target is Oracle Database 18c, two different
client software installations are required. One for Oracle Database 12c and another for Oracle Database 18c. If both
source and target database releases are the same, a single Oracle client software installation is required.
NOTE: Do not install the Oracle instant client software because it does not contain all of the required libraries.
The Oracle client software can be downloaded from https://edelivery.oracle.com. On Oracle Software Delivery Cloud
select the Release category and search for ”Oracle Database Client”.
When you are installing the software, select to install the Oracle Client Runtime software, as shown in the example
below.
Figure 4: Oracle Client Software Installation

18 | ORACLE DATABASE MIGRATION WITH AN ORACLE GOLDENGATE HUB CONFIGURATION
Remember to install Oracle client software that matches both the source and target database releases into separate
ORACLE_HOME directories.
Install Oracle GoldenGate Software
You must install the Oracle GoldenGate software release that supports the source and target Oracle Database
releases. The Oracle GoldenGate software compatibility matrix can be found at
https://www.oracle.com/technetwork/middleware/ias/downloads/fusion-certification-100350.html
Download the latest Oracle GoldenGate software from https://edelivery.oracle.com. Select the Release category and
search for ”Oracle GoldenGate”. It is recommended that you install the latest available release of Oracle
GoldenGate, which is currently 19c Release 1. Using Oracle GoldenGate 19c Release 1 allows the cross endian
extract where the operating system running GoldenGate Extract is a different endianness from the source database
platform.
If the source and target database releases are different, make sure you install the Oracle GoldenGate software
twice, once for each database release. Figure 5 below shows the software installer option for the database releases.
Figure 5. Select the Oracle GoldenGate release for your Oracle Database version
Remember to Install the Oracle GoldenGate software into separate directories.
Install NGINX Reverse Proxy Server
The Oracle GoldenGate reverse proxy feature allows a single point of contact for all of the GoldenGate
microservices associated with a GoldenGate deployment. Without reverse proxy, the GoldenGate deployment
microservices are contacted using a URL consisting of a hostname or IP address and separate port numbers, one
for each of the services. For example, to contact the Service Manager you may use

19 | ORACLE DATABASE MIGRATION WITH AN ORACLE GOLDENGATE HUB CONFIGURATION
http://gghub.example.com:9100, the Administration Server is http://gghub.example.com:9101, the
administration server of deployment #2 may be https://gghub.example.com:9111, and so on.
With reverse proxy, port numbers are not required to connect to the microservices, as they are replaced with the
deployment name. Using the previous example, to connect to the Service Manager you use the URL
https://gghub.example.com, the Admin Server of deployment #1 (named Source) would use
https://gghub.example.com/Source/adminsrvr, and the administration server of deployment #2 (named
Target) would be https://gghub.example.com/Target/adminsrvr.
The Oracle GoldenGate reverse proxy is recommended to ensure easy access to microservices and provide
enhanced security and manageability.
The Oracle GoldenGate reverse proxy feature uses NGINX-based reverse proxy. The following instructions describe
how to configure the reverse proxy.
1. Check that NGINX is not already installed (as root).
$ sudo rpm -qa |grep nginx
If not installed, nothing is returned.
If NGINX is installed, the output is similar to the following.
nginx-mod-http-xslt-filter-1.12.2-2.el7.x86_64
nginx-mod-http-image-filter-1.12.2-2.el7.x86_64
nginx-filesystem-1.12.2-2.el7.noarch
nginx-mod-mail-1.12.2-2.el7.x86_64
nginx-mod-http-perl-1.12.2-2.el7.x86_64
nginx-1.12.2-2.el7.x86_64
nginx-all-modules-1.12.2-2.el7.noarch
nginx-mod-http-geoip-1.12.2-2.el7.x86_64
nginx-mod-stream-1.12.2-2.el7.x86_64
2. If NGINX is not already installed, install it. The following instructions assume the YUM (Yellowdog Updated
Modified) is installed and configured for easier package installation.
$ sudo yum install epel-release
$ sudo yum update
$ sudo yum install nginx
3. Start NGINX.
$ sudo nginx
4. Verify that NGINX is running.
$ curl -I 127.0.0.1
HTTP/1.1 200 OK
Server: nginx/1.12.2

20 | ORACLE DATABASE MIGRATION WITH AN ORACLE GOLDENGATE HUB CONFIGURATION
Date: Wed, 4 Apr 2019 21:48:43 GMT
Content-Type: text/html
Content-Length: 3700
Last-Modified: Wed, 4 Apr 2019 05:06:50 GMT
Connection: keep-alive
ETag: "5abdc5ea-e74"
Accept-Ranges: bytes
Complete documentation for NGINX installation can be found at https://docs.nginx.com/nginx/admin-guide/installing-
nginx/installing-nginx-open-source/.
Configure an Oracle GoldenGate Microservices Deployment
A separate GoldenGate deployment is required for each database release that is being operated against, similar to
the Oracle client software and GoldenGate software installations. If both the source and target databases are the
same release, only a single deployment is required.
Each deployment is created with an Administration Server and (optionally) Performance Metrics Server. There is no
need to create a Distribution or Receiver Server due to the fact that the trail files are stored on the same server as
the Replicat process.
A single Oracle GoldenGate Service Manager is created by the first deployment creation. Subsequent deployments
are created using the existing Service Manager.
There are two ways to create an Oracle GoldenGate deployment:
1. Using the Oracle GoldenGate Configuration Assistant (oggca.sh) – a graphical tool for deployment
creation
2. Using a response file in silent mode, containing all of the deployment parameter values
Both methods of deployment produce the same result, but when you create multiple deployments it is easier to use
option #2 with a response file. Appendix A contains an example response file with parameter changes needed for
creating two deployments, one of which is for the different source and target database releases, using Oracle
GoldenGate 19c. There are no default response files contained in the Oracle GoldenGate software installation,
because the initial deployment must be created using oggca.sh. The screenshot below in Figure 6 shows where a
response file is created in oggca.sh.

21 | ORACLE DATABASE MIGRATION WITH AN ORACLE GOLDENGATE HUB CONFIGURATION
Figure 6: Creating a deployment response file
After using the example response file in Appendix A to set the correct parameters, create the initial deployment
using the following command.
$ cd $GG_HOME/bin
$ ./oggca.sh -silent -responseFile /u01/oracle/target_deployment.rsp
When complete the following message will be displayed:
Linux, x64, 64bit (optimized) on Mar 28 2019 14:38:11
Operating system character set identified as UTF-8.
Stopping...STOPPED.
Successfully Setup Software.
If the source and target databases are different Oracle releases, for example 12g Release 2 and 19c, an additional
deployment must be created.
Repeat the deployment of for second Oracle GoldenGate installation, making sure you set the parameters differently
from the first deployment, especially the port numbers and deployment name. The second deployment does not
create a new service manager, instead using the one already created by the first deployment. Refer to Appendix A
for an example response file for creating the second deployment.
NOTE: Make sure that you use the response file template for the Oracle GoldenGate software version that was
installed, because the parameter names and number of parameters may vary per release.

22 | ORACLE DATABASE MIGRATION WITH AN ORACLE GOLDENGATE HUB CONFIGURATION
After each deployment is created, the deployment is automatically started. Refer to Appendix B for example scripts
to start and stop the deployments.
Throughout this white paper, two GoldenGate deployments will be referenced, named SOURCE and TARGET.
Configure NGINX Reverse Proxy
Because a single GoldenGate Service Manager is in use on the GoldenGate Hub, reverse proxy configuration is
simplified by using a single reverse proxy server.
1. Create a server certificate for NGINX.
A certificate is required for NGINX to authenticate client requests using HTTPS. Correct corporate standards should
be followed in creating or obtaining the certificate.
The certificate should be coped to the location /etc/nginx/ogg.pem.
The new certificate will be read by NGINX later when the configuration is reloaded.
2. Set the GoldenGate environment variables and create the NGINX configuration files.
Make sure the OGG_HOME environment variable is set to the home directory for the GoldenGate software running the
Service Manager (the first deployment created above).
export OGG_HOME=/app/oracle/goldengate/target
export PATH=$PATH:$OGG_HOME/bin
$ $OGG_HOME/lib/utl/reverseproxy/ReverseProxySettings –u <username> -P <password> -o
ogg.conf http://localhost:9100
The user name and password specified by the –u and –P parameters should mirror the GoldenGate administrator
(non-database) account specified with the initial deployment creation (in the ADMINISTRATOR_USER and
ADMINISTRATOR_PASSWORD response file parameters). The port number (9100) should also match the Service
Manager port number specified in the initial deployment creation (in the PORT_SERVICEMANAGER response file
parameter).
This command needs to be re-run every time the GoldenGate deployments configurations changes, for example
when adding or removing a deployment.
3. Replace the existing NGINX configuration with the new configuration.
$ sudo mv ogg.conf /etc/nginx/conf.d/
4. Test the new NGINX configuration.
$ sudo nginx -t
nginx: the configuration file /etc/nginx/nginx.conf syntax is ok
nginx: configuration file /etc/nginx/nginx.conf test is successful
5. Reload NGINX and the new configuration.
$ sudo nginx -s reload

23 | ORACLE DATABASE MIGRATION WITH AN ORACLE GOLDENGATE HUB CONFIGURATION
6. Test Oracle GoldenGate Microservices connectivity.
A simple test is to query the health of the deployments using the following command.
$ curl -s –K access.cfg https://localhost/services/v2/config/health -XGET | python -m
json.tool
Sample output:
{
"$schema": "api:standardResponse",
"links": [
{
"href": "https://localhost/services/v2/config/health",
"mediaType": "application/json",
"rel": "canonical"
},
{
...
"response": {
"$schema": "ogg:health",
"criticalResources": [
{
"deploymentName": "source",
"healthy": true,
"name": "adminsrvr",
"status": "running",
"type": "service"
},
{
"deploymentName": "target”,
"healthy": true,
"name": "adminsrvr",
"status": "running",
"type": "service"
},
],
"deploymentName": "ServiceManager",
"healthy": true,
"serviceName": "ServiceManager",
"started": "2019-03-28T21:52:42.835Z"
}
}

24 | ORACLE DATABASE MIGRATION WITH AN ORACLE GOLDENGATE HUB CONFIGURATION
Oracle GoldenGate Configuration
This section describes the Oracle GoldenGate configuration steps that must be done on the GoldenGate Hub before
instantiating the target database.
Create the Source GoldenGate Credentials
The GoldenGate database credentials are required to allow GoldenGate processes to connect to the source and
target databases. Using a GoldenGate credential store prevents clear text passwords from being stored in any of the
Extract or Replicat parameter files. Because the target database has not yet been created, only the source database
credential is created in this step. The target database credential is created in a later step.
Preparing the Oracle Net Configuration Files
The database credential uses the Oracle Easy Connect naming method, which does not require the use of a local
tnsnames.ora file, unless the database version is earlier than release 19c and using SSL authentication. In those
cases, Easy Connect naming cannot be used, and tnsnames.ora is required.
The following is an example tnsnames.ora entry for a pre-19c source Oracle RAC database with SSL
authentication.
GGSOURCE =
(DESCRIPTION=
(SDU=2097152) # Or set to 65536 for 11.2.0.4 database
(CONNECT_TIMEOUT=10)(RETRY_COUNT=3)
(ADDRESS=(PROTOCOL=TCPS)(HOST=<primary db scan address>)(PORT=2484))
(CONNECT_DATA=(SERVICE_NAME=<db service name>))
)
If the source database is using SSL authentication and the database is an earlier version than 19c, a sqlnet.ora
file with the following parameters is required.
SSL_CLIENT_AUTHENTICATION=TRUE
SSL_SERVER_DN_MATCH=OFF
SQLNET.EXPIRE_TIME = 10
SQLNET.WALLET_OVERRIDE = FALSE
WALLET_LOCATION =
(SOURCE=(METHOD=FILE)(METHOD_DATA=(DIRECTORY="/u01/oracle/network")))
SSL_VERSION = 1.2
DEFAULT_SDU_SIZE=2097152 # Change to 65536 for 11.2.0.4 database
NOTE: Make sure you copy the SSL wallet from the source database environment to the DIRECTORY directory on
the GoldenGate Hub.
Lastly, if the source database uses Oracle Net encryption instead of SSL authentication, and the database is of any
version, a sqlnet.ora file is required with the following parameters.
SQLNET.ENCRYPTION_CLIENT = required
SQLNET.ENCRYPTION_TYPES_CLIENT= (AES256)

25 | ORACLE DATABASE MIGRATION WITH AN ORACLE GOLDENGATE HUB CONFIGURATION
# The SDU size is only required for databases earlier than 19c:
DEFAULT_SDU_SIZE=2097152 # Change to 65536 for 11.2.0.4 database
Oracle Database 19c enhanced the Easy Connect naming method, renaming it to Easy Connect Plus. Refer to the
Oracle Net Administrators Guide for more information about the Easy Connect Plus naming method.
https://docs.oracle.com/en/database/oracle/oracle-database/19/netag/configuring-naming-methods.html#GUID-
8C85D289-6AF3-41BC-848B-BF39D32648BA
Create GoldenGate Database Credentials
If you are using a tnsnames.ora file, create the credential to the source database using the TNS alias.
$ curl -s –K access.cfg https://gghub-
server/SOURCE/adminsrvr/services/v2/credentials/goldengate/source -X POST --data
'{"userid":"ggadmin@GGSOURCE", "password":"<password>"}' | python -m json.tool
If you are not using a tnsnames.ora file, but the database version is an earlier release than 19c, create the
credential to the source database using the following Easy Connect naming example (with a SCAN listener).
$ curl -s –K access.cfg https://gghub-
server/SOURCE/adminsrvr/services/v2/credentials/goldengate/source -X POST --data
'{"userid":"ggadmin@database-host-scan:1521/database_service_name",
"password":"<password>"}' | python -m json.tool
The following example shows credential creation for a 19c source database that is configured with Oracle RAC and
SSL authentication.
curl -s –K access.cfg https://gghub-
server/SOURCE/adminsrvr/services/v2/credentials/goldengate/source -X POST --data
'{"userid":"ggadmin@tcps://database-host-scan:2484/db_service_name?sdu=2097152&
SSL_SERVER_DN_MATCH=NO&ssl_server_cert_dn=’cn=common_name’&wallet_location=’/u01/orac
le/network’", "password":"<password>"}' | python -m json.tool
The following is an example of creating a credential that is using Oracle Net encryption, enabled in the sqlnet.ora
file, with an Oracle RAC database.
$ curl -s –K access.cfg https://gghub-
server/SOURCE/adminsrvr/services/v2/credentials/goldengate/source -X POST --data
'{"userid":"ggadmin@tcp://database-host-scan:1521/db_service_name?sdu=2097152",
"password":"<password>"}' | python -m json.tool
For a multitenant database, separate credentials must be created for the CDB and the PDB being migrated using
the guidelines above.
To show the GoldenGate credentials created, use the following commands.
26 | ORACLE DATABASE MIGRATION WITH AN ORACLE GOLDENGATE HUB CONFIGURATION
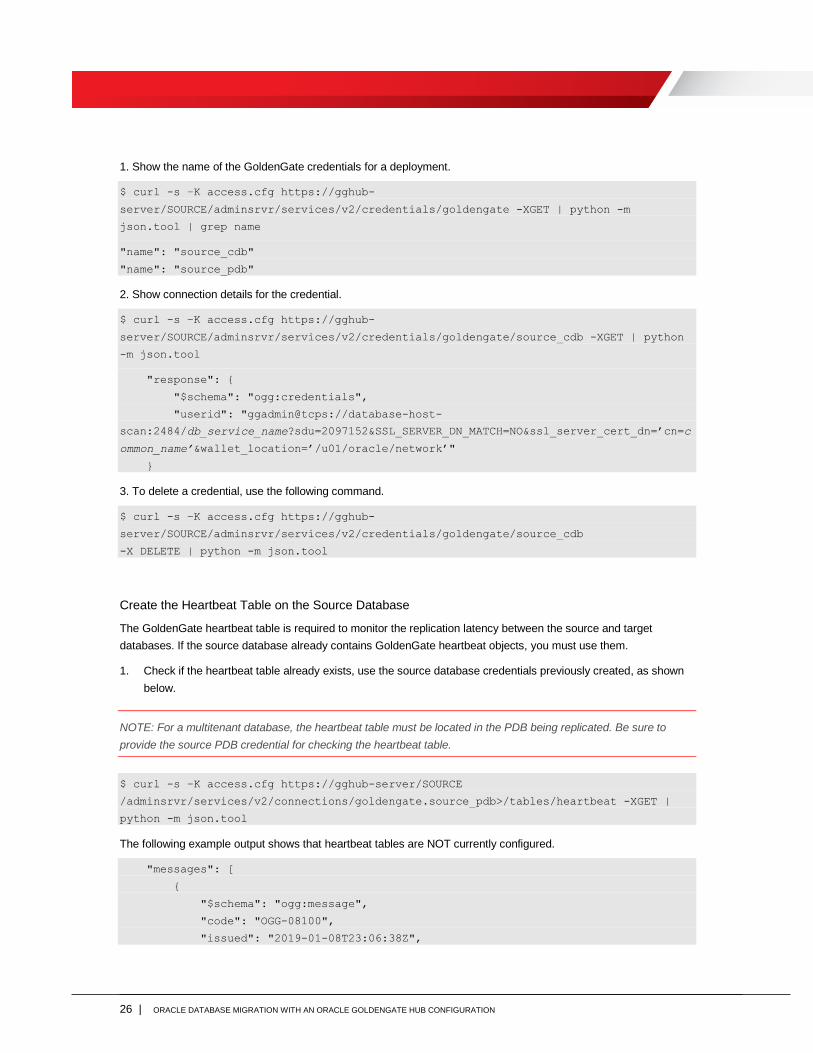
1. Show the name of the GoldenGate credentials for a deployment.
$ curl -s –K access.cfg https://gghub-
server/SOURCE/adminsrvr/services/v2/credentials/goldengate -XGET | python -m
json.tool | grep name
"name": "source_cdb"
"name": "source_pdb"
2. Show connection details for the credential.
$ curl -s –K access.cfg https://gghub-
server/SOURCE/adminsrvr/services/v2/credentials/goldengate/source_cdb -XGET | python
-m json.tool
"response": {
"$schema": "ogg:credentials",
"userid": "ggadmin@tcps://database-host-
scan:2484/db_service_name?sdu=2097152&SSL_SERVER_DN_MATCH=NO&ssl_server_cert_dn=’cn=c
ommon_name’&wallet_location=’/u01/oracle/network’"
}
3. To delete a credential, use the following command.
$ curl -s –K access.cfg https://gghub-
server/SOURCE/adminsrvr/services/v2/credentials/goldengate/source_cdb
-X DELETE | python -m json.tool
Create the Heartbeat Table on the Source Database
The GoldenGate heartbeat table is required to monitor the replication latency between the source and target
databases. If the source database already contains GoldenGate heartbeat objects, you must use them.
1. Check if the heartbeat table already exists, use the source database credentials previously created, as shown
below.
NOTE: For a multitenant database, the heartbeat table must be located in the PDB being replicated. Be sure to
provide the source PDB credential for checking the heartbeat table.
$ curl -s –K access.cfg https://gghub-server/SOURCE
/adminsrvr/services/v2/connections/goldengate.source_pdb>/tables/heartbeat -XGET |
python -m json.tool
The following example output shows that heartbeat tables are NOT currently configured.
"messages": [
{
"$schema": "ogg:message",
"code": "OGG-08100",
"issued": "2019-01-08T23:06:38Z",

27 | ORACLE DATABASE MIGRATION WITH AN ORACLE GOLDENGATE HUB CONFIGURATION
"severity": "INFO",
"title": "Heartbeat table ggadmin.gg_heartbeat does not exist.",
"type": http://docs.oracle.com/goldengate/c1910/gg-
winux/GMESG/oggus.htm#OGG-08100
},
{
"$schema": "ogg:message",
"code": "OGG-08100",
"issued": "2019-01-08T23:06:38Z",
"severity": "INFO",
"title": "Heartbeat table ggadmin.gg_heartbeat_seed does not exist.",
"type": http://docs.oracle.com/goldengate/c1910/gg-
winux/GMESG/oggus.htm#OGG-08100
},
{
"$schema": "ogg:message",
"code": "OGG-08100",
"issued": "2019-01-08T23:06:38Z",
"severity": "INFO",
"title": "Heartbeat table ggadmin.gg_heartbeat_history does not exist.",
"type": http://docs.oracle.com/goldengate/c1910/gg-
winux/GMESG/oggus.htm#OGG-08100
}
]
The following example output shows that the GoldenGate heartbeat table already exists:
"messages": [
{
"$schema": "ogg:message",
"code": "OGG-08100",
"issued": "2019-01-08T23:31:08Z",
"severity": "INFO",
"title": "HEARTBEAT table ggadmin.gg_heartbeat exists.",
"type": http://docs.oracle.com/goldengate/c1910/gg-
winux/GMESG/oggus.htm#OGG-08100
},
...
{
"$schema": "ogg:message",
"code": "OGG-08100",
"issued": "2019-01-08T23:31:08Z",
"severity": "INFO",
"title": "HEARTBEAT table ggadmin.gg_heartbeat_seed supplemental logging
ENABLED.",

28 | ORACLE DATABASE MIGRATION WITH AN ORACLE GOLDENGATE HUB CONFIGURATION
"type": http://docs.oracle.com/goldengate/c1910/gg-
winux/GMESG/oggus.htm#OGG-08100
},
...
"response": {
"$schema": "ogg:tablesHeartbeat",
"addTrandata": true,
"frequency": 300,
"partitioned": false,
"purgeFrequency": 1,
"retentionTime": 30,
"targetOnly": false
}
If a heartbeat table is already in use, the same tables are used by the new migration GoldenGate Extract.
2. If the existing heartbeat table's frequency is not the default 60 seconds, note the current value and modify it to
60 seconds for the duration of the migration.
NOTE: Remember what the frequency value is BEFORE changing it so you can revert it after the migration is
complete.
Modify the heartbeat update frequency.
$ curl -s –K access.cfg https://gghub-
server/SOURCE/adminsrvr/services/v2/connections/goldengate.source_pdb/tables/heartbea
t -X PATCH --data '{"frequency":60}'| python -m json.tool
3. If the heartbeat tables do not exist, create the heartbeat tables in the source database.
$ curl -s –K access.cfg https://gghub-server/SOURCE
/adminsrvr/services/v2/connections/goldengate.source_pdb/tables/heartbeat -X POST
--data '{}'| python -m json.tool
The target database heartbeat tables are created after the database is instantiated.
Prepare the Source Database Schemas for Instantiation
You must prepare for replication the source schemas for all of the database schemas that are part of the database
migration and will be replicated.
NOTE: Preparing the database schemas for instantiation MUST be done before the GoldenGate Extract process is
created.

29 | ORACLE DATABASE MIGRATION WITH AN ORACLE GOLDENGATE HUB CONFIGURATION
1. Use the following command to instantiate each database schema.
$ curl -s –K access.cfg https://gghub-
server/SOURCE/adminsrvr/services/v2/connections/goldengate.source_pdb/trandata/schema
-X POST --data '{"operation":"add","schemaName":"soesmall",
"prepareCsnMode":"nowait"}' | python -m json.tool
2. Use the following example commands to check each prepared schema in the source database.
Check single schema with the following command.
$ curl -s –K access.cfg https://gghub-server/SOURCE
/adminsrvr/services/v2/connections/goldengate.source_pdb/trandata/schema -X POST --
data '{"operation":"info","schemaName":"soesmall"}'| python -m json.tool
Check for all database schemas (from which you can pull out the schemas you are replicating) with the following
command.
$ curl -s –K access.cfg https://gghub-server/SOURCE
/adminsrvr/services/v2/connections/goldengate.source_pdb/trandata/schema -X POST --
data '{"operation":"info","schemaName":"*"}'| python -m json.tool
Create and Start the GoldenGate Extract Process
The following section describes how to verify the existence of the Extract, add an Extract, start and stop the process,
and delete the Extract.
1. Check for Extract existence (in case it was previously created and not removed).
$ curl -s –K access.cfg https://gghub-
server/SOURCE/adminsrvr/services/v2/extracts/EXT1 -X GET | python -m json.tool
The following example shows the response if the Extract does NOT exist.
"messages": [
{
"$schema": "ogg:message",
"code": "OGG-12029",
"issued": "2019-01-31T04:52:41Z",
"severity": "INFO",
"title": "The extract with name 'EXT1' does not exist.",
"type": http://docs.oracle.com/goldengate/c1910/gg-
winux/GMESG/oggus.htm#OGG-12029
}
The following example shows the response if the Extract does exist.
"messages": [],
"response": {

30 | ORACLE DATABASE MIGRATION WITH AN ORACLE GOLDENGATE HUB CONFIGURATION
"$schema": "ogg:extract",
"begin": "now",
"config": [
"Extract EXT1",
"ExtTrail aa",
"UseridAlias source_cdb DOMAIN goldengate",
"TRANLOGOPTIONS PERFORMANCEPROFILE HIGH",
"TRANLOGOPTIONS _readaheadcount 64"
"REPORTCOUNT EVERY 15 MINUTES, RATE",
"STATOPTIONS REPORTFETCH",
"DDL EXCLUDE ALL",
"Table pdb1.soesmall.*;"
],
"credentials": {
"alias": "source_cdb",
"domain": "goldengate"
},
"registration": {
"containers": [
"PDB1"
],
"csn": 51162830
},
"source": {
"tranlogs": "integrated"
},
"status": "stopped",
"targets": [],
"type": "Integrated"
}
2. Create the Extract process.
The following are the minimum recommended Extract parameters.
-- Replace with trail file naming standard
EXTTRAIL aa
TRANLOGOPTIONS PERFORMANCEPROFILE HIGH
TRANLOGOPTIONS _readaheadcount 64 -- Required for streaming protocol (bug fix
28849751)
DISCARDFILE APPEND
REPORTCOUNT EVERY 15 MINUTES, RATE
STATOPTIONS REPORTFETCH
31 | ORACLE DATABASE MIGRATION WITH AN ORACLE GOLDENGATE HUB CONFIGURATION
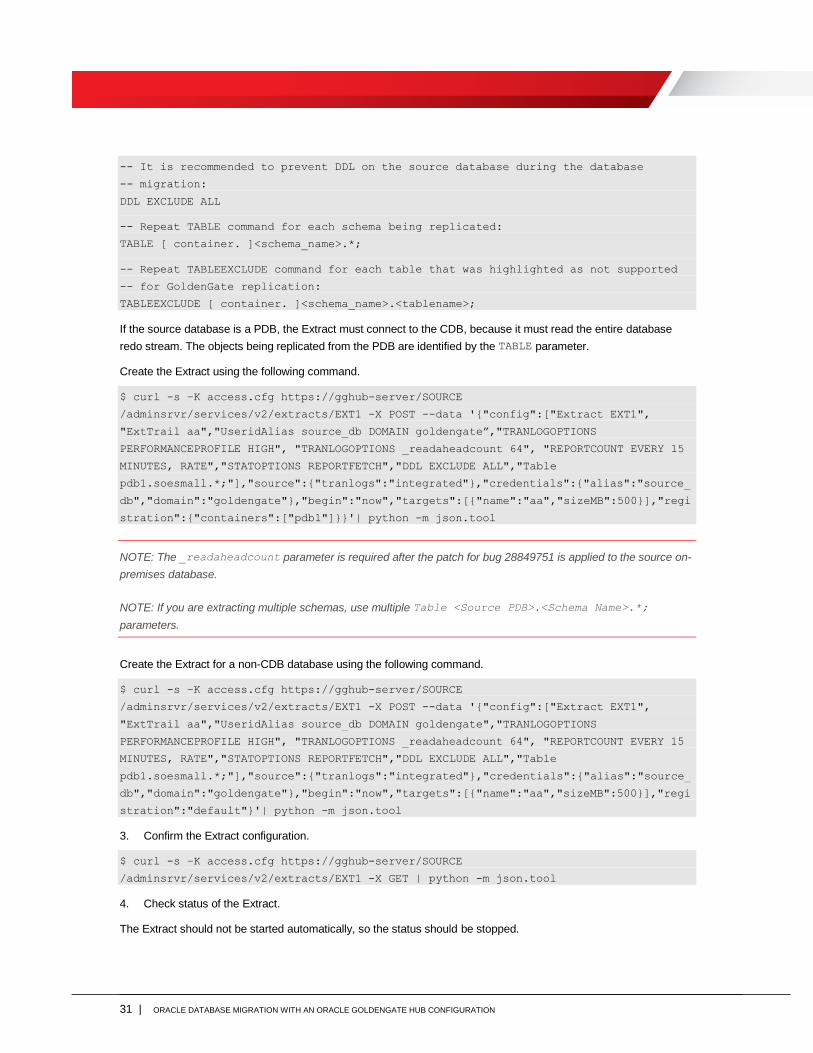
-- It is recommended to prevent DDL on the source database during the database
-- migration:
DDL EXCLUDE ALL
-- Repeat TABLE command for each schema being replicated:
TABLE [ container. ]<schema_name>.*;
-- Repeat TABLEEXCLUDE command for each table that was highlighted as not supported
-- for GoldenGate replication:
TABLEEXCLUDE [ container. ]<schema_name>.<tablename>;
If the source database is a PDB, the Extract must connect to the CDB, because it must read the entire database
redo stream. The objects being replicated from the PDB are identified by the TABLE parameter.
Create the Extract using the following command.
$ curl -s –K access.cfg https://gghub-server/SOURCE
/adminsrvr/services/v2/extracts/EXT1 -X POST --data '{"config":["Extract EXT1",
"ExtTrail aa","UseridAlias source_db DOMAIN goldengate”,"TRANLOGOPTIONS
PERFORMANCEPROFILE HIGH", "TRANLOGOPTIONS _readaheadcount 64", "REPORTCOUNT EVERY 15
MINUTES, RATE","STATOPTIONS REPORTFETCH","DDL EXCLUDE ALL","Table
pdb1.soesmall.*;"],"source":{"tranlogs":"integrated"},"credentials":{"alias":"source_
db","domain":"goldengate"},"begin":"now","targets":[{"name":"aa","sizeMB":500}],"regi
stration":{"containers":["pdb1"]}}'| python -m json.tool
NOTE: The _readaheadcount parameter is required after the patch for bug 28849751 is applied to the source on-
premises database.
NOTE: If you are extracting multiple schemas, use multiple Table <Source PDB>.<Schema Name>.*;
parameters.
Create the Extract for a non-CDB database using the following command.
$ curl -s –K access.cfg https://gghub-server/SOURCE
/adminsrvr/services/v2/extracts/EXT1 -X POST --data '{"config":["Extract EXT1",
"ExtTrail aa","UseridAlias source_db DOMAIN goldengate","TRANLOGOPTIONS
PERFORMANCEPROFILE HIGH", "TRANLOGOPTIONS _readaheadcount 64", "REPORTCOUNT EVERY 15
MINUTES, RATE","STATOPTIONS REPORTFETCH","DDL EXCLUDE ALL","Table
pdb1.soesmall.*;"],"source":{"tranlogs":"integrated"},"credentials":{"alias":"source_
db","domain":"goldengate"},"begin":"now","targets":[{"name":"aa","sizeMB":500}],"regi
stration":"default"}'| python -m json.tool
3. Confirm the Extract configuration.
$ curl -s –K access.cfg https://gghub-server/SOURCE
/adminsrvr/services/v2/extracts/EXT1 -X GET | python -m json.tool
4. Check status of the Extract.
The Extract should not be started automatically, so the status should be stopped.

32 | ORACLE DATABASE MIGRATION WITH AN ORACLE GOLDENGATE HUB CONFIGURATION
$ curl -s –K access.cfg https://gghub-server/SOURCE
/adminsrvr/services/v2/extracts/EXT1/info/status -X GET | python -m json.tool
The following example shows the expected result with Extract NOT started.
"messages": [],
"response": {
"$schema": "ogg:extractStatus",
"lag": 0,
"lastStarted": null,
"position": "0.0",
"sinceLagReported": 208,
"status": "stopped"
}
5. Start the Extract.
$ curl -s –K access.cfg https://gghub-server/SOURCE
/adminsrvr/services/v2/commands/execute -X POST --data
'{"name":"start","processName":"EXT1"}' | python -m json.tool
Wait 2 minutes and then check the status of the Extract.
$ curl -s –K access.cfg https://gghub-server/SOURCE
/adminsrvr/services/v2/extracts/EXT1/info/status -X GET | python -m json.tool
The output after a successful start should be similar to the following.
"response": {
"$schema": "ogg:extractStatus",
"lag": 1,
"lastStarted": "2019-01-31T19:09:45.524Z",
"position": "0.51251093",
"processId": 4702,
"sinceLagReported": 2,
"status": "running"
}
Create Autostart Tasks
Autostart and autorestart profiles are needed to automatically start the GoldenGate processes when the deployment
is started. By default GoldenGate processes are not part of an active profile to automatically start them.
1. Check to see if an autostart profile exisits, and if one does, you can delete it or update it.
Check for the existence of the autostart profile.
$ curl -s –K access.cfg https://gghub-
server/SOURCE/adminsrvr/services/v2/config/types/ogg:managedProcessSettings/values/og
g:managedProcessSettings:MIGRATE01 -XGET | python -m json.tool

33 | ORACLE DATABASE MIGRATION WITH AN ORACLE GOLDENGATE HUB CONFIGURATION
The following example output displays when the profile doesn't exist.
"messages": [
{
"$schema": "ogg:message",
"code": "OGG-12029",
"issued": "2019-02-06T17:22:43Z",
"severity": "INFO",
"title": "The value with name 'ogg:managedProcessSettings:MIGRATE01' does
not exist.",
"type": http://docs.oracle.com/goldengate/c1910/gg-
winux/GMESG/oggus.htm#OGG-12029
}
]
When the profile does exist, you’ll see the following output.
"response": {
"autoRestart": {
"delay": 60,
"disableOnFailure": true,
"enabled": true,
"onSuccess": false,
"retries": 5,
"window": 1200
},
"autoStart": {
"delay": 60,
"enabled": true
}
}
If the profile already exists, then it can either be deleted or updated with the settings recommended below.
To delete the profile:
$ curl -s –K access.cfg https://gghub-
server/SOURCE/adminsrvr/services/v2/config/types/ogg:managedProcessSettings/values/og
g:managedProcessSettings:MIGRATE01 -XDELETE | python -m json.tool
To update the current profile with recommended settings:
$ curl -s –K access.cfg https://gghub-
server/SOURCE/adminsrvr/services/v2/config/types/ogg:managedProcessSettings/values/og
g:managedProcessSettings:MIGRATE01 -XPUT --data '{"autoStart": {"enabled":
true,"delay": 60},"autoRestart": {"delay": 60,"disableOnFailure": true,"enabled":
true,"onSuccess": false,"retries": 5,"window": 1200}}' | python -m json.tool

34 | ORACLE DATABASE MIGRATION WITH AN ORACLE GOLDENGATE HUB CONFIGURATION
2. Create the following autostart and autorestart profiles for both the source and target deployments.
If the profile doesn't currently exist, or was deleted in the previous step, create the profile.
$ curl -s –K access.cfg https://gghub-
server/SOURCE/adminsrvr/services/v2/config/types/ogg:managedProcessSettings/values/og
g:managedProcessSettings:MIGRATE01 -XPOST --data '{"autoStart": {"enabled":
true,"delay": 60},"autoRestart": {"delay": 60,"disableOnFailure": true,"enabled":
true,"onSuccess": false,"retries": 5,"window": 1200}}' | python -m json.tool
3. Assign the autostart profile to the Extract.
NOTE: You cannot yet assign the profile to the GoldenGate Replicat because it has not yet been created.
$ curl -s –K access.cfg https://gghub-server/SOURCE
/adminsrvr/services/v2/extracts/EXT1 -X PATCH --data '{"managedProcessSettings":
"MIGRATE01"}' | python -m json.tool
Confirm that the Extract is configured with the new profile (partial output shown).
$ curl -s –K access.cfg https://gghub-
server/SOURCE/adminsrvr/services/v2/extracts/EXT1 -X GET | python -m json.tool
"managedProcessSettings": "MIGRATE01",
Monitor the Source Database for Long Running Transactions
Before the database can be used to instantiate the target database, it is important that you make sure any
transactions that were active at the time the GoldenGate Extract was created have committed to ensure that
GoldenGate replicates all transactional data.
For example, consider the following timeline.
35 | ORACLE DATABASE MIGRATION WITH AN ORACLE GOLDENGATE HUB CONFIGURATION
Transaction #1 commits on the source database at SCN 1100, but it is not captured by Extract because Extract only
processes complete transactions, and the process was created after the transaction had begun. Because SCN 750
is less than 800, this transaction is ignored.
Use the following query on the source database to determine when all of the transactions that were started before
the Extract was created have committed or rolled back, making it safe to start instantiating the target database.
SQL> SELECT capture_name, c.start_scn, t.start_scn
FROM dba_capture c, v$transaction t WHERE t.start_scn < c.start_scn;
When the query returns no rows, it is safe to begin the target database instantiation.
Target Database Instantiation
The following two methods for target database instantiation are provided in this paper.
1. Oracle RMAN duplicate database – The source database can be duplicated by RMAN when the source
and destination database versions of Oracle are the same, along with the same platform endian format.
This instantiation method is the fastest way to instantiate the target database.
2. Data Pump export/import – The source database is exported using Oracle Data Pump and imported into
an empty target database. This instantiation method is required when the source and destination Oracle
database versions are different, the platform endian format is different, or there is a database structure
change, such as migrating from single tenant to multitenant or to an encrypted database.
Oracle RMAN Duplicate Database
Duplicating a source database using RMAN is a much simpler method to copy an entire database if the source and
destination platform endianness is compatible, and the Oracle Database versions are the same. Complete details
about using RMAN to duplicate the source database can be found in the Oracle Backup and Recovery User’s Guide
at
https://docs.oracle.com/en/database/oracle/oracle-database/19/bradv/rman-duplicating-databases.html#GUID-
F31F9FCE-B610-49EB-B9DB-44B9AA4E838F
After the target database has been opened after duplicating it, there are some additional configuration steps that
need to be done.
1. When the target database is opened after duplication, the SCN to which the database was recovered must be
recorded. The SCN is used in a later step to start the Oracle GoldenGate Replicat process. You can get the
SCN from the target database alert.log or from the data dictionary. Both examples are shown below.
Get the SCN from the alert.log entry.
RESETLOGS after incomplete recovery UNTIL CHANGE 681543060 time 05/01/2019
15:05:20
Get the SCN using a data dictionary query.
SQL> select RESETLOGS_CHANGE# - 1 from v$database;

36 | ORACLE DATABASE MIGRATION WITH AN ORACLE GOLDENGATE HUB CONFIGURATION
NOTE: Record this SCN for later use when you start the GoldenGate Replicat process.
2. Confirm that the database initialization parameter, ENABLE_GOLDENGATE_REPLICATION, is set to TRUE. If it
is not, set it using the following command.
SQL> alter system set enable_goldengate_replication=TRUE scope=both;
Oracle Data Pump Export/Import
Oracle Data Pump Export/Import provides an alternative method to instantiate the target database when the source
and target database versions are different, the hardware platform is different, or the database structure is different.
For example, when migrating to a non-encrypted database to an encrypted database.
The target database should already be created, and there are many options available with Data Pump export/import
to instantiate the target database.
There are a few important considerations when using Data Pump export/import.
» Consider using Data Pump import with the NETWORK_LINK parameter to import directly from the source database
over a database link from the target database, reducing the time it takes to instantiate the target database.
» When exporting the source database do not export the GoldenGate administrator. Exclude the user with the
export parameter EXCLUDE=SCHEMA:"='GGADMIN'".
» Monitor the Data Pump export/import progress with the V$SESSION_LONGOPS data dictionary view.
» Because the objects being replicated by Oracle GoldenGate were already prepared in an earlier step, after the
objects are imported into the target database, Replicat can determine which transactions from the trail files to
apply without applying duplicate data. There is no need to use the Data Pump parameter FLASHBACK_SCN.
Refer to the Oracle Database Utilities documentation for more information about using Oracle Data Pump.
https://docs.oracle.com/en/database/oracle/oracle-database/19/sutil/index.html
Complete the Oracle GoldenGate Configuration
This section describes the Oracle GoldenGate configuration required after the target database is instantiated.
Create the Target Database GoldenGate Credentials
If the target database was instantiated using Oracle Data Pump, the GoldenGate database administrator account
should have already been created in a previous step, Create GoldenGate administrator database account.
The GoldenGate database credentials are required to allow the GoldenGate processes connectivity to the source
and target databases. Use the commands already provided above in the section Create GoldenGate Credentials to
create the target database GoldenGate credential.
If the target database is a multitenant database, the GoldenGate credential must connect to the PDB, and not the
CDB.
Create the Target Database GoldenGate Checkpoint Table
The checkpoint table is a required component of nonintegrated Parallel Replicat, which is recommended for use in
this whitepaper.

37 | ORACLE DATABASE MIGRATION WITH AN ORACLE GOLDENGATE HUB CONFIGURATION
A nonintegrated Replicat maintains its recovery checkpoints in the checkpoint table, which is stored in the target
database. Checkpoints are written to the checkpoint table within the Replicat transaction. Because a checkpoint
either succeeds or fails with the transaction, Replicat ensures that a transaction is only applied once, even if there is
a failure of the process or the database.
If the target database was created using RMAN Duplicate, verify the existence of a checkpoint table, using the
following command.
$ curl -s –K access.cfg https://gghub-
server/TARGET/adminsrvr/services/v2/commands/execute -X POST --data '{"name":
"report","reportType": "checkpointTables","credentials": {"alias":
"target_atp1","domain": "goldengate"},"specification": "ggadmin.gg_checkpoints"}'|
python -m json.tool
Replace the alias, domain, and specification of the checkpoint table to match the target database.
Example output if the checkpoint table already exists:
"response": {
"$schema": "ogg:commandResult",
"tables": [
"GGADMIN.GG_CHECKPOINTS"
]
}
Example output if the checkpoint table does not exist:
"response": {
"$schema": "ogg:commandResult",
"tables": []
}
If the checkpoint table already exists, drop it before creating a new one.
$ curl -s –K access.cfg https://gghub-
server/TARGET/adminsrvr/services/v2/connections/goldengate.target/tables/checkpoint -
X POST --data '{"operation": "delete","name": "ggadmin.gg_checkpoints"}'| python -m
json.tool
Create the checkpoint table.
$ curl -s –K access.cfg https://gghub-
server/TARGET/adminsrvr/services/v2/connections/goldengate.target/tables/checkpoint -
X POST --data '{"operation": "add","name": "ggadmin.gg_checkpoints"}'| python -m
json.tool
Then check the table creation.
$ curl -s –K access.cfg https://gghub-
server/TARGET/adminsrvr/services/v2/connections/goldengate.target/tables/checkpoint -

38 | ORACLE DATABASE MIGRATION WITH AN ORACLE GOLDENGATE HUB CONFIGURATION
X POST --data '{"operation": "info","name": "ggadmin.gg_checkpoints"}'| python -m
json.tool
Example return message:
{
"$schema": "ogg:message",
"code": "OGG-08100",
"issued": "2019-02-04T17:18:09Z",
"severity": "INFO",
"title": "Checkpoint table ggadmin.gg_checkpoints created 2019-02-04 17:17:36.",
"type": http://docs.oracle.com/goldengate/c1910/gg-winux/GMESG/oggus.htm#OGG-08100
}
Create Heartbeat Tables on the Target Database
The GoldenGate heartbeat tables are required to monitor the replication latency between the source and target
databases. If the target database already contains GoldenGate heartbeat objects, after being instantiated using
RMAN Duplicate, the objects need to be dropped before being recreated.
Use the following command to drop the target heartbeat table objects.
$ curl -s –K access.cfg https://gghub-
server/TARGET/adminsrvr/services/v2/connections/goldengate.target /tables/heartbeat -
X DELETE| python -m json.tool
Create the target heartbeat table objects.
$ curl -s –K access.cfg https://gghub-
server/TARGET/adminsrvr/services/v2/connections/goldengate.target/tables/heartbeat -X
POST --data '{"targetOnly":true}'| python -m json.tool
Create the Oracle GoldenGate Replicat
Before creating the Replicat, if the target database was instantiated using RMAN, the GoldenGate Extract that was
previously created for the database migration should be unregistered and deleted.
Use the following commands to unregister the Extract and delete it from the database.
$ curl -s –K access.cfg https://gghub-
server/TARGET/adminsrvr/services/v2/extracts/EXT1 -X DELETE | python -m json.tool
The creation of the Replicat process differs depending on how the target database was instantiated. Follow the
instructions below for either RMAN or Data Pump instantiation.
When creating a Replicat using the REST API, the process parameter file is automatically created, so there is no
need to manually create one.

39 | ORACLE DATABASE MIGRATION WITH AN ORACLE GOLDENGATE HUB CONFIGURATION
Creating the Replicat for an RMAN Instantiation
The following example command creates the non-integrated parallel Replicat.
$ curl -s –K access.cfg https://gghub-server/TARGET
adminsrvr/services/v2/replicats/REP1 -X POST --data '{"credentials": {"alias":
target","domain": "goldengate"},"source": {"path":
"/u01/oracle/goldengate/deployments/SOURCE/var/lib/data","name": "aa"},"begin":
{"sequence": 0,"offset": 0}, "checkpoint": {"table":
"ggadmin.gg_checkpoints"},"mode":{"type": "nonintegrated","parallel":
true},"config":["Replicat REP1", "UseridAlias target DOMAIN
goldengate","MAP_PARALLELISM 4","MIN_APPLY_PARALLELISM 2", "MAX_APPLY_PARALLELISM
50", REPORTCOUNT EVERY 15 MINUTES, RATE", "BATCHSQL", "Map pdb1.*.*"," Target
PDB1.*.*;"]}' | python -m json.tool
Confirm that the Replicat was created.
$ curl -s –K access.cfg https://gghub-
server/TARGET/adminsrvr/services/v2/replicats/REP1 -X GET | python -m json.tool
To start the Replicat, the SCN you recorded above in the Oracle RMAN Duplicate Database section is required.
Using the SCN value in the above example, 681543060, start the Replicat using the following example command.
$ curl -s –K access.cfg https://gghub-
server/TARGET/adminsrvr/services/v2/commands/execute -X POST --data
'{"name":"start","processName":"REP1",”AT”:681543060}' | python -m json.tool
Check the status of the Replicat.
$ curl -s –K access.cfg https://gghub-
server/TARGET/adminsrvr/services/v2/replicats/REP1/info/status -X GET | python -m
json.tool
Example output:
"response": {
"$schema": "ogg:replicatStatus",
"lag": 0,
"lastStarted": "2019-06-14T19:40:10.419Z",
"position": {
"name": "aa",
"offset": 190639772,
"path": "/u01/oracle/goldengate/deployments/SOURCE/var/lib/data/",
"sequence": 5
},
"processId": 55184,
"sinceLagReported": 8,
"status": "running"
}

40 | ORACLE DATABASE MIGRATION WITH AN ORACLE GOLDENGATE HUB CONFIGURATION
Creating the Replicat for a Data Pump Instantiation
When the target database is instantiated with Oracle Data Pump, there is an additional parameter required when
you create the Replicat process. The ENABLE_INSTANTIATION_FILTERING parameter instructs Replicat to filter
out and not apply trail file data that was committed before the instantiation SCN of each table, recorded in the Data
Pump export file. The instantiation SCN is stored in the target database data dictionary when the table is imported.
Create the Replicat.
$ curl -s –K access.cfg https://gghub-server/TARGET
adminsrvr/services/v2/replicats/REP1 -X POST --data '{"credentials": {"alias":
target","domain": "goldengate"},"source": {"path":
"/u01/oracle/goldengate/deployments/SOURCE/var/lib/data","name": "aa"},"begin":
{"sequence": 0,"offset": 0}, "checkpoint": {"table":
"ggadmin.gg_checkpoints"},"mode":{"type": "nonintegrated","parallel":
true},"config":["Replicat REP1", "UseridAlias target DOMAIN
goldengate","MAP_PARALLELISM 4","MIN_APPLY_PARALLELISM 2", "MAX_APPLY_PARALLELISM
50", REPORTCOUNT EVERY 15 MINUTES, RATE", "BATCHSQL", "DBOPTIONS
ENABLE_INSTANTIATION_FILTERING","Map pdb1.*.*"," Target PDB1.*.*;"]}' | python -m
json.tool
Confirm that the Replicat was created.
$ curl -s –K access.cfg https://gghub-
server/TARGET/adminsrvr/services/v2/replicats/REP1 -X GET | python -m json.tool
Start the Replicat.
$ curl -s –K access.cfg https://gghub-
server/TARGET/adminsrvr/services/v2/commands/execute -X POST --data
'{"name":"start","processName":"REP1"}' | python -m json.tool
Check the status of the started Replicat.
$ curl -s –K access.cfg https://gghub-
server/TARGET/adminsrvr/services/v2/replicats/REP1/info/status -X GET | python -m
json.tool
Assign the Autostart Task to Replicat
Now that the Replicat process is running, the autostart task previously in Create Auto-start Tasks should be
assigned to the Replicat using the following example command.
$ curl -s –K access.cfg https://gghub-server/TARGET
/adminsrvr/services/v2/replicats/REP1 -X PATCH --data '{"managedProcessSettings":
"MIGRATE01"}' | python -m json.tool

41 | ORACLE DATABASE MIGRATION WITH AN ORACLE GOLDENGATE HUB CONFIGURATION
Confirm that the Replicat is configured with the new profile (partial output shown).
$ curl -s –K access.cfg https://gghub-
server/TARGET/adminsrvr/services/v2/replicats/REP1 -X GET | python -m json.tool
"managedProcessSettings": "MIGRATE01",
Monitor GoldenGate Replication
When the Extract and Replicat are both running, the GoldenGate end-to-end latency must be monitored until all
outstanding transactional data generated during the target database instantiation has been applied, after which, you
can switch users and applications over to the migrated database.
First, compare the trail file progress of the Extract and Replicat processes.
View Extract checkpoint progress:
$ curl -s –K access.cfg https://gghub-server
/SOURCE/adminsrvr/services/v2/extracts/EXT1/info/checkpoints -XGET | python -m
json.tool
Example output:
"current": {
"name": "aa",
"offset": 388314032,
"path": "/u01/oracle/goldengate/deployments/SOURCE/var/lib/data/",
"sequence": 311,
"sequenceLength": 9,
"sequenceLengthFlip": false,
"timestamp": "2019-02-08T21:43:36.660Z"
}
View Replicat checkpoint progress:
$ curl -s –K access.cfg https://gghub-server /SOURCE
/TARGET/adminsrvr/services/v2/replicats/REP1/info/checkpoints -XGET | python -m
json.tool
Example output:
"current": {
"name": "aa",
"offset": 346955548,
"path": "/u01/oracle/goldengate/deployments/SOURCE/var/lib/data",
"sequence": 311,
"sequenceLength": 9,
"sequenceLengthFlip": false,

42 | ORACLE DATABASE MIGRATION WITH AN ORACLE GOLDENGATE HUB CONFIGURATION
"timestamp": "2019-02-08T21:48:12.906Z"
}
When the Replicat is reading from the same trail file that the Extract is writing to, with a similar checkpoint offset, the
Replicat has applied all of the trail files generated during the target database instantiation.
Next, monitor the Oracle GoldenGate end-to-end latency using the heartbeat tables. Run the following command
until the lag time is acceptably low (for example, less than 2 seconds).
$ curl -s –K access.cfg https://gghub-server/TARGET
/adminsrvr/services/v2/connections/goldengate.target/tables/heartbeat/REP1 -XGET |
python -m json.tool
Example output:
"heartbeats": [
{
"ageSeconds": 5.02,
"lagSeconds": 1.27,
"path": "EXT1 ==> REP1",
"source": "DSGG:PDB1",
"target": "GGT:PDB1"
}
]
Testing the Migrated Database
Suspend GoldenGate apply and then create a Guaranteed Restore Point (GRP) so that you can test the target
database. When you are done testing flashback the database to the GRP, and the GoldenGate Replicat is restarted,
and replication resumes. When all testing is complete, you can drop the GRP. The cycle of suspending replication,
creating a GRP, testing, flashback database, and resuming replication can be done a number of times.
Suspend Replication
Suspend replication by stopping the GoldenGate Replicat process. Extract is left running so it will continue to extract
data from the source database, creating new trail file data.
1. Stop Replicat.
$ curl -s –K access.cfg https://gghub-
server/TARGET/adminsrvr/services/v2/commands/execute -X POST --data
'{"name":"stop","processName":"REP1","force":false}' | python -m json.tool
2. Check Replicat status.
$ curl -s –K access.cfg https://gghub-
server/TARGET/adminsrvr/services/v2/replicats/REP1 -X GET | python -m json.tool
It is not safe to continue until the Replicat status is stopped cleanly.

43 | ORACLE DATABASE MIGRATION WITH AN ORACLE GOLDENGATE HUB CONFIGURATION
Example output:
"sinceLagReported": 14,
"status": "stopped"
Create a Guaranteed Restore Point (GRP)
If the target database is a multitenant database, you create the GRP from in the CDB.
Connect to the CDB as the SYSDBA user and run the following statement.
SQL> CREATE RESTORE POINT <GRP name> FOR PLUGGABLE DATABASE <PDB name> GUARANTEE
FLASHBACK DATABASE;
For a single tenant database, use the following command to create the restore point.
SQL> CREATE RESTORE POINT <GRP name> GUARANTEE FLASHBACK DATABASE;
Confirm GRP creation.
SQL> set linesize 140 pages 1000
SQL> col con_id format 9999
SQL> col pdb_restore_point format a20
SQL> col name format a20
SQL> col guarantee_flashback_database format a5
SQL> col scn format 999999999999
SQL> col time format a48
SQL> alter session set nls_date_format='dd-Mon-yyyy hh:mi:ss';
SQL> select con_id,name,scn,time,guarantee_flashback_database,pdb_restore_point
from v$restore_point;
Validate the Target Database
The target database can now be used for application validation and a quick sanity check, including DML/DDL
against database tables. The test window should not normally exceed a couple of hours.
It is recommended that comprehensive performance and functional testing is completed before you start the
migration. The risks of using the current migration window for such comprehensive testing are:
1. Extend the migration window.
2. Extend the time GoldenGate requires, and possibly makes it impossible to catch up replicating the
transactions that are continually generated on the source database.
3. Cause issues that may compromise the target system and compromise the entire migration.
During testing, it is recommended that you continue monitoring GoldenGate lag and checkpoint differences (current
Extract trail file vs. Replicat last trail file applied) as detailed in the Monitoring GoldenGate Replication section.

44 | ORACLE DATABASE MIGRATION WITH AN ORACLE GOLDENGATE HUB CONFIGURATION
Flashback the Target Database
When testing is complete the target database can be closed, flashed back to the GRP, and reopened.
All of the following commands must be run while connected to the CDB as the SYSDBA user, if running a
multitenant database.
a. Shut down the database.
For single tenant:
SQL> shutdown immediate
For multitenant:
SQL> ALTER PLUGGABLE DATABASE <PDB name> CLOSE IMMEDIATE;
b. Flashback the database.
For single tenant:
SQL> FLASHBACK DATABASE TO RESTORE POINT <GRP name>;
For multitenant:
SQL> FLASHBACK PLUGGABLE DATABASE <PDB name> TO RESTORE POINT <GRP name>;
c. Start the database
For single tenant:
SQL> ALTER DATABASE OPEN RESETLOGS;
For multitenant:
SQL> ALTER PLUGGABLE DATABASE <PDB name> OPEN RESETLOGS;
After the database has been flashed back it is possible to do multiple cycles of testing and flashback to the same
GRP. However, the longer that replication is suspended, the longer it takes for replication to catch up.
Drop the Guaranteed Restore Point
When the database is open and testing is complete, drop the GRP. If you want to do multiple cycles of testing, it is
recommended that you resume replication and allow GoldenGate to catch up before re-iterating the testing cycle.
For single tenant:
SQL> DROP RESTORE POINT <GRP name>;
For multitenant:
SQL> DROP RESTORE POINT <GRP name> FOR PLUGGABLE DATABASE <PDB name>;
Resume Replication

45 | ORACLE DATABASE MIGRATION WITH AN ORACLE GOLDENGATE HUB CONFIGURATION
Resume replication by restarting the GoldenGate Replicat process.
$ curl -s –K access.cfg https://gghub-
server/TARGET/adminsrvr/services/v2/commands/execute -X POST --data
'{"name":"start","processName":"REP1"}' | python -m json.tool
Continue to monitor the GoldenGate checkpoints and lag, and when testing is complete, move to the final
switchover.
Switch Over to the Migrated Database
When you are done testing, you can switch over to the target database.
Determine Whether GoldenGate Replication Lag is Acceptably Low
An acceptable low replication lag can very vary greatly, depending on the source workload and network latency.
The lag should be monitored along with the current checkpoint position of the GoldenGate Extract and Replicat to
make sure that both processes are operating within the same trail file, which commonly implies lower latency
between Extract and Replicat. Use the commands specified in the Monitor GoldenGate Replication section to
determine when Extract and Replicat have reached an acceptable lag.
Stop Transactions From Starting on the Source Database
To complete a zero data loss switchover, stop transactions from occurring on the source database by stopping the
service for the source database, using SRVCTL.
After new connections and transactions are no longer allowed on the source database, monitor the database for all
active transactions to complete.
For example:
SQL> select XIDUSN, XIDSLOT, XIDSQN, STATUS, USED_UBLK, USED_UREC from v$transaction
where RECURSIVE='NO';
Once this returns no rows, you can assume that the source database is idle.
Verify That Extract Has Completed Outstanding Transactions
When all transactions have stopped on the source database, monitor Extract to make sure it has caught up with
extracting all outstanding transactions.
$ curl -s –K access.cfg https://gghub-
server/SOURCE/adminsrvr/services/v2/extracts/EXT1/info/checkpoints -XGET | python -m
json.tool
The Extract output checkpoint position should not be moving much, only by the GoldenGate heartbeat table updates

46 | ORACLE DATABASE MIGRATION WITH AN ORACLE GOLDENGATE HUB CONFIGURATION
every 5 minutes.
Stop the Extract
When you can see the Extract no longer moving forwards, you can stop it.
$ curl -s –K access.cfg https://gghub-
server/SOURCE/adminsrvr/services/v2/commands/execute -X POST --data
'{"name":"stop","processName":"EXT1","force":true}' | python -m json.tool
Check that the status is stopped.
$ curl -s –K access.cfg https://gghub-
server/SOURCE/adminsrvr/services/v2/extracts/EXT1 -X GET | python -m json.tool|grep
status
Wait for Replicat to Apply All Trail File Data
After Extract has been stopped you must wait for Replicat to apply all outstanding trail file data. To do this, monitor
the Replicat with the LOGEND command.
$ curl -s –K access.cfg https://gghub-
server/TARGET/adminsrvr/services/v2/replicats/REP1/command -X POST --data
'{"command":"LOGEND"}' | python -m json.tool
Example output:
"replyData": {
"$schema": "er:logEndResult",
"allRecordsProcessed": true
}
When the Replicat has applied all trail file data the allRecordsProcessed value of “true” is returned.
Switch Over to the Target Database
Now that all of the replicated data is applied to the target database, you can stop the Replicat.
$ curl -s –K access.cfg https://gghub-
server/TARGET/adminsrvr/services/v2/commands/execute -X POST --data
'{"name":"stop","processName":"REP1","force":true}' | python -m json.tool
With Replicat stopped, switch the database clients over to the target database.
Because both source and target databases are opened read-write during the migration process, enabling application
database services and switching the application to use the targeted services is under the discretion of the system or
database administrators. For read-only applications, switchover can happen immediately after GoldenGate Replicat
has applied all outstanding source transactions and stops, allowing for zero application downtime for those services.

47 | ORACLE DATABASE MIGRATION WITH AN ORACLE GOLDENGATE HUB CONFIGURATION
Read-write applications may require the assurance that all transactions have been applied on the target before
switching the application over to ensure the most up to date data is being manipulated.
If desired, Oracle GoldenGate Veridata can be used to identify and repair any out-of-sync data before switching over
to the migrated database. Refer to the Oracle GoldenGate Veridata documentation for more information.
https://docs.oracle.com/en/middleware/goldengate/veridata/12.2.1.2.0/books.html
Removing the GoldenGate Configuration
After migrating the Oracle database, you can remove the GoldenGate configuration using the following commands.
Drop the GoldenGate Processes
$ curl -s –K access.cfg https://gghub-
server/TARGET/adminsrvr/services/v2/replicats/REP1 -X DELETE | python -m json.tool
$ curl -s –K access.cfg https://gghub-
server/SOURCE/adminsrvr/services/v2/extracts/EXT1 -X DELETE | python -m json.tool
Use the following command to remove the trail files.
$ curl -s –K access.cfg https://gghub-
server/SOURCE/adminsrvr/services/v2/commands/execute -X POST --data '{"name":
"purge","purgeType": "trails","trails":[{"name":"aa"}],"useCheckpoints":
false,"keep": [{"type": "min","units": "files","value": 0}]}' | python -m json.tool
Remove the Autostart Tasks
$ curl -s –K access.cfg https://gghub-
server/SOURCE/adminsrvr/services/v2/config/types/ogg:managedProcessSettings/values/og
g:managedProcessSettings:MIGRATE01 -XDELETE | python -m json.tool
$ curl -s –K access.cfg https://gghub-
server/TARGET/adminsrvr/services/v2/config/types/ogg:managedProcessSettings/values/og
g:managedProcessSettings:MIGRATE01 -XDELETE | python -m json.tool
Drop the Heartbeat Tables on the Target Database
$ curl -s –K access.cfg https://gghub-
server/SOURCE/adminsrvr/services/v2/connections/goldengate.source_pdb/tables/heartbea
t -X DELETE| python -m json.tool
If the heartbeat table was created in the source database as part of the migration, then it should be also be dropped.
$ curl -s –K access.cfg https://gghub-
server/SOURCE/adminsrvr/services/v2/connections/goldengate.source_pdb/tables/heartbea
t -X DELETE| python -m json.tool

48 | ORACLE DATABASE MIGRATION WITH AN ORACLE GOLDENGATE HUB CONFIGURATION
Drop the Checkpoint Table
$ curl -s –K access.cfg https://gghub-
server/TARGET/adminsrvr//services/v2/connections/goldengate.target/tables/checkpoint
-X POST --data '{"operation": "delete","name": "ggadmin.gg_checkpoints"}'| python -m
json.tool
Remove the GoldenGate Credentials
Removing the Oracle GoldenGate credentials does not drop the user accounts from the database.
$ curl -s –K access.cfg https://gghub-
server/TARGET/adminsrvr/services/v2/credentials/goldengate/target -X DELETE | python
-m json.tool
The following example is for a multitenant source database.
$ curl -s –K access.cfg https://gghub-
server/SOURCE/adminsrvr/services/v2/credentials/goldengate/source_cdb -X DELETE |
python -m json.tool
$ curl -s –K access.cfg https://gghub-
serverSOURCE/adminsrvr/services/v2/credentials/goldengate/source_pdb -X DELETE |
python -m json.tool

49 | ORACLE DATABASE MIGRATION WITH AN ORACLE GOLDENGATE HUB CONFIGURATION
Appendix A – Example Oracle GoldenGate Deployment Creation Response Files
Most of the configuration variables are related to file system directories where the deployment and GoldenGate
process files are stored, so it is important that the directories match those already created.
Use the correct response file from the current GoldenGate installation software to ensure that the parameters are
specified correctly.
The following example response file parameter changes are required.
Section A - General
DEPLOYMENT_NAME=TARGET # Make sure this is a unique deployment name
Section B - Administrator Account
ADMINISTRATOR_USER=admin # GG deployment administration account, NOT a database account.
ADMINISTRATOR_PASSWORD=password # Note: you MUST specify a password
Section C - Service Manager
# File system directory for the Service Manager deployment. This only gets set for the first deployment creation.
SERVICEMANAGER_DEPLOYMENT_HOME=/mnt/acfs_gg/deployments/ggsm
HOST_SERVICEMANAGER=127.0.0.1 # Leave as localhost (127.0.0.1)
PORT_SERVICEMANAGER=9100 # Set to a unused port number, unique for this deployment. For the second
# deployment creation, set this to the port# used for the initial deployment
# creation.
CREATE_NEW_SERVICEMANAGER=true # Only set to a true for first deployment creation.
Section D - Software Home
OGG_SOFTWARE_HOME=/app/goldengate/target # GoldenGate software location
Section E - Deployment Directories
OGG_DEPLOYMENT_HOME=/ mnt/acfs_gg/deployments/target # Deployment name should be unique
OGG_ETC_HOME=/mnt/acfs_gg/deployments/target/etc
OGG_CONF_HOME=/mnt/acfs_gg/deployments/target/etc/conf
OGG_SSL_HOME=/mnt/acfs_gg/deployments/target/etc/ssl
OGG_VAR_HOME=/mnt/acfs_gg/deployments/target/var
OGG_DATA_HOME=/mnt/acfs_gg/deployments/target/var/lib/data
Section F - Environment Variables
ENV_ORACLE_HOME=/u01/app/oracle/product/19.1/client
ENV_LD_LIBRARY_PATH=${ORACLE_HOME}/lib:/u01/app/oracle/product/19.1/client/lib:/u
01/app/oracle/product/19.1/client/rdbms/lib:/u01/app/oracle/product/19.1/client/j
dbc/lib:/u01/oracle/goldengate/target/lib
50 | ORACLE DATABASE MIGRATION WITH AN ORACLE GOLDENGATE HUB CONFIGURATION
ENV_TNS_ADMIN=/u01/app/oracle/network/admin # Use a single TNS_ADMIN for all deployments
Section I - Services
PORT_ADMINSRVR=9101 # Set to an unused port number, unique for this deployment.
DISTRIBUTION_SERVER_ENABLED=false # Not using due to local trail files.
PORT_DISTSRVR=9102 # Set to an unused port number, unique for this deployment.
RECEIVER_SERVER_ENABLED=false # Not using due to local trail files.
PORT_RCVRSRVR=9103 # Set to an unused port number, unique for this deployment.
PORT_PMSRVR=9104 # Set to an unused port number, unique for this deployment.
UDP_PORT_PMSRVR=9105 # Set to an unused port number, unique for this deployment.
Section J - REPLICATION OPTIONS
OGG_SCHEMA=ggadmin # Set to schema used for GG administrator in the database. MAKE SURE
# SOURCE & TARGET DATABASE SCHEMA NAMES MATCH.
For the second deployment, create a second response file with different directories and port numbers, including the
following major parameter differences.
Section A - General
DEPLOYMENT_NAME=SOURCE # Make sure this is a unique deployment name, should use SOURCE or
# TARGET
Section C - Service Manager
SERVICEMANAGER_DEPLOYMENT_HOME= # Leave blank for subsequent deployment creations.
HOST_SERVICEMANAGER=127.0.0.1 # Leave as localhost (127.0.0.1)
PORT_SERVICEMANAGER=9100 # Set this to the port# used for the initial deployment creation.
CREATE_NEW_SERVICEMANAGER=false # Set to false because the initial deployment will have already
# created the Service Manager.
Section D - Software Home
OGG_SOFTWARE_HOME=/app/oracle/goldengate/source # GoldenGate software location specified
# above in step #2 for the correct database compatibility
Section E - Deployment Directories
OGG_DEPLOYMENT_HOME=/mnt/acfs_gg/deployments/source # Store on the encrypted file system.
# Should be either 'source' or 'target'.
OGG_ETC_HOME=/mnt/acfs_gg/deployments/source/etc
OGG_CONF_HOME=/mnt/acfs_gg/deployments/source/etc/conf
OGG_SSL_HOME=/mnt/acfs_gg/deployments/source/etc/ssl

51 | ORACLE DATABASE MIGRATION WITH AN ORACLE GOLDENGATE HUB CONFIGURATION
OGG_VAR_HOME=/mnt/acfs_gg/deployments/source/var
OGG_DATA_HOME=/mnt/acfs_gg/deployments/source/var/lib/data
Section F - Environment Variables
ENV_ORACLE_HOME=/u01/app/oracle/product/12.2/client # Assuming the source database is 12.2,
# but this may differ depending on the source database
# version
ENV_LD_LIBRARY_PATH=${ORACLE_HOME}/lib:/u01/app/oracle/product/19.1/client/lib:/u
01/app/oracle/product/19.1/client/rdbms/lib:/u01/app/oracle/product/19.1/client/j
dbc/lib:/u01/oracle/goldengate/source/lib
ENV_TNS_ADMIN=/u01/app/oracle/network/admin # Use a single TNS_ADMIN for all deployments
Section I - Services
PORT_ADMINSRVR=9111 # Set to an unused port number, unique for this deployment
DISTRIBUTION_SERVER_ENABLED=false
PORT_DISTSRVR=9112 # Set to an unused port number, unique for this deployment
RECEIVER_SERVER_ENABLED=false
PORT_RCVRSRVR=9113 # Set to an unused port number, unique for this deployment
PORT_PMSRVR=9114 # Set to an unused port number, unique for this deployment
UDP_PORT_PMSRVR=9115 # Set to an unused port number, unique for this deployment

52 | ORACLE DATABASE MIGRATION WITH AN ORACLE GOLDENGATE HUB CONFIGURATION
Appendix B – Example Start and Stop Oracle GoldenGate Deployment Scripts
Starting the Oracle GoldenGate Deployments
Deployments are started automatically when the Service Manager starts, unless deployment services were not running at the time the Service Manager was last stopped. To start the Service Manager, which starts the two deployments, set the following environment variables.
export OGG_HOME=/app/oracle/goldengate/target
export OGG_ETC_HOME=/mnt/acfs_gg/deployments/ggsm/etc
export OGG_VAR_HOME=/mnt/acfs_gg/deployments/ggsm/var
export PATH=$OGG_HOME/bin:$PATH
export JAVA_HOME=$OGG_HOME/jdk
export LD_LIBRARY_PATH=$LD_LIBRARY_PATH:$OGG_HOME/lib
Then run the startSM.sh script that is located in the service manager deployment directory.
For example:
/mnt/acfs_gg/deployments/ggsm/bin/startSM.sh
NOTE: The location of the startSM.sh script matches the location specified in the initial GoldenGate deployment
creation template file (SERVICEMANAGER_DEPLOYMENT_HOME).
Stopping the Oracle GoldenGate Deployments
When stopping deployments, if the Service Manager is currently running it will automatically restart the deployment. For that reason it is important to stop the deployment where Service Manager is running BEFORE stopping the second deployment. Determine which deployment is running the Service Manager.
$ ps -ef | grep ServiceManager | grep -v grep
oracle 6240 1 0 Mar21 ? 00:09:19 /app/oracle/goldengate/target/bin/ServiceManager –
quiet
In this example, the Service Manager was started from the Oracle GoldenGate software home of
/app/oracle/goldengate/target. This is the OGG_HOME directory specified below.
Set the environment variables to match the deployment from where Service Manager is running (note that this is NOT the same as starting the Service Manager).
export OGG_HOME=/app/oracle/goldengate/target
export OGG_ETC_HOME=/mnt/acfs_gg/deployments/target/etc
export OGG_VAR_HOME=/mnt/acfs_gg/deployments/target/var
export PATH=$OGG_HOME/bin:$PATH

53 | ORACLE DATABASE MIGRATION WITH AN ORACLE GOLDENGATE HUB CONFIGURATION
export JAVA_HOME=$OGG_HOME/jdk
export LD_LIBRARY_PATH=$LD_LIBRARY_PATH:$OGG_HOME/lib
Then stop the deployment with the following script (stopDeployment.sh $OGG_HOME).
#!/bin/bash
# test if we have one arguments on the command line
if [ $# != 1 ]
then
echo " "
echo "Usage: ./stopDeployment.bsh <GG Home Directory>"
echo " "
exit 1
fi
oggHome=$1
# Check oggHome exsists!
if [ ! -d ${oggHome} ]
then
echo " "
echo "*** ERROR: Directory ${oggHome} does NOT exist!"
echo " "
exit 1
fi
if [[ -z "${OGG_VAR_HOME}" ]]; then
echo "Error: OGG_VAR_HOME environment variable is not set."
exit
fi
function getPID {
PID=$(cat "${OGG_VAR_HOME}/run/ServiceManager.pid" 2>/dev/null)
}
function isRunning {
kill -0 ${PID} 2>/dev/null
}
##
## Check if any OGG components are running
##
function isOGGRunning {
local pgrep=$(command -v pgrep 2>/dev/null)
local pattern=${oggHome}/bin/${OGGProcesses}
if [[ ! -z ${pgrep} ]]; then
pgrep -f ${pattern} &>/dev/null
else
ps -aef | egrep ${pattern} &>/dev/null

54 | ORACLE DATABASE MIGRATION WITH AN ORACLE GOLDENGATE HUB CONFIGURATION
fi
}
##
## Task: runCleanStop
## Stop all OGG services
##
function runCleanStop {
local timeout=10
while (true); do
pkill -f ${oggHome}/bin/'(adminsrvr|distsrvr|pmsrvr|recvsrvr|ServiceManager)'
isOGGRunning || break
sleep 1
timeout=$(expr ${timeout} - 1)
if [ ${timeout} -eq 0 ]; then
return 1
fi
done
return 0
}
runCleanStop
getPID
if (! isRunning); then
echo "Service Manager is not running"
exit
fi
echo "Stopping Service Manager process (PID: ${PID})..."
pkill -P ${PID}
for attempt in $(seq 10); do
if (! isRunning); then
echo "Service Manager stopped"
exit 0
fi
sleep 1
done
echo "Service Manager process could not be stopped"
exit 1
To stop subsequent deployments, set the environment variables to match subsequent deployment directories
(OGG_ETC_HOME and OGG_VAR_HOME).
export OGG_HOME=/app/oracle/goldengate/source
export OGG_ETC_HOME=/mnt/acfs_gg/deployments/deployments/source/etc
export OGG_VAR_HOME=/mnt/acfs_gg/deployments/source /var
export PATH=$OGG_HOME/bin:$PATH

55 | ORACLE DATABASE MIGRATION WITH AN ORACLE GOLDENGATE HUB CONFIGURATION
export JAVA_HOME=$OGG_HOME/jdk
export LD_LIBRARY_PATH=$LD_LIBRARY_PATH:$OGG_HOME/lib
Then run the same stopDeployment.sh script that was used to stop the Service Manager deployment.

2 | ORACLE DATABASE MIGRATION WITH AN ORACLE GOLDENGATE HUB CONFIGURATION
Oracle Corporation, World Headquarters Worldwide Inquiries
500 Oracle Parkway Phone: +1.650.506.7000
Redwood Shores, CA 94065, USA Fax: +1.650.506.7200
Copyright © 2018, Oracle and/or its affiliates. All rights reserved. This document is provided for information purposes only, and the
contents hereof are subject to change without notice. This document is not warranted to be error-free, nor subject to any other warranties or conditions, whether expressed orally or implied in law, including implied warranties and conditions of merchantability or fitness for a particular purpose. We specifically disclaim any liability with respect to this document, and no contractual obligations are formed either directly or indirectly by this document. This document may not be reproduced or transmitted in any form or by any means, electronic or mechanical, for any purpose, without our prior written permission. Oracle and Java are registered trademarks of Oracle and/or its affiliates. Other names may be trademarks of their respective owners. Intel and Intel Xeon are trademarks or registered trademarks of Intel Corporation. All SPARC trademarks are used under license and are trademarks or registered trademarks of SPARC International, Inc. AMD, Opteron, the AMD logo, and the AMD Opteron logo are trademarks or registered trademarks of Advanced Micro Devices. UNIX is a registered trademark of The Open Group. 0116
Oracle Database Migration with an Oracle
GoldenGate Hub Configuration
August 2019
Author: Stephan Haisley
C O N N E C T W I T H U S
blogs.oracle.com/oracle
facebook.com/oracle
twitter.com/oracle
oracle.com


![Oracle GoldenGate Installing and Configuring Oracle ... · [1]Oracle® GoldenGate Installing and Configuring Oracle GoldenGate for MySQL 12c (12.1.2) E29286-04 May 2015 This document](https://static.fdocuments.us/doc/165x107/5cb240b088c99351708bc1ba/oracle-goldengate-installing-and-configuring-oracle-1oracle-goldengate.jpg)


