Oracle 10g Installing & Configuring Oracle 10g Application
73
Proven Practice Installing & Configuring Oracle 10g Application Server for IBM Cognos 8 Product(s): IBM Cognos 8.4, Oracle 10G Application Server Area of Interest: Infrastructure DOC ID: AS20 Version 8.4.0.0
Transcript of Oracle 10g Installing & Configuring Oracle 10g Application
Proven Practice
Installing & Configuring Oracle 10g Application Server for IBM Cognos 8 Product(s): IBM Cognos 8.4, Oracle 10G Application
Server
Area of Interest: Infrastructure
DOC ID: AS20 Version 8.4.0.0

Installing & Configuring Oracle 10g Application Server for IBM Cognos 8
Copyright and Trademarks
Licensed Materials - Property of IBM. © Copyright IBM Corp. 2009 IBM, the IBM logo, and Cognos are trademarks or registered trademarks of International Business Machines Corp., registered in many jurisdictions worldwide. Other product and service names might be trademarks of IBM or other companies. A current list of IBM trademarks is available on the Web at http://www.ibm.com/legal/copytrade.shtml
While every attempt has been made to ensure that the information in this document is accurate and complete, some typographical errors or technical inaccuracies may exist. IBM does not accept responsibility for any kind of loss resulting from the use of information contained in this document. The information contained in this document is subject to change without notice. This document is maintained by the Best Practices, Product and Technology team. You can send comments, suggestions, and additions to [email protected].
Adobe, the Adobe logo, PostScript, and the PostScript logo are either registered trademarks or trademarks of Adobe Systems Incorporated in the United States, and/or other countries.
Intel, Intel logo, Intel Inside, Intel Inside logo, Intel Centrino, Intel Centrino logo, Celeron, Intel Xeon, Intel SpeedStep, Itanium, and Pentium are trademarks or registered trademarks of Intel Corporation or its subsidiaries in the United States and other countries.
Linux is a registered trademark of Linus Torvalds in the United States, other countries, or both.
Microsoft, Windows, Windows NT, and the Windows logo are trademarks of Microsoft Corporation in the United States, other countries, or both.
UNIX is a registered trademark of The Open Group in the United States and other countries.
Java and all Java-based trademarks and logos are trademarks of Sun Microsystems, Inc. in the United States, other countries, or both.
Installing & Configuring Oracle 10g Application Server for IBM Cognos 8
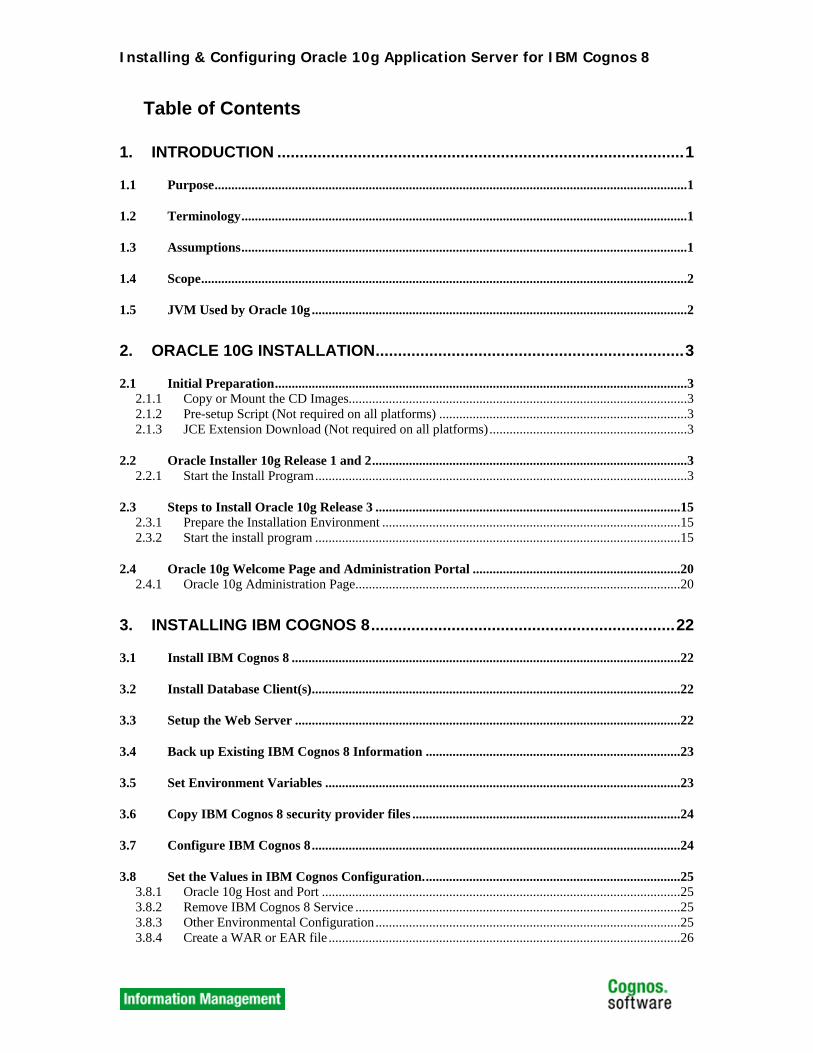
Table of Contents
1. INTRODUCTION ...........................................................................................1
1.1 Purpose.............................................................................................................................................1
1.2 Terminology.....................................................................................................................................1
1.3 Assumptions.....................................................................................................................................1
1.4 Scope.................................................................................................................................................2
1.5 JVM Used by Oracle 10g ................................................................................................................2
2. ORACLE 10G INSTALLATION.....................................................................3
2.1 Initial Preparation...........................................................................................................................3 2.1.1 Copy or Mount the CD Images.....................................................................................................3 2.1.2 Pre-setup Script (Not required on all platforms) ..........................................................................3 2.1.3 JCE Extension Download (Not required on all platforms)...........................................................3
2.2 Oracle Installer 10g Release 1 and 2..............................................................................................3 2.2.1 Start the Install Program...............................................................................................................3
2.3 Steps to Install Oracle 10g Release 3 ...........................................................................................15 2.3.1 Prepare the Installation Environment .........................................................................................15 2.3.2 Start the install program .............................................................................................................15
2.4 Oracle 10g Welcome Page and Administration Portal ..............................................................20 2.4.1 Oracle 10g Administration Page.................................................................................................20
3. INSTALLING IBM COGNOS 8....................................................................22
3.1 Install IBM Cognos 8 ....................................................................................................................22
3.2 Install Database Client(s)..............................................................................................................22
3.3 Setup the Web Server ...................................................................................................................22
3.4 Back up Existing IBM Cognos 8 Information ............................................................................23
3.5 Set Environment Variables ..........................................................................................................23
3.6 Copy IBM Cognos 8 security provider files ................................................................................24
3.7 Configure IBM Cognos 8..............................................................................................................24
3.8 Set the Values in IBM Cognos Configuration.............................................................................25 3.8.1 Oracle 10g Host and Port ...........................................................................................................25 3.8.2 Remove IBM Cognos 8 Service .................................................................................................25 3.8.3 Other Environmental Configuration...........................................................................................25 3.8.4 Create a WAR or EAR file .........................................................................................................26
Installing & Configuring Oracle 10g Application Server for IBM Cognos 8
3.8.5 Save and Exit Cognos Configuration .........................................................................................29
3.9 Configure Oracle 10g & Deploy IBM Cognos 8 .........................................................................29 3.9.1 Deploy IBM Cognos 8 in Oracle 10g Release 1 & 2..................................................................29 3.9.2 Deploy IBM Cognos 8 into Oracle 10g Release 3......................................................................39
3.10 Verify Startup................................................................................................................................44
4. DATABASE CONNECTIONS UNDER ORACLE 10G................................45
4.1 Oracle Net Configuration Assistant Utility .................................................................................45
4.2 Testing Database Setup / Connectivity ........................................................................................50 4.2.1 Windows.....................................................................................................................................50 4.2.2 Windows and Unix .....................................................................................................................51
4.3 Additional Database Configuration Information ......................................................................52 4.3.1 Naming Method Configuration ..................................................................................................52
5. ENABLING SSL ..........................................................................................55
5.1 Oracle Wallet Management..........................................................................................................55 5.1.1 Wallet Creation...........................................................................................................................55 5.1.2 Import CA certificates ................................................................................................................56 5.1.3 Requesting a CA-Signed Certificate...........................................................................................57 5.1.4 Adding a CA-signed Certificate .................................................................................................59 5.1.5 Saving your wallet......................................................................................................................60
5.2 Steps to configure SSL for IBM Cognos 8...................................................................................63 5.2.1 Modify IBM Cognos Configuration Settings .............................................................................63
5.3 Importing Certificates into IBM Cognos 8 .................................................................................63
5.4 Enabling SSL in the Application Server .....................................................................................64
5.5 Modifying the HTTP Server.........................................................................................................65
5.6 Restarting the application server.................................................................................................66
6. TROUBLESHOOTING AND GENERAL ISSUES .......................................67
Installing & Configuring Oracle 10g Application Server for IBM Cognos 8 1
1. INTRODUCTION
1.1 Purpose This document is for those who have limited experience with Oracle 10g Application Server and who wish to set up an environment into which IBM Cognos 8 will be deployed. The document consists of detailed instructions and screenshots that explain the steps required. The goal is to set up a basic environment for testing purposes and not necessarily a high performance production environment, although a good foundation will be in place which can then be monitored and tuned as required.
1.2 Terminology
1.3 Assumptions • That you have the necessary files (appropriate for your environment) to perform the installation and any applicable updates. These can be acquired from Oracle (customer) or internally (IBM). • That you have the necessary access rights to perform the installation. It is critical that the user account that runs Oracle has access to the directory tree that IBM Cognos 8 installs in. Configuration files must be readable and log files must be writable. The easiest solution is to user the same user account for both Oracle and IBM Cognos 8 where possible. The next best option is to create a group to which both users belong. Ultimately, the users account/group needs access to the following areas: • Application Server (Oracle 10g) directory tree • Cognos 8 directory tree • Java Virtual Machine • Web Server • Database Client software
Term Definition JVM Java Virtual Machine
CM Content Manager
<Cog8_root> Path to the directory where IBM Cognos 8 is installed (example e:\Program Files\Cognos\cognos8) * NOTE this will be renamed as part of W/O 1038. Also note: use of spaces in the install path is strongly discouraged.
UI User Interface. Typically shown as screen captures.
JAVA_HOME Environment variable that points to the directory into which the JVM has been installed.
Installing & Configuring Oracle 10g Application Server for IBM Cognos 8 2
• That you have the necessary system resources to perform the installation. There is considerable more memory, hard disk space and CPU power required to run under any full Application Server than running IBM Cognos 8 under Tomcat. The minimal requirements for Oracle 10g should be compared to available resources. Running with less than 512MB of RAM is definitely not suggested (although it may be possible for testing purposes only), 1GB should be considered a minimum to ensure performance and reliability. • The JVM used is the one shipped with Oracle 10g or one that is supported by Oracle10g and IBM Cognos 8. Since Cognos 8 will use the JVM that Oracle 10g runs under, the version used must be compatible and supported by both Oracle 10g and IBM Cognos 8. • That you have the customer documentation (IBM Cognos 8 Install Guide) available as a resource. Many steps include a note stating that the customer documentation should be consulted to avoid updating two different documents as processes change. Note: Oracle Application Server releases prior to 10g, 9i for example, do not work with IBM Cognos 8 due to http chunking issues and are therefore not supported.
1.4 Scope The instructions in this document will work cross platform however the examples shown will be typically be based on a Windows install. Unix installations may require slight modifications to syntax but should otherwise be identical. Where appropriate, notations will be made of any significant differences / variations. For example, paths on Windows use backslashes “\” and paths on Unix use forward slashes “/”. Examples shown may use either. This document is meant as an example only of a particular Oracle 10g installation. Other versions may require additional steps or may present different UI elements. Whenever possible and appropriate, examples will be included.
1.5 JVM Used by Oracle 10g Currently, Oracle 10g only supports a JVM release 1.4 and higher. IN most cases, the Oracle installer includes the necessary JVM to run both the Oracle Application Server and IBM Cognos 8.
Installing & Configuring Oracle 10g Application Server for IBM Cognos 8 3
2. ORACLE 10G INSTALLATION 2.1 Initial Preparation
2.1.1 Copy or Mount the CD Images Expand the Oracle 10g archive files or insert/mount the CD-ROM. On a Unix platform it is necessary to run a script as the root user prior to starting the installation. Oracle Application Server downloads range from a single CD to multiple (up to three) CDs. In order to properly install software you need to download all CDs from each set. Click on each CD link and save each file to a target destination on your system. By pointing on each link you can review a specific file name, size, and on UNIX platforms, CKSUM information. On Windows: Extract content of ZIP files or execute EXE files. To verify the integrity of a downloaded file, after the file has been transfer compare its size with the file size listed on this page. On UNIX: To extract the cpio file, move the cpio file to an empty directory, then do: cpio -idmv < filename.
2.1.2 Pre-setup Script (Not required on all platforms) Run ‘rootpre.sh’ as the root user before continuing. This script can be found under the Disk1 directory. You will be prompted to confirm this script has been run during the install process if it is required.
2.1.3 JCE Extension Download (Not required on all platforms) Prior to starting the install, it may also be necessary to download and expand the Java Cryptography Extension (JCE) since it does not ship with the installer. The installer will prompt for this step if necessary and will provide a link such as http://java.sun.com/products/jce/index-122.html where the file can be downloaded. Save this file to a directory that the user account performing the installation can access, as you will be prompted for the path, if this file is required.
2.2 Oracle Installer 10g Release 1 and 2
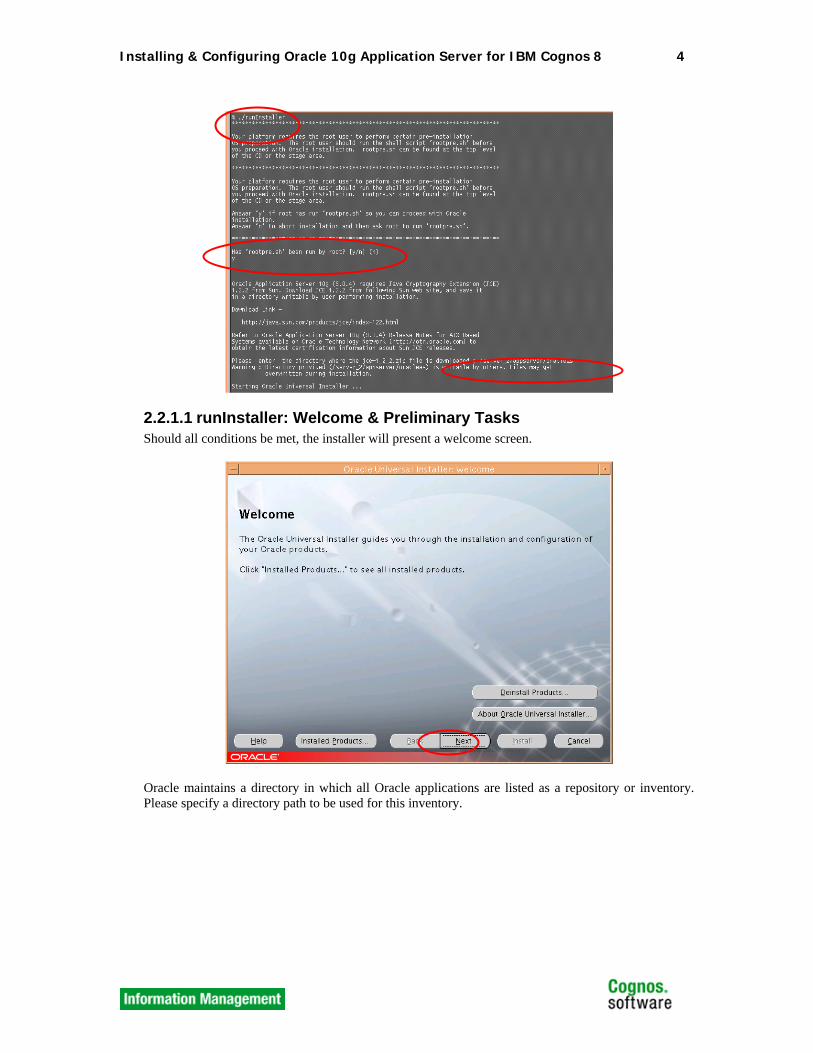
2.2.1 Start the Install Program Start the Oracle 10g AS installation by running the runInstaller script after expanding the Oracle 10g archive files or inserting/mounting the CD-ROM discs. This script can be found in the root of the Disk1 directory. You will be prompted to confirm any actions that are required to be performed prior to running the installer if they are required in your environment such as the steps listed above. If there are any additional requirements, please perform the actions as specified by the installer.
Installing & Configuring Oracle 10g Application Server for IBM Cognos 8 4
2.2.1.1 runInstaller: Welcome & Preliminary Tasks Should all conditions be met, the installer will present a welcome screen.
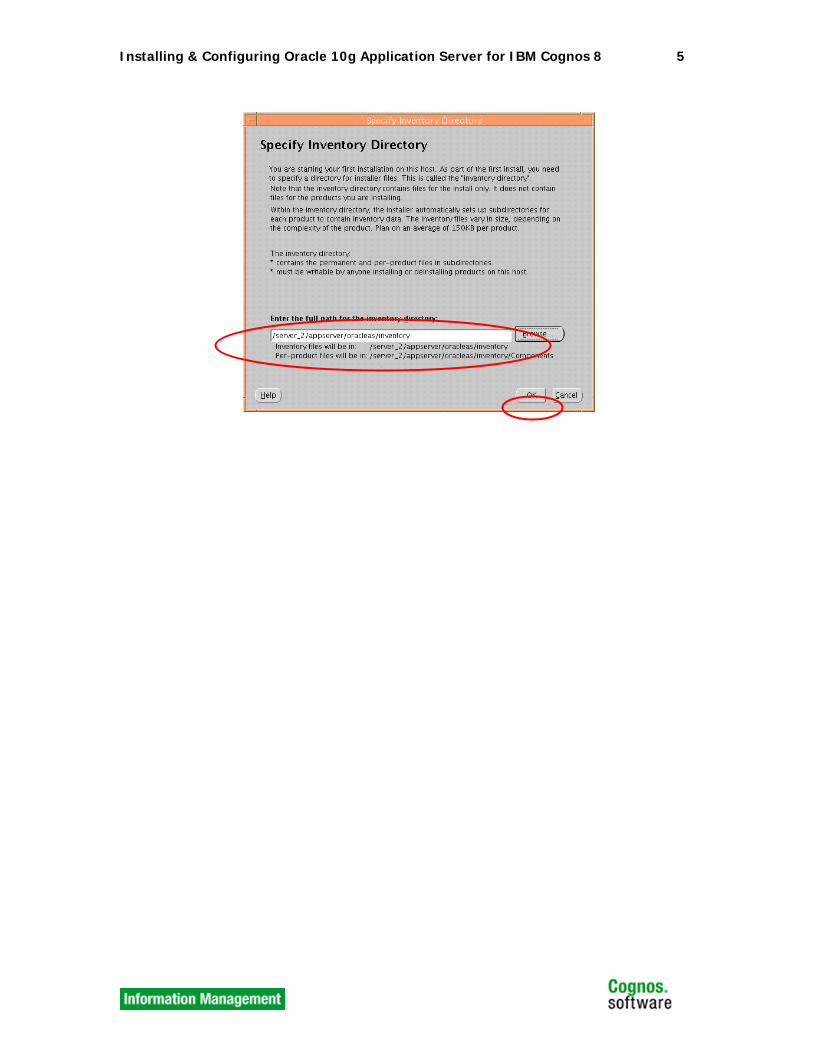
Oracle maintains a directory in which all Oracle applications are listed as a repository or inventory. Please specify a directory path to be used for this inventory.
Installing & Configuring Oracle 10g Application Server for IBM Cognos 8 5
Installing & Configuring Oracle 10g Application Server for IBM Cognos 8 6
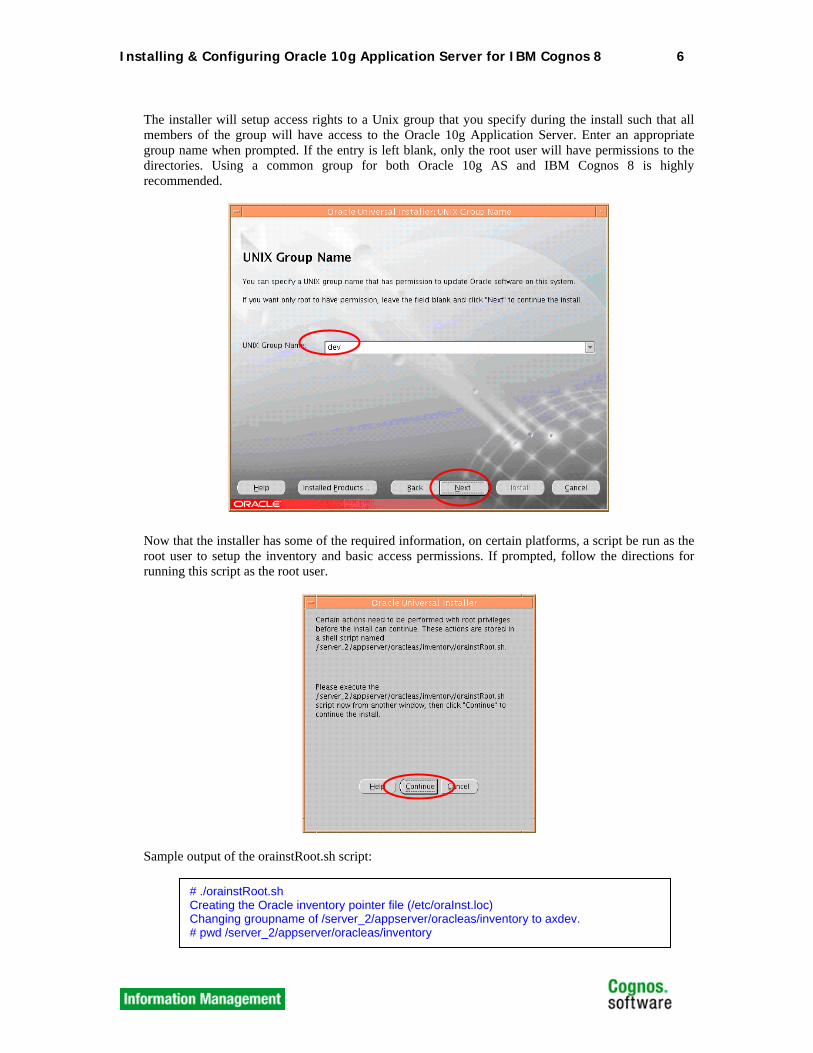
The installer will setup access rights to a Unix group that you specify during the install such that all members of the group will have access to the Oracle 10g Application Server. Enter an appropriate group name when prompted. If the entry is left blank, only the root user will have permissions to the directories. Using a common group for both Oracle 10g AS and IBM Cognos 8 is highly recommended.
Now that the installer has some of the required information, on certain platforms, a script be run as the root user to setup the inventory and basic access permissions. If prompted, follow the directions for running this script as the root user.
Sample output of the orainstRoot.sh script:
# ./orainstRoot.sh Creating the Oracle inventory pointer file (/etc/oraInst.loc) Changing groupname of /server_2/appserver/oracleas/inventory to axdev. # pwd /server_2/appserver/oracleas/inventory
Installing & Configuring Oracle 10g Application Server for IBM Cognos 8 7
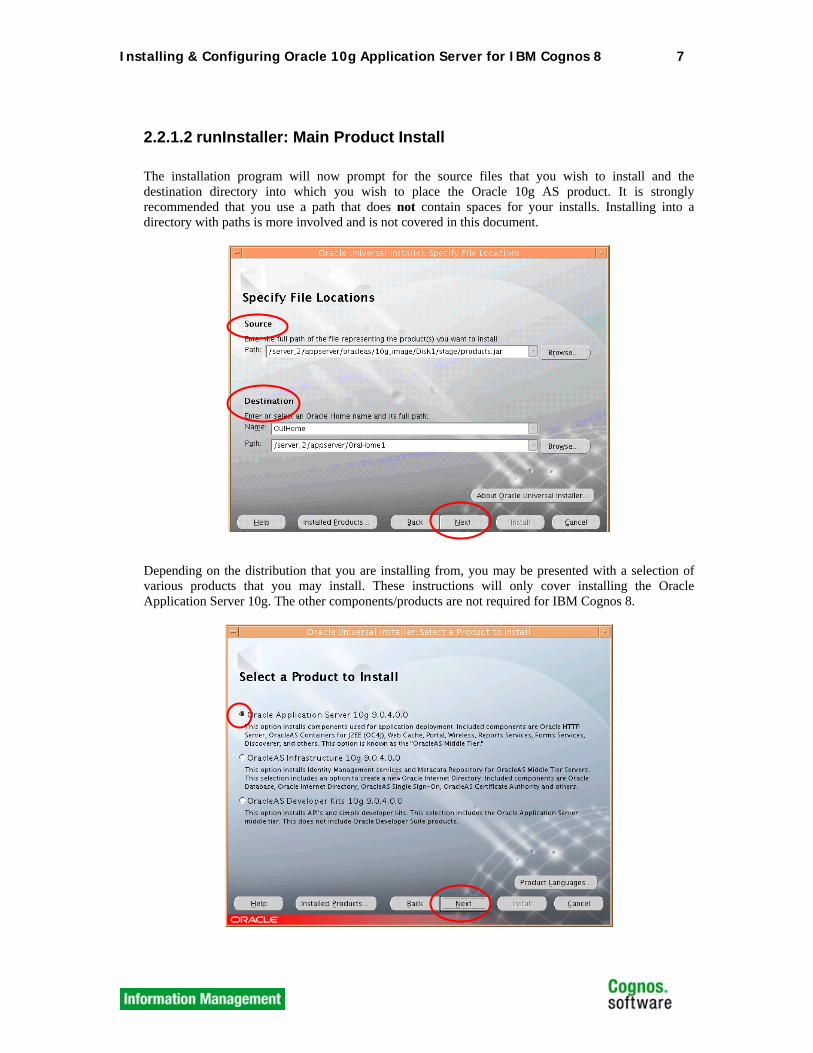
2.2.1.2 runInstaller: Main Product Install The installation program will now prompt for the source files that you wish to install and the destination directory into which you wish to place the Oracle 10g AS product. It is strongly recommended that you use a path that does not contain spaces for your installs. Installing into a directory with paths is more involved and is not covered in this document.
Depending on the distribution that you are installing from, you may be presented with a selection of various products that you may install. These instructions will only cover installing the Oracle Application Server 10g. The other components/products are not required for IBM Cognos 8.

Installing & Configuring Oracle 10g Application Server for IBM Cognos 8 8
Oracle 10g AS can be installed to support a variety of interfaces and install types. This document only covers the J2EE engine and Web Cache as the others products are optional and are not required for basic IBM Cognos 8 operation. Ensure the appropriate selection is made.
You will now be presented with the steps necessary to install the OracleAS Middle Tier.

Installing & Configuring Oracle 10g Application Server for IBM Cognos 8 9
A list of requirements will be presented that you must acknowledge prior to continuing the installation. In this example, the only requirement that requires acknowledgement is that the root user be used to run another script when prompted. Check off any requirements after verifying that you meet the conditions.
A number of configuration options may be selected during the install process. None are required for the operation of IBM Cognos 8. In this example, none will be selected.
Installing & Configuring Oracle 10g Application Server for IBM Cognos 8 10
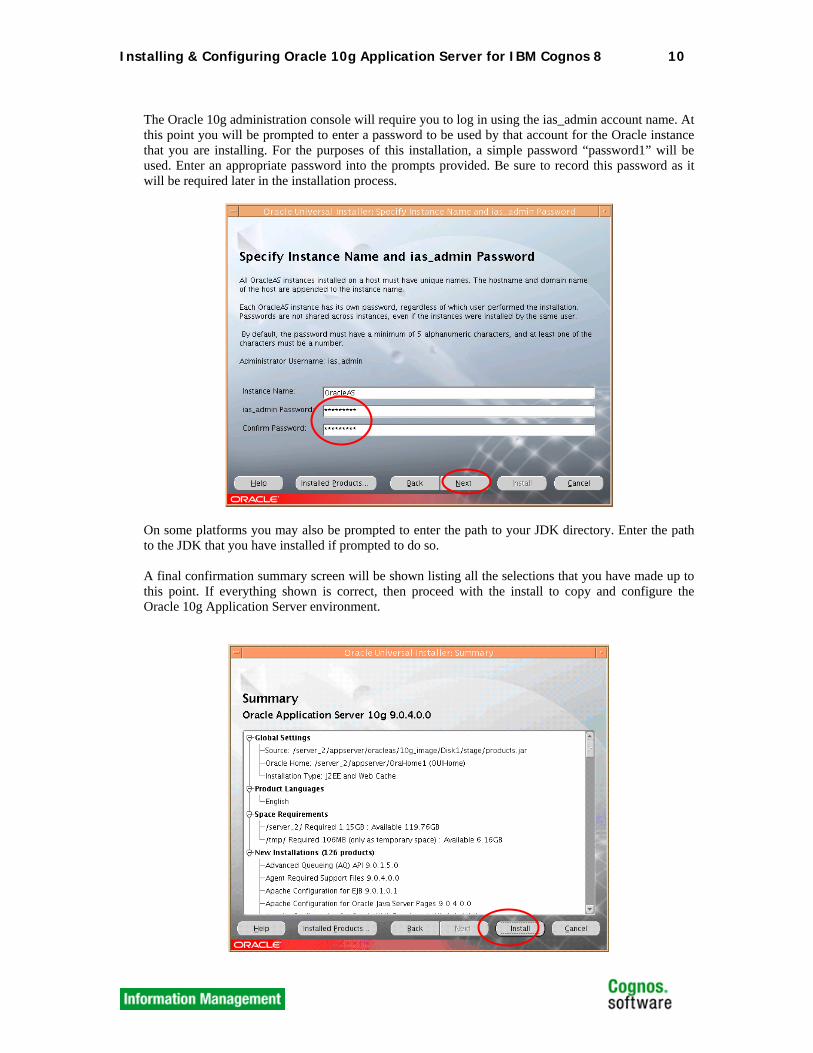
The Oracle 10g administration console will require you to log in using the ias_admin account name. At this point you will be prompted to enter a password to be used by that account for the Oracle instance that you are installing. For the purposes of this installation, a simple password “password1” will be used. Enter an appropriate password into the prompts provided. Be sure to record this password as it will be required later in the installation process.
On some platforms you may also be prompted to enter the path to your JDK directory. Enter the path to the JDK that you have installed if prompted to do so. A final confirmation summary screen will be shown listing all the selections that you have made up to this point. If everything shown is correct, then proceed with the install to copy and configure the Oracle 10g Application Server environment.

Installing & Configuring Oracle 10g Application Server for IBM Cognos 8 11
The installation will take several minutes. Files will be copied to the specified destinations and related configuration tasks will be performed.
On Unix, it may be necessary to run a script as the root user to set appropriate access rights and update key files. If the following window opens during the install, follow the directions provided then press OK.
Installing & Configuring Oracle 10g Application Server for IBM Cognos 8 12
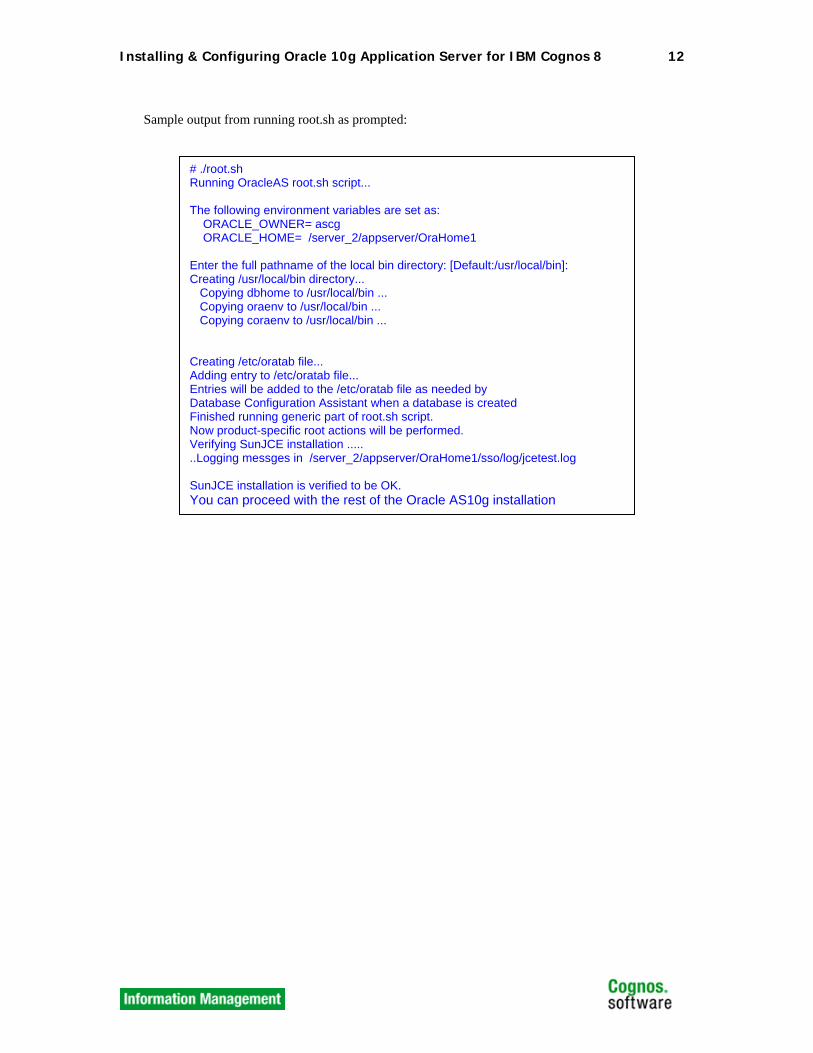
Sample output from running root.sh as prompted:
# ./root.sh Running OracleAS root.sh script... The following environment variables are set as: ORACLE_OWNER= ascg ORACLE_HOME= /server_2/appserver/OraHome1 Enter the full pathname of the local bin directory: [Default:/usr/local/bin]: Creating /usr/local/bin directory... Copying dbhome to /usr/local/bin ... Copying oraenv to /usr/local/bin ... Copying coraenv to /usr/local/bin ... Creating /etc/oratab file... Adding entry to /etc/oratab file... Entries will be added to the /etc/oratab file as needed by Database Configuration Assistant when a database is created Finished running generic part of root.sh script. Now product-specific root actions will be performed. Verifying SunJCE installation ..... ..Logging messges in /server_2/appserver/OraHome1/sso/log/jcetest.log SunJCE installation is verified to be OK. You can proceed with the rest of the Oracle AS10g installation

Installing & Configuring Oracle 10g Application Server for IBM Cognos 8 13
The installation will continue after running the root.sh script.
Configuration steps will be automatically performed.
Once the installation and configuration steps have completed, review the results as indicated in the output window. Rectify any errors and make note of any failures. If performed in the correct order, with appropriate access rights, there should not be any failures.

Installing & Configuring Oracle 10g Application Server for IBM Cognos 8 14
Make note of the URL’s provided at the end of the installation. These will be required to further configure Oracle 10g and also to configure IBM Cognos 8.
2.2.1.3 runInstaller: Installation Complete After a successful install, the installation window should close and the Oracle 10g AS should start automatically. This is indicated in the screen shot below showing the OPMN process is running.

Installing & Configuring Oracle 10g Application Server for IBM Cognos 8 15
2.3 Steps to Install Oracle 10g Release 3
2.3.1 Prepare the Installation Environment Follow the directions under Oracle 10g Release 1 & 2 above to extract or copy the files in preparation for the install.
2.3.2 Start the install program Start the Oracle 10g AS installation by running the runInstaller program/script after expanding the Oracle 10g archive files or inserting/mounting the CD-ROM discs. This script can also be found in the root of the Disk1 directory. You will be prompted to confirm any actions that are required to be performed prior to running the installer if they are required in your environment. If there are any additional requirements, please perform the actions as specified by the installer. Launch the runInstaller program and Select Advanced Installation Mode.
Continue the Advanced Installation by selecting Yes if prompted as in the sample dialogue box below.

Installing & Configuring Oracle 10g Application Server for IBM Cognos 8 16
Select the type of installation that will be performed. An all inclusive “Integrated Web Server, J2EE Server and Process Management” install is recommended as it includes all the necessary components.
Allow the installer to automatically select the ports that Oracle AS will use unless you know they will conflict with existing products.

Installing & Configuring Oracle 10g Application Server for IBM Cognos 8 17
Ensure the “Configure this as an Administration OC4J instance” check box is checked so that the administrative functions of OracleAS will be installed.
Enter a unique Oracle Application Server Instance Name and Administrator Account Password. The Administration user account name cannot be changed Make note of these values as they will be required in order to administer the Oracle Application Server.

Installing & Configuring Oracle 10g Application Server for IBM Cognos 8 18
Ensure the Clustering checkbox is not checked on the Cluster Topology Configuration entry screen.
A summary page will be displayed prior to performing the selected actions. Verify the information is accurate before proceeding with the install.

Installing & Configuring Oracle 10g Application Server for IBM Cognos 8 19
Installation progress will be displayed as actions are completed.
An End of Installation dialogue will be displayed indicating success or any failures that were encountered. Important: Make note of the URLs and ports indicated as they will be necessary to complete the installation of IBM Cognos 8.

Installing & Configuring Oracle 10g Application Server for IBM Cognos 8 20
2.4 Oracle 10g Welcome Page and Administration Portal Start Oracle 10g Application Server. For Windows, start the server from Windows Services or from a command prompt. For UNIX, run the command “opmnctl startall” from <AS_location>/opmn/bin and “emctl start iasconsole” from <AS_location>/bin. Start a browser session and access the Oracle 10g HTTP Server using the URL and port specified at the end of the installation. (Default hostname:7777). The Welcome page should be displayed as per the example below.
2.4.1 Oracle 10g Administration Page Access the Administration URL as indicated at the end of the installation process. (Default hostname:1810 or hostname:7777/em) or click “Log on to Oracle Enterprise Manager 10g Application Server Control” in the welcome page, the Application Server Control log in page will be displayed. You will be prompted to login using the username “ias_admin” (release 1 & 2) or “oc4jadmin (release 3) and the password specified during the install (password1 in our example). Click the “Save this password in our password list” check box so that you do not have to enter this information every time you access the administration portal.
or
Installing & Configuring Oracle 10g Application Server for IBM Cognos 8 21
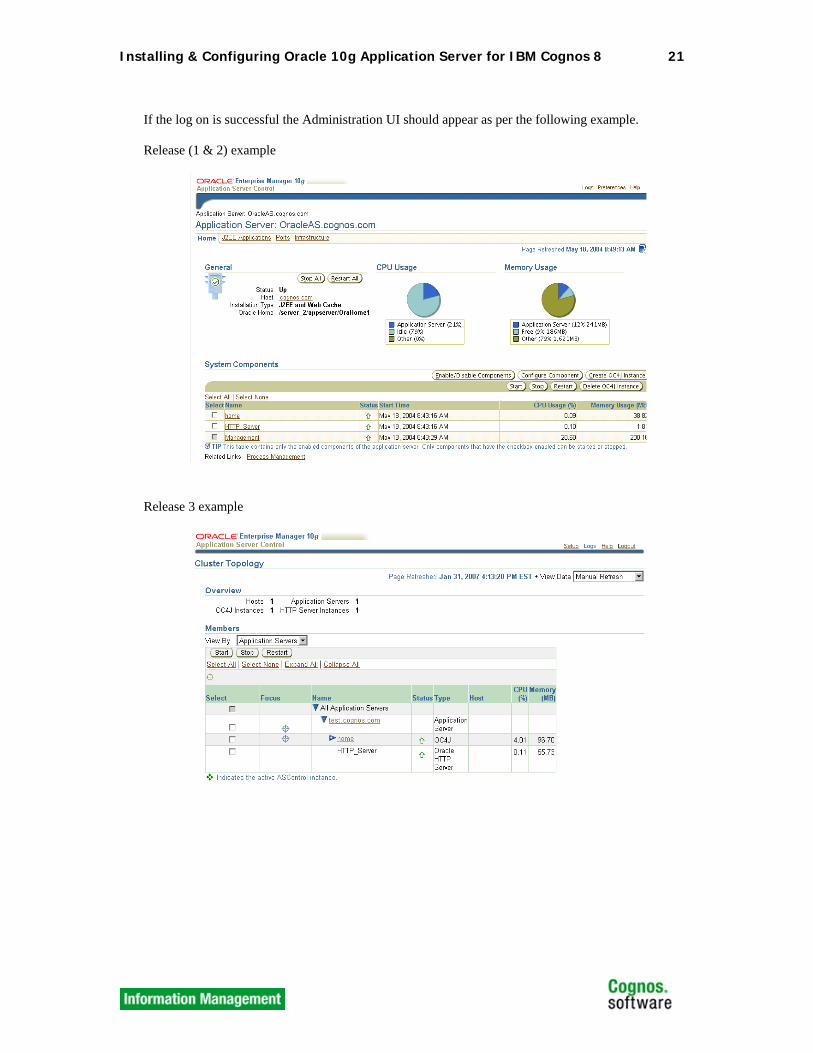
If the log on is successful the Administration UI should appear as per the following example. Release (1 & 2) example
Release 3 example

Installing & Configuring Oracle 10g Application Server for IBM Cognos 8 22
3. INSTALLING IBM COGNOS 8 The specifics for installing IBM Cognos 8 can be found in the customer documentation. There is also a chapter that deals with installing IBM Cognos 8 within an Application Server, such as Oracle 10g. This section will provide a detailed look at how to make the changes listed in the customer documentation and expand on other areas.
3.1 Install IBM Cognos 8 Follow the customer documentation to install IBM Cognos 8 into an appropriate directory (avoid directory paths that include spaces). It is recommended, in particular for a test environment, that you use the same user account to install and run Oracle 10g as you do for installing IBM Cognos 8 so that you do not encounter file or directory permission issues. The next best alternative is to create a group that has full permissions to both installs.
3.2 Install Database Client(s) Ensure that all necessary client software is installed and available to the user account that will run Oracle 10g for access to the database that you will use for Content Manager as well as your report database(s). The database that will be used as the Content Manager data store must be created and a user id / password must be given appropriate rights to the database. It is recommended that you verify access to the database using an appropriate tool (such as sqlplus) to ensure the client software is installed and configured correctly. Keep in mind that this environment must be available to the user running Oracle 10g and IBM Cognos 8 and should therefore be setup in such a way that it is set automatically. The easiest way to accomplish this under Windows is to set it up as global environment variables. The proper way to set this up under Windows and Unix is to modify the iasenv.bat (Windows) or iasenv.sh (Unix) to set the appropriate environment. This file may be found in the <Oracle 10g_ROOT>\bin directory. Additionally, it is necessary to enter the variable information within Oracle A/S as will be demonstrated later in this document.
3.3 Setup the Web Server Follow the standard customer documentation to configure a Web Server in your environment if you are using one. Since most versions of Oracle 10g ship with the Apache HTTP Server, you may use it or any other web server that is supported by IBM Cognos 8. Note: The user account that runs the Web Server must have appropriate rights to access the <Cog8_root> directory as well. A basic Apache setup requires only that you add the following to the HTTPD.CONF file located in the <path to Apache>/conf directory. Add these directives to the end of the file changing the paths as appropriate:
Installing & Configuring Oracle 10g Application Server for IBM Cognos 8 23
3.4 Back up Existing IBM Cognos 8 Information Should you already have content in the Content Manager data store or if you have already created the encryption keys (using IBM Cognos Configuration), then it is important to follow the directions in the customer documentation to backup the critical components, which include: • The content store data by creating a deployment export; • Configuration information (cogstartup.xml) by exporting it to decrypt it; • The cryptographic keys by saving the files and directories to an alternate location. Following these steps is critical to ensure that the existing information will still be available in the new environment and to ensure that you can go back to your previous install if something goes wrong. It is particularly important to follow these steps if the JVM is changing from one vendor to another since the encryption keys will change.
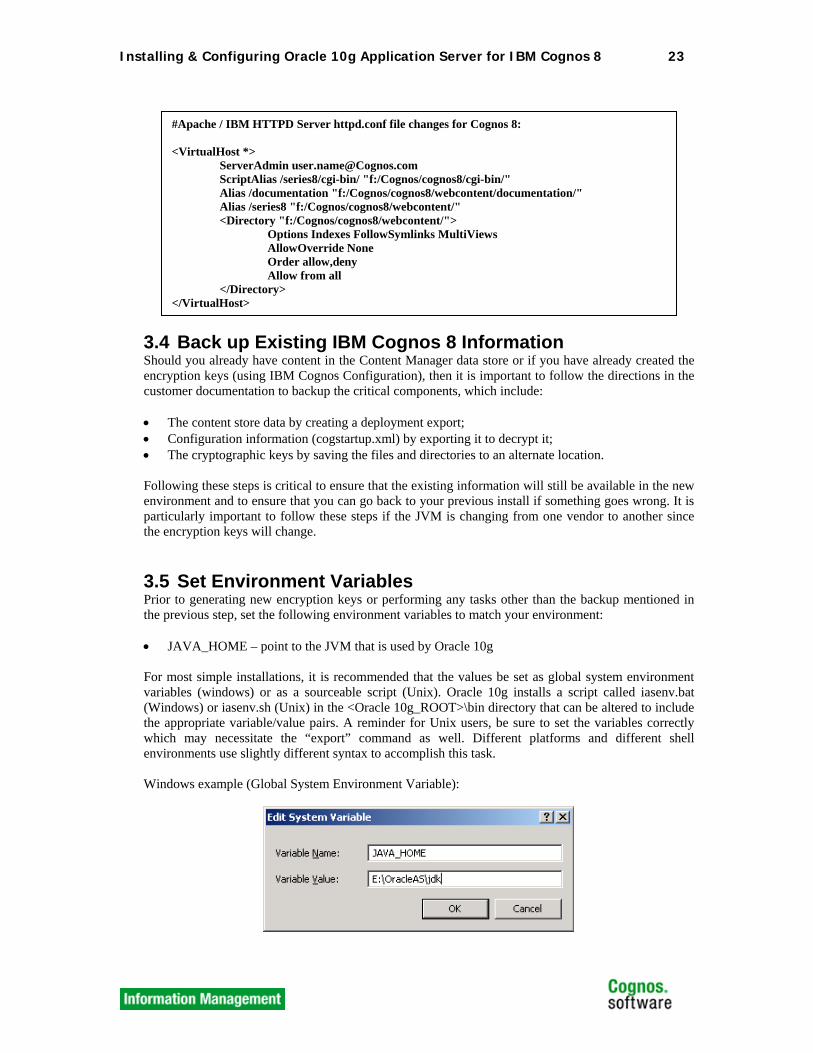
3.5 Set Environment Variables Prior to generating new encryption keys or performing any tasks other than the backup mentioned in the previous step, set the following environment variables to match your environment: • JAVA_HOME – point to the JVM that is used by Oracle 10g For most simple installations, it is recommended that the values be set as global system environment variables (windows) or as a sourceable script (Unix). Oracle 10g installs a script called iasenv.bat (Windows) or iasenv.sh (Unix) in the <Oracle 10g_ROOT>\bin directory that can be altered to include the appropriate variable/value pairs. A reminder for Unix users, be sure to set the variables correctly which may necessitate the “export” command as well. Different platforms and different shell environments use slightly different syntax to accomplish this task. Windows example (Global System Environment Variable):
#Apache / IBM HTTPD Server httpd.conf file changes for Cognos 8: <VirtualHost *>
ServerAdmin [email protected] ScriptAlias /series8/cgi-bin/ "f:/Cognos/cognos8/cgi-bin/" Alias /documentation "f:/Cognos/cognos8/webcontent/documentation/" Alias /series8 "f:/Cognos/cognos8/webcontent/" <Directory "f:/Cognos/cognos8/webcontent/">
Options Indexes FollowSymlinks MultiViews AllowOverride None Order allow,deny Allow from all
</Directory> </VirtualHost>
Installing & Configuring Oracle 10g Application Server for IBM Cognos 8 24
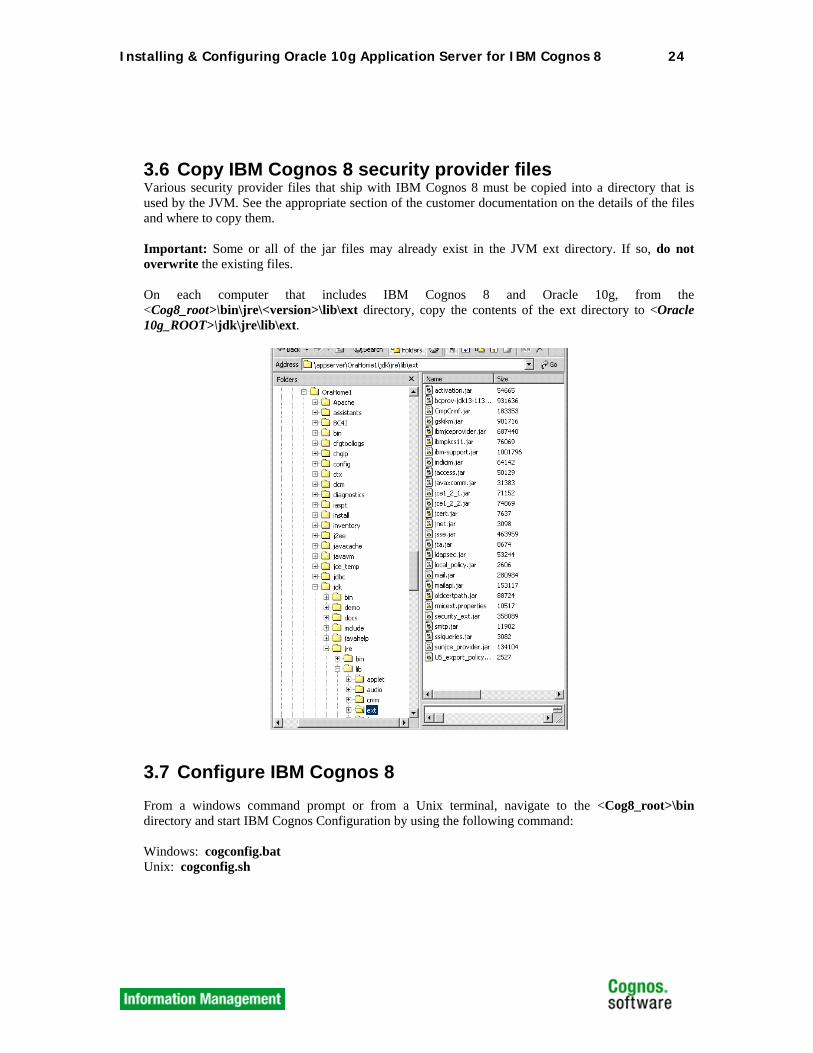
3.6 Copy IBM Cognos 8 security provider files Various security provider files that ship with IBM Cognos 8 must be copied into a directory that is used by the JVM. See the appropriate section of the customer documentation on the details of the files and where to copy them. Important: Some or all of the jar files may already exist in the JVM ext directory. If so, do not overwrite the existing files. On each computer that includes IBM Cognos 8 and Oracle 10g, from the <Cog8_root>\bin\jre\<version>\lib\ext directory, copy the contents of the ext directory to <Oracle 10g_ROOT>\jdk\jre\lib\ext.
3.7 Configure IBM Cognos 8 From a windows command prompt or from a Unix terminal, navigate to the <Cog8_root>\bin directory and start IBM Cognos Configuration by using the following command: Windows: cogconfig.bat Unix: cogconfig.sh

Installing & Configuring Oracle 10g Application Server for IBM Cognos 8 25
Starting IBM Cognos Configuration in this way will allow it to use the JVM as configured by the JAVA_HOME variable that you set in a previous step. Verify that the correct path is displayed by the J_HOME variable.
3.8 Set the Values in IBM Cognos Configuration.
3.8.1 Oracle 10g Host and Port In the Explorer window, click on Environment and then change the following properties to use the Oracle 10g host name and port number. The Oracle 10g default port is 7777, your environment may vary. • Internal Dispatcher URI • External Dispatcher URI • Content Manager URI • Dispatcher URI for external applications
3.8.2 Remove IBM Cognos 8 Service Under Environment, IBM Cognos 8 Service, right-click IBM Cognos 8, and then click Delete. Now IBM Cognos 8 will not run as a service, which is not required for Oracle 10g, since these settings pertain only to running under Tomcat.
3.8.3 Other Environmental Configuration Complete other required configuration changes such as: • Specifying properties for the Content Manager database • Supplying user IDs and passwords • Specifying authentication sources • Other specific values to match your environment
Installing & Configuring Oracle 10g Application Server for IBM Cognos 8 26
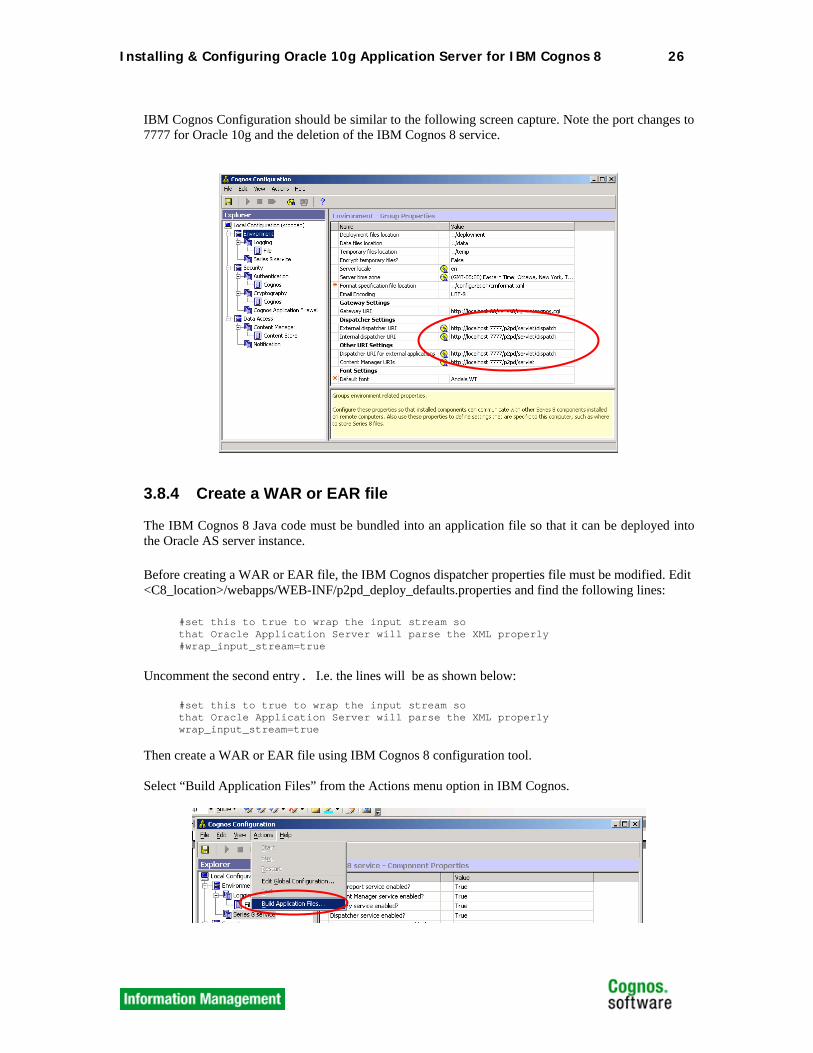
IBM Cognos Configuration should be similar to the following screen capture. Note the port changes to 7777 for Oracle 10g and the deletion of the IBM Cognos 8 service.
3.8.4 Create a WAR or EAR file The IBM Cognos 8 Java code must be bundled into an application file so that it can be deployed into the Oracle AS server instance.
Before creating a WAR or EAR file, the IBM Cognos dispatcher properties file must be modified. Edit <C8_location>/webapps/WEB-INF/p2pd_deploy_defaults.properties and find the following lines:
#set this to true to wrap the input stream so that Oracle Application Server will parse the XML properly #wrap_input_stream=true
Uncomment the second entry. I.e. the lines will be as shown below:
#set this to true to wrap the input stream so that Oracle Application Server will parse the XML properly wrap_input_stream=true
Then create a WAR or EAR file using IBM Cognos 8 configuration tool. Select “Build Application Files” from the Actions menu option in IBM Cognos.

Installing & Configuring Oracle 10g Application Server for IBM Cognos 8 27
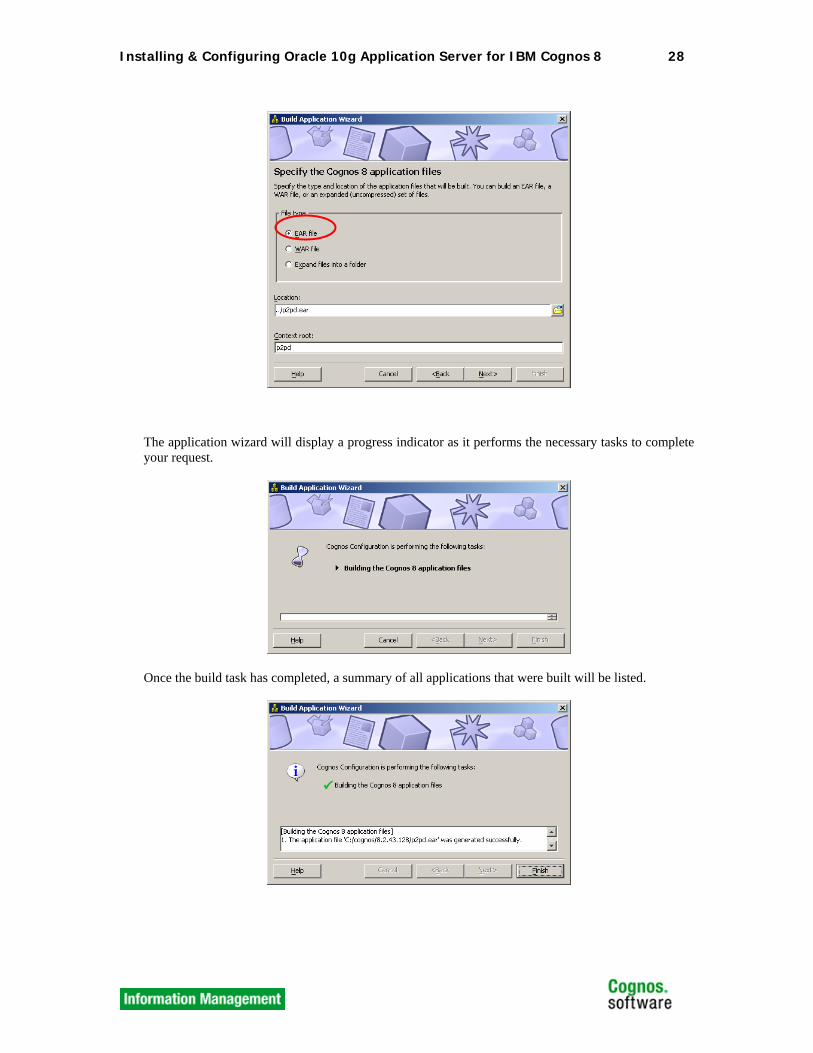
A full IBM Cognos 8 install includes 2 applications that can be built and deployed to the Application Server. The IBM Cognos 8 application and the Servlet Gateway. The IBM Cognos 8 application contains the core functions such as Content Manager, Application Tier, Dispatcher depending on the original install options. The Servlet Gateway is an alternative to Cognos.cgi, the isapi.dll or the Apache modules and is a Java implementation that can be deployed to the Application Server. IBM Cognos 8 can be used without a gateway in place by accessing the Dispatcher URL directly. In this case, or any other case where you wish to have the static content (html, images, javascripts, etc) provided by the Application Server, select the “Include static files from the Webcontent folder”. If you are running a standalone gateway, this is not required and will considerably reduce the size of the application file that will be deployed. If documentation and sample files are not required, they may also be selectively excluded further reducing the application file size. Most Application Servers support deploying application files as either WAR (Web ARchive) or EAR (Enterprise ARchive) files. There is very little difference between the two formats but an EAR file will provide a few default prompt values required by the Application Server. For Oracle Application Server, ensure the “Other” Application Server Type radio button is selected.
NOTE: There is an issue when deploying a WAR or EAR file that includes the webcontent. The workaround is to exclude the webcontent from the WAR/EAR file if you encounter a 500 error webpage when you deploy the application. ie ensure the “Include static files from the Webcontent folder” is NOT checked in the step above. Alternatively, you can use the command line tools provided with Oracle A/S to deploy the application file. More information on this can be found in the deployment section of this document. Select the application file package type and the location into which you want to save the file. Ensure that there is adequate disk space. Based on your selections you may require up to 500MB of space or more including temporary files used in the build process.
Installing & Configuring Oracle 10g Application Server for IBM Cognos 8 28
The application wizard will display a progress indicator as it performs the necessary tasks to complete your request.
Once the build task has completed, a summary of all applications that were built will be listed.

Installing & Configuring Oracle 10g Application Server for IBM Cognos 8 29
3.8.5 Save and Exit Cognos Configuration Save the configuration and close IBM Cognos Configuration. If you are prompted to start the IBM Cognos 8 service, click No (if you removed the IBM Cognos 8 Service, you should not be prompted). During the saving process, new cryptographic keys are created using the Oracle 10g JVM pointed to by the JAVA_HOME variable.
3.9 Configure Oracle 10g & Deploy IBM Cognos 8
3.9.1 Deploy IBM Cognos 8 in Oracle 10g Release 1 & 2
3.9.1.1 Launch the Oracle 10g Administration Console Start Oracle 10g by using an appropriate method depending on how you installed it. If you installed as a service you may use the Windows Services manager to start Oracle 10g or you can use the link in the Windows Start menu. You may also start Oracle 10g from a command prompt or Unix terminal session. Log on to the Administration portal using your browser and the credentials that you created during the install or Oracle AS.
Installing & Configuring Oracle 10g Application Server for IBM Cognos 8 30
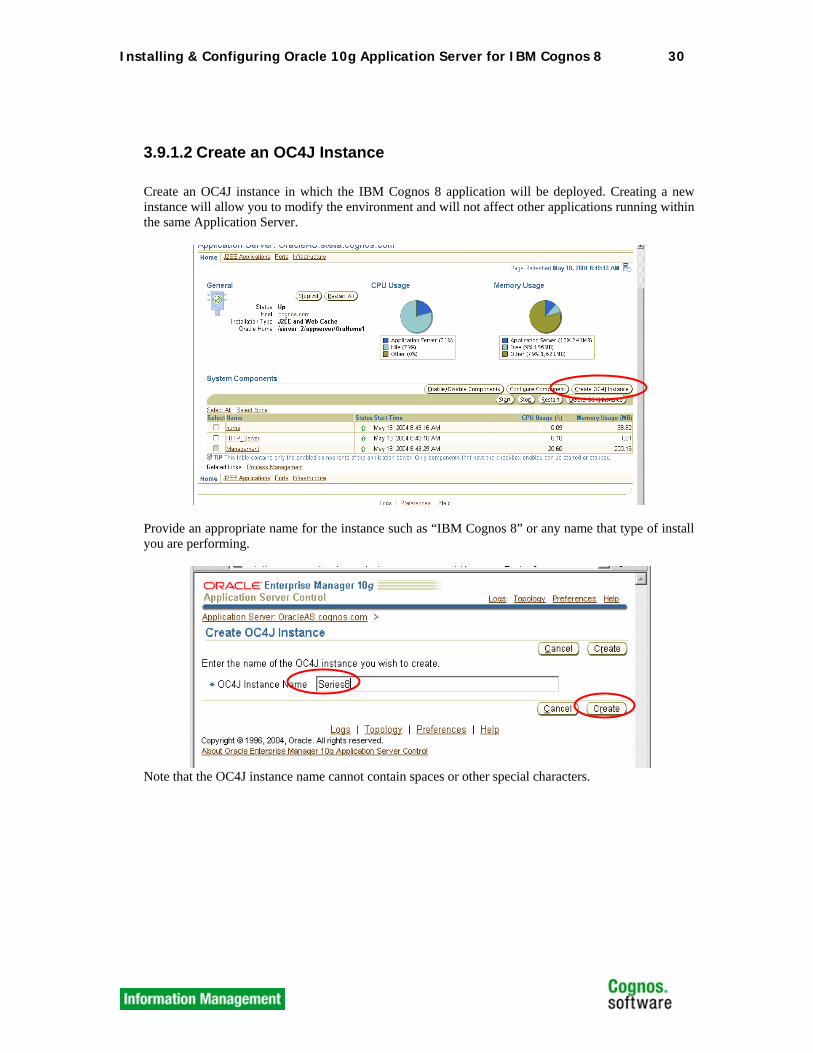
3.9.1.2 Create an OC4J Instance Create an OC4J instance in which the IBM Cognos 8 application will be deployed. Creating a new instance will allow you to modify the environment and will not affect other applications running within the same Application Server.
Provide an appropriate name for the instance such as “IBM Cognos 8” or any name that type of install you are performing.
Note that the OC4J instance name cannot contain spaces or other special characters.

Installing & Configuring Oracle 10g Application Server for IBM Cognos 8 31
If the OC4J instance creation fails, see the troubleshooting section on how to back out the last transaction.
Installing & Configuring Oracle 10g Application Server for IBM Cognos 8 32
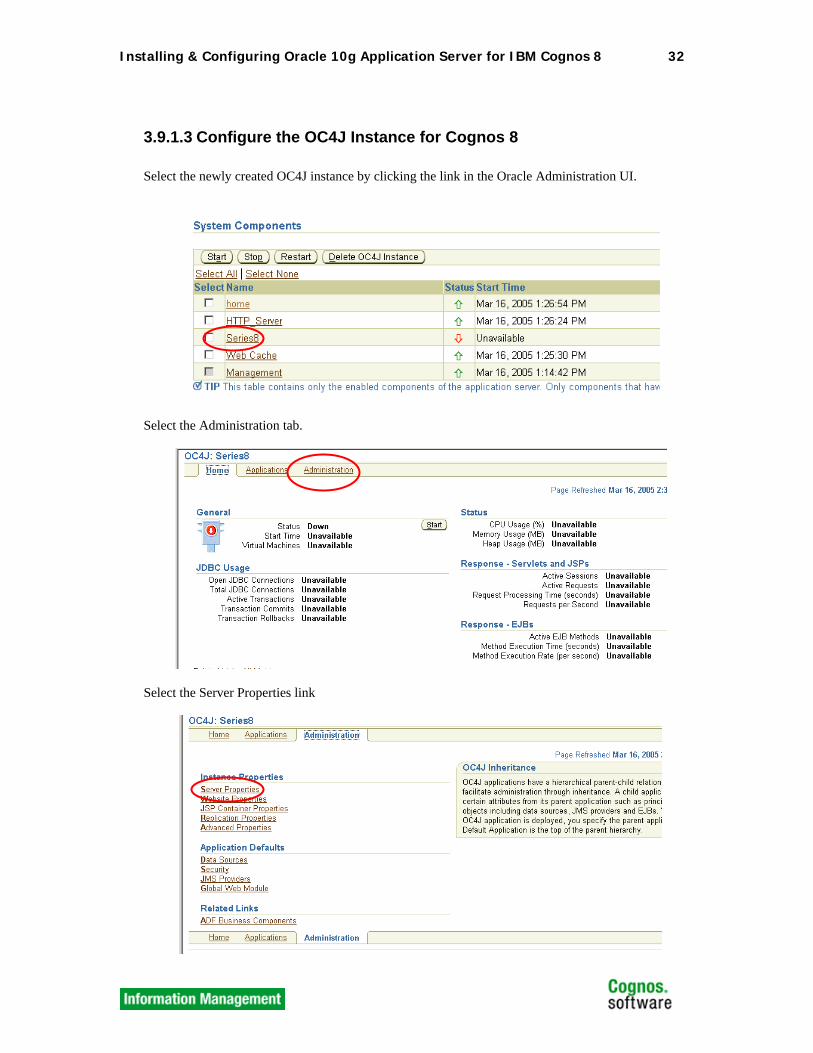
3.9.1.3 Configure the OC4J Instance for Cognos 8 Select the newly created OC4J instance by clicking the link in the Oracle Administration UI.
Select the Administration tab.
Select the Server Properties link
Installing & Configuring Oracle 10g Application Server for IBM Cognos 8 33
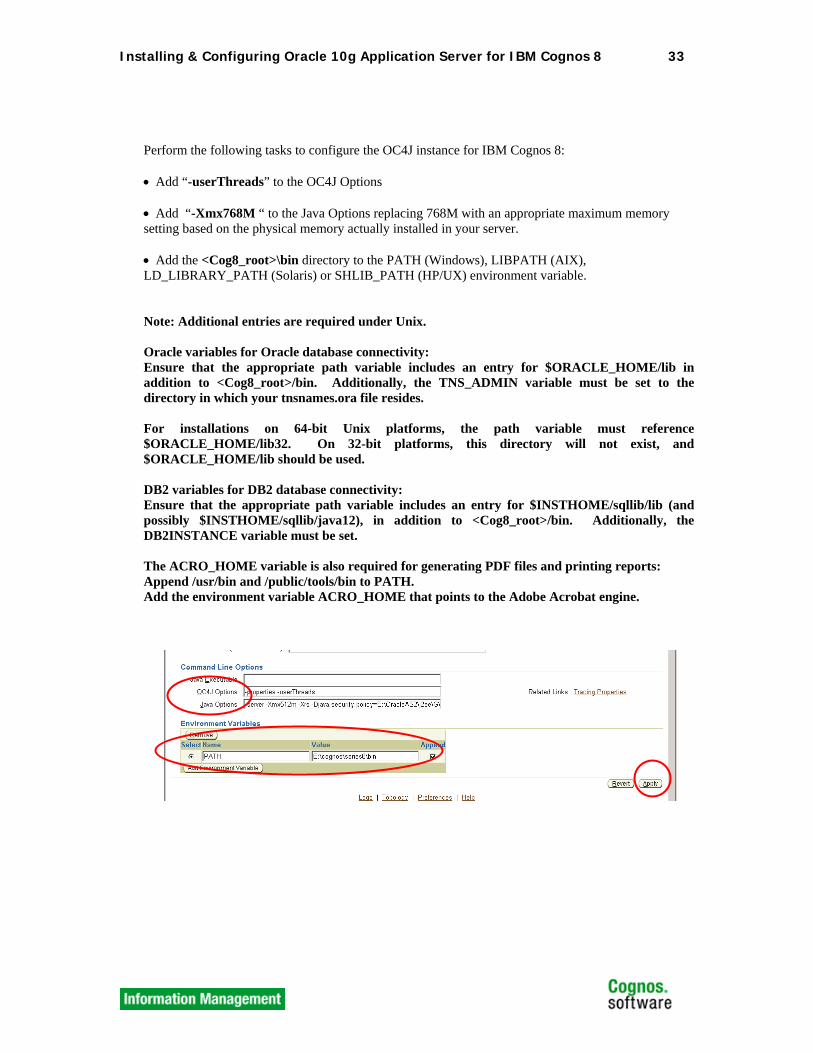
Perform the following tasks to configure the OC4J instance for IBM Cognos 8: • Add “-userThreads” to the OC4J Options • Add “-Xmx768M “ to the Java Options replacing 768M with an appropriate maximum memory setting based on the physical memory actually installed in your server. • Add the <Cog8_root>\bin directory to the PATH (Windows), LIBPATH (AIX), LD_LIBRARY_PATH (Solaris) or SHLIB_PATH (HP/UX) environment variable. Note: Additional entries are required under Unix. Oracle variables for Oracle database connectivity: Ensure that the appropriate path variable includes an entry for $ORACLE_HOME/lib in addition to <Cog8_root>/bin. Additionally, the TNS_ADMIN variable must be set to the directory in which your tnsnames.ora file resides. For installations on 64-bit Unix platforms, the path variable must reference $ORACLE_HOME/lib32. On 32-bit platforms, this directory will not exist, and $ORACLE_HOME/lib should be used. DB2 variables for DB2 database connectivity: Ensure that the appropriate path variable includes an entry for $INSTHOME/sqllib/lib (and possibly $INSTHOME/sqllib/java12), in addition to <Cog8_root>/bin. Additionally, the DB2INSTANCE variable must be set. The ACRO_HOME variable is also required for generating PDF files and printing reports: Append /usr/bin and /public/tools/bin to PATH. Add the environment variable ACRO_HOME that points to the Adobe Acrobat engine.

Installing & Configuring Oracle 10g Application Server for IBM Cognos 8 34
Start the OC4J instance using the start button on the “Home” tab.
3.9.1.4 Deploy the IBM Cognos 8 Application Select the Applications tab to begin the deployment of the IBM Cognos 8 application.
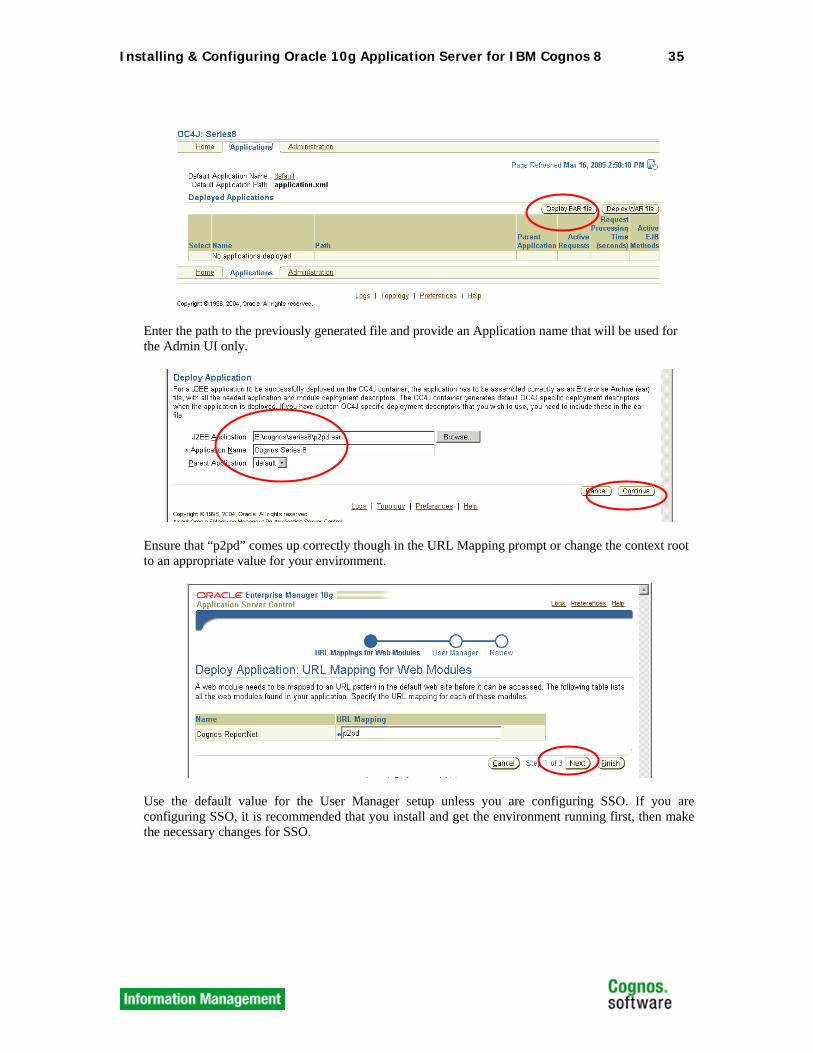
Depending on the file type that you created earlier, select “Deploy EAR file” or “Deploy WAR file”. Deploying an EAR file is used in this example.
Installing & Configuring Oracle 10g Application Server for IBM Cognos 8 35
Enter the path to the previously generated file and provide an Application name that will be used for the Admin UI only.
Ensure that “p2pd” comes up correctly though in the URL Mapping prompt or change the context root to an appropriate value for your environment.
Use the default value for the User Manager setup unless you are configuring SSO. If you are configuring SSO, it is recommended that you install and get the environment running first, then make the necessary changes for SSO.
Installing & Configuring Oracle 10g Application Server for IBM Cognos 8 36
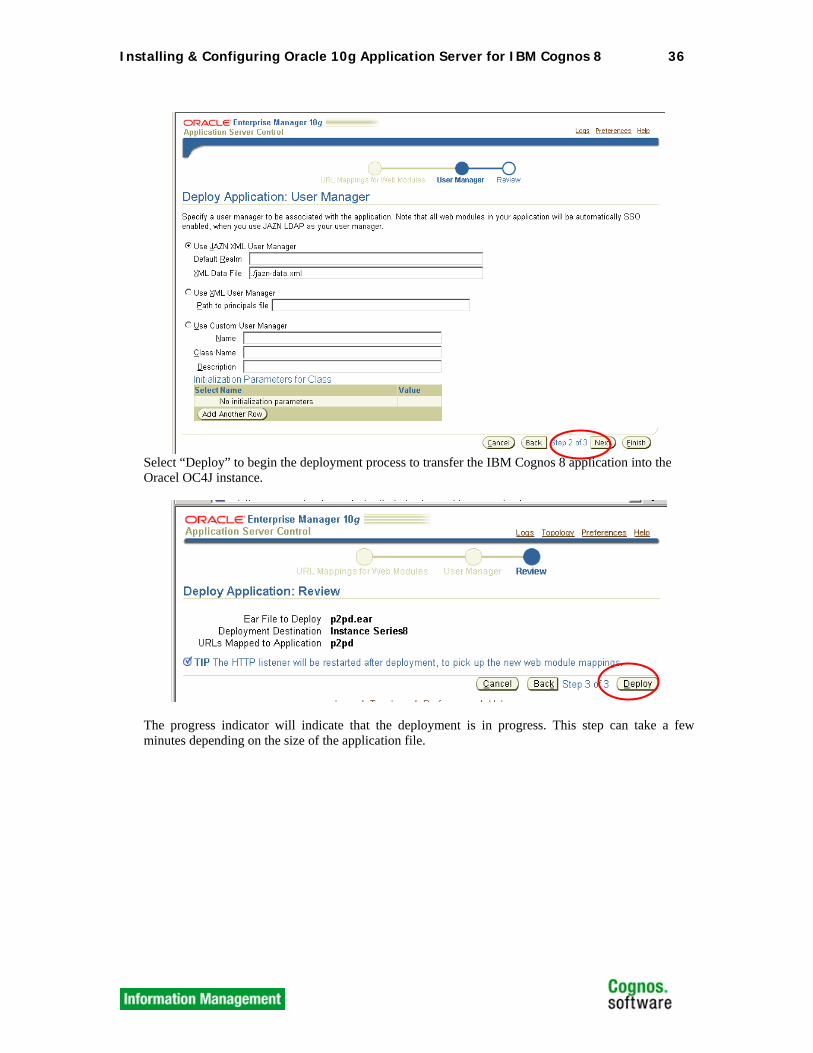
Select “Deploy” to begin the deployment process to transfer the IBM Cognos 8 application into the Oracel OC4J instance.
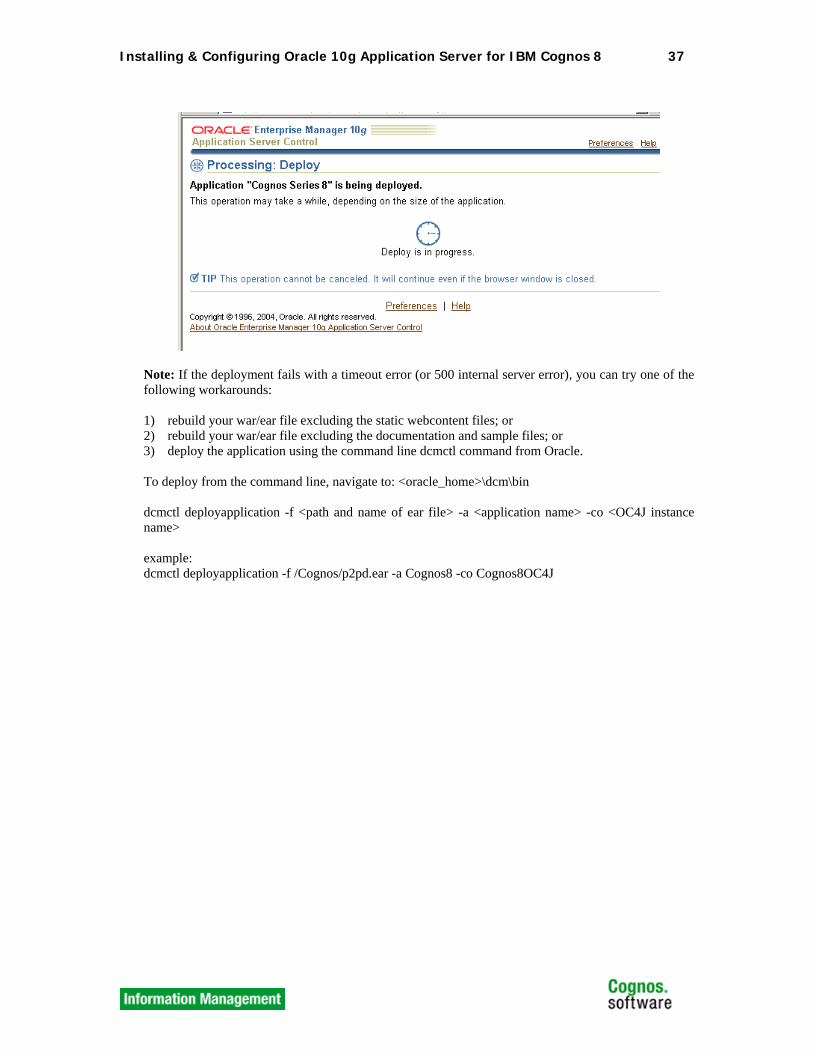
The progress indicator will indicate that the deployment is in progress. This step can take a few minutes depending on the size of the application file.
Installing & Configuring Oracle 10g Application Server for IBM Cognos 8 37
Note: If the deployment fails with a timeout error (or 500 internal server error), you can try one of the following workarounds: 1) rebuild your war/ear file excluding the static webcontent files; or 2) rebuild your war/ear file excluding the documentation and sample files; or 3) deploy the application using the command line dcmctl command from Oracle. To deploy from the command line, navigate to: <oracle_home>\dcm\bin dcmctl deployapplication -f <path and name of ear file> -a <application name> -co <OC4J instance name> example: dcmctl deployapplication -f /Cognos/p2pd.ear -a Cognos8 -co Cognos8OC4J
Installing & Configuring Oracle 10g Application Server for IBM Cognos 8 38
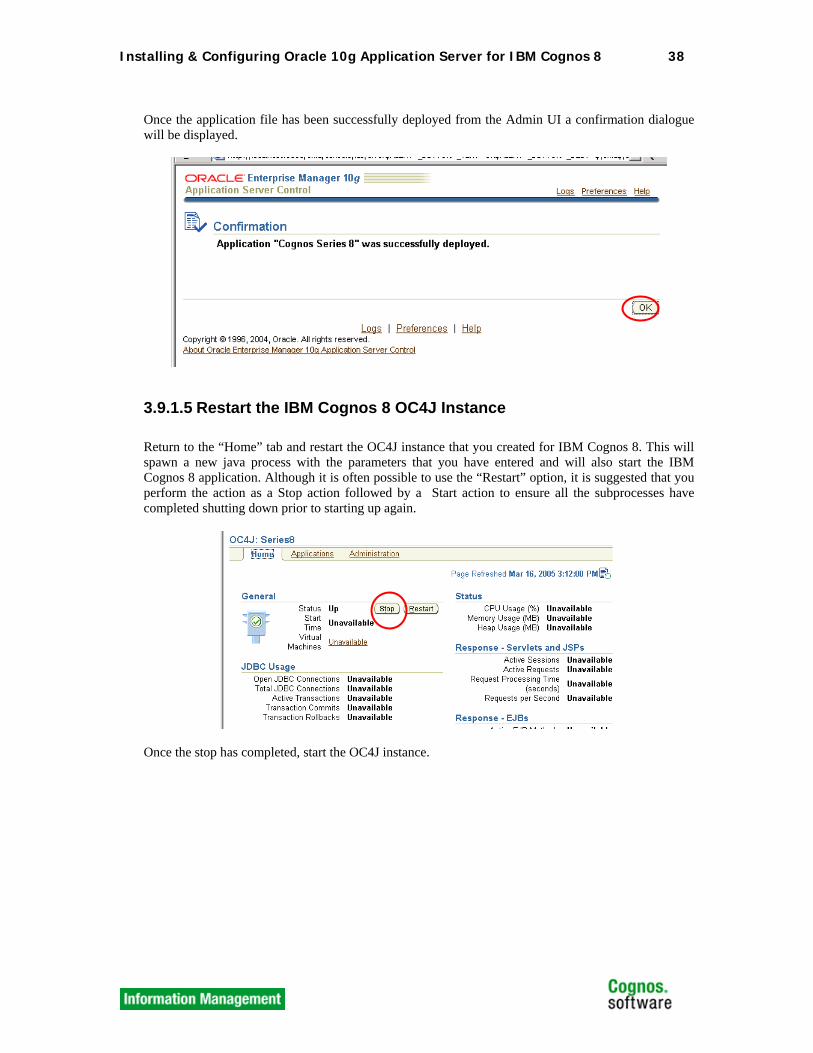
Once the application file has been successfully deployed from the Admin UI a confirmation dialogue will be displayed.
3.9.1.5 Restart the IBM Cognos 8 OC4J Instance Return to the “Home” tab and restart the OC4J instance that you created for IBM Cognos 8. This will spawn a new java process with the parameters that you have entered and will also start the IBM Cognos 8 application. Although it is often possible to use the “Restart” option, it is suggested that you perform the action as a Stop action followed by a Start action to ensure all the subprocesses have completed shutting down prior to starting up again.
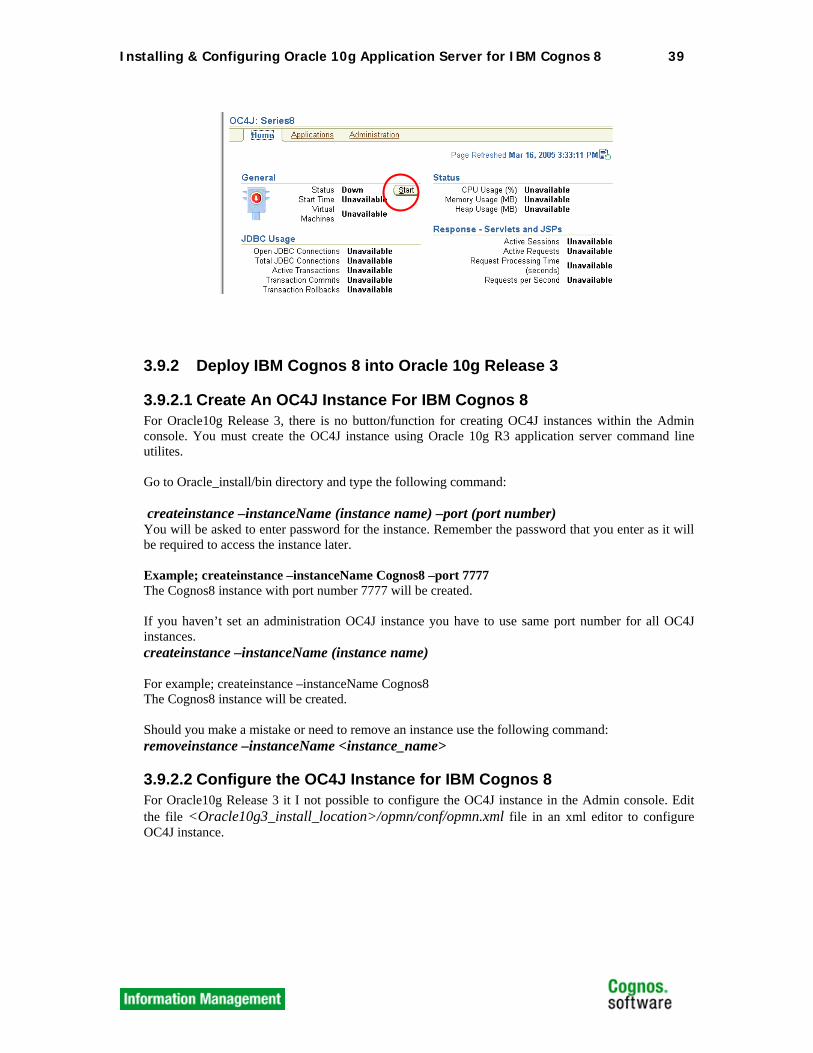
Once the stop has completed, start the OC4J instance.
Installing & Configuring Oracle 10g Application Server for IBM Cognos 8 39
3.9.2 Deploy IBM Cognos 8 into Oracle 10g Release 3
3.9.2.1 Create An OC4J Instance For IBM Cognos 8 For Oracle10g Release 3, there is no button/function for creating OC4J instances within the Admin console. You must create the OC4J instance using Oracle 10g R3 application server command line utilites. Go to Oracle_install/bin directory and type the following command: createinstance –instanceName (instance name) –port (port number) You will be asked to enter password for the instance. Remember the password that you enter as it will be required to access the instance later. Example; createinstance –instanceName Cognos8 –port 7777 The Cognos8 instance with port number 7777 will be created. If you haven’t set an administration OC4J instance you have to use same port number for all OC4J instances. createinstance –instanceName (instance name) For example; createinstance –instanceName Cognos8 The Cognos8 instance will be created. Should you make a mistake or need to remove an instance use the following command: removeinstance –instanceName <instance_name>
3.9.2.2 Configure the OC4J Instance for IBM Cognos 8 For Oracle10g Release 3 it I not possible to configure the OC4J instance in the Admin console. Edit the file <Oracle10g3_install_location>/opmn/conf/opmn.xml file in an xml editor to configure OC4J instance.

Installing & Configuring Oracle 10g Application Server for IBM Cognos 8 40
Sample opmn.xml file with the changes highlighted Locate the OC4J instance, “cognos8” in this example. Insert the changes into the sections shown.
For Unix systems, use an appropriate environment variable depending on your operating system. For example, Solaris uses LD_LIBRARY_PATH, AIX uses LIBPATH and HPUX uses SHLIB_PATH. Database variables or anything else required in the environment should also be added to this file. For db2 example, you have to add
To resolve a printing issue on Windows, load the file <Oracle_install>\j2ee\<Instance>\config\global-web-application.xml into an editor and comment out the following section:
<process-type id="cognos8" module-id="OC4J" status="enabled"> <environment> <variable id="PATH" value="<Cognos8_install_location>/bin" append="true"/> </environment> <module-data> <category id="start-parameters">
<data id="java-options" value="-server -Xmx768m -XX:MaxNewSize=384m -XX:NewSize=192m -XX:MaxPermSize=128m -Djava.security.policy=$ORACLE_HOME/j2ee/cognos/config/java2.policy -Djava.awt.headless=true -Dhttp.webdir.enable=false"/>
<data id="oc4j-options" value="-properties -userThreads"/> </category> <category id="stop-parameters">
<data id="java-options" value="-Djava.security.policy=$ORACLE_HOME/j2ee/cognos/config/java2.policy -Djava.awt.headless=true -Dhttp.webdir.enable=false"/>
</category> </module-data> <start timeout="600" retry="2"/> <stop timeout="120"/> <restart timeout="720" retry="2"/> <port id="default-web-site" range="12501-12600" protocol="ajp"/> <port id="rmi" range="12401-12500"/> <port id="jms" range="12601-12700"/> <process-set id="default_group" numprocs="1"/> </process-type>
<environment> <variable id="PATH" value=”/usr/opt/db2/lib” append="true"/> <variable id="DB2DIR" value="<location>"/> <variable id="DB2INSTANCE value="<location>"/> <variable id="INSTHOME value="<location>"/> </environment>
<welcome-file-list> <welcome-file>index.html</welcome-file> <welcome-file>default.jsp</welcome-file> <welcome-file>index.htm</welcome-file> <welcome-file>index.jsp</welcome-file> </welcome-file-list>
Installing & Configuring Oracle 10g Application Server for IBM Cognos 8 41
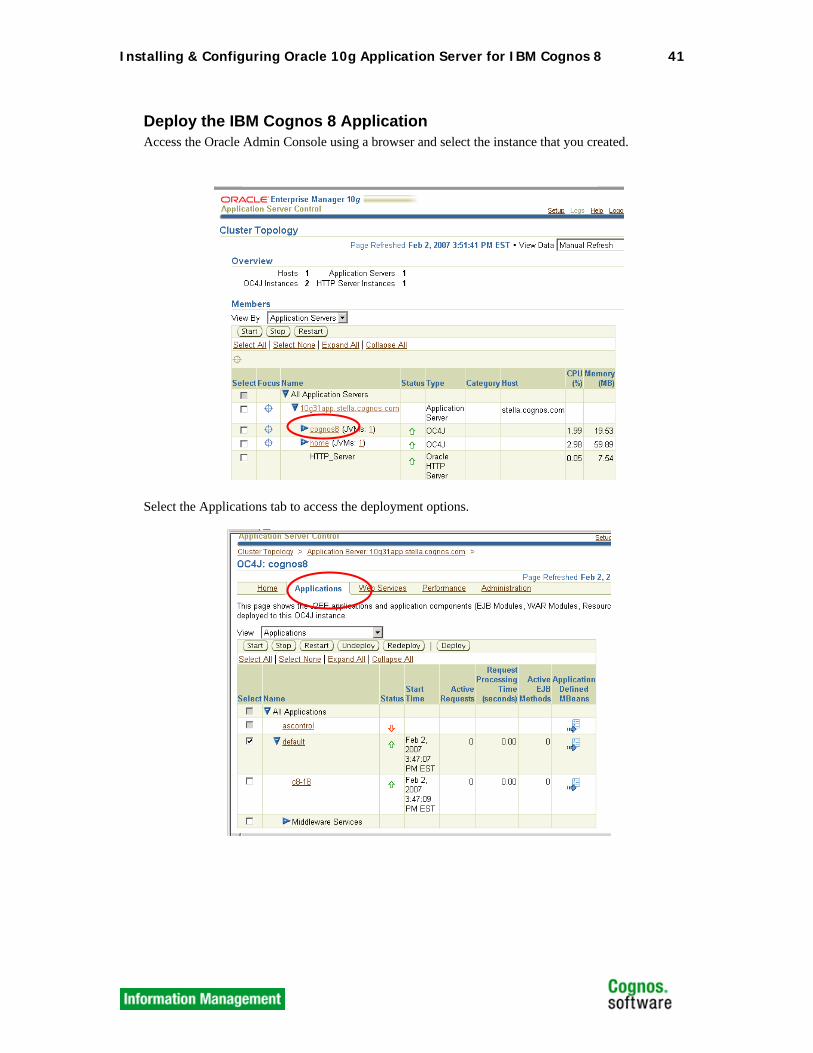
Deploy the IBM Cognos 8 Application Access the Oracle Admin Console using a browser and select the instance that you created.
Select the Applications tab to access the deployment options.

Installing & Configuring Oracle 10g Application Server for IBM Cognos 8 42
Select the Deploy button.
Browse to or enter the path and name of the Application you created previously.
Enter an Application name that will be used to reference this application. Any name can be used.

Installing & Configuring Oracle 10g Application Server for IBM Cognos 8 43
Click Deploy to begin the deployment process.
The deployment tasks will be listed and their completion status shown during the deployment process.
3.9.2.3 Restart the IBM Cognos 8 OC4j Instance For Windows, stop the Oracle AS service using the service manager or use the command prompts. For Windows and Unix, use the “opmnctl stopall” and “opmnctl startall” commands in <Oracle_install_location>/opmn/bin directory to perform this task.
Installing & Configuring Oracle 10g Application Server for IBM Cognos 8 44
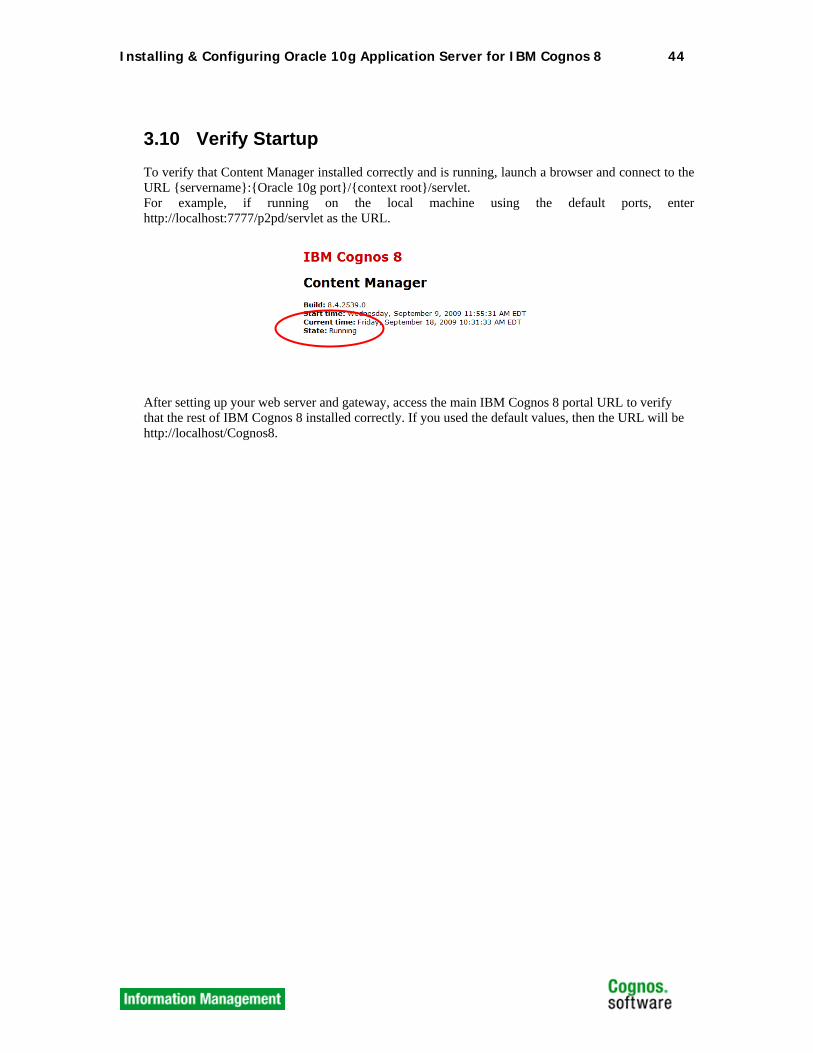
3.10 Verify Startup To verify that Content Manager installed correctly and is running, launch a browser and connect to the URL {servername}:{Oracle 10g port}/{context root}/servlet. For example, if running on the local machine using the default ports, enter http://localhost:7777/p2pd/servlet as the URL.
After setting up your web server and gateway, access the main IBM Cognos 8 portal URL to verify that the rest of IBM Cognos 8 installed correctly. If you used the default values, then the URL will be http://localhost/Cognos8.
Installing & Configuring Oracle 10g Application Server for IBM Cognos 8 45
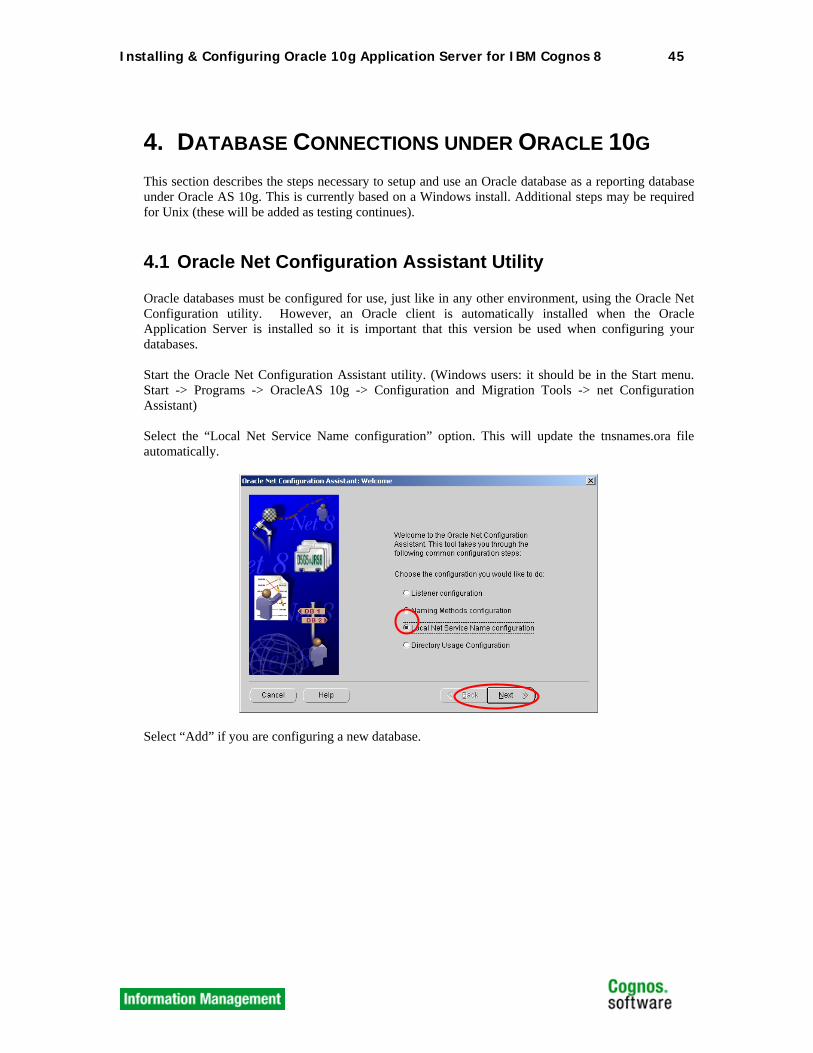
4. DATABASE CONNECTIONS UNDER ORACLE 10G This section describes the steps necessary to setup and use an Oracle database as a reporting database under Oracle AS 10g. This is currently based on a Windows install. Additional steps may be required for Unix (these will be added as testing continues).
4.1 Oracle Net Configuration Assistant Utility Oracle databases must be configured for use, just like in any other environment, using the Oracle Net Configuration utility. However, an Oracle client is automatically installed when the Oracle Application Server is installed so it is important that this version be used when configuring your databases. Start the Oracle Net Configuration Assistant utility. (Windows users: it should be in the Start menu. Start -> Programs -> OracleAS 10g -> Configuration and Migration Tools -> net Configuration Assistant) Select the “Local Net Service Name configuration” option. This will update the tnsnames.ora file automatically.
Select “Add” if you are configuring a new database.

Installing & Configuring Oracle 10g Application Server for IBM Cognos 8 46
Select the appropriate option when prompted for the Oracle database version that you wish to connect to. In this example an older 8.0 database will be used.
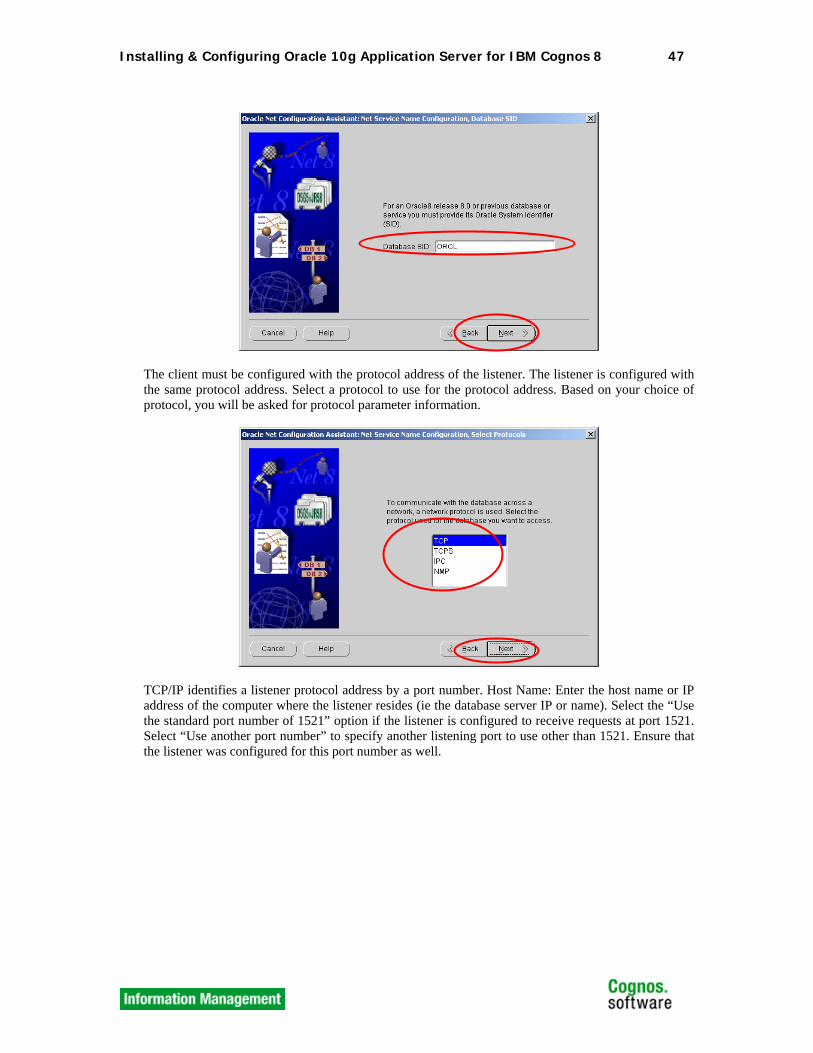
Enter the Oracle System Identifier (SID) of the database. The character length can be no longer than nine (9) characters. The SID is the identifier for an instance of the Oracle database running on that computer. It is created during database creation. If you are not sure what the SID is, ask your DBA.
Installing & Configuring Oracle 10g Application Server for IBM Cognos 8 47
The client must be configured with the protocol address of the listener. The listener is configured with the same protocol address. Select a protocol to use for the protocol address. Based on your choice of protocol, you will be asked for protocol parameter information.
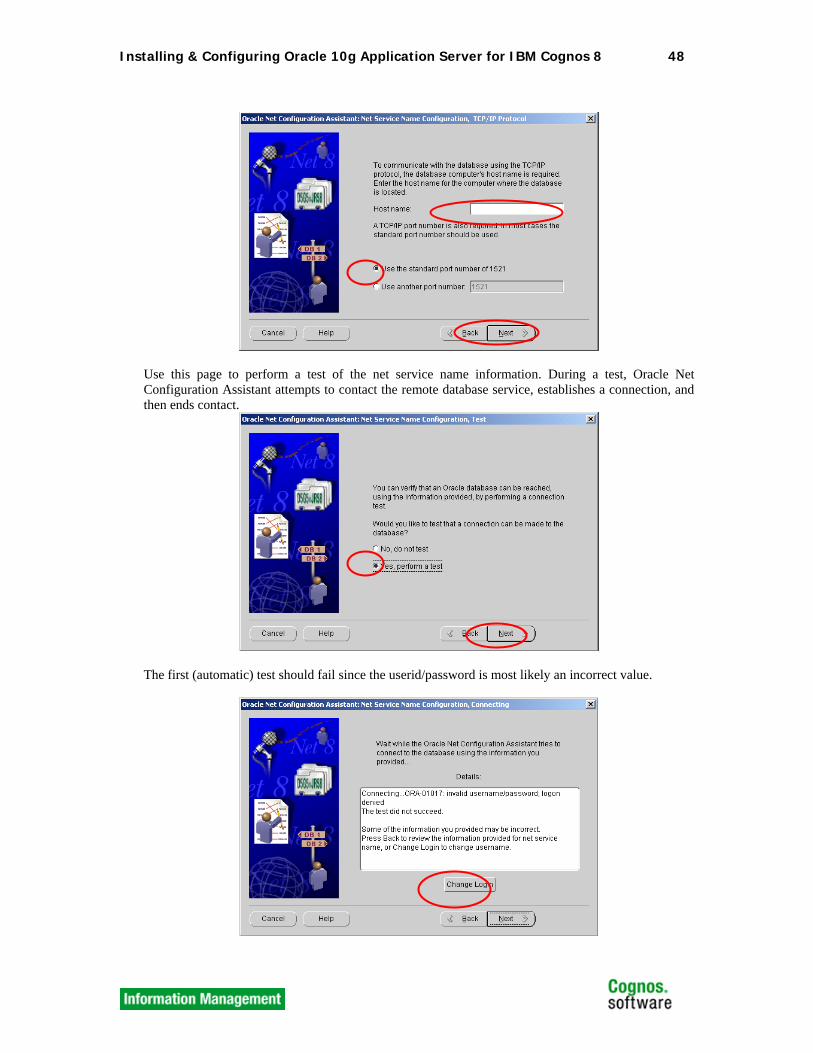
TCP/IP identifies a listener protocol address by a port number. Host Name: Enter the host name or IP address of the computer where the listener resides (ie the database server IP or name). Select the “Use the standard port number of 1521” option if the listener is configured to receive requests at port 1521. Select “Use another port number” to specify another listening port to use other than 1521. Ensure that the listener was configured for this port number as well.
Installing & Configuring Oracle 10g Application Server for IBM Cognos 8 48
Use this page to perform a test of the net service name information. During a test, Oracle Net Configuration Assistant attempts to contact the remote database service, establishes a connection, and then ends contact.
The first (automatic) test should fail since the userid/password is most likely an incorrect value.

Installing & Configuring Oracle 10g Application Server for IBM Cognos 8 49
After the failure, select the “Change Login” button and replace the username and password with correct values for your environment.
Pressing “OK” from the Change Login screen will automatically perform a second connection test. If the Username and Password are accepted and the other information (hostname or ip address, port, etc) is correct, and the server is actually up and running then you should get a “Test successful” message.
Enter a net service name in the Net Service Name field. The name you enter should be unique to the client. This will be used within IBM Cognos 8 to connect to the database.
If you wish to add multiple databases, you may do so at this point. If you are done, you may continue with the default “No” selected.

Installing & Configuring Oracle 10g Application Server for IBM Cognos 8 50
Select “Next” to exit the Net Configuration Assistant tool.
4.2 Testing Database Setup / Connectivity
4.2.1 Windows It is a good idea to test the database connectivity again after running the configuration tool. This can be done at any time after your database is configured. This is particularly useful in a Unix environment to ensure that the shell that you are currently running within is set correctly. In Windows, you can use the SQLPlus tool to verify connectivity. Select the tool from the start menu. You will be prompted for the connection information. Enter an appropriate User Name, Password and Host String.

Installing & Configuring Oracle 10g Application Server for IBM Cognos 8 51
If the information is correct and the database server is running, you should see the “Connected to:” message as indicated below.
To verify that the tables are indeed available, you can enter the command “select * from user_tables;” and you should see information scroll by. Type “Quit” to exit.
4.2.2 Windows and Unix Similar to the Windows UI test listed above, on Windows and Unix you can also run the test from the command prompt. Type “sqlplus {username}/{password}@{host string}” replacing the tags listed with appropriate values.
To verify that the tables are indeed available, you can enter the command “select * from user_tables;” and you should see information scroll by. Type “Quit” to exit.
Installing & Configuring Oracle 10g Application Server for IBM Cognos 8 52
4.3 Additional Database Configuration Information
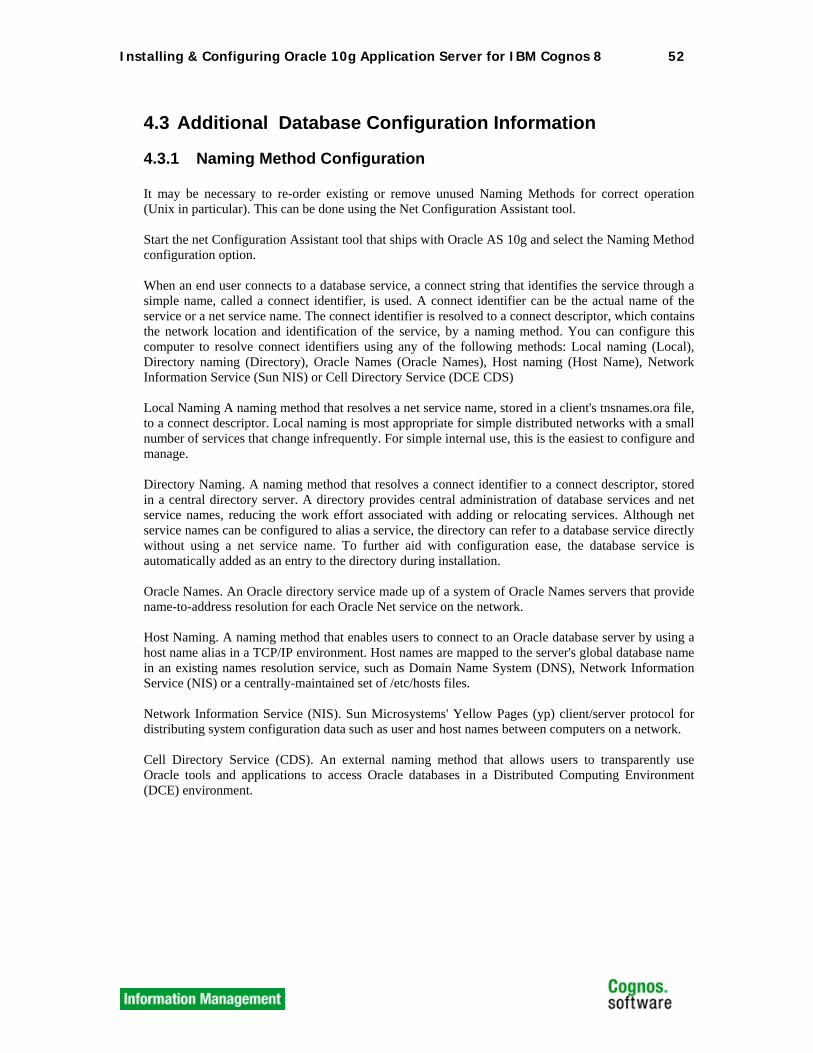
4.3.1 Naming Method Configuration It may be necessary to re-order existing or remove unused Naming Methods for correct operation (Unix in particular). This can be done using the Net Configuration Assistant tool. Start the net Configuration Assistant tool that ships with Oracle AS 10g and select the Naming Method configuration option. When an end user connects to a database service, a connect string that identifies the service through a simple name, called a connect identifier, is used. A connect identifier can be the actual name of the service or a net service name. The connect identifier is resolved to a connect descriptor, which contains the network location and identification of the service, by a naming method. You can configure this computer to resolve connect identifiers using any of the following methods: Local naming (Local), Directory naming (Directory), Oracle Names (Oracle Names), Host naming (Host Name), Network Information Service (Sun NIS) or Cell Directory Service (DCE CDS) Local Naming A naming method that resolves a net service name, stored in a client's tnsnames.ora file, to a connect descriptor. Local naming is most appropriate for simple distributed networks with a small number of services that change infrequently. For simple internal use, this is the easiest to configure and manage. Directory Naming. A naming method that resolves a connect identifier to a connect descriptor, stored in a central directory server. A directory provides central administration of database services and net service names, reducing the work effort associated with adding or relocating services. Although net service names can be configured to alias a service, the directory can refer to a database service directly without using a net service name. To further aid with configuration ease, the database service is automatically added as an entry to the directory during installation. Oracle Names. An Oracle directory service made up of a system of Oracle Names servers that provide name-to-address resolution for each Oracle Net service on the network. Host Naming. A naming method that enables users to connect to an Oracle database server by using a host name alias in a TCP/IP environment. Host names are mapped to the server's global database name in an existing names resolution service, such as Domain Name System (DNS), Network Information Service (NIS) or a centrally-maintained set of /etc/hosts files. Network Information Service (NIS). Sun Microsystems' Yellow Pages (yp) client/server protocol for distributing system configuration data such as user and host names between computers on a network. Cell Directory Service (CDS). An external naming method that allows users to transparently use Oracle tools and applications to access Oracle databases in a Distributed Computing Environment (DCE) environment.
Installing & Configuring Oracle 10g Application Server for IBM Cognos 8 53
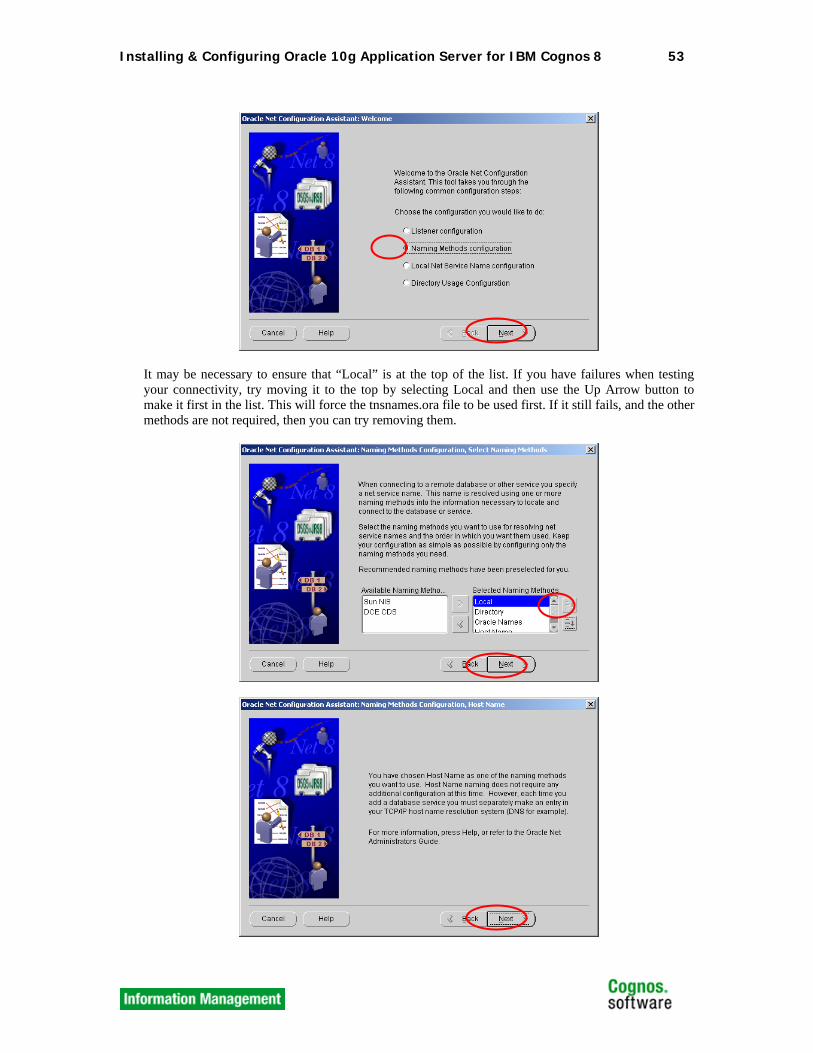
It may be necessary to ensure that “Local” is at the top of the list. If you have failures when testing your connectivity, try moving it to the top by selecting Local and then use the Up Arrow button to make it first in the list. This will force the tnsnames.ora file to be used first. If it still fails, and the other methods are not required, then you can try removing them.
Installing & Configuring Oracle 10g Application Server for IBM Cognos 8 54

Installing & Configuring Oracle 10g Application Server for IBM Cognos 8 55
5. ENABLING SSL The Oracle 10g Application Server ships with a default certificate wallet that configures the server to use SSL. Oracle warns that you should create your own wallet, since these defaults are not secure for a production environment. For the purposes of testing (and our demonstration), we will create a simple wallet file to use in place of the default. Note: Do not use Oracle’s default dummy SSL wallet. Cognos 8 will not trust the self-signed certificates that these produce, and will not launch. Important: You must install IBM Cognos 81.1 MR1 Hotsite build 319 in order to run IBM Cognos 8 with Oracle 10g and enabling SSL.
5.1 Oracle Wallet Management
5.1.1 Wallet Creation Oracle’s approach to certificate management is through the use of an “Oracle Wallet”. We will need to create a wallet in order to manage our certificates. More information can be found at: http://download-east.oracle.com/docs/cd/B10464_04/core.904/b10377/appowm.htm Navigate to $ORACLE_HOME/bin, and from the command line, type “owm”, and the Oracle Wallet Manager should start.
From the “Wallet” menu, choose “New”. The tool may display the following warning:
Click no, if this does appear. Next, you will be prompted for a password:

Installing & Configuring Oracle 10g Application Server for IBM Cognos 8 56
After supplying a password, you should see the following dialog:
For now, click “no”. You should see a list of trusted certificates under your new wallet:
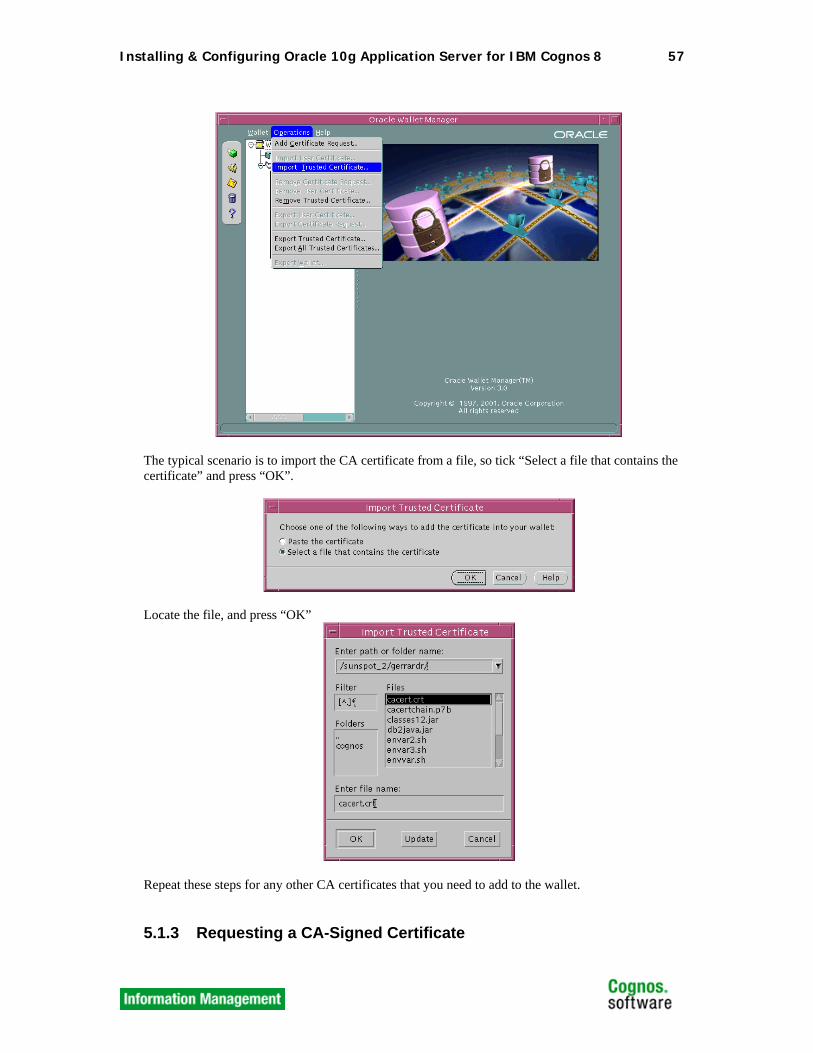
5.1.2 Import CA certificates From the “Operations” menu, choose “Import Trusted Certificate” to import any root or intermediate certificates from your choice of CA (if they are not already present in the list).
Installing & Configuring Oracle 10g Application Server for IBM Cognos 8 57
The typical scenario is to import the CA certificate from a file, so tick “Select a file that contains the certificate” and press “OK”.
Locate the file, and press “OK”
Repeat these steps for any other CA certificates that you need to add to the wallet.
5.1.3 Requesting a CA-Signed Certificate
Installing & Configuring Oracle 10g Application Server for IBM Cognos 8 58
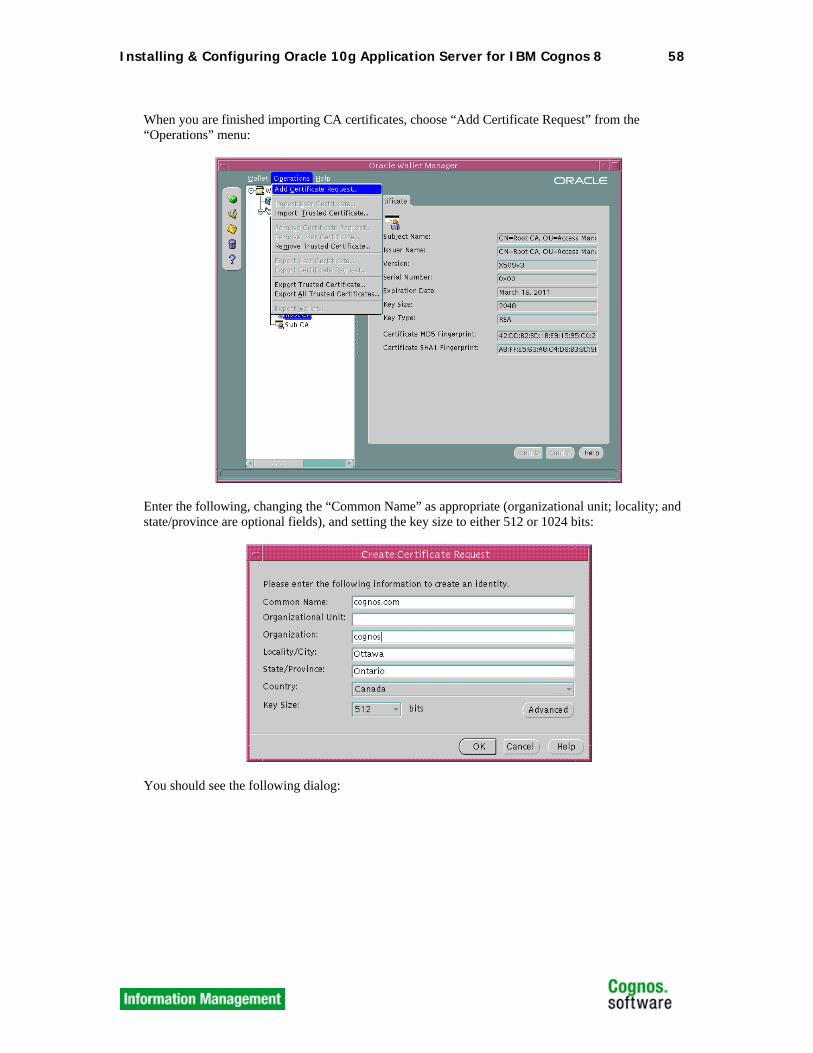
When you are finished importing CA certificates, choose “Add Certificate Request” from the “Operations” menu:
Enter the following, changing the “Common Name” as appropriate (organizational unit; locality; and state/province are optional fields), and setting the key size to either 512 or 1024 bits:
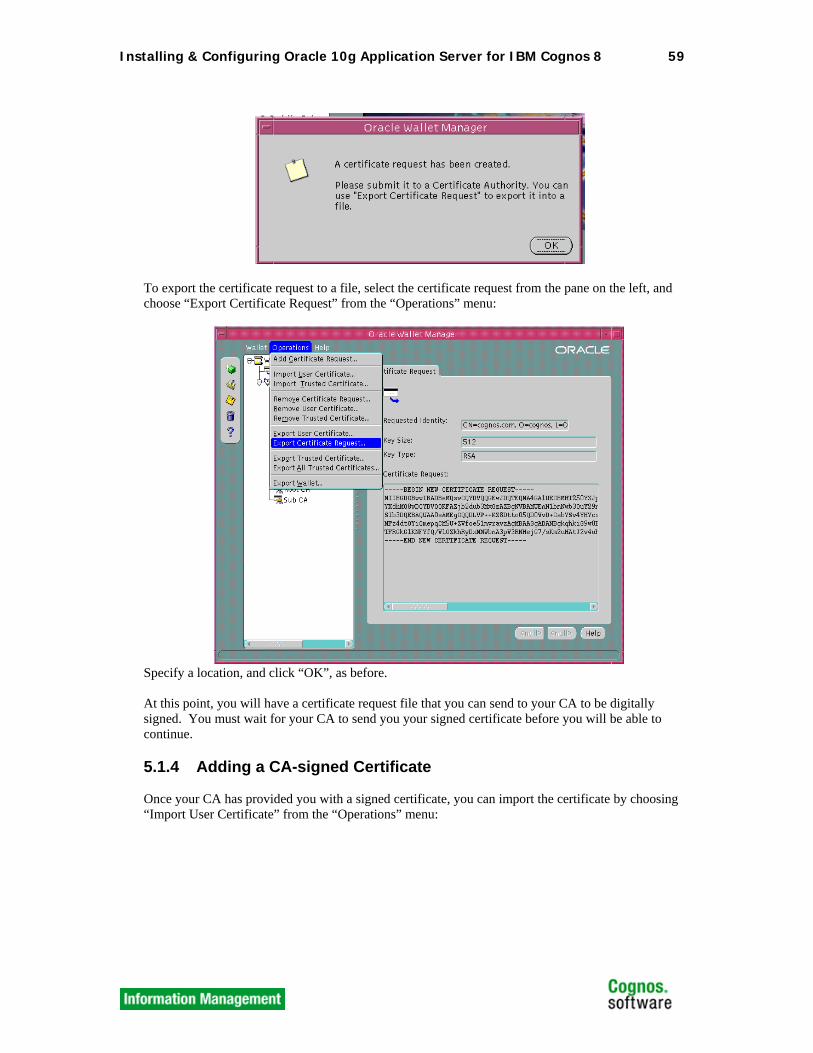
You should see the following dialog:
Installing & Configuring Oracle 10g Application Server for IBM Cognos 8 59
To export the certificate request to a file, select the certificate request from the pane on the left, and choose “Export Certificate Request” from the “Operations” menu:
Specify a location, and click “OK”, as before. At this point, you will have a certificate request file that you can send to your CA to be digitally signed. You must wait for your CA to send you your signed certificate before you will be able to continue.
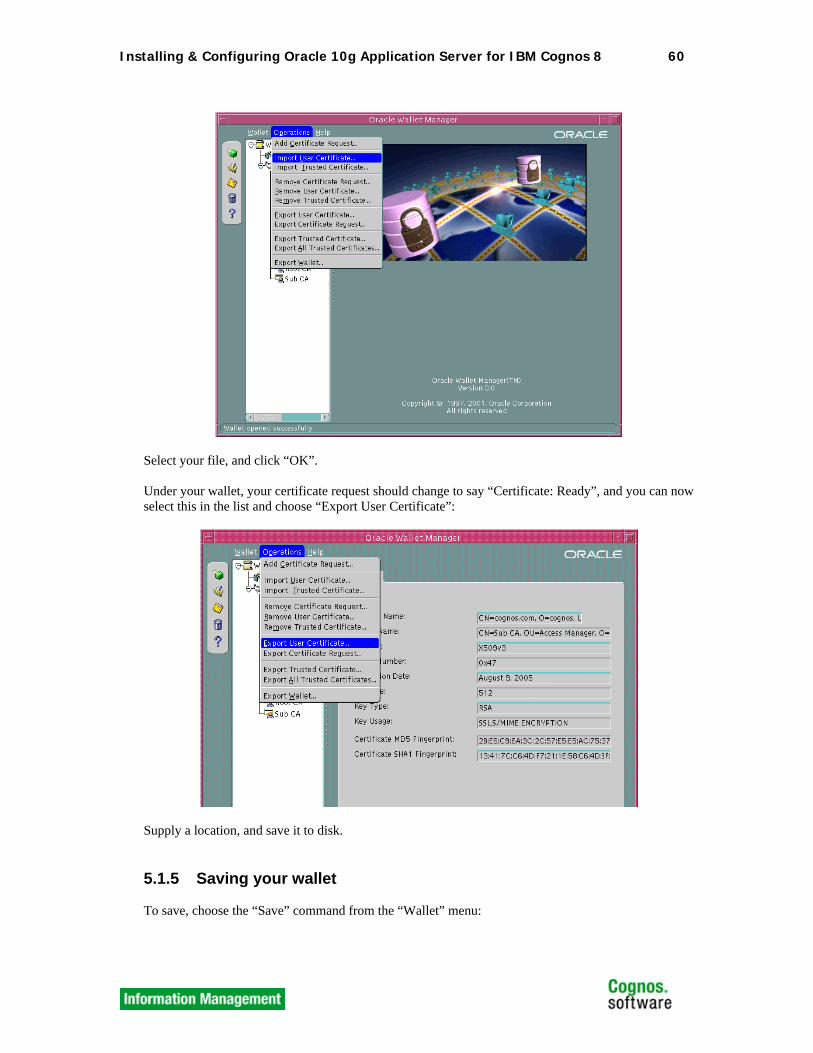
5.1.4 Adding a CA-signed Certificate Once your CA has provided you with a signed certificate, you can import the certificate by choosing “Import User Certificate” from the “Operations” menu:
Installing & Configuring Oracle 10g Application Server for IBM Cognos 8 60
Select your file, and click “OK”. Under your wallet, your certificate request should change to say “Certificate: Ready”, and you can now select this in the list and choose “Export User Certificate”:
Supply a location, and save it to disk.
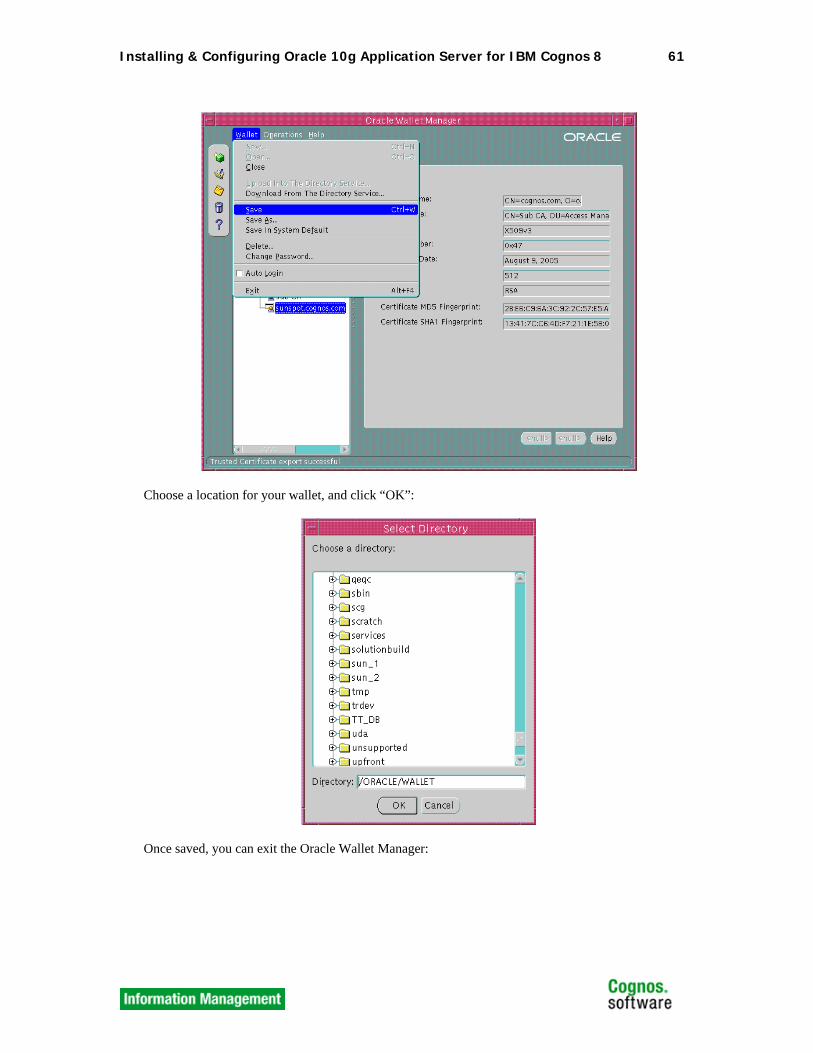
5.1.5 Saving your wallet To save, choose the “Save” command from the “Wallet” menu:
Installing & Configuring Oracle 10g Application Server for IBM Cognos 8 61
Choose a location for your wallet, and click “OK”:
Once saved, you can exit the Oracle Wallet Manager:

Installing & Configuring Oracle 10g Application Server for IBM Cognos 8 62

Installing & Configuring Oracle 10g Application Server for IBM Cognos 8 63
5.2 Steps to configure SSL for IBM Cognos 8 Note: Refer to Chapter 5 of the IBM Cognos 8 Installation & Configuration Guide: “Configuring IBM Cognos 8” for the most up-to-date instructions regarding SSL configuration and options. A general overview of the steps will be provided here.
5.2.1 Modify IBM Cognos Configuration Settings 1. Start IBM Cognos Configuration. 2. In the Explorer window, click Environment. 3. In the Properties window, type the appropriate values for the Internal dispatcher URI and External dispatcher URI values: • To configure SSL for internal connections only, for the Internal dispatcher URI property, type https and a port for SSL communication. For the External dispatcher URI property, type http and use the default or another available port. The ports in the two dispatcher URIs must be different. • To configure SSL for external connections only, for the External dispatcher URI property, type https and a secure port. For the Internal dispatcher URI property, type http and use the default or another available port. To configure SSL for all connections, type the same URI for both the Internal dispatcher URI and External dispatcher URI properties. Type https and a secure port, such as 4443.
Note: Port 4443* is the default Oracle SSL port and should be used for all settings. (*Use port 443 on windows; 4443 on Unix) 4. Configure the SSL protocol for the other environment URIs, including the Content Manager URIs, the SDK URI, and Gateway URI. • For internal connections only, type https in the URIs that contain localhost. • For external connections only, type https in the URIs that do not contain localhost. • For all connections, type https in all the URIs. 5. In the Explorer window, click Security -> Cryptography. 6. To use SSL protocol, you must specify passwords for the IBM Cognos 8 encryption key stores. There are more settings under Security -> Cryptography -> Cognos. 7. From the File menu, click Save.
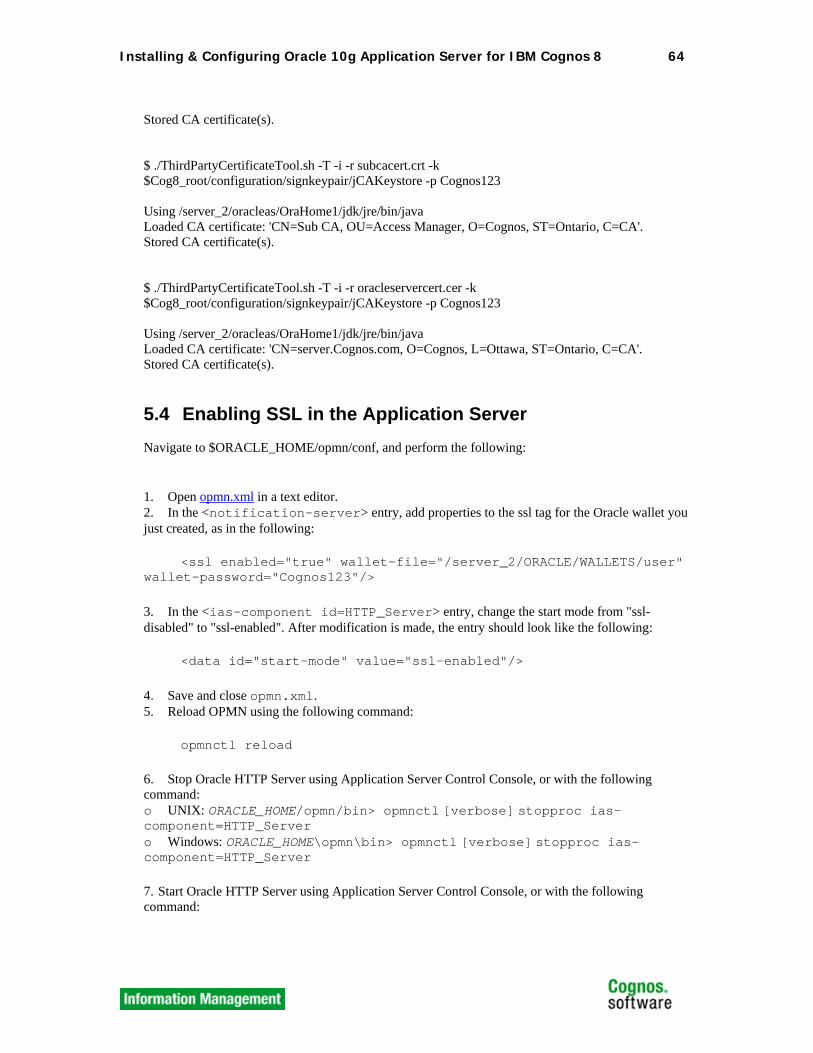
5.3 Importing Certificates into IBM Cognos 8 Navigate to $Cog8_root/bin, and use the ThirdPartyCertificateTool to add your CA root certificates and your oracle server certificate to the keystore: $ ./ThirdPartyCertificateTool.sh -T -i -r cacert.crt -k $Cog8_root/configuration/signkeypair/jCAKeystore -p Cognos123 Using /server_2/oracleas/OraHome1/jdk/jre/bin/java Loaded CA certificate: 'CN=Root CA, OU=Access Manager, O=Cognos, L=Ottawa, ST=Ontario, C=CA'.
Installing & Configuring Oracle 10g Application Server for IBM Cognos 8 64
Stored CA certificate(s). $ ./ThirdPartyCertificateTool.sh -T -i -r subcacert.crt -k $Cog8_root/configuration/signkeypair/jCAKeystore -p Cognos123 Using /server_2/oracleas/OraHome1/jdk/jre/bin/java Loaded CA certificate: 'CN=Sub CA, OU=Access Manager, O=Cognos, ST=Ontario, C=CA'. Stored CA certificate(s). $ ./ThirdPartyCertificateTool.sh -T -i -r oracleservercert.cer -k $Cog8_root/configuration/signkeypair/jCAKeystore -p Cognos123 Using /server_2/oracleas/OraHome1/jdk/jre/bin/java Loaded CA certificate: 'CN=server.Cognos.com, O=Cognos, L=Ottawa, ST=Ontario, C=CA'. Stored CA certificate(s).
5.4 Enabling SSL in the Application Server Navigate to $ORACLE_HOME/opmn/conf, and perform the following:
1. Open opmn.xml in a text editor. 2. In the <notification-server> entry, add properties to the ssl tag for the Oracle wallet you just created, as in the following:
<ssl enabled="true" wallet-file="/server_2/ORACLE/WALLETS/user" wallet-password="Cognos123"/>
3. In the <ias-component id=HTTP_Server> entry, change the start mode from "ssl-disabled" to "ssl-enabled". After modification is made, the entry should look like the following:
<data id="start-mode" value="ssl-enabled"/>
4. Save and close opmn.xml. 5. Reload OPMN using the following command:
opmnctl reload
6. Stop Oracle HTTP Server using Application Server Control Console, or with the following command: o UNIX: ORACLE_HOME/opmn/bin> opmnctl [verbose] stopproc ias-component=HTTP_Server o Windows: ORACLE_HOME\opmn\bin> opmnctl [verbose] stopproc ias-component=HTTP_Server
7. Start Oracle HTTP Server using Application Server Control Console, or with the following command:

Installing & Configuring Oracle 10g Application Server for IBM Cognos 8 65
o UNIX: ORACLE_HOME/opmn/bin> opmnctl [verbose] startproc ias-component=HTTP_Server o Windows: ORACLE_HOME\opmn\bin> opmnctl [verbose] startproc ias-component=HTTP_Server
5.5 Modifying the HTTP Server Navigate to $ORACLE_HOME/Apache/Apache/conf and perform the following: 1. Open the file ssl.conf 2. Within the VirtualHost tag, somewhere after the line “Port 4443”, add your IBM Cognos 8 alias instructions, as in: ScriptAlias /Cognos 8/cgi-bin/ "/server_2/Cognos/Cognos 8/cgi-bin/" Alias /Cognos 8 "/server_2/Cognos/Cognos 8/webcontent/" 3. Change the SSLWallet line to point to your new Oracle Wallet file, as in: SSLWallet file:/server_2/ORACLE/WALLETS/user 4. Uncomment the SSLWalletPassword line, and provide your password. Note: providing a clear text password as in the following example is NOT secure. SSLWalletPassword Cognos123 5. Uncomment the Client Authentication line, and set it to “none”. Note: as Oracle 10g uses the same SSL port for the dispatcher and the gateway, IBM Cognos 8 will not run if this setting is set to “required” or “optional” SSLVerifyClient none 6. Save the file, and Exit 7. Open the file httpd.conf 8. Scroll to the bottom of the file, and ensure that the following line has been uncommented: include /server_2/oracleas/OraHome1/Apache/Apache/conf/ssl.conf" 9. Optionally, you can comment out your old <VirtualHost> section for your IBM Cognos 8 aliases, to disable normal access to IBM Cognos 8, as the default port, 7777, will still be active, and will serve IBM Cognos 8 content via non-SSL means. 10. Save the file, and Exit.

Installing & Configuring Oracle 10g Application Server for IBM Cognos 8 66
5.6 Restarting the application server
Restart the Oracle 10g Application Server using the Application Server Control Console, or with the stopall/startall commands:
o UNIX: ORACLE_HOME/opmn/bin> opmnctl [verbose] stopall o Windows: ORACLE_HOME\opmn\bin> opmnctl [verbose] stopall
Installing & Configuring Oracle 10g Application Server for IBM Cognos 8 67
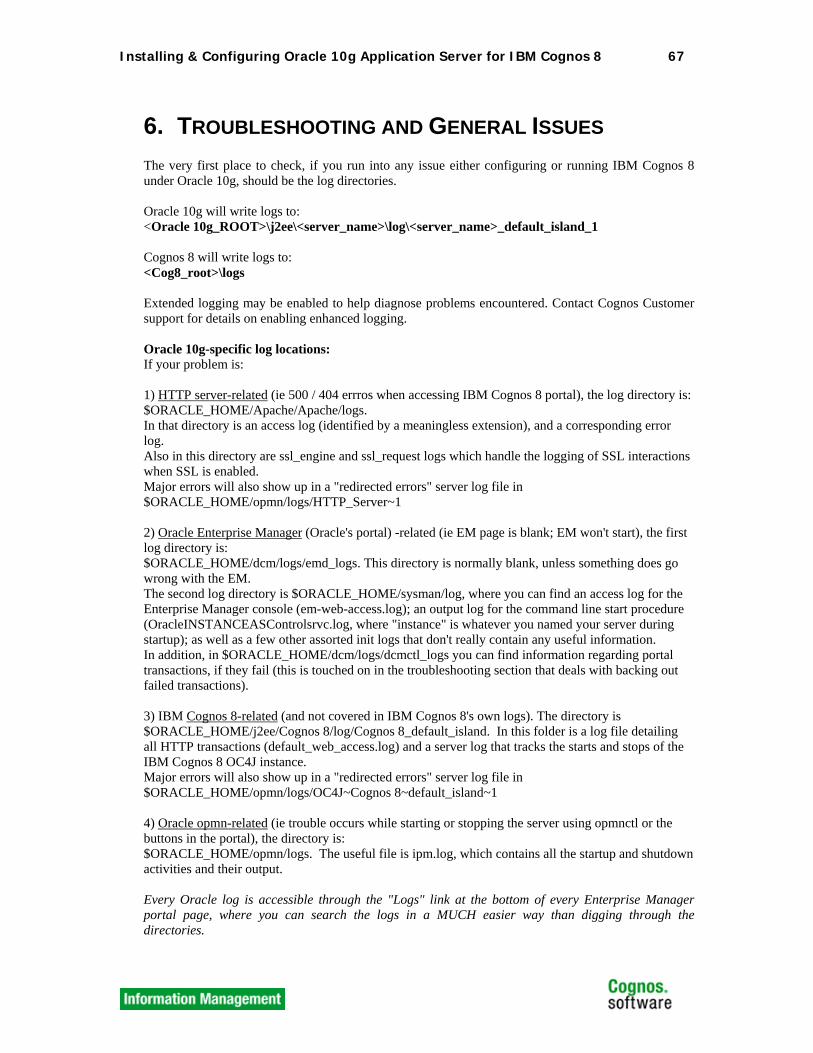
6. TROUBLESHOOTING AND GENERAL ISSUES The very first place to check, if you run into any issue either configuring or running IBM Cognos 8 under Oracle 10g, should be the log directories. Oracle 10g will write logs to: <Oracle 10g_ROOT>\j2ee\<server_name>\log\<server_name>_default_island_1 Cognos 8 will write logs to: <Cog8_root>\logs Extended logging may be enabled to help diagnose problems encountered. Contact Cognos Customer support for details on enabling enhanced logging. Oracle 10g-specific log locations: If your problem is: 1) HTTP server-related (ie 500 / 404 errros when accessing IBM Cognos 8 portal), the log directory is: $ORACLE_HOME/Apache/Apache/logs. In that directory is an access log (identified by a meaningless extension), and a corresponding error log. Also in this directory are ssl_engine and ssl_request logs which handle the logging of SSL interactions when SSL is enabled. Major errors will also show up in a "redirected errors" server log file in $ORACLE_HOME/opmn/logs/HTTP_Server~1 2) Oracle Enterprise Manager (Oracle's portal) -related (ie EM page is blank; EM won't start), the first log directory is: $ORACLE_HOME/dcm/logs/emd_logs. This directory is normally blank, unless something does go wrong with the EM. The second log directory is $ORACLE_HOME/sysman/log, where you can find an access log for the Enterprise Manager console (em-web-access.log); an output log for the command line start procedure (OracleINSTANCEASControlsrvc.log, where "instance" is whatever you named your server during startup); as well as a few other assorted init logs that don't really contain any useful information. In addition, in $ORACLE_HOME/dcm/logs/dcmctl_logs you can find information regarding portal transactions, if they fail (this is touched on in the troubleshooting section that deals with backing out failed transactions). 3) IBM Cognos 8-related (and not covered in IBM Cognos 8's own logs). The directory is $ORACLE_HOME/j2ee/Cognos 8/log/Cognos 8_default_island. In this folder is a log file detailing all HTTP transactions (default_web_access.log) and a server log that tracks the starts and stops of the IBM Cognos 8 OC4J instance. Major errors will also show up in a "redirected errors" server log file in $ORACLE_HOME/opmn/logs/OC4J~Cognos 8~default_island~1 4) Oracle opmn-related (ie trouble occurs while starting or stopping the server using opmnctl or the buttons in the portal), the directory is: $ORACLE_HOME/opmn/logs. The useful file is ipm.log, which contains all the startup and shutdown activities and their output. Every Oracle log is accessible through the "Logs" link at the bottom of every Enterprise Manager portal page, where you can search the logs in a MUCH easier way than digging through the directories.
Installing & Configuring Oracle 10g Application Server for IBM Cognos 8 68
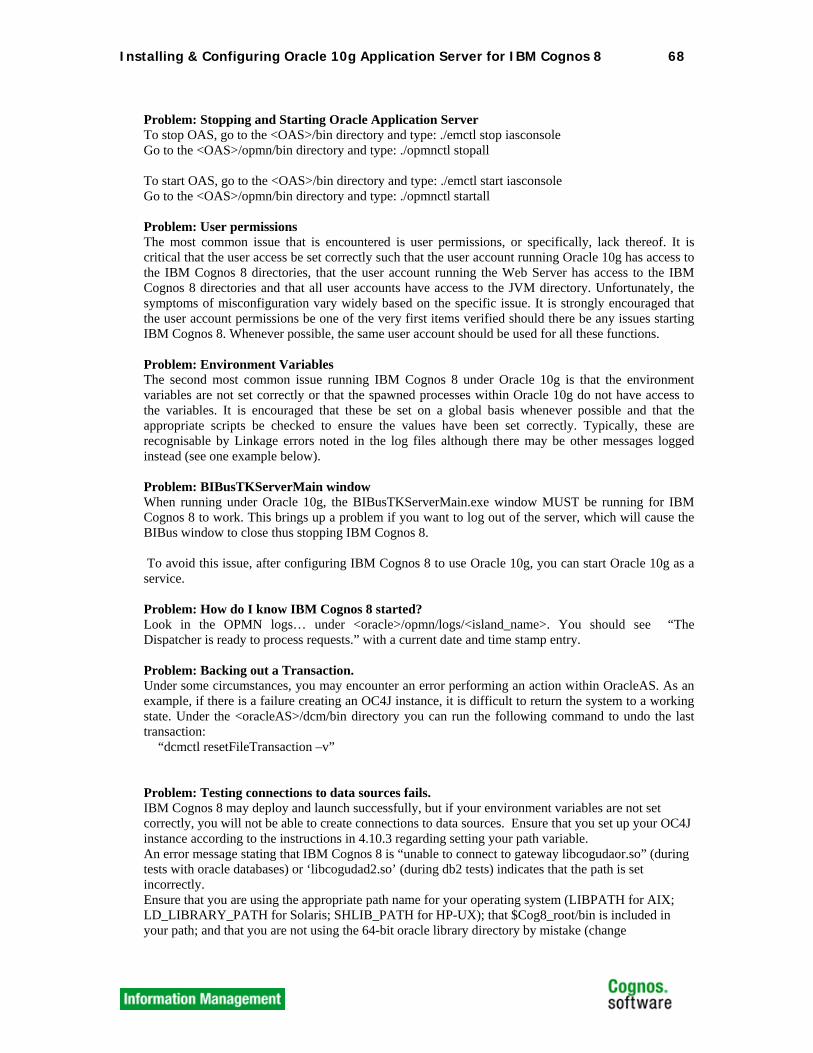
Problem: Stopping and Starting Oracle Application Server To stop OAS, go to the <OAS>/bin directory and type: ./emctl stop iasconsole Go to the <OAS>/opmn/bin directory and type: ./opmnctl stopall To start OAS, go to the <OAS>/bin directory and type: ./emctl start iasconsole Go to the <OAS>/opmn/bin directory and type: ./opmnctl startall Problem: User permissions The most common issue that is encountered is user permissions, or specifically, lack thereof. It is critical that the user access be set correctly such that the user account running Oracle 10g has access to the IBM Cognos 8 directories, that the user account running the Web Server has access to the IBM Cognos 8 directories and that all user accounts have access to the JVM directory. Unfortunately, the symptoms of misconfiguration vary widely based on the specific issue. It is strongly encouraged that the user account permissions be one of the very first items verified should there be any issues starting IBM Cognos 8. Whenever possible, the same user account should be used for all these functions. Problem: Environment Variables The second most common issue running IBM Cognos 8 under Oracle 10g is that the environment variables are not set correctly or that the spawned processes within Oracle 10g do not have access to the variables. It is encouraged that these be set on a global basis whenever possible and that the appropriate scripts be checked to ensure the values have been set correctly. Typically, these are recognisable by Linkage errors noted in the log files although there may be other messages logged instead (see one example below). Problem: BIBusTKServerMain window When running under Oracle 10g, the BIBusTKServerMain.exe window MUST be running for IBM Cognos 8 to work. This brings up a problem if you want to log out of the server, which will cause the BIBus window to close thus stopping IBM Cognos 8. To avoid this issue, after configuring IBM Cognos 8 to use Oracle 10g, you can start Oracle 10g as a service. Problem: How do I know IBM Cognos 8 started? Look in the OPMN logs… under <oracle>/opmn/logs/<island_name>. You should see “The Dispatcher is ready to process requests.” with a current date and time stamp entry. Problem: Backing out a Transaction. Under some circumstances, you may encounter an error performing an action within OracleAS. As an example, if there is a failure creating an OC4J instance, it is difficult to return the system to a working state. Under the <oracleAS>/dcm/bin directory you can run the following command to undo the last transaction: “dcmctl resetFileTransaction –v” Problem: Testing connections to data sources fails. IBM Cognos 8 may deploy and launch successfully, but if your environment variables are not set correctly, you will not be able to create connections to data sources. Ensure that you set up your OC4J instance according to the instructions in 4.10.3 regarding setting your path variable. An error message stating that IBM Cognos 8 is “unable to connect to gateway libcogudaor.so” (during tests with oracle databases) or ‘libcogudad2.so’ (during db2 tests) indicates that the path is set incorrectly. Ensure that you are using the appropriate path name for your operating system (LIBPATH for AIX; LD_LIBRARY_PATH for Solaris; SHLIB_PATH for HP-UX); that $Cog8_root/bin is included in your path; and that you are not using the 64-bit oracle library directory by mistake (change

Installing & Configuring Oracle 10g Application Server for IBM Cognos 8 69
$ORACLE_HOME/lib to $ORACLE_HOME/lib32 in your path if the lib32 directory exists). If the problem persists, try adding /usr/lib and /lib to your path variable as well. Problem: SSL configuration: ThirdPartyConfigurationTool fails (1) When running ThirdPartyCertificateTool under Windows, the tool might not find the correct JVM, and throw an error. Alternately, you might notice from its output that it is accessing the JVM included with IBM Cognos 8, and not the one in your JAVA_HOME directory. If this occurs, you should remark out the first few lines in the batch file/script, as follows: rem ----- Verify Required Environment Variables ----------------------- rem using the local distribution rem set J_HOME=..\bin\jre\1.3.1 rem echo Looking in: %J_HOME%\bin... rem if exist "%J_HOME%\bin\java.exe" goto gotJava (2) When using Oracle on AIX, using the included IBM JVM, the ThirdPartyCertificateTool script may complain that it cannot find the class sun.security.Provider.Sun. If this occurs, this means that you are not running the Hotsite build. You should install build 319 on top of the MR1 install. (3) Lastly, when importing a certificate, using the ThirdPartyCertificateTool, you may encounter a list of MAC or crypto errors, of the form: CAM-CRP-1093 Unable to read the contents of the keystore 'C:\Cognos\Cognos 8\configuration\signkeypair\jCAKeystore'. Reason: java.io.IOException: error constructing MAC: java.io.IOException: PKCS12 key store mac invalid. at com.Cognos.accman.jcam.crypto.misc.CAMKeyStore.loadKeyStore(CAMKeyStore.java:81) at com.Cognos.accman.jcam.crypto.misc.KeyStoreWriter.storeThirdPartyCaCert(KeyStoreWriter.java:1134) at com.Cognos.accman.jcam.utilities.ThirdPartyCertificateTool.installCACert(ThirdPartyCertificateTool.java:494) at com.Cognos.accman.jcam.utilities.ThirdPartyCertificateTool.main(ThirdPartyCertificateTool.java:743) If this occurs, make sure your JAVA_HOME variable is set; launch IBM Cognos Configuration, and specify cryptography passwords for ALL keystores (Security -> Cryptography -> Common Symmetric Key Store Password; Security -> Cryptography -> Cognos -> Signing Key Store Password; Security -> Cryptography -> Cognos -> Encryption Key Store Password; Security -> Cryptography -> Cognos -> Password; Security -> Cryptography -> Cognos -> Certificate Authority Key Store Password); regenerate your cryptographic keys, and try again. Failing to set any of the five passwords could cause the certificate tool to fail. Problem: printing a report fails (1) Check the IBM Cognos 8 configuration. Make sure that SMTP mail server under Notification is configured correctly. (2) On windows, make sure the application server is running with a valid account, not with LocalSystem. (3) On UNIX, make sure ACRO_HOME environment variable is defined and /usr/bin and /public/tools/bin are in the PATH environment variable for the instance.