OPERATOR’S MANUAL - Welcome to Costco Wholesale€¦ · · 2015-05-15Your pressure washer has...
44
SAVE THIS MANUAL FOR FUTURE REFERENCE Your pressure washer has been engineered and manufactured to our high standard for dependability, ease of operation, and operator safety. When properly cared for, it will give you years of rugged, trouble-free performance. WARNING: To reduce the risk of injury, the user must read and understand the operator’s manual before using this product. Thank you for your purchase. OPERATOR’S MANUAL MANUAL DEL OPERADOR 3100 PSI PRESSURE WASHER LAVADORA A PRESIÓN DE 3 100 PSI PS80310E GUARDE ESTE MANUAL PARA FUTURAS CONSULTAS Su lavadora de presión ha sido diseñada y fabricada de conformidad con las estrictas normas para brindar fiabilidad, facilidad de uso y seguridad para el operador. Con el debido cuidado, le brindará muchos años de sólido y eficiente funcionamiento. ADVERTENCIA: Para reducir el riesgo de lesiones, el usuario debe leer y comprender el manual del operador antes de usar este producto. Le agradecemos su compra. CUSTOMER SERVICE SERVICIO AL CLIENTE USA: 1-877-617-3501 Mexico: 01 800 843 1111 www.powerstroketools.com To register your POWERSTROKE product, please visit: http://register.powerstroketools.com/ Para registrar su producto de POWERSTROKE, por favor visita: http://register.powerstroketools.com/ NOTICE AVISO Do not use E15 or E85 fuel in this product. It is a violation of federal law and will damage the unit and void your warranty. Only use unleaded gasoline containing up to 10% ethanol. No utilice combustibles E15 o E85 con este producto. Esto constituye una violación a la ley federal, dañará la unidad y anulará la garantía. Use únicamente gasolina sin plomo con un contenido de hasta 10 % de etanol.
Transcript of OPERATOR’S MANUAL - Welcome to Costco Wholesale€¦ · · 2015-05-15Your pressure washer has...

SAVE THIS MANUAL FOR FUTURE REFERENCE
Your pressure washer has been engineered and manufactured to our high standard for dependability, ease of operation, and operator safety. When properly cared for, it will give you years of rugged, trouble-free performance.
WARNING: To reduce the risk of injury, the user must read and understand the operator’s manual before using this product.
Thank you for your purchase.
OPERATOR’S MANUALMANUAL DEL OPERADOR
3100 PSI PRESSURE WASHERLAVADORA A PRESIÓN DE 3 100 PSI
PS80310E
GUARDE ESTE MANUAL PARA FUTURAS CONSULTAS
Su lavadora de presión ha sido diseñada y fabricada de conformidad con las estrictas normas para brindar fiabilidad, facilidad de uso y seguridad para el operador. Con el debido cuidado, le brindará muchos años de sólido y eficiente funcionamiento.
ADVERTENCIA: Para reducir el riesgo de lesiones, el usuario debe leer y comprender el manual del operador antes de usar este producto.
Le agradecemos su compra.
CUSTOMER SERVICESERVICIO AL CLIENTE
USA: 1-877-617-3501Mexico: 01 800 843 1111
www.powerstroketools.com
To register your POWERSTROKE product, please visit: http://register.powerstroketools.com/
Para registrar su producto de POWERSTROKE, por favor visita: http://register.powerstroketools.com/
NOTICE AVISODo not use E15 or E85 fuel in this product. It is a violation of federal law and will damage the unit and void your warranty. Only use unleaded gasoline containing up to 10% ethanol.
No utilice combustibles E15 o E85 con este producto. Esto constituye una violación a la ley federal, dañará la unidad y anulará la garantía. Use únicamente gasolina sin plomo con un contenido de hasta 10 % de etanol.
ii
Fig. 1
A - Fuel cap (tapa del combustible)B - Starter grip and rope (mango del arrancador
con cuerda)C - Fuel tank (tanque de combustible)D - Oil cap/dipstick (tapa del aceite con varilla de
nivel)E - Gripping surface (superficie de sujeción)F - Engine switch (interruptor del motor)
G - Fuel valve (válvula de combustible)H - Battery maintainer charger (cargador
mantenedor de la batería)I - Choke (anegador)J - High pressure hose (manguera de alta presión)K - Nozzle storage (boquillas y compartimientos
para boquillas)L - Handle (mango)
M - Trigger handle (mango del gatillo)N - Trigger with lock out (gatillo con seguro)O - Spray wand (tubo de rociado)P - Muffler (silenciador)Q - Battery (batería)R - Maintainer input (entrada del mantenedor)S - Soap tank (tanque de jabón)
Fig. 2 Fig. 3 Fig. 4
A - Push to insert (tapa de aseguramiento del mango)
A - Trigger handle (mango del gatillo)B - Connector (conector)C - Spray wand (tubo de rociado)
See this fold-out section for all of the figures referenced in the operator’s manual.
Consulte esta sección desplegable para ver todas las figuras a las que se hace referencia en el manual del operador.
A
A
A
E
JM
N
O
Q
H
B
L
F
S
G
R
I
D
P
C
K
A
B
C
A - Red female wire (+) [cable hembra rojo (+)]B - Positive (+) terminal [terminal positiva (+)]C - Red male wire (+) [cable macho rojo (+)]D - Black female wire (–) [cable hembra negro (–)]E - Negative (–) terminal [terminal negativa (–)]F - Black male wire (–) [cable macho negro (–)]G - Cap (tapa)
BG C
DA EF

iii
Fig. 5
A - Threaded nipple (conexión roscada)B - Collar (casquillo)
A - Battery (batería)B - Battery bracket (soporte de la batería)C - Tab (lengüeta)
Fig. 8
A - Water intake (entrada de agua)B - Screen (cedazo)C - Garden hose (manguera de jardín)
Fig. 9
Fig. 6 Fig. 7
A - Oil cap/dipstick (tapa del aceite con varilla de nivel)
Fig. 10
A - Fuel cap (tapa del tanque de combustible)B - Funnel (embudo)
A
C
B
BA
A
DB
A
B
A - Inlet coupler (acoplador de entrada)B - Collar (casquillo)C - High pressure hose (manguera de alta presión)
B
C
D - Opening (abertura)E - Battery holder (porta de la batería)F - Bolt (perno)
F
ACE
A

iv
Fig. 14
A - Starter grip and rope (mango del arrancador con cuerda)
Fig. 17
Fig. 18
A - Nozzle (boquilla)B - “Click” (hasta que trabe)C - Quick-connect collar (casquillo de conexión
rápida)D - Spray wand (tubo de rociador)E - Pull back the quick-connect collar (tire del
collar de conexión rápida)F - Push the nozzle into place (introduzca la
boquilla en su lugar)G - Push the collar forward (empuje del collar
adelante)
A
B
C
D
F
E
G
A
Fig. 16Fig. 14
A - Trigger (gatillo)B - Slot (ranura)C - Lock out (seguro)
A
B
C
Fig. 15
A - OFF position (posición APAGADO)B - Engine switch (interruptor del motor)
A - ON position (posición ENCENDIDO) B - Lock button (botón del seguro)C - Engine switch (interruptor del motor)D - START position (posición ARRANQUE)
1
2A
A
B
C
D
B
Fig. 12
Fig. 11
A - Engine switch (interruptor del motor)B - Choke (anegador)C - Fuel valve (válvula de combustible)
OFF
ENGINESWITCH
ON
START
C
B
A
A - OPEN position (posición ABIERTO)B - CLOSED position (posición CERRADO)C - Fuel valve (válvula de combustible)
C
B
A
Fig. 13
A - Choke (anegador)B - RUN position (posición MARCHA)C - START position (posición ARRANQUE)
AB
C

v
Fig. 19
TO MOVE THE MACHINEPARA MOVER LA MÁQUINA
Fig. 20
A - Fuse holder (portafusibles)B - Fuse (fusible)
A - Maintainer input (entrada del mantenedor)B - Battery maintainer charger (cargador
mantenedor de la batería)C - Cover (cubierta)
Fig. 25
Fig. 23
Fig. 24
Fig. 22
TO STORE THE MACHINEPARA GUARDAR LA MÁQUINA
C
B
AFig. 21
A - Threaded top (parte superior roscada)B - Rubber seal (sello de goma)C - Paper seal (sello de papel)D - Water intake (entrada de agua)E - Pump outlet (orificio de descarga de la
bomba)
A - Paper clip (clips de papel)B - Nozzle (boquilla)
BA
B
B
C
A
A
E
DA

Page 2 — English
� Introduction ...................................................................................................................................................................... 2 Introducción
� Important Safety Instructions ........................................................................................................................................... 3 Instrucciones de seguridad importantes
� Specific Safety Rules ........................................................................................................................................................ 4 Reglas de seguridad específicas
��Symbols .........................................................................................................................................................................5-6 Símbolos
� Features .........................................................................................................................................................................6-7 Características
� Assembly .......................................................................................................................................................................7-9 Armado
� Operation .....................................................................................................................................................................9-14 Funcionamiento
� Maintenance ..............................................................................................................................................................15-18 Mantenimiento
� Troubleshooting .............................................................................................................................................................. 19 Solución de problemas
� Warranty ......................................................................................................................................................................... 20 Garantía
� Parts Ordering and Service ...............................................................................................................................Back Page Pedidos de piezas y servicio ............................................................................................................................................Pág. posterior
This product has many features for making its use more pleasant and enjoyable. Safety, performance, and dependability have been given top priority in the design of this product making it easy to maintain and operate.
* * *
Este producto ofrece numerosas características para hacer más agradable y placentero su uso. En el diseño de este producto se ha conferido prioridad a la seguridad, el desempeño y la fiabilidad, por lo cual se facilita su manejo y mantenimiento.
INTRODUCTION INTRODUCCIÓN
TABLE OF CONTENTS ÍNDICE DE CONTENIDO
Page 3 — English
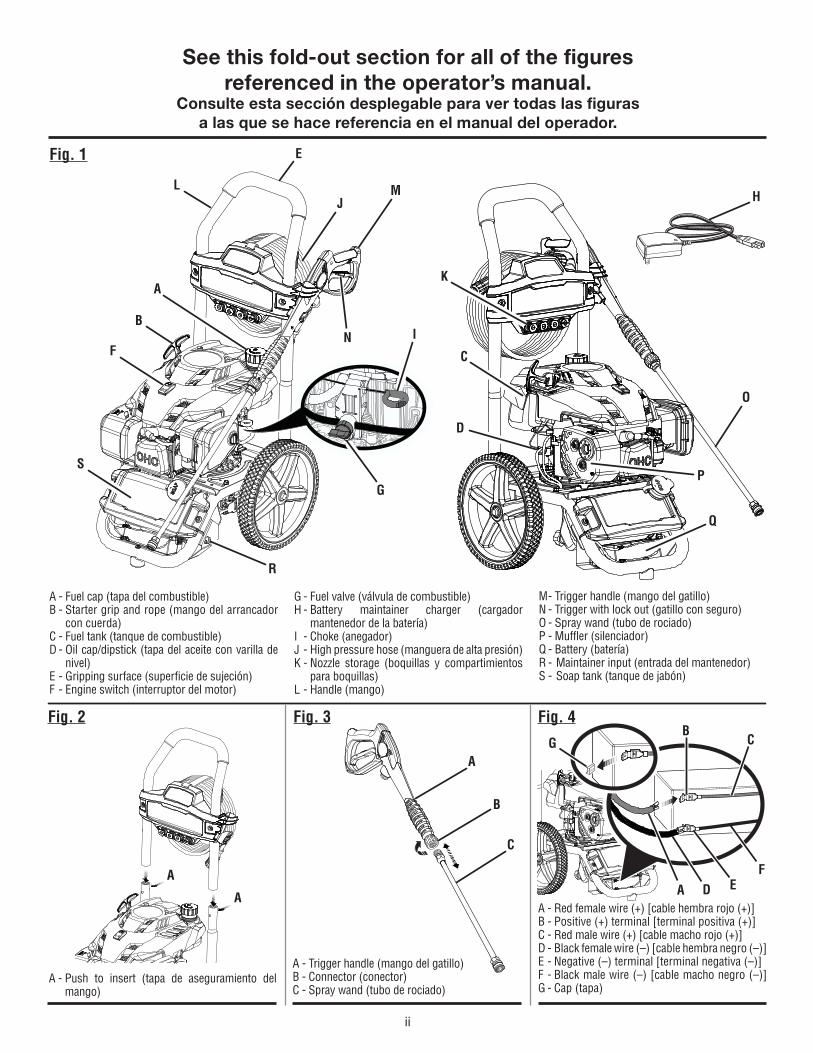
IMPORTANT SAFETY INSTRUCTIONS
DANGER:Risk of fire and serious burns: Never remove fuel cap when unit is running. Shut off engine and allow the unit to cool at least five minutes. Remove cap slowly.
WARNING:Read and understand all instructions. Failure to follow all instructions listed below may result in electric shock, fire and/or carbon monoxide poisoning which will cause death or serious personal injury.
READ ALL INSTRUCTIONS� Know your tool. Read the operator’s manual carefully.
Learn the machine’s applications and limitations as well as the specific potential hazards related to this tool.
��Keep guards in place and in working order. Never operate the tool with any guard or cover removed. Make sure all guards are operating properly before each use.
� Remove adjusting keys and wrenches. Form habit of checking to see that keys and adjusting wrenches are removed from tool before turning it on.
� To reduce the risk of injury, keep children and visitors away. All visitors should wear safety glasses and be kept a safe distance from work area.
��Keep the area of operation clear of all persons, particularly small children, and pets.
��Do not start or operate the engine in a confined space, building, near open windows, or in other unventilated space where dangerous carbon monoxide fumes can collect. Carbon monoxide, a colorless, odorless, and extremely dangerous gas, can cause unconsciousness or death.
� Use right tool. Don’t force tool or attachment to do a job it was not designed for. Don’t use it for a purpose not intended.
� Dress properly. Wear long pants and long sleeves. Do not wear loose clothing, neckties, or jewelry that can get caught and draw you into moving parts. Rubber gloves and nonskid footwear are recommended when working outdoors. Also wear protective hair covering to contain long hair.
��Do not operate the equipment while barefoot or when wearing sandals or similar lightweight footwear. Wear protective footwear that will protect your feet and improve your footing on slippery surfaces.
��Exercise caution to avoid slipping or falling.� Always wear eye protection with side shields marked
to comply with ANSI Z87.1. Following this rule will reduce the risk of serious personal injury.
� Don’t overreach or stand on a ladder, rooftop, or other unstable support. Keep proper footing and balance at all times.
� Use only recommended accessories. The use of improper accessories may cause risk of injury.
� Follow the maintenance instructions specified in this manual.
� Check damaged parts. Before further use of the tool, a guard or other part that is damaged should be carefully checked to determine that it will operate properly and perform its intended function. Check for alignment of moving parts, binding of moving parts, breakage of parts, mounting, and any other conditions that may affect its operation. A guard or other part that is damaged must be properly repaired or replaced by a qualified service center to avoid risk of personal injury.
� Never leave tool running unattended. Turn power off. Don’t leave tool until it comes to a complete stop.
��Keep the engine free of grass, leaves, or grease to reduce the chance of a fire hazard.
� Keep the exhaust pipe free of foreign objects.��Follow manufacturer’s recommendations for safe
loading, unloading, transport, and storage of machine.� Be thoroughly familiar with controls. Know how to stop
the product and bleed pressure quickly.� Keep tool dry, clean, and free from lubricant and
grease. Always use a clean cloth when cleaning. Never use brake fluids, gasoline, petroleum-based products, or any solvents to clean tool.
� Stay alert and exercise control. Watch what you are doing and use common sense. Do not operate tool when you are tired. Do not rush.
��Do not operate the product while under the influence of drugs, alcohol, or any medication.
��Check the work area before each use. Remove all objects such as rocks, broken glass, nails, wire, or string which can be thrown or become entangled in the machine.
��Do not use tool if switch does not turn it off. Have defective switches replaced by a qualified service center.
��Before cleaning, repairing, or inspecting, shut off the engine and make certain all moving parts have stopped. Disconnect the spark plug wire, and keep the wire away from the plug to prevent accidental starting.
� Avoid dangerous environment. Don’t use in damp or wet locations or expose to rain. Keep work area well lit.
� Never use in an explosive atmosphere. Normal sparking of the motor could ignite fumes.
��Do not operate while smoking or near an open flame.��Do not operate around dry brush, twigs, cloth rags, or
other flammable materials.� WARNING: Risk of injection or injury – Do not direct
discharge stream at persons.

Page 4 — English
SPECIFIC SAFETY RULES
� Use caution when positioning the pressure washer for use. Warm air from the engine could cause discolored spots on grass.
� Never direct a water stream toward people or pets, or any electrical device.
� Before starting any cleaning operation, close doors and windows. Clear the area to be cleaned of debris, toys, outdoor furniture, or other objects that could create a hazard.
� Never pick up or carry a machine while the engine is running.
� Never start the machine if ice has formed in any part of the equipment.
� Do not use acids, alkalines, solvents, flammable material, bleaches, or industrial grade solutions in this product. These products can cause physical injuries to the operator and irreversible damage to the machine.
� Always operate the machine on a level surface. If the engine is on an incline, it could seize due to improper lubrication (even at the maximum lubricant level).
� WARNING: High pressure jets can be dangerous if subject to misuse. The jet must not be directed at persons, animals, electrical devices, or the machine itself.
� Hold the trigger handle securely with both hands. Expect the trigger handle to move when the trigger is pulled due to reaction forces. Failure to do so could cause loss of control and injury to yourself and others.
� Never attempt to make any adjustments while the engine (motor) is running (except where specifically recommended by the manufacturer).
� Protective covers must always cover rotating parts when the engine is running.
� Keep cooling air intake (starter grip and rope area) and muffler side of the engine at least 3 feet away from buildings, obstructions, and other combustible objects.
� Keep the engine away from flammables and other hazardous materials.
� Keep away from hot parts. The muffler and other engine parts become very hot; use caution.
� Do not touch the spark plug and ignition cable when starting and operating the engine.
� Check fuel hoses and joints for looseness and fuel leakage before each use.
� Check bolts and nuts for looseness before each use. A loose bolt or nut may cause serious engine problems.
� Always refuel outdoors. Never refuel indoors or in a poorly ventilated area.
� Never store the machine with fuel in the fuel tank inside a building where ignition sources are present, such as hot water and space heaters, clothes dryers, and the like.
� If the fuel tank has to be drained, do this outdoors into a container approved for gasoline and away from all ignition sources.
� To reduce the risk of fire and burn injury, handle fuel with care. It is highly flammable.
� Do not smoke while handling fuel.
� Add fuel before starting the engine. Never remove the cap of the fuel tank or add fuel while the engine is running or when the engine is hot.
� Loosen fuel cap slowly to release pressure and to keep fuel from escaping around the cap.
� Replace all fuel tank and container caps securely.
� Wipe spilled fuel from the unit. Move 30 feet away from refueling site before starting engine.
� If fuel is spilled, do not attempt to start the engine but move the machine away from the area of spillage and avoid creating any source of ignition until fuel vapors have dissipated.
� Never attempt to burn off spilled fuel under any circumstances.
� Before storing, allow the pressure washer to cool for 30 minutes and drain fuel from the unit.
� Store fuel in a cool, well-ventilated area, safely away from spark and/or flame-producing equipment.
� Store fuel in containers specifically designed for this purpose.
� Empty fuel tank and restrain the unit from moving before transporting in a vehicle.
� When servicing use only recommended or equivalent replacement parts. Use of any other parts may create a hazard or cause product damage.
� ONLY use cold water.
� Make sure minimum clearance of 3 feet is maintained from combustible materials.
� Never spray close to the surface to be cleaned as you can damage the surface.
��After stopping the engine, always pull the trigger on the trigger handle to relieve stored pressure in the high pressure hose. Failure to do so could result in serious personal injury.
� Ensure the high pressure hose is properly connected before using the product.
� For outdoor use only.
��When battery pack is not in use, keep it away from other metal objects like paper clips, coins, keys, nails, screws, or other small metal objects that can make a connection from one terminal to another. Shorting the battery terminals together may cause burns or a fire.
� Save these instructions. Refer to them frequently and use them to instruct other users. If you loan someone this tool, loan them these instructions also.
Page 5 — English
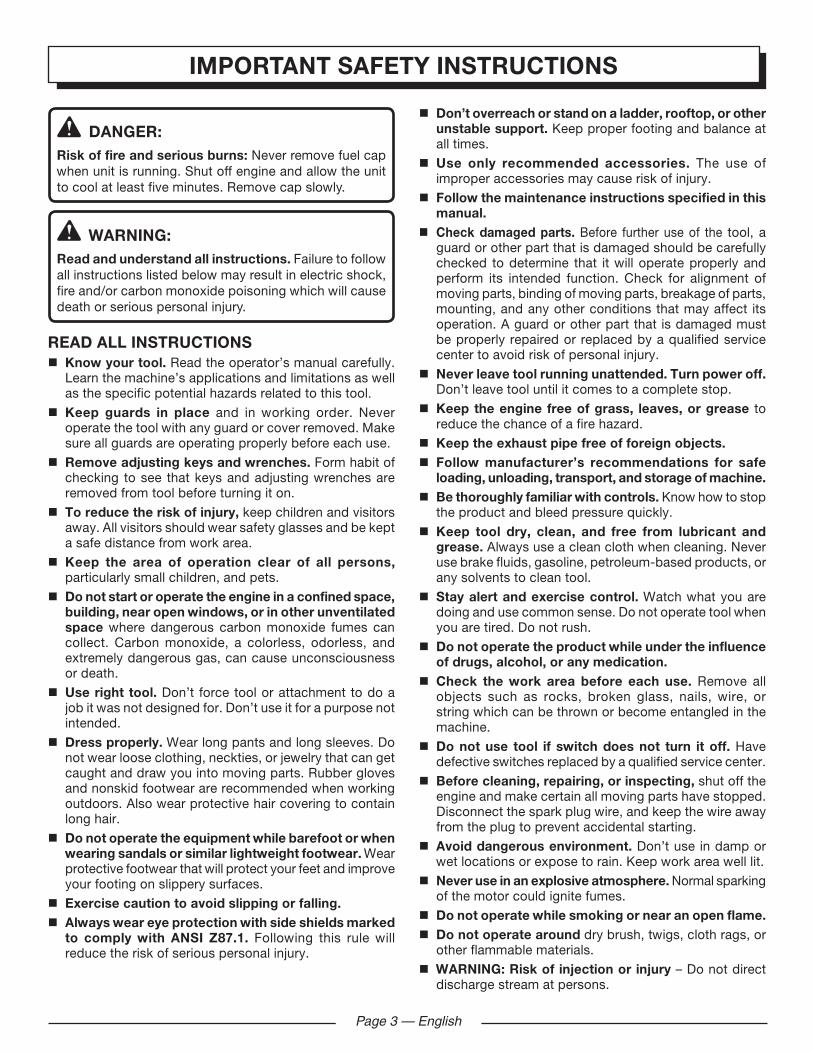
SYMBOLS
Some of the following symbols may be used on this product. Please study them and learn their meaning for safe operation of this product.
SYMBOL NAME EXPLANATION
Safety Alert Indicates a potential personal injury hazard.
Read Operator’s ManualTo reduce the risk of injury, user must read and understand operator’s manual before using this product.
Eye ProtectionAlways wear eye protection with side shields marked to comply with ANSI Z87.1.
Wet Conditions Alert Never direct a water stream toward any electrical device.
Hot SurfaceTo reduce the risk of injury or damage, avoid contact with any hot surface.
Risk of Injections
To reduce the risk of injection or injury, never direct a water stream towards people or pets or place any body part in the stream. Leaking hoses and fittings are also capable of causing injection injury. Do not hold hoses or fittings.
Risk of ExplosionDo not spray flammable liquids. Flammable liquids, fuel, and their vapors are explosive and can cause severe burns or death.
Risk of FireFuel and its vapors are extremely flammable and explosive. Fire can cause severe burns or death.
The following signal words and meanings are intended to explain the levels of risk associated with this product.
SYMBOL SIGNAL MEANING
DANGER: Indicates an imminently hazardous situation, which, if not avoided, will result in death or serious injury.
WARNING: Indicates a potentially hazardous situation, which, if not avoided, could result in death or serious injury.
CAUTION: Indicates a potentially hazardous situation, which, if not avoided, may result in minor or moderate injury.
NOTICE: (Without Safety Alert Symbol) Indicates important information not related to an injury hazard, such as a situation that may result in property damage.

Page 6 — English
SYMBOLS
Some of the following symbols may be used on this product. Please study them and learn their meaning for safe operation of this product.
SYMBOL NAME EXPLANATION
Toxic FumesGas products emit carbon monoxide, an odorless, colorless, poison gas. Breathing carbon monoxide can cause nausea, fainting, or death.
KickbackTo reduce the risk of injury from kickback, hold the spray wand securely with both hands when the machine is on.
Electric ShockFailure to use in dry conditions and to observe safe practices can result in electric shock.
Chemical BurnsTo reduce the risk of injury or damage, DO NOT USE ACIDS, ALKALINES, BLEACHES, SOLVENTS, FLAMMABLE MATERIAL, OR INDUSTRIAL GRADE SOLUTIONS in this product.
Recycle Symbol
This product uses lead acid (Pb) batteries. Local, state or federal laws may prohibit disposal of batteries in ordinary trash. Consult your local waste authority for information regarding available recycling and/or disposal options.
FEATURES
PRODUCT SPECIFICATIONSFuel Tank Capacity ....................................................................................................................................................0.31 gal.
Maximum Pounds Per Square Inch Pressure* ......................................................................................................... 3,100 psi
Maximum Gallons Per Minute* ...................................................................................................................................2.4 gpm
Maximum Inlet Water Temperature ................................................................................................................................�����
*Max. rating determined by PWMA Standard 101
KNOW YOUR PRESSURE WASHERSee Figure 1.The safe use of this product requires an understanding of the information on the tool and in this operator’s manual as well as a knowledge of the project you are attempting. Before use of this product, familiarize yourself with all operating features and safety rules.
189cc OHC ENGINEThis engine enables the pressure washer to achieve 3,100 psi (pounds per square inch) at a rate of 2.4 gpm (gallons per minute).
AUTOMATIC SOAP INJECTION SYSTEMPour pressure washer detergent into the soap tank to apply detergent quickly and easily to your cleaning project. Use of the soap nozzle will activate the soap injector at a 20:1 dilution ratio.
BATTERY MAINTAINER CHARGERWhen storing the pressure washer, connect the battery maintainer charger to keep the battery fully charged and ready for use. If the battery’s charge is depleted, the Electric Start feature will not function.
NOTE: The pressure washer engine does not charge or maintain the battery as it runs.
ENGINE SWITCHThe engine switch is used either alone or in combination with the recoil starter grip to start the pressure washer.
FUEL TANKThis fuel tank has a maximum capacity of 0.31 gal. Use unleaded automotive gasoline in the engine.
Page 7 — English
FEATURES
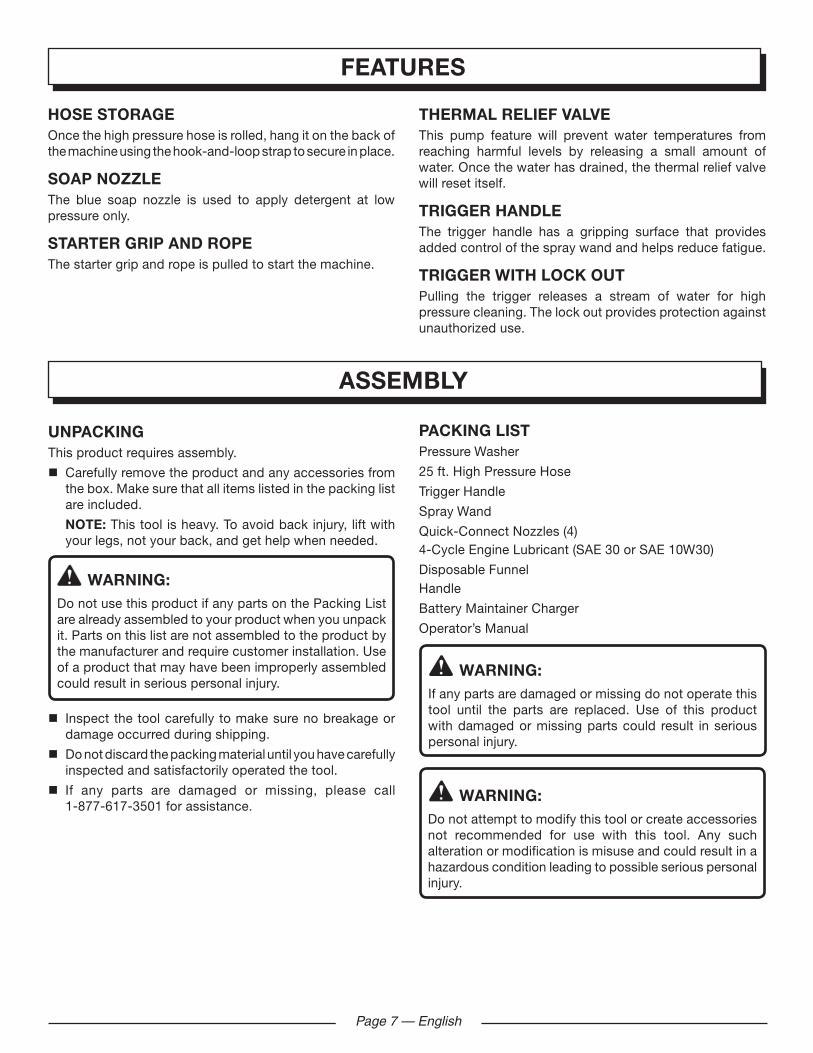
HOSE STORAGEOnce the high pressure hose is rolled, hang it on the back of the machine using the hook-and-loop strap to secure in place.
SOAP NOZZLEThe blue soap nozzle is used to apply detergent at low pressure only.
STARTER GRIP AND ROPEThe starter grip and rope is pulled to start the machine.
THERMAL RELIEF VALVEThis pump feature will prevent water temperatures from reaching harmful levels by releasing a small amount of water. Once the water has drained, the thermal relief valve will reset itself.
TRIGGER HANDLEThe trigger handle has a gripping surface that provides added control of the spray wand and helps reduce fatigue.
TRIGGER WITH LOCK OUTPulling the trigger releases a stream of water for high pressure cleaning. The lock out provides protection against unauthorized use.
ASSEMBLY
UNPACKINGThis product requires assembly.
� Carefully remove the product and any accessories from the box. Make sure that all items listed in the packing list are included.
NOTE: This tool is heavy. To avoid back injury, lift with your legs, not your back, and get help when needed.
WARNING:Do not use this product if any parts on the Packing List are already assembled to your product when you unpack it. Parts on this list are not assembled to the product by the manufacturer and require customer installation. Use of a product that may have been improperly assembled could result in serious personal injury.
� Inspect the tool carefully to make sure no breakage or damage occurred during shipping.
� Do not discard the packing material until you have carefully inspected and satisfactorily operated the tool.
� If any parts are damaged or missing, please call 1-877-617-3501 for assistance.
PACKING LISTPressure Washer
25 ft. High Pressure Hose
Trigger Handle
Spray Wand
Quick-Connect Nozzles (4)4-Cycle Engine Lubricant (SAE 30 or SAE 10W30)
Disposable FunnelHandle
Battery Maintainer Charger
Operator’s Manual
WARNING:If any parts are damaged or missing do not operate this tool until the parts are replaced. Use of this product with damaged or missing parts could result in serious personal injury.
WARNING:Do not attempt to modify this tool or create accessories not recommended for use with this tool. Any such alteration or modification is misuse and could result in a hazardous condition leading to possible serious personal injury.

Page 8 — English
WARNING:To prevent accidental starting that could cause serious personal injury, always disconnect the engine spark plug wire from the spark plug when assembling parts.
INSTALLING THE HANDLESee Figure 2.
CAUTION:Be careful to avoid pinching your fingers or hands when installing the handle onto the frame.
Push and hold the push-pin button on the side of the handle as you slide the handle onto the frame.
NOTE: Before use, pull the handle up until the push-pin button snaps through the locking slots to secure the handle in place.
CONNECTING THE SPRAY WAND TO THE TRIGGER HANDLESee Figure 3.
� Place the threaded end of the spray wand in the connector on the end of the trigger handle.
� Turn the connector clockwise until it stops. This secures the spray wand in place.
CONNECTING/DISCONNECTING BATTERYSee Figures 4 and 5.
WARNING:To reduce the risk of electric shock or explosion, do not short circuit the battery terminals or charge in a sealed container. Keep sparks and flame away. Do not use metal tools for connections and keep metal objects away from the battery terminals. Metal objects can make a connection from one terminal to another. Shorting the battery terminals together can cause sparks, burns, or a fire.
The battery terminal design does not require the use of tools when installing or removing battery wires. All battery wires must be connected before the electric start feature of the pressure washer can be operated.
To connect the battery:
� Remove the cap from the positive (+) terminal.
� Connect the red female wire to the red male wire on the positive (+) terminal.
NOTE: The black male, black female, and red male wires have been preinstalled.
ASSEMBLY
To replace the battery:
� Drain lubricant and fuel from the pressure washer into containers approved for lubricant and gasoline.
� Disconnect the black wires from the battery’s negative (–) terminal, first the female then the male wire.
� Disconnect the red wires from the battery’s positive (+) terminal, first the female then the male wire.
� Carefully lay the pressure washer down so that it rests on its handle.
NOTE: Do not attempt to access the battery by tilting the unit as this may allow the pressure washer to fall unexpectedly.
� Using a 10 mm wrench, remove the retaining bolt securing the battery holder to the battery bracket. Lift and slide the battery holder to the left until it disengages from the bracket.
� Remove the old battery and dispose of according to local and state regulations. Always abide by the safety warnings provided with the battery.
� Put the battery holder on top of the new battery, then place the new battery on the bracket in the same orientation as the old one.
� Insert the battery holder’s tab into the opening on the battery bracket. Gently press down on the battery holder while pushing it to the right to lock it into position.
� Install the retaining bolt and return the pressure washer to its upright position.
� Connect the red wires to the battery’s positive (+) terminal, first the male then the female wire.
� Connect the black wires to the battery’s negative (–) terminal, first the male then the female wire.
NOTE: Be careful not to short across the terminals when installing. Shorting the terminals together can cause sparks, damage to the battery or pressure washer, or even burns or explosions.
CONNECTING HIGH PRESSURE HOSE TO TRIGGER HANDLESee Figure 6.
� Screw the collar on the high pressure hose into the trigger handle inlet coupler by turning the hose collar clockwise. Tighten securely.
NOTE: Be careful to avoid cross-threading, which can cause the trigger handle to leak during use.
� Pull on the hose to be certain it is properly secured.

Page 9 — English
ASSEMBLY
CONNECTING THE HIGH PRESSURE HOSE TO THE PUMPSee Figure 7.
� Completely uncoil and straighten the high pressure hose to prevent kinks.
NOTE: See Using The High Pressure Hose in Operation for more information about using the high pressure hose.
� Align the collar on the hose to the threaded outlet on the pump.
� Insert the high pressure hose collar onto the threaded outlet.
� Turn the collar clockwise to tighten the hose securely to the pump.
NOTE: Be careful to avoid cross-threading, which can cause the hose to leak during use.
� Pull on the hose to be certain it is properly secured.
CONNECTING THE GARDEN HOSE TO THE PRESSURE WASHERSee Figure 8.
NOTICE:Always observe all local regulations when connecting hoses to the water main. Some areas have restrictions against connecting directly to public drinking water supply to prevent the feedback of chemicals into the drinking water supply. Direct connection through a receiver tank or backflow preventer is usually permitted.
DO NOT OVERTILT THE UNIT!
The water supply must come from a water main. NEVER use hot water or water from pools, lakes, etc. Before connecting the garden hose to the pressure washer:
� Run water through the hose for 30 seconds to clean any debris from the hose.
� Inspect the screen in the water intake.
� If the screen is damaged, do not use the machine until the screen has been replaced.
� If the screen is dirty, clean it before connecting the garden hose to the machine.
���������������� ��������������������
� Completely uncoil the garden hose or remove completely from reel to prevent kinks.
NOTE: There must be a minimum of 10 feet of unrestricted hose between the pressure washer intake and the hose faucet or shut off valve (such as a “Y” shut off connector).
� With the hose faucet turned completely off, attach the end of the garden hose to the water intake. Tighten by hand.
NOTICE:Do not run the pressure washer without water supply connected and turned on, as this may damage the high pressure seals and decrease pump life. Completely unwind the hose from its reel or coil and make sure the hose is not being restricted by tires, rocks, or any other objects that may lessen or prevent water flow to the pressure washer.
OPERATION
WARNING:Do not allow familiarity with tools to make you careless. Remember that a careless fraction of a second is sufficient to inflict serious injury.
WARNING:Always wear eye protection with side shields marked to comply with ANSI Z87.1. Failure to do so could result in objects being thrown into your eyes resulting in possible serious injury.

Page 10 — English
WARNING:Do not use any attachments or accessories not recommended by the manufacturer of this tool. The use of attachments or accessories not recommended can result in serious personal injury.
WARNING:Never direct a water stream toward people or pets, or any electrical device including the pressure washer’s battery and maintainer input. Failure to follow these instructions could result in serious injury, electric shock, or death.
NOTICE:This product is not equipped with a spark arrestor and cannot be used on U.S. forest lands; in addition, product users must comply with Federal, State, and local fire prevention regulations. Check with appropriate authorities. Refer to accompanying engine manual for maintenance and replacement parts.
NOTICE:Before each use, inspect the entire product for damaged, missing, or loose parts such as screws, nuts, bolts, caps, etc. Tighten securely all fasteners and caps and do not operate this product until all missing or damaged parts are replaced. Please contact customer service or a qualified service center for assistance.
APPLICATIONSYou may use this tool around the house for cleaning most small to large horizontal or vertical exterior surfaces, smaller exterior objects and structures, and outdoor equipment and tools.* You can:
��Clean or remove mold and mildew from weathered decks, driveways, patios, walkways, sidewalks, etc.
��Remove dirt from various exterior vertical surfaces such as house exteriors, siding, fences, brick, concrete or stone walls, etc.
��Wash boats, outdoor furniture, powered or non-powered garden equipment, gutters, window screens, grills, playground equipment, etc.
*Always test in an inconspicuous area first.
ADDING/CHECKING ENGINE LUBRICANTSee Figure 9.
NOTE: This machine has been shipped with approximately 2 oz. of lubricant in the engine from testing. You must add lubricant to the engine before starting it the first time.
OPERATION
NOTICE:Any attempt to start the engine without adding lubricant will result in engine failure.
To add engine lubricant:
� Place pressure washer on a flat, level surface. Do not tilt.
� Unscrew the oil cap/dipstick by turning counter-clockwise.
� Before first use, squeeze the entire contents of the lubricant container provided into the oil reservoir.
After initial use, add 4-stroke engine lubricant (SAE 30 or SAE 10W30) until the fluid level rises to the upper portion of the hatched area on the dipstick. Do not overfill.
� Replace the oil cap/dipstick and securely tighten.
To check engine lubricant level:
� Set pressure washer on a flat surface. Do not tilt.
� Unscrew the oil cap/dipstick by turning counterclockwise.
� Wipe dipstick clean and re-seat in hole; do not rethread.
� Remove dipstick again and check lubricant level. Lubricant level should fall within the hatched area on the dipstick.
� If level is low, add engine lubricant until the fluid level rises to the upper portion of the hatched area on the dipstick.
� Replace and secure the oil cap/dipstick.
NOTICE:Do not overfill. Overfilling the crankcase may cause excessive smoke and engine damage.
OXYGENATED FUELS
NOTICE:Do not use E15 or E85 fuel in this product. It is a violation of federal law and will damage the unit and void your warranty. Only use unleaded gasoline containing up to 10% ethanol.
Fuel system damage or performance problems resulting from the use of an oxygenated fuel containing more than the percentage of oxygenates previously stated are not covered under warranty.
ADDING GASOLINE TO THE FUEL TANKSee Figure 10.
DANGER:Risk of fire and serious burns: Never remove fuel cap when unit is running. Shut off engine and allow the unit to cool at least five minutes. Remove cap slowly.

Page 11 — English
OPERATION
WARNING:Gasoline and its vapors are highly flammable and explosive. To prevent serious personal injury and property damage, handle gasoline with care. Keep away from ignition sources, handle outdoors only, do not smoke while adding fuel, and wipe up spills immediately.
WARNING:Always shut off engine before fueling. Never remove fuel cap or add fuel to a machine with a running or hot engine. Make sure the unit is sitting on a flat, level surface and only add fuel outdoors. If the engine is hot, let the unit cool for at least five minutes before adding fuel. After fueling, immediately replace fuel cap and tighten securely. Move at least 30 ft. from refueling site before starting engine. Do not smoke and stay away from open flames and sparks! Failure to follow these instructions could result in a fire and cause serious personal injury.
WARNING:Check for fuel leaks. A leaking fuel cap, tank, or lines are a fire hazard and must be replaced immediately. If you find any leaks, correct the problem before using the product. Failure to do so could result in a fire that could cause serious personal injury.
NOTE: This is a 4-cycle engine. Do not mix fuel and lubricant together.
� Mix fuel stabilizer with gasoline according to fuel stabilizer manufacturer’s directions.
� Before removing the fuel cap, clean the area around it. Remove the fuel cap.
� Insert a clean funnel into the fuel tank then slowly pour gasoline into the tank. Fill tank to approximately 1-1/2 in. below the top of the tank neck (this allows for fuel expansion).
� Replace fuel cap and tighten until the cap “clicks”.
� Clean up any spills before starting the engine.
PUMP LUBRICANTThe pressure washer pump has been filled with sufficient lubricant at the factory. You do not need to check or add lubricant to the pump.
ELECTRIC STARTThis pressure washer model is provided with both electric start and recoil start capabilities. Avoid prolonged cranking, as it can damage the engine.
The battery provided is a nominal 12 volt sealed rechargeable lead-acid battery and can be operated in any position without leakage. It complies with non-spillable battery regulations.
NOTE: Brand new pressure washers are shipped with the red female wire (+) disconnected. The cap must be removed and the red female wire (+) must be connected to the positive (+) terminal on the battery before the Electric Start feature will work.
For initial battery connection, see Connecting/Disconnecting Battery.
STARTING AND STOPPING THE PRESSURE WASHERSee Figures 11 - 15.
NOTICE:Do not run the pressure washer without water supply connected and turned on, as this may damage the high pressure seals and decrease pump life. Completely unwind the hose from its reel or coil and make sure the hose is not being restricted by tires, rocks, or any other objects that may lessen or prevent water flow to the pressure washer.
Before starting the engine:
��Connect the battery.
��Connect all hoses.
NOTE: Make sure the pressure washer’s water intake screen is in place and unclogged before connecting garden hose.
��Check all fluids (lubricant and gas).
��Turn on the garden hose then pull the trigger to relieve air pressure; hold the trigger until a steady stream of water appears.
NOTE: Make sure the faucet is turned on fully and that there are no kinks or leaks in the hose.
To start the engine:
� Turn the fuel valve to the OPEN position.
� Pull the choke out to the START position.
NOTE:����� �� ���������������������� �������������push the choke in to the RUN position.
� Push in at the top of the engine switch to put it in the ON position.
� Slide down and hold the lock button while pushing the engine switch to the START position.
NOTE: The battery may require charging before the pressure washer can be started using only the engine switch. The pressure washer can be started by pulling the starter grip and rope.

Page 12 — English
OPERATION
� The pressure washer can also be started by pulling the starter grip and rope until the engine runs.
NOTE: Do not allow the starter grip and rope to snap back after starting; return it gently to its original place.
� Allow the engine to run for 5 seconds, then push the choke in to the RUN position.
NOTICE:Routinely make a visual inspection of the pump and engine during use. If you notice any lubricant leaking around the pump or engine seals, stop using the pressure washer immediately. Contact customer service or a qualified service center for repair. Failure to do so may cause property damage.
To stop the engine:
� Put the engine switch in the OFF position by pushing in at the bottom of the switch.
NOTE: Shutting off the engine will not relieve pressure in the system. Pull trigger to release water pressure.
WARNING:While operating and storing, keep at least 3 feet of clearance on all sides of this product, including overhead. Allow a minimum of 30 minutes of “cool down” time before storage. Keep all body parts, clothing, combustible materials, and hoses away from the muffler. Heat created by muffler and exhaust gases could be hot enough to cause serious burns, ignite combustible objects, and/or damage high pressure hoses that can result in an injection injury.
USING THE SPRAY WAND TRIGGERSee Figure 16.
WARNING:Hold the trigger handle securely with both hands. Expect the trigger handle to move when the trigger is pulled due to reaction forces. Failure to do so could cause loss of control and injury to yourself and others.
� Pull back and hold the trigger to operate the pressure washer.
� Release the trigger to stop the flow of water through the nozzle.
To engage the lock out:� Push up on the lock out until it clicks into the slot.To disengage the lock out:� Push the lock out down and into its original position.Start with the nozzle 1-2 ft. away from the cleaning surface and carefully approach the surface just until the desired level of cleaning is achieved. If the spray is too close it can damage the cleaning surface.
SELECTING THE RIGHT NOZZLE FOR THE JOBSee Figure 17.
Each of the nozzles has a different spray pattern. Before starting any cleaning job, determine the best nozzle for the job. Refer to the Nozzle Selection Guide for more information about which nozzle to choose.
WARNING:NEVER remove nozzles without first turning off the engine, relieving the water pressure in the trigger handle, and locking the lock out on the trigger handle. NEVER point the nozzle at your face or at others. The quick-connect feature contains small springs that could eject the nozzle with some force. Failure to follow these instructions could result in an eye injury or other serious personal injury.
To connect a nozzle to the spray wand:
� Turn off the pressure washer and shut off the water supply. Pull trigger to release water pressure.
� Engage the lock out on the trigger handle by pushing up on the lock out until it clicks into the slot.
� Pull back the quick-connect collar.
� Push the nozzle into place in the spray wand. � Push the collar forward so that the nozzle is secured
properly. Check to see that the nozzle is secure.To disconnect a nozzle from the spray wand once the cleaning job is complete:��Turn off the pressure washer and shut off the water supply.
Pull trigger to release water pressure.� Engage the lock out on the trigger handle by pushing up
on the lock out until it clicks into the slot.� Pull back and hold the quick-connect collar.� Remove the nozzle by pulling it from the quick-connect
collar. Place nozzle in the nozzle storage area on the top of the machine.

Page 13 — English
ABRASIVE GENTLE
NOZZLE SELECTION GUIDE
HIGH PRESSURE(NO SOAP WHEN USING THESE NOZZLES)
LOW PRESSURE(FOR SOAP OR GENTLE RINSE)
0º Red 25º Green 40º White Blue Soap Nozzle
Concrete, Brick, Masonry � � � �Siding, Gutters, House � � �Fencing, Deck, Patio � � �Lawn Equipment, Boat, RV � � �
� Recommended Nozzle � Use With Caution for Certain Applications
OPERATION
USING THE HIGH PRESSURE HOSE
WARNING:Injection hazard. Fully unwrap and straighten high pressure hose prior to and during each use and do not allow it to become kinked. The high pressure hose features an outer covering that provides strength to the hose. If the outer covering becomes damaged, stop using the hose and replace it immediately. A kinked or damaged hose can develop a high pressure leak and result in a possible injection or other serious personal injury.
To prevent damage to the outer covering:
� Inspect the hose before every use.
� Fully unwrap and straighten the hose before use.
� Do not allow the high pressure hose to be kinked.
� Keep the hose away from hot surfaces and sharp edges.
� Do not pull the unit by the high pressure hose.
� Do not allow the hose to be crushed or wrapped around objects.
WASHING WITH DETERGENTSee Figures 18 - 19.
As sold, this unit is designed for use with “downstream” pressure washer detergents. To convert for use with “upstream” detergents, contact customer service or a qualified service center for more information.
NOTICE:USE ONLY DETERGENTS DESIGNED FOR PRESSURE WASHERS. Do not use household detergents, acids, alkalines, bleaches, solvents, flammable material, or industrial grade solutions, which can damage the pump or cause property damage. Many detergents may require mixing prior to use. Prepare cleaning solution as instructed on the solution bottle. Always test in an inconspicuous area before beginning.
� Remove the cap from the soap tank and pour pressure washer detergent in the tank. Replace cap on tank.
NOTE: The machine setting of this unit is 20:1, which usually allows the use of 1 gallon pressure washer detergent without further dilution. Check your detergent instructions to be sure additional dilution is not necessary.
� Install the blue soap nozzle on the spray wand.
Page 14 — English
OPERATION
� Squeeze the trigger and wait approximately 5 seconds for the detergent to appear.
� Spray the detergent on a dry surface using long, even, overlapping strokes. To prevent streaking, do not allow detergent to dry on the surface.
Before shutting off the engine:
� Fill the soap tank with clean water.
� Spray the clear water through the spray wand until the tank is empty.
� If any detergent remains in the spray, repeat with a second tank of clean water.
� Shut off the engine.
NOTE: Shutting off the engine will not relieve pressure in the system. Pull trigger to release water pressure.
RINSING WITH THE PRESSURE WASHER��Turn off the pressure washer and shut off the water supply.
Pull trigger to release water pressure.
��Engage the lock out on the trigger handle by pushing up on the lock out until it clicks into the slot.
��Remove the soap nozzle by placing hand over nozzle then pulling back the quick-connect collar. Place soap nozzle in the nozzle storage area on the machine.
��Select the right nozzle for the job. See the chart on the previous page for selecting the appropriate nozzle.
��Start at the top of the area to be rinsed and work down, overlapping the strokes.
MOVING THE PRESSURE WASHERSee Figure 20.
NOTE: Never lift or carry this product using the handle and never place the unit in any position other than upright on its wheels.
� Turn the pressure washer off.
� Tilt the machine toward you slightly until it balances on the wheels then roll the machine to the desired position. Do not tilt forward or sideways when moving.
� DO NOT attempt to move the unit by pulling on any of the hoses.
USING PUMP PROTECTORSee Figure 21.
Regular use of a commercially available pump protector prolongs the life of the pressure washer by removing hard water mineral deposits, lubricating pump seals and pistons, and preventing freeze damage. Pump protector should be added to the unit after every use and before storage. Pump protector can be purchased at the retailer where you purchased your pressure washer, or by calling customer service.
The instructions that follow are typical for adding pump protector but you should always verify the specific instructions provided by the manufacturer of the pump protector used.
� Turn off the pressure washer engine and shut off the water supply. Pull trigger to release water pressure.
� Disconnect garden hose and high pressure hose.
� Unscrew threaded top from pump protector bottle and remove paper seal from bottle. Reinstall top on bottle and tighten securely.
NOTE: The rubber seal should remain inside the threaded top. If it comes out, be sure to replace before reinstalling the top.
� Remove bottle cap and attach threaded end of bottle securely to pressure washer pump water intake.
� Squeeze bottle to inject contents into pump.
� With engine switch in the OFF position, pull starter grip and rope to cycle pump, then squeeze bottle again to guarantee complete coverage.
� Pump is protected when the protector fluid exits the pump outlet.

Page 15 — English
MAINTENANCE
Normal maintenance, replacement or repair of emission control devices and systems may be performed by any qualified repair establishment or individual with original or equivalent parts. Warranty and recall repairs must be performed by an authorized service center; please contact customer service for assistance.
WARNING:When servicing, use only recommended or equivalent replacement parts. Use of any other parts could create a hazard or cause product damage.
WARNING:Always wear eye protection with side shields marked to comply with ANSI Z87.1. Failure to do so could result in objects being thrown into your eyes resulting in possible serious injury.
WARNING:Before inspecting, cleaning or servicing the machine, shut off engine, wait for all moving parts to stop, and disconnect spark plug wire and move it away from spark plug. Failure to follow these instructions can result in serious personal injury or property damage.
NOTICE:This product is not equipped with a spark arrestor and cannot be used on U.S. forest lands; in addition, product users must comply with Federal, State, and local fire prevention regulations. Check with appropriate authorities. Refer to accompanying engine manual for maintenance and replacement parts.
NOTICE:Periodically, inspect the entire product for damaged, missing, or loose parts such as screws, nuts, bolts, caps, etc. Tighten securely all fasteners and caps and do not operate this product until all missing or damaged parts are replaced. Please contact customer service or a qualified service center for assistance.
GENERAL MAINTENANCEAvoid using solvents when cleaning plastic parts. Most plastics are susceptible to damage from various types of commercial solvents and may be damaged by their use. Use clean cloths to remove dirt, dust, oil, grease, etc.
WARNING:Do not at any time let brake fluids, gasoline, petroleum-based products, penetrating oils, etc., come in contact with plastic parts. Chemicals can damage, weaken or destroy plastic which could result in serious personal injury.
Before running the engine, perform the following pre-operation steps:
��Check that all bolts, nuts, etc., are securely tightened.
�������������� �� ���� ������"
��#�������������� ������ �����������$������������level; refill as needed.
��������������������������%��$�"
���� ���� �� &��� �� �� �� ��� � ���� ���� ����� ��� �� ��immediately.
NOZZLE MAINTENANCESee Figure 22.
Excessive pump pressure (a pulsing sensation felt while pulling the trigger) may be the result of a clogged or dirty nozzle.
��Turn off the pressure washer and shut off the water supply. Pull trigger to release water pressure.
��Remove the nozzle from the spray wand.
WARNING:NEVER remove nozzles without first turning off the engine, relieving the water pressure in the trigger handle, and locking the lock out on the trigger handle. NEVER point the nozzle at your face or at others. The quick-connect feature contains small springs that could eject the nozzle with some force. Failure to follow these instructions could result in an eye injury or other serious personal injury.

Page 16 — English
STORING THE PRESSURE WASHERSee Figure 25.
NOTE: Regular use of fuel stabilizer and pump protector will give you better performance of the unit and increase the life of the pump. See the Replacement Parts List for available sizes and part numbers of these items and call customer service to order.
WARNING:While storing, keep at least 3 feet of clearance on all sides of this product, including overhead. Allow a minimum of 30 minutes of “cool down” time before storage. Heat created by muffler and exhaust gases could be hot enough to ignite combustible objects.
Store in a dry, covered area where the weather can’t damage it.
It is important to store this product in a frost-free area. Always empty water from all hoses, the pump, and the soap tank before storing.
��Drain the fuel tank completely by running the pressure washer until the gas runs out. Stored gas can go stale in 30 days.
NOTE: Make sure the water supply is connected and turned on when allowing the pressure washer engine to run.
� Make sure the engine switch is in the OFF position and the fuel valve is in the CLOSED position.
� Disconnect both the high pressure hose and the garden hose from the pump.
��Empty the pump by pulling on the starter grip and rope about 6 times. This should remove most of the liquid from the pump.
NOTICE:The use of a pump protector is required after each use and before storing to prevent cold weather and seal damage during storage. Failure to use pump protector will void your warranty.
��Drain the lubricant and replace with fresh, clean lubricant as described in Adding/Checking Engine Lubricant in the Operation section of this manual.
��Disconnect spark plug wire and remove the spark plug. Pour about a teaspoon of clean, air-cooled, four-cycle lubricant through the spark plug hole into the combustion chamber.
��Leaving the spark plug out, pull the starter grip and rope two or three times to coat the inside of the cylinder wall.
��Inspect the spark plug and clean or replace, as necessary.
��Using a straightened paper clip or nozzle cleaning tool (not provided), free any foreign materials clogging or restricting the nozzle.
��Using a garden hose, flush debris out of nozzle by back flushing (running the water through the nozzle backwards or from the outside to the inside).
��Reconnect the nozzle to the spray wand.
��Turn on the water supply and start the engine.
PUMP MAINTENANCERoutinely make a visual inspection of the pump. If you notice any leaking of lubricant around the pump oil seals, take the pressure washer to an qualified service center for repair.
There are no user serviceable parts to the pressure washer pump. Any attempt to service or alter the pump may damage the pressure washer and void your product warranty.
USING THE BATTERY MAINTAINER CHARGERSee Figure 23.
When storing the pressure washer, connect the battery maintainer charger to keep the battery fully charged and ready for use.
NOTE: The battery maintainer charger provided should only be used with the 12V 4.5Ah/20HR sealed lead acid battery model RT1245B supplied with this pressure washer.
��Plug the battery maintainer charger into a standard household 120V receptacle. Make sure the household power supply is 120V, 60 Hz, AC only.
��Remove the input cover and connect the battery maintainer charger to the pressure washer’s maintainer input. The light on the battery maintainer charger will illuminate red while the battery is charging.
��The battery will become slightly warm to the touch while charging. This is normal and does not indicate a problem. When battery is fully charged, the red light will turn green. NOTE: If the light does not illuminate, the battery maintainer fuse may need to be replaced. Check the fuse and replace if needed.
��Disconnect the battery maintainer charger before operating the pressure washer. Place the cover over the the pressure washer’s maintainer input when not in use.
CHANGING BATTERY MAINTAINER FUSESee Figure 24.
NOTICE:Do not use a higher rated fuse other than the specified amperage. This could cause damage to the product.
��Open the fuse holder and remove the old fuse.
��Insert new 7.5 amp fuse and close the fuse holder.
MAINTENANCE
Page 17 — English
MAINTENANCE
��Reinstall the spark plug, but leave the spark plug wire disconnected.
��Clean the air filter.
��Extend the starter grip and rope to check its condition. If the rope is frayed, have it replaced immediately by a qualified service center.
��Remove all hoses. Coil the hoses and store as shown. Do not allow the hose to become kinked.
� For short-term storage, connect the charging cable and allow the battery to charge. For long-term storage, disconnect the cable and coil it neatly.
� Store the unit and accessories in an area that does not reach freezing temperatures. Do not store near furnace or other sources of heat that could dry out the pump seals.
PREPARING FOR USE AFTER STORAGE��Pull the starter grip and rope three or four times to clean
lubricant from the combustion chamber.
��Remove spark plug from the cylinder. Wipe lubricant from the spark plug and return it to the cylinder.
��Reconnect the spark plug wire.
��Refuel the machine as described earlier in the operator’s manual.
BATTERY REMOVAL AND PREPARATION FOR RECYCLING
WARNING:To reduce the risk of electric shock or explosion, do not short circuit the battery terminals. Keep sparks and flame away. Do not use metal tools for connections and keep metal objects away from the battery terminals. Metal objects can make a connection from one terminal to another. Shorting the battery terminals together can cause sparks, burns, or a fire.
To preserve natural resources, please recycle or dispose of batteries properly.
This product uses lead acid batteries. Local, state or federal laws may prohibit disposal of batteries in ordinary trash.
Consult your local waste authority for information regarding available recycling and/or disposal options.
WARNING:Upon removal, cover the battery’s terminals with heavy-duty adhesive tape. Do not attempt to destroy or disassemble battery or remove any of its components. Lead acid batteries must be recycled or disposed of properly. Also, never touch both terminals with metal objects and/or body parts as short circuit may result. Keep away from children. Failure to comply with these warnings could result in fire and/or serious injury.

Page 18 — English
MAINTENANCE
PERIODIC MAINTENANCE SCHEDULE TABLENOTE: If a separate engine manual is provided for this pressure washer, please follow the maintenance schedule provided in the engine manual instead of the maintenance information listed below.
Maintenance Items Each use Weekly 25 hrs 50 hrs 200 hrs
Check for water leaks under manifold, into crankcase X
Plumbing X
Clean engine and check nuts and bolts X
Check and refill engine lubricant X
Change engine lubricant (initial change)1 X
Check water inlet filter placement2 X
Add fuel stabilizer X
Add pump protector X
Change engine lubricant X
Check spark plug X
Clean air filter X
Replace air filter element X
Clean and adjust spark plug and electrodes X
Replace spark plug X
1 Initial lubricant change should be performed after first 20 hours of operation. Thereafter, change lubricant every 100 hours.2 If water inlet filter is missing or damaged, it must be replaced. See Replacement Parts List for part number to order.
NOTE: If you are not sure how to perform any of the maintenance items listed above, take the unit to a qualified service center to have the maintenance item performed.

Page 19 — English
TROUBLESHOOTING
PROBLEM CAUSE SOLUTIONEngine fails to start No fuel in tank
Water pressure in hose
Spark plug shorted or fouled
Spark plug is broken (cracked porcelain or electrodes broken)
Ignition lead wire shorted, broken, or disconnected from spark plug
Ignition inoperative
Fill tank
Squeeze trigger to relieve water pressure
Replace spark plug
Replace spark plug
Replace lead wire or attach to spark plug
Contact a qualified service center
Engine hard to start Water in gasoline
Weak spark at spark plug
Drain entire system and refill with fresh fuel
Contact a qualified service center
Engine lacks power Dirty air filter Clean or replace air filter
Electric Start feature not working Battery is not charged
Battery wires disconnected
Charge the battery using the battery maintainer charger
Connect the battery wires.
Detergent fails to mix with spray Soap tank is empty
High pressure nozzle attached
Add detergent to soap tank
Use blue soap nozzle to apply detergent
Pump doesn’t produce pressure Low pressure nozzle installed
Inadequate water supply
Trigger handle or spray wand leaks
Nozzle is clogged
Air in line
Hose is leaking
Kink in hose
Choke in START position
Pump is faulty
Replace with high pressure nozzle
Provide adequate water flow
Check connections and / or replace trigger handle or spray wand
Clean nozzle
Pull trigger on trigger handle to remove air from line
Replace hose
Eliminate kinks in hose
Push choke in to the RUN position.
Contact a qualified service center
Machine doesn’t reach high pressure
Diameter of garden hose is too small
Water supply is restricted
Not enough inlet water
Wrong nozzle is attached
Replace with 3/4 in. garden hose
Check garden hose for kinks, leaks, and blockages
Open water source full force
Attach the high pressure nozzle
If problem persists after trying the above solutions, contact customer service or a qualified service center for assistance.
NOTICE:As the equipment owner, you are responsible for the performance of the required maintenance listed in the Maintenance section. It is recommended that you retain all receipts covering maintenance on your equipment. Neglecting or failing to perform the required maintenance may increase emissions, decrease fuel efficiency, degrade performance, cause irreversible engine damage and/or void your warranty.

Page 20 — English
WARRANTY
LIMITED NON-ENGINE WARRANTY STATEMENT
OWT Industries, Inc., (the Company) warrants to the original retail purchaser that this PowerStroke Product is free from defects in material and workmanship and agrees to repair or replace, at the Company’s discretion, any defective Product free of charge within these time periods from the date of purchase:
��Three years, if the Product is used solely for personal, family, or household use;
��90 days, if the Product is used for business or commercial use.
This warranty applies only to Products sold within the United States of America, the District of Columbia, Canada, Mexico, the Commonwealth of Puerto Rico, the Virgin Islands, or Guam.
This warranty is not transferable and does not cover damage resulting from defects other than in material or workman-ship, or damage caused by unreasonable use, including the failure to provide reasonable and necessary maintenance.
Other items not covered under this warranty include:
��Transportation charges for sending the product to the Company or its authorized service representative for warranty service, or for shipping repaired or replacement products back to the customer; these charges must be borne by the original retail purchaser.
��Damages caused by abuse, accident, misuse, neglect, alteration, modification, the effects of corrosion, erosion, normal wear and tear or repairs by other than the Company or its authorized service representative.
��In addition this warranty does not cover:
� Tune-ups – Spark Plugs, Carburetor, Carburetor Adjustments, Ignition, Filters, Oil Change
� Wear items – Hoses, Connector Fittings, Spray Nozzles, Trigger Handle, Spray Wand, Wheels
Warranty is voided if the customer fails to install, maintain and operate the product in accordance with the instruc-tions and recommendations of the Company as set forth in the Product’s operator’s manual or if the Product is used as rental equipment.
The Company will not pay for repairs or adjustments to the Product, or for any costs or labor, performed without the Company’s prior authorization.
IMPORTANT: Some components not covered under this warranty may still be covered by a separate warranty issued by the engine manufacturer. Please see the Engine Manufacturer Warranty (if any) supplied with this product for further details.
SAVE YOUR SALES SLIPProof of purchase in the form of your dated sales receipt, cash register slip, etc., will be required before the Company and/or its authorized service representatives can perform warranty service on the Product.
EXCLUSIONS AND LIMITATIONSTHIS LIMITED WARRANTY IS IN LIEU OF ALL OTHER EXPRESS WARRANTIES. ANY IMPLIED WARRANTY OF MERCHANTABILITY, FITNESS FOR A PARTICULAR PURPOSE, OR OTHERWISE, APPLICABLE TO THIS PRODUCT, SHALL BE LIMITED IN DURATION TO THE DURATION OF THIS LIMITED WARRANTY. THE WARRANTY SERVICE DESCRIBED ABOVE IS THE EXCLUSIVE REMEDY UNDER THIS WARRANTY. THE COMPANY SHALL NOT BE LIABILE FOR ANY SPECIAL, INCIDENTAL OR CONSEQUENTIAL DAMAGES.
SOME STATES DO NOT ALLOW A LIMITATION ON THE DURATION OF IMPLIED WARRANTIES, OR THE EXCLUSION OR LIMITATION OF INCIDENTAL, OR CONSEQUENTIAL DAMAGES, SO THE ABOVE LIMITATION OR EXCLUSION MAY NOT APPLY TO YOU.
HOW TO OBTAIN WARRANTY SERVICEFor warranty service: Call toll free 1-877-617-3501, or write to OWT Industries, Inc., P.O. Box 35, Hwy. 8, Pickens, SC 29671.
For warranty service outside the USA, please contact your local PowerStroke dealer.

Page 21 — English
BATTERY CHARGER FCC COMPLIANCEThis device complies with Part 15 of the FCC Rules. Operation is subject to the following two conditions: (1) This device may not cause harmful interference, and (2) This device must accept any interference received, including interference that may cause undesired operation.
WARNING:Changes or modifications to this unit not expressly approved by the party responsible for compliance could void the user’s authority to operate the equipment.
NOTE: This equipment has been tested and found to comply with the limits for a Class B digital device, pursuant to Part 15 of the FCC Rules. These limits are designed to provide reasonable protection against harmful interference in a residential installation. This equipment generates, uses and can radiate radio frequency energy and, if not installed and used in accordance with the instructions, may cause harmful interference to radio communications. However, there is no guarantee that interference will not occur in a particular installation. If this equipment does cause harmful interference to radio or television reception, which can be determined by turning the equipment on and off, the user is encouraged to try to correct the interference by one or more of the following measures:
��Reorient or relocate the receiving antenna.
��Increase the separation between the equipment and receiver.
��Connect the equipment into an outlet on a circuit different from that to which the receiver is connected.
��Consult the dealer or an experienced radio/TV technician for help.
CUMPLIMIENTO DE LAS NORMAS DE LA FCC PARA CARGADOR DE BATERÍASEste dispositivo cumple con la Parte 15 de las Reglas de la FCC. El uso depende de las siguientes dos condiciones: 1) Este dispositivo no puede causar interferencias perjudiciales y 2) este dispositivo debe admitir cualquier interferencia recibida, incluidas las que pudieran causar un funcionamiento no deseado.
ADVERTENCIA:Los cambios o modificaciones hechos a esta unidad sin la autorización expresa del responsable del cumplimiento de la norma podrían anular la autoridad del usuario para manejar el equipo.
NOTA: Se ha verificado y determinado que este equipo cumple con los límites correspondientes a los dispositivos digitales de Clase B, de acuerdo con la Parte 15 de las Normas de la FCC. Estos límites están establecidos para proporcionar una protección razonable contra la interferencia dañina en las instalaciones residenciales. Este equipo genera, utiliza y puede irradiar energía de frecuencia de radio, y si no se instala y emplea de conformidad con las instrucciones, puede causar interferencia dañina a las radiocomunicaciones. No obstante, no hay garantía de que no ocurrirá ninguna interferencia en cada instalación en particular. Si este equipo causa interferencia dañina en la recepción de radio o televisión, lo cual puede determinarse apagando y luego encendiendo el equipo, se exhorta al usuario a tratar de corregir la interferencia tomando una o más de las siguientes medidas:
��Cambiar la orientación o ubicación de la antena receptora.
��Aumentar la separación entre el equipo y el aparato receptor.
��Conectar el equipo en una toma de corriente de un circuito diferente al que esté conectado el aparato receptor.
��Consultar al concesionario o a un técnico experimentado de radio y TV para que le brinden ayuda.
Pàgina 3 — Español
INSTRUCCIONES IMPORTANTES DE SEGURIDAD
PELIGRO:Riesgo de incendios y lesiones por quemaduras: Nunca retire la tapa de combustible mientras esté encendida la unidad. Apague el motor y deje enfriar la unidad durante al menos cinco minutos. Retire la tapa lentamente.
ADVERTENCIA:Lea y comprenda todas las instrucciones. El incumplimiento de todas las instrucciones siguientes puede causar descargas eléctricas, incendio o intoxicación por monóxido de carbono, lo cual puede causar la muerte o lesiones graves.
LEA TODAS LAS INSTRUCCIONES��Familiarícese con la herramienta. Lea cuidadosamente el
manual del operador. Aprenda los usos y limitaciones de la máquina, así como los posibles peligros específicos de esta herramienta.
��Mantenga las protecciones en su lugar y en buenas condiciones de trabajo. Nunca utilice la herramienta con ninguna de las protecciones o cubiertas quitadas. Asegúrese de que todas las protecciones estén funcionando de forma correcta antes de utilizar la unidad.
� Retire toda llave y herramienta de ajuste. Adquiera el hábito de verificar que se haya retirado de la herramienta eléctrica toda llave y herramienta de ajuste antes de encenderla.
� Para reducir el riesgo de lesiones, mantenga a alejados a niños y demás circunstantes. Todos los presentes deben llevar puestos anteojos de seguridad y permanecer a una distancia segura del área de trabajo.
��������������� ��� �������� �������������� ���������������, particularmente a los niños de corta edad, y también a las mascotas.
��No haga arrancar o funcionar el motor en un espacio ������� ��� �� � �������� ������ �� �������� ���������� �� �������� ����� ���� ����������� donde se puedan recolectar las emanaciones de monóxido de carbono. El monóxido de carbono, un gas incoloro, inodoro y sumamente peligroso, puede causar la pérdida de la conciencia o la muerte.
� Use la herramienta adecuada a la tarea. No fuerce la herramienta ni ningún accesorio a efectuar tareas para las que no están hechos. No la use para propósitos no indicados en las instrucciones.
� Vístase adecuadamente. Use pantalones largos y mangas largas. No vista ropas, guantes, corbatas o joyas holgadas. Pueden resultar atrapadas y tirar de usted hacia piezas en movimiento. Se recomiendan guantes y calzado antiderrapantes al trabajar al aire libre. Si tiene el pelo largo cúbraselo de alguna manera para contenerlo.
����� �������� ��� ������� ���� �� ����� �����"�� �� ��� ��������������� ��� ������ �� ���"� �� �������� �������# Use calzado de seguridad que le proteja sus pies y mejore su postura en superficies resbaladizas.
����������������������������������������������������#� Siempre ������������������������������������������������
con la marca de cumplimiento de la norma ANSI Z87.1. Con el cumplimiento de esta regla se reduce el riesgo de lesiones corporales serias.
� ������������������������������������������������������"�������� ��������� ����������#� Mantenga una postura firme y buen equilibrio en todo momento
�� $������� ����� ����������� ������� � ��#� El empleo de accesorios inadecuados puede presentar riesgos de lesiones.
� Siga las instrucciones de la mantenimiento especificadas en este manual.
� I����������� �������"��� �&� ��# Antes de seguir utilizando la herramienta, es necesario inspeccionar cuidadosamente toda protección o pieza dañada para determinar si funcionará correctamente y desempeñará la función a la que está destinada. Verifique la alineación de las partes móviles, que no haya atoramiento de las mismas, que no haya piezas rotas, el montaje de las piezas y cualquier otra condición que pudiera afectar su funcionamiento. Toda protección o pieza que esté dañada debe repararse apropiadamente o reemplazarse en un centro de servicio calificado.
� Nunca deje desatendida ninguna herramienta en funcionamiento. Apague la herramienta. No se aleje de la herramienta hasta no verla completamente detenida.
��'������������������������ ������� ��������������a fin de reducir el riesgo de incendio.
�� ���������������� ��������������� �����������*���&��#��+��� ���� ������� �������� ��� ����������� ����� ������ ���
carga, descarga, transporte y almacenamiento seguros de ����������#
� Familiarícese completamente con los controles. Aprenda a detener la máquina y a liberar rápidamente la presión.
�� �����������������������������������;������� ������������ y grasa. Siempre utilice un paño limpio para la limpieza de la unidad. Nunca utilice fluidos para frenos, gasolina, productos a base de petróleo ni solventes para limpiar la herramienta.
�� <������"����������;�����������# Preste atención a lo que esté haciendo y aplique el sentido común. No utilice la herramienta cuando esté cansado. No se apresure.
����� �������� ��� ��� � � ��� ��� ���������� ����� ���� �������� ��drogas, alcohol o medicamentos.
� =�������������� ������������ ����"������� �������"��������herramienta. Retire todos los objetos como piedras, vidrio roto, clavos, alambre o cuerda que puedan salir disparados o enredarse en la máquina.
��No utilice la herramienta si el interruptor no apaga. Lleve todo interruptor defectuoso a un centro de servicio calificado para que lo reparen.
��>����� ��������������������������������������������� apague el motor y cerciórese de que se hayan detenido todas las partes en movimiento. Desconecte el cable de la bujía, y mantenga dicho cable alejado de la bujía para evitar el arranque accidental de la unidad.
�� ?����� ������ ��� �������� �� �������� ��������# No utilice herramientas eléctricas en lugares húmedos o mojados ni las exponga a la lluvia. Mantenga bien iluminada el área de trabajo.
�� �������������������� � �������������������*�������#�El chispeo normal del motor podría encender los gases presentes.
� ����������������� � ������������������������ �����������������#� No utilice la unidad cerca de vegetación o ramas secas, paños
de textiles ni otros materiales inflamables.��>@Q?=�?�'[>��=����� ����;��������� ���������– No dirija
el chorro hacia las personas.

Pàgina 4 — Español
REGLAS DE SEGURIDAD ESPECÍFICAS
�� +��� ������� �� ���� �� ���������� ��� ���� ���� �� ��������para usarla. El aire tibio que sale del motor podría causar áreas puntuales descoloridas en el césped.
�� ������ ��������������� ��������� ��������� ������������������������������� ����������������������#
��>����� �� �������� ���������� ���������� �� ������"��� cierre puertas y ventanas. Despeje el área a limpiar y elimine cualesquier desechos, juguetes, muebles de patio u otros objetos que pudiesen crear un peligro.
�������������������������������������������������������������en marcha.
�� �������������������������������si se ha formado hielo en cualquier parte del equipo.
�� ��������������������� ��������������������������������������������������� ���� �� �� ��������en este producto. Estos productos pueden causar lesiones físicas al operador y daños irreparables a la máquina.
�� +��������������������������������en superficies niveladas. Si el motor se encuentra inclinado, podría agarrotarse debido a la lubricación insuficiente (incluso con el nivel de lubricante al máximo).
��>@Q?=�?�'[>�� \��� ������� �� ����� �������� ��� ��� �������������������������"����� ��� ������#�Nunca dirija el chorro a personas, animales, dispositivos eléctricos ni a la máquina misma.
��Sujete el mango con gatillo���������������������������#�Se espera que el mango del gatillo se mueva cuando se tire del gatillo como consecuencia de las fuerzas de reacción. La inobservancia de esta advertencia podría causar pérdida de control y lesiones a usted y a otras personas.
�������������������������������������������������������������en marcha (excepto cuando así lo recomiende específicamente el fabricante).
�� '��� ����������������������������� ��������������� �������������� ��������������������������������������������#
��Mantenga la entrada de aire de enfriamiento (el área del mango del arrancador y cuerda) y el lado del silenciador alejados un mínimo de 91 cm (tres pies) de cualquier edificación, obstrucciones y otros objetos combustibles.
��������������� ����������� �������������������������;� ��otros materiales peligrosos.
��Evite el contacto con las partes calientes de la unidad. El silenciador y otras partes del motor se calientan mucho; tenga precaución.
�����������������]�������������� ����������durante el arranque ni durante el funcionamiento del motor.
�� '� ����"������� ������������� � ��������������������������� ��������������;������������������������������ para verificar que no estén flojos ni haya derrames de combustible.
� Antes de cada uso, inspeccione los pernos y las tuercas para verificar que están apretados. Una tuerca o perno sueltos pueden causar problemas graves en el motor.
��+������� ��������"��� ��� ������������ ��� ����� �����# Nunca reabastezca el combustible en espacios interiores ni en áreas con ventilación insuficiente.
����������� �� ��������������������������������� �������dentro de un edificio donde haya presentes fuentes de ignición,
como el agua caliente y calentadores locales, secadoras de ropa y cosas parecidas.
��+�������������������������������� ��������������������������������������������������� ������������ ���������������;������ �� ���������� ���������#
� Para reducir el riesgo de incendio o de lesiones por quemadura, maneje con cuidado el combustible. Es sumamente inflamable.
�� ��� ����� ��������� ����� ��"���� �� ��� ������������ �������������� �����������.
��=�������"��� �������������������� � ������� �����������el motor. Nunca retire la tapa del tanque de combustible ni lo reabastezca mientras esté encendida o caliente la unidad.
� >�������������� ���������� ������������������������ para aliviar la presión y evitar que se escape combustible por la tapa.
��Vuelva a colocar firmemente la tapa del tanque de ������������;���� �������������#
� \�������� �������������������������;�� ������ �� �����unidad. Aléjese por lo menos 9 metros (30 pies) del sitio de reabastecimiento de combustible antes de encender el motor.
��+����� ������������������� no intente arrancar el motor; aleje la máquina del área del derramamiento y evite causar una fuente de ignición hasta que se disipen los vapores del combustible.
� Nunca intente en ninguna circunstancia eliminar el ������������ ������ �������� ���#
� Antes del almacenamiento, permita que la lavadora de ���������������]�� �������̂ _���������;� ��������������������de la unidad.
��̀ ��� �� ������ � ������� ����� ��]�� ;������ventilado, a una distancia segura de todo equipo generador de chispas o llamas.
��̀ ��� �� ��� ������������ �� recipientes diseñados específicamente para tal fin.
� Antes de transportar la unidad en un vehículo, vacíe el tanque de combustible e inmovilícela.
��>�� �������������������� � ������������������"��� �����������recomendados o equivalentes. El empleo de piezas diferentes puede causar un peligro o dañar el producto.
��Use SOLAMENTE agua fría.��Asegúrese de que haya una distancia mínima de 914 mm
(tres pies) de todo material combustible.��Nunca rocío cierra a la superficie para ser limpiado como
usted puede dañar la superficie. ��Luego de detener el motor, siempre presione el gatillo
����� �� ��� ��� ����� ��� ������� ����� �������� ��� ��������������� ���������������� ��������������#�La inobservancia de esta advertencia puede causar lesiones personales graves.
��>��{����� �� ���� ��� �������� �� ����� �������� �����conectada adecuadamente antes de usar el producto.
��<�����������������������*������#��'��� �� ��� ����� �����"�� ���� ��� �������� �� �����]����
���������������� ������������������������������������������ ������������������������������;������������������������������&���������� ������������������*����������������terminales. Establecer una conexión directa entre las dos terminales de las baterías puede causar quemaduras o incendios.
��Guarde estas instrucciones. Consúltelas frecuentemente y utilícelas para instruir a otros usuarios. Si presta a alguien esta herramienta, facilítele también las instrucciones.

Pàgina 5 — Español
SÍMBOLOS
Es posible que se empleen en esta producto algunos de los siguientes símbolos. Le suplicamos estudiarlos y aprender su significado. Una correcta interpretación de estos símbolos le permitirá utilizar mejor y de manera más segura la producto.
SÍMBOLO NOMBRE DENOMINACIÓN/EXPLICACIÓN
Alerta de seguridad Indica un peligro posible de lesiones personales.
Lea manual del operadorPara reducir el riesgo de lesiones, el usuario debe leer y comprender el manual del operador antes de usar este producto.
Protección ocularSiempre póngase protección ocular con protección lateral con la marca de cumplimiento de la norma ANSI Z87.1.
Alerta de condiciones húmedas No exponga la unidad a la lluvia ni la use en lugares húmedos.
Superficie calientePara reducir el riesgo de lesiones corporales o daños materiales evite tocar toda superficie caliente.
Riesgo de inyecciones
Para reducir el riesgo de una inyección o lesión, nunca dirija un chorro de agua hacia personas o mascotas ni ponga ninguna parte del cuerpo en el chorro. Las fugas presentes en mangueras y acopladores también pueden causar lesiones por inyección. No sujete ninguna manguera ni acoplador.
Riesgo de explosiónEl combustible y los vapores del mismo son explosivos y pueden causar quemaduras graves e incluso la muerte.
Las siguientes palabras de señalización y sus significados tienen el objeto de explicar los niveles de riesgo relacionados con este producto.
SÍMBOLO SEÑAL SIGNIFICADO
PELIGRO: Indica una situación peligrosa inminente, la cual, si no se evita, causará la muerte o lesiones serias.
ADVERTENCIA: Indica una situación peligrosa posible, la cual, si no se evita, podría causar la muerte o lesiones serias.
PRECAUCIÓN: Indica una situación potencialmente peligrosa la cual, si no se evita, puede causar lesiones leves o moderadas.
AVISO:(Sin el símbolo de alerta de seguridad) Indica información importante no relacionada con ningún peligro de lesiones, como una situación que puede ocasionar daños físicos.

Pàgina 6 — Español
SÍMBOLOS
CARACTERÍSTICAS
ESPECIFICACIONES DEL PRODUCTOCapacidad del tanque de combustible .............................................................................................................1,17 litros (0,31 gal.)
Presión máxima*................................................................................................................................................................. 3 100 psi
Flujo máximo* .................................................................................................................................................... 9,09 LPM (2,4 gpm)
Temperatura máxima de agua de cala .........................................................................................................................����#�'������<
*Máximo que valora determinado por el estándar de PWMA 101, cuándo probado con boquilla roja
FAMILIARÍCESE CON LA LAVADORA DE PRESIÓNVea la figura 1.Para usar este producto con la debida seguridad se debe comprender la información indicada en la herramienta misma y en este manual, y se debe comprender también el trabajo que intenta realizar. Antes de usar este producto, familiarícese con todas las características de funcionamiento y normas de seguridad del mismo.
189cc OHC MOTOREste motor permite que su lavadora de presión alcance las 3 100 psi (libras por pulgada cuadrada) a una velocidad de 2,4 gpm (galones por minuto).
+[+�?�>� >$�|�}�['|� @?� [�~?''[��� @?�JABÓNVierta detergente para lavadoras a presión en el tanque de jabón para aplicar detergente rápida y fácilmente en su trabajo de limpieza. El uso de la boquilla para jabón activará el inyector de jabón con una razón de dilución de 20:1.
CARGADOR MANTENEDOR DE LA BATERÍACuando almacene la lavadora de presión, conecte el cargador mantenedor de la batería para mantener la batería completamente cargada y lista para usar. Si la carga de la batería está agotada, la función de Arranque eléctrico no responderá.
NOTA: El motor de la lavadora de presión no carga ni mantiene la batería cuando funciona.
Es posible que se empleen en esta producto algunos de los siguientes símbolos. Le suplicamos estudiarlos y aprender su significado. Una correcta interpretación de estos símbolos le permitirá utilizar mejor y de manera más segura la producto.
SÍMBOLO NOMBRE DENOMINACIÓN/EXPLICACIÓN
Riesgo de incendioEl combustible y los vapores del mismo son extremadamente inflamables y explosivos. El fuego puede causar quemaduras graves e incluso la muerte.
Emanaciones tóxicasLos aparatos de gasolina emiten monóxido de carbono, un gas tóxico incoloro e inodoro. Si se inhala monóxido de carbono puede causarse náusa, desmayo o la muerte.
ContragolpePara reducir el riesgo de lesiones por un contragolpe, sujete firmemente el tubo rociador con ambas manos cuando esté encendida la máquina.
Descarga eléctricaSi no se usa la unidad en condiciones secas y no se observan prácticas seguras de trabajo, puede producirse una descarga eléctrica.
Quemaduras químicasPara reducir el riesgo de lesiones o daños físicos, NO USE SOLUCIONES =#�>?@��?J#?J�[?@��\J?[]^_?>`{_@��@`J|_[}_@���?}_{�?J_@��[�J?�?\J_@�`�>_�~{?>`��[>^@}{�?J���������$����"
Símbolo de reciclado
_������$��������� ����������$��������� $��'�\<"�_����� ������algunas leyes municipales, estatales o federales prohíban desechar las baterías de níquel-cadmio en la basura normal. Consulte a las autoridades reguladoras de desechos para obtener información en relación con las alternativas de reciclado y desecho disponibles.

Pàgina 7 — Español
CARACTERÍSTICAS
INTERRUPTOR DEL MOTOREl interruptor del motor se utiliza solo o en combinación con el mango del arrancador retráctil para arrancar la lavadora de presión.
TANQUE DE COMBUSTIBLEEste tanque de combustible tiene una capacidad de 1,17 litros (0,31 gal.). Use gasolina sin plomo para vehículos.
ALMACENAMIENTO DE LA MANGUERAUna vez que la manguera de alta presión esté enrollada, cuélguela en la parte trasera de la máquina utilizando la tira de gancho y lazada para ajustarla correctamente.
BOQUILLA PARA JABÓNLa boquilla azul para jabón se utiliza para aplicar detergente sólo a baja presión.
�>�`|�@?\�>==>�'>@|=�~�'$?=@>Tire del mango de arranque y de la soga para arrancar el motor.
Q}\Q$\>�@?�@?+'>=`>���=�['>Este dispositivo de la bomba evita que la temperatura del agua alcance un nivel peligroso; para ello, deja salir una pequeña cantidad de agua por una manguera de caucho. Una vez salida el agua, la válvula de seguridad térmica se reinicializa automáticamente.
MANGO DEL GATILLOEl mango del gatillo dispone de una superficie de sujeción ranurada la cual proporciona control adicional de dicho tubo y reduce la fatiga del operador.
GATILLO CON SEGUROAl tirar del gatillo sale un chorro de agua para limpiar con alta presión. El seguro ofrece protección contra todo uso no autorizado.
ARMADO
DESEMPAQUETADOEste producto requiere armarse.
� Extraiga cuidadosamente de la caja la herramienta y los accesorios. Asegúrese de que estén presentes todos los artículos enumerados en la lista de empaquetado.
NOTA: Esta herramienta es pesada. Para evitar sufrir lesiones en la columna, levante con las piernas, no con la espalda, y obtenga ayuda cuando sea necesario.
ADVERTENCIA:No utilice este producto si alguna pieza incluida en la lista de empaquetado ya está ensamblada al producto cuando lo desempaqueta. El fabricante no ensambla las piezas de esta lista en el producto. Éstas deben ser instaladas por el usuario. El uso de un producto que puede haber sido ensamblado de forma inadecuada podría causar lesiones personales graves.
� Inspeccione cuidadosamente la herramienta para asegurarse de que no haya sufrido ninguna rotura o daño durante el transporte.
� No deseche el material de empaquetado hasta que haya inspeccionado cuidadosamente la herramienta y la haya utilizado satisfactoriamente.
� Si hay piezas dañadas o faltantes, le suplicamos llamar al 1-877-617-3501, donde le brindaremos asistencia.
LISTA DE EMPAQUETADOLavadora de presiónManguera de alta presión de 7,6 m (25 pies)Mango del gatilloTubo rociador\��� ����$����& ������ $��'�<Lubricante para motor de 4 tiempos (SAE 30 o SAE 10W30)
Embudo descartable
Mango
\�������� ��� ���������
Manual del operador
ADVERTENCIA:Si hay piezas dañadas o faltantes, no utilice esta herramienta sin haber reemplazado todas las piezas. Usar este producto con partes dañadas o faltantes puede causar lesiones serias al operador.
ADVERTENCIA:No intente modificar esta herramienta ni hacer accesorios no recomendados para la misma. Cualquier alteración o modificación constituye maltrato, el cual puede causar una condición peligrosa, y como consecuencia posibles lesiones serias.

Pàgina 8 — Español
ADVERTENCIA:Para evitar un arranque accidental que podría causar lesiones corporales graves, siempre desconecte el cable de la bujía del motor de la bujía misma al ensamblar las piezas.
INSTALACIÓN DEL MANGOVea la figura 2.
PRECAUCIÓN:Sea precavido cuando instale el mango en el bastidor: evite pellizcarse los dedos o las manos.
Presione y sostenga el botón de seguridad en el armazón a medida que desliza el mango sobre el armazón.
NOTA: Tire del mango hacia arriba hasta que el botón de aseguramiento pase a través de la ranuras correspondiente y asegure el mango en su lugar.
COMO CONECTAR LE TUBO ROCIADOR AL MANGO DEL GATILLOVea la figura 3.
� Coloque el extremo del tubo de roscado en el conector del extremo el mango del gatillo.
�� ~ �������$��������������������������$����"�>�����manera se asegura en su lugar el tubo de rociado.
'|�?�[���~�@?+'|�?�[���\>��>�?=�>Vea las figuras 4 y 5.
ADVERTENCIA:Para reducir el riesgo de descarga eléctrica o explosión, no realice un corto circuito en las terminales de la batería ni la cargue en un contenedor sellado. Manténgala lejos de las chispas y las llamas. No utilice herramientas metálicas para las conexiones y mantenga los objetos metálicos lejos de las terminales de la batería. Los objetos metálicos pueden realizar una conexión de una terminal a la otra. Establecer una conexión directa entre las dos terminales puede causar chispas, quemaduras o incendios.
El diseño de la terminal de la batería no requiere el uso de herramientas al instalar o extraer los cables de la batería. Todos los cables de la batería deben conectarse antes de iniciar la función de arranque eléctrico de la lavadora de presión.
<���������������������]��
� Retire la tapa de la terminal (+) positiva.
� Conecte el cable hembra rojo al cable macho rojo en la terminal positiva (+).
NOTA: Los cables macho negro, hembra negro y macho rojo están previamente instalados.
<�����������"�����������]��
� Drene el lubricante y el combustible de la lavadora de presión en los contenedores aprobados para lubricantes y gasolina.
ARMADO
� Desconecte los cables negros de la terminal negativa (–) de la batería, primero el hembra y luego el macho.
� Desconecte los cables rojos de la terminal positiva (+) de la batería, primero el hembra y luego el macho.
� Apoye con cuidado la lavadora de presión de manera que descanse sobre el mango.
NOTA: No intente acceder a la batería inclinando la unidad ya que esto puede provocar que la lavadora de presión caiga inesperadamente.
� Utilizando una llave de 10 mm, retire el perno de sujeción que asegura el protector de la batería al soporte de la batería. Eleve y deslice el protector de la batería hacia la izquierda hasta que se desenganche del soporte.
� Retire la vieja batería y deséchela según las reglamentaciones locales y estatales. Respete siempre las advertencias de seguridad provistas con la batería.
� Coloque el protector de la batería en la parte superior de la batería nueva, luego coloque la batería nueva en el soporte en la misma orientación en la que estaba la vieja.
� Inserte la lengüeta del protector de la batería en la apertura del soporte de la batería. Presione hacia abajo con cuidado en el soporte de la batería mientras empuja hacia la derecha para fijarlo en posición.
� Instale el perno de sujeción y vuelva a colocar la lavadora de presión en la posición vertical.
� Conecte los cables rojos a la terminal positiva (+) de la batería, primero el macho y luego el hembra.
� Conecte los cables negros a la terminal negativa (+) de la batería, primero el macho y luego el hembra.
NOTA: Tenga cuidado de no realizar un corto circuito entre las terminales durante la instalación. Establecer una conexión directa entra las terminales puede provocar chispas, daños en la batería o la lavadora de presión o incluso quemaduras o explosiones.
CÓMO CONECTAR LA MANGUERA DE ALTA PRESIÓN AL MANGO DEL GATILLOVea la figura 6.
� Enrosque el casquillo de la manguera de alta presión en el acoplador de entrada el mango del gatillo; para ello, gire a la derecha el casquillo de la manguera. Apriete firmemente.
NOTA: Tenga cuidado de no trasroscar la rosca, ya que esto podría provocar que el mango del gatillo pierda durante su uso.
� Tire de la manguera para asegurarse de que esté debidamente asegurada.
CÓMO CONECTAR LA MANGUERA DE ALTA PRESIÓN A LA BOMBAVea la figura 7.
� Desenrolle y enderece completamente la manguera de alta presión para evitar la formación de acodaduras.
NOTA: Vea $��� ������������� �������������� en la sección Funcionamiento para obtener más información sobre el uso de la manguera de alta presión.

Pàgina 9 — Español
ARMADO
� Alinee el casquillo con la conexión roscada de la bomba.
� Coloque casquillo de la manguera de alta presión en la conexión roscada.
�� ~ �������$������������ ������ �� �����������������a la bomba.
NOTA: Tenga cuidado de no trasroscar la rosca, ya que esto podría provocar que la manguera pierda durante su uso.
� Tire de la manguera para asegurarse de que esté debidamente asegurada.
CÓMO CONECTAR UNA MANGUERA DE JARDÍN A LA LAVADORA DE PRESIÓNVea la figura 8.
AVISO:Siempre observe las normas locales cuando conecte las mangueras a la tubería principal de agua. En algunas áreas existen restricciones para la conexión directa al suministro público de agua potable a fin de evitar la retroalimentación de químicos al suministro de agua potable. La conexión directa a través de un tanque receptor o de una válvula contra reflujo suele estar permitida.
El suministro de agua debe venir de la tubería principal de agua. NUNCA use agua caliente o agua de piscinas, lagos, etc. Antes de conectar una manguera de jardín a la lavadora de presión:
� Deje correr agua por la manguera durante 30 segundos para limpiar toda la basura que pueda haber en el interior de la misma.
¡NO INCLINE DEMASIADO LA UNIDAD!
� Inspeccione el cedazo de la entrada de agua.
� Si está dañado el cedazo, no utilice la máquina sino hasta haber reemplazado aquél.
� Si está sucio el cedazo, límpielo antes de conectar la manguera de jardín a la máquina.
<������������������������� ����� ]���������������
� Desenrolle completamente la manguera de jardín o quítela completamente del carrete para evitar la formación de acodaduras.
NOTA: Debe haber un mínimo de 3 metros (10 pies) de manguera sin ninguna restricción en el flujo de la misma, entre la entrada de la lavadora de presión y el grifo o válvula de cierre (como un conector de cierre en “Y”).
� Teniendo el grifo de la manguera completamente cerrado, conecte el extremo de la manguera de jardín a la entrada de agua. Efectúe el apriete con la mano.
AVISO:No accione la lavadora de presión sin que el suministro de agua esté conectado y abierto; de lo contrario, se pueden dañar los sellos de alta presión y se puede acortar la vida útil de la bomba. Desenrolle la manguera de su riel o bobina por completo y asegúrese de que ninguna rueda, piedra o cualquier otro objeto no pise la manguera, ya que puede disminuir o impedir el paso del agua a la lavadora de presión.
FUNCIONAMIENTO
ADVERTENCIA:No permita que su familarización con las herramientas lo vuelva descuidado. Tenga presente que un descuido de un instante es suficiente para causar una lesión grave.
ADVERTENCIA:Siempre póngase protección ocular con protección lateral con la marca de cumplimiento de la norma ANSI Z87.1. Si no cumple esta advertencia, los objetos que salen despedidos pueden producirle lesiones serias en los ojos.

Pàgina 10 — Español
ADVERTENCIA:No utilice ningún aditamento o accesorio no recomendado por el fabricante de esta herramienta. El empleo de aditamentos o accesorios no recomendandos podría causar lesiones serias.
ADVERTENCIA:Nunca apunte el flujo de agua hacia personas o mascotas, ni a ningún dispositivo eléctrico, incluida la batería de la lavadora de presión y la entrada del mantenedor. La inobservancia de esta advertencia podría causar lesiones graves, descargas eléctricas o muerte.
AVISO:Este producto no cuenta con un parachispas y no se puede usar en terrenos forestales de EE. UU., además, los usuarios del producto deben cumplir con los reglamentos de prevención de incendios locales, estatales y federales. Consulte a las autoridades que correspondan. Consulte el manual del motor adjunto sobre el mantenimiento y las piezas de repuesto.
AVISO:Antes de cada uso, inspeccione todo el producto para detectar partes dañadas, faltantes o sueltas, como tornillos, tuercas, pernos, tapas, etc. Apriete firmemente todos los sujetadores y las tapas y no accione este producto hasta que todas las partes faltantes o dañadas sean reemplazadas. Póngase en contacto con el servicio al cliente o con un centro de servicio calificado para obtener ayuda.
USOSPuede usar esta herramienta en la casa para limpiar la mayoría de las superficies exteriores horizontales o verticales grandes o pequeñas, las estructuras y objetos exteriores pequeños y las herramientas y equipos para uso al aire libre.* Puede:
��Limpiar o quitar moho y hongos de terrazas, caminos de entrada, patios, caminos, aceras y otras superficies desgastadas.
��Quitar la suciedad de diversas superficies exteriores verticales tales como exteriores de casas, revestimientos de muros exteriores, cercas, paredes de ladrillo, hormigón o piedra, etc.
��Limpiar botes, muebles de patio, equipos de jardinería eléctricos o no, canalones, paneles de ventanas, parrillas, juegos para niños, etc.
*Siempre pruebe primero en un área poco notoria.
FUNCIONAMIENTO
>�>+�?'[�[?��|� ~� Q?=[�['>'[��� @?�LUBRICANTEVea la figura 9.
NOTA: Esta máquina se embarcó con cerca de dos onzas de lubricante de las pruebas en el motor. ?���������������������� ���������������������������� ���������������������������"#
AVISO:Cualquier intento de arrancar el motor sin abastecerlo de lubricante puede causar la descompostura del mismo.
<�����&� �������������������������
� Coloque la lavadora de presión sobre una superficie horizontal nivelada. No la incline.
� Desenrosque la tapa del aceite con varilla de nivel; para ello, gírela a la izquierda.
� Antes de usar por primera vez, apriete el recipiente que contiene el lubricante para que todo su contenido ingrese en el depósito de aceite.
Luego de usar por primera vez, agregue lubricante para motores de 4 tiempos (SAE 30 o SAE 10W30) hasta que el nivel de fluido aumente y alcance la parte superior del área de rayado de la varilla. ����������������*����#
� Vuelva a colocar la tapa del aceite con varilla de nivel y apriétela firmemente.
<����������������������� ������������������������
� Coloque la lavadora de presión sobre una superficie plana. No la incline.
� Desenrosque la tapa del aceite con varilla de nivel; para ello, gírela a la izquierda.
� Limpie la varilla de nivel y vuelva a asentarla en el agujero; no la enrosque.
� Retire de nuevo la varilla medidora de lubricante y verifique el nivel de lubricante. El nivel de aceite siempre debe estar dentro del área cubierta con rayas entrecruzadas de la varilla medidora.
� Si está bajo el nivel, abastezca de lubricante el motor hasta que el nivel del fluido alcance la parte superior del área cubierta con rayas entrecruzadas de la varilla.
� Vuelva a colocar la tapa de relleno de aceite/varilla medidora de aceite y asegúrela.
AVISO:No lo llene excesivamente. Llenar excesivamente el cárter puede producir humo en exceso y daños en el motor.
COMBUSTIBLES OXIGENADOS
AVISO:������������������������?�����?��������������� ����#�?������������;�����������������������;��� ������ �&���������� � �;�����������������]�#�$���{������������������������������������������ �� ��������_��� ��������#

Pàgina 11 — Español
FUNCIONAMIENTO
������������������������������]� los problemas de desempeño o daños al sistema de combustible producidos por el uso de un combustible oxigenado con un contenido superior a los porcentajes de alcohol o compuesto de éter señalados previamente.
ABASTECIMIENTO DEL TANQUE DE GASOLINAVea la figura 10.
PELIGRO:Riesgo de incendios y lesiones por quemaduras: Nunca retire la tapa de combustible mientras esté encendida la unidad. Apague el motor y deje enfriar la unidad durante al menos cinco minutos. Retire la tapa lentamente.
ADVERTENCIA:La gasolina y los vapores de la misma son extremadamente inflamables y explosivos. Para evitar lesiones y daños físicos serios, maneje con cuidado la gasolina. Manténgala lejos de fuentes de ignición, manéjela solamente al aire libre, no fume mientras vierta la gasolina y limpie de inmediato cualquier derramamiento que ocurra.
ADVERTENCIA:Apague siempre el motor antes de reabastecer combustible. Nunca retire la tapa de combustible ni agregue combustible a una máquina mientras el motor esté en funcionamiento o caliente. Asegúrese de que la unidad esté apoyada en una superficie horizontal y nivelada, y solo agregue combustible al aire libre. Si el motor está caliente, deje que el unidad se enfríe durante al menos cinco minutos antes de reabastecer. Vuelva a colocar inmediatamente la tapa del tanque después de reabastecer y apriétela firmemente. Aléjese al menos 9 metros (30 pies) del sitio de carga de combustible antes de poner en marcha el motor. No fume y permanezca lejos de llamas abiertas y chispas! La inobservancia de estas instrucciones podrían provocar un incendio y lesiones personales graves.
ADVERTENCIA:Verifique que no haya fugas de combustible. Una tapa, un tanque o unas líneas de combustible con fugas constituyen un riesgo de incendio y deben reemplazarse de inmediato. Si encuentra fugas, corrija el problema antes de utilizar la herramienta. La inobservancia de esta advertencia podría provocar un incendio que podría causar lesiones graves.
�|�>��?���������������� ����������������#������"������������������;���������������#
� Mezcle el estabilizador de combustible con la gasolina de acuerdo con las instrucciones del fabricante del estabilizador de combustible.
� Antes de retirar la tapa del combustible, limpie el área circundante de la unidad. Retire la tapa del combustible.
� Introduzca un embudo limpio en el tanque de combustible y después vierta lentamente la gasolina en el tanque. Llene el tanque hasta una altura aproximada de 38 mm (1-1/2 pulg.) abajo de la parte superior del cuello del tanque (para permitir la expansión del combustible).
� Vuelva a colocar la tapa del combustible y apriétela firmemente la tapa “déclic”.
� Limpie todo combustible derramado antes de encender la máquina.
LUBRICANTE PARA BOMBALa bomba de la lavadora de presión fue abastecida con suficiente lubricante en la fábrica. No es necesario controlar la bomba o agregarle lubricante antes de su primer uso.
>==>��$?�?\�'�=['|El modelo de esta lavadora de presión se proporciona con capacidades de arranque tanto de impacto trasero como eléctrico. Evite el uso prolongado de arranque con manivela, pues esto puede dañar el motor.
La batería que se suministra es de plomo-ácido, de 12 voltios nominales, sellada y recargable y se puede poner en funcionamiento en cualquier posición sin que presente fugas. Cumple con las regulaciones de baterías antiderrame.
NOTA: Las lavadoras de presión completamente nuevas se envían con el cable hembra rojo (+) desconectado. Debe retirar la tapa y debe conectar el cable hembra rojo (+) a la terminal positiva (+) de la batería antes de iniciar la función de arranque eléctrico.
Para conexión inicial de la batería, consulte el apartado '���*����;� ������*������������]�.
?�'?�@[@|�~�><>`>@|�@?�\>�\>Q>@|=>�DE PRESIÓNVea las figuras 11 a 15.
AVISO:No accione la lavadora de presión sin que el suministro de agua esté conectado y abierto; de lo contrario, se pueden dañar los sellos de alta presión y se puede acortar la vida útil de la bomba. Desenrolle la manguera de su riel o bobina por completo y asegúrese de que ninguna rueda, piedra o cualquier otro objeto no pise la manguera, ya que puede disminuir o impedir el paso del agua a la lavadora de presión.
Antes de arrancar el motor:
��Conecte de la batería.
��Conecte todas las mangueras.
NOTA: Asegúrese de que el grifo esté abierto completamente y de que no haya acodaduras o pérdidas en la manguera.
��Revise todos los fluidos (lubricante y gasolina).
��Abra el grifo del agua y luego oprima gatillo para purgar la presión de aire; mantenga oprimido el gatillo hasta que aparezca un chorro de agua estable.

Pàgina 12 — Español
FUNCIONAMIENTO
NOTA: Asegúrese de que el grifo esté abierto completamente y de que no haya acodaduras o pérdidas en la manguera.
Para arrancar el motor:
� Ponga el válvula de combustible en la posición ABIERTO.
� Retire del anegador de la posición ARRANQUE.
NOTA: Si el motor está caliente, o la temperatura es superior ����������#�'�����<�������$������$��������������� � ���MARCHA.
� Presione en la parte superior del interruptor del motor para colocarlo en la posición MARCHA.
� Deslice abajo y manténgalo el botón del seguro y presione el interruptor del motor en la posición ARRANQUE.
NOTA: Es posible que deba cargarla la batería antes poder arrancar la lavadora de presión exclusivamente mediante la interruptor del motor. La lavadora de presión puede arrancarse tirando del mango del arrancador y cuerda.
� La lavadora de presión también puede arrancar tirando del mango del arrancador y cuerda hasta que comience a funcionar el motor.
NOTA: No permita que el mango del arrancador y cuerda se retraiga violentamente después de arrancar; regréselo suavemente a su lugar original.
� Permita que el motor funcione 5 segundos y, después, empuje del anegador hasta la posición MARCHA.
AVISO:Realice inspecciones visuales de la bomba y del motor en forma rutinaria durante su uso. Si nota que existen pérdidas en las juntas de la bomba o del motor, deje de usar la lavadora de presión inmediatamente y que llévelo a un centro de servicio calificado para su reparación. La inobservancia de esta advertencia puede causar daños a la propiedad.
Para apagar el motor:
� Coloque el interruptor del motor en la posición APAGADO presionando en la parte inferior del interruptor.
NOTA: La presión del sistema no se aliviará apagando el motor.Oprima el gatillo para purgar el agua.
ADVERTENCIA:Tanto en funcionamiento como al guardarlo, mantenga siempre 91,4 cm (3 pies) de espacio libre en todos los laterales de este producto, incluida la parte superior. Aguarde al menos 30 minutos para el equipo se enfríe antes de guardarlo. Mantenga todas las partes del cuerpo, la ropa, los materiales combustibles y las mangueras alejadas del silenciador. El calor generado por el silenciador y los gases de escape puede ser suficiente para causar quemaduras graves, prender fuego a objetos combustibles, y/o dañar las mangueras de alta presión que puede causar lesiones por inyección.
USO DEL MANGO DEL GATILLOVea la figura 16.
ADVERTENCIA:Sujete el mango firmemente con ambas mano. Se espera que el mango del gatillo se mueva cuando se tire del gatillo como consecuencia de las fuerzas de reacción. La inobservancia de esta advertencia podría causar pérdida de control y lesiones a usted y a otras personas.
� Para iniciar el chorro de agua, oprima y no suelte el gatillo.
� Para interrumpir el flujo del chorro de agua por la boquilla, suelte el gatillo.
Para accionar el seguro:� Suba el seguro hasta dejarlo trabado en la ranura.Para quitar el seguro:�� \������������������� � ����� � ���"Comience con la boquilla a una distancia de entre 30 y 60 cm (1 y 2 pies) de la superficie a limpiar y acérquese a la superficie justo lo suficiente para alcanzar el nivel de limpieza deseado. Si está demasiado cerca el chorro, puede dañar la superficie que está limpiándose.
SELECCIÓN DE LA BOQUILLA CORRECTA DE '|�?�[���=}<[@>�<>=>�'>@>��=>�>�|Vea la figura 17.
Cada una de las boquillas tiene un patrón de rociado diferente. Antes de empezar cualquier trabajo de limpieza, determine cuál es la mejor boquilla para el trabajo. Vea la `�]�� ������������ ����������� para obtener más información sobre qué boquilla utilizar.
ADVERTENCIA:NUNCA quite las boquillas sin antes apagar el motor, liberar la presión de agua con el gatillo y colocar la traba del gatillo. NO apunte la boquilla a sí mismo ni a otras personas. El elemento de conexión rápida contiene pequeños resortes que podrían eyectar la boquilla con fuerza. Si no sigue estas instrucciones puede provocar lesiones oculares o otras lesiones personales graves.
<������������������������������������������ ���
� Apague la lavadora de presión y cierre el suministro de agua. Oprima el gatillo para purgar el agua.
� Accione el seguro el el mango de gatillo; para ello, suba aquél hasta que se trabe en la ranura.
� Tire del collar de conexión rápida.
� Introduzca la boquilla en su lugar en el tubo rociador.
� Empuje del collar adelante para que la boquilla quede correctamente asegurada. Asegúrese de que la boquilla esté asegurada.

Pàgina 13 — Español
FUNCIONAMIENTO
<���� ����������� ��� ��������� ��� ����� ����� ��� ���� ��"������"� ������������� ��������"����Apague la lavadora de presión y cierre el suministro de agua.
Oprima el gatillo para purgar el agua.� Accione el seguro el el mango de gatillo; para ello, suba
aquél hasta que se trabe en la ranura.� Tire y sostenga el collar de conexión rápida.� Para quitar la boquilla, coloque la mano sobre ella y a
continuación tire del collar de conexión rápida. Coloque la boquilla en el lugar donde se guardan éstas, en la parte superior de la máquina.
USO DE LA MANGUERA DE ALTA PRESIÓN
ADVERTENCIA:Daño por inyecciones. Desenrolle por completo la manguera de alta presión y enderécela antes de usarla y durante el uso y no permita que se retuerza. La manguera de alta presión tiene una cubierta exterior que hace resistente a la manguera. Si la cubierta exterior está dañada, deje de usar la manguera y remplácela inmediatamente. Una manguera retorcido o dañada puede tener una fuga de alta presión que puede provocar una inyección u otras lesiones personales graves.
<���������������������������������*��������� �&��
� Inspeccione la manguera antes de cada uso.
� Desenrosque y estire la manguera antes de usarla.
� Evite que la manguera de alta presión se retuerza.
� Mantenga la manguera alejada de superficies calientes y bordes filosos.
� No arrastre la unidad cerca de la manguera de alta presión.
� Evite que otros objetos aplasten la manguera o que ésta se enrede con otros objetos.
LAVADO CON DETERGENTEVea las figuras 18 y 19.
Tal como se vende, esta unidad está diseñada para usarse con detergentes para lavadoras a presión de “flujo descendente”. Para convertir la lavadora de modo que se pueda utilizar con detergentes de “flujo ascendente”. Contacto con el servicio al cliente o con un centro de servicio calificado para obtener más información.
ABRASIVO LEVE
GUÍA DE SELECCIÓN DE BOQUILLAS
ALTA PRESIÓN(NO USE ESTAS BOQUILLAS CON JABÓN)
BAJA PRESIÓN(PARA JABÓN O ENJUAGUES
LEVES)
0º Rojo 25º Verde 40º Blanco Boquilla azul para jabón
Cemento, ladrillo, mampostería � � � �Revestimiento de muros exteriores, canalones, casas � � �Cercas, terrazas, patios � � �Equipos de jardinería, botes, casas rodantes � � �
� Boquilla recomendada � Usar con cuidado en ciertas aplicaciones

Pàgina 14 — Español
FUNCIONAMIENTO
AVISO:USE SÓLO DETERGENTES DISEÑADOS PARA LAVADORAS DE PRESIÓN. No utilice los detergentes caseros, soluciones ácidas, alcalinas, blanqueadores, solventes, materiales inflamables o de grado industrial pueden dañar la bomba. Numerosos detergentes requieren mezclarse antes de usarse o provocar daños a la propiedad. Prepare la solución de limpieza de conformidad con las instrucciones de la botella correspondiente. Siempre pruebe en un área poco notoria antes de comenzar la limpieza.
� Quite la tapa del tanque de jabón y vierta el detergente para lavadoras de presión en el tanque. Vuelva la tapa del tanque.
NOTE: La configuración de la máquina de esta unidad es 20:1, lo que generalmente permite el uso de 3,79 l (1 galón) de detergente para lavadoras de presión sin más dilución. Consulte las instrucciones de su detergente para asegurarse de que no sea necesario realizar una dilución adicional.
� Instale la boquilla detergente (azul) n el tubo rociador.
� Oprima el gatillo y espere aproximadamente 5 segundos a que comience a salir detergente.
� Rocíe el detergente en una superficie seca, con pasadas largas uniformes traslapadas. Para evitar la formación de franjas, no permita que seque el detergente en la superficie.
Antes de apagar el motor:
� Llene el tanque de jabón con agua limpia.
� Rocíe el agua limpia a través del tubo rociador hasta vaciar el tanque.
� Si queda detergente en el rociador, repita el proceso con un segundo tanque de agua limpia.
� Apague el motor.
NOTA: Apagando el motor no se purga del sistema la presión interna. |�������������������������������������������#
ENJUAGADO CON LA LAVADORA DE PRESIÓN��?������������$����$���� ������ �������� � �����$�����"�
Oprima el gatillo para purgar el agua.
��Accione el seguro el mango de gatillo; para ello, suba aquél hasta que se trabe en la ranura.
��Para quitar la boquilla de jabón, coloque la mano sobre ella y a continuación tire del collar de conexión rápida. Coloque la boquilla para jabón en el área del compartimiento para boquillas de la máquina.
��Siempre utilice la boquilla adecuada a la tarea. Vea el cuadro de la página anterior para seleccionar el ajuste de boquilla adecuado.
��Comience por la parte superior por enjuagar y avance hacia abajo, traslapando cada pasada.
TRASLADO DE LA LAVADORA DE PRESIÓNVea la figura 20.
NOTA: Nunca alce o mueva este producto tomándolo por el mango movil y nunca coloque la unidad en una posición distinta de la vertical, sobre sus ruedas.
� Apague la lavadora de presión.
� Incline la máquina hacia usted hasta equilibrarla sobre las ruedas y después empújela a la posición deseada. No incline la máquina hacia delante o hacia los lados mientras la mueve.
� NO trate de mover la unidad tirando de ninguna de las mangueras.
USO DEL PROTECTOR DE BOMBAVea la figura 21.
El uso regular del protector para bombas comercialmente disponible prolonga la vida de la lavadora de presión, dado que elimina los sedimentos minerales del agua dura, lubrica las juntas y los pistones de la bomba y evita los daños por congelación. El protector de bomba debe agregarse a la unidad después de cada uso y antes de almacenarla. Este protector puede comprarse en el minorista donde compró la lavadora de presión o comunicándose con el servicio de atención al cliente. Este protector de bomba puede comprarse en el minorista donde compró la lavadora de presión o comunicándose con el servicio de atención al cliente.
Las siguientes instrucciones son generales para agregar un protector de bomba, pero siempre debe verificar las instrucciones específicas provistas por el fabricante del protector de bomba utilizado.
� Apague el motor de la lavadora de presión y cierre el suministro de agua. |�������������������������������������������#
� Desconecte la manguera de jardín y la de alta presión.
� Desenrosque la parte superior de la botella del protector de bomba y retire el sello de papel de la botella. Vuelva a colocar la tapa en la botella y apriétela con fuerza.
NOTA: El sello de goma debe quedar dentro de la parte superior roscada. Si se sale, asegúrese de volverlo a colocar antes de colocarle la tapa.
� Retire la tapa de la botella y calce el extremo roscado de la botella bien en la entrada de agua de la bomba de la lavadora de presión.
� Apriete la botella para inyectar el contenido en la bomba.
� Con el interruptor del motor en la posición APAGADO, tire de la cuerda del arrancador de la bomba y apriete la botella una vez más para garantizar la cobertura total.
� La bomba está protegida cuando el líquido protector sale por el orificio de descarga de la bomba.

Pàgina 15 — Español
MANTENIMIENTO
Cualquier establecimiento o técnico de reparaciones calificado puede realizar el mantenimiento normal, el reemplazo o la reparación de los dispositivos y sistemas de control de emisiones, con repuestos originales o equivalentes. Un centro de servicio autorizado deberá realizar las reparaciones y el retiro del producto que cubra la garantía; póngase en contacto con el servicio al cliente para obtener ayuda.
ADVERTENCIA:Al dar servicio a la unidad, sólo utilice piezas de repuesto recomendados o equivalentes. El empleo de piezas diferentes podría causar un peligro o dañar el producto.
ADVERTENCIA:Siempre póngase protección ocular con protección lateral con la marca de cumplimiento de la norma ANSI Z87.1. Si no cumple esta advertencia, los objetos que salen despedidos pueden producirle lesiones serias en los ojos.
ADVERTENCIA:Antes de inspeccionar, limpiar o dar servicio a la máquina, apague el motor, espere a que se detengan todas las piezas en movimiento, desconecte el cable de la bujía y aléjelo de ésta. El incumplimiento de cualquiera de estas instrucciones puede causar lesiones serias.
AVISO:Este producto no cuenta con un parachispas y no se puede usar en terrenos forestales de EE. UU., además, los usuarios del producto deben cumplir con los reglamentos de prevención de incendios locales, estatales y federales. Consulte a las autoridades que correspondan. Consulte el manual del motor adjunto sobre el mantenimiento y las piezas de repuesto.
AVISO:Inspeccione periódicamente todo el producto para detectar partes dañadas, faltantes o sueltas, como tornillos, tuercas, pernos, tapas, etc. Apriete firmemente todos los sujetadores y las tapas y no accione este producto hasta que todas las partes faltantes o dañadas sean reemplazadas. Contacto con el servicio al cliente o con un centro de servicio calificado para obtener ayuda.
MANTENIMIENTO GENERALEvite el empleo de solventes al limpiar piezas de plástico. La mayoría de los plásticos son susceptibles a diferentes tipos de solventes comerciales y pueden resultar dañados. Utilice paños limpios para eliminar la suciedad, el polvo, el aceite, la grasa, etc.
ADVERTENCIA:No permita en ningún momento que fluidos para frenos, gasolina, productos a base de petróleo, aceites penetrantes, etc., lleguen a tocar las piezas de plástico. Las sustancias químicas pueden dañar, debilitar o destruir el plástico, lo cual a su vez podría producir lesiones corporales serias.
Antes de encender el motor realice los siguientes pasos previos:
��Verifique que todos los pernos, tuercas, etc., estén firmemente apretados.
��Asegúrese de que esté limpio el filtro.
��Revise tanto el nivel de lubricante del motor como el nivel del tanque de combustible; reabastézcalos según sea necesario.
��Inspeccione el área de trabajo para ver si hay peligros presentes.
��Si hay ruido o vibración excesivos, apague de inmediato la unidad.
MANTENIMIENTO DE LAS BOQUILLASVea la figura 22.
La presión excesiva de la bomba (se siente una sensación de pulsación al estar oprimiendo el gatillo) puede deberse a que la boquilla está tapada o sucia.
��Apague la lavadora de presión y cierre el suministro de agua. Oprima el gatillo para purgar el agua
��Retire la boquilla del tubo rociador.
ADVERTENCIA:NUNCA quite las boquillas sin antes apagar el motor, liberar la presión de agua con el gatillo y colocar la traba del gatillo. NUNCA apunte con la boquilla a su rostro o al de otras personas. El elemento de conexión rápida contiene pequeños resortes que podrían eyectar la boquilla con fuerza. La inobservancia de estas instrucciones podría provocar lesiones en los ojos y otras lesiones personales graves.

Pàgina 16 — Español
CAMBIAR EL FUSIBLE DEL MANTENEDOR DE CARGA DE LA BATERÍAVea la figura 24.
AVISO:No use un fusible de mayor capacidad que el amperaje especificado. Esto puede hacer que el producto se recaliente.
��Abra el protector del fusible y retire el fusible viejo.
��Inserte un nuevo fusible de 7,5 amperios y cierre el protector del fusible.
ALMACENAMIENTO DE LA LAVADORA A PRESIÓNVea la figura 25.
�|�>��?������ ������� �����������"� ��� ��������������;� ������������������������ ������������� ������&���������� � �;�������������� ��{���� ����������#�Q������\����� �����"��� ��������������������������������&��� �����������;������{������ �����"�� ������������������;���������������������������������������"�������� � �#
ADVERTENCIA:Al guardado, mantenga siempre 914 mm (3 pies) de espacio libre en todos los laterales de este producto, incluida la parte superior. Aguarde al menos 30 minutos para el equipo se enfríe antes de guardarlo. El calor generado por el silenciador y los gases de escape puede ser suficiente para prender fuego a objetos combustibles.
~���$� ����� $�$������ ��������������� �����������������pueda resultar dañada a la intemperie.
Es importante guardar este producto en un área protegida contra la congelación. Siempre vacíe todas las mangueras, la bomba, el tanque de combustible y el tanque de jabón antes de guardar la unidad.
��Mantenga encendida la máquina hasta agotar el combustible. La gasolina puede echarse a perder en 30 días.
NOTA: Asegúrese de que el suministro de agua esté conectado y encendido cuando ponga en marcha el motor de la lavadora a presión.
� Asegúrese de que el interruptor del motor es en la posición APAGADO y la válvula de combustible es en la posición CERRADO.
��À l’aide d’un trombone droit ou d’un outil pour nettoyer les buses (non fourni), retirer toute matière étrangère engorgeant ou obstruant la buse.
��Con una manguera de jardín expulse de la boquilla toda la basura presente con un contraflujo (haciendo pasar hacia atrás agua por la boquilla, o sea del exterior hacia el interior).
��Vuelva a conectar la boquilla al tubo rociador.
��Abra el suministro de agua y arranque el motor.
MANTENIMIENTO DE LA BOMBARealice una inspección visual diaria de la bomba. Si advierte una pérdida de lubricante alrededor de los sellos de la bomba, lleve la lavadora de presión a un centro de servicio califado para que la repare.
La bomba de la lavadora de presión no contiene piezas que pueda reparar el usuario. Cualquier intento de realizar el mantenimiento de la bomba o de alterarla podrá dañar la lavadora de presión y anular la garantía del producto.
USAR EL MANTENEDOR DE CARGA DE LA BATERÍAVea la figura 23.
Cuando almacene la lavadora de presión, conecte el cable de carga del mantenedor de la batería para mantener la batería completamente cargada y lista para usar.
NOTA: El mantenedor de carga de la batería que se incluye solo debe usarse con el modelo de batería de plomo y ácido RT1290H de 12 V 9Ah/20 horas provista con esta lavadora de presión.
��Conecte el cable de carga del mantenedor de carga de la batería a la línea de alimentación. Asegúrese de que el suministro de corriente sea solo el doméstico normal, de 120 voltios, solo de corriente alterna y de 60 Hz.
��Conecte el otro extremo del cable de carga del mantenedor de la batería a la entrada del mantenedor/cargador de la batería. La luz roja del enchufe se encenderá para indicar que se está cargando la batería.
��La batería se siente un poco caliente al tacto mientras se está cargando. Esto es normal y no indica ningún problema. Una vez cargado completamente el batería, la luz roja se ponga verde.
NOTA: Si la luz no se enciende, es posible que sea necesario cambiar el fusible del mantenedor de carga de la batería. Revise el fusible y cámbielo si fuese necesario.
��Desconecte el cable de carga del mantenedor de carga de la batería antes de operar la lavadora de presión.
MANTENIMIENTO

Pàgina 17 — Español
MANTENIMIENTO
� Desconecte la manguera de alta presión y la manguera de jardín de la bomba.
��Vacíe la bomba; para ello, tire del mango del arrancador y cuerda seis veces aproximadamente. De esta manera se elimina de la bomba la mayoría del líquido.
AVISO:Se requiere usar un protector de bomba después de cada uso y antes de almacenar la unidad para evitar daños por bajas temperaturas y en la junta durante el almacenamiento. La garantie sera nulle si vous n’utilisez pas un protecteur de pompe.
��Drene el lubricante y cámbielo por lubricante nuevo y limpio como se explica en >�������������� ;� ������������� ������������ en la sección Operación de este manual.
��Desconecte el cable de la bujía y retire ésta. Vierta cerca de una cucharada chica de lubricante limpio para motor de cuatro tiempos a través del agujero de la bujía, en el interior de la cámara de combustión.
��Teniendo la bujía afuera, tire de la mango del arrancador y cuerda dos o tres veces para recubrir el interior de la pared del cilindro.
��Inspeccione la bujía y límpiela o reemplácela según sea necesario.
��Vuelva a instalar la bujía, pero deje desconectado el cable de la misma.
��Limpie el filtro de aire.
��Extienda la mango del arrancador y cuerda para controlar su condición. Si la cuerda está deshilachada, hágala cambiar de inmediato en un centro de servicio califado.
��Retire las mangueras. Enrolle las mangueras y guarde como se muestra. No permita que la manguera se retuerza.
��Para el almacenamiento a corto plazo, conecte el cable de carga y permita que se cargue la batería. Para el almacenamiento a largo plazo, desconecte el cable y enróllelo en forma prolija.
�� ~���$� ��� �� $�$� �� ���� ������ ��� �� ��� ���� ��� ����protegida contra las temperaturas bajo cero. No la guarde cerca de hornos u otras fuentes de calor que pueda secar los sellos de la bomba.
PREPARACIÓN DE LA UNIDAD PARA $+>=\>�@?+<$�+�@?��?�?=\>�`$>=@>@>��Tire del mango del arrancador y cuerda tres o cuatro veces
para limpiar el lubricante de la cámara de combustión.
��Retire la bujía del cilindro. Limpie el lubricante de la bujía y vuelva a ponerla en el cilindro.
��Vuelva a conectar el cable de la bujía.
��Reabastezca de combustible la máquina de la forma descrita anteriormente en el manual del operador.
=?�|'[���~�<=?<>=>'[���@?��>�?=�>+�PARA EL RECICLADO
ADVERTENCIA:Para reducir el riesgo de descarga eléctrica o explosión, no realice un corto circuito en los terminales de la batería. Manténgala lejos de las chispas y las llamas. No utilice herramientas metálicas para las conexiones y mantenga los objetos metálicos lejos de las terminales de la batería. Los objetos metálicos pueden realizar una conexión de una terminal a la otra. Establecer una conexión directa entre las dos terminales puede causar chispas, quemaduras o incendios.
Para preservar los recursos naturales, le suplicamos reciclar o desechar debidamente las baterías.
Este producto contiene baterías de plomo-ácido. Es posible que algunas leyes municipales, estatales o federales prohíban desechar las baterías en la basura normal.
Consulte a las autoridades reguladoras de desechos para obtener información en relación con las alternativas de reciclado y desecho disponibles.
ADVERTENCIA:Al retirar de baterías, cubra las terminales de la misma con cinta adhesiva reforzada. No intente destruir o desarmar de baterías, ni de desmontar ninguno de sus componentes. Las baterías de plomo-ácido deben reciclarse o desecharse debidamente. También, nunca toque ambas terminales con objetos metálicos y partes del cuerpo, ya que puede producirse un corto circuito.Manténgase fuera del alcance de los niños. La inobservancia de estas advertencias puede causar incendios y lesiones corporales serias.

Pàgina 18 — Español
MANTENIMIENTO
PROGRAMA DE MANTENIMIENTONOTA: Si recibe un manual del motor para este lavadora a presión, respete el cronograma de mantenimiento que se indique en el manual del motor para todos los puntos de mantenimiento de motor y no la información de mantenimiento que figura a continuación.
Artículos de mantenimiento Cada uso Semanas ������� �_����� �__�����
Revise si hay fugas de agua bajo colector, en el cárter X
Plomería X
Limpiar motor y revisar tuercas y pernos X
Revisar y vuelva a llenar el aceite del motor X
Cambiar el aceite del motor (cambio inicial)1 X
Controle la colocación del filtro de entrada de agua2 X
Agregue estabililzador de combustible X
Agregue protector para bombas X
Cambiar el lubricante del motor X
Revise la bujía X
Limpiar el filtro de aire X
Reemplazar el filtro de aire X
Limpiar y ajustar la bujía y electrodos X
Reemplazar la bujía X
1 Se debe realizar el cambio inicial de lubricante después de las primeras 20 horas de funcionamiento. A partir de ese momento, cambie el lubricante cada 100 horas.
2 Si el filtro de entrada de agua falta o está dañado, debe colocarse uno nuevo. Vea la Lista de piezas de repuesto para conocer el número de pieza para realizar un pedido.
NOTA: No está seguro sobre cómo realizar alguna de las tareas de mantenimiento enumeradas anteriormente, lleve la unidad a un centro de servicio calificado para que se realice la tarea de mantenimiento en cuestión.

Pàgina 19 — Español
CORRECCIÓN DE PROBLEMAS
PROBLEMA CAUSA SOLUCIÓNEl motor no arranca No hay combustible en el tanque
Presión de agua en la manguera Falló o tiene corta la bujíaSe rompió la bujía (se rajó la porcelana o se rompieron los electrodosEl cable de ignición tiene corto, está roto o desconectado de la bujía casoEl sistema de ignición no funciona
Reabastezca el tanqueOprima el gatillo para liberar la presión de aguaReemplace la bujíaReemplace la bujía Reemplace el cable de ignición o conéctelo a la bujíaComuníquese con un centro de servicio calificado
Cuesta trabajo arrancar el motor Hay agua en la gasolina Está débil la chispa de la bujía
Drene todo el sistema y reabastézcalo con combustible nuevoComuníquese con un centro de servicio calificado
Le falta potencia al motor Está sucio el filtro de aire Limpie o reemplace el filtro de aire
No se inicia la función de arranque eléctrico
La batería no está cargada Los cables de la batería están desconectados
Cargue la batería utilizando el cargador mantenedor de la bateríaConecte los cables de la batería.
El detergente no está mezclándose en el rocío
El tanque de jabón está vacíoLa boquilla de alta presión es la que está conectada
Agregue detergente al tanque de jabónPara aplicar el detergente use la boquilla azul
La bomba no genera presión La boquilla de baja presión es la que está instaladaEl suministro de agua es inadecuadoMango del gatillo o tubo de rociador Está tapada la boquillaAire en el conductor La manguera tiene pérdidasLa manguera está acodadaAnegador en posición de ARRANQUEEstá defectuosa la bomba
Reemplácela por la boquilla de alta presión Suministre un flujo de agua adecuadoVerifique las conexiones y/o tiene fugas reemplace el mango del gatillo o tubo de rociadorLimpie la boquillaOprima el gatillo el mango del gatillo para eliminar el aire del conductorCambie la mangueraQuite la acodadura de la mangueraMueva el anegador a la posición de marchaComuníquese con un centro de servicio calificado
La máquina no alcanza presión alta Está demasiado pequeño el diámetro de la manguera de jardínEstá restringido el suministro de agua No hay suficiente agua en la entradaEstá puesta una boquilla equivocada
Reemplácela con una manguera de 19 mm (3/4 pulg.)Revise la manguera de jardín para ver si tiene dobleces, fugas o bloqueosAbra el suministro de agua a toda su capacidadInstale la boquilla de alta presión
Si el problema persiste después de probar las soluciones mencionadas arriba, contacto con el servicio al cliente o con un centro de servicio calificado para solicitar asistencia.
AVISO:Como propietario equipo, usted es responsable de la que realice el mantenimiento obligatorio que se indica en la sección Mantenimiento. Le recomendamos que guarde todos los comprobantes relacionados con el mantenimiento de su equipo. Negligencia o falta del mantenimiento indicado puede aumentar las emisiones, reducir la eficiencia del combustible, perjudicar el funcionamiento, provocar daños irreversibles al motor y anulará su garantía.

Pàgina 20 — Español
GARANTÍA
DECLARACIÓN DE GARANTÍA LIMITADA NO APLICABLE AL MOTOR
OWT Industries, Inc., (la Compañía) garantiza al comprador minorista original que este Producto PowerStroke carece de defectos en material y mano de obra, y acuerda reparar o reemplazar, a la discreción de la Compañía, cualquier Producto defectuoso sin cargo en los siguientes períodos a partir de la fecha de la compra:
��Tres años si el Producto se utiliza exclusivamente para fines personales, familiares o domésticos.
��90 días, si el Producto se utiliza para fines comerciales.
Esta garantía sólo es válida para los Productos vendidos dentro del territorio de los Estados Unidos de América, el $ ��� ���$�#����� ���#���$�����& ������_���$��J ���?��� �$��$�������{ ��������������|���������~���"
Esta garantía no es transferible y sólo cubre los daños derivados de defectos en material o mano de obra y no los daños causados por el uso irracional, incluida la falta de mantenimiento razonable y necesario.
?������������]�������������������������������������� ������������]�����������������
��Los gastos de transporte originados por el envío del producto a la Compañía o a su representante de servicio autorizado para el mantenimiento incluido en la garantía, o por el envío al consumidor de productos reparados o reemplazados; estos cargos corren por cuenta del comprador minorista original.
��Los daños causados por el maltrato, los accidentes, el uso indebido, la negligencia, la alteración, la modificación, los efectos de la corrosión, la erosión, el desgaste normal o las reparaciones realizadas por personas ajenas a la Compañía o a sus representantes de servicio autorizados.
��Además, esta garantía no cubre:
�� ? ��� �����\��������������$�����������$���������$�������$ $��� ����������� ��$��� �
� Desgaste de piezas – mangueras, accesorios de conexión, boquillas rociadoras, mango de gatillo, tubo rociador, ruedas
La garantía queda anulada si el cliente no instala, mantiene o utiliza el producto respetando las instrucciones y las recomendaciones de la Compañía, según se expresa en el manual del operador del Producto, o si el Producto se utiliza como equipo de alquiler.
La Compañía no se hará cargo de las reparaciones o los ajustes al Producto, o de cualquier tarea o gasto que no sea autorizado previamente por esta Compañía.
[�<|=�>��?��>�������������������������������]������������������ �������������������]��� ������������� ������������������������ ��������#������������������]�� �������������� ������������������������������������������������ ���������������������� �������#
GUARDE SU COMPROBANTE DE COMPRAAntes de que la Compañía o sus representantes de servicio autorizados puedan efectuar el servicio correspondiente cubierto por la garantía del Producto, se solicitará como comprobante de compra una factura de compra con fecha.
?�'\$+[|�?+�~�\[�[�>'[|�?+ESTA GARANTÍA LIMITADA PREVALECE SOBRE CUALQUIER OTRA GARANTÍA EXPRESA.�#^?J]^�_{�~?{?[}�?����J�#�}?�>_�#`�_{#�?\�J�>?>�� �>`[_�>?>��?{?�^[���[�_@�_#���#`�^�`}{?�]^_�\{�[>_�#`\_{}^{?��?{?�_@}_��{`>^#}`�_@}?{=�J���}?>?�_[�>^{?#��[�?J��J?�`�>_�_@}?�~?{?[}�?�J���}?>?"�_J�@_{|�#�`�>_�~?{?[}�?�>_@#{�}`�?[}_{�`{�_[}_�_@�_J��[�#`�{_#^{@`�\?�`�_@}?�~?{?[}�?"�J?�#`��?��?�[`�@_{=�{_@�`[@?\J_�>_�#^?J]^�_{�>?�`�_@�_#�?J���[>�{_#}`�`�#`[@_#^_[}_"
?J~^[`@�_@}?>`@�[`��_{��}_[�J���}?#�`[_@�_[�#^?[}`�?�J?�>^{?#��[�>_�̂ [?�~?{?[}�?����J�#�}?��̀ �J?�_�#J^@��[�`�J���}?#��[�>_�J`@�>?�`@��[>�{_#}`@�`�#`[@_#^_[}_@���`{�J`�]^_�_@��`@�\J_�]^_�LAS LIMITACIONES O EXCLUSIONES ANTERIORES NO SE APLIQUEN EN SU CASO.
CÓMO OBTENER UN SERVICIO DE GARANTÍA<���� �������� ��� ��������� �� �����]��� \����� ���� ����� ��� ����������^�_�� �� �������� �� |��� [� ��������� [��#�� <#|#���*�^�����;#����<��������+'������#�
<������������������������ �������]�������� ������??#�$$#�������]�����������������������������<����+�����������#

3100 PSI PRESSURE WASHERLAVADORA A PRESIÓN DE 3 100 PSI
PS80310E
9910003972-19-15 (REV:01)
OWT INDUSTRIES, INC.P.O. Box 35, Highway 8Pickens, SC 29671 USA
1-877-617-3501www.powerstroketools.com
SERVICEFor parts or service, contact customer service or a service center. Be sure to provide all relevant information when you call or visit. Please call 1-877-617-3501 for assistance.
REPAIR PARTS The item number of this product is found on a plate or label attached to the housing. Please record the serial number in the space provided below.
ITEM NO. ___________________________________
SERIAL NO. _________________________________
SERVICIOPara obtener piezas o servicio, comuníquese con el servicio al cliente o con un centro de servicio. Asegúrese de proporcionar todos los datos pertinentes al llamar o al presentarse personalmente. Para asistencia le suplicamos llamar al 1-877-617-3501 para la asistencia.
PIEZAS DE REPUESTOEl número de artículo de este producto se encuentra en una placa o etiqueta pegada a la caja del motor. Le recomendamos anotar el número de serie en el espacio suministrado abajo.
NÚMERO DE ARTÍCULO _____________________
NÚMERO DE SERIE _________________________
CALIFORNIA PROPOSITION 65
WARNING:This product, its exhaust, and other sub-stances that may become airborne from its use may contain chemicals, including lead, known to the State of California to cause cancer, birth defects, or other reproductive harm. Wash hands after handling.
CALIFORNIA - PROPUESTA DE LEY NÚM. 65
ADVERTENCIA:Este producto, su escape y otras sustancias que puedan llegar a ser aerotransportadas por su uso pueden contener sustancias químicas (incluido el plomo) reconocidas por el estado de California como causantes de cáncer, defectos congénitos y otras afecciones del aparato reproductor. Lávese las manos después de utilizar el aparato.
OPERATOR’S MANUALMANUAL DEL OPERADOR