ONYX Thrive Technical Information © 2011 ONYX Graphics, Inc.
71
ONYX Thrive Technical Information © 2011 ONYX Graphics, In
-
Upload
danielle-webb -
Category
Documents
-
view
269 -
download
10
Transcript of ONYX Thrive Technical Information © 2011 ONYX Graphics, Inc.
ONYX ThriveTechnical Information
© 2011 ONYX Graphics, Inc.
Overview
Adobe PDF Print Engine and NormalizerNetwork Based Site LicensingThrive Production Manager
Hot Back-up Option
Key Differences
Adobe PDF Technologies
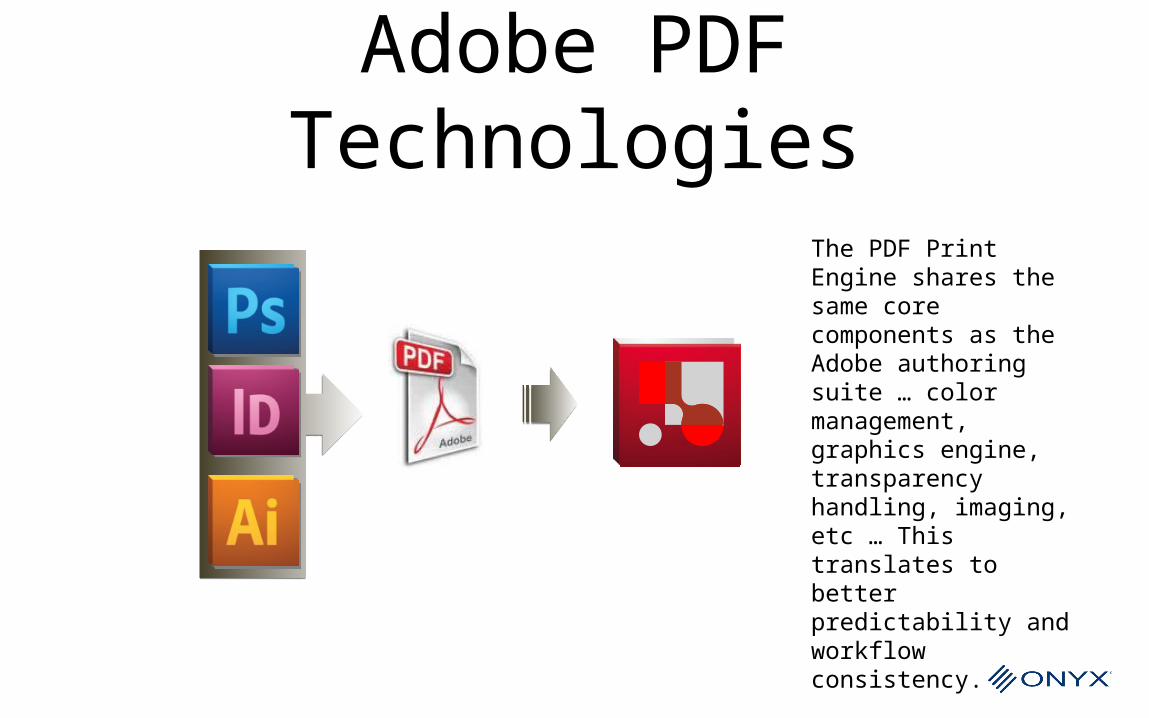
The PDF Print Engine shares the same core components as the Adobe authoring suite … color management, graphics engine, transparency handling, imaging, etc … This translates to better predictability and workflow consistency.
Adobe PDF Technologies
• Thrive uses the Adobe PDF Print Engine for converting PDF/PS/EPS document files into pixels for the purposes of printing.
• The Adobe PDF Print Engine is a native PDF Interpreter and pixel rasterizer. It utilizes the same interpreting libraries utilized by Adobe products like Acrobat, and Illustrator.
• The rendering libraries are similar libraries used by Adobe for other products, but optimized for large rendering of print ready data.
• The Adobe PDF Print Engine has been integrated with the Onyx Color and image processing libraries to generate processed data that can be printed to large format printers.
Adobe PDF Technologies Normalizer
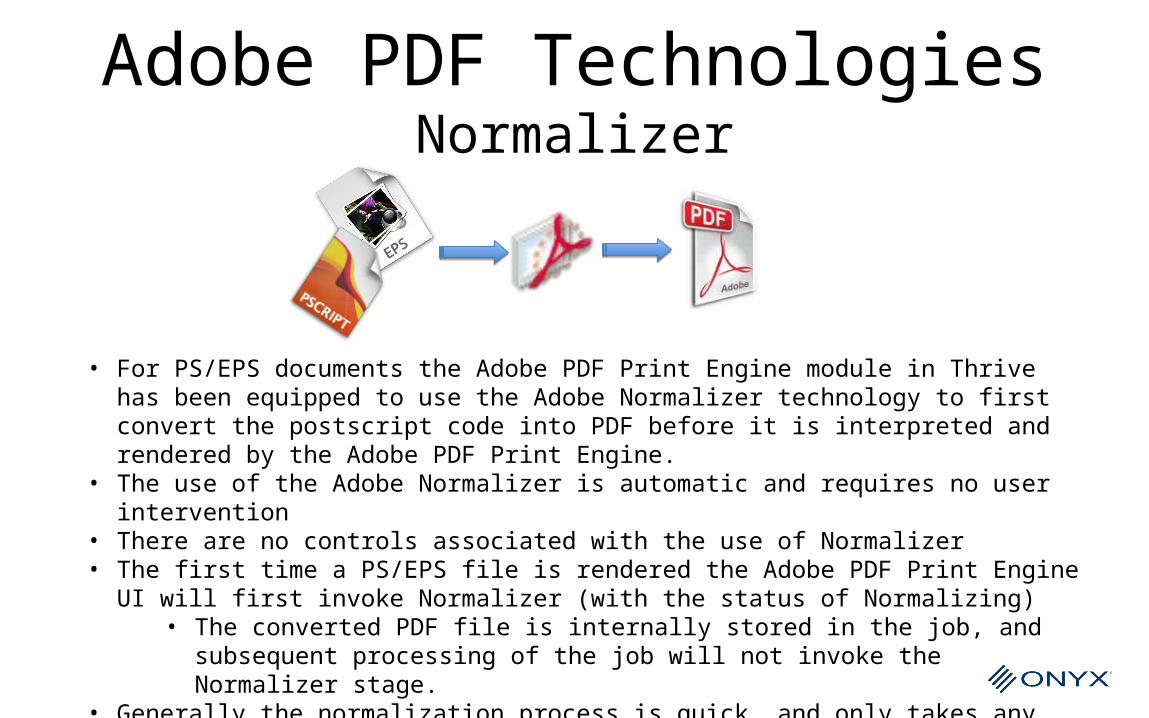
• For PS/EPS documents the Adobe PDF Print Engine module in Thrive has been equipped to use the Adobe Normalizer technology to first convert the postscript code into PDF before it is interpreted and rendered by the Adobe PDF Print Engine.
• The use of the Adobe Normalizer is automatic and requires no user intervention• There are no controls associated with the use of Normalizer• The first time a PS/EPS file is rendered the Adobe PDF Print Engine UI will first
invoke Normalizer (with the status of Normalizing) • The converted PDF file is internally stored in the job, and subsequent
processing of the job will not invoke the Normalizer stage. • Generally the normalization process is quick, and only takes any significant
time for large PS/EPS files.
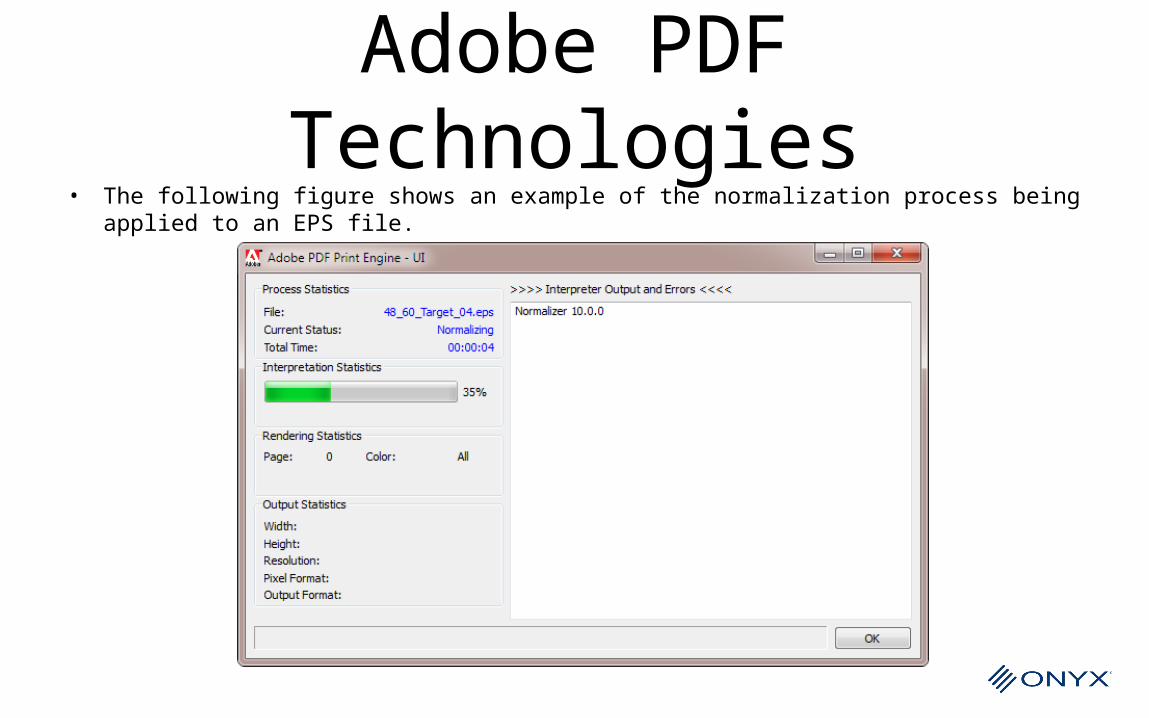
Adobe PDF Technologies• The following figure shows an example of the normalization process being applied to
an EPS file.
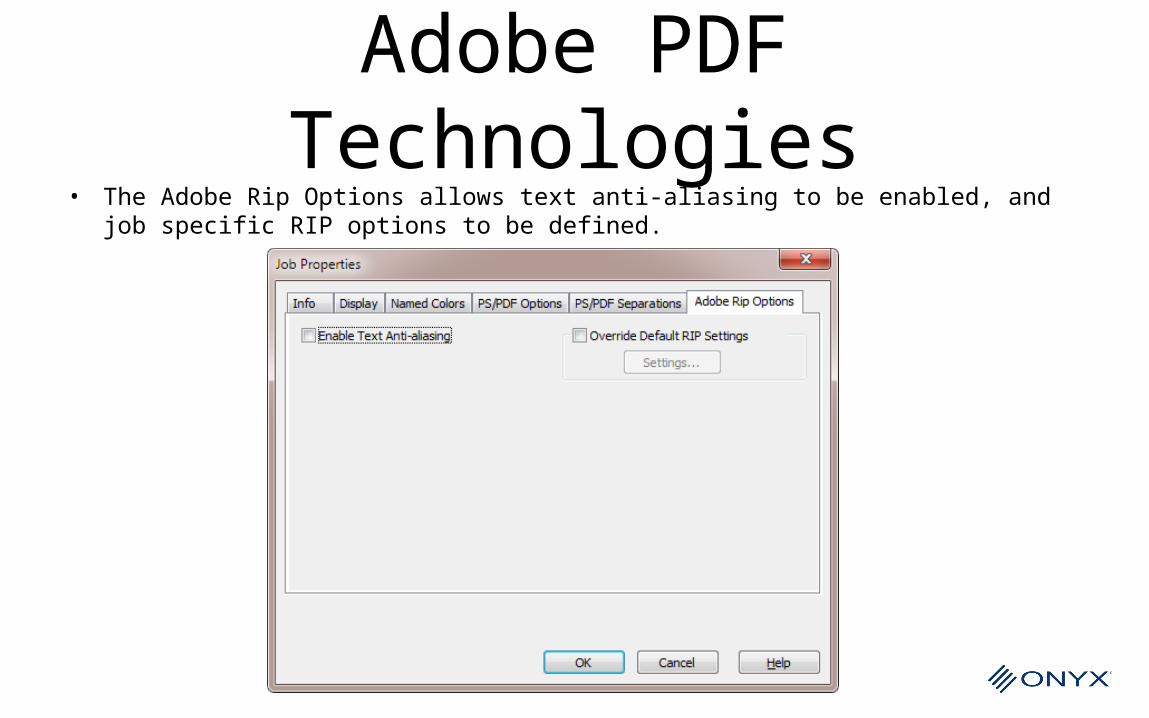
Adobe PDF Technologies• The Adobe Rip Options allows text anti-aliasing to be enabled, and job specific
RIP options to be defined.
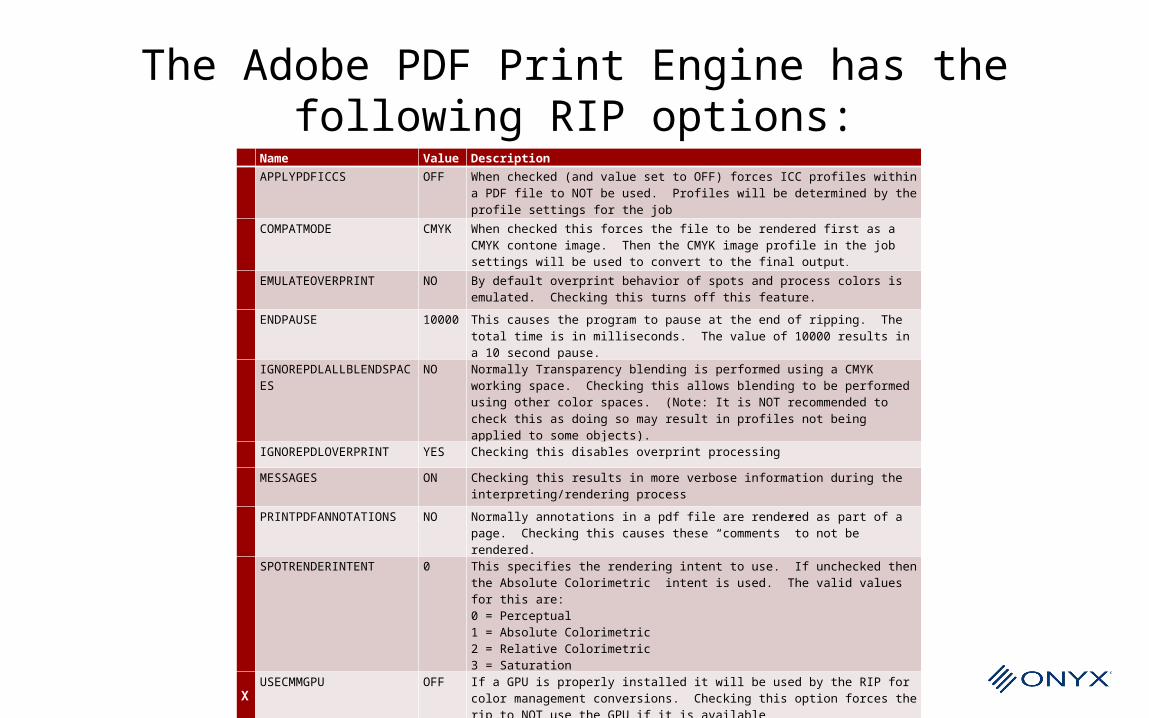
The Adobe PDF Print Engine has the following RIP options:
Name Value Description APPLYPDFICCS OFF When checked (and value set to OFF) forces ICC profiles within a PDF file to NOT be used.
Profiles will be determined by the profile settings for the job
COMPATMODE CMYK When checked this forces the file to be rendered first as a CMYK contone image. Then the CMYK image profile in the job settings will be used to convert to the final output.
EMULATEOVERPRINT NO By default overprint behavior of spots and process colors is emulated. Checking this turns off this feature.
ENDPAUSE 10000 This causes the program to pause at the end of ripping. The total time is in milliseconds. The value of 10000 results in a 10 second pause.
IGNOREPDLALLBLENDSPACES NO Normally Transparency blending is performed using a CMYK working space. Checking this allows blending to be performed using other color spaces. (Note: It is NOT recommended to check this as doing so may result in profiles not being applied to some objects).
IGNOREPDLOVERPRINT YES Checking this disables overprint processing
MESSAGES ON Checking this results in more verbose information during the interpreting/rendering process
PRINTPDFANNOTATIONS NO Normally annotations in a pdf file are rendered as part of a page. Checking this causes these “comments” to not be rendered.
SPOTRENDERINTENT 0 This specifies the rendering intent to use. If unchecked then the Absolute Colorimetric intent is used. The valid values for this are:0 = Perceptual1 = Absolute Colorimetric2 = Relative Colorimetric3 = Saturation
X USECMMGPU OFF If a GPU is properly installed it will be used by the RIP for color management conversions. Checking this option forces the rip to NOT use the GPU if it is available
USEPDFCROP YES Checking this forces the page size to be cropped using the PDF Crop information.
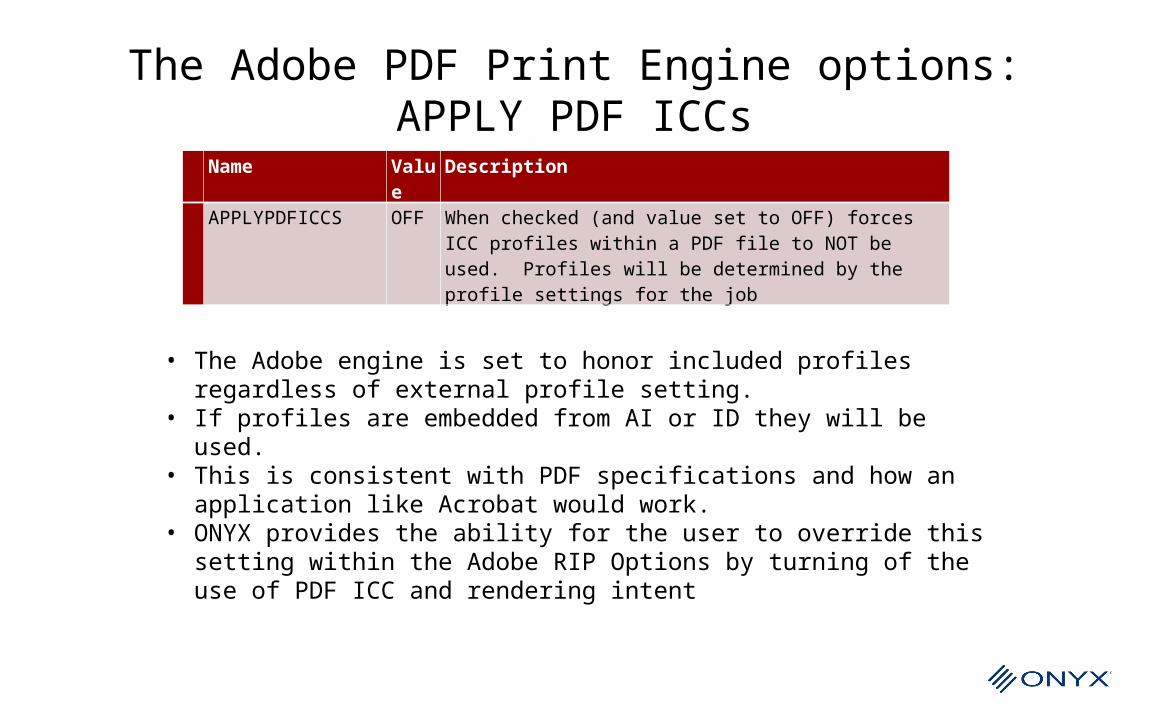
The Adobe PDF Print Engine options:APPLY PDF ICCs
Name Value Description APPLYPDFICCS OFF When checked (and value set to OFF) forces ICC profiles within a
PDF file to NOT be used. Profiles will be determined by the profile settings for the job
• The Adobe engine is set to honor included profiles regardless of external profile setting.
• If profiles are embedded from AI or ID they will be used. • This is consistent with PDF specifications and how an application
like Acrobat would work. • ONYX provides the ability for the user to override this setting
within the Adobe RIP Options by turning of the use of PDF ICC and rendering intent

Network Site LicensingWhat does that mean?
•Floating license•Key is available to users remotely•Limits are how many instances of any feature can be used simultaneously•Installed on server
– Key is installed on the server only and accessed remotely
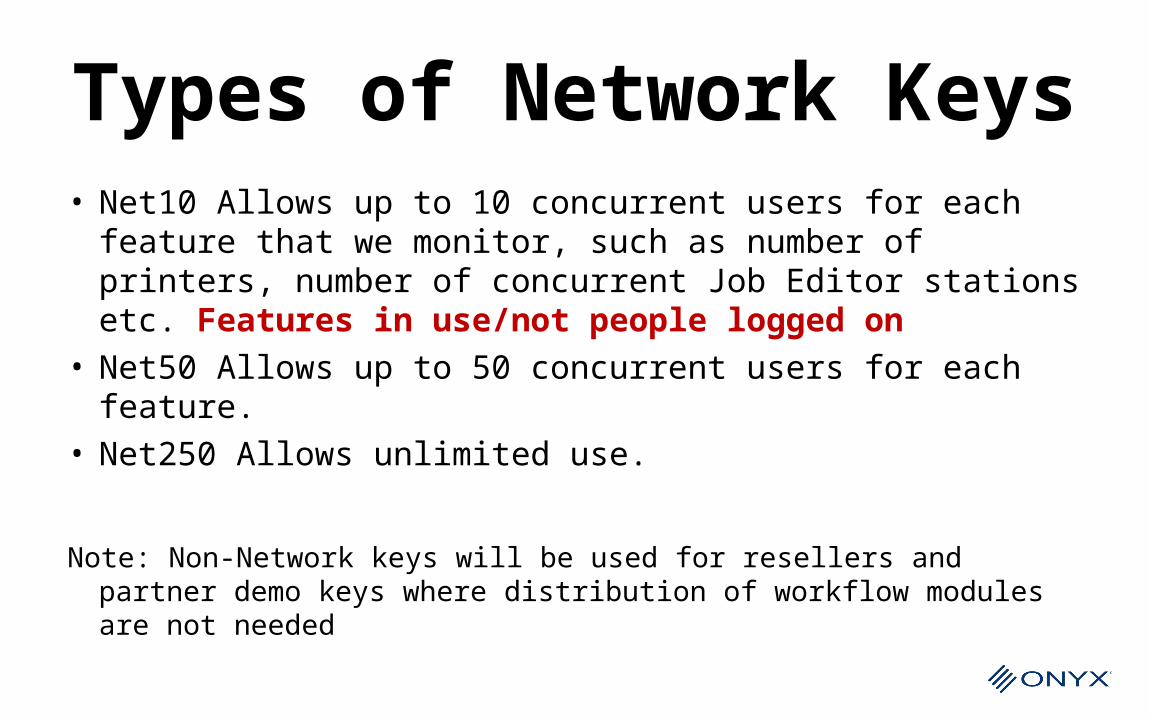
Types of Network Keys
• Net10 Allows up to 10 concurrent users for each feature that we monitor, such as number of printers, number of concurrent Job Editor stations etc. Features in use/not people logged on
• Net50 Allows up to 50 concurrent users for each feature.• Net250 Allows unlimited use.
Note: Non-Network keys will be used for resellers and partner demo keys where distribution of workflow modules are not needed
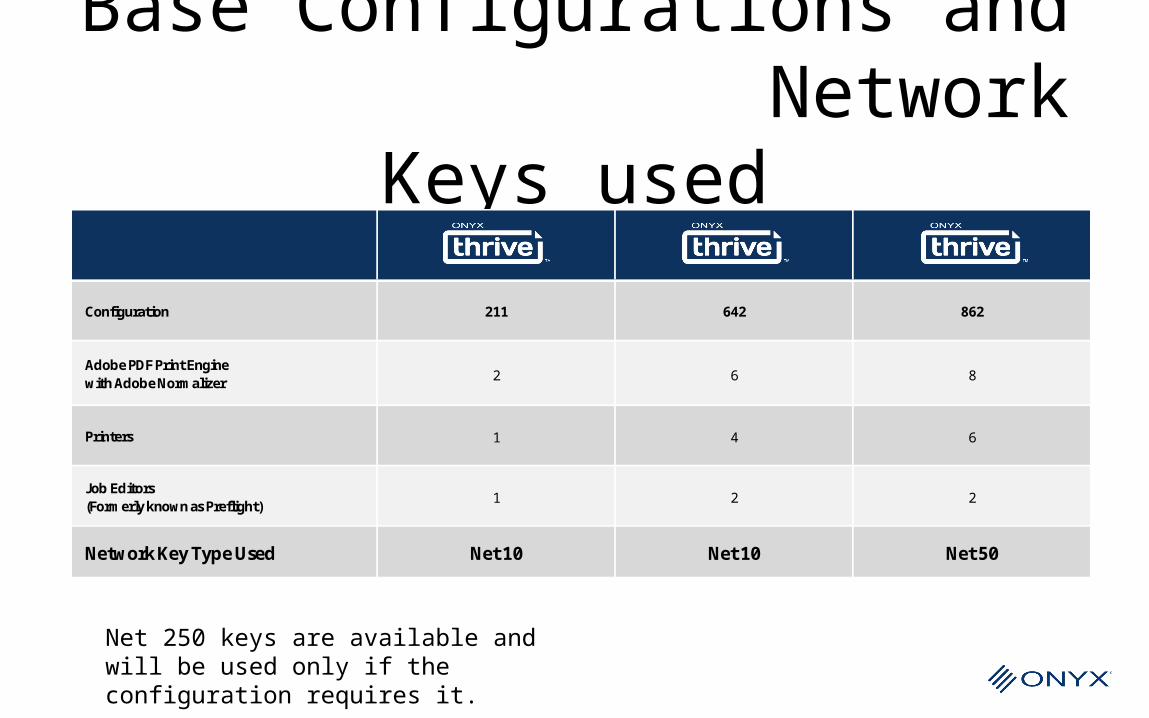
Base Configurations and Network Keys used
Configuration 211 642 862
Adobe PDF Print Engine with Adobe Normalizer 2 6 8
Printers 1 4 6
Job Editors (Formerly known as Preflight)
1 2 2
Network Key Type Used Net 10 Net 10 Net 50
Net 250 keys are available and will be used only if the configuration requires it.
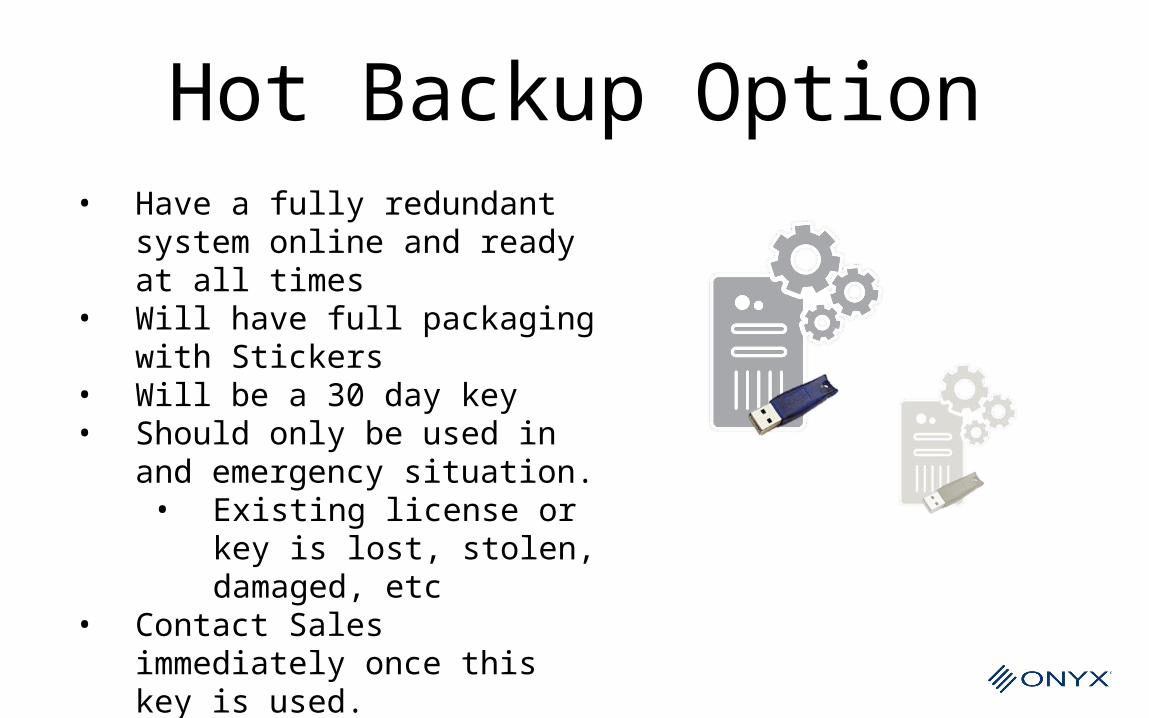
Hot Backup Option• Have a fully redundant
system online and ready at all times
• Will have full packaging with Stickers
• Will be a 30 day key• Should only be used in and
emergency situation.• Existing license or key
is lost, stolen, damaged, etc
• Contact Sales immediately once this key is used.
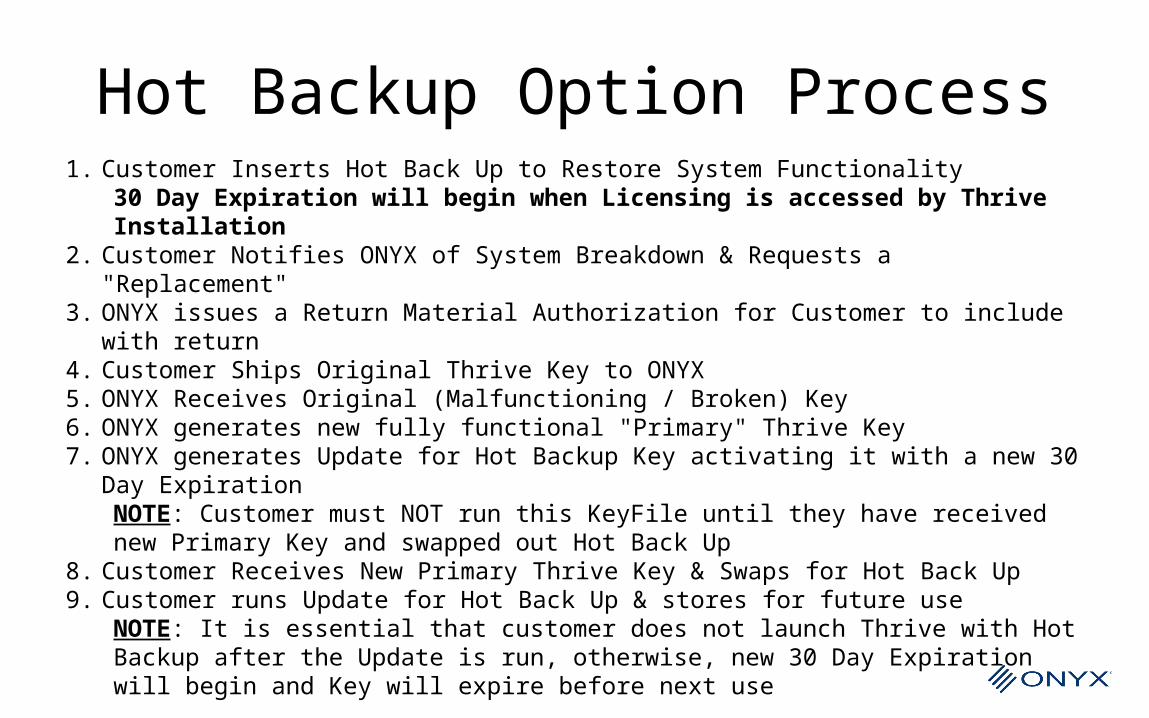
Hot Backup Option Process1. Customer Inserts Hot Back Up to Restore System Functionality
30 Day Expiration will begin when Licensing is accessed by Thrive Installation
2. Customer Notifies ONYX of System Breakdown & Requests a "Replacement"3. ONYX issues a Return Material Authorization for Customer to include with return4. Customer Ships Original Thrive Key to ONYX5. ONYX Receives Original (Malfunctioning / Broken) Key6. ONYX generates new fully functional "Primary" Thrive Key7. ONYX generates Update for Hot Backup Key activating it with a new 30 Day
ExpirationNOTE: Customer must NOT run this KeyFile until they have received new Primary Key and swapped out Hot Back Up
8. Customer Receives New Primary Thrive Key & Swaps for Hot Back Up9. Customer runs Update for Hot Back Up & stores for future use
NOTE: It is essential that customer does not launch Thrive with Hot Backup after the Update is run, otherwise, new 30 Day Expiration will begin and Key will expire before next use

Installation
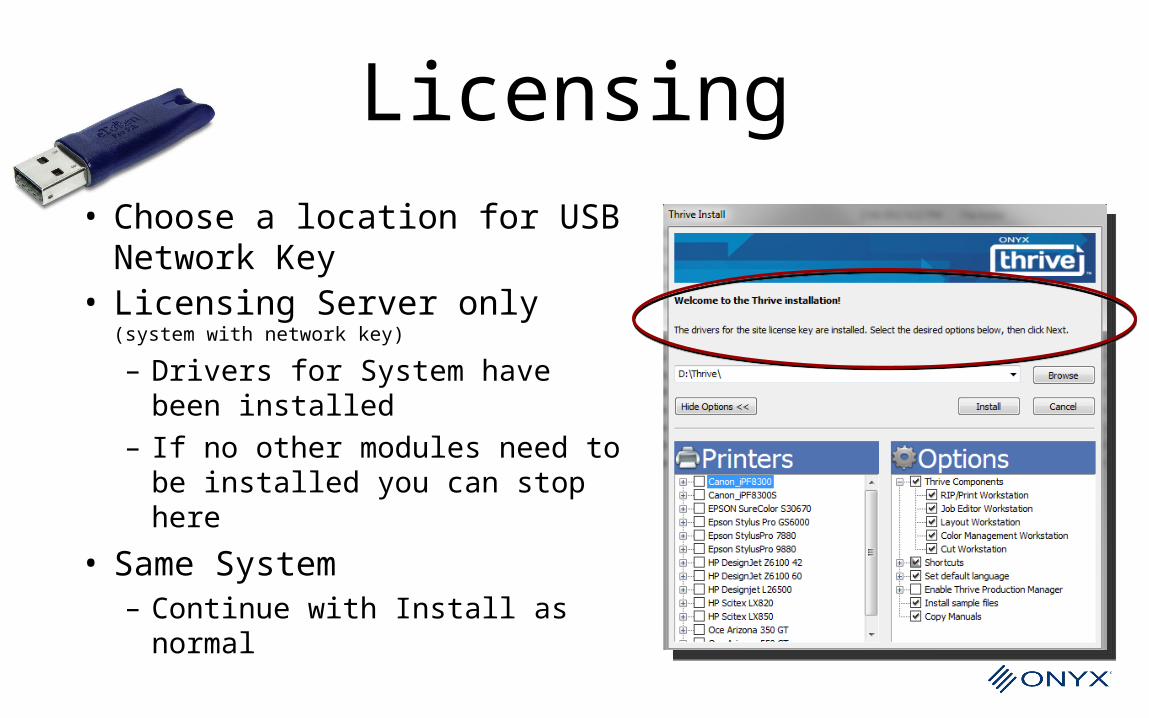
Licensing• Choose a location for USB
Network Key• Licensing Server only (system
with network key)
– Drivers for System have been installed
– If no other modules need to be installed you can stop here
• Same System– Continue with Install as
normal
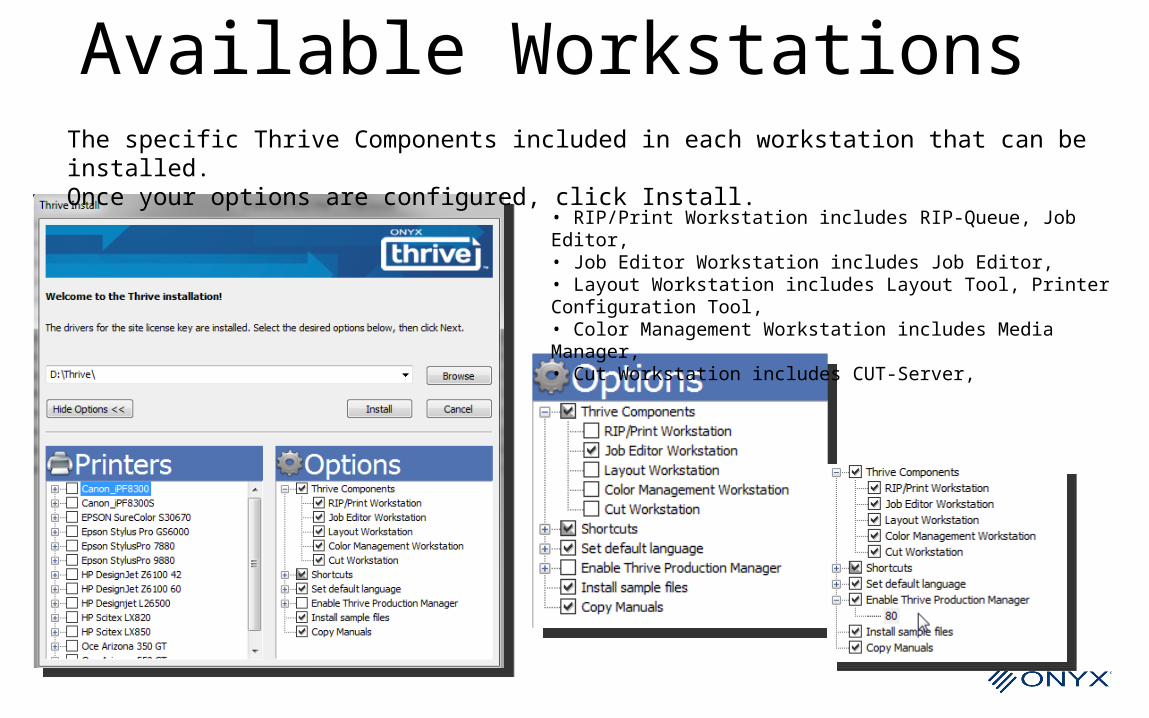
Available Workstations The specific Thrive Components included in each workstation that can be installed. Once your options are configured, click Install.
• RIP/Print Workstation includes RIP-Queue, Job Editor,• Job Editor Workstation includes Job Editor,• Layout Workstation includes Layout Tool, Printer Configuration Tool,• Color Management Workstation includes Media Manager, • Cut Workstation includes CUT-Server,
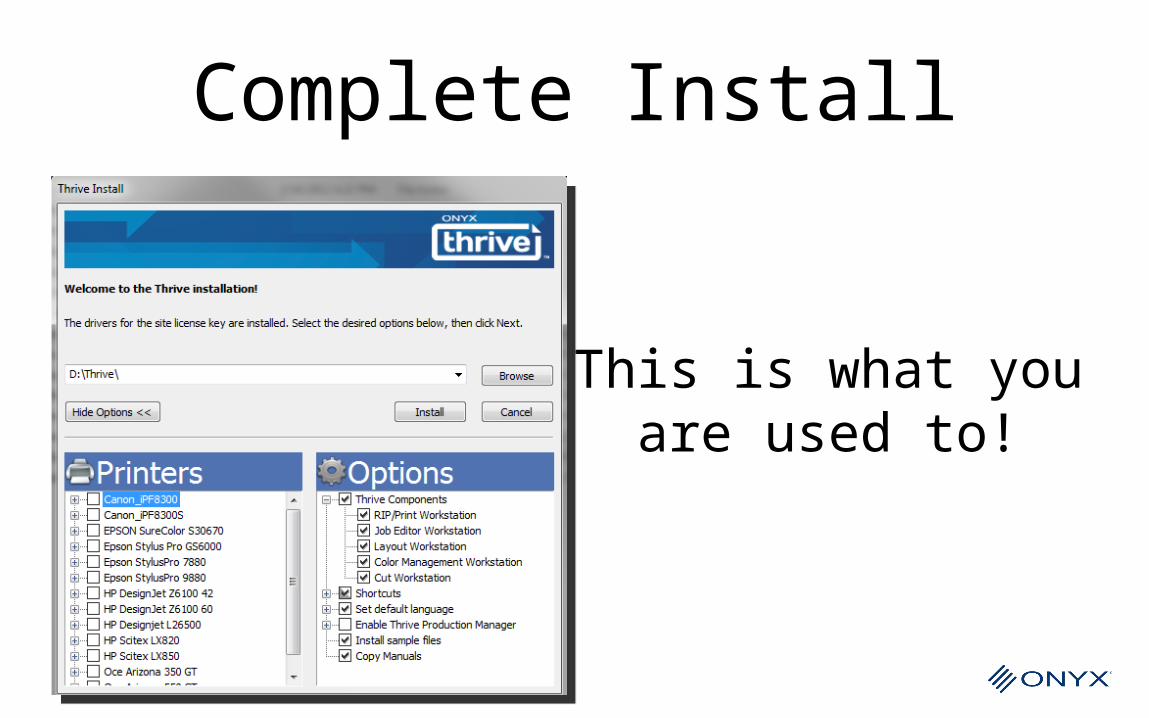
Complete Install
This is what you are used to!
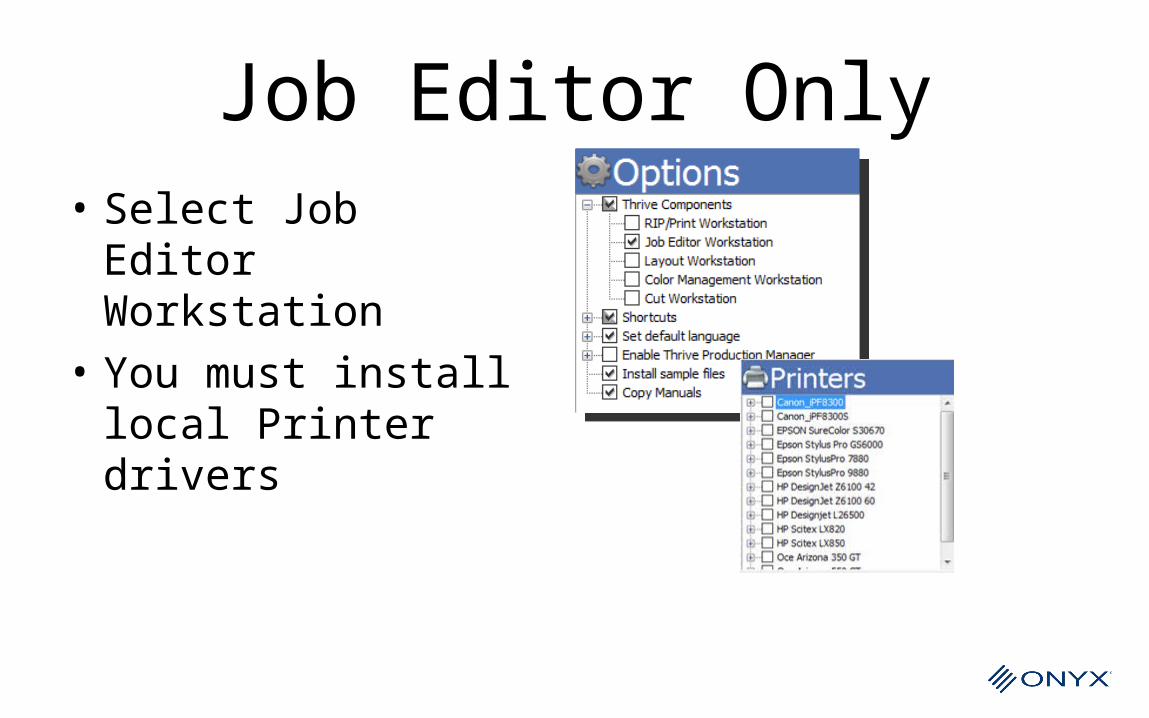
Job Editor Only• Select Job Editor
Workstation• You must install
local Printer drivers

Print Only• What gets installed?
– RIP-Queue– Printers
• Printer Configuration from RIP System– Print Forwarding
• Normal printer set up for Print only station– Spooling and Nesting only
• No Licensing impact to active printers for Print Forwarding– Print forwarding from processing system
will not diminish licensing availability
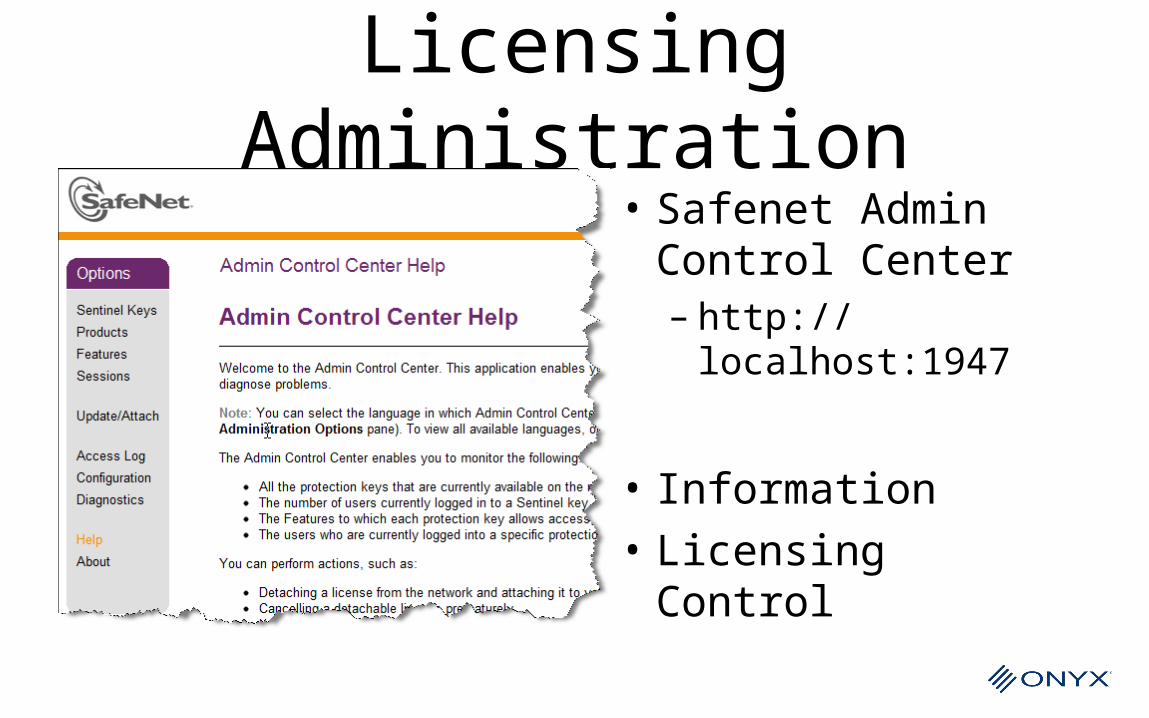
Licensing Administration• Safenet Admin
Control Center– http://
localhost:1947
• Information• Licensing Control
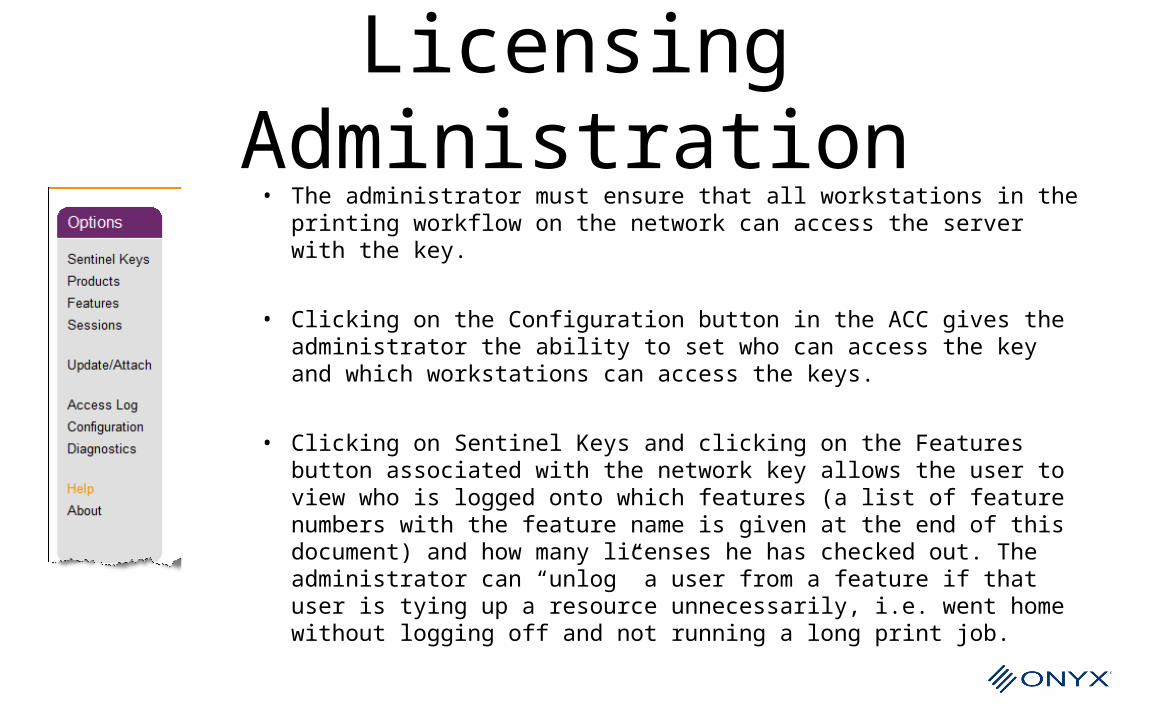
Licensing Administration• The administrator must ensure that all workstations in the
printing workflow on the network can access the server with the key.
• Clicking on the Configuration button in the ACC gives the administrator the ability to set who can access the key and which workstations can access the keys.
• Clicking on Sentinel Keys and clicking on the Features button associated with the network key allows the user to view who is logged onto which features (a list of feature numbers with the feature name is given at the end of this document) and how many licenses he has checked out. The administrator can “unlog” a user from a feature if that user is tying up a resource unnecessarily, i.e. went home without logging off and not running a long print job.
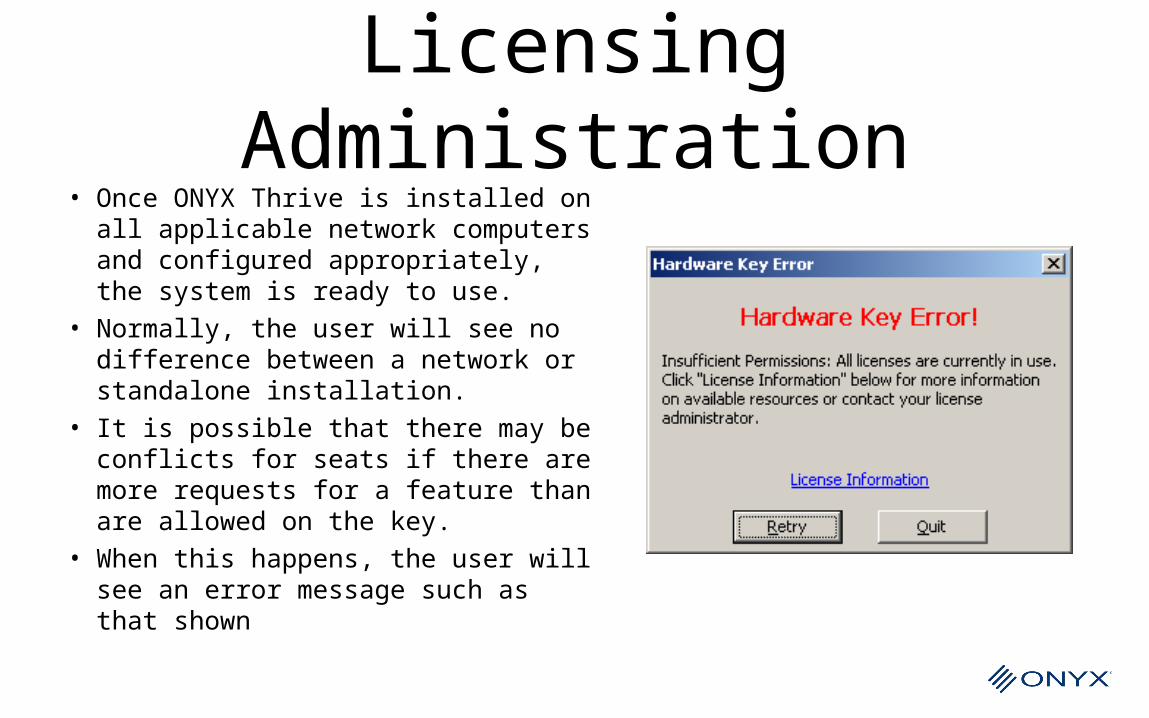
Licensing Administration• Once ONYX Thrive is installed on all
applicable network computers and configured appropriately, the system is ready to use.
• Normally, the user will see no difference between a network or standalone installation.
• It is possible that there may be conflicts for seats if there are more requests for a feature than are allowed on the key.
• When this happens, the user will see an error message such as that shown
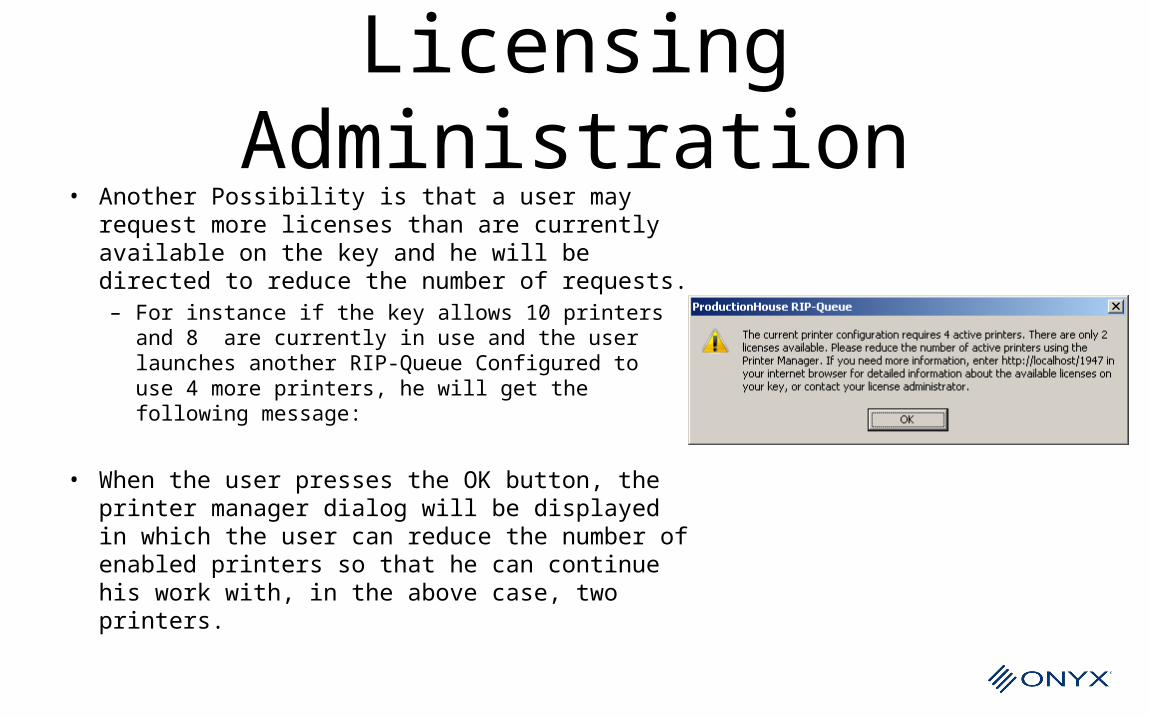
Licensing Administration• Another Possibility is that a user may
request more licenses than are currently available on the key and he will be directed to reduce the number of requests. – For instance if the key allows 10 printers and
8 are currently in use and the user launches another RIP-Queue Configured to use 4 more printers, he will get the following message:
• When the user presses the OK button, the printer manager dialog will be displayed in which the user can reduce the number of enabled printers so that he can continue his work with, in the above case, two printers.
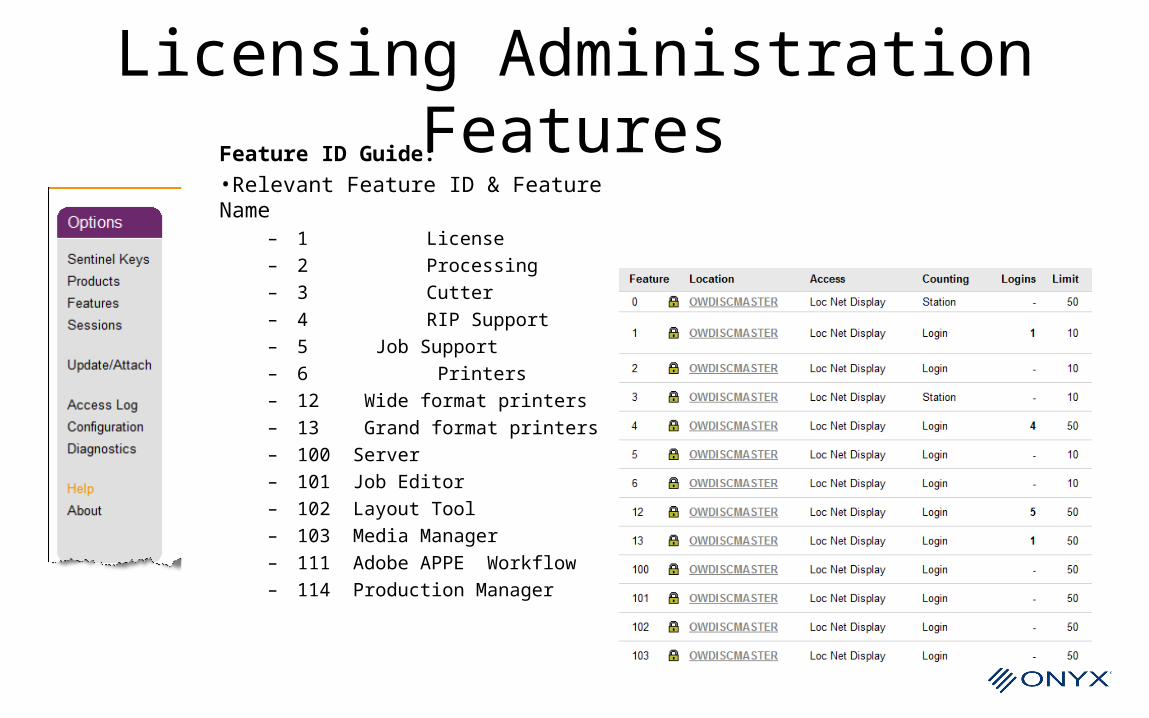
Licensing Administration FeaturesFeature ID Guide:
•Relevant Feature ID & Feature Name– 1 License– 2 Processing– 3 Cutter– 4 RIP Support– 5 Job Support– 6 Printers – 12 Wide format printers– 13 Grand format printers– 100 Server– 101 Job Editor– 102 Layout Tool– 103 Media Manager– 111 Adobe APPE Workflow– 114 Production Manager
Production Manager
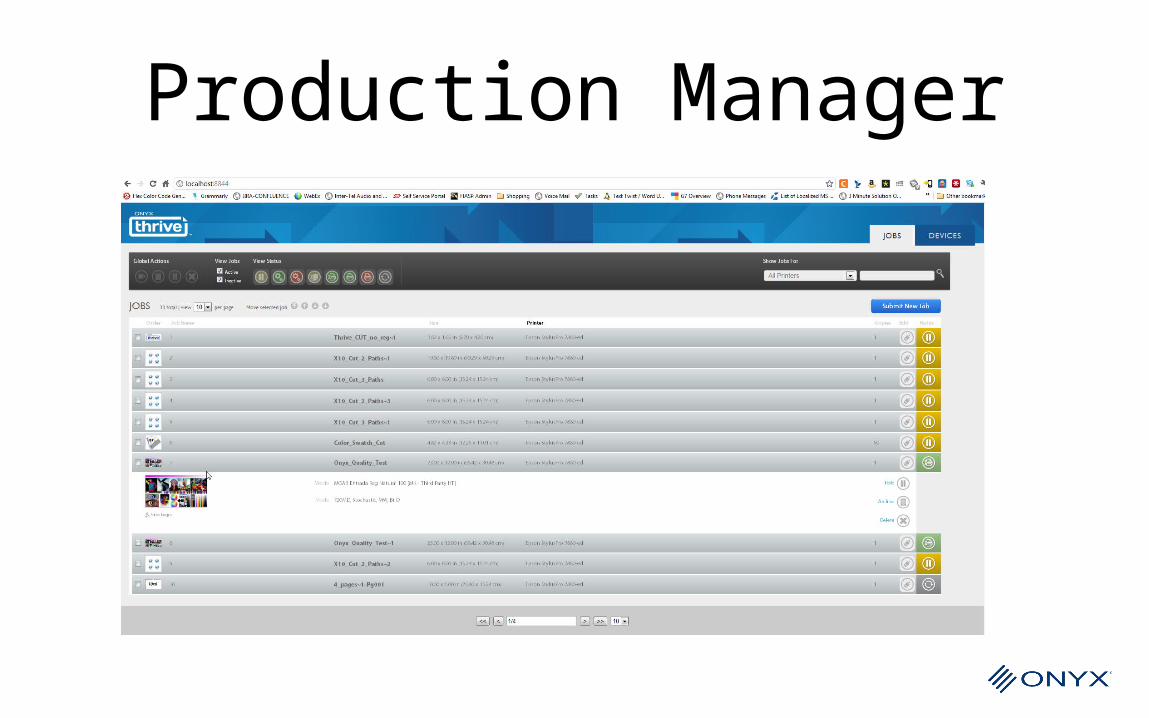
ONYX Thrive Production Manager
• Job Submission• Job Information• Production Control
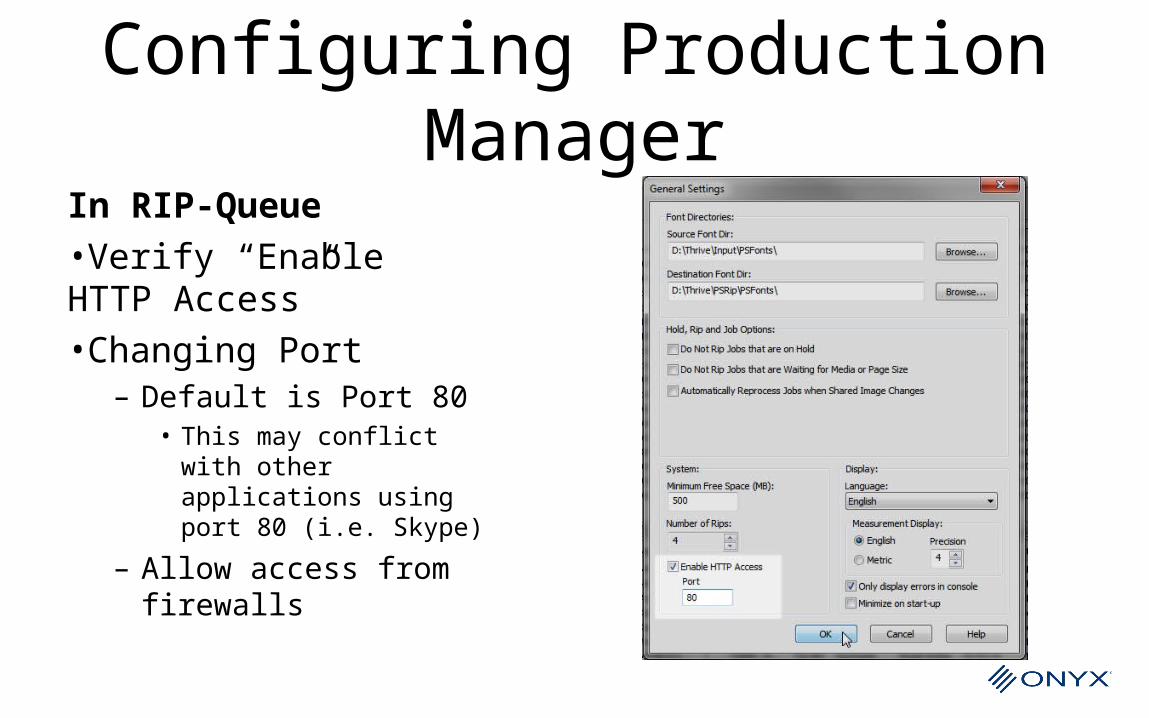
Configuring Production Manager
In RIP-Queue•Verify “Enable HTTP Access”•Changing Port
– Default is Port 80• This may conflict with
other applications using port 80 (i.e. Skype)
– Allow access from firewalls
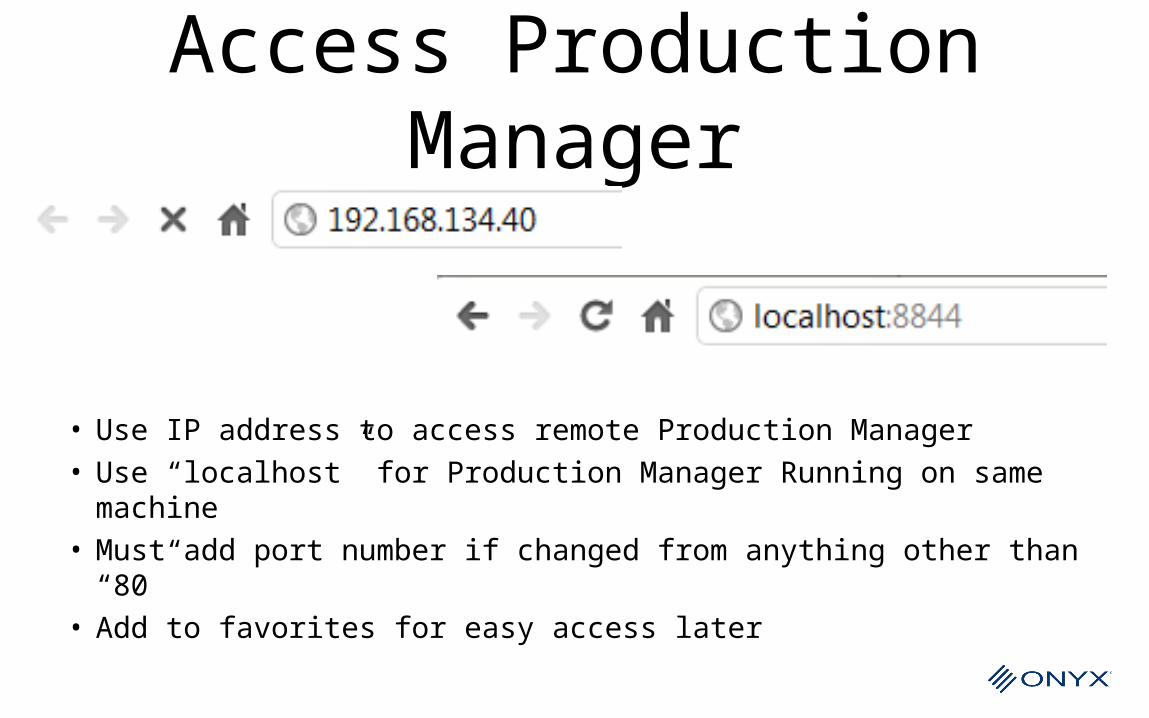
Access Production Manager
• Use IP address to access remote Production Manager• Use “localhost” for Production Manager Running on same
machine• Must add port number if changed from anything other than “80”• Add to favorites for easy access later
Changes to ONYX Applications
Job Editor
New name “Job Editor”
Formerly “Preflight”
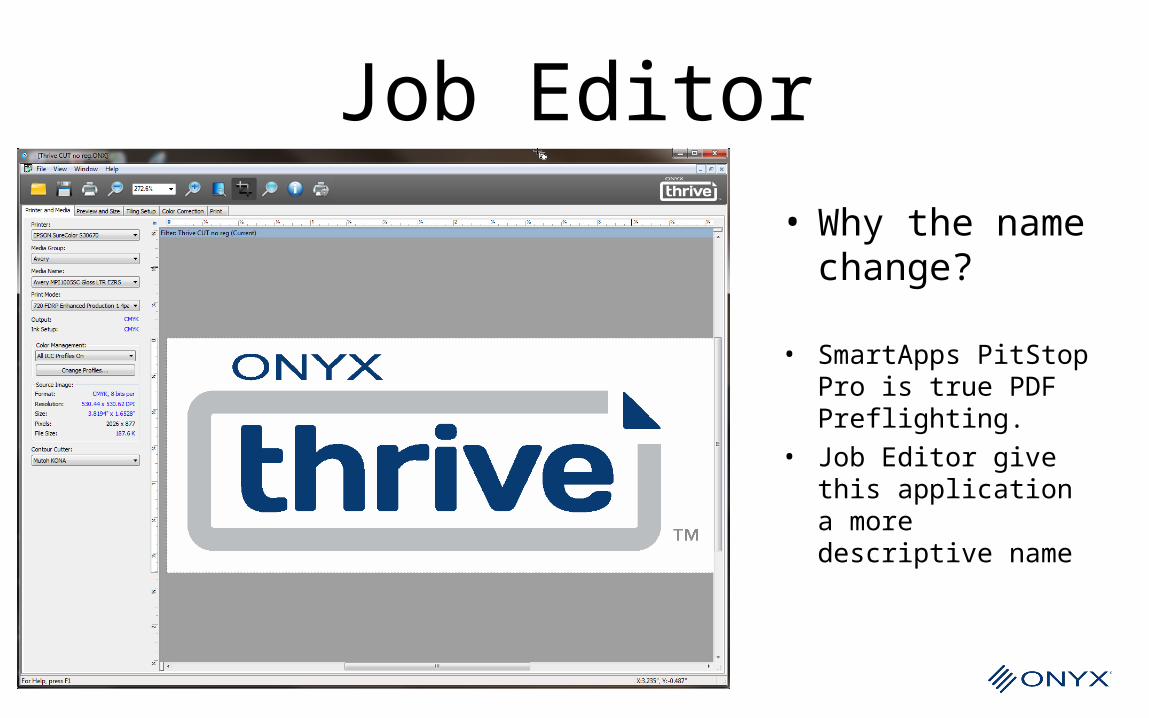
Job Editor• Why the name
change?
• SmartApps PitStop Pro is true PDF Preflighting.
• Job Editor give this application a more descriptive name
Job Editor• Remote Job Editing• Spot Color Replacement• Viewing Named Colors in RIP Queue• Multi Page PDF

Job Editor Only Connect Remote Printers
• Connection of remote printers– Remove local printers if
needed– Add remote printers
• Browse to Remote system
• Importing/Syncing media– After connection of remote
printers. Simply select update media. All media profiles for that device will be copied
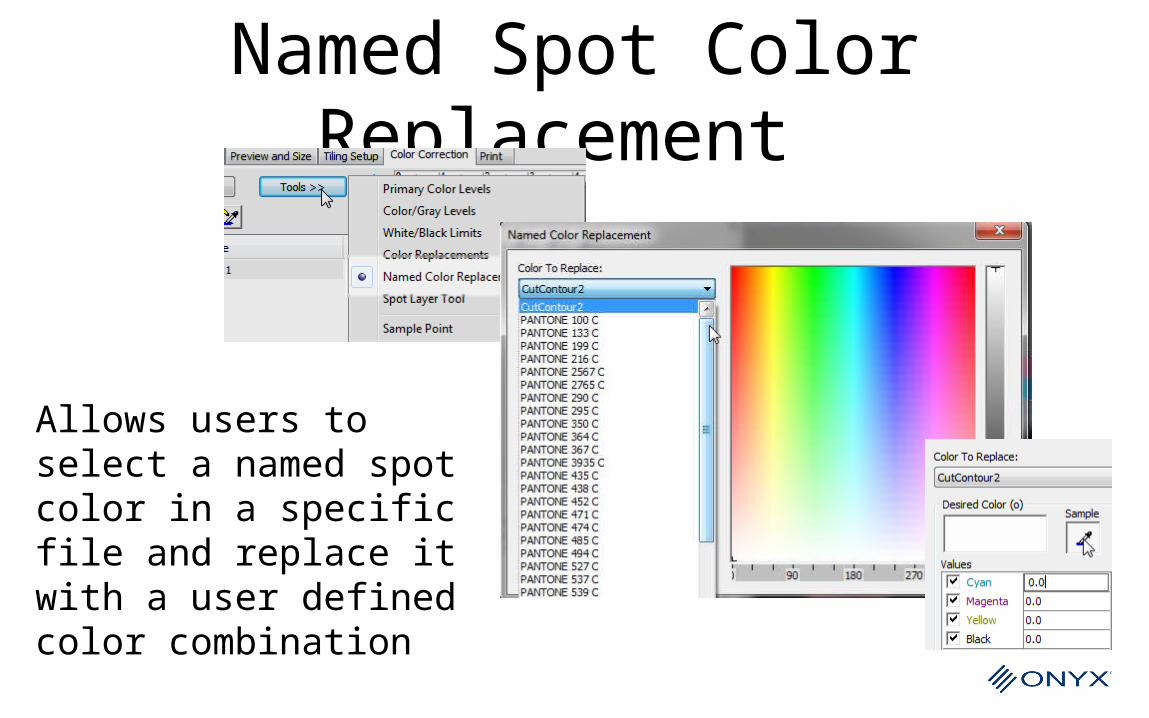
Named Spot Color Replacement
Allows users to select a named spot color in a specific file and replace it with a user defined color combination
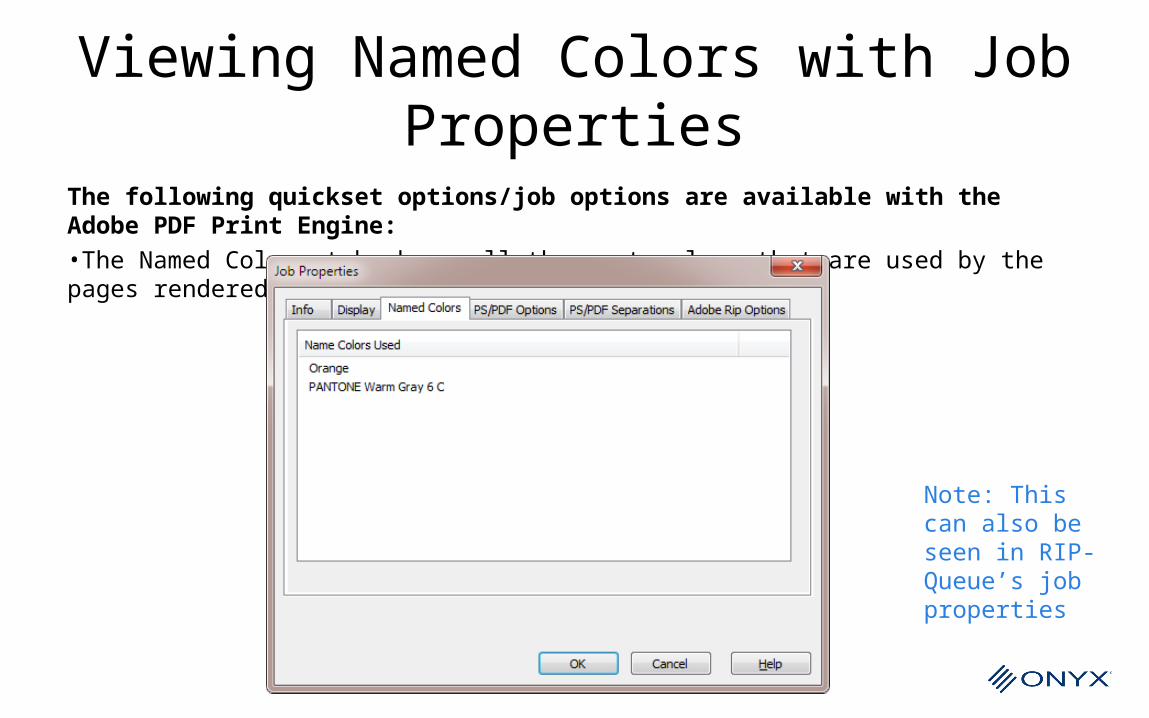
Viewing Named Colors with Job Properties
The following quickset options/job options are available with the Adobe PDF Print Engine:•The Named Colors tab shows all the spot colors that are used by the pages rendered for the preview.
Note: This can also be seen in RIP-Queue’s job properties
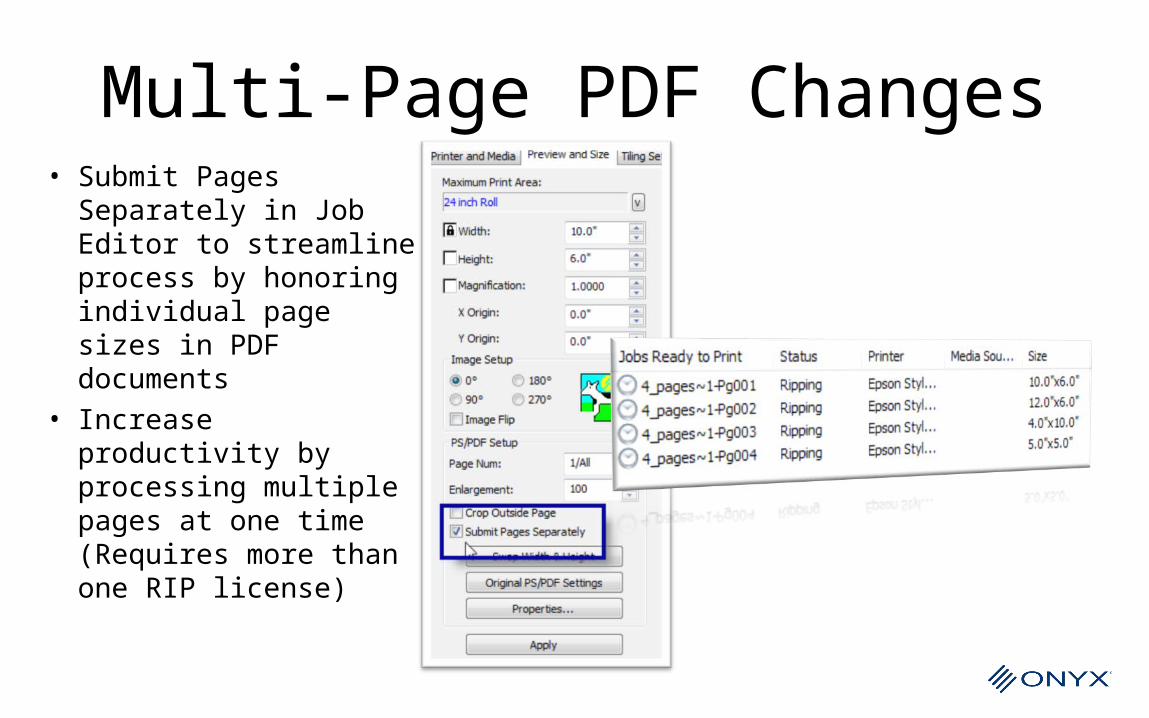
Multi-Page PDF Changes• Submit Pages
Separately in Job Editor to streamline process by honoring individual page sizes in PDF documents
• Increase productivity by processing multiple pages at one time (Requires more than one RIP license)
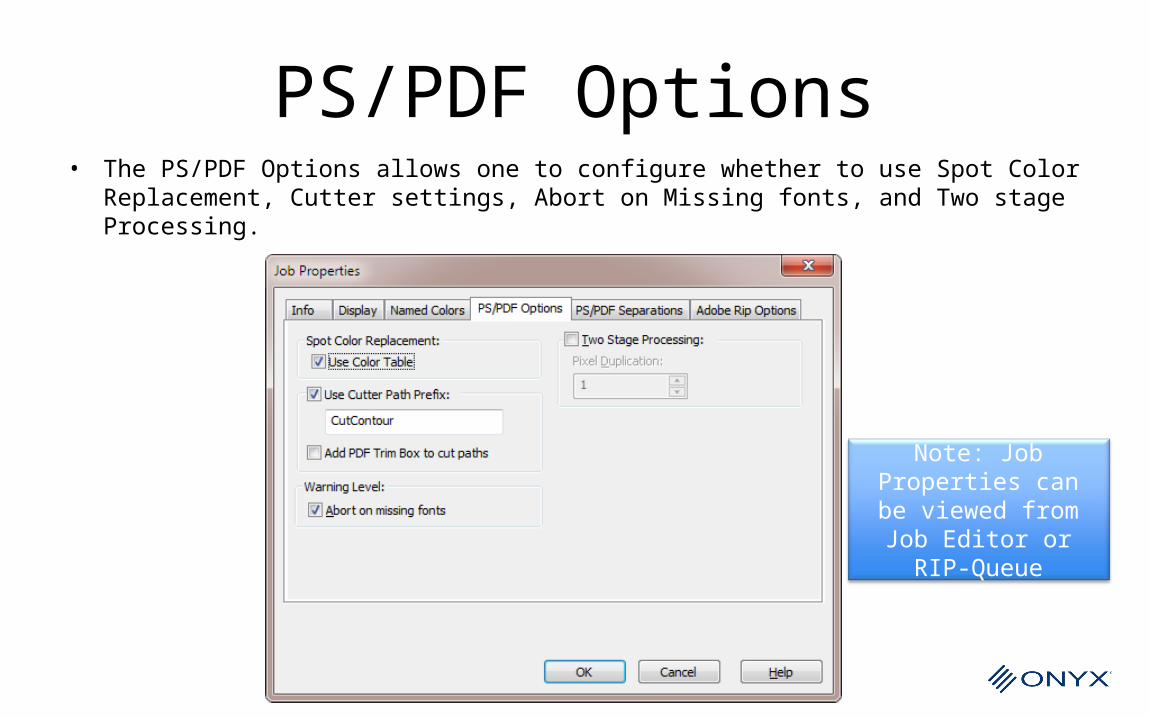
PS/PDF Options• The PS/PDF Options allows one to configure whether to use Spot Color
Replacement, Cutter settings, Abort on Missing fonts, and Two stage Processing.
Note: Job Properties can be viewed from Job Editor or RIP-Queue
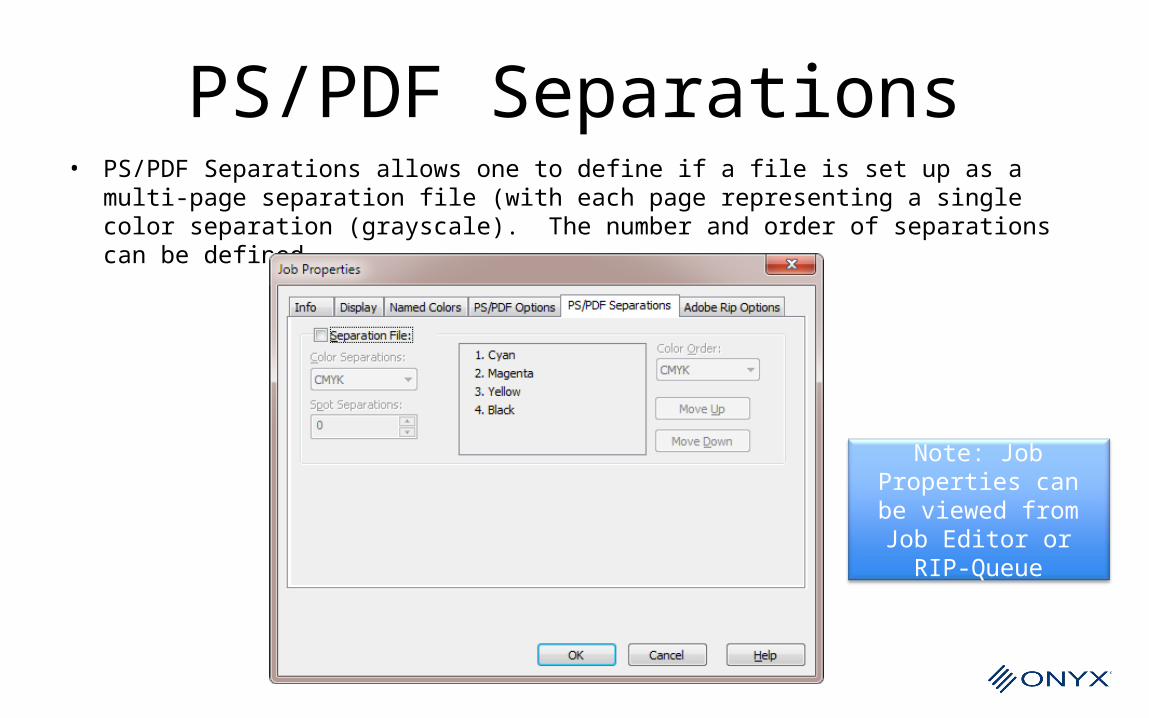
PS/PDF Separations• PS/PDF Separations allows one to define if a file is set up as a multi-page
separation file (with each page representing a single color separation (grayscale). The number and order of separations can be defined
Note: Job Properties can be viewed from Job Editor or RIP-Queue
RIP-Queue• Quick Set Changes
– Quick Set Change and Adobe Options– Source Image vs Reduced Size to Fit
• Improvements for file handling in RIP-Queue when importing multiple files simultaneously
• Added the ability to print all ink channels with the Gutter feature in RIP-Queue
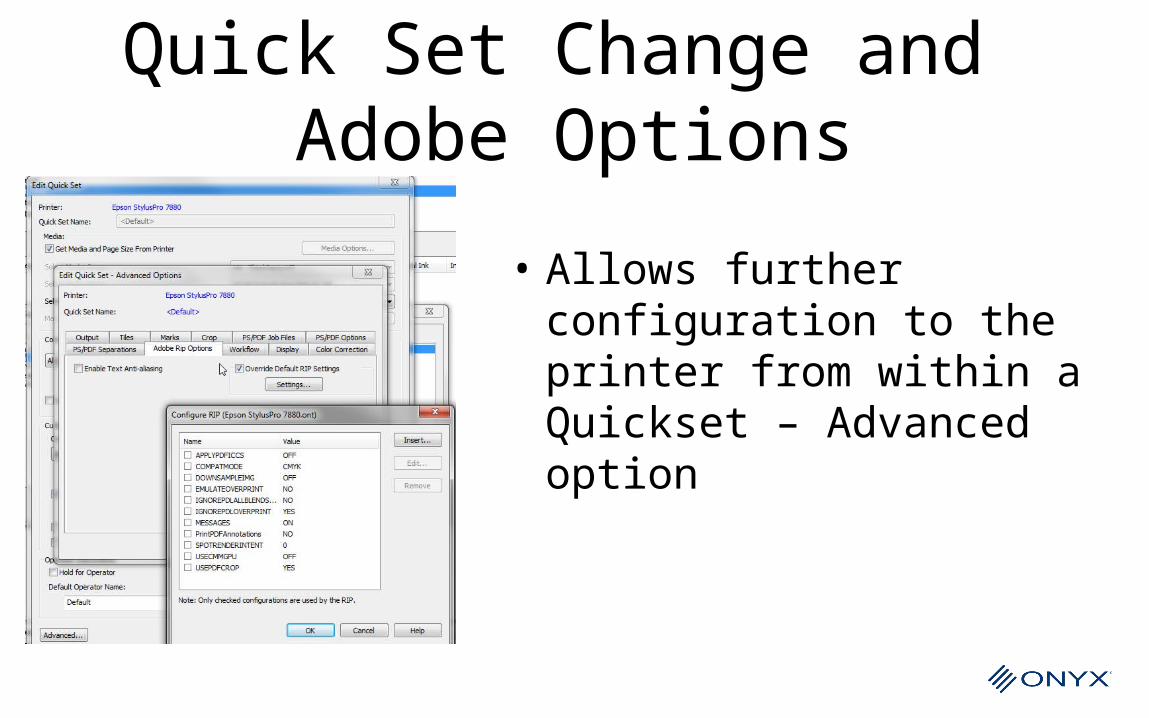
Quick Set Change and Adobe Options
• Allows further configuration to the printer from within a Quickset – Advanced option
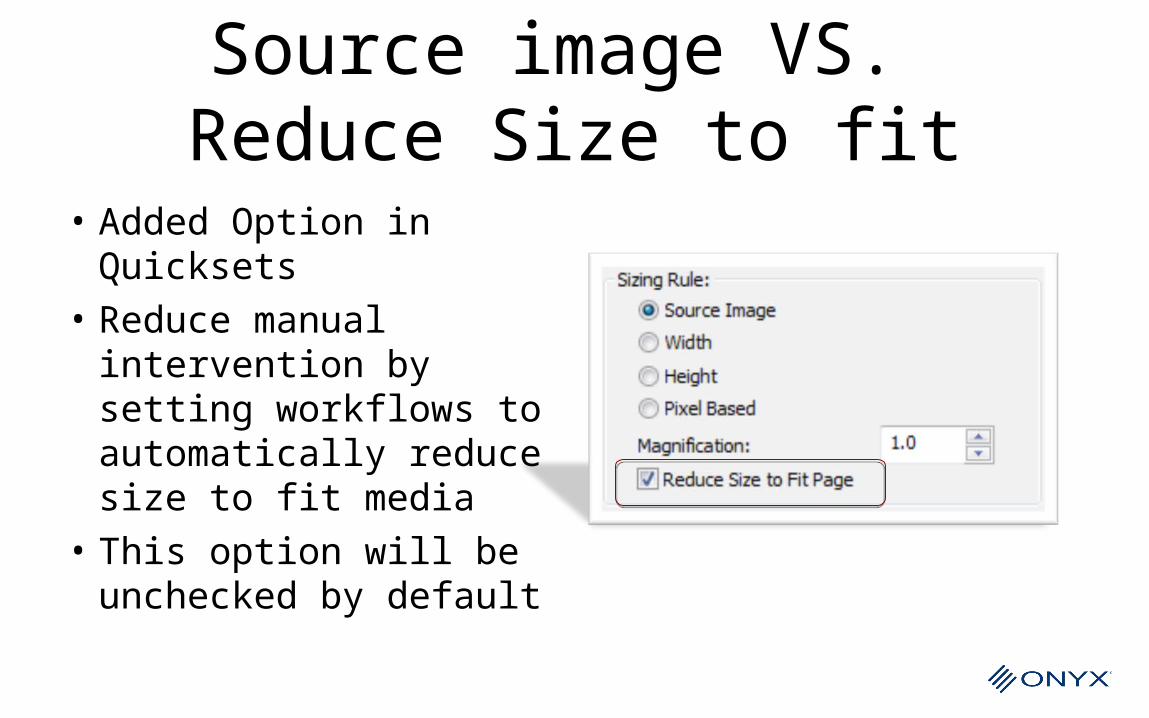
Source image VS. Reduce Size to fit
• Added Option in Quicksets
• Reduce manual intervention by setting workflows to automatically reduce size to fit media
• This option will be unchecked by default
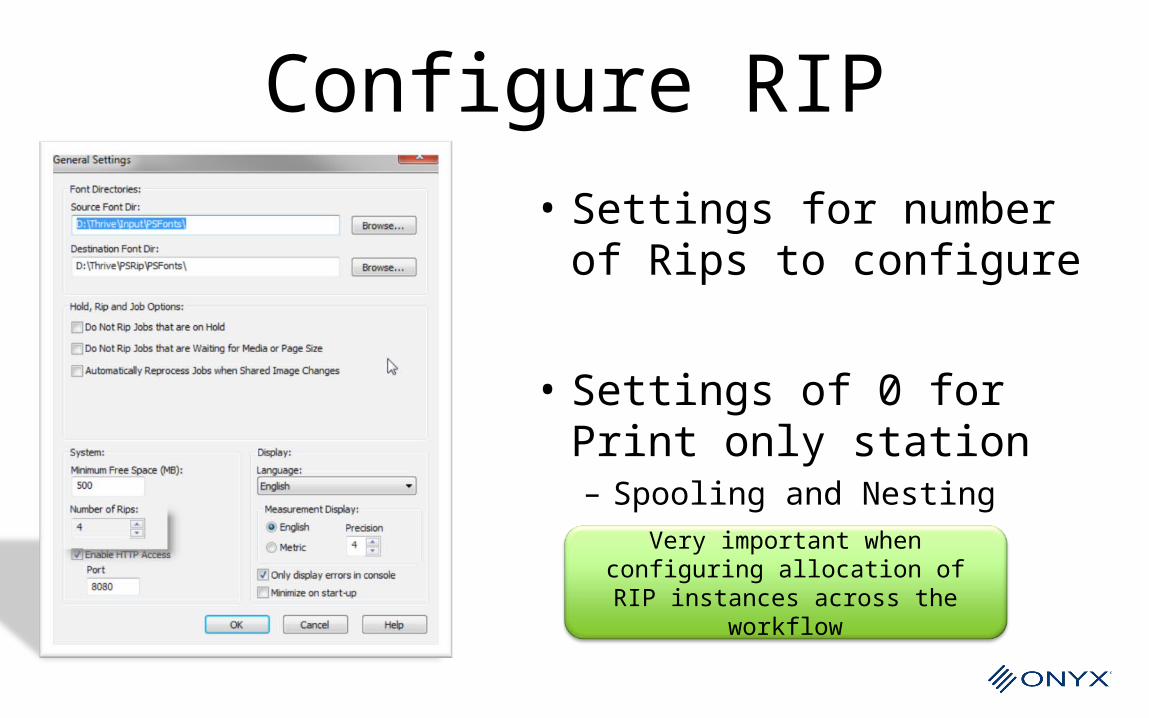
Configure RIP• Settings for number of
Rips to configure
• Settings of 0 for Print only station– Spooling and Nesting
Very important when configuring allocation of RIP instances across the
workflow
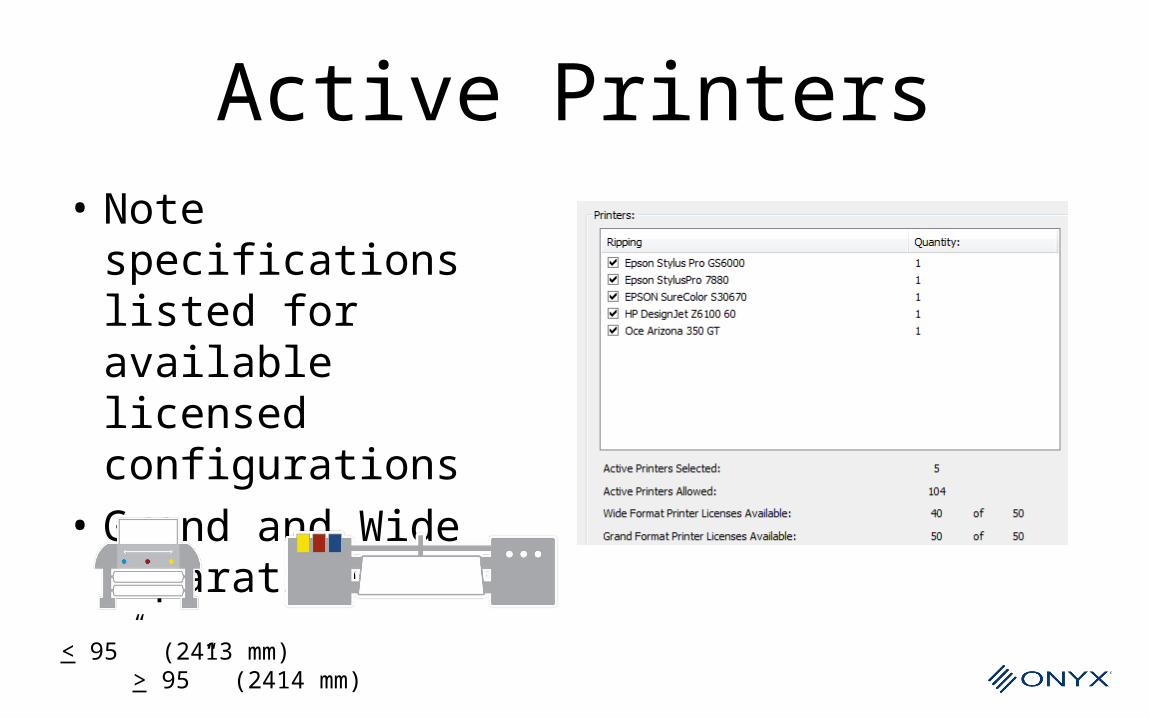
Active Printers• Note specifications
listed for available licensed configurations
• Grand and Wide Separation
< 95” (2413 mm) > 95” (2414 mm)

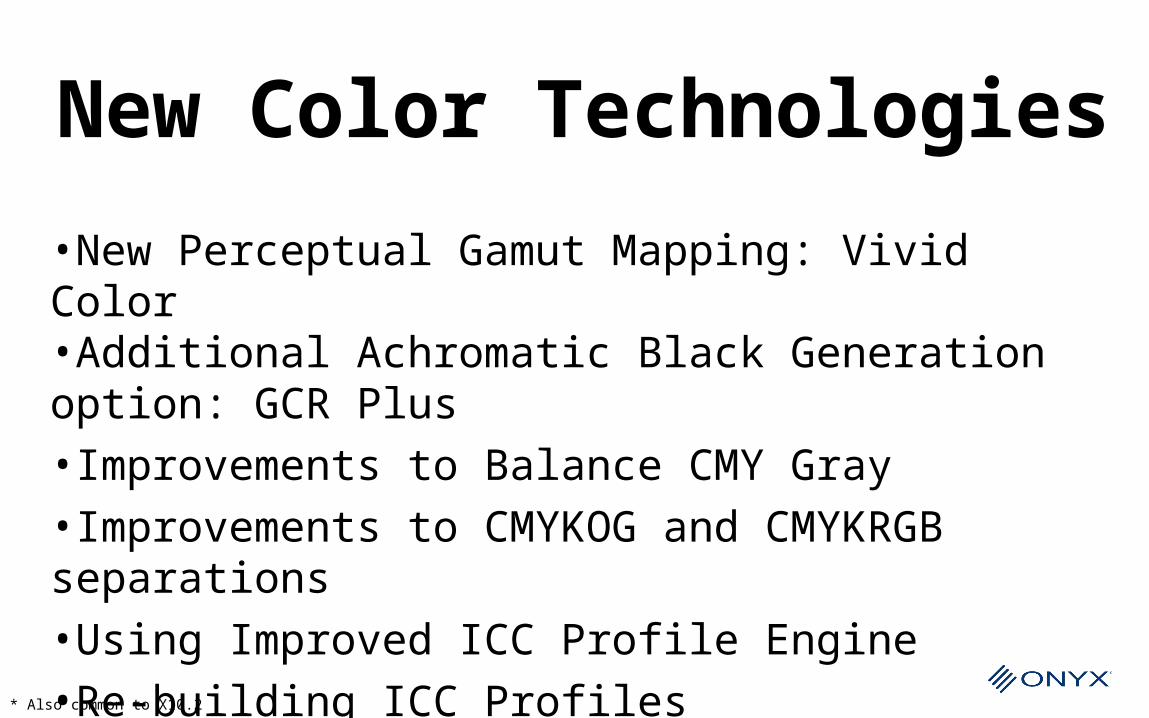
New Color Technologies
•New Perceptual Gamut Mapping: Vivid Color •Additional Achromatic Black Generation option: GCR Plus •Improvements to Balance CMY Gray•Improvements to CMYKOG and CMYKRGB separations •Using Improved ICC Profile Engine•Re-building ICC Profiles
* Also common to X10.2
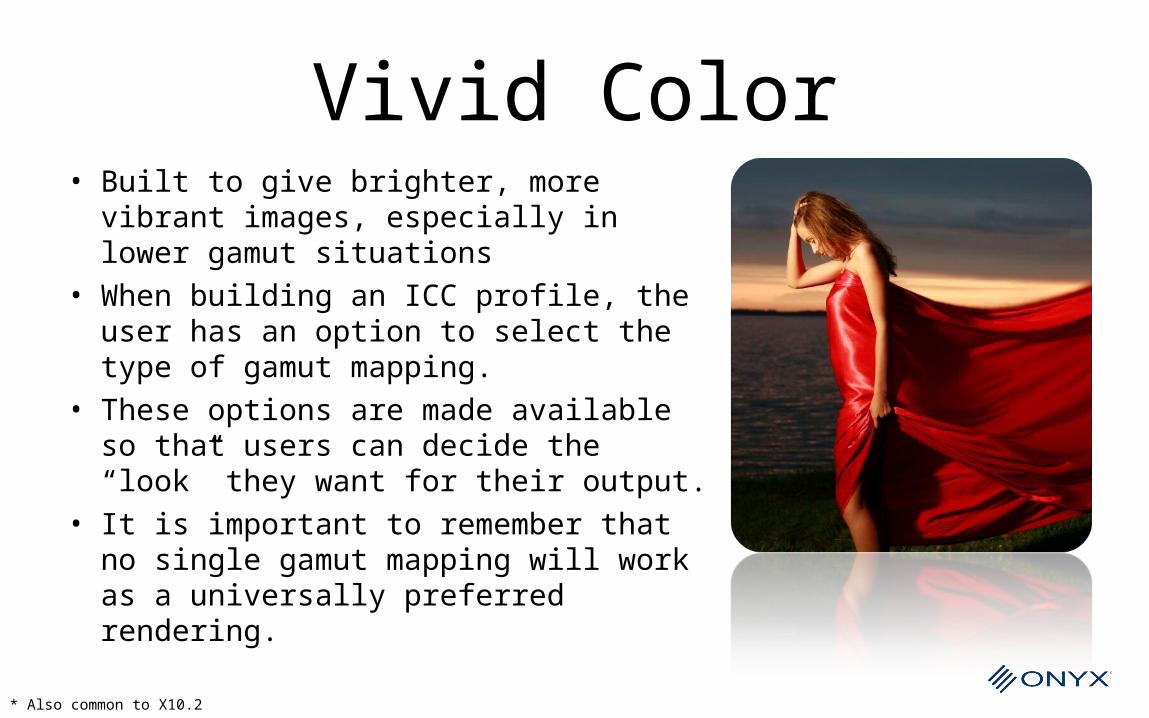
Vivid Color• Built to give brighter, more vibrant
images, especially in lower gamut situations
• When building an ICC profile, the user has an option to select the type of gamut mapping.
• These options are made available so that users can decide the “look” they want for their output.
• It is important to remember that no single gamut mapping will work as a universally preferred rendering.
* Also common to X10.2
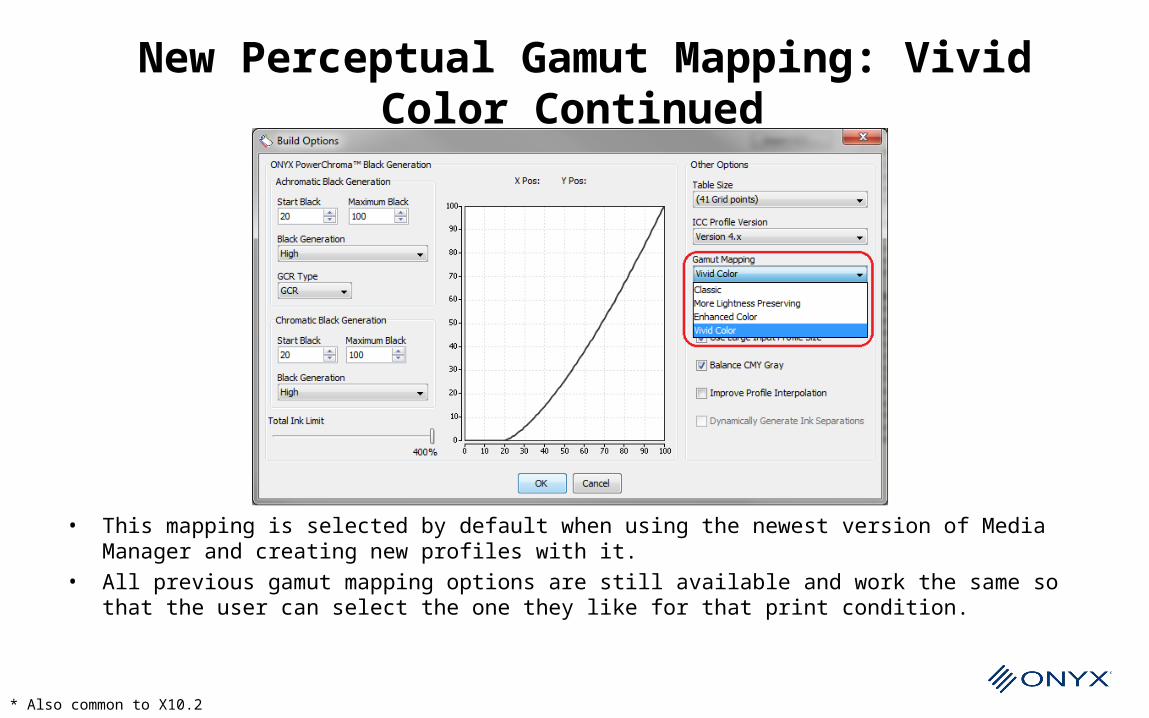
New Perceptual Gamut Mapping: Vivid Color Continued
• This mapping is selected by default when using the newest version of Media Manager and creating new profiles with it.
• All previous gamut mapping options are still available and work the same so that the user can select the one they like for that print condition.
* Also common to X10.2
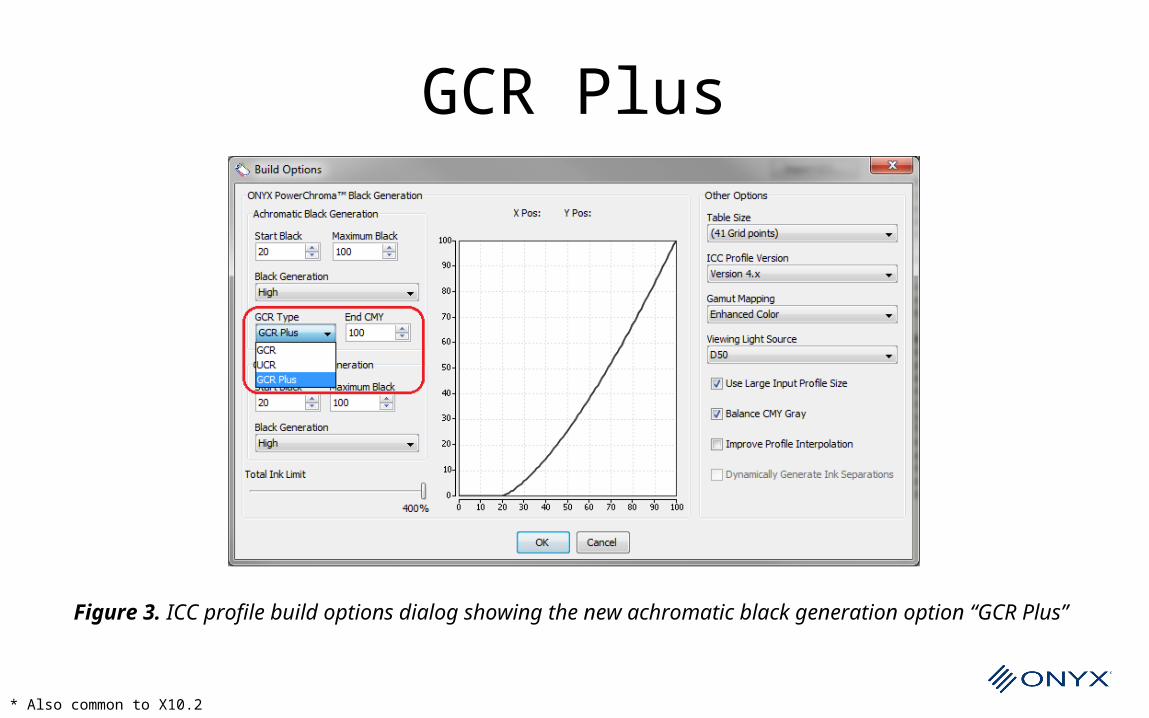
GCR Plus
Figure 3. ICC profile build options dialog showing the new achromatic black generation option “GCR Plus”
* Also common to X10.2
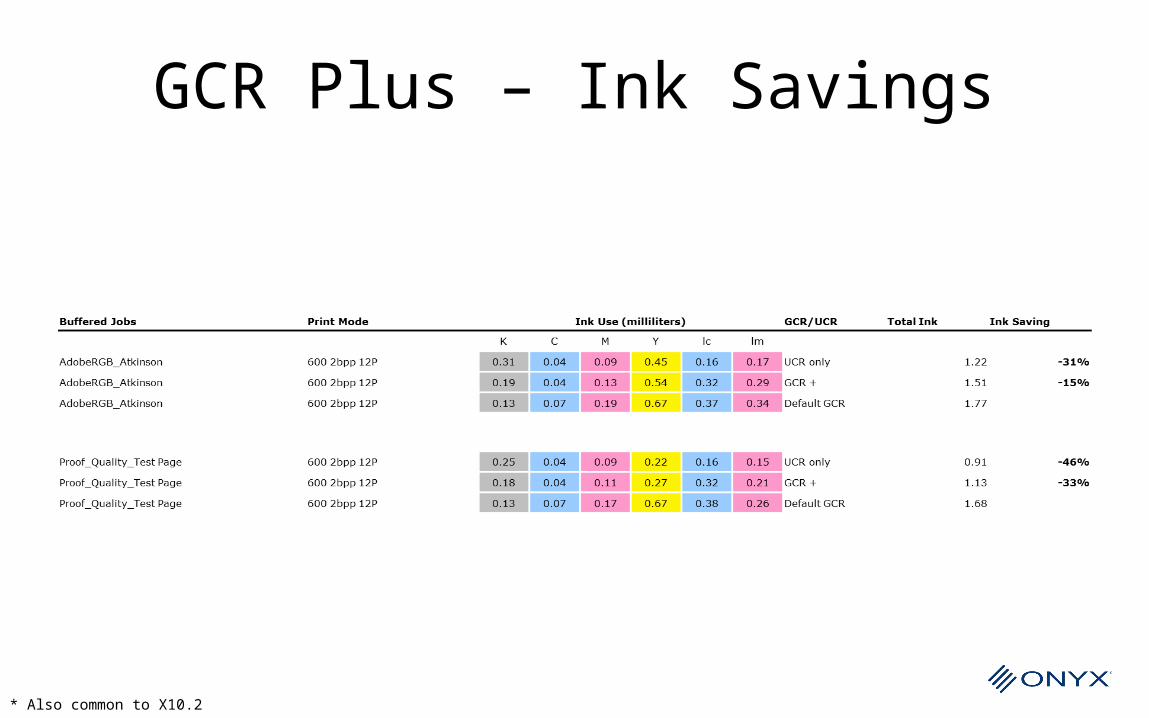
GCR Plus – Ink Savings
* Also common to X10.2
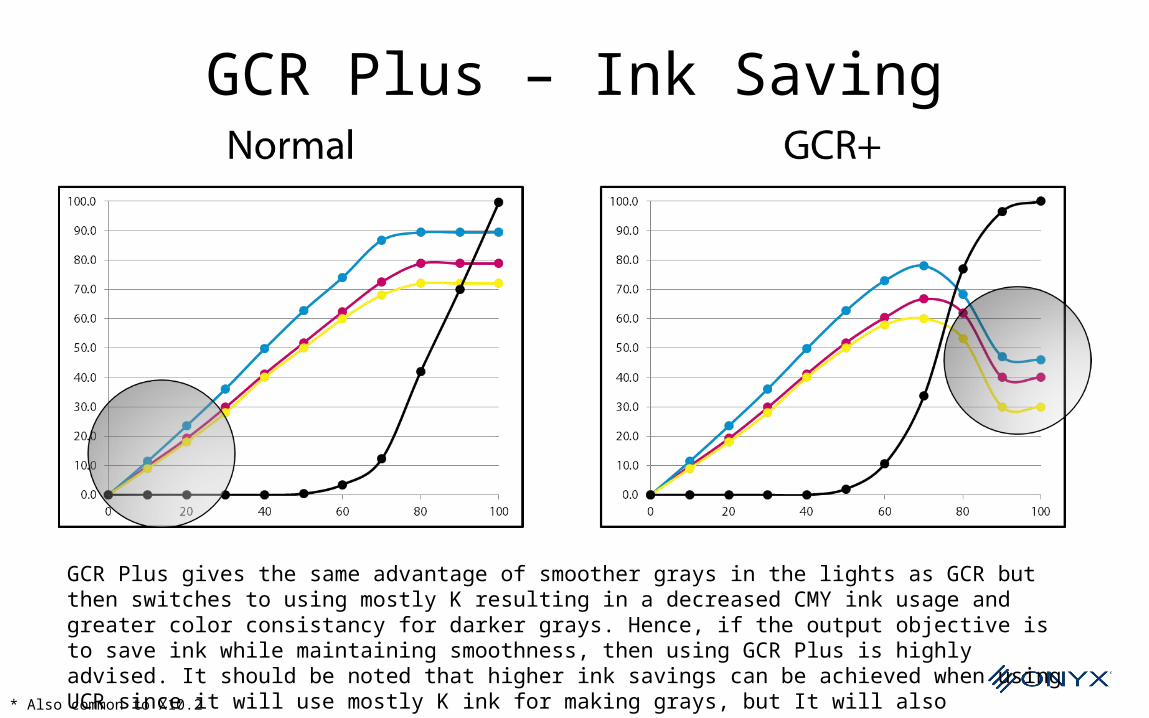
GCR Plus – Ink Saving
GCR Plus gives the same advantage of smoother grays in the lights as GCR but then switches to using mostly K resulting in a decreased CMY ink usage and greater color consistancy for darker grays. Hence, if the output objective is to save ink while maintaining smoothness, then using GCR Plus is highly advised. It should be noted that higher ink savings can be achieved when using UCR since it will use mostly K ink for making grays, but It will also potentially result in grainier output.
* Also common to X10.2
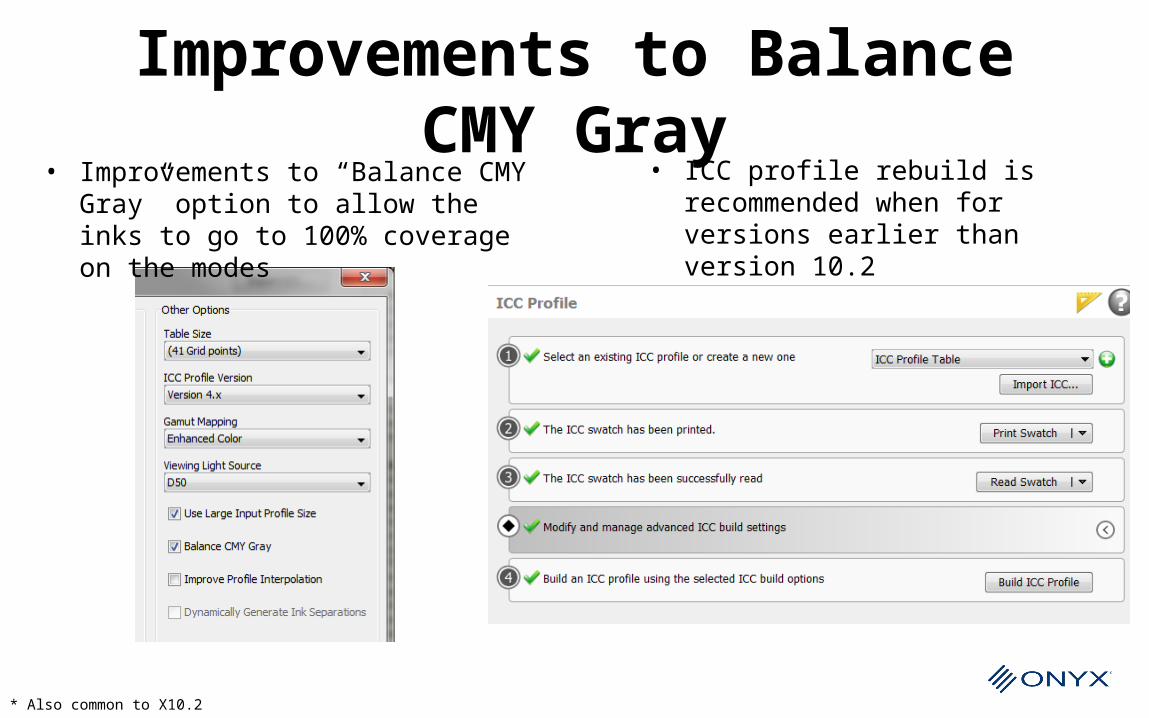
Improvements to Balance CMY Gray
• ICC profile rebuild is recommended when for versions earlier than version 10.2
• Improvements to “Balance CMY Gray” option to allow the inks to go to 100% coverage on the modes
* Also common to X10.2

Improvements to CMYKOG and CMYKRGB separations
ONYX Color Management Module (CMM) along with the ICC profile build engine works natively with HiFi inks such as OG and RGB.
•A HiFi process channel mode allows the user to create an ICC profile for such a mode using a CMYK swatch or a HiFi swatch.
•When a HiFi swatch is used, the ICC is natively using all ink channels including the HiFi channels, to which the highly opmitized ICC engine effectively makes use of the HiFi channels.
•When a CMYK swatch is used to build an ICC profile for a HiFi mode, the ICC profile uses only the CMYK channels. The separation to HiFi channels is done by the CMM.
* Also common to X10.2
Improvements to CMYKOG and CMYKRGB separations
In version 10.2 the results are more consistent and improved HiFi output. These improvements will also be realized when printing without ICC profiles. There are two important things that one should be aware of:
•1. Users of versions before 10.2 of Media Manager must avoid building CMYK ICC profiles for a HiFi mode as it did not give optimum separations. If they must build CMYK ICC profiles then it is highly advised that they upgrade to the latest version. It is also recommended that they not print without ICC profiles with versions before 10.2.
•2. If CMYK ICC profiles were built for HiFi modes in versions before 10.2, it is recommended that those profiles be rebuilt when used with the latest version of the software. If they are imported in the latest version and are not rebuilt, then the output will look different (because the new optimized separations are used) and might not be preferred. To rebuild the ICC profile, the swatch will need to be reprinted and remeasured. If for some reason the user is not able to rebuild such profiles then it is recommended that they contact ONYX support for further assistance.
* Also common to X10.2

Taking advantage of the improvements to the ICC profile engine
• 2 parts to ICC Color Management
– Profile Application : Color Management Module (CMM) – Profile Generation : Profile Generation Engine
Improvements/changes to profile application will apply to all profiles whenever used to process images
Improvements/changes to profile generation will only apply when new profiles are created or previous profiles are rebuilt.
* Also common to X10.2
Before trying to “re-build” an ICC profile for a print mode it is recommended that a backup copy of the print mode is made. (Note: Profiles that have been imported from other ICC profiling packages into Media Manager cannot be re-built using these methods.)
To make a backup copy a print mode: 1. Run Media Manager. 2. Ensure that you are working with the correct printer and then select “View Media Library”. 3. From this view select the Media Group, Media, and mode that you want to copy. 4. Then press the “Make Copy” button on the right. 5. You will be asked to give the mode a new name. (Suggestion: add “Copy” to the name). The mode has now been copied with a new name.
How to Re-build ICC profiles
* Also common to X10.2

How to Re-build ICC profiles To re-build an existing profile: 1.From the “View Media Library” screen, select the Media Group, Media, Mode, “ICC Color Matching Profiles”, and the ICC profile to be re-built. Then press the “Edit…” button on the right. 2.At this point you might be asked to select the appropriate profiling workflow. If this occurs select the correct workflow for the print mode you are working with. 3.The Profiling wizard will then be displayed with the ICC Profile step shown. Since the ICC profile has been previously built the Print Swatch and Read Swatch buttons should be enabled. On the black diamond step, press the Edit button. 4.A dialog titled “Build Options” is then displayed. 5.Make any desired changes in the Build Options dialog, and press OK when you are done. 6.NOTE: This is where you will select the new gamut mapping option “Vivid Color” or the “GCR Plus” achromatic black generation option, as desired. 7.With profile build options in place you can then press the “Build ICC Profile” button to re-build the ICC profile. A Build Profile Progress dialog will then be displayed showing the progress of the profile build. After some time the build will complete and the progress dialog will go away. 8.(Note: For some printers there may be an option to build a named color profile table in the ICC profile step of the profiling wizard. Since the named color table is based upon the ICC profile it is advisable to also re-build the named color table after re-building the ICC profile). 9.The profile re-build is complete, and the stop button (bottom-middle button with a square on it) can be pressed to exit the profiling wizard. A dialog will ask if you want to save the results of the session. Press the “Yes” button.
At this point you can exit Media Manager and use the print mode with the newly re-built profile. Test the output of the profile. If you like the results then you can delete the copy of the print mode using the View Media Library section of Media Manager. If you do not like the results then delete the print mode, and rename the backup copy of the print mode to be the same as the old mode.
* Also common to X10.2
Print and Cut update / Changes
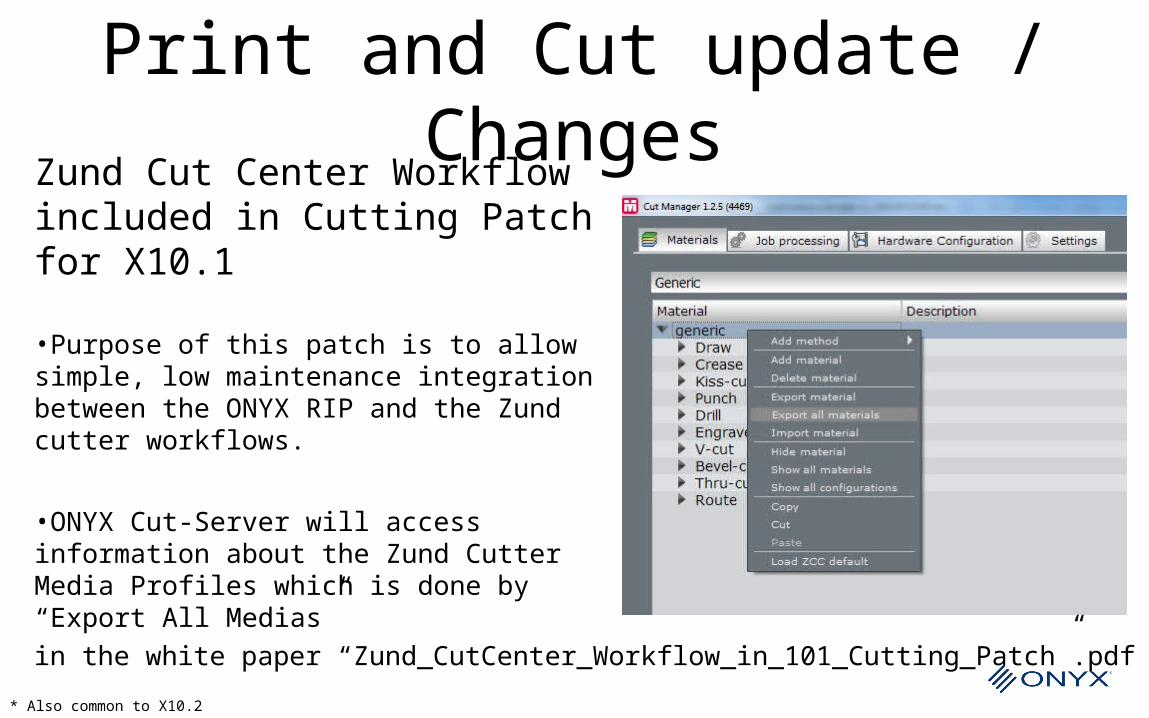
Zund Cut Center Workflow included in Cutting Patch for X10.1
•Purpose of this patch is to allow simple, low maintenance integration between the ONYX RIP and the Zund cutter workflows.
•ONYX Cut-Server will access information about the Zund Cutter Media Profiles which is done by “Export All Medias”
Further configuration steps can be referencedin the white paper “Zund_CutCenter_Workflow_in_101_Cutting_Patch”.pdf
* Also common to X10.2
Print and Cut update / Changes
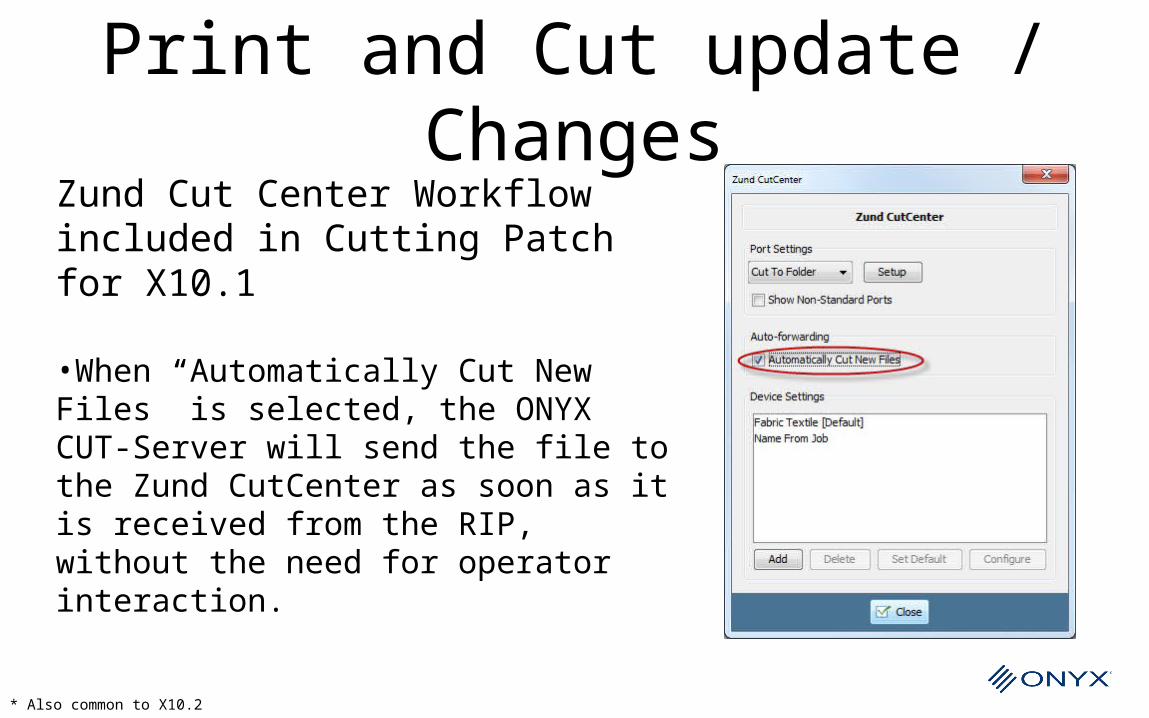
Zund Cut Center Workflow included in Cutting Patch for X10.1
•When “Automatically Cut New Files” is selected, the ONYX CUT-Server will send the file to the Zund CutCenter as soon as it is received from the RIP, without the need for operator interaction.
* Also common to X10.2
Print and Cut update / Changes
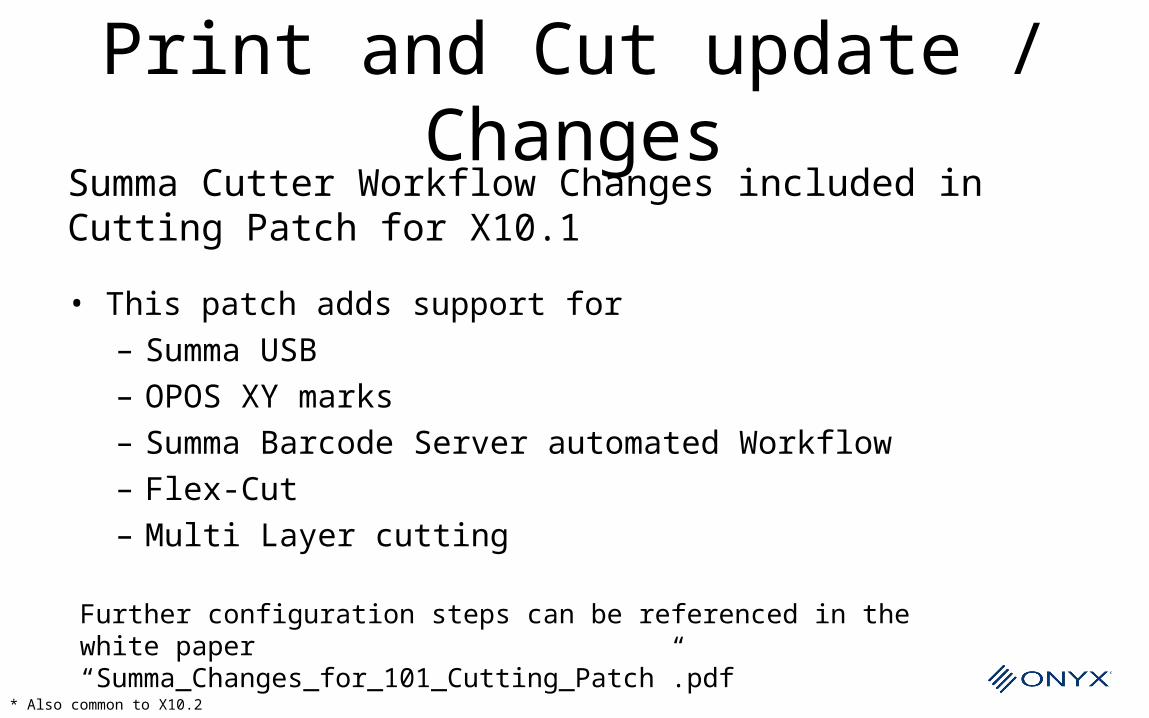
Summa Cutter Workflow Changes included in Cutting Patch for X10.1
• This patch adds support for – Summa USB – OPOS XY marks– Summa Barcode Server automated Workflow– Flex-Cut– Multi Layer cutting
Further configuration steps can be referenced in the white paper “Summa_Changes_for_101_Cutting_Patch”.pdf
* Also common to X10.2
Print and Cut update / Changes
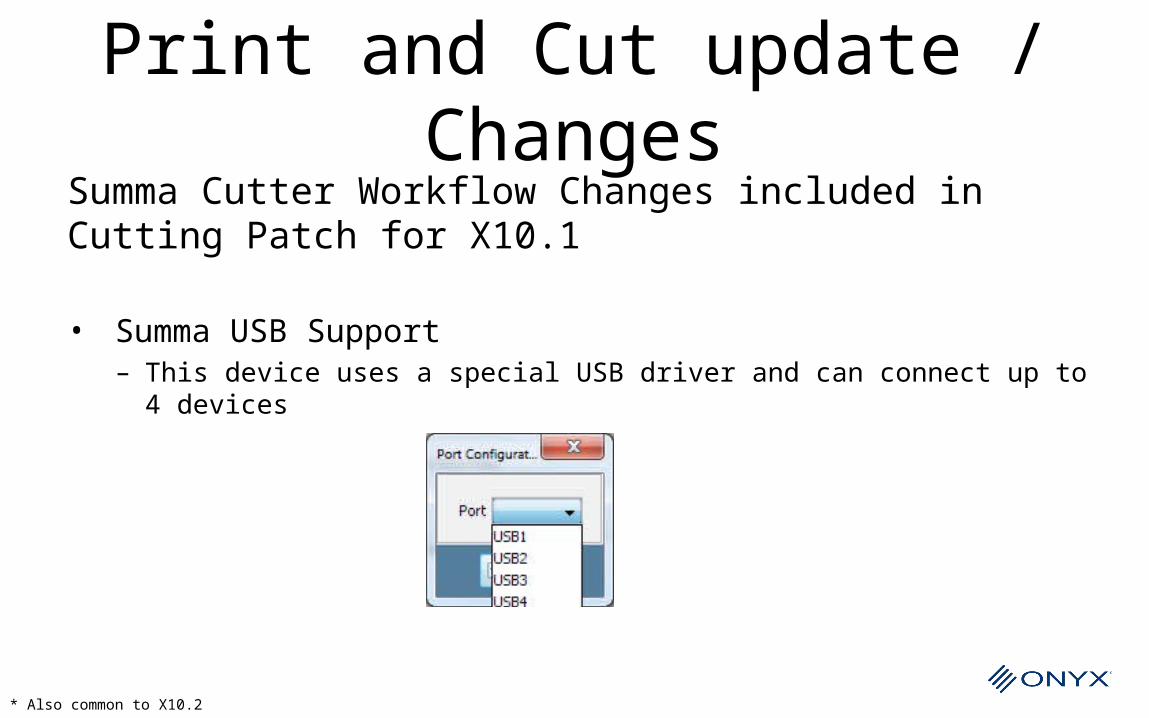
Summa Cutter Workflow Changes included in Cutting Patch for X10.1
• Summa USB Support– This device uses a special USB driver and can connect up to 4 devices
* Also common to X10.2
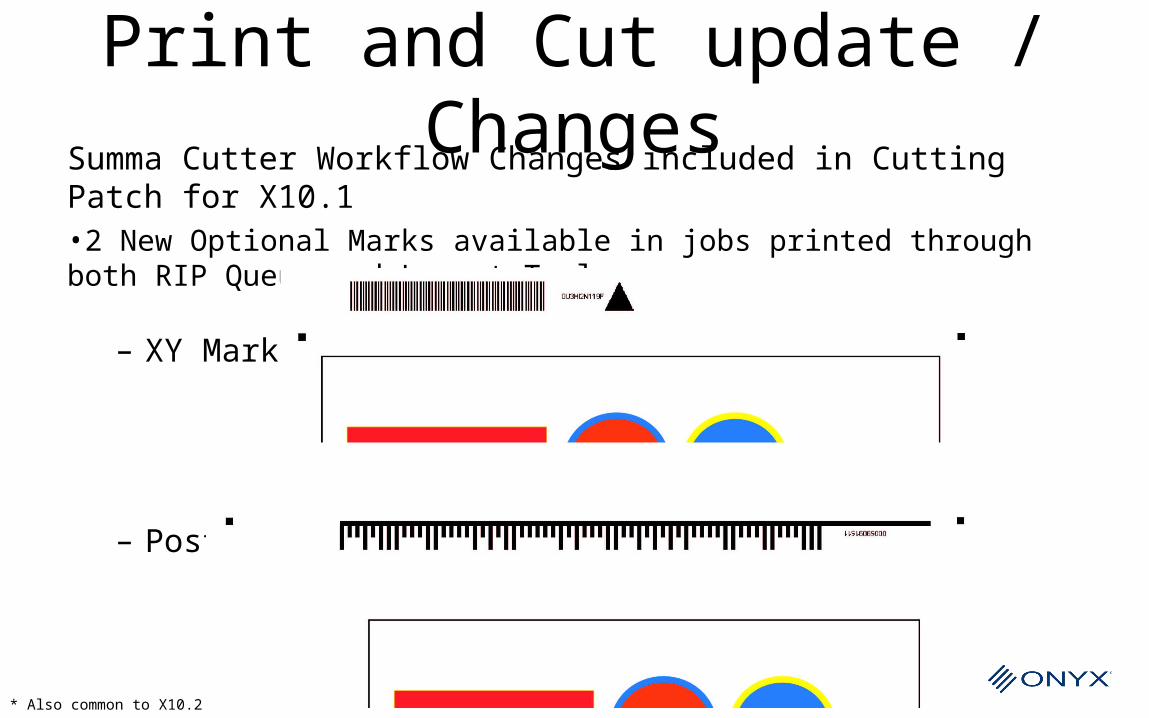
Print and Cut update / ChangesSumma Cutter Workflow Changes included in Cutting Patch for
X10.1•2 New Optional Marks available in jobs printed through both RIP Queue and Layout Tool
– XY Mark
– Postnet Barcode for Automatic Cutting
* Also common to X10.2
Print and Cut update / Changes
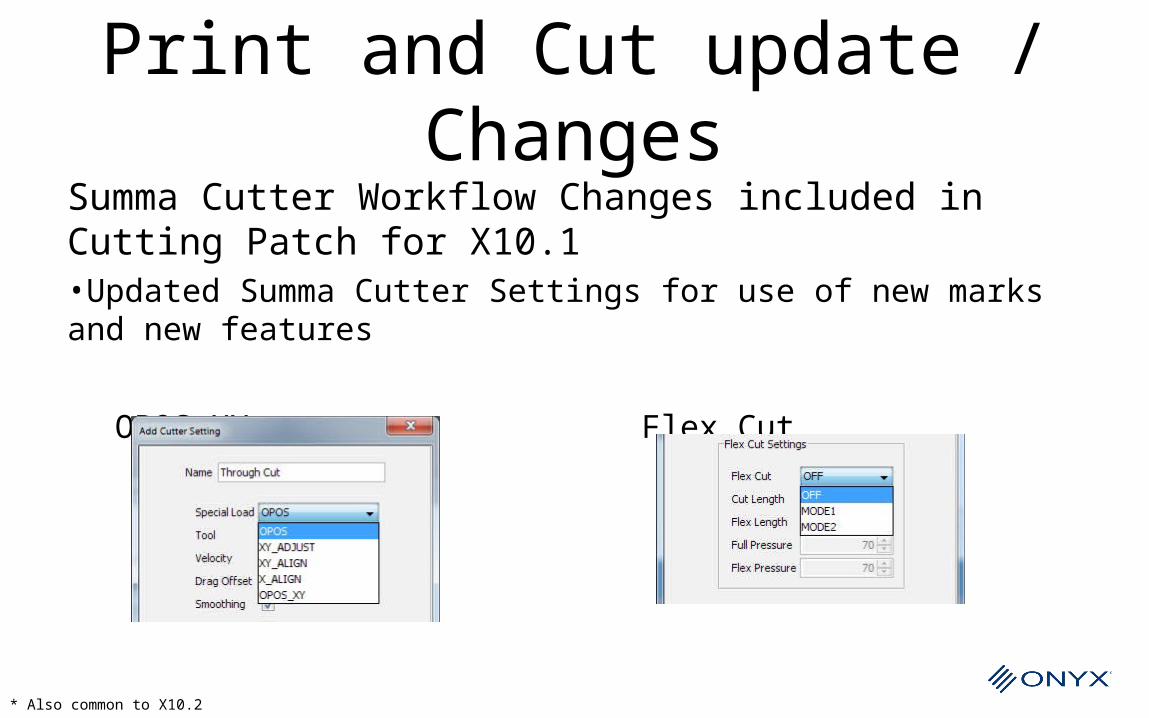
Summa Cutter Workflow Changes included in Cutting Patch for X10.1•Updated Summa Cutter Settings for use of new marks and new features
OPOS XY Flex Cut
* Also common to X10.2
Print and Cut update / Changes
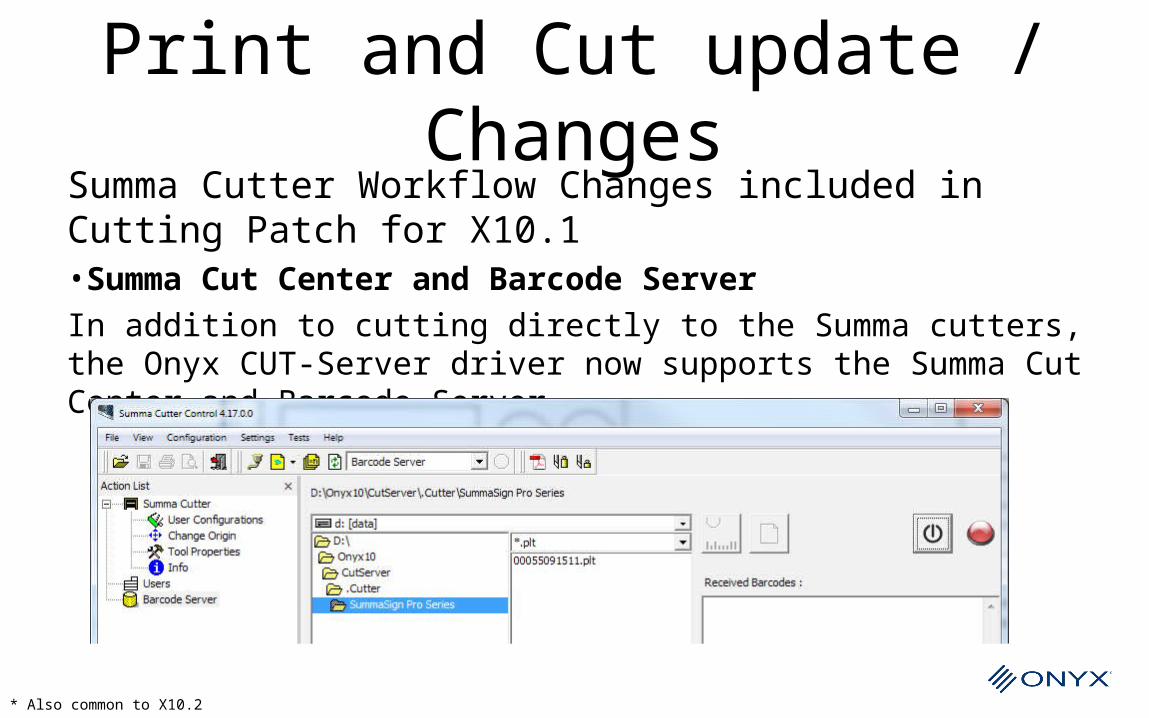
Summa Cutter Workflow Changes included in Cutting Patch for X10.1•Summa Cut Center and Barcode Server In addition to cutting directly to the Summa cutters, the Onyx CUT-Server driver now supports the Summa Cut Center and Barcode Server.
* Also common to X10.2
Print and Cut update / Changes
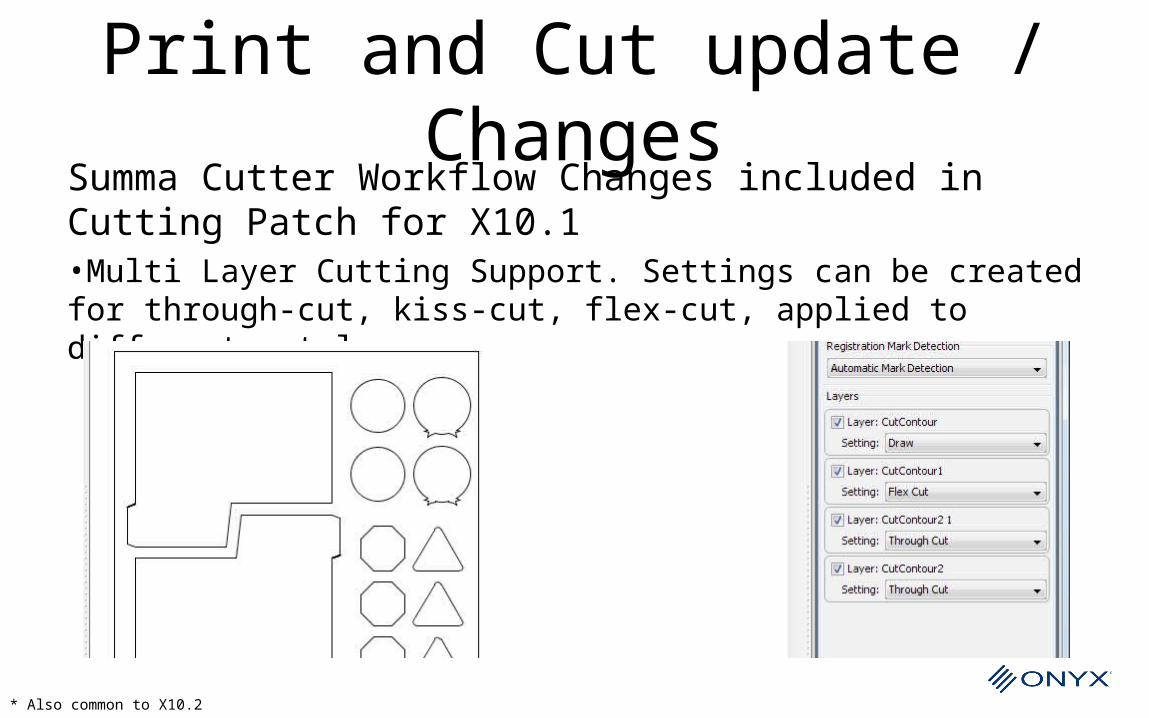
Summa Cutter Workflow Changes included in Cutting Patch for X10.1•Multi Layer Cutting Support. Settings can be created for through-cut, kiss-cut, flex-cut, applied to different cut layers
* Also common to X10.2
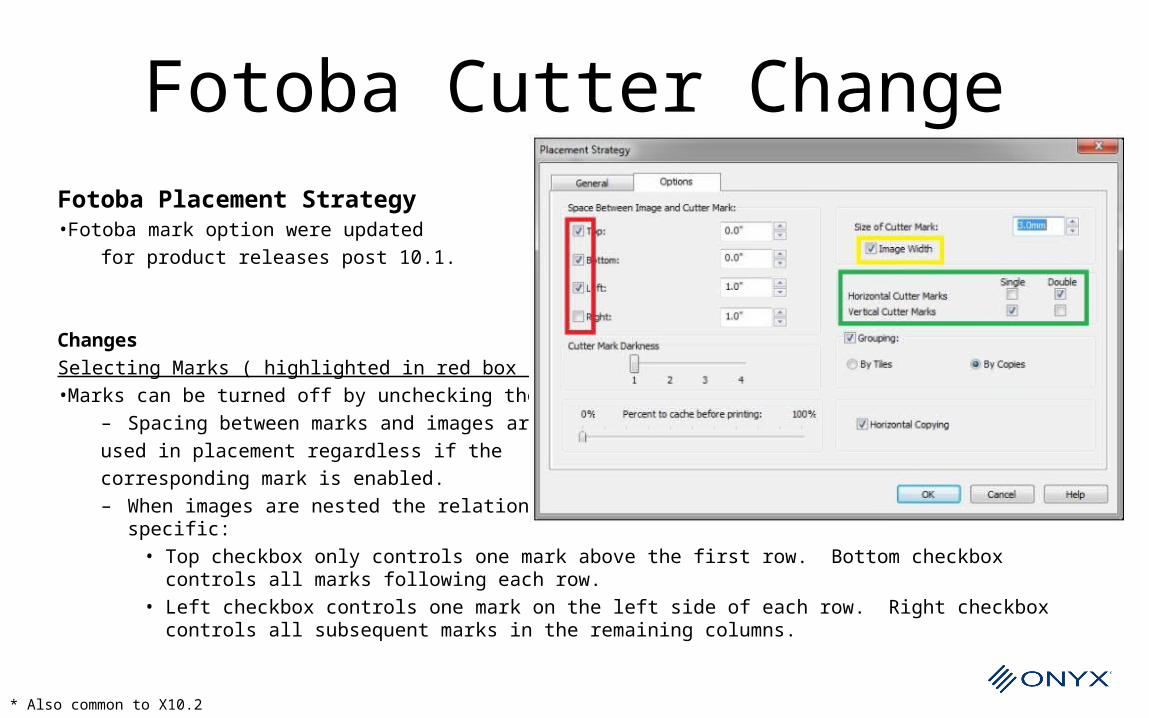
Fotoba Cutter ChangeFotoba Placement Strategy•Fotoba mark option were updated
for product releases post 10.1.
ChangesSelecting Marks ( highlighted in red box ): •Marks can be turned off by unchecking the box.
– Spacing between marks and images are used in placement regardless if the corresponding mark is enabled.– When images are nested the relationship between Top & Bottom, Left & Right is specific:
• Top checkbox only controls one mark above the first row. Bottom checkbox controls all marks following each row.
• Left checkbox controls one mark on the left side of each row. Right checkbox controls all subsequent marks in the remaining columns.
* Also common to X10.2
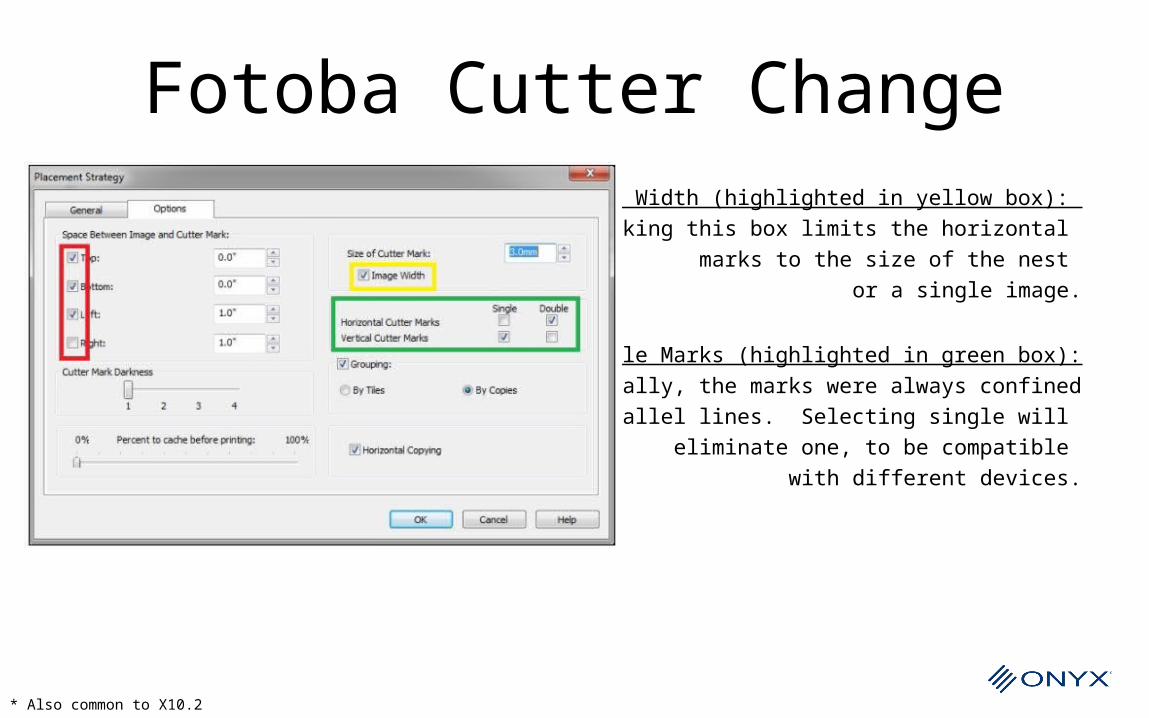
Fotoba Cutter Change Image Width (highlighted in yellow box):
•Checking this box limits the horizontal marks to the size of the nest
or a single image.
Double or Single Marks (highlighted in green box):• Historically, the marks were always confined
to two parallel lines. Selecting single will eliminate one, to be compatible
with different devices.
* Also common to X10.2
Technical Notes: Known Issues
• From Job Editor, submit jobs as separate tiles and make copy of image causes the individual jobs to be deleted in the RIP-Queue
• Immediate work around is to uncheck make copy of image from related Quicksets• This is currently scheduled to be fixed in the next update
• Unable to complete installation correctly if the system temp dir. has been moved• Install looks like it completed ok but there are no registry entries, shortcuts etc. even though
the install dir. and files are present
• From Media Manager - Barbieri SpectroPad: Measurement Condition isn’t getting passed to the device (only an issue if you change your condition then try to re-read without reprinting)
• The Zund CutCenter workflow generates a phantom or empty registration layer that prevents automation if you use the pdf trimbox or generate tile outline in RIP-Queue. You have to manually remove the registration layer

Thank You.