
of the OPERA - Bolder Soundsboldersounds.net/media/The Juilliard Harmonium Manual.pdfPresents...
17
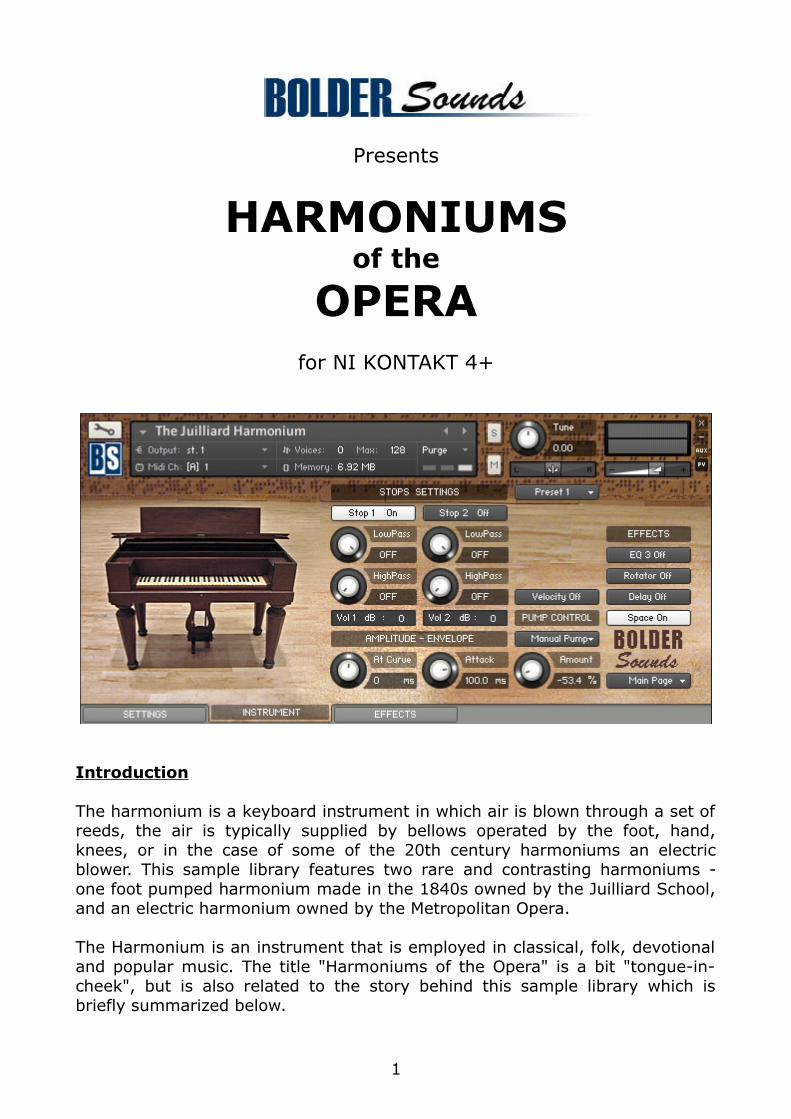
Presents HARMONIUMS of the OPERA for NI KONTAKT 4+ Introduction The harmonium is a keyboard instrument in which air is blown through a set of reeds, the air is typically supplied by bellows operated by the foot, hand, knees, or in the case of some of the 20th century harmoniums an electric blower. This sample library features two rare and contrasting harmoniums - one foot pumped harmonium made in the 1840s owned by the Juilliard School, and an electric harmonium owned by the Metropolitan Opera. The Harmonium is an instrument that is employed in classical, folk, devotional and popular music. The title "Harmoniums of the Opera" is a bit "tongue-in- cheek", but is also related to the story behind this sample library which is briefly summarized below. 1
Transcript of of the OPERA - Bolder Soundsboldersounds.net/media/The Juilliard Harmonium Manual.pdfPresents...
Presents
HARMONIUMSof the
OPERAfor NI KONTAKT 4+
Introduction
The harmonium is a keyboard instrument in which air is blown through a set of reeds, the air is typically supplied by bellows operated by the foot, hand, knees, or in the case of some of the 20th century harmoniums an electric blower. This sample library features two rare and contrasting harmoniums - one foot pumped harmonium made in the 1840s owned by the Juilliard School, and an electric harmonium owned by the Metropolitan Opera.
The Harmonium is an instrument that is employed in classical, folk, devotional and popular music. The title "Harmoniums of the Opera" is a bit "tongue-in-cheek", but is also related to the story behind this sample library which is briefly summarized below.
1

Background on this Sample Library
A sample library of a Bharat 3-1/2 octave harmonium was added to the Bolder Sounds catalogue in July of 2009. To my surprise, it has been one of the most popular libraries we offer. A number of well known organizations and high profile musicians have been using it.
In January of 2010 I received a call from Rob Gorton - chief sound engineer from the Sound Department at the Metropolitan Opera in New York City. The MET had just purchased a copy of the Bharat harmonium for use in the Richard Strauss opera Ariadne. The MET needed the range of the sampled harmonium extended to accommodate the score, also a KONTAKT programming error needed to be corrected (which very inconveniently played the wrong pitch during a rehearsal). Rob told me the MET owned an old German electric 5 octave harmonium which was no longer suitable for live performance. It's notes were very soft and the blower which sent the air over the reeds was very loud (not an ideal combination). Also there was approximately a .5 second delay from the key being pressed until the note was actually heard. We discussed the possibility of myself coming to NYC sometime in the future and creating a virtual restoration/recreation of this instrument.
In July of 2010 I received a call from Christopher Ruigomez - (Director of Concert Operations Boston Symphony Orchestra) from Tanglewood about the possibility of doing a quick sampling of the BSO's historic harmonium for a performance by the Boston Lyric Opera. Due to complications and time constraints that was not possible. Chris later referred me to Joanna Treblehorn (Director of Orchestral and Ensemble Operations) at the Juilliard School in NYC, where I had heard they owned one of the best sounding harmoniums on the east coast - and indeed, it was a beautiful sounding instrument that was recently restored. I was generously permitted to record it.
The sampling sessions of these two instruments took place on June 10th of 2011 at the Metropolitan Opera and on June 13th at the Juilliard School at Lincoln Center in New York City.
==============================================
Index
About the Juilliard Harmonium 3General Stuff 6The Instrument Panel 7The Settings Panel 10The Effects Panel 12
The EQ Page 13The Modulation Page 13The Delay Page 15The Space/Reverb Page 16
License Agreement 17
2

The Juilliard Harmonium
The Juilliard harmonium was made in the 1840s. It is a foot pumped instrument and the bellows are the original leather. It is a five octave instrument with one stop only (in the KONTAKT version we have created an artificial octave couplet). It has a wonderful organic breathing accordion-like quality. This harmonium has 2 pedals - one to pump the bellows and a second pedal that acts as a breath pedal which allows you to pull the bellows apart without making an audible musical note (similar to accordions). In the sampling of the Juilliard instrument it was not necessary to use the breath pedal.
I sampled all of the keys chromatically. First I recorded long notes with a continuous up and down pedal stroke. Then I recorded just one long downward pedal stroke. By the end of the 6 hour sampling session, I had to use both my arms to move my leg up and down in order to pump this instrument - it was
3

quite a workout!
The samples that were finally used in this library were the one long downward pedal stroke samples. Only a small section of those samples were used as the final .wav files. This is why the Juilliard harmonium is quite compact. Some might consider it to be small by today's sampling standards. I will explain the reason for these smaller sized samples below. However, I am very confident that when you begin playing this sampled harmonium you will forget entirely that it is just 20 MB in size. Size does not necessarily reflect quality- it is an extremely expressive harmonium sample. And the KSP scripting by Bo Clausen will give you a great deal of sonic flexibility.
When pumping the harmonium, there is a natural volume swell and decay. But even more important, there is a swell and decay in the EQ characteristics which gives the player control over the "rhythmic breathing" quality that makes the instrument sound so human.
My intention with the long downward stroke pedal samples was to get a very even sound for as long as possible, and to make fairly sizable samples with loops- perhaps 5 or 6 seconds in length. However, this was not the result. There was always a tonal change from dark to bright which took place within a minimum of 3 to 4 seconds and on higher notes even more quickly. If I chose to use the long samples with the tonal (EQ) present, then the user would really have no way of controlling the speed at which those tonal/volume changes occur. Also, since samples are triggered at different points in time, there would be no way to synchronize the breathing tonal effect. When playing a virtual instrument, control is the key to expressiveness.
As you can see in the above waveform, the loop is placed where the volume is at a fairly even peak and the EQ spectrum is at its brightest as well.
The solution was simply to find a stable part of the waveform which had a bright character and to use only that portion. The brighter portion of the waveform was chosen because most listeners find subtractive EQ more pleasing than additive EQ. By programming various control parameters within KONTAKT, we emulated the breathing effect with the use of LFOs, amplitude and filter modulation. Also the subtle use of an LFO is employed to give the samples a bit of motion to keep the sound from being too static.
4

5
General StuffKONTAKT Compatibility:
This library requires NI KONTAKT version 4.2.4 or higher, and has been tested for compatibility in KONTAKT 5. This library is NOT compatible with the KONTAKT 4 or 5 sample PLAYER, only the full retail KONTAKT SAMPLER. It will only run in demo mode for 30 minutes on the KONTAKT PLAYER.
Hover Over Mouse Help:
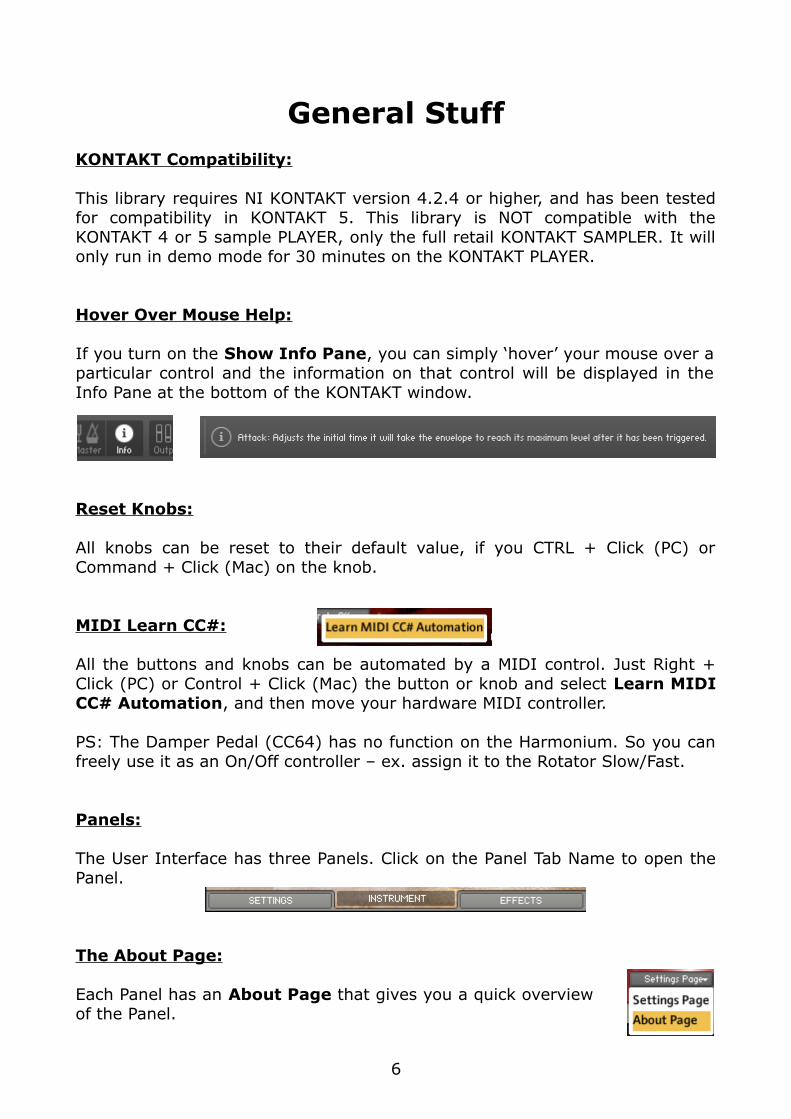
If you turn on the Show Info Pane, you can simply ‘hover’ your mouse over a particular control and the information on that control will be displayed in the Info Pane at the bottom of the KONTAKT window.
Reset Knobs:
All knobs can be reset to their default value, if you CTRL + Click (PC) or Command + Click (Mac) on the knob.
MIDI Learn CC#:
All the buttons and knobs can be automated by a MIDI control. Just Right + Click (PC) or Control + Click (Mac) the button or knob and select Learn MIDI CC# Automation, and then move your hardware MIDI controller.
PS: The Damper Pedal (CC64) has no function on the Harmonium. So you can freely use it as an On/Off controller – ex. assign it to the Rotator Slow/Fast.
Panels:
The User Interface has three Panels. Click on the Panel Tab Name to open the Panel.
The About Page:
Each Panel has an About Page that gives you a quick overview of the Panel.
6

The Instrument Panel
On the Instrument Panel you can select, adjust and combine the two Stops. The Stop settings can be saved as Presets, and these Presets can then be recalled by Key-Switches. Here you also control the Attack Amplitude Envelope, and turn the Velocity response On/Off. You can select how the Pump effect is controlled - either Auto or Manual pumping. And you have access to all the Effect On/Off buttons from the Effect Panel.
The Stops Settings:
The Stop buttons can be turned On/Off either by:
1. Mouse clicking on the Stop buttons in the User-Interface.2. Using Key-Switches (the KS can be freely set up on the Setting Panel).3. MIDI CC# (right click the Stop button, and MIDI Learn the CC#).
You need to have at least one Stop selected. If only one Stop is selected, then it's not possible to turn it off.
The LowPass knobs sets the frequency above which signals are attenuated.
The HighPass knobs sets the frequency below which signals are attenuated.
The Volume values adjusts the volume of the Stops, ( from - 24 db to 12 db ).
7

The Stop Presets:
The Stop Settings can be Saved as Stop Presets. You can Save and Recall up to eight Stop Presets. The eight Presets can also be Recalled by Key-Switches.
To Save a Preset, first edit the Stop Settings as you like, and then select the Save as Preset # in the Preset Menu.
To Recall/Select a Preset, open the Preset Menu and select the Preset #.
All eight Presets can also be Stored and Loaded as an external independent file to your Hard Disc.
To Store the eight Presets, select the Store All Presets in the Preset Menu. A save dialog box opens, pointing to the default Data folder inside the main Instrument folder.For better organization, give the file a name that refers to the Preset type – ex. “Stops - my presets”. (The file can be saved to anywhere you like).
To Load the eight Presets, select the Load All Presets in the Preset Menu. A open dialog box opens, pointing to the default Data folder.
The Reset All Knobs sets all the knobs to their default setting.
The Attack:
The At Curve knob adjusts the curve shape of the attack phase. A value of zero results in a linear curve, negative values make the shape more concave, and positive values make it more convex.
The Attack knob adjusts the initial time it will take the envelope to reach its maximum level after it has been triggered.
The Velocity:
The Velocity button turns the velocity On/Off. The velocity response can be adjusted on the Settings Panel.
8
The Pump Control:
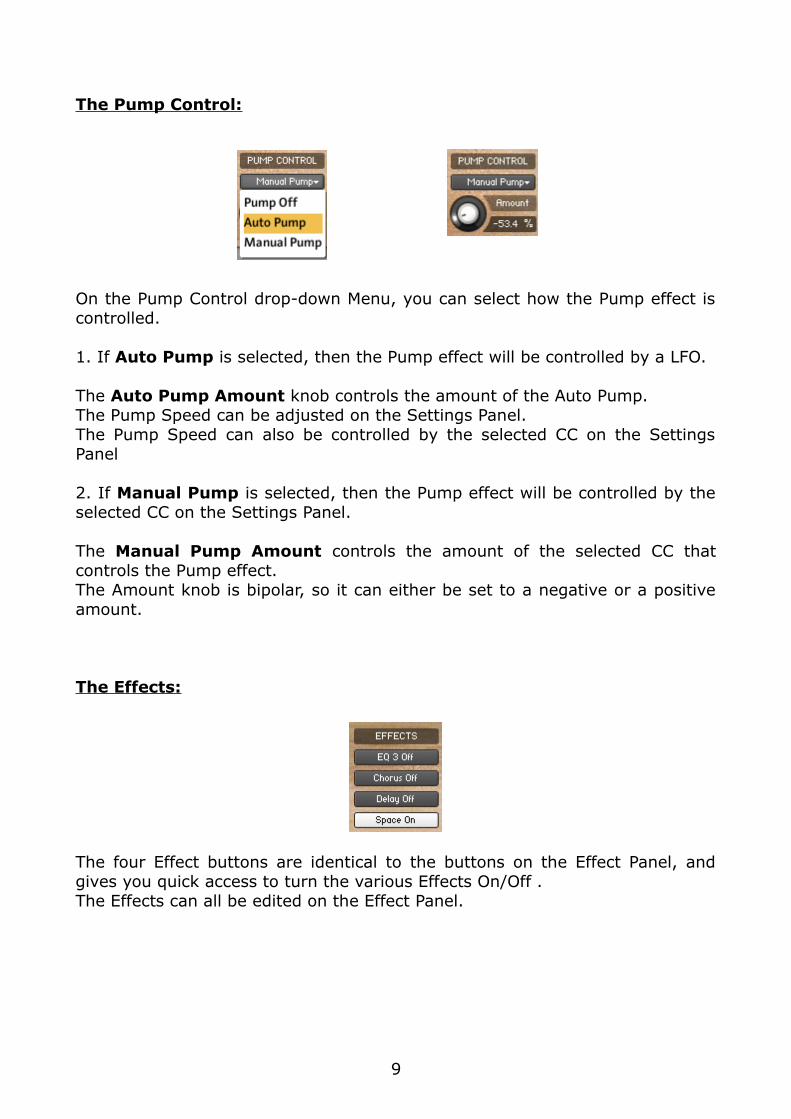
On the Pump Control drop-down Menu, you can select how the Pump effect is controlled.
1. If Auto Pump is selected, then the Pump effect will be controlled by a LFO.
The Auto Pump Amount knob controls the amount of the Auto Pump.The Pump Speed can be adjusted on the Settings Panel.The Pump Speed can also be controlled by the selected CC on the Settings Panel
2. If Manual Pump is selected, then the Pump effect will be controlled by the selected CC on the Settings Panel.
The Manual Pump Amount controls the amount of the selected CC that controls the Pump effect.The Amount knob is bipolar, so it can either be set to a negative or a positive amount.
The Effects:
The four Effect buttons are identical to the buttons on the Effect Panel, and gives you quick access to turn the various Effects On/Off .The Effects can all be edited on the Effect Panel.
9

The Settings Panel
On the Settings Panel, you set the keys that will act as Key-Switches for the eight saved Stop Presets. You can control the Keyboards Perspective, Spread and Velocity. And also adjust the Stereo Field of the instrument, and control the Amount of the Global Volume. The CC# that will control the Auto Pump and the Manual Pump can be selected. Finally you can set the Speed Base of the Auto Pump.
The Key-Switches:
You have eight freely assignable Key-Switches. The Key-Switches can be assigned to the eight saved Stop Presets on the Instrument Panel. The Key-Switches can be assigned to any key outside the instrument range.
To assign a Key-Switch, do this:
1. Activate the Learn button for the Stop/Vibrato.
2. Then play the Key that you would like to be the Key-Switch for the Stop/Vibrato. You can either play your connected MIDI keyboard, or click on the virtual keyboard in KONTAKT.
The Preset Label now shows the new note name of the Key-Switch, and the color code on the virtual keyboard updates to the selected key.
The color code for the Key-Switches are green.
10

The Keyboard:
The Perspective button switches between a Public or a Player keyboard layout/perspective.
The Spread knob controls how much each note is panned/spread out across the keyboard.
The Velocity knob adjust the Velocity response of the keyboard (if Velocity is selected as Volume Control on the Instrument Panel).
The Stereo Field:
The Width knob Sets the Width of the Stereo Field. Negative values close it in, and at full counter clockwise the signal becomes mono. Positive values push the Stereo spread outward.
The Pan knob adjust the panning of the Stereo Field.
The Global Volume:
As it says – controls the Global Volume of the instrument.
The Select Speed CC# :
The Speed CC# knob select the CC# that will control the Speed of the Auto Pump (if Auto Pump is selected on the Instrument Panel).
The Select Pump CC# :
The Pump CC# knob select the CC# that will control the Manual Pump (if Manual Pump is selected on the Instrument Panel).
The Speed Base:
The Speed knob adjusts the fundamental/base speed of the Auto Pump effect (if Auto Pump is selected on the Instrument Panel).
11
The Effects Panel
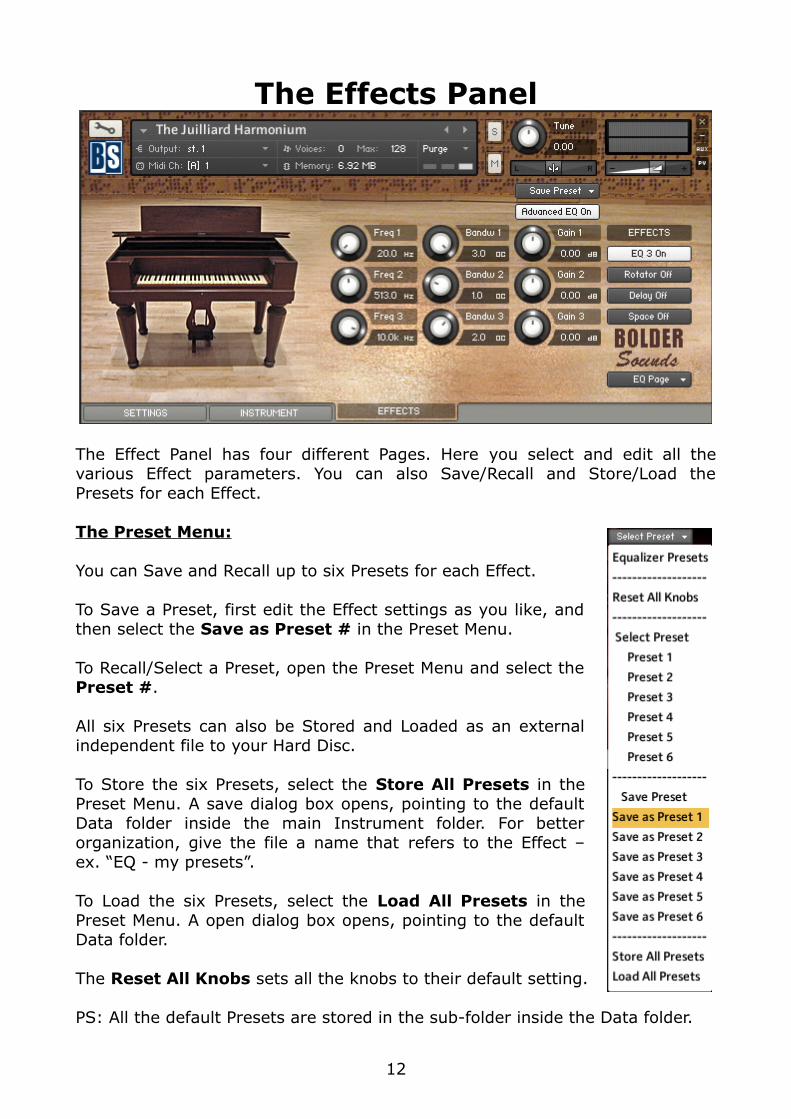
The Effect Panel has four different Pages. Here you select and edit all the various Effect parameters. You can also Save/Recall and Store/Load the Presets for each Effect.
The Preset Menu:
You can Save and Recall up to six Presets for each Effect.
To Save a Preset, first edit the Effect settings as you like, and then select the Save as Preset # in the Preset Menu.
To Recall/Select a Preset, open the Preset Menu and select the Preset #.
All six Presets can also be Stored and Loaded as an external independent file to your Hard Disc.
To Store the six Presets, select the Store All Presets in the Preset Menu. A save dialog box opens, pointing to the default Data folder inside the main Instrument folder. For better organization, give the file a name that refers to the Effect – ex. “EQ - my presets”.
To Load the six Presets, select the Load All Presets in the Preset Menu. A open dialog box opens, pointing to the default Data folder.
The Reset All Knobs sets all the knobs to their default setting.
PS: All the default Presets are stored in the sub-folder inside the Data folder.
12

The Effects On/Off and the Pages:
The four Effect buttons turn the various Effects On and Off, and opens the corresponding Page.You can also navigate between the different Effect Pages, using the Page Menu.
The EQ Page:
The EQ can either be a simple Bass/Middle/Treble Equalizer, with predefined Frequency and Bandwidth.Or an Advanced 3-Band Parametric Equalizer.
The Freq. knob chooses the frequency at which boosting or cutting will appear.
The Bandw. knob sets the width of the frequency band in octaves to be boosted or cut.
The Gain knob controls the amount of boost at positive values, or the amount of cut at negative values.
The Modulation Page:
On the Modulation Page, you can choose between four different modulation types.
Chorus:
The Depth knob sets the amount of LFO modulation applied to a signal. Higher amounts result in a stronger effect.
The Speed knob sets the speed of the LFO modulating the signal.
The Phase knob adjusts the phase difference between the two LFOs that drive the left and right stereo channels.
The Amount knob sets the amount of processed signal sent to the main output.
13

Flanger:
The Depth knob sets the amount of LFO modulation applied to a signal. Higher amounts result in a stronger effect.
The Speed knob sets the speed of the LFO modulating the signal.
The Phase knob adjusts the phase difference between the two LFOs that drive the left and right stereo channels.
The Color knob adjusts the range of the flanging effect. Lower values sweep the effect toward the higher end of the flanging range, while larger values sweep the effect toward the lower end.
The Feedback knob routes the processed signal back to the Module's input. Higher values create a sharper, more intense effect.
Phaser:
The Depth knob sets the amount of LFO modulation applied to a signal. Higher amounts result in a stronger effect.
The Speed knob sets the speed of the LFO modulating the signal.
The Phase knob adjusts the phase difference between the two LFOs that drive the left and right stereo channels.
The Feedback knob routes the processed signal back to the Module's input. Higher values create a sharper, more intense effect.
Rotator:
The Acceleration High/Low knobs adjusts how quickly the rotors of the treble/bass parts of the cabinets will react to speed changes. At the right-most position, the speaker will change it's speed instantly.
The Balance knob sets the ratio of the sound produced by the rotating speakers high frequency horn compared to the low frequency woofer. Higher values produce more highs, lower values more bass.
14
The Distance knob edits the distance between the virtual microphones and the rotating speaker. Higher values increase the distance.
The Wet Mix knob controls the effects strength. Turn fully clockwise to hear the rotating speakers only.
The Output knob sets the rotators overall output level.
The Speed button switches the speed of the rotator speaker. Choose between slow and fast.
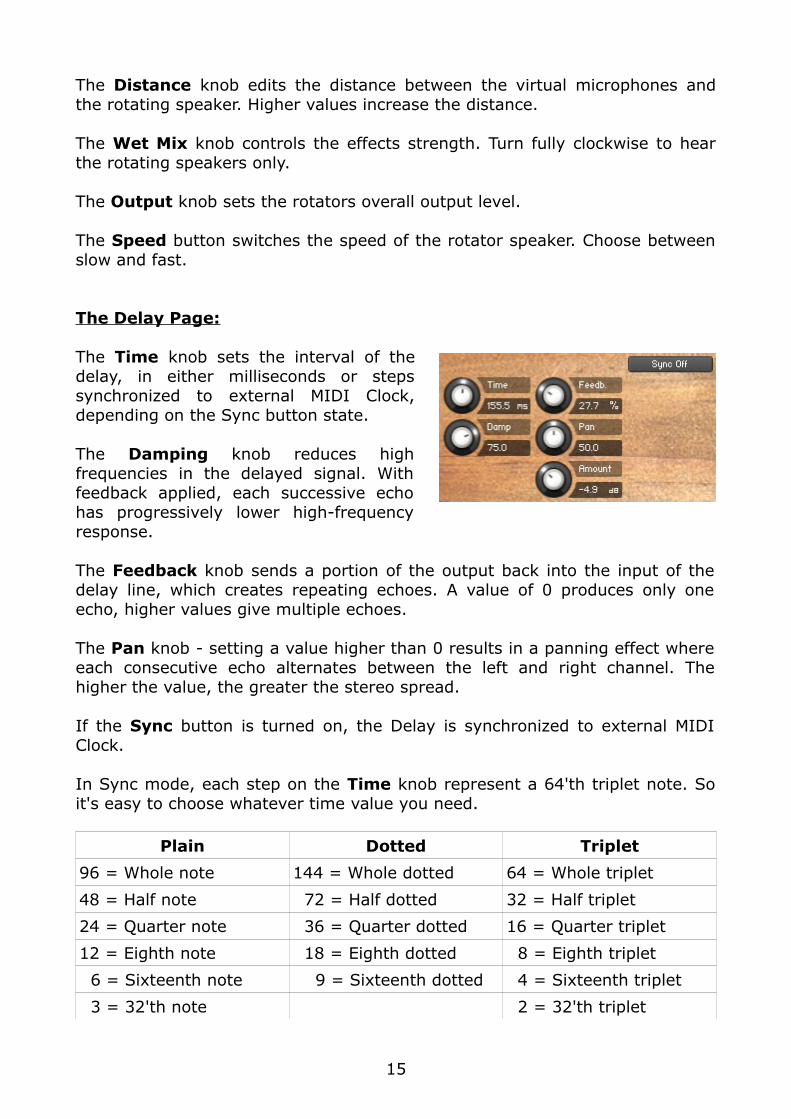
The Delay Page:
The Time knob sets the interval of the delay, in either milliseconds or steps synchronized to external MIDI Clock, depending on the Sync button state.
The Damping knob reduces high frequencies in the delayed signal. With feedback applied, each successive echo has progressively lower high-frequency response.
The Feedback knob sends a portion of the output back into the input of the delay line, which creates repeating echoes. A value of 0 produces only one echo, higher values give multiple echoes.
The Pan knob - setting a value higher than 0 results in a panning effect where each consecutive echo alternates between the left and right channel. The higher the value, the greater the stereo spread.
If the Sync button is turned on, the Delay is synchronized to external MIDI Clock.
In Sync mode, each step on the Time knob represent a 64'th triplet note. So it's easy to choose whatever time value you need.
Plain Dotted Triplet
96 = Whole note 144 = Whole dotted 64 = Whole triplet
48 = Half note 72 = Half dotted 32 = Half triplet
24 = Quarter note 36 = Quarter dotted 16 = Quarter triplet
12 = Eighth note 18 = Eighth dotted 8 = Eighth triplet
6 = Sixteenth note 9 = Sixteenth dotted 4 = Sixteenth triplet
3 = 32'th note 2 = 32'th triplet
15

The Space/Reverb Page:
On the Space/Reverb Page you can choose between two different reverb types – Space (convolution reverb) and Reverb (algorithmic reverb). The Reverb uses less CPU than the Space.
Space:
With the Select Space Menu, you can choose between eighteen different Impulse Responses, that can be loaded into the convolution plugin. The eighteen Impulses are divided into six different categories.
With the Space Size Menu, you can choose between five different sizes of the selected Impulse Response.
The Amount knob sets the amount of processed signal sent to the main output.
Reverb:
The Predelay knob introduces a short amount of delay before the reverb takes effect. Increase this parameter to simulate larger rooms, decrease it for smaller rooms.
The Size knob determines the room size by setting the length of the effect. Higher values simulate larger rooms, lower values smaller rooms.
The Color knob determines the type of material used to construct the room. Lower values are softer surfaces, higher values are harder surfaces.
The Damping knob sets the amount of absorption in the room. Higher values simulate more absorption.
The Stereo knob - higher values increase the stereo effect. Use lower values to simulate sitting closer to the stage, and higher values for sitting further back in the hall.
The Amount knob sets the amount of processed signal sent to the main output.
16

Our sincere appreciation to the following people for their help on this project-
Rob Gorton at the Metropolitan Opera / Joanna Treblehorn at the Juilliard School / Christopher Ruigomez at the Boston Symphony Orchestra
==============================================Script and Preset by Bo Clausen.
Enjoy The Juilliard Harmonium library!
Dennis Burns - Bolder Sounds - February 2012==============================================
Customer SupportFor any questions, technical issues inquiries etc .... Please contact Bolder
Sounds via email at [email protected].
==============================================
LICENSE AGREEMENT (EULA)
You have purchased a single-user license use these samples to be used in any type of music production, i.e. making demos, records, remixes, commercials, jingles, post productions, commissioned pieces, sound tracks for film, theater, musicals, live performances, computer games or multimedia. Samples may not be utilized or resold in the form of Sample Library Music or Sample-related endeavors (e.g. “Joe’s Sample Collection” which contains our products). Written permission from Bolder Sounds is required. You CAN NOT trade, re-sell, lend, rent, copy, duplicate, upload or download to any database, BBS, or Server any of our sounds because Bolder Sounds owns the rights to the samples and programs, Bolder is licensing these to a single user for music production. Use of these samples MAY NOT be utilized in separate commercial applications such as the Apple ipad or the Android etc.. without written consent from Bolder Sounds.
Installation of this library constitutes full acceptance of these terms.
* On a personal note ......... Please think twice before making a copy of this library for a friend or anyone else. All the legal mumbo jumbo in the world is not going to stop piracy of libraries such as this. Many hours of work have gone into this library, I have also gone to great lengths to make this disc as affordable as I can so that this disc is NOT pirated. As always.......... please put yourself in our shoes before making a decision whether to copy this data for purposes of piracy or not.
Thank You for your consideration! Dennis Burns – boldersounds.com
Creative Sample Libraries Since 1992
17


![Kritaanjli: A Robotic Harmonium for Performance, Pedogogy and … · 2012-06-19 · Kritaanjli: A Robotic Harmonium for Performance, Pedogogy and Research Ajay Kapur 1,2 [1] California](https://static.fdocuments.us/doc/165x107/5e2c0b245dc12f0ec25673c4/kritaanjli-a-robotic-harmonium-for-performance-pedogogy-and-2012-06-19-kritaanjli.jpg)


