ODK Scan - Setup and Technical Guide
53
Objectives • Understand the basic functions of the Android device • Gain familiarity with installing the required applications onto the device • Know the appropriate con>iguration for each application • Learn how to set up and use ODK Aggregate on Google’s App Engine • Create and add new forms for use with ODK Scan and Aggregate
-
Upload
trina-miller -
Category
Documents
-
view
56 -
download
5
Transcript of ODK Scan - Setup and Technical Guide
Objectives • Understand the basic functions of the Android device
• Gain familiarity with installing the required applications onto the device
• Know the appropriate con>iguration for each application
• Learn how to set up and use ODK Aggregate on Google’s App Engine
• Create and add new forms for use with ODK Scan and Aggregate

PART 1
SET-‐UP Installing applications and con>iguring Android device to work properly for ODK suite of tools

ANDROID DEVICE BASICS Before you get started
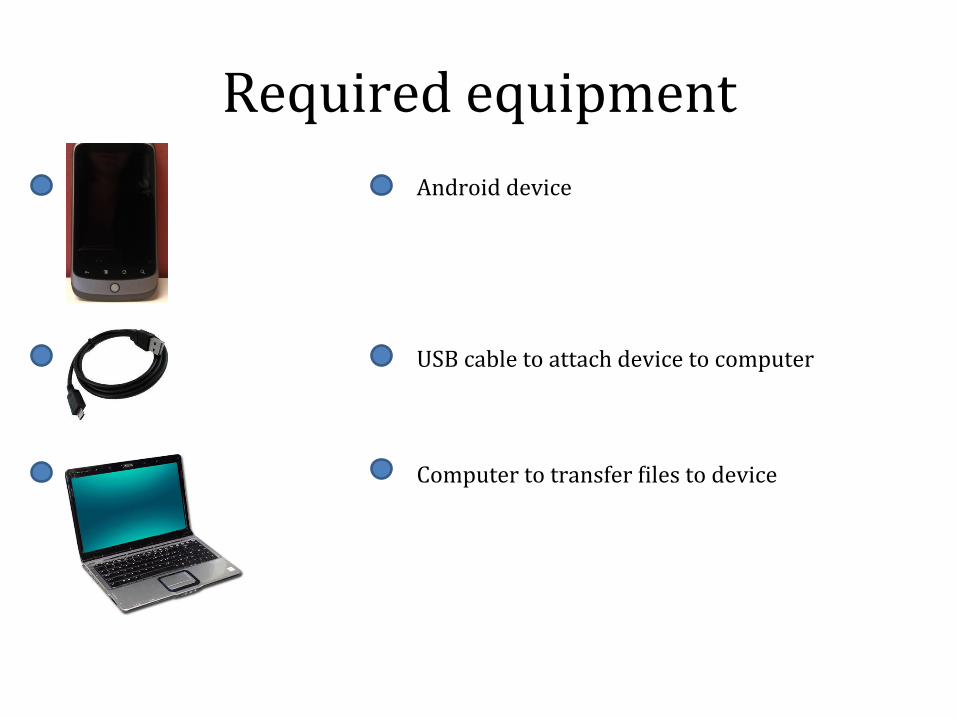
Required equipment 1 1 Android device
USB cable to attach device to computer Computer to transfer >iles to device
2 2
3 3
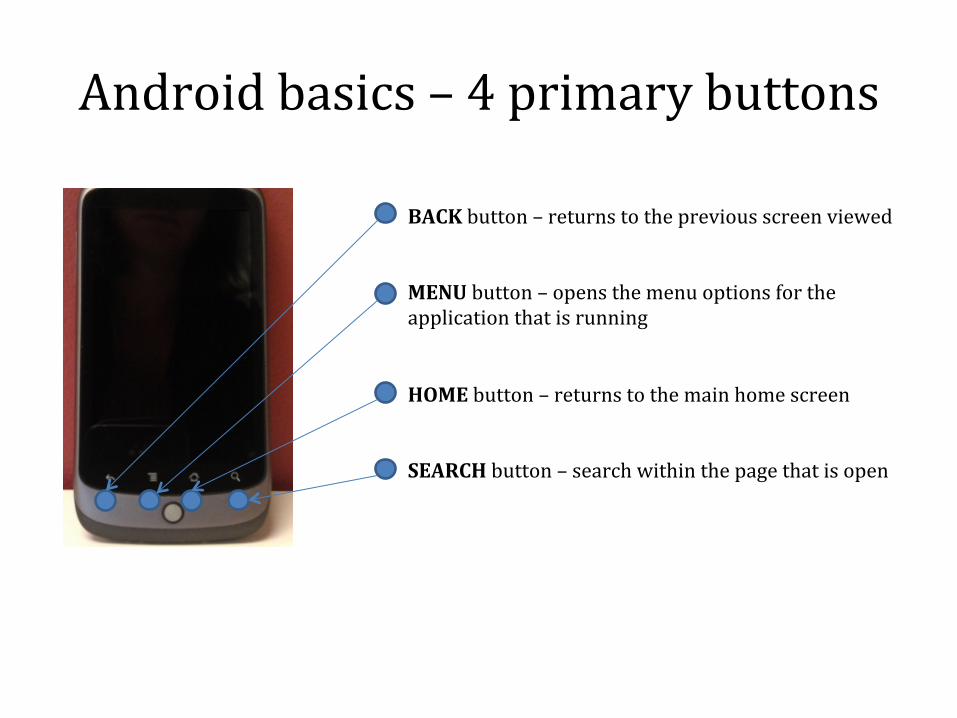
Android basics – 4 primary buttons
1 2 3 4
1
2
3
4
BACK button – returns to the previous screen viewed MENU button – opens the menu options for the application that is running HOME button – returns to the main home screen SEARCH button – search within the page that is open

Android basics – Top Bar and Application drawer
APPLICATION DRAWER button – opens the device’s entire list of applications including those that are not on the main home screen
TOP BAR – shows the date, time, battery charge and internet connectivity. Sliding the top bar by placing a >inger and moving it downward will open the device’s noti>ications

Android basics -‐ unlocking
When the device isn’t used for a period of time, it needs to be turned on from a sleep mode and unlocked. To turn on, tap the power button, which is located on the top or side of the device. To unlock, slide the lock icon to the right side of the screen by pressing your >inger on the lock and moving it to the right.
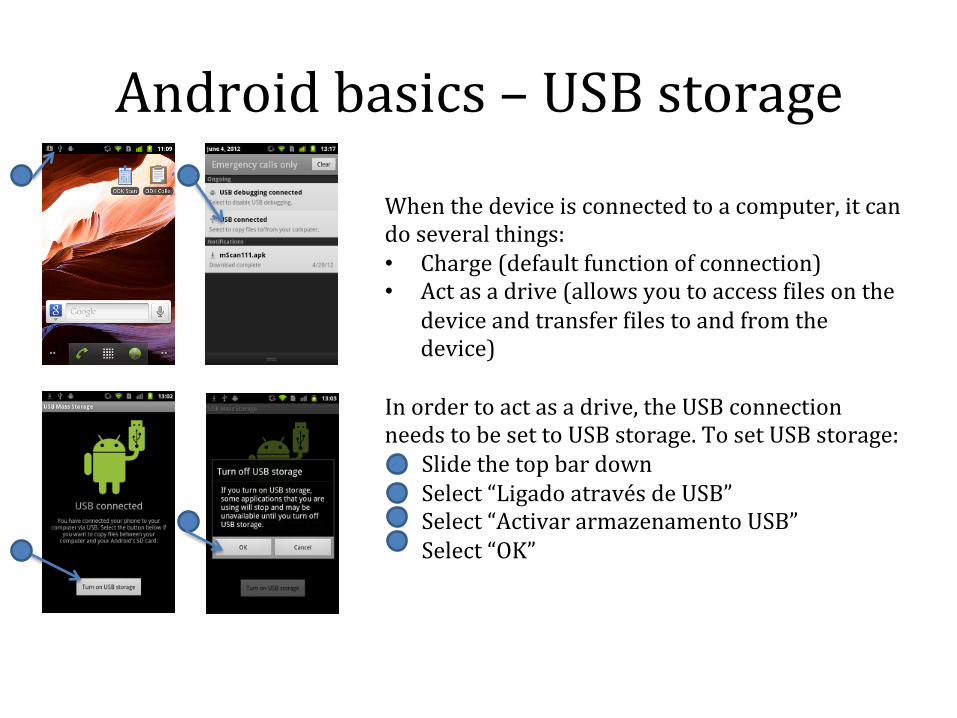
Android basics – USB storage
When the device is connected to a computer, it can do several things: • Charge (default function of connection) • Act as a drive (allows you to access >iles on the
device and transfer >iles to and from the device)
In order to act as a drive, the USB connection needs to be set to USB storage. To set USB storage: Slide the top bar down Select “Ligado através de USB” Select “Activar armazenamento USB” Select “OK”
1
1
2
2
3
3 4
4
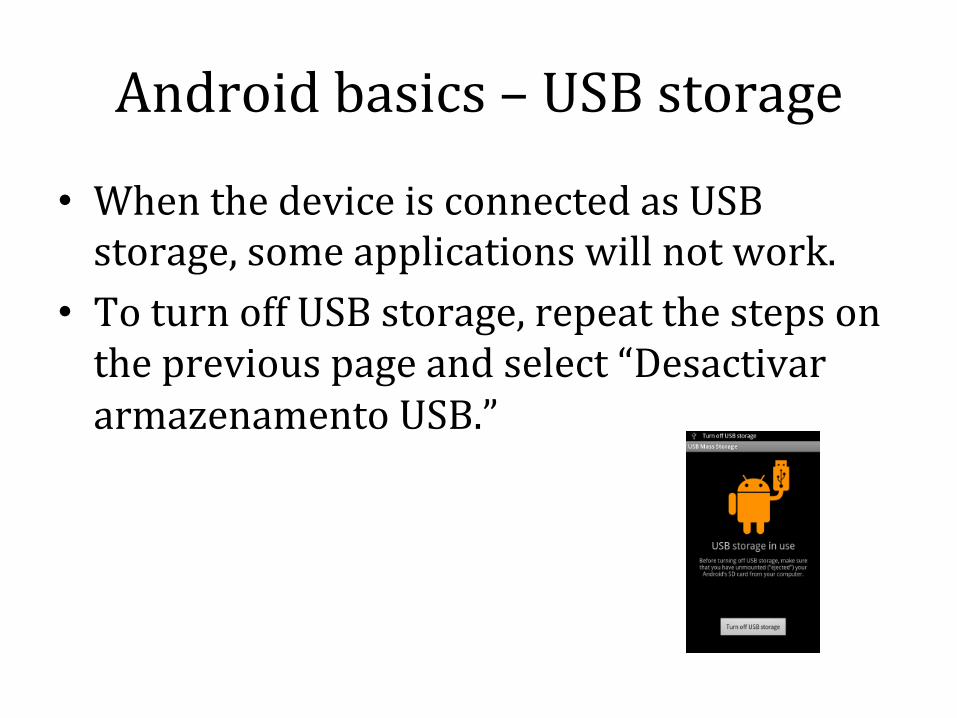
• When the device is connected as USB storage, some applications will not work.
• To turn off USB storage, repeat the steps on the previous page and select “Desactivar armazenamento USB.”
Android basics – USB storage

Before installing applications • There are multiple ways to install applications on an Android device. The most common way is to download them directly from the application store, called Google Play.
• Applications can also be manually installed on the device. Set the device so that this can be done by tapping the menu button > De>inições > Aplicações > check the box for Fontes desconhecidas.
1 2 3

Google Play
Open the Play Store from the applications drawer
Use the search button (a magnifying glass) to search for the application of your choice.
A connection to the internet is required to access the Google Play store. The store has many different applications available for download onto the
device.

ODK TOOLS Installation and Device Set up

ODK Tools • Three tools will be used to capture, collect, and store the data from APE consumption forms: ODK Scan, Collect, and Aggregate
• Two applications need to be installed on the device: – ODK Scan – ODK Collect
• The third application will need to be con>igured but is not installed on the device: – ODK Aggregate
• ODK Scan allows the user to scan a form using the Android device and digitize the data contained in bubbles and check boxes.
• ODK Collect allows the user to edit the data that has been digitized using ODK Scan and submit to a database -‐ ODK Aggregate.
• ODK Aggregate is cloud-‐based server that allows user to submit digitized data to a central database.
Installing ODK Scan • There are two methods to install ODK Scan. For the >irst, the device needs a QR Code reader, which is available in Google Play.
• Scanning a QR Code requires that the device is connected to the internet via 3G or a wireless connection.
RECOMMENDED APPLICATION: QR DROID

Installing ODK Scan • It is also recommended that a >ile manager that allows the user to browse >iles on the SD card be installed. The reason for downloading this application is because if there is no connectivity, the folder where a new .apk >ile (an application) is placed (in method #2: manual installation) is unavailable without a >ile manager.
RECOMMENDED APPLICATION: ES FILE EXPLORER
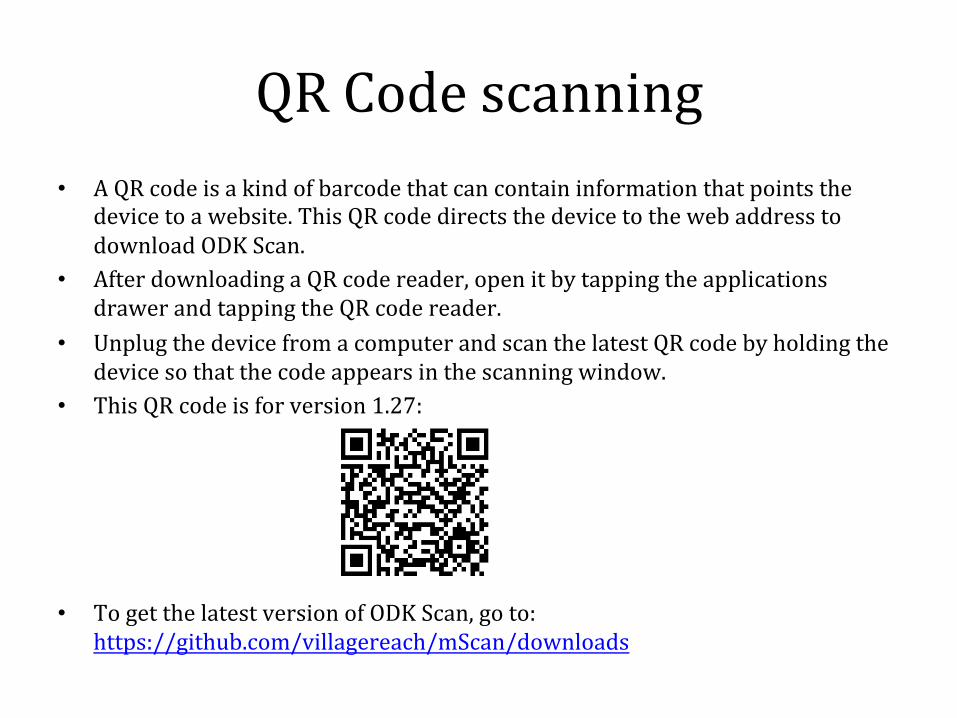
QR Code scanning • A QR code is a kind of barcode that can contain information that points the
device to a website. This QR code directs the device to the web address to download ODK Scan.
• After downloading a QR code reader, open it by tapping the applications drawer and tapping the QR code reader.
• Unplug the device from a computer and scan the latest QR code by holding the device so that the code appears in the scanning window.
• This QR code is for version 1.27:
• To get the latest version of ODK Scan, go to: https://github.com/villagereach/mScan/downloads
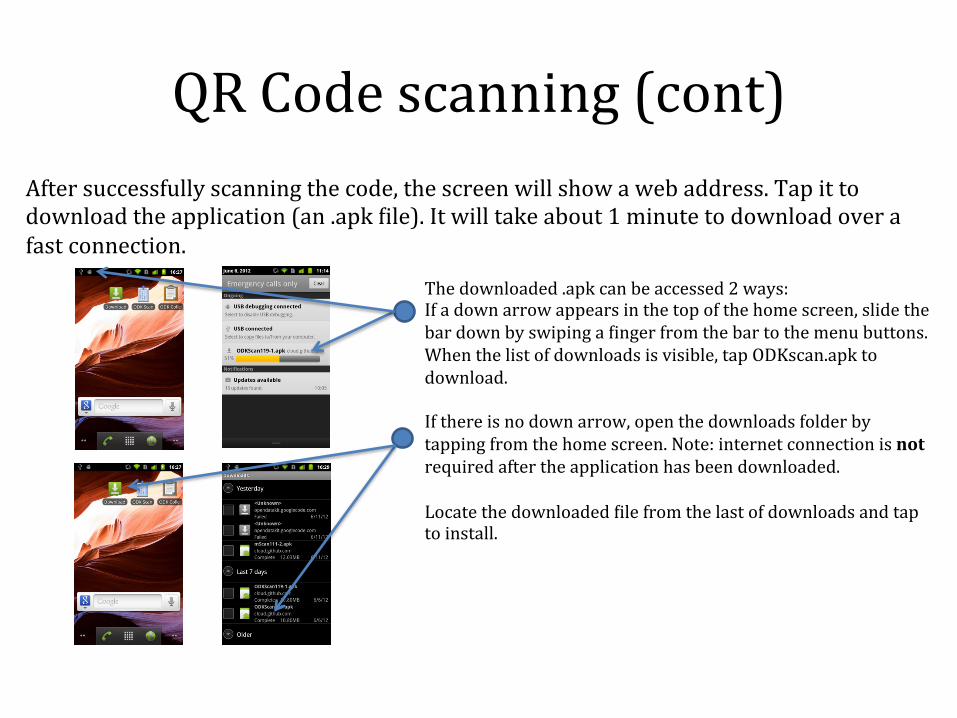
QR Code scanning (cont) After successfully scanning the code, the screen will show a web address. Tap it to download the application (an .apk >ile). It will take about 1 minute to download over a fast connection.
The downloaded .apk can be accessed 2 ways: If a down arrow appears in the top of the home screen, slide the bar down by swiping a >inger from the bar to the menu buttons. When the list of downloads is visible, tap ODKscan.apk to download. If there is no down arrow, open the downloads folder by tapping from the home screen. Note: internet connection is not required after the application has been downloaded. Locate the downloaded >ile from the last of downloads and tap to install.
1
2
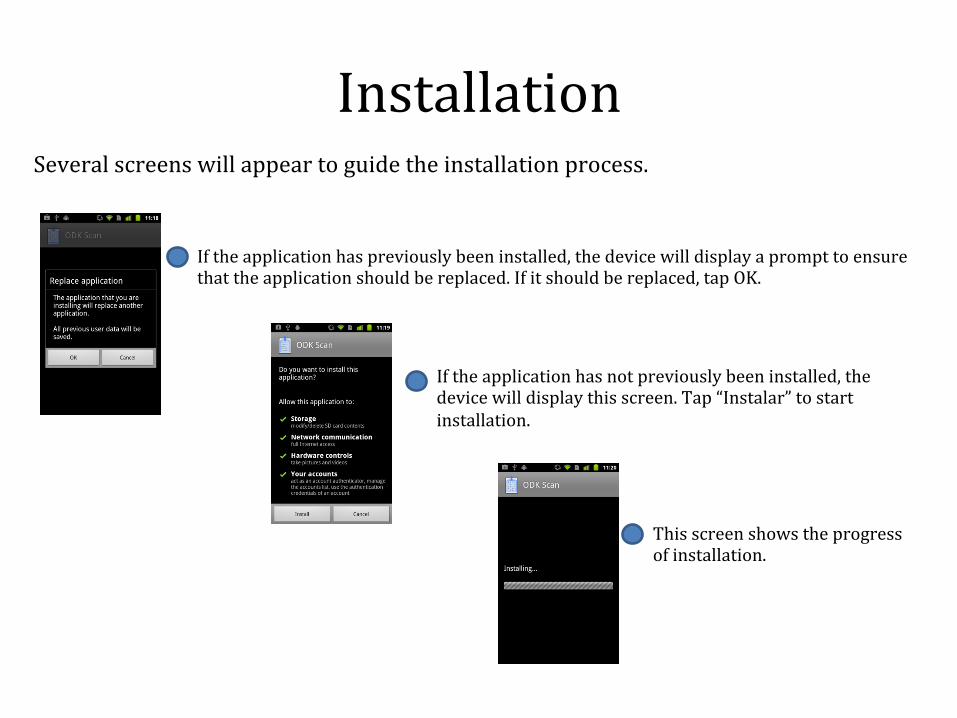
Installation Several screens will appear to guide the installation process.
1
2
3
If the application has previously been installed, the device will display a prompt to ensure that the application should be replaced. If it should be replaced, tap OK.
If the application has not previously been installed, the device will display this screen. Tap “Instalar” to start installation.
This screen shows the progress of installation.

Installation (con’t)
4 When the application is >inished installing, a screen that displays “Aplicação instalada” will appear. Tap “Abrir” to launch the application.
5 The current main display of ODK Scan will look like this. If this is displayed, the application has been installed correctly.

Installing ODK Collect • The easiest way to install ODK Collect is to search the Google Play market for ODK Collect (internet connection required).
• If Google Play download is not available, ODK Collect can be installed the same way as ODK Scan.
• Open the QR code reader to scan the code below:

ODK Aggregate con>iguration
• ODK Aggregate is a cloud based server that allows a user to submit data to a central database.
• To submit forms from ODK Scan to ODK Aggregate via ODK Collect, the settings for Aggregate on the device must be con>igured for the correct instance.
ODK Aggregate settings 1
2
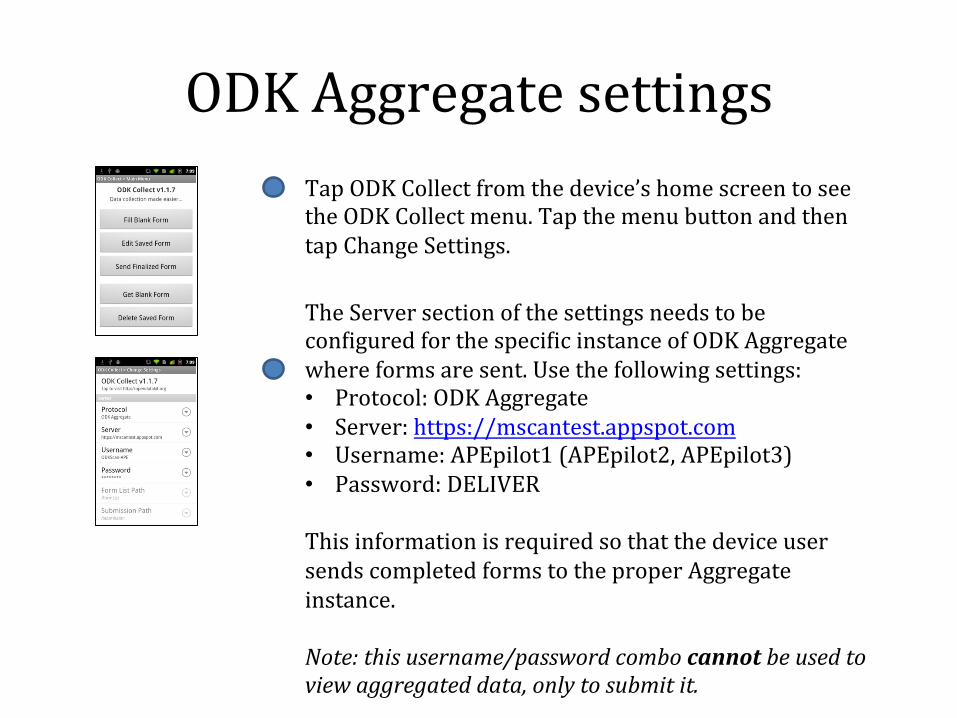
Tap ODK Collect from the device’s home screen to see the ODK Collect menu. Tap the menu button and then tap Change Settings.
The Server section of the settings needs to be con>igured for the speci>ic instance of ODK Aggregate where forms are sent. Use the following settings: • Protocol: ODK Aggregate • Server: https://mscantest.appspot.com • Username: APEpilot1 (APEpilot2, APEpilot3) • Password: DELIVER
This information is required so that the device user sends completed forms to the proper Aggregate instance. Note: this username/password combo cannot be used to view aggregated data, only to submit it.

Creating and adding form templates to ODK Scan and
Aggregate
ODK Scan form and template • Two >iles will need to be present on the device SD card in order for Scan to recognize the form that is being scanned: – A .json – is a >ile that contains all of the information about the location and size of segments and bubbles as well as the de>inition of data >ields is required. These can be created using a template maker tool (separate instruction manual).
– A .jpg image of the form is also required. Instructions for how to create a jpg of the form is included in this manual.

Installing new form templates and images onto the device
• Once you have the .json and .jpg >iles, they need to be transferred to the device before using them. To do this follow the steps:
1. Connect the device to a computer and turn on USB storage. As seen before, a pop-‐up window will permit opening a folder to view >iles. 2. Navigate to ODKScan > form_templates for the proper location for the template >iles. 3. Create a new folder with a meaningful name for the project. 4. Each form template (json) and image (jpg) must be transferred to this folder. 5. Eject the device from the computer and open ODK Scan >Settings>Templates to ensure that the transfer worked. IMPORTANT: FILES MUST BE NAMED TEMPLATE.JSON AND FORM.JPG

Using new templates with ODK Scan When the form template and image are successfully transferred to the device, they can be used to scan forms. Ensure that the correct template is selected for ODK Scan before scanning.
1
2
3
Open ODK Scan from the application drawer
Tap “de>inicoes” > “Templates to use”
Check the box next to the new template that has been transferred to the device
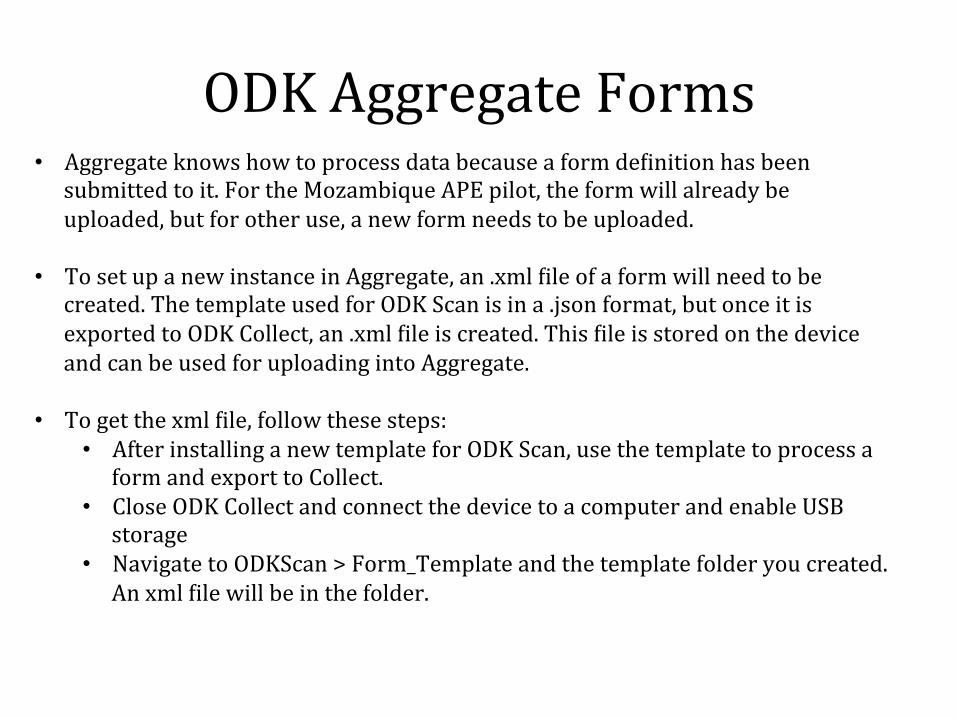
ODK Aggregate Forms • Aggregate knows how to process data because a form de>inition has been submitted to it. For the Mozambique APE pilot, the form will already be uploaded, but for other use, a new form needs to be uploaded.
• To set up a new instance in Aggregate, an .xml >ile of a form will need to be created. The template used for ODK Scan is in a .json format, but once it is exported to ODK Collect, an .xml >ile is created. This >ile is stored on the device and can be used for uploading into Aggregate.
• To get the xml >ile, follow these steps: • After installing a new template for ODK Scan, use the template to process a form and export to Collect.
• Close ODK Collect and connect the device to a computer and enable USB storage
• Navigate to ODKScan > Form_Template and the template folder you created. An xml >ile will be in the folder.

ODK Aggregate Forms To add a new form, go the form management tab and click on Add New Form. Connect the device as a drive and browse for the form in the device’s storage – after scanned data has been exported to Collect, an .xml >ile is created and can be used: device > mscan > form_templates > [your folder name] > [folder name].xml

Template updates • To update a template that already exists, delete the template.json from the SD card in the appropriate folder. Then place the new template.json >ile in the folder. Delete any xml or yml >iles that are in the folder as well.
• You will also need to update Aggregate with the new xml >ile that is generated by ODK Collect following the previous instructions.

PART 2
Using ODK Aggregate to view and export data

Accessing and exporting from ODK Aggregate
• To view data that has been submitted to ODK Aggregate, a computer with connectivity to the internet is required.
• Navigate a web browser to https://mscantest.appspot.com
• Log onto Aggregate using the “Sign in with Aggregate password” button. A prompt for username and password will appear on the screen – use the username and password given to you.
Viewing Aggregate data
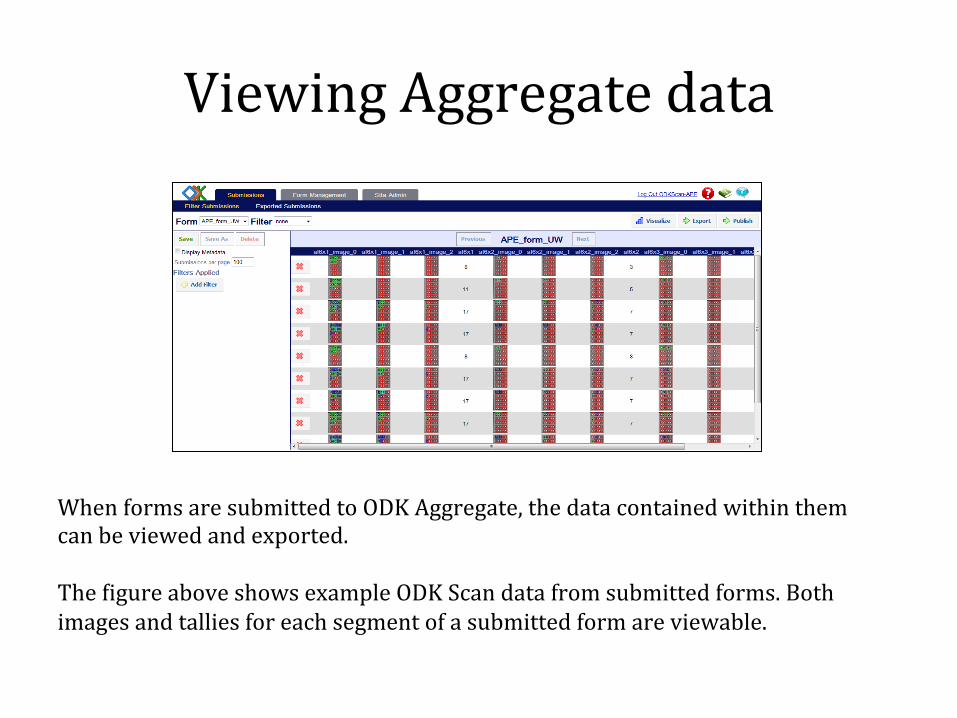
When forms are submitted to ODK Aggregate, the data contained within them can be viewed and exported. The >igure above shows example ODK Scan data from submitted forms. Both images and tallies for each segment of a submitted form are viewable.

Filtering Aggregate data • The data stored in Aggregate can be >iltered to only see a particular subset of data. Data
>ilters that are used commonly can be saved for easy >ilter application and for use in data export.
• Add a >ilter to the data by clicking the button that says +Add Filter.
• Set the >ilter criteria by displaying or hiding certain rows or columns. Rows can be displayed or hidden based on logical criteria and entire columns can be hidden. After setting criteria, click Apply Filter to view only >iltered data.
• Save the >ilter for reuse and give it a meaningful name.
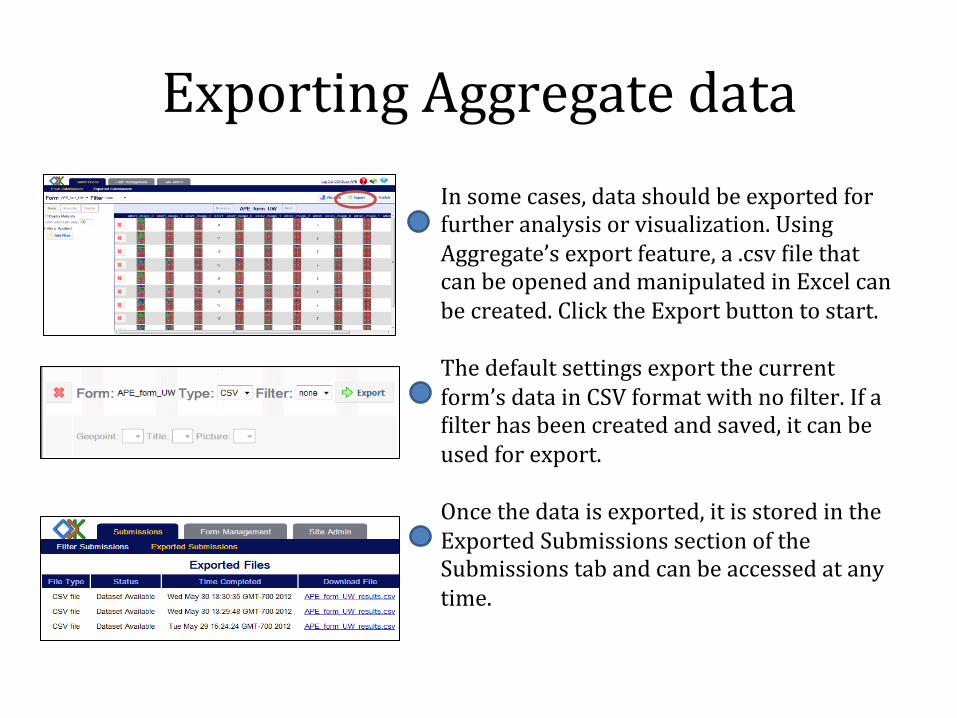
Exporting Aggregate data In some cases, data should be exported for further analysis or visualization. Using Aggregate’s export feature, a .csv >ile that can be opened and manipulated in Excel can be created. Click the Export button to start. The default settings export the current form’s data in CSV format with no >ilter. If a >ilter has been created and saved, it can be used for export. Once the data is exported, it is stored in the Exported Submissions section of the Submissions tab and can be accessed at any time.
2
1
3
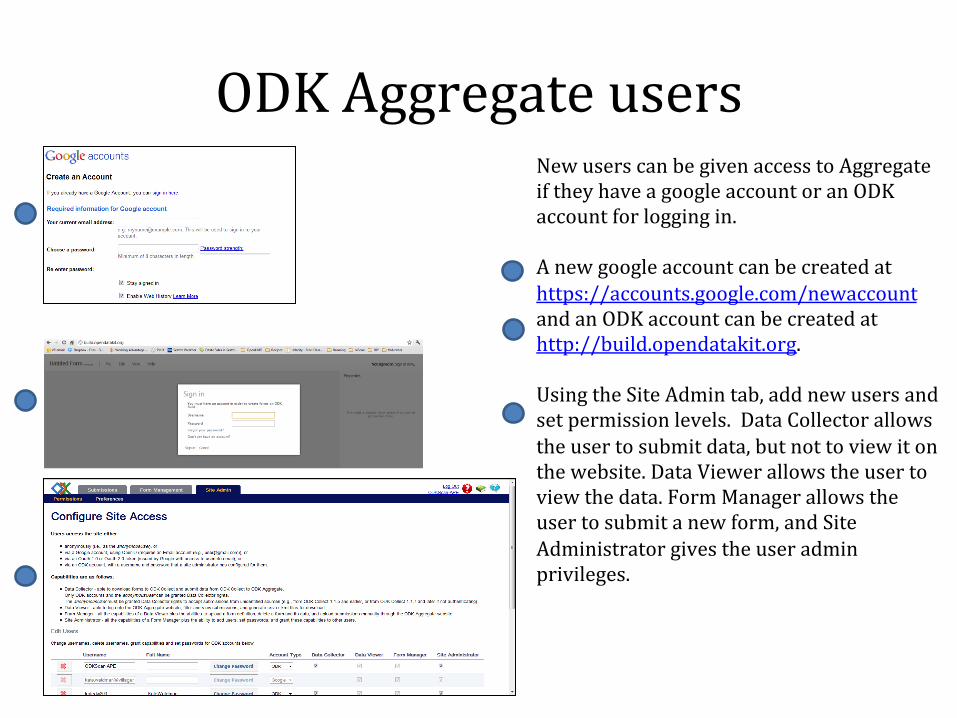
ODK Aggregate users New users can be given access to Aggregate if they have a google account or an ODK account for logging in. A new google account can be created at https://accounts.google.com/newaccount and an ODK account can be created at http://build.opendatakit.org. Using the Site Admin tab, add new users and set permission levels. Data Collector allows the user to submit data, but not to view it on the website. Data Viewer allows the user to view the data. Form Manager allows the user to submit a new form, and Site Administrator gives the user admin privileges.
1
2
1
2
3
3
PART 3
Common errors during ODK use and how to handle them
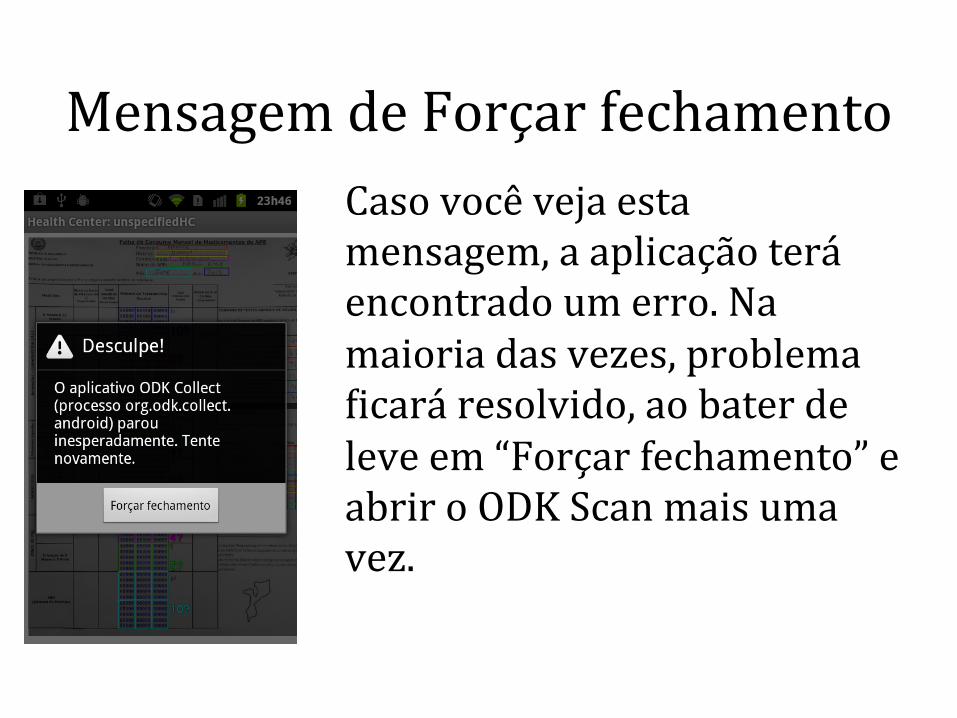
Mensagem de Forçar fechamento Caso você veja esta mensagem, a aplicação terá encontrado um erro. Na maioria das vezes, problema >icará resolvido, ao bater de leve em “Forçar fechamento” e abrir o ODK Scan mais uma vez.
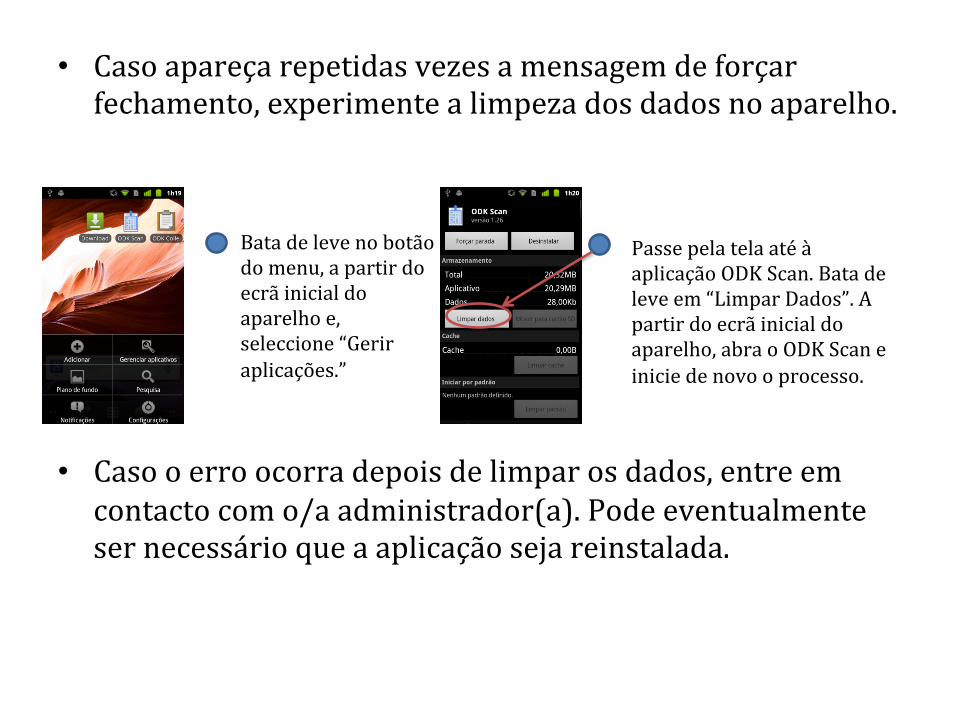
• Caso apareça repetidas vezes a mensagem de forçar fechamento, experimente a limpeza dos dados no aparelho.
• Caso o erro ocorra depois de limpar os dados, entre em contacto com o/a administrador(a). Pode eventualmente ser necessário que a aplicação seja reinstalada.
1 2 Bata de leve no botão do menu, a partir do ecrã inicial do aparelho e, seleccione “Gerir aplicações.”
Passe pela tela até à aplicação ODK Scan. Bata de leve em “Limpar Dados”. A partir do ecrã inicial do aparelho, abra o ODK Scan e inicie de novo o processo.

Application Errors Occasionally, all the steps are followed but errors occur. Some of the most common errors and how to solve them are: • An application will fail to function or there is a message such as “there is a problem parsing the package.” Most frequently, this happens when the device is connected to a computer. Ensure that if all >iles have been transferred, the device is not still connected as a drive by swiping the top bar down and changing the connection type.
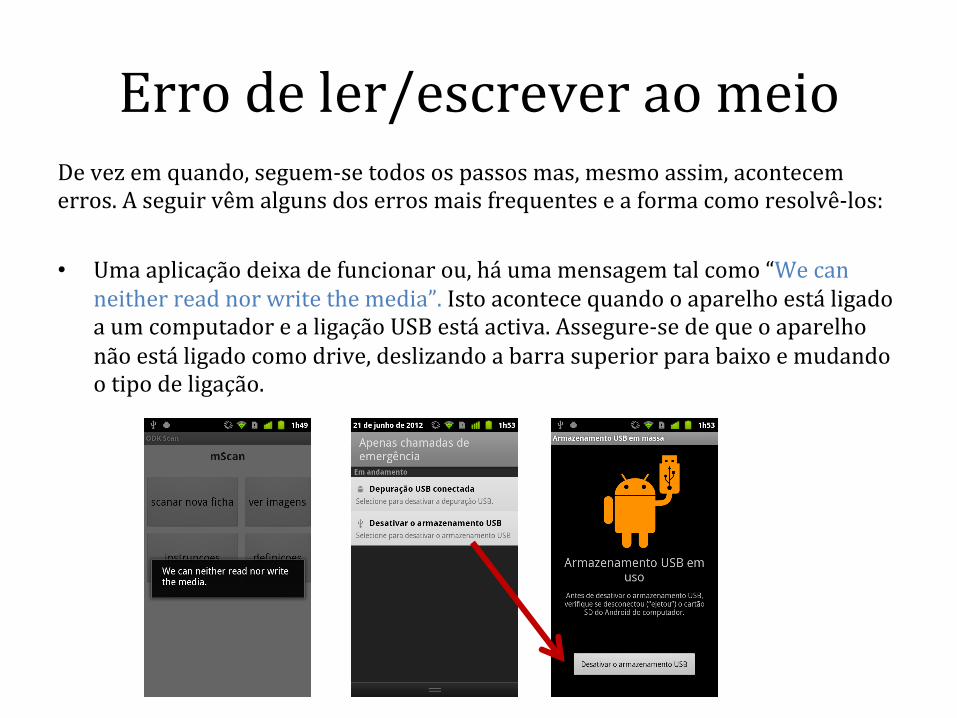
Erro de ler/escrever ao meio De vez em quando, seguem-‐se todos os passos mas, mesmo assim, acontecem erros. A seguir vêm alguns dos erros mais frequentes e a forma como resolvê-‐los: • Uma aplicação deixa de funcionar ou, há uma mensagem tal como “We can
neither read nor write the media”. Isto acontece quando o aparelho está ligado a um computador e a ligação USB está activa. Assegure-‐se de que o aparelho não está ligado como drive, deslizando a barra superior para baixo e mudando o tipo de ligação.
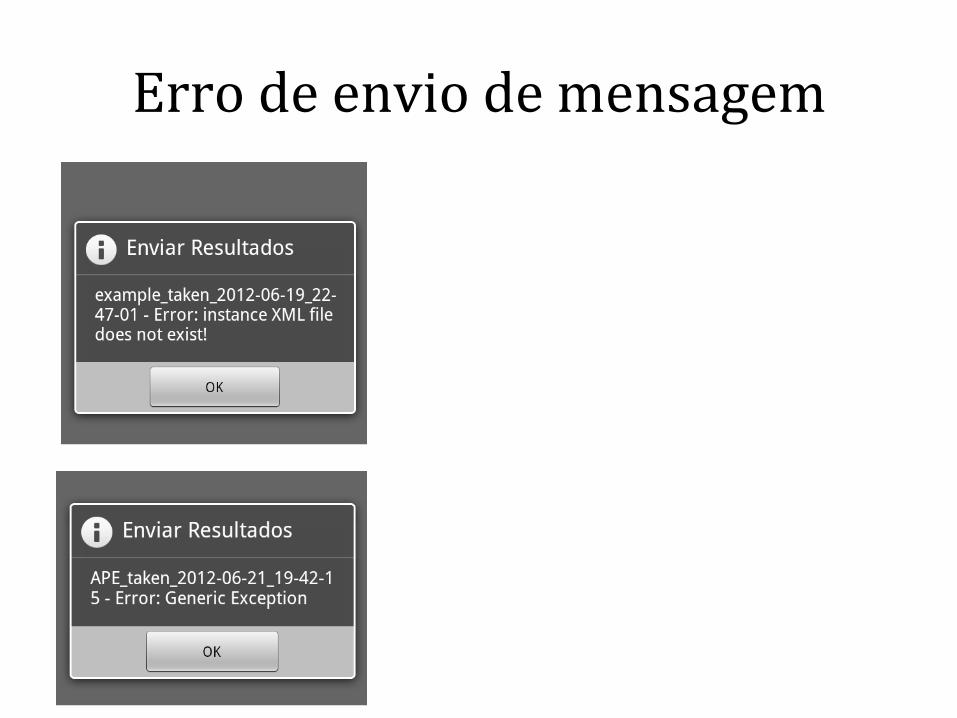
Erro de envio de mensagem

Erro de não existir a >icha
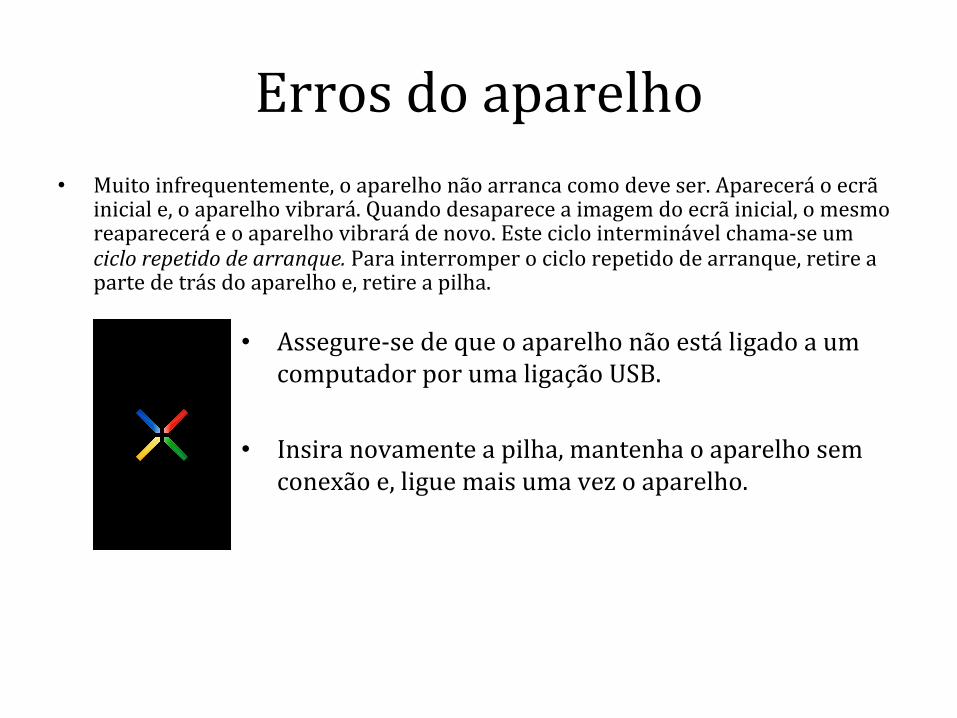
Erros do aparelho • Muito infrequentemente, o aparelho não arranca como deve ser. Aparecerá o ecrã
inicial e, o aparelho vibrará. Quando desaparece a imagem do ecrã inicial, o mesmo reaparecerá e o aparelho vibrará de novo. Este ciclo interminável chama-‐se um ciclo repetido de arranque. Para interromper o ciclo repetido de arranque, retire a parte de trás do aparelho e, retire a pilha.
• Assegure-‐se de que o aparelho não está ligado a um computador por uma ligação USB.
• Insira novamente a pilha, mantenha o aparelho sem conexão e, ligue mais uma vez o aparelho.

• ODK Scan displays a message during form alignment or processing that the application has stopped working and shows a button to force close.
• If error occurs after clearing the data, uninstall the application and reinstall using previous instructions.
1 2 Tap the menu button from the device home screen and select “Gerir aplicações.”
Scroll to the ODK Scan application. Tap “ Limpar dados.” From the device home screen, open ODK Scan and start process over.
1 2 Tap the menu button from the device home screen and select “Gerir aplicações.”
Scroll to the ODK Scan application. Tap “Desinstalar.” Follow installation instructions at the beginning of these slides.
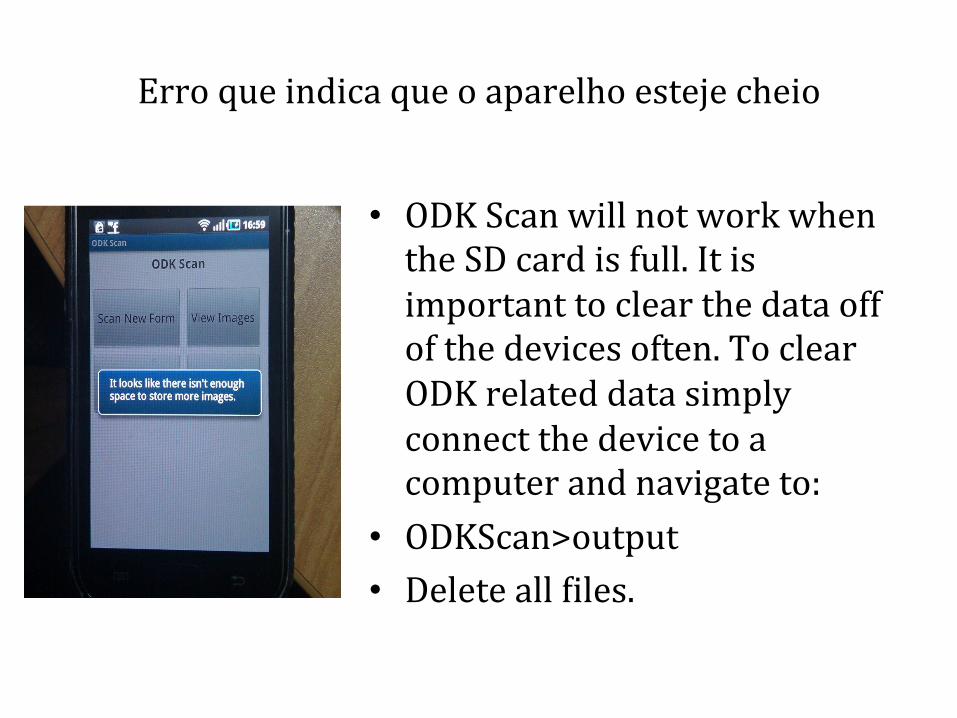
Erro que indica que o aparelho esteje cheio
• ODK Scan will not work when the SD card is full. It is important to clear the data off of the devices often. To clear ODK related data simply connect the device to a computer and navigate to:
• ODKScan>output • Delete all >iles.

Device errors • On rare occasions the device will not start properly. The start screen will
appear and the device will vibrate. When the start screen image disappears, it will reappear and vibrate again. This never ending cycle is called a boot loop. To stop the boot loop, remove the back of the device and remove the battery.
• Be sure that the device is not attached to a computer by a USB connection.
• Put the battery back in, keep the device unconnected, and turn the device on again.

PART 4
Creating new templates and setting up Aggregate
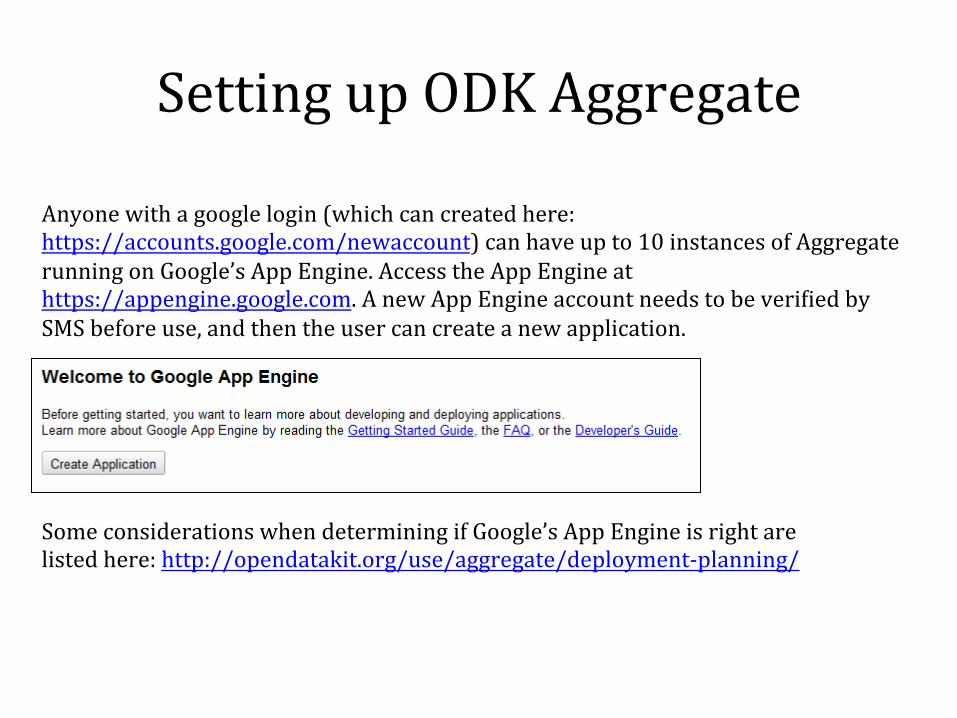
Setting up ODK Aggregate
Anyone with a google login (which can created here: https://accounts.google.com/newaccount) can have up to 10 instances of Aggregate running on Google’s App Engine. Access the App Engine at https://appengine.google.com. A new App Engine account needs to be veri>ied by SMS before use, and then the user can create a new application.
Some considerations when determining if Google’s App Engine is right are listed here: http://opendatakit.org/use/aggregate/deployment-‐planning/

How to use form description tool to create a json template
• When creating the new form template, keep in mind that the only data types that can be digitized are bubbles and checkboxes, but other data types can be included for manual entry post-‐device processing.
• Form description tool allows the user to use a new form image to create a new template.
• It can be accessed at: http://rwinkwavu.cs.washington.edu:8082/proto/TemplateMaker/
• Separate training materials for this will be created…..

How to create a form image (jpg) • A form must be in .jpg format to be used with ODK Scan. This is a type of image format.
• Many forms are originally created in Word (.doc) or Excel (.xls). They must be converted to .jpg format before using them.
• If a scanner is accessible, the form can be scanned and saved as an image.
• If a scanner is not accessible, the form can be copied and pasted into Word as an image. From there, it can be saved as a .jpg >ile.
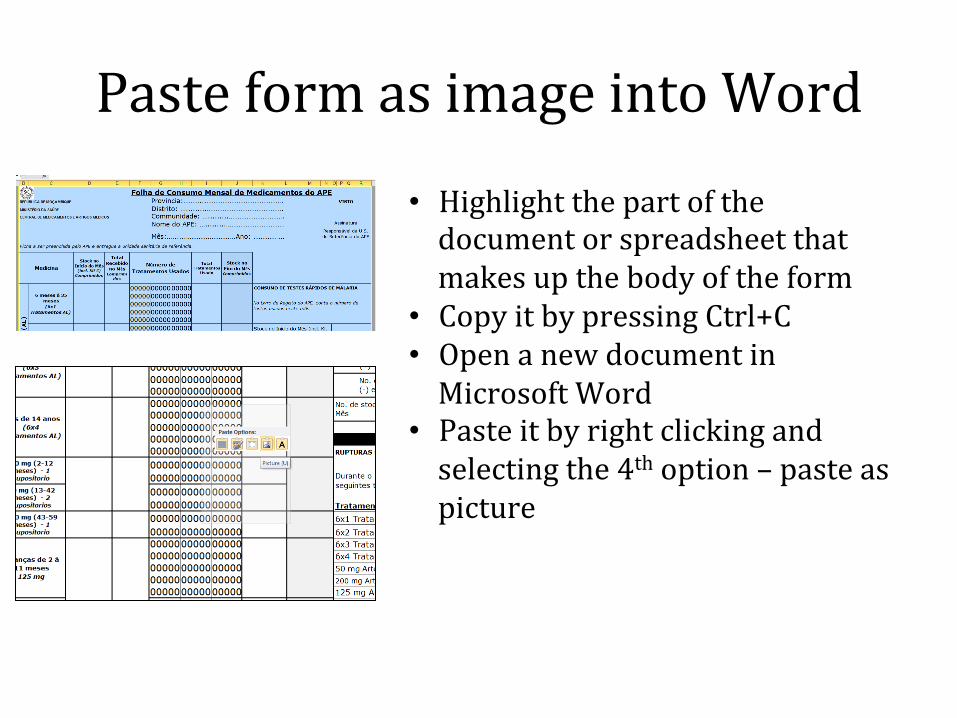
Paste form as image into Word
• Highlight the part of the document or spreadsheet that makes up the body of the form
• Copy it by pressing Ctrl+C • Open a new document in Microsoft Word
• Paste it by right clicking and selecting the 4th option – paste as picture

Folha de Consumo Mensal de Medicamentos do APEREPÚBLICA DE MOÇAMBIQUE Provincia:………...…………………………………….MINISTÉRIO DA SAÚDE Distrito: ….........…………………………………….CENTRAL DE MEDICAMENTOS E ARTIGOS MÉDICOS Communidade: ….........………………………….
Nome do APE: ….........……………………………
Mês:…......………….…………..Ano: ………….….Ficha a ser preenchida pelo APE e entregue a unidade sanitária de referência.
000000000000000 CONSUMO DE TESTES RÁPIDOS DE MÁLARIA
000000000000000000000000000000000000000000000000000000000000000000000000000000000000000000000000000000000000000000000000000000000000000000000000000000000000000000000000000000000000000000000000000000000000000000000000000000000000000000000000000000000000000000000000000000000000000000000 RUPTURAS DE STOCK
000000000000000000000000000000000000000000000000000000000000 Tratamentos Sim Não
000000000000000 6x1 Tratamentos AL000000000000000 6x2 Tratamentos AL000000000000000 6x3 Tratamentos AL000000000000000 6x4 Tratamentos AL000000000000000 50 mg Artesunato Supositorio000000000000000 200 mg Artesunato Supositorio
000000000000000 125 mg Amoxicilina000000000000000 250 mg Amoxicilina000000000000000 Zinco 20 mg000000000000000 SRO Pacotes000000000000000 TDRs000000000000000000000000000000000000000000000 Data: _____/_____/___000000000000000000000000000000 Assinatura do APE000000000000000000000000000000 _____________________000000000000000000000000000000000000000000000000000000000000000000000000000000000000000000000000000000000000000000000000000000000000000000000000000000000000000000000000000000000000000000000000000000000000000000
Crianças de 2 a 5 Meses
Durante o mês houve ruptura de stock dos seguintes tratamentos (marcar com um x):
Mais de 14 anos (6x4
Tratamentos AL)
50 mg (2-12 meses) - 1 supositorio
Am
oxic
ilin
aZ
inco
20
mg
Instruções: Para cada paciente tratado pinte, diariamente, uma bolinha na linha correspondente ao tratamento receitado. No inicio e no final de cada mês faça a contagem dos medicamentos que dispõe e usados, e preencha nos espaços em branco.
6 meses à 35 meses(6x1
Tratamentos AL)
Art
esu
nat
o S
upo
sito
rio
50 mg (13-42 meses) - 2 supositorios
200 mg (43-59 meses) - 1 supositorio
Crianças de 2 à 11 meses125 mg
Crianças de 1 à 5 anos
250 mg
Crianças de 6 Meses a 5 Anos
Art
emé t
er -
Lum
efan
trin
a (A
L)
SRO(Número de Pacotes)
3 à 8 anos (6x2
Tratamentos AL)
9 à 14 anos (6x3
Tratamentos AL)
VISTO
Stock no Inicio do Mês
(incl. Kit C)Comprimidos
Stock no Fim do MêsComprimidos
Assinatura
Responsável da U.S. de Referência do APE
No. de TDRs RECEBIDOS Neste Mês
No. de TDRs USADOS Neste Mês
No. de TDRs POSITIVOS (+)
No. de TDRs NEGATIVOS (-) e INDETERMINADOS
No. de stock de TDRs no Fim do Mês
Medicina Número de Tratamentos Usados
Total Recebido
no MêsComprimi
dos
No Livro de Registo do APE, conta o número de testes usados neste mês.
Stock no Inicio do Mês (incl. Kit AL APE)
Total Tratamentos
Usado Right click once to open menu
Change type to JPEG