NUTTYFI fileHowtoinstallNUTTYFIintoArduinoIDE: The most basic way to use the ESP8266 module is to...
12
NUTTYFI An IoT Hardware Platform Nutty Engineer Pvt Ltd
Transcript of NUTTYFI fileHowtoinstallNUTTYFIintoArduinoIDE: The most basic way to use the ESP8266 module is to...

NUTTYFI An IoT Hardware Platform
Nutty Engineer Pvt Ltd

NUTTYFI is a self-contained WiFi networking solution hardware platform offering as abridge from existing micro controller to WiFi and is also capable of running self-containedapplications. This module comes with a built in capability to program via any USB toUART Bridge Converter like FTDI, CH340 or CP2102. With these, you can connectNUTTYFI Board to your laptop and flash it without any trouble, just like Arduino.
Nutty Engineer Pvt Ltd

Specification:
• Voltage:Input 5v to 21V DC
• Wi- Fi Direct (P2P), soft- AP.
• Current consumption: 10uA~170mA.
• Flash memory attachable: 16MB max (512K normal).
• Integrated TCP/IP protocol stack.
• Processor: Tensilica L106 32 - bit.
• Processor speed: 80~160MHz.
• RAM: 32K + 80K.
• GPIOs: 17 (multiplexed with other functions).
• Analog to Digita l: 1 input with 1024 step resolution.
• +19.5dBm output power in 802.11b mode
• 802.11 support: b/g/n.
• Maximum concurrent TCP connections: 5
Nutty Engineer Pvt Ltd

Pin Definition:
1. 8 digital pins: From D0 to D7,
2. 1 Analog pin- A0
3. Vinput- From 5V to 21v
4. 3.3V output pin
5. UART Pins to Flash program to NUTTYFI
Cloud Device using FTDI UART Bridge.
Nutty Engineer Pvt Ltd
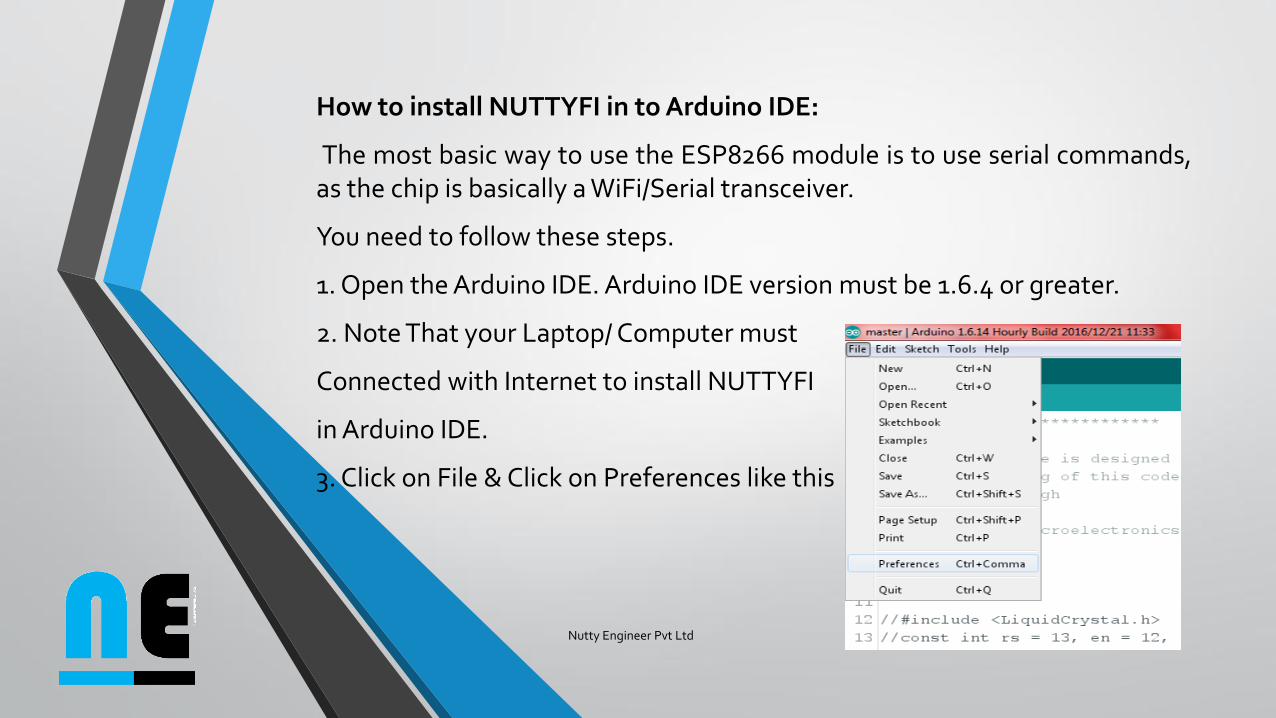
How to install NUTTYFI in toArduino IDE:
The most basic way to use the ESP8266 module is to use serial commands,as the chip is basically a WiFi/Serial transceiver.
You need to follow these steps.
1. Open the Arduino IDE. Arduino IDE version must be 1.6.4 or greater.
2. Note That your Laptop/ Computer must
Connected with Internet to install NUTTYFI
in Arduino IDE.
3. Click on File & Click on Preferences like this
Nutty Engineer Pvt Ltd

4. Preference window will appear.
You have to copy & paste given below link to Additional Board ManagerURLs as shown in image in next page-
http://arduino.esp8266.com/stable/package_esp8266com_index.json
Nutty Engineer Pvt Ltd
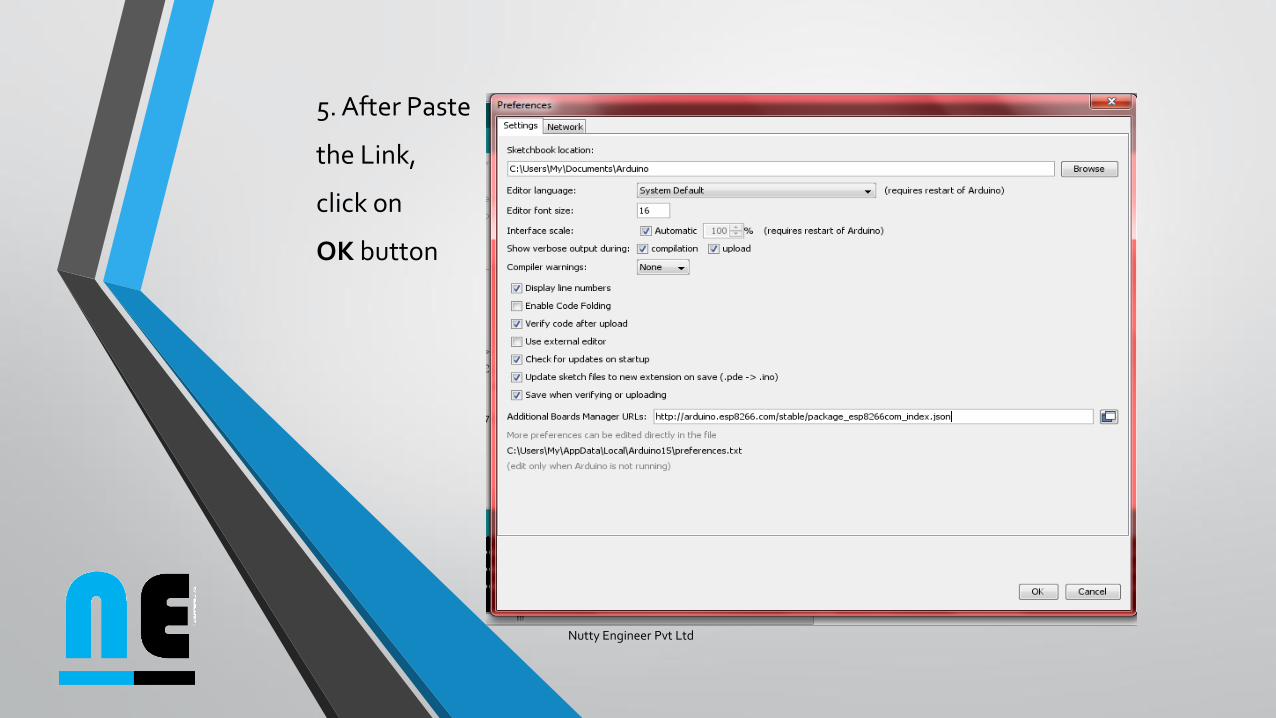
5. After Paste
the Link,
click on
OK button
Nutty Engineer Pvt Ltd
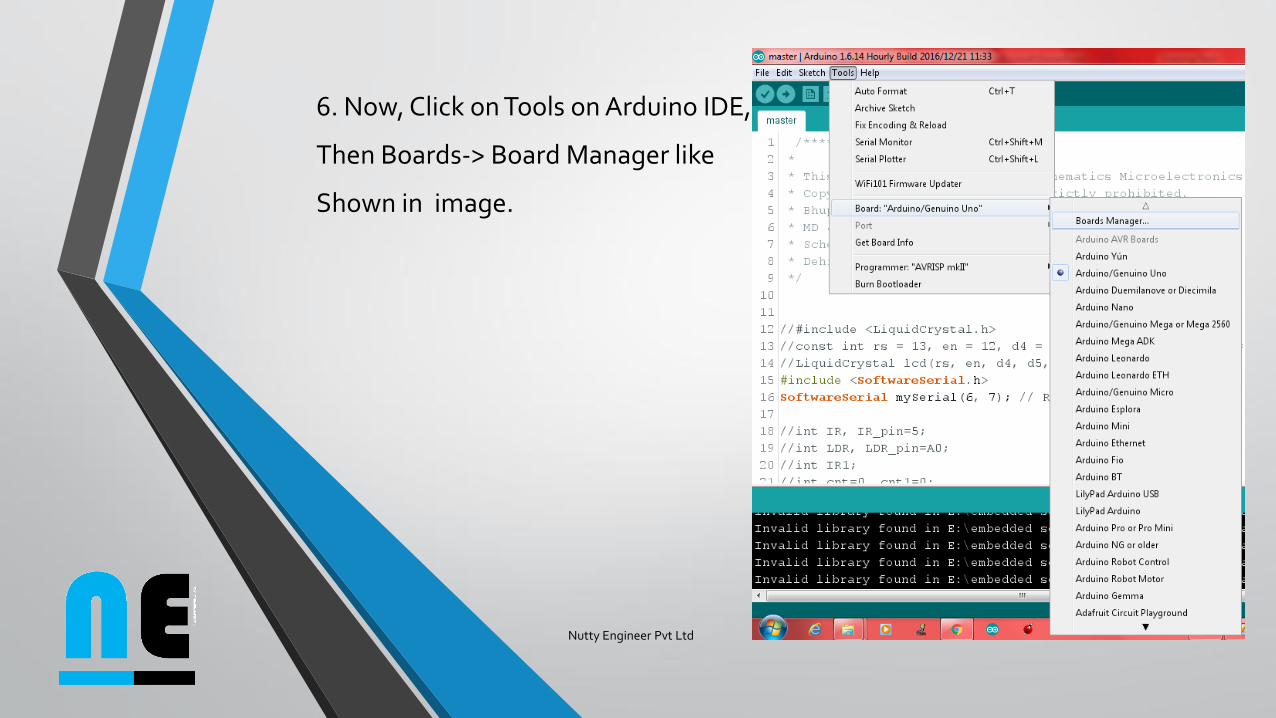
6. Now, Click on Tools on Arduino IDE,
Then Boards-> Board Manager like
Shown in image.
Nutty Engineer Pvt Ltd
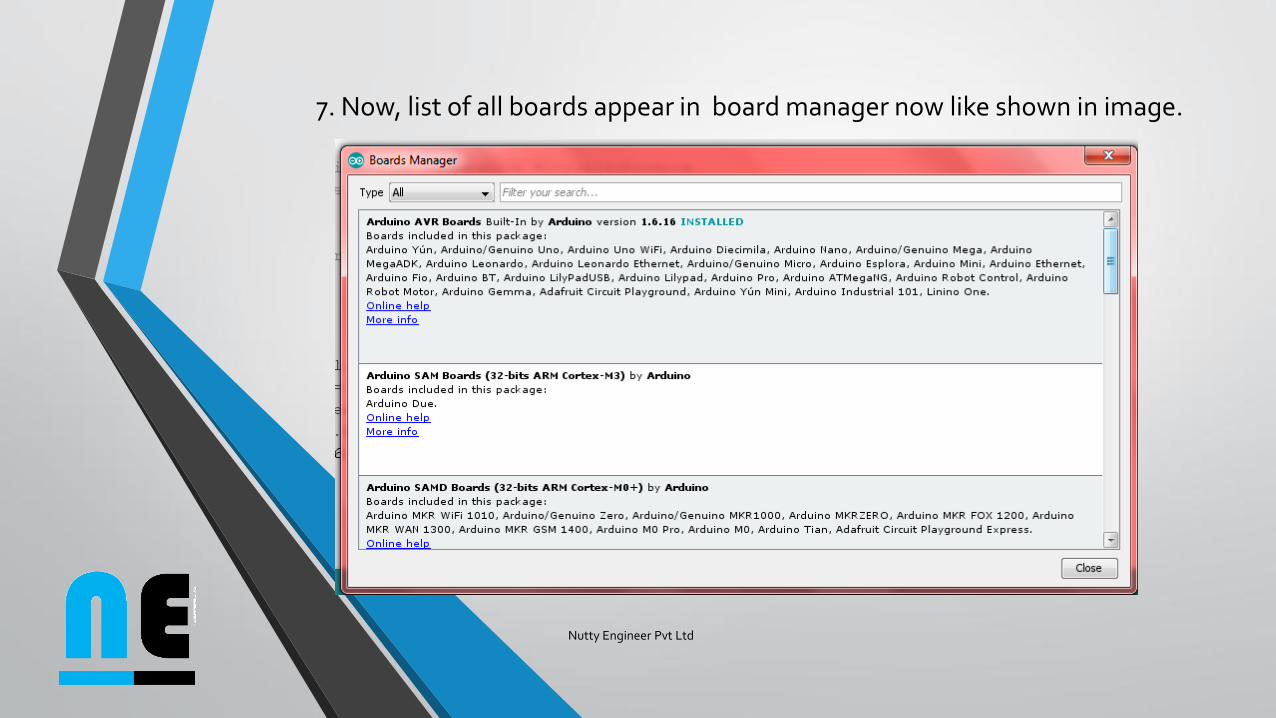
7. Now, list of all boards appear in board manager now like shown in image.
Nutty Engineer Pvt Ltd
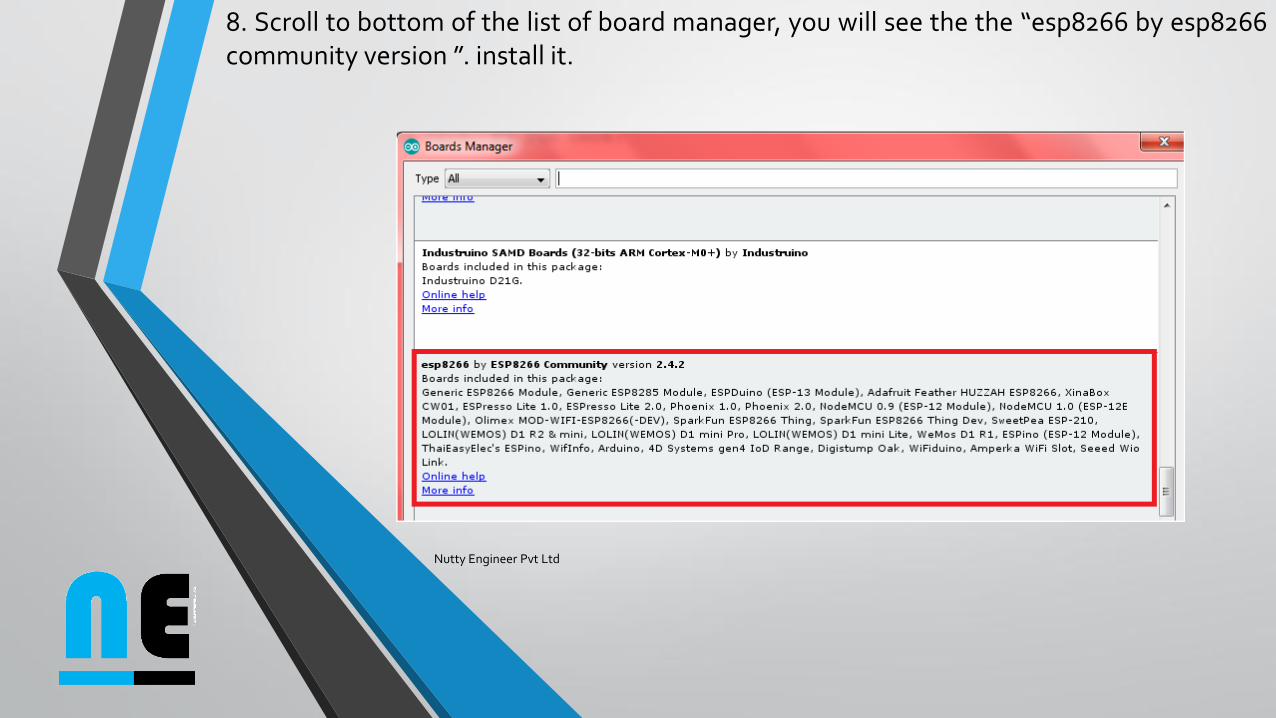
8. Scroll to bottom of the list of board manager, you will see the the “esp8266 by esp8266community version ”. install it.
Nutty Engineer Pvt Ltd

Once installation completed, close and re -open Arduino IDE for ESP8266 library to takeeffect
9. Now, go to Tools > Board > ESP8266 Modules and you can see many option forESP8266. For NuttyFi, it is recommended to select "NodeMCU 1.0 (ESP-12E Module).
Nutty Engineer Pvt Ltd

10. NowYour NUTTYFI Wifi Board is ready to use.
11. Next, select your port. If you cant recognize your port, go to the ControlPanel > System > Device Manager > Port and update your USB driver.
If you feel any trouble in installing FTDI USB to UART Bridge Driver in yourcomputer, then click here to step by step guide to install FTDI to yourcomputer.
Nutty Engineer Pvt Ltd