Nikon Coolpix 2200 Digital Camera User’s Manual · i Notices/For Your Safety For Your Safety To...
120
The Guide to Digital Photography with the DIGITAL CAMERA
-
Upload
truongdieu -
Category
Documents
-
view
213 -
download
0
Transcript of Nikon Coolpix 2200 Digital Camera User’s Manual · i Notices/For Your Safety For Your Safety To...

(En )
The Guide to Digital Photography with the
DIGITAL CAMERA
TR3L03(11)Fuji Bldg., 2-3 Marunouchi 3-chome, 6MAA9511-AChiyoda-ku, Tokyo 100-8331, Japan 1AG6P1P1940-A
No reproduction in any form of this manual, in whole or in part (except for brief quotation in critical articles or reviews), may be made without written authoriza-tion from NIKON CORPORATION.

Trademark InformationApple, the Apple logo, Macintosh, Mac OS, Power Macintosh, PowerBook, andQuick Time are registered trademarks of Apple Computer, Inc. Finder, Power Mac,iMac, and iBook are trademarks of Apple Computer, Inc. Microsoft and Windows areregistered trademarks of Microsoft Corporation. Internet is a trademark of DigitalEquipment Corporation. Adobe and Acrobat are registered trademarks of AdobeSystems Inc. The SD logo is a trademark of the SD Card Association. PictBridge is atrademark. All other trade names mentioned in this manual or the other documen-tation provided with your Nikon product are trademarks or registered trademarks oftheir respective holders.

i
No
tices/For Y
ou
r SafetyFor Your Safety
To prevent damage to your Nikon product or injury to yourself or to others, readthe following safety precautions in their entirety before using this equipment.Keep these safety instructions where all those who use the product will read them.
The consequences that could result from failure to observe the precautions listedin this section are indicated by the following symbol:
WARNINGS
This icon marks warnings, information that should be read before using yourNikon product to prevent possible injury.
Turn off immediately in theevent of malfunction
Should you notice smoke or anunusual smell coming from theequipment or from the AC adapter(available separately), unplug the ACadapter and remove the batteriesimmediately, taking care to avoidburns. Continued operation couldresult in injury. After removing thebatteries, take the equipment to aNikon-authorized service center forinspection.
Do not use in the presence offlammable gas
Do not use electronic equipment inthe presence of flammable gas, asthis could result in explosion or fire.
Observe caution when using thecamera strap
Never place the strap around theneck of an infant or child.
Do not disassemble
Touching the product's internalparts could result in injury. In theevent of malfunction, the productshould be repaired only by a quali-fied technician. Should the productbreak open as the result of a fall orother accident, take the product to aNikon-authorized service center forinspection after unplugging the ACadapter and removing the batteries.
Observe proper precautionswhen handling batteries
Batteries may leak or explode ifimproperly handled. Observe the fol-lowing precautions when handlingbatteries for use in this product:• Before replacing the batteries, turn the
camera off and make sure the power-on lamp has gone out. If you are usingan AC adapter, be sure it is unplugged.
• Use a pair of rechargeable NikonEN-MH1 NiMH batteries, one CR-V3 lithium battery, two ZR6 (AA)nickel manganese batteries, LR6(AA) alkaline batteries, or two FR6/L91 (AA) lithium batteries. Do notuse other types of battery. Do notmix batteries of different types.
• When inserting batteries, do notattempt to insert them upsidedown or backwards.
• Do not short or disassemble batteries.

ii
No
tices/For Y
ou
r Safety
• Do not expose batteries to flameor to excessive heat.
• Do not immerse in or expose to water.• Do not transport or store with metal
objects such as necklaces or hairpins.• Batteries are prone to leakage when
fully discharged. To avoid damage tothe product, be sure to remove thebatteries when no charge remains.
• When the battery is not in use, attach the terminal cover and store ina cool place.
• Immediately after use, or when theproduct is used on battery powerfor an extended period, the batter-ies may become hot. Before remov-ing the batteries, turn the cameraoff and allow the batteries to cool.
• Discontinue use immediatelyshould you notice any changes inthe batteries, such as discolora-tion or deformation.
Use appropriate cables
When connecting cables to theinput and output jacks, use only thecables provided or sold by Nikon forthe purpose, to maintain compli-ance with product regulations.
Keep out of reach of children
Particular care should be taken to pre-vent infants from putting the batteriesor other small parts into their mouths.
Removing memory cards
Memory cards may become hot duringuse. Observe due caution when remov-ing memory cards from the camera.
CD-ROMs
The CD-ROMs on which the softwareand manuals are distributed shouldnot be played back on audio CDequipment. Playing CD-ROMs on anaudio CD player could cause hearingloss or damage the equipment.
Observe caution when operat-ing the flash
Using the flash close to your sub-ject's eyes could cause temporaryvisual impairment. Particular careshould be observed if photograph-ing infants, when the flash shouldbe no less than one meter (39″)from the subject.
Avoid contact with liquid crystal
Should the monitor break, careshould be taken to avoid injury dueto broken glass and to prevent liq-uid crystal from the monitor touch-ing the skin or entering the eyes ormouth.
iii
No
tices/For Y
ou
r SafetyCautions
To ensure continued enjoyment of your Nikon product, observe the followingprecautions when storing or using the device:
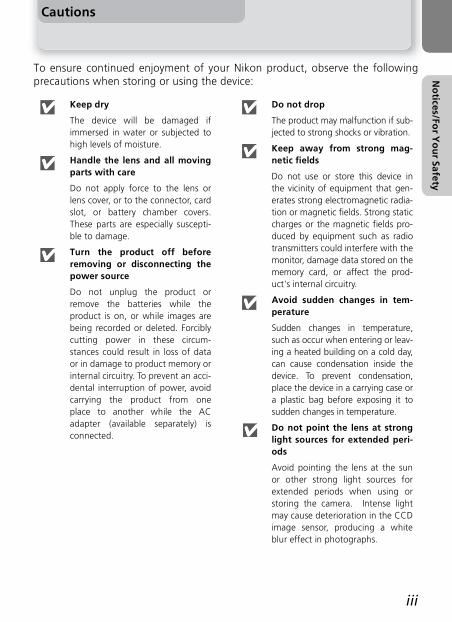
Keep dry
The device will be damaged ifimmersed in water or subjected tohigh levels of moisture.
Handle the lens and all movingparts with care
Do not apply force to the lens orlens cover, or to the connector, cardslot, or battery chamber covers.These parts are especially suscepti-ble to damage.
Turn the product off beforeremoving or disconnecting thepower source
Do not unplug the product orremove the batteries while theproduct is on, or while images arebeing recorded or deleted. Forciblycutting power in these circum-stances could result in loss of dataor in damage to product memory orinternal circuitry. To prevent an acci-dental interruption of power, avoidcarrying the product from oneplace to another while the ACadapter (available separately) isconnected.
Do not drop
The product may malfunction if sub-jected to strong shocks or vibration.
Keep away from strong mag-netic fields
Do not use or store this device inthe vicinity of equipment that gen-erates strong electromagnetic radia-tion or magnetic fields. Strong staticcharges or the magnetic fields pro-duced by equipment such as radiotransmitters could interfere with themonitor, damage data stored on thememory card, or affect the prod-uct's internal circuitry.
Avoid sudden changes in tem-perature
Sudden changes in temperature,such as occur when entering or leav-ing a heated building on a cold day,can cause condensation inside thedevice. To prevent condensation,place the device in a carrying case ora plastic bag before exposing it tosudden changes in temperature.
Do not point the lens at stronglight sources for extended peri-ods
Avoid pointing the lens at the sunor other strong light sources forextended periods when using orstoring the camera. Intense lightmay cause deterioration in the CCDimage sensor, producing a whiteblur effect in photographs.

iv
No
tices/For Y
ou
r Safety
Notices
• No part of the manuals included withthis product may be reproduced, trans-mitted, transcribed, stored in a retrievalsystem, or translated into any languagein any form, by any means, withoutNikon's prior written permission.
• Nikon reserves the right to change thespecifications of the hardware andsoftware described in these manuals atany time and without prior notice.
• Nikon will not be held liable for anydamages resulting from the use of thisproduct.
• While every effort has been made toensure that the information in thesemanuals is accurate and complete, wewould appreciate it were you to bringany errors or omissions to the attentionof the Nikon representative in yourarea (address provided separately).
Notice for customers in the U.S.A.
Federal Communications Commission (FCC) Radio Frequency Interference Statement
This equipment has been tested and found tocomply with the limits for a Class B digital de-vice, pursuant to Part 15 of the FCC rules.These limits are designed to provide reason-able protection against harmful interference ina residential installation. This equipment gen-erates, uses, and can radiate radio frequencyenergy and, if not installed and used in accor-dance with the instructions, may cause harm-ful interference to radio communications.However, there is no guarantee that interfer-ence will not occur in a particular installation.If this equipment does cause harmful interfer-ence to radio or television reception, whichcan be determined by turning the equipmentoff and on, the user is encouraged to try tocorrect the interference by one or more of thefollowing measures:• Reorient or relocate the receiving antenna.• Increase the separation between the equip-
ment and receiver.• Connect the equipment into an outlet on a
circuit different from that to which the re-ceiver is connected.
• Consult the dealer or an experienced radio/television technician for help.
CAUTIONSModificationsThe FCC requires the user to be notified thatany changes or modifications made to this de-vice that are not expressly approved by NikonCorporation may void the user's authority tooperate the equipment.
Interface CablesUse the interface cables sold or provided by Ni-kon for your equipment. Using other interfacecables may exceed the limits of Class B Part 15of the FCC rules.
Notice for customers in the State of CaliforniaWARNING: Handling the cord on this product will expose you to lead, a chemical known to theState of California to cause birth defects or other reproductive harm. Wash hands after handling.
Nikon Inc.,1300 Walt Whitman Road, Melville, New York11747-3064, U.S.A.Tel.: 631-547-4200
E3200/E2200
FOR HOME OR OFFICE USE
Tested To ComplyWith FCC Standards

v
No
tices/For Y
ou
r Safety
Notice for customers in Canada
CAUTIONThis class B digital apparatus meets allrequirements of the Canadian Interfer-ence Causing Equipment Regulations.
ATTENTIONCet appareil numérique de la classe B re-specte toutes les exigences du Règlementsur le matériel brouilleur du Canada.
Notice Concerning Prohibition of Copying or Reproduction
Note that simply being in possession of material that has been digitally copied or repro-duced by means of a scanner, digital camera or other device may be punishable by law.• Items prohibited by law from
being copied or reproducedDo not copy or reproduce papermoney, coins, securities, govern-ment bonds, or local governmentbonds, even if such copies or repro-ductions are stamped "Sample."The copying or reproduction ofpaper money, coins, or securitieswhich are circulated in a foreigncountry is prohibited.Unless the prior permission of thegovernment has been obtained, thecopying or reproduction of unusedpostage stamps or post cards issuedby the government is prohibited.The copying or reproduction ofstamps issued by the governmentand of certified documents stipu-lated by law is prohibited.
• Cautions on certain copies andreproductions The government has issued cautionson copies or reproductions of securi-ties issued by private companies(shares, bills, checks, gift certificates,etc.), commuter passes, or coupontickets, except when a minimum ofnecessary copies are to be providedfor business use by a company. Also, do not copy or reproduce pass-ports issued by the government,licenses issued by public agencies andprivate groups, ID cards, and tickets,such as passes and meal coupons.
• Comply with copyright noticesThe copying or reproduction ofcopyrighted creative works such asbooks, music, paintings, woodcutprints, maps, drawings, movies, andphotographs is governed bynational and international copyrightlaws. Do not use this product for thepurpose of making illegal copies orto infringe copyright laws.

vi
No
tices/For Y
ou
r Safety
Before Taking Important Pictures
Before taking pictures on important occasions (such as at weddings or beforetaking the camera with you on a trip), take a test shot to ensure that the camerais functioning normally. Nikon will not be held liable for damages or lost profitsthat may result from product malfunction.
Use Only Nikon Brand Electronic Accessories
Your Nikon COOLPIX camera is designed to the highest standards and includescomplex electronic circuitry. Only Nikon brand electronic accessories (includingbattery chargers, batteries, and AC adapters) certified by Nikon specifically foruse with your Nikon digital camera are engineered and proven to operate withinthe operational and safety requirements of this electronic circuitry.
THE USE OF NON-NIKON ELECTRONIC ACCESSORIES COULD DAMAGE YOUR CAMERA AND MAY
VOID YOUR NIKON WARRANTY.
For more information about Nikon brand accessories, contact your local autho-rized Nikon dealer.
vii
Table of contents
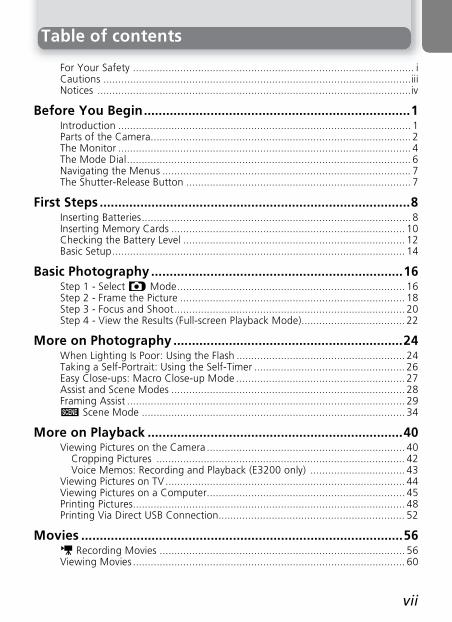
For Your Safety ............................................................................................... iCautions ........................................................................................................iiiNotices ..........................................................................................................iv
Before You Begin........................................................................1Introduction ................................................................................................... 1Parts of the Camera........................................................................................ 2The Monitor ................................................................................................... 4The Mode Dial................................................................................................ 6Navigating the Menus .................................................................................... 7The Shutter-Release Button ............................................................................ 7
First Steps ....................................................................................8Inserting Batteries........................................................................................... 8Inserting Memory Cards ............................................................................... 10Checking the Battery Level ........................................................................... 12Basic Setup................................................................................................... 14
Basic Photography....................................................................16Step 1 - Select P Mode............................................................................. 16Step 2 - Frame the Picture ............................................................................ 18Step 3 - Focus and Shoot.............................................................................. 20Step 4 - View the Results (Full-screen Playback Mode)................................... 22
More on Photography ..............................................................24When Lighting Is Poor: Using the Flash ......................................................... 24Taking a Self-Portrait: Using the Self-Timer ................................................... 26Easy Close-ups: Macro Close-up Mode ......................................................... 27Assist and Scene Modes ............................................................................... 28Framing Assist .............................................................................................. 29e Scene Mode ......................................................................................... 34
More on Playback .....................................................................40Viewing Pictures on the Camera ................................................................... 40
Cropping Pictures .................................................................................... 42Voice Memos: Recording and Playback (E3200 only) ................................ 43
Viewing Pictures on TV................................................................................. 44Viewing Pictures on a Computer................................................................... 45Printing Pictures............................................................................................ 48Printing Via Direct USB Connection............................................................... 52
Movies .......................................................................................56W Recording Movies ................................................................................... 56Viewing Movies ............................................................................................ 60

viii
The Shooting Menu..................................................................61Using the Shooting Menu............................................................................. 61Image Mode................................................................................................. 63White Balance .............................................................................................. 65Exp. +/- ........................................................................................................ 67Continuous .................................................................................................. 68Best Shot Selector......................................................................................... 69Color Options............................................................................................... 70
The Playback Menu...................................................................71Using the Playback Menu ............................................................................. 71Slide Show ................................................................................................... 72Delete .......................................................................................................... 73Protect ......................................................................................................... 75Auto Transfer ............................................................................................... 76Small Picture................................................................................................. 78Copy ............................................................................................................ 79
The Setup Menu........................................................................82Using the Setup Menu.................................................................................. 82Welcome Screen........................................................................................... 83Date............................................................................................................. 84Monitor Settings........................................................................................... 86Date Imprint ................................................................................................. 87Brightness .................................................................................................... 89Sound Settings ............................................................................................. 90Blur Warning................................................................................................ 91Auto Off....................................................................................................... 92Format memory/card .................................................................................... 93Language ..................................................................................................... 94Video Mode ................................................................................................. 94Reset All ....................................................................................................... 94Battery Type ................................................................................................. 96Firmware Version.......................................................................................... 96
Technical Notes .........................................................................97Optional Accessories..................................................................................... 97Caring for Your Camera ............................................................................... 98Error Messages ........................................................................................... 100Troubleshooting ......................................................................................... 103Specifications ............................................................................................. 106Index .......................................................................................................... 108

1
Befo
re Yo
u B
egin
Introduction
Thank you for your purchase of a Nikon COOLPIX3200 (E3200)/COOLPIX2200(E2200) digital camera. This manual has been written to help you enjoy takingpictures with your Nikon digital camera. Read this manual thoroughly before use,and keep it handy when using the product.
To make it easier to find the information you need, the following symbols andconventions are used:
Internal Memory and SD Memory CardThis camera uses both an internal memory and an SD memory card for storingpictures. If you insert a card into the camera, pictures will automatically be storedon the card instead of in the memory. To store, view or delete pictures in thememory or to format the memory, remove the memory card first.
Life-Long Learning
As part of Nikon's "Life-Long Learning" commitment to ongoing product support and education,continually-updated information is available on-line at the following sites:• For users in the U.S.A.: http://www.nikonusa.com/• For users in Europe: http://www.europe-nikon.com/support• For users in Asia, Oceania, the Middle East, and Africa: http://www.nikon-asia.com/Visit these sites to keep up-to-date with the latest product information, tips, answers to fre-quently-asked questions (FAQs), and general advice on digital imaging and photography.Additional information may be available from the Nikon representative in your area. See theURL below for contact information:
http://www.nikonimaging.com/eng/
This icon marks cautions,information you should readbefore use to prevent damageto your camera.
This icon marks tips, addi-tional information you mayfind helpful when using yourcamera.
This icon marks notes, infor-mation that you should readbefore using your camera.
This icon indicates that moreinformation is available else-where in this manual or in theQuick Start Guide.
Q
Before You BeginIntroduction

2
Befo
re Yo
u B
egin
Parts of the Camera
Shutter-release button (Q 7)
Power switch(Q 12)
Viewfinder (Q 18)
Built-in Speedlight (Q 24)
Self-timer lamp (Q 26)/Red-eye reduction lamp(E3200 only)(Q 24)AF-Assist illuminator(E3200 only)(Q 24)
Lens (Q 18)
Power-on lamp (Q 12)
Attaching the Camera Strap
Memory card slotcover (Q 10)
Eyelet forcamera strap
Speaker (E3200 only)
Microphone (E3200 only)

3
Parts of the Camera
Befo
re Yo
u B
egin
Zoom (l/O ) buttons (Q 18)Red (!) lamp (Q 20)
Monitor(Q 5, 18) Battery-chamber
cover (Q 8)
Mode dial (Q 6)
USB connector (Q 46)Audio/video (AV) outconnector (E3200 only) (Q 44)/Video output connector(E2200 only) (Q 44)
Interface connector cover(Q 44, 46)
Tripod socket (Q 25, 26)
u(delete) button(Q 22, 23)
Viewfinder(Q 18)
Multi selector(!/Y/&/V) (Q 7)
x(play) button(Q 22, 23)
Battery-chambercover latch (Q 8)
Interface connector cover
Green (AF) lamp(Q 20)
MENU button (Q 61)

4
Befo
re Yo
u B
egin
The Monitor
Shooting
1 Shooting mode . . . . . . . . . . . . . 16 12 Date counter/stored date number . . . . . . . . . . 882 AE-L1 . . . . . . . . . . . . . . . . . . . . . 38
3 Focus indicator. . . . . . . . . . . . . . 20 13 Number of exposures remaining/length of movie. . . . . . . . 16, 17, 564 Zoom indicator2 . . . . . . . . . . . . . 18
5 Battery level indicator3 . . . . . . . . 12 14 Flash mode . . . . . . . . . . . . . . . . . 24
6 Internal memory/memory card indicator. . . . . . . . . . . . . . . . . . . 16
15 Image mode . . . . . . . . . . . . . . . . 63
16 Exposure compensation . . . . . . . 67
7 Camera shake icon4 . . . . . . . . . . 25 17 Sensitivity gain indicator6 . . . . . . 25
8 Time zone . . . . . . . . . . . . . . . . . 84 18 Continuous shooting mode. . . . . 68
9 "Date not set" icon5 . . . . . . . . . 14 19 Best Shot Selector (BSS). . . . . . . . 69
10 Self-timer indicator. . . . . . . . . . . 26 20 White balance. . . . . . . . . . . . . . . 65
11 Date imprint indicator . . . . . . . . 87 21 Color options . . . . . . . . . . . . . . . 70
22 Macro close-up mode . . . . . . . . . 271
23
4
Appears when taking pictures with PanoramaAssistDisplayed when zoom buttons are pressed.Appears when batteries are running low.Appears at slow shutter speeds to warn thatpictures may be blurred.
56
Appears when camera clock has not been set.Indicates that camera has raised sensitivityautomatically.
AUTO 999
AE-LAE-LAE-L
134
19
18
5
12
1314
8
11
6
7
9
15
22
21
16
20
1710
2

5
The Monitor
Befo
re Yo
u B
egin
Playback
Controlling the Monitor
To hide or display indicators in the monitor, select the Monitor settings option in the setupmenu. (Q 86)
Monitor turns off while flash is charging (Q 20).
8 10
20042004.0808.050512:0000
8
10
12
11
2
1
3
4
57
6
14
13
17
16
15
9
1 Current folder . . . . . . . . . . . . . . 23 9 Movie playback indicator . . . . . . 602 File number and type . . . . . . . . . 23 10 Voice memo icon2 . . . . . . . . . . . 433 Internal memory/memory card
indicator . . . . . . . . . . . . . . . . . . 1611 Image mode. . . . . . . . . . . . . . . . 6312 Movie indicator . . . . . . . . . . . . . 57
4 Battery level indicator1 . . . . . . . . 12 13 Protect icon . . . . . . . . . . . . . . . . 755 Volume indicator2 . . . . . . . . . . . 60 14 Print-order icon . . . . . . . . . . . . . 486 Voice memo recording guide2 . . 43 15 Transfer icon . . . . . . . . . . . . . . . 767 Voice memo playback guide2 . . . 43 16 Time of recording. . . . . . . . . .14-158 Current frame number/total number
of frames/length of movie . . 23, 6017 Date of recording. . . . . . . . . .14-15
12
Appears when batteries are running low.E3200 only.
AUTO 19
Monitor shows viewthrough lens only
Monitor off Monitor shows cur-rent settings andview through lens
Monitor showsframing grid

6
Befo
re Yo
u B
egin
The Mode Dial
Using the mode dial, you can select from seven shooting modes and setup mode.Choose a shooting mode according to shooting conditions.
To select a mode, align the mode icon with the "_" marknext to the mode dial.
e Scene (Q 28, 34)
Choose from eleven "scenes"suited to different subjects orshooting conditions and let thecamera do the rest.
i Portrait Assist
N Landscape Assist
j Sports Assist
m Night Portrait Assist
Use framing assist to help composepictures suited to a particular typeof subject (Q 28-33).
P Auto (Q 16)
Choose this mode to take pictures.Select from six shooting menus toachieve the desired effect.
W Movie (Q 56-59)
Choose from three kinds of movies.Make movies with sound usingE3200, or using E2200 for silentmovies only.
f Setup (Q 82)
Choose this mode to display the set-up menu, where you can performsuch tasks as setting the camera clockand adjusting monitor brightness.

7
Befo
re Yo
u B
egin
Navigating the Menus
The multi selector is used to navigate through the camera menus.
Your camera has a two stage shutter-release button. The camera sets focus andexposure when the button is pressed halfway. The green (AF) lamp next to theviewfinder will light when the focus operation is complete. Focus and exposurewill remain locked while the shutter-release button is pressed halfway. To takethe picture, press the shutter-release button the rest of the way down.
Move cursor up
Cancel and return to previousmenu, or move cursor left
Move cursor down
Display sub-menu,move cursor right,or make selection.
Press center (a) tomake selection
The Shutter-Release Button

8
First Steps
First Steps
Inserting Batteries
Your camera uses:• LR6 (AA) alkaline batteries (×2), or• Nikon EN-MH1 rechargeable nickel-metal hydride (NiMH) batteries (×2), or• ZR6 (AA) nickel manganese batteries (×2), or• FR6/L91 (AA) lithium batteries (×2), or• CR-V3 lithium batteries (×1)
Open the battery-chamber cover
• Pressing the battery-chamber latch (g; ),slide the battery-chamber cover out ( ).
Insert the batteries
• Insert the batteries as shown in the label insidethe battery chamber.
Close the battery-chamber cover
• Close the battery-chamber cover ( ) and slideit in until it latches ( ). Be sure that the bat-tery-chamber cover is properly latched.
[IMPORTANT] Battery Type
To improve battery performance, select the type of battery currently inserted in the camera in thesetup menu. The default setting is Alkaline. When any other type of battery is used, turn the cam-era on and change the setting (Q 96).
21
1
AA batteries
2
CR-V3
1
2
3

9
Inserting Batteries
First Steps
Replacing Batteries
Turn the camera off and make sure that the power-on lamp has gone out before removing or in-serting batteries.
Read Battery Warnings
Read and follow all warnings and instructions supplied by the battery manufacturer.
Damaged Batteries
The following batteries can not be used:• Batteries with peeling or damaged insulation. Using batter-
ies with damaged insulation could result in leakage, over-heating, or rupture. Note that due to manufacturingdefects even new batteries may have faulty insulation.
• Batteries with insulation that covers only the sides of thebattery and not the area around the negative terminal.
• Batteries with a flat negative terminal. Do not use such bat-teries even if the insulation adequately covers the areaaround the negative terminal.
Alkaline Batteries
Performance of alkaline batteries may vary greatly depending on the manufacturer. Choose a reli-able brand.
EN-MH1 Batteries
Using an MH-70 battery charger, charge EN-MH1 batteries before first use. Charge each pair ofbatteries at the same time — do not charge batteries one at a time or mix batteries with differentcharges. Note that EN-MH1 batteries may discharge quickly immediately after purchase or after thebatteries have been left unused for an extended period. This is normal, and the batteries will retaina charge for longer periods after being used and recharged several times. For more information oncharging batteries, see the documentation provided with the MH-70.
Alternative Power Sources
• To power the camera continuously for extended periods, use an EH-62B AC adapter (Q97). Do not, under any circumstances, use another make or model of AC adapter.Failure to observe this precaution could result in overheating or in damage to the camera.
• We recommend that you buy CR-V3 lithium batteries as a back-up power source.

10
First Steps
Inserting Memory Cards
Pictures can be stored in the camera's internal memory (about 14.5 MB) or onSecure Digital (SD) memory card. If no memory card has been inserted in thecamera, pictures will be stored in the memory, and if the camera contains a mem-ory card, then pictures will automatically be stored on the card. To store pictures in the internal memory, remove the memory card.
Confirm that the camera is off
• The power-on lamp should be off.
Open the memory card slot cover
Insert the memory card
• Insert the memory card in the direction of thearrow as shown in the label on the undersideof the memory card slot cover. Insert straightwithout bending.
Inserting Memory Cards
Insert the memory card terminals first. Inserting the card upside down or backwards coulddamage the camera or the card. Check to be sure thecard is in the correct orientation.
Close the memory card slot cover
1
2
FrontDirection of insertion
Terminals
3
4

11
Inserting Memory Cards
First Steps
Formatting Memory Cards
Memory cards must be formatted before first use. For information on formatting memory cards,see "The Setup Menu: Format memory/card" (Q 93).
Removing Memory Cards
Memory cards can be removed without loss of data when thecamera is off. To remove memory cards, turn the camera off andconfirm that the power-on lamp is off. Do not open the mem-ory card slot cover while the power-on lamp is lit. Open thememory card slot cover and press the memory card to partiallyeject the card. The card can then be removed by hand.
Memory Cards
• Use only Secure Digital (SD) memory cards.• Do not disassemble or modify.• Do not drop, bend, or expose to water or strong physical shocks.• Do not touch the metal terminals with your fingers or metal objects.• Do not affix labels or stickers to the memory card.• Do not leave in direct sunlight in a closed vehicle or in other areas exposed to high
temperatures.• Do not expose to high levels of humidity or to corrosive gas.
The Write Protect Switch
SD cards are equipped with a write protect switch to prevent accidental loss of data. When thisswitch is in the "lock" position, pictures can not be recorded, deleted, or edited, and the card cannot be formatted. Do not lock the card when taking, deleting, or editing pictures.
Write protect switch
When card is locked, pictures can beplayed back but can not be recorded,deleted, edited, or transferred using thecamera a (V) button.

12
First Steps
Checking the Battery Level
Turn the camera on
• Press the power switch. The power-on lampwill light. Rotate the mode dial to a settingother than f.
Check the battery level in the monitor
• When the camera is turned on for the first time,a language selection dialog will be displayed.Choose the desired language and press centerof multi selector. See "First Steps: Basic Setup"(Q 14).
• Before checking the battery level, select theappropriate Battery type option in the setupmenu (Q 96).
The red (!) and green (AF) lamps will blink whenthe "BATTERY EXHAUSTED" warning is displayed.
The x Button
The camera can also be turned on by pressing the x button for about a second. Your mostrecent picture will be displayed in the monitor (Q 22).
Display Meaning
NO ICON Batteries fully charged.
X Low battery.
WARNING!!BATTERY
EXHAUSTED
Batteries exhausted.Replace with new or fully chargedbatteries.
1
AUTO 19
2

13
Checking the Battery Level
First Steps
Turning the Camera Off
To turn the camera off, press the power switch when the power-on lamp is lit. Do not remove thebatteries or disconnect the EH-62B AC adapter until the power-on lamp has gone out.
The Power-on Lamp
Auto Power Off (Standby Mode)
If no operations are performed for one minute (default setting), the monitor will turn off automat-ically and the camera will enter standby mode to reduce the drain on the batteries. While the cam-era is in standby mode, the power-on lamp will blink. If no operations are performed for threeminutes after the camera enters standby mode, the camera will turn off automatically and thepower-on lamp will go out. The camera will be reactivated from standby mode when you:• Press the power switch• Press the shutter-release button halfway• Press the x button to view the last picture taken• Press the MENU button to display the menu for the current mode• Rotate the mode dial to select a new mode
The length of time before the camera enters standby mode can be changed using the Autooff option in the setup menu (Q 92). However, when a menu or the setup menu is dis-played, the monitor will turn off after three minutes, and when pictures are being shown ina non-stop slide show (Q 72) or when the camera is powered by an AC adapter, the mon-itor will turn off after thirty minutes.
Sleep Mode
Turning sleep mode on will cause the camera to enter standby mode when there is no change inthe brightness of the subject, even before the time selected in the AUTO OFF menu has elapsed(Q 92).
When the power on lamp is The camera is
On On
Blinking In standby mode
Off Off

14
First Steps
Basic Setup
The first time the camera is turned on, a language-selection dialog will be displayed inthe monitor. Follow the steps below to choose a language and set the time and date.
The Clock Battery
When the main batteries are installed or the camera is powered by an AC adapter, the clock batterywill charge in about ten hours. When fully charged, the clock battery can provide several days ofback-up power.
Confirmation dialog displayed. Highlight Yes.Select No to exit to mode currently selected with mode dial. If you exit without setting time anddate, Z ("date not set") icon will flash in monitor when camera is in shooting mode and all pic-tures will have time stamp of "0000.00.00 00:00" (still images) or "2004.01.01.00:00" (movies).
TIME ZONE menu displayed. † Display map of world time zones.
†To turn daylight saving time on or off, press multi selector down to highlightDaylightSaving and press center of multi selector. When DaylightSaving ischecked, time will automatically be advanced one hour (Q 85). To return toStep 4, press multi selector up to highlight current time zone.
1 LANGUAGELANGUAGELANGUAGE
Cancel SetMENU
2 DATEDATEDATE
Set time and date?Set time and date?Set time and date?
No
Yes
Highlight Deutsch (German), English, Español (Spanish), Français (French), Italiano (Italian), Nederlands (Dutch), Svenska (Swedish), (Japanese),
(Simplified Chinese), or (Korean) and press a.
3 DATEDATEDATE
Set time and date?Set time and date?Set time and date?
No
Yes
42004. 01. 01 00 : 002004. 01. 01 00 : 002004. 01. 01 00 : 00
TIME ZONETIME ZONE TIME ZONE
:DaylightSavingLondon, Casablanca
5 HOME TIME ZONEHOME TIME ZONE
Back SetMENU
London, Casablanca

15
Basic Setup
First Steps
Setting the Clock from Nikon View (Windows XP/Mac OS X Only)
If the camera is connected with the USB option set to PTP (Q 45), Nikon View (included) can be used to setthe camera clock to the same time and date as the computer. See the Nikon View Reference Manual for details.
Select home time zone.
Edit Day (order of Day, Month, and Year may differ in some areas).
Highlight D M Y.
Display DATE menu.
Select Month. Repeat steps 8–9 to edit Month, Year, hour, and minute.
Choose order in which Day, Month, and Year will be displayed.
Exit to mode currently selected withmode dial. Note that time and date ofrecording will not be imprinted on pic-tures unless Date or Date and time is se-lected for Date imprint (Q 87).
6 HOME TIME ZONEHOME TIME ZONE
Back SetMENU
London, Casablanca
8
200401
00 00
05
DATEDATEDATE
D M Y
10 DATEDATEDATE
200408
13 00
05
D M Y
AUTO 19
12
200401
00 00
01
DATEDATEDATE
D M Y
7
9
200408
00 00
05
DATEDATEDATE
D M Y
11200405
13 00
08
DATEDATEDATE
M D Y

16
Basic Ph
oto
grap
hy
Basic Photography
Step 1 - Select P Mode
This section details the basic steps involved in taking pictures in P (auto) mode.In this automatic, "point-and-shoot" mode, the majority of camera settings arecontrolled by the camera in response to shooting conditions, producing optimalresults in most situations.
Rotate the mode dial to P
Turn the camera on
• The power-on lamp will light and the monitorwill display a welcome screen (Q 83). Thecamera is ready to shoot when the monitorshows the view through the camera lens.
1
2
AUTO 19
Image mode
Choose from five (E3200) or four(E2200) options depending on howyou plan to use the picture (Q 63).The default setting is b (E3200) orc (E2200).
Shooting mode/scene mode
P indicates auto mode.
Flash mode
Choose from five modes de-pending on lighting and yourcreative intent (Q 24). The de-fault setting is !# (auto).
Number of exposures remaining
The number of pictures that can be storeddepends on the capacity of the memory ormemory card and the option chosen forImage mode (Q 63).
Memory/memory card
When the camera contains amemory card, / is displayed,and when there is no card inthe camera, } is displayed.

17
Step 1 - Select P Mode
Basic Ph
oto
grap
hy
Number of Exposures Remaining
If the number of exposures remaining is zero, the message "OUT OF MEMORY" will be displayedin the monitor. No further pictures can be taken until you:• choose a lower Image mode setting (Q 63)• insert a new memory card (Q 10)• delete some pictures (Q 22-23, 73-74)

18
Basic Ph
oto
grap
hy
Step 2 - Frame the Picture
Ready the camera
Hold the camera steadily in both hands. Photo-graphs can be framed in the monitor or the view-finder.
Frame your subject
Your Nikon digital camera is equipped with twotypes of built-in zoom: optical zoom, in which thecamera's telescoping lens can be used to magnify thesubject up to 3 ×, and digital zoom, in which digitalprocessing is used to further magnify the image upto 4 ×, for a total of 12 ×. Use the zoom buttons toframe your subject in the center of the monitor:
• Press the l (W) button to zoom out fromyour subject, increasing the area visible in theframe.
• Press the O (T) button to zoom in on your sub-ject so that it fills a larger area of the frame.
• When the camera is zoomed in to maximummagnification, holding the O (T) button downfor about one second will trigger digital zoom.The zoom indicator will turn yellow, and thegreen (AF) lamp next to the viewfinder willblink. Use the O (T) and l (W) buttons to ad-just zoom in the digital zoom range. To canceldigital zoom, press l (W) until the zoom in-dicator turns white.
1
Don't Block the Shot
To avoid dark or partially obscured pictures, keepyour fingers and other objects away from thelens, flash window and microphone (E3200 only).
Zoom out Zoom in
AUTO 19
AUTO 19
Indicator in monitor showsamount of zoom when ei-ther button is pressed
Digital zoom
2

19
Step 2 - Frame the Picture
Basic Ph
oto
grap
hy
Digital Zoom
In digital zoom, data from the camera's image sensor are processed digitally, enlarging the centerportion of the picture to fill the frame. Unlike optical zoom, digital zoom does not increase theamount of detail visible in the picture. Instead, details visible at maximum optical zoom are simplyenlarged, producing a slightly "grainy" image. Note that the effects of digital zoom are not visiblein the viewfinder - use the monitor when framing pictures with digital zoom. Digital zoom is notavailable when the monitor is off or when Multi-Shot 16 is selected in the CONTINUOUS menu(Q 68).
When Lighting Is Poor
When lighting is poor, sensitivity is raised to compensate and the image in the monitor may beslightly mottled. This is normal and does not indicate a malfunction.
Monitor or Viewfinder?
Use the monitor to confirm camera settings at a glance while at the same time viewing an imagethat shows how the final picture will appear. This is particularly useful when the image in the view-finder does not accurately reflect what will appear in the final picture, for example when:• your subject is less than a meter (3´3”) from the camera• digital zoom is in effect
Use the viewfinder when you want to save power by turning the monitor off (Q 5), or whenbright ambient lighting makes it difficult to see the display in the monitor.

20
Basic Ph
oto
grap
hy
Step 3 - Focus and Shoot
Focus
Press the shutter-release button halfway to set fo-cus and exposure. In P mode, the camera willautomatically focus on the subject at the center ofthe frame. Focus and exposure will lock while theshutter-release button is pressed halfway.With the shutter-release button pressed halfway,check focus and flash. Focus is indicated by thegreen AF (autofocus) lamp next to the viewfinderand by the focus indicator in the monitor. Flashstatus is indicated by the red ! (flash-ready) lampnext to the viewfinder.
Monitor turns off while flash is charging.
Take the picture
Press the shutter release button the rest of the waydown to take the picture. The shutter sound isplayed when the shutter-release button is pressed(default setting Q 90). To prevent blur, press theshutter-release button down smoothly. You canchoose whether or not to display the camerashake warning. (Q 25).
OnFlash will fire when picture istaken.
BlinksFlash charging. Wait until lampcomes on.
Off Flash off or not required.
On Subject in focus.
Flashes
Camera unable to focus on sub-ject at center of frame. Usingfocus lock, focus on another sub-ject at same distance, thenrecompose picture and shoot.
AUTO 19
Red (!) lamp
Green (AF) lamp
Focus indicator
1
Red (!) lam
pG
reen(AF)lam
p/focus indicator
2

21
Step 3 - Focus and Shoot
Basic Ph
oto
grap
hy
During Recording
While pictures are being recorded to the memory or memory card, the green (AF) lamp blinks, andthe < icon lights or the memory icon }// blinks. You can continue to take pictures until the <icon is displayed. Do not turn the camera off, eject the memory card, or remove or discon-nect the power source while picture are being recorded. Cutting power or removing thememory card in these circumstances could result in loss of data or in damage to the camera or card.
Getting Good Results with Autofocus
Autofocus performs best when there is contrast between the subject and the background and thesubject is evenly lit. It does not perform well if the subject is very dark or moving rapidly, if there areobjects of sharply differing brightness in the scene (e.g., the sun is behind your subject and theirfeatures are in deep shadow), or if there are several objects at different distances from the cameraat the center of the frame (e.g., your subject is inside a cage).
Focusing on Off-Center Subjects: Focus Lock
If your subject is not at the center of the frame when the shutter-release button is pressed halfway,your picture may be out of focus. To focus on an off-center subject:
FocusPosition the subject in the center of the frame andpress the shutter-release button halfway.
Check the green (AF) lamp and focus indicator
With the shutter-release button pressed halfway,check that the green (AF) lamp and focus indicatorglow steadily, indicating that the subject is in focus.Focus and exposure will remain locked while theshutter-release button is pressed halfway.
Recompose the picture
Keeping the shutter-release button pressed half-way, recompose your picture. Do not change thedistance between the camera and your subjectwhile focus lock is in effect. If your subject moves,remove your finger from the shutter-release buttonand focus again at the new distance.
Take the picturePress the shutter-release button the rest of the waydown to shoot.
NORMAL 10AUTO 19AUTO 19
AUTO 19

22
Basic Ph
oto
grap
hy
Step 4 - View the Results (Full-screen Playback Mode)
Press the x button
View pictures in the monitor
To view additional pictures, press the multi selec-tor down or right to view pictures in the order re-corded, up or left to view pictures in reverse order.To scroll quickly to a particular frame numberwithout viewing the intervening pictures, pressand hold the multi selector. . @ (voice memorecording guide) is displayed (E3200 only).
To cancel full-screen playback and return to shoot-ing mode, press the x button again.
Deleting Unwanted Pictures
To delete the picture displayed in the monitor, pressthe u button. A confirmation dialog will be displayed.Press the multi selector up or down to highlight Yesand then press the center of the multi selector. To exitwithout deleting the picture, highlight No and pressthe center of the multi selector.
1
11
2004.08.05 13:00
100NIKON0001.JPG
Done
Erase 1 image ?Erase 1 image ?Erase 1 image ?
No
Yes
2

23
Step 4 - View the Results (Full-screen Playback Mode)
Basic Ph
oto
grap
hy
Deleting Your Last Shot
At any time during shooting, you can press the u button to delete the lastpicture taken. The confirmation dialog shown at right will be displayed.Delete the picture as described opposite under "Deleting Unwanted Pic-tures."
Playback Tip
The first and last pictures in memory are linked. Pressing the multi selector up or left when the firstpicture in memory is displayed will take you to the last picture. Pressing the multi selector down orright when the last picture is displayed takes you to the first picture.
Image File and Folder Names
In the memory or on the memory card, pictures are identified by file names with three parts: a fourletter identifier, a four-digit file number assigned automatically by the camera in ascending order,and a three-letter extension (e.g., "DSCN0001.JPG")
When a picture is viewed in the monitor, the file number and extension appear in the top right cornerof the display. The identifier is not displayed, but is visible when the picture is transferred to a computer.
Pictures are stored in folders created automatically by the camera and named with a three-digit fold-er number followed by "NIKON" (e.g., "100NIKON"). Folders can hold up to 200 pictures; if youtake a picture when the current folder contains 200 pictures, a new folder will be created by addingone to the current folder number. If you take a picture when the current folder contains a picturenumbered 9999, a new folder will be created and file numbering will begin again from 0001. If thenumber of files reaches 200 or file numbering reaches 9999 when the memory or memory cardcontains a folder numbered 999, no further pictures can be taken until the memory or memory cardhas been formatted (Q 93) or a new memory card inserted.
Picture type Identifier Extension Q
OriginalStill picture DSCN .JPG 22
Movie DSCN .MOV 60
CopySmall copy SSCN .JPG 78
Cropped copy RSCN .JPG 42
Voice memo appended to still picture
(E3200 only)
Voice memoDSCNSSCNRSCN
.WAV 43
Erase 1 image ?Erase 1 image ?Erase 1 image ?
No
Yes

24
Mo
re on
Pho
tog
raph
y
More on Photography
When Lighting Is Poor: Using the Flash
The following flash modes are available:
To select the flash mode:
Display flash-mode menu. Highlight desired mode (to exit without changing mode, wait two seconds or
press multi selector to left).
Exit menu. Flash mode shown by icon atbottom of monitor.
Mode How it works When to use it
#Auto
Flash fires when lighting ispoor. Best choice in most situations.
%Auto with
red-eye reduction
Red-eye reduction lamp(E3200) or flash (E2200)fires before main flash,reducing "red-eye."
Use for portraits (works best when sub-ject is well within range of flash andlooking at pre-flash). Not recommendedwhen quick shutter response isrequired.
$Flash Cancel
(off)
Flash will not fire evenwhen lighting is poor.
Use to capture natural lighting underdim light or where use of flash is prohib-ited. If 2 (camera shake) icon appears,care should be taken to avoid blurring.
!Anytime Flash
( fill flash)
Flash fires whenever pictureis taken.
Use to "fill-in" (illuminate) shadows andback-lit subjects.
k(Slow sync)
Auto flash combined withslow shutter speeds.
Use to capture both subject and back-ground at night or under dim light. If2 (camera shake) icon appears, careshould be taken to avoid blurring.
1
19AUTO
2
19
3
19

25
When Lighting Is Poor: Using the Flash
Mo
re on
Pho
tog
raph
y
Sensitivity ( ISO Equivalency)
"Sensitivity" is a measure of how quickly the camera responds to light.Your Nikon digital camera normally has a sensitivity roughly equivalent tofilm with an ISO 50 rating. When lighting is poor and the flash is off ($),the camera will automatically increase sensitivity, permitting faster expo-sures and minimizing blur caused by inadvertent camera movement (cam-era shake). An ISO icon will appear in the monitor to warn that the picturemay be slightly mottled.
The 2 (Camera Shake) Icon
When lighting is poor and the flash is off ($), shutter speeds will slowand pictures may be blurred. If the shutter speed required for exposure isvery slow, a 2 (camera shake) warning will appear in the monitor. Use ofa tripod or support is recommended.
Flash Range
Flash range varies with zoom position. When the camera is zoomed all the way out, the flash has arange of 0.4 - 3.4 m (1´4” - 11´2”) with E3200 and 0.4 - 3.7 m (1´4” - 12´2”) with E2200. The rangeat maximum zoom is 0.4 - 2.0 m (1´4” - 6´6”) with E3200 and E2200.
Close-Ups
The flash may not be able to light the entire subject at distances of less than 40 cm (1´4”). Whentaking close-ups, play each picture back after shooting to check the results.
Flash Mode Selection
In P (auto) mode, the camera "remembers" the current flash mode setting even when the cam-era is turned off. The most recent setting will automatically be restored whenever the mode dial isset to P unless the Reset all option in the setup menu is used to restore the default setting (Q94).
Depending on the mode selected, the flash mode may change automatically when youchoose a new shooting mode (Q 28-39).
The AF-Assist Illuminator (E3200 only)
The E3200 is equipped with an AF-assist illuminator. If lighting is poor, the built-in AF-assist illumi-nator will light when the shutter-release button is pressed halfway, allowing the camera to focuseven when the subject is poorly lit. When the camera is zoomed all the way out, the AF-assist illu-minator has a range of 0.4 – 2.0m (1’4” – 6’7”). The range at maximum zoom is 0.4 – 1.4m (1’4”– 4’6”). In scene mode (Q 28-39), the AF-assist illuminator is only available in i (Portrait), m(Night Portrait) and B (Party/Indoor) modes without the framing assist option (Q 29-33), and inC (Beach/Snow), D (Sunset), I (Copy), J (Back light) and K (Panorama assist) modes.
19
19

26
Mo
re on
Pho
tog
raph
y
Taking a Self-Portrait: Using the Self-Timer
When the self-timer is on, pictures are taken ten seconds after the shutter-releasebutton is pressed. This can be used to allow you to appear in your own picturesor to prevent close-up or low-light shots from being blurred by the camera move-ment that occurs when the shutter-release button is pressed.When using this op-tion, you should either mount the camera on a tripod (recommended) or rest iton a flat, level surface.
Display self-timer menu.
Exit menu. Self-timer icon is displayed in monitor.
Highlight YON (to exit without chang-ing mode, wait two seconds or press
multi selector to left).
Frame picture and start timer. Countdown timer shows number of seconds remaining
until picture is taken.
Focus and exposure lock when the shutter-release button ispressed. The self-timer lamp on the front of the camera willblink until one second before the picture is taken, staying litduring the final second to warn that the shutter is about to bereleased.
Stopping the Self-Timer
To stop the timer before the picture is taken, press the shutter-release button.
The Self-Timer
The self-timer is not available in some shooting modes (Q 28-39).
1
AUTO 19
ONOFF
AUTO 19
3
2ON
OFF
AUTO 19
4
AUTO 19

27
Mo
re on
Pho
tog
raph
y
Easy Close-ups: Macro Close-up Mode
Macro close-up mode is used for taking close-up shots of small objects at veryshort distances (minimum 4 cm/1.6″).
Display macro close-up menu.
Exit menu. & icon appears in monitor when camera is in macro close-up.
Highlight &ON (to exit without chang-ing setting, wait two seconds or press
multi selector to left).
Frame picture. If camera is zoomed out until & icon turns green, camera can fo-
cus at distance of 4 cm/1.6″.
Macro Close-up Mode
At short ranges, the viewfinder does not show the image that will appear in the final picture. Usethe monitor for close-ups.
In macro close-up mode, the camera focuses continuously, even when the shutter-releasebutton is not pressed halfway.
Macro close-up is not available in some shooting modes (Q 28-39).
1
AUTO 19
OFFON
3
AUTO 19
AUTO 19
ONOFF
ON
2
4
AUTO 19

28
Mo
re on
Pho
tog
raph
y
Assist and Scene Modes
Your Nikon digital camera offers a choice of four "assist" and eleven "scene"modes. In these modes, camera settings are automatically optimized for the se-lected subject type, sparing you the necessity of adjusting settings one-by-one.
Assist ModesAssist modes are chosen by rotating the mode dial to the desired mode. Framingassist options are available to help you compose your shots.
Scene ModesScene modes are selected by rotating the mode dial to e and selecting the de-sired scene from a menu.
Assist and Scene Modes
Depending on your subject, assist and scene modes may not always produce the desired results. Ifresults are not to your satisfaction, choose P (auto) and try again.
Mode Description Q
i Portrait assist Use for portraits in which the main subject stands outclearly while background details are softened. 30
N Landscape assistUse to enhance outlines, colors, and contrast in sky-scapes, forests, and other landscape shots, or to takeportraits that feature a landmark in the background.
31
j Sports assist Use for sports shots that freeze motion in rapidly-moving subjects. 32
m Night portrait assist Use for portraits taken against a dimly-lit backdrop. 33
Mode Description Q
B Party/Indoor Use to capture background details or the effects of can-dlelight and other indoor lighting. 35
C Beach/Snow Use for bright subjects such as snowfields, beaches, andsunlit expanses of water. 35
D Sunset Use to preserve the deep hues seen in sunsets and sunrises. 35
E Dusk/Dawn Use to preserve the colors seen in the weak natural lightbefore sunrise and after sunset. 35
F Night landscape Use when taking landscape shots at night. 36
A Close up Use to capture vivid colors in close-up shots of flowers,insects, and other small objects. 36
G Museum Use where flash photography is prohibited. 36
H Fireworks show Use to capture the expanding burst of light from a firework. 37
I Copy Use to copy text and line drawings. 37
J Back light Use when light is coming from behind your subject,throwing their features into shadow. 37
K Panorama assist Use when taking a series of pictures that will later bejoined to form a single scene. 38

29
Mo
re on
Pho
tog
raph
y
Framing Assist
The four assist modes offer a selection of framing assist options that allow youto compose pictures with the help of framing guides displayed in the monitor. Touse framing assist, rotate the mode dial to the desired mode and follow the stepsbelow.
After selecting mode, display framing as-sist menu.
Make selection. To return to shooting mode, press the MENU button. Framing
guide appears in monitor.
Choose composition type. Current selec-tion shown by large icon and caption.
When taking pictures, position subject or subjects in framing guide as described
on following pages.
Using the Guides
Your subject does not have to fit exactly in the framing guides. When framing pictures, pay at-tention to your surroundings; be careful not to trip and fall.
Image Mode
The image mode option is available in the assist mode menu (Q63).
1
MENU Exit Set
PortraitPortraitPortrait
3
19
2
MENU
Portrait close-up
Portrait
Exit Set
4
19
Exit SetMENU
IMAGE MODEIMAGE MODEIMAGE MODE

30
Framing Assist
Mo
re on
Pho
tog
raph
y
i Portrait Assisti (portrait assist) mode helps you frame portraits in whichthe main subject stands out clearly while background detailsare softened, lending the composition a sense of depth (thedegree of softening depends on the amount of light avail-able). A framing assist menu helps you frame off-center sub-jects and compose tall or wide shots and two-person portraits.
* Other modes can be selected.
i Portrait
No guides are displayed in monitor. Camera focuses on subject in center offrame; focus lock can be used to focus on off-center subjects.
9 Portraitleft
Use to compose shot with subject centered in left half of frame. Camera willfocus on subject in framing guide.
0 Portrait right
Use to compose shot with subject centered in right half of frame. Camerawill focus on subject in framing guide.
: Portraitclose-up
Use to compose shot with your subject's face positioned in top half offrame. Camera will focus on face area in framing guide.
[ Portraitcouple
Use to compose shot with two subjects positioned side-by-side. Camera willfocus on closest subject.
; Portraitfigure
Use to compose shot with camera held as shown at rightand subject's face in top half of frame. Camera will focuson face area in framing guide.
MENU Exit Set
PortraitPortraitPortrait
MENU
Portraitleft
PortraitPortraitPortrait
Exit Set
MENU
Portraitright
PortraitPortraitPortrait
Exit Set
MENU
Portrait close-up
PortraitPortraitPortrait
Exit Set
MENU
Portraitcouple
PortraitPortraitPortrait
Exit Set
MENU
Portraitfigure
PortraitPortraitPortrait
Exit Set
! %* Y OFF* & OFF

31
Framing Assist
Mo
re on
Pho
tog
raph
y
NLandscape AssistN (landscape assist) mode helps you frame vivid landscapeshots that enhance outlines, colors, and contrast. A framingassist menu helps you frame not only natural landscapes butalso cityscapes and portrait shots featuring a landmark inthe background.
* Other modes can be selected.
N Landscape
No guides are displayed in monitor. Use to focus on distant objects throughforeground objects such as windows or a screen of branches. Focus is fixedat infinity.
6 Scenicview
Use to compose landscapes with sky in top third of frame, distant objects inmiddle third, and closer objects in bottom third. Match top of skyline withwavy yellow guide.
7 Architecture
Use to photograph buildings. A grid is displayed in the monitor to help keepverticals and horizontals aligned with the frame.
MENU Exit Set
LandscapeLandscapeLandscape
MENU
Scenicview
Exit Set
LandscapeLandscapeLandscape
MENU
Architecture
Exit Set
LandscapeLandscapeLandscape
! $ Y OFF* & OFF
5 Groupright
Use to compose portraits with portrait subjects to right and landmark orother object in background at left of frame. Both portrait subject and back-ground object will be in focus.
8 Groupleft
Use to compose portraits with portrait subjects to left and landmark orother object in background at right of frame. Both portrait subject andbackground object will be in focus.
MENU
Groupright
Exit Set
LandscapeLandscapeLandscape
MENU
Groupleft
Exit Set
LandscapeLandscapeLandscape
! #* Y OFF* & OFF

32
Framing Assist
Mo
re on
Pho
tog
raph
y
j Sports Assistj (sports assist) mode is used for dynamic action shots thatcapture moving objects. The assist menu lets you freeze theaction in a single shot or record motion in a series of pic-tures.
Sports Assist
In Sports or Sports composite mode, the focus is constantly reset until it is locked by pressing theshutter-release button halfway.
j Sports
While shutter-release button is held down, pictures are recorded at rate ofabout 3 frames every 2 seconds (rate of shooting will slow when < icon isdisplayed). With E3200, camera records 3 shots when image mode is set tob Normal (2048), and with E2200, 6 shots when image mode is set to c(1600). Focus, exposure, and white balance are determined by first shot ineach series. Camera focuses continuously, even when shutter-release buttonis not pressed.
\ Sportspectator
Sport spectator is ideal for capturing those instants when you have no timeto compose the picture. Use at ranges of 3 m to infinity.A series of shots can be taken by holding the shutter-release button down.Number of shots that can be taken is the same as for j (Sports) mode.
] Sportcomposite
Each time shutter-release button is pressed, camera takes 16 shots in abouttwo seconds and arranges them in four rows to form a single picture. Focus,exposure, and white balance are determined by first shot in each series.
MENU Exit Set
SportsSportsSports
MENU Exit Set
Sports
Sportspectator
MENU Exit Set
SportsSportsSports
Sportcomposite
! $ Y OFF & OFF

33
Framing Assist
Mo
re on
Pho
tog
raph
y
m Night Portrait Assistm (night portrait assist) mode is used for taking portraitshots at night, when it provides a natural balance betweenthe main subject and the background. Pictures taken at slowshutter speeds are adjusted to improve quality, slightly in-creasing processing time; to prevent blurring, mount thecamera on a tripod or rest it on a flat, stable surface. Formore information on framing assist options, see i PortraitAssist (Q 30).
* Other modes can be selected.
Flash Mode Selection in m Mode
Flash mode is automatically set to % (auto with red-eye reduction).
! % Y OFF* & OFF

34
Mo
re on
Pho
tog
raph
y
e Scene Mode
e (scene) mode offers a menu of eleven "scenes," eachcorresponding to a common situation, such as a backlitsubject, sunset, or interior shot. Camera settings are auto-matically adjusted to suit the selected scene, sparing youthe necessity of adjusting each setting separately. To takepictures in scene mode, rotate the mode dial to e andfollow the steps below.
Display scene menu.
Make selection. To return to shooting mode, press ^. Selected scene shown by icon at top left corner of monitor.
Choose scene. Current selection shown by large icon and caption.
Take pictures.
Image Mode
Image mode can be selected in the scene menu. The current settingis shown when the image mode icon is highlighted.
The 2 (Camera Shake) Icon
When the 2 icon appears in the monitor, pictures may be blurred. In this section, the precautionsthat you can take to avoid blur are indicated by stars:
hold camera in both hands and brace elbows against your body. use a tripod or rest the camera on a flat, level surface.
Scene mode
1
MENU
Party/IndoorParty/IndoorParty/Indoor
Exit Set
3 Beach/SnowBeach/SnowBeach/Snow
Exit SetMENU
2
Exit SetMENU
Beach/SnowBeach/SnowBeach/Snow
4
AUTO 19
Exit SetMENU
IMAGE MODEIMAGE MODEIMAGE MODE

35
e Scene Mode
Mo
re on
Pho
tog
raph
y
The following scenes are available:
* Other modes can be selected.
BParty/IndoorUse for shots that include details of the background, or to capturethe effects of candlelight and other indoor background lighting.
CBeach/SnowVividly captures the brightness of such subjects as snowfields,beaches, or sunlit expanses of water. Flash mode automatically setto AUTO; other modes can be selected.
DSunsetPreserves the deep hues seen in sunsets and sunrises.
EDusk/DawnPreserves the colors seen in the weak natural light before sunrise orafter sunset.
Pictures taken at slow shutter speeds are processed to improve quality, slightly increasing timebefore pictures are saved to memory or memory card.
! %* Y OFF* & OFF
! Auto* Y OFF* & OFF
! $* Y OFF* & OFF
! $ Y OFF* & OFF

36
e Scene Mode
Mo
re on
Pho
tog
raph
y
* Other modes can be selected.
FNight landscapeA slow shutter speed is used to produce stunning night land-scapes. Focus is fixed at infinity.
Pictures taken at slow shutter speeds are processed to improve quality, slightly increasing timebefore pictures are saved to memory or memory card.
AClose upUse to capture vivid colors in close-up shots of flowers, insects,and other small objects, with the background artistically blurred.Flash mode automatically set to AUTO; other modes can beselected.
Camera focuses continuously, even when shutter-release button is not pressed halfway. Mini-mum focus distance varies with zoom position. To focus on objects as close as 4 cm/1.6” to thelens, adjust zoom until the macro close-up icon (&) in monitor turns green.
GMuseumFlash turns off ($) automatically. Use this mode indoors where flashphotography is prohibited (for example, in museums and art galleries)or in other indoor settings in which you do not want to use the flash.
•The Best Shot Selector (BSS;Q 65) turns on automatically, reducing the effects of inad-vertent camera movement.
•Macro close-up turns off automatically; other modes can be selected.•Photography may be prohibited altogether in some settings. Be sure to obtain permis-
sion first.
! $ Y OFF* & OFF
! Auto* Y OFF* & ON
! $ Y OFF* & OFF*

37
e Scene Mode
Mo
re on
Pho
tog
raph
y
* Other modes can be selected.
HFireworks showSlow shutter speeds are used to capture the expanding burst oflight from a firework. The camera responds more rapidly to theshutter-release button, ensuring that you can capture the start ofthe burst.
• Focus is fixed at infinity.• Follow the firework as it ascends and press the shutter-release button all the way down
at the start of the burst.
ICopyProvides clear pictures of text or drawings on a white board or inprinted matter such as a business card.
• Flash and macro close-up turn off automatically; other modes can be selected.• Colored text and drawings may not show up well in the final picture.
JBack lightUse when light is coming from behind your subject, throwingtheir features into shadow, or when your subject is in the shadebut the background is brightly lit. The flash will fire automaticallyto "fill in" (illuminate) shadows.
! $ Y OFF & OFF
! $* Y OFF & OFF
! ! Y OFF* & OFF

38
e Scene Mode
Mo
re on
Pho
tog
raph
y
* Other modes can be selected.To use panorama assist, follow the steps below.
Highlight K (Panorama Assist), and press the center of the multi selector.
Pan direction displayed in yellow.
Select how pictures will be joined to-gether in completed panorama. This isthe direction in which to pan the cameraafter each shot.
Joining Panorama Pictures
Transfer the pictures taken with Panorama Assist to your computer (Q 45) and use the PanoramaMaker function in Nikon View to join them into a single scene. For further information, see theNikon View Reference Manual (on CD-ROM).
KPanorama AssistUse to take a series of photographs that youwill later join to form a single scene (forexample, a panorama or 360º virtual-realityimage).
! $* Y OFF & OFF*
1 Panorama assistPanorama assistPanorama assist
Exit SetMENU
3
19
Bottom to top
Top to bottom
Left toright
Right to left
2
19

39
e Scene Mode
Mo
re on
Pho
tog
raph
y
Compose the next shot to overlap with the previous picture.
Make selection (to change selected pandirection, press center of multi selectorand repeat steps 3–4). Pan direction dis-played in white.
Take first picture. About one third of pic-ture is shown superimposed on viewthrough lens (if pan direction is left toright, picture will appear on left side ofmonitor).
Take the next picture.Repeat steps 6 and 7 until all shots in se-
ries have been taken.
Panorama Assist
The pan direction, flash mode, macro close-up mode, and exposure compensation can not be changed after thefirst picture is taken. To change the pan direction, press the ^ button to end shooting and repeat steps 1–3.
Using a Tripod
Using a tripod makes it easier to compose shots so that they overlap.
Storage Locations for Panoramas
Each series of pictures taken at Panorama assist is stored in a separate folder with a name consistingof "P_" preceded by a three-digit folder number and followed by a three-digit sequence number(e.g., "101P_002").
4
19
5
18
AE-LAE-L
6 AE-LAE-L
18
8End series. Shooting will also end if a new mode is selected or camera enters standby mode.
7

40
Mo
re on
Playback
More on Playback
Viewing Pictures on the Camera
Viewing Multiple Pictures: Thumbnail PlaybackPressing the l (W) button in full-screen playbackdisplays the pictures in the memory or on the memorycard in "contact sheets" of four thumbnail images.The following operations can be performed whilethumbnails are displayed:
To Press Description
Highlight pictures
Press multi selector up, down, left or right to highlightpictures. Press center of multi selector to return to full-screen playback.
Change number of
pictures displayed
l (W)/O (T)
With four thumbnails displayed, press l (W) buttononce to view nine thumbnails. Press O (T) to "zoom in"from nine thumbnails to four-thumbnail view, or, whenfour thumbnails are displayed, to return to full-screenplayback.
Cancel thumbnailplayback
Cancel thumbnail playback and return to full-screenplayback.
Delete highlighted
pictureu
Confirmation dialog will be dis-played. Press multi selector up ordown to highlight option, pressthe center of the multi selector toselect.
1
3 4
2
Erase 1 image ?Erase 1 image ?Erase 1 image ?
No
Yes
41
Viewing Pictures on the Camera
Mo
re on
Playback
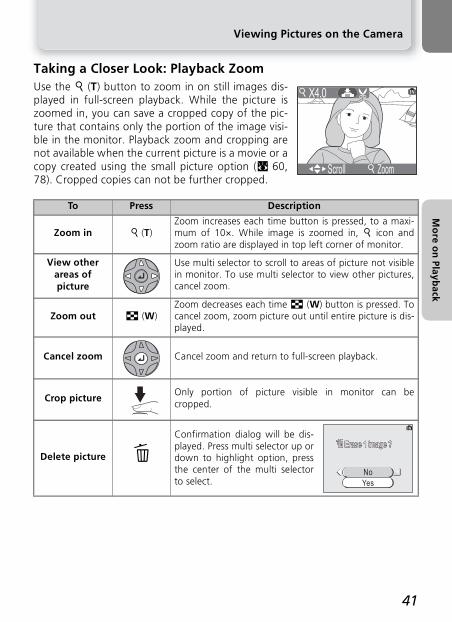
Taking a Closer Look: Playback ZoomUse the O (T) button to zoom in on still images dis-played in full-screen playback. While the picture iszoomed in, you can save a cropped copy of the pic-ture that contains only the portion of the image visi-ble in the monitor. Playback zoom and cropping arenot available when the current picture is a movie or acopy created using the small picture option (Q 60,78). Cropped copies can not be further cropped.
To Press Description
Zoom in O (T)Zoom increases each time button is pressed, to a maxi-mum of 10×. While image is zoomed in, O icon andzoom ratio are displayed in top left corner of monitor.
View other areas of picture
Use multi selector to scroll to areas of picture not visiblein monitor. To use multi selector to view other pictures,cancel zoom.
Zoom out l (W)Zoom decreases each time l (W) button is pressed. Tocancel zoom, zoom picture out until entire picture is dis-played.
Cancel zoom Cancel zoom and return to full-screen playback.
Crop pictureOnly portion of picture visible in monitor can becropped.
Delete picture uConfirmation dialog will be dis-played. Press multi selector up ordown to highlight option, pressthe center of the multi selectorto select.
Scroll
X4.0
Zoom
Erase 1 image ?Erase 1 image ?Erase 1 image ?
No
Yes

42
Mo
re on
Playback
Cropping Pictures
This option lets you crop part of a picture and save it as a separate file.
Zoom picture in and out. Scroll picture. Repeat steps 1 and 2 until desired portion of image is displayed in
monitor.
Confirmation dialog displayed. Select Yes to create cropped copy, No to exit without creating copy, then press the
center of the multi selector.
To view the new, cropped copy, pressthe multi selector down until the copyis displayed.
Cropped pictures are stored as JPEG files (compression ratio 1 : 8). Depending onthe size of the original and the zoom ratio at the time the copy was created, copieswill be 2,048 × 1,536 (E3200 only), 1,600 × 1,200, 1,280 × 960, 1,024 × 768, 640× 480, 320 × 240, or 160 × 120 pixels in size. Copies are stored in separate files inthe memory or on the memory card with names of the form "RSCNnnnn.JPG,"where "nnnn" is a four-digit number assigned automatically by the camera.
Photo Trim
• Cropped pictures are stored with the same recording date and time as the original.• Resized copies and cropped copies can not be cropped.• If a cropped copy created using the E3200 or E2200 is viewed on a different digital cam-
era, the picture may not be displayed or it may not be possible to transfer it to a computer.
1
Scroll
X4.0
Zoom
2
Scroll
X4.0
Zoom
3Save this image as Save this image as displayed?displayed?Save this image as displayed?
No
Yes

43
Mo
re on
Playback
Voice Memos: Recording and Playback (E3200 only)
Using the camera’s microphone, you can record avoice memo by pressing the shutter-release buttonwhile a picture with the . @ icon is displayed in full-screen playback (Q 22). Do not touch the microphoneduring recording. Voice memos cannot be recorded orplayed back for movies (Q 56) or during thumbnailplayback (Q 40) or playback zoom (Q 41).If a voice memo already exists for the current picture,[1] (voice memo icon) and . [1] (voice memo play-back guide) are displayed and a new voice memo cannot be recorded.
Voice Memos
Voice memo file names consist of an identifier ("DSCN" for memos appended to original pictures,"SND_" for memos appended to copies), a four-digit file number copied from the associated pic-ture, and the extension ".WAV" (e.g., "DSCN0015.WAV").
To Press Description
Record voice memo
If . @ icon is displayed on current picture, memo willbe recorded while shutter-release button is held down.During recording, REC icon blinks. Recording endsafter about 20s or when shutter-release button isreleased. Do not touch microphone during recording.
Play voice memo
Pictures for which voice memo exists are marked by 1icon. Press shutter-release button to play voice memo.Playback ends when voice memo ends or shutter-releasebutton is pressed again.
Change vol-ume
l (W)/O (T)
Zoom buttons control volume during playback. Press l(W) to lower volume, O (T) to increase. Volume can alsobe adjusted using Sound settings option in setup menu(Q 90).
Delete picture or voice memo
u
Confirmation dialog will be dis-played. Press multi selector up ordown to highlight option, press thecenter of the multi selector to select.• Select No to exit without delet-
ing picture or voice memo.• Select [1] to delete voice memo
only.• Select Yes to delete both picture
and voice memo.
11
2004.08.05 13:00
100NIKON0001.JPG
Erase 1 image ?Erase 1 image ?
Yes
Erase 1 image ?
No

44
Mo
re on
Playback
Viewing Pictures on TV
Using the EG-CP12 audio/video (AV) cable (E3200) or EG-CP11 video cable(E2200) included with your camera, you can connect the camera to a televisionor video-cassette recorder (VCR).
Choosing a Video Mode
The Video mode item in the camera setup menu offers a choice of NTSC and PAL standards(Q 94). Be sure that the standard selected matches that used in the device.
Turn the camera off
• Turn the camera off before connecting or dis-connecting the AV/video cable.
Connect the AV/video cable to thecamera
• Open the interface connector cover and insertthe black plug into the camera's interface con-nector.
Connect the AV/video cable to thetelevision or VCR
• [E3200] Insert the yellow plug on the AV cableinto the video-in jack on the television or VCRand the white plug into the audio-in jack.
• [E2200] Insert the yellow plug on the video ca-ble into the video-in jack on the television orVCR.
Turn the camera on
• Press the x button for about a second to turnthe camera on. The camera monitor will re-main off and the television will display the im-age normally shown in the monitor. If thecamera is connected to a VCR, images can berecorded to video tape.
1
2
3
4

45
Mo
re on
Playback
Viewing Pictures on a Computer
Using the UC-E6 USB cable and Nikon View software provided with your camera,you can view your photographs and movies on a computer. Before you can trans-fer (copy) pictures to your computer, you will need to install Nikon View. Formore information on installing Nikon View and transferring pictures to your com-puter, see the Quick Start Guide and the Nikon View Reference Manual.
Before Connecting the CameraPictures can be copied from the camera to the computer by:• Pressing the a (V) button on the camera (Q 76)
• Clicking the button in Nikon ViewWhich method you will use depends on your computer's operating system andthe USB option selected in the camera setup menu. After consulting the follow-ing table, select the appropriate option using the USB item in the camera setupmenu. The default option is Mass Storage.
* The camera a (V) button can not be used to transfer pictures in the following cases. Use theNikon View button.
• When your computer's operating system is Mac OS X 10.1.2• When Mass Storage is selected for the USB option when transferring pictures from the
camera memory• When the memory card write-protect switch is in the "lock" position. Unlock by sliding
the switch to the "write" position before transferring pictures.
Operating systemPictures transferred using:
Camera a (V) button*
Nikon View button
Windows XP Home EditionWindows XP Professional
Choose Mass Storage or PTP.
Mac OS X 10.1.3 or later Choose PTP. Choose Mass Storage or PTP.Mac OS X 10.1.2 -
Windows 2000 ProfessionalWindows Millennium Edition (Me)Windows 98 Second Edition (SE)
Mac OS 9 (9.0 - 9.2)
Choose Mass Storage.
1/51/5SET-UPSET-UPSET-UP
Welcome screen
Date
Monitor settings
1/5 USBUSBUSB
PTP
Mass StorageVideo mode
4/54/54/5
Language
USB
SET-UPSET-UPSET-UP

46
Viewing Pictures on a Computer
Mo
re on
Playback
Connecting the USB CableTurn the computer on and wait for it to start up. After confirming that the cam-era is off, connect the UC-E6 USB cable as shown below. Connect the cameradirectly to the computer; do not connect the cable via a USB hub or keyboard.
You can now turn the camera on and transfer pictures as described in the QuickStart Guide.
Windows 2000 Professional, Windows Millennium Edition (Me),Windows 98 Second Edition (SE), Mac OS 9 (9.0-9.2)
Do NOT select PTP when connecting the camera to a computer running one of the above operat-ing systems. If you have connected the camera to a computer running one of the above operatingsystems with PTP selected in the USB menu, disconnect the camera as described below. Be sureto select Mass Storage before reconnecting the camera.
Windows 2000 Professional
A dialog will be displayed welcoming you to the Found New Hardware Wizard.
Click Cancel to close the dialog, and then disconnect the camera.
Windows Millennium Edition (Me)
After displaying a message stating that the hardware information database is being updat-ed, the computer will start the Add New Hardware Wizard. Click Cancel to exit the wizard,and then disconnect the camera.
Windows 98 Second Edition (SE)
The Add New Hardware Wizard will be displayed. Click Cancel to exit the wizard, and thendisconnect the camera.
Mac OS 9 (9.0 - 9.2)
A dialog will be displayed stating that the computer is unable to use the driver needed forthe "Nikon Digital Camera E3200_PTP" (E3200) or "Nikon Digital Camera E2200_PTP"(E2200) USB device. Click Cancel to close the dialog, and then disconnect the camera.
UC-E6 USB cable

47
Viewing Pictures on a Computer
Mo
re on
Playback
Disconnecting the CameraIf PTP is selected in the USB menu, you can turn the camera off and disconnectthe USB cable once transfer is complete. If you have not changed the USB optionin the camera setup menu from its default setting of Mass Storage, you mustremove the camera from the system as shown below before turning the cameraoff or disconnecting the cable.
Windows XP Home Edition/Windows XP Pro-fessionalClick the "Safely Remove Hardware" icon ( ) inthe taskbar and select Safely remove USB MassStorage Device from the menu that appears.
Windows 2000 ProfessionalClick the "Unplug or Eject Hardware" icon ( ) inthe taskbar and select Stop USB Mass StorageDevice from the menu that appears.
Windows Millennium Edition (Me)Click the "Unplug or Eject Hardware" icon ( ) inthe taskbar and select Stop USB Disk from themenu that appears.
Windows 98 Second Edition (SE)In My Computer, click with the right mouse buttonon the removable disk corresponding to the cam-era and select Eject from the menu that appears.
Mac OS XDrag the "NO_NAME" camera volume into theTrash.
Mac OS 9Drag the "untitled" camera volume into the Trash.
Mac OS X Mac OS 9

48
Mo
re on
Playback
Printing Pictures
Pictures stored in the memory or on the memory card can be printed in the sameway as pictures taken with a film camera. Using the Print set option in the play-back menu, you can specify the pictures to be printed, the number of prints, andthe information to be included with each print.
Printing picturesPictures can be printed as follows.• By printer or at a photo lab
Pictures can be printed by inserting a memory card containing pictures into aprinter or having prints made at a digital photo lab. If a print order has beencreated, the printer or photo lab must support DPOF.Pictures stored in the camera memory can be printed. They must be copied tothe memory card (Q 79). Copy the pictures before creating a print order.
• By a printer that supports PictBridge (Q 52)Connect the camera to a printer that supports PictBridge to print pictures.Print order data can be used.
• By transferring pictures to a PC and printing themFor more information, see the Nikon View Reference Manual.

49
Printing Pictures
Mo
re on
Playback
Highlight Print set. Display PRINT SET menu.
Highlight Print selected. Pictures on memory card displayed as thumbnail images.
Highlight picture. Select highlighted picture. Selected pic-tures marked by d icon.
"Delete print set"
To cancel the current print order, highlight Delete print set in the PRINT SET menu and press themulti selector to the right. Print marking will be removed from all pictures in the current print order;the pictures themselves will not be deleted.
1 1/31/3PLAYBACK MENUPLAYBACK MENUPLAYBACK MENU
Print set
Slide show
Delete
1/3 2 PRINT SETPRINT SETPRINT SET
Print selected
Delete print set
3 PRINT SETPRINT SETPRINT SET
Print selected
Delete print set
4
2004200408.0508.0512:0012:00
MENU
PRINT SELECTIONPRINT SELECTIONPRINT SELECTION
Back Set5/5/ 5
5
2004200408.0508.0512:0012:00
MENU
PRINT SELECTIONPRINT SELECTIONPRINT SELECTION
Back Set4/4/ 5
6
4/4/ 5MENU
1
12004200408.0508.0512:0012:00
PRINT SELECTIONPRINT SELECTIONPRINT SELECTION
Back Set

50
Printing Pictures
Mo
re on
Playback
Use multi selector to specify number ofprints (up to 9). To deselect picture, pressmulti selector down until icon disap-pears. Repeat steps 5-7 to select addi-tional pictures. To exit without alteringprint order, press ^ button.
Press the center of the multi selector tocomplete print order and display menuof print options.• To print date of recording on all pictures in
print order, highlight Date and press thecenter of the multi selector.Check will appear in box next to item.
• To print shutter speed and aperture on allpictures in print order, highlight Info andpress the center of the multi selector. Check will appear in box next to item.
• To deselect checked item, highlight andpress the center of the multi selector.
• To complete print order and return toplayback, highlight Done and press thecenter of the multi selector. Done is dis-played and the screen returns to the play-back menu. Press the Menu button toreturn to full-screen playback. To exitwithout altering print order, press ^ but-ton.
7
MENU
3 2 1
22004200408.0508.0512:0012:00
PRINT SELECTIONPRINT SELECTIONPRINT SELECTION
Back Set4/4/ 5
8 PRINT SETPRINT SETPRINT SET
Done
Date
Info
Done
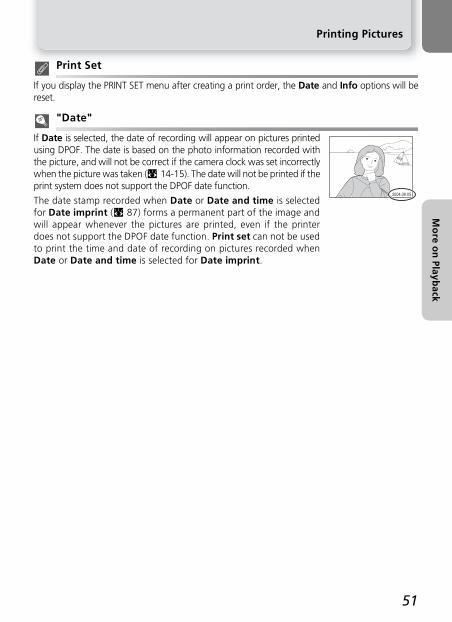
51
Printing Pictures
Mo
re on
Playback
Print Set
If you display the PRINT SET menu after creating a print order, the Date and Info options will bereset.
"Date"
If Date is selected, the date of recording will appear on pictures printedusing DPOF. The date is based on the photo information recorded withthe picture, and will not be correct if the camera clock was set incorrectlywhen the picture was taken (Q 14-15). The date will not be printed if theprint system does not support the DPOF date function.
The date stamp recorded when Date or Date and time is selectedfor Date imprint (Q 87) forms a permanent part of the image andwill appear whenever the pictures are printed, even if the printerdoes not support the DPOF date function. Print set can not be usedto print the time and date of recording on pictures recorded whenDate or Date and time is selected for Date imprint.
2004.08.05

52
Mo
re on
Playback
Printing Via Direct USB Connection
Your camera allows pictures to be printed directly from the camera using Pict-Bridge. If the UC-E6 USB cable is used to connect the camera to a printer thatsupports PictBridge, pictures can be printed directly from the memory or memorycard without having to be transferred to a computer.
Select PTP in the camera USB menu.
• For more information on selecting theUSB option, see "Viewing Pictures on aComputer" (Q 45).
After confirming that the camera is off, connect the UC-E6 USB cable as shownabove.You can now turn the camera and printer on.
Highlight Print. Display options.
1 USBUSBUSB
PTP
Mass Storage
2
3 PictBridgePictBridgePictBridge
DPOF printing
Cancel
4 PRINTPRINTPRINT
Print selection
Print all images
Cancel
Option Description
Print selection Select picture and specify number of prints.
Print all images All pictures in internal memory or on memory card are printed.
DPOF printingPictures for which print order has been created are printedaccordingly.

53
Printing Via Direct USB Connection
Mo
re on
Playback
Highlight Print selection. * Display selection dialog.*To print one copy of all pictures on
memory card, highlight Print all im-ages and press multi selector to right.
Scroll through pictures. Current pictureshown at bottom of display.
Use multi selector to specify number ofprints (up to 9). To deselect picture, pressmulti selector down when number ofprints is 1. Repeat steps 7–9 to select ad-ditional pictures.
Select current picture and set number ofprints to 1. Selected pictures marked byd icon.
View selected pictures. Press multi selec-tor up, right, left, or down to view pic-tures not visible in display.
5 PRINTPRINTPRINT
Print selection
Print all images
Cancel
6
2004200408.0508.0512:0012:00 5/5/ 5
MENU
PRINT SELECTIONPRINT SELECTIONPRINT SELECTION
Back Set
7
2004200408.0508.0512:0012:00
MENU
PRINT SELECTIONPRINT SELECTIONPRINT SELECTION
Back Set4/4/ 5
2004200408.0508.0512:0012:00 4/4/ 5
MENU
1 3 1
3
PRINT SELECTIONPRINT SELECTIONPRINT SELECTION
Back Set
9
8
2004200408.0508.0512:0012:00 4/4/ 5
MENU
1
1
PRINT SELECTIONPRINT SELECTIONPRINT SELECTION
Back Set
10
Exit
3
2
11
CONFIRMCONFIRMCONFIRM

54
Printing Via Direct USB Connection
Mo
re on
Playback
Display confirmation dialog. Press multi selector up or down to highlight option, press center to select.• Select Start print to start printing. To interrupt printing, press center of multi
selector, then turn camera off and disconnect USB cable.• Select Confirm to return to print selection dialog shown in Step 6.• Select Cancel to exit without printing pictures.• Select Resume to return to Step 3.Message shown above at right is displayed when printing is complete. Turn cam-era off and disconnect USB cable.
To print the current print order:
Highlight DPOF printing. Display options.
Highlight Confirm (to exit without print-ing pictures, highlight Cancel and press
center of multi selector).
Display print order. Press multi selector up, right, left, or down to view pictures
not visible in display.
11 PRINTPRINTPRINT
007 printsprintsPrinter ready?Printer ready? printsPrinter ready?
Start print
Confirm
Cancel
Printing002/007
Cancel
Done
YOU MAY TURN
OFF THE CAMERA
Resume
+ +
1 PictBridgePictBridgePictBridge
DPOF printing
Cancel
2 DPOF PRINTINGDPOF PRINTINGDPOF PRINTING
Start print
Confirm
Cancel
007Printer ready?Printer ready? printsprintsPrinter ready? prints
3 DPOF PRINTINGDPOF PRINTINGDPOF PRINTING
Start print
Confirm
Cancel
007Printer ready?Printer ready? printsprintsPrinter ready? prints
4
Exit
3
2
11
CONFIRMCONFIRMCONFIRM

55
Printing Via Direct USB Connection
Mo
re on
Playback
Display confirmation dialog. Press multi selector up or down to highlight option, press cen-ter to select.• Select Start print to start printing. To interrupt printing, press center of multi
selector, then turn camera off and disconnect USB cable.• Select Cancel to exit without printing pictures.Message shown above at right is displayed when printing is complete. Turn cameraoff and disconnect USB cable.
Before Printing
Before printing via direct USB connection, make sure that the printer supports PictBridge or USBDirect and check printer settings. See the printer manual for details.
Use a Reliable Power Source
When printing pictures via direct USB connection, be sure the battery is fully charged. If in doubt,recharge the battery before printing or use the optional EH-62B AC adapter.
DPOF Printing
The DPOF printing option is only available if a print order has been created.
Error Messages
If an error message is displayed, an error has occurred. After checking theprinter and resolving any problems as directed in the printer manual, high-light Resume and press the center of the multi selector to resume printing.Select Cancel to exit without printing the remaining images.
PictBridge
PictBridge is an industry standard for direct printing that ensures compatibility when different de-vices are connected.
5 DPOF PRINTINGDPOF PRINTINGDPOF PRINTING
Start print
Confirm
Cancel
007Printer ready?Printer ready? printsprintsPrinter ready? prints
Printing002/007
Cancel
Done
YOU MAY TURN
OFF THE CAMERA
Resume
+ +
PRINTER ERROR
CHECK PRINTER
STATUS
ResumeResume
CancelCancel

56
Mo
vies
Movies
W Recording Movies
Movies can be recorded with sound recorded via the camera's built-in micro-phone, using the E3200, or silent movies using the E2200:
Rotate the mode dial to W
Turn the camera on
The monitor shows the length of the movie thatcan be recorded.
Start recording
Press the shutter-release button all the way downto start recording. During recording, the RECicon blinks and progress is shown by the indicatorat the bottom of the monitor.• Recording will end automatically when no
more memory is available in the memory or onthe memory card.
To select a movie mode:
Select W Mode. Display MOVIE menu.
1
20s
2
REC
12s
3
1
20s
2Movie options
Auto-focus mode
MOVIEMOVIEMOVIE

57
W Recording Movies
Mo
vies
The type of movie recorded can be selected from the following options:
*1 Total recording time shown is approximate.Time may vary depending on type of memory cardused.
*2 With E2200, even if a memory card over 256 MB is used, total recording time will be the sameas for a 128 MB memory card.
Flash Mode Selection in W Mode
The flash turns off ($) automatically when movie mode is selected.
Digital Zoom
Digital zoom can not be used while recording is in progress.
Notes on Movies
Depending on the make of memory card used, recording may end before the memory cardis full (Q 101). During recording with E3200, do not touch the built-in microphone. To pre-vent the sound of the camera focusing from interfering with recording, select a focus modeof Single AF.The progress indicator stops at 999s. Recording can continue past this point if enough mem-ory is available on the memory card.
Movies
Movies are recorded as Quick Time movie files with the extension ".MOV" and can beplayed back on a computer after transfer.
Type Description
Length of movie *1
MemoryMemory card
128 MB 256-512MB
TV movie (640) Movies are recorded at a rate of 15 framesper second. Vertical interlacing is used toachieve a size of 640 × 480 pixels, suitablefor television playback.
Approx. 26 sec.
Approx. 223 sec.
Approx. 448 sec.*2
Small size (320) (default option)
Movies are recorded at a rate of 15 framesper second. Each frame has a size of 320 ×240 pixels.
Approx. 52 sec.
Approx. 438 sec.
Approx. 881 sec.*2
Smaller size (160)
Movies are recorded at a rate of 15 frames persecond. Each frame has a size of 160 × 120 pixels.Small size allows longer movies to be recorded.
Approx. 211 sec.
Approx. 1754 sec.
Approx. 3525 sec.*2

58
W Recording Movies
Mo
vies
Highlight Movie options. Display MOVIE OPTIONS menu.
Highlight mode.**To exit without changing mode,
press MENU button.
Make selection.†† To return to MOVIE menu after making
selection, press multi selector to left.
Return to shooting mode. Selected moviemode shown in monitor.
3Movie options
Auto-focus mode
MOVIEMOVIEMOVIE 4TV movie 640
Small size 320
Smaller size 160
MOVIE OPTIONSMOVIE OPTIONSMOVIE OPTIONS
5TV movie 640
Small size 320
Smaller size 160
MOVIE OPTIONSMOVIE OPTIONSMOVIE OPTIONS
7
8s
6TV movie 640
Small size 320
Smaller size 160
MOVIE OPTIONSMOVIE OPTIONSMOVIE OPTIONS

59
W Recording Movies
Mo
vies
The movie menu also includes the following focus options (E3200 only):
To choose a focus option from the MOVIE menu:
Highlight Auto-focus mode. Display options.
Highlight desired focus mode. Make selection.
Return to shooting mode.
Focus mode Description
Single AF Camera focuses when shutter-release button is pressed halfway.Focus locks when focus operation is complete.
Continuous AF Camera adjusts focus continuously.
1Movie options
Auto-focus mode
MOVIEMOVIEMOVIE 2Single AF
Continuous AF
AUTO-FOCUS MODEAUTO-FOCUS MODEAUTO-FOCUS MODE
3Single AF
Continuous AF
AUTO-FOCUS MODEAUTO-FOCUS MODEAUTO-FOCUS MODE 4Single AF
Continuous AF
AUTO-FOCUS MODEAUTO-FOCUS MODEAUTO-FOCUS MODE
5
20s
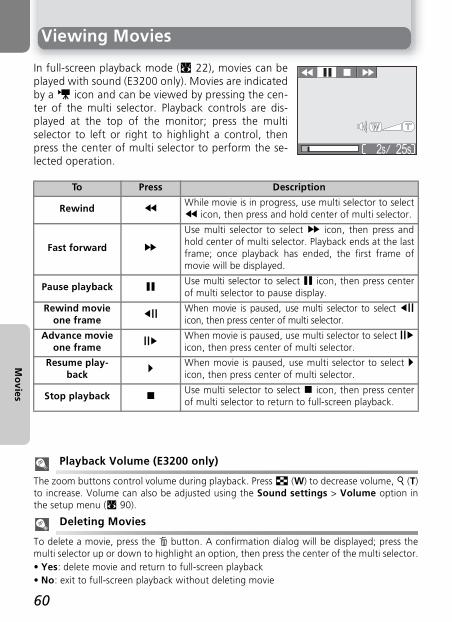
60
Mo
vies
Viewing Movies
In full-screen playback mode (Q 22), movies can beplayed with sound (E3200 only). Movies are indicatedby a W icon and can be viewed by pressing the cen-ter of the multi selector. Playback controls are dis-played at the top of the monitor; press the multiselector to left or right to highlight a control, thenpress the center of multi selector to perform the se-lected operation.
Playback Volume (E3200 only)
The zoom buttons control volume during playback. Press l (W) to decrease volume, O (T)to increase. Volume can also be adjusted using the Sound settings > Volume option inthe setup menu (Q 90).
Deleting Movies
To delete a movie, press the u button. A confirmation dialog will be displayed; press themulti selector up or down to highlight an option, then press the center of the multi selector.• Yes: delete movie and return to full-screen playback• No: exit to full-screen playback without deleting movie
To Press Description
Rewind (While movie is in progress, use multi selector to select( icon, then press and hold center of multi selector.
Fast forward *
Use multi selector to select * icon, then press andhold center of multi selector. Playback ends at the lastframe; once playback has ended, the first frame ofmovie will be displayed.
Pause playback )Use multi selector to select ) icon, then press centerof multi selector to pause display.
Rewind movie one frame
,When movie is paused, use multi selector to select ,icon, then press center of multi selector.
Advance movie one frame
-When movie is paused, use multi selector to select -icon, then press center of multi selector.
Resume play-back
yWhen movie is paused, use multi selector to select yicon, then press center of multi selector.
Stop playback =Use multi selector to select = icon, then press centerof multi selector to return to full-screen playback.
25s2s

61
The Sh
oo
ting
Men
uThe Shooting Menu
Using the Shooting Menu
In P (auto) mode, the following settings can be adjusted from the shootingmenu:
In P (auto) mode, the shooting menu is displayed when the MENU button ispressed.
To make a selection from the shooting menu:
Display shooting menu.
Option Description Q
Image mode Choose image size and quality. 63-64
White balance Match white balance to your light source. 65
Exp. +/- Adjust exposure for very bright, very dark, or high-contrast subjects.
67
Continuous Take pictures one at a time or in a sequence. 68
BSS Turn the Best Shot Selector (BSS) on or off. 69
Color options Choose a standard color, vivid color, black-and-white,sepia, or cyanotype effect for your pictures.
70
1 1/21/2SHOOTING MENUSHOOTING MENUSHOOTING MENU
Image mode
White balance
Exp. +/-
1/2

62
Using the Shooting Menu
The Sh
oo
ting
Men
u
Highlight menu item.
Highlight option (to return to previous step, press multi selector to left).
Display options.
Make selection. To exit menu and return to shooting mode, press MENU button.
1 1/21/2SHOOTING MENUSHOOTING MENUSHOOTING MENU
Image mode
White balance
Exp. +/-
1/2
3 EXP. +/-EXP. +/-EXP. +/-
+0.7
0
+0.3
2 EXP. +/-EXP. +/-EXP. +/-
+0.3
-0.3
0
4
AUTO 19

63
The Sh
oo
ting
Men
u
Image Mode Image mode
Pictures taken with a digital camera are recorded asimage files. The size of the files, and with it the num-ber of images that can be recorded in the memory oron the memory card, depends on the size and qualityof the images. Before shooting, choose image qualityand size according to how you plan to use the picture.
* To reduce the amount of memory each shot occupies, pictures are compressed as they are savedto the memory or memory card. Compression selectively reduces the quality of the image. Themore a picture is compressed, the more noticeable this loss of quality is likely to be. The figuresshow the appropriate compression ratio for each setting.
† All figures are approximate. Dimensions in "Description" column assume a printer resolution ofapproximately 200 dpi, dimensions in "Print size" column a resolution of approximately 300 dpi.
If in doubt, choose Normal (2048) or Normal (1600). Pictures can be reducedor cropped when played back in the monitor after shooting (Q 42, 78).
OptionSize
(pixels)Quality* Description
Print size (cm)†
L(2048*)
(E3200 only)
2,048 ×1,536
1 : 4High quality, suitable for enlarge-ments or high-quality prints.
17 × 13 (7” × 5”)
w(1600*)
(E2200 only)
1,600 ×1,200
13 × 10 (5” × 4”)
b(2048)
(E3200 only)
2,048 ×1,536
1 : 8 Best choice in most situations.17 × 13
(7” × 5”)
c (1600)
1,600 ×1,200
1 : 8Smaller size allows more pictures tobe stored on memory card.
13 × 10 (5” × 4”)
S PC screen (1024)
1,024 ×768
1 : 8 Suited to display on computer moni-tors 17” or larger.
9 × 7 (3.5” × 2.5”)
R TV screen (640)
640 ×480
1 : 8Can be displayed full-screen on atelevision or 13” monitor. Suited todistribution by e-mail or the web.
5 × 4 (2” × 1.5”)
IMAGE MODEIMAGE MODEIMAGE MODE 1/2 1/2 1/2
High (2048*)
Normal (2048)
Normal (1600)

64
Image Mode
The Sh
oo
ting
Men
u
The following table shows the approximate number of pictures that can bestored in the memory or on 128- and 256-megabyte memory cards at differentimage mode settings.
*All figures are approximate. File size of pictures depends on scene recorded,producing wide variations in number of images that can be stored.
Image Mode and Number of Exposures Remaining
The figure shown in the monitor for the number of exposures remaining is only an approximation.The file size of compressed images varies with the scene recorded, producing wide variations in thenumber of pictures that can be stored.
Image Size
Smaller images create smaller files suited to transmission by e-mail or use in web pages. Whenprinted at larger sizes, however, small images will be rough and uneven in appearance.
Print Size
The size of images when printed depends on the printer resolution: the higher the resolution, thesmaller the final print size.
Image Mode
The current image mode setting is shown by an icon at the bottom leftcorner of the monitor.
Memory Memory card
Image mode 14.5 MB 128 MB 256 MB
High (2048*) (E3200 only) Approx. 9 Approx. 78 Approx. 157
High (1600*) (E2200 only) Approx. 15 Approx. 125 Approx. 252
Normal (2048) (E3200 only) Approx. 18 Approx. 153 Approx. 308
Normal (1600) Approx. 29 Approx. 239 Approx. 482
PC screen (1024) Approx. 61 Approx. 511 Approx. 1028
TV screen (640) Approx. 132 Approx. 1096 Approx. 2203
AUTO 19

65
The Sh
oo
ting
Men
u
White Balance White balance
The color of the light reflected from an object varieswith the color of the light source. The human brain isable to adapt to such changes in color, with the resultthat we see white objects as white, regardless ofwhether they are in the shade, direct sunlight, or underincandescent lighting. Digital cameras can mimic thisadjustment by processing information from the cam-era’s image sensor (CCD) according to the color of thelight source. This process is known as a "white balance adjustment."• If you cannot achieve the desired white balance with Auto (M) or you want to
lock the white balance for a specific light source or shooting conditions,choose a setting other than Auto (M).
• When the white balance setting is changed, the new setting is reflected in thepicture in the monitor.
Option Description
M AutoWhite balance automatically adjusted to suit lighting condi-tions. Best choice in most situations.
n White bal. presetGray object used as reference to set white balance underunusual lighting conditions.
Daylight White balance adjusted for direct sunlight.
Incandescent Use under incandescent lighting.
Fluorescent Use under most types of fluorescent lighting.
Cloudy Use when taking pictures under overcast skies.
Speedlight Use with the flash
1/3 1/3 WHITE BALANCEWHITE BALANCEWHITE BALANCE 1/3
White bal. preset
Daylight
Auto

66
White Balance
The Sh
oo
ting
Men
u
Preset White BalancePreset white balance is used when shooting undermixed lighting or to compensate for light sources witha strong color cast (for example, to make pictures tak-en under a lamp with a red shade look as though theyhad been taken under white light). When n (Whitebal. preset) is selected from the white-balancemenu, the camera will zoom in and the menu shownat right will be displayed in the monitor.
White Balance
At settings other than auto, white balance is shown by an icon in the mon-itor.
Option Description
CancelRecalls the most recent value for preset white balance from memory andsets white balance to this value.
Measure
To measure a new value for white balance, place a gray object, such as apiece of cardboard, under the lighting that will be used in the final picture.Frame this object so that it fills the square in the center of the menu shownabove. Highlight Measure and press the center of the multi selector tomeasure a new value for white balance (shutter will be released and cam-era will return to original zoom position, but no picture will be recorded).
WHITE BAL PRESETWHITE BAL PRESETWHITE BAL PRESET
Cancel
Measure
White balance measuring window
AUTO 19

67
The Sh
oo
ting
Men
u
Exp. +/- Exp. +/-
The Exp. +/- (exposure compensation) menu is usedto alter exposure from the value suggested by thecamera, making pictures brighter or darker. Exposurecan be adjusted in the range -2.0 to +2.0 EV. • When the exposure compensation is altered, the
new setting is reflected in the picture in the moni-tor.
Choosing an Exposure Compensation Value
As a rule of thumb, select positive values when large areas of the frame are very brightly lit (for ex-ample, when photographing an expanse of sunlit water, sand, or snow) or when the backgroundis much brighter than the main subject. Choose negative values when large areas of the frame arevery dark (for example, when photographing a forest of dark green leaves) or when the back-ground is much darker than the main subject. This is because the camera, in order to avoid extremeover- or under-exposure, tends to lower exposure when the frame is very bright and raise exposurewhen the frame is very dark, which can make naturally bright subjects look dim and naturally darksubjects appear over-bright, or "washed out."
Exposure Compensation
At settings other than 0, exposure compensation is shown in the monitor.
EXP. +/-EXP. +/-EXP. +/-
+0.3
-0.3
0
AUTO 19

68
The Sh
oo
ting
Men
u
Continuous Continuous
Use the options in this menu to capture a fleeting ex-pression on a portrait subject, photograph a subjectthat is moving unpredictably, or capture motion in aseries of pictures.
Restrictions on Camera Settings
At settings other than Single, the flash (Q 24) turns off automatically and focus (Q 20), exposure(Q 67), and auto white balance (Q 65) for all photos are determined by the first picture in eachseries. When Multi-Shot 16 is selected, digital zoom (Q 18) can not be used. Multi-Shot 16 cannot be selected when digital zoom is in effect. BSS (Q 69) is available only at a setting of Single.
Continuous
At settings other than Single, the current "continuous" setting is indicat-ed by an icon in the monitor.
Option Description
Single Camera takes one picture each time shutter-release button ispressed.
Continuous
Camera takes pictures continuously while shutter-release button isheld down. Pictures are recorded at rate of about three framesevery two seconds. With E3200, camera records three pictureswhen image mode is set to b Normal (2048), and with E2200, sixpictures when image mode is set to c Normal (1600).
Multi-Shot 16
When shutter-release button is pressed all the way, camera takessixteen consecutive images at rate of about three frames every twoseconds. With E3200, up to five series of images can be taken, andwith E2200, one series can be taken. The sixteen images arearranged in four rows of four images and saved as a single picture.Image mode is fixed at b Normal (2048) with E3200 and at cNormal (1600) with E2200.
CONTINUOUSCONTINUOUSCONTINUOUS
Single
Continuous
Multi-shot 16
19

69
The Sh
oo
ting
Men
u
Best Shot Selector BSS
When the "Best Shot Selector" (BSS) is on, the cam-era takes pictures as long as the shutter-release but-ton is held down, to a maximum of ten. These imagesare then compared and the sharpest picture (the pic-ture with highest level of detail) saved to the memoryor memory card. BSS is recommended for situations inwhich inadvertent camera movement can produceblurred pictures, for example when:• the camera is zoomed in• lighting is poor and the flash can not be used
Notes on BSS
BSS may not produce the desired results with a moving subject or if you change the compositionwhile the shutter-release button is pressed all the way down.
"Continuous" and BSS
CONTINUOUS is automatically set to Single when BSS is on. Choosing another option for CON-TINUOUS cancels BSS.
The Self-Timer
BSS will not take effect when the self-timer is on, even if On is selected in the BEST SHOT SELEC-TOR menu.
BSS
When BSS is on, a BSS icon appears in the monitor.
Option Description
off BSS off; camera functions normally.
onBSS on. Flash turns off automatically and focus, exposure, and autowhite balance for all photos are determined by the first picture in eachseries.
BEST SHOT SELECTORBEST SHOT SELECTORBEST SHOT SELECTOR
ON
OFF
19

70
The Sh
oo
ting
Men
u
Color Options Color options
Use the options in this menu to add special effects toyour pictures. There are five special effects to choosefrom. • The effect you choose is reflected in the picture dis-
played in the monitor.
White Balance
When Black-and-white, Sepia or Cyanotype is selected, the White balance option is not availablein the shooting menu.
Color Options Indicator
When an option other than Standard color is chosen, the selected modeindicator is displayed in the monitor.
Option Description
Standard color Picture appears with natural colors.
Vivid color Picture appears in sharp colors.
Black-and-white Picture appears in black and white.
Sepia Picture appears in sepia tones.
Cyanotype Picture appears with blue cast.
COLOR OPTIONSCOLOR OPTIONS
Standard color
Vivid color
Black-and-white
1/21/21/2COLOR OPTIONS
AUTO 19

71
The Playb
ack Men
uThe Playback Menu
Using the Playback Menu
The playback menu contains the following options:
To display the playback menu:
Display playback menu.
Option Description Q
Print setSelect pictures for printing on a DPOF-compatible device;specify number of copies and information to be included onprints.
48-51
Slide showView pictures in the memory or on the memory card in anautomatic slide show.
72
Delete Delete all or selected pictures. 73-74
Protect Protect selected pictures from accidental deletion. 75
Auto transferMark all or selected pictures for transfer to a computer; turnauto transfer marking on or off.
76-77
Small pic. Create small copies of pictures. 78
CopyTransfer pictures from internal memory to memory card orvice versa.
79-81
1 1/31/3PLAYBACK MENUPLAYBACK MENUPLAYBACK MENU
Print set
Slide show
Delete
1/3

72
The Playb
ack Men
u
Slide Show Slide show
This option is used to play pictures back in an automated "slide show" withabout three seconds between each picture.
Highlight Start. Begin slide show.
The following operations can be performed during the show:
"Loop"
If Loop is selected in the starting screen, the slide show will repeat auto-matically. To select or deselect the loop option, highlight Loop and pressthe center of the multi selector. A check mark next to Loop indicates thatthe loop option is selected.
Auto Off
The camera will enter standby mode if no operations are performed for thirty minutes during a slide show.Small Pictures and Movies
Copies created with the small picture option (Q 78) are not displayed during slide shows. Moviesare displayed as still images showing the movie’s first frame.
1 SLIDE SHOWSLIDE SHOW
PausePause
SLIDE SHOW
Start
Pause
Loop
2
To Press Description
Pause slide show
Menu shown right will be dis-played. Highlight Restart andpress the center of the multi selec-tor to resume show. Highlight Endand press the center of the multiselector to end show.
Skip to next frame
Press multi selector to right or down to skip to next slide.Hold multi selector down to fast forward through show.
Return to previous
frame
Press multi selector to left or up to return to previousslide. Hold multi selector down to rewind through show.
End slide show ^ End slide show and return to playback.
PAUSEPAUSEPAUSE
End
Restart
SLIDE SHOWSLIDE SHOW
PausePause
SLIDE SHOW
Pause
Loop
Start

73
The Playb
ack Men
u
Delete Delete
The delete menu contains the following options: If no memory card is inserted in the camera, picturesin the internal memory will be deleted.If the camera contains a memory card, pictures on thecard will be deleted.To delete pictures in the internal memory, re-move the memory card.
Deleting Selected Pictures
Highlight Erase selected images.
Highlight picture.
Pictures in memory or memory card dis-played as thumbnail images.
Select highlighted picture. Selected pic-tures marked by u icon.
Repeat steps 3 and 4 to select additional pictures. To deselect picture, highlight andpress multi selector down. To exit without deleting pictures, press ^ button.
DELETEDELETEDELETE
Erase selected images
Erase all images
1 DELETEDELETEDELETE
Erase selected images
Erase all images
3ON
OFF
MENU
2004200408.0508.0512:0012:00
ERASE SELECTED IMAGESERASE SELECTED IMAGESERASE SELECTED IMAGES
Back Set4/4/ 5
2ON
OFF
MENU
2004200408.0508.0512:0012:00
ERASE SELECTED IMAGESERASE SELECTED IMAGESERASE SELECTED IMAGES
Back Set5/5/ 5
4ON
OFF
MENU
2004200408.0508.0512:0012:00
ERASE SELECTED IMAGESERASE SELECTED IMAGESERASE SELECTED IMAGES
Back Set4/4/ 5
5

74
Delete
The Playb
ack Men
u Confirmation dialog displayed. Select Yes to delete pictures, No to exit without de-
leting pictures.
Deleting All PicturesTo delete all unprotected pictures in the memory or on the memory card:
Highlight Erase all images. Confirmation dialog displayed. Select Yes to delete pictures, No to exit with-
out deleting pictures.
Before Deletion
Once deleted, pictures can not be recovered. Be sure that any pictures you would like to keephave been transferred to a computer (Q 45-47).
Protected Pictures
Pictures marked with a U icon are protected and can not be deleted (Q 75).
6
No
Yes
DELETEDELETEDELETE
Erase 1 image(s) ?Erase 1 image(s) ?Erase 1 image(s) ?
1 DELETEDELETEDELETE
Erase selected images
Erase all images
2Erasing all imagesErasing all images( Excluded)( Excluded)Erasing all images( Excluded)
DELETEDELETEDELETE
No
Yes
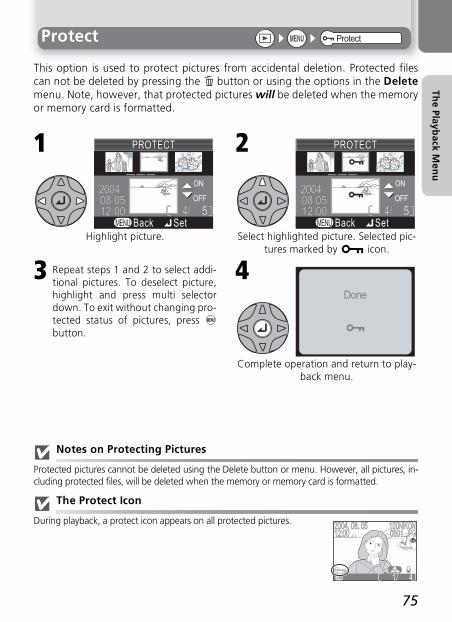
75
The Playb
ack Men
u
Protect Protect
This option is used to protect pictures from accidental deletion. Protected filescan not be deleted by pressing the u button or using the options in the Deletemenu. Note, however, that protected pictures will be deleted when the memoryor memory card is formatted.
Highlight picture.
Repeat steps 1 and 2 to select addi-tional pictures. To deselect picture,highlight and press multi selectordown. To exit without changing pro-tected status of pictures, press ^button.
Select highlighted picture. Selected pic-tures marked by U icon.
Complete operation and return to play-back menu.
Notes on Protecting Pictures
Protected pictures cannot be deleted using the Delete button or menu. However, all pictures, in-cluding protected files, will be deleted when the memory or memory card is formatted.
The Protect Icon
During playback, a protect icon appears on all protected pictures.
1ON
OFF
MENU
2004200408.0508.0512:0012:00
PROTECTPROTECTPROTECT
Back Set4/4/ 5
3
2ON
OFF
MENU
2004200408.0508.0512:0012:00
Back Set
PROTECTPROTECTPROTECT
4/4/ 5
4Done
4
2004. 08. 052004. 08. 0512:0012:00
100100NIKONNIKON0001. 0001. JPGJPG
1/

76
The Playb
ack Men
u
Auto Transfer Auto transfer
This option is used to mark pictures for transfer to acomputer and to turn automatic transfer marking onand off.
Transferring More than 999 Pictures
No more than 999 pictures can be marked for transfer. If the memory or memory card contains morethan 999 pictures, transfer all pictures using Nikon View. See the Nikon View Reference Manual (on CD)for details.
Hidden Pictures
Some Nikon digital cameras allow you to hide pictures during playback. Hidden pictures can beviewed on the E3200/E2200 but can not be selected for transfer.
The V Icon
Pictures that have been selected for transfer are identified by a V icon.
When you connect the camera to a computer via the UC-E6 USB cable and press thecenter of the multi selector to transfer pictures, only pictures marked with a V iconwill be transferred (Q 45).
Option Description
V All on (default option)
All pictures in memory or on memory card are marked fortransfer. Pictures taken while this option is in effect will bemarked for transfer.
All offRemove transfer marking from all pictures in memory oron memory card. Pictures taken while this option is ineffect will not be marked for transfer.
Select image(s) Mark selected pictures for transfer.
AUTO TRANSFERAUTO TRANSFERAUTO TRANSFER
All on
All off
Select image(s)
4
2004. 08. 052004. 08. 0512:0012:00
100100NIKONNIKON0001. 0001. JPGJPG
1/
1
3 4
2
Full-screen playback Thumbnail playback

77
Auto Transfer
The Playb
ack Men
u
Marking Selected Pictures for Transfer
Highlight Select image(s).
Highlight picture.
Repeat steps 3 and 4 to select addi-tional pictures. To deselect picture,highlight and press multi selectordown. To exit without changingtransfer status of pictures, press ^button.
Pictures in memory or on memory card displayed as thumbnail images.
Select highlighted picture. Selected pic-tures marked by V icon.
Complete operation.
Marking Pictures for Transfer with Other Cameras
Pictures selected for transfer with another model of Nikon camera can not be transferred when thememory card is inserted in the E3200/E2200. Use the E3200/E2200 to reselect the pictures.
1 AUTO TRANSFERAUTO TRANSFERAUTO TRANSFER
All on
All off
Select image(s)
3ON
OFF
MENU
2004200408.0508.0512:0012:00
AUTO TRANSFERAUTO TRANSFERAUTO TRANSFER
Back Set4/4/ 5
5
2
2004200408.0508.0512:0012:00
MENU
5/5/ 5
AUTO TRANSFERAUTO TRANSFERAUTO TRANSFER
Back Set
ON
OFF
4ON
OFF
MENU
2004200408.0508.0512:0012:00
AUTO TRANSFERAUTO TRANSFERAUTO TRANSFERAUTO TRANSFERAUTO TRANSFERAUTO TRANSFER
Back Set4/4/ 5
6Done

78
The Playb
ack Men
u
Small Picture Small pic.
To create a small copy of a picture, select Small pic. after displaying the imagein full-screen playback or selecting it in the thumbnail display.
Highlight option. Confirmation dialog displayed. Select Yes to create resized copy, No to exit
without creating copy.
To view the new, resized copy, press the multi selector down until the copy is dis-played. The copy will be displayed after the last picture recorded (in thumbnailplayback, small pictures are indicated by a gray border). To reduce file size, copiesare stored in the memory or on the memory card as BASIC-quality JPEG files(compression ratio 1 : 16). Copies are stored in separate files with names of theform "SSCNnnnn.JPG," where "nnnn" is a four-digit number assigned automat-ically by the camera.
Copies can not be viewed or cropped using playback zoom.
Small Picture
• Small pictures can not be created from resized copies or cropped copies.• Small pictures can not be printed using the Direct Print function (Q 52).
Option Size (pixels) Description
q 640 × 480 640 × 480Copy can be displayed full-screen on television or 13”monitor with no drop in quality.
r 320 × 240 320 × 240Suited to display on web pages. Small file size reducestime needed to display picture in web browser.
s 160 × 120 160 × 120Copy can be sent and received quickly as email attach-ment. Where application supports display of JPEGimages, picture can be viewed in message window.
1 SMALL PICSMALL PICSMALL PIC
640 x
x320
480
240
x160 120
Save this image as Save this image as displayed?displayed?Save this image as displayed?
No
Yes
2

79
The Playb
ack Men
u
Copy Copy
This option is used to transfer pictures from the cam-era's internal memory to the memory card, or viceversa.} indicates the camera's internal memory and /the memory card.
Copying Selected Pictures
Highlight (memory → memory card) or (memory card → mem-
ory), press multi selector to right.
Pictures in memory or on memory card are displayed. (Based on when is
selected in step 1)
Highlight Selected images.
Highlight picture.
COPYCOPYCOPY
COPYCOPYCOPY1
3ON
OFF
MENU
2004200408.0508.0512:0012:00
COPYCOPYCOPY
Back Set5/5/ 5
2 CAMERA TO CARDCAMERA TO CARDCAMERA TO CARD
Selected images
All images
4ON
OFF
MENU
2004200408.0508.0512:0012:00
COPYCOPYCOPY
Back Set4/4/ 5

80
Copy
The Playb
ack Men
u Select highlighted picture.Selected pictures marked by A icon.
Repeat steps 4 and 5 to select additional pictures. To deselect picture, highlight
and press multi selector down.
Confirmation dialog displayed. Select Yes to copy pictures, No to exit without
copying pictures.
Copying All PicturesTo copy all pictures in the memory or on the memory card:
Highlight (memory → memory card) or (memory card →
memory), press multi selector to right.
Confirmation dialog displayed. Select Yes to copy pictures, No to exit without
copying pictures.
Highlight All images.
5ON
OFF
MENU
2004200408.0508.0512:0012:00
COPYCOPYCOPY
Back Set4/4/ 5
6Selected images Selected images will be copied. will be copied. OK?OK?
Selected images will be copied. OK?
COPYCOPYCOPY
No
Yes
COPYCOPYCOPY1
3
No
Yes
COPYCOPYCOPY
All images will beAll images will becopied. OK?copied. OK?( excluded)( excluded)
All images will becopied. OK?( excluded)
2 CAMERA TO CARDCAMERA TO CARD
Selected images
All images
CAMERA TO CARD

81
Copy
The Playb
ack Men
u
Copy
• If there is not enough space in the memory or on the memory card to receive the copy,IMAGE CANNOT BE SAVED will be displayed (Q 101). Delete unwanted pictures or inserta new memory card (if using a memory card) before trying again.
• Movies over 10 MB cannot be copied to the E3200 and movies over 5 MB cannot be cop-ied to the E2200.
• Copying of pictures taken with another make of camera or retouched on a computer isnot guaranteed by Nikon.
File Number
• When pictures are copied using the All images option, all the pictures in the folder arecopied with the same file numbers.
• When pictures are copied using the Selected images option, numbering will continuefrom the lowest number after the last number in the memory or on the memory card towhich the pictures have been copied.
Ex: when the last number in the memory or on the memory card to which pictures havebeen copied is 15 (DSCN0015.JPG)
The copied pictures are assigned numbers starting from DSCN0016.
After that, numbering will continue from the lowest number after the number of the lastfile that was copied.
Print Set
If a print order has been created, the print order data will not be copied with the picture.

82
The Setu
p M
enu
The Setup Menu
Using the Setup Menu
The setup menu contains the following options:
To clear the setup menu from the monitor, rotate the mode dial to another settingor press the x button.
Option Description Q
Welcome screenChoose the welcome screen displayed when the camerais turned on.
83
Date Set the camera clock. 84-85
Monitor settings Hide or display the monitor indicators. 86
Date imprint Imprint pictures with the date and/or time of recording. 87-88
Brightness Adjust monitor brightness. 89
Sound settings Adjust volume of button, shutter and start-up sounds. 90
Blur warningChoose whether or not to perform a camera shakecheck.
91
Auto offChoose how long the monitor will remain on beforeturning off automatically to save power.
92
Format memory/ card
Format internal memory or memory cards for use in thecamera.
93
Language Choose a language for camera menus and messages. 94
USBChoose PTP or Mass Storage according to your com-puter's operating system.
45
Video mode Select the video mode from NTSC and PAL. 94
Reset all Restore camera settings to default values. 94
Battery type Choose the type of batteries inserted in the camera. 96
Firmware version Display the current firmware version. 96
1/51/5SET-UPSET-UPSET-UP
Welcome screen
Date
Monitor settings
1/5

83
The Setu
p M
enu
Welcome Screen Welcome screen
This option is used to choose the welcome screen dis-played when the camera is turned on.
Small Pictures and Cropped Copies
Resized copies created with the small picture and cropping options can only be selected for thewelcome screen if they are (q) 640 × 480 pixels or larger.
"Select an Image"
When Select an image is selected, the chosen picture will appearat startup even when the memory card containing the image is re-moved from the camera. If you select Select an image after choos-ing a custom welcome screen, the confirmation dialog shown atright will be displayed. Select Yes to choose a new picture for thewelcome screen, No to exit leaving the welcome screen unchanged.
Option DescriptionDisable welcome No welcome screen is displayed when camera is turned on.
NikonImage shown at right is displayed when camerais turned on.
Animation(default option)
Short animation is displayed when camera isturned on.
Select an image
You can choose the welcome screen from pic-tures currently stored in the memory or on thememory card.1 The SELECT IMAGE screen is displayed. High-
light a picture using the multi selector andpress the multi selector up.
2 Press center of multi selector.To select a picture stored in the cameramemory, remove the memory card.
1/2 1/2 1/2
Disable welcome
Nikon
Animation
WELCOME IMAGE SELECTWELCOME IMAGE SELECTWELCOME IMAGE SELECT
3/3/ 5
2003200308.0508.0512:0512:05
ON
OFF
MENU Back Set
SELECT IMAGESELECT IMAGESELECT IMAGE
Replace current Replace current image?image?Replace current image?
No
Yes
WELCOME IMAGE SELECTWELCOME IMAGE SELECTWELCOME IMAGE SELECT

84
The Setu
p M
enu
Date Date
This option is used to set the camera clock.This option is available after you have set the cameraclock when using your camera for the first time. Formore information on setting the camera clock, see"First Steps: Basic Setup" (Q 14).
The Camera Clock
The camera clock is less accurate than most watches or household clocks. Check the clock regularlyagainst more accurate timepieces and reset as necessary.
Option Description
Date Set the date and time (Q 14).
Time zone
Select the time zone.The normal time zone setting is (home timezone).If you select (travel destination time zone),the time difference is automatically calculatedand the date and time in the selected region aredisplayed.
1 Press multi selector up or down to highlight or , then press center of multi selec-
tor.Press multi selector down to highlight Day-lightSaving and press center of multi selec-tor. The h icon is displayed. Selectingdaylight saving time automatically advancesthe time one hour. To cancel daylight savingtime, press center of multi selector again.
2 Press multi selector right to display the timezone screen.
3 Press multi selector left or right to highlight atime zone (region), then press center of multi selector.
DATEDATEDATE
Date
Time zone
TIME ZONETIME ZONETIME ZONE
Tokyo, Seoul
London, Casablanca
2003. 09.06 2003. 09.06 13:0013:00
DaylightSaving
DaylightSaving
HOME TIME ZONEHOME TIME ZONE
Back SetMENU
London, Casablanca

85
Date
The Setu
p M
enu
(Travel Destination Time Zone)To set the clock to the travel destination time zone, high-light and press the center of the multi selector. Whilethe travel destination time zone is selected, a icon willbe displayed in the monitor when the camera is in shootingmode. To choose a new travel destination, highlight andpress the multi selector to the right, then choose a locationas described on the previous page.
DaylightSaving (Daylight Saving Time)To turn daylight saving time on or off, highlight DaylightSaving and press thecenter of the multi selector. Selecting daylight saving time automatically advanc-es the time one hour.
The camera supports the following time zones:
Time Zones
The time zone can not be selected if the date and time have not been set.Time zone increments of less than one hour are not supported. When travelling to or fromdestinations at half- or quarter-hour increments from Greenwich Mean Time (GMT), such asAfghanistan, Central Australia, India, Iran, Nepal, or Newfoundland, set the camera clock tolocal time (Q 14).
GMT +/– Location GMT +/– Location
GMT –14 Sydney, Guam GMT –3 BuenosAires, Sanpauro
GMT –13 NewCaledonia GMT –2 Fernando de Noronha
GMT –12 Auckland, Fiji GMT –1 Azores
GMT –11 Midway, Samoa GMT London, Casablanca
GMT –10 Hawaii, Tahiti GMT +1 Madrid, Paris, Berlin
GMT –9 Alaska, Anchorage GMT +2 Athens, Helsinki
GMT –8 PST (PDT): LosAngels,Seattle, Vancouver
GMT +3 Moscow, Nairobi
GMT +4 AbuDhabi, Dubai
GMT –7 MST (MDT): Denver,Phoenix, La Paz
GMT +5 Islamabad, Karachi
GMT +6 Colombo, Dacca
GMT –6 CST (CDT): Chicago, Houston, MexicoCity
GMT +7 Bangkok, Jakarta
GMT +8 Beijing, Hong Kong, Singapore
GMT –5EST (EDT): New York
Toronto, LimaGMT +9 Tokyo, Seoul
GMT +10 Sydney, Guam
GMT –4 Caracas, Manaus GMT +11 NewCaledonia
GMT +12 Auckland, Fiji
AUTO 19

86
The Setu
p M
enu
Monitor Settings Monitor settings
Select this option to hide or display the monitor indi-cators.
Option Description
Show info Display current settings in monitor when taking or viewing pictures.
Hide info Current settings are hidden.
Framing grid Display framing grid. Current settings are hidden. (P mode only)
Monitor off Turn the monitor off. (P mode only)
MONITOR SETTINGSMONITOR SETTINGSMONITOR SETTINGS1/2 1/2 1/2
Show info
Hide info
Framing grid

87
The Setu
p M
enu
Date Imprint Date imprint
The date imprint option is used to imprint the date orthe date and time of recording on pictures as they arerecorded to the memory or memory card. It can notbe used to imprint a date stamp on pictures after re-cording.
Image Mode
Data imprinted at an Image mode setting of TV screen (640) may be difficult to read. Choose asetting of PC screen (1024) or larger when using the date imprint option.
Date Imprint
Imprinted data forms a permanent part of the image and will appearwhenever the image is printed, regardless of whether the date option ischosen in the Print set menu. At settings other than Off, a Date icon isdisplayed in the monitor during shooting. Check before shooting to makesure that the camera clock is set to the correct time and date.
The date is recorded in the order selected in the DATE menu. You will notbe able to select Date or Date and time if the camera clock has not been set.
When shooting with the following, Date Imprint is automatically canceled.E3200Panorama assist and MovieE2200BSS, "Continuous" in the Continuous menu, Sports and Sports spectator in the Scene mode,Panorama assist and Movie.
Print Set
The Print set option can be used to print the date and time of recording on images taken with Offselected in the DATE IMPRINT menu.
Option Description
Off Time and date do not appear on pictures.
Date Date is imprinted at bottom right corner of all pictures takenwhile this option is in effect.
Date and time Date and time are imprinted at bottom right corner of all pic-tures taken while this option is in effect.
Date counterNumber of days from stored date until date of recording isimprinted at bottom right corner of all pictures taken while thisoption is in effect.
DATE IMPRINTDATE IMPRINTDATE IMPRINT 1/2 1/2 1/2
Off
Date
Date and time
AUTO 19

88
Date Imprint
The Setu
p M
enu
Date counterThis option is used to store the date and imprint thenumber of days from that date until the date of re-cording on pictures. To imprint the number of daysthat have elapsed, set the day count option by select-ing Date counter in the DATE IMPRINT menu.If the stored date is earlier than the date of recording,the number of days that have elapsed is imprinted onpictures.If the stored date is later than the date of recording, z followed by the numberof days until the date of storage is imprinted on pictures.
Date counter
When a date that has been stored in the date counter is selected andthe date imprint option is set to Date counter, the date counter indi-cator and stored date number are displayed in the monitor.
Option Description
Stored dates
Up to 3 dates can be stored. Press multi selectorup or down to highlight option in STOREDDATES menu, then press multi selector to right.Enter date. Follow steps described in Basic Setup(Q 14).
Dates between 1 January 1910 and 31 Decem-ber 2037 can be stored.
Display options
Press multi selector up or down to highlight Dis-play options, then press center of multi selec-tor.
DATE COUNTERDATE COUNTERDATE COUNTER
Number of days
015501550155
01.01.2004
1
2
3
STORED DATESSTORED DATESSTORED DATES
05.08.2004
20.10.2004
- - - - . - - . - -
DATEDATEDATE
D M Y
20040101
DISPLAY OPTIONSDISPLAY OPTIONSDISPLAY OPTIONS
Number of days
Years and days
Yrs, mnths, days
19AUTO
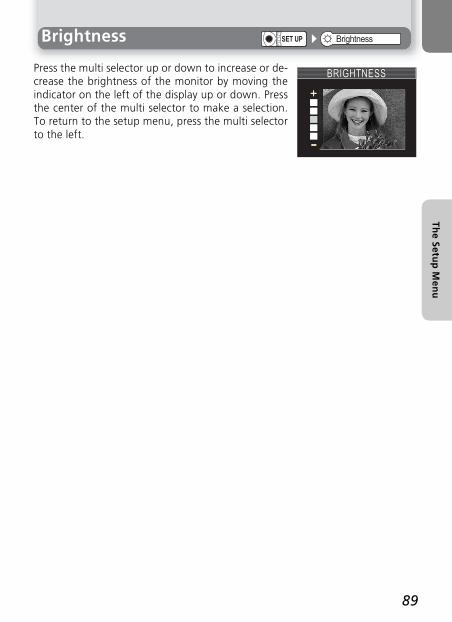
89
The Setu
p M
enu
Brightness Brightness
Press the multi selector up or down to increase or de-crease the brightness of the monitor by moving theindicator on the left of the display up or down. Pressthe center of the multi selector to make a selection.To return to the setup menu, press the multi selectorto the left.
BRIGHTNESSBRIGHTNESSBRIGHTNESS

90
The Setu
p M
enu
Sound Settings Sound settings
The options in this menu control the sound settingslisted below.With E2200, sound settings can only be set On orOff. Choosing Off mutes button, shutter and start-up sounds. Tone and volume cannot be adjusted.
Option Description
Button sound(E3200 only)
Control the sound played when buttons arepressed.A different sound is played when an erroroccurs or when you turn the camera, select anew mode, switch between shooting and play-back mode or make a selection from menus.
Shutter sound(E3200 only)
There are three shutter sounds to choose from.Press multi selector up or down to highlightoption, press center of multi selector to select.
Start-up sound(E3200 only)
Adjust volume of sound played when camera isturned on.
Volume(E3200 only)
Adjust volume of voice memos, movies, and shut-ter and start-up sounds. Choose volume for built-in speaker from Loud and Normal. Choosing Offmutes, shutter and start-up sounds, and playsvoice memos and movies at lowest volume.
SOUND SETTINGSSOUND SETTINGSSOUND SETTINGS 1/2 1/2 1/2
Button sound
Shutter sound
Start-up sound
On
Off
BUTTON SOUNDBUTTON SOUNDBUTTON SOUND
SHUTTER SOUNDSHUTTER SOUNDSHUTTER SOUND
1
2
3
Off
On
Off
START-UP SOUNDSTART-UP SOUNDSTART-UP SOUND
Loud
Normal
Off
VolumeVolumeVolume

91
The Setu
p M
enu
Blur Warning Blur warning
This option is used to display or hide the camerashake warning after you have taken a picture.
Selecting On displays the warning only if inadvertentcamera movement has caused the picture you havejust taken to be blurred.Select Yes to keep the picture or No to delete it.
Blur Check
If you want to check how blurred the picture is before deciding whether to delete it or not, selectYes to save the picture and then press x.
BLUR WARNINGBLUR WARNINGBLUR WARNING
On
Off
PICTURE IS BLURRED.PICTURE IS BLURRED.SAVE PICTURE?SAVE PICTURE?PICTURE IS BLURRED.SAVE PICTURE?
No
Yes

92
The Setu
p M
enu
Auto Off Auto off
To save battery power, the camera will enter standbymode if no operations are performed for a presetlength of time.
Option Description
Auto Off
Choose how long monitor will remain onbefore turning off automatically. Choosefrom thirty seconds (30s), one minute (1m)default setting, five minutes (5m) and thirtyminutes (30m). Regardless of option chosenin AUTO OFF menu, monitor will remain onfor three minutes when menus are dis-played. When powered by AC adapter,camera will enter standby mode if no opera-tions are performed for thirty minutes.
Sleep mode
If On is selected, camera will enter standbymode when there is no change in brightnessof subject, even before time selected inAUTO OFF menu has elapsed.The camera will enter sleep mode afterthirty seconds of non-operation when Autooff is set to thirty seconds (30s) or oneminute (1m), and after one minute whenAuto off is set to five minutes (5m) or thirtyminutes (30m).
AUTO OFFAUTO OFFAUTO OFF
Auto off
Sleep mode
AUTO OFFAUTO OFFAUTO OFF
30s
1m
5m
30m
SLEEP MODESLEEP MODESLEEP MODE
On
Off

93
The Setu
p M
enu
Format memory/cardFormat memory
Format card
This option is used when you need to format the cam-era's internal memory or a memory card.If no memory card is inserted in the camera, the inter-nal memory will be formatted, and if the camera con-tains a memory card, the card will be formatted.To format the internal memory, remove the memorycard.
To format the memory:
Highlight Format (to exit without for-matting memory, highlight No and press
the center of the multi selector).
Begin formatting. While formatting is in progress, message shown above will be
displayed.
To format a memory card:
Highlight Format (to exit without for-matting card, highlight No and press the
center of the multi selector).
Begin formatting. While formatting is in progress, message shown above will be
displayed.
WARNING!WARNING!All images will be All images will be deleted!deleted!
WARNING!All images will be deleted!
WARNING!All images will be deleted!
No
Format
MEMORY CARD FORMATMEMORY CARD FORMATMEMORY CARD FORMAT
1WARNING!WARNING!All images will be All images will be deleted!deleted!
WARNING!All images will be deleted!
WARNING!All images will be deleted!
No
Format
FORMAT MEMORYFORMAT MEMORYFORMAT MEMORY 2FORMATTING
1WARNING!WARNING!All images will be All images will be deleted!deleted!
WARNING!All images will be deleted!
WARNING!All images will be deleted!
No
Format
MEMORY CARD FORMATMEMORY CARD FORMATMEMORY CARD FORMAT 2FORMATTING

94
The Setu
p M
enu
Language Language
Choose the language for camera menus and messagesfrom Deutsch (German), English, Español (Spanish),Français (French), Italiano (Italian), Nederlands(Dutch), Svenska (Swedish), (Japanese), (Simplified Chinese), or (Korean).
Before connecting your camera to a video device suchas a television or VCR (Q 44), choose a video modesetting that matches the video standard used in thedevice. Your Nikon digital camera supports NTSC andPAL standards.
Select this option to restore the settings listed oppo-site to their original state.
Option Description
No Exit menu, leaving settings unchanged.
Reset Restore settings to default values.
LANGUAGELANGUAGELANGUAGE
Back SetMENU
Video Mode Video mode
NTSC
PAL
VIDEO MODEVIDEO MODEVIDEO MODE
Reset All Reset all
RESET ALLRESET ALL
Reset all settings Reset all settings to default valuesto default values
RESET ALL
Reset all settings to default values
No
Reset

95
Reset All
The Setu
p M
enu
The following settings are affected:
Choosing Reset also clears the current file number (Q 23) from memory. Num-bering will continue from the lowest number available in the memory or on thememory card. All other settings are unaffected.
Resetting File Numbering to 0001
To reset file numbering (Q 23) to 0001, select Reset All after either deleting all pictures (Q 74)or formatting the memory card (Q 93).
Setting Default
i Portrait assist Portrait
N Landscape assist Landscape
j Sports assist Sports
m Night portrait assist Night Portrait
e Scene Party/Indoor
W Movie Small size (320)
Speedlight ! Auto
Self-timer Off
Macro close-up Off
Image mode Normal (2048) (E3200)Normal (1600) (E2200)
White balance Auto
Exp. +/- ±0
Continuous Single
Best Shot Selector Off
Color options Standard color
Auto transfer All on
Welcome screen Animation
Monitor Settings Show info
Date imprint Off
Brightness 3
Button sound On
Start-up sound On
Shutter sound 1
Volume (E3200 only) Normal
Auto Off 1m
Sleep mode Off
Blur warning On

96
The Setu
p M
enu
Battery Type Battery type
This option is used to choose the type of batteries in-serted in the camera.
Backup Battery
If the backup battery (Q 14) is not charged sufficiently, the battery type setting may revert to thedefault setting (alkaline batteries).
Select this option to display the current firmware ver-sion.
Option Description
Alkaline Select this option when you have inserted alkaline (AA) batteries.
COOLPIX (NiMH)
Select this option when you have inserted rechargeable EN-MH1 (AA)nickel-metal hydride batteries, or nickel-manganese batteries.
CR-V3Select this option when you have inserted a CR-V3 lithium battery orlithium (AA) batteries.
BATTERY TYPEBATTERY TYPEBATTERY TYPE
Alkaline
COOLPIX NiMH
CR-V3
Firmware Version Firmware version
Back
E3200 Ver.XX

97
Techn
ical No
tesTechnical Notes
Optional Accessories
At the time of writing, the following optional accessories were available for yourNikon digital camera. Contact your local retailer or Nikon representative for de-tails.
*1 Not available in U.S.
*2 Not available in some areas.
Approved Memory CardsThe following memory cards have been tested and approved for use with yourNikon digital camera:
* High speed type of 10 MB/s or over
Rechargeable batteryAdditional EN-MH1 NiMH batteries are available fromyour retailer or local Nikon representative.
Battery charger MH-70 battery charger for EN-MH1 batteries
AC adapter EH-62B AC adapter
Carrying case CS-CP18 soft case*1
Water-proof Case WP-CP1*2
San Disk 16 MB, 32 MB, 64 MB, 128 MB, 256 MB
Toshiba 16 MB, 32 MB, 64 MB, 128 MB, 256 MB
Panasonic 16 MB, 32 MB, 64 MB, 128 MB, 256 MB*, 512 MB*

98
Techn
ical No
tes
Caring for Your Camera
Cleaning
LensOne key to cleaning the lens is to not touch it with your fingers. Remove dust orlint with a blower (typically a small device with a rubber bulb attached to one endthat you pump to produce a stream of air out the other). To remove fingerprintsor other stains that can not be removed with a blower, wipe the lens with a softcloth, using a spiral motion that starts in the center of the lens and works out tothe edges.
MonitorRemove dust or lint with a blower. To remove fingerprints and other stains, cleanthe monitor with a soft, dry cloth, being careful not to apply pressure.
Avoid contact with liquid crystalShould the monitor break, care should be taken to avoid injury due to brokenglass and to prevent the liquid crystal from the monitor touching the skin or en-tering the eyes or mouth.
BodyUse a blower to remove dust and lint, then wipe gently with a soft, dry cloth.After using the camera at the beach or seaside, wipe off any sand or salt with acloth lightly dampened with fresh water, then dry thoroughly.
Do not use alcohol, thinner, or other volatile chemicals.
Notes on the Monitor
• The monitor may contain a few pixels that are always lit or that do not light. This is a char-acteristic common to all TFT LCD monitors, and does not indicate a malfunction. Imagesrecorded using the product will not be affected.
• When you frame bright subjects, vertical comet-like streaks that whiten toward either endmay appear in the monitor. This phenomenon, known as "smear," does not appear in thefinal photograph and does not indicate a malfunction. Some smear may appear in movies.
• Images in the monitor may be difficult to see in a bright light.• The monitor is lit by an LED backlit. Should the monitor begin to dim or flicker, contact
your Nikon service representative.

99
Caring for Your Camera
Techn
ical No
tes
StorageTurn the camera off when not in use and check that the power-on lamp is off be-fore putting the camera away. To prevent mold or mildew, store the camera in adry, well-ventilated area. If you will not be using the product for long periods, re-move the batteries to prevent leakage and store the camera in a plastic bag con-taining a desiccant. Do not store the camera case (available separately) in a plasticbag, as this may cause the material to deteriorate. Note that desiccant graduallyloses its capacity to absorb moisture and should be replaced at regular intervals.Do not store your camera with naptha or camphor moth balls or in locations that:• are poorly ventilated or damp• are next to equipment that produces strong electromagnetic fields, such as
televisions or radios• are exposed to temperatures below -10 °C (14 °F) or above 50 °C (122 °F; for
example near a space heater or in a closed vehicle on a sunny day)• are subject to humidities of over 60%
To prevent mold or mildew, take the camera out of storage at least once amonth. Turn the camera on and release the shutter a few times before puttingthe camera away again.
Store the batteries in a cool, dry place.
Batteries
• When turning the camera on, check thatthe batteries are charged. The monitorwill display a warning when batteries arelow.
• Carry a fresh CR-V3 battery as a replace-ment when taking pictures on importantoccasions.You may find it difficult to pur-chase replacement batteries on short no-tice.
• On cold days, the capacity of batteriestends to decrease. Be sure that the batter-ies are fully charged before heading out-side to take pictures in cold weather.Keep spare batteries in a warm place andexchange as necessary. Once warmed, acold battery may recover some of itscharge.
• If the battery terminals are dirty, wipethem off with a clean, dry cloth beforeuse.
• Repeatedly recharging NiMH batteries be-fore they are fully exhausted may result ina "memory" effect, causing the batteriesto lose their charge quickly. The batterieswill return to normal after being fully dis-charged and recharged.
• NiMH batteries gradually lose their chargewhen left unused. We recommend thatyou charge NiMH batteries immediatelybefore use.
• Used batteries are a valuable resource.Please recycle used batteries in accor-dance with local regulations.

100
Techn
ical No
tes
Error Messages
The following table lists the error messages and other warnings that appear inthe monitor and how to deal with them.
Display Problem Solution Q
Z(Flashes)
Clock not set.Set clock to current date andtime.
14
WARNING ! !BATTERY
EXHAUSTEDBatteries exhausted.
Turn camera off and replacebatteries.
12
AF( flashes red)
Camera cannot focus.Use focus lock to focus onanother subject at same dis-tance, then recompose picture.
21
2Slow shutter speed. Picturesmay be blurred.
Use flash, or steady camerausing tripod, by placing cam-era on level surface, or byholding camera in both handswith elbows against torso.
18, 24-25
Recorded picture may beblurred.
Select Yes to keep picture,No to delete.Camera shakewarning can be hidden.
91
WARNING ! !PLEASE WAIT
FOR THE CAM-ERA TO FINISH RECORDING
<
Camera turned off or x but-ton pressed during recording.The mode dial was rotatedduring recording.
Message clears from displayautomatically when recordingis complete.
21
MEMORY CARD IS WRITE
PROTECTED
Write-protect switch is in"lock" position.
Slide write-protect to "write"position.
11
/ CARD IS NOTFORMATTED
Format No >
Memory card has not beenformatted for use in camera.
Press multi selector up tohighlight FORMAT and pressto right to format card, orturn camera off and replacecard.
93, 10-11
PICTURE IS BLURRED.PICTURE IS BLURRED.SAVE PICTURE?SAVE PICTURE?PICTURE IS BLURRED.SAVE PICTURE?
No
Yes

101
Error Messages
Techn
ical No
tes
THIS CARD CANNOT BE USED
4
Error accessing memory card.Use approved card.Check that connectors areclean.
97-WARNING ! !
THIS CARD CAN-NOT BE READ
/
OUT OF MEMORY
/
Camera in shooting mode:Insufficient memory to recordpictures at current settings.
• Choose lower image qual-ity/ size.
• Delete pictures.
• Insert new memory card.
63-64
22-23,73-74
10
Camera connected to com-puter: Not enough space onmemory card to record infor-mation need for transfer.
Disconnect camera, deleteunwanted pictures, and tryagain.
22-23,73-74
IMAGE CANNOT BE SAVED
/
• Memory card has not beenformatted for use in cam-era, or error occurred whilesaving picture.
• Camera has run out of filenumbers.
• Camera can not copy pic-ture using small picture, orcrop options.
• Memory card has not beenformatted for use in camera.
• Error occurred while savingmovie.
• Camera has run out of filenumbers.
• Takes long time to savemovie on memory card.
• Reformat memory card.
• Insert new memory card ordelete pictures.
• Copies can not be createdfrom movies or from othercopies.
• Reformat memory card.
• Insert new memory card ordelete pictures or movies.
• Insert memory card withfaster processing speed.
93
10, 22,23,
73-7442, 78
93
10, 73
56, 97
CARD CONTAINS NO IMAGES
No pictures on memory cardor in memory.
Press x button to return toshooting mode.
22ALL IMAGES ARE HIDDEN
No pictures on memory cardthat can be viewed on E3200or E2200.
FILE CONTAINS NO IMAGE DATA
File created by computer ordifferent make of camera.
View file on computer or cor-rect make of camera.
-
Display Problem Solution Q

102
Error Messages
Techn
ical No
tes
WARNING! MODE DIAL IS NOT IN THE
PROPER POSITION
Mode dial is positionedbetween two modes.
Adjust mode dial to selectdesired mode.
6
THIS IMAGE CAN-NOT BE DELETED
Attempt to delete protectedpicture.
Remove protection beforedeleting picture.
75
COMMUNICA-TIONS ERROR
USB cable disconnected ormemory card removed whilepictures are being transferredto computer.
If error appears in computermonitor, click OK to exitNikon View. Turn camera off,reconnect cable or replacememory card, then turn cam-era on and transfer pictures.
45-47
USB option set incorrectly.
Turn camera off and discon-nect cable, then choose newUSB setting in camera setupmenu and reconnect cam-era. If error persists, useNikon View button totransfer pictures.
45
NO IMAGES ARE MARKED FOR TRANSFER
No pictures selected for trans-fer when a (V) buttonpressed to transfer pictures tocomputer.
Disconnect camera and selectat least one picture for trans-fer, then begin transferagain.
47,76-77
TRANSFERERROR
Error occurred when pictureswere transferred to computer.
Check that camera is con-nected and that batteries arefully charged.
1246
NEW CITY IS INTHE CURRENTTIME ZONE
Travel destination is in sametime zone as home location.
No need to specify new time zoneif travel destination is in sametime zone as home location.
84
LENS ERRORError has occurred during lensoperation.
Turn camera off and then onagain. If error persists, con-tact retailer or Nikon repre-sentative.
-
SYSTEM ERRORError has occurred in camera'sinternal circuitry.
Turn camera off, unplugoptional AC adapter (ifusing), remove and reinsertbatteries, and turn cameraon. If error persists, contactretailer or Nikon representa-tive.
8-9, 12
Display Problem Solution Q

103
Techn
ical No
tes
Troubleshooting
If your camera fails to function as expected, check the list of common problemsbelow before consulting your retailer or Nikon representative. Refer to the pagenumbers listed in the right-most column for information on solving the problemslisted here.
Electronically-Controlled Cameras
In extremely rare instances, unusual characters may appear in the monitor and the cameramay stop functioning. In most cases, this phenomenon is caused by a strong external staticcharge. Turn the camera off, remove and replace the batteries, and turn the camera onagain, or, if you are using an AC adapter (available separately), disconnect and reconnectthe adapter, and turn the camera on again. In the event of continued malfunction, contactyour retailer or Nikon representative. Note that disconnecting the power source as describedabove may result in the loss of any data not recorded to the memory or memory card at thetime the problem occurred. Data already recorded to the memory or memory card will notbe affected.
Problem Possible cause Q
Monitor is blank
• Camera is off.• Batteries are not correctly inserted or battery-chamber
cover is not properly latched.• Batteries are exhausted.• EH-62B AC adapter (available separately) is not prop-
erly connected.• Camera is in sleep mode. Press shutter-release button
halfway.• Monitor is off.• USB cable is connected.• AV/Video cable is connected.
128
12-
13
5--
Camera turns off without warning
• Batteries are low.• Batteries are cold.
1299
No indicators appear in monitor
• Indicators are hidden. Select Show info for Monitorsettings option in setup menu.
86
Monitor is hard to read
• Ambient lighting is too bright: move to a darker loca-tion or use viewfinder.
• Monitor brightness needs adjustment.• Monitor is dirty: clean monitor.
19
8998

104
Troubleshooting
Techn
ical No
tes
No picture is taken when shutter-
release button is pressed
• Camera is in playback mode.• Batteries are exhausted.• Red (!) lamp flickers: flash is charging.• Green (AF) lamp flickers: camera unable to focus.• Message "CARD IS NOT FORMATTED" appears in
monitor: memory card is not formatted for use in yourcamera.
• Message "OUT OF MEMORY" appears in monitor:insufficient memory to record picture at current Imagemode setting.
22122020
10-11,93
63
Pictures are too dark (underexposed)
• Flash is off.• Flash window is blocked.• Subject is outside range of flash.• Exposure compensation is too low.
24182567
Pictures are too bright (overexposed)
• Exposure compensation is too high. 67
Pictures are out of focus
• Subject was not in focus area when shutter-releasebutton was pressed halfway.
• Green (AF) lamp flickers: camera unable to focus.
20
20
Pictures are blurred
• Camera shook during shot. Blurring caused by camerashake can be reduced by:
Using the flashUsing the Best Shot Selector (BSS)Using the self-timer with a tripod
246926
Randomly-spaced bright pixels
("noise") appear in image
• Shutter speed too slow. Noise can be reduced by:Using the flashSelecting m (night portrait assist) mode, or selectinge (scene) mode and choosing E Dusk/Dawn orF Night landscape (E3200)Selecting i (portrait assist), N (landscape assist),m (night portrait assist) mode, or selecting e (scene)mode and choosing B Party/Indoor, C Beach/Snow, D Sunset, E Dusk/Dawn, F Nightlandscape, A Close up, H Fireworks show,I Copy, K Panorama assist, or selectingP (Auto) mode and choosing (single, turningBSS off) (E2200)
2433, 35,
36
30, 3133
35-3968, 69
Colors are unnatural• White balance does not match light source.• Color options is not set to Standard color.
65
Problem Possible cause Q

105
Troubleshooting
Techn
ical No
tes
Flash does not fire
• Flash is off. Note that flash turns off automaticallywhen;
The mode dial is set to N (landscape assist),j (sports assist), or W (movie), or to e (scene)mode with any of D Sunset, F Night landscape,G Museum, H Fireworks show, or E Dusk/Dawn selected in scene menu
24
31,32,56,
35-36
Picture can not be played back
• Picture has been overwritten or renamed by computeror other make of camera.
-
Copy can not be cre-ated using small pic-ture or crop options
• Picture is a movie.• Picture was created with small picture, or crop option.• There is not enough free space on memory card to
store new copy.
6042, 7816-17
Can not zoom in on picture
• Picture is a movie.• Picture was created with small picture option.• Picture has been cropped to size less than 320 × 240
607842
Nikon View does not start when camera is connected or mem-ory card inserted in card reader or card
slot
• Camera is off.• EH-62B AC adapter (available separately) is not prop-
erly connected, or batteries are exhausted.• UC-E6 USB cable is not correctly connected, or card not
properly inserted in card reader or card slot.• USB item in setup menu set to PTP when camera con-
nected to computer running Windows 2000 Profes-sional, Windows Millennium Edition (Me), Windows 98Second Edition (SE), or Mac OS 9.
• Camera is not registered in Device Manager (Windowsonly).
See Nikon View Reference Manual (on CD) for furtherinformation.
12-139, 12
10-11,4645
-
Problem Possible cause Q

106
Techn
ical No
tes
Specifications
TypeE3200 digital cameraE2200 digital camera
Effective pixels 3.2 million (E3200); 2.0 million (E2200)
CCDE3200 1/2.7” high-density CCD; total pixels: 3.34 millionE2200 1/3.2” high-density CCD; total pixels: 2.14 million
Image size (pixels)
2,048 × 1,536 (2048) (E3200 only)1,600 × 1,200 (1600) (E3200 only)1,600 × 1,200 (1600) (E2200 only)1,024 × 768 (1024)640 × 480 (640)
Lens 3 × Zoom Nikkor
Focal length
E3200F=5.8 - 17.4 mm (35-mm [135] camera-format equivalent: 38 - 115 mm)E2200F=4.7 - 14.1 mm (35-mm [135] camera-format equivalent: 36 - 108 mm)
f/-number f/2.8 - f/4.9 (E3200); f/2.6 - f/4.7 (E2200)
ConstructionSeven elements in six groups (E3200)Six elements in five groups (E2200)
Digital zoom4 × (35-mm [135] camera-format equivalent: 460 mm[E3200]/430 mm [E2200])
Autofocus (AF)Contrast-detect through the lens (TTL) AF, with AF-assist illu-minator (E3200 only)
Focus range 30 cm (1´) - ∞; macro mode 4 cm/1.6” (W) - ∞Focus-area selection Center with five-area selection in frame assist mode
Viewfinder Real-image zoom viewfinder with LED indicationMagnification 0.34 - 0.94 ×
Frame coverageApproximately 82% horizontal and 82% vertical (E3200)Approximately 80% horizontal and 80% vertical (E2200)
Monitor 1.6”, 80,000-dot, low temperature polysilicon TFT LCD monitorFrame coverage(shooting mode)
Approximately 96% horizontal and 96% vertical
Storage Media SD memory cards/Internal memory (14.5 MB)
File systemCompliant with Design Rule for Camera File System(DCF), Exif 2.2, and Digital Print Order Format (DPOF)
File formatsCompressed: JPEG-baseline-compliantMovies: Quick Time
ExposureMetering
256-segment matrix metering linked to AF area (when frame is displayed in frame-assisted scene mode)
Exposure controlProgrammed auto exposure with exposure compensation(-2.0 - +2.0 EV in steps of 1/3 EV)

107
Specifications
Techn
ical No
tes
Design Rule for Camera File System (DCF)
Your camera conforms to the Design Rule for Camera File System (DCF), a standard widelyused in the digital camera industry to ensure compatibility among different makes of camera.
Exif Version 2.2
Your camera supports Exif (Exchangeable Image File Format for Digital Still Cameras) version2.2, a standard that allows information stored with pictures to be used for optimal color re-production when images are output on Exif-compliant printers.
Range W: +1 - +17.8 EV (E3200); +0.8 - +17.7 EV (E2200)T: +2.6 - +16.2 EV (E3200); +2.5 - +16.2 EV (E2200)
Shutter Mechanical and charge-coupled electronic shutterSpeed 4 - 1/3,000 s
Aperture Electronically-controlled preset aperture
Range Two steps (f/2.8 and f/5.6 [W]) (E3200)Two steps (f/2.6 and f/5.2 [W]) (E2200)
Sensitivity Approximately equivalent to ISO 50 (auto gain of two to four times) (up to equivalent of ISO200)
Self-timer Ten-second duration
Built-inSpeedlight
Range (approx.) W:0.4 - 3.4 m/1´3” - 11´2” (E3200); 0.4 - 3.7 m/1´3” - 12´1” (E2200)T: 0.4 - 2.0 m/1´3” - 6´6” (E3200); 0.4 - 2.0 m/1´3” - 6´6” (E2200)
Flash control Sensor flash systemInterface USBVideo output Can be selected from NTSC and PAL
I/O terminals• DC in• A/V out/digital I/O (E3200); • Video out/digital I/O (E2200);
Power sources
• Two rechargeable Nikon EN-MH1 NiMH batteries• One CR-V3 lithium battery• Two LR6 (AA) alkaline batteries• Two ZR6 (AA) nickel manganese batteries• Two FR6/L91 (AA) lithium batteries• EH-62B AC adapter
Number of frames taken in succession
E3200: 140 frames (alkaline batteries)320 frames (EN-MH1)/550 frames (CR-V3).
E2200: 150 frames (alkaline batteries) 350 frames (EN-MH1)/600 frames (CR-V3).
Measured at standard temperature (25°C/77°F) with fully-charged batteries under standard Nikon test conditions:zoom adjusted with each shot, flash used in approximatelyone half of shots, image type set to Normal.
Dimensions (W × H × D) 88 × 65 × 38 mm (3.5” × 2.6” × 1.5”)Approximate weight 140 g (4.9 oz) without battery or memory cardOperatingenvironment
Temperature 0 - 40 °C (32 - 104 °F)Humidity Less than 85% (no condensation)

108
Techn
ical No
tes
Index
SymbolsP (auto) mode, 6, 16-21u (delete) button, 3, 22, 23,
75! lamp, see Lamp, red (!)N (landscape assist) mode,
28, 31W (movie) mode, 6, 56-59m (night portrait assist) mode,
28, 33, 104x (play) button, 3, 12, 22i (portrait assist) mode, 28,
30/ (recording) icon, 21j (sports assist) mode, 28, 32,
104. @ (voice memo), 43< (wait) icon, 21, 32
AAC adapter, i, iii, vi, 9, 97, 107AF , 4, 20, 100AF lamp, see Lamp, green (AF)Audio/video (AV) cable (EG-
CP12), 44Audio/video (AV) output con-
nector, 3Auto off, 13, 82, 92Auto transfer, 71, 76-77
BBacklit subjects, 34Back light, 28, 37Batteries, i-ii, vi, 8-9, 12, 99,
107LR6 (AA), i, 8, 107CR-V3, i, 8, 9, 96, 99, 107EN-MH1, i, 8, 9, 96, 97,
107charging, 9FR6/L91 (AA), i, 8, 107ZR6 (AA), i, 8, 107
Battery type, 82, 96Beach/Snow, 28, 35Best Shot Selector, 36, 69, 104Blur, 24, 25, 26, 33, 34, 69,
104Blur warning, 82, 91Brightness, 82, 89
BSS, see Best Shot Selector
CClock, see DateClose-ups, 25, 27, 36Close up, 28, 36Color options, 61, 70Computer, 45-47copying pictures to, 76-77Continuous, 61, 68Copy, 28, 37
Cropping pictures, 41, 42, 105
CR-V3, see Batteries
DDate, 14-15, 51, 82, 84, 87Date imprint, 51, 82, 87DCF, see Design rule for Cam-
era File systemDelete, 71, 73-74Deleting pictures, 73-74
all pictures, 74during shooting, 23in full-screen playback, 22selected pictures, 73-74
Design rule for Camera File system, 106, 107
Digital Print Order Format, 48, 52, 106
DPOF, see Digital Print Order Format
Dusk/Dawn, 28, 35, 104
EE-mail, 63, 64, 78EN-MH1, see BatteriesError messages, 100-102Exif 2.2, 106, 107Exif Print, see Exif 2.2Exp. +/-, 61, 67, 104, 106Exposure compensation, see
Exp. +/-
FFile numbering, 23, 95Fill flash, 24, 37Fireworks show, 28, 37, 104Firmware version, 96Flash, ii, 2, 24-25, 104, 107
mode, 16, 24, 25, 33, 35-37
Focus, 18-19, 104, 106Focus lock, 7, 21, 30Format card, 82, 93Framing assist, 6, 28, 29-33Framing pictures, 18-19, 29-
33
IImage quality, see Image
modeImage mode, 16, 34, 63-64Image size, see Image modeISO, 25
JJPEG, 23, 106
LLamp, green (AF), 3, 7, 12, 20,
104Lamp, red (!), 3, 12, 20, 104Language, 14, 94Language, choosing, 14Lens, iii, 2, 99, 106
MMacro mode, 27, 30-33, 35-
38Memory cards, ii, 2, 10-11,
106approved, 97capacity of, 16, 64formatting, 11, 75, 93insertion and removal of,
10-11MENU button, 3MH-70 battery charger, 9, 97Microphone, 2Mode dial, 3, 6, 29Monitor, ii, 3, 4-5, 18-19, 98,
103, 106indicators in, 4-5, 103turning on and off, 5
Monitor settings, 82, 86MOV, see MoviesMovies, 56-60, 106
recording, 56-59viewing, 60

109
Index
Techn
ical No
tes
Movie menu, the, 57Multi selector, 3, 7Museum, 28, 36, 104
NNight landscape, 28, 36, 104Nikon View, 45, 105NTSC, see Video modeNumber of exposures remain-
ing, 16, 17
OOn/off, see Power switch
PPAL, see Video modeParty/Indoor, 28, 35PictBridge, 52, 55Play back, 22-23, 40-43, 44,
45full-screen playback, 22-
23movie playback, 60on TV, 44
Playback menu, 71-81Power-on lamp, 2, 12-13, 16Power switch, 2, 12-13Printing pictures, 48-51, 64
See also Date imprint, Digital Print Order For-mat
Print set, 48-51, 71, 87Protect, 71, 75Protected pictures, 74, 75
QQuality, see Image modeQuick Time, see Movies
RRed-eye reduction, see FlashReset all, 82, 94Resizing pictures, 78
Se (scene) mode, 28, 34-38Secure Digital (SD), see Memo-
ry cardsSelf-portraits, 26Self-timer, 26, 69, 106Self-timer lamp, 2, 26
Sensitivity, 25, 107Setup menu, 82-96f (setup) mode, 6, 82-96Shooting menu, 61-70Shutter-release button, 2, 7Shutter-release delay, see Self-
timerSize, see Image modeSlide show, 71-72Small pic, 71, 78Smear, 98Sound settings, 82, 90 Speaker, 2Speedlight, see FlashStandby mode, 13, 92Strap, camera, i, 2Sunset, 28, 35Support information, 1
TTelephoto, see ZoomTelevision, 44, 94
connecting to, 44taking pictures for display
on, 57, 63Thumbnail playback, 40Transfer
marking pictures for, 76-77
Tripod, 3T button, see Zoom buttons
UUSB, 45-47, 82
cable (UC-E6), 45-46connector, 3
VVCR, 44, 94Video output connector, 3Video cable (EG-CP11), 44Video mode, 44, 82, 94Video output, 107Viewfinder, 2, 3, 18-19
WWelcome screen, 82, 83White balance, 65-66, 70,
104 preset, 66
Wide angle, see ZoomW button, see Zoom buttons
ZZoom, 18-19, 106
digital, 18-19, 57, 106indicator, 18optical, 18-19playback, 41, 105
Zoom buttons, 3, 18, 40-41

(En )
The Guide to Digital Photography with the
DIGITAL CAMERA
TR3L03(11)Fuji Bldg., 2-3 Marunouchi 3-chome, 6MAA9511-AChiyoda-ku, Tokyo 100-8331, Japan 1AG6P1P1940-A
No reproduction in any form of this manual, in whole or in part (except for brief quotation in critical articles or reviews), may be made without written authoriza-tion from NIKON CORPORATION.