NI TestStand 1: Test Development Course Manual · Course Manual Course Software Version 2012 ......
37
NI TestStand TM 1: Test Development Course Manual Course Software Version 2012 May 2013 Edition Part Number 325703R-01 NI TestStand 1 Course Manual Copyright © 1998–2013 National Instruments. All rights reserved. Under the copyright laws, this publication may not be reproduced or transmitted in any form, electronic or mechanical, including photocopying, recording, storing in an information retrieval system, or translating, in whole or in part, without the prior written consent of National Instruments Corporation. National Instruments respects the intellectual property of others, and we ask our users to do the same. NI software is protected by copyright and other intellectual property laws. Where NI software may be used to reproduce software or other materials belonging to others, you may use NI software only to reproduce materials that you may reproduce in accordance with the terms of any applicable license or other legal restriction. End-User License Agreements and Third-Party Legal Notices You can find end-user license agreements (EULAs) and third-party legal notices in the following locations: • Notices are located in the <National Instruments>\_Legal Information and <National Instruments> directories. • EULAs are located in the <National Instruments>\Shared\MDF\Legal\License directory. • Review <National Instruments>\_Legal Information.txt for more information on including legal information in installers built with NI products. Sample
Transcript of NI TestStand 1: Test Development Course Manual · Course Manual Course Software Version 2012 ......
NI TestStandTM 1:Test DevelopmentCourse Manual
Course Software Version 2012May 2013 EditionPart Number 325703R-01
NI TestStand 1 Course Manual
Copyright
© 1998–2013 National Instruments. All rights reserved. Under the copyright laws, this publication may not be reproduced or transmitted in any form, electronic or mechanical, including photocopying, recording, storing in an information retrieval system, or translating, in whole or in part, without the prior written consent of National Instruments Corporation.
National Instruments respects the intellectual property of others, and we ask our users to do the same. NI software is protected by copyright and other intellectual property laws. Where NI software may be used to reproduce software or other materials belonging to others, you may use NI software only to reproduce materials that you may reproduce in accordance with the terms of any applicable license or other legal restriction.
End-User License Agreements and Third-Party Legal NoticesYou can find end-user license agreements (EULAs) and third-party legal notices in the following locations:
• Notices are located in the <National Instruments>\_Legal Information and <National Instruments> directories.
• EULAs are located in the <National Instruments>\Shared\MDF\Legal\License directory.• Review <National Instruments>\_Legal Information.txt for more information on including legal information
in installers built with NI products.
Sam
ple

TrademarksRefer to the NI Trademarks and Logo Guidelines at ni.com/trademarks for more information on National Instruments trademarks.
ARM, Keil, and µVision are trademarks or registered of ARM Ltd or its subsidiaries.LEGO, the LEGO logo, WEDO, and MINDSTORMS are trademarks of the LEGO Group. ©2013 The LEGO Group.TETRIX by Pitsco is a trademark of Pitsco, Inc.©2013
FIELDBUS FOUNDATION™ and FOUNDATION™ are trademarks of the Fieldbus Foundation.
EtherCAT® is a registered trademark of and licensed by Beckhoff Automation GmbH.
CANopen® is a registered Community Trademark of CAN in Automation e.V.
DeviceNet™ and EtherNet/IP™ are trademarks of ODVA.Go!, SensorDAQ, and Vernier are registered trademarks of Vernier Software & Technology. Vernier Software & Technology and vernier.com are trademarks or trade dress.Xilinx is the registered trademark of Xilinx, Inc.Taptite and Trilobular are registered trademarks of Research Engineering & Manufacturing Inc.
FireWire® is the registered trademark of Apple Inc.
Linux® is the registered trademark of Linus Torvalds in the U.S. and other countries.
Handle Graphics®, MATLAB®, Real-Time Workshop®, Simulink®, Stateflow®, and xPC TargetBox® are registered trademarks, and TargetBox™ and Target Language Compiler™ are trademarks of The MathWorks, Inc.
Tektronix®, Tek, and Tektronix, Enabling Technology are registered trademarks of Tektronix, Inc.
The Bluetooth® word mark is a registered trademark owned by the Bluetooth SIG, Inc.
The ExpressCard™ word mark and logos are owned by PCMCIA and any use of such marks by National Instruments is under license.The mark LabWindows is used under a license from Microsoft Corporation. Windows is a registered trademark of Microsoft Corporation in the United States and other countries.
Other product and company names mentioned herein are trademarks or trade names of their respective companies.
Members of the National Instruments Alliance Partner Program are business entities independent from National Instruments and have no agency, partnership, or joint-venture relationship with National Instruments.
PatentsFor patents covering National Instruments products/technology, refer to the appropriate location: Help»Patents in your software, the patents.txt file on your media, or the National Instruments Patent Notice at ni.com/patents.
Sam
ple

Support
Worldwide Technical Support and Product Informationni.com
Worldwide Offices
Visit ni.com/niglobal to access the branch office Web sites, which provide up-to-date contact information, support phone numbers, email addresses, and current events.
National Instruments Corporate Headquarters
11500 North Mopac Expressway Austin, Texas 78759-3504 USA Tel: 512 683 0100
For further support information, refer to the Additional Information and Resources appendix. To comment on National Instruments documentation, refer to the National Instruments Web site at ni.com/info and enter the Info Code feedback.
Sam
ple

Sam
ple

© National Instruments | v
Contents
Student GuideA. NI Certification .....................................................................................................ixB. Course Description ...............................................................................................ixC. What You Need to Get Started .............................................................................xD. Installing the Course Software..............................................................................xiE. TestStand Directories............................................................................................xiF. Course Goals.........................................................................................................xii
Lesson 1Introduction to Testing
A. Types of Tests .......................................................................................................1-2B. Automated Testing................................................................................................1-4C. Test System Terminology.....................................................................................1-4D. Components of an Automated Test System..........................................................1-5E. Testing Roles ........................................................................................................1-6F. Test System Development Process .......................................................................1-7G. Tracking Requirements.........................................................................................1-7
Lesson 2Introduction to TestStand
A. Role of Test Management Software .....................................................................2-2B. TestStand Terminology.........................................................................................2-2C. TestStand Components .........................................................................................2-5D. Using the TestStand Sequence Editor...................................................................2-7E. TestStand Execution Architecture ........................................................................2-12
Lesson 3Analyzing Sequences
A. Debugging and Diagnostics ..................................................................................3-2B. Informational Tools ..............................................................................................3-9
Lesson 4Creating Sequences
A. Overview...............................................................................................................4-2B. Creating Steps .......................................................................................................4-2C. Code Modules .......................................................................................................4-18D. Subsequences ........................................................................................................4-22E. Sequence Properties ..............................................................................................4-23Sa
mpl
e

Contents
vi | ni.com
Lesson 5Managing Data
A. TestStand Data ......................................................................................................5-2B. Expressions ...........................................................................................................5-8C. Custom Data Types...............................................................................................5-11D. Variables ...............................................................................................................5-16E. Importing and Exporting Properties .....................................................................5-19
Lesson 6Overriding Callbacks
A. Callbacks...............................................................................................................6-2B. Engine Callbacks ..................................................................................................6-3C. Process Model Callbacks ......................................................................................6-7
Lesson 7Configuring TestStand
A. Station Options .....................................................................................................7-2B. Adapter Configuration ..........................................................................................7-4C. Edit Search Directories .........................................................................................7-7D. Result Processing Options ....................................................................................7-7
Lesson 8Executing Tests in Parallel
A. Multi-UUT Testing ...............................................................................................8-2B. Multithreading ......................................................................................................8-3C. Executing Sequences in New Threads..................................................................8-4D. Multithreaded Process Models..............................................................................8-5E. Multithreading Caveats.........................................................................................8-10F. Synchronization Step Types .................................................................................8-12
Lesson 9Best Practices for Test Development
A. Creating Modular Test Systems............................................................................9-2B. Using Appropriate Data Scope .............................................................................9-3C. Using Setup and Cleanup Groups .........................................................................9-4D. Handling Non-Product-Specific Operations .........................................................9-4E. Documenting Test Systems ..................................................................................9-4F. Additional Resources ............................................................................................9-7Sa
mpl
e

NI TestStand 1 Course Manual
© National Instruments | vii
Lesson 10User Management
A. TestStand User Management ................................................................................10-2B. User Groups ..........................................................................................................10-4C. Privileges ..............................................................................................................10-4D. Synchronizing with Other User Management Systems ........................................10-5
Lesson 11Deploying a Test System
A. Introduction to Deployment..................................................................................11-2B. Deployment Considerations..................................................................................11-2C. Deployment Preparation .......................................................................................11-3D. Deployment Process .............................................................................................11-4E. Common Deployment Scenarios ..........................................................................11-7F. Deployment Licensing..........................................................................................11-9
Appendix AAdditional Information and Resources
Sam
ple
© National Instruments | 4-1
4Creating Sequences
Topics
A. Overview
B. Creating Steps
C. Code Modules
D. Subsequences
E. Sequence Properties
Sam
ple
Lesson 4 Creating Sequences
4-2 | ni.com
A. OverviewComplete the following tasks to create a test program:
1. Create or open a sequence file—Use the File menu or the toolbar.
2. Add a sequence or use the MainSequence—When you create a new sequence file, TestStand automatically creates a MainSequence. To create other sequences, right-click the Sequences pane and select Insert Sequence from the context menu.
3. Add a step to a step group—Drag a step from the Insertion Palette to a step group in the Steps pane or right-click in the Steps pane and select Insert Step from the context menu.
4. Set step properties—All steps have properties that define their behavior. Use the tabs in the Step Settings pane to configure these properties.
5. (Optional) Configure a code module or subsequence—Some steps call other sequences or code modules written in other languages. For these steps, use the Module tab on the Step Settings pane to specify the location of the code module you want to call, the data you want to pass to the code module, and the storage location of any data that the code module returns.
6. Repeat steps 2-5 as necessary—Repeat the procedure for each step you need to add to the sequence.
7. (Optional) Set sequence properties—The sequence contains properties that you can access by right-clicking the sequence in the Sequences pane and selecting Sequence Properties or by selecting Edit»Sequence Properties. Most sequences use the default properties, but you might want to specify how the sequence reacts when a critical step fails or enter documentation and requirements information.
8. (Optional) Set sequence file properties—To set properties of the sequence file as a whole, select Edit»Sequence File Properties. Use sequence file properties to specify documentation, file format, and other options. A sequence file property of particular importance is the Model Option property, which you can use to specify a process model for the sequence file to use.
B. Creating StepsTo create a step, select a step type to insert in the sequence, then specify the settings for the step. Step settings include properties of the step and step-specific settings. You can also use step templates to create steps with preconfigured settings.
Step TypesWhen you insert a step, you must first choose a step type from the Step Types palette, shown in Figure 4-1. The step type defines the behavior and configuration options of the step. TestStand includes a variety of built-in step types. You can also create and use custom step types. Refer to Lesson 3, Custom Step Types, in the NI TestStand 2: Framework Development course for more information about custom step types. Sa
mpl
e
NI TestStand 1 Course Manual
© National Instruments | 4-3
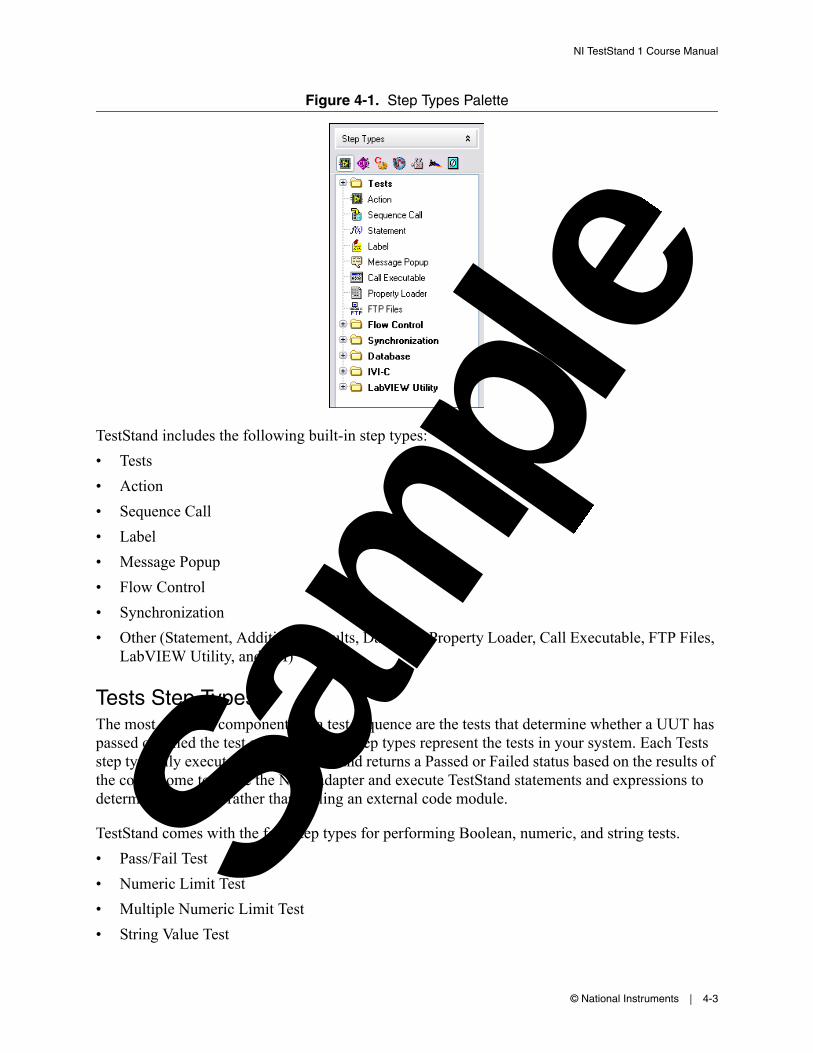
Figure 4-1. Step Types Palette
TestStand includes the following built-in step types:
• Tests
• Action
• Sequence Call
• Label
• Message Popup
• Flow Control
• Synchronization
• Other (Statement, Additional Results, Database, Property Loader, Call Executable, FTP Files, LabVIEW Utility, and IVI)
Tests Step TypesThe most essential components of a test sequence are the tests that determine whether a UUT has passed or failed the test sequence. Tests step types represent the tests in your system. Each Tests step typically executes a code module and returns a Passed or Failed status based on the results of the code. Some tests use the None adapter and execute TestStand statements and expressions to determine the status rather than calling an external code module.
TestStand comes with the four step types for performing Boolean, numeric, and string tests.
• Pass/Fail Test
• Numeric Limit Test
• Multiple Numeric Limit Test
• String Value Test
Sam
ple
Lesson 4 Creating Sequences
4-4 | ni.com
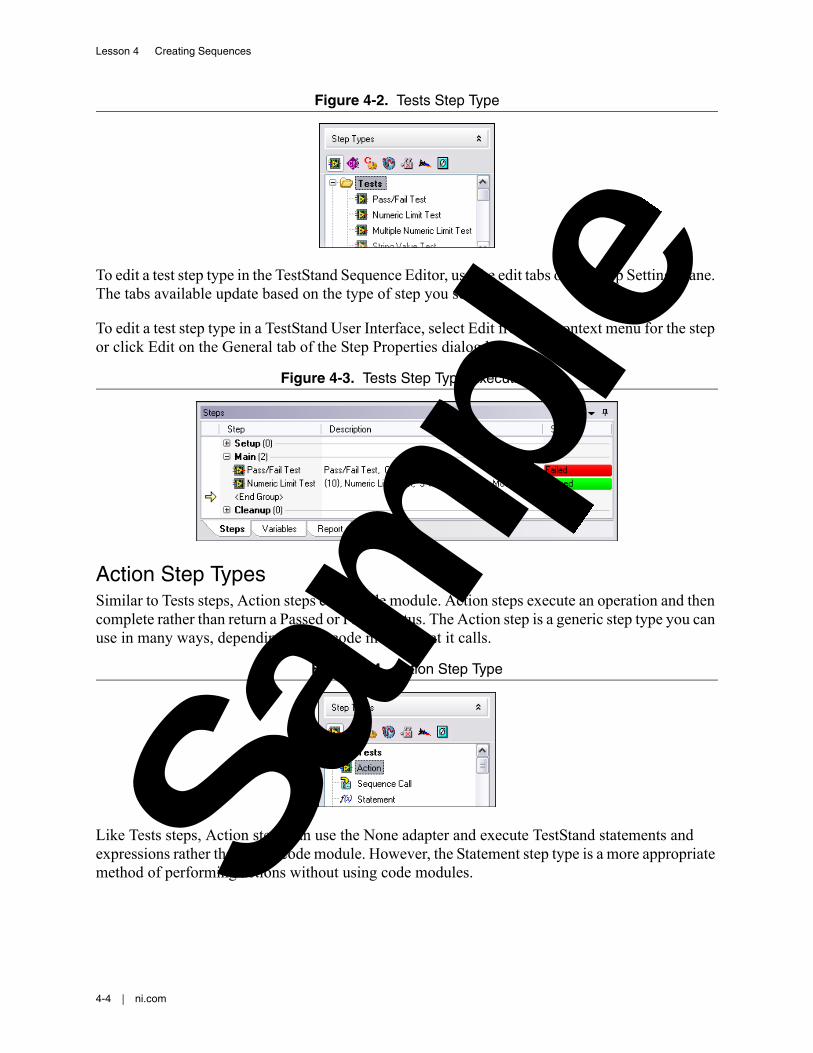
Figure 4-2. Tests Step Type
To edit a test step type in the TestStand Sequence Editor, use the edit tabs on the Step Settings pane. The tabs available update based on the type of step you select.
To edit a test step type in a TestStand User Interface, select Edit from the context menu for the step or click Edit on the General tab of the Step Properties dialog box.
Figure 4-3. Tests Step Type Executing
Action Step TypesSimilar to Tests steps, Action steps call a code module. Action steps execute an operation and then complete rather than return a Passed or Failed status. The Action step is a generic step type you can use in many ways, depending on the code module that it calls.
Figure 4-4. Action Step Type
Like Tests steps, Action steps can use the None adapter and execute TestStand statements and expressions rather than call a code module. However, the Statement step type is a more appropriate method of performing actions without using code modules.Sa
mpl
e

NI TestStand 1 Course Manual
© National Instruments | 4-5
Figure 4-5. Action Step Type Executing
Sequence Call Step TypeTestStand sequences can call other sequences as subsequences. Use the Sequence Call step type to specify a sequence to execute.
Figure 4-6. Sequence Call Step Type
You can select the sequence to call from the current sequence file or select a sequence in another sequence file. When calling a sequence, you often pass data to the sequence through variables called parameters. Refer to Lesson 5, Managing Data, for more information about parameters.
Figure 4-7. Sequence Step Type Executing
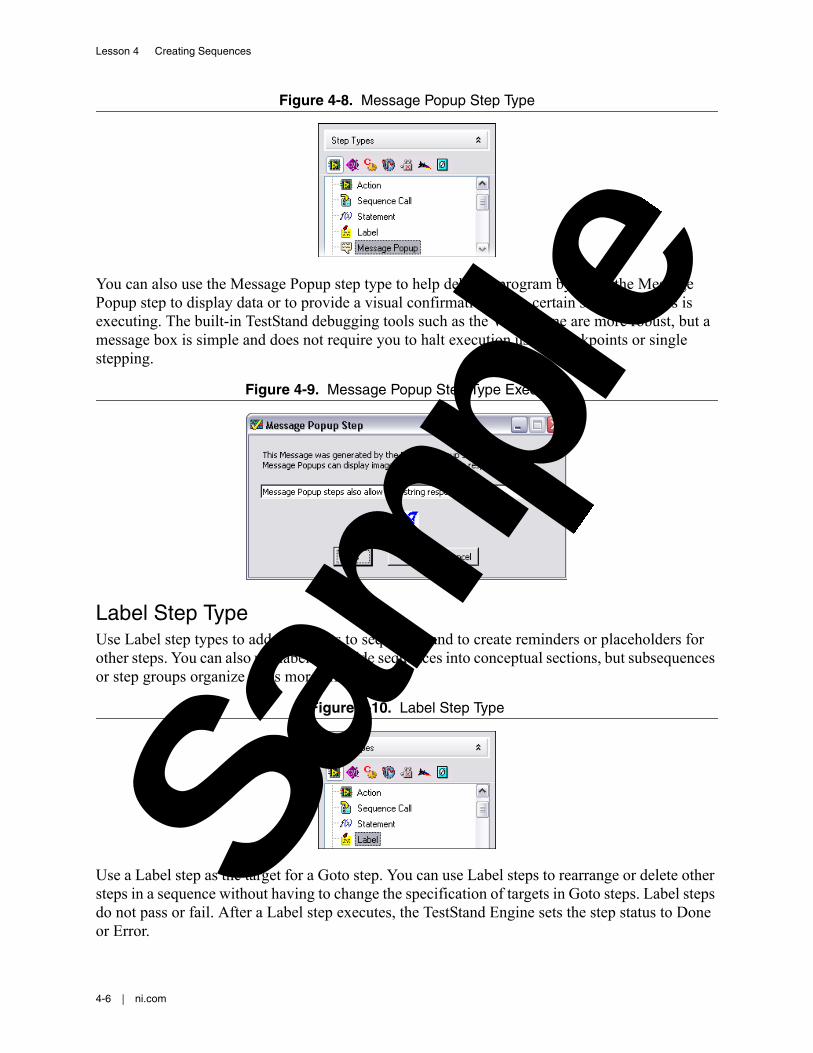
Message Popup Step TypeUse the Message Popup step type to display a message to the user, such as text, an image, and/or a Web page. You can also use the Message Popup step to obtain feedback by prompting the user to click one of up to six buttons or enter a string in a response box. For more complex user interaction, use an Action or Tests step type to call a code module written in a language that can create user interfaces.
Sam
ple
Lesson 4 Creating Sequences
4-6 | ni.com
Figure 4-8. Message Popup Step Type
You can also use the Message Popup step type to help debug a program by using the Message Popup step to display data or to provide a visual confirmation that a certain section of steps is executing. The built-in TestStand debugging tools such as the Watch pane are more robust, but a message box is simple and does not require you to halt execution using breakpoints or single stepping.
Figure 4-9. Message Popup Step Type Executing
Label Step TypeUse Label step types to add comments to sequences and to create reminders or placeholders for other steps. You can also use labels to divide sequences into conceptual sections, but subsequences or step groups organize steps more effectively.
Figure 4-10. Label Step Type
Use a Label step as the target for a Goto step. You can use Label steps to rearrange or delete other steps in a sequence without having to change the specification of targets in Goto steps. Label steps do not pass or fail. After a Label step executes, the TestStand Engine sets the step status to Done or Error.
Sam
ple
NI TestStand 1 Course Manual
© National Instruments | 4-7
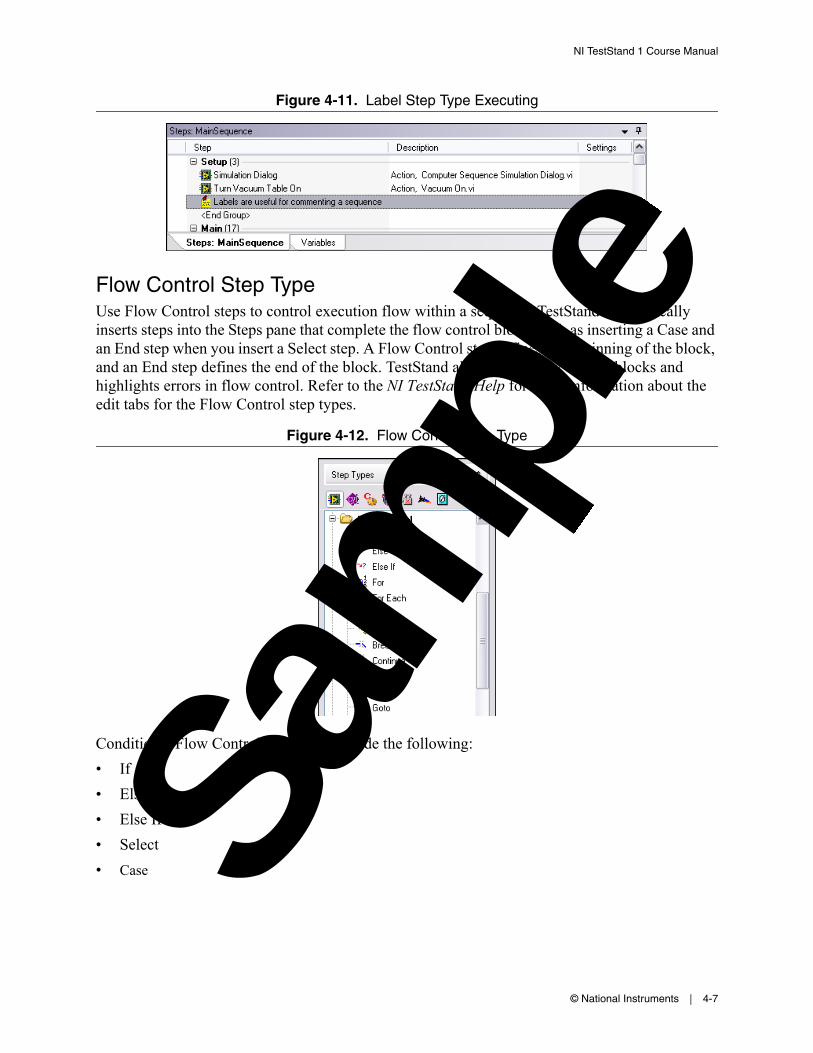
Figure 4-11. Label Step Type Executing
Flow Control Step TypeUse Flow Control steps to control execution flow within a sequence. TestStand automatically inserts steps into the Steps pane that complete the flow control block, such as inserting a Case and an End step when you insert a Select step. A Flow Control step defines the beginning of the block, and an End step defines the end of the block. TestStand also indents flow control blocks and highlights errors in flow control. Refer to the NI TestStand Help for more information about the edit tabs for the Flow Control step types.
Figure 4-12. Flow Control Step Type
Conditional Flow Control step types include the following:
• If
• Else
• Else If
• Select
• Case Sam
ple
Lesson 4 Creating Sequences
4-8 | ni.com
Loop Flow Control blocks repeat a series of steps. TestStand includes the following Loop Flow Control step types:
• For—Use For steps to define a block of steps that executes repeatedly for a number of iterations.
• For Each—Use For Each steps to define a block of steps that executes once for each element in an array.
• While—Use While steps to define a block of steps that executes while a condition is True.
• Do While—Use Do While steps to define a block of steps that executes once and then repeatedly while a condition is True.
Loop control step types alter the execution of a loop. TestStand includes the following loop control step types:
• Break—Use a Break step to cause a For, For Each, While, or Do While loop block or a Case block to exit before completing.
• Continue—Use a Continue step to cause the next iteration of an enclosing For, For Each, While, or Do While loop block to begin.
Use Goto steps to set the next step that the TestStand Engine executes. You usually use a Label step as the target of a Goto step, so you can rearrange or delete steps in a sequence without changing the targets you specify in Goto steps.
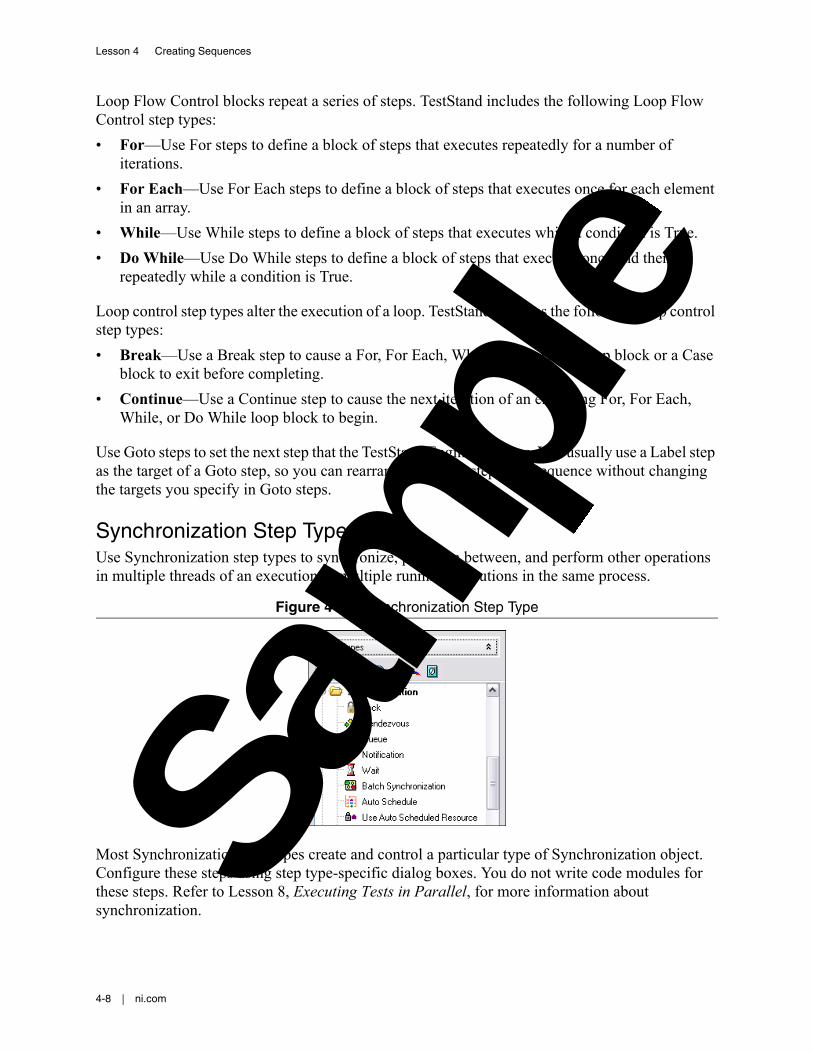
Synchronization Step TypeUse Synchronization step types to synchronize, pass data between, and perform other operations in multiple threads of an execution or multiple running executions in the same process.
Figure 4-13. Synchronization Step Type
Most Synchronization step types create and control a particular type of Synchronization object. Configure these steps using step type-specific dialog boxes. You do not write code modules for these steps. Refer to Lesson 8, Executing Tests in Parallel, for more information about synchronization.
Sam
ple

NI TestStand 1 Course Manual
© National Instruments | 4-9
Other Step TypesThe TestStand courses describe the following step types in more detail in other locations:
• Statement—Executes a TestStand expression. Use this step type to alter or set TestStand variable or property values. Refer to Lesson 5, Managing Data, for more information about expressions, properties, and variables.
• Property Loader—Loads property settings from a file. Refer to Lesson 5, Managing Data, for more information about loading property settings.
• Database—Directly accesses a database. You do not have to use Database step types to perform database logging. Refer to Lesson 7, Configuring TestStand, for more information about database logging. Refer to the NI TestStand 2: Framework Development course for more information about the Database step types.
• Additional Results—Adds and configures additional results. An additional result is a value TestStand adds to the result list of a step when the step executes. An additional result can be a module parameter or a custom additional result in which you specify the name and value of the result.
The following step types are specific to certain applications and code modules:
• Call Executable—Use Call Executable steps to launch an application, open a file, run a system command, or call a script. When you specify the name of a non-executable file, the step launches the file using the default application associated with the extension of the file. For example, you can execute a Python or Perl script file or open a text file by specifying the non-executable file directly.
• FTP Files—Use FTP Files steps to transfer files between the local system and an FTP server.
• LabVIEW Utility—Use LabVIEW Utility steps to check remote system status, run VIs asynchronously, and deploy a library. Refer to the LabVIEW Utility Step Types topic of the NI TestStand Help for more information about the LabVIEW Utility step type.
• IVI—TestStand provides several step types you can use to configure and acquire data from Interchangeable Virtual Instrument (IVI) class-compliant instruments. IVI is an instrument driver standard that provides common programming interfaces for several classes of instruments. IVI drivers exist for a number of popular instruments, including all applicable devices from National Instruments. For more information about IVI and IVI class-compliant instrument drivers, refer to the IVI Step Types topic of the NI TestStand Help.
Sam
ple

Lesson 4 Creating Sequences
4-10 | ni.com
Step SettingsUse the sequence editor Step Settings pane, shown in Figure 4-14, to edit the settings of the selected steps in the Steps pane of the active Sequence File window, Execution window, or Diff window.
Figure 4-14. Step Settings Pane
You can modify the values of built-in properties of steps, edit the step type-specific properties of steps, or specify the module call that a step performs. You can use the Step Settings pane to edit multiple steps, but the pane displays only the settings that are common to all selected steps.
Properties TabThe Properties tab contains all the standard settings for steps. Unlike the other tabs of the Step Settings pane, the items on the Properties tab do not vary from one step type to another. All steps have the same set of built-in properties, although the default values might vary and some items might be disabled for certain step types. Select a panel in the list to display those properties.
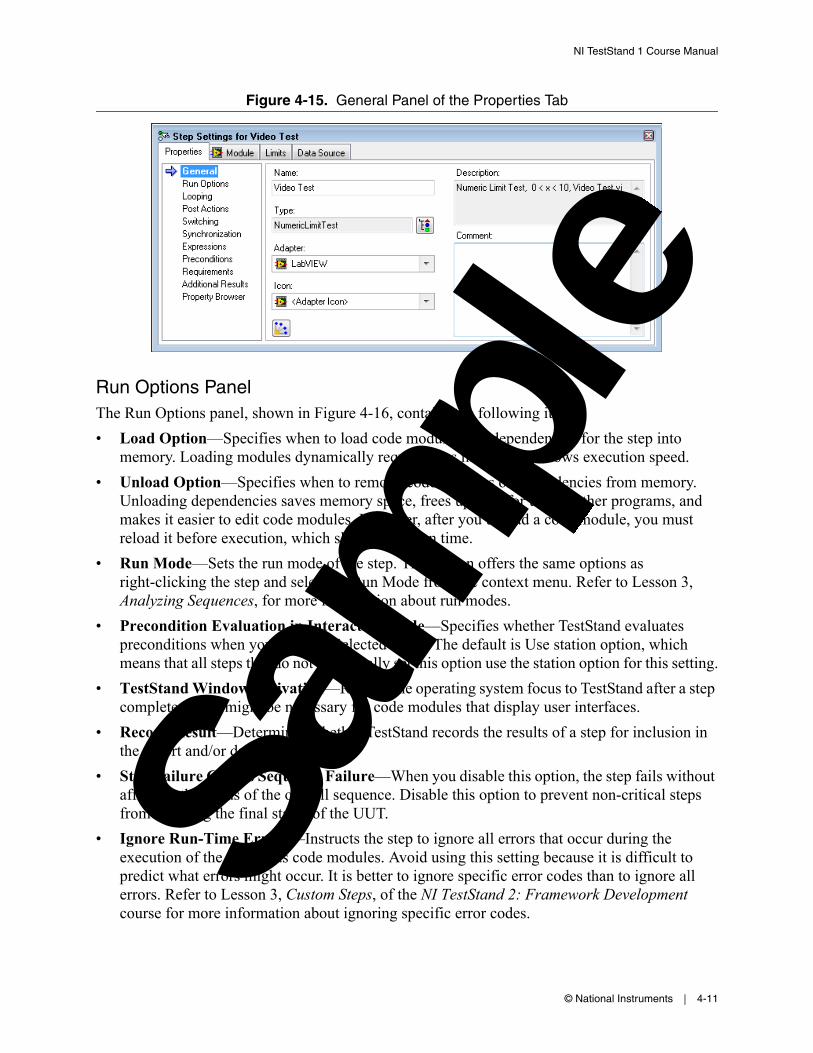
General PanelThe General panel, shown in Figure 4-15, contains the following items.
• Name—Specifies the step name. You can also specify the step name by right-clicking the step in the Steps tab and selecting Rename from the context menu.
• Type—Changes the step type for the step and retains the other settings.
• Adapter—Specifies the module adapter for the step. The module adapter determines the type of code module the step calls. Steps that do not call code modules use the None adapter.
• Icon—Specifies the icon that appears next to the step in the Steps pane. TestStand includes a variety of icons. You can also add custom icons to the <TestStand Public>\Components\Icons directory.
• Description—Displays the description that appears next to the step in the Steps pane. Each step type generates a description based on the settings of the step. You cannot edit the description.
• Comment—Specifies a comment about the step. Use comments to describe the purpose of a step or specify requirements for the use of a step.Sa
mpl
e
NI TestStand 1 Course Manual
© National Instruments | 4-11
Figure 4-15. General Panel of the Properties Tab
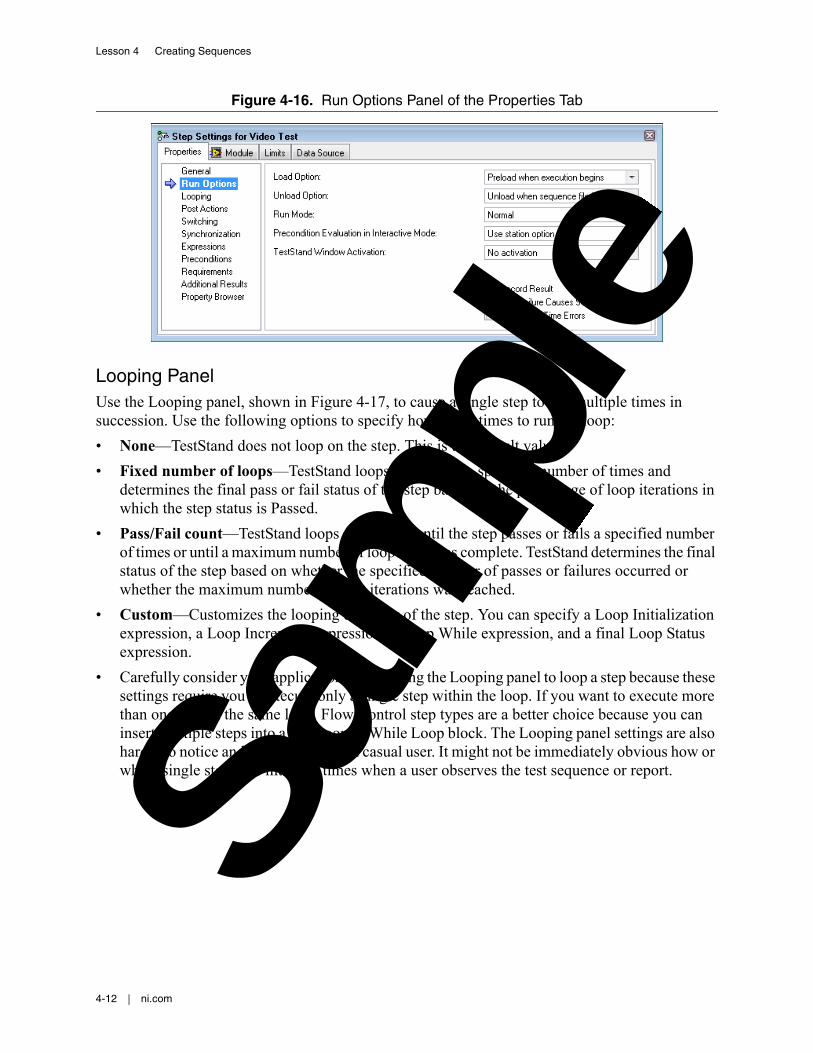
Run Options PanelThe Run Options panel, shown in Figure 4-16, contains the following items.
• Load Option—Specifies when to load code modules and dependencies for the step into memory. Loading modules dynamically requires less memory but slows execution speed.
• Unload Option—Specifies when to remove code modules or dependencies from memory. Unloading dependencies saves memory space, frees up files for use by other programs, and makes it easier to edit code modules. However, after you unload a code module, you must reload it before execution, which slows execution time.
• Run Mode—Sets the run mode of the step. This option offers the same options as right-clicking the step and selecting Run Mode from the context menu. Refer to Lesson 3, Analyzing Sequences, for more information about run modes.
• Precondition Evaluation in Interactive Mode—Specifies whether TestStand evaluates preconditions when you use Run Selected Steps. The default is Use station option, which means that all steps that do not specifically set this option use the station option for this setting.
• TestStand Window Activation—Returns the operating system focus to TestStand after a step completes. This might be necessary for code modules that display user interfaces.
• Record Result—Determines whether TestStand records the results of a step for inclusion in the report and/or database.
• Step Failure Causes Sequence Failure—When you disable this option, the step fails without affecting the status of the overall sequence. Disable this option to prevent non-critical steps from affecting the final status of the UUT.
• Ignore Run-Time Errors—Instructs the step to ignore all errors that occur during the execution of the step or its code modules. Avoid using this setting because it is difficult to predict what errors might occur. It is better to ignore specific error codes than to ignore all errors. Refer to Lesson 3, Custom Steps, of the NI TestStand 2: Framework Development course for more information about ignoring specific error codes.
Sam
ple
Lesson 4 Creating Sequences
4-12 | ni.com
Figure 4-16. Run Options Panel of the Properties Tab
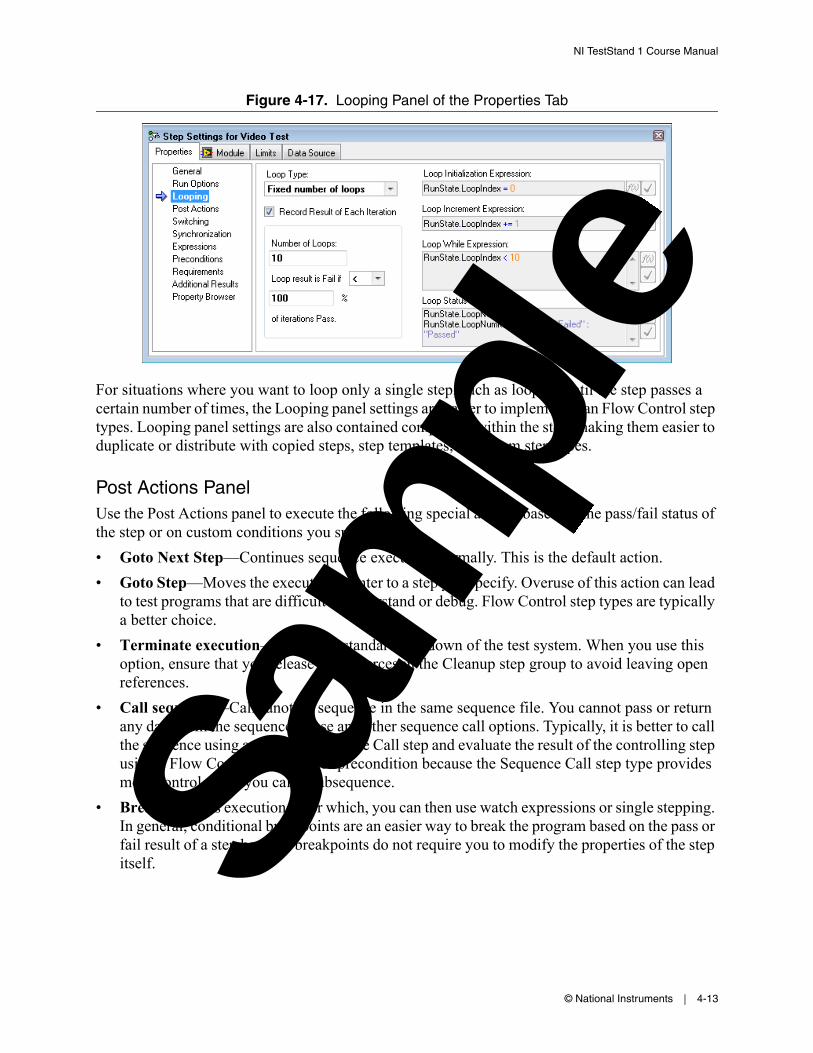
Looping PanelUse the Looping panel, shown in Figure 4-17, to cause a single step to run multiple times in succession. Use the following options to specify how many times to run the loop:
• None—TestStand does not loop on the step. This is the default value.
• Fixed number of loops—TestStand loops on the step a specified number of times and determines the final pass or fail status of the step based on the percentage of loop iterations in which the step status is Passed.
• Pass/Fail count—TestStand loops on the step until the step passes or fails a specified number of times or until a maximum number of loop iterations complete. TestStand determines the final status of the step based on whether the specified number of passes or failures occurred or whether the maximum number of loop iterations was reached.
• Custom—Customizes the looping behavior of the step. You can specify a Loop Initialization expression, a Loop Increment expression, a Loop While expression, and a final Loop Status expression.
• Carefully consider your application before using the Looping panel to loop a step because these settings require you to execute only a single step within the loop. If you want to execute more than one step in the same loop, Flow Control step types are a better choice because you can insert multiple steps into a For Loop or While Loop block. The Looping panel settings are also harder to notice and comprehend for a casual user. It might not be immediately obvious how or why a single step runs multiple times when a user observes the test sequence or report. Sa
mpl
e
NI TestStand 1 Course Manual
© National Instruments | 4-13
Figure 4-17. Looping Panel of the Properties Tab
For situations where you want to loop only a single step, such as looping until the step passes a certain number of times, the Looping panel settings are easier to implement than Flow Control step types. Looping panel settings are also contained completely within the step, making them easier to duplicate or distribute with copied steps, step templates, or custom step types.
Post Actions PanelUse the Post Actions panel to execute the following special actions based on the pass/fail status of the step or on custom conditions you specify:
• Goto Next Step—Continues sequence execution normally. This is the default action.
• Goto Step—Moves the execution pointer to a step you specify. Overuse of this action can lead to test programs that are difficult to understand or debug. Flow Control step types are typically a better choice.
• Terminate execution—Initiates a standard shutdown of the test system. When you use this option, ensure that you release all resources in the Cleanup step group to avoid leaving open references.
• Call sequence—Calls another sequence in the same sequence file. You cannot pass or return any data from the sequence or use any other sequence call options. Typically, it is better to call the sequence using a separate Sequence Call step and evaluate the result of the controlling step using a Flow Control step type or precondition because the Sequence Call step type provides more control when you call a subsequence.
• Break—Pauses execution, after which, you can then use watch expressions or single stepping. In general, conditional breakpoints are an easier way to break the program based on the pass or fail result of a step because breakpoints do not require you to modify the properties of the step itself. Sa
mpl
e

Lesson 4 Creating Sequences
4-14 | ni.com
Figure 4-18. Post Actions Panel of the Properties Panel
Preconditions PanelThe Preconditions panel, shown in Figure 4-19, specifies the conditions that must evaluate to True for TestStand to execute a step during the normal flow of execution in a sequence, such as running a step only if a previous step passes. The Preconditions panel contains the following options:
• Precondition Expression—The expression that must evaluate to True to execute the step.
• Precondition Builder—Launches the Preconditions Builder dialog box, in which you can build a precondition expression using step statuses, AllOf and AnyOf conditional groups, and subexpressions.
• Expression Browser Dialog Box—Launches the Expression Browser dialog box.
• Check Expression for Errors—Verifies the syntax of the expression in the Expression control.
Figure 4-19. Preconditions Panel
A step executes only if its precondition is True. A precondition is an expression that you can enter manually. Refer to Lesson 5, Managing Data, for more information about expressions. Sa
mpl
e
NI TestStand 1 Course Manual
© National Instruments | 4-15
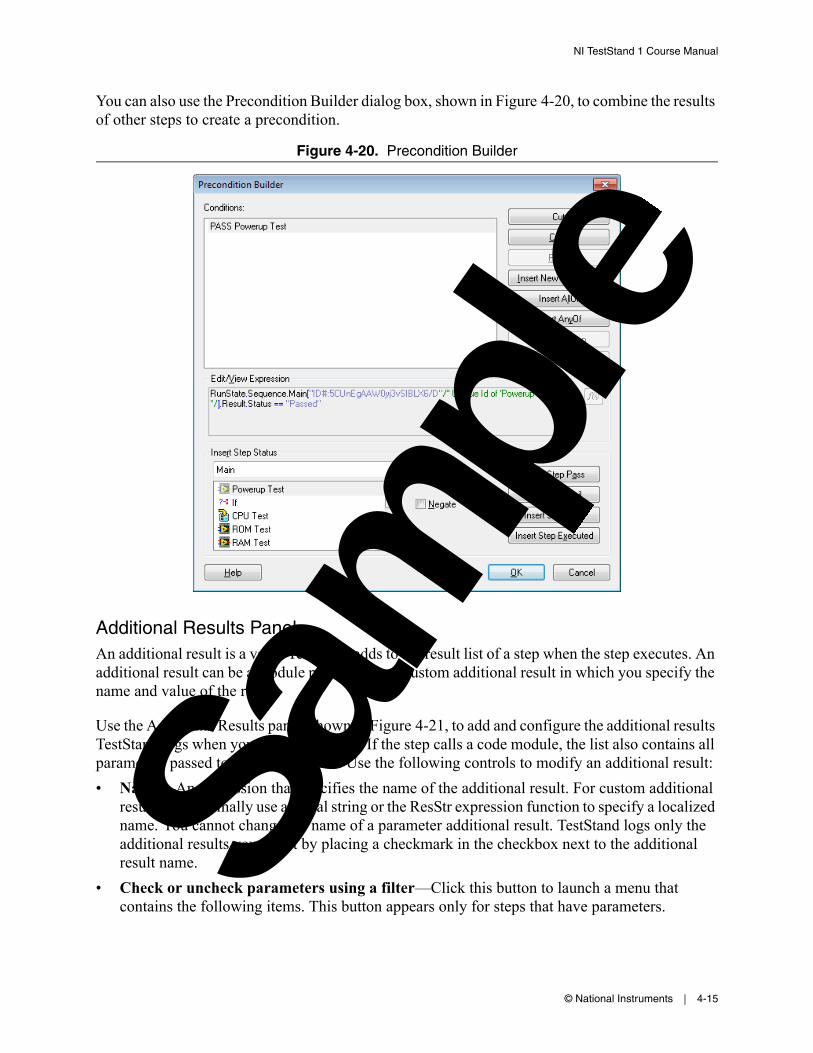
You can also use the Precondition Builder dialog box, shown in Figure 4-20, to combine the results of other steps to create a precondition.
Figure 4-20. Precondition Builder
Additional Results PanelAn additional result is a value TestStand adds to the result list of a step when the step executes. An additional result can be a module parameter or a custom additional result in which you specify the name and value of the result.
Use the Additional Results panel, shown in Figure 4-21, to add and configure the additional results TestStand logs when you execute the step. If the step calls a code module, the list also contains all parameters passed to the code module. Use the following controls to modify an additional result:
• Name—An expression that specifies the name of the additional result. For custom additional results, you normally use a literal string or the ResStr expression function to specify a localized name. You cannot change the name of a parameter additional result. TestStand logs only the additional results you select by placing a checkmark in the checkbox next to the additional result name.
• Check or uncheck parameters using a filter—Click this button to launch a menu that contains the following items. This button appears only for steps that have parameters. Sa
mpl
e

Lesson 4 Creating Sequences
4-16 | ni.com
• Check Non-Filtered Parameters—Places a checkmark in all parameters not included in the parameter filter.
• Uncheck Filtered Parameters—Removes the checkmark from all parameters included in the parameter filter.
• Configure Parameter Filter—Launches the Configure Parameter Filter dialog box, in which you can define the parameter filter.
• Select Result From List—For a custom additional result, select an item from the list to set all columns to a value the item defines. The list contains items that apply to any step and might also contain items specific to the step type.
• Value to Log—An expression that specifies the value of the additional result.
• Type—Specifies the type of the additional result. When you click the Change Result Type button and select a type, you can expand the Name column of the Additional Results list to view the fields of the selected type and specify a value to log for each field in the Value to Log column. When you click the Change Result Type button and select <Any Type>, the Type column shows the type of the Value to Log expression. For parameter additional results, the Type column shows the type of the parameter.
• Condition—If you specify a condition that evaluates to False, TestStand does not log the additional result.
• Include in Report—Enable this option to set the PropFlags_IncludeInReport flag on the additional result, which indicates that the report displays the additional result.
• Is Measurement—Enable this option to set the PropFlags_IsMeasurementValue flag on the additional result, which indicates that the additional result is a measurement.
• Is Limit—Enable this option to set the PropFlags_IsLimit flag on the additional result, which indicates that the additional result is a test limit.
• Add Result From List—Behaves the same as the Select Result From List button, except the Add Result From List button inserts a new custom result before setting the column values.
• Add Custom Result—Adds a new custom additional result.
• Remove Selected Result—Removes the currently selected custom additional result.
• Move Selected Result Up—Moves the currently selected custom additional result up in the Additional Results list.
• Move Selected Result Down—Moves the currently selected custom additional result down in the Additional Results list. Sa
mpl
e

NI TestStand 1 Course Manual
© National Instruments | 4-17
Figure 4-21. Additional Results Pane
Other PanelsThe Properties tab includes the following other panels:
• Switching—National Instruments Switch Executive is an intelligent switch management and routing application that simplifies switch system configuration and increases test performance, ultimately lowering cost to test. Use switching to programmatically change the inputs to test equipment. You can use code modules to control a switch, but use NI Switch Executive to directly connect the appropriate routes for each step in a sequence without having to add additional code and steps.
• Synchronization—Some process models execute multiple instances of a single sequence at the same time. This property panel contains settings that control how multithreaded process models execute the step. Refer to Lesson 8, Executing Tests in Parallel, for more information about multithreaded process models.
• Expressions—Use expressions to programmatically access or change the data TestStand gathers as it runs a sequence. Use the Expressions panel to specify expressions to execute before or after the step. You can also specify an expression that determines the status the step reports to TestStand after it executes.
• Requirements—Use the Requirements panel to indicate that a step tests a specific requirement by linking the step to a specific requirement_id managed by NI Requirements Gateway.
• Property Browser—Each step has data elements that TestStand populates as the step runs. These data elements describe aspects of the step execution, such as execution time and results. Use the Property Browser panel to view these data elements and to set advanced flags on data elements. Refer to Lesson 5, Managing Data, for more information about run-time properties.
Creating Steps—Step TemplatesUse the Templates list, shown in Figure 4-22, to hold copies of sequences, steps, and variables that you reuse during the development of sequence files. For example, you can add a step from a sequence that calls a specific LabVIEW VI you typically use or add a sequence that contains common Setup steps, Cleanup steps, and predefined local variables.Sa
mpl
e

Lesson 4 Creating Sequences
4-18 | ni.com
Figure 4-22. Step Templates
• You can add sequences, steps, or variables to the Templates list by dragging sequences from the Sequences pane, steps from the Steps pane, or variables from the Variables pane to the Templates list. You can rename, copy, paste, delete, import, and export the items in the Templates list, and you can rearrange the items and create folders. To edit a sequence, step, or variable in the Templates list, you must drag the item to a sequence file, make changes, drag the item back to the Templates list, and delete the original item.
To practice the concepts in this section, complete Exercise 4-1.
C. Code Modules
The code to run a specific test on a UUT is generally not written in TestStand. Certain step types, such as the Action step type and the Tests step types, call code modules to execute external code. TestStand uses module adapters to call external code modules written in a variety of languages. Each module adapter corresponds to one programming language and includes the necessary code to execute and, in some cases, debug code modules.
Module Adapters Each time you create a step that can accept a code module, TestStand assigns the module adapter you selected to that step. Select a module adapter from the Selected Adapter pull-down menu before you create a new Tests or Action step type. Use the General panel of the Properties tab of the Step Settings pane to change the adapter for a step.Sa
mpl
e
NI TestStand 1 Course Manual
© National Instruments | 4-19
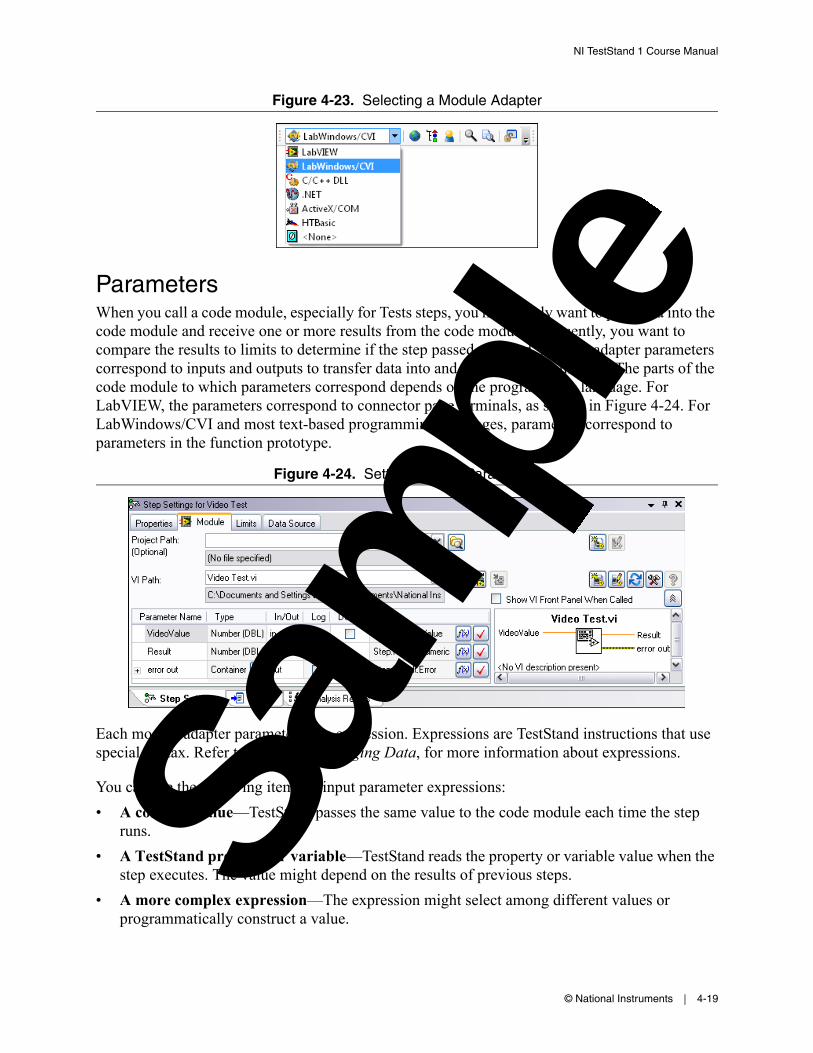
Figure 4-23. Selecting a Module Adapter
Parameters When you call a code module, especially for Tests steps, you most likely want to pass data into the code module and receive one or more results from the code module. Frequently, you want to compare the results to limits to determine if the step passed or failed. Module adapter parameters correspond to inputs and outputs to transfer data into and out of the code module. The parts of the code module to which parameters correspond depends on the programming language. For LabVIEW, the parameters correspond to connector pane terminals, as shown in Figure 4-24. For LabWindows/CVI and most text-based programming languages, parameters correspond to parameters in the function prototype.
Figure 4-24. Setting Module Parameters
Each module adapter parameter is an expression. Expressions are TestStand instructions that use special syntax. Refer to Lesson 5, Managing Data, for more information about expressions.
You can use the following items as input parameter expressions:
• A constant value—TestStand passes the same value to the code module each time the step runs.
• A TestStand property or variable—TestStand reads the property or variable value when the step executes. The value might depend on the results of previous steps.
• A more complex expression—The expression might select among different values or programmatically construct a value.
Sam
ple

Lesson 4 Creating Sequences
4-20 | ni.com
You can use the following items as output parameter expressions:
• One of the items in the result container of the step—The data that the code module returns might affect the status of the step or be displayed in the report.
• Another TestStand property or variable—TestStand might store the returned data for future steps or sequences to use.
• A more complex expression—The destination for the data might be selected programmatically.
Path Types TestStand must locate the files you call in a sequence on the hard drive and uses the following two options for locating files:
• Absolute Path—TestStand stores the exact location of the file on the hard drive. Moving the file to another location breaks the link to the file. Deploying the program to another computer requires the file to be in the same location it was on the original computer.
• Relative Path—TestStand maintains a list of search directories to search when you use a relative path to specify a file. For TestStand to successfully resolve a relative path, the path must exist in one of the search directories. One of the default search directories is the current sequence file directory. You can add the directory that contains the file to the search paths. If you do so, deploying the program to another computer might require you to update the search paths on that computer as well. National Instruments recommends that you use paths relative to the current sequence file directory.
LabVIEW Code ModulesUse the LabVIEW Adapter to call a VI and pass TestStand data directly to the VI through the VI connector pane terminals. TestStand automatically loads the VI icon, connector pane information, and context help into the Specify Module dialog box to show you exactly what parameters the VI expects and pass the appropriate values. TestStand can open LabVIEW and step into the VI when debugging.
Figure 4-25. LabVIEW Adapter Module Parameters
Sam
ple

NI TestStand 1 Course Manual
© National Instruments | 4-21
Refer to the Using LabVIEW and LabWindows/CVI with TestStand manual for information about how to organize the VIs you create and use in a test system.
LabWindows/CVI Code Modules Use the LabWindows/CVI Adapter, shown in Figure 4-26, to call DLL, object, source, and static library files LabWindows/CVI generates. You can also use the LabWindows/CVI Adapter to step into LabWindows/CVI code directly from TestStand. DLLs must be compiled as debuggable for to step into them from TestStand.
Figure 4-26. LabWindows/CVI Model Parameters
Parameters represent arguments in the function prototype. Pass by value parameters provide input to the code module. Pass by reference parameters provide input from and return data to the same location. Function return values provide output from the code module.
To practice the concepts in this section, complete Exercise 4-2.
Sam
ple

Lesson 4 Creating Sequences
4-22 | ni.com
D. SubsequencesAs you construct a test program, avoid placing the entire test within one sequence because doing so can lead to repetition of code and make it harder to reuse code for other tests. Instead, divide code into segments based on function. Place the code segments inside other sequences and call the sequences as subsequences. Refer to Lesson 9, Best Practices for Test Development, for more information about breaking a program up into logical components.
You can use the Sequence Call step type to call subsequences or enable the Sequence Adapter from the Adapter Configuration dialog box and use the adapter to call subsequences from other step types. Refer to Lesson 7, Configuring TestStand, for more information about the Adapter Configuration dialog box. Sequences can pass and return data through parameters much like code modules. To define parameters for a subsequence, create special variables to pass the data. Refer to Lesson 5, Managing Data, for more information about variables and parameters.
Figure 4-27. Creating a Subsequence
To practice the concepts in this section, complete Exercise 4-3.
Sam
ple
NI TestStand 1 Course Manual
© National Instruments | 4-23
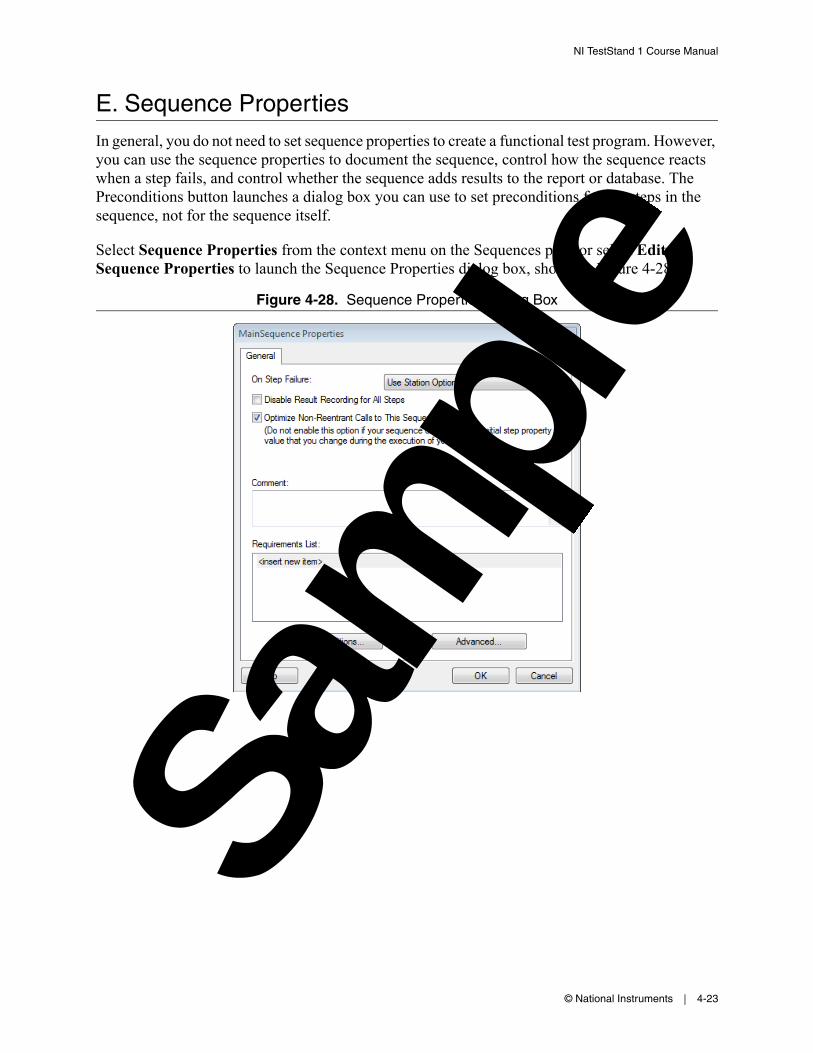
E. Sequence PropertiesIn general, you do not need to set sequence properties to create a functional test program. However, you can use the sequence properties to document the sequence, control how the sequence reacts when a step fails, and control whether the sequence adds results to the report or database. The Preconditions button launches a dialog box you can use to set preconditions for the steps in the sequence, not for the sequence itself.
Select Sequence Properties from the context menu on the Sequences pane or select Edit»Sequence Properties to launch the Sequence Properties dialog box, shown in Figure 4-28.
Figure 4-28. Sequence Properties Dialog Box
Sam
ple

Lesson 4 Creating Sequences
4-24 | ni.com
General TabUse the General tab, shown in Figure 4-29, to configure settings for tracking and managing sequence files. Update the version information on the sequence file to track multiple copies of the sequence file and determine whether a copy of the sequence file is the most recent version. Use the comment and requirements list fields to describe the sequence file. Refer to Lesson 9, Best Practices for Test Development, for more information about documenting test systems.
You can also use the General tab to control other options. Among the most important of these options are the Load/Unload options to override the load options on individual steps and specify when TestStand must load into memory the dependencies for the sequence.
Figure 4-29. General Tab of the Sequence File Properties Dialog Box
Each sequence file has a setting that identifies a process model. A process model is a sequence file that contains all the test execution code that is not specific to the particular type of UUT. Each process model has one or more execution entry points, which are sequences that define how to execute a test. If you do not specify a process model in the sequence file, TestStand uses the default process model, configured through the station options.Sa
mpl
e

NI TestStand 1 Course Manual
© National Instruments | 4-25
Advanced TabUse the Advanced tab, shown in Figure 4-30, to specify the process model, use the default process model for the test station, or use no process model at all. You can also use the Advanced tab to change the type of the sequence file to create special sequence files, such as process models. Refer to the NI TestStand 2: Framework Development course for more information about creating process models.
Figure 4-30. Advanced Tab of the Sequence File Properties Dialog BoxSa
mpl
e

Sam
ple

NI TestStand 1 Course Manual
© National Instruments | 4-27
Self-Review: Quiz
1. For each of the following step types, determine whether the step type allows you to use a code module. (Yes or No)
a. Goto
b. Action
c. Numeric Limit Test
d. Statement
e. String Value Test
2. On which panel of the Properties tab can you configure a step to run based on a Boolean condition?
a. Looping Panel
b. Post Actions Panel
c. Preconditions Panel
d. Additional Results Panel
3. Which is the best option for storing the path to a code module?
a. Relative path
b. Absolute path
Sam
ple

Sam
ple
NI TestStand 1 Course Manual
© National Instruments | 4-29
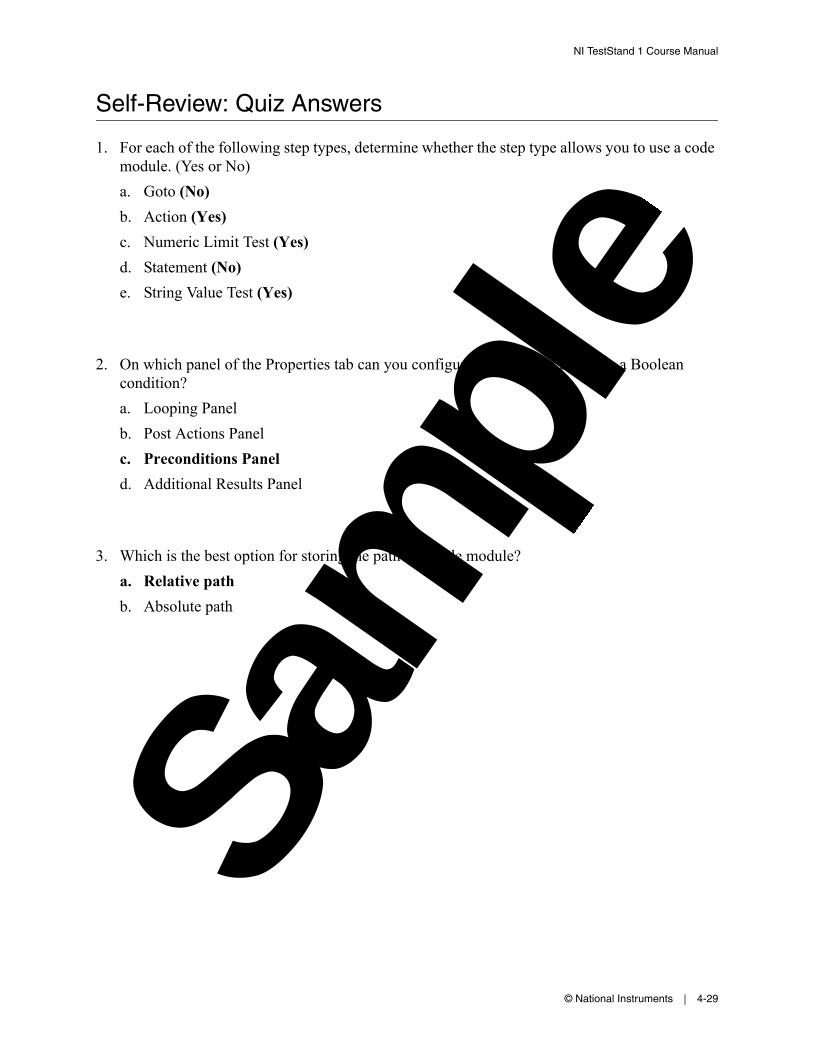
Self-Review: Quiz Answers
1. For each of the following step types, determine whether the step type allows you to use a code module. (Yes or No)
a. Goto (No)
b. Action (Yes)
c. Numeric Limit Test (Yes)
d. Statement (No)
e. String Value Test (Yes)
2. On which panel of the Properties tab can you configure a step to run based on a Boolean condition?
a. Looping Panel
b. Post Actions Panel
c. Preconditions Panel
d. Additional Results Panel
3. Which is the best option for storing the path to a code module?
a. Relative path
b. Absolute path
Sam
ple

Lesson 4 Creating Sequences
4-30 | ni.com
Notes
Sam
ple