NetComm Wireless VPN Functionality Feature Spotlight.
21
NetComm Wireless VPN Functionality Feature Spotlight
-
Upload
brianna-morrison -
Category
Documents
-
view
226 -
download
2
Transcript of NetComm Wireless VPN Functionality Feature Spotlight.
NetComm Wireless
VPN FunctionalityFeature Spotlight
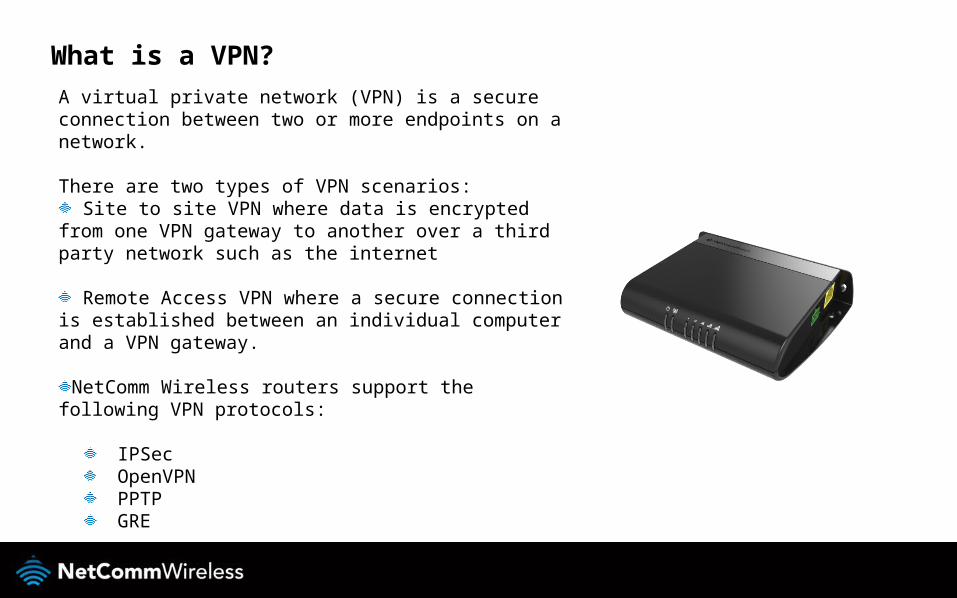
What is a VPN?
A virtual private network (VPN) is a secure connection between two or more endpoints on a network.
There are two types of VPN scenarios: Site to site VPN where data is encrypted from one
VPN gateway to another over a third party network such as the internet
Remote Access VPN where a secure connection is established between an individual computer and a VPN gateway.
NetComm Wireless routers support the following VPN protocols:
IPSec OpenVPN PPTP GRE

PPPoE username and password
IPSec
IPSec is a VPN protocol operating at the internet protocol (IP) layer of the internet protocol suite.
It can be used to secure data flow in the following configurations: Host-to-host Network-to-network Network-to-host
OpenVPN
OpenVPN is an open source virtual private network program for creating point-to-point or server-to-multi-client encrypted tunnels between host computers.
It can traverse network address translation (NAT) and firewalls and provides 3 methods of authentication:
Certificate Pre-shared key Username/password
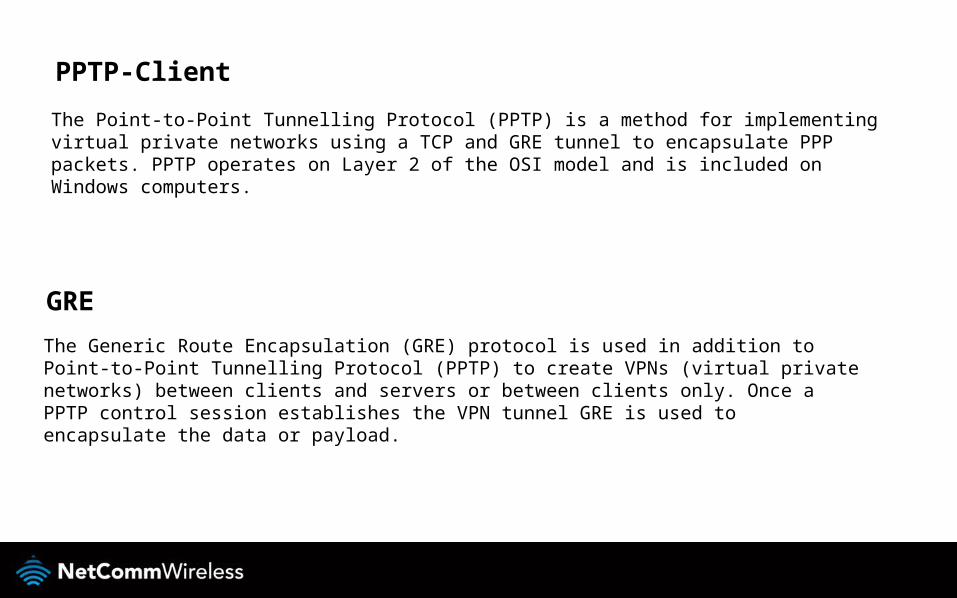
PPTP-Client
GRE
The Point-to-Point Tunnelling Protocol (PPTP) is a method for implementing virtual private networks using a TCP and GRE tunnel to encapsulate PPP packets. PPTP operates on Layer 2 of the OSI model and is included on Windows computers.
The Generic Route Encapsulation (GRE) protocol is used in addition to Point-to-Point Tunnelling Protocol (PPTP) to create VPNs (virtual private networks) between clients and servers or between clients only. Once a PPTP control session establishes the VPN tunnel GRE is used to encapsulate the data or payload.
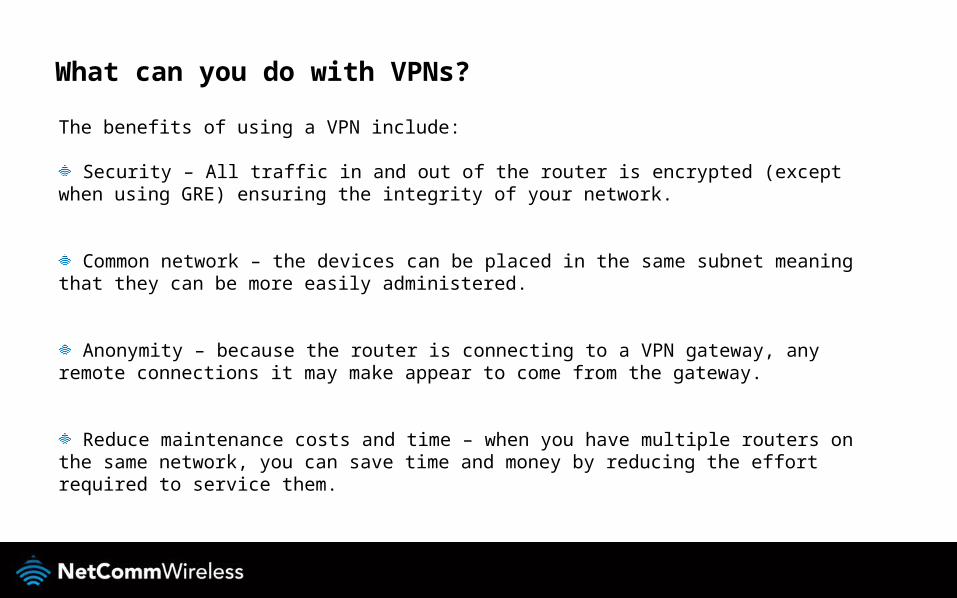
What can you do with VPNs?
The benefits of using a VPN include:
Security – All traffic in and out of the router is encrypted (except when using GRE) ensuring the integrity of your network.
Common network – the devices can be placed in the same subnet meaning that they can be more easily administered.
Anonymity – because the router is connecting to a VPN gateway, any remote connections it may make appear to come from the gateway.
Reduce maintenance costs and time – when you have multiple routers on the same network, you can save time and money by reducing the effort required to service them.

Configuring an IPSec VPN
1
2 3
4

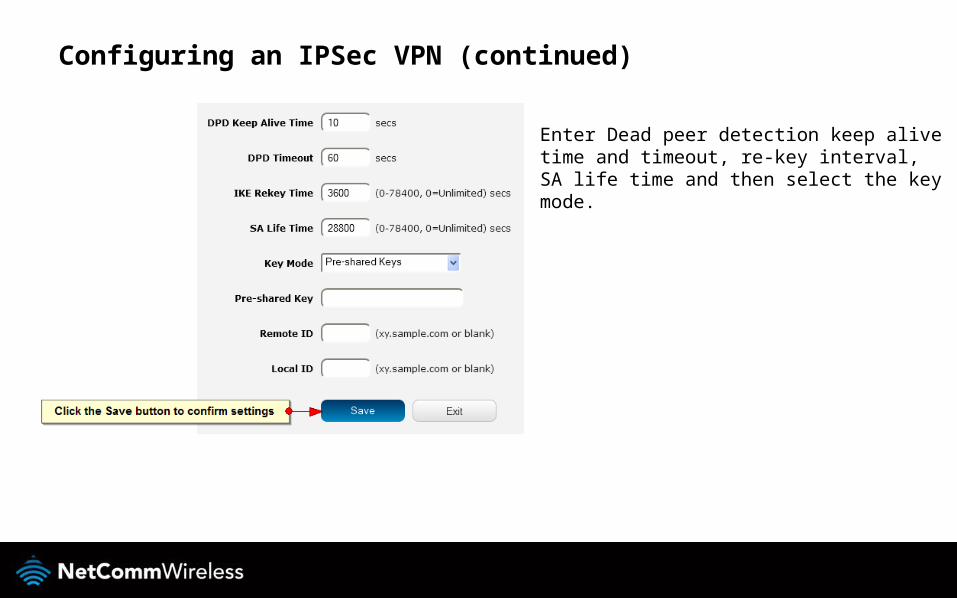
Configuring an IPSec VPN (continued)
5
Select encapsulation, encryption and hash types6
Configuring an IPSec VPN (continued)
Enter Dead peer detection keep alive time and timeout, re-key interval, SA life time and then select the key mode.
7
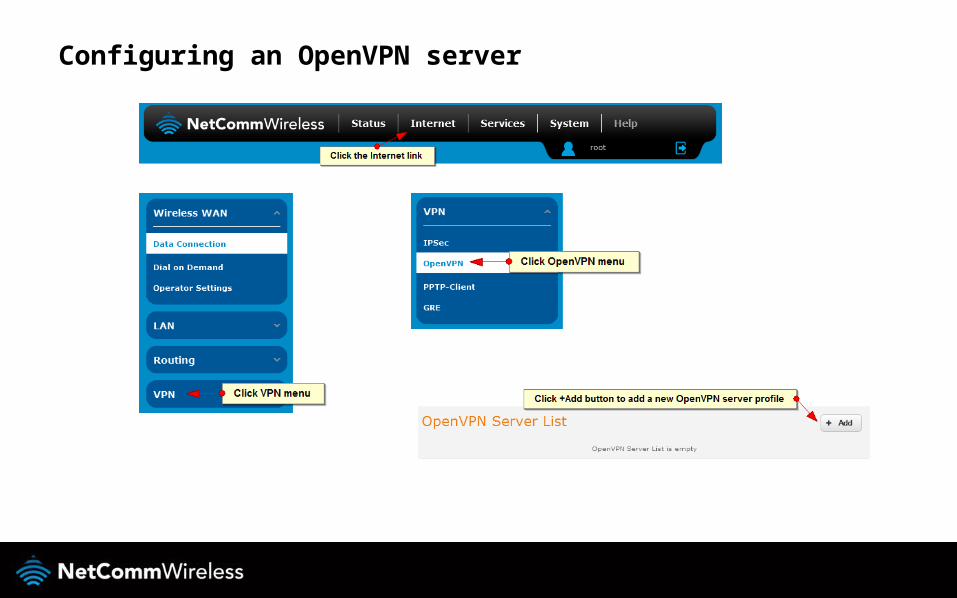
Configuring an OpenVPN server
1
2 3
4
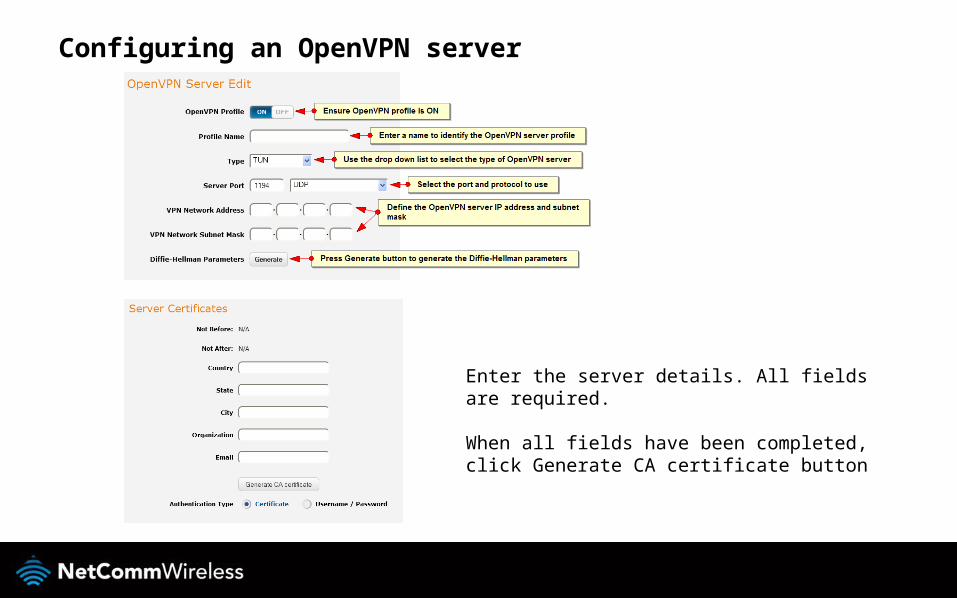
Configuring an OpenVPN server
5
Enter the server details. All fields are required.
When all fields have been completed, click Generate CA certificate button
6
Configuring an OpenVPN server
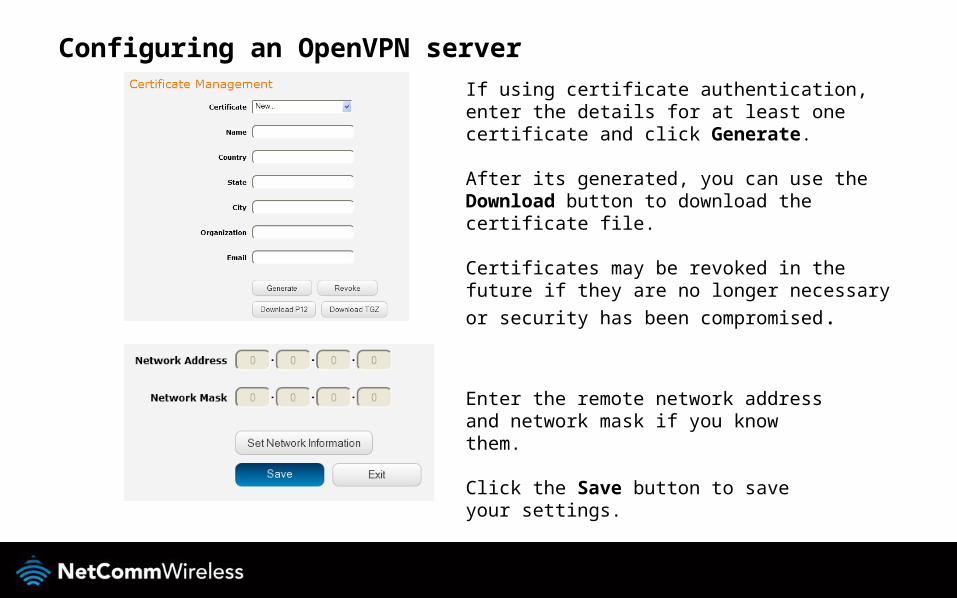
If using certificate authentication, enter the details for at least one certificate and click Generate.
After its generated, you can use the Download button to download the certificate file.
Certificates may be revoked in the future if they are no longer necessary or security has
been compromised.
Enter the remote network address and network mask if you know them.
Click the Save button to save your settings.
7
8

Configuring an OpenVPN client
1
2 3
4
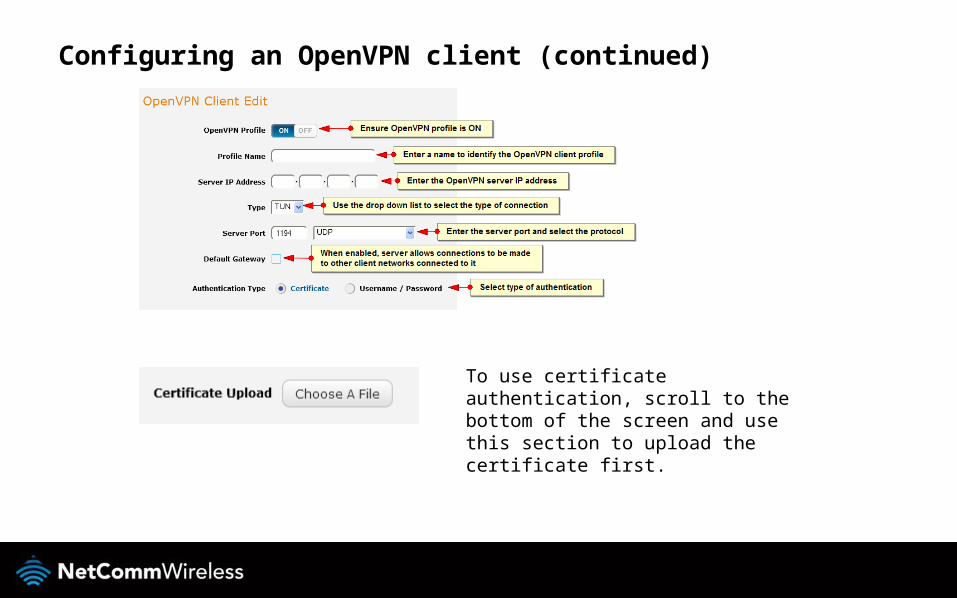
Configuring an OpenVPN client (continued)
5
To use certificate authentication, scroll to the bottom of the screen and use this section to upload the certificate first.
6
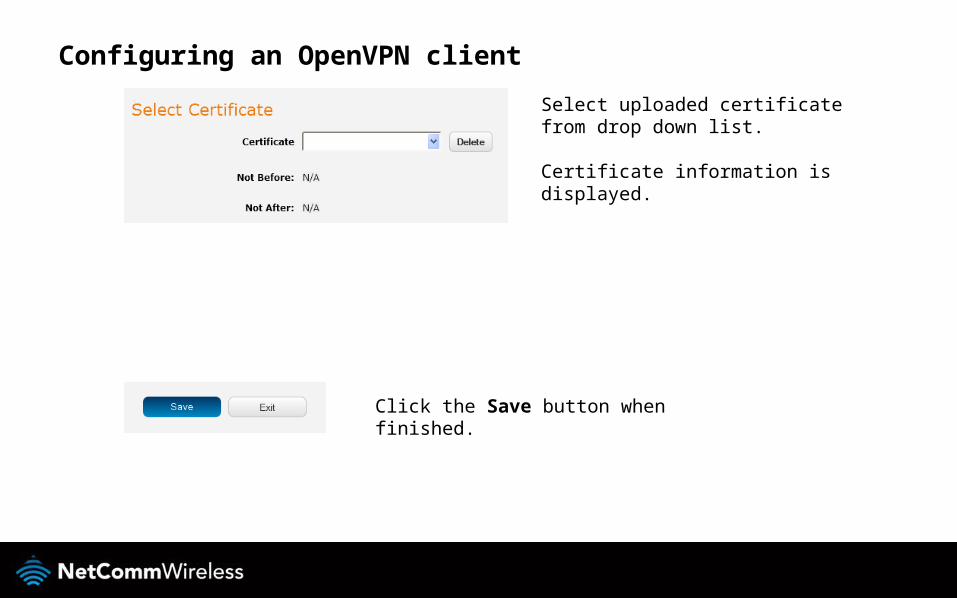
Configuring an OpenVPN client
7
Click the Save button when finished.8
Select uploaded certificate from drop down list.
Certificate information is displayed.

Configuring an OpenVPN P2P connection
1
2 3
4
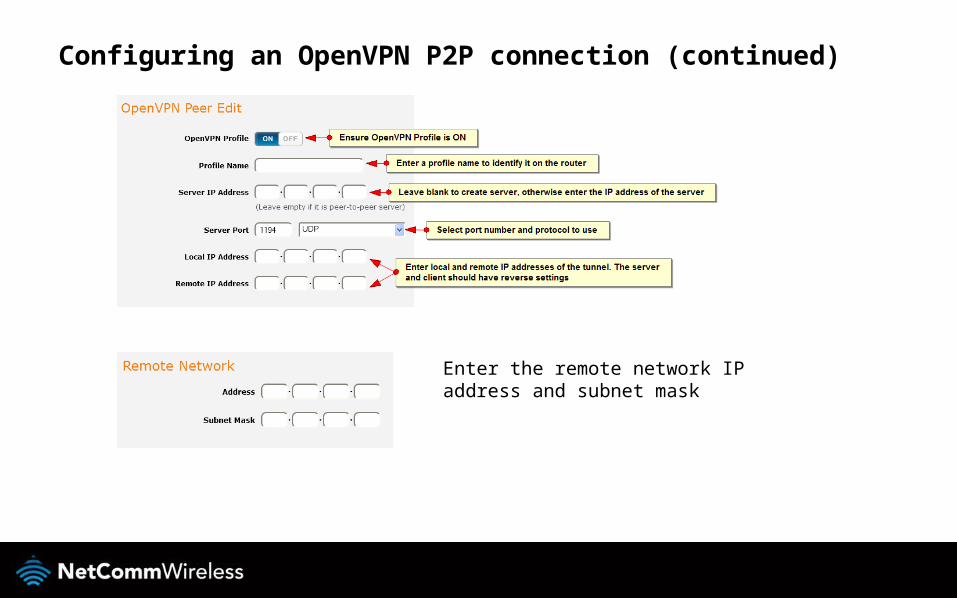
Configuring an OpenVPN P2P connection (continued)
5
6Enter the remote network IP address and subnet mask
Configuring an OpenVPN P2P connection (continued)
7
8
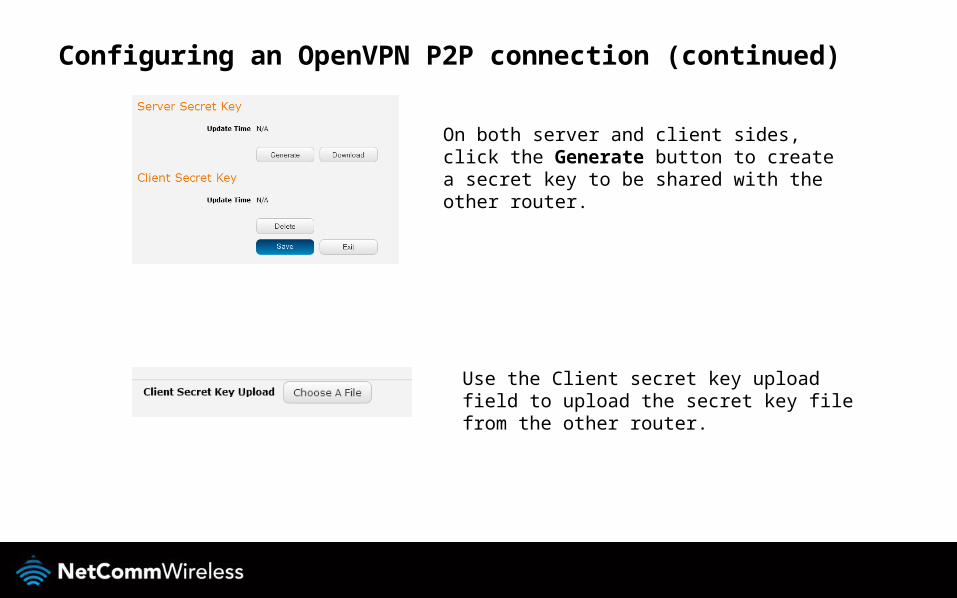
On both server and client sides, click the Generate button to create a secret key to be shared with the other router.
Use the Client secret key upload field to upload the secret key file from the other router.
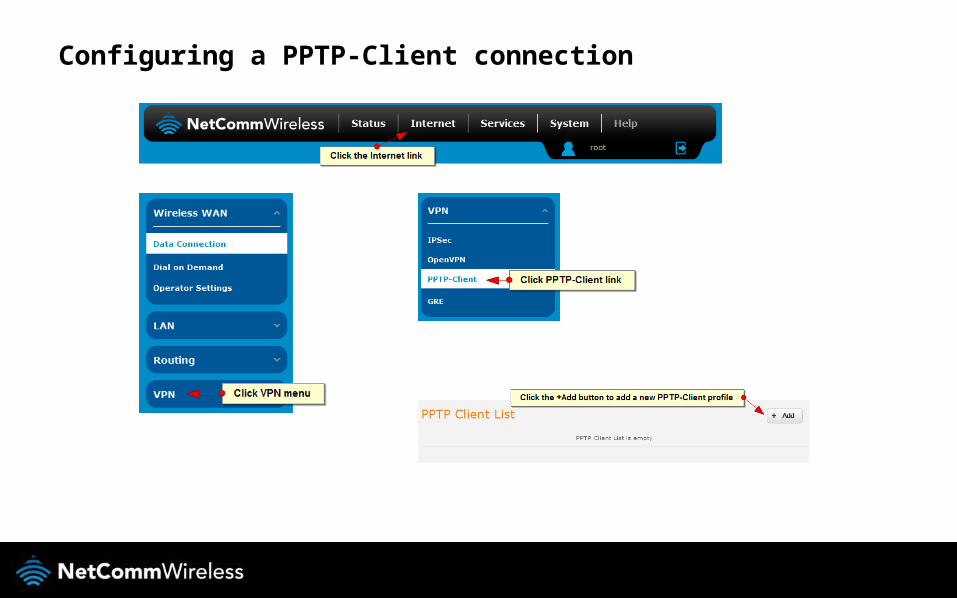
Configuring a PPTP-Client connection
1
2 3
4
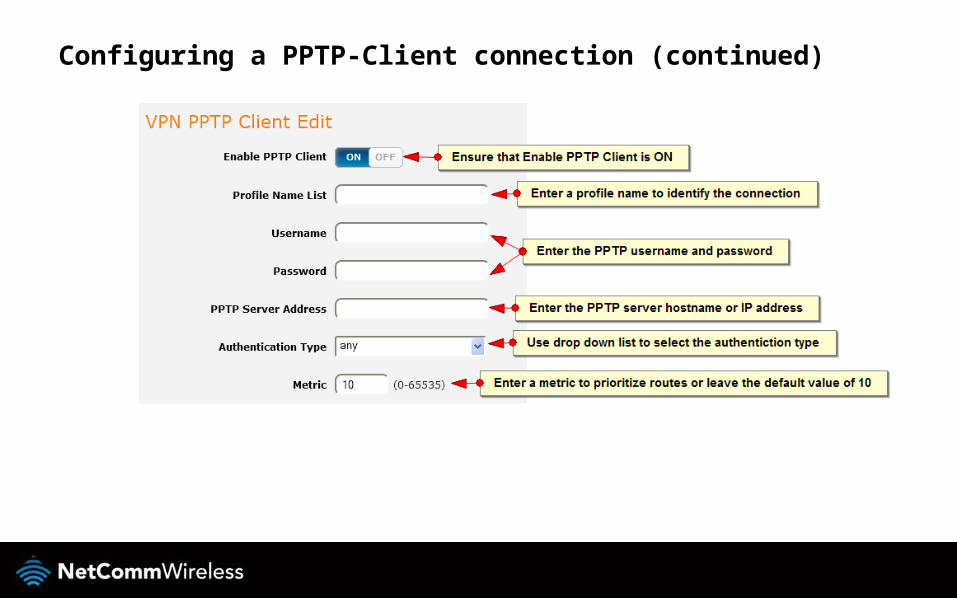
Configuring a PPTP-Client connection (continued)
5
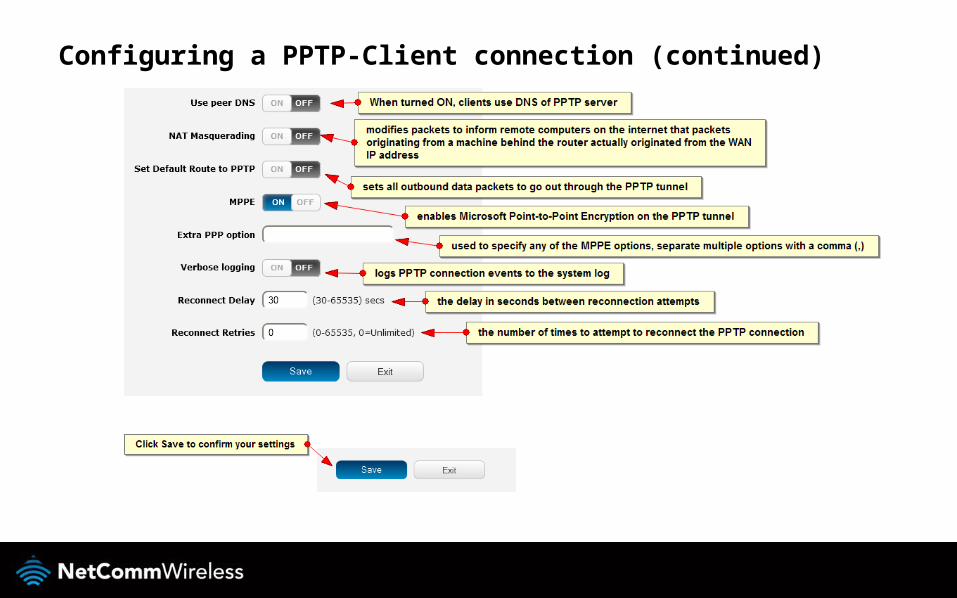
Configuring a PPTP-Client connection (continued)
6
7
Further information
For more information, please visit www.netcommwireless.com and navigate to your product’s support page.