NETAPP TECHNICAL REPORTdoc.agrarix.net/netapp/tr/tr-3091.pdf · 2012-11-06 · 6 Integrating Sybase...
32
NETAPP TECHNICAL REPORT Integrating Sybase Adaptive Server Enterprise for UNIX with a NetApp Storage System Deepak SN and Gangoor Sridhara, NetApp February 2009 | TR-3091
Transcript of NETAPP TECHNICAL REPORTdoc.agrarix.net/netapp/tr/tr-3091.pdf · 2012-11-06 · 6 Integrating Sybase...

NETAPP TECHNICAL REPORT
Integrating Sybase Adaptive Server Enterprise for UNIX with a NetApp Storage System Deepak SN and Gangoor Sridhara, NetApp
February 2009 | TR-3091

2 Integrating Sybase Adaptive Server Enterprise 12.5.x for UNIX with a NetApp Storage System
TABLE OF CONTENTS
1 INTRODUCTION ......................................................................................................................... 4
1.1 SCOPE ...................................................................................................................................................... 4
2 INSTALLATION PREREQUISITES ............................................................................................ 4
2.1 SYSTEM REQUIREMENTS ....................................................................................................................... 4
2.2 SYBASE ADAPTIVE SERVER REQUIREMENTS .................................................................................... 5
2.3 NETAPP STORAGE SYSTEM REQUIREMENTS ..................................................................................... 5
2.4 NETWORK REQUIREMENTS ................................................................................................................... 5
2.5 SYBASE USER ACCOUNT ....................................................................................................................... 5
2.6 NFS MOUNT POINT .................................................................................................................................. 6
2.7 ADDITIONAL INFORMATION ................................................................................................................... 6
3 INSTALLING SYBASE ADAPTIVE SERVER ............................................................................ 6
4 CREATING A SYBASE DATABASE ON A STORAGE SYSTEM ............................................ 7
4.1 CREATING THE MOUNT POINT .............................................................................................................. 7
4.2 INSTALLATION PROCEDURE ................................................................................................................. 7
4.3 TESTING THE DATABASE ....................................................................................................................... 8
5 MOVING A SYBASE DATABASE TO A STORAGE SYSTEM ............................................... 10
5.1 SHUTTING DOWN THE SYBASE DATABASE SERVER ....................................................................... 10
5.2 CREATING A MOUNT POINT ................................................................................................................. 10
5.3 MOVING A NONMIRRORED DATABASE BY USING DISK MIRRORING ............................................. 10
5.4 STARTING THE DATABASE .................................................................................................................. 10
5.5 TESTING THE DATABASE ..................................................................................................................... 11
6 DATABASE AND DISK RESIZING BY USING FLEXIBLE VOLUMES .................................. 12
6.1 DISADVANTAGES OF USING TRADITIONAL VOLUMES ..................................................................... 12
6.2 CREATING FLEXIBLE VOLUME WITH THIN PROVISIONING .............................................................. 12
6.3 CREATING FLEXIBLE VOLUME WITH SPACE GUARANTEE .............................................................. 13
7 DATA PROTECTION USING SNAPSHOT TECHNOLOGY .................................................... 15
7.1 CREATING A SNAPSHOT COPY ........................................................................................................... 15
7.2 PERFORMING SNAPRESTORE ............................................................................................................. 15
8 DEVELOPMENT AND TEST ENVIRONMENT ........................................................................ 16
8.1 CREATING A VOLUME CLONE ............................................................................................................. 16
8.2 MOUNTING VOLUME CLONE ON THE TEST SERVER ........................................................................ 17
9 BACKUP AND RECOVERY ..................................................................................................... 18
9.1 KEY ADVANTAGES................................................................................................................................ 18
9.2 REQUIREMENTS .................................................................................................................................... 20
9.3 BACKUP ................................................................................................................................................. 20
3 Integrating Sybase Adaptive Server Enterprise 12.5.x for UNIX with a NetApp Storage System
9.4 RESTORE ............................................................................................................................................... 21
10 APPENDIX ................................................................................................................................ 23
10.1 ONLINE BACKUP USING QUIESCE ...................................................................................................... 23
10.2 OFFLINE BACKUP ................................................................................................................................. 26
10.3 RESTORING A DATABASE WITH TRANSACTION LOG AVAILABLE ................................................. 29
10.4 RESTORING A DATABASE WITHOUT TRANSACTION LOG AVAILABLE .......................................... 31
11 CAVEATS ................................................................................................................................. 32

4 Integrating Sybase Adaptive Server Enterprise 12.5.x for UNIX with a NetApp Storage System
1 INTRODUCTION
This document describes the procedure to integrate Sybase Adaptive Server for UNIX® with a NetApp® storage
system.
This document assumes familiarity with the following:
Sybase Adaptive Server
The operation of NetApp storage systems
Knowledge of your version of UNIX. Some of the supported UNIX platforms are Solaris™, HP/UX, IBM AIX, and Linux®.
1.1 SCOPE
Specifically, we cover the following procedures:
Installing Sybase Adaptive Server Enterprise on supported platforms with a storage system
Creating a new database with database devices on a storage system
Migrating a database from a local disk to a storage system
2 INSTALLATION PREREQUISITES
2.1 SYSTEM REQUIREMENTS
Before beginning installation, do the following:
Check for platform and operating system release level, RAM required, and supported network protocol. For
example, Sun® SPARC Solaris with minimum RAM of 64MB.
For all latest software ASE versions certification, visit below website
http://media.netapp.com/documents/sybase-certification-matrix.pdf
Refer to the installation guide for instructions to install ASE on your platform. Sybase supports TLI/TCP and
TLI/SPX network protocols.
Set the shared memory configurations for each database. For good database performance, NetApp
recommends setting a high value for this parameter. If the database performance is not critical, you can set a
smaller value. Configuring this parameter in the OS differs from platform to platform. For Solaris, edit the
/etc/system file and add the following line:
set shmsys:shminfo_shmmax = nnn
Where nnn is the value in bytes.
The total memory should be set to at least 64MB. On a 64-bit machine, set it to a minimum of 92MB. By default,
asynchronous disk I/O is set when the server is configured. Read the release bulletin for ASE for your platform.
Check for additional requirements for using Adaptive Server, such as OS patches. To list all currently installed
patches and display the OS version level, enter:
% showrev –p
Check that the storage system has a mount point.
Make sure that the following hardware and software prerequisites are met before installing ASE on UNIX for
use in conjunction with a storage system:
o A server machine where Sybase ASE will be configured (running an OS version of UNIX supported by Sybase)
o An installed and configured storage system
o A network with supported protocols
o A UNIX user account named Sybase

5 Integrating Sybase Adaptive Server Enterprise 12.5.x for UNIX with a NetApp Storage System
2.2 SYBASE ADAPTIVE SERVER REQUIREMENTS
Sybase Adaptive Server software is required for the installation. Complete the entries on the preinstallation requirement sheet provided in the Sybase installation guide. Make sure that you have the appropriate license information to enter when prompted during the installation. Follow the instructions described in the Sybase Adaptive Server Enterprise Installation Guide for your platform. Make sure that your system has enough resources for running Sybase ASE. For more details, see the installation guide.
2.3 NETAPP STORAGE SYSTEM REQUIREMENTS
A NetApp storage system running Data ONTAP® version 7.X or later
NFS license on the storage system must be activated
NFS protocol must be set up and running
2.4 NETWORK REQUIREMENTS
A network connection between the Sybase server machine and the storage system is required. In this setup, a single
100BaseT connection is used. Using multiple connections or a faster network technology improves performance.
Sybase supports TLI/TCP and TLI/SPX protocols to enhance data integrity. Figure 1 illustrates the network
configuration used to test this solution.
Figure 1) Network setup.
2.5 SYBASE USER ACCOUNT
You must add a user account under which the Sybase processes will run. Normally, this user account is called
sybase. This account should exist on both the Sybase server machine and the storage system.
For more information on adding users to a storage system, see the NetApp Storage System Administrator's Guide.
The system administrator can set up this account.

6 Integrating Sybase Adaptive Server Enterprise 12.5.x for UNIX with a NetApp Storage System
2.6 NFS MOUNT POINT
Create a directory on the storage system with security set to include:
rwx SybaseUser
Where SybaseUser is the user account created as described in section 2.5.
This directory will be mounted on the Sybase server machine. Set a few non-default NFS mount options, when
selecting how the Sybase server machine should mount the storage system. Based on requirements, the system
administrator should define these NFS mounts with the necessary options. For example:
-o hard, vers=3, proto=tcp
Table 1) NFS mount options.
NFS Mount Options
Description
hard
This option determines that the mount point should never time out and that the Sybase server machine should not run without it. This causes the Sybase server machine to hang if the storage system is not responding to NFS for some reason. If the Sybase server machine is starting, and if the storage system is not found, it does not complete the boot and Sybase does not start. If it is already up and running, all I/O to and from the storage system is suspended until the storage system is available again.
vers
This option is supported in recent releases of UNIX. It specifies that the protocol to be used is NFS version 3. This is to take care of compatibility issues. If the system administrator wants to try version 2, no harm occurs and the performance of Sybase is not affected. In our setup we used the default settings (version 3).
proto Set the value as TCP for this option, because UDP is not a reliable transport for database operations. Note that Sybase supports only TLI/TCP and TLI/SPX protocols, not UDP protocols.
2.7 ADDITIONAL INFORMATION
Before you install the Sybase product, read the Sybase release notes and check for any known issues, their workarounds, and any prerequisites for installing and using the Sybase server.
Install the required patches to the OS platform.
To mount media and other information, see the Sybase Adaptive Server Enterprise Installation Guide on the
supported platform. Apply the latest EBF downloads (http://www.sybase.com/downloads) to your Sybase
server after installation. Apply the EBF when the server is not running.
In this report, snaplink refers to the host machine’s name. The storage system described in this document is
configured to auto mount over NFS (/remote/configuration), test database devices on various supported
platforms, and access data devices on a storage system.
3 INSTALLING SYBASE ADAPTIVE SERVER
To install the Sybase Adaptive Server, see the Sybase Adaptive Server Enterprise Installation Guide.
Make sure that the storage system is up and running and is visible over the network.

7 Integrating Sybase Adaptive Server Enterprise 12.5.x for UNIX with a NetApp Storage System
4 CREATING A SYBASE DATABASE ON A STORAGE SYSTEM
This section describes the process of creating a new Sybase database with the database residing on a NetApp
storage system.
Note: The prerequsites described in section 2 are required for this setup to work.
4.1 CREATING THE MOUNT POINT
Make changes to the Sybase server machine so that the storage system's mount point is always mounted whenever
the server boots. For Solaris, add the following line to the /etc/vfstab file:
snaplink:/vol1/home/sybase - DatabasePath nfs - yes
hard,vers=3,proto=tcp
Where DatabasePath is the path to the directory to mount the storage system (for example,
/export/home/sybase/data).
Other UNIX operating systems have similar mechanisms for mounting file systems when the system is first started.
The specified NFS parameters are described in section 2.6. Mount the file system on the server using the appropriate
mount command. For Solaris, enter:
# mount DatabasePath
Where DatabasePath is the path to the directory where you want to mount the storage system (for example,
/export/home/sybase/data).
If the settings are correctly specified, the space on the storage system is now available.
4.2 INSTALLATION PROCEDURE
Use the Sybase Asset Management software to license optional Adaptive Server features or to add new licenses to
existing servers. The basic Sybase installation procedure consists of:
Checking that the volumes on the storage system from your OS machine are accessible
Performing the pre-installation tasks described in the Sybase Installation Guide for various operating systems
Performing the installation by using any of the methods described in the installation guide
Performing the post-installation tasks
CREATING THE DATABASE
Once the mount point is set up correctly, it is easy to install Sybase ASE. The studio installer utility of ASE prompts
you for the name of the directory in which to install the Sybase binaries and other information.
Use the GUI screen to answer the prompts and provide the required information. You can use directories on the
storage system to create these databases. This unloads the binaries from the media and calls the srvbuild utility to
build the servers and database. At this stage you are prompted to enter information such as server name, master
device, sybsystemprocs database device name, size, and so on. Provide the licensing information when prompted.
At this point, creating the database is easy. The srvbuild utility builds the master device and servers. To build a
Sybase server and database separately, you can also use the srvbuild utility to create the database on the storage
system. The srvbuild utility provides a graphical interface that allows you to set up the database anywhere within
the file system. Specify the database path that you previously defined as the storage location for the database's
device files. You can use the path to the database directory on the storage system directly, rather than using a
symbolic link. For example, if your mount point to the storage system is /filer2 and the database directory within
the storage system is /data, and if you had a symbolic link between /filer2/data and
/export/home/sybase/data, then define a master device named master.dat as follows:
/export/home/sybase/data/master.dat

8 Integrating Sybase Adaptive Server Enterprise 12.5.x for UNIX with a NetApp Storage System
The use of a symbolic link hides the existence of the storage system mount point from the database. Alternatively,
you could simply use the path to the database directory on the storage system directly, rather than using a symbolic
link. In this case you would define the device file as follows:
/filer2/data/master.dat
4.3 TESTING THE DATABASE
After Sybase ASE is installed with the default settings and the server and database are built, execute the
SYBASE.csh script created by Sybase ASE during the installation procedure. This script is used to set the
environment variables needed to run the Sybase server.
To test the database, from a terminal window on the Sybase server, enter:
% isql -U sa -Ssybase_server_name -P
Password:
1> sp_help
2> go
If the output of this command (a set of database dictionary objects) is displayed on the screen, the database is
working correctly. You can now populate the database as you normally would.
This procedure installs the Sybase server, master device, and sybsystemprocs database, which can reside on the
storage system. Sybase recommends installing database and transaction log devices on different volumes. This
helps in recovery if the database gets corrupted. The following command creates a database device and databases
on the storage system:
%isql -Usa -Ppassword -Ssybase_server_name
1> use master
2> go
1> sp_helpdevice
2> go
The sample output of this command is given below. Check the highest value for the ―device‖ column and add 1 to that
number to obtain the value for vdevno in the next example.
In this example, you must decide the name of the database device, the database name, the size, and the vdevno for
the devices. Similarly, create a log device on the storage system so that you can use datadevice for data and log on
the log device.
1> sp_helpdevice
2> go
device_name physical_name
description
status cntrltype device_number
low
high
------------------------------ ---------------------------------------------- --
--------------------------------------------------------------------------------
--------------------------------------------------------------------------------
--------------------------------------------------------------------------------
data1 /filer2/sybase/logdata1
special, MIRROR DISABLED, mirror = '', nonserial writes, dsync on, physical disk,
87.89 MB
16386 0 6

9 Integrating Sybase Adaptive Server Enterprise 12.5.x for UNIX with a NetApp Storage System
100663296
100708295
data2 /filer2/sybase/usrdata2
special, MIRROR DISABLED, mirror = '', nonserial writes, dsync on, phys
ical disk, 107.42 MB
16386 0 7
117440512
117495511
master d_master
special, dsync on, default disk, physical disk, 156.25 MB
3 0 0
0
79999
tapedump1 /dev/rmt4
tape, 625 MB, dump device
16 3 0
0
20000
tapedump2 /dev/rst0
disk, dump device
16 2 0
0
20000
(5 rows affected)
1> disk init
2> name ="datadevice",
3> vdevno=6,

10 Integrating Sybase Adaptive Server Enterprise 12.5.x for UNIX with a NetApp Storage System
4> physname="/filer2/sybase/datadevice",
5> size=102400
6> go
5 MOVING A SYBASE DATABASE TO A STORAGE SYSTEM
The following procedure moves an existing Sybase instance from local disk to a storage system.
Note: The prerequsites described in section 2 are required for this setup to work.
5.1 SHUTTING DOWN THE SYBASE DATABASE SERVER
Shut down the Sybase database by entering:
% isql -U sa -Ssybase_server_name -P
Password:
1> shutdown
2> go
5.2 CREATING A MOUNT POINT
The following procedure describes how to choose a path on the storage system to hold the database devices and
make the changes necessary so that this path is always present when the Sybase server machine reboots.
1. Create a directory on the storage system, for example at snaplink:/vol1/home/sybase/data. Make the
changes to the Sybase server machine to mount this directory (on Solaris ), adding the following line to
/etc/vfstab:
snaplink:/vol1/home/sybase/data - /export/home/sybase/data nfs - yes
hard,vers=3,intr,proto=tcp
Where snaplink refers to the host machine name.
2. Create the directory to mount by entering:
# mkdir /export/home/sybase/data
3. Mount this directory by entering:
# mount /export/home/sybase/data
5.3 MOVING A NONMIRRORED DATABASE BY USING DISK MIRRORING
To move a database on a nonmirrored device, do the following:
1. Dump the database.
2. Drop the database.
3. Drop the device.
4. Initialize the new devices.
5. Create the database on the new devices.
6. Load the database.
For details, see the Sybase product manuals at http://my.sybase.com
5.4 STARTING THE DATABASE
To start the server with the predefined master device, configuration file, server name, and other parameters, from the
UNIX command line, enter:
RUN_> ServerName <

11 Integrating Sybase Adaptive Server Enterprise 12.5.x for UNIX with a NetApp Storage System
You can create a RUN_server script similar to the following example:
#!/bin/sh -f
#
# Adaptive Server name: snaplink # Master device path: /filer2/sybase/master
# Error log path: /filer2/sybase/ASE-12_5/install/snaplink.log
# Directory for shared memory files: /filer2/sybase
#configuration file : /filer2/sybase/default.cfg
#
/filer2/sybase/ASE-12_5/bin/dataserver \
-ssnaplink \
-d/filer2/sybase/master \
-c/filer2/sybase/default.cfg \
-e/filer2/sybase/ASE-12_5/install/snaplink.log \
-M/filer2/sybase \
This assumes that the runserver file for your Sybase server is located in $SYBASE/install, and that its name is
RUN_ServerName, where ServerName is the name of your Sybase server.
The database is now ready for normal operation on the storage system.
5.5 TESTING THE DATABASE
To test the database, on the Sybase server, enter:
% isql -U sa -Ssybase_server_name -P
Password:
1> sp_help
2> go
The database is working correctly if the output appears as a set of database dictionary objects.

12 Integrating Sybase Adaptive Server Enterprise 12.5.x for UNIX with a NetApp Storage System
6 DATABASE AND DISK RESIZING BY USING FLEXIBLE VOLUMES
This section describes how to use the FlexVol® feature, available in Data ONTAP 7.0 and later, to resize flexible
volumes on NetApp storage without application downtime. Flexible volumes are logical data containers that can be
sized, resized, and managed. A FlexVol volume can share its containing aggregate with other FlexVol volumes to
allow better storage space provisioning. It can also run faster because it uses all spindles in the aggregate available
to them at all times. The recommended best practice is to create one large aggregate with more disks and then
allocate space for multiple flexible volumes on top of it, which makes unused disk space and performance capacity
available to all database applications by using flexible volumes.
Table 2 lists the logical view of storage and hosts on the NFS and Sybase device entries described in section 6.2 and
section 6.3.
Table 2) NFS and Sybase device entries.
Aggregate Name
Flexible Volume Name
Volume Size
NFS Mount Points on Storage
Hosts /etc/vfstab entries Sybase Devices
Aggr1 ERP1 50 GB exportfs -p rw,/vol/ERP1
10.x.x.x:/vol/ERP1 - /ERP1 nfs – yes rw,bg,hard,intr,rsize=32768,wsize=32768,proto=tcp,vers=3
ERP1device
ERP2 50 GB exportfs -p rw,/vol/ERP2
10.x.x.x:/vol/ERP2 - /ERP2 nfs – yes rw,bg,hard,intr,rsize=32768,wsize=32768,proto=tcp,vers=3
ERP2device
6.1 DISADVANTAGES OF USING TRADITIONAL VOLUMES
Suppose Sybase databases are created on traditional volumes named trad1 and trad2, each of 10GB size and
each using RAID 4. After a period, the trad1 volume consumes only 1GB and the trad2 volume consumes 9GB.
Traditional volumes can be scaled by adding more disks, but they cannot be decreased in size. In this scenario, because the trad2 volume has to be increased, the only solution is to add an extra disk. The disadvantage of a
traditional volume is that the unused space under the trad1 volume cannot be reused as it cannot be compressed to
free the extra storage space, which can be added to scale trad1. In addition, when it comes to performance, you are
restricted with limited disks when IOPS numbers have to be calculated in sizing for database performance.
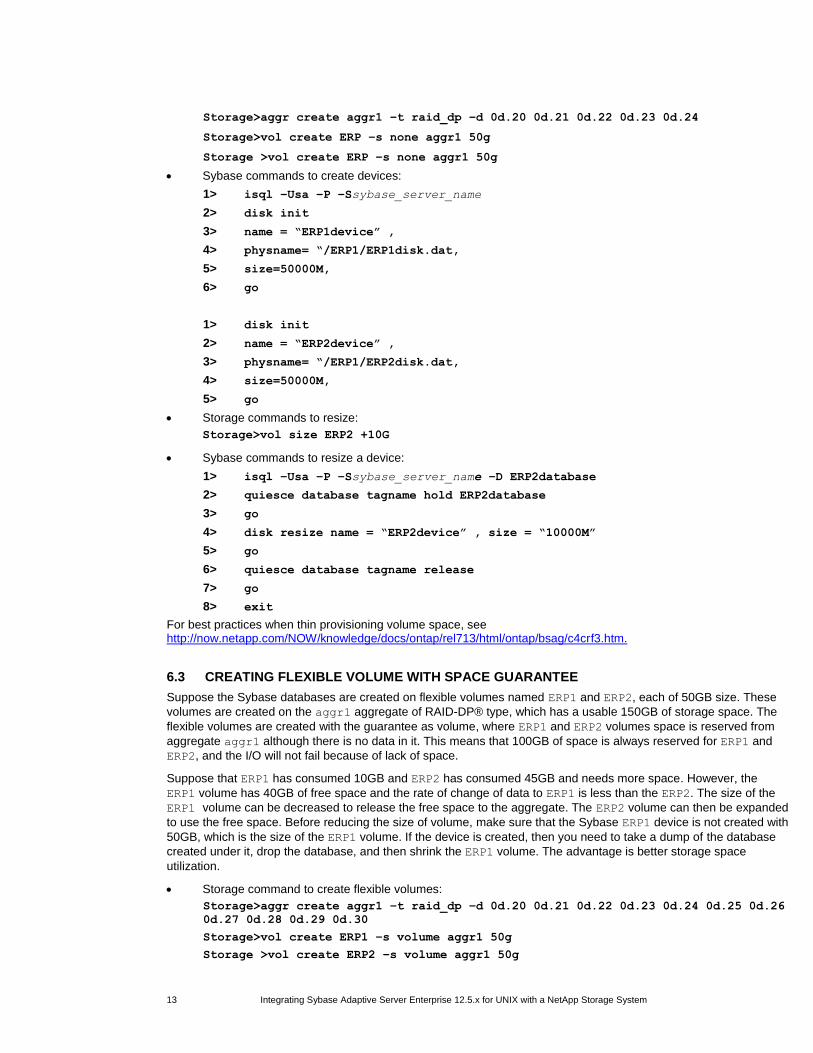
6.2 CREATING FLEXIBLE VOLUME WITH THIN PROVISIONING
You can set the volume space higher than the available physical space on an aggregate by changing the space
guarantee option to none on the volume. By this, you can over provision storage than available. This method is
known as thin provisioning. However, monitor the available space on the aggregate, which must be increased accordingly, or you will run out of space and end up losing data. The three types of space guarantee options are:
Volume: In this setting, the amount of space required by the flexible volume is always available from its
aggregate. This is the default setting for flexible volumes.
File: In this setting, space is always available for the write operation on the NFS volume.
None: This setting does not allow reserving space, and overrides any existing space reservation settings on
the volume. The write operations to the volume might fail if the containing aggregate does not have enough available space.
The following example describes the workaround for a situation where the Sybase ERP1 device size is created with a
maximum of ERP1 volume size. Volumes ERP1 and ERP2 are created with the none option so that they do not
reserve any space on the aggregate. By using this feature, you can provision your storage size against your available
usable aggr1 aggregate size. This feature works only on flexible volumes; traditional volumes cannot be used. Using
this feature, you can scale the ERP2 volume, because the ERP1 volume is not fully occupied and the available free
space can be used by growing the ERP2 volume. Suppose the aggr1 aggregate has 100GB of usable space, and
has two volumes ERP1 and ERP2 with 50GB space each.
Storage commands to create flexible volumes:
13 Integrating Sybase Adaptive Server Enterprise 12.5.x for UNIX with a NetApp Storage System
Storage>aggr create aggr1 –t raid_dp –d 0d.20 0d.21 0d.22 0d.23 0d.24
Storage>vol create ERP –s none aggr1 50g
Storage >vol create ERP –s none aggr1 50g
Sybase commands to create devices:
1> isql –Usa –P –Ssybase_server_name
2> disk init
3> name = “ERP1device” ,
4> physname= “/ERP1/ERP1disk.dat,
5> size=50000M,
6> go
1> disk init
2> name = “ERP2device” ,
3> physname= “/ERP1/ERP2disk.dat,
4> size=50000M,
5> go
Storage commands to resize:
Storage>vol size ERP2 +10G
Sybase commands to resize a device:
1> isql –Usa –P –Ssybase_server_name –D ERP2database
2> quiesce database tagname hold ERP2database
3> go
4> disk resize name = “ERP2device” , size = “10000M”
5> go
6> quiesce database tagname release
7> go
8> exit
For best practices when thin provisioning volume space, see http://now.netapp.com/NOW/knowledge/docs/ontap/rel713/html/ontap/bsag/c4crf3.htm.
6.3 CREATING FLEXIBLE VOLUME WITH SPACE GUARANTEE
Suppose the Sybase databases are created on flexible volumes named ERP1 and ERP2, each of 50GB size. These
volumes are created on the aggr1 aggregate of RAID-DP® type, which has a usable 150GB of storage space. The
flexible volumes are created with the guarantee as volume, where ERP1 and ERP2 volumes space is reserved from
aggregate aggr1 although there is no data in it. This means that 100GB of space is always reserved for ERP1 and
ERP2, and the I/O will not fail because of lack of space.
Suppose that ERP1 has consumed 10GB and ERP2 has consumed 45GB and needs more space. However, the
ERP1 volume has 40GB of free space and the rate of change of data to ERP1 is less than the ERP2. The size of the
ERP1 volume can be decreased to release the free space to the aggregate. The ERP2 volume can then be expanded
to use the free space. Before reducing the size of volume, make sure that the Sybase ERP1 device is not created with
50GB, which is the size of the ERP1 volume. If the device is created, then you need to take a dump of the database
created under it, drop the database, and then shrink the ERP1 volume. The advantage is better storage space
utilization.
Storage command to create flexible volumes:
Storage>aggr create aggr1 –t raid_dp –d 0d.20 0d.21 0d.22 0d.23 0d.24 0d.25 0d.26
0d.27 0d.28 0d.29 0d.30
Storage>vol create ERP1 –s volume aggr1 50g
Storage >vol create ERP2 –s volume aggr1 50g

14 Integrating Sybase Adaptive Server Enterprise 12.5.x for UNIX with a NetApp Storage System
Storage> exportfs -p rw /vol/ERP1 or wrfile /etc/exportfs
Storage>exportfs -p rw /vol/ERP2 or wrfile /etc/exportfs
Storage>exportfs –a
Sybase commands to create devices:
1> isql –Usa –P –Ssybase_server_name
2> disk init
3> name = “ERP1device” ,
4> physname= “/ERP1/ERP1disk.dat,
5> size=10000M,
6> go
1> disk init
2> name = “ERP2device” ,
3> physname= “/ERP1/ERP2disk.dat,
4> size=50000M,
5> go
1> create database ERP1database on ERP1device = “10000M”
2> go
3> create database ERP2database on ERP2device=”50000M”
4> go
5> exit
Note: Database and log are created on same ERP1device and ERP2device devices.
Storage commands to resize volumes:
Storage>vol size ERP1 -10G
Storage>vol size ERP2 +10G
Sybase commands to resize a device:
1> isql –Usa –P –Ssybase_server_name –D ERP2database
2> quiesce database tagname hold ERP2database
3> go
4> disk resize name = “ERP2device” , size = “10000M”
5> go
6> quiesce database tagname release
7> go
8> exit

15 Integrating Sybase Adaptive Server Enterprise 12.5.x for UNIX with a NetApp Storage System
7 DATA PROTECTION USING SNAPSHOT TECHNOLOGY
A Snapshot™ copy is a frozen read-only image of a volume that captures the state of the file system at a point-in-time. Data ONTAP provides a configurable Snapshot scheduler that defines the number of Snapshot copies to be created and retained, and specifies the time and days to take the Snapshot copies. The Snapshot scheduler is unaware of applications writing data to volumes when it performs Snapshot operation, and therefore NetApp recommends driving the Snapshot technology by running storage commands from the host where the Sybase database is installed. This is important because when Data ONTAP creates a Snapshot copy on the volume where Sybase is actively writing or updating the database from memory, you may end up having inconsistent data in the
Snapshot copy. When snap restore is run on the volume, you may end up with a corrupt database.
7.1 CREATING A SNAPSHOT COPY
This section describes the best practices for taking Snapshot copies in a Sybase environment.
Note: You can run storage commands by using RSH from the host. To enable RSH on storage, see
https://now.netapp.com/Knowledgebase/solutionarea.asp?id=kb7872.
1. Turn off the Snapshot scheduler on the volume where the Sybase database is installed. Running Snapshot scheduler when the RSH is active, results in the creation of incorrect Snapshot copies and consumption of space.
To estimate of the maximum number of Snapshot copies that can be retained on a volume, see http://now.netapp.com/NOW/knowledge/docs/ontap/rel1003/html/ontap/admin/guide-volume-tasks-volume-snapshot.html. The maximum number of Snapshot copies to be retained also depends on the Data ONTAP version.
To turn off Snapshot scheduler, using the CLI or FilerView®, enter:
Storage>snap sched ERP1 0 0 0
2. Before taking a Snapshot copy of the ERP volume Sybase ASE database needs to be in quiesce mode and then perform manual checkpoint so that all writes in data cache are written to log and data devices which are created on NFS mount points on storage. When snap restore is performed you can recover database up
the last minute by load transaction logs as explained in section 10.
1> isql –Usa –P –Ssybase_server_name
2> checkpoint
3> go
4> quiesce database tagname hold ERP1database
5> go
rsh 10.x.x.x snap create –V ERP1 ERPsnap.1
1> quiesce database tagname release
2> go
3> exit
7.2 PERFORMING SNAPRESTORE
If there is database corruption due to a virus or an upgrade procedure, you can restore the database back to the required data by choosing the appropriate Snapshot copy. The following example uses the ERPsnap.1 Snapshot
copy to perform a restore. Before performing snap restore, stop the Sybase database and unmount the NFS
mount point/database as follows:
Umount /database
Rsh snap restore ERP –s ERPsnap.1
Mount /database

16 Integrating Sybase Adaptive Server Enterprise 12.5.x for UNIX with a NetApp Storage System
1> isql –Usa –P –Ssybase_server_name –D ERP1database
2> select * from tablename
3> go
8 DEVELOPMENT AND TEST ENVIRONMENT
NetApp FlexClone® technology instantly replicates data volumes and data sets as transparent, virtual copies by
increasing productivity and save storage space without compromising performance.
FlexClone saves space with minimal overhead, so you can create all the clones you need to improve productivity.
Each cloned volume is a transparent virtual copy that you can use for your essential business operations:
Testing and bug fixing
Platform and upgrade sets
Multiple simulations against large data sets
8.1 CREATING A VOLUME CLONE
This section describes how to leverage FlexClone to rapidly deploy the test and development environment, debug
any issue, and roll out an application or operating system patch in a test environment before it is applied to
production.
1. To create a FlexClone volume for a test and development environment using the ERPsnap.1 Snapshot copy
and mount a cloned volume to a test host, copy the control information into a manifestfile by using the
external dump options:
Touch /ERP1data/ERP1mainfestfile
1> isql –Usa –P –Ssybase_server_name –D ERP1database
2> go
3> checkpoint
4> quiesce database tagname hold ERP1database for external dump to
“/ERP1data/ERP1mainfestfile”
5> go
Storage commands to restore the ERP1 volume from the ERP1snap1 Snapshot copy:
Storage>snap create –V ERP1 ERP1snap.1
rsh 10.x.x.x snap create –V ERP1 ERP1snap.1
1> quiesce database tagname release
2> go
3> exit
2. Create a FlexClone volume for development and test environment from the Snapshot copy created on the ERP
parent volume.
Storage>vol clone create ERP1clone –b ERP1 ERP1snap.1
Or
rsh 10.x.x.x. vol lun create ERP1clone –b ERP1 ERP1snap.1
3. To create a FlexClone volume for a single database for development and test environment by using the
ERPsnap.1 Snapshot copy using control information into a manifestfile by using the external dump options:
Touch /ERP1data/ERP1mainfestfile
1> isql –Usa –P –Ssybase_server_name –D ERP1database
2> go
17 Integrating Sybase Adaptive Server Enterprise 12.5.x for UNIX with a NetApp Storage System
3> checkpoint
4> quiesce database tagname hold ERP1database for external dump to
“/ERP1data/ERP1mainfestfile”
5> go
Storage commands to restore the ERP1 volume from the ERP1snap1 Snapshot copy:
Storage>snap create –V ERP1 ERP1snap.1
rsh 10.x.x.x snap create –V ERP1 ERP1snap.1
1> quiesce database tagname release
2> go
3> exit
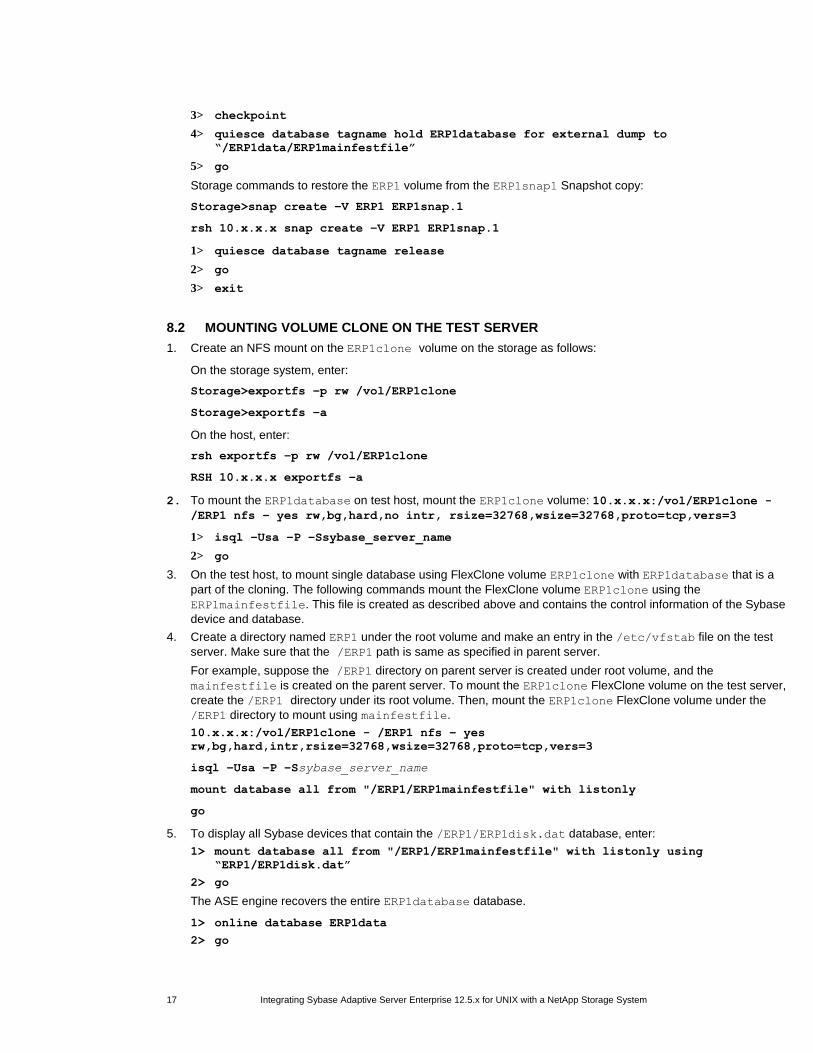
8.2 MOUNTING VOLUME CLONE ON THE TEST SERVER
1. Create an NFS mount on the ERP1clone volume on the storage as follows:
On the storage system, enter:
Storage>exportfs –p rw /vol/ERP1clone
Storage>exportfs –a
On the host, enter:
rsh exportfs –p rw /vol/ERP1clone
RSH 10.x.x.x exportfs –a
2. To mount the ERP1database on test host, mount the ERP1clone volume: 10.x.x.x:/vol/ERP1clone -
/ERP1 nfs – yes rw,bg,hard,no intr, rsize=32768,wsize=32768,proto=tcp,vers=3
1> isql –Usa –P –Ssybase_server_name
2> go
3. On the test host, to mount single database using FlexClone volume ERP1clone with ERP1database that is a
part of the cloning. The following commands mount the FlexClone volume ERP1clone using the
ERP1mainfestfile. This file is created as described above and contains the control information of the Sybase
device and database.
4. Create a directory named ERP1 under the root volume and make an entry in the /etc/vfstab file on the test
server. Make sure that the /ERP1 path is same as specified in parent server.
For example, suppose the /ERP1 directory on parent server is created under root volume, and the
mainfestfile is created on the parent server. To mount the ERP1clone FlexClone volume on the test server,
create the /ERP1 directory under its root volume. Then, mount the ERP1clone FlexClone volume under the
/ERP1 directory to mount using mainfestfile.
10.x.x.x:/vol/ERP1clone - /ERP1 nfs – yes
rw,bg,hard,intr,rsize=32768,wsize=32768,proto=tcp,vers=3
isql –Usa –P –Ssybase_server_name
mount database all from "/ERP1/ERP1mainfestfile" with listonly
go
5. To display all Sybase devices that contain the /ERP1/ERP1disk.dat database, enter:
1> mount database all from "/ERP1/ERP1mainfestfile" with listonly using “ERP1/ERP1disk.dat”
2> go
The ASE engine recovers the entire ERP1database database.
1> online database ERP1data
2> go

18 Integrating Sybase Adaptive Server Enterprise 12.5.x for UNIX with a NetApp Storage System
3> exit
1> isql –Usa –P –Ssybase_server_name –D ERP1database
2> go
6. After mounting the ERP1database, you can test the application or the OS patch. If successful, you can send it
to the production database.
9 BACKUP AND RECOVERY
This section describes the techniques for integrating the quiesce database feature provided in ASE for backing up
and restoring a Sybase ASE server (henceforth called Sybase server) for a UNIX database when a NetApp storage
system is used for database storage. Specifically, this report covers the following topics:
Using the quiesce database feature to take advantage of the Snapshot and SnapRestore functionality
Backing up a database while the ASE is up and running (online backup)
Backing up a database while the ASE is shut down (offline backup)
Recovering a database when the transaction log is available
Recovering a database when transaction log is not available
9.1 KEY ADVANTAGES
The performance and reliability of the backup and recovery operations are critical to effective database operation.
NetApp provides unique functionality that enhances performance and reliability in both backup and recovery
procedures. NetApp's Snapshot technology is a key enabling feature for efficient and fast database backup and
recovery operations. To take advantage of Snapshot technology, Sybase has provided a new feature called quiesce
database in the ASE 12.0 and later versions. With ASE, the quiesce database feature is enhanced to support the log
roll forward capability with Snapshot copies. With the quiesce database feature, you can take consistent Snapshot
copies suspending the specified database(s) for update activities for a very short time. Updates will resume once the
quiesced database(s) is/are released. In this way, while taking Snapshot copies, the database is available to the
users. For more details about quiesce database, see the Sybase ASE reference manual. For more information on
how Snapshot works, see File System Design for an NFS File Server Appliance
(http://www.netapp.com/tech_library/3002.html).
Snapshot copies are critical because they allow the database administrator to quickly and easily create a read-only
image of the entire file system, including the database data and log files. The Snapshot directory can be written to
tape for archival while the database is being used. Actual backup-to-tape performance is thus of secondary
importance, as the impact of this operation on the database's performance is negligible. With the quiesce database
feature, there is no need to shut down the server to take Snapshot copies for backup operations. The archival
operation does not impact the database availability and performance. For backup operations, the database
administrator (DBA) may choose either of the following methods:
Suspend the database for update activities for the minimal amount of time while the server is running (online backup).
Shut down and restart the server in a minimal amount of time (offline backup).
With Snapshot copies, an offline backup can be taken by shutting down the database, then taking a Snapshot copy.
The database will remain offline for only a short period of time. As Snapshot takes very little time, the server
downtime is minimized.
During online backup mode, the database is still available to users but is suspended for update activities. Therefore,
the database being unavailable for write operations. Thus, getting the database out of suspended state is very
important.
Using the quiesce database feature provided by the ASE, the time required to take a backup using a Snapshot copy
is significantly reduced and there is no need to shut down the database server (for an offline backup) when using a
NetApp storage system.

19 Integrating Sybase Adaptive Server Enterprise 12.5.x for UNIX with a NetApp Storage System
As the time required for the backup operation is significantly reduced, many DBAs may find that offline or online
backups are more affordable when using a storage system for database storage. The functionality of Snapshot
copies provides the DBA with the ability to shut down the database server (for offline backup purposes) for only a few
seconds, during which a Snapshot copy is taken, and then bring the database server up again.
Using online backup, you can also take Snapshot copies several times a day, and archive only one of them to tape.
This offers the DBA additional flexibility. Effectively, you can take an online backup of your entire database every few
hours.
Note: The amount of storage overhead associated with a Snapshot copy is based on the number of blocks that are
different between the Snapshot copy and the active file system. As this increases, the size of the Snapshot copy's
storage requirements will increase as well. Snapshot copies can be taken based on backup policy requirements. For
more information, see section Backup Using the quiesce database Feature.
Sybase has provided the initial implementation of the quiesce database command in the ASE 12.0 product release.
This command allows the user to suspend the writes to the database(s) while an external copy is being performed;
write suspension of the database is critical to for transactional consistency. However, in ASE, this feature has been
enhanced with the capability to do log roll forward from Snapshot copies.
Snapshot copies provide key advantages for the restore operation. You can restore the data that you need (point-in-
time data) from a Snapshot copy; in fact, you can restore the entire database, regardless of size, in a few minutes.
This is accomplished with the SnapRestore function provided by the storage system. If you save several days' worth
of Snapshot copies, the chances are that you will never need to restore from tape at all, barring a catastrophic failure
on the storage system itself. Make sure that all required Snapshot copies are maintained while restoring from the
Snapshot copy using SnapRestore.
Consider the following scenario:
A company is running a 200GB database on a UNIX platform, with storage on local disk. A glitch in one of the
database server's CPUs results in corrupt data being written to the databases. As a result, the entire database must
be restored from tape. Even at a rate of about 50GB per hour, it will take approximately four hours to restore the data.
Now consider the same scenario with storage on a storage system. Suppose the DBA has saved a Snapshot copy
from a period prior to the failure, all that is required is to restore the data files from the Snapshot copy. Using the
snap restore command, this can be accomplished in few minutes, vastly improving mean time to recovery
(MTTR) over that provided by the local disk solution. Starting with NetApp's Data ONTAP™ 6.0 releases, rebooting
after the restore is no longer required, this further improves data availability. However, if you are restoring the data of
the root volume (/vol/vol0), a reboot of the storage system is necessary.
The following is just a sample of times taken for the entire operation of quiesce database hold, Snapshot, and
quiesce database release for update activities. These times do not include time taken for transaction load operation.
The data is relevant to our test scenario.
For more information on restoring a database using the snap restore command, see sections Restoring a
Database with Transaction Log Available and Restoring a Database with No Transaction Log Available
Table 3) Database operation sample.
Database Size Data ONTAP Version
Time Taken for a Snapshot copy Including quiesce database
Time Taken for SnapRestore
500MB 6.1-7.x Less than 10 seconds Less than 10 seconds
1GB 6.1-7.x Less than 10 seconds Less than 10 seconds
20GB 6.1-7.x Less than 10 seconds Less than 10 seconds
20 Integrating Sybase Adaptive Server Enterprise 12.5.x for UNIX with a NetApp Storage System
9.2 REQUIREMENTS
All examples in this technical report are from Sybase ASE version running under Sun Solaris. The scripts contained
in this paper may require significant modifications to run under your version of UNIX.
You must have your UNIX host configured to perform remote shell operations on the storage system. This technical
report assumes that the Sybase ASE server OS machine has this capability. For instructions on how to set up remote
shell access to a storage system, see
http://now.netapp.com/knowledge/docs/ontap/rel53/html/sag/routine4.htm#1148067.
The examples in this technical report use the following syntax:
rsh -l root filer2 Command
Where sybase:sybase1 is user ID or password; filer2 is the name of the storage system.
For example:
rsh -l sybase:sybase1 filer2 snap list
If the hosts.equiv file on the storage system is set up correctly, this is a secure operation. In our storage system,
the following entry is placed in the hosts.equiv file:
snaplink sybase
Where snaplink is the name of our UNIX machine where Sybase ASE server is running, and sybase is the name
of our Sybase user account. This entry in the hosts.equiv file on the storage system indicates that the Sybase
user on snaplink is allowed to become a root on the storage system for the purpose of running rsh commands. As
long as this is properly administered, it does not create a security hole.
The sample scripts in this technical report assume the following:
The name of the storage system is filer2.
The location of the database is filer2:/vol/vol1/filer2
The name of the Sybase ASE server is snaplink
The filer2:/vol/vol1 directory is mounted on the Sybase ASE server machine at /filer2.
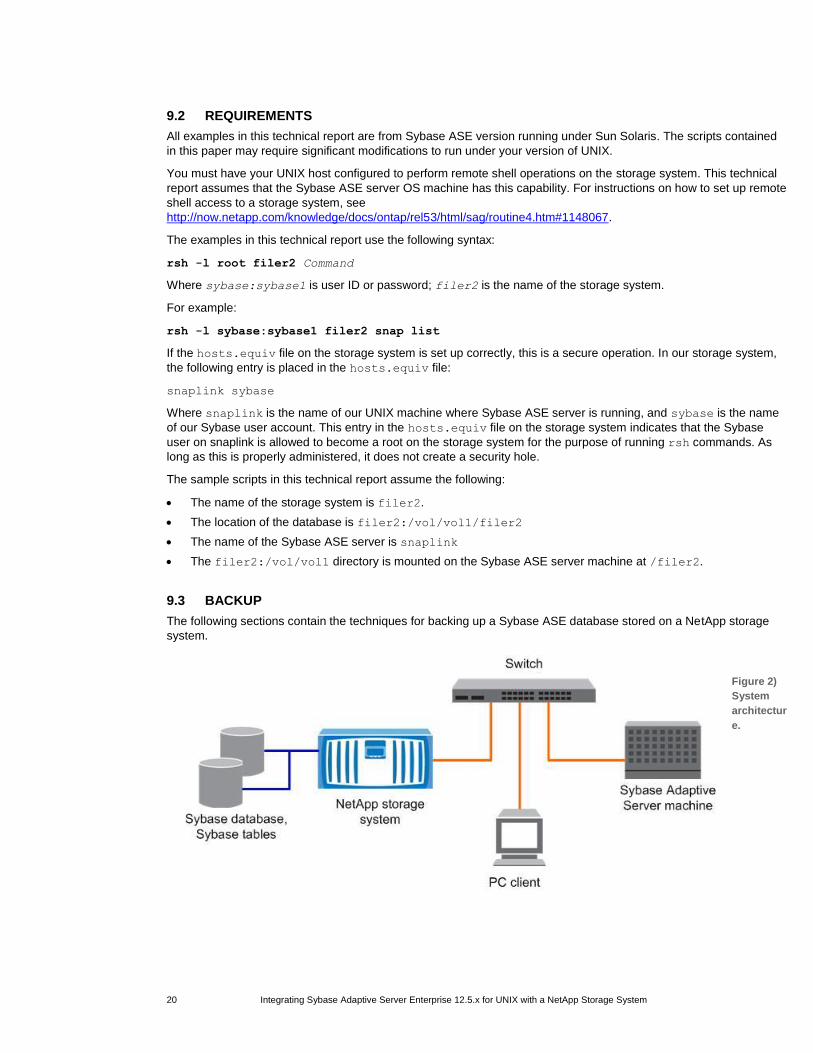
9.3 BACKUP
The following sections contain the techniques for backing up a Sybase ASE database stored on a NetApp storage
system.
Figure 2)
System
architectur
e.
21 Integrating Sybase Adaptive Server Enterprise 12.5.x for UNIX with a NetApp Storage System
BACKUP USING THE QUIESCE DATABASE FEATURE
The quiesce database feature allows the DBA (with filer root privileges) to take Snapshot copies while the server is
running and available to users. The database is open for user access while doing backup. However, the quiesce
database command suspends update activities for specified databases. For this reason, it is critical that the database
remain in suspended mode for the absolute minimum period of time. NetApp affords the DBA the opportunity to
reduce the interval during which the database is in suspended mode.
Sybase databases and log devices can be placed on the same volume on a storage system. Using NetApp
SnapRestore technology, the database can be restored up to the point of the last Snapshot copy. Sybase has
provided the log roll forward capability with the Snapshot feature to support rolling the database forward from the
restored Snapshot copy to the last committed transaction.
The steps for backing up and restoring the database as follows:
1 Log in to the ASE using isql or other tools.
2 Issue the quiesce database hold command (needs system administrator (SA) role).
3 Take the Snapshot copy of the storage system (needs admin privilege on storage system).
4 Release the database hold using quiesce database release command.
5 Take transaction log dumps per your needs; name them in sequence.
6 Save these transaction log dumps on a different volume to preserve their presence through a restore.
7 If the DBA wants another Snapshot copy instead of log dumps, repeat steps 1-6.
OFFLINE BACKUP
To take an offline backup, it requires that the database be shut down, all critical files be backed up using operating
system commands, and then restarting the database. However, this can be accomplished by using the quiesce
database feature without shutting down the server.
9.4 RESTORE
The examples concerning restore in this technical report assume that the data required is still stored in a Snapshot
copy. If this is not the case, (either because the Snapshot copy has been deleted or because the storage system is
not currently available) you will need to perform a restore-from-tape operation. The requirements to do this are
comparable to a similar operation on a UNIX system. For more information, see Data ONTAP 7.0 Data Protection
Tape Backup and Recovery Guide.
RESTORING A DATABASE WITH TRANSACTION LOG AVAILABLE
The database is restored using the most current or previous (point-in-time recovery) Snapshot copy. With the
rollforward capability now integrated by Sybase with Snapshot technology, restoring a database with the availability of
transaction log mode at the time of the failure presents a greater range of options. With the transaction log rollforward
feature, the DBA can recover the database and roll it forward to the very last committed transaction using the
transaction log. The full range of techniques covering all these options is far beyond the scope of this technical report.
Recovery is a manual process. The DBA should be intimately involved in each step of this process. For this reason,
we do not supply a set of canned scripts to do a recovery. Instead, we illustrate the steps involved. You need to start
the ASE server with the "-q" option to apply the transaction logs to the Snapshot copies restored.
The entire restore procedure is described as follows:
1 Shut down the ASE server if it's still running. If you are running other ASE servers on this volume on the storage system, shut down all the servers. If restore is performed when the ASE is up and running, the database will be marked as suspect and will require the DBA's attention. Also, shut down the ASE servers using normal shutdown mode and do not use the nowait option as this may leave file without flocks released.
2 Telnet to the storage system and issue the snap restore command.
3 The storage system restores to the point-in-time from the Snapshot copy. Restore the data files from the last Snapshot copy taken using the snap restore command.

22 Integrating Sybase Adaptive Server Enterprise 12.5.x for UNIX with a NetApp Storage System
4 Start the server with "-q" option.
5 Apply the transaction logs by using the load transaction command. Do not bring the database online until all the required transaction logs have been applied. The sequence of the transaction log dumps is a must.
6 After all logs are applied, check the database and release it for user access.
This procedure completes the restore database procedure. Note that these transaction log dumps are relevant
only with the previous Snapshot copy. If you take another Snapshot copy, you must maintain a new set of
transaction log dumps to restore from the Snapshot copy taken most recently. For example, if you take a
Snapshot copy at 8:00 a.m. and name it sshot001_8am032905. Then, suppose you take a transaction log
dump at 9:00 a.m. named logdump001_9am032905, another transaction dump at 10:00 a.m. named
logdump002_10am032905, and another transaction log dump at 11.00 a.m. named
logdump003_11am032905. Suppose another Snapshot copy is taken at 12:00 noon named
sshot002_12pm032905. At this time, you have the option to recover the database to any one of the following
points in time: 8:00 a.m., 9:00 a.m., 10:00 a.m., 11:00 a.m., and 12:00 noon. If you decide to recover up to 12:00
noon, simply restore from the Snapshot copy taken at 12:00 noon. There are no log dumps available for the
Snapshot copy taken at noon. In case if you decide to recover only till 11:00 a.m., restore the Snapshot
(sshot001_8am032905) and load transactions logdump001_9am032905, logdump002_10am032905, and
logdump003_11am032905 in that particular order.
RESTORING A DATABASE WITH NO TRANSACTION LOG AVAILABLE
In the event that transactions logs are not available, you may then restore from your most recent Snapshot copy
(point-in-time recovery). Recovery is a manual process. The DBA should be intimately involved in each step of this
process. For this reason, we do not supply a set of canned scripts to do a recovery. Instead, we illustrate the steps
involved. The steps for point-in-time recovery are as follows:
1 Shut down the database using the shutdown command (if the database is still running).
2 Restore the databases (including the system databases) from the last Snapshot copy taken using the snap
restore command or use a previous Snapshot copy for point-in-time recovery.
3 Restart the database.

23 Integrating Sybase Adaptive Server Enterprise 12.5.x for UNIX with a NetApp Storage System
10 APPENDIX
10.1 ONLINE BACKUP USING QUIESCE
Taking a backup while the server is running using a NetApp storage system is a simple and fast operation. It
requires the first four of the following scripts. These scripts have the following functions:
Script Name Function
Quiesce_use.sh This script calls quiesce_hold.sh backup_snap.sh quiesce_rel.sh and optionally backup_dmp.sh
quiesce_hold.sh Suspends the specified databases for updates
backup_snap.sh Takes backup and does housekeeping
quiesce_rel.sh Releases the databases for update activities
backup_dmp.sh Optional script to use dump command
To insert records we used the following script file (tblcopy.sh) that counts the total number of rows after inserting
rows. This script was started before we executed the quiesce database command.
#!/bin/sh
$SYBASE/$SYBASE_OCS/bin/isql -Usa -P -Ssnaplink << EOF
$SYBASE/$SYBASE_OCS/bin/isql -Usa -P -Ssnaplink << EOF
use userdb1
go
insert into titles select * from title
insert into title select * from titlea
go
select count(*) from titlea
go
select count(*) from title
go
select count(*) from titles
go
Following is the text of the quiesce_use.sh script:
#!/bin/sh –f
# This script suspends the database, take Snapshots, release database
# and can also dump Snapshots to tape as a backup
# calls quiesce_hold.sh
quiesce_hold.sh
backup_snap.sh
quiesce_rel.sh
# you can call backup_dmp.sh
# backup_dmp.sh # this script can be run separately from another window

24 Integrating Sybase Adaptive Server Enterprise 12.5.x for UNIX with a NetApp Storage System
# needs modification depending on your environment.
Following is the text of the quiesce_hold.sh script that you can customize to your environment: The syntax of the
quiesce database command is quiesce database tag_name hold userdb1, userdb2 for external
dump
#!/bin/sh -f
# Quiesce the database and take a Snapshot
# Make relevant changes to the following command syntax with correct database names
# The syntax for quiesce database is given below
# quiesce database tagname hold database1 [,database2] ... for external dump
$SYBASE/$SYBASE_OCS/bin/isql -Usa -P -Ssnaplink << EOF
quiesce database tagname hold userdb1 , master for external dump
go
EOF
On our system, the quiesce_hold script generated this output resulting from suspending update activities:
00:00000:00013:2005/03/29 06:32:57.14 server
QUIESCE DATABASE command with tag tagname is being executed by process 13.
00:00000:00012:2005/03/29 06:32:57.15 server
Process 13 successfully executed QUIESCE DATABASE with HOLD option for tag tagname.
Processes trying to issue IO operation on the quiesced database(s) will be suspended
until user executes Quiesce Database command with RELEASE option.
The following is the text of the backup_snap.sh script:
##!/bin/sh -f
#
# Rename and delete old Snapshots
# deletes the oldest Snapshot
rsh -l root filer2 snap delete vol1 extdb3
# rename the currently available oldest Snapshot for retention
rsh -l root filer2 snap rename vol1 extdb2 extdb3
# rename the next currently available older Snapshot for retention
rsh -l root filer2 snap rename vol1 extdb1 extdb2
# rename the most current Snapshot as older Snapshot for retention
sh -l root filer2 snap rename vol1 newdb extdb1
# Take a new Snapshot
rsh -l root filer2 snap create vol1 newdb
#rsh can also be executed by specifying userid/passwd as given below
#rsh -l sybase:sybase12 filer2 snap create vol1 newdb
# where sybase:sybase12 is userid/password on the filer
In this example, one new Snapshot copy is created and three are retained.. If the script is run every night as a cron
job, then four days' worth of Snapshot copies would be available at any given time. Alternatively, you may want to
take an online backup more frequently than once a day. Also you need to take frequent transaction log dumps for log
rollforward capability. For more information, see section Key Advantages.
In our system the backup_snap.sh script generated the following output.
25 Integrating Sybase Adaptive Server Enterprise 12.5.x for UNIX with a NetApp Storage System
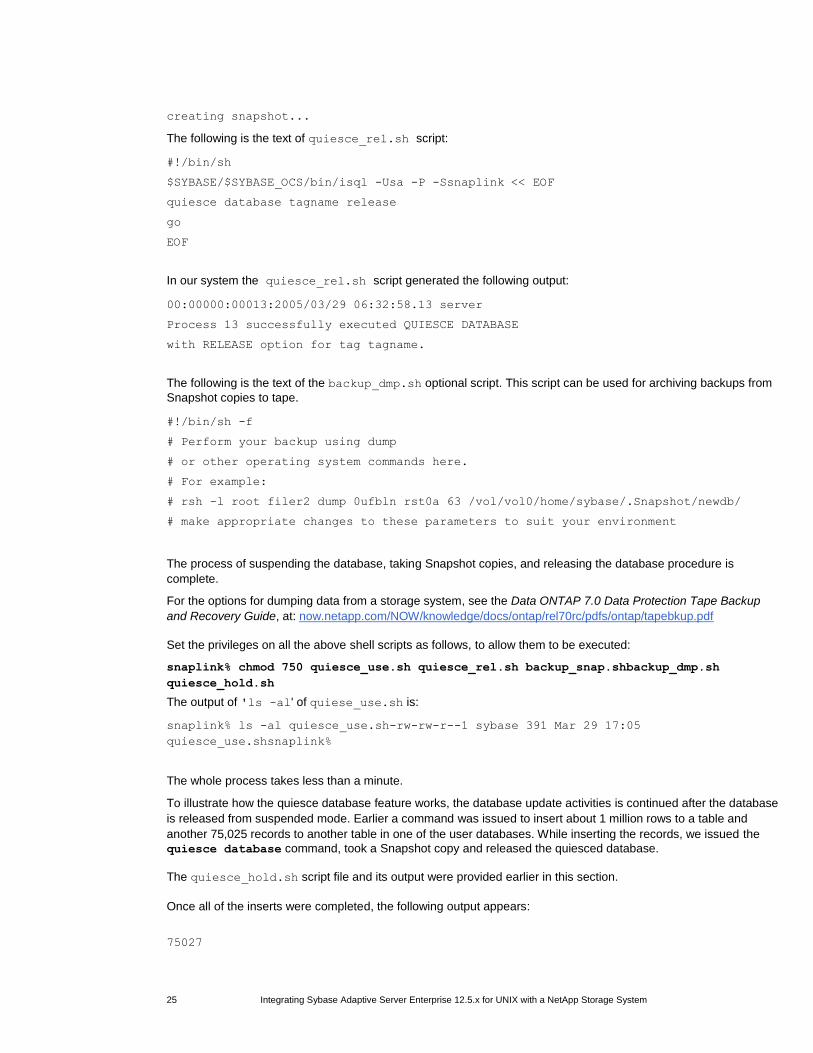
creating snapshot...
The following is the text of quiesce_rel.sh script:
#!/bin/sh
$SYBASE/$SYBASE_OCS/bin/isql -Usa -P -Ssnaplink << EOF
quiesce database tagname release
go
EOF
In our system the quiesce_rel.sh script generated the following output:
00:00000:00013:2005/03/29 06:32:58.13 server
Process 13 successfully executed QUIESCE DATABASE
with RELEASE option for tag tagname.
The following is the text of the backup_dmp.sh optional script. This script can be used for archiving backups from
Snapshot copies to tape.
#!/bin/sh -f
# Perform your backup using dump
# or other operating system commands here.
# For example:
# rsh -l root filer2 dump 0ufbln rst0a 63 /vol/vol0/home/sybase/.Snapshot/newdb/
# make appropriate changes to these parameters to suit your environment
The process of suspending the database, taking Snapshot copies, and releasing the database procedure is
complete.
For the options for dumping data from a storage system, see the Data ONTAP 7.0 Data Protection Tape Backup
and Recovery Guide, at: now.netapp.com/NOW/knowledge/docs/ontap/rel70rc/pdfs/ontap/tapebkup.pdf
Set the privileges on all the above shell scripts as follows, to allow them to be executed:
snaplink% chmod 750 quiesce_use.sh quiesce_rel.sh backup_snap.shbackup_dmp.sh
quiesce_hold.sh
The output of 'ls -al' of quiese_use.sh is:
snaplink% ls -al quiesce_use.sh-rw-rw-r--1 sybase 391 Mar 29 17:05
quiesce_use.shsnaplink%
The whole process takes less than a minute.
To illustrate how the quiesce database feature works, the database update activities is continued after the database
is released from suspended mode. Earlier a command was issued to insert about 1 million rows to a table and
another 75,025 records to another table in one of the user databases. While inserting the records, we issued the
quiesce database command, took a Snapshot copy and released the quiesced database.
The quiesce_hold.sh script file and its output were provided earlier in this section.
Once all of the inserts were completed, the following output appears:
75027

26 Integrating Sybase Adaptive Server Enterprise 12.5.x for UNIX with a NetApp Storage System
(1 row affected)
-----------
1010747
(1 row affected)
-----------
75025
(1 row affected)
Now take the transaction log dumps as needed. In our test case, we used a script file named dumptran3demo3.sh
with the following contents (make sure that Sybase backup server is started before executing this script):
#!/bin/sh
$SYBASE/$SYBASE_OCS/bin/isql -Usa -P -Ssnaplink << EOF
use master
go
dump tran userdb1 to "/home/sybase/userdb1log1"
go
The output of the above script is:
Backup Server session id is: 5. Use this value when executing the 'sp_volchanged'
system stored procedure after fulfilling any volume change request from the Backup
Server.
Backup Server: 6.28.1.1: Dumpfile name 'userdb10124105C74' section number 1
mounted on disk file '/home/sybase/userdb1log1'
Backup Server: 4.58.1.1: Database userdb1: 128520 kilobytes DUMPed.
Backup Server: 4.58.1.1: Database userdb1: 257042 kilobytes DUMPed.
Backup Server: 4.58.1.1: Database userdb1: 385564 kilobytes DUMPed.
Backup Server: 4.58.1.1: Database userdb1: 514086 kilobytes DUMPed.
Backup Server: 4.58.1.1: Database userdb1: 640864 kilobytes DUMPed.
Backup Server: 3.43.1.1: Dump phase number 3 completed.
Backup Server: 4.58.1.1: Database userdb1: 640874 kilobytes DUMPed.
Backup Server: 3.42.1.1: DUMP is complete (database userdb1).
On our system (a Sun machine running Sybase ASE version) the entire operation took less than a minute.
Note: The size of the database will not appreciably affect this interval, as the time required to take a Snapshot copy is
not dependent on the size of the file system, or the files within the file system. Rather, a Snapshot operation triggers
a consistency point within the storage system, and then simply copies the master inode of the file system to a new
location. Thus, only about 4kB of data is actually copied. For more information, see File System Design for an NFS
File Server Appliance at http://www.netapp.com/tech_library/3002.html.
10.2 OFFLINE BACKUP
Taking an offline backup using a NetApp storage system is simple and fast. It requires three scripts, which have the
following functions:
Script Name Function
shutdown_server.sh Shuts down the Sybase ASE server

27 Integrating Sybase Adaptive Server Enterprise 12.5.x for UNIX with a NetApp Storage System
start_server.sh Brings up the Sybase server.
offlinebackup.sh
A wrapper shell script that calls shutdown.server.sh, takes a
Snapshot copy, calls Start_server.sh, and performs the backup-to-
tape from the Snapshot copy. This script also does some housecleaning to keep four Snapshot copies online at a time. If the script is run every night as a cron job, then those four days' worth of Snapshot copies would be available at any given time.
The shutdown_server.sh, start_server.sh, and offlinebackup.sh scripts are given as examples.
Customize these scripts to your specific environment for them to work properly.
The following is the text of the shutdown_server.sh script:
#!/bin/sh –f
# Now Shutdown the server
isql -Usa -P$PASSWORD -S$SYBASESERVERNAME << EOF
shutdown go
EOF
You may want to wrap your shutdown command inside a shell script to shut down the server in normal mode. We
recommend users not utilize the "nowait" option while using the "shutdown" command. The following is the text of
the start_server.sh script. You can use this example to customize your script.
#!/bin/sh
#
# Adaptive Server name: snaplink
# ASE page size (KB): 4k
# Master device path: /filer2/release
# Error log path: /filer2/release/ASE-12_5/install/snaplink.log
# Configuration file path: /filer2/release/ASE-12_5/snaplink.cfg
# Directory for shared memory files: /filer2/release/ASE-12_5
# /filer2/release/ASE-12_5/bin/dataserver \
-ssnaplink \
-d/filer2/release/snaplink \
-e/filer2/release/ASE-12_5/install/snaplink.log \
-c/filer2/release/ASE-12_5/snaplink.cfg \
-M/filer2/release/ASE-12_5 \
Following is the text:
#!/bin/csh –f
# shutdown the Sybase ASE Server
shutdown_server.sh
#rename and delete old snapshots
#Delete Snapshot only when you no longer require that particular Snapshot
#This example is doing some housekeeping to manage Snapshots.
#In your own case, you may not wish delete your Snapshot
rsh -l root filer2 snap delete vol1 extdb3
#rename snapshot for retention

28 Integrating Sybase Adaptive Server Enterprise 12.5.x for UNIX with a NetApp Storage System
rsh -l root filer2 snap rename vol1 extdb2 extdb3
#rename snapshot for retention
rsh -l root filer2 snap rename vol1 extdb1 extdb2
#rename current snapshot as previous snapshot for retention
rsh -l root filer2 snap rename vol1 newdb extdb1
# take a new snapshot and name it as newdb
rsh -l root filer2 create vol1 newdb
#the above steps can be customized
#start the Sybase ASE server again
# this is required as you are taking snapshot
#on offline mode. Server is down start_server.sh
#perform your archival to tape whenever you need using ndmp
#or any other tools
# for example the following command in one line
# rsh -l root filer2 dump 0ufbln rst0a 63 /vol/vol1/release/.snapshot/newdb/
For the options for dumping data from a storage system, see the Data ONTAP
7.0 Data Protection Tape Backup and Recovery Guide at:
now.netapp.com/NOW/knowledge/docs/ontap/rel70rc/pdfs/ontap/tapebkup.pdf
You must set the privileges in all of the above-mentioned shell scripts to allow them to be executed. To do this,
execute the following commands:
snaplink% chmod 750 offlinebackup.sh
snaplink% ls -l offlinebackup.sh
-rwxr-xr--1 sybase sybase 880 Sep 11 15:38 offlinebackup.sh
At that point, calling the offlinebackup.sh shell script does the following:
$ ./offlinebackup.sh
snaplink% shutdown_server.sh
Server SHUTDOWN by request.
The SQL Server is terminating this process.
00:00000:00011:2005/03/29 06:32:26.38 server SQL Server shutdown by request.
00:00000:00011:2005/03/29 06:32:26.38 kernel ueshutdown: exiting
CT-LIBRARY error:
ct_results(): network packet layer: internal net library error:Net-Library operation
terminated due to disconnect
After this script runs without any errors, a new Snapshot copy is created. This can be verified by using the snap
list command.
On our system (a Sun Solaris server running Sybase ASE) the entire operation took less than a minute.
Note: The size of the database will not appreciably affect this interval, since the time required to take a Snapshot
copy is not dependent on the size of the file system, or the files within the file system. Rather, a Snapshot operation triggers a consistency point within the storage system, and then simply copies the master inode of the file system to a new location. Thus, only about 4KB of data is actually copied. For more information, see File System Design for an NFS File Server Appliance at: (http://www.netapp.com/tech_library/3002.html)

29 Integrating Sybase Adaptive Server Enterprise 12.5.x for UNIX with a NetApp Storage System
10.3 RESTORING A DATABASE WITH TRANSACTION LOG AVAILABLE
The shutdown_server.sh script can be used to shut down the server.
To restore the databases, execute a script called restoresnapshot.sh. In our test case, the contents of the
restoresnapshot.sh script are:
#!/bin/sh
rsh -l sybase:sybase12 filer2 vol snaprestore vol1 -s newdb
./start_server.sh -q &
echo " Waiting for db recovery complete Message'
sleep 20
:
The above commands in our test case resulted in the following output:
WARNING! This will revert the volume to a previous snapshot.
All modifications to the volume after the snapshot will be
irrevocably lost.
Volume vol1 will be taken offline briefly before coming back online.
Are you sure you want to do this? y
You have selected volume vol1, snapshot sybdemo3
Proceed with revert? y
Volume vol1 is now offline.
exported /vol/vol1
Volume vol1 is now online
Volume vol1: revert successful.
Waiting for db recovery complete Message'
.
.
.
00:00000:00001:2005/03/29 06:37:57.82 server
Recovering database 'userdb1'.
00:00000:00001:2005/03/29 06:37:57.86 server
Database 'userdb1' is in QUIESCE DATABASE state.
It will recovered as for LOAD DATABASE and left off line.
00:00000:00001:2005/03/29 06:37:57.90 server
Checking external objects.
00:00000:00001:2005/03/29 06:37:57.91 serverDatabase 'userdb1' appears to be in the
process of being loaded;SQL Server will not bring it online automatically. Use the
ONLINE DATABASEcommand to bring this database online.
00:00000:00001:2005/03/29 06:37:57.92 server Recovery complete.
00:00000:00001:2005/03/29 06:37:57.92 server
SQL Server's default unicode sort order is 'binary'.00:00000:00001:2005/03/29
06:37:57.92 server SQL Server's default sort order is:00:00000:00001:2005/03/29
06:37:57.92 server 'bin_iso_1' (ID = 50)00:00000:00001:2005/03/29 06:37:57.92
server on top of default character set:00:00000:00001:2005/03/29 06:37:57.92 server
'iso_1' (ID = 1).00:00000:00001:2005/03/29 06:37:57.92 server
Master device size: 400 megabytes, or 204800 virtual pages.
(A virtual page is 2048 bytes.)

30 Integrating Sybase Adaptive Server Enterprise 12.5.x for UNIX with a NetApp Storage System
00:00000:00010:2005/03/29 06:37:58.12 kernel nconnect:
t_rcvconnect, An event requires attention
To show that the quiesced database is not available for user access, enter:
1> use userdb1
2> 2> go
Msg 950, Level 14, State 1:
Server 'userdb1', Line 1:
Database 'userdb1' is currently offline. Please wait and try your command again
later.
Now start loading the transaction logs to the database(s). On our test case, we used a script called tlog5.sh
after starting the Sybase backup server. The tlog5.sh file appears as follows:
#!/bin/sh
$SYBASE/$SYBASE_OCS/bin/isql -Usa -P -Ssnaplink << EOF
use master
go
load tran userdb1 from "/home/sybase/userdb1log1"
go
online database userdb1
go
EOF
The data and the updated table is verified. Verify that the transactional consistency is maintained by
running rowcount.sh script. The output from this script is:
75027
(1 row affected)
1010747
(1 row affected)
75025
)

31 Integrating Sybase Adaptive Server Enterprise 12.5.x for UNIX with a NetApp Storage System
10.4 RESTORING A DATABASE WITHOUT TRANSACTION LOG AVAILABLE
To shut down the server, you can use the shutdown_server.sh script described earlier. To start the Sybase
ASE server, you can use the script start_server.sh.
The Recovery_complete.sh script has the following lines:
# This is Recovery_complete.sh to make sure "Recovery is Complete"
# Sleep a bit, or you'll detect wrong "Recovery complete"sleep 10
until
tail errorlog | grep -s "Recovery complete"
do
sleep 2
done
Next, you can execute the rsh command. On our system, we executed a script called
restoresnapshot.sh that had the following content:
#!/bin/sh
rsh -l root filer2 vol snaprestore vol1 -s newdb
#rsh -l sybase:sybase12 filer2 vol snaprestore vol1 -s newdb
./start_server.sh &
echo " Waiting for db recovery complete Message'
./Recovery_complete.sh
The following output appears:
WARNING! This will revert the volume to a previous snapshot.
All modifications to the volume after the snapshot will be
irrevocably lost.
Volume vol1 will be taken offline briefly before coming back online.
Are you sure you want to do this? y
You have selected volume vol1, snapshot newdb
Proceed with revert? Y
Volume vol1 is now offline.
exported /vol/vol1
Volume vol1 is now online
Volume vol1: revert successful.
.
.
.
00:00000:00001:2005/03/29 06:37:57.92 server 'bin_iso_1' (ID = 50)
00:00000:00001:2005/03/29 06:37:57.92 server on top of default character set:
00:00000:00001:2005/03/29 06:37:57.92 server 'iso_1' (ID = 1).
00:00000:00001:2005/03/29 06:37:57.92 server Master device size: 400 megabytes,
or 204800 virtual pages. (A virtual page is 2048 bytes.)
00:00000:00010:2001/08/29 06:37:58.12 kernel nconnect: t_rcvconnect,

32 Integrating Sybase Adaptive Server Enterprise 12.5.x for UNIX with a NetApp Storage System
An event requires attention
The time required to do a recovery is minimal—only two or three minutes. This is true regardless of the size of
the database, since the act of restoring a Snapshot copy is merely the copying of a single 4kB block. Beginning
with Data ONTAP 6.0, a reboot of the storage system is no longer required. This allows the DBA to quickly
recover a database that can be very large in size (many Gigabytes).
11 CAVEATS
Sybase has certified Network Attached Storage (NAS) for storing Sybase Adaptive Server database files only on NetApp storage systems. The configuration presented in this paper has been tested by NetApp using certain sets of hardware and software options. Therefore your experience may differ from that presented here. If you have any problems with the information provided in this technical report, contact NetApp Technical Support.
© 2009 NetApp. All rights reserved. Specifications are subject to change without notice. NetApp, the NetApp logo, Go Further, Faster, Data ONTAP, FilerView, FlexClone, FlexVol, RAID-DP, SnapRestore, and Snapshot are trademarks or registered trademarks of NetApp, Inc. in the United States and/or other countries. Linux is a registered trademark of Linus Torvalds. Solaris and Sun are trademarks of Sun Microsystems, Inc. UNIX is a registered trademark of The Open Group. All other brands or products are trademarks or registered trademarks of their respective holders and should be treated as such.
www.netapp.com