Discover Smart Solutions for Enterprise Cloud Storage on Amazon Web Services
NAS 254 Cloud Backup
Use Cloud Backup to backup your data to Amazon S3
A S U S T O R C O L L E G E

A S U S T O R C O L L E G E / 2
NAS 254: Cloud Backup
COURSE OBJECTIVES
Upon completion of this course you should be able to:
1. Have a basic understanding of Cloud Backup 2. Use Cloud Backup to back up the data from your NAS to Amazon S3 and vice versa.
PREREQUISITES
Course Prerequisites:
None
Students are expected to have a working knowledge of: N/A
OUTLINE
1. Introduction to Cloud Backup
1.1 What is Cloud Backup?
2. Creating an Amazon S3 Cloud Backup Job
2.1 Backing up data from your NAS to Amazon S3
2.2 Backing up data from Amazon S3 to your NAS
A S U S T O R C O L L E G E / 3
NAS 254: Cloud Backup
1. Introduction to Cloud Backup
1.1 What is Cloud Backup?
ASUSTOR NAS users can use Cloud Backup to either back up the data from their NAS to
Amazon S3 or vice versa. Amazon S3 (Simple Storage Service) is a cloud storage service
provided by Amazon Web Services. One of the great things about Cloud Backup is that it can be
used to provide an offsite backup for all NAS data. The main purpose of offsite backup is for
disaster recovery in the event of environmental disasters, theft, and hard disk or other
mechanical failures. With data already backed up offsite, disaster recovery efforts should be
uncomplicated and straightforward.
Amazon S3 official Website: http://aws.amazon.com/s3/
A S U S T O R C O L L E G E / 4
NAS 254: Cloud Backup
2. Creating an Amazon S3 Cloud Backup Job
Here we will show you how to backup data from your NAS to Amazon S3 and vice versa.
Before you start, please make sure that your system time and time zone settings are correct.
It is recommended that you synchronize the time on your NAS with an NTP server.
2.1 Backing up data from your NAS to Amazon S3
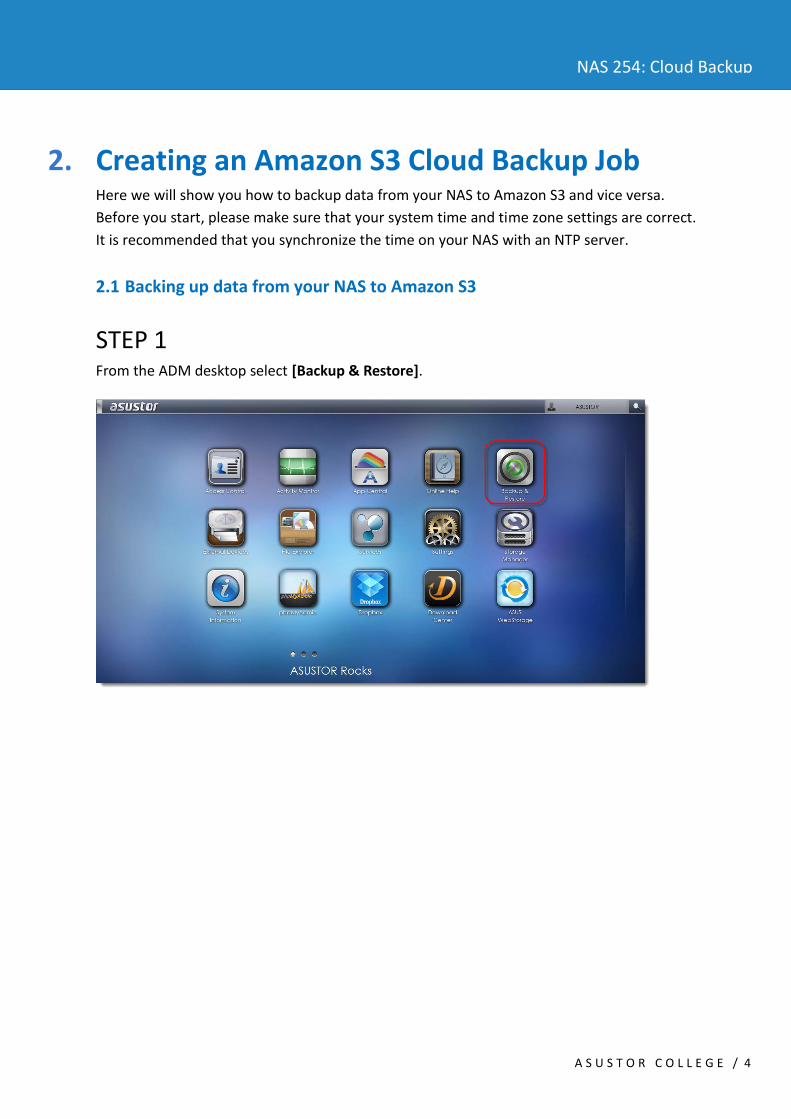
STEP 1 From the ADM desktop select [Backup & Restore].

A S U S T O R C O L L E G E / 5
NAS 254: Cloud Backup
STEP 2 Select [Cloud Backup] and then click on the [Create] button.
STEP 3 Select [Upload] for your transfer mode and then enter in your Amazon S3 access key and secret key. Click on [Next] once you are done.
A S U S T O R C O L L E G E / 6
NAS 254: Cloud Backup
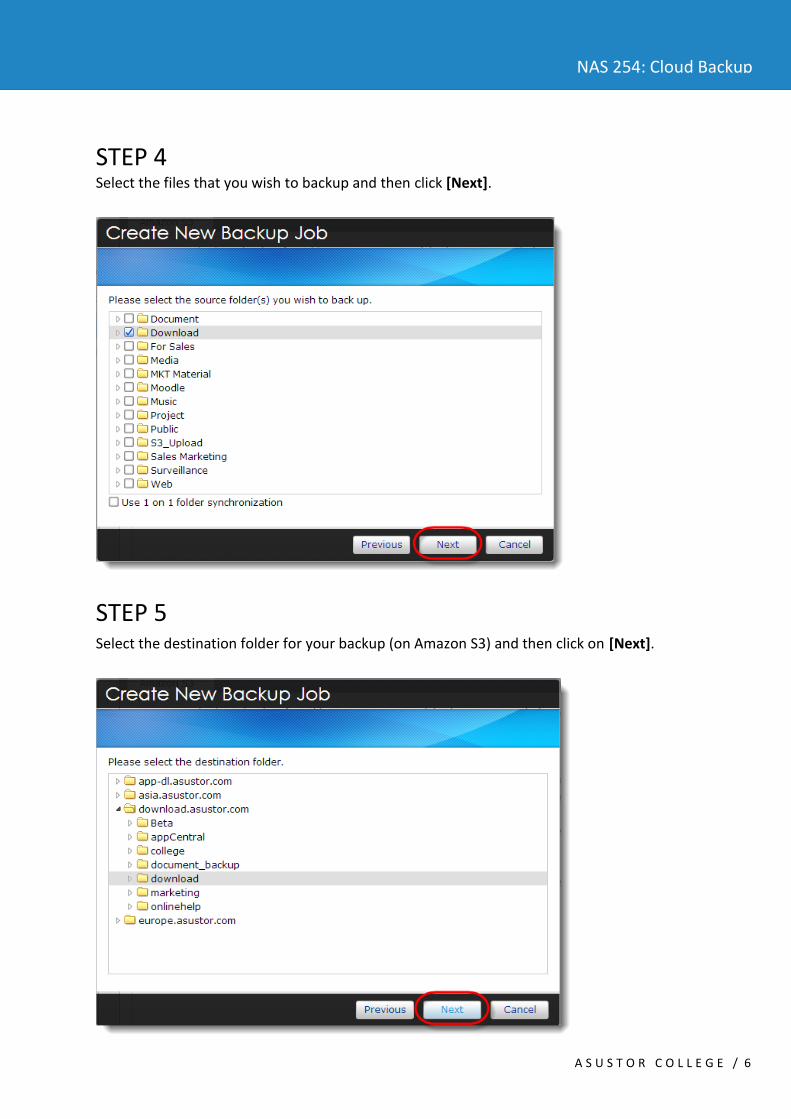
STEP 4 Select the files that you wish to backup and then click [Next].
STEP 5 Select the destination folder for your backup (on Amazon S3) and then click on [Next].
A S U S T O R C O L L E G E / 7
NAS 254: Cloud Backup
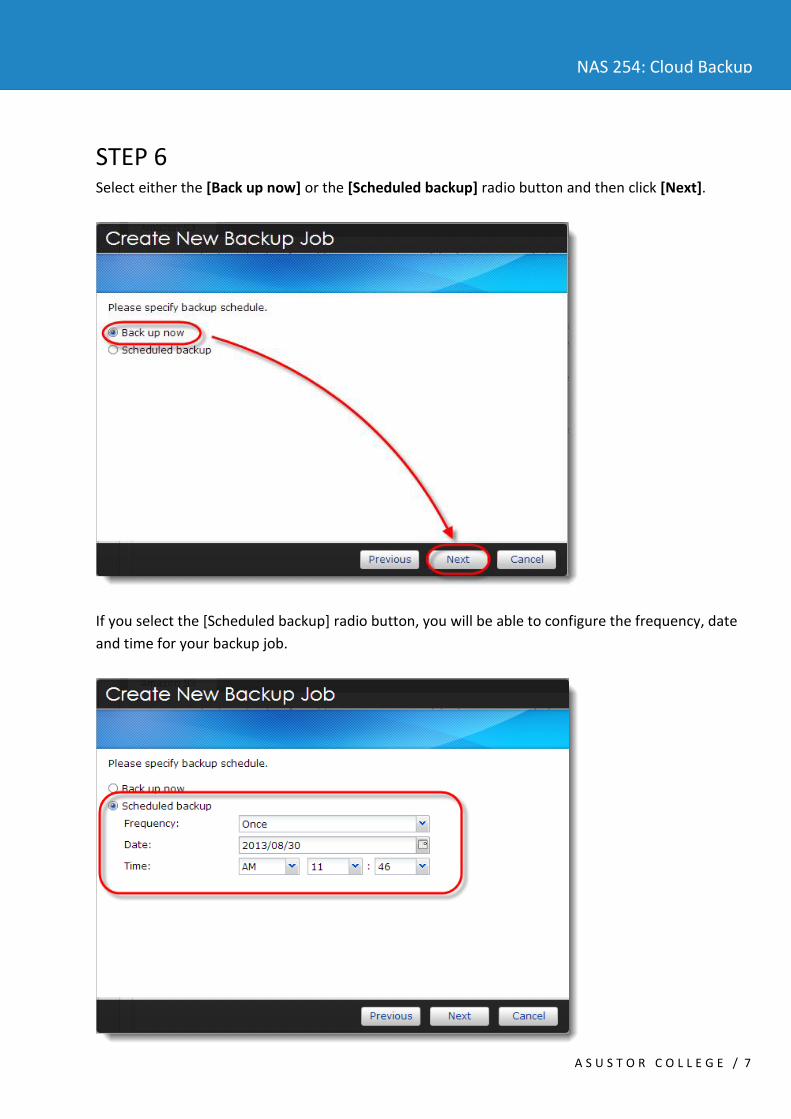
STEP 6 Select either the [Back up now] or the [Scheduled backup] radio button and then click [Next].
If you select the [Scheduled backup] radio button, you will be able to configure the frequency, date
and time for your backup job.
A S U S T O R C O L L E G E / 8
NAS 254: Cloud Backup
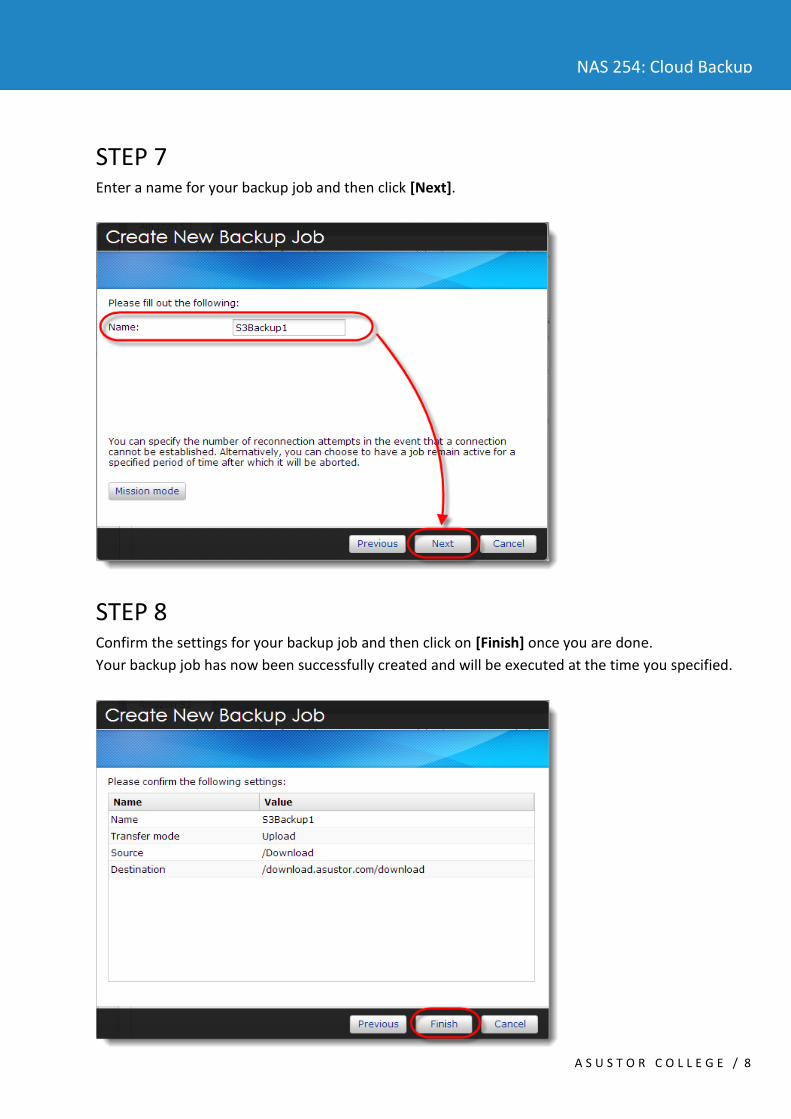
STEP 7 Enter a name for your backup job and then click [Next].
STEP 8 Confirm the settings for your backup job and then click on [Finish] once you are done.
Your backup job has now been successfully created and will be executed at the time you specified.

A S U S T O R C O L L E G E / 9
NAS 254: Cloud Backup
2.2 Backing up data from Amazon S3 to your NAS
STEP 1 From the ADM Desktop select [Backup & Restore].
STEP 2 Select [Cloud Backup] and then click on the [Create] button.

A S U S T O R C O L L E G E / 10
NAS 254: Cloud Backup
STEP 3 Select [Download] for your transfer mode and then enter in your Amazon S3 access key and secret key. Click on [Next] once you are done.
STEP 4 Select the source folder that you wish to back up and then click on [Next].

A S U S T O R C O L L E G E / 11
NAS 254: Cloud Backup
STEP 5 Select the destination folder on your NAS for the backup job and then click on [Next].
STEP 6 Select either the [Back up now] or the [Scheduled backup] radio button and then click [Next].

A S U S T O R C O L L E G E / 12
NAS 254: Cloud Backup
If you select the [Scheduled backup] radio button, you will be able to configure the frequency, date
and time for your backup job.
STEP 7 Enter a name for your backup job and then click [Next].
A S U S T O R C O L L E G E / 13
NAS 254: Cloud Backup
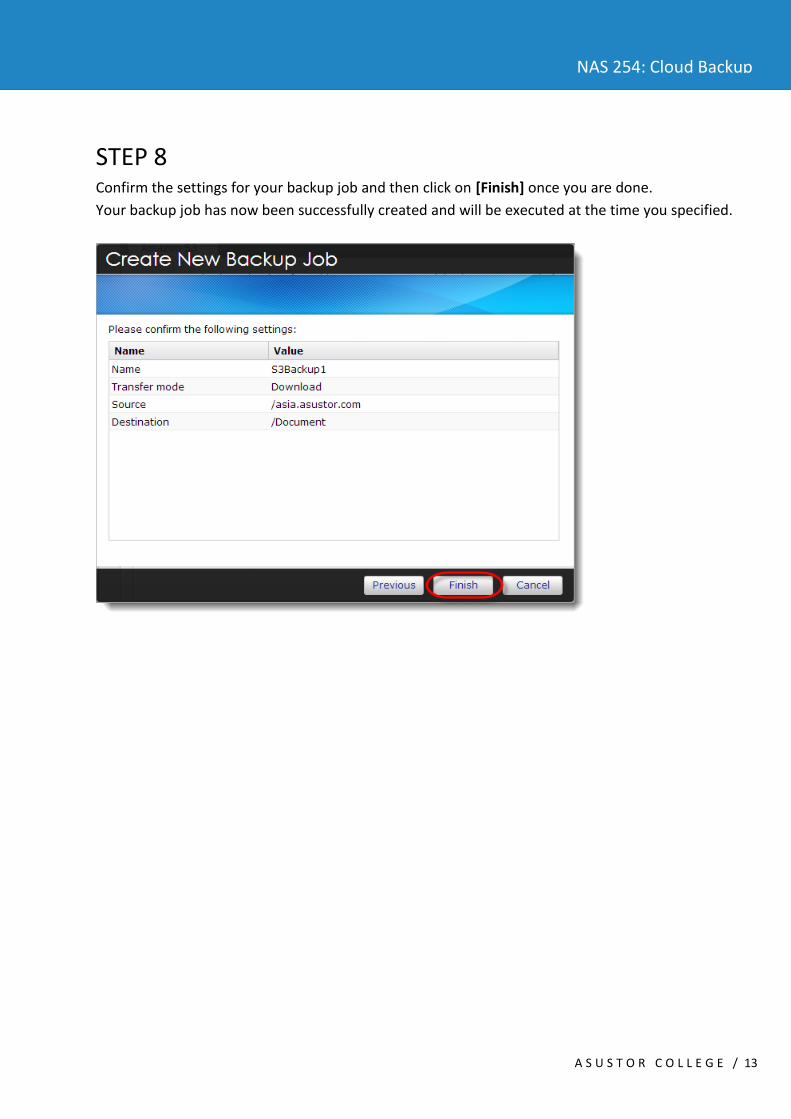
STEP 8 Confirm the settings for your backup job and then click on [Finish] once you are done.
Your backup job has now been successfully created and will be executed at the time you specified.