My name is Bob Railroader.
23
Transcript of My name is Bob Railroader.


My name is Bob
and I am a Model
Railroader.
I’m also a 3D
Model Designer
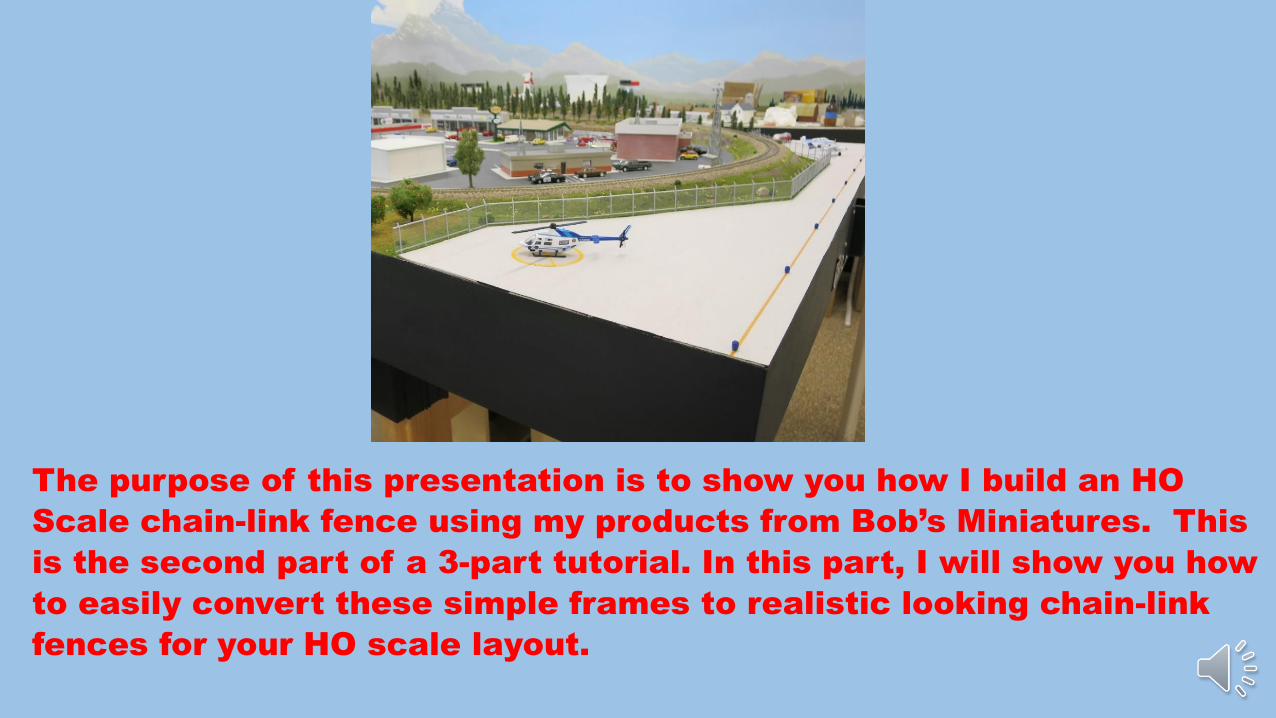
The purpose of this presentation is to show you how I build an HO
Scale chain-link fence using my products from Bob’s Miniatures. This
is the second part of a 3-part tutorial. In this part, I will show you how
to easily convert these simple frames to realistic looking chain-link
fences for your HO scale layout.

The following instructions are geared for the beginner or the layman with new
bench work. You seasoned model railroaders have built, torn down layouts,
built again and already pretty much know what you are doing. But tag along
anyway, you may glean something.
Don’t worry if the video gets a little too fast for taking notes. It will be available
on my information website as an Adobe .pdf file that you can down-load and
print.
https://bobsminiatures.com/

At this time you should pretty much
have received all of your fence parts
(from part-1) and have your support
material at hand.
So, let’s get to work and build a
fence.

This is my way of painting chain-link fence frames:
Cut out a couple pieces of ½” foam insulation
about 12” wide x 12” long to use as a part holder
while painting your fence. Lay one of the pieces
flat on your work bench.
Tear off about 6 pieces of 1” wide blue painter’s
tape that are about 3” long and tack them to the
edge of your work bench.
Tear off a piece of blue tape about 7-8” long and
place it along the middle of the piece of insulation
with the sticky side up. Using one of the short
pieces of tape, tape one end down onto the
insulation. Stretch the long tape across the
center and tape the other end down with another
short piece of tape. Tear off two more pieces of
blue tape about 7-8” long and repeat the process,
placing them parallel to the first piece and
somewhere between it and the edge of the
insulation.
Now you have a sticky surface to hold your work
while you paint.

Begin sticking the base of your
fence parts onto the blue tape. Be
sure to leave some breathing room
between each part so one part
won’t block another part from the
paint spray. For those parts like
gate section that are without bases,
you can stick them flat on the tape
or pin them onto the insulation with
map pins. If you are painting gate,
mask off the hinge parts of the
assembly and brush paint them
carefully later. You don’t want to
get paint on the hinge pins or in the
hinge holes.
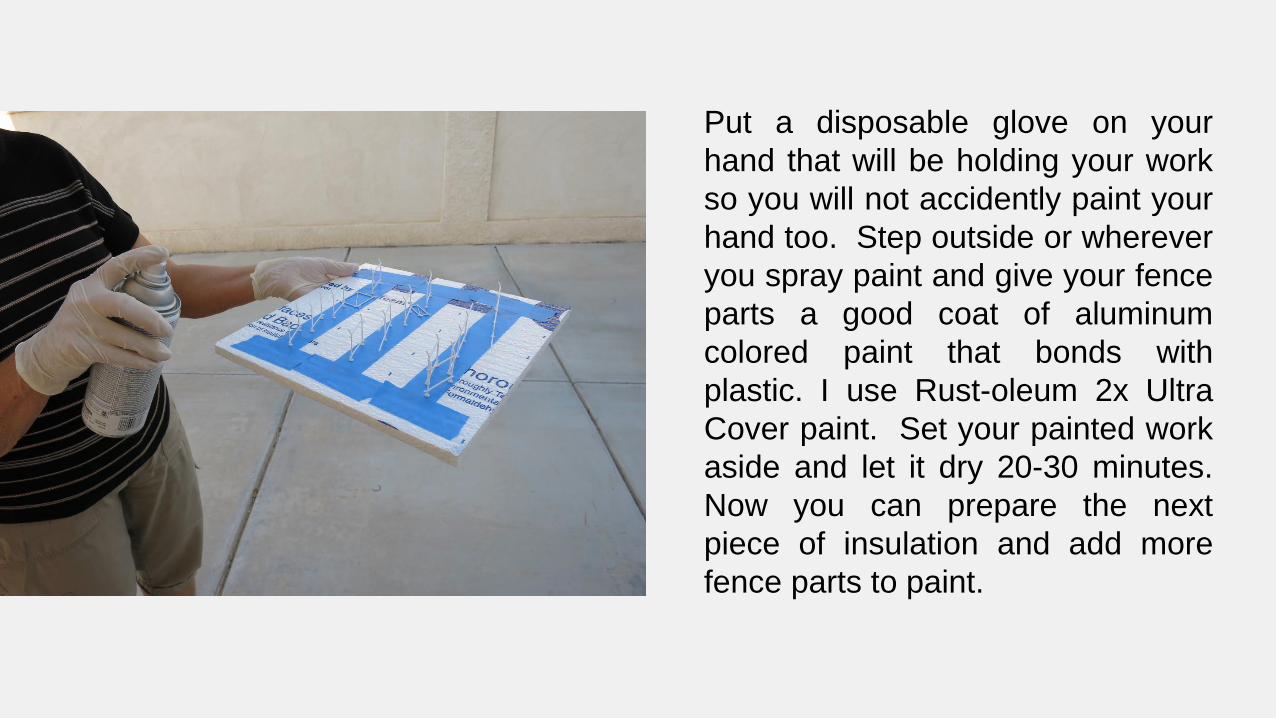
Put a disposable glove on your
hand that will be holding your work
so you will not accidently paint your
hand too. Step outside or wherever
you spray paint and give your fence
parts a good coat of aluminum
colored paint that bonds with
plastic. I use Rust-oleum 2x Ultra
Cover paint. Set your painted work
aside and let it dry 20-30 minutes.
Now you can prepare the next
piece of insulation and add more
fence parts to paint.

To remove your dried fence from
the tape, pull off an entire strip of
tape with the fencing attached.
Carefully peel the tape away from
each fence base. Otherwise, there
is a chance of breaking off the
base. Set the fence parts aside
and prepare the insulation for more
fence parts to paint as needed.
Continue this cycle until all of the
fence parts are painted with the
aluminum colored paint.
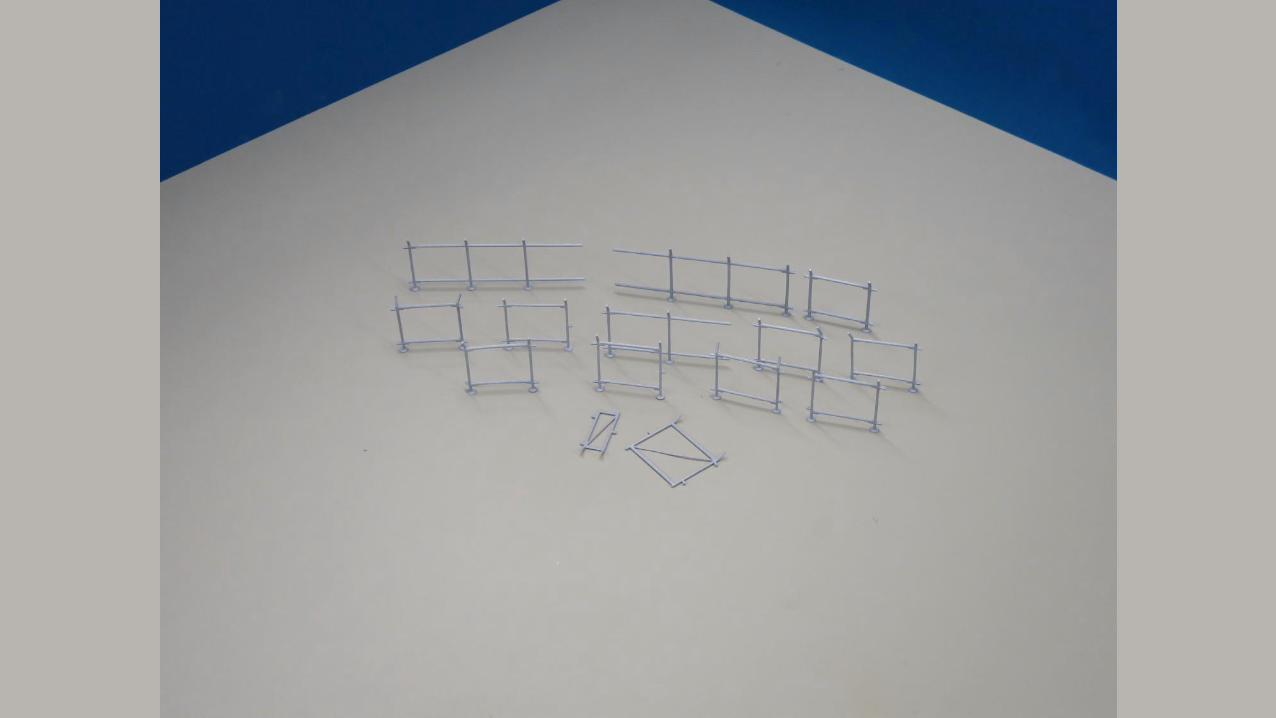

Now that all of your fence parts are
painted Aluminum, it’s time to paint
the bases. If you don’t want to
expose the bases, then paint them
a matching color of the medium
you will be using as ground cover,
such as green turf, brown turf, or
gravel. Since chain-link fence
posts are buried in the ground with
concrete, I choose a flat, acrylic
concrete colored paint. Using a
small brush and a flat, acrylic paint,
carefully paint the bases of all of
your fence parts.

All of the fence parts are painted
and time to prepare the chain-link
wire mesh.
Take a piece of scrap wood or
MDF about 30” long and draw 2-
parrallel lines 24” long x 1 1/8”
apart with a straight edge and
pencil.
Start at one end of the parallel
lines and draw 3-consecutive
rectangles that are 8” long, using
the parallel lines as sides.
Now you have a pattern/template
to cut-out your wire mesh.

Cut-off 26” of tulle ribbon mesh from its spool (as
discussed in part-1 of this tutorial.)
Lay a long edge of the mesh along the closest parallel
line to you and tape it down with blue painter’s tape as
shown.
Lay a metal straight edge over the rectangles with its
edge along the furthest parallel line. Hold the straight
edge down firmly and use a sharp Utility knife to cut
the mesh into a 1 1/8” wide strip. I’m lucky enough to
have a work bench that allows me to clamp down my
projects (as shown.) You cannot allow the straight
edge to move while cutting.
Inspect the edges for any rough spots and set the strip
aside.
Continue cutting as many mesh strips as possible from
this original ribbon piece. You may get 3 or 4 strips
from it. Anything less than 1 1/8” wide is scrap.
Continue this process until you have enough mesh to
cover all of your fence pieces. You can always cut
more strips as needed.

Clip a wooden clothes pin to each end of a mesh
strip. One pin is a handle and the other pin is a
weight
Put a disposable glove on the hand that will hold
the handle pin.
Step outside or wherever you spray paint. Let the
weighted end dangle while spray painting the
mesh on both sides with the same aluminum
colored paint as the frames.
Lay the painted mesh, clothes pins and all on a
clean, smooth, dry surface to dry. Better yet, hang
them up to dry. Cut about 4 sections of utility wire
about 2 ft. long. Bend and form one end to go
over your garage door overhead frame and bend a
small “L” shape on the other end. Pre-drill holes
on one side of each handle clothes pins larger
than the wire. Then when you have finished
painting the strip, you can simply hang them on
the “L” shape end of the wire to dry.
You can repeat this process as often as needed
until all of your mesh sections are painted.

After the mesh sections have dried take one section at
a time and remove the clothes pins.
Place the section back onto your cutting board,
aligning the bottom edge of the mesh with the closest
parallel line and centered left to right with the 3
rectangles.
Tape down the mesh as shown with blue painter’s
tape.
Use a straight edge and a sharp Utility knife to cross
cut your mesh into 3 smaller sections using the 3
rectangles you drew earlier.
Now you should have 3 sections of mesh about the
same length, each long enough to cover the longest
fence part.
Repeat this process until you have enough mesh
sections to cover all your fence parts.
Check the edges ragged places. If you find some bad
areas, discard the whole section or maybe use it in a
shorter section.

You may want to find
a comfortable place
to sit as it becomes a
little more tedious.
You should have
most or all of your
mesh sections
painted and cut to
working size.
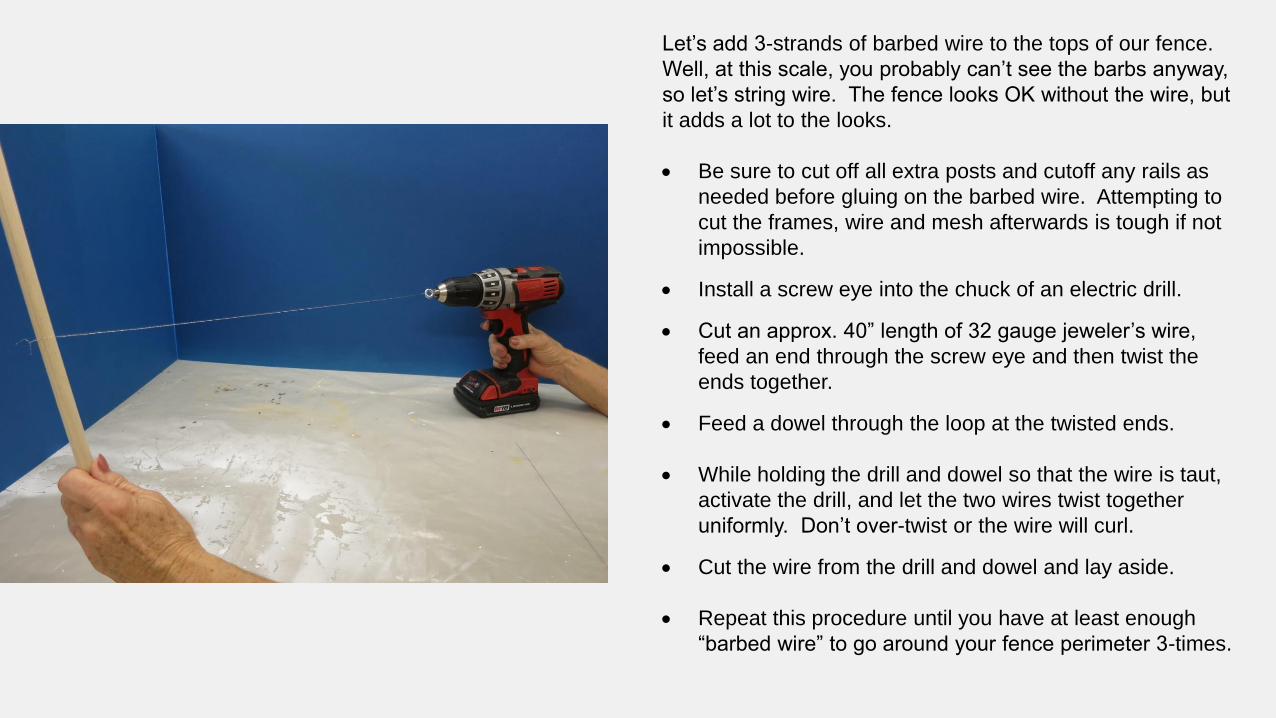
Let’s add 3-strands of barbed wire to the tops of our fence.
Well, at this scale, you probably can’t see the barbs anyway,
so let’s string wire. The fence looks OK without the wire, but
it adds a lot to the looks.
Be sure to cut off all extra posts and cutoff any rails as
needed before gluing on the barbed wire. Attempting to
cut the frames, wire and mesh afterwards is tough if not
impossible.
Install a screw eye into the chuck of an electric drill.
Cut an approx. 40” length of 32 gauge jeweler’s wire,
feed an end through the screw eye and then twist the
ends together.
Feed a dowel through the loop at the twisted ends.
While holding the drill and dowel so that the wire is taut,
activate the drill, and let the two wires twist together
uniformly. Don’t over-twist or the wire will curl.
Cut the wire from the drill and dowel and lay aside.
Repeat this procedure until you have at least enough
“barbed wire” to go around your fence perimeter 3-times.

I prepared a jig on a piece of insulation foam with a block of
wood and some straight pins to hold my work in place
Pin down the fence frame with straight pins with the bent
barbed wire fence top positioned as shown.
Cut a section of twisted wire approx. 1” longer than the fence
section and lay it across the top of the posts as close as
possible to the tips.
Add a drop of model glue or Super Glue to each point where
the wire crosses the fence post. I use Model Master’s plastic
model glue. I don’t know of anything that sticks to stainless
steel other than a weld or solder. The glue doesn’t stick the
wire to the fence, it surrounds and binds the wire to the fence.
Cut a second length of wire in the same manner as the first,
but place the wire across the posts slightly higher than the
bend and glue it in place as you did the top wire.
Cut a third length of wire in the same manner as the first, but
place the wire across the posts as close to the middle as
possible with equal distance between the upper and lower
wires. Let dry for about half an hour between wires.
Trim each wire flush at the outside fence post. Leave the
extra wire where there is no post as it will be connected to the
next fence section later.

Take one of your painted frames and lay
it down with the barbed wire arms up.
This is the outside of the fence.
Lay a section of mesh across the frame
to be sure it fits. If it is adequate, set the
section of mesh aside.
Cut out a piece of waxed paper or tin foil
wrap about 6” x 6” to use as a glue
staging area. In the next few steps it is
important to work quickly as the glue will
dry fairly fast. I use a gluing mat.

Pour a few drops of white, clear drying glue
onto your glue staging area (foil wrap or wax
paper). I use either Elmer’s white glue or
Woodland Scenics Scenic Glue.
Quickly swab on a fairly generous amount of
glue over the entire front of the frame from
the staging area with a mini swab. I use
Tamiya cotton craft swabs.
Quickly, but carefully align the section of
mesh that you set aside onto the frame with
the long edge along the top rail and the end
edge the first post. Try not to wrinkle the
mesh. If you do, push or pull the wrinkle out
before the glue dries. The mesh needs to
be relatively taught across both directions of
the frame. When the glue dries, cut off the
excess mesh along the ends of the rails with
a pair of scissors or with an Exacto knife
alone the second post if the is one. The
mesh should extend slightly below the
bottom rail.

Continue the above barbed wire
and mesh procedures for of all of
your fence sections.
In the third and final presentation,
we will install the fence sections
on the sample layout.

https://www.bobsminiatures.com
OR
https://www.shapeways.com/shops/bob-s-miniatures
Please Visit My Shop at:

End of Part-2
Thanks for viewing


![Model Railroad E-Book - Building Scenery [Kalmbach-Model Railroader]](https://static.fdocuments.us/doc/165x107/54e8bd464a79599f4e8b4a71/model-railroad-e-book-building-scenery-kalmbach-model-railroader.jpg)