
Museum Virtual Tour Design Guide 26-Apr · This section discusses the different types and...
24
Museum Virtual Tour Design Guide WORCESTER POLYTECHNIC INSTITUTE
Transcript of Museum Virtual Tour Design Guide 26-Apr · This section discusses the different types and...

About this guide Acknowledgements The authors of this guide would like to thank several people who have provided valuable input throughout its development:
Museum Virtual Tour Design Guide covers the design and content identification steps needed to successfully make an accessible virtual tour. This guidebook focuses on photo-based tours as a feasible option for museums with limited financial resources.
Centre for Accessible Environments Cassie Herschel-Shorland Paul Highman Land Design Studios This guidebook provides practical
assistance to help museum staff understand the advantages of virtual tours, how to develop a virtual tour, how to include access options and how to maintain a virtual tour. Feedback can be sent to
James Dibble Museums, Libraries and Archives Council Marcus Weisen Royal Armouries, HM Tower of London
Elizabeth Denton Guidebook creation This guidebook was created in April 2006 by students from Worcester Polytechnic Institute in Worcester, MA, USA with support from the Centre for Accessible Environments. The authors, Cathryn Bedard, Jason DuBois, Scott Lehtinen and Brian Loveland, created this guidebook to fulfil the Interactive Qualifying Project requirement of their Bachelor of Science degrees.
Royal National Institute of the Blind Catherine Hillis The Shakespeare Birthplace Trust Ann Donnelly Tate Jemima Rellie The Virtual Experience Company Mike Gogan
1

Introduction Virtual tours The information included in this guide
is based on background research and interviews with representatives of disability organisations and those in the field of virtual tour creation. The guide includes different options for enhancing accessibility as well as design recommendations to remove barriers which can inhibit a user’s experience of the museum. The steps can also be used to develop a more elaborate virtual tour.
A virtual tour is an educational tool that can benefit all users. It can provide detailed and up close images of museum artefacts and text descriptions on a computer, sometimes with even more information than in the museum itself. Virtual tours also serve as an access option for disabled people who cannot otherwise experience exhibits due to physical, sensory or intellectual barriers. Amongst other options, a tour can include audio features as well as user preferred display and navigation options, all of which help to remove barriers.
Disability Discrimination Act 1995 and 2005 The Disability Discrimination Act (DDA) 1995 and 2005 requires all public facilities to provide an equal experience for all visitors. The DDA protects the rights of disabled people by making it unlawful to discriminate against them.
Objectives This guide is designed to provide museums that have limited resources with a set of steps to create their own virtual tour. The primary goal is to present museum staff with the appropriate steps to identify content and presentation setup. This can reduce the need for external consultants and thus the cost of production, while increasing virtual tour feasibility for museums with a limited budget. This document was created with the consideration of inclusive design for all users. The basic steps this guidebook covers include:
Museums must reasonably attempt to remove any access barriers that inhibit visitors from experiencing an exhibit. However, if this is not possible due to the site being listed as a historic building, museums are still required to make an equal experience available. A virtual tour can be used to improve museum accessibility where physical changes to the museum itself are not feasible. Therefore, it is important to ensure that it is designed with inclusive features. While a virtual tour can assist with improving museum accessibility, a full access audit and access plan are recommended to identify barriers and plan to remove them.
• What to put in your virtual tour • How to make your virtual tour • Where to put your virtual tour • What to do with your finished virtual
tour
2

Table of Contents
About this guide 1 Where to put your virtual tour 18
On-site access 18 Acknowledgements 1 Internet access considerations 18
Introduction 2 Ergonomic setup 19
Process outline 4 User controls for on-site access 19
Overview of virtual tours 5 What to do with your finished virtual tour 20 Types of virtual tours 5
Maintenance 20 Advantages of a virtual tour 7 Evaluating virtual tour service 21 Photo-based tours 7 Implementing staff guidance 21 Advantages of a photo-based tour 9
How a virtual tour can enhance your museum 9
Appendix: Additional resources 22
Other access options 23 What to put in your virtual tour 10
Identifying the audience 10
Outlining the story 10
Artefact descriptions 11
Tour guidance 11
Arranging your virtual tour 12
How to make your virtual tour 13
Including users in the design process 13
Computer presentation 13
Outside help or do it yourself? 15
Technology requirements 16
Important steps 16
Web accessibility 17
3

Process outline The flowchart below shows the main steps that are included in this guidebook. Each block represents a chapter with important points to consider. The recommended process for creating a virtual tour has been designed to be easy to follow. While this guidebook works through the necessary steps one by one, it is important to read through the entire guidebook and consider all of the stages before beginning the process. The first step in the process is to understand the scope of virtual tours. There are many different types of virtual tours and this section explores the different options available. This guidebook focuses on the creation and implementation of a photo-based tour, as the most economically feasible option for many museums.
Learning about virtual tours
What to include in the virtual tour
How to create the virtual
tour
Where to put the virtual
tour
Updating and maintaining the virtual
tour
Photo - based tours
The second step in the process is to decide what content to include in the virtual tour. Each museum can tell its own story and interpretive experiences through the exhibits included in the virtual tour. Once the content is decided upon, everything must be pieced together. This section covers some of the computer details necessary in creating the virtual tour, including computer presentation and web accessibility. When the virtual tour has been created, it is important to consider placing it somewhere that everyone can access. This section covers options for where to place the tour in the museum, the ergonomics of an accessible setup and recommendations for placing a tour online. The last step in the process is to ensure that the tour is updated regularly. This section covers some of the details of maintaining the virtual tour and the importance of an informed staff with regards to the virtual tour. Through following the steps explained above and contained in this guidebook, museums will have assistance in creating an accessible virtual tour of their facility that can also provide a better learning experience for all museum visitors. This guide is intended to reduce the cost for museums in creating a virtual tour. It is difficult to quantify the exact cost savings, as it depends on many factors. If the museum has staff which can complete the entire virtual tour, then there will be no need to pay for an outside web designer. The rates of web designers and number of hours required are unique to the designer. It is important to follow the guidance while choosing a web designer, and developing a budget for the project prior to starting it.
4

Overview of virtual tours A virtual tour is a digital representation of a location or artefacts shown on a computer. In relation to museums, a tour is an educational tool that provides images and information that can enhance learning experiences. Virtual tours can also be an access option for disabled people who cannot otherwise experience an exhibit, due to physical, sensory or other barriers. There are different types of virtual tours that can be used to represent exhibits. The first step in creating a virtual tour is to understand what it is and the specific features that it contains. This section discusses the different types and advantages of virtual tours while focusing on photo-based tours as the most feasible option for museums with limited financial resources.
Types of virtual tours Type of Qualities virtual tour Text-based This tour conveys an accurate sense of space through description
of the exhibit. This is a simple tour, with no visual aids, allowing it to be inexpensive to create.
Photo-based This tour contains pictures of each artefact with in-depth text descriptions. It is a simple tour to produce, involving only pictures and descriptions of exhibits.
Panoramic This tour creates a 360 degree image of an exhibit for a greater feeling of reality for the user. These tours are often high cost due to the need for high quality pictures to ensure the photographs match correctly when patched together.
Example of panoramic virtual tour
The Old Operating Theatre virtual tour (created by Stuart Franey): www.thegarret.org.uk/tour.htm
5
Type of Qualities virtual tour Video-based This tour consists of a video depicting a typical museum
visit, which can use both audio and text descriptions to further enhance the experience. This type of tour can be expensive to produce and difficult to update. In order to add new information, new video content needs to be produced, which can be an expensive process.
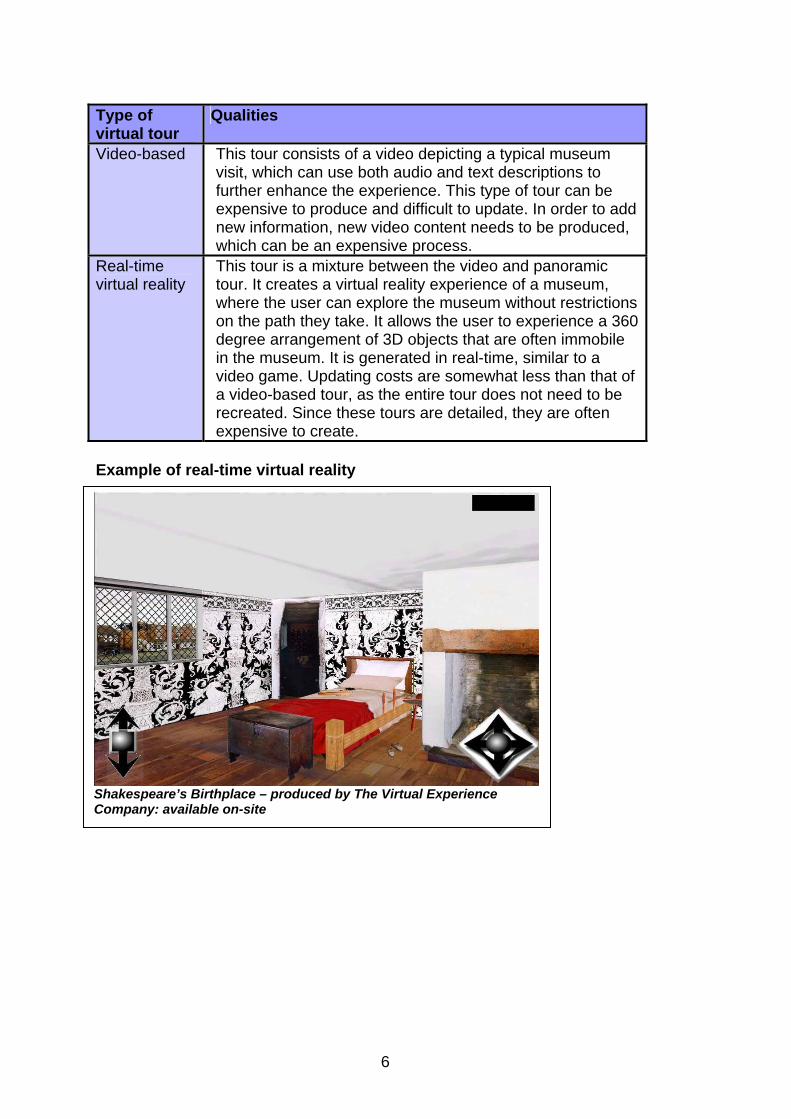
Real-time This tour is a mixture between the video and panoramic tour. It creates a virtual reality experience of a museum, where the user can explore the museum without restrictions on the path they take. It allows the user to experience a 360 degree arrangement of 3D objects that are often immobile in the museum. It is generated in real-time, similar to a video game. Updating costs are somewhat less than that of a video-based tour, as the entire tour does not need to be recreated. Since these tours are detailed, they are often expensive to create.
virtual reality
Example of real-time virtual reality
Shakespeare’s Birthplace – produced by The Virtual Experience Company: available on-site
6

Advantages of a virtual tour There are several features of a virtual tour that enhance the learning potential and accessibility of museum content. Virtual tours can also be valuable for museums in respect to artefact conservation. Specific benefits include:
providing alternate access to listed or small museums by showing objects in rooms with limited access
Photo-based tours A photo-based virtual tour is portrayed through a series of still photographs with descriptive text about the subject. For a better understanding, follow the example links below to learn about photo-based virtual tours. The Science Museum of London has a high quality virtual tour. The user can pick which exhibits they wish to explore rather than being forced to follow a predetermined tour. Text descriptions of the story that the museum is trying to tell are accompanied by a still-frame picture that is described in a caption underneath. Also included are some interactive elements that show how a simple photo-based virtual tour can be expanded and built upon.
allowing the user to explore with alternative formats including audio descriptions, enhanced visual aids, screen readers and British Sign Language (BSL)
Access
providing a closer, adjustable experience of objects that are roped off or sometimes overlooked by visitors providing a tool for use with school curriculum as an educational reinforcement and teaching supplement assisting in the goals of life learning including additional information or references which are not available at the exhibit allowing a personally paced learning experience which may be inhibited in the museum by other visitors moving through the exhibits providing a resource that can be personalised for the users’ preferences or needs (language, font size and audio options) allowing the user to focus on items of interest rather than going through a tour of the entire building
Education
allowing an interactive experience to further understand certain artefacts either prior to, during or after visiting the exhibit protecting the original unique artefacts by reducing wear from handling or lighting
Artefact conservation
allowing access to artefacts in storage, due to limited space on-site
The Science Museum of London website: www.sciencemuseum.org.uk
7
The Victoria and Albert Museum also provides a good virtual tour example. The user has the choice of deciding which exhibits they wish to explore. In this example, a map is provided of the exhibit so that the user may get a sense of space and how the objects are laid out. Some exhibits have virtual tours that are more elaborate, using panoramic tours along with 3D modelling, consider taking some time to explore the different exhibits. This site shows the various styles of tours and how each one can be used to create a successful virtual tour.
The Victoria and Albert Museum virtual tour website: www.vam.ac.uk/exhibitions/touring_exhibs/index.html
The British Museum has a virtual tour that is another good example. As a learning tool it is effective in providing a general tour along with a children’s tour, adding to the museum experience. It can be used as a post-visit experience where visitors can learn more about particular exhibits that they found to be interesting. This site is also equipped with a section with audio descriptions for blind and partially sighted people. This part of the tour not only gives the historical significance of the artefact but also a detailed description of the object. Tate Modern shows the presentation of art through a virtual tour. The user is provided with still-frame photographs accompanied by text descriptions. This particular tour offers options specifically created for blind and partially sighted people as well as people with learning difficulties. High contrast pictures of artwork are provided with detailed descriptions. These descriptions are an example of not relying on the picture to describe the art. The site also provides the user with the option of printing a raised copy of the art with a swell paper copier. For deaf visitors and users of BSL, Tate provides a BSL glossary.
The Tate i-Map virtual tour website: www.tate.org.uk/imap/
The British Museum virtual tour website: www.thebritishmuseum.ac.uk/compass/
8
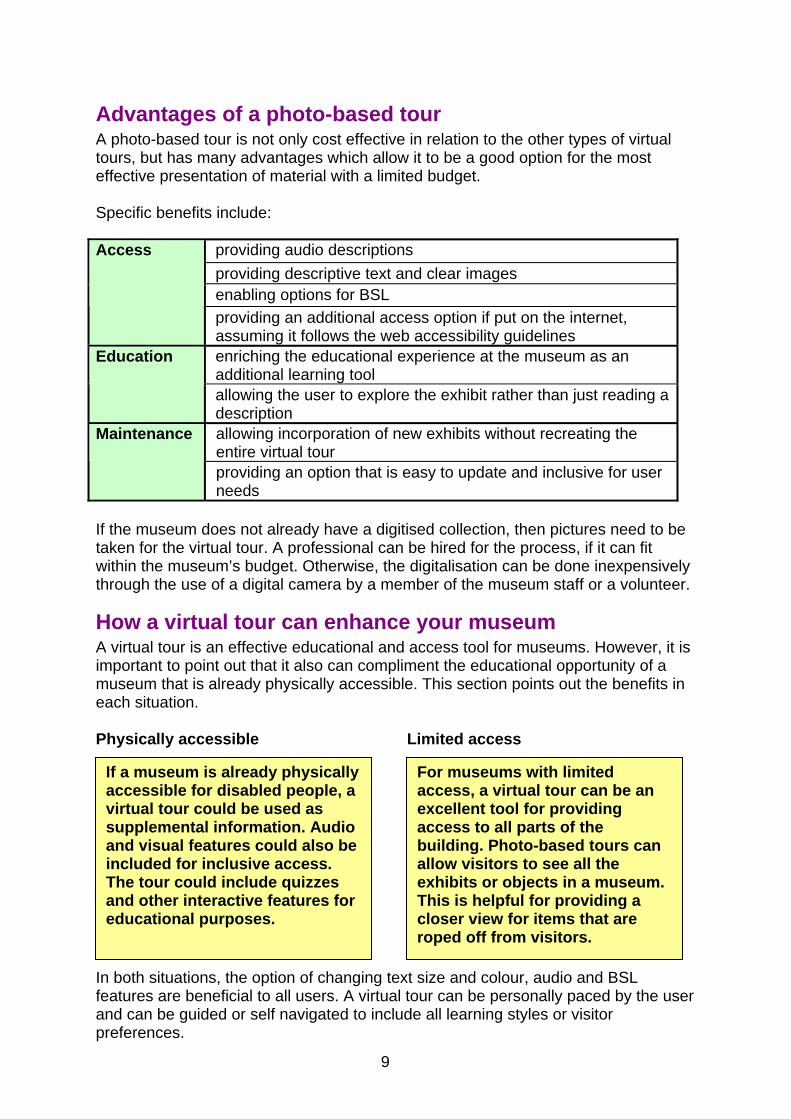
Advantages of a photo-based tour A photo-based tour is not only cost effective in relation to the other types of virtual tours, but has many advantages which allow it to be a good option for the most effective presentation of material with a limited budget. Specific benefits include:
providing audio descriptions
If the museum does not already have a digitised collection, then pictures need to be taken for the virtual tour. A professional can be hired for the process, if it can fit within the museum’s budget. Otherwise, the digitalisation can be done inexpensively through the use of a digital camera by a member of the museum staff or a volunteer.
How a virtual tour can enhance your museum A virtual tour is an effective educational and access tool for museums. However, it is important to point out that it also can compliment the educational opportunity of a museum that is already physically accessible. This section points out the benefits in each situation.
Physically accessible Limited access In both situations, the option of changing text size and colour, audio and BSL features are beneficial to all users. A virtual tour can be personally paced by the user and can be guided or self navigated to include all learning styles or visitor preferences.
providing descriptive text and clear images enabling options for BSL
Access
providing an additional access option if put on the internet, assuming it follows the web accessibility guidelines enriching the educational experience at the museum as an additional learning tool
Education
allowing the user to explore the exhibit rather than just reading a description allowing incorporation of new exhibits without recreating the entire virtual tour
Maintenance
providing an option that is easy to update and inclusive for user needs
If a museum is already physically accessible for disabled people, a virtual tour could be used as supplemental information. Audio and visual features could also be included for inclusive access. The tour could include quizzes and other interactive features for educational purposes.
For museums with limited access, a virtual tour can be an excellent tool for providing access to all parts of the building. Photo-based tours can allow visitors to see all the exhibits or objects in a museum. This is helpful for providing a closer view for items that are roped off from visitors.
9

What to put in your virtual tour When designing a virtual tour it is essential to identify the content to be presented. It is important to include the interpretive experiences of the museum visit in the virtual tour to make it effective. This section provides guidance on how to translate these experiences into the virtual tour through content identification.
Identifying the audience The first step in the process of creating the virtual tour is to identify the target audience. This helps specify the proper content and presentation features to be included. The following are some important questions to consider: • Who will use the virtual tour? • Is the tour aimed at any specific age groups? • Is the purpose of the tour to improve the experience for current visitors, to interest
new visitors or both? The answers to these questions may help the museum develop ideas to guide them in the creation of their virtual tour. Focusing on a target audience may help to promote a maximum learning experience. Gearing the content towards the interests of your target audience is important for a successful virtual tour.
Outlining the story Each museum has exhibits and artefacts that tell stories. The most important question in virtual tour development is: What is the story that should be told? It is necessary to determine the journey which you would like your visitors to experience through the use of the virtual tour. In order to help identify the storyline, it is recommended that the museum consider the following questions: • What do you expect people to take away from visiting the museum? • What is different about the museum in comparison to most others? • What is the main focus of the museum? It is important to keep the target audience in mind while answering these questions. Once a storyline is developed, the order and presentation of the exhibits that need to be included should begin to fall into place. Example
A tour of someone’s house may be set up to tell the story of their life. This tour may start with childhood artefacts, and move through other stages of their life as a timeline.
10
Artefact descriptions It is beneficial to have the information included with each exhibit in the tour be detailed and descriptive; possibly even providing more information than is available at the exhibit in the museum. It is recommended to answer the following questions in order to provide a thorough description of the exhibit: • What is unique about the particular artefact? • What pictorial or descriptive qualities should be emphasised to communicate this
uniqueness? By including the answers to these questions in the virtual tour, the audience should be able to understand what makes the exhibit so memorable. Descriptions in a virtual tour have the ability to provide additional information or resources for users who develop a desire to learn more about the exhibit. This can also be useful for visually impaired people who benefit from description.
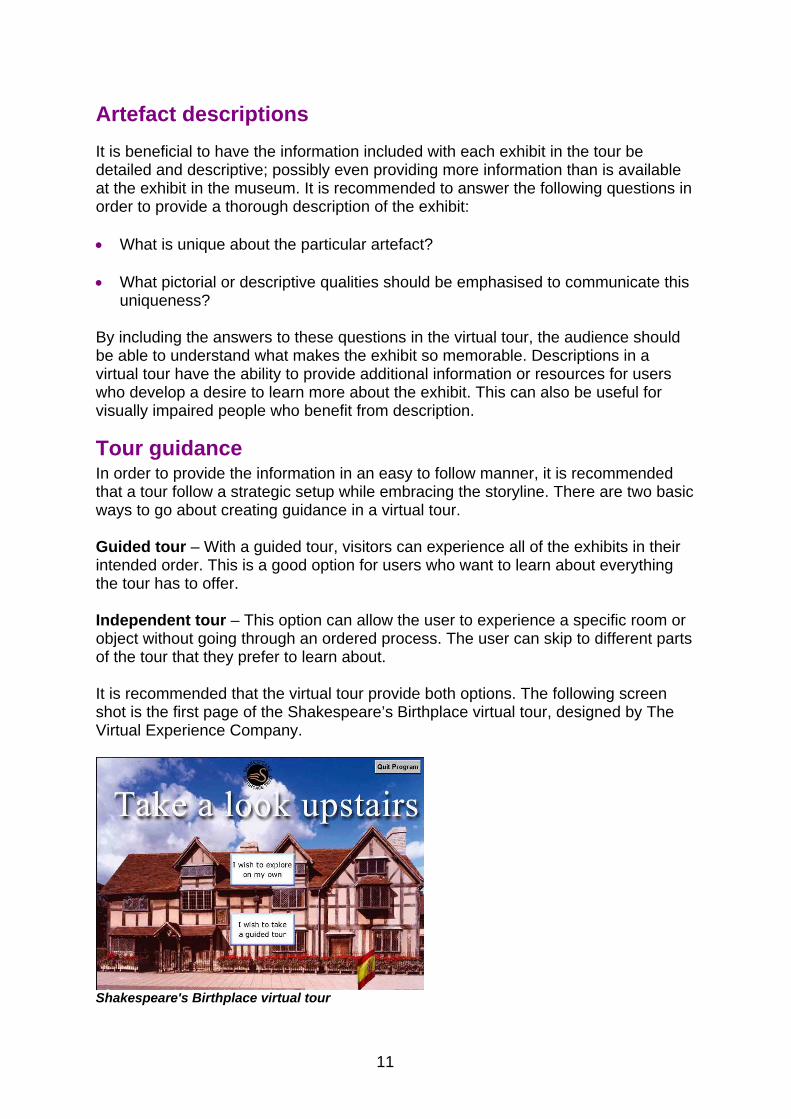
Tour guidance In order to provide the information in an easy to follow manner, it is recommended that a tour follow a strategic setup while embracing the storyline. There are two basic ways to go about creating guidance in a virtual tour. Guided tour – With a guided tour, visitors can experience all of the exhibits in their intended order. This is a good option for users who want to learn about everything the tour has to offer. Independent tour – This option can allow the user to experience a specific room or object without going through an ordered process. The user can skip to different parts of the tour that they prefer to learn about. It is recommended that the virtual tour provide both options. The following screen shot is the first page of the Shakespeare’s Birthplace virtual tour, designed by The Virtual Experience Company.
Shakespeare's Birthplace virtual tour
11

Arranging your virtual tour The arrangement of the exhibits in the virtual tour is an important part of the process. It is recommended that the tour be created to explore the museum in a logical manner. Below are two options that can help in developing the arrangement of the exhibits.
Take photographs of exhibits that will be used in the virtual tour and lay them out on a table. Museum staff members can discuss what order they should go in and position them accordingly. This could start a discussion on the content of the virtual tour and help to stimulate creativity.
It is possible to lay out the tour in Microsoft PowerPoint as a slide show, where the slides can easily be interchanged. To test the quality of the tour layout, it is recommended to start with the staff and then include visitors of the museum.
OR
As can be seen by these two examples, the process of arranging the virtual tour does not have to be high-tech. An important part of this process is to receive input from the museum staff, so that all ideas are considered.
12
How to make your virtual tour Along with the content that goes into the virtual tour, equally important is the way it is presented and its accessibility. A virtual tour that can not be accessed or understood creates more barriers rather than removing them. This section discusses guidance on the inclusive design of a virtual tour. Designing with the web accessibility standards and exploring user testing methods are the most important steps in ensuring inclusive design.
Including users in the design process To produce an accessible virtual tour, it is important to consider involving potential disabled users in the creation process. They may provide useful information about their preferences and point out specific physical, sensory, and intellectual barriers. This can be done through discussions and feedback during development stages, or through exploring alternative methods such as the Usability Exchange. It is recommended to have ongoing consultation with disabled users to ensure that they have influence on the layout of material, text descriptions and navigation features of the virtual tour. Organisations such as the Royal National Institute of the Blind (RNIB) can be used to help the museum find particular user groups in the development of their tour. In addition, your local Council for Voluntary Service (CVS) may be able to provide you with a community group. You can find your local CVS through the National Association of Councils for Voluntary Service.
The Usability Exchange for disabled user testing of websites:
www.usabilityexchange.com
Computer presentation User-friendly presentation of the virtual tour is essential to its success. The guidelines in this section are based on RNIB’s See it Right pack (2002) as well as other guides and research.
For more information on the RNIB’s See it Right pack: www.rnib.org.uk/xpedio/groups/public/documents/PublicWebsite/public_seeitright.hcsp
The National Association of Councils for Voluntary Service: www.nacvs.org.uk
13

The following features are helpful considerations for the creation of an inclusive and accessible virtual tour:
User friendly navigation text picture • clear and relatively large navigation buttons in the
same location on the screen throughout the tour • colour-coded and consistent shapes for navigation,
avoiding complementary colours • contrast between the screen background and objects Back Menu/Exit Next Photos • enlarged but clear images with a zoom feature • clear focus on the subject without background clutter • good contrast between background and foreground objects • defined edges through the use of borders Text • sans serif fonts with a minimum of 14 point • avoidance of italics, underlining, and words in all block letters • sufficient weight of font in text and titles • simple but descriptive sentences • options for the user to enlarge text • avoidance of scrolling text
This is sans serif font This is an unclear font with sufficient weight with insufficient weight and contrast. and poor contrast.
Information presentation • short sentences with simple words • short paragraphs that capture a reader’s attention • sentences presented horizontally • avoidance of too much information, causing clutter Colour • high contrast (light/dark colours) for user appeal and background and foreground
distinction • consistent colours that do not distract from the tour • avoidance of complementary colours together: red and green, blue and orange
and purple and yellow Additional features • audio descriptions for blind and partially sighted people • detailed narrations of what the museum itself is like (surroundings, lighting,
smells, and so on) • in depth descriptions of paintings, artefacts and sensory qualities • the option of BSL for deaf visitors and users of BSL
14

Audio descriptions Audio descriptions are a helpful feature for blind and partially sighted users, as they can provide interpretation from tone of voice as compared to screen reading software. Although audio descriptions are not required to meet basic web accessibly requirements, it is recommended that they be included if the budget allows for it. Creating audio descriptions is more involved than having a narrator reading text that would normally be on the screen. The narrator needs to not only discuss a detailed description of the artefacts, but also the significance of the exhibit. It is important to keep in mind that some users may not be able to see the image clearly. Therefore, it is helpful to find a knowledgeable writer who can convey an accurate sense of space with detailed descriptions. This could be someone working in the museum that has experience with descriptive writing and could assist with the development of audio descriptions. For detailed explanations of the different aspects of creating an audio description consult the RNIB’s See It Right pack and Talking Images Guide or Vocaleyes, a charity which provides audio description services.
More information on Vocaleyes can be found at their website:
www.vocaleyes.co.uk
Here are some quick recommendations to consider when implementing audio descriptions: • using a writer with knowledge of description techniques • reading descriptions with a clear, pleasant and varied voice • using tone that reflects the mood of the work • implementing professional recording of the audio description
Outside help or do it yourself? Once the content for the virtual tour has been identified, the next step is to assemble it into a final product. First, it is helpful to decide the method for the technical implementation of the tour – with an outside consultant or with an internal web designer. This guide by no means provides the technical knowledge required for web design. In the Technology requirements section, there is a brief description of some software tools for web design; however they still require significant background knowledge in terms of the web itself. Recommendation
Unless the budget absolutely prohibits it, or sufficient web design knowledge is available, the best option for a museum is to find a web designer. The designer would have to be willing to start with the content that a museum identified through the use of this guide, and assemble it into web form to be used in a virtual tour. A good place to start is with the same web designer a museum used for their current website, if they have one. Otherwise, the British Standards Institution PAS 78:2006 Guide to good practice in commissioning accessible websites provides some recommendations on choosing a web designer, particularly for keeping accessibility in mind.
15

Technology requirements In order for the museum to complete the website themselves, basic web authoring and photo manipulation tools are required. Although the choice is up to the museum itself, there is a wide range of tools available in terms of both capability and price. The industry standard tools are Adobe Dreamweaver (formally Macromedia Dreamweaver) for web authoring and Adobe Photoshop for photo manipulation. A reduced price version of Adobe Photoshop, called Adobe Photoshop Elements, is also available and should be sufficient for the image manipulation that is necessary for basic web development. Adobe GoLive and Microsoft FrontPage are also popular web authoring tools. If the museum desires to take the photographs themselves, a digital camera is recommended, although using a film camera and scanning is also an option. In general, digital cameras are specified in terms of their image resolution, in mega pixels, and for web photos a camera generating at least four mega pixel images should produce photos of acceptable quality. If the museum wishes to use the camera for printed materials, the investment in a higher quality camera is recommended.
Important steps Once the content to include in the virtual tour has been identified and the method for creating the tour has been chosen, the next step is to begin the process of virtual tour implementation. There are two primary parts to this: • assembling the content (taking the photographs) • implementing the tour (authoring the webpage) Photographs – If the museum has completed or is in the process of completing a digitisation project, this would be an excellent source of high quality pictures that are already available. Otherwise, the museum must obtain the photographs of the exhibits to be included in the tour. This could be done by working with a professional or completing the work themselves. Working with a professional photographer is an option for museums that desire higher quality photographs, which could be used in later projects. However, to save on resources, it is perfectly acceptable for the museum to take their own photographs. To obtain the highest quality pictures and creating the most professional outcome, some reading into basic photography is recommended. The manual that comes with a camera is an excellent source for this information, as it discusses specific settings, for obtaining high quality photographs. It is also important to ensure that all pictures are taken at the highest possible resolution to obtain the highest quality photographs, which can be scaled down at a later time. Physical layout – In order to incorporate photographs into the website, the museum needs to consult a web designer or use a web design tool to create the HTML code appropriate for web presentation of the photographs. As discussed previously, it is recommended that the museum only attempt the website creation themselves if they have sufficient background. Important considerations include both the Web accessibility guidelines, below, as well as the Computer presentation on page 13.
16
Web accessibility Following web accessibility standards ensures that the virtual tour content presented is available to everyone, regardless of how they experience the site. It is important to consider the guidance provided by the standards of the Web Accessibility Initiative (WAI), set by the World Wide Web Consortium (W3C). Complying with the web accessibility standards allows all internet users to experience the virtual tour, including people who use screen readers and other technologies. Complying with the WAI is something that is primarily done by whoever creates the site, being the web designer or the museum itself, although it is important to consider throughout the process.
A full copy of the W3C WAI standards can be found at: www.w3.org/WAI/, as well as additional resources to assist in complying with the standards
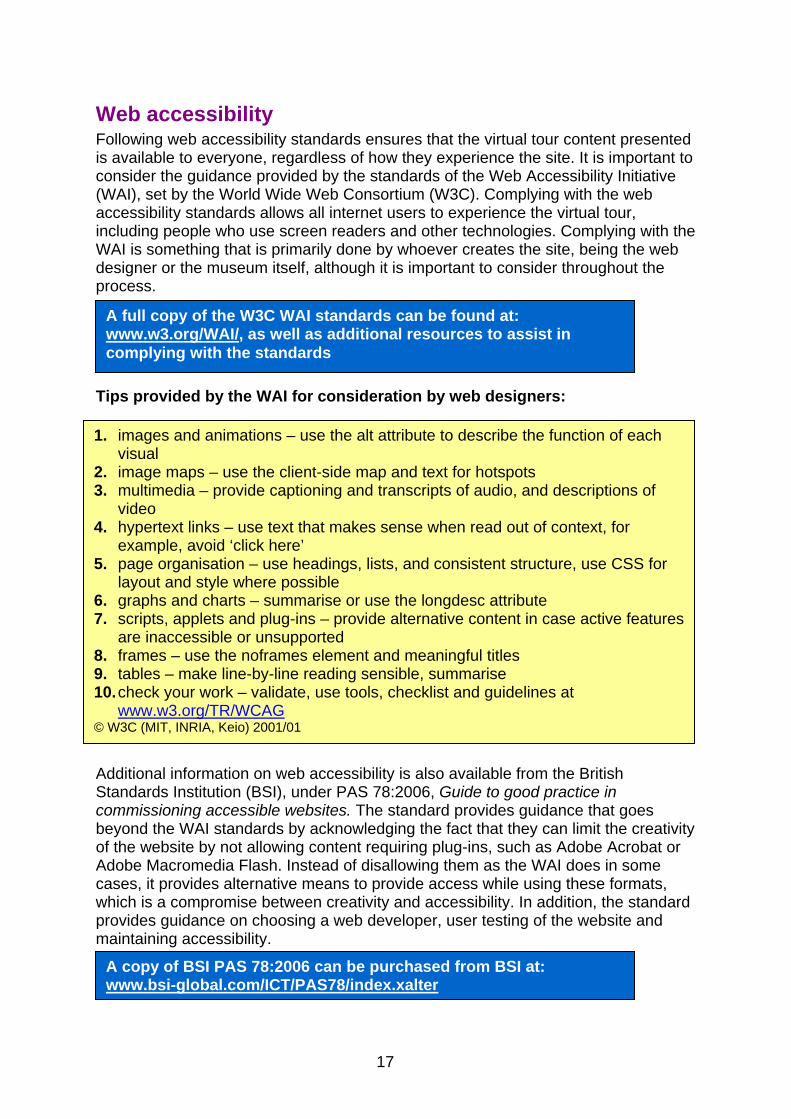
Tips provided by the WAI for consideration by web designers:
Additional information on web accessibility is also available from the British Standards Institution (BSI), under PAS 78:2006, Guide to good practice in commissioning accessible websites. The standard provides guidance that goes beyond the WAI standards by acknowledging the fact that they can limit the creativity of the website by not allowing content requiring plug-ins, such as Adobe Acrobat or Adobe Macromedia Flash. Instead of disallowing them as the WAI does in some cases, it provides alternative means to provide access while using these formats, which is a compromise between creativity and accessibility. In addition, the standard provides guidance on choosing a web developer, user testing of the website and maintaining accessibility.
A copy of BSI PAS 78:2006 can be purchased from BSI at: www.bsi-global.com/ICT/PAS78/index.xalter
1. images and animations – use the alt attribute to describe the function of each visual
2. image maps – use the client-side map and text for hotspots 3. multimedia – provide captioning and transcripts of audio, and descriptions of
video 4. hypertext links – use text that makes sense when read out of context, for
example, avoid ‘click here’ 5. page organisation – use headings, lists, and consistent structure, use CSS for
layout and style where possible 6. graphs and charts – summarise or use the longdesc attribute 7. scripts, applets and plug-ins – provide alternative content in case active features
are inaccessible or unsupported 8. frames – use the noframes element and meaningful titles 9. tables – make line-by-line reading sensible, summarise 10. check your work – validate, use tools, checklist and guidelines at
www.w3.org/TR/WCAG © W3C (MIT, INRIA, Keio) 2001/01
17

Where to put your virtual tour The next step in the creation process is to determine the best way for users to access the virtual tour. There are three options for the availability of a virtual tour: on-site, online or both. The recommendation of this guidebook is to make it available both on-site and online, but each option is explained in detail throughout this set of recommendations. This section also discusses the ergonomics of a computer work station, assuming placement of the virtual tour on-site.
On-site access An important consideration for the museum is whether or not they want to make the virtual tour available on-site (at an accessible kiosk). For museums with limited access to the building, the recommendation of this guidebook is to always make the virtual tour available on-site, so that it is available as an alternative access medium for disabled visitors. If the decision has been made to make the virtual tour available on-site, the placement of the virtual tour at the museum is also important to consider. Placing the tour in an accessible exhibit area of the museum allows all users taking the tour to experience the significance of being at the museum as well as the educational value of the tour. However, it is not always physically possible to make the tour accessible in an exhibit area of the museum. In these situations, it is recommended that the tour be implemented on-site in an accessible location.
Shakespeare's Birthplace on-site virtual tour
Internet access considerations Another important consideration is whether or not to make the virtual tour available on the internet. By placing the tour on the internet, the general public can preview what is available in the museum. This preview may create a greater interest in the subject, stimulating the general public’s desire to visit the museum. In this way, a virtual tour can be considered a complementary experience. If the museum has its own website, a link can be provided to the virtual tour. If the museum does not have a website, it may be an excellent opportunity to create one integrated with the virtual tour.
18

Ergonomic setup If the museum has made the decision to make their virtual tour available on-site, it is important to consider how it will be presented. In order to create an accessible and user friendly environment for all visitors, it is important to regard the ergonomic qualities of the workstation. The following are standards to consider when creating a work station that is accessible: Computer station surface:
• activity surface preferred at 760mm from floor level • more than one height option or an adjustable system
Space below surface of computer station: • depth of 500mm minimum from front to back, with chamfered front edge • 700mm height (750mm will clear armrests on a wheelchair) • width of 800mm minimum
Controls: • manual controls 750-1000mm from floor level • base of interactive or touch screen units at a maximum height of 760mm
from floor level Other important information:
• large cells for touch screens preferred at 40 x 40mm • screens should be adjustable, or kept at an angle of between 55-77
degrees from the back of the monitor to the horizontal surface • interface operable with one hand • removable seat
For more detailed ergonomics of creating a work station consult: BS 8300:2001 Design of buildings and their approaches to meet the needs of disabled people – Code of practice, available from BSI at www.bsi-global.com/Building/Disability/index.xalter
Also helpful in creating a work station are recommendations in Access to ATMs by the Centre for Accessible Environments
User controls for on-site access If placing the virtual tour on-site, it is also important to consider a user interface method that is easy to use. There are many different kinds of interactive controls available. While some new technologies may seem like the best option at first, it is important to ensure they do not create frustration by introducing new barriers. There are a variety of computer mice, keyboards, and interactive screens to choose from. It is important to keep in mind that this is what connects the user to the virtual tour, and if the controls are difficult to manage, it may hinder the virtual tour experience. The RNIB has information on controls that have few visual barriers and can help with the decision on suitable options to fit the museum’s and user’s needs. User testing is vital to the success of the interactive control of the virtual tour and should be done before any one setup is decided upon. Once a suitable choice has been made, the instructions on how to use the controls need to placed in an obvious location next to the virtual tour and written in a clear manner.
19

What to do with your finished virtual tour The final step in the virtual tour creation process is to regularly improve and update its content. This is where a photo-based tour is convenient because it is often easier to update than other types of tours. Since a virtual tour is created for the visitors of the museum, it is important to have a feedback system that allows people to give their opinions to help the museum improve its virtual tour. It is important to ensure that the staff members of the museum are knowledgeable about the virtual tour and are able to pass this information onto visitors to enhance the visitors’ overall experience. This section discusses how to maintain a successful virtual tour.
Maintenance What is special about photo-based virtual tour maintenance? A virtual tour is unlike other forms of communication, such as print or pre-recorded audio and video. New information can be added and modified, unlike printed materials which must be completely replaced. This is one of the advantages of a virtual tour, but if ignored, can also be a significant disadvantage. With the additional flexibility of upkeep come additional user expectations of an up to date tour. Considering maintainability from the beginning It is important to consider creating a virtual tour with expandability in mind. Although this may mean a greater upfront cost, it could mean substantial savings later on if the museum wants to expand its virtual tour. In addition, the museum may want to decide how they plan to update the virtual tour when physical changes to the museum are made, for example, when additional items are added to an exhibit. It is important for changes in the physical museum to be updated in the virtual tour, to avoid confusion by the user and to ensure that the best experience is provided. Who will maintain the virtual tour? One challenge of web content, which includes the HTML based virtual tours discussed in this guidebook, is the fact that the latest copy of the virtual tour is presented to each user each time it is requested. Unlike printed material, which is printed all at once and is guaranteed to stay the same, web content can change. Changes to the environment make it possible for a virtual tour to end up in a ‘broken’ state, where the content does not display as expected. If staff members who work at the museum complete the web content creation of the virtual tour, then this is not as much of an issue, as they will be able to fix it. However, if the virtual tour is completed by a consultant, it is important to discuss their maintenance plan for updates and what they will do if something goes wrong. This could include paying them a yearly fee for a set number of hours, or simply paying them by the hour when work needs to be completed, depending on the consultant.
20
Evaluating virtual tour service Feedback is one of the most important and effective ways of finding out what can be improved in any service. For a virtual tour, there are several ways which information can be gathered from users: • providing a written questionnaire about the virtual tour • providing a comments section for feedback in the virtual tour • gathering feedback from visitors through discussion • ongoing consultation with disabled users All the feedback may be monitored weekly to make sure that the virtual tour is meeting the needs of the visitors. It is important to remember that the virtual tour was created for the users and that their feedback is essential in maintaining a successful tour.
Implementing staff guidance One of the most important features of having a successful and inclusive virtual tour is to make visitors aware of it. The first step in this process is to provide guidance and training to museum staff about the value of the virtual tour and the importance of informing all visitors of its content and educational significance. The virtual tour is only valuable to users when they are aware it is available. Therefore, it is essential to ensure that the museum staff members inform all visitors of the virtual tour features and availability.
21

Appendix: Additional resources The British Dyslexia Association (BDA): www.bdadyslexia.org.ukThe BDA promotes the welfare of dyslexic people. They aim to influence government and other institutions to promote a dyslexia friendly society. They strive to represent the needs of dyslexic people in higher education and work. Along with research, they provide training and consultancy services regarding policy and strategy. British Standards Institution (BSI): www.bsi-global.comBSI is the body which sets the national standards for the United Kingdom. The most relevant to virtual tour creation are BS 8300:2001, Design of buildings and their approaches to meet the needs of disabled people – Code of practice and PAS 78:2006, Guide to good practice in commissioning accessible websites. The standards are available for purchase from their website as well as via telephone at 020 8996 9001. Centre for Accessible Environments (CAE): www.cae.org.uk CAE is a charitable organisation which assists in the use of inclusion by design. CAE has assisted museums and other organisations in creating access solutions to their facilities. They have published many guides which may be helpful in the consideration of removing barriers:
• Access to ATMs: UK design guidelines • Access Audit Handbook • Designing for Accessibility
Disability Rights Commission (DRC): www.drc-gb.org The DRC’s goal is to create ‘a society where all disabled people can participate fully as equal citizens.’ The DRC’s mission is to change the public’s attitude and awareness of disabled people. Museums, Libraries and Archives Council (MLA): www.mla.gov.ukThe MLA is a government funded organisation which assists museums, libraries and archives in unlocking all of the information which they provide. The MLA has published several guides on accessibility, the most influential being the Disability Portfolio. The Disability Portfolio is available free on their website, in both Microsoft Word and Adobe PDF formats, by choosing ‘Information’ followed by ‘Publications’. Royal Association for Deaf people (RAD): www.royaldeaf.org.ukThe RAD promotes the welfare and interests of deaf people whose first or preferred language is BSL. They strive to create inclusive environments for the entire deaf community. The RAD has training courses to help raise awareness by teaching BSL and lip-reading.
22
Royal National Institute of the Blind (RNIB): www.rnib.org.ukThe RNIB is a national UK charity which assists blind and partially sighted people. RNIB often works with museums and can provide useful information, such as ideas for removing barriers and providing information on other museums which have tried certain ideas. The RNIB has published several guides on removing visual barriers. The two useful guides for creating virtual tours are:
• See It Right • Talking Images Guide
Royal National Institute for Deaf People (RNID): www.rnid.org.ukThe RNID represents the nine million deaf people and people with hearing impairments in the UK. The RNID supports and conducts a lot of hearing research. They are an excellent resource for any inquiries regarding accessibility for deaf people or people with hearing impairments. They complete training programs, including one designed towards the study of BSL. Usability Exchange: www.usabilityexchange.com The Usability Exchange can be contacted to find out if your website is accessible. They employ disabled people to test the accessibility of websites. Through remote viewing software it is possible to observe the testing as it takes place. The Virtual Experience Company: www.virtualexperience.co.uk The Virtual Experience Company assists in the creation of virtual tours for museums. They focus on real-time virtual reality tours, where a user can experience the museum in virtual reality. The tours also allow users to explore selected objects in greater detail, including options such as bringing up additional text information, high resolution photographs and detailed 3-dimensional models. Vocaleyes: www.vocaleyes.co.ukVocaleyes is a national charity which works to enhance the experiences of blind and partially sighted people at the theatre and museums. They provide audio descriptions, with focus on theatre performances but they also complete work for museums, galleries and heritage sites. They are an excellent resource for professional audio descriptions, from development to recording stage.
Other access options
Although this guide provides several recommendations for solutions to create a virtual tour, sometimes it is not the correct access solution. When physical changes are reasonable, it would be more advantageous to remove the barriers, as the physical visit is often far more powerful than a virtual representation. This is a recommendation to consider, before committing resources to a virtual tour. All reasonable options should be explored by consulting several of the references included above and by performing an access audit. Specifically, the Access on a Shoestring and Accessible Environments guides found in the MLA’s Disability Portfolio provide excellent information on affordable options that should be explored in addition to, or instead of a virtual tour.
23


