
Makeup artist freelance bridal makeup artist- bridal wear - makeup training institute
pag. 1
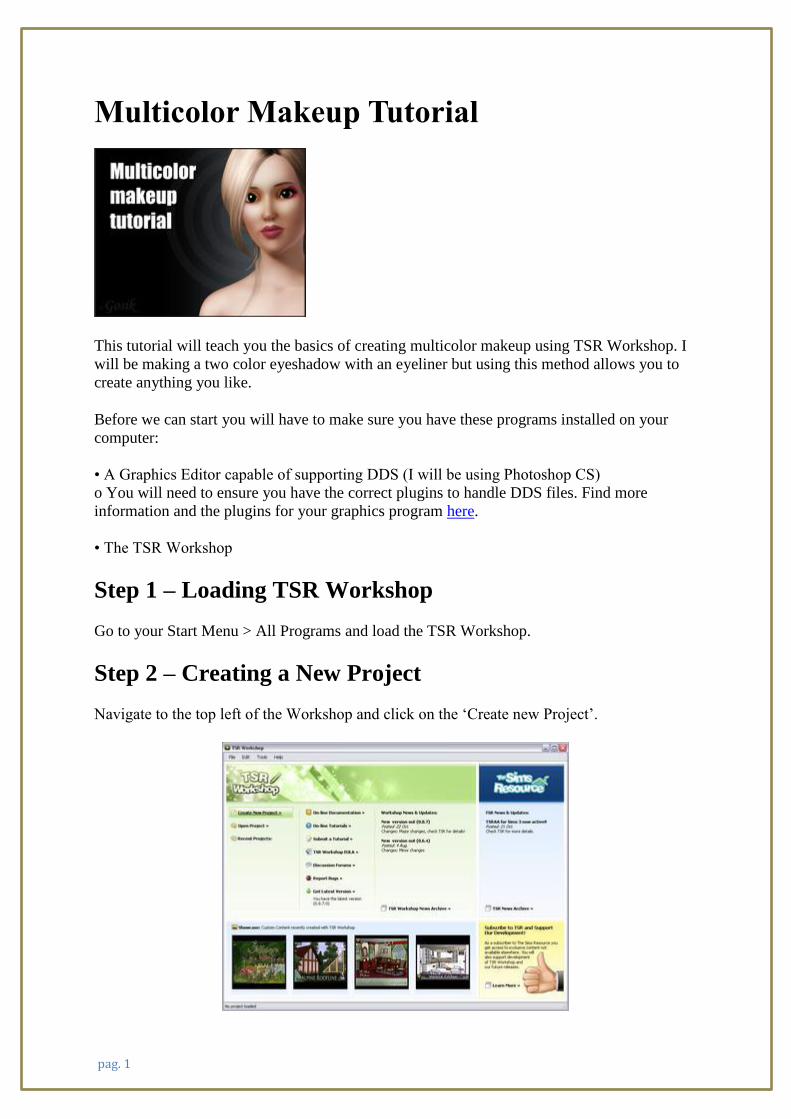
Multicolor Makeup Tutorial
This tutorial will teach you the basics of creating multicolor makeup using TSR Workshop. I
will be making a two color eyeshadow with an eyeliner but using this method allows you to
create anything you like.
Before we can start you will have to make sure you have these programs installed on your
computer:
• A Graphics Editor capable of supporting DDS (I will be using Photoshop CS)
o You will need to ensure you have the correct plugins to handle DDS files. Find more
information and the plugins for your graphics program here.
• The TSR Workshop
Step 1 – Loading TSR Workshop
Go to your Start Menu > All Programs and load the TSR Workshop.
Step 2 – Creating a New Project
Navigate to the top left of the Workshop and click on the ‘Create new Project’.

pag. 2
In the new window that will pop out in front of you select Makeup/Facial overlay and click
the button ‘Next’ in the right bottom corner.
As I said before I’m going to make an eyeshadow so I’ll choose afMakeupEyeshadowSmoky
and click ‘Next’
In the next screen you will be asked to give your project a name and some additional details.
Although it is very important to give your projects a unique identifier and fill in all the other
boxes, we’re actually only going to use this project to get a file we will need – we won’t be
exporting anything for the game from here. So for now, just click ‘Next’.

pag. 3
Finally your new project will load and you will be able to see the eyeshadow on the model in
the left window and project details in the right one.
When you click on the ‘Texture’ tab you will see that under ‘Textures’ there are ‘Face
Overlay’ and ‘Face Specular’. The important one for us is ‘Face Overlay’, which determine
where the makeup is placed on the face.

pag. 4
Probably by now you also noticed that at the bottom, under colors, there is only one color that
can be changed. That means you won’t be able to create a multicolor makeup starting from
the eyeshadow you have opened.
However, this is still a very important step – as I mentioned earlier we’re just needed to find
an image file – the face overlay is the image file we needed here, so now we’re going to
export it.
Step 3 – Exporting Face Overlay
In order to export Face Overlay you have to click on it, then click on the ‘Edit’ button that
will show up in the top corner. When you do that a new window will pop out. You have to
click Export and than save it.
I am going to save this file as EYESHADOW on my desktop but you can give it different
name and save it in any place you like. Some people like to create a folder called “Projects” or
something similar, and create a new folder inside that for each thing they make, to keep the
files for that project separate, but this is all entirely up to you.

pag. 5
At this point I should probably tell you that although this tutorial is in english, sometimes on
my screenshots some Polish words may appear (just like in the picture above).
Right now we have everything that we need from this eyeshadow so it’s time to move on. But
before we start the actual process of creating the multicolor eyeshadow with eyeliner we will
also need the face overlay for an eyeliner.
Step 4 – Getting an eyeliner
In order to get it we will repeat Step 2 and Step 3. The only difference is that instead of
choosing an eyeshadow we have to choose an eyeliner.
Step 5 – Starting the actual project
Now when we have both files exported, saved in a safe place and ready to use we can start
making the multicolor eyeshadow with eyeliner that we wanted to make.
First of all we have to create new project. Just like before you have to select Makeup/Facial

pag. 6
overlay. Next instead of choosing eyeshadow or eyeliner we will select costume makeup. It
may seem strange to be using costume makeup for this but there is a very good reason to do
so – it supports having some different colors!
This time you will have to fill in all the project details. Just remember that the project unique
identifier must be really unique. To help to make sure it’s unique, and different from your
other creations and those by other creators, you can include your creator name or creator
initials and a date (eg. Oct09, or as I’ve done below, 101009), as well as a short name for the
creation.
Now we finally have the project that we will be working with.
When you open the ‘Texture’ tab on the right you will see that this time there are not only
‘Face Overlay’ and ‘Face Specular’ but also ‘Mask’ (which is responsible for different colors
on different parts).
Step 6 – Preparing new face overlay

pag. 7
The first thing we are going to do is making a new face overlay. To do that we need the
EYESHADOW file that we exported earlier. So now it is the time to open it and see how it
looks like.
To see the actual eyeshadow you would have to select ‘Channel’ tab in the left bottom
window and then click on the Alpha1.
Now by using a brush (B) I will modify it. Since it would be very hard to make both eyes
exactly the same I will only make one for now. Just zoom in, so you can see better and get to
work.

pag. 8
When you finish the edges of the eyeshadow will be very sharp. To make it smoother we will
select the blur tool and use it on the edges (in Photoshop CS1 to CS3 you can press the R key
to get this tool, but in CS4 it has no shortcut – look for a picture of a water drop).
After you finish it should look this way:
Now when we have finished we can make the second eye exactly the same. In order to do that
you have to zoom out and with the rectangular marquee tool (M) select half of the picture.

pag. 9
Press Ctrl + c to copy what you have just selected and then Ctrl + v to paste it into the picture.
You will not see any difference right now, but don’t worry.
You have to right click on the selected area, a small context menu will open. Now select the
free transform option (sixth one from the bottom).
The selection lines will still be there but they will change slightly and a small point in the
middle will appear.

pag. 10
Now you have to right click on the selected area again and another context menu will open.
You have to select the flip horizontal option (second one from the bottom).
The final effect should look like that:
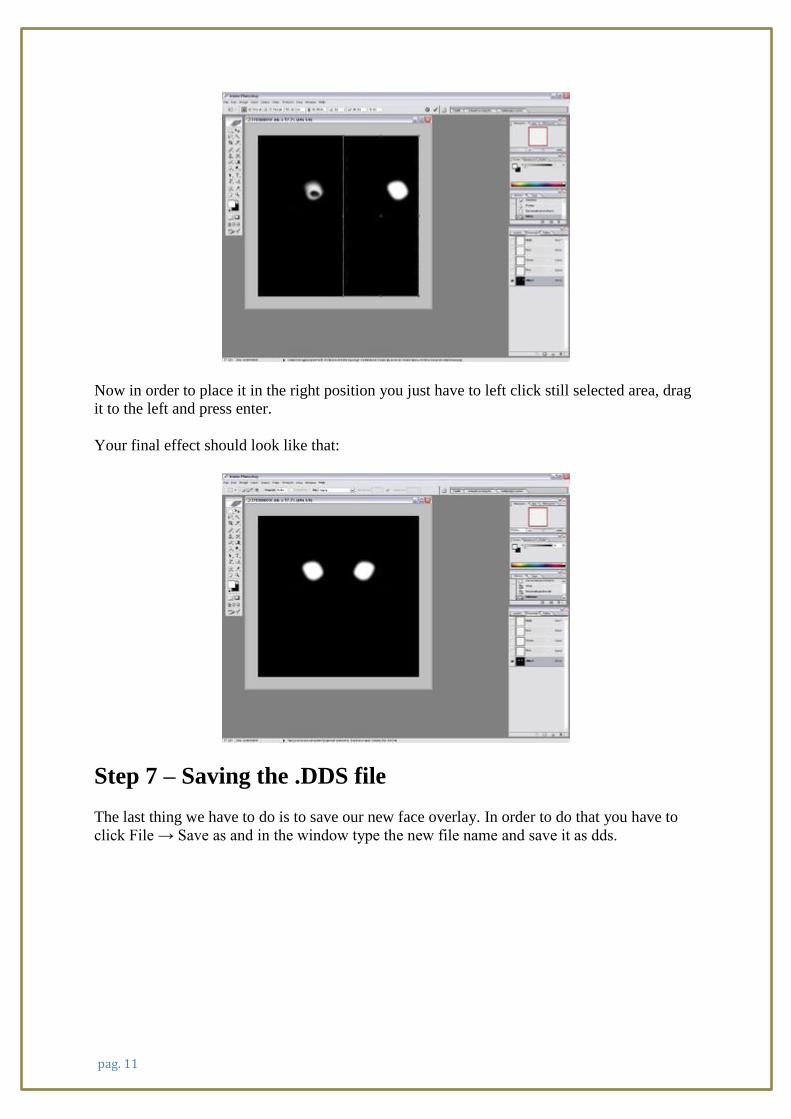
pag. 11
Now in order to place it in the right position you just have to left click still selected area, drag
it to the left and press enter.
Your final effect should look like that:
Step 7 – Saving the .DDS file
The last thing we have to do is to save our new face overlay. In order to do that you have to
click File → Save as and in the window type the new file name and save it as dds.

pag. 12
When another window pops out you have to make sure that DXT5 option is selected and click
‘Save’.
Step 8 – Importing new Face Overlay to TSR Workshop
Now we can get back to the Workshop and import our just created face overlay. To do that
click on ‘Face Overlay’ and then on ‘Edit’ button. In the window that will pop out select
‘Import’ and in the next window choose the right file and than ‘Open’ button.

pag. 13
In the Image editor you will see your imported file, just click ‘Done’.

pag. 14
Right now you won’t see the eyeshadow and that’s because we still have the old Mask. To fix
it we have to create a new one.
Step 9 – Exporting Mask
First we have to export the mask. In order to do that we will repeat step 3.
(Click on the Mask, then click on the ‘Edit’ button that will show up in the top corner. When
you do that a new window will pop out. You have to click Export and than save it.)
Step 10 – Preparing new Mask
Open the mask in Photoshop (or any other program that you are using) and switch to
‘Channels’ in the low right window.
There you will see three channels Red, Green, Blue and in each of them a different parts will
be painted white.

pag. 15
First thing we will do is making Green and Blue channels completely black. Select Brush tool
(B), click on the Green channel to make only this one visible and paint the white parts black.
When you finish this channel do the same thing with Blue one.
Your final result should look like that:
Now click on the Red channel and with Brush paint the whole area white. When you finish
your mask should look like that:

pag. 16
Step 11 – Saving the Mask
For now we will save the mask and import it to the Workshop.
Click on the File → Save as and in the window type the new file name and save it as dds.
When another window pops out you have to make sure that DXT1 with no alpha option is
selected and click ‘Save’.
Step 12 – Importing Mask to the Workshop
To import new mask we will repeat step 8.
(Click on ‘Mask’ and then on ‘Edit’ button. In the window that will pop out select ‘Import’
and in the next window choose the right file and than ‘Open’ button.)
Now you should see your new eyeshadow:
pag. 17
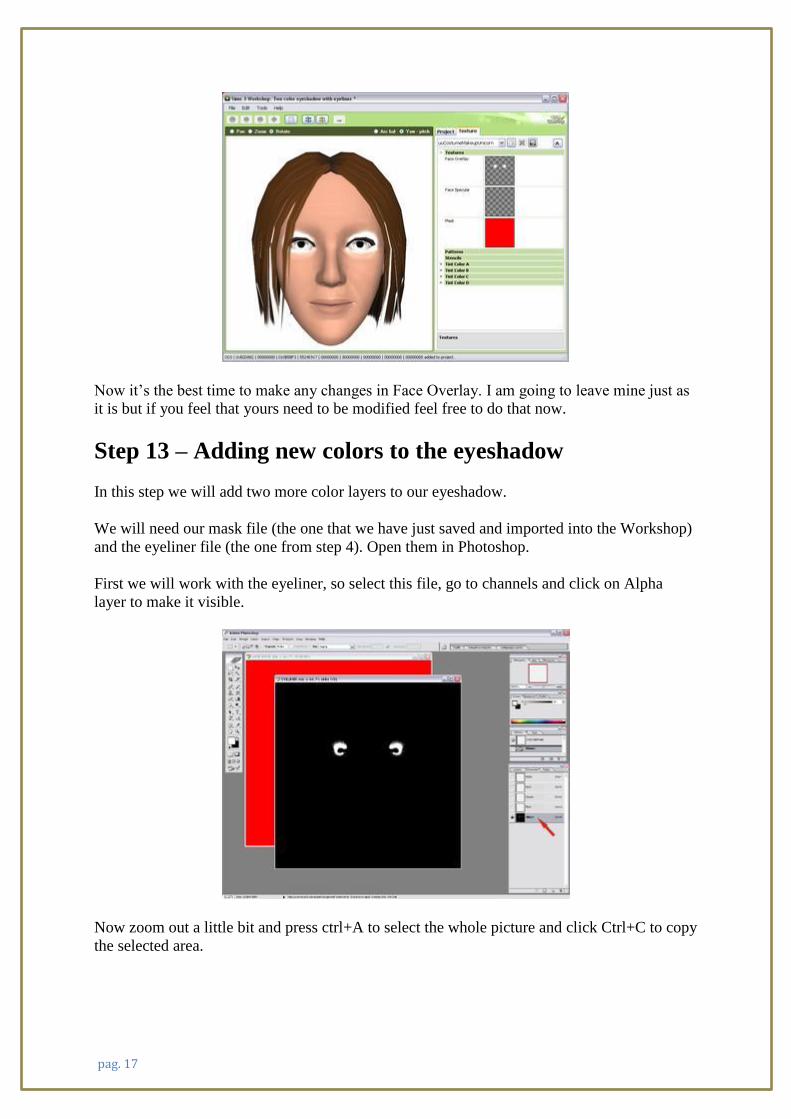
Now it’s the best time to make any changes in Face Overlay. I am going to leave mine just as
it is but if you feel that yours need to be modified feel free to do that now.
Step 13 – Adding new colors to the eyeshadow
In this step we will add two more color layers to our eyeshadow.
We will need our mask file (the one that we have just saved and imported into the Workshop)
and the eyeliner file (the one from step 4). Open them in Photoshop.
First we will work with the eyeliner, so select this file, go to channels and click on Alpha
layer to make it visible.
Now zoom out a little bit and press ctrl+A to select the whole picture and click Ctrl+C to copy
the selected area.
pag. 18
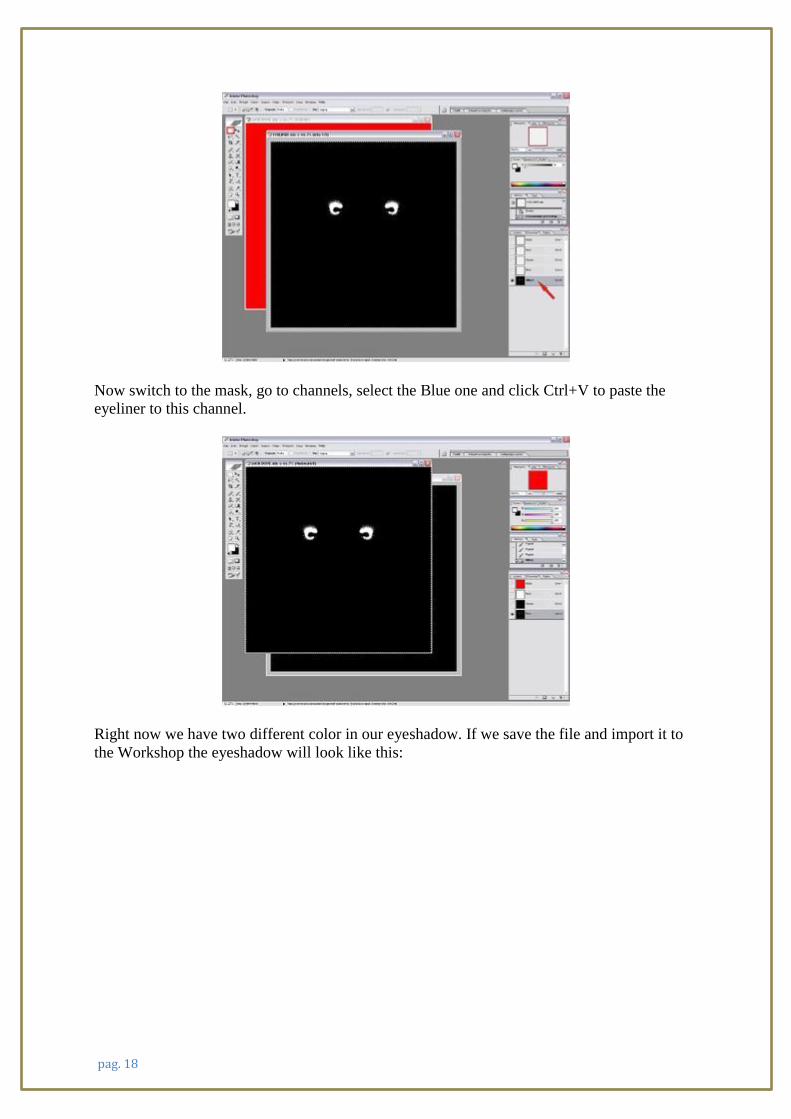
Now switch to the mask, go to channels, select the Blue one and click Ctrl+V to paste the
eyeliner to this channel.
Right now we have two different color in our eyeshadow. If we save the file and import it to
the Workshop the eyeshadow will look like this:
pag. 19
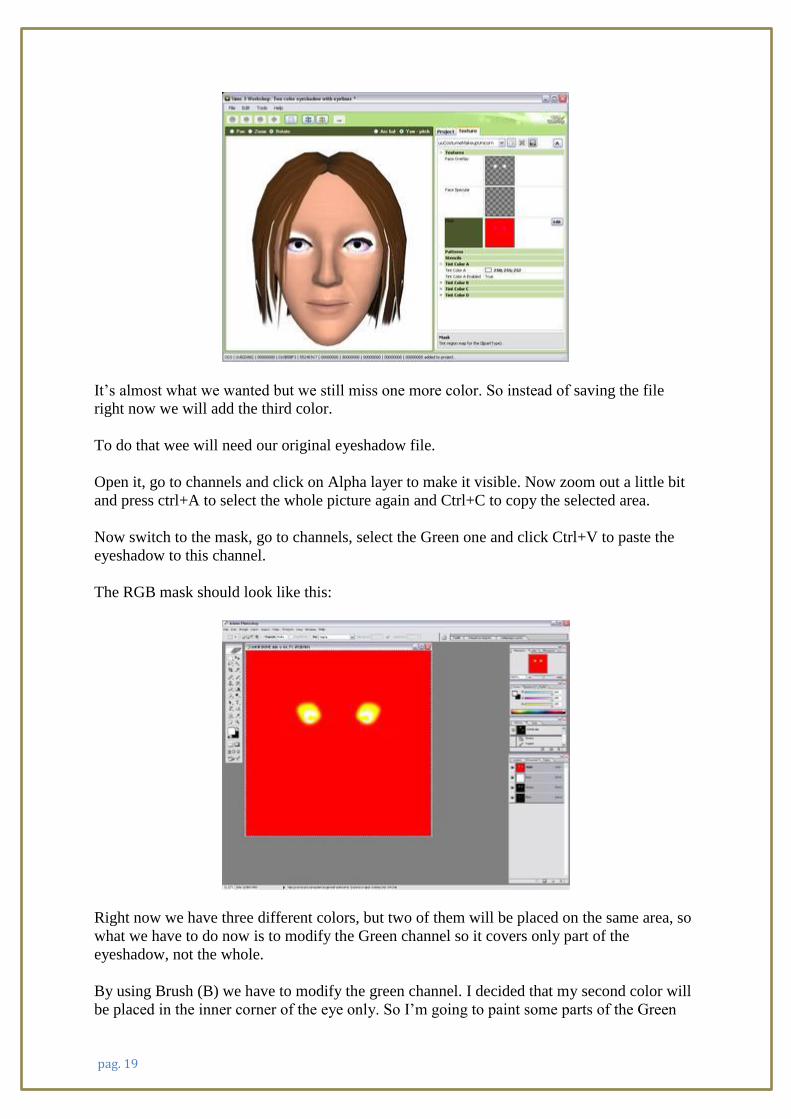
It’s almost what we wanted but we still miss one more color. So instead of saving the file
right now we will add the third color.
To do that wee will need our original eyeshadow file.
Open it, go to channels and click on Alpha layer to make it visible. Now zoom out a little bit
and press ctrl+A to select the whole picture again and Ctrl+C to copy the selected area.
Now switch to the mask, go to channels, select the Green one and click Ctrl+V to paste the
eyeshadow to this channel.
The RGB mask should look like this:
Right now we have three different colors, but two of them will be placed on the same area, so
what we have to do now is to modify the Green channel so it covers only part of the
eyeshadow, not the whole.
By using Brush (B) we have to modify the green channel. I decided that my second color will
be placed in the inner corner of the eye only. So I’m going to paint some parts of the Green

pag. 20
channel black.
Just like when we were preparing the face overlay, I will make one eye only.
As you can see the edge is very sharp and to make it softer I’m going to use the blur tool
again.
Now after finishing this eye, we can make the other one. We won’t make it from the
beginning, as it won’t be possible to make identical. Instead we will repeat part of step 6.
(Zoom out the picture and with rectangular marquee tool (M) select half of the picture.
Click Ctrl + c to copy what you have just selected and then Ctrl + v to paste it into the picture.
You have to right click on the selected area, a small context menu will open. Now select free
transform option (sixth one from the bottom).
Now you have to right click on the selected area again and another context menu will open.
You have to select flip horizontal option (second one from the bottom).
Now in order to place it in the right position you just have to left click still selected area, drag

pag. 21
it to the left and press enter.)
The final effect should look like that:
Now we finally have what we wanted – three different color layers! And it’s the high time to
check how it looks.
Step 14 – Saving the Mask and importing it to the TSR
Workshop
By now you should be able to do that by yourself (just repeat step 11 and 12).
Step 15 – Final touches
We are almost finished! There are only two things left to do. First we have to modify the
colors in the eyeshadow.
If you chose the same face mask as the base for your project, you will see only two colors
right now. That’s because Color A and Color B are both white.

pag. 22
So just go ahead and change them any way you like. I decided to go with fuchsia and gold for
the eyeshadow and classic smoky black for the eyeliner.
The second thing we have to do is to make sure that what we have just made will show up as
an eyeshadow in the game. Remember, we cloned this from a costume makeup, but we want
things to make sense for the downloaders, so we’ll recategorise it as an eyeshadow.
Go to ‘Project’ tab and unfold ‘Clothing Type’. Right now ‘Makeup’ is selected, so just select
‘Eyeshadow’ instead.

pag. 23
Step 16 – Exporting the eyeshadow
Now you jest have to export your eyeshadow as a .Sims3pack.
Step 17 – Checking the eyeshadow in the game
Install the .sims3pack as you usually would, and check the eyeshadow in the game!
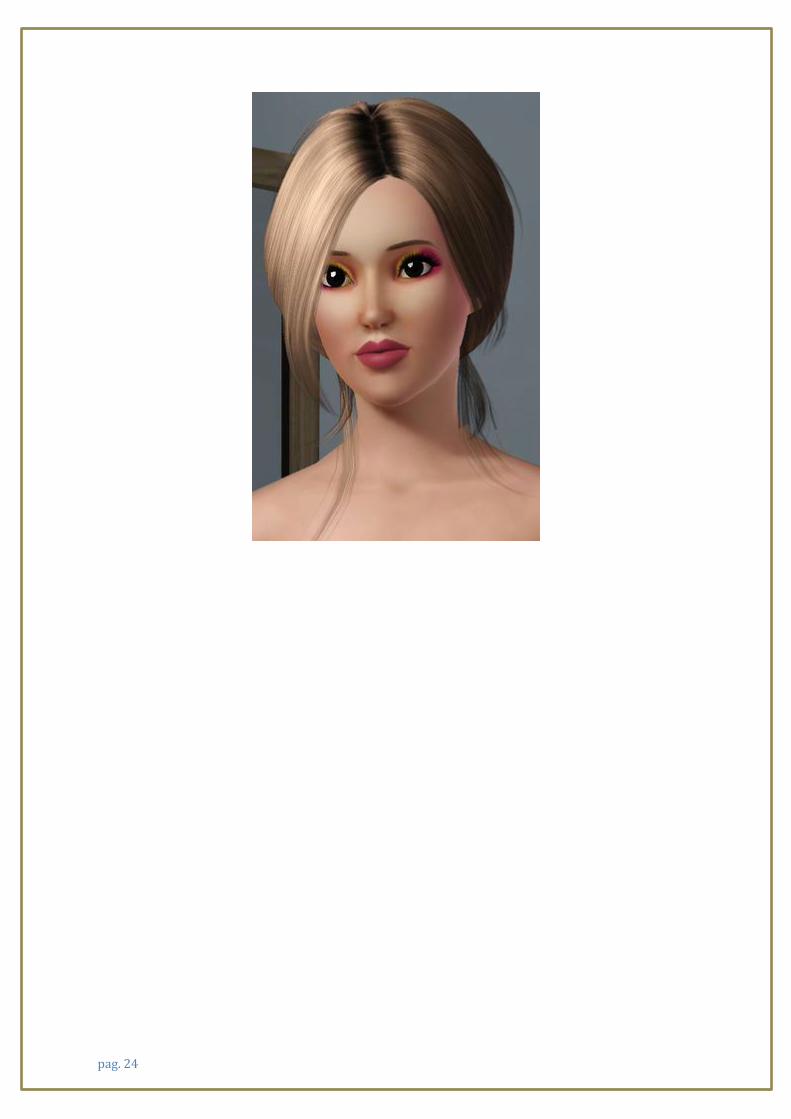
Hopefully everything is just the way you wanted. Now you just have to create a nice preview
picture and upload the eyeshadow to TSR.
See the image below to see how mine turned out in game.