MS. HESS – FLORAL DESIGN AND · PDF fileDVD – Flower Lover’s series –...
67
MS. HESS – FLORAL DESIGN AND MANAGEMENT
Transcript of MS. HESS – FLORAL DESIGN AND · PDF fileDVD – Flower Lover’s series –...
MS. HESS –
FLORAL
DESIGN
AND
MANAGEMENT

August
Unit 0 – Introduction
Schedule
Syllabus
Units of Study
Lesson 1 - Introduction
Power point
Worksheet/notes
Unit 1 – Exploring Careers
Textbook
Lesson 1 – Types of Floral shops
Power point
Worksheet/notes
Lesson 2 – Jobs in Retail Operation
Power point
Worksheet/notes
Lesson 3 – Employability Portfolio
Power point
Letter of introduction
Letter of application
Completed job application form
Resume
Letter of recommendation
Work samples
Test
Unit 22 – Pricing Strategies
Lesson 1 – Cost and selling Price
Standard Ratio Pricing form
Self Evaluation
Test
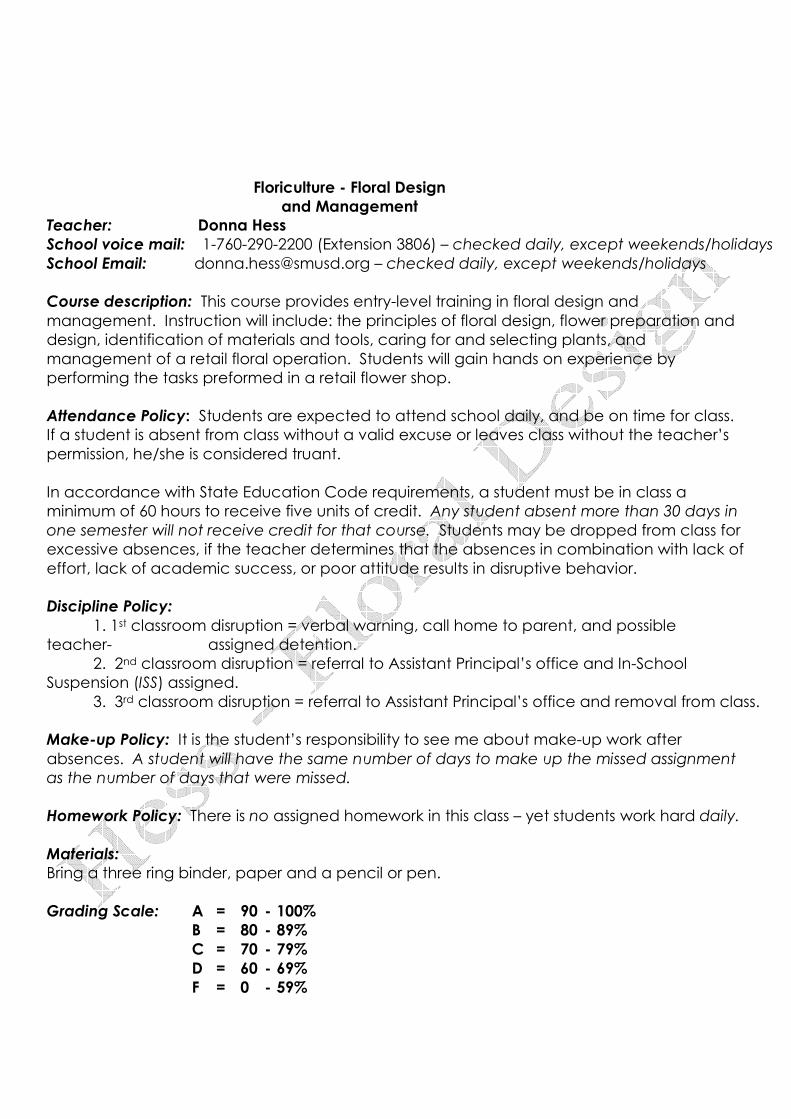
Floriculture - Floral Design
and Management
Teacher: Donna Hess
School voice mail: 1-760-290-2200 (Extension 3806) – checked daily, except weekends/holidays
School Email: [email protected] – checked daily, except weekends/holidays
Course description: This course provides entry-level training in floral design and
management. Instruction will include: the principles of floral design, flower preparation and
design, identification of materials and tools, caring for and selecting plants, and
management of a retail floral operation. Students will gain hands on experience by
performing the tasks preformed in a retail flower shop.
Attendance Policy: Students are expected to attend school daily, and be on time for class.
If a student is absent from class without a valid excuse or leaves class without the teacher’s
permission, he/she is considered truant.
In accordance with State Education Code requirements, a student must be in class a
minimum of 60 hours to receive five units of credit. Any student absent more than 30 days in
one semester will not receive credit for that course. Students may be dropped from class for
excessive absences, if the teacher determines that the absences in combination with lack of
effort, lack of academic success, or poor attitude results in disruptive behavior.
Discipline Policy:
1. 1st classroom disruption = verbal warning, call home to parent, and possible
teacher- assigned detention.
2. 2nd classroom disruption = referral to Assistant Principal’s office and In-School
Suspension (ISS) assigned.
3. 3rd classroom disruption = referral to Assistant Principal’s office and removal from class.
Make-up Policy: It is the student’s responsibility to see me about make-up work after
absences. A student will have the same number of days to make up the missed assignment
as the number of days that were missed.
Homework Policy: There is no assigned homework in this class – yet students work hard daily.
Materials:
Bring a three ring binder, paper and a pencil or pen.
Grading Scale: A = 90 - 100%
B = 80 - 89%
C = 70 - 79%
D = 60 - 69%
F = 0 - 59%
Parent (Guardian) Signature: I have read and understand the discipline policy outlined
above:
X______________________________________ Date: _____________

UNIT 0 - INTRODUCTION

Unit 0 - Lesson 1 - Introduction to Floral Design
Objectives:
1. Introduce students to Floral Design.
2. Define florist
3. Identify occasions for which floral products are purchased
4. Identify products and services florists provide
5. Identify florist in the community
1. Write in your own words what a florist is and does.
2. What are some of the major occasions to buy flowers?
3. What are some of the products that are sold or services that are rendered by a florist?

UNIT 1 – EXPLORING CAREERS
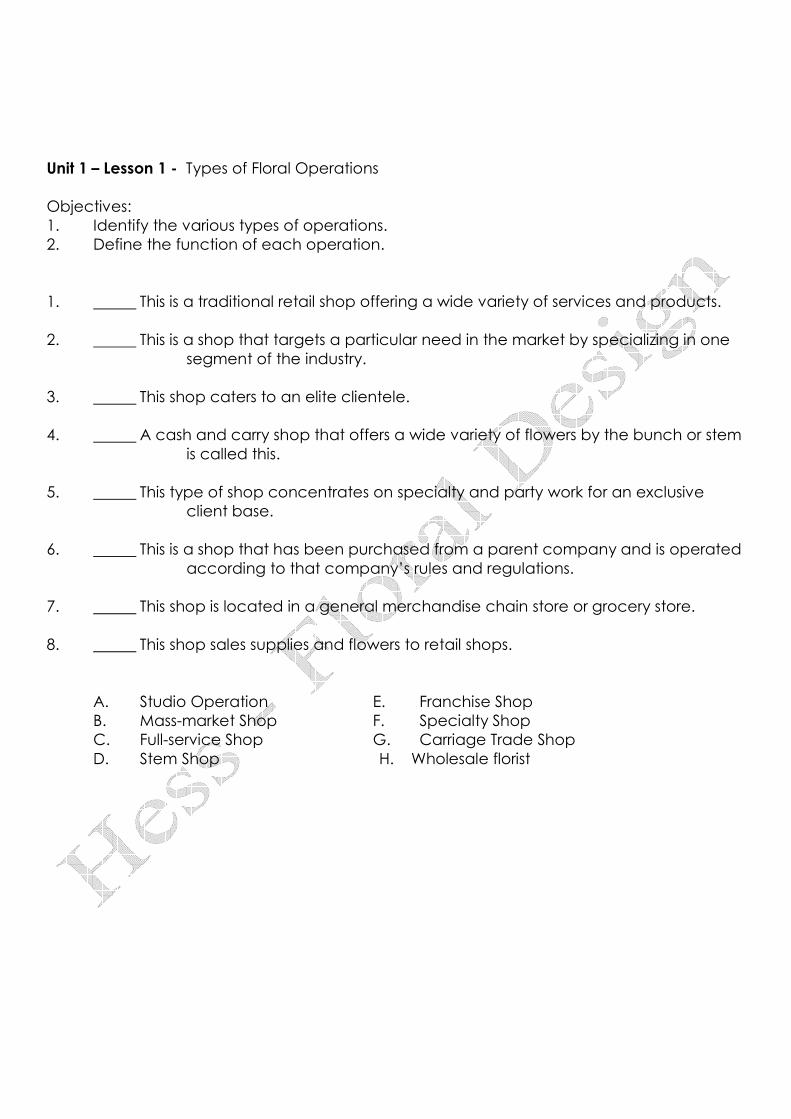
Unit 1 – Lesson 1 - Types of Floral Operations
Objectives:
1. Identify the various types of operations.
2. Define the function of each operation.
1. This is a traditional retail shop offering a wide variety of services and products.
2. This is a shop that targets a particular need in the market by specializing in one
segment of the industry.
3. This shop caters to an elite clientele.
4. A cash and carry shop that offers a wide variety of flowers by the bunch or stem
is called this.
5. This type of shop concentrates on specialty and party work for an exclusive
client base.
6. This is a shop that has been purchased from a parent company and is operated
according to that company’s rules and regulations.
7. This shop is located in a general merchandise chain store or grocery store.
8. This shop sales supplies and flowers to retail shops.
A. Studio Operation E. Franchise Shop
B. Mass-market Shop F. Specialty Shop
C. Full-service Shop G. Carriage Trade Shop
D. Stem Shop H. Wholesale florist
Unit 1- Lesson 2 – Job Opportunities in the Retail Operation
Objectives:
1. Identify the jobs available in the retail flower business.
2. Describe the duties of the various jobs in the retail florist business.
3. Describe the training requirements for a job in the retail florist operation.
4. Identify institutions that promote training in floral skills.
5. Recognize the training necessary for employment in each type of operation.
Describe the responsibilities of each of the follow:
Flower Shop Owner/ Manager Designer
Designer’s Assistant
Salesperson
Delivery Person
UNIT 22 – PRICING STRATEGIES

STANDARD RATIO MARKUP PRICING
ITEM WHOLESALE
COST
MARK
UP
RATIO
TOTAL COST
STANDARD RATIO MARKUP PRICING
ITEM WHOLESALE
COST
MARK
UP
RATIO
TOTAL COST
STANDARD RATIO MARKUP PRICING
ITEM WHOLESALE
COST
MARK
UP
RATIO
STANDARD RATIO MARKUP PRICING
ITEM WHOLESALE
COST
MARK
UP
RATIO
TOTAL COST
TOTAL COST
September
Unit 2 – History of Floral design
Textbook
Lesson 1 – History of Design
Power point
Worksheet/notes
Self Evaluation
Test
Unit 3 - Principles of Design
Textbook
Lesson 1 –Floral Design Principals
Power points -2
Worksheet/notes
DVD– Floral Design Theory and Mechanics – Chapter 4
Lesson 2 – Elements of Floral Design
Power points - 2
Worksheet/notes
DVD – Floral Design Theory and mechanics – chapter 9 -
Elements
DVD – Floral Design Theory and Mechanics – chapter 11-
Color Theory
Video clip – An Introduction to Color Theory
Video clip – A study of monochromatic color
Video clip – The Study of analogous color schemes
Video clip – The Study of Complementary color
Video clip – The Study of Triadic color schemes
Video clip – The Study of Polychromatic color
Video clip – A Touch of Texture
Lesson 3 – General floral Guide lines
Power point
Self Evaluation
Test
Unit 4 – Selection of Cut Flowers and Greens
Textbook
Lesson 1 – Flower Identification
Power point
Worksheet/notes
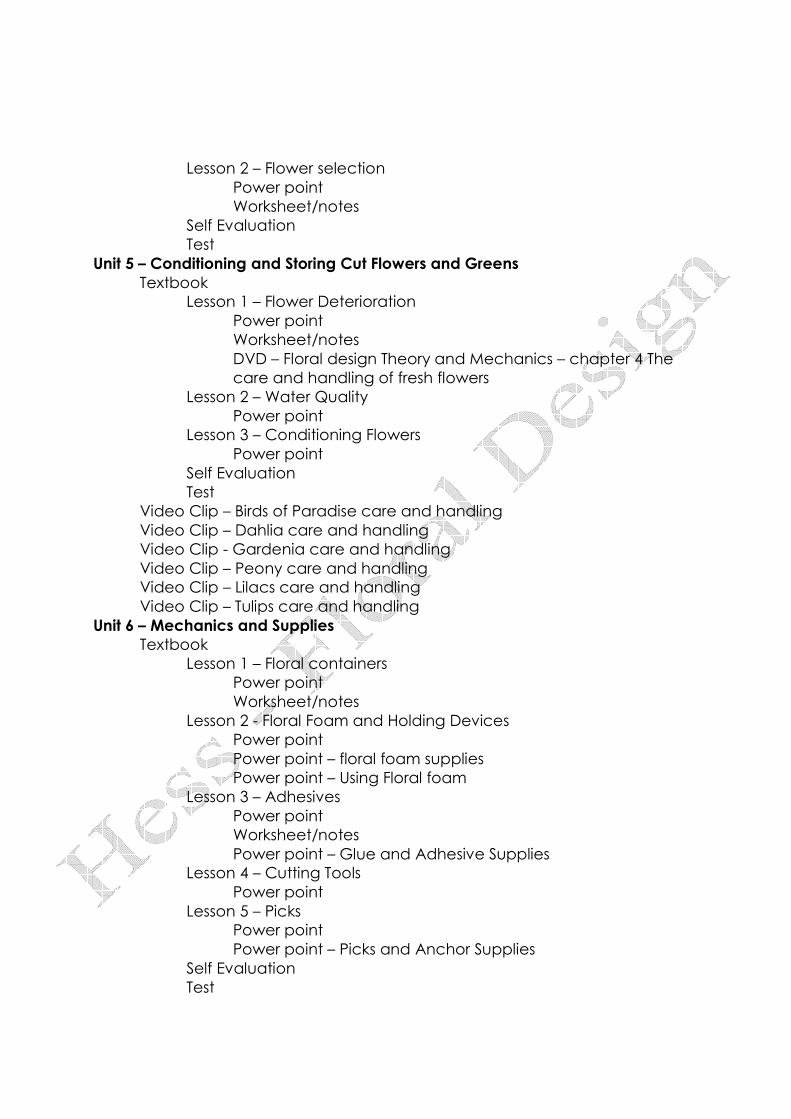
Lesson 2 – Flower selection
Power point
Worksheet/notes
Self Evaluation
Test
Unit 5 – Conditioning and Storing Cut Flowers and Greens
Textbook
Lesson 1 – Flower Deterioration
Power point
Worksheet/notes
DVD – Floral design Theory and Mechanics – chapter 4 The
care and handling of fresh flowers
Lesson 2 – Water Quality
Power point
Lesson 3 – Conditioning Flowers
Power point
Self Evaluation
Test
Video Clip – Birds of Paradise care and handling
Video Clip – Dahlia care and handling
Video Clip - Gardenia care and handling
Video Clip – Peony care and handling
Video Clip – Lilacs care and handling
Video Clip – Tulips care and handling
Unit 6 – Mechanics and Supplies
Textbook
Lesson 1 – Floral containers
Power point
Worksheet/notes
Lesson 2 - Floral Foam and Holding Devices
Power point
Power point – floral foam supplies
Power point – Using Floral foam
Lesson 3 – Adhesives
Power point
Worksheet/notes
Power point – Glue and Adhesive Supplies
Lesson 4 – Cutting Tools
Power point
Lesson 5 – Picks
Power point
Power point – Picks and Anchor Supplies
Self Evaluation
Test
DVD – Floral Design Theory and Mechanics – Chapter 5 Tools and supplies
for floral design
Power point –Preservative Supplies
Power point – Wedding Supplies
Unit 7 – Selecting Wire and Wiring Flowers
Textbook
Lesson 1 – Floral Wire
Power Point
Power point – Tapes and wires
Worksheet/notes
Lesson 2 – Methods of Wiring
Power point
DVD – Floral Design Theory and Mechanics – ch 6 Wiring
fresh flowers
Lesson 3 – Floral Taping
Power point
Self Evaluation
Test
Unit 8 – Selecting ribbon and Tying Bows
Textbook
Lesson 1 – Selecting Ribbons
Power point
Worksheet/notes
Lesson 2 – Types of Bows
Power point
Lesson 3 – Tying a Bow
Power point
DVD – Floral design Theory and Mechanics – ch 7 Ribbons
and bow typing
Video Clip – Bow Tying Basics
Video Clip – The Tailored Bow
Self Evaluation
Test
Power Point - Candle Technique
DVD - Flower of the Month – July and Gerbera Daisies
Introduction
Care and Handling
Mini Delights – try this
A Simple Vase – ok to show don’t do arrangement
Gerbera Waves – Fun Big Leaves, do as a class
Citrus Zest – Try This
A Hand Tied Bouquet - ok
Gerbera Jewelry – weird don’t try this
DVD – Flower Lover’s series – Arranging Flowers in a vase
Introduction
Care and Handling
French Weave Technique
German Armature Technique
Tape Grid Technique
UNIT 2 – HISTORY OF FLORAL DESIGN
Unit 2 - Lesson 1 – History of floral design
Objectives:
1. Identify the 2 concepts of floral design which evolved into our modern design.
2. Trace the programs of floral design through the major historical periods.
1.
• Evolved from the Egyptian & Middle Eastern cultures
• Further developed by the Europeans
• Characterized by large, massive designs
2. Oriental style
• Started in
• Used by the
• Characterized as a line design with few flowers used
3. Egyptian period
• Flowers are arranged in rows in shallow containers, used bright colors
• Arrangements of neatly piled fruits & vegetables would be placed on feast
tables
• Water lilies & lotus blossoms were placed in elaborate vases, bowls & jars
4. 600 - 146 B.C.
• Flowers were scattered on tables & streets during banquets and festivals
• Used garlands and wreaths, these were worn at special events and
presented as awards
• , horn-of-plenty, was introduced. It was displayed standing
up, rather than on its side.
5. Romans
• Elaborate use of plant material
• Scattered roses on tables and floors at banquets
• Altar gifts of blossom filled scarves were part of religious ceremonies
6. Byzantine period A.D. 320 - 600
• Arrangements of
• Formal conical designs with clusters of blossoms at regular intervals

7. A.D. 1400 - 1600
• Large, tall, pyramidal and symmetrically balanced designs
• Documented by the artists of the time
• Loose, uncrowded and airy designs
• Used intense colors to contrast white walls
• Arrangements were the height of the container
8. Baroque period A.D. 1600 - 1775
• Began as oval shaped designs
• Arrangements incorporated a
• The S-curve and arrangements were developed
9. A.D. 1600 - 1750
• Beautifully captured by painters
• Better and more compact than the Baroque style
• Massed, shaped designs with rich colors and an array of flowers
10. Georgian period A.D. 1714 - 1760
• Used a
• Symmetrical, shape
• - a hand-held bouquet that became stylish. These were
placed in bowls and became the first centerpiece as we know them today
• Greatly influenced the decorative acts in Colonial America, fan-shaped and
triangular arrangements
11. A.D. 1820 - 1914
• Large numbers of flowers were crammed into a compact container
• designs with no focal point
• Unplanned designs with many different colors and flower types
• Attempted to establish rules of floral design
12. Line - mass designs
• Combination of Occidental and Oriental styles of designs
• Present style of design in the U.S.
UNIT 3 – PRINCIPLES OF DESIGN
Unit 3 - Lesson 1- Floral Design Principals
Objectives:
1. Recognize the principles of balance, proportion and scale, focal point, emphasis,
rhythm, harmony and unity in creating a design.
2. Utilize techniques of flower placement to achieve each design principle.
1. List the six principles of design.
A.
B.
C.
D.
E.
F.
2. What are the four types of balance that were discussed in class? Briefly explain each.
A.
B.
C.
D.
3. Give the definitions of each of the following terms.
A. Proportion
B. Scale
4. Select the correct word that matches the definition.
One material dominates over the others and one area has the strongest eye appeal.
A. Harmony
B. Rhythm
C. Emphasis
D. Focal Point
Movement of the eye through a design toward or away from the center of interest.
A. Focal Point
B. Rhythm
C. Unity
D. Emphasis
5. What are the techniques used in creating rhythm in an arrangement?
A.
B.
C.
D.
E.
F.
G.
Unit 3 - Lesson 2 –Elements of Floral Design
Objectives:
1. Recognize the elements of line, form, texture, and color in creating a design.
2. Utilize the color wheel.
3. Recognize the proper concentration of color in a design.
1. Name four elements of design.
2. Matching:
Equal mixture of a primary and secondary color
Add gray to make a color dull
Tool to use to understand the uses of color
Add black to make a color darker
Three colors that are equally spaced on the color wheel
Measure of the brightest or dullest color
Two colors that are opposite of each other on the color wheel
Natural colors
Brightness or darkness of a color
Combinations of colors that are pleasing to the eye
Three or more unrelated colors, select tints, shades and tones
One hue with its tints, shades and tones
Color wheel Primary color Secondary color
Tertiary color Chrome Value
Tint Tone Shade
Color harmonies Monochromatic Analogous
Complementary Split-complementary Triadic
Polychromatic
3. Define line and give the three types.
4. is the surface appearance of flowers, foliage, container and
accessories. May be fine or coarse, smooth or rough, shiny or dull, or satin-like or
velvet-like.

Unit 3 - Lesson 3 – General floral Guidelines
1. Please list the seven steps in making an arrangement.

UNIT 4 – MECHANICS AND SUPPLIES
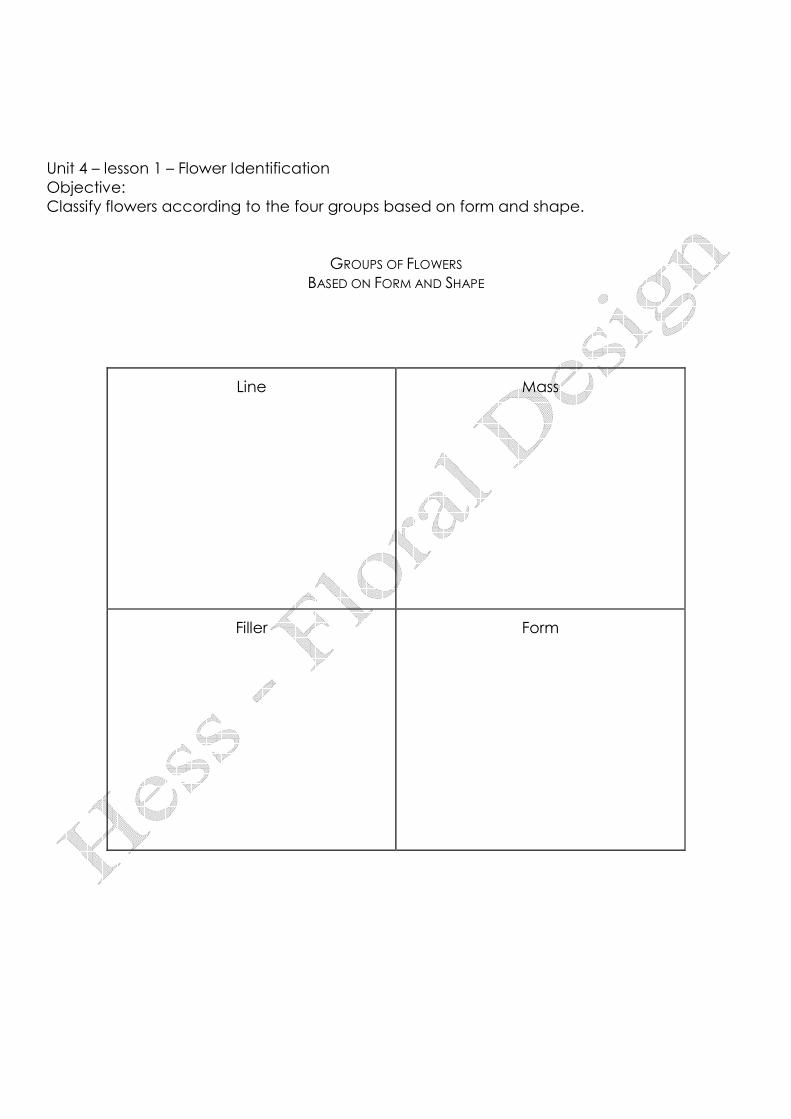
Unit 4 – lesson 1 – Flower Identification
Objective:
Classify flowers according to the four groups based on form and shape.
GROUPS OF FLOWERS
BASED ON FORM AND SHAPE
Line
Mass
Filler
Form
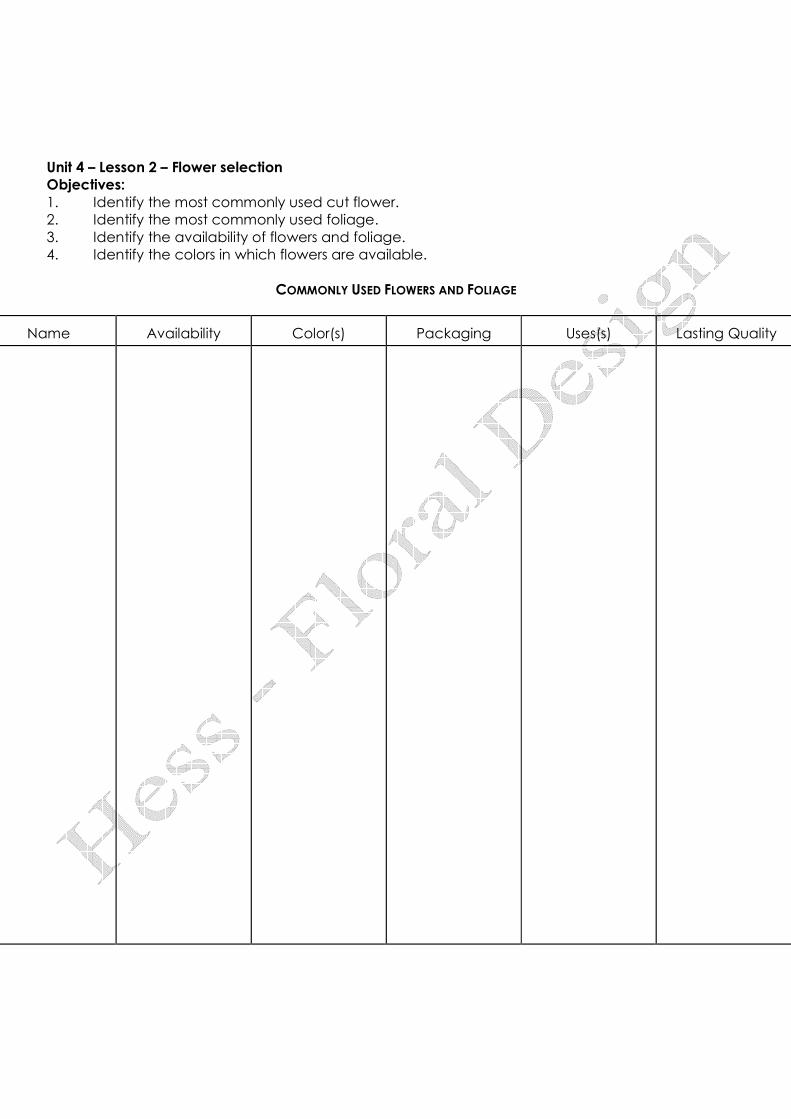
Unit 4 – Lesson 2 – Flower selection
Objectives:
1. Identify the most commonly used cut flower.
2. Identify the most commonly used foliage.
3. Identify the availability of flowers and foliage.
4. Identify the colors in which flowers are available.
COMMONLY USED FLOWERS AND FOLIAGE
Name
Availability
Color(s)
Packaging
Uses(s)
Lasting Quality

UNIT 5 – CONDITIONING AND STORING CUT FLOWERS AND GREENS
Unit 5 Lesson 1- Flower Deterioration
Objectives:
1. Identify the causes of premature flower determination.
2. Identify the steps in handling a shipment of flowers.
1. List the ten steps in handling a shipment of flowers.
2. List the five most common causes of early deterioration,
UNIT 6 – MECHANCIS AND SUPPLIES
Unit 6 Lesson 1- Floral identification
Objectives:
1. Recognize the importance of texture, shape, size and color when choosing a
container.
2. Demonstrate the ability to match the appropriate container with the intended floral
design.
1. Define: Texture
Shape
Size
Color
2. If you were having a formal dinner in a formal dining room, which container would you
use?
A. Plastic
B. Crystal
C. Silver
D. B and C
3. What reason(s) would you use your choice in question 2?
1.
4. If you have a country, blue and white kitchen, what flowers are you most likely going
to use in an arrangement and why?

Unit 6 - Lesson 3 – Adhesives
Objective: Demonstrate the uses of common floral adhesives.
Matching:
1. __________ sticky tape material similar in texture to children=s play dough
2. __________ used to secure floral foam into container
3. __________ used extensively in florist shops and it is bought in solid sticks to use in guns
or melted in a melting pot or electric frying pan
4. __________ waxed, stretchy tape that only sticks to itself
A. Waterproof or Anchor tape
B. Stem wrap or Floral tape
C. Floral adhesive clay
D. Hot glue
5. List the steps on how to tape a wire.
1.
2.
3.
4.
5.
6.
Unit 6 Lesson 5 – Picks
Objectives:
1. Identify the types of picks used in floral design.
2. Demonstrate the operation of a pick machine.
1. What are picks used for?
A.
B.
C.
2. What types of picks are used in the floral industry?
A.
B.
3. What is a characteristic of the two floral picks?
A.
B.

UNIT 7 – SELECTING WIRE AND WIRING FLOWERS
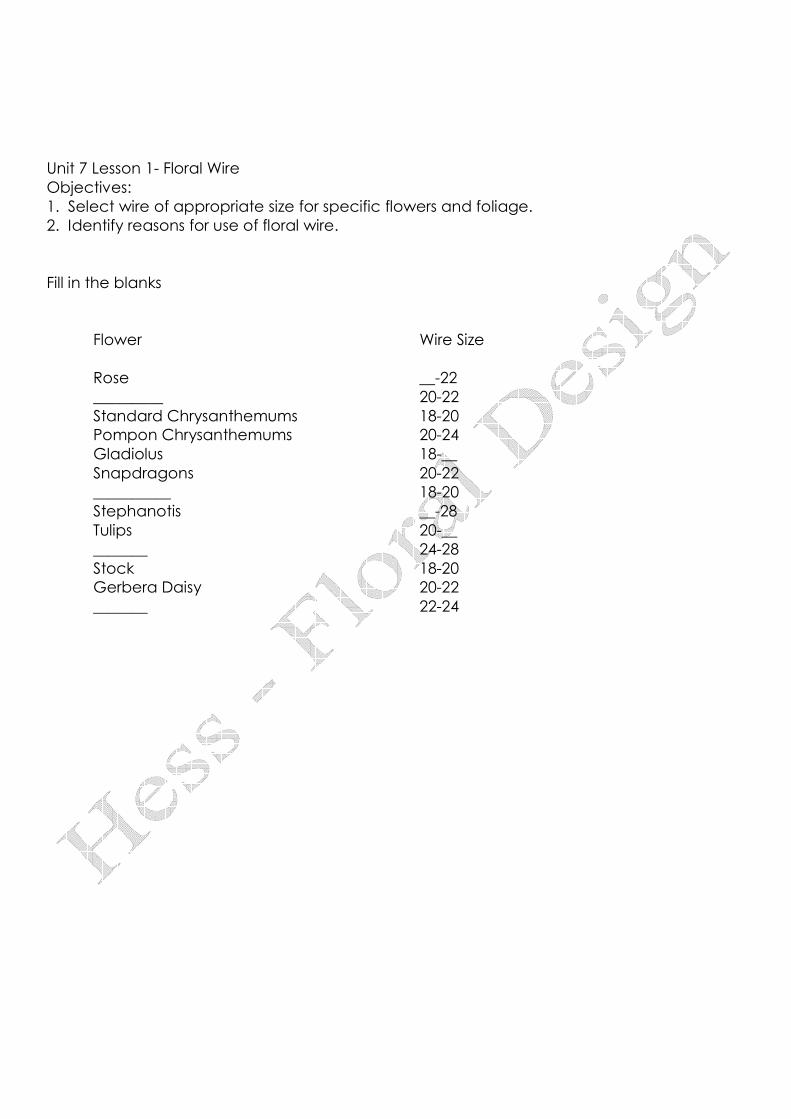
Unit 7 Lesson 1- Floral Wire
Objectives:
1. Select wire of appropriate size for specific flowers and foliage.
2. Identify reasons for use of floral wire.
Fill in the blanks
Flower Wire Size
Rose __-22
_________ 20-22
Standard Chrysanthemums 18-20
Pompon Chrysanthemums 20-24
Gladiolus 18-__
Snapdragons 20-22
__________ 18-20
Stephanotis __-28
Tulips 20-__
_______ 24-28
Stock 18-20
Gerbera Daisy 20-22
_______ 22-24
UNIT 8 – SELECTING RIBBON AND TYPING BOWS
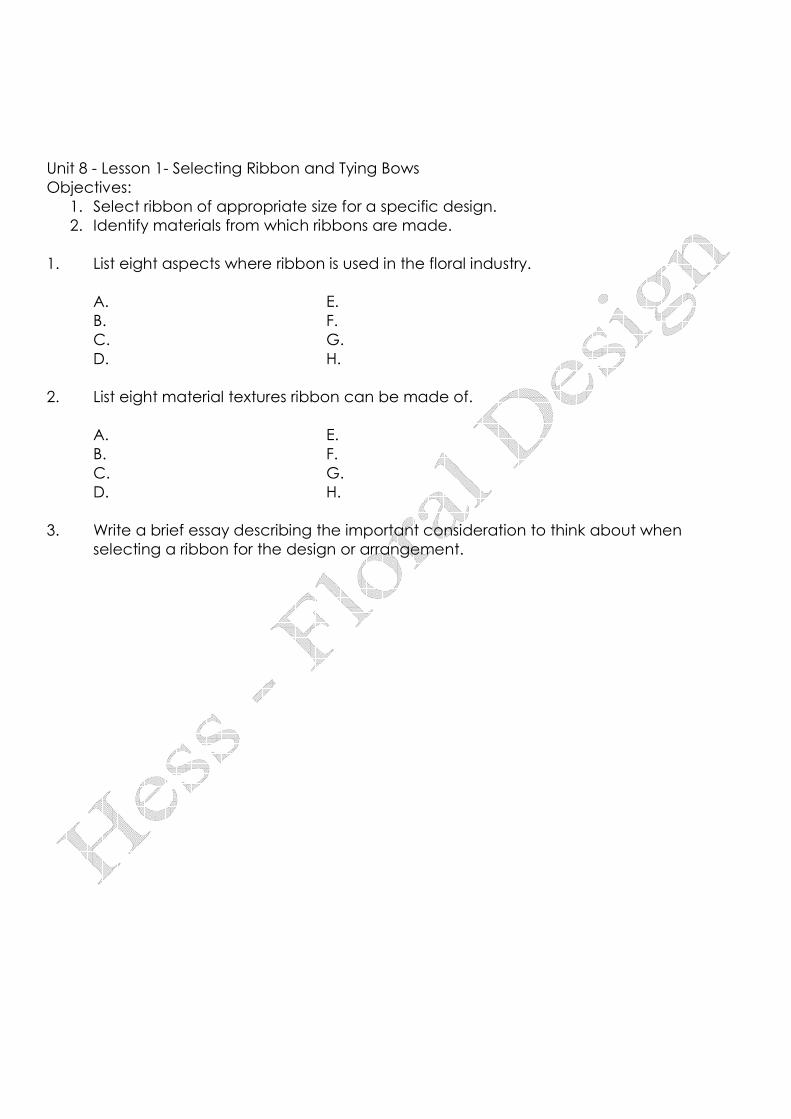
Unit 8 - Lesson 1- Selecting Ribbon and Tying Bows
Objectives:
1. Select ribbon of appropriate size for a specific design.
2. Identify materials from which ribbons are made.
1. List eight aspects where ribbon is used in the floral industry.
A. E.
B. F.
C. G.
D. H.
2. List eight material textures ribbon can be made of.
A. E.
B. F.
C. G.
D. H.
3. Write a brief essay describing the important consideration to think about when
selecting a ribbon for the design or arrangement.

DVD – FLOWER OF THE MONTH – JULY AND GERBERA DAISIES
DVD- FLOWER LOVER’S SERIES – ARRANGING FLOWERS IN A VASE
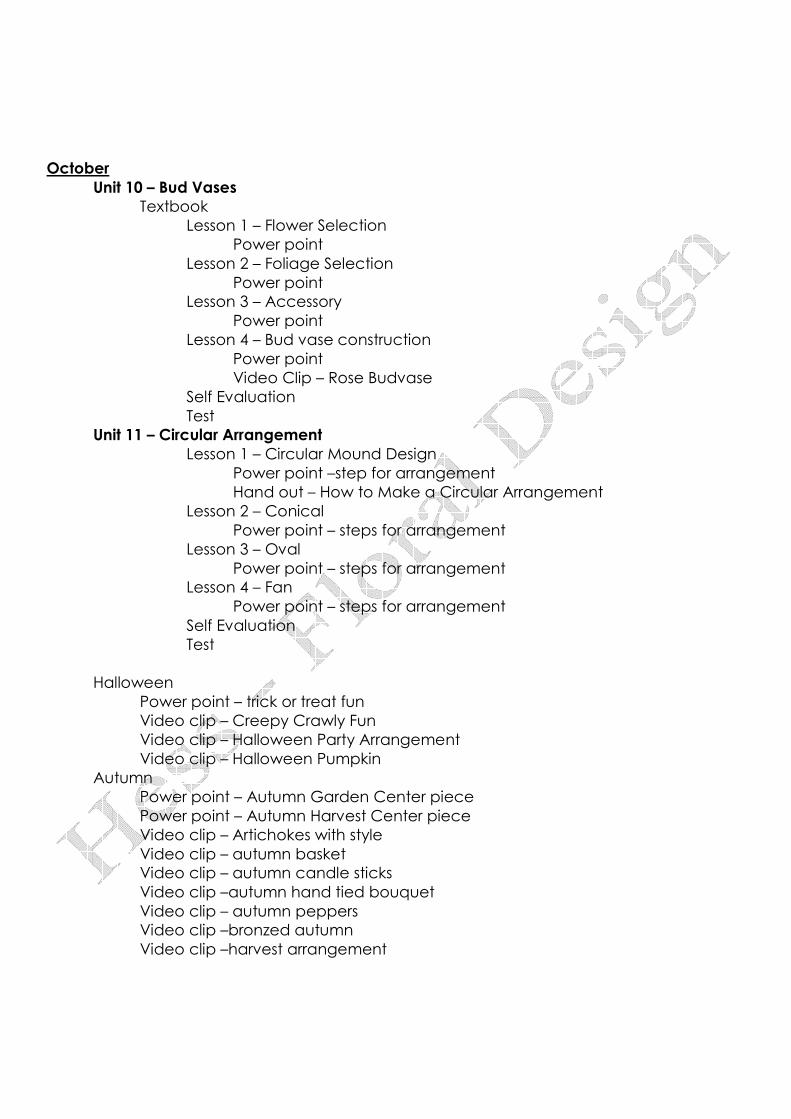
October
Unit 10 – Bud Vases
Textbook
Lesson 1 – Flower Selection
Power point
Lesson 2 – Foliage Selection
Power point
Lesson 3 – Accessory
Power point
Lesson 4 – Bud vase construction
Power point
Video Clip – Rose Budvase
Self Evaluation
Test
Unit 11 – Circular Arrangement
Lesson 1 – Circular Mound Design
Power point –step for arrangement
Hand out – How to Make a Circular Arrangement
Lesson 2 – Conical
Power point – steps for arrangement
Lesson 3 – Oval
Power point – steps for arrangement
Lesson 4 – Fan
Power point – steps for arrangement
Self Evaluation
Test
Halloween
Power point – trick or treat fun
Video clip – Creepy Crawly Fun
Video clip – Halloween Party Arrangement
Video clip – Halloween Pumpkin
Autumn
Power point – Autumn Garden Center piece
Power point – Autumn Harvest Center piece
Video clip – Artichokes with style
Video clip – autumn basket
Video clip – autumn candle sticks
Video clip –autumn hand tied bouquet
Video clip – autumn peppers
Video clip –bronzed autumn
Video clip –harvest arrangement

Video clip –late summer harvest vase
DVD – Flower Lovers Series – Creative Floral Center Piece
Introduction
Basic care and Handling
Candle light Romance – Must show –oval arrangement
Festive checker board
Contemporary Geometrics – uses orbs
DVD – Flower of the Month – June and Alstroemeria
Introduction
Care and handling
Striped Beauty – looks fun
A Casual Planter – skip
Feathered Beauty – Have students add feather but don’t do arrangement
Alstroemeria caddy – skip
Parallel Stems – show but don’t do arrangement
Summer Abundance – skip
Wired for fun – Try this
Power point – Centerpiece with candles
Video clip – Ruffled Vase
UNIT 10 – BUD VASES
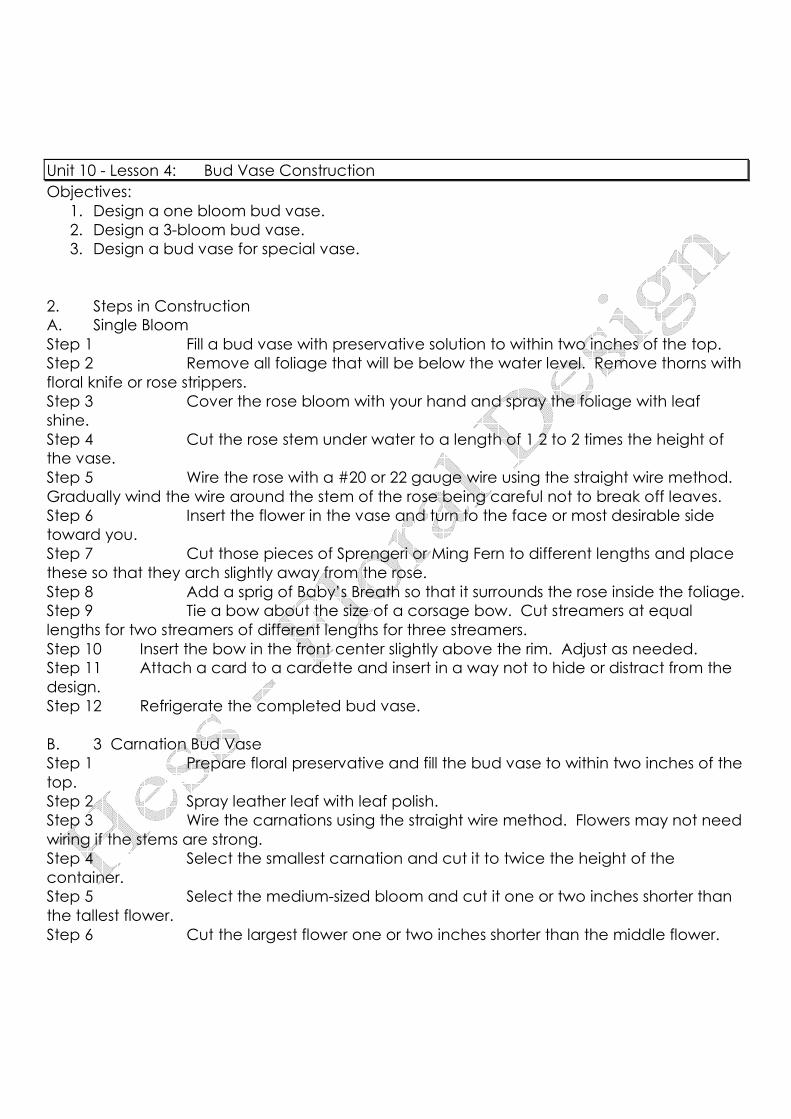
Unit 10 - Lesson 4: Bud Vase Construction
Objectives:
1. Design a one bloom bud vase.
2. Design a 3-bloom bud vase.
3. Design a bud vase for special vase.
2. Steps in Construction
A. Single Bloom
Step 1 Fill a bud vase with preservative solution to within two inches of the top.
Step 2 Remove all foliage that will be below the water level. Remove thorns with
floral knife or rose strippers.
Step 3 Cover the rose bloom with your hand and spray the foliage with leaf
shine.
Step 4 Cut the rose stem under water to a length of 1 2 to 2 times the height of
the vase.
Step 5 Wire the rose with a #20 or 22 gauge wire using the straight wire method.
Gradually wind the wire around the stem of the rose being careful not to break off leaves.
Step 6 Insert the flower in the vase and turn to the face or most desirable side
toward you.
Step 7 Cut those pieces of Sprengeri or Ming Fern to different lengths and place
these so that they arch slightly away from the rose.
Step 8 Add a sprig of Baby’s Breath so that it surrounds the rose inside the foliage.
Step 9 Tie a bow about the size of a corsage bow. Cut streamers at equal
lengths for two streamers of different lengths for three streamers.
Step 10 Insert the bow in the front center slightly above the rim. Adjust as needed.
Step 11 Attach a card to a cardette and insert in a way not to hide or distract from the
design.
Step 12 Refrigerate the completed bud vase.
B. 3 Carnation Bud Vase
Step 1 Prepare floral preservative and fill the bud vase to within two inches of the
top.
Step 2 Spray leather leaf with leaf polish.
Step 3 Wire the carnations using the straight wire method. Flowers may not need
wiring if the stems are strong.
Step 4 Select the smallest carnation and cut it to twice the height of the
container.
Step 5 Select the medium-sized bloom and cut it one or two inches shorter than
the tallest flower.
Step 6 Cut the largest flower one or two inches shorter than the middle flower.

Step 7 Remove all foliage from the stems that will below the vase line.
Step 8 Insert the flowers in the bud vase. Place the smallest flower in the center,
facing up. Stagger the medium flower to the left or right and place the largest flower at the
bottom center. Gradually face the middle and bottom flowers toward the viewer.
Step 9 Select two pieces of Leather leaf which are slightly taller than the flowers
and place these back to back behind the flowers. This causes the Leather leaf to stand up
straight behind the flowers.
Step 10 Insert shorter pieces of Leather leaf on each side at a 45 degree angle and in
front of all other stems, An optional piece may be inserted vertically in front of the tallest
stem.
Step 11 Insert Baby’s Breath and add a bow centrally, slightly above the front rim of the
vase. The bow is attached to a wooden pick that is inserted into the bud vase.
Step 12 Add a card to a cardette and refrigerate.
UNIT 11 – CIRCULAR ARRANGEMENTS
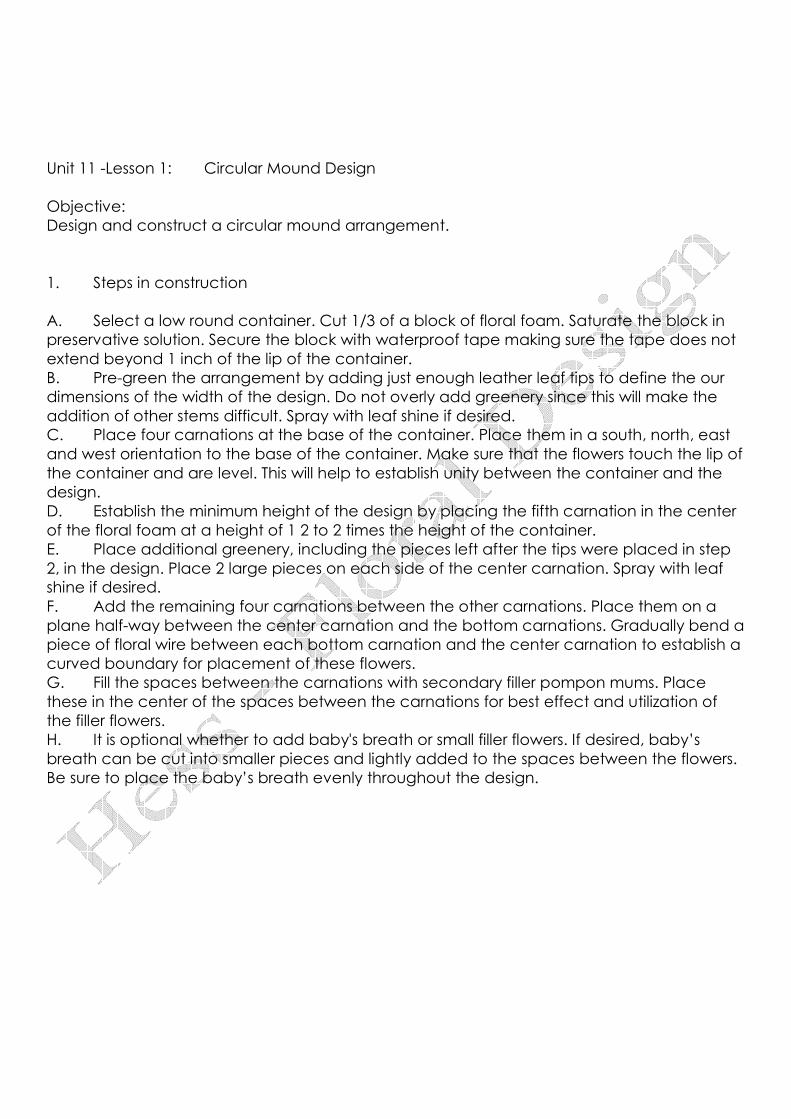
Unit 11 -Lesson 1: Circular Mound Design
Objective:
Design and construct a circular mound arrangement.
1. Steps in construction
A. Select a low round container. Cut 1/3 of a block of floral foam. Saturate the block in
preservative solution. Secure the block with waterproof tape making sure the tape does not
extend beyond 1 inch of the lip of the container.
B. Pre-green the arrangement by adding just enough leather leaf tips to define the our
dimensions of the width of the design. Do not overly add greenery since this will make the
addition of other stems difficult. Spray with leaf shine if desired.
C. Place four carnations at the base of the container. Place them in a south, north, east
and west orientation to the base of the container. Make sure that the flowers touch the lip of
the container and are level. This will help to establish unity between the container and the
design.
D. Establish the minimum height of the design by placing the fifth carnation in the center
of the floral foam at a height of 1 2 to 2 times the height of the container.
E. Place additional greenery, including the pieces left after the tips were placed in step
2, in the design. Place 2 large pieces on each side of the center carnation. Spray with leaf
shine if desired.
F. Add the remaining four carnations between the other carnations. Place them on a
plane half-way between the center carnation and the bottom carnations. Gradually bend a
piece of floral wire between each bottom carnation and the center carnation to establish a
curved boundary for placement of these flowers.
G. Fill the spaces between the carnations with secondary filler pompon mums. Place
these in the center of the spaces between the carnations for best effect and utilization of
the filler flowers.
H. It is optional whether to add baby's breath or small filler flowers. If desired, baby’s
breath can be cut into smaller pieces and lightly added to the spaces between the flowers.
Be sure to place the baby’s breath evenly throughout the design.

Unit 11 - Lesson 2: Conical
Objective:
Design and construct a conical arrangement.
1. Steps in construction
A. Step 1- select a low round or pedestal container.
• Cut 1/3 of a block of floral foam.
• Saturate the block in preservative solution.
• Secure the block with waterproof tape, making sure the tape doesn't
extend beyond 1 inch of the lip of the container.
B. Step 2- pre-green the arrangement by adding just enough leatherleaf tips to define
the outer limits of the width of we design and partially cover the mechanics of construction.
• Save the pieces of leatherleaf for further use.
• Do not over add leatherleaf or it will be difficult to add flower stems
later.
C. Step 3 - place five carnations equidistant around the lip of the container being
cautious that they are installed level and that the stems touch the lip of the container.
• The over-lapping of the blooms will help to develop unity between the
design and the container.
D. Step 4 - establish the maximum height of the design by placing a 6th carnation in the
center of the container at the height of two times the height of the container.
• In some situations, this height may be slightly higher.
E. Step 5. Add two full pieces of greenery on each side of the center carnation.
• Place additional greenery to fill the spaces in the design.
• Spray with leaf shine if desired.
• Don't fill these spaces too full since other flowers will be added and
make insertion of stems difficult.
F. Step 6- add the remaining five carnations between the bottom flower on a plane
half-way between the center and bottom flowers.
• Use a piece of floral wire by gently curving it to form the conical shape.
• Use the wire to establish the boundaries of the design.
G. Step 7- fill the spaces between the carnations with secondary filler pompon mums.
• Place them in the center of the spaces between the carnations for
best effect and utilization of the material.
H. Step 8- it is optional whether to add baby's breath or other small filler flowers.
• If baby's breath is used, cut into smaller pieces and add it lightly to the
spaces between flowers.
• Place the filler evenly throughout the design.
I. Step 9- add preservative solution to the container and mist the design with clear
water.
Unit 11 - Lesson 3: Oval
Objective:
Design and construct an oval arrangement.
1. Steps in construction
A. Select a pedestal container. Cut 2 of a block of floral foam. Saturate the block in the
preservative solution, secure the block with waterproof tape, making sure the tape doesn't
extend beyond 1 inch of the lip of the container.
B. Pre-green the arrangement by adding 6 leatherleaf tips around the lip of the
container. Spray with leaf shine if desired.
C. Place a standard carnation in the center of the container to establish the maximum
height of the design. Place the flower One 11/2 to 2 times the height of the container.
D. Place four carnations equidistant around the lip of the container. Be sure each bloom
overlaps the lip of the container and the stems touch the lip of the container.
E. Carnations to gracefully arch outward from the design and near the center flower.
F. Select four additional carnations to gracefully arch outward from the design. Make
sure their placement is half-way between the base and center carnations. Stagger their
positions between the base carnations so they will not be placed in rows.
G. Place filler mini-carnations in the spaces between the standard carnations. There will
be more than one bloom per stem. Place the longer stems in the upper spaces and the
shorter stems in the lower spaces of the design. Place these filler flowers in the center of each
space for best effect and utilization of materials.
H. Add greenery to the design. Foliage such as sprengeri, boston fern, curved leatheleaf,
etc. will repeat the arching effect of the standard carnations. Don't overdo the greenery.
Use just enough to hide the mechanics and fill any holes in the design.
I. Add baby’s breath to the design. Other appropriate small filler could include statice,
spray asters, saladago, or other filler.

Unit 11 -Lesson 4: Fan
Objective:
Design and construct a fan arrangement.
1. Steps in construction
A. Select a pedestal container. Cut 2 of a block of floral foam. Saturate the foam with
preservative solution. Secure the block with waterproof tape making sure the tape doesn't
extend beyond 1 inch of the lip of the container.
B. Uses seven snapdragons to create the fan silhouette. Use a floral wire to help in
developing the gradual curved shape. Bend the wire from the bottom snapdragon to the
middle snapdragon. Be sure the bottom snapdragon's stems touch the lip of the container.
C. Place the three remaining snapdragons inside the silhouette near the focal point. The
placement of linear flowers in this manner will help to integrate the outer line flowers with the
mass flowers.
D. Place the largest carnation at the focal point area of the design. Place five to seven
additional carnations along the outer edges of the design. Wire any flowers with weak stems.
Place the remaining carnations between the outer and focal carnations. Approximate
equidistance between these.
E. Add greenery to the design in such a way as to enhance the fan shape of the design.
Leatherleaf can be used exclusively or other greenery can be included such as eucalyptus,
bear grass, gorse, saladaga, etc. Places some pieces of leatherleaf at the back of the
design and to cover the mechanics.
HALLOWEEN

AUTUMN

DVD – FLOWER OF THE MONTH – JUNE AND ALSTROEMERIA
DVD – FLOWER LOVER’S SERIES

November
Unit 15 – Holiday Arrangements
Text book
Power point
Self Evaluation
Test
Unit 18 – Preserving Floral Materials
Text book
Lesson 1 – Methods of Floral Preserving
Power point
Self Evaluation
Test
Unit 19 – Arranging Preserved and artificial Flowers
Text book
Lesson 1 – Types of Artificial Flowers
Power point
Lesson 2 – Arranging Artificial flowers
Power point
Self Evaluation
Test
Power point – Dried Material Supplies
Thanksgiving
Power point - Apple Harvest Centerpiece
Power point – Thanksgiving Centerpiece
Video clip – Contemporary Thanksgiving
Video clip – Feasting Table part I
Video clip – Feasting Table part II
DVD –Thanksgiving with Leanne
Introduction
The Bountiful Harvest – Try This Arrangement
Asian Inspiration – interesting but don’t try this
Thanksgiving Nouveau
DVD – Flower of the Month –November and Chrysanthemums
Introduction
Care and Handling
A Grand Topiary – show but don’t do
Stately Elegance – maybe
Sheltered Orbs – show
Autumn Centerpiece – ok
Harvest Urn – skip
Candle light Ring – ok

UNIT 15 – HOLIDAY ARRANGEMENTS
UNIT 18 – PRESERVING FLORAL MATERIALS

UNIT 19 – ARRANGING PRESERVED AND ARTIFICIAL FLOWERS
THANKSGIVING

DVD – FLOWER OF THE MONTH – NOVEMBER AND CHRYSANTHEMUMS
December
Unit 14 – Constructing Wreaths
Text book
Self Evaluation
Test
Power point - Orchid Wreath
Unit 21 – Decorating Potted Plants
Text book
Self Evaluation
Test
Power point – Dressing a Poinsettia
Christmas
Power point – Christmas Bundles
Power point – Christmas Candle light centerpiece
Power point – ornamental Whimsy
Power point – Wired for Christmas
Video clip – Christmas Traditions Floral Design
Video clip – Creative Poinsettia
Video clip – Gift Wrapped Christmas Cubes
DVD – Christmas Traditions
Design Preparation
Welcoming Wreaths – Try this one
Cranberry candle light – watch for ideas
Gardener’s paradise – don’t do this one
DVD – A New fangled Christmas
Copper Delight – interesting use of Magnolia leaves
Generation X
A Zen Christmas
DVD – The flavors of Christmas
Care and Handling
Peppermint or black – show this one
Lime – skip
Egg Plant Purple – Skip
Blueberry blue
Chocolate brown
Marshmallow cream – skip

UNIT 14 – CONSTRUCTING WREATHS

UNIT 21 – DECORATING POTTED PLANTS

CHRISTMAS

DVD – CHRISTMAS TRADITIONS
DVD – A NEW FANGLED CHRISTMAS
DVD – THE FLAVORS OF CHRISTMAS