MPF30 User Manual
64
MultiPASS TM F30 Color Bubble Jet TM Printer/Copier/Scanner User’s Manual
Transcript of MPF30 User Manual

8/13/2019 MPF30 User Manual
http://slidepdf.com/reader/full/mpf30-user-manual 1/64
MultiPASSTM
F30
Color Bubble JetTM Printer/Copier/Scanner
User’s Manual

8/13/2019 MPF30 User Manual
http://slidepdf.com/reader/full/mpf30-user-manual 2/64
Canon MultiPASS F30 MFP Color Bubble Jet Printer/Copier/Scanner User’s Manual.
Copyrig ht
This manual is copyrighted by Canon U.S.A., Inc. with all rights reserved. Under the copyright laws, thismanual may not be reproduced in any form, in whole or in part, without the prior written consent of CanonU.S.A., Inc.
© 2001 Canon U.S.A., Inc.
Disclaimer
Canon U.S.A., Inc. has reviewed this manual thoroughly in order that it will be an easy-to-use guide to yourCanon MultiPASS F30 MFP. All statements, technical information and recommendations in this manual andin any guides or related documents are believed reliable, but the accuracy and completeness thereof arenot guaranteed or warranted, and they are not intended to be, nor should they be understood to be,
representation or warranties concerning the products described.
Specifications are subject to change without notice.
All print speeds are based on draft mode. Print speed will vary depending on system configuration,software, document complexity, print mode and page coverage.
As anEnergy Star partner, Canon U.S.A., Inc., has determined that this product meets the
Energy Star guidelines for energy efficiency.
Trademarks
Canon MultiPASS and ScanGear are trademarks of Canon Inc. All other products and brand names aretrademarks of their respective owners.
Canon U.S.A., Inc.Digital Home and Personal Systems Division2995 Redhill AvenueCosta Mesa, CA 92626
PRINTED IN THAILAND
8/13/2019 MPF30 User Manual
http://slidepdf.com/reader/full/mpf30-user-manual 3/64iii
Contents
1 IntroductionWhat the F30 MFP Can Do . . . . . . . . . . . . . . . . . . . . . . . . . . . . . . . . .1
The MultiPASS Toolbar . . . . . . . . . . . . . . . . . . . . . . . . . . . . . . . .1
Getting More Help . . . . . . . . . . . . . . . . . . . . . . . . . . . . . . . . . . . . . . .1
The F30 MFP Unit . . . . . . . . . . . . . . . . . . . . . . . . . . . . . . . . . . . . . . . .2
Control Panel Menus . . . . . . . . . . . . . . . . . . . . . . . . . . . . . . . . . . . . .3How to Load Paper and Envelopes . . . . . . . . . . . . . . . . . . . . . . . . . . .3
Specifying Paper Size and Type . . . . . . . . . . . . . . . . . . . . . . . . . .3
Loading Paper . . . . . . . . . . . . . . . . . . . . . . . . . . . . . . . . . . . . . . .3
2 How to Use the MultiPASS ToolbarGetting Help for the Toolbar . . . . . . . . . . . . . . . . . . . . . . . . . . . . . . .5
Getting More Help . . . . . . . . . . . . . . . . . . . . . . . . . . . . . . . . . . . . . . .6
Using the MultiPASS Toolbar . . . . . . . . . . . . . . . . . . . . . . . . . . . . . . .6
Modifying Toolbar Settings . . . . . . . . . . . . . . . . . . . . . . . . . . . . .6
Working with Saved MultiPASS Files . . . . . . . . . . . . . . . . . . . . . . . . .7
Accessing Saved MultiPASS Files . . . . . . . . . . . . . . . . . . . . . . . .7
Viewing, Editing and Printing Saved Documents . . . . . . . . . . . .8
Working with the Address Book . . . . . . . . . . . . . . . . . . . . . . . . .8
Emailing Saved Documents . . . . . . . . . . . . . . . . . . . . . . . . . . . . .9
The MultiPASS Status Monitor . . . . . . . . . . . . . . . . . . . . . . . . . . . . . .9
3 How to PrintWhat Is a Printer Driver? . . . . . . . . . . . . . . . . . . . . . . . . . . . . . . . . .11
Getting Help From the Printer Driver . . . . . . . . . . . . . . . . . . . . . . . .11
Selecting the F30 MFP Printer . . . . . . . . . . . . . . . . . . . . . . . . . . . . .12
Canceling a Print Job . . . . . . . . . . . . . . . . . . . . . . . . . . . . . . . . . . . .12
Improving Printed Images . . . . . . . . . . . . . . . . . . . . . . . . . . . . . . . .13
8/13/2019 MPF30 User Manual
http://slidepdf.com/reader/full/mpf30-user-manual 4/64
MultiPASS F30 User’s Manual
iv
Adjusting Print Quality . . . . . . . . . . . . . . . . . . . . . . . . . . . . . . .13
Automatically Smoothing Images . . . . . . . . . . . . . . . . . . . . . . .15
Adjusting Color Balance, Intensity and Brightness . . . . . . . . . .16
Automatically Optimizing Images . . . . . . . . . . . . . . . . . . . . . . .17
Changing Page Setup . . . . . . . . . . . . . . . . . . . . . . . . . . . . . . . . . . .17
Saving and Recalling Driver Settings . . . . . . . . . . . . . . . . . . . . . . . .18
Other Print Features . . . . . . . . . . . . . . . . . . . . . . . . . . . . . . . . . . . . .19
4 How to Copy Loading Documents . . . . . . . . . . . . . . . . . . . . . . . . . . . . . . . . . . . . .21
Clearing Paper Jams . . . . . . . . . . . . . . . . . . . . . . . . . . . . . . . . .22
Making Copies . . . . . . . . . . . . . . . . . . . . . . . . . . . . . . . . . . . . . . . . .23
Reducing or Enlarging the Image Copied . . . . . . . . . . . . . . . . . . . .23
Shrinking an Image to Fit the Page . . . . . . . . . . . . . . . . . . . . . . . . .25
Setting Paper Size and Type . . . . . . . . . . . . . . . . . . . . . . . . . . . . . .26
Adjusting Image Quality . . . . . . . . . . . . . . . . . . . . . . . . . . . . . . . . .26
Adjusting Image Exposure . . . . . . . . . . . . . . . . . . . . . . . . . . . . . . . .28
Other Copy Features . . . . . . . . . . . . . . . . . . . . . . . . . . . . . . . . . . . .28
5 How to Scan
Scanning From Within an Application . . . . . . . . . . . . . . . . . . . . . . .29Using ScanGear® Software . . . . . . . . . . . . . . . . . . . . . . . . . . . . . . . .30
Using the Scan Button for One-Push Functions . . . . . . . . . . . . . . . .31
6 How to Maintain Your F30 MFPCleaning Your F30 MFP . . . . . . . . . . . . . . . . . . . . . . . . . . . . . . . . . .33
Replacing Ink Tanks . . . . . . . . . . . . . . . . . . . . . . . . . . . . . . . . . . . . .33
Maintaining the Printhead . . . . . . . . . . . . . . . . . . . . . . . . . . . . . . . .34
Printing a Nozzle Check Pattern . . . . . . . . . . . . . . . . . . . . . . . .34
Cleaning the Printhead . . . . . . . . . . . . . . . . . . . . . . . . . . . . . . .35
Aligning the Printhead . . . . . . . . . . . . . . . . . . . . . . . . . . . . . . . .36
7 TroubleshootingTips for Troubleshooting . . . . . . . . . . . . . . . . . . . . . . . . . . . . . . . . .39
Customer Care Center . . . . . . . . . . . . . . . . . . . . . . . . . . . . . . . . . . .47

8/13/2019 MPF30 User Manual
http://slidepdf.com/reader/full/mpf30-user-manual 5/64
8 Appendix Safety Information . . . . . . . . . . . . . . . . . . . . . . . . . . . . . . . . . . . . . .49
Regulatory Information . . . . . . . . . . . . . . . . . . . . . . . . . . . . . . . . . .51
Specifications . . . . . . . . . . . . . . . . . . . . . . . . . . . . . . . . . . . . . . . . .52
Limited Warranty—U.S. Only . . . . . . . . . . . . . . . . . . . . . . . . . . . . . .54
Index
v

8/13/2019 MPF30 User Manual
http://slidepdf.com/reader/full/mpf30-user-manual 6/64
MultiPASS F30 User’s Manual
vi
8/13/2019 MPF30 User Manual
http://slidepdf.com/reader/full/mpf30-user-manual 7/64
1
1
Introduction
What the F30 MFP Can Do
Congratulations on purchasing your Canon MultiPASS F30 multifunction unit!
The F30 MFP eliminates the need for multiple devices in your home or office by
incorporating the functions of:
Printer Print crisp, clear color or black and white pages from your PC.Copier Use your F30 MFP as a stand-alone copier for color or black and
white copies.
Scanner Scan high-resolution images to your PC.
The MultiPASS Toolbar You can use the F30 MFP as a stand-alone device for copying, or with your PC as
a fully-integrated printer/copier/scanner. From your PC, you can access and
navigate many of the features using the MultiPASS toolbar.
Getting More Help
This manual describes some of the features of your F30 MFP and how to use
them. For more information, see the online MultiPASS User’s Guide available on
your MultiPASS CD-ROM.
You can also access online help from the MultiPASS toolbar (see “How to Use
the MultiPASS Toolbar” starting on page 5) or the printer driver (see “How to
Print” starting on page 11).
8/13/2019 MPF30 User Manual
http://slidepdf.com/reader/full/mpf30-user-manual 8/64
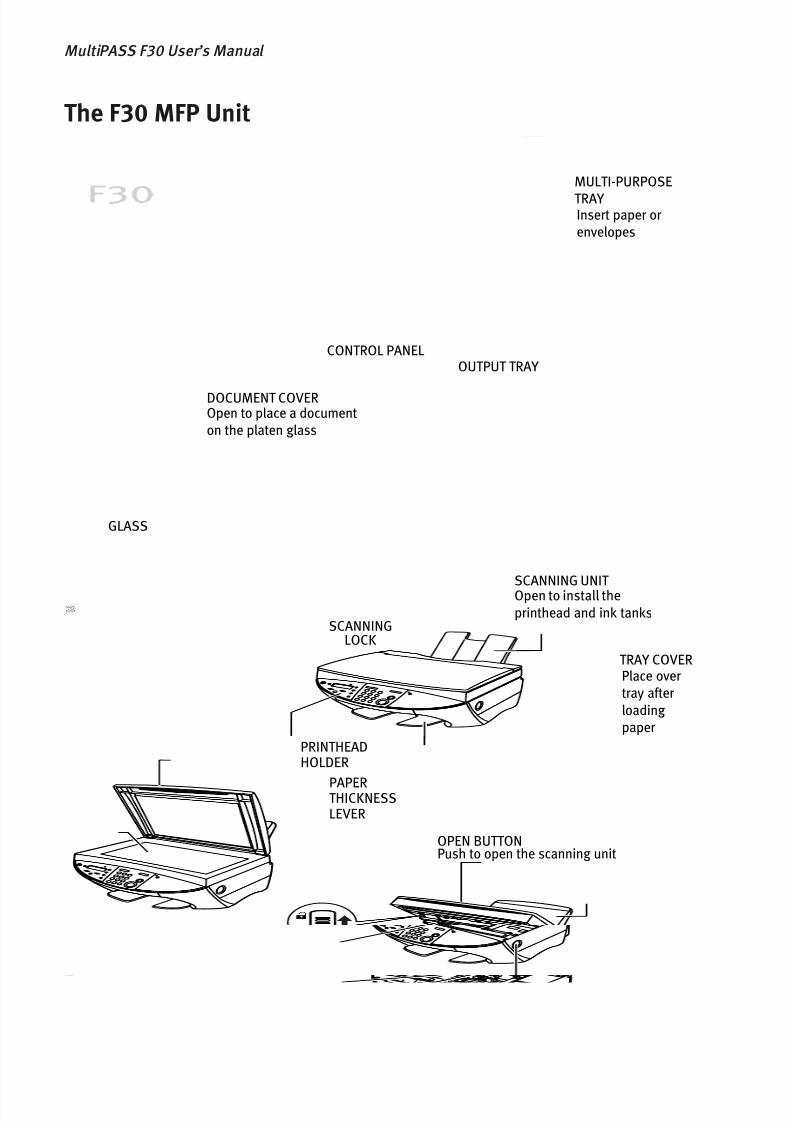
The F30 MFP Unit
2
MultiPASS F30 User’s Manual
DOCUMENT COVEROpen to place a document
on the platen glass
GLASS
SCANNINGLOCK
PRINTHEADHOLDER
OPEN BUTTONPush to open the scanning unit
SCANNING UNIT Open to install the
printhead and ink tanks
OUTPUT TRAY CONTROL PANEL
MULTI-PURPOSE
TRAY Insert paper or
envelopes
TRAY COVERPlace over
tray after
loading
paper
PAPERTHICKNESSLEVER
8/13/2019 MPF30 User Manual
http://slidepdf.com/reader/full/mpf30-user-manual 9/64
Control Panel Menus
Menu options on the control panel vary
depending on whether Copy or Scan mode is
selected.
Some options are common to all modes.
How to Load Paper and Envelopes
Specifying Paper Size and TypeIf copying on specialty paper (glossy, high resolution, transparency or photo),
you can optimize results by setting the paper size and type from the F30 MFPcontrol panel. If printing on specialty paper, select the appropriate paper type
from the printer driver. For procedures, see the chapters on printing or copying
in this manual, or the documentation included on your MultiPASS Suite 4.0 CD-ROM.
Loading Paper
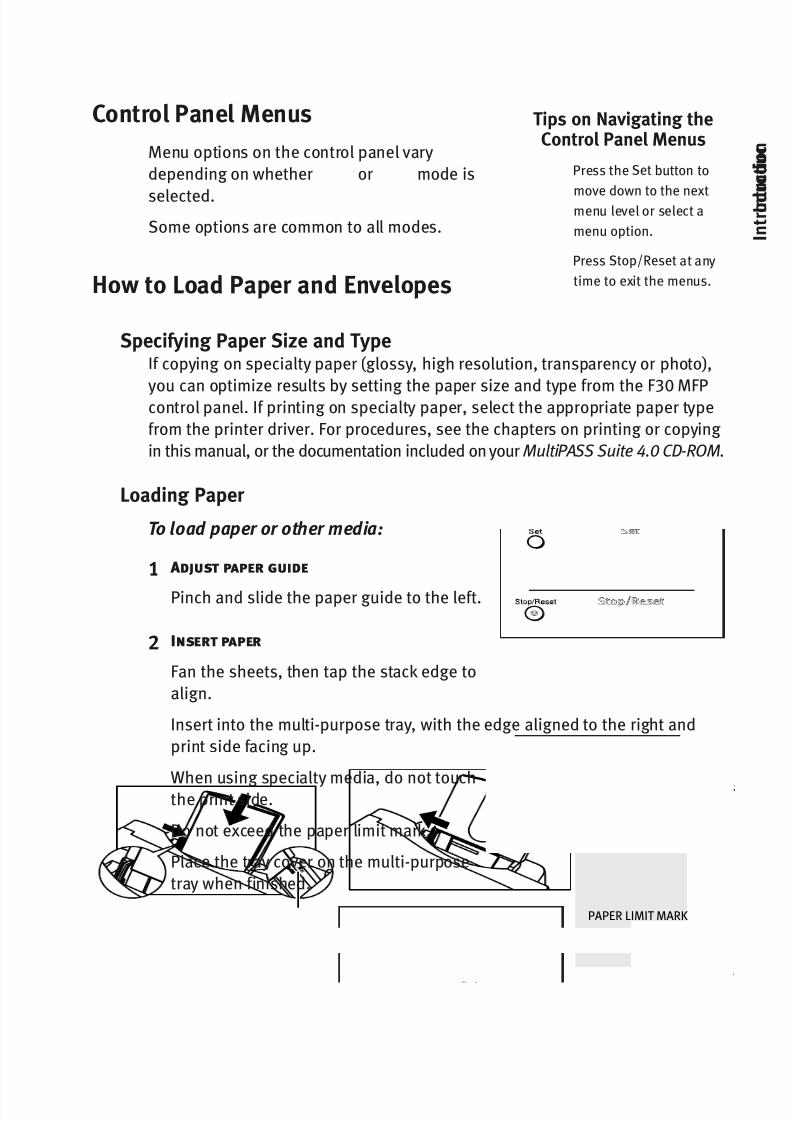
To load paper or other media:
1 Adjust paper guide
Pinch and slide the paper guide to the left.
2 Insert paper
Fan the sheets, then tap the stack edge to
align.
Insert into the multi-purpose tray, with the edge aligned to the right and
print side facing up.
When using specialty media, do not touchthe print side.
Do not exceed the paper limit mark.
Place the tray cover on the multi-purpose
tray when finished.
3
Tips on Navigating theControl Panel Menus
Press the Set button to
move down to the nextmenu level or select a
menu option.
Press Stop/Reset at any
time to exit the menus.
PAPER LIMIT MARK
8/13/2019 MPF30 User Manual
http://slidepdf.com/reader/full/mpf30-user-manual 10/64
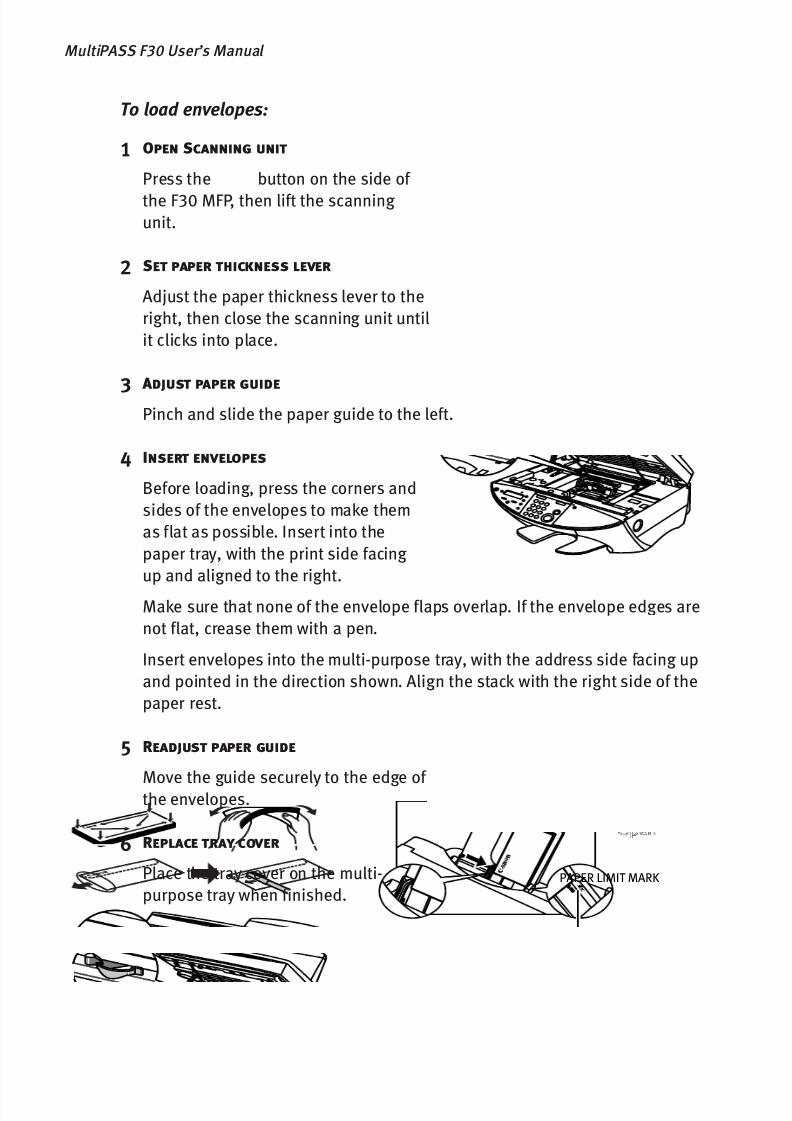
To load envelopes:
1 Open Scanning unit
Press the Open button on the side of
the F30 MFP, then lift the scanning unit.
2 Set paper thickness lever
Adjust the paper thickness lever to the
right, then close the scanning unit until
it clicks into place.
3 Adjust paper guide
Pinch and slide the paper guide to the left.
4 Insert envelopes
Before loading, press the corners and
sides of the envelopes to make them
as flat as possible. Insert into the
paper tray, with the print side facing
up and aligned to the right.
Make sure that none of the envelope flaps overlap. If the envelope edges are
not flat, crease them with a pen.
Insert envelopes into the multi-purpose tray, with the address side facing up
and pointed in the direction shown. Align the stack with the right side of the
paper rest.
5 Readjust paper guide
Move the guide securely to the edge of the envelopes.
6 Replace tray cover
Place the tray cover on the multi-
purpose tray when finished.
4
MultiPASS F30 User’s Manual
PAPER LIMIT MARK

8/13/2019 MPF30 User Manual
http://slidepdf.com/reader/full/mpf30-user-manual 11/64
5
2
How to Use the MultiPASS Toolbar
The Canon MultiPASS Suite is a software program that provides tools for quickly
accessing and using many of the features of your F30 MFP. With the MultiPASS
Toolbar, your F30 MFP is fully integrated with your PC as a printer, copier, and
scanner.
Documents scanned through the MultiPASS Toolbar can be saved, edited or emailed. You can also customize the settings for the different toolbar features.
The MultiPASS Toolbar icons provide quick access to a number of scanning operations.
Mail scans an image and attaches it to an email.
Save scans an image and saves it as a file which can later be viewed,
edited, printed or sent as an email.
Photo scans an image, and displays it in a graphic application.
My MultiPASS accesses the My MultiPASS folders, from which saved
files can be viewed, edited, printed or sent as an email.
Settings allows editing of MultiPASS Toolbar settings.
Getting Help for the Toolbar
Online help is available for the toolbar.
To access online help from the toolbar:
• Click the icon on the toolbar, or
• Right-click any screen area of the window to access the What’s This?help description for that area, or
• Click the key in the upper right corner, then click the feature youwant to know more about.

8/13/2019 MPF30 User Manual
http://slidepdf.com/reader/full/mpf30-user-manual 12/64
MultiPASS F30 User’s Manual
Getting More Help
This manual describes some of the features of your F30 MFP and how to use
therm. For more information, see the online MultiPASS Software Guide available
on your MultiPASS CD-ROM.
Using the MultiPASS Toolbar
Opening the toolbar provides direct access to the MultiPASS features. Once the
toolbar is open, you can access the desired feature directly.
To access the toolbar:
Double-click the Canon MultiPASS Toolbar icon on your desktop, or
Go to Start, then Programs. Select Canon MultiPASS Suite 4.0, then CanonMultiPASS Toolbar.
Modifying Toolbar SettingsToolbar Settings define the settings used for scan operations started from theMultiPASS toolbar. Before using the MultiPASS Toolbar, set up each optionusing Toolbar Settings.
You can set a custom image type, image quality resolution and paper size foreach scan operation. For scan operations thatopen other applications (such as Scan Photo ),you can select the application to open.
You can also set up to three custom scanoperations with the Custom1, Custom2 andCustom3 tabs. Custom operations only showon the toolbar if they’ve been set up to do so.
To change Toolbar Settings:
1 Select option to be modified
Click on the MultiPASS Toolbar, then
select the tab for the setting you want to
modify.
6
8/13/2019 MPF30 User Manual
http://slidepdf.com/reader/full/mpf30-user-manual 13/64
7
2 Define settings for operation
Make the desired modifications for each operation, referring to the onlinehelp as needed.
When one tab is complete, select the next tab and continue.
Click OK to save the new settings and exit the dialog box.
Working with Saved MultiPASS Files
When a document is scanned with the Scan to Save option or is saved from
within the MultiPASS viewer, it is saved in the My MultiPASS folders. From these
folders, a saved document can be viewed, edited, sent as an email attachment,
or printed.
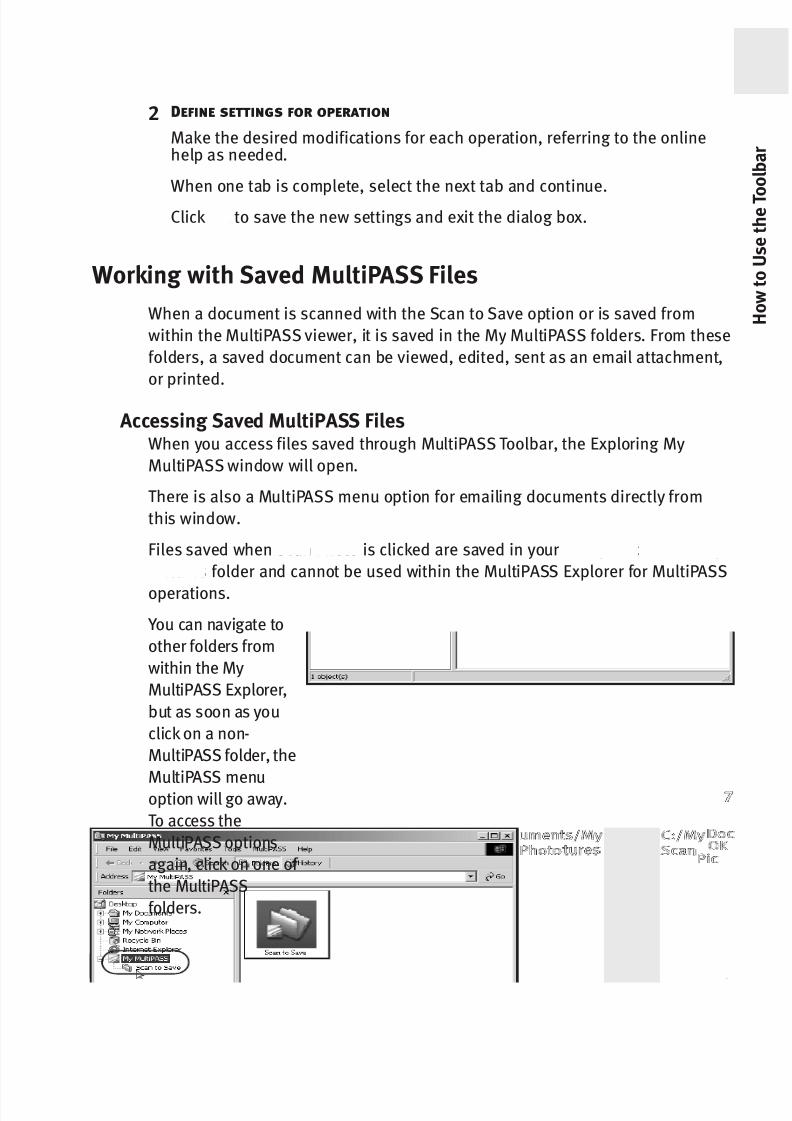
Accessing Saved MultiPASS FilesWhen you access files saved through MultiPASS Toolbar, the Exploring My
MultiPASS window will open.
There is also a MultiPASS menu option for emailing documents directly from
this window.
Files saved when Scan Photo is clicked are saved in your C:/My Documents/My
Pictures folder and cannot be used within the MultiPASS Explorer for MultiPASS
operations.
You can navigate to
other folders from
within the My
MultiPASS Explorer,
but as soon as you
click on a non-
MultiPASS folder, the
MultiPASS menuoption will go away.
To access the
MultiPASS options
again, click on one of
the MultiPASS
folders.
8/13/2019 MPF30 User Manual
http://slidepdf.com/reader/full/mpf30-user-manual 14/64
MultiPASS F30 User’s Manual
8
Files you have created in other applications cannot be saved in My MultiPASS
folders.
To access files in the My MultiPASS folders:
Click the icon on the MultiPASS Toolbar or double-click the My
MultiPASS icon on the desktop.
Viewing, Editing and Printing Saved DocumentsDocuments saved in My MultiPASS folders can be viewed and edited in the
MultiPASS Viewer.
To use the MultiPASS Viewer:
1 Access document
Navigate My MultiPASS
folders, then double-click the
document. The MultiPASS
Viewer will open and display
the document.
2 View or edit document
On the MultiPASS Viewer, you
can rotate the document andperform other basic editing
tasks. To print the document, click Print on the MultiPASS Viewer toolbar.
Working with the Address Book Unless you specify otherwise, the MultiPASS software uses the MultiPASS
Address Book to store all of your address book entries. You create the Address
Book the first time you open it.
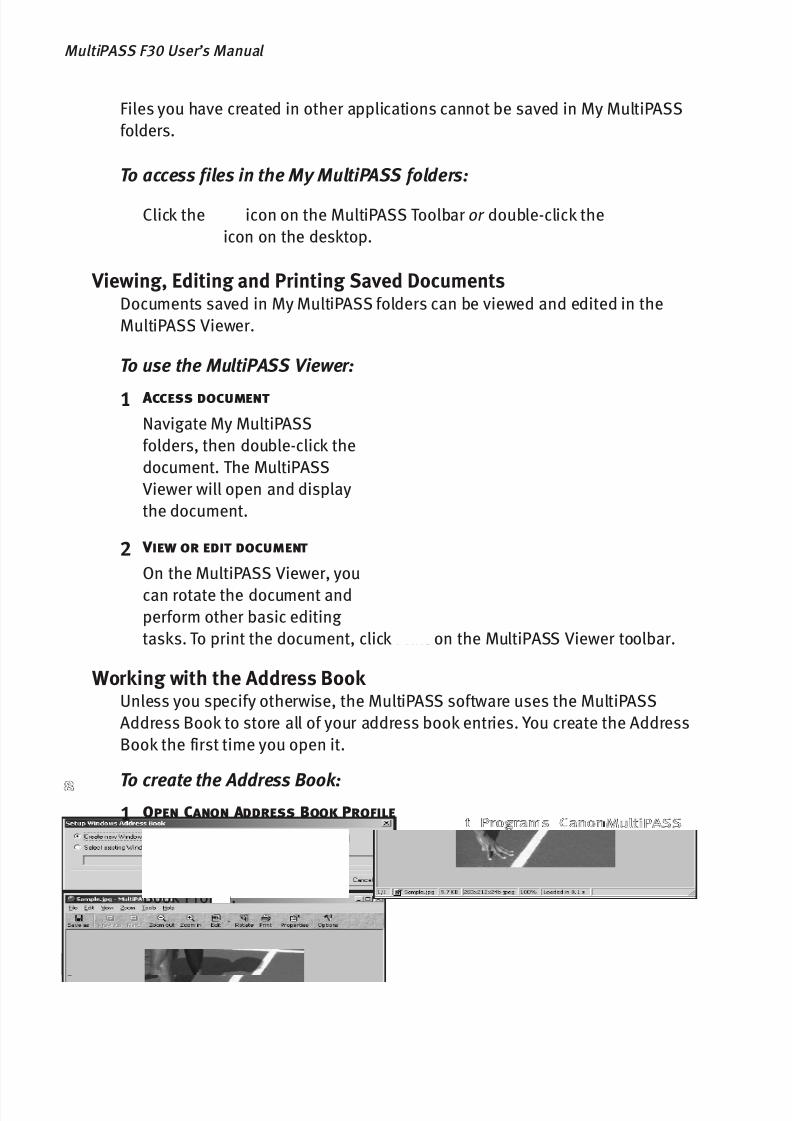
To create the Address Book:1 Open Canon Address Book Profile
Click Start, Programs, CanonMultiPASS Suite 4.0, thenCanon MultiPASS AddressBook Prof ile.

8/13/2019 MPF30 User Manual
http://slidepdf.com/reader/full/mpf30-user-manual 15/64
9
2 Create an Address Book
Click Create New Windows Address Book f ilefor MultiPASS, then click OK.
3 Open your Address Book
Double-click My MultiPASS folders icon on theWindows desktop, click the MultiPASS menu,then Address Book.
You can now enter Contacts (individual data)or a Distribution List (multiple addresses towhom you repeatedly send the same emails).
Emailing Saved Documents
You can attach a document saved in MultiPASS toan email.
To email a document:
1 Select document
Navigate My MultiPASS folders, then click thedocument to highlight.
2 Send document
Select the Email option to send an email with the document attached. Followthe on-screen instructions.
The MultiPASS Status Monitor
The Status Monitor displays a list of the F30 MFP’s currently running jobs. If no
jobs are running, it shows the F30 MFP as idle.
NOTE: The Status Monitor must be running to print, copy or scan.
To open the Status Monitor:Click Start, then Programs.
Select Canon MultiPASS Suite4.0, then Canon MultiPASSStatus Monitor. The Status Monitor window will appear.
Tips on Sending EmailsUsing MultiPASS
When prompted, enter the name
and email address of therecipient, then click Add to
Recipient List. This information
will also be stored in the
MultiPASS Address Book for
future use.
To email to multiple recipients
(sometimes referred to as
sequential broadcasting ),
continue to enter email addresses
and click Add to Recipient List.
Once email data is entered, you
have the option to Send Now or
Send Later. If you click Send
Later, you will be prompted to
enter a date and time to send the
email.

8/13/2019 MPF30 User Manual
http://slidepdf.com/reader/full/mpf30-user-manual 16/64
10
MultiPASS F30 User’s Manual

8/13/2019 MPF30 User Manual
http://slidepdf.com/reader/full/mpf30-user-manual 17/6411
3How to Print
Using your F30 MFP with your PC lets you print basic business documents in
B&W or color on a variety of specialty media. For a full list of Canon specialty
media that can be used with your F30 MFP, see the inside back cover of this
manual.
What Is a Printer Driver?
A printer driver is a software program that acts as an interface between yourcomputer and your printer and allows you to print from any application thatsupports printing in Windows. The Canon F30 MFP printer driver also providesother features, such as monitoring the F30 MFP's paper supply and ink levels.
Menus vary between applications. Consult your user manual if
recommended procedures for accessing the printing feature within
an application do not match your application.
To access the printer driver dialog box:
From an application File menu, select Print. With Canon MultiPASS F 30Printer as the selected printer, click Properties. The Properties window will
open to the Main tab.
Getting Help From the Printer Driver
Online help is available when in the printer driver.
To access online help from the printer driver:
• Press the F1 key, or • Right-click any screen area of the window to access the What’s This? help
description for that area, or
• Click the key in the upper right corner, then click the feature you want to
know more about, or
• Click the button when it is available.
8/13/2019 MPF30 User Manual
http://slidepdf.com/reader/full/mpf30-user-manual 18/64
Selecting the F30 MFP Printer
If the F30 MFP is the only printer connected to your PC, it will be the default
(main) printer. However, if your PC has access to multiple printers, you can
select the F30 MFP as the default.
If another printer is set as the default, you can select the F30 MFP for a specific
print job from within most Windows applications.
To set the Canon MultiPASS F30 MFP as your default printer:
1 Access Printers
From Windows desktop, click Start, Settings, then Printers.
2 Set as Default
Right-click the Canon MultiPASS F30 printer icon, then click Set as Default.
The Canon MultiPASS F30 printer icon will display a check mark indicating it
is the default printer.
To select the Canon MultiPASS F30 Printer from within an application:
1 Access Print Dialog
With the application open, click File, then Print.
2 Select Canon F30 MFP
Select Canon MultiPASS F30 Printer from the printer name drop-down list,
then click OK.
Canceling a Print Job
There are several ways to cancel a print job in progress:
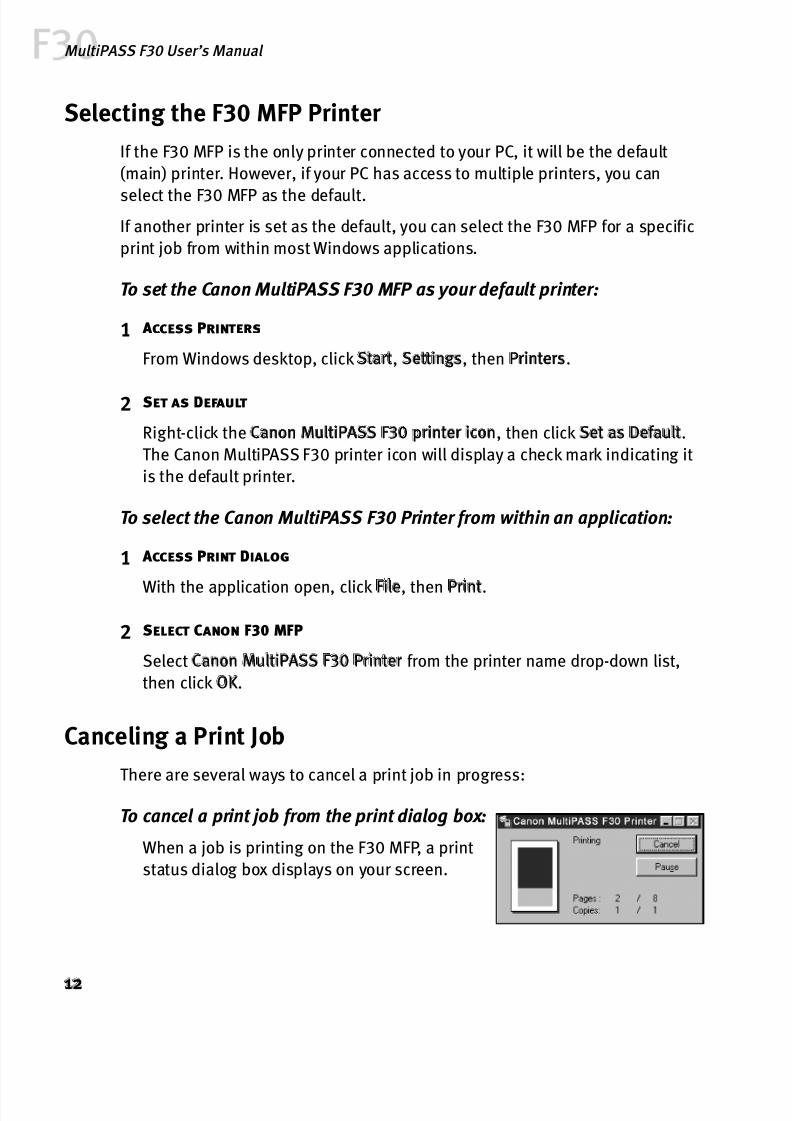
To cancel a print job from the print dialog box:
When a job is printing on the F30 MFP, a print
status dialog box displays on your screen.
12
MultiPASS F30 User’s Manual

8/13/2019 MPF30 User Manual
http://slidepdf.com/reader/full/mpf30-user-manual 19/64
Click Cancel at any time while the print dialog is open to cancel the current
job. The job will be canceled and the paper ejected.
To cancel a job from Windows:
1 Access Printers
While the print job is running, click Start, then Settings, then Printers.
2 Delete job
Double-click Canon MultiPASS F30 Printer, right-click the print job, then
Cancel.
Improving Printed ImagesTwo important factors control the quality and output of your printed images:
Paper and Ink Using recommended paper or specialty media for printing
graphic images or photographs can significantly improve
print quality. Also, always use the specific Canon inks for
your F30 MFP printer, as noted on the inside back cover.
Driver Settings There are a variety of printer driver settings you can use to
enhance the quality of the print, the colors and the way in
which the document comes out of the printer. These settingscan be adjusted from the printer driver interface, or in some
instances, directly from the MultiPASS Toolbar.
Adjusting Print Quality Two features that affect the appearance and quality of your printed documents
can be controlled with the printer driver.
Media Type The F30 MFP automatically adjusts printer settings to
improve print quality based on the media type (plain paper,Glossy Photo Paper, etc.) you select.
Print Quality When you select a media type, print quality is automatically
set for that media. You can override these settings if desired.
13

8/13/2019 MPF30 User Manual
http://slidepdf.com/reader/full/mpf30-user-manual 20/64
To select best print quality with the Print Advisor wizard:
1 Access printer driver
From an application File menu,
select Print.
With Canon MultiPASS F30 Printer
as the selected printer, click
Properties. The Properties
window will open to the Main tab.
2 Use Print Advisor
Click the Print Advisor button. The
wizard dialog box will open.
Follow on-screen instructions to select the optimum output type, media and
settings for your print job.
When done, click OK to save the setting and close the window.
To manually adjust print quality settings:
1 Access printer driver
From an application File menu, select Print.With Canon MultiPASS F30 Printer as the selected printer, click Properties.
The Properties window will open to the Main tab.
2 Select media type
Select the appropriate Media Type from the drop-down menu.
3 Change media settings
Each Media Type has a default Print Quality, but you can select different
settings:
High For high quality when printing a color document.
Standard For high quality when printing text.
Draf t For printing text drafts at a faster speed.
Custom To allow for more precise control.
14
MultiPASS F30 User’s Manual
8/13/2019 MPF30 User Manual
http://slidepdf.com/reader/full/mpf30-user-manual 21/64
If you select Custom, the Set button
becomes active. Click Set to open the
Set Print Quality dialog box. There are
two features you can control:
Print Quality Provides five settings
for custom print quality, ranging
from Fast at the far left (prints at 600 dpi, which means faster printing and
less ink) to Fine, which prints at 2400 x 1200 dpi.
Half toning Controls the pattern in which the ink is laid down when
printing graphic images.
When done, click OK.
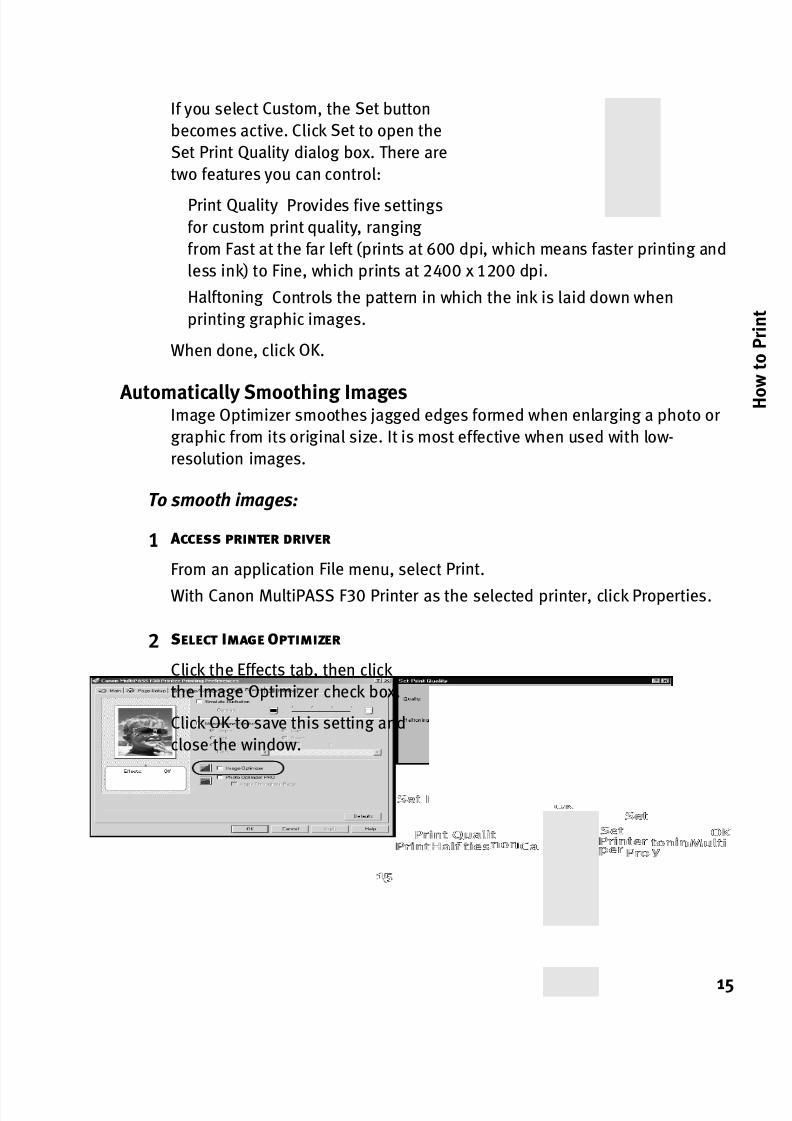
Automatically Smoothing ImagesImage Optimizer smoothes jagged edges formed when enlarging a photo or
graphic from its original size. It is most effective when used with low-
resolution images.
To smooth images:
1 Access printer driver
From an application File menu, select Print.
With Canon MultiPASS F30 Printer as the selected printer, click Properties.
2 Select Image Optimizer
Click the Effects tab, then click
the Image Optimizer check box.
Click OK to save this setting and
close the window.
15

8/13/2019 MPF30 User Manual
http://slidepdf.com/reader/full/mpf30-user-manual 22/64
Adjusting Color Balance, Intensity and Brightness You can enhance color printing by adjusting the color balance, intensity
(saturation) and brightness.
To adjust color settings:
1 Access printer driver
From an application File menu, select Print.
With Canon MultiPASS F30 Printer as the selected printer, click Properties.
The Properties window will open to the Main tab.
2 Adjust color settings
Under Color Adjustment, select Manual,then click Set to open the Manual Color
Adjustment dialog box.
Click and drag the Color Balance slide bar
for each color to adjust the color settings.
The results will preview.
Click and drag the Intensity slide bar to
change the intensity (saturation) for the
image. The results will preview.To use Image Color Management (ICM), see below.
Under Print Type, select Photo when printing photographs for a wider range
of tones, or Graphic when printing graphic images for crisper, cleaner
printing.
Select a Brightness setting to determine how light or dark the image will
appear when printed.
Image Color Management (ICM) automatically
adjusts image colors. To use ICM, click the
Enable ICM check box. All other features on
this tab (except intensity) will become
inactive.
When done, click OK.
16
MultiPASS F30 User’s Manual

8/13/2019 MPF30 User Manual
http://slidepdf.com/reader/full/mpf30-user-manual 23/64
Automatically Optimizing ImagesPhoto Optimizer PRO automatically adjusts a photographic image created with a
digital camera. Use this feature to compensate for unsatisfactory color balance
and over- or under-exposure before printing.
To optimize images:
1 Access printer driver
From an application File menu,select Print.
With Canon MultiPASS F30 Printer
as the selected printer, click
Properties.
2 Select Photo Optimizer PRO
Click the Effects tab, then click the
Photo Optimizer PRO check box.
When Photo Optimizer PRO is
checked, the Apply Throughout
Page option becomes active. If this box is left unchecked, the F30 MFP will
optimize each image individually. If checked, all images will be automatically
corrected with the same settings.When done, click OK.
Changing Page Setup
You can change how the image is
printed without affecting the original
image file.
To change page setup:
1 Access printer driver
From an application File menu,select Print.
17
8/13/2019 MPF30 User Manual
http://slidepdf.com/reader/full/mpf30-user-manual 24/64
With Canon MultiPASS F30 Printer as the selected printer, click Properties.
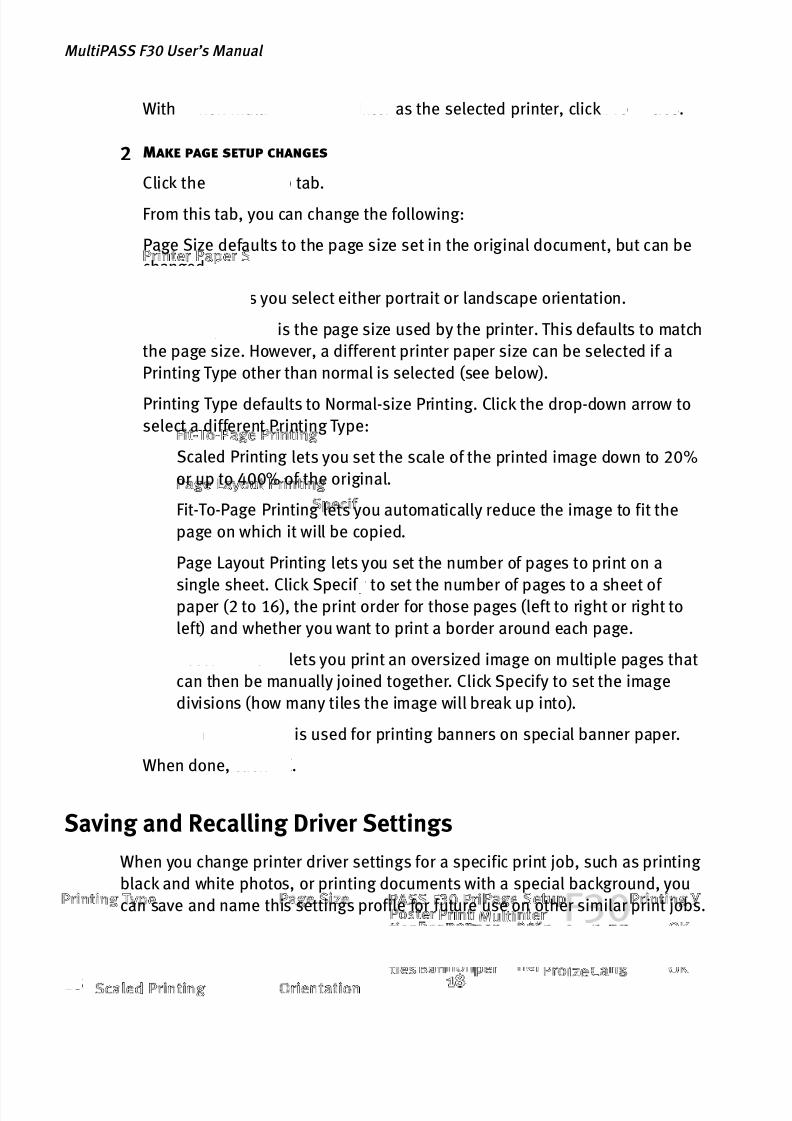
2 Make page setup changes
Click the Page Setup tab.
From this tab, you can change the following:
Page Size defaults to the page size set in the original document, but can be
changed.
Orientation lets you select either portrait or landscape orientation.
Printer Paper Size is the page size used by the printer. This defaults to match
the page size. However, a different printer paper size can be selected if a
Printing Type other than normal is selected (see below).
Printing Type defaults to Normal-size Printing. Click the drop-down arrow to
select a different Printing Type:
Scaled Printing lets you set the scale of the printed image down to 20%
or up to 400% of the original.
Fit-To-Page Printing lets you automatically reduce the image to fit the
page on which it will be copied.
Page Layout Printing lets you set the number of pages to print on a
single sheet. Click Specif y to set the number of pages to a sheet of paper (2 to 16), the print order for those pages (left to right or right to
left) and whether you want to print a border around each page.
Poster Printing lets you print an oversized image on multiple pages that
can then be manually joined together. Click Specify to set the image
divisions (how many tiles the image will break up into).
Banner Printing is used for printing banners on special banner paper.
When done, click OK.
Saving and Recalling Driver Settings
When you change printer driver settings for a specific print job, such as printing
black and white photos, or printing documents with a special background, you
can save and name this settings profile for future use on other similar print jobs.
18
MultiPASS F30 User’s Manual

8/13/2019 MPF30 User Manual
http://slidepdf.com/reader/full/mpf30-user-manual 25/64
To save a driver setting profile:
1 Access printer driver
From an application File menu,
select Print.
With Canon MultiPASS F30 Printer
as the selected printer, click
Properties.
2 Name and save profile
Click the Profiles tab.
Click Add to Prof iles, then type a
name for your settings in theName field. You can also select an
icon for this profile.
Type a description of your settings, then
click Save.
To recall a driver setting profile:
1 Access printer driver
From an application File menu, select Print.
2 Retrieve profile
Click the Prof iles tab.
Highlight the saved setting profile you want to use, then click Retrieve from
Prof iles. Click OK to confirm the profile change. The profile settings will
become active.
Click OK again to close the window.
Other Print Features
You can find other available features in the online MultiPASS Reference Guide on
your CD-ROM, or by exploring the printer driver interface and referring to the
online help as needed.
19

8/13/2019 MPF30 User Manual
http://slidepdf.com/reader/full/mpf30-user-manual 26/6420
MultiPASS F30 User’s Manual
8/13/2019 MPF30 User Manual
http://slidepdf.com/reader/full/mpf30-user-manual 27/6421
4How to Copy
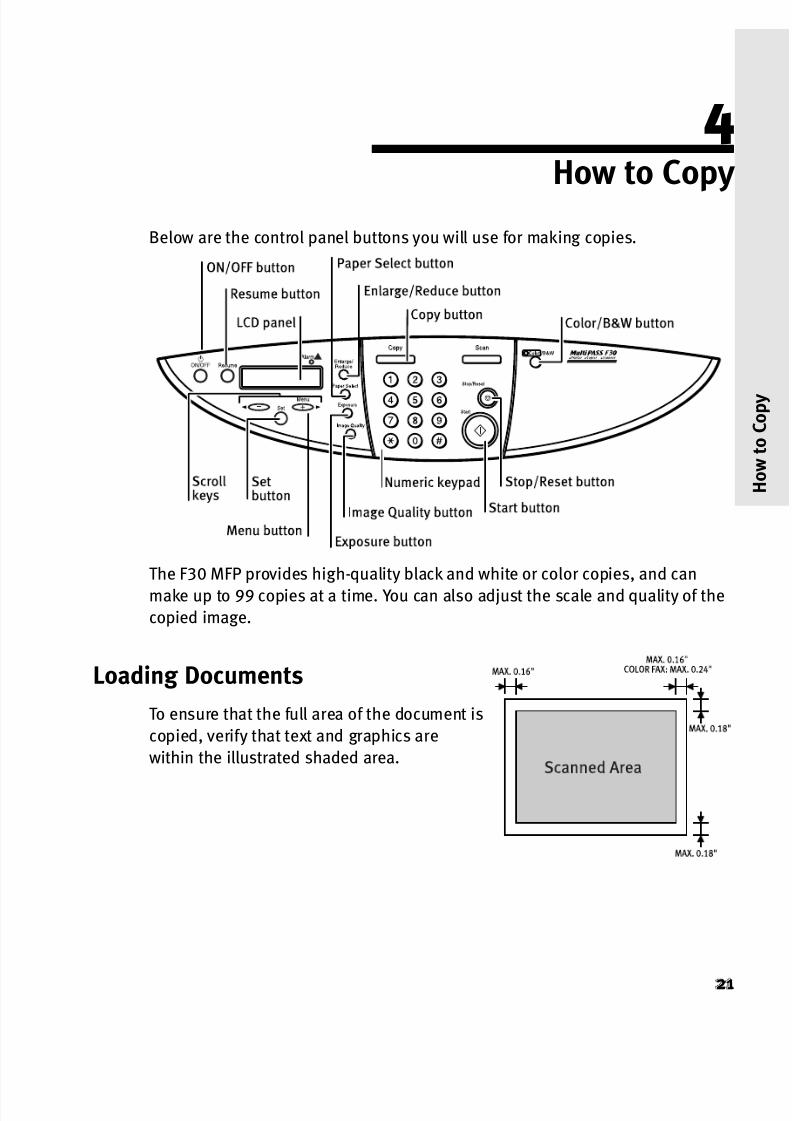
Below are the control panel buttons you will use for making copies.
The F30 MFP provides high-quality black and white or color copies, and can
make up to 99 copies at a time. You can also adjust the scale and quality of thecopied image.
Loading Documents
To ensure that the full area of the document is
copied, verify that text and graphics are
within the illustrated shaded area.
8/13/2019 MPF30 User Manual
http://slidepdf.com/reader/full/mpf30-user-manual 28/64
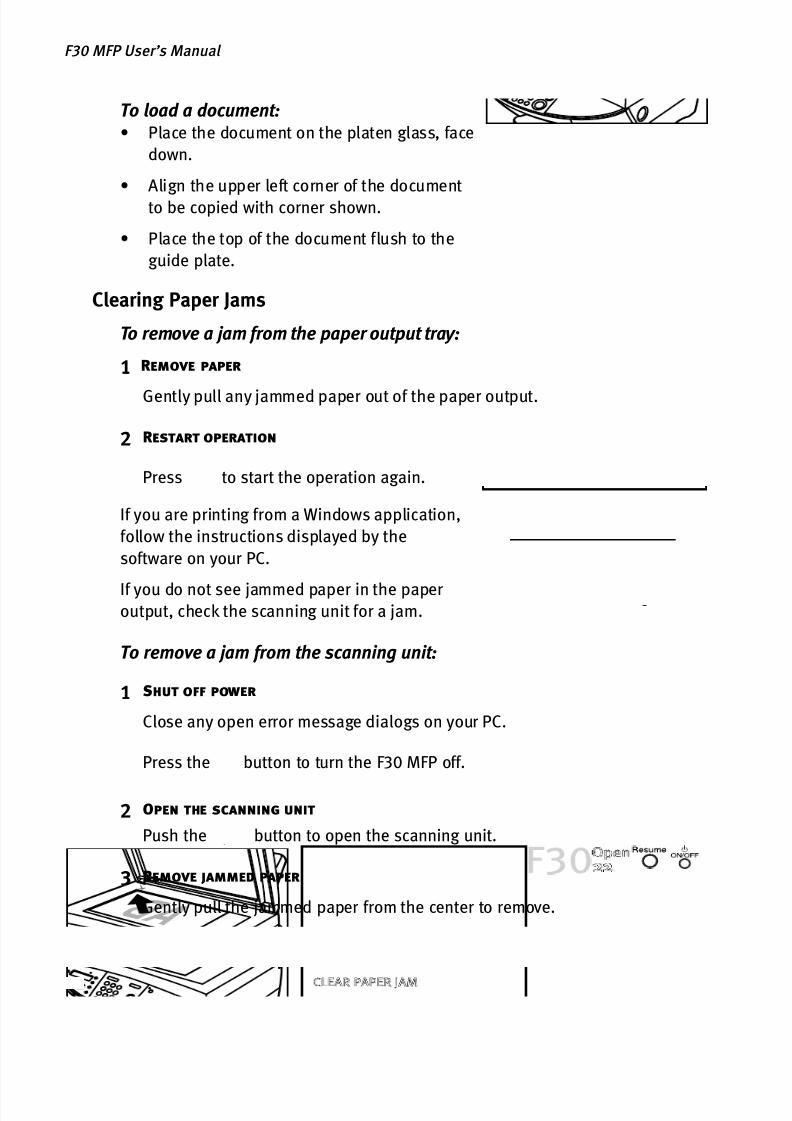
To load a document:• Place the document on the platen glass, face
down.
• Align the upper left corner of the document
to be copied with corner shown.
• Place the top of the document flush to the
guide plate.
Clearing Paper Jams
To remove a jam from the paper output tray:
1 Remove paper
Gently pull any jammed paper out of the paper output.
2 Restart operation
Press to start the operation again.
If you are printing from a Windows application,
follow the instructions displayed by the
software on your PC.
If you do not see jammed paper in the paperoutput, check the scanning unit for a jam.
To remove a jam from the scanning unit:
1 Shut off power
Close any open error message dialogs on your PC.
Press the button to turn the F30 MFP off.
2 Open the scanning unit
Push the Open button to open the scanning unit.
3 Remove jammed paper
Gently pull the jammed paper from the center to remove.
22
F30 MFP User’s Manual
Tips on ClearingPaper Jams
If print media jams in the multi-
purpose tray, the LCD displays a
CLEAR PAPER JAM message.
8/13/2019 MPF30 User Manual
http://slidepdf.com/reader/full/mpf30-user-manual 29/64
Be careful not to touch the components inside the F30 MFP.
When the paper is out, close the scanning unit, then turn the F30 MFP backon.
4 Restart operation
Press the button to turn the F30 MFP on.
Press to start the operation again.
Making Copies
You can copy a document in B&W (the default) or color, and make single or multiplecopies.
To copy a document:
1 Load document
Place document to be copied directly on the platen glass.
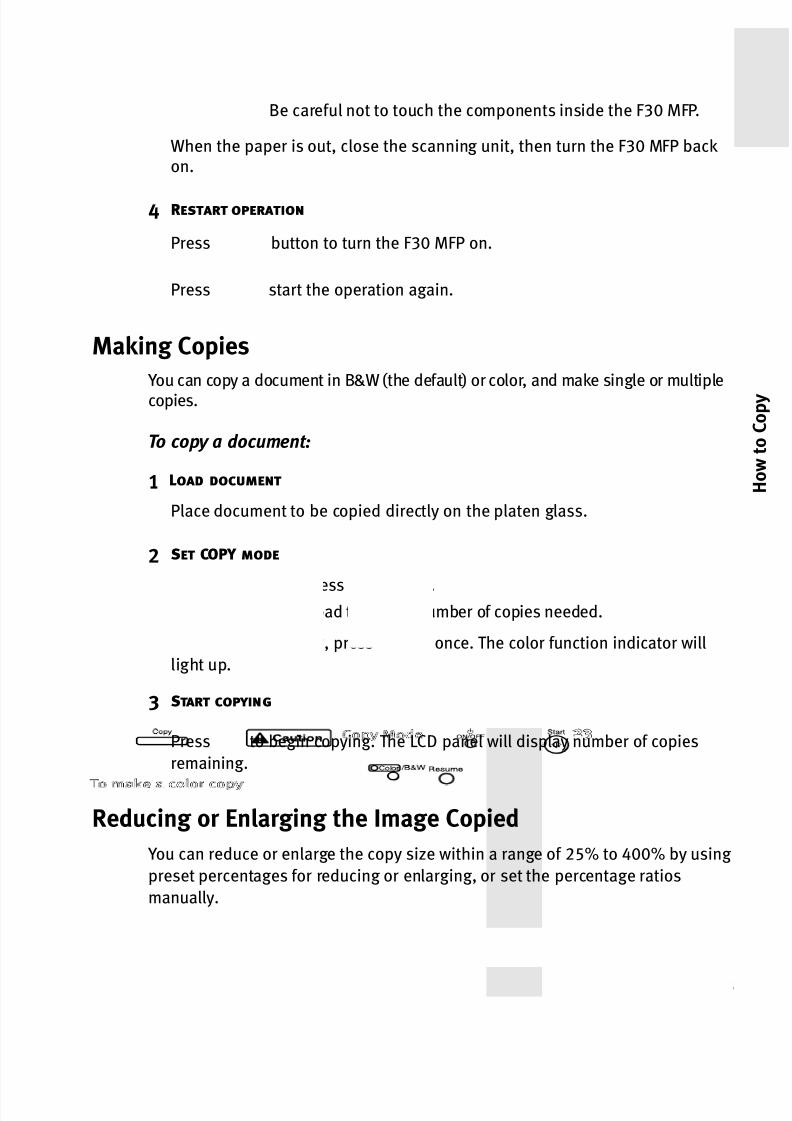
2 Set COPY mode
Press to access Copy Mode.Use the numeric keypad to set the number of copies needed.
To make a color copy, press once. The color function indicator will
light up.
3 Start copying
Press to begin copying. The LCD panel will display number of copies
remaining.
Reducing or Enlarging the Image Copied
You can reduce or enlarge the copy size within a range of 25% to 400% by using
preset percentages for reducing or enlarging, or set the percentage ratios
manually.
23
8/13/2019 MPF30 User Manual
http://slidepdf.com/reader/full/mpf30-user-manual 30/64
To enlarge or reduce using preset ratios:
1 Load document
Place document to be copied directly on the
platen glass.
2 Select Enlarge/Reduce
Press to access Copy Mode.
Press once to access.
3 Set ratio
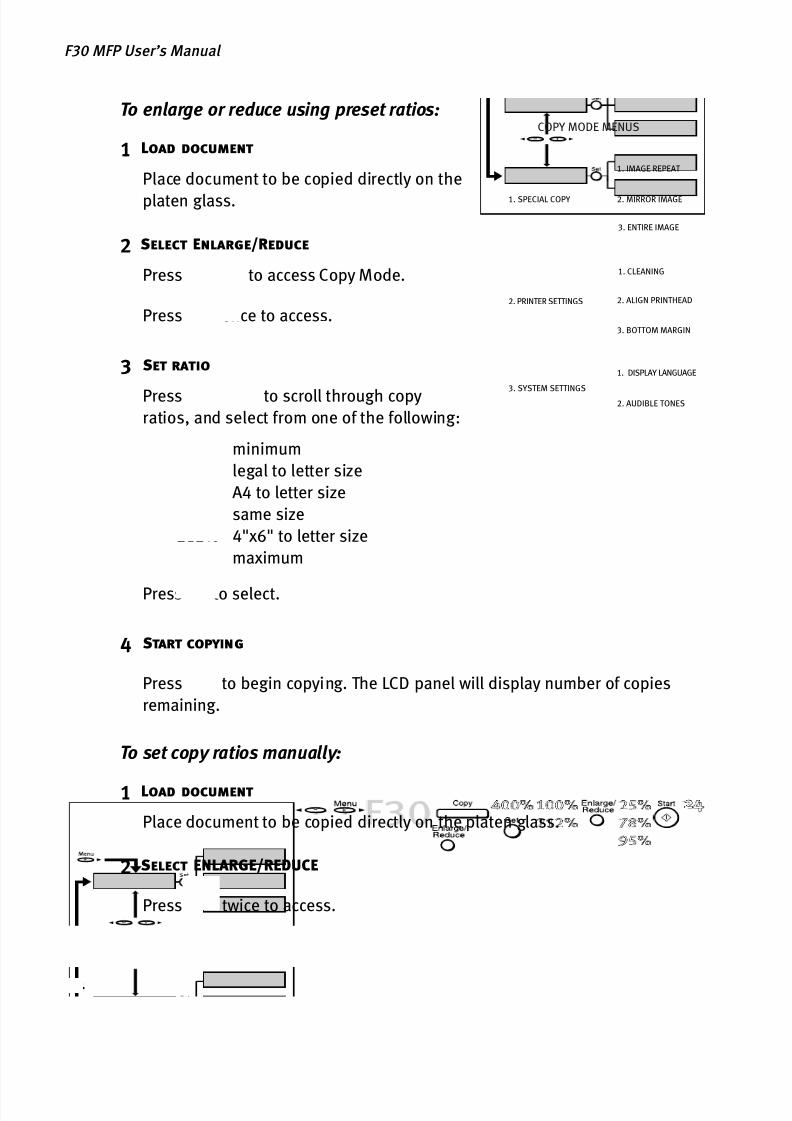
Press to scroll through copyratios, and select from one of the following:
25% minimum
78% legal to letter size
95% A4 to letter size
100% same size
212% 4"x6" to letter size
400% maximum
Press to select.
4 Start copying
Press to begin copying. The LCD panel will display number of copies
remaining.
To set copy ratios manually:
1 Load document
Place document to be copied directly on the platen glass.
2 Select ENLARGE/REDUCE
Press twice to access.
24
F30 MFP User’s Manual
COPY MODE MENUS
1. SPECIAL COPY
2. PRINTER SETTINGS
3. SYSTEM SETTINGS
2. MIRROR IMAGE
1. IMAGE REPEAT
3. ENTIRE IMAGE
2. AUDIBLE TONES
1. DISPLAY LANGUAGE
1. CLEANING
3. BOTTOM MARGIN
2. ALIGN PRINTHEAD
8/13/2019 MPF30 User Manual
http://slidepdf.com/reader/full/mpf30-user-manual 31/64
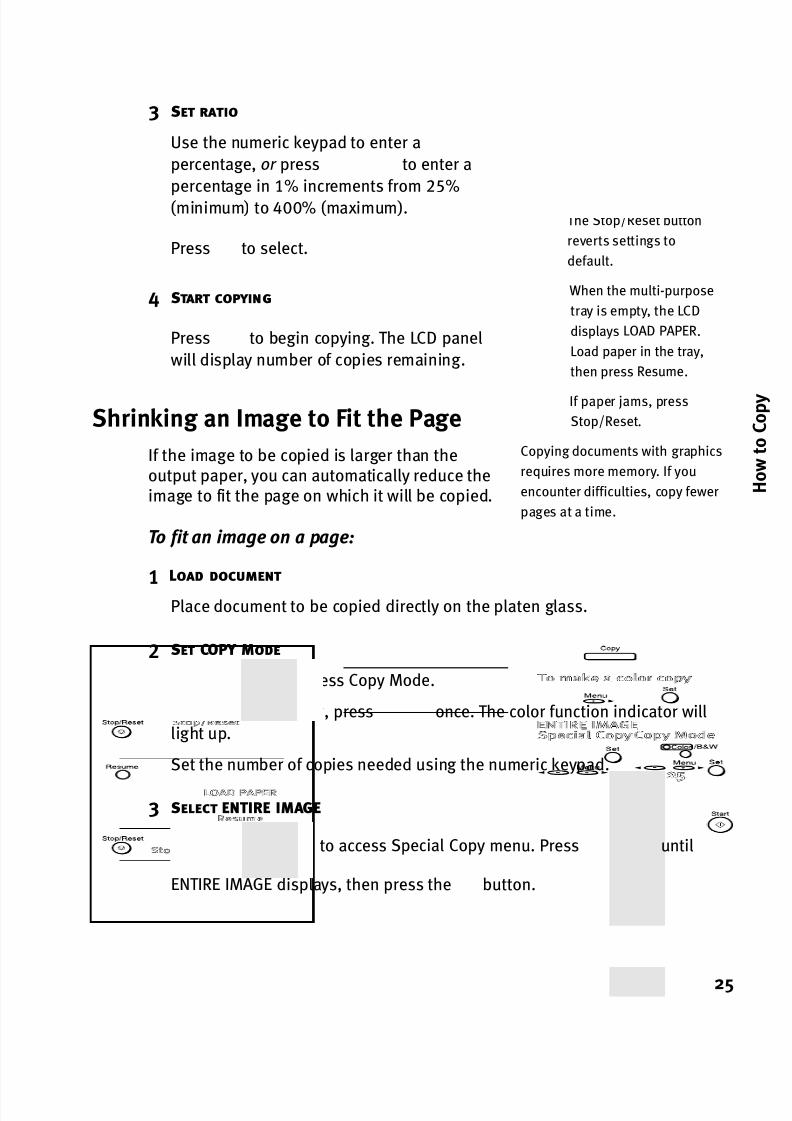
3 Set ratio
Use the numeric keypad to enter a
percentage, or press to enter a
percentage in 1% increments from 25%
(minimum) to 400% (maximum).
Press to select.
4 Start copying
Press to begin copying. The LCD panel
will display number of copies remaining.
Shrinking an Image to Fit the Page
If the image to be copied is larger than theoutput paper, you can automatically reduce theimage to fit the page on which it will be copied.
To fit an image on a page:
1 Load document
Place document to be copied directly on the platen glass.
2 Set COPY Mode
Press to access Copy Mode.
To make a color copy, press once. The color function indicator will
light up.
Set the number of copies needed using the numeric keypad.
3 Select ENTIRE IMAGE
Press then to access Special Copy menu. Press until
ENTIRE IMAGE displays, then press the button.
Tips on Copying
The LCD display shows the
number of remaining pages
during copying.
The Stop/Reset button
reverts settings to
default.
When the multi-purpose
tray is empty, the LCD
displays LOAD PAPER.
Load paper in the tray,
then press Resume.
If paper jams, press
Stop/Reset.
Copying documents with graphics
requires more memory. If you
encounter difficulties, copy fewer
pages at a time.
25
8/13/2019 MPF30 User Manual
http://slidepdf.com/reader/full/mpf30-user-manual 32/64
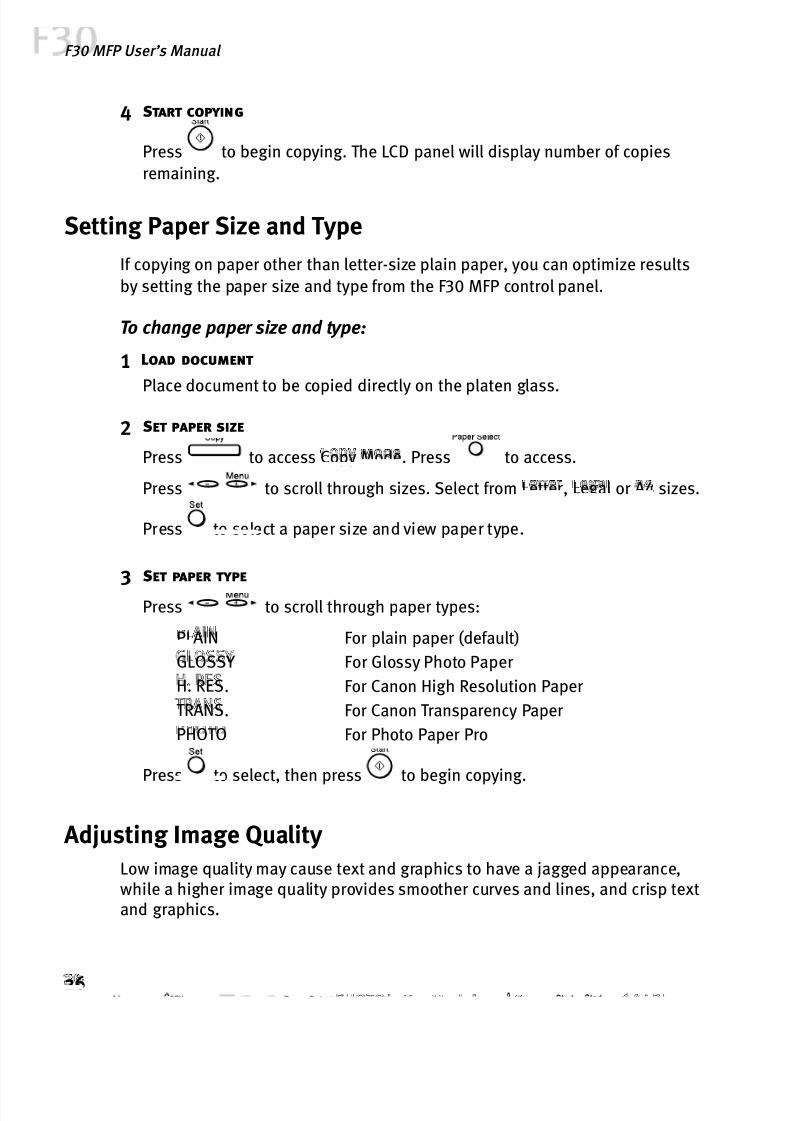
4 Start copying
Press to begin copying. The LCD panel will display number of copies
remaining.
Setting Paper Size and Type
If copying on paper other than letter-size plain paper, you can optimize results
by setting the paper size and type from the F30 MFP control panel.
To change paper size and type:
1 Load document
Place document to be copied directly on the platen glass.
2 Set paper size
Press to access Copy Mode. Press to access.
Press to scroll through sizes. Select from Letter, Legal or A4 sizes.
Press to select a paper size and view paper type.
3 Set paper type
Press to scroll through paper types:
PLAIN For plain paper (default)
GLOSSY For Glossy Photo Paper
H. RES. For Canon High Resolution Paper
TRANS. For Canon Transparency Paper
PHOTO For Photo Paper Pro
Press to select, then press to begin copying.
Adjusting Image Quality
Low image quality may cause text and graphics to have a jagged appearance,while a higher image quality provides smoother curves and lines, and crisp textand graphics.
26
F30 MFP User’s Manual
8/13/2019 MPF30 User Manual
http://slidepdf.com/reader/full/mpf30-user-manual 33/64
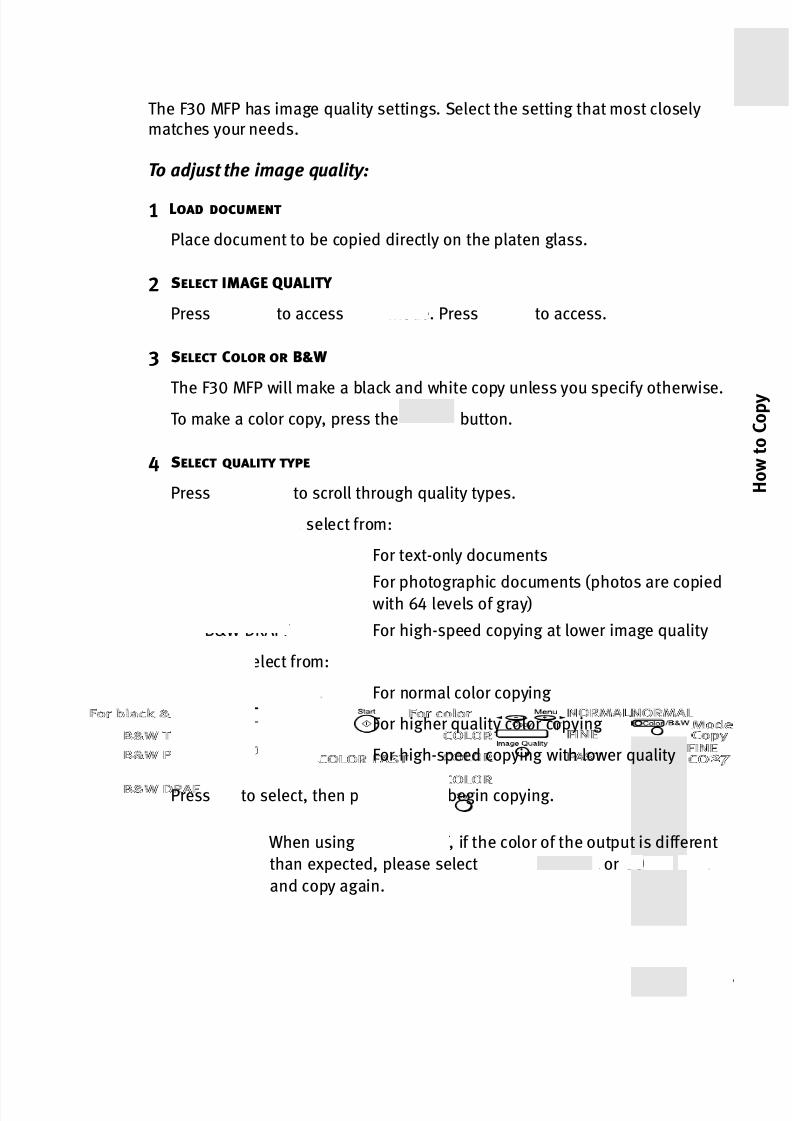
The F30 MFP has image quality settings. Select the setting that most closelymatches your needs.
To adjust the image quality:
1 Load document
Place document to be copied directly on the platen glass.
2 Select IMAGE QUALITY
Press to access Copy Mode. Press to access.
3 Select Color or B&W
The F30 MFP will make a black and white copy unless you specify otherwise.To make a color copy, press the button.
4 Select quality type
Press to scroll through quality types.
For black & white, select from:
B&W TEXT For text-only documents
B&W PHOTO For photographic documents (photos are copiedwith 64 levels of gray)
B&W DRAF T For high-speed copying at lower image quality
For color, select from:
COLOR NORMAL For normal color copying
COLOR FINE For higher quality color copying
COLOR FAST For high-speed copying with lower quality
Press to select, then press to begin copying.
When using COLOR FAST , if the color of the output is different
than expected, please select COLOR NORMAL or COLOR FINE
and copy again.
27

8/13/2019 MPF30 User Manual
http://slidepdf.com/reader/full/mpf30-user-manual 34/64
Adjusting Image Exposure
Exposure controls the lightness or darkness of the copied document. If adocument copies too light or too dark, you can adjust the exposure settings.
There are nine different levels of exposure to help you adjust your document.
To adjust the copy exposure:
1 Load document
Place document to be copied directly on the platen glass.
2 Select EXPOSURE
Press to access Copy Mode. Press to access.
3 Set exposure level
Press once or more to lighten the copy. Press once or more to
darken the copy.
Press to set your selection.
This setting will remain for one minute unless is pressed.
Press to begin copying.
Other Copy Features
The F30 MFP has other copy features available, including:
Repeating an image on a page: allows you to tile an image multiple times ona single page.
Create a mirror image: copies a document in reverse (mirror) image.For more information on these features, see the online MultiPASS Reference
Guide on your CD-ROM.
28
F30 MFP User’s Manual
8/13/2019 MPF30 User Manual
http://slidepdf.com/reader/full/mpf30-user-manual 35/6429
5
How to Scan
An image scanned with your F30 MFP can be saved, sent as an email
attachment, printed or edited in an application such as OmniPage®.
There are two basic ways to obtain a scanned image:
From within an application
Open an application that supports scanning, then open the scanning
software and perform the scan. The scanned image will automatically be
brought into the application.
With the MultiPASS Suite
Scan a document directly with the MultiPASS Suite (See “How to Use the
MultiPASS Toolbar” on page 5). To scan a document and print without
saving, See “How to Copy” starting on page 21.
Scanning From Within an Application
Most image processing applications use the TWAIN driver standard forscanning. Much in the same way your printer driver allows your PC to
communicate with your printer, a TWAIN driver makes it possible to send a
scanned document from a scanner to your application.
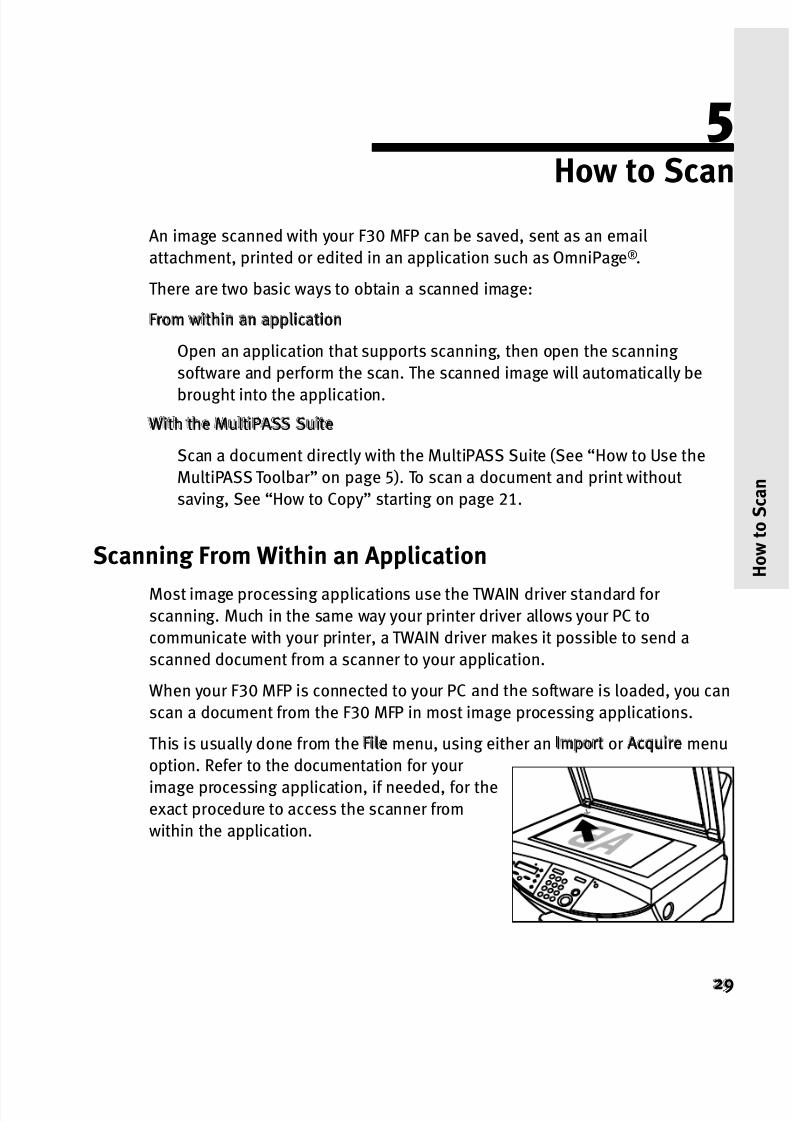
When your F30 MFP is connected to your PC and the software is loaded, you can
scan a document from the F30 MFP in most image processing applications.
This is usually done from the F ile menu, using either an Import or Acquire menu
option. Refer to the documentation for your
image processing application, if needed, for theexact procedure to access the scanner from
within the application.

8/13/2019 MPF30 User Manual
http://slidepdf.com/reader/full/mpf30-user-manual 36/64
To scan from an application:
1 Load document
Open the F30 MFP document cover and place the document face down on the
platen glass.
Align the document as shown.
2 Acquire image
From your image processing application, select Canon MultiPASS F 30
Scanner as the TWAIN SOURCE if not already selected. Access the scanner
software to acquire the image.
Using ScanGear ®
Software You can also adjust these settings in, and scan directly from, the MultiPASS
Toolbar’s ScanGear driver.
To enable ScanGear Software:
Click the Settings icon on
the toolbar, then click the Toolbar
Settings tab.
Under General, check the box for
Show ScanGear before scanning .
The ScanGear dialog box will open
whenever you scan from the
MultiPASS Toolbar.
30
MultiPASS F30 User’s Manual

8/13/2019 MPF30 User Manual
http://slidepdf.com/reader/full/mpf30-user-manual 37/64
Using the Scan Button for One-Push Functions
You can set the button on the F30 MFP’s control panel to instantly
perform any of the Toolbar’s functions.
To enable a particular function for the Scan button:
1 Access Toolbar Settings
Click Settings on the MultiPASS Toolbar, then click the Toolbar Settings tab.
2 Activate Scanner Push Button dialog
Click the drop-down list under When Scanner Push Button pressed.
Select from this list the function you would like to assign to the Scan button
on the control panel. You can also select this setting by right-clicking the MultiPASS Toolbar icon
on the taskbar, then selecting from the list under When Scanner Push
Button Pressed.
31

8/13/2019 MPF30 User Manual
http://slidepdf.com/reader/full/mpf30-user-manual 38/6432
MultiPASS F30 User’s Manual

8/13/2019 MPF30 User Manual
http://slidepdf.com/reader/full/mpf30-user-manual 39/6433
6How to Maintain Your F30 MFP
Routine maintenance for your F30 MFP includes keeping your unit clean,
changing the ink tanks as needed and maintaining the printhead.
Cleaning Your F30 MFP
Clean your F30 MFP periodically with a soft, dry, lint-free cloth to maintain
image quality, and to keep the unit free of dust and debris.
Replacing Ink Tanks
When ink runs out in an ink tank, an INK EMPT Y message will appear in the LCD
panel. The message will also specify which tank is empty: C for cyan,
M for magenta, Y for yellow or K for black.
To replace an empty ink tank:
1 Open unit
Press the Open button to open the scanning
unit. The printhead holder automatically moves
to the center.
Do not force the printhead holder
or damage could result!
2 Remove empty ink tank
Press the tab on the front of the empty tank,then remove and discard.
3 Prepare new ink tank
Take the new ink tank from its package and
remove the protective wrap and cap.
8/13/2019 MPF30 User Manual
http://slidepdf.com/reader/full/mpf30-user-manual 40/64
Handle ink tanks carefully so that ink does not spill. Never
squeeze the sides of an ink tank.
4 Install new ink tank
Gently insert the ink tank and press down until it clicks into place. Do not force an ink tank into the printhead. If the ink tank does not go in smoothly,
reseat it, then try again.
Press the scanning unit closed until it clicks securely into place.
Maintaining the Printhead
Routine printhead maintenance can extend the life of your F30 MFP printhead.
Printing a Nozzle Check PatternThe printhead discharges ink through nozzles—tiny openings from which the ink
is sprayed. If faded or streaked colors and text appear on your output, some of
the nozzles may be clogged. You can check this by printing a nozzle check pattern.
Ensure that paper is loaded in the F30 MFP before performing a nozzle check.
To print a nozzle check pattern from the F30 MFP control panel:
1 Select PRINTER SETTINGS
Press until PRINTER SET TINGS appears. Press to select.
2 Print nozzle check pattern
The CLEANING option displays. Press to select.
The NOZZLE CHECK option displays. Press to select.
34
MultiPASS F30 User’s Manual
8/13/2019 MPF30 User Manual
http://slidepdf.com/reader/full/mpf30-user-manual 41/64
Cleaning the Printhead
If the printed nozzle check pattern is broken, missing, or a specific color is notprinted, the printhead needs to be cleaned. Perform normal printhead cleaning
first, then perform a deep printhead cleaning only if normal cleaning does not
provide the desired result.
Cleaning the printhead consumes ink. Cleaning too often uses inkunnecessarily.
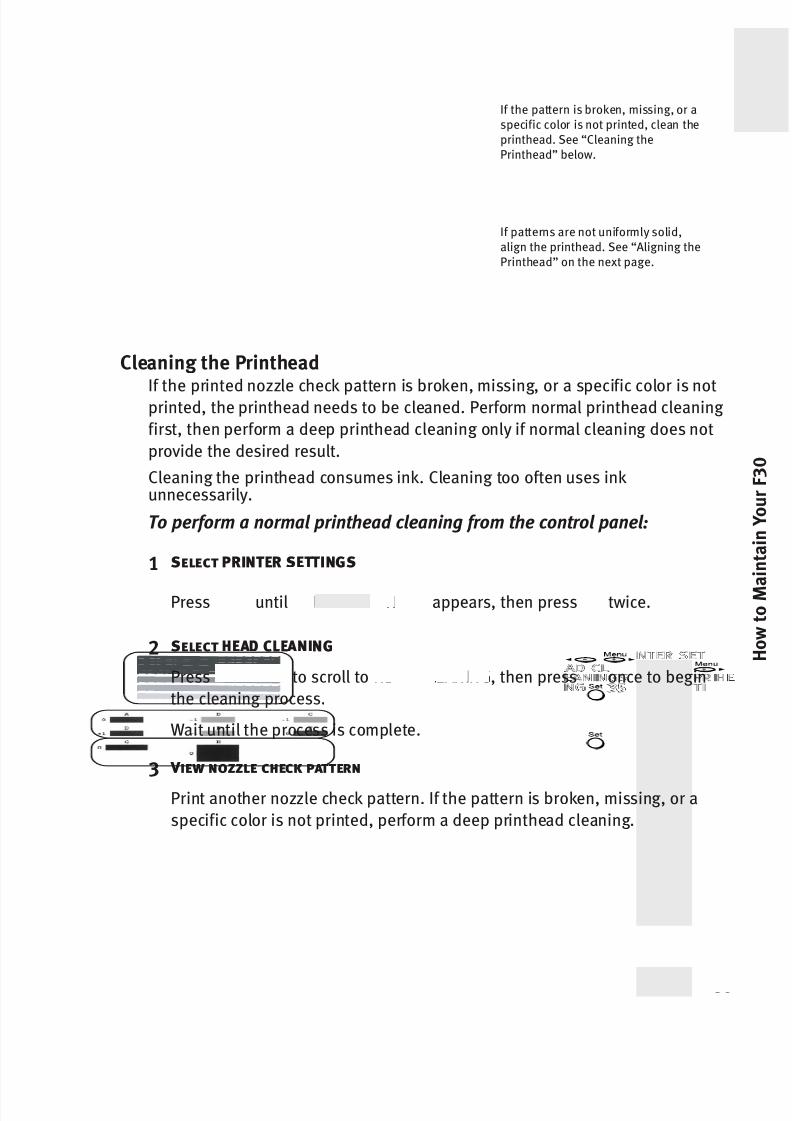
To perform a normal printhead cleaning from the control panel:
1 Select PRINTER SETTINGS
Press until PRINTER SET TINGS appears, then press twice.
2 Select HEAD CLEANING
Press to scroll to HEAD CLEANING, then press once to begin
the cleaning process.
Wait until the process is complete.
3 View nozzle check pattern
Print another nozzle check pattern. If the pattern is broken, missing, or a
specific color is not printed, perform a deep printhead cleaning.
If patterns are not uniformly solid,align the printhead. See “Aligning thePrinthead” on the next page.
If the pattern is broken, missing, or aspecific color is not printed, clean theprinthead. See “Cleaning thePrinthead” below.
35
8/13/2019 MPF30 User Manual
http://slidepdf.com/reader/full/mpf30-user-manual 42/64
Aligning the PrintheadWhen you install a new printhead or replace an old printhead, you will need to
align the position of the printhead before printing.
Several sheets of paper are required to align the printhead. Ensure that a stackof paper is loaded in the F30 MFP before performing alignment.
To align a new printhead:
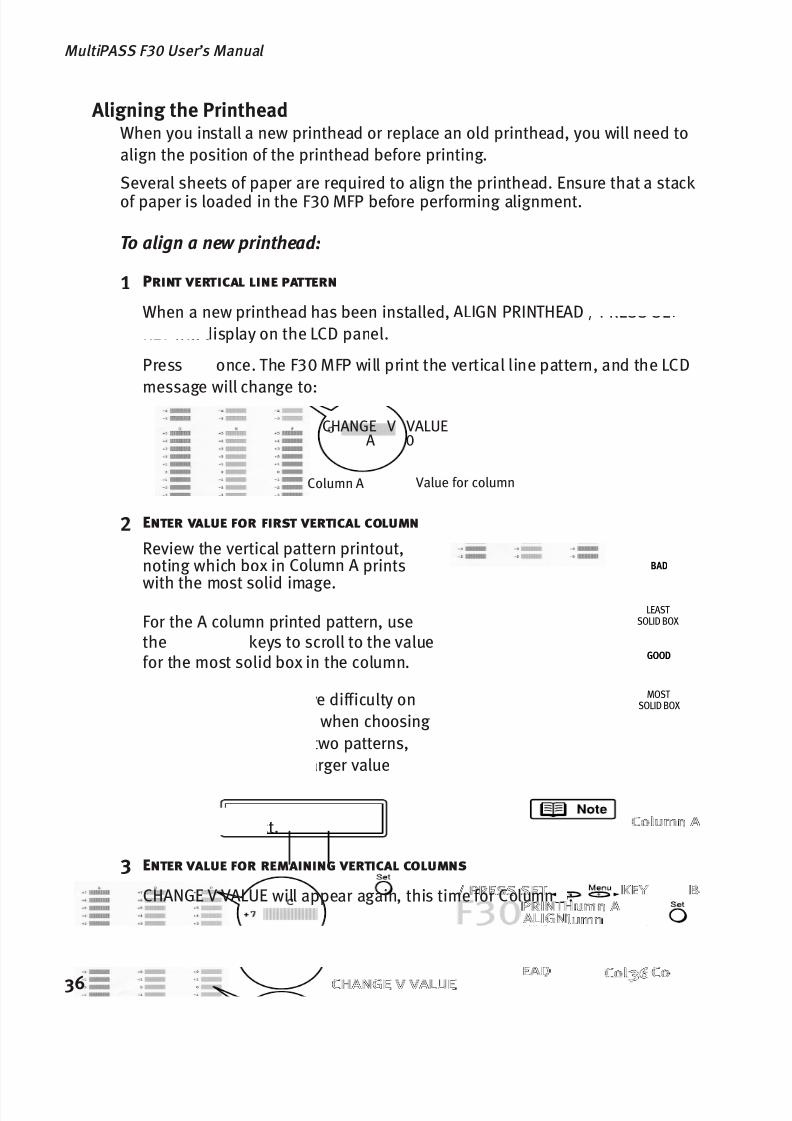
1 Print vertical line pattern
When a new printhead has been installed, ALIGN PRINTHEAD / PRESS SET
KEY will display on the LCD panel.
Press once. The F30 MFP will print the vertical line pattern, and the LCD
message will change to:
2 Enter value for first vertical column
Review the vertical pattern printout,noting which box in Column A prints
with the most solid image.
For the A column printed pattern, usethe keys to scroll to the valuefor the most solid box in the column.
If you have difficulty on
Column A when choosing
between two patterns,
use the larger value
number.
Press to select.
3 Enter value for remaining vertical columns
CHANGE V VALUE will appear again, this time for Column B:
CHANGE V VALUEA 0
Column A Value for column
36
MultiPASS F30 User’s Manual
MOST
SOLID BOX
LEAST
SOLID BOX
BAD
GOOD
8/13/2019 MPF30 User Manual
http://slidepdf.com/reader/full/mpf30-user-manual 43/64
Repeat Step 2 for patterns B through F on the printout.
If you have difficulty on Columns B or C when choosing
between two patterns, use the larger value number.
If you have difficulty when choosing between patterns for
Columns D, E or F , use the smaller value number.
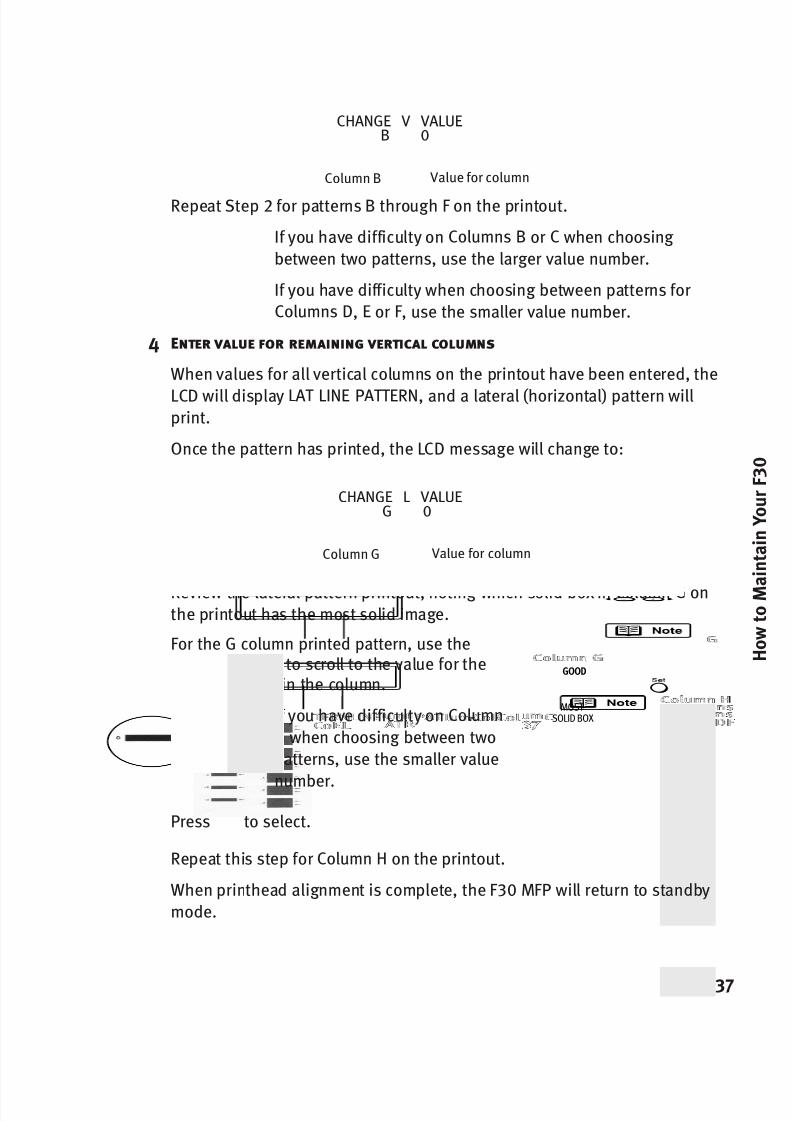
4 Enter value for remaining vertical columns
When values for all vertical columns on the printout have been entered, the
LCD will display LAT LINE PAT TERN, and a lateral (horizontal) pattern willprint.
Once the pattern has printed, the LCD message will change to:
Review the lateral pattern printout, noting which solid box in Column G onthe printout has the most solid image.
For the G column printed pattern, use thekeys to scroll to the value for the
most solid box in the column.
If you have difficulty on Column
G when choosing between two
patterns, use the smaller value
number.
Press to select.
Repeat this step for Column H on the printout.
When printhead alignment is complete, the F30 MFP will return to standby
mode.
CHANGE L VALUEG 0
Column G Value for column
CHANGE V VALUEB 0
Column B Value for column
37
MOST
SOLID BOX
GOOD

8/13/2019 MPF30 User Manual
http://slidepdf.com/reader/full/mpf30-user-manual 44/6438
MultiPASS F30 User’s Manual
8/13/2019 MPF30 User Manual
http://slidepdf.com/reader/full/mpf30-user-manual 45/64
7Troubleshooting
Tips for Troubleshooting
Troubleshooting usually falls into one of the following categories:
Sof tware and Installation
The software will not install properly.
Printing The printing feature is not working properly.
Scanning
The scan feature is not working as expected.
Copying
Copies are not coming out as expected.
Paper Feeding
Paper is not feeding through the unit properly.
LCD Message
An error message displays on the F30 MFP LCD panel.
If you encounter difficulties during installation or operation, scan the problems
or messages in the left column until you find a description that approximates
your difficulty. Go through the related solutions until you find one that works.
Customer Care Center
Canon also offers a full range of customer technical support options.
39

8/13/2019 MPF30 User Manual
http://slidepdf.com/reader/full/mpf30-user-manual 46/64
40
MultiPASS F30 User’s Manual
Troubleshooting Software and InstallationTroubleshooting Software and InstallationTroubleshooting Software and InstallationTroubleshooting Software and Installation
ProblemProblemProblemProblem Possible CausePossible CausePossible CausePossible Cause Try ThisTry ThisTry ThisTry This
Cannot installMultiPASS
Suite
Other applicationsrunning in
background
Close any open software applications, including anti-virusprograms, then install the software again.
Installation notstartingautomatically when
CD is inserted intothe drive
If installation did not start automatically when you inserted theCD-ROM:
1. Double-click My ComputerMy ComputerMy ComputerMy Computer on the Windows desktop, thendouble-click CD-ROM driveCD-ROM driveCD-ROM driveCD-ROM drive.
2. Double-click csplash.execsplash.execsplash.execsplash.exe.
Previous MultiPASS
software version
installed
Always uninstall the previous version of the software prior to
installing a new version. Close all MultiPASS programs, including
the Toolbar. Remove the MultiPASS software using the WindowsAdd/Remove ProgramsAdd/Remove ProgramsAdd/Remove ProgramsAdd/Remove Programs utility, or using the Canon MultiPASS
uninstall program as described in the online MultiPASS Suite onyour CD-ROM.
Unable tocommunicate
with device
Loose printer cableport
Verify that the cable is securely connected to both your PC and thecorrect printer.
MultiPASS StatusMonitor not
running
To print to the F30 MFP, the MultiPASS Status Monitor must berunning. Launch the Status Monitor from the MultiPASS Program
menu. See "To open the Status Monitor" on page 9.
Error message:
The CanonMultiPASShardware could
not beinitialized
F30 MFP is not on Ensure that the power cord is connected to the F30 MFP and
plugged into a working outlet.
Press the ON/OFFON/OFFON/OFFON/OFF button to turn the unit on.
Printer cable isloose ordisconnected
Ensure that the cable connection (USB or parallel) is secure onboth the F30 MFP and the PC.
Another port deviceis interfering with
the CanonMultiPASS portdrivers
The Canon MultiPASS hardware and software is not compatiblewith parallel port data "pass through" devices. If you are using a
"data pass through" device, you must unplug it and connect theMultiPASS directly to the parallel port on your PC.
Another driver is
interfering with theCanon MultiPASSport drivers
There is another program that uses the parallel port to which the
MultiPASS printer is connected. Try changing your other printersto a port other than the port used by your F30 MFP. If this does notcorrect the problem, the interfering printer driver may need to be
disabled or uninstalled.
8/13/2019 MPF30 User Manual
http://slidepdf.com/reader/full/mpf30-user-manual 47/64
41
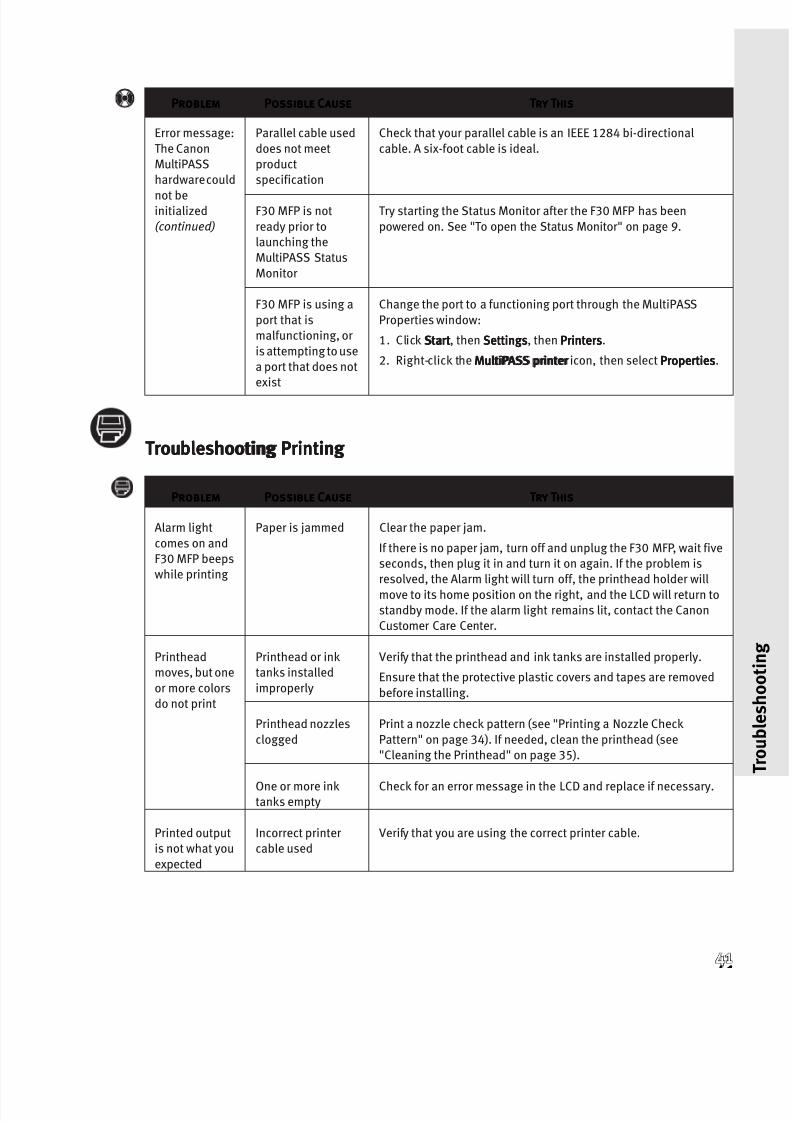
Troubleshooting Printing Troubleshooting Printing Troubleshooting Printing Troubleshooting Printing
Error message:
The CanonMultiPASShardware could
not beinitialized(continued)
Parallel cable used
does not meetproductspecification
Check that your parallel cable is an IEEE 1284 bi-directional
cable. A six-foot cable is ideal.
F30 MFP is not
ready prior tolaunching theMultiPASS Status
Monitor
Try starting the Status Monitor after the F30 MFP has been
powered on. See "To open the Status Monitor" on page 9.
F30 MFP is using a
port that ismalfunctioning, or
is attempting to usea port that does notexist
Change the port to a functioning port through the MultiPASS
Properties window:
1. Click StartStartStartStart, then SettingsSettingsSettingsSettings, then PrintersPrintersPrintersPrinters.
2. Right-click the MultiPASS printerMultiPASS printerMultiPASS printerMultiPASS printer icon, then select PropertiesPropertiesPropertiesProperties.
ProblemProblemProblemProblem Possible CausePossible CausePossible CausePossible Cause Try ThisTry ThisTry ThisTry This
Alarm light
comes on andF30 MFP beepswhile printing
Paper is jammed Clear the paper jam.
If there is no paper jam, turn off and unplug the F30 MFP, wait fiveseconds, then plug it in and turn it on again. If the problem isresolved, the Alarm light will turn off, the printhead holder will
move to its home position on the right, and the LCD will return tostandby mode. If the alarm light remains lit, contact the CanonCustomer Care Center.
Printheadmoves, but one
or more colorsdo not print
Printhead or inktanks installed
improperly
Verify that the printhead and ink tanks are installed properly.
Ensure that the protective plastic covers and tapes are removed
before installing.
Printhead nozzles
clogged
Print a nozzle check pattern (see "Printing a Nozzle Check
Pattern" on page 34). If needed, clean the printhead (see"Cleaning the Printhead" on page 35).
One or more inktanks empty
Check for an error message in the LCD and replace if necessary.
Printed outputis not what you
expected
Incorrect printercable used
Verify that you are using the correct printer cable.
ProblemProblemProblemProblem Possible CausePossible CausePossible CausePossible Cause Try ThisTry ThisTry ThisTry This

8/13/2019 MPF30 User Manual
http://slidepdf.com/reader/full/mpf30-user-manual 48/64
42
MultiPASS F30 User’s Manual
Printed outputis not what you
expected(continued)
Printer cable toolong
Make sure the cable used does not exceed the recommendedlength (16.4 feet for USB; 6.6 feet for parallel).
Printout doesnot matchpaper size
Paper not correctlyloaded and aligned
Make sure the paper is loaded and aligned correctly in the multi-purpose tray, and that the paper guides are adjusted correctly.See "Loading Paper" on page 3.
Printout curls Page contains largeamount of ink
Leave the sheet in the output tray for 30 to 60 seconds to allowthe ink to dry. Remove the sheet carefully without touching the
printed surface.
Paper you are usingis too thin
Printing dense graphics on light paper stock may cause the paperto curl. Try using heavier stock.r
No printout Printer cable notsecurely connected
Check the printer cable connection on both the F30 MFP and yourPC.
Incorrect parallelcable type
Ensure that you are using an IEEE 1284 bi-directional parallelcable.
Power cord notplugged in securely
Check that the power cord is plugged securely into the F30 MFPand into the wall outlet. If the F30 MFP is plugged into a power
strip, make sure the power strip is plugged in and turned on.
Printhead not
installed properly
Re-install the printhead.
One or more inktanks are empty
See "Replacing Ink Tanks" on page 33.
Printed text or
images areskewed
Paper not loaded
correctly
Make sure the paper is loaded properly in the multi-purpose tray,
and that the paper guide is adjusted correctly. See "LoadingPaper" on page 3.
Make sure the paper exit path is clear.
Printingsuspended
after each line
Printhead is too hot When the printhead has become too hot, the F30 MFP slows itsprinting to protect the printhead. Stop printing and wait several
minutes for the printhead to cool, then resume printing.
Printing is slow Incorrect printer
driver settings
Altering driver settings may improve print speed. See "Improving
Printed Images" on page 13.
Parallel port maynot be configuredfor optimum speed
Change the parallel port on your PC to ECP (Extended CapabilitiesPort) to increase scanning speed and throughput. For details onECP, refer to your PC user documentation or contact technical
support for your PC.
ProblemProblemProblemProblem Possible CausePossible CausePossible CausePossible Cause Try ThisTry ThisTry ThisTry This

8/13/2019 MPF30 User Manual
http://slidepdf.com/reader/full/mpf30-user-manual 49/64
43
Error: writing toLPT1
F30 MFP notconnected
Check the printer cables and ensure they are securely connected.Then try printing again.
F30 MFP is
unplugged
Plug in the F30 MFP and try printing again.
Paper jam Clear any paper jams. See "Clearing Paper Jams" on page 22.
MultiPASS StatusMonitor not
running
To print to the F30 MFP, the MultiPASS Status Monitor must berunning. Launch the Status Monitor from the MultiPASS Program
menu. See "The MultiPASS Status Monitor" on page 9.
Hardware error Check the LCD display for a message, then take the appropriate
action to correct the error and clear the message. Press ResumeResumeResumeResumeto continue.
Print quality is
poor
Incorrect driver
setting
Ensure that the printer driver is configured correctly for the paper
being used. See "Improving Printed Images" starting on page 13.for more information.
Media not
supported by F30MFP
Make sure that the paper used is recommended for this
equipment.
Printing on wrongside of paper
Some papers have a specific side for printing. If print quality isnot as clear as expected, try turning the paper over and printingon the other side.
Printhead nozzles
clogged
Print a nozzle check pattern (see "Printing a Nozzle Check
Pattern" on page 34). If needed, clean the printhead (see"Cleaning the Printhead" on page 35).
Printhead or inktanks installedimproperly
Verify that the printhead and ink tanks are installed properly.
Ensure that the protective plastic covers and tapes are removedbefore installing.
One or more inktanks empty
Check for an error message in the LCD and replace if necessary.
Printheadalignment needed
If you did not align the printhead after installing a new printhead,this can affect the quality. See "Aligning the Printhead" on page
36.
Printout image
is smeared
Paper thickness
lever not setcorrectly
When printing pages that contain large quantities of ink, the
paper may curl and rub. Try setting the paper thickness to theright to compensate.
Color balanceis poor
Printer settingsneed to be adjusted
Printer settings may not be ideal for the images you are trying toprint. Experiment with different settings and paper types. See"Improving Printed Images" starting on page 16.
ProblemProblemProblemProblem Possible CausePossible CausePossible CausePossible Cause Try ThisTry ThisTry ThisTry This
8/13/2019 MPF30 User Manual
http://slidepdf.com/reader/full/mpf30-user-manual 50/64
44
MultiPASS F30 User’s Manual
Troubleshooting Scanning
Troubleshooting Copies
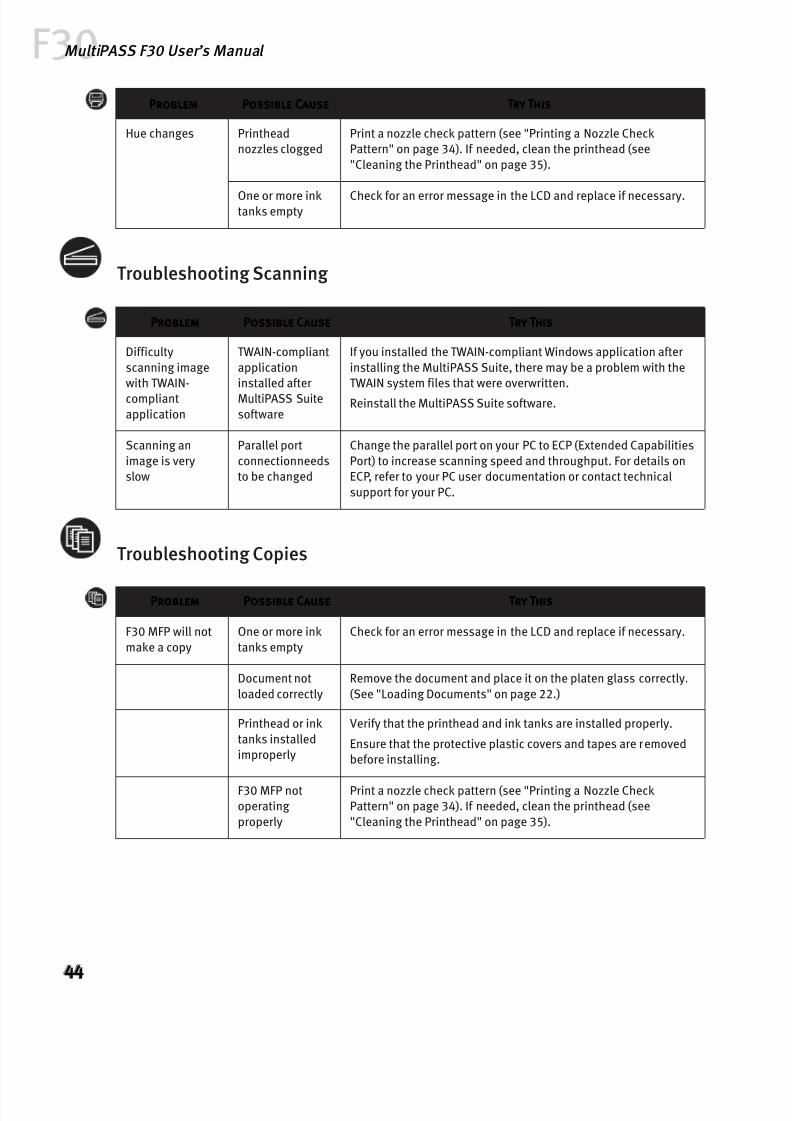
Hue changes Printheadnozzles clogged
Print a nozzle check pattern (see "Printing a Nozzle CheckPattern" on page 34). If needed, clean the printhead (see
"Cleaning the Printhead" on page 35).
One or more inktanks empty
Check for an error message in the LCD and replace if necessary.
Difficulty
scanning imagewith TWAIN-compliant
application
TWAIN-compliant
applicationinstalled afterMultiPASS Suite
software
If you installed the TWAIN-compliant Windows application after
installing the MultiPASS Suite, there may be a problem with theTWAIN system files that were overwritten.
Reinstall the MultiPASS Suite software.
Scanning an
image is veryslow
Parallel port
connection needsto be changed
Change the parallel port on your PC to ECP (Extended Capabilities
Port) to increase scanning speed and throughput. For details onECP, refer to your PC user documentation or contact technical
support for your PC.
F30 MFP will not
make a copy
One or more ink
tanks empty
Check for an error message in the LCD and replace if necessary.
Document not
loaded correctly
Remove the document and place it on the platen glass correctly.
(See "Loading Documents" on page 22.)
Printhead or ink
tanks installedimproperly
Verify that the printhead and ink tanks are installed properly.
Ensure that the protective plastic covers and tapes are removedbefore installing.
F30 MFP notoperating
properly
Print a nozzle check pattern (see "Printing a Nozzle CheckPattern" on page 34). If needed, clean the printhead (see
"Cleaning the Printhead" on page 35).
ProblemProblemProblemProblem Possible CausePossible CausePossible CausePossible Cause Try ThisTry ThisTry ThisTry This
ProblemProblemProblemProblem Possible CausePossible CausePossible CausePossible Cause Try ThisTry ThisTry ThisTry This
ProblemProblemProblemProblem Possible CausePossible CausePossible CausePossible Cause Try ThisTry ThisTry ThisTry This

8/13/2019 MPF30 User Manual
http://slidepdf.com/reader/full/mpf30-user-manual 51/64
45
Troubleshooting Paper Feeding
ProblemProblemProblemProblem Possible CausePossible CausePossible CausePossible Cause Try ThisTry ThisTry ThisTry This
Paper does notfeed correctly
Multi-purposetray contains toomany sheets
Make sure the paper stack in the multi-purpose tray does notexceed the paper limit mark. See "How to Load Paper andEnvelopes" starting on page 3.
Paper not loaded
correctly
Make sure that paper is loaded correctly in the multi-purpose
tray, and paper guides adjusted properly. See "How to Load Paperand Envelopes" on page 3.
Paper is skewed(printing isskewed)
Paper not loadedcorrectly.
Make sure that paper is loaded correctly in the multi-purposetray, and paper guides adjusted properly. See "How to Load Paperand Envelopes" on page 3.
Multiple sheetsfeed at same time
Paper not loadedcorrectly
Make sure that paper is loaded correctly in the multi-purposetray, and that the paper guide is adjusted properly. See "How to
Load Paper and Envelopes" starting on page 3.
Sheets of papersticking together
Fan the paper stack before loading it in the multi-purpose tray.This keeps the sheets of paper from sticking together.
Too many sheetsin multi-purposetray
Make sure loaded paper does not exceed the paper limit mark.See "How to Load Paper and Envelopes" on page 3.
Do not force paper into the multi-purpose tray.
Different papertypes mixed
together
Load only one type of paper at a time.
Use only recommended paper types (see inside back cover for fulllisting of recommended media).
Transparenciesdo not feed
correctly
Transparenciesnot loaded
correctly
Do not load more than 30 transparencies in the multi-purposetray. See "How to Load Paper and Envelopes" on page 3.
Repeated paperjams
Paper used is notrecommendedpaper
Use only recommended paper types (see inside back cover for fulllisting of recommended media).
Envelopes do notfeed correctly
Envelopes notloaded correctly
Make sure the envelopes are loaded properly. Do not load morethan 10 envelopes at a time. See "How to Load Paper and
Envelopes" on page 3. If needed, clean the rollers.
Unsupported
envelope type
Envelopes must be U.S. commercial #10 or European DL
envelopes.

8/13/2019 MPF30 User Manual
http://slidepdf.com/reader/full/mpf30-user-manual 52/64
46
MultiPASS F30 User’s Manual
LCD Messages
C INK EMPTY Cyan ink tank isempty
Replace the ink tank. See "Replacing Ink Tanks" on page 33.
CARTRIDGE JAMMED
Printhead cannotmove
This problem is usually due to a paper jam. Clear the paper jam orobstruction (see "Clearing Paper Jams" on page 22), then press
ResumeResumeResumeResume. Do not attempt to move the printhead manually.
CHECK PAPER SIZE PAPER SIZE settingdifferent thanloaded paper
Load the correct paper size or change the PAPER SIZEPAPER SIZEPAPER SIZEPAPER SIZE setting. See"Changing Page Setup" on page 17.
CHECK PRINTER Printhead not
moving
Check for any obstruction (paper clip or other small object). Also
check for a paper jam and clear the jam if necessary. Then pressResumeResumeResumeResume and start again.
Waste tank is full The F30 MFP has a built-in waste ink tank to hold the ink consumed
during printhead cleaning. Contact the Canon Customer Care Centerto have the waste ink tank replaced.
Printhead isdefective
Check the printhead for signs of damage. If the printhead needs tobe replaced contact the Canon Customer Care Center.
COVER OPEN Scanning unit wasopened during
operation
Close the scanning unit.
INK EMPTY Black ink tank is
empty.
Replace the ink tank. See "Replacing Ink Tanks" on page 33.
LOAD PAPER PRESS
RESUME KEY
No paper loaded Load paper in the multi-purpose tray. Make sure the stack is below
the paper limit mark. Press ResumeResumeResumeResume to continue printing.
M INK EMPTY Magenta tank is
empty.
Replace the ink tank. See "Replacing Ink Tanks" on page 33.
NOT AVAILABLE A group speed-
dialing number
was manuallyentered
Use regular dialing, or enter a one-touch speed dialing button or
coded speed dialing code that only has one number assigned to it.
PUT IN CARTRIDGE Printhead not
installed
Install the printhead.
WAIT COOLING Printhead is too
hot
Wait a few moments for the F30 MFP to cool down, then resume
printing when the LCD message changes.
MessageMessageMessageMessage Possible CausePossible CausePossible CausePossible Cause Try ThisTry ThisTry ThisTry This
8/13/2019 MPF30 User Manual
http://slidepdf.com/reader/full/mpf30-user-manual 53/64
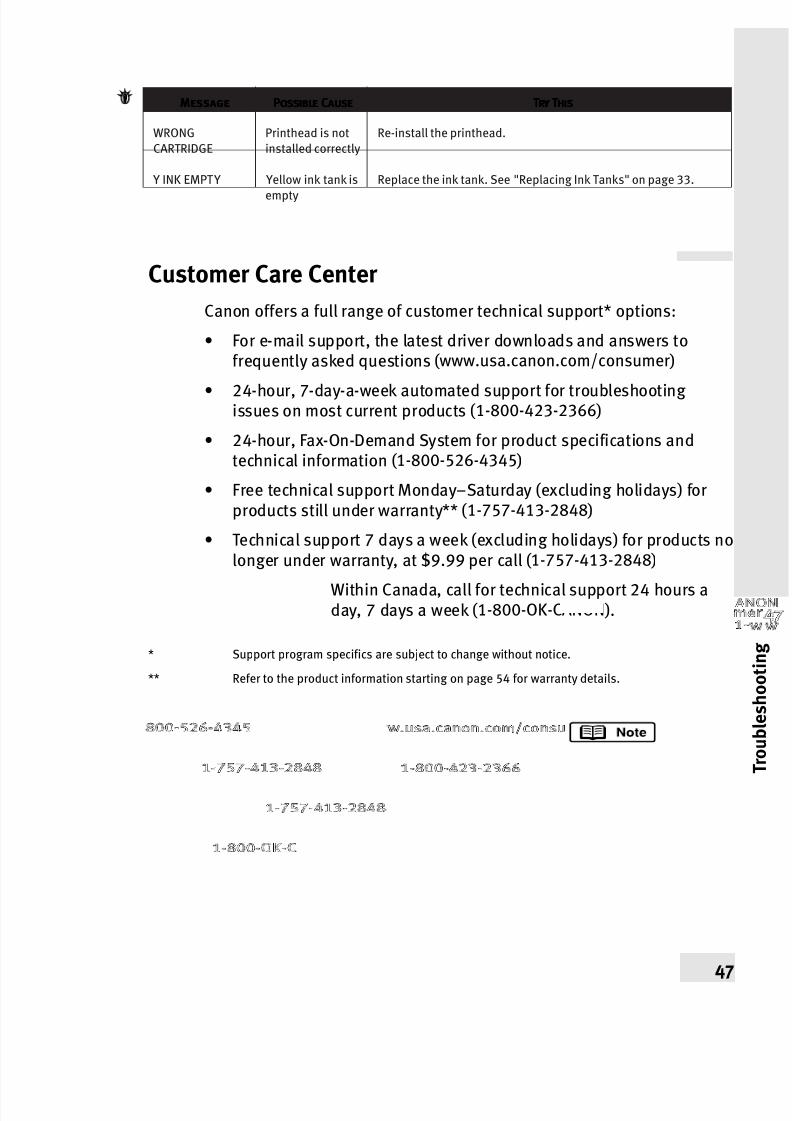
Customer Care Center
Canon offers a full range of customer technical support* options:
• For e-mail support, the latest driver downloads and answers tofrequently asked questions ( www.usa.canon.com/consumer )
• 24-hour, 7-day-a-week automated support for troubleshooting issues on most current products ( 1-800-423-2366 )
• 24-hour, Fax-On-Demand System for product specifications andtechnical information ( 1-800-526-4345 )
• Free technical support Monday–Saturday (excluding holidays) forproducts still under warranty** ( 1-757-413-2848 )
• Technical support 7 days a week (excluding holidays) for products nolonger under warranty, at $9.99 per call ( 1-757-413-2848 )
Within Canada, call for technical support 24 hours aday, 7 days a week ( 1-800-OK-CANON ).
* Support program specifics are subject to change without notice.
** Refer to the product information starting on page 54 for warranty details.
47
WRONG
CARTRIDGE
Printhead is not
installed correctly
Re-install the printhead.
Y INK EMPTY Yellow ink tank is
empty
Replace the ink tank. See "Replacing Ink Tanks" on page 33.
MessageMessageMessageMessage Possible CausePossible CausePossible CausePossible Cause Try ThisTry ThisTry ThisTry This

8/13/2019 MPF30 User Manual
http://slidepdf.com/reader/full/mpf30-user-manual 54/64
48
MultiPASS F30 User’s Manual
8/13/2019 MPF30 User Manual
http://slidepdf.com/reader/full/mpf30-user-manual 55/64
8
Appendix
Safety Information
This guide uses the following icons to indicate situations that could cause damage or injury:
Always follow the instructions provided in Warnings to prevent potential or serious personalinjury or death as a result of careless operation of the equipment.
Always follow the instructions provided in Cautions to prevent minor injuries to yourself ordamage to the equipment as a result of careless operation of the equipment.
Read and follow all of these cautions and warnings to ensure the safe use of the F30 MFP. To avoid the hazards
of fire, personal injury, or damage to the equipment, never attempt to use the equipment in any way other
than the methods described in this guide.
This product emits low level magnetic flux. If you use a cardiac pacemaker and feelabnormalities, please move away from this product and consult your doctor.
Do not disassemble or modify. There are high-temperature and high-voltage componentsinside the F30 MFP which may result in a fire or electrical shock.
Follow all warnings and instructions marked on the F30 MFP.
Location Do not place the F30 MFP near alcohol, paint thinner or other flammable substances. If flammable substances come into contact with electrical parts inside the F30 MFP, it may resultin a fire or electrical shock.
Do not block or cover the ventilation port or any openings on the F30 MFP with objects, as thismay result in a fire.
Place the F30 MFP on a flat, stable, vibration-free surface that is strong enough to support itsweight (approx. 22 lb.)
• Make sure the area is free from dust.
• Make sure the location is not affected by extreme temperature changes, and always stays between 50°and 90.5°F.
• Make sure the relative humidity of the area is between 20% and 85%.
• Keep the F30 MFP away from direct sunlight.
• Do not use or store the F30 MFP outdoors.
• Do not install the F30 MFP near devices that contain magnets or generate magnetic fields, such asspeakers.
• Make sure the F30 MFP is approximately 4 inches away from walls and other equipment for properventilation.
49

8/13/2019 MPF30 User Manual
http://slidepdf.com/reader/full/mpf30-user-manual 56/64
Power Supply Do not damage or modify the power cord and power plug. Also do not place heavy objects onthe power cord, pull on it, or extensively bend it. These actions may cause electrical damageand result in a fire or electrical shock.
Do not insert or unplug the power plug with wet hands, as this may result in electrical shock.
During electrical storms, turn off the power and disconnect the power cord from the poweroutlet.
If dust accumulates around the plug of the power cord when it is connected to a power outlet,unplug the F30 MFP and wipe the plug with a clean, dry cloth.
Do not plug the F30 MFP into the same circuit with appliances such as an air conditioner,television, or copier. These devices generate electrical noise which may interfere with your F30MFP’s ability to operate.
Whenever you turn off the power and unplug the F30 MFP, wait at least five seconds before youplug it in again.
Plug the F30 MFP into a standard 120V AC/60Hz, three-prong grounded outlet. Operate the F30 MFP only fromthe type of power source indicated on the F30 MFP’s label. If you are not sure of the type of power available,consult your local power company.
Use only the power cord that came with the F30 MFP.
Turn off the power and unplug the F30 MFP in the following conditions:
• When the power cord or plug is damaged or frayed.
• If liquid has spilled into the F30 MFP.
• If the F30 MFP has been exposed to rain or water.
• If the F30 MFP does not operate normally when you have followed the instructions in the guides includedwith your machine. Adjust only those controls that are covered by the instructions in the guides sinceimproper adjustment of other controls may result in damage and will often require extensive work by aqualified technician to restore the product to normal operation.
• If the F30 MFP has been dropped or damaged.
• If the F30 MFP exhibits a distinct change in performance, indicating a need for servicing.
HandlingDo not drop paper clips, staples, or other metal objects inside the F30 MFP. Also do not spillwater, liquid or flammable substances inside the F30 MFP. If these items come into contact
with high-voltage parts inside the F30 MFP, it may result in a fire or electrical shock. If theseitems are dropped or spilled in the F30 MFP, turn off the power and unplug the power cordimmediately with dry hands. Then, contact the Canon Customer Care Center.
Do not use any highly flammable spray near the F30 MFP. If gas from a spray comes intocontact with the electrical components inside the F30 MFP, it will result in a fire.
Close the platen glass cover or the scanning unit gently to avoid catching your hand. Failing todo so may result in personal injury.
50
F30 MFP User’s Manual

8/13/2019 MPF30 User Manual
http://slidepdf.com/reader/full/mpf30-user-manual 57/64
• Do not press down hard on the platen glass cover when using the platen glass to scan thick books. Thismay damage the platen glass and/or result in personal injury.
• Do not fix your eyes on the luminous source while making copies and scanning, as this may result inpersonal injury.
• Do not subject the F30 MFP to strong physical shock or vibration.
• Turn off the power and unplug the F30 MFP before moving it.
• Do not lift the F30 MFP by any of its attachments.
• If the F30 MFP exhibits a distinct change in performance, this indicates a need for servicing.
MaintenanceDo not service the F30 MFP yourself except as specifically described in this guide. If furtherservicing is required, contact the Canon Customer Care Center.
• Keep the F30 MFP clean. Dust accumulation may prevent the F30 MFP from operating properly.
Printhead and Ink TanksFor safety, always store printhead and ink tanks out of the reach of small children. If a childaccidentally licks or ingests any ink, consult a physician immediately.
Never subject a printhead or ink tank to shocks or excessive vibration. Shaking could cause inkto leak and stain clothing.
Never touch the printhead or electrical contacts on a printhead immediately after removing itfrom the F30 MFP. These metal parts become very hot during printing and could cause minorburns.
Turning the F30 MFP Off To avoid equipment malfunction always use the ON/OFF button to turn the F30 MFP on and off. Never remove
the power cord from the power outlet until you have turned off the F30 MFP by pressing the ON/OFF button.Once off, you can unplug the power cord from the power outlet.
Using the Printer Near Appliances and Fluorescent LampsAllow at least 6 inches clearance between the F30 MFP and another appliance or a fluorescent lamp. Electricalnoise generated by a fluorescent lamp placed too close to the F30 MFP could cause the F30 MFP tomalfunction.
Regulatory Information
MultiPASS F30 MFP Color Printer, Model Number H12220This device complies with Part 15 of the FCC Rules. Operation is subject to the following two conditions: (1)This device may not cause harmful interference, and (2) this device must accept any interference received,including interference that may cause undesired operation.
Note: This equipment has been tested and found to comply with the limits for a Class B digital device,pursuant to Part 15 of the FCC Rules. These limits are designed to provide reasonable protection againstharmful interference in a residential installation. This equipment generates, uses and can radiate radio
51

8/13/2019 MPF30 User Manual
http://slidepdf.com/reader/full/mpf30-user-manual 58/64
frequency energy and, if not installed and used in accordance with the instructions, may cause harmfulinterference to radio communications. However, there is no guarantee that interference will not occur in aparticular installation. If this equipment does cause harmful interference to radio or television reception,which can be determined by turning the equipment off and on, the user is encouraged to try to correct theinterference by one or more of the following measures:
• Reorient or relocate the receiving antenna.• Increase the separation between the equipment and receiver.
• Plug the equipment into an outlet on a different circuit.
• Consult the dealer or an experienced radio/TV technician for help.
Use of a shielded cable is required to comply with Class B limits in Subpart B of Part 15 of the FCC Rules.
Do not make any changes or modifications to the equipment unless otherwise specified in the manual. If suchchanges or modifications should be made, you could be required to stop operation of the equipment.
Canon U.S.A., Inc.Digital Home and Personal Systems Division2995 Redhill AvenueCosta Mesa, CA 92626
1-800-423-2366
Canadian Radio Interference RegulationsThis digital apparatus does not exceed Class B limits for radio noise emissions from a digital apparatus as setout in the interference-causing equipment standard entitled “Digital Apparatus”, ICES-003 of the IndustryCanada.
Cet appareil numérique respecte les limites de bruits radio électriques applicables aux appareils numériquesde Classe B prescrites dans la norme sur le matériel brouilleur: “Appareils Numériques”, NMB-003 édictée parl’Industrie Canada.
Specifications
System Requirements• CD-ROM drive, or access to one over a network connection
• 256-color SVGA monitor or greater
• Microsoft Internet Explorer version 4.0 or later
• 60 MB of available hard disk space (150 MB of available hard disk space is recommended)
Microsof t Windows 95/98: IBM or compatible computer with a Pentium® 90 processor or higher32 megabytes (MB) of RAM (64 MB of RAM or more is recommended)
Windows NT 4.0: IBM or compatible computer with a Pentium 90 processor or higher32 megabytes (MB) of RAM (64 MB of RAM or more is recommended)Service Pack 4 or later
Windows Me: IBM or compatible computer with a Pentium 150 processor or higher32 megabytes (MB) of RAM (64 MB of RAM or more is recommended)
Windows 2000: IBM or compatible computer with a Pentium 133 processor or higher64 megabytes (MB) of RAM (128 MB of RAM or more is recommended)
52
F30 MFP User’s Manual
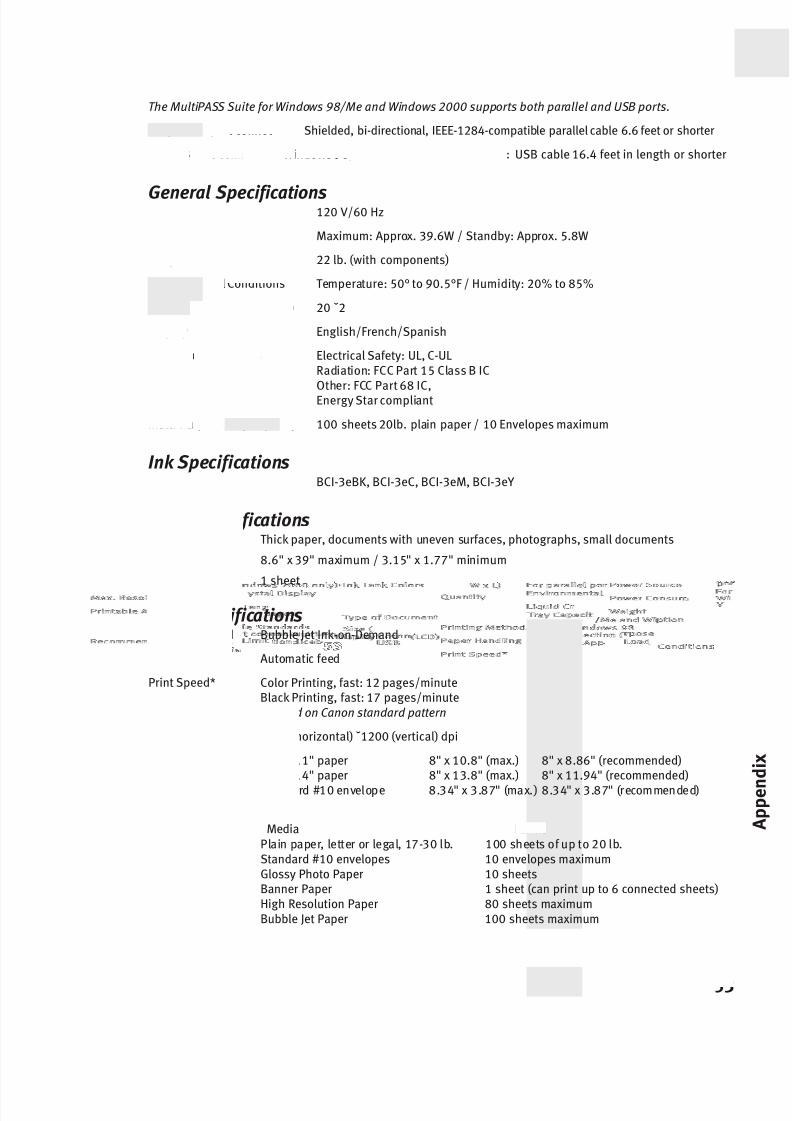
8/13/2019 MPF30 User Manual
http://slidepdf.com/reader/full/mpf30-user-manual 59/64
The MultiPASS Suite for Windows 98/Me and Windows 2000 supports both parallel and USB ports.
For parallel port connection: Shielded, bi-directional, IEEE-1284-compatible parallel cable 6.6 feet or shorter
For USB port connection ( Windows 98/Me and Windows 2000 only): USB cable 16.4 feet in length or shorter
General SpecificationsPower Source 120 V/60 Hz
Power Consumption Maximum: Approx. 39.6W / Standby: Approx. 5.8W
Weight 22 lb. (with components)
Environmental Conditions Temperature: 50° to 90.5°F / Humidity: 20% to 85%
Liquid Crystal Display (LCD) 20 ˘2
Display Lang uages English/French/Spanish
Applicable Standards Electrical Safety: UL, C-ULRadiation: FCC Part 15 Class B ICOther: FCC Part 68 IC,Energy Star compliant
Multi-Purpose Tray Capacity 100 sheets 20lb. plain paper / 10 Envelopes maximum
Ink SpecificationsInk Tank Colors BCI-3eBK, BCI-3eC, BCI-3eM, BCI-3eY
Glass SpecificationsType of Document Thick paper, documents with uneven surfaces, photographs, small documents
Size ( W x L) 8.6" x 39" maximum / 3.15" x 1.77" minimum
Quantity 1 sheet
Print SpecificationsPrinting Method Bubble Jet Ink-on-Demand
Paper Handling Automatic feed
Print Speed* Color Printing, fast: 12 pages/minuteBlack Printing, fast: 17 pages/minute* Based on Canon standard pattern
Max. Resolution 2400 (horizontal) ˘1200 (vertical) dpi
Printable Area 8.5" x 11" paper 8" x 10.8" (max.) 8" x 8.86" (recommended)8.5" x 14" paper 8" x 13.8" (max.) 8" x 11.94" (recommended)Standard #10 envelope 8.34" x 3.87" (max.) 8.34" x 3.87" (recommended)
Recommended Print MediaMedia Load Limit
Plain paper, letter or legal, 17-30 lb. 100 sheets of up to 20 lb.Standard #10 envelopes 10 envelopes maximumGlossy Photo Paper 10 sheetsBanner Paper 1 sheet (can print up to 6 connected sheets)High Resolution Paper 80 sheets maximumBubble Jet Paper 100 sheets maximum
53
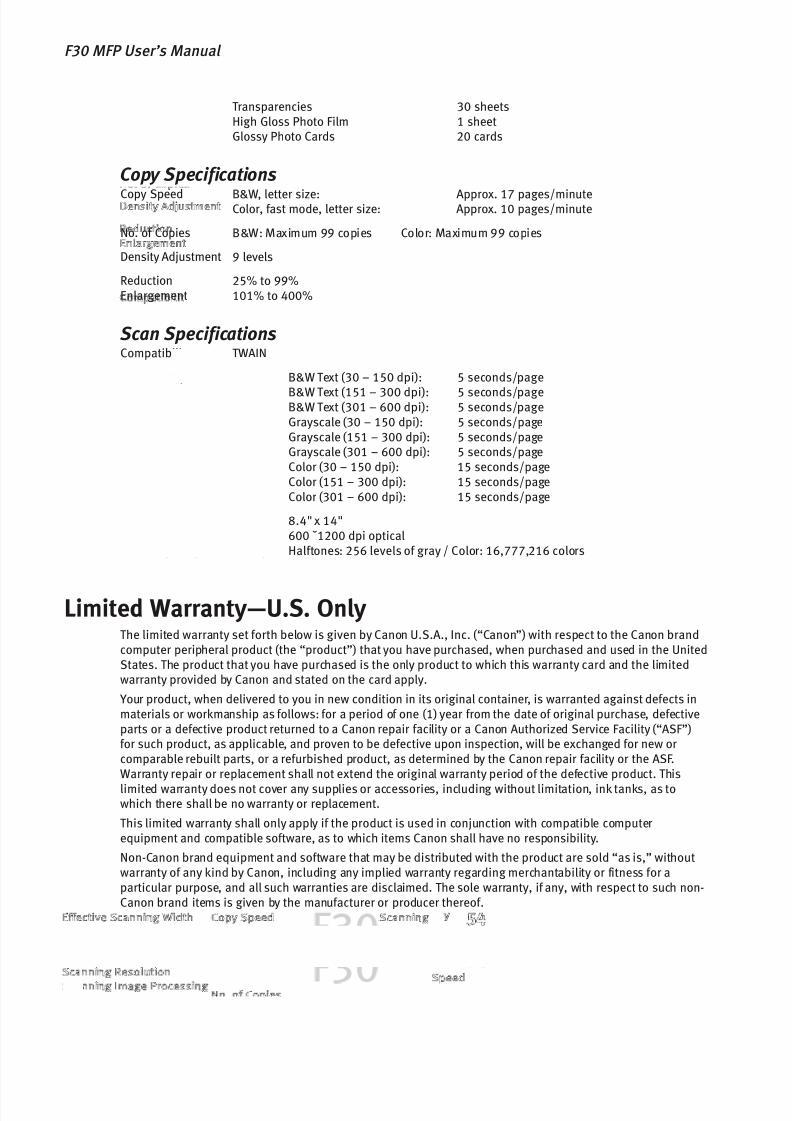
8/13/2019 MPF30 User Manual
http://slidepdf.com/reader/full/mpf30-user-manual 60/64
Transparencies 30 sheetsHigh Gloss Photo Film 1 sheetGlossy Photo Cards 20 cards
Copy Specifications
Copy Speed B&W, letter size: Approx. 17 pages/minuteColor, fast mode, letter size: Approx. 10 pages/minute
No. of Copies B&W: Maximum 99 copies Color: Maximum 99 copies
Density Adjustment 9 levels
Reduction 25% to 99%Enlargement 101% to 400%
Scan SpecificationsCompatibility TWAIN
Scanning Speed B&W Text (30 – 150 dpi): 5 seconds/page
B&W Text (151 – 300 dpi): 5 seconds/pageB&W Text (301 – 600 dpi): 5 seconds/pageGrayscale (30 – 150 dpi): 5 seconds/pageGrayscale (151 – 300 dpi): 5 seconds/pageGrayscale (301 – 600 dpi): 5 seconds/pageColor (30 – 150 dpi): 15 seconds/pageColor (151 – 300 dpi): 15 seconds/pageColor (301 – 600 dpi): 15 seconds/page
Effective Scanning Width 8.4" x 14"Scanning Resolution 600 ˘1200 dpi opticalScanning Image Processing Halftones: 256 levels of gray / Color: 16,777,216 colors
Limited Warranty—U.S. Only The limited warranty set forth below is given by Canon U.S.A., Inc. (“Canon”) with respect to the Canon brandcomputer peripheral product (the “product”) that you have purchased, when purchased and used in the UnitedStates. The product that you have purchased is the only product to which this warranty card and the limitedwarranty provided by Canon and stated on the card apply.
Your product, when delivered to you in new condition in its original container, is warranted against defects inmaterials or workmanship as follows: for a period of one (1) year from the date of original purchase, defectiveparts or a defective product returned to a Canon repair facility or a Canon Authorized Service Facility (“ASF”)for such product, as applicable, and proven to be defective upon inspection, will be exchanged for new orcomparable rebuilt parts, or a refurbished product, as determined by the Canon repair facility or the ASF.Warranty repair or replacement shall not extend the original warranty period of the defective product. This
limited warranty does not cover any supplies or accessories, including without limitation, ink tanks, as towhich there shall be no warranty or replacement.
This limited warranty shall only apply if the product is used in conjunction with compatible computerequipment and compatible software, as to which items Canon shall have no responsibility.
Non-Canon brand equipment and software that may be distributed with the product are sold “as is,” withoutwarranty of any kind by Canon, including any implied warranty regarding merchantability or fitness for aparticular purpose, and all such warranties are disclaimed. The sole warranty, if any, with respect to such non-Canon brand items is given by the manufacturer or producer thereof.
54
F30 MFP User’s Manual

8/13/2019 MPF30 User Manual
http://slidepdf.com/reader/full/mpf30-user-manual 61/64
This limited warranty covers all defects encountered in normal use of the product, and does not apply in thefollowing cases:
(a) Loss of or damage to the product due to abuse, mishandling, improper packaging by you, alteration,accident, electrical current fluctuations, failure to follow operating, maintenance or environmental instructionsprescribed in Canon’s instruction manual, or service performed by someone other than a Canon repair facilityor an ASF.
(b) Use of parts or supplies (other than those sold by Canon) that cause damage to the product or causeabnormally frequent service calls or service problems.
(c) If the product has had its serial number or dating altered or removed.
NO IMPLIED WARRANTY, INCLUDING ANY IMPLIED WARRANTY OF MERCHANTABILITY OR FITNESS FOR APARTICULAR PURPOSE, APPLIES TO THE PRODUCT AFTER THE APPLICABLE PERIOD OF THE EXPRESS LIMITEDWARRANTY STATED ABOVE, AND NO OTHER EXPRESS WARRANTY OR GUARANTY, EXCEPT AS MENTIONED ABOVE,GIVEN BY ANY PERSON OR ENTITY WITH RESPECT TO THE PRODUCT SHALL BIND CANON. (SOME STATES DO NOT ALLOW LIMITATIONS ON HOW LONG AN IMPLIED WARRANTY LASTS, SO THE ABOVE LIMITATION MAY NOT APPLY TO YOU.) CANON SHALL NOT BE LIABLE FOR LOSS OF REVENUES OR PROFITS, INCONVENIENCE, EXPENSE FORSUBSTITUTE EQUIPMENT OR SERVICE, STORAGE CHARGES, LOSS OR CORRUPTION OF DATA, OR ANY OTHERSPECIAL, INCIDENTAL OR CONSEQUENTIAL DAMAGES CAUSED BY THE USE OR MISUSE OF, OR INABILITY TO USETHE PRODUCT, REGARDLESS OF THE LEGAL THEORY ON WHICH THE CLAIM IS BASED, AND EVEN IF CANON HAS
BEEN ADVISED OF THE POSSIBILITY OF SUCH DAMAGES. IN NO EVENT SHALL RECOVERY OF ANY KIND AGAINST CANON BE GREATER IN AMOUNT THAN THE PURCHASE PRICE OF THE PRODUCT SOLD BY CANON WHICH CAUSEDTHE ALLEGED DAMAGE.
WITHOUT LIMITING THE FOREGOING, YOU ASSUME ALL RISK AND LIABILITY FOR LOSS, DAMAGE OR INJURY TO YOU AND YOUR PROPERTY AND TO OTHERS AND THEIR PROPERTY ARISING OUT OF USE OR MISUSE OF, ORINABILITY TO USE THE PRODUCT NOT CAUSED DIRECTLY BY THE NEGLIGENCE OF CANON. (SOME STATES DO NOT ALLOW THE EXCLUSION OR LIMITATION OF INCIDENTAL OR CONSEQUENTIAL DAMAGES, SO THE ABOVEEXCLUSION OR LIMITATION MAY NOT APPLY TO YOU.) THIS LIMITED WARRANTY SHALL NOT EXTEND TO ANYONEOTHER THAN THE ORIGINAL PURCHASER OF THE PRODUCT, OR THE PERSON FOR WHOM IT WAS PURCHASED ASA GIFT, AND STATES YOUR EXCLUSIVE REMEDY.
Canon offers a full range of customer technical support* options:
For email technical support, the latest driver downloads and answers to frequently asked questions
(www.usa.canon.com/consumer)24-hour, 7-day-a-week, automated support for troubleshooting issues on most current products (800-423-2366)
24-hour, Fax-On-Demand System for product specifications and technical information (800-526-4345)
Free technical support Monday—Saturday (excluding holidays) for products still under warranty (757-413-2848)
Technical support 7 days a week (excluding holidays) for products no longer under warranty, at $9.99 per call(757-413-2848)
If the problem can’t be corrected by using one of the above technical support options, you will be asked tofollow the applicable procedures for warranty service. Note that a dated proof of purchase (bill of sale) isrequired to verify eligibility at the time of service. This requirement will be satisfied by providing a copy of yourdated bill of sale. You will also need to supply the product serial number.
Carry-In/Mail-InCarry-In/Mail-In is a service program by which your defective product is repaired by an ASF. The name andtelephone number of the ASF(s) nearest to your location may be obtained from our Web site at:www.usa.canon.com/consumer, or by calling the Canon Customer Care Center at 1-800-423-2366. If shipping is involved, it is your responsibility to properly package and send your defective product, together with yourdated proof of purchase, a complete explanation of the problem and a return address, to the ASF at yourexpense. Do not include any other items with your product. The repair(s) covered by this limited warranty willbe made and the product will be returned to you without charge by the ASF. Repairs not covered under thislimited warranty will be charged to you at such costs as each ASF may generally establish from time to time.
55

8/13/2019 MPF30 User Manual
http://slidepdf.com/reader/full/mpf30-user-manual 62/64
InstantExchange†
InstantExchange is a warranty program that expedites, usually by the next business day††, the exchange of adefective product with a refurbished product. The refurbished product you receive will be covered by thebalance of the period remaining on your original limited warranty. Note that by using this service you will keepthe replacement product that is sent to you, and your originally purchased product shall become the property
of Canon. InstantExchange warranty program service is available only during the express limited-warrantyperiod for your product and only in the continental United States, Alaska and Hawaii during such period.
If the Canon Customer Care Center representative cannot correct the problem with your product over thetelephone, and you elect InstantExchange warranty program service, the representative will issue you areference number upon verification of warranty eligibility. You will be asked for information pertaining to yourdefective product and for a ship-to location for the replacement product (street address only). You must alsoprovide a major credit card number that will be pre-authorized by Canon in an amount up to the cost of a newproduct at the time you elect InstantExchange warranty program service. Your credit card number will becharged in an amount up to the cost of a new product (i) if you do not return your defective product to a Canonrepair facility by the date specified by Canon and in the manner described below; (ii) if the defect(s) in theproduct is/are not covered by this limited warranty; or (iii) if the warranty period on the product has expired orhas not been sufficiently established by your supplying the appropriate documentation.
The Canon repair facility will ship out the replacement product via overnight courier, prepaid by Canon. Afterreceipt of the replacement product (with instructions and a pre-paid return waybill), follow the instructions toship the defective product to a Canon repair facility. You must return the defective product in the shipping carton in which the replacement product was packed (be sure to retain your printhead and ink tanks), and youmust include the reference number, a copy of your dated proof of purchase (bill of sale) and a completeexplanation of the problem. Do not include any other items in the return shipping container.
This limited warranty gives you specific legal rights, and you may also have other rights that vary from state tostate.
* Support program specifics are subject to change without notice.
† InstantExchange warranty program service is subject to availability of refurbished replacement units.
†† 9 a.m.–5 p.m. (local), Monday–Friday (excluding holidays). The Canon Customer Care Center must receive pertinentinformation by 3 p.m. (E.S.T.) to ensure next-business-day InstantExchange warranty program service (two-business-day
InstantExchange warranty service for Alaska and Hawaii). Canon does not guarantee next-business-day service in theevent of factors beyond Canon’s reasonable control.
56
F30 MFP User’s Manual
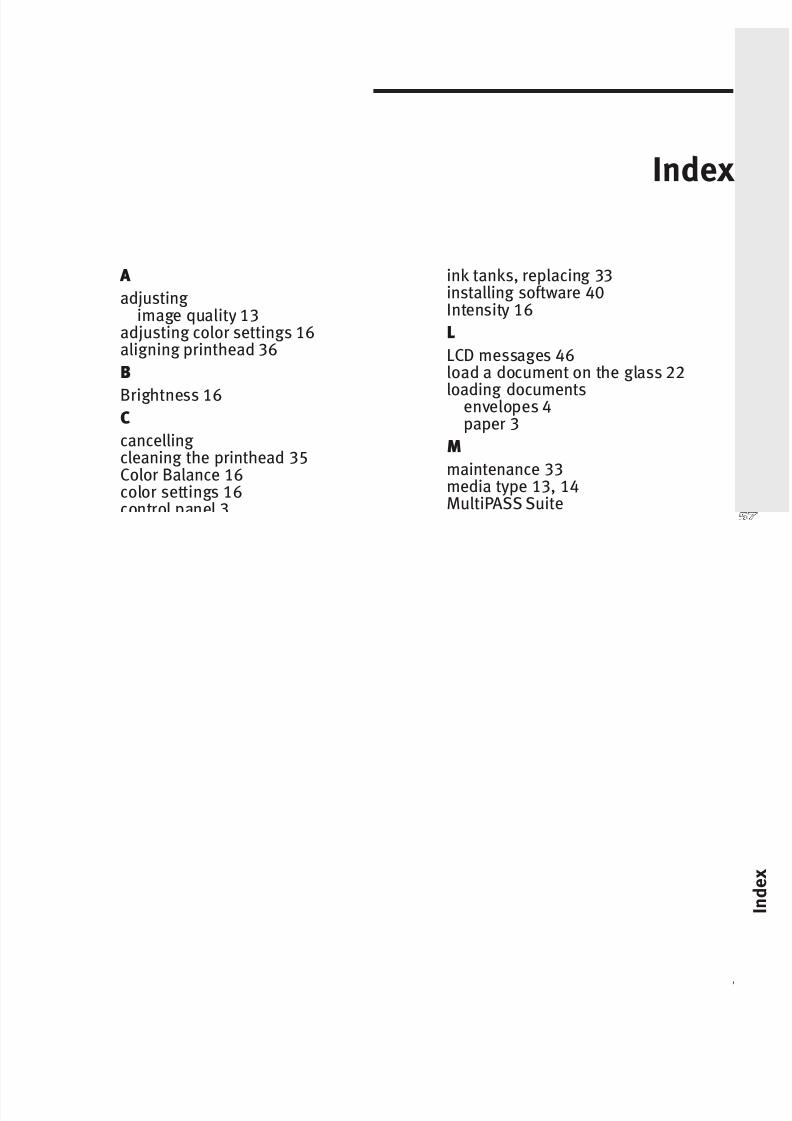
8/13/2019 MPF30 User Manual
http://slidepdf.com/reader/full/mpf30-user-manual 63/64
A
adjusting image quality 13
adjusting color settings 16aligning printhead 36
B
Brightness 16C
cancelling cleaning the printhead 35Color Balance 16color settings 16control panel 3copying 44correcting digital photos 17customer care center 47
Ddefault printer 12
F
F1 key 11
G
glass 22
H
helpfor the printer driver 11
for the toolbar 5online help 5Whatís This? 5
I
ICM 16Image Color Management (ICM), 16Image Optimizer 15image quality 13
ink tanks, replacing 33installing software 40Intensity 16
L
LCD messages 46load a document on the glass 22
loading documentsenvelopes 4paper 3
M
maintenance 33media type 13, 14MultiPASS Suite
editing documents 8-9emailing documents 9My MultiPASS 5printing documents 8-9
saving documents 7-8Status Monitor 9viewing documents 8-9
O
online help 11orientation 18
P
page setup 17page size 18paper
loading 3-4specifying size and type 3-4paper feeding 45Paper Jams 22paper size 18Photo Optimizer PRO 17Print Advisor 14print quality 13
57
Index
8/13/2019 MPF30 User Manual
http://slidepdf.com/reader/full/mpf30-user-manual 64/64
printerselecting from within an application12setting as default 12specifications 53
printer driver
adjusting settings 13defintion of 11
printer driver profiles 19printer driver settings 18printhead
aligning 36cleaning 35maintenance 34nozzle check pattern 34
printing 41adjusting image quality 13
cancelling 12nozzle check pattern 34profiles for printer driver settings 19
R
regulatory information 51replacing ink tanks 33
S
safety information 49scaled printing 18scan
from within an application 29one-push functions 31photos 5scan button 31scan specifications 54using ScanGear 30
ScanGear 30scanning 44selecting
F30 as default printer 12F30 from an application 12
specialty media, using 11, 13
T
toolbar
one-push scan button functions 31troubleshooting 39turning the F30 on and off 51
U
using ScanGear 30
W
warranty 54carry-in/mail 55instant exchange 56
What’s This? help 11
MultiPASS F30 User’s Manual