
Mobile Java Programming - Metropolia … { Apache Cordova Multiplatform Game Frameworks Cocos2D-X...
120
Android Development Mobile Java Programming Luis Fernando de Mingo L´opez Universidad Polit´ ecnica de Madrid [email protected] May 19, 2014
Transcript of Mobile Java Programming - Metropolia … { Apache Cordova Multiplatform Game Frameworks Cocos2D-X...

Android DevelopmentMobile Java Programming
Luis Fernando de Mingo Lopez
Universidad Politecnica de [email protected]
May 19, 2014
Amazing!!!Simple games ... great UI (programming background needed)
Box2D Testbed → No testing today
LiquidFun
Snake
Space
Terrain
Water
Java/C/C++ → Android → Box2D/Chipmunk → Cocos2d-X
Be careful what you install !!! Spy my Wife
Agenda
1 Part I: What is Android ?
2 Part II: How to develop in Android ?
3 Part III: What are the Android building blocks ?
4 Part IV: Just Coding ....
5 Part V: Great Libraries
6 Part VI: Games
Who cares about testing ???
RoboTium
RoboElectric
Table of ContentsPart I: What is Android ?
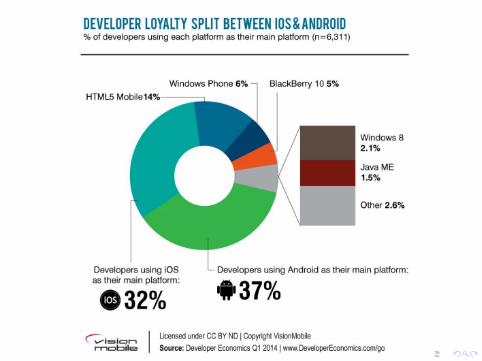
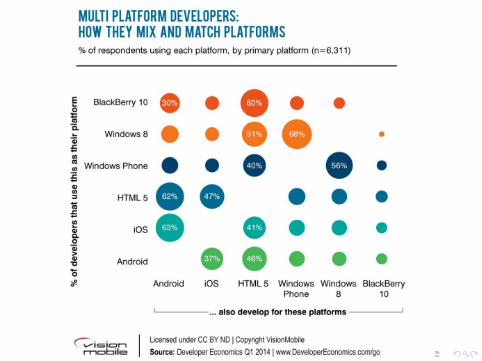
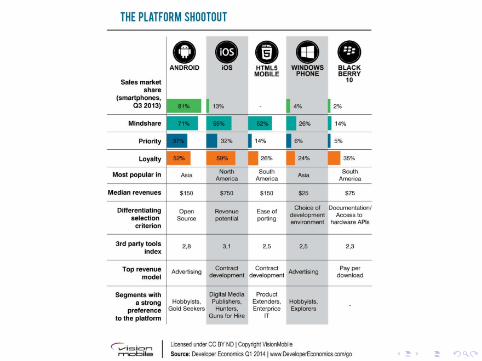
1 Where to find information2 Market sales3 What is Android?
Android Architecture4 Android versions
API Level and NDK
ResourcesWhere to go?
Official Sites
developer.android.com
jetbrains.comBest Android Blogs
stackoverflow.comandroidweekly.net
Game Resources
cocos2d-x.org
box2d.org
chipmunk-physics.net
iforce2d.net
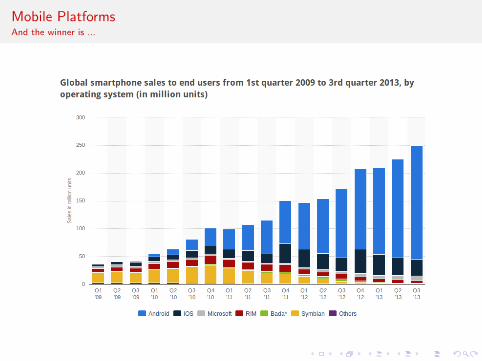
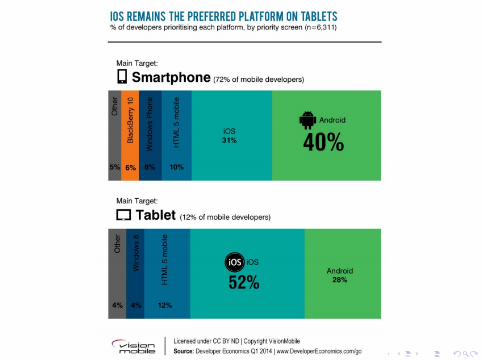
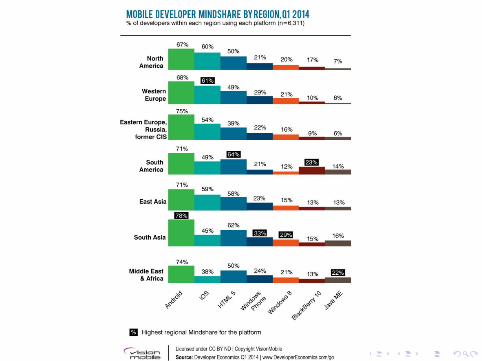
Mobile PlatformsAnd the winner is ...
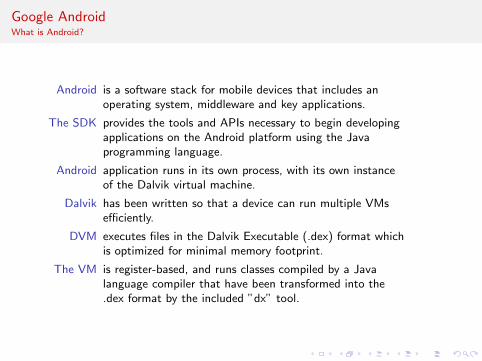
Google AndroidWhat is Android?
Android is a software stack for mobile devices that includes anoperating system, middleware and key applications.
The SDK provides the tools and APIs necessary to begin developingapplications on the Android platform using the Javaprogramming language.
Android application runs in its own process, with its own instanceof the Dalvik virtual machine.
Dalvik has been written so that a device can run multiple VMsefficiently.
DVM executes files in the Dalvik Executable (.dex) format whichis optimized for minimal memory footprint.
The VM is register-based, and runs classes compiled by a Javalanguage compiler that have been transformed into the.dex format by the included ”dx” tool.
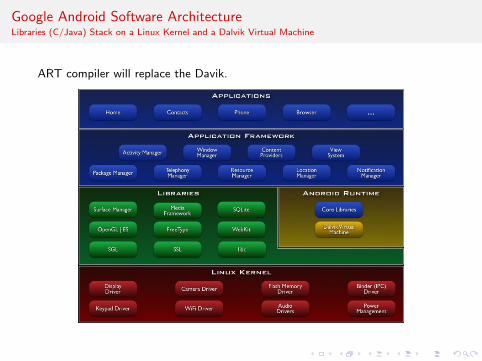
Google Android Software ArchitectureLibraries (C/Java) Stack on a Linux Kernel and a Dalvik Virtual Machine
ART compiler will replace the Davik.
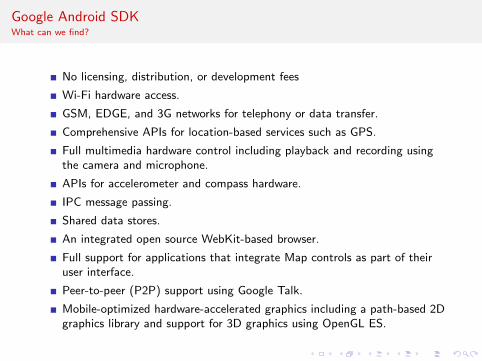
Google Android SDKWhat can we find?
No licensing, distribution, or development fees
Wi-Fi hardware access.
GSM, EDGE, and 3G networks for telephony or data transfer.
Comprehensive APIs for location-based services such as GPS.
Full multimedia hardware control including playback and recording usingthe camera and microphone.
APIs for accelerometer and compass hardware.
IPC message passing.
Shared data stores.
An integrated open source WebKit-based browser.
Full support for applications that integrate Map controls as part of theiruser interface.
Peer-to-peer (P2P) support using Google Talk.
Mobile-optimized hardware-accelerated graphics including a path-based 2Dgraphics library and support for 3D graphics using OpenGL ES.
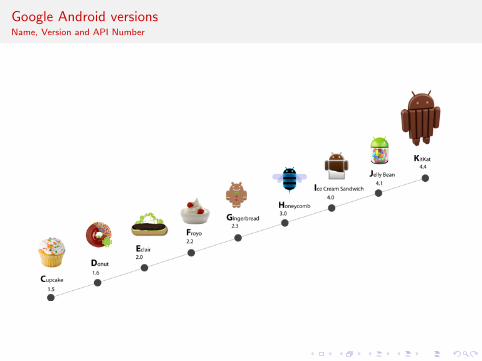
Google Android versionsName, Version and API Number
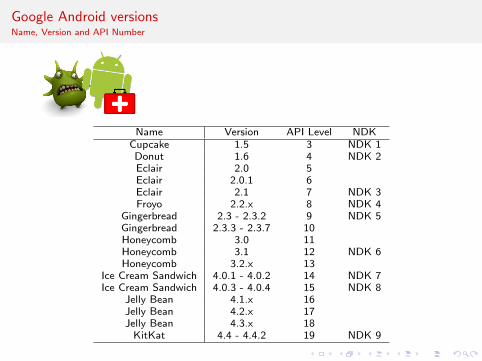
Google Android versionsName, Version and API Number
Name Version API Level NDKCupcake 1.5 3 NDK 1Donut 1.6 4 NDK 2Eclair 2.0 5Eclair 2.0.1 6Eclair 2.1 7 NDK 3Froyo 2.2.x 8 NDK 4
Gingerbread 2.3 - 2.3.2 9 NDK 5Gingerbread 2.3.3 - 2.3.7 10Honeycomb 3.0 11Honeycomb 3.1 12 NDK 6Honeycomb 3.2.x 13
Ice Cream Sandwich 4.0.1 - 4.0.2 14 NDK 7Ice Cream Sandwich 4.0.3 - 4.0.4 15 NDK 8
Jelly Bean 4.1.x 16Jelly Bean 4.2.x 17Jelly Bean 4.3.x 18
KitKat 4.4 - 4.4.2 19 NDK 9
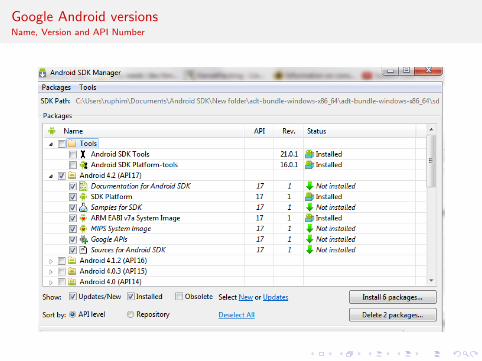
Google Android versionsName, Version and API Number
Table of ContentsPart II: How to develop in Android ?
5 Market Fragmentation6 How to develop in Android
Development ToolsInstall Development Platform

FragmentationJanuary 2014
API level 10 and up covers more than 98% devices
API level 15 and up covers more than 85% devices
API level 16 and up covers more than 65% devices
Android DevelopmentJava, C++, HTML5 ?
Android Development Kit – ADK(Java)
Android Native Development Kit –NDK (C++)
Multiplatform DevelopmentXamarin (C#)Apportable (Objective C)Web UI – HTML5, CSS, etc.
PhoneGap – Apache Cordova
Multiplatform Game FrameworksCocos2D-X (C/C++)Unity3D
JAVAWe will show basic info about android development in Java during this lecture.
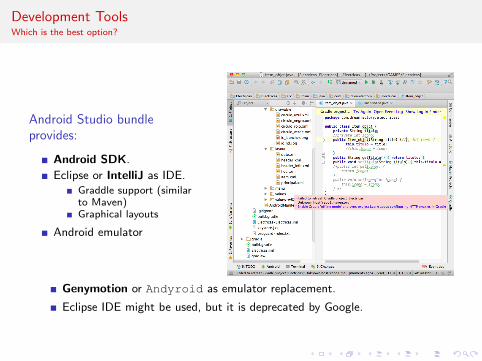
Development ToolsWhich is the best option?
Android Studio bundleprovides:
Android SDK.
Eclipse or IntelliJ as IDE.Graddle support (similarto Maven)Graphical layouts
Android emulator
Genymotion or Andyroid as emulator replacement.
Eclipse IDE might be used, but it is deprecated by Google.
Install Android SDKSDK + IntelliJ
Personal choice ....
Download Android SDK (not the bundle, choose Use an existing IDE).Just unzip the sdk. http://developer.android.com/sdk
Run Android SDK Manager from ANDROID ROOT/tools/android andinstall Android 4.X and Android 2.3.
Install Intellij Community Edition, and configure the path to Android SDK.http://www.jetbrains.com/idea/download/
Install Genymotion.https://cloud.genymotion.com/page/launchpad/download/
Create a new black project (gradle or not gradle) and run it.
Table of ContentsPart III: What are the Android building blocks ?
7 Android Components8 Compilation process9 Understand resources10 Project structure
AndroidManifest.xml11 Resources
Android ComponentsKey Concepts
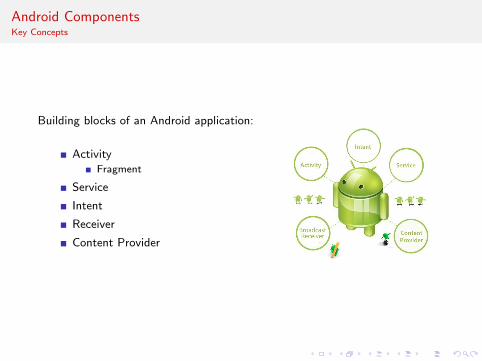
Building blocks of an Android application:
ActivityFragment
Service
Intent
Receiver
Content Provider
Android ComponentsActivity
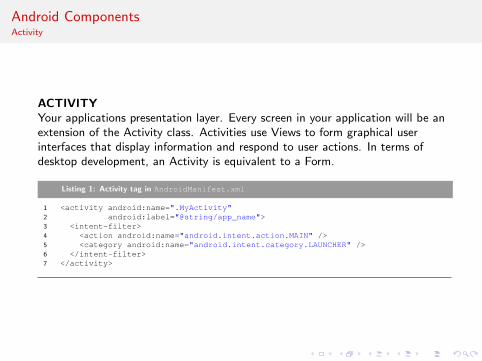
ACTIVITYYour applications presentation layer. Every screen in your application will be anextension of the Activity class. Activities use Views to form graphical userinterfaces that display information and respond to user actions. In terms ofdesktop development, an Activity is equivalent to a Form.
Listing 1: Activity tag in AndroidManifest.xml
1 <activity android:name=".MyActivity"2 android:label="@string/app_name">3 <intent-filter>4 <action android:name="android.intent.action.MAIN" />5 <category android:name="android.intent.category.LAUNCHER" />6 </intent-filter>7 </activity>
Android ComponentsFragment
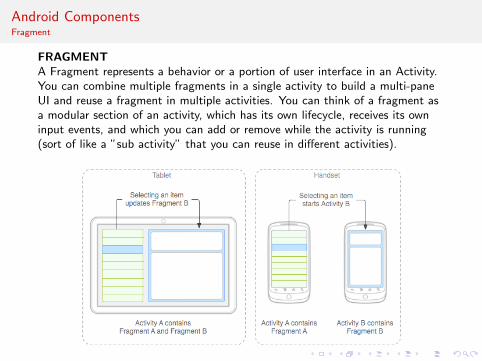
FRAGMENTA Fragment represents a behavior or a portion of user interface in an Activity.You can combine multiple fragments in a single activity to build a multi-paneUI and reuse a fragment in multiple activities. You can think of a fragment asa modular section of an activity, which has its own lifecycle, receives its owninput events, and which you can add or remove while the activity is running(sort of like a ”sub activity” that you can reuse in different activities).
Android ComponentsService
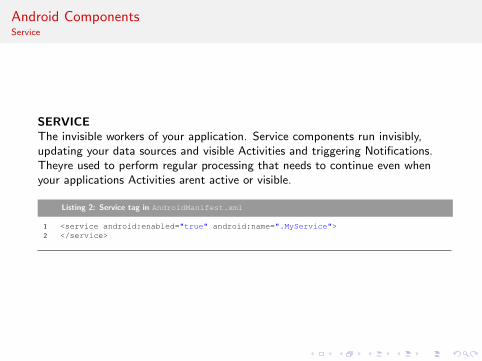
SERVICEThe invisible workers of your application. Service components run invisibly,updating your data sources and visible Activities and triggering Notifications.Theyre used to perform regular processing that needs to continue even whenyour applications Activities arent active or visible.
Listing 2: Service tag in AndroidManifest.xml
1 <service android:enabled="true" android:name=".MyService">2 </service>
Android ComponentsIntent
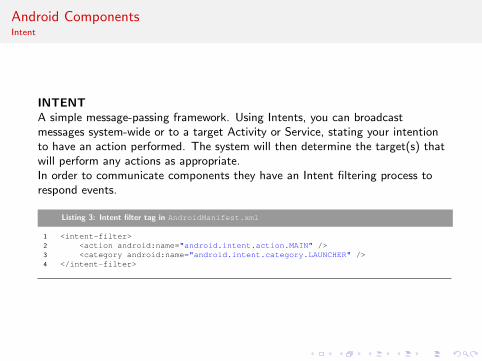
INTENTA simple message-passing framework. Using Intents, you can broadcastmessages system-wide or to a target Activity or Service, stating your intentionto have an action performed. The system will then determine the target(s) thatwill perform any actions as appropriate.In order to communicate components they have an Intent filtering process torespond events.
Listing 3: Intent filter tag in AndroidManifest.xml
1 <intent-filter>2 <action android:name="android.intent.action.MAIN" />3 <category android:name="android.intent.category.LAUNCHER" />4 </intent-filter>
Android ComponentsReceiver
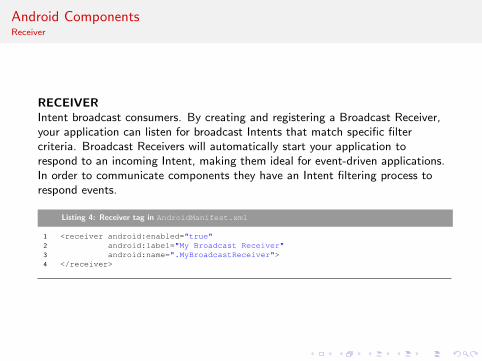
RECEIVERIntent broadcast consumers. By creating and registering a Broadcast Receiver,your application can listen for broadcast Intents that match specific filtercriteria. Broadcast Receivers will automatically start your application torespond to an incoming Intent, making them ideal for event-driven applications.In order to communicate components they have an Intent filtering process torespond events.
Listing 4: Receiver tag in AndroidManifest.xml
1 <receiver android:enabled="true"2 android:label="My Broadcast Receiver"3 android:name=".MyBroadcastReceiver">4 </receiver>
Android ComponentsContent Provider
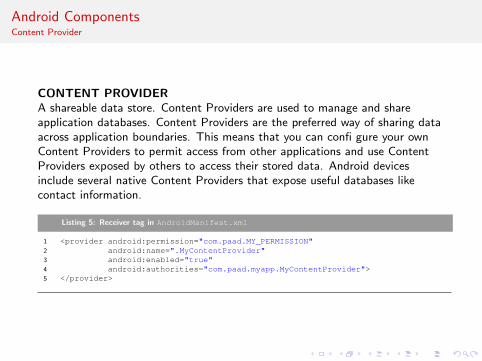
CONTENT PROVIDERA shareable data store. Content Providers are used to manage and shareapplication databases. Content Providers are the preferred way of sharing dataacross application boundaries. This means that you can confi gure your ownContent Providers to permit access from other applications and use ContentProviders exposed by others to access their stored data. Android devicesinclude several native Content Providers that expose useful databases likecontact information.
Listing 5: Receiver tag in AndroidManifest.xml
1 <provider android:permission="com.paad.MY_PERMISSION"2 android:name=".MyContentProvider"3 android:enabled="true"4 android:authorities="com.paad.myapp.MyContentProvider">5 </provider>
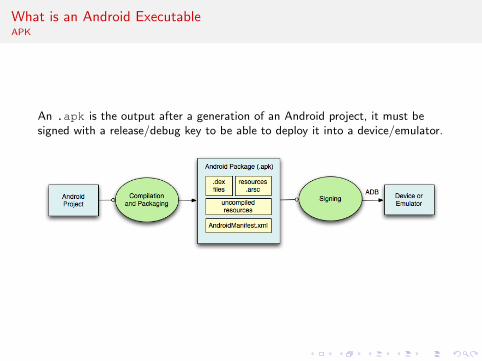
What is an Android ExecutableAPK
An .apk is the output after a generation of an Android project, it must besigned with a release/debug key to be able to deploy it into a device/emulator.
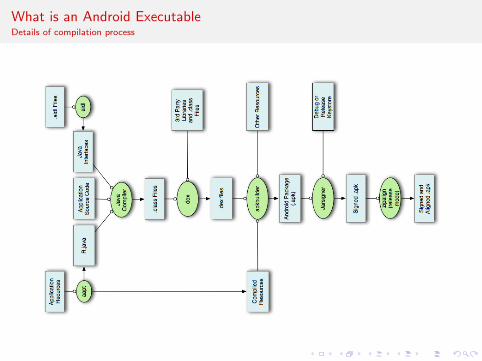
What is an Android ExecutableDetails of compilation process
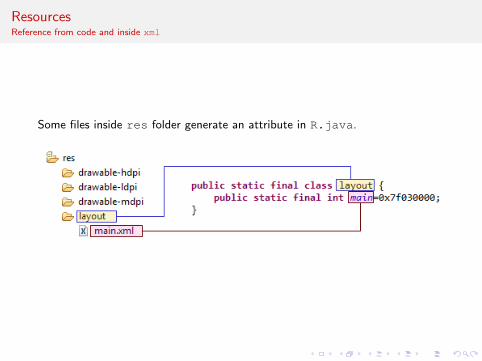
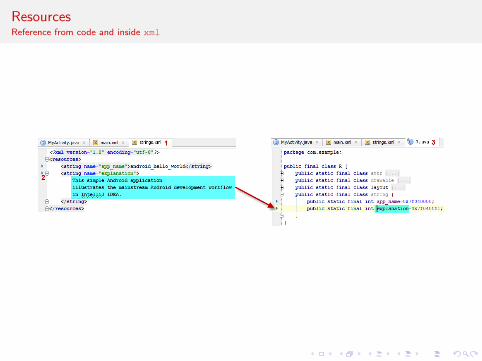
ResourcesReference from code and inside xml
Some files inside res folder generate an attribute in R.java.
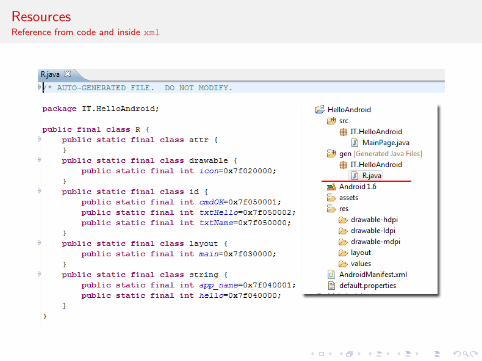
ResourcesReference from code and inside xml
ResourcesReference from code and inside xml
ResourcesReference from code and inside xml
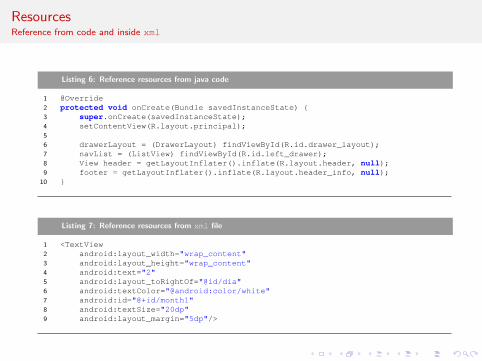
Listing 6: Reference resources from java code
1 @Override2 protected void onCreate(Bundle savedInstanceState) {3 super.onCreate(savedInstanceState);4 setContentView(R.layout.principal);5
6 drawerLayout = (DrawerLayout) findViewById(R.id.drawer_layout);7 navList = (ListView) findViewById(R.id.left_drawer);8 View header = getLayoutInflater().inflate(R.layout.header, null);9 footer = getLayoutInflater().inflate(R.layout.header_info, null);
10 }
Listing 7: Reference resources from xml file
1 <TextView2 android:layout_width="wrap_content"3 android:layout_height="wrap_content"4 android:text="2"5 android:layout_toRightOf="@id/dia"6 android:textColor="@android:color/white"7 android:id="@+id/month1"8 android:textSize="20dp"9 android:layout_margin="5dp"/>
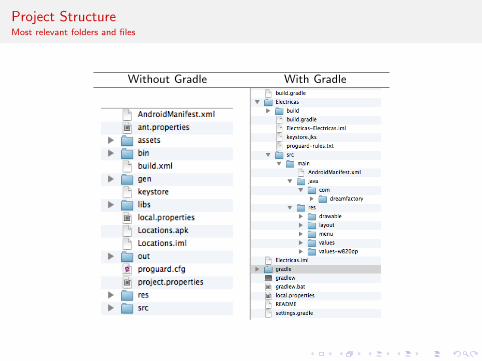
Project StructureMost relevant folders and files
Without Gradle With Gradle
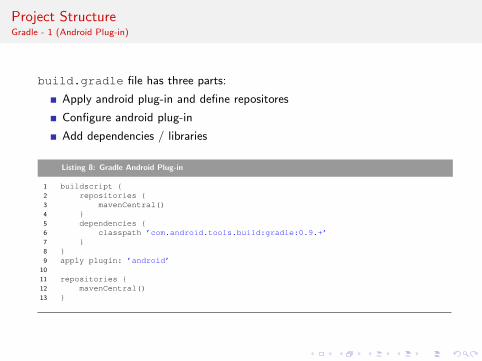
Project StructureGradle - 1 (Android Plug-in)
build.gradle file has three parts:
Apply android plug-in and define repositores
Configure android plug-in
Add dependencies / libraries
Listing 8: Gradle Android Plug-in
1 buildscript {2 repositories {3 mavenCentral()4 }5 dependencies {6 classpath ’com.android.tools.build:gradle:0.9.+’7 }8 }9 apply plugin: ’android’
10
11 repositories {12 mavenCentral()13 }
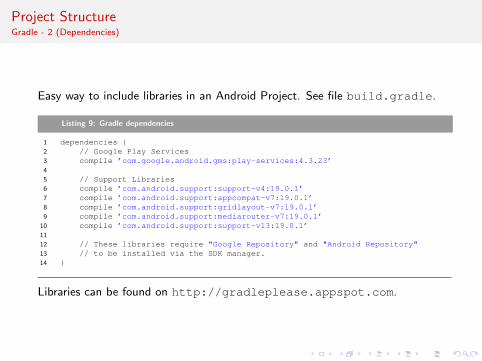
Project StructureGradle - 2 (Dependencies)
Easy way to include libraries in an Android Project. See file build.gradle.
Listing 9: Gradle dependencies
1 dependencies {2 // Google Play Services3 compile ’com.google.android.gms:play-services:4.3.23’4
5 // Support Libraries6 compile ’com.android.support:support-v4:19.0.1’7 compile ’com.android.support:appcompat-v7:19.0.1’8 compile ’com.android.support:gridlayout-v7:19.0.1’9 compile ’com.android.support:mediarouter-v7:19.0.1’
10 compile ’com.android.support:support-v13:19.0.1’11
12 // These libraries require "Google Repository" and "Android Repository"13 // to be installed via the SDK manager.14 }
Libraries can be found on http://gradleplease.appspot.com.
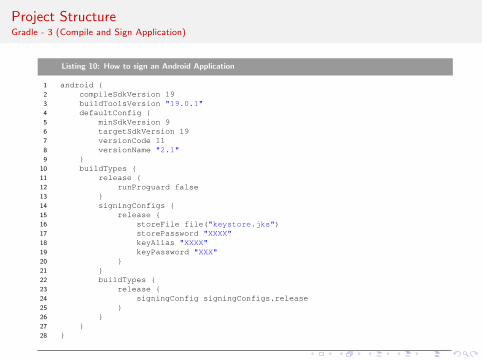
Project StructureGradle - 3 (Compile and Sign Application)
Listing 10: How to sign an Android Application
1 android {2 compileSdkVersion 193 buildToolsVersion "19.0.1"4 defaultConfig {5 minSdkVersion 96 targetSdkVersion 197 versionCode 118 versionName "2.1"9 }
10 buildTypes {11 release {12 runProguard false13 }14 signingConfigs {15 release {16 storeFile file("keystore.jks")17 storePassword "XXXX"18 keyAlias "XXXX"19 keyPassword "XXX"20 }21 }22 buildTypes {23 release {24 signingConfig signingConfigs.release25 }26 }27 }28 }
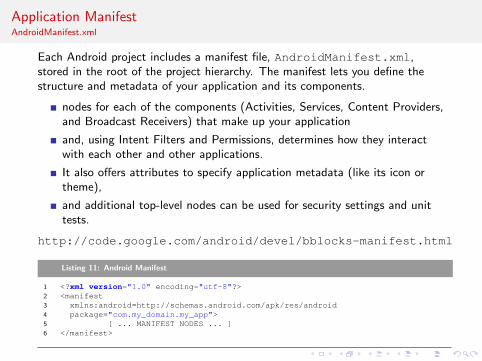
Application ManifestAndroidManifest.xml
Each Android project includes a manifest file, AndroidManifest.xml,stored in the root of the project hierarchy. The manifest lets you define thestructure and metadata of your application and its components.
nodes for each of the components (Activities, Services, Content Providers,and Broadcast Receivers) that make up your application
and, using Intent Filters and Permissions, determines how they interactwith each other and other applications.
It also offers attributes to specify application metadata (like its icon ortheme),
and additional top-level nodes can be used for security settings and unittests.
http://code.google.com/android/devel/bblocks-manifest.html
Listing 11: Android Manifest
1 <?xml version="1.0" encoding="utf-8"?>2 <manifest3 xmlns:android=http://schemas.android.com/apk/res/android4 package="com.my_domain.my_app">5 [ ... MANIFEST NODES ... ]6 </manifest>
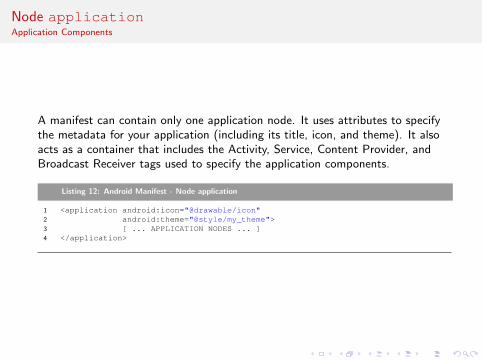
Node applicationApplication Components
A manifest can contain only one application node. It uses attributes to specifythe metadata for your application (including its title, icon, and theme). It alsoacts as a container that includes the Activity, Service, Content Provider, andBroadcast Receiver tags used to specify the application components.
Listing 12: Android Manifest - Node application
1 <application android:icon="@drawable/icon"2 android:theme="@style/my_theme">3 [ ... APPLICATION NODES ... ]4 </application>

Node application/activityActivity description
An activity tag is required for every Activity displayed by your application,using the android:name attribute to specify the class name. This must includethe main launch Activity and any other screen or dialogs that can be displayed.Trying to start an Activity thats not defined in the manifest will throw aruntime exception. Each Activity node supports intent-filter child tagsthat specify which Intents launch the Activity.
Listing 13: Android Manifest - Node application/activity
1 <activity android:name=".MyActivity"2 android:label="@string/app_name">3 <intent-filter>4 <action android:name="android.intent.action.MAIN" />5 <category android:name="android.intent.category.LAUNCHER" />6 </intent-filter>7 </activity>

Node application/serviceService description
As with the activity tag, create a new service tag for each Service class used inyour application. Service tags also support intent-filter child tags to allow lateruntime binding.
Listing 14: Android Manifest - Node application/service
1 <service android:enabled="true" android:name=".MyService">2 </service>
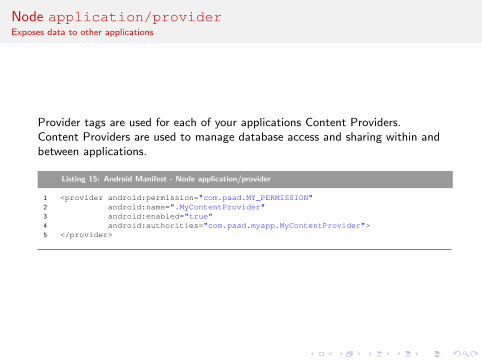
Node application/providerExposes data to other applications
Provider tags are used for each of your applications Content Providers.Content Providers are used to manage database access and sharing within andbetween applications.
Listing 15: Android Manifest - Node application/provider
1 <provider android:permission="com.paad.MY_PERMISSION"2 android:name=".MyContentProvider"3 android:enabled="true"4 android:authorities="com.paad.myapp.MyContentProvider">5 </provider>
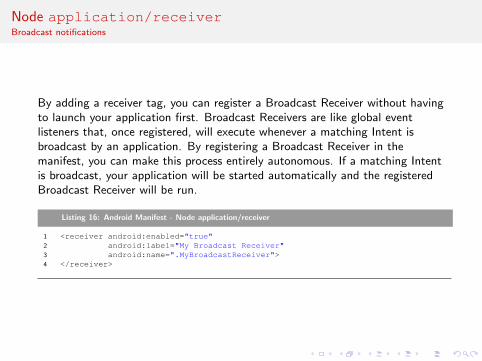
Node application/receiverBroadcast notifications
By adding a receiver tag, you can register a Broadcast Receiver without havingto launch your application first. Broadcast Receivers are like global eventlisteners that, once registered, will execute whenever a matching Intent isbroadcast by an application. By registering a Broadcast Receiver in themanifest, you can make this process entirely autonomous. If a matching Intentis broadcast, your application will be started automatically and the registeredBroadcast Receiver will be run.
Listing 16: Android Manifest - Node application/receiver
1 <receiver android:enabled="true"2 android:label="My Broadcast Receiver"3 android:name=".MyBroadcastReceiver">4 </receiver>
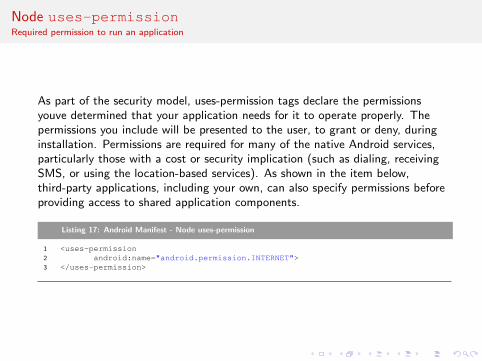
Node uses-permissionRequired permission to run an application
As part of the security model, uses-permission tags declare the permissionsyouve determined that your application needs for it to operate properly. Thepermissions you include will be presented to the user, to grant or deny, duringinstallation. Permissions are required for many of the native Android services,particularly those with a cost or security implication (such as dialing, receivingSMS, or using the location-based services). As shown in the item below,third-party applications, including your own, can also specify permissions beforeproviding access to shared application components.
Listing 17: Android Manifest - Node uses-permission
1 <uses-permission2 android:name="android.permission.INTERNET">3 </uses-permission>
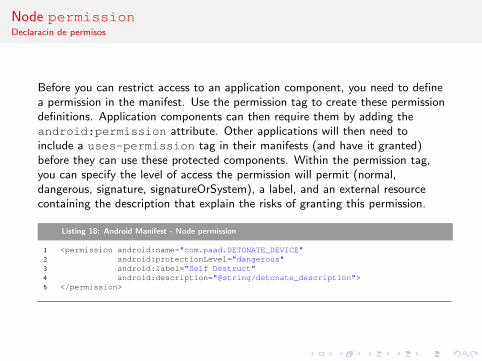
Node permissionDeclaracin de permisos
Before you can restrict access to an application component, you need to definea permission in the manifest. Use the permission tag to create these permissiondefinitions. Application components can then require them by adding theandroid:permission attribute. Other applications will then need toinclude a uses-permission tag in their manifests (and have it granted)before they can use these protected components. Within the permission tag,you can specify the level of access the permission will permit (normal,dangerous, signature, signatureOrSystem), a label, and an external resourcecontaining the description that explain the risks of granting this permission.
Listing 18: Android Manifest - Node permission
1 <permission android:name="com.paad.DETONATE_DEVICE"2 android:protectionLevel="dangerous"3 android:label="Self Destruct"4 android:description="@string/detonate_description">5 </permission>
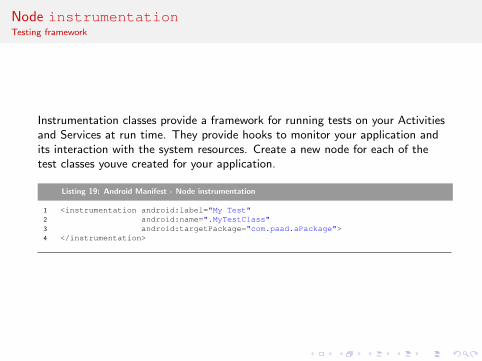
Node instrumentationTesting framework
Instrumentation classes provide a framework for running tests on your Activitiesand Services at run time. They provide hooks to monitor your application andits interaction with the system resources. Create a new node for each of thetest classes youve created for your application.
Listing 19: Android Manifest - Node instrumentation
1 <instrumentation android:label="My Test"2 android:name=".MyTestClass"3 android:targetPackage="com.paad.aPackage">4 </instrumentation>
Table of ContentsPart IV: Just coding ...
12 ActivityJava codeLayout definitionRegister activity inside AndroidManifest.xml
13 UI DesignLayouts
14 IntentsExplicit IntentsImplicit IntentsStart activity and wait resultNative Android Actions
15 Intents Filters16 Menus17 BroadCasts Intents
Broadcast an eventReceiving an eventNative Android Broadcast Actions
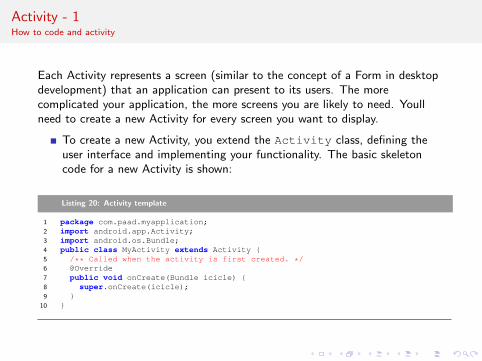
Activity - 1How to code and activity
Each Activity represents a screen (similar to the concept of a Form in desktopdevelopment) that an application can present to its users. The morecomplicated your application, the more screens you are likely to need. Youllneed to create a new Activity for every screen you want to display.
To create a new Activity, you extend the Activity class, defining theuser interface and implementing your functionality. The basic skeletoncode for a new Activity is shown:
Listing 20: Activity template
1 package com.paad.myapplication;2 import android.app.Activity;3 import android.os.Bundle;4 public class MyActivity extends Activity {5 /** Called when the activity is first created. */6 @Override7 public void onCreate(Bundle icicle) {8 super.onCreate(icicle);9 }
10 }
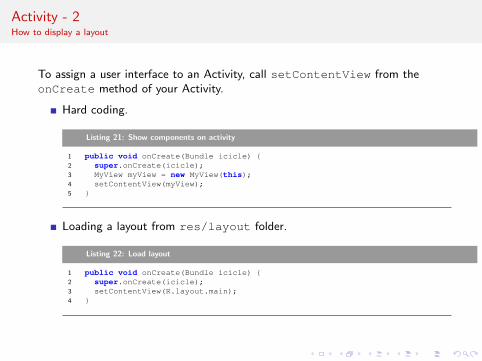
Activity - 2How to display a layout
To assign a user interface to an Activity, call setContentView from theonCreate method of your Activity.
Hard coding.
Listing 21: Show components on activity
1 public void onCreate(Bundle icicle) {2 super.onCreate(icicle);3 MyView myView = new MyView(this);4 setContentView(myView);5 }
Loading a layout from res/layout folder.
Listing 22: Load layout
1 public void onCreate(Bundle icicle) {2 super.onCreate(icicle);3 setContentView(R.layout.main);4 }
Activity - 3Register Activity inside AndroidManifest.xml
In order to use an Activity in your application, you need to register it in themanifest. Add new activity tags within the application node of the manifest;the activity tag includes attributes for metadata such as the label, icon,required permissions, and themes used by the Activity. An Activity without acorresponding activity tag cant be started.
Listing 23: Register an activity
1 <activity android:label="@string/app_name"2 android:name=".MyActivity">3 </activity>
Activity - 4Add Activity in the Home Screen
Within the activity tag, you can add intent-filter nodes that specify the Intentsyour Activity will listen for and react to. Each Intent Filter defines one or moreactions and categories that your Activity supports. To make an Activityavailable from the main program launcher, it must include an Intent Filterlistening for the Main action and the Launcher category:
Listing 24: Intent filter for an activity
1 <activity android:label="@string/app_name"2 android:name=".MyActivity">3 </activity>
UI DesignViews
Views. Views are the basic User Interface class for visual interfaceelements (commonly known as controls or widgets). All User Interfacecontrols, and the layout classes, are derived from Views.
ViewGroups. View Groups are extensions of the View class that cancontain multiple child Views. By extending the ViewGroup class, you cancreate compound controls that are made up of interconnected child Views.The ViewGroup class is also extended to provide the layout managers,such as LinearLayout, that help you compose User Interfaces.
Activities. Activities represent the window or screen being displayed tothe user. Activities are the Android equivalent of a Form. To display aUser Interface, you assign a View or layout to an Activity.
ViewsUse or modify views from code
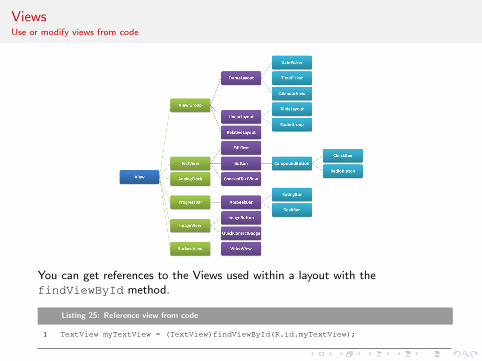
You can get references to the Views used within a layout with thefindViewById method.
Listing 25: Reference view from code
1 TextView myTextView = (TextView)findViewById(R.id.myTextView);
Android ControlsControls
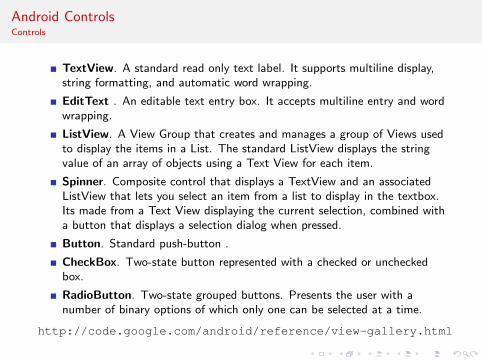
TextView. A standard read only text label. It supports multiline display,string formatting, and automatic word wrapping.
EditText . An editable text entry box. It accepts multiline entry and wordwrapping.
ListView. A View Group that creates and manages a group of Views usedto display the items in a List. The standard ListView displays the stringvalue of an array of objects using a Text View for each item.
Spinner. Composite control that displays a TextView and an associatedListView that lets you select an item from a list to display in the textbox.Its made from a Text View displaying the current selection, combined witha button that displays a selection dialog when pressed.
Button. Standard push-button .
CheckBox. Two-state button represented with a checked or uncheckedbox.
RadioButton. Two-state grouped buttons. Presents the user with anumber of binary options of which only one can be selected at a time.
http://code.google.com/android/reference/view-gallery.html
LayoutsHow to place elements on a layout
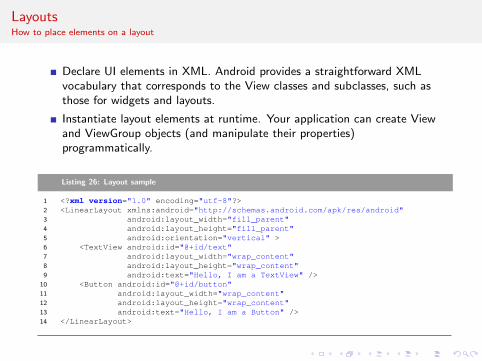
Declare UI elements in XML. Android provides a straightforward XMLvocabulary that corresponds to the View classes and subclasses, such asthose for widgets and layouts.
Instantiate layout elements at runtime. Your application can create Viewand ViewGroup objects (and manipulate their properties)programmatically.
Listing 26: Layout sample
1 <?xml version="1.0" encoding="utf-8"?>2 <LinearLayout xmlns:android="http://schemas.android.com/apk/res/android"3 android:layout_width="fill_parent"4 android:layout_height="fill_parent"5 android:orientation="vertical" >6 <TextView android:id="@+id/text"7 android:layout_width="wrap_content"8 android:layout_height="wrap_content"9 android:text="Hello, I am a TextView" />
10 <Button android:id="@+id/button"11 android:layout_width="wrap_content"12 android:layout_height="wrap_content"13 android:text="Hello, I am a Button" />14 </LinearLayout>
LayoutsSome layout types
FrameLayout The Frame Layout simply pins each child view to the topleft corner. Adding multiple children stacks each new child on top of theprevious, with each new View obscuring the last.
LinearLayout A Linear Layout adds each child View in a straight line,either vertically or horizontally. A vertical layout has one child View perrow, while a horizontal layout has a single row of Views. The LinearLayout Manager allows you to specify a weight for each child View thatcontrols the relative size of each within the available space.
RelativeLayout Using the Relative Layout, you can define the positions ofeach of the child Views relative to each other and the screen boundaries.
TableLayout The Table Layout lets you lay out Views using a grid of rowsand columns. Tables can span multiple rows and columns, and columnscan be set to shrink or grow.
AbsoluteLayout In an Absolute Layout, each child Views position isdefined in absolute coordinates. Compared to the previous managers,describing a layout in absolute terms means that your layout cantdynamically adjust for different screen resolutions and orientations.
Layouts using XMLBetter than coding
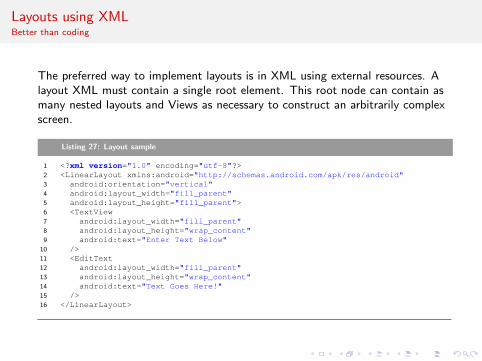
The preferred way to implement layouts is in XML using external resources. Alayout XML must contain a single root element. This root node can contain asmany nested layouts and Views as necessary to construct an arbitrarily complexscreen.
Listing 27: Layout sample
1 <?xml version="1.0" encoding="utf-8"?>2 <LinearLayout xmlns:android="http://schemas.android.com/apk/res/android"3 android:orientation="vertical"4 android:layout_width="fill_parent"5 android:layout_height="fill_parent">6 <TextView7 android:layout_width="fill_parent"8 android:layout_height="wrap_content"9 android:text="Enter Text Below"
10 />11 <EditText12 android:layout_width="fill_parent"13 android:layout_height="wrap_content"14 android:text="Text Goes Here!"15 />16 </LinearLayout>
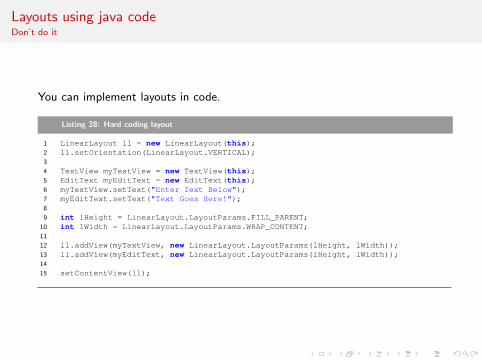
Layouts using java codeDon’t do it
You can implement layouts in code.
Listing 28: Hard coding layout
1 LinearLayout ll = new LinearLayout(this);2 ll.setOrientation(LinearLayout.VERTICAL);3
4 TextView myTextView = new TextView(this);5 EditText myEditText = new EditText(this);6 myTextView.setText("Enter Text Below");7 myEditText.setText("Text Goes Here!");8
9 int lHeight = LinearLayout.LayoutParams.FILL_PARENT;10 int lWidth = LinearLayout.LayoutParams.WRAP_CONTENT;11
12 ll.addView(myTextView, new LinearLayout.LayoutParams(lHeight, lWidth));13 ll.addView(myEditText, new LinearLayout.LayoutParams(lHeight, lWidth));14
15 setContentView(ll);
Custom Views/Controls/LayoutsUser defined controls
The ability to extend existing Views, create composite widgets, and createunique new controls lets you create beautiful User Interfaces optimized for yourparticular workflow. Android lets you subclass the existing widget toolbox andimplement your own View controls, giving you total freedom to tailor your UserInterface to maximize the user experience.
Modifying Existing Views
Creating Compound Controls
Creating Custom Widgets and Controls
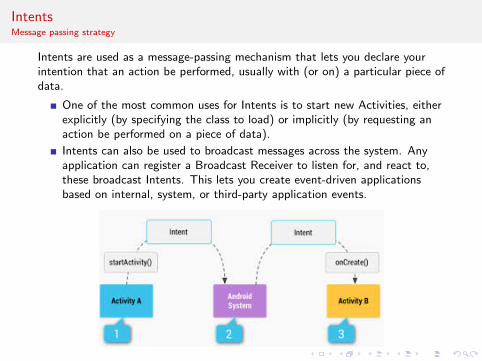
IntentsMessage passing strategy
Intents are used as a message-passing mechanism that lets you declare yourintention that an action be performed, usually with (or on) a particular piece ofdata.
One of the most common uses for Intents is to start new Activities, eitherexplicitly (by specifying the class to load) or implicitly (by requesting anaction be performed on a piece of data).
Intents can also be used to broadcast messages across the system. Anyapplication can register a Broadcast Receiver to listen for, and react to,these broadcast Intents. This lets you create event-driven applicationsbased on internal, system, or third-party application events.
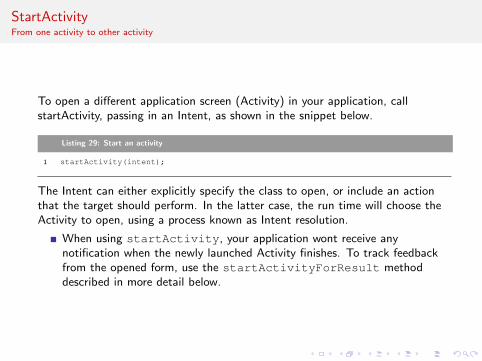
StartActivityFrom one activity to other activity
To open a different application screen (Activity) in your application, callstartActivity, passing in an Intent, as shown in the snippet below.
Listing 29: Start an activity
1 startActivity(intent);
The Intent can either explicitly specify the class to open, or include an actionthat the target should perform. In the latter case, the run time will choose theActivity to open, using a process known as Intent resolution.
When using startActivity, your application wont receive anynotification when the newly launched Activity finishes. To track feedbackfrom the opened form, use the startActivityForResult methoddescribed in more detail below.
ExplicitDirectamente especificar la clase a ejecutar
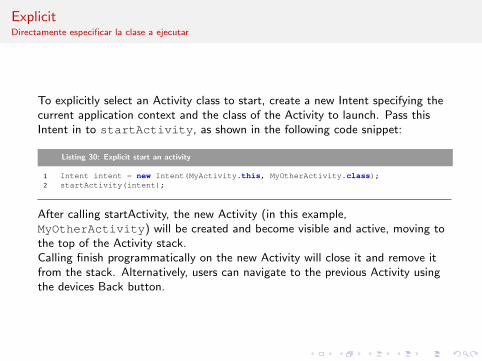
To explicitly select an Activity class to start, create a new Intent specifying thecurrent application context and the class of the Activity to launch. Pass thisIntent in to startActivity, as shown in the following code snippet:
Listing 30: Explicit start an activity
1 Intent intent = new Intent(MyActivity.this, MyOtherActivity.class);2 startActivity(intent);
After calling startActivity, the new Activity (in this example,MyOtherActivity) will be created and become visible and active, moving tothe top of the Activity stack.Calling finish programmatically on the new Activity will close it and remove itfrom the stack. Alternatively, users can navigate to the previous Activity usingthe devices Back button.
ImplicitIntent.ACTION
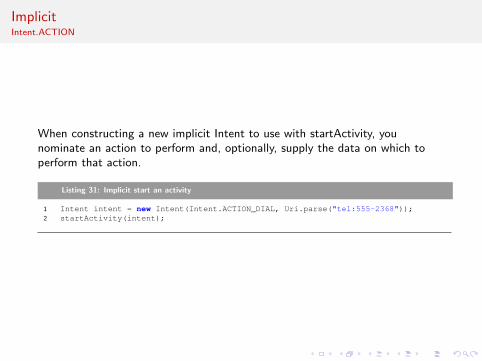
When constructing a new implicit Intent to use with startActivity, younominate an action to perform and, optionally, supply the data on which toperform that action.
Listing 31: Implicit start an activity
1 Intent intent = new Intent(Intent.ACTION_DIAL, Uri.parse("tel:555-2368"));2 startActivity(intent);
Start Activity for Result - 1Wait for a result
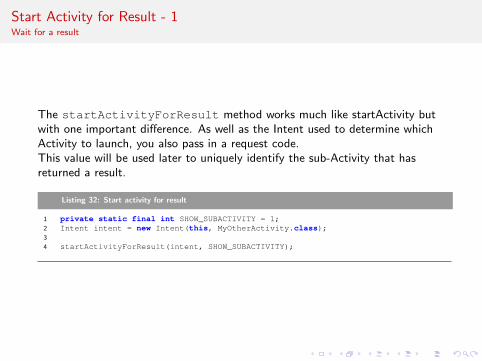
The startActivityForResult method works much like startActivity butwith one important difference. As well as the Intent used to determine whichActivity to launch, you also pass in a request code.This value will be used later to uniquely identify the sub-Activity that hasreturned a result.
Listing 32: Start activity for result
1 private static final int SHOW_SUBACTIVITY = 1;2 Intent intent = new Intent(this, MyOtherActivity.class);3
4 startActivityForResult(intent, SHOW_SUBACTIVITY);

Start Activity for Result - 2Return a result
When your sub-Activity is ready to close, call setResult before finish toreturn a result to the calling Activity. The method takes two parameters: theresult code and result payload represented as an Intent.
Listing 33: Return a result
1 Button okButton = (Button) findViewById(R.id.ok_button);2
3 okButton.setOnClickListener(new View.OnClickListener() {4 public void onClick(View view) {5 Uri data = Uri.parse("content://horses/" + selected_horse_id);6
7 Intent result = new Intent(null, data);8 result.putExtra(IS_INPUT_CORRECT, inputCorrect);9 result.putExtra(SELECTED_PISTOL, selectedPistol);
10 setResult(RESULT_OK, result);11 finish();12 }13 });
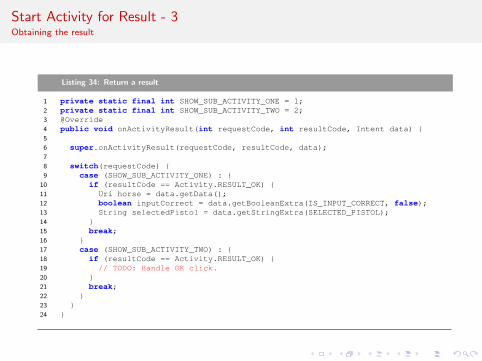
Start Activity for Result - 3Obtaining the result
When a sub-Activity closes, its parent Activitys onActivityResult event handleris fired and receives several parameters:
The Request Code The request code that was used to launch thereturning sub-Activity.
A Result Code. The result code set by the sub-Activity to indicate itsresult. It can be any integer value, but typically will be eitherActivity.RESULT OK or Activity.RESULT CANCELLED.
Data. An Intent used to bundle any returned data. Depending on thepurpose of the sub-Activity, it will typically include a URI that representsthe particular piece of data selected from a list.
Start Activity for Result - 3Obtaining the result
Listing 34: Return a result
1 private static final int SHOW_SUB_ACTIVITY_ONE = 1;2 private static final int SHOW_SUB_ACTIVITY_TWO = 2;3 @Override4 public void onActivityResult(int requestCode, int resultCode, Intent data) {5
6 super.onActivityResult(requestCode, resultCode, data);7
8 switch(requestCode) {9 case (SHOW_SUB_ACTIVITY_ONE) : {
10 if (resultCode == Activity.RESULT_OK) {11 Uri horse = data.getData();12 boolean inputCorrect = data.getBooleanExtra(IS_INPUT_CORRECT, false);13 String selectedPistol = data.getStringExtra(SELECTED_PISTOL);14 }15 break;16 }17 case (SHOW_SUB_ACTIVITY_TWO) : {18 if (resultCode == Activity.RESULT_OK) {19 // TODO: Handle OK click.20 }21 break;22 }23 }24 }
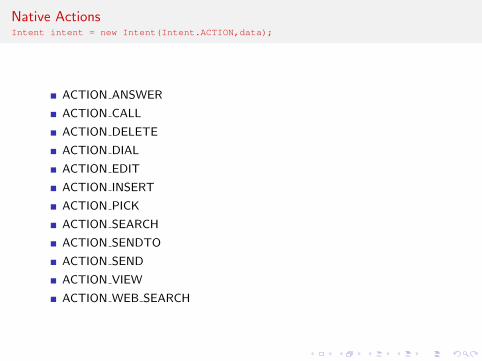
Native ActionsIntent intent = new Intent(Intent.ACTION,data);
ACTION ANSWER
ACTION CALL
ACTION DELETE
ACTION DIAL
ACTION EDIT
ACTION INSERT
ACTION PICK
ACTION SEARCH
ACTION SENDTO
ACTION SEND
ACTION VIEW
ACTION WEB SEARCH
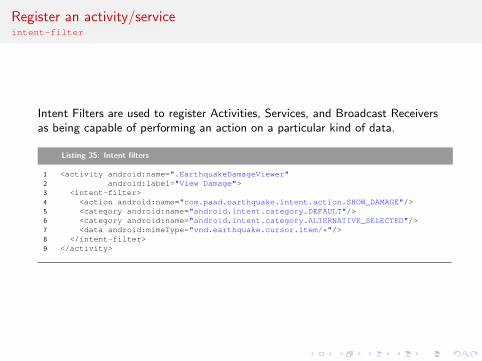
Register an activity/serviceintent-filter
Intent Filters are used to register Activities, Services, and Broadcast Receiversas being capable of performing an action on a particular kind of data.
Listing 35: Intent filters
1 <activity android:name=".EarthquakeDamageViewer"2 android:label="View Damage">3 <intent-filter>4 <action android:name="com.paad.earthquake.intent.action.SHOW_DAMAGE"/>5 <category android:name="android.intent.category.DEFAULT"/>6 <category android:name="android.intent.category.ALTERNATIVE_SELECTED"/>7 <data android:mimeType="vnd.earthquake.cursor.item/*"/>8 </intent-filter>9 </activity>
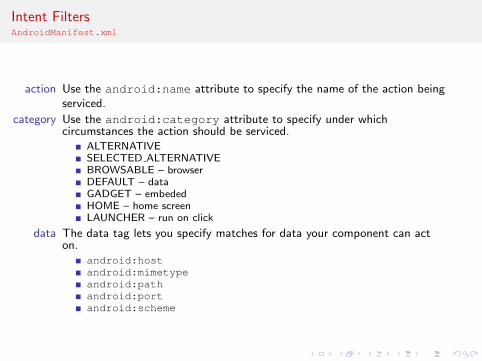
Intent FiltersAndroidManifest.xml
action Use the android:name attribute to specify the name of the action beingserviced.
category Use the android:category attribute to specify under whichcircumstances the action should be serviced.
ALTERNATIVESELECTED ALTERNATIVEBROWSABLE – browserDEFAULT – dataGADGET – embededHOME – home screenLAUNCHER – run on click
data The data tag lets you specify matches for data your component can acton.
android:hostandroid:mimetypeandroid:pathandroid:portandroid:scheme
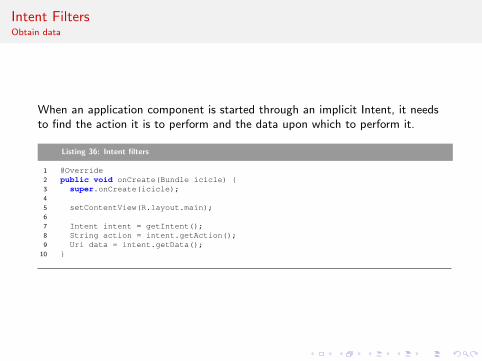
Intent FiltersObtain data
When an application component is started through an implicit Intent, it needsto find the action it is to perform and the data upon which to perform it.
Listing 36: Intent filters
1 @Override2 public void onCreate(Bundle icicle) {3 super.onCreate(icicle);4
5 setContentView(R.layout.main);6
7 Intent intent = getIntent();8 String action = intent.getAction();9 Uri data = intent.getData();
10 }
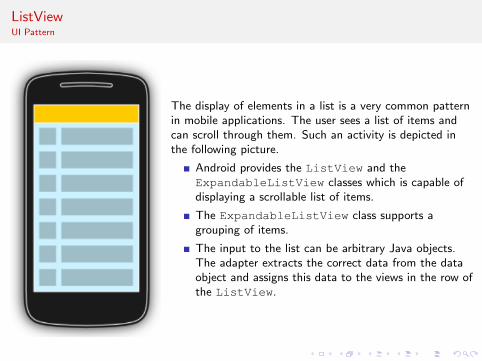
ListViewUI Pattern
The display of elements in a list is a very common patternin mobile applications. The user sees a list of items andcan scroll through them. Such an activity is depicted inthe following picture.
Android provides the ListView and theExpandableListView classes which is capable ofdisplaying a scrollable list of items.
The ExpandableListView class supports agrouping of items.
The input to the list can be arbitrary Java objects.The adapter extracts the correct data from the dataobject and assigns this data to the views in the row ofthe ListView.
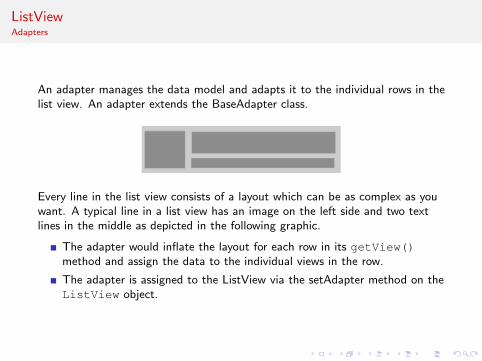
ListViewAdapters
An adapter manages the data model and adapts it to the individual rows in thelist view. An adapter extends the BaseAdapter class.
Every line in the list view consists of a layout which can be as complex as youwant. A typical line in a list view has an image on the left side and two textlines in the middle as depicted in the following graphic.
The adapter would inflate the layout for each row in its getView()method and assign the data to the individual views in the row.
The adapter is assigned to the ListView via the setAdapter method on theListView object.
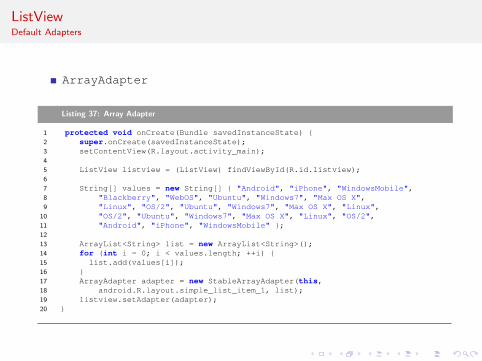
ListViewDefault Adapters
ArrayAdapter
Listing 37: Array Adapter
1 protected void onCreate(Bundle savedInstanceState) {2 super.onCreate(savedInstanceState);3 setContentView(R.layout.activity_main);4
5 ListView listview = (ListView) findViewById(R.id.listview);6
7 String[] values = new String[] { "Android", "iPhone", "WindowsMobile",8 "Blackberry", "WebOS", "Ubuntu", "Windows7", "Max OS X",9 "Linux", "OS/2", "Ubuntu", "Windows7", "Max OS X", "Linux",
10 "OS/2", "Ubuntu", "Windows7", "Max OS X", "Linux", "OS/2",11 "Android", "iPhone", "WindowsMobile" };12
13 ArrayList<String> list = new ArrayList<String>();14 for (int i = 0; i < values.length; ++i) {15 list.add(values[i]);16 }17 ArrayAdapter adapter = new StableArrayAdapter(this,18 android.R.layout.simple_list_item_1, list);19 listview.setAdapter(adapter);20 }
ListViewDefault Adapters
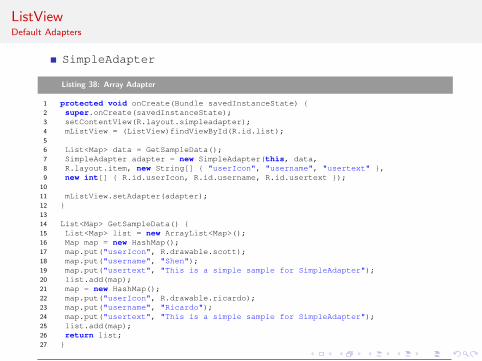
SimpleAdapter
Listing 38: Array Adapter
1 protected void onCreate(Bundle savedInstanceState) {2 super.onCreate(savedInstanceState);3 setContentView(R.layout.simpleadapter);4 mListView = (ListView)findViewById(R.id.list);5
6 List<Map> data = GetSampleData();7 SimpleAdapter adapter = new SimpleAdapter(this, data,8 R.layout.item, new String[] { "userIcon", "username", "usertext" },9 new int[] { R.id.userIcon, R.id.username, R.id.usertext });
10
11 mListView.setAdapter(adapter);12 }13
14 List<Map> GetSampleData() {15 List<Map> list = new ArrayList<Map>();16 Map map = new HashMap();17 map.put("userIcon", R.drawable.scott);18 map.put("username", "Shen");19 map.put("usertext", "This is a simple sample for SimpleAdapter");20 list.add(map);21 map = new HashMap();22 map.put("userIcon", R.drawable.ricardo);23 map.put("username", "Ricardo");24 map.put("usertext", "This is a simple sample for SimpleAdapter");25 list.add(map);26 return list;27 }
ListViewCustom Adapters
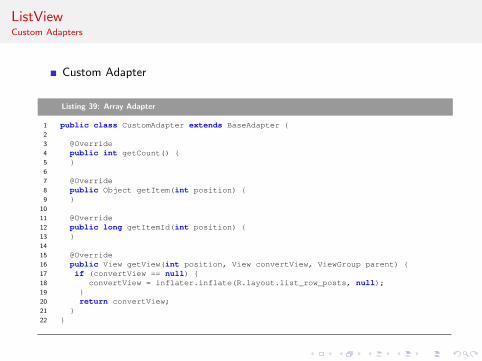
Custom Adapter
Listing 39: Array Adapter
1 public class CustomAdapter extends BaseAdapter {2
3 @Override4 public int getCount() {5 }6
7 @Override8 public Object getItem(int position) {9 }
10
11 @Override12 public long getItemId(int position) {13 }14
15 @Override16 public View getView(int position, View convertView, ViewGroup parent) {17 if (convertView == null) {18 convertView = inflater.inflate(R.layout.list_row_posts, null);19 }20 return convertView;21 }22 }
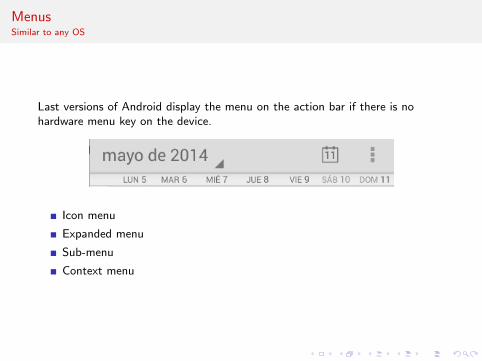
MenusSimilar to any OS
Last versions of Android display the menu on the action bar if there is nohardware menu key on the device.
Icon menu
Expanded menu
Sub-menu
Context menu
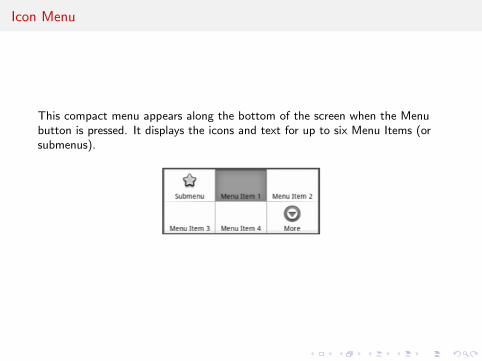
Icon Menu
This compact menu appears along the bottom of the screen when the Menubutton is pressed. It displays the icons and text for up to six Menu Items (orsubmenus).
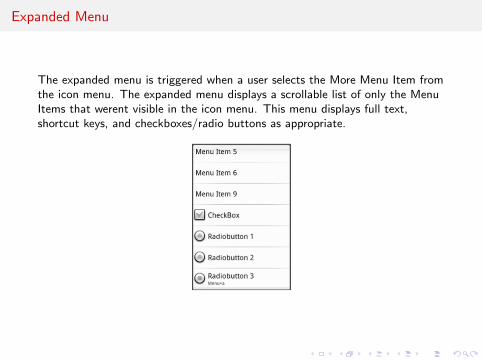
Expanded Menu
The expanded menu is triggered when a user selects the More Menu Item fromthe icon menu. The expanded menu displays a scrollable list of only the MenuItems that werent visible in the icon menu. This menu displays full text,shortcut keys, and checkboxes/radio buttons as appropriate.
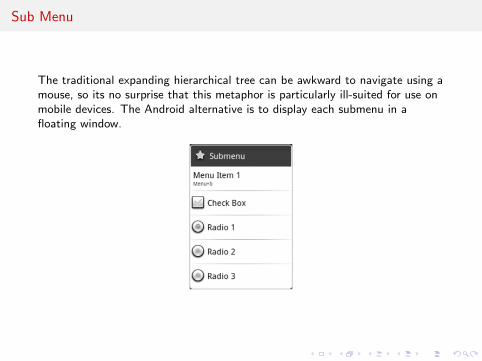
Sub Menu
The traditional expanding hierarchical tree can be awkward to navigate using amouse, so its no surprise that this metaphor is particularly ill-suited for use onmobile devices. The Android alternative is to display each submenu in afloating window.
How to display MenuonCreateOptionsMenu
To define a menu for an Activity, override its onCreateOptionsMenumethod. This method is triggered the first time an Activitys menu is displayed.Use the add method on the Menu object to populate your menu. For eachMenu Item, you must specify:
A group value to separate Menu Items for batch processing and ordering.
A unique identifier for each Menu Item. For efficiency reasons, Menu Itemselections are generally handled by the onOptionsItemSelected eventhandler, so this unique identifier is important to determine which MenuItem was pressed. It is convention to declare each menu ID as a privatestatic variable within the Activity class. You can use the Menu.FIRSTstatic constant and simply increment that value for each subsequent item.
An order value that defines the order in which the Menu Items aredisplayed.
The menu text, either as a character string or as a string resource.
When you have finished populating the menu, return True to allow Android todisplay the menu.
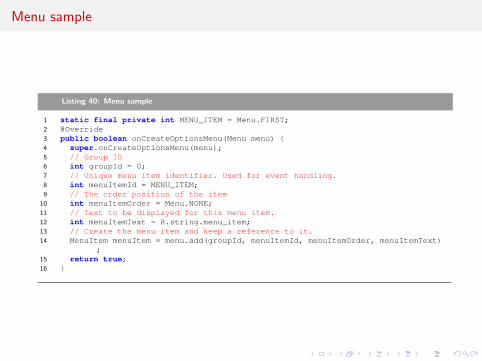
Menu sample
Listing 40: Menu sample
1 static final private int MENU_ITEM = Menu.FIRST;2 @Override3 public boolean onCreateOptionsMenu(Menu menu) {4 super.onCreateOptionsMenu(menu);5 // Group ID6 int groupId = 0;7 // Unique menu item identifier. Used for event handling.8 int menuItemId = MENU_ITEM;9 // The order position of the item
10 int menuItemOrder = Menu.NONE;11 // Text to be displayed for this menu item.12 int menuItemText = R.string.menu_item;13 // Create the menu item and keep a reference to it.14 MenuItem menuItem = menu.add(groupId, menuItemId, menuItemOrder, menuItemText)
;15 return true;16 }
Menu optionsRadio buttons and short-keys
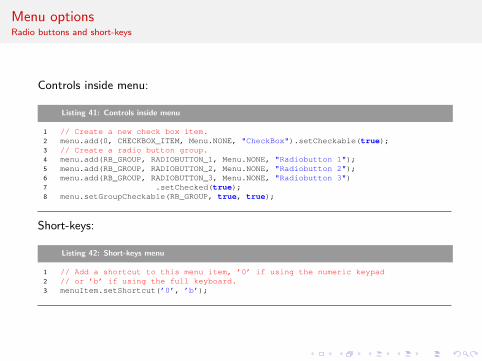
Controls inside menu:
Listing 41: Controls inside menu
1 // Create a new check box item.2 menu.add(0, CHECKBOX_ITEM, Menu.NONE, "CheckBox").setCheckable(true);3 // Create a radio button group.4 menu.add(RB_GROUP, RADIOBUTTON_1, Menu.NONE, "Radiobutton 1");5 menu.add(RB_GROUP, RADIOBUTTON_2, Menu.NONE, "Radiobutton 2");6 menu.add(RB_GROUP, RADIOBUTTON_3, Menu.NONE, "Radiobutton 3")7 .setChecked(true);8 menu.setGroupCheckable(RB_GROUP, true, true);
Short-keys:
Listing 42: Short-keys menu
1 // Add a shortcut to this menu item, ’0’ if using the numeric keypad2 // or ’b’ if using the full keyboard.3 menuItem.setShortcut(’0’, ’b’);

Other optionsIcons, intents, etc.
Condensed Titles:The icon menu does not display shortcuts or checkboxes, so its often necessaryto modify its display text to indicate its state. The following code shows howto set the icon menu specific text for a Menu Item:
Listing 43: Short-keys menu
1 menuItem.setTitleCondensed("Short Title");
Icons:
Listing 44: Short-keys menu
1 menuItem.setIcon(R.drawable.menu_item_icon);
Intents:Android will execute startActivity, passing in the specified Intent.
Listing 45: Short-keys menu
1 menuItem.setIntent(new Intent(this, MyOtherActivity.class));
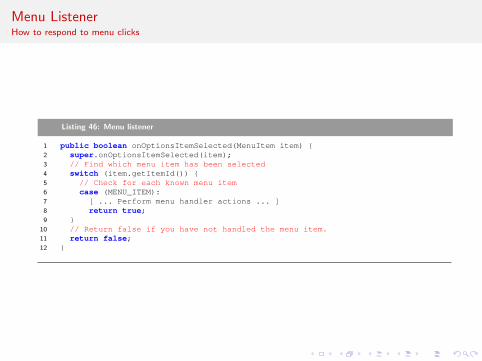
Menu ListenerHow to respond to menu clicks
Listing 46: Menu listener
1 public boolean onOptionsItemSelected(MenuItem item) {2 super.onOptionsItemSelected(item);3 // Find which menu item has been selected4 switch (item.getItemId()) {5 // Check for each known menu item6 case (MENU_ITEM):7 [ ... Perform menu handler actions ... ]8 return true;9 }
10 // Return false if you have not handled the menu item.11 return false;12 }
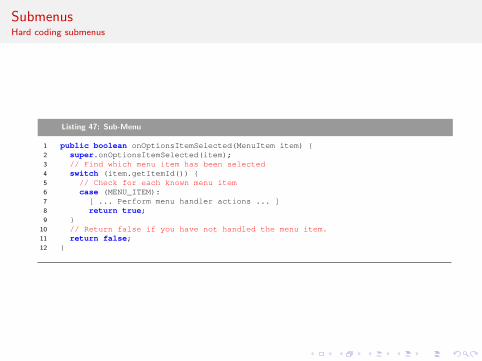
SubmenusHard coding submenus
Listing 47: Sub-Menu
1 public boolean onOptionsItemSelected(MenuItem item) {2 super.onOptionsItemSelected(item);3 // Find which menu item has been selected4 switch (item.getItemId()) {5 // Check for each known menu item6 case (MENU_ITEM):7 [ ... Perform menu handler actions ... ]8 return true;9 }
10 // Return false if you have not handled the menu item.11 return false;12 }
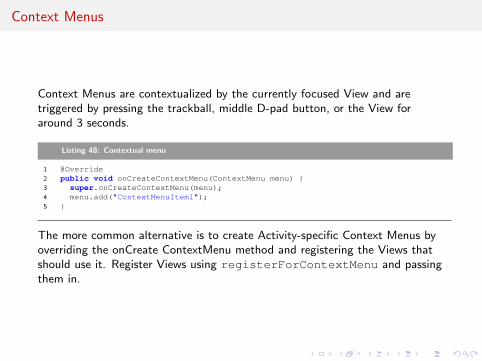
Context Menus
Context Menus are contextualized by the currently focused View and aretriggered by pressing the trackball, middle D-pad button, or the View foraround 3 seconds.
Listing 48: Contextual menu
1 @Override2 public void onCreateContextMenu(ContextMenu menu) {3 super.onCreateContextMenu(menu);4 menu.add("ContextMenuItem1");5 }
The more common alternative is to create Activity-specific Context Menus byoverriding the onCreate ContextMenu method and registering the Views thatshould use it. Register Views using registerForContextMenu and passingthem in.
Context menuEvent listener
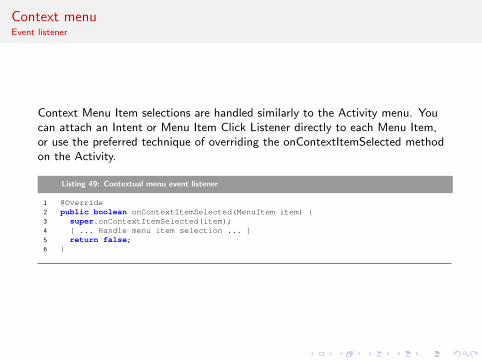
Context Menu Item selections are handled similarly to the Activity menu. Youcan attach an Intent or Menu Item Click Listener directly to each Menu Item,or use the preferred technique of overriding the onContextItemSelected methodon the Activity.
Listing 49: Contextual menu event listener
1 @Override2 public boolean onContextItemSelected(MenuItem item) {3 super.onContextItemSelected(item);4 [ ... Handle menu item selection ... ]5 return false;6 }
Resource menuInflating menu instead hard coding
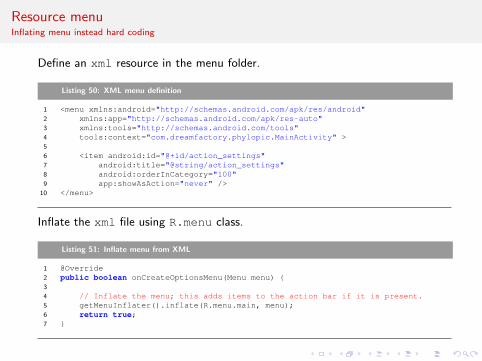
Define an xml resource in the menu folder.
Listing 50: XML menu definition
1 <menu xmlns:android="http://schemas.android.com/apk/res/android"2 xmlns:app="http://schemas.android.com/apk/res-auto"3 xmlns:tools="http://schemas.android.com/tools"4 tools:context="com.dreamfactory.phylopic.MainActivity" >5
6 <item android:id="@+id/action_settings"7 android:title="@string/action_settings"8 android:orderInCategory="100"9 app:showAsAction="never" />
10 </menu>
Inflate the xml file using R.menu class.
Listing 51: Inflate menu from XML
1 @Override2 public boolean onCreateOptionsMenu(Menu menu) {3
4 // Inflate the menu; this adds items to the action bar if it is present.5 getMenuInflater().inflate(R.menu.main, menu);6 return true;7 }
BroadcastingReceive global notifications
So far youve looked at using Intents to start new application components, butthey can also be used to broadcast messages anonymously between componentswith the sendBroadcast method. You can implement Broadcast Receivers tolisten for, and respond to, these broadcast Intents within your applications.
Android uses Broadcast Intents extensively to broadcast system events likebattery-charging levels, network connections, and incoming calls.

Send a broadcastsendBroadcast
Broadcasting Intents is actually quite simple. Within your applicationcomponent, construct the Intent you want to broadcast, and use thesendBroadcast method to send it.
Listing 52: Define a broadcast string
1 public static final String NEW_LIFEFORM_DETECTED = "com.paad.action.NEW_LIFE";
Set the action, data, and category of your Intent in a way that lets BroadcastReceivers accurately determine their interest. In this scenario, the Intent actionstring is used to identify the event being broadcast, so it should be a uniquestring that identifies the event.
Listing 53: Send the broadcast
1 Intent intent = new Intent(NEW_LIFEFORM_DETECTED);2 intent.putExtra("lifeformName", lifeformType);3 intent.putExtra("longitude", currentLongitude);4 intent.putExtra("latitude", currentLatitude);5 sendBroadcast(intent);
Receive a broadcast - 1How to respond to a broadcast
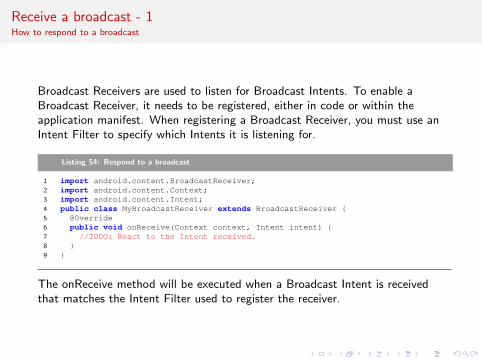
Broadcast Receivers are used to listen for Broadcast Intents. To enable aBroadcast Receiver, it needs to be registered, either in code or within theapplication manifest. When registering a Broadcast Receiver, you must use anIntent Filter to specify which Intents it is listening for.
Listing 54: Respond to a broadcast
1 import android.content.BroadcastReceiver;2 import android.content.Context;3 import android.content.Intent;4 public class MyBroadcastReceiver extends BroadcastReceiver {5 @Override6 public void onReceive(Context context, Intent intent) {7 //TODO: React to the Intent received.8 }9 }
The onReceive method will be executed when a Broadcast Intent is receivedthat matches the Intent Filter used to register the receiver.
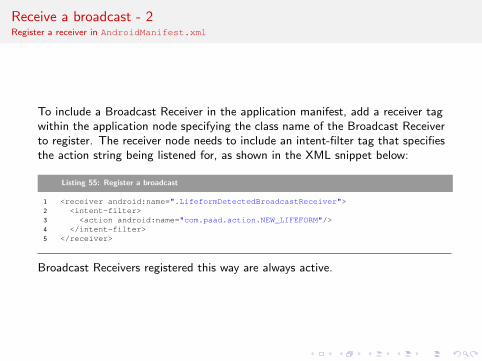
Receive a broadcast - 2Register a receiver in AndroidManifest.xml
To include a Broadcast Receiver in the application manifest, add a receiver tagwithin the application node specifying the class name of the Broadcast Receiverto register. The receiver node needs to include an intent-filter tag that specifiesthe action string being listened for, as shown in the XML snippet below:
Listing 55: Register a broadcast
1 <receiver android:name=".LifeformDetectedBroadcastReceiver">2 <intent-filter>3 <action android:name="com.paad.action.NEW_LIFEFORM"/>4 </intent-filter>5 </receiver>
Broadcast Receivers registered this way are always active.
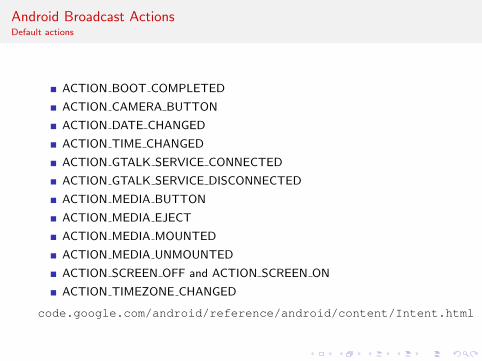
Android Broadcast ActionsDefault actions
ACTION BOOT COMPLETED
ACTION CAMERA BUTTON
ACTION DATE CHANGED
ACTION TIME CHANGED
ACTION GTALK SERVICE CONNECTED
ACTION GTALK SERVICE DISCONNECTED
ACTION MEDIA BUTTON
ACTION MEDIA EJECT
ACTION MEDIA MOUNTED
ACTION MEDIA UNMOUNTED
ACTION SCREEN OFF and ACTION SCREEN ON
ACTION TIMEZONE CHANGED
code.google.com/android/reference/android/content/Intent.html
Table of ContentsPart V: Great Libraries
18 Grab data19 Square Open Source
Retrofit - okhttp by defaultOttoPicasso
How to grab data?Free service
Programmable Web APIs http://www.programmableweb.com
KimoloLabs http://www.kimonolabs.com
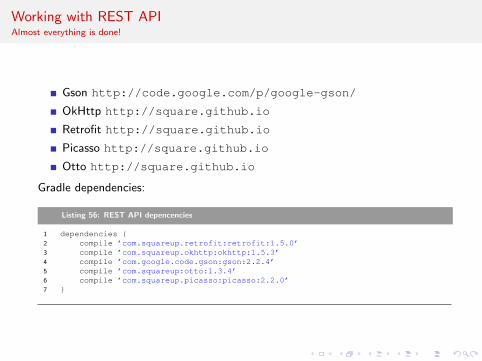
Working with REST APIAlmost everything is done!
Gson http://code.google.com/p/google-gson/
OkHttp http://square.github.io
Retrofit http://square.github.io
Picasso http://square.github.io
Otto http://square.github.io
Gradle dependencies:
Listing 56: REST API depencencies
1 dependencies {2 compile ’com.squareup.retrofit:retrofit:1.5.0’3 compile ’com.squareup.okhttp:okhttp:1.5.3’4 compile ’com.google.code.gson:gson:2.2.4’5 compile ’com.squareup:otto:1.3.4’6 compile ’com.squareup.picasso:picasso:2.2.0’7 }
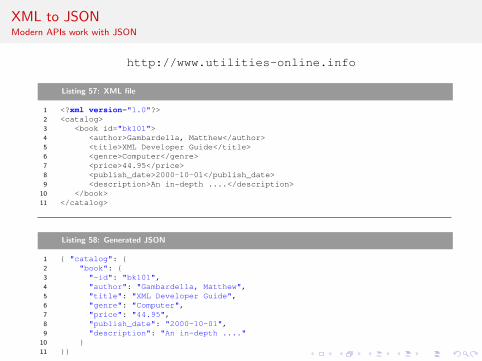
XML to JSONModern APIs work with JSON
http://www.utilities-online.info
Listing 57: XML file
1 <?xml version="1.0"?>2 <catalog>3 <book id="bk101">4 <author>Gambardella, Matthew</author>5 <title>XML Developer Guide</title>6 <genre>Computer</genre>7 <price>44.95</price>8 <publish_date>2000-10-01</publish_date>9 <description>An in-depth ....</description>
10 </book>11 </catalog>
Listing 58: Generated JSON
1 { "catalog": {2 "book": {3 "-id": "bk101",4 "author": "Gambardella, Matthew",5 "title": "XML Developer Guide",6 "genre": "Computer",7 "price": "44.95",8 "publish_date": "2000-10-01",9 "description": "An in-depth ...."
10 }11 }}
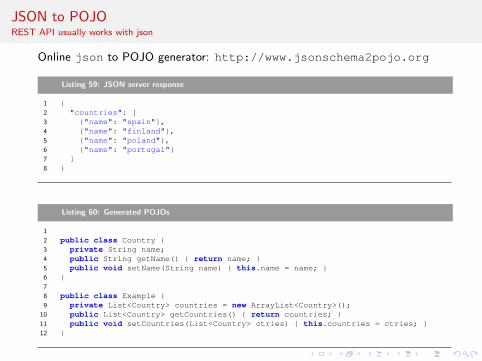
JSON to POJOREST API usually works with json
Online json to POJO generator: http://www.jsonschema2pojo.org
Listing 59: JSON server response
1 {2 "countries": [3 {"name": "spain"},4 {"name": "finland"},5 {"name": "poland"},6 {"name": "portugal"}7 ]8 }
Listing 60: Generated POJOs
1
2 public class Country {3 private String name;4 public String getName() { return name; }5 public void setName(String name) { this.name = name; }6 }7
8 public class Example {9 private List<Country> countries = new ArrayList<Country>();
10 public List<Country> getCountries() { return countries; }11 public void setCountries(List<Country> ctries) { this.countries = ctries; }12 }
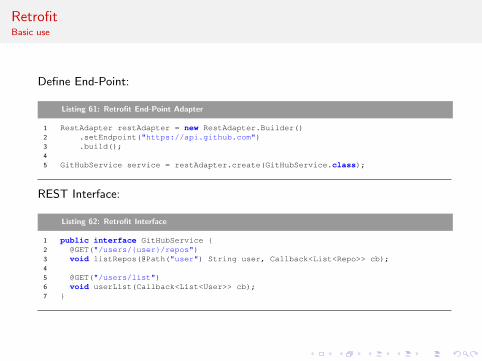
RetrofitBasic use
Define End-Point:
Listing 61: Retrofit End-Point Adapter
1 RestAdapter restAdapter = new RestAdapter.Builder()2 .setEndpoint("https://api.github.com")3 .build();4
5 GitHubService service = restAdapter.create(GitHubService.class);
REST Interface:
Listing 62: Retrofit Interface
1 public interface GitHubService {2 @GET("/users/{user}/repos")3 void listRepos(@Path("user") String user, Callback<List<Repo>> cb);4
5 @GET("/users/list")6 void userList(Callback<List<User>> cb);7 }
RetrofitBasic use
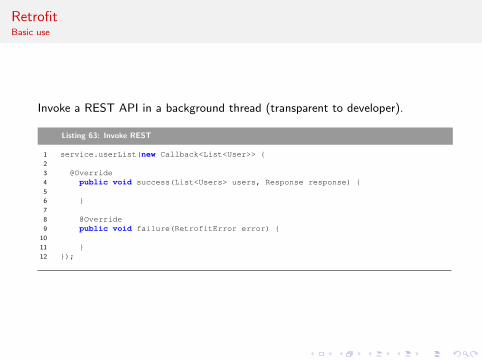
Invoke a REST API in a background thread (transparent to developer).
Listing 63: Invoke REST
1 service.userList(new Callback<List<User>> {2
3 @Override4 public void success(List<Users> users, Response response) {5
6 }7
8 @Override9 public void failure(RetrofitError error) {
10
11 }12 });
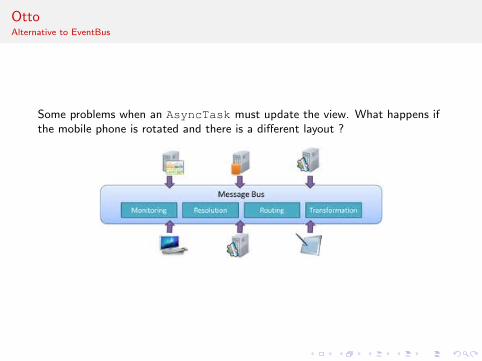
OttoAlternative to EventBus
Some problems when an AsyncTask must update the view. What happens ifthe mobile phone is rotated and there is a different layout ?
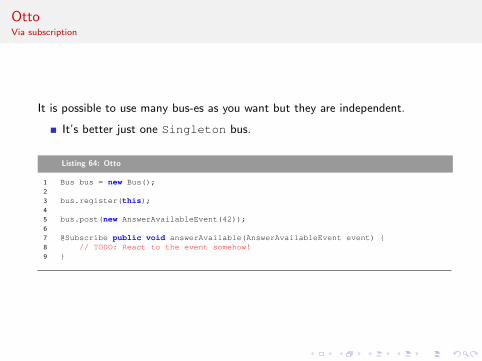
OttoVia subscription
It is possible to use many bus-es as you want but they are independent.
It’s better just one Singleton bus.
Listing 64: Otto
1 Bus bus = new Bus();2
3 bus.register(this);4
5 bus.post(new AnswerAvailableEvent(42));6
7 @Subscribe public void answerAvailable(AnswerAvailableEvent event) {8 // TODO: React to the event somehow!9 }
Loading imagesAsync load
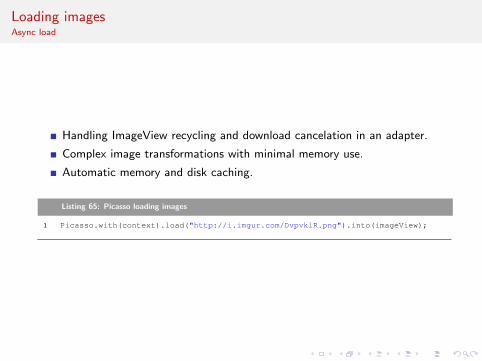
Handling ImageView recycling and download cancelation in an adapter.
Complex image transformations with minimal memory use.
Automatic memory and disk caching.
Listing 65: Picasso loading images
1 Picasso.with(context).load("http://i.imgur.com/DvpvklR.png").into(imageView);
Table of ContentsPart VI: Games
20 Cocos2D-X21 Game Tools
Cocos2D-X Installwww.cocos2d-x.org
C++ coding, there are also versions for Objective-C, JS.
cocos2d-x v3.0
python 2.7
c++ compiler (gcc, vs)
Windows, OSX, Linux, etc...
Multiplatform, cross compiling, etc..
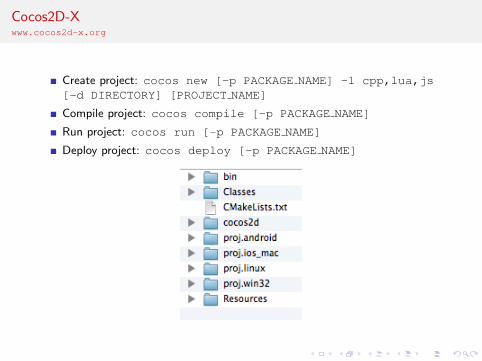
Cocos2D-Xwww.cocos2d-x.org
Create project: cocos new [-p PACKAGE NAME] -l cpp,lua,js[-d DIRECTORY] [PROJECT NAME]
Compile project: cocos compile [-p PACKAGE NAME]
Run project: cocos run [-p PACKAGE NAME]
Deploy project: cocos deploy [-p PACKAGE NAME]
Box2D and ChipMunkPhysics Similation
Continuous collision detection
Contact callbacks: begin, end, pre-solve, post-solve
Convex polyons and circles.
Multiple shapes per body
One-shot contact manifolds
Dynamic tree broadphase
Efficient pair management
Fast broadphase AABB queries
Collision groups and categories
Continuous physics with time of impact solver
Persistent body-joint-contact graph
Island solution and sleep management
Contact, friction, and restitution
Stable stacking with a linear-time solver
Revolute, prismatic, distance, pulley, gear, mouse joint, ...
Joint limits, motors, and friction
Momentum decoupled position correction
Fairly accurate reaction forces/impulses
Box2D and ChipMunkPhysics Simulation
http://www.iforce2d.net
Liquid FunSPH Simulator
http://google.github.io/liquidfun/

R.U.B.E. Level EditorWith physics editor

Developer Economics Sales Report Q1 2014http://www.developereconomics.com/reports/q1-2014/


![Metropolia „Silesia” 35 km 60 km Metropolia „Silesia” [%]Silesia Province [%] area1218 km210%12 334 km2100% population2.](https://static.fdocuments.us/doc/165x107/56649ce05503460f949a9c5d/metropolia-silesia-httpplwikipediaorgwikikatowice-35-km-60-km.jpg)