Mobile Autonomous Systems Laboratory 6.186 Java Image … · Mobile Autonomous Systems Laboratory...
14
Mobile Autonomous Systems Laboratory 6.186 Java Image Processing Tutorial By David Nelson and the Maslab Staff 4th December 2004 1 Introduction The purpose of this tutorial is to help you become acquainted with some of the basic computer vision techniques used in Maslab and with image processing in Java. Once IAP starts, you will have less than a month to build and debug your robot. The goal of this tutorial is to enable you to hit the ground running. There are two tasks that we would like you to complete before IAP: blue line filtering and red ball finding. These are two tasks that your robot will likely need to perform regardless of the details of the contest. If you are unfamiliar with Java, we strongly suggest that you look at Sun’s Java Tutorial, 1 and that you check out the O’Reilly books on Java. 2 Image Processing in Maslab In Maslab last year, robots had to collect red balls and place them into (or near) yellow goals. Some of the red balls were laying about the field, whereas others were stored in green towers. Although the specifics of the playing field will change, the field will be similar in spirit to last year’s. Detecting and locating objects from images is a difficult computer vision problem. Fortunately, we have simplified the task by color-coding, so that you will be able to manageably complete it during IAP. Last year’s playing field was colorcoded as follows: Color Object Red Balls Yellow Goals Green Towers Blue Top edge of walls Light Blue Floor White Walls 1 http://java.sun.com/docs/books/tutorial/index.html 3 The HSV Color Space The PNG images we will use—and the images returned from your camera—are stored in the RGB (red, green, blue) color space. You will likely find it easier to process the images in the HSV (hue, saturation, value) color space, because it decouples hue from the other variables. In RGB, it’s difficult to consicely describe all the shades of, say, yellow. Colors within the HSV color space are determined by three numbers: hue, saturation, and value. Hue is the pigment of the color. For instance, red, green, yellow, and blue are hues, whereas light blue and dark blue have similar hues. Saturation is how much pigment there is in a color; when saturation is zero, the color is a shade of gray. You can think of saturation as the amount of food coloring added to water when making colored water. Finally, there is value, sometimes refered to as brightness or luminance. If the value is zero, the color is black, regardless of hue or saturation. Similarly, a color with maximum value is white, regardless of hue or saturation. This leads to an annoyance in the HSV system: when value is extreme, hue and
Transcript of Mobile Autonomous Systems Laboratory 6.186 Java Image … · Mobile Autonomous Systems Laboratory...
Mobile Autonomous Systems Laboratory 6.186Java Image Processing Tutorial
By David Nelson and the Maslab Staff
4th December 2004
1 Introduction The purpose of this tutorial is to help you become acquainted with some of the basic computer vision techniques used in Maslab and with image processing in Java. Once IAP starts, you will have less than a month to build and debug your robot. The goal of this tutorial is to enable you to hit the ground running. There are two tasks that we would like you to complete before IAP: blue line filtering and red ball finding. These are two tasks that your robot will likely need to perform regardless of the details of the contest. If you are unfamiliar with Java, we strongly suggest that you look at Sun’s Java Tutorial,
1 and that you check out the
O’Reilly books on Java.
2 Image Processing in Maslab In Maslab last year, robots had to collect red balls and place them into (or near) yellow goals. Some of the red balls were laying about the field, whereas others were stored in green towers. Although the specifics of the playing field will change, the field will be similar in spirit to last year’s. Detecting and locating objects from images is a difficult computer vision problem. Fortunately, we have simplified the task by color-coding, so that you will be able to manageably complete it during IAP. Last year’s playing field was colorcoded as follows:
Color Object Red Balls Yellow Goals Green Towers Blue Top edge of walls Light Blue Floor White Walls
1http://java.sun.com/docs/books/tutorial/index.html
3 The HSV Color Space The PNG images we will use—and the images returned from your camera—are stored in the RGB (red, green, blue) color space. You will likely find it easier to process the images in the HSV (hue, saturation, value) color space, because it decouples hue from the other variables. In RGB, it’s difficult to consicely describe all the shades of, say, yellow.
Colors within the HSV color space are determined by three numbers: hue, saturation, and value. Hue is the pigment of the color. For instance, red, green, yellow, and blue are hues, whereas light blue and dark blue have similar hues. Saturation is how much pigment there is in a color; when saturation is zero, the color is a shade of gray. You can think of saturation as the amount of food coloring added to water when making colored water. Finally, there is value, sometimes refered to as brightness or luminance. If the value is zero, the color is black, regardless of hue or saturation. Similarly, a color with maximum value is white, regardless of hue or saturation. This leads to an annoyance in the HSV system: when value is extreme, hue and

saturation are undefined, and when saturation is zero, hue is undefined. That is, black and white can have any hue and saturation, and gray can have any hue.
In the computer, hue, saturation, and value are each represented by a byte and can range from 0 to 255. Playing with the color picker in your favorite image editing program (Gimp, Photoshop, Windows Paint, etc.) will allow you to get a feel for the HSV representations of common colors. Vivid shades of red, yellow, green and blue all have saturations of 255, and hues of appoximately 0/255, 43, 85, 170, respectively. You will notice another annoyance in the HSV color space, namely that red is both 0 and 255. This is because hue is circular, and wraps around at red. If you want to know more about HSV, or about the various color spaces in general, use Google.
4 Example: Finding Red Blobs
4.1 Overview In order to help you learn to manipulate images in Java, we will walk you through the process of loading an image from disk, processing the image, and then writing it back to disk. There are many possible image formats, and we have chosen PNG because it is lossless. A lossy format like JPEG can introduce artifacts that you might not notice, but that your code probably will. You may either download test images from the Maslab website or make your own using Gimp or Photoshop. Remember that you should assess the quality of your algorithms using real images, not toy examples. For the MIT Server phobic, to use the Gimp, type:
MIT Server% add graphicsMIT server% gimp&
Maslab is all about learning by doing. In this spirit, although we have provided you with a program that does an image processing task, you will quickly notice that it needs some work before you can use it on your robot. We hope that this program will serve as a base from which to complete functions for blue line filtering and red ball finding.
In our demonstration program, we will use the following image:
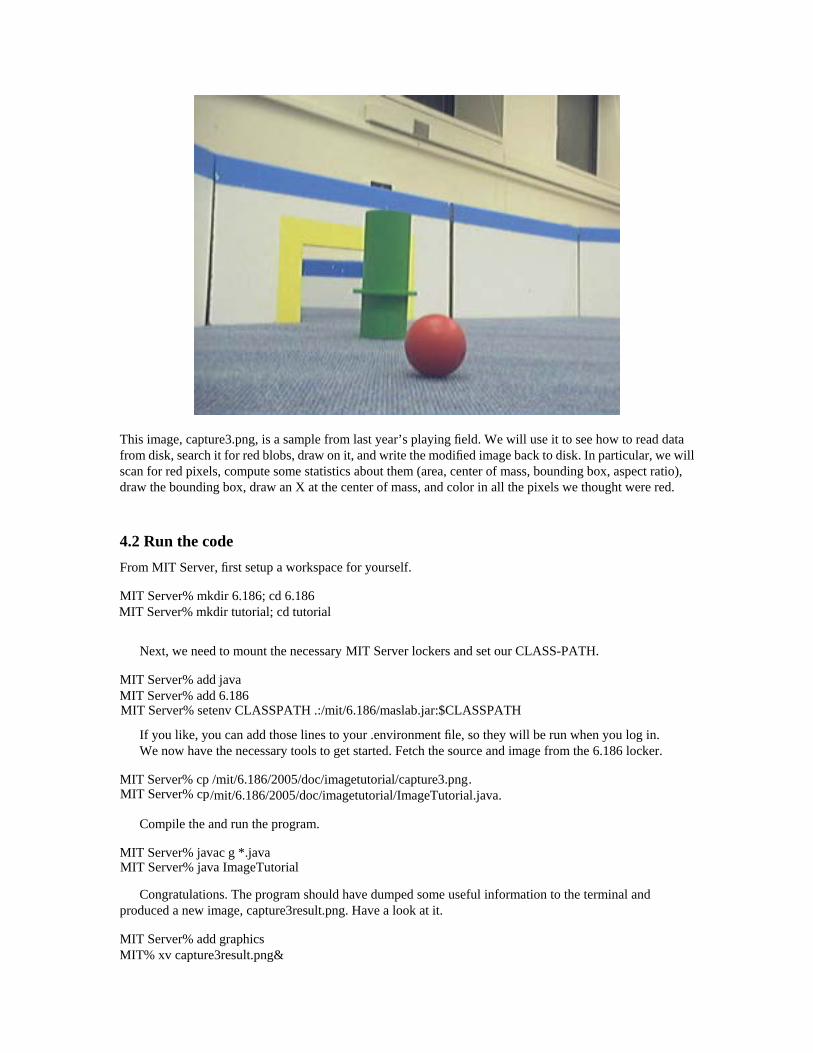
This image, capture3.png, is a sample from last year’s playing field. We will use it to see how to read data from disk, search it for red blobs, draw on it, and write the modified image back to disk. In particular, we will scan for red pixels, compute some statistics about them (area, center of mass, bounding box, aspect ratio), draw the bounding box, draw an X at the center of mass, and color in all the pixels we thought were red.
4.2 Run the code From MIT Server, first setup a workspace for yourself.
MIT Server% mkdir 6.186; cd 6.186MIT Server% mkdir tutorial; cd
tutorial
Next, we need to mount the necessary MIT Server lockers and set our CLASS-PATH.
MIT Server% add java MIT Server% add 6.186 MIT Server% setenv CLASSPATH .:/mit/6.186/maslab.jar:$CLASSPATH
If you like, you can add those lines to your .environment file, so they will be run when you log in. We now have the necessary tools to get started. Fetch the source and image from the 6.186 locker.
MIT Server% cp /mit/6.186/2005/doc/imagetutorial/capture3.png . MIT Server% cp
/mit/6.186/2005/doc/imagetutorial/ImageTutorial.java.
Compile the and run the program.
MIT Server% javac g *.javaMIT Server% java ImageTutorial
Congratulations. The program should have dumped some useful information to the terminal and produced a new image, capture3result.png. Have a look at it.
MIT Server% add graphicsMIT% xv capture3result.png&
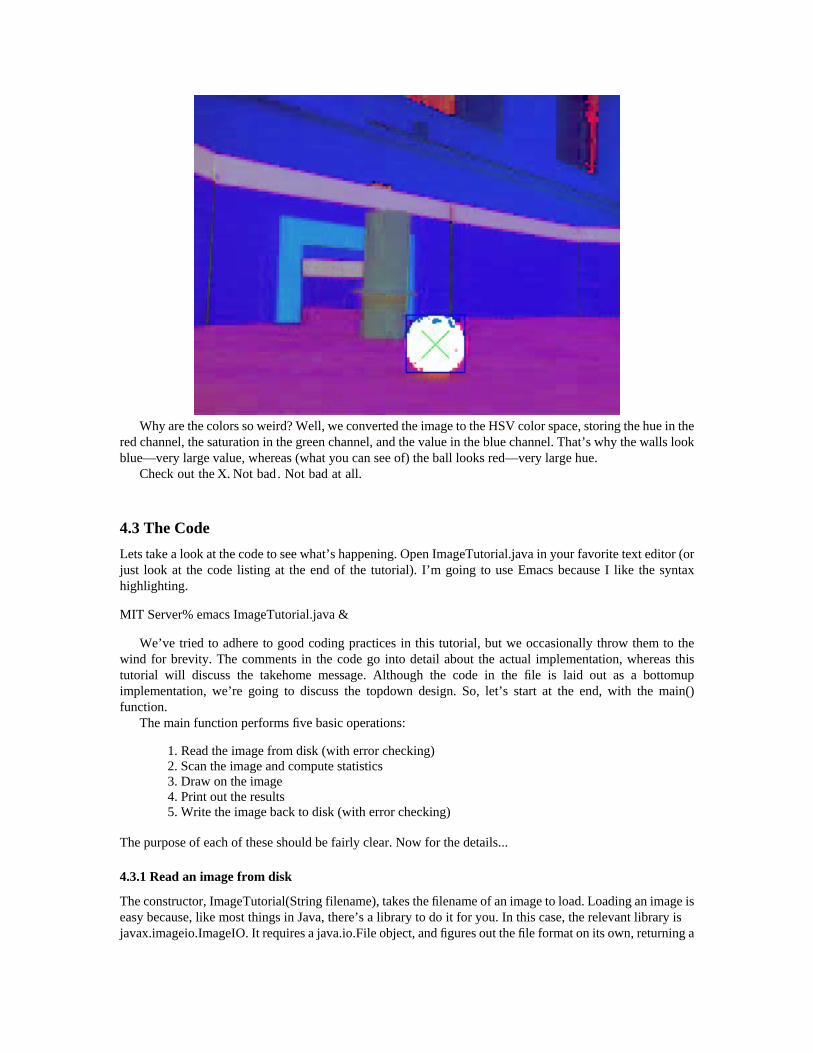
Why are the colors so weird? Well, we converted the image to the HSV color space, storing the hue in the
red channel, the saturation in the green channel, and the value in the blue channel. That’s why the walls look blue—very large value, whereas (what you can see of) the ball looks red—very large hue.
Check out the X. Not bad. Not bad at all.
4.3 The Code Lets take a look at the code to see what’s happening. Open ImageTutorial.java in your favorite text editor (or just look at the code listing at the end of the tutorial). I’m going to use Emacs because I like the syntax highlighting.
MIT Server% emacs ImageTutorial.java &
We’ve tried to adhere to good coding practices in this tutorial, but we occasionally throw them to the wind for brevity. The comments in the code go into detail about the actual implementation, whereas this tutorial will discuss the takehome message. Although the code in the file is laid out as a bottomup implementation, we’re going to discuss the topdown design. So, let’s start at the end, with the main() function.
The main function performs five basic operations:
1. Read the image from disk (with error checking) 2. Scan the image and compute statistics 3. Draw on the image 4. Print out the results 5. Write the image back to disk (with error checking)
The purpose of each of these should be fairly clear. Now for the details...
4.3.1 Read an image from disk
The constructor, ImageTutorial(String filename), takes the filename of an image to load. Loading an image is easy because, like most things in Java, there’s a library to do it for you. In this case, the relevant library is javax.imageio.ImageIO. It requires a java.io.File object, and figures out the file format on its own, returning a
java.awt.BufferedImage. Although Java supports a number of different implementations of the Image class, we will use BufferedImages exclusively, because they guarantee that all of the image data is loaded and available. Other implementations support lazy loading and other features which will only cause headaches.
The constructor creates the appropriate File object, hands it off to ImageIO, and the rest is history. If something goes wrong, like the file doesn’t exist, or ImageIO can’t figure out the format, the constructor just passes the resulting IOException back to main, which fails gracefully. Finally, the constructor calls the handy function maslab.util.ImageUtil.RGBtoHSV( ) which does the right thing, placing hue in the red channel, saturation in the green channel, and value in the blue channel.
4.3.2 Scan the image and compute statistics
The heart of this process is the function find_red_blob( ). It makes a linear scan through the image, checking to see whether a pixel is red. If it finds one, it updates the statistics. The area (also called the zeroth moment) is simply the number
of red pixels, N =
x y
B(x, y). The center-of-mass (also called the first moment, and taken to be the position of the ball), is a weighted sum of the red pixels. Let B(x, y) = 1 if the pixel (x, y) is red, 0 otherwise. Then the x
component of the first moment is given
by
positionx = 1
y x·B(x, y), and x
similarly for the ycomponent. Because B(x, y) is either zero or one, we simply add in x or y whenever (x,y) is
red. Finally, we keep track of the minimum and
maximum x and y values seen. To determine if a pixel is red, we use the isRed(int hsv) function. It first unpacks the hue, saturation,
and value out of the integer returned by getRGB() using some bit twiddling. getRGB() is supposed to return the RGB value of a pixel in packed integer format. That is, with blue in the low byte, green in the next byte, red in the next byte, and zero in the high byte. However, we’ve replaced those with HSV values. Convince yourself that the ANDs and shifts do the right thing. In particular, notice the care taken to perform the shift first, and the mask second. All numeric types in Java are signed, so a left-shift actually fills the high-order bits with copies of the sign bit. This is a subtle point, but it can cause your code to do things you didn’t expect. Google for “bit mask” if you’re still lost. Finally, we check
to see if the HSV values fall in the appropriate ranges for a red ball. We could get away with just testing the hue, but try removing the tests on saturation and value and see what happens. Also note that, becausethe hue wraps around, and because we happen to be measuring a range that includes the “end points,” wemust be careful about how we formulate the test. See the source comments for an alternative approach.
Where did we get those thresholds? There are a number of ways to find them. Trial and error is a popular one. Looking at values in your favorite image editor is another. These particular numbers came from MATLAB and some trial and error. If you wanted to be fancier, you could compute the mean and variance of the hue of the pixels in the red ball, or you could try to learn the thresholds on the fly by using some sort of clustering algorithm in the colorspace. The point is, you should play around with different values to see how much complexity you think you need. More complex schemes can make your algorithms more robust, but take time to compute, time to implement, and provide more opportunity to make a mistake.
N
� �� �
All the drawing takes place in the renderStatistics() function. The first step is to create a Graphics2D object associated with our BufferedImage. Next, we set the color. Then we draw. Because the drawing has been separated from the searching, we need to do another complete scan of the image to color in the red pixels. We did this partly to split out different operations into different functions, and partly because, in a real system, you wouldn’t want to draw on every image you process. If the second pass through the image really bugs you, you’re welcome to embed the drawing code in the initial pass.
For each red pixel in the image, we draw a line from the pixel to itself. There is no particular function to draw just one pixel, and this works fine. To draw the bounding box and the X, we make use of the drawLine() and drawRect() functions. Note that drawRect() takes the x and ycoordiantes of the upper left corner, followed by the width and height of the rectangle. There are many other drawing functions. For a list, see the Java J2SE API reference for Graphics and Graphics2D.3 That’s all there is to it. The Graphics2D operations alter the underlying BufferedImage.
4.3.4 Print out the results
This is just some pretty formatting. We also include the aspect ratio (width/height) in the output. A correctly detected ball should have an aspect ratio close to one, whereas a partially detected ball, or multiple balls, will likely have aspect ratios greater or less than one. We use a function to convert to a string rather than call System.out.println() directly because you don’t usually have access to standard output on your robot. You will want to use another logging mechanism, such as Maslab’s botclient (you’ll hear more about it later). 3http://java.sun.com/docs/. Make friends with it. 4.3.5 Write the image back to disk
This is basically the same as reading, except that we pass a string indicating the output format. In this case it’s PNG. Again, we pass any errors back to main, which fails gracefully.
4.4 Discussion As you may have noticed by looking at the algorithm, there are two obvious failure modes of this system: multiple balls, and changing lighting conditions. The problem of multiple balls is serious. You will definitely be faced with multiple balls, and you will need to find a way to distinguish among them. The problem of lighting is less of a problem, because for weak enough thresholds, the algorithm will still detect balls. However, it may also detect spurious balls, and it might detect only pieces of balls, which will not give you the quality of information you might like. The thresholds in this example were tuned by hand for this particular image. You’ll find that they don’t work as well all the time.
5 Exercise: Blue Line Filtering
5.1 Motivation The walls of the Maslab playing field are (mostly) white with a blue border along the top. The colors above the border are determined by the conditions surrounding the playing field and could be anything. In order to avoid attacking an audience member with a red sweater, your robot will likely need to do “blue line filtering.” Blue line filtering attempts to locate the tops of the walls and discards all information above them (by, for example, drawing black in that area).
4.3.3 Draw on the image
5.2 A possible solution The following simple algorithm (in pseudo-code) should get you started in the right direction.
for each row, starting from the bottom // (why the bottom?) for each pixel in the current row
if the current pixel is blue (but not light blue!) discard information above this pixel
end if end for
end for
5.3 Discussion The above algorithm works pretty well in the average, wellbehaved case. However, you should be able to imagine some important cases when it would fail.
Suppose there is a gap in the blue line, even a few pixels wide. Suppose, in addition to the gap, there is a jump discontinuity in the blue line, such as a near corner occluding a far wall. Suppose that some other object (like a tower, in 2004) occludes the blue line. Suppose your robot can see a blue line through a yellow goal.
Your job is to go about dealing with these cases. There are a number of possibilities, including interpolation, Hough transforms, a stateful detector, and topological considerations, to name a few.
6 Exercise: Red Ball Finding
6.1 Motivation The overall goal of your robot will involve finding and reasoning about the locations of colored things. It is therefore important to be able to find red balls. As you saw in the example, this is far from easy. Just searching for red is hard enough. What is red, exactly? Even once you know what red is, how can you tell how many red things you’re seeing? Balls are particularly obnoxious. They reflect light; they cast shadows; they have wildly non-uniform brightness. (On the other hand, they look conveniently the same from all directions.) How does one deal with this? Among any five Maslab Staff members, you would probably find five different approaches. Clearly you’ll need to consider both color and geometry, and you’ll probably end up effectively doing some sort of connected components analysis. (That is, you’ll assign each red pixel to a particular red ball or to noise). Keep in mind what you really want out of this, though: a list of ball locations (and perhaps sizes).
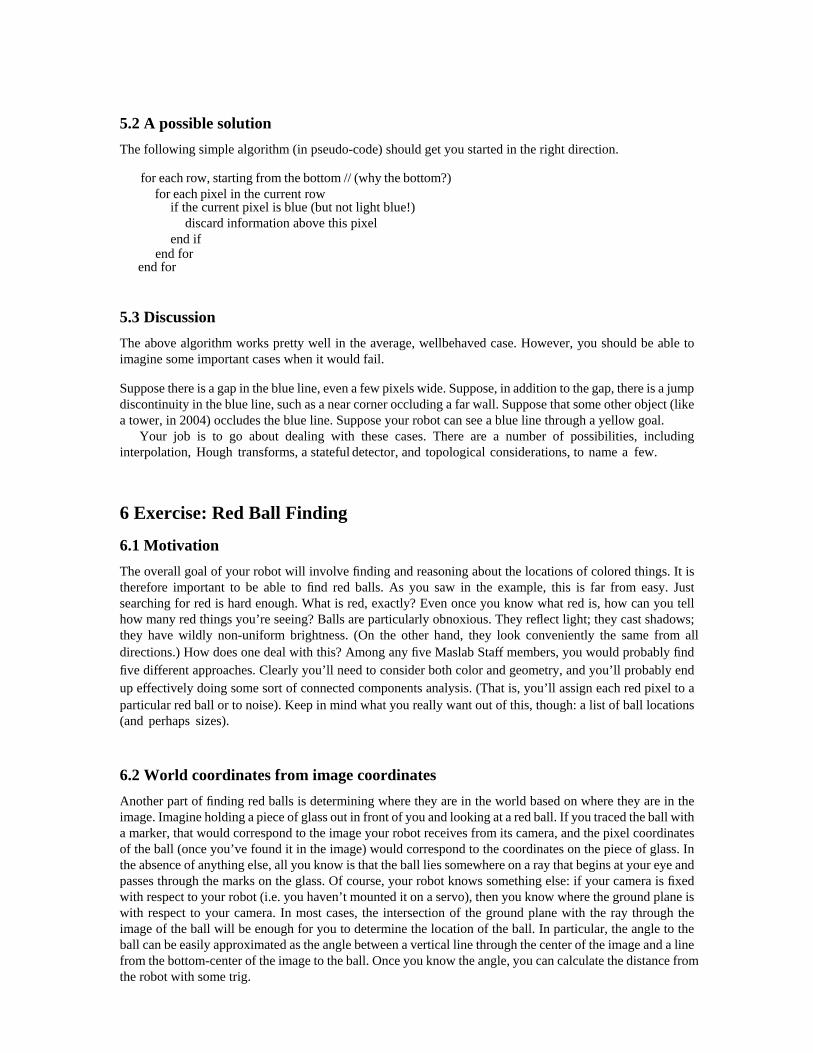
6.2 World coordinates from image coordinates Another part of finding red balls is determining where they are in the world based on where they are in the image. Imagine holding a piece of glass out in front of you and looking at a red ball. If you traced the ball with a marker, that would correspond to the image your robot receives from its camera, and the pixel coordinates of the ball (once you’ve found it in the image) would correspond to the coordinates on the piece of glass. In the absence of anything else, all you know is that the ball lies somewhere on a ray that begins at your eye and passes through the marks on the glass. Of course, your robot knows something else: if your camera is fixed with respect to your robot (i.e. you haven’t mounted it on a servo), then you know where the ground plane is with respect to your camera. In most cases, the intersection of the ground plane with the ray through the image of the ball will be enough for you to determine the location of the ball. In particular, the angle to the ball can be easily approximated as the angle between a vertical line through the center of the image and a line from the bottom-center of the image to the ball. Once you know the angle, you can calculate the distance from the robot with some trig.
Depending on how well you can find red balls, you might be able to use the size of the ball as an indicator of validity and distance. If you have a ball that has an area of only two pixels, it’s a good bet that it’s either noise, or only part of a ball. Depending on the orientation of your camera, you may also be able to tell of a red blob you found is floating in mid-air.
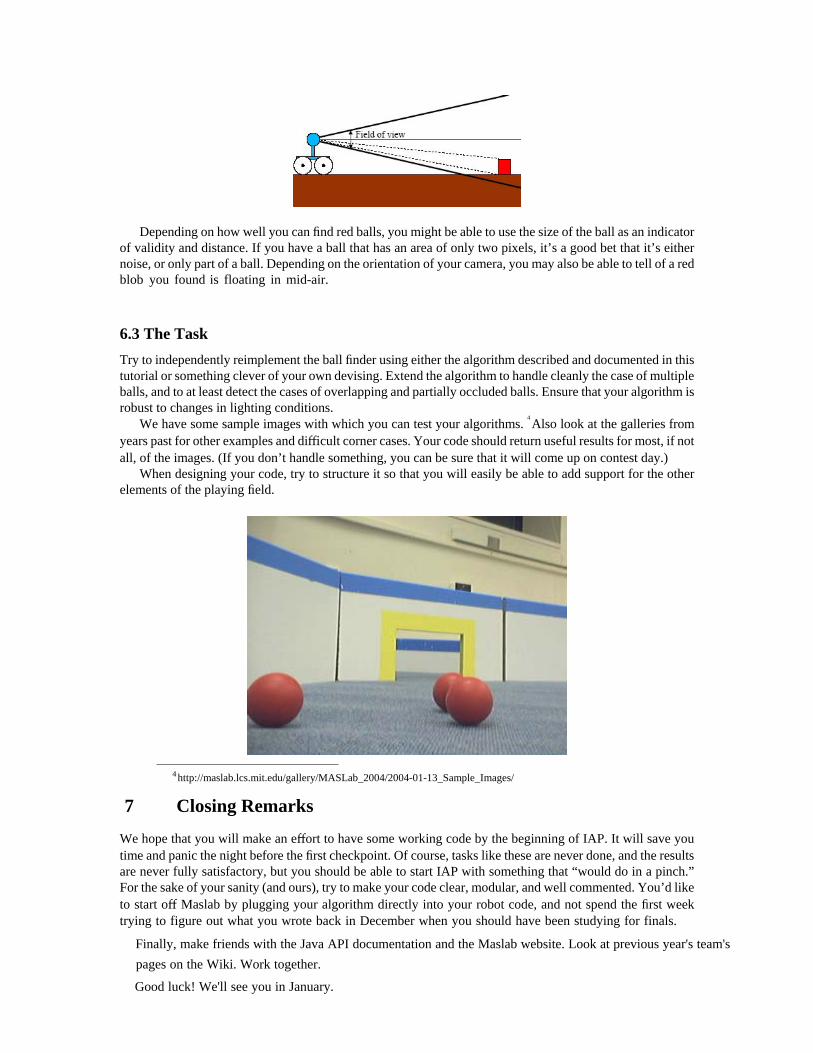
6.3 The Task Try to independently reimplement the ball finder using either the algorithm described and documented in this tutorial or something clever of your own devising. Extend the algorithm to handle cleanly the case of multiple balls, and to at least detect the cases of overlapping and partially occluded balls. Ensure that your algorithm is robust to changes in lighting conditions.
We have some sample images with which you can test your algorithms. 4 Also look at the galleries from years past for other examples and difficult corner cases. Your code should return useful results for most, if not all, of the images. (If you don’t handle something, you can be sure that it will come up on contest day.)
When designing your code, try to structure it so that you will easily be able to add support for the other elements of the playing field.
4 http://maslab.lcs.mit.edu/gallery/MASLab_2004/2004-01-13_Sample_Images/
7 Closing Remarks
We hope that you will make an effort to have some working code by the beginning of IAP. It will save you time and panic the night before the first checkpoint. Of course, tasks like these are never done, and the results are never fully satisfactory, but you should be able to start IAP with something that “would do in a pinch.” For the sake of your sanity (and ours), try to make your code clear, modular, and well commented. You’d like to start off Maslab by plugging your algorithm directly into your robot code, and not spend the first weektrying to figure out what you wrote back in December when you should have been studying for finals.
Finally, make friends with the Java API documentation and the Maslab website. Look at previous year's team'spages on the Wiki. Work together.
Good luck! We'll see you in January.
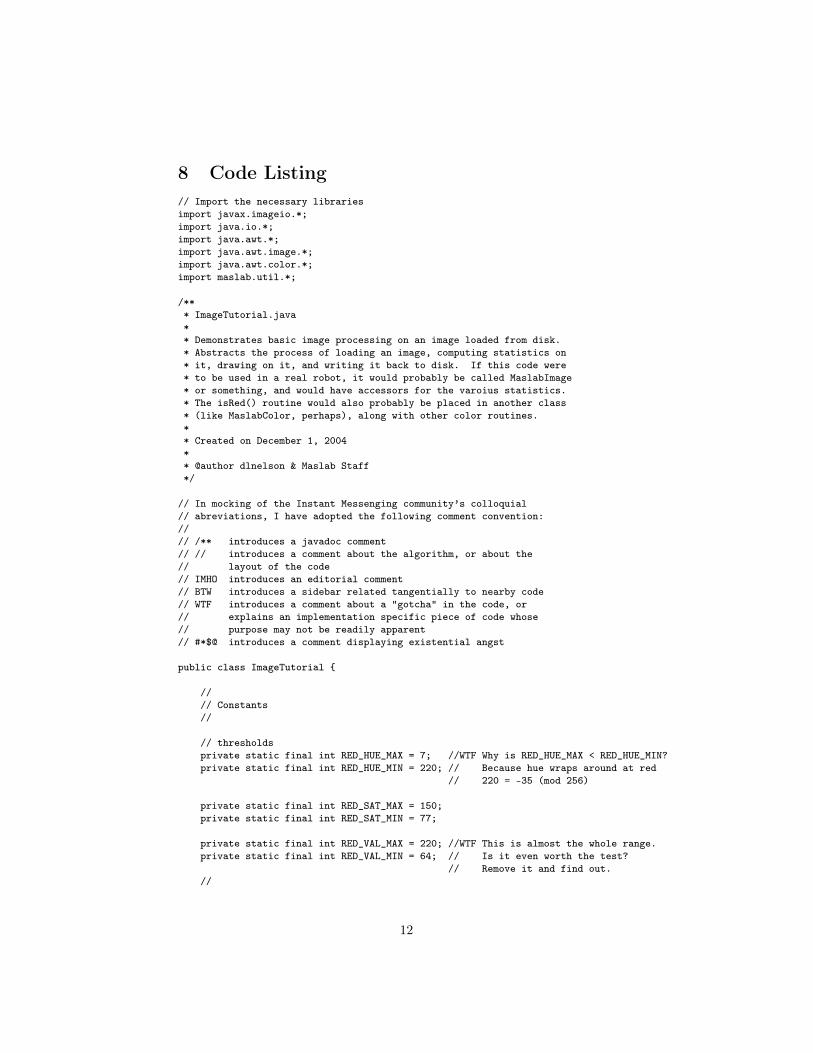
8 Code Listing// Import the necessary librariesimport javax.imageio.*;import java.io.*;import java.awt.*;import java.awt.image.*;import java.awt.color.*;import maslab.util.*;
/*** ImageTutorial.java** Demonstrates basic image processing on an image loaded from disk.* Abstracts the process of loading an image, computing statistics on* it, drawing on it, and writing it back to disk. If this code were* to be used in a real robot, it would probably be called MaslabImage* or something, and would have accessors for the varoius statistics.* The isRed() routine would also probably be placed in another class* (like MaslabColor, perhaps), along with other color routines.** Created on December 1, 2004** @author dlnelson & Maslab Staff*/
// In mocking of the Instant Messenging community’s colloquial// abreviations, I have adopted the following comment convention://// /** introduces a javadoc comment// // introduces a comment about the algorithm, or about the// layout of the code// IMHO introduces an editorial comment// BTW introduces a sidebar related tangentially to nearby code// WTF introduces a comment about a "gotcha" in the code, or// explains an implementation specific piece of code whose// purpose may not be readily apparent// #*$@ introduces a comment displaying existential angst
public class ImageTutorial {
//// Constants//
// thresholdsprivate static final int RED_HUE_MAX = 7; //WTF Why is RED_HUE_MAX < RED_HUE_MIN?private static final int RED_HUE_MIN = 220; // Because hue wraps around at red
// 220 = 35 (mod 256)
private static final int RED_SAT_MAX = 150;private static final int RED_SAT_MIN = 77;
private static final int RED_VAL_MAX = 220; //WTF This is almost the whole range.private static final int RED_VAL_MIN = 64; // Is it even worth the test?
// Remove it and find out.//
12
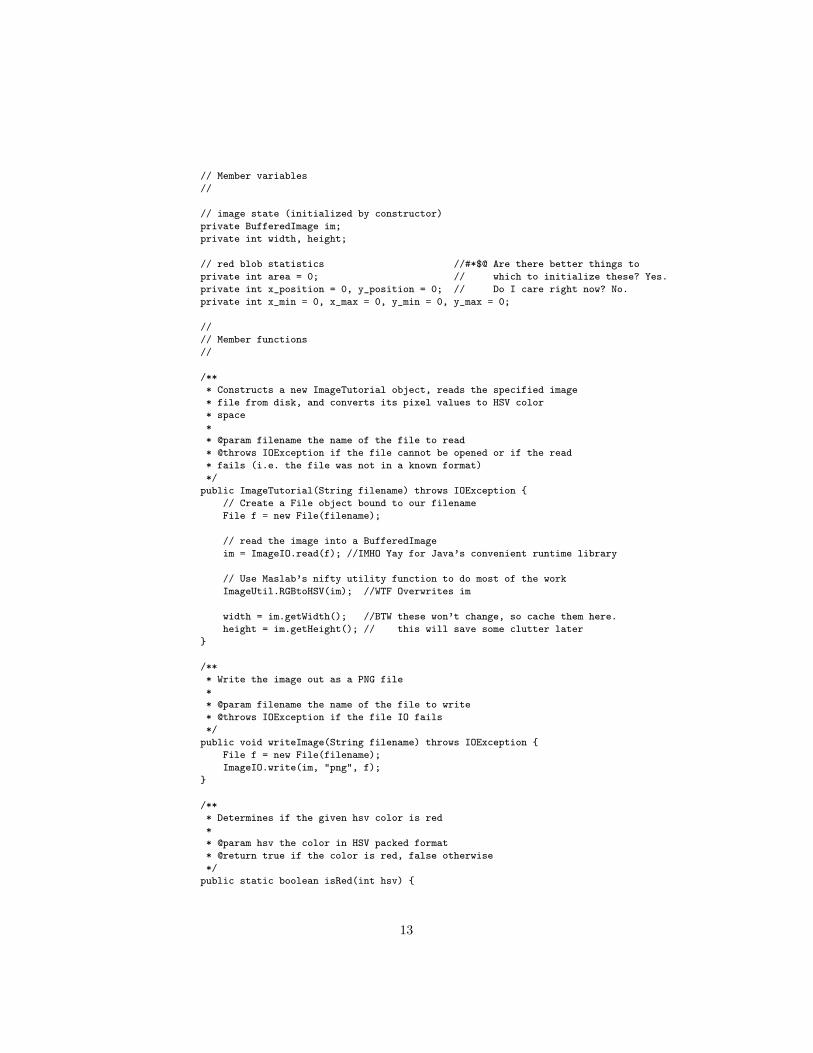
// Member variables//
// image state (initialized by constructor)private BufferedImage im;private int width, height;
// red blob statistics //#*$@ Are there better things toprivate int area = 0; // which to initialize these? Yes.private int x_position = 0, y_position = 0; // Do I care right now? No.private int x_min = 0, x_max = 0, y_min = 0, y_max = 0;
//// Member functions//
/*** Constructs a new ImageTutorial object, reads the specified image* file from disk, and converts its pixel values to HSV color* space** @param filename the name of the file to read* @throws IOException if the file cannot be opened or if the read* fails (i.e. the file was not in a known format)*/
public ImageTutorial(String filename) throws IOException {// Create a File object bound to our filenameFile f = new File(filename);
// read the image into a BufferedImageim = ImageIO.read(f); //IMHO Yay for Java’s convenient runtime library
// Use Maslab’s nifty utility function to do most of the workImageUtil.RGBtoHSV(im); //WTF Overwrites im
width = im.getWidth(); //BTW these won’t change, so cache them here.height = im.getHeight(); // this will save some clutter later
}
/*** Write the image out as a PNG file** @param filename the name of the file to write* @throws IOException if the file IO fails*/
public void writeImage(String filename) throws IOException {File f = new File(filename);ImageIO.write(im, "png", f);
}
/*** Determines if the given hsv color is red** @param hsv the color in HSV packed format* @return true if the color is red, false otherwise*/
public static boolean isRed(int hsv) {
13
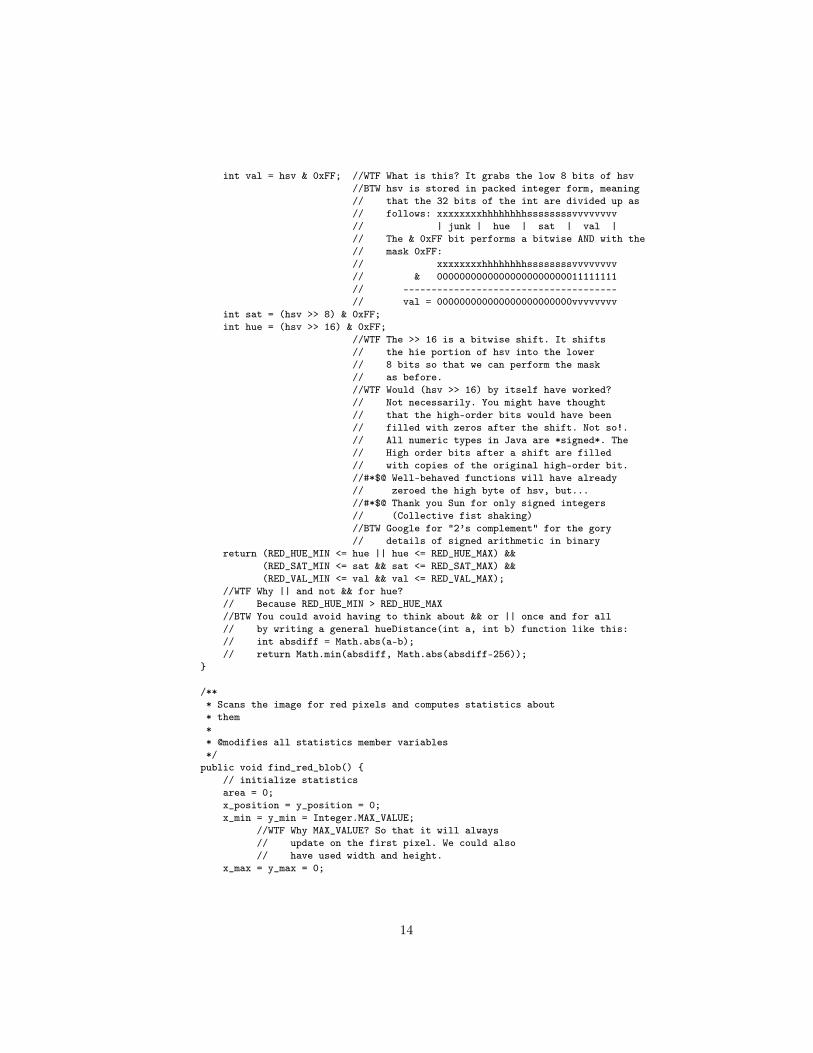
int val = hsv & 0xFF; //WTF What is this? It grabs the low 8 bits of hsv//BTW hsv is stored in packed integer form, meaning// that the 32 bits of the int are divided up as// follows: xxxxxxxxhhhhhhhhssssssssvvvvvvvv// | junk | hue | sat | val |// The & 0xFF bit performs a bitwise AND with the// mask 0xFF:// xxxxxxxxhhhhhhhhssssssssvvvvvvvv// & 00000000000000000000000011111111// // val = 000000000000000000000000vvvvvvvv
int sat = (hsv >> 8) & 0xFF;int hue = (hsv >> 16) & 0xFF;
//WTF The >> 16 is a bitwise shift. It shifts// the hie portion of hsv into the lower// 8 bits so that we can perform the mask// as before.//WTF Would (hsv >> 16) by itself have worked?// Not necessarily. You might have thought// that the highorder bits would have been// filled with zeros after the shift. Not so!.// All numeric types in Java are *signed*. The// High order bits after a shift are filled// with copies of the original highorder bit.//#*$@ Wellbehaved functions will have already// zeroed the high byte of hsv, but...//#*$@ Thank you Sun for only signed integers// (Collective fist shaking)//BTW Google for "2’s complement" for the gory// details of signed arithmetic in binary
return (RED_HUE_MIN <= hue || hue <= RED_HUE_MAX) &&(RED_SAT_MIN <= sat && sat <= RED_SAT_MAX) &&(RED_VAL_MIN <= val && val <= RED_VAL_MAX);
//WTF Why || and not && for hue?// Because RED_HUE_MIN > RED_HUE_MAX//BTW You could avoid having to think about && or || once and for all// by writing a general hueDistance(int a, int b) function like this:// int absdiff = Math.abs(ab);// return Math.min(absdiff, Math.abs(absdiff256));
}
/*** Scans the image for red pixels and computes statistics about* them** @modifies all statistics member variables*/
public void find_red_blob() {// initialize statisticsarea = 0;x_position = y_position = 0;x_min = y_min = Integer.MAX_VALUE;
//WTF Why MAX_VALUE? So that it will always// update on the first pixel. We could also// have used width and height.
x_max = y_max = 0;
14
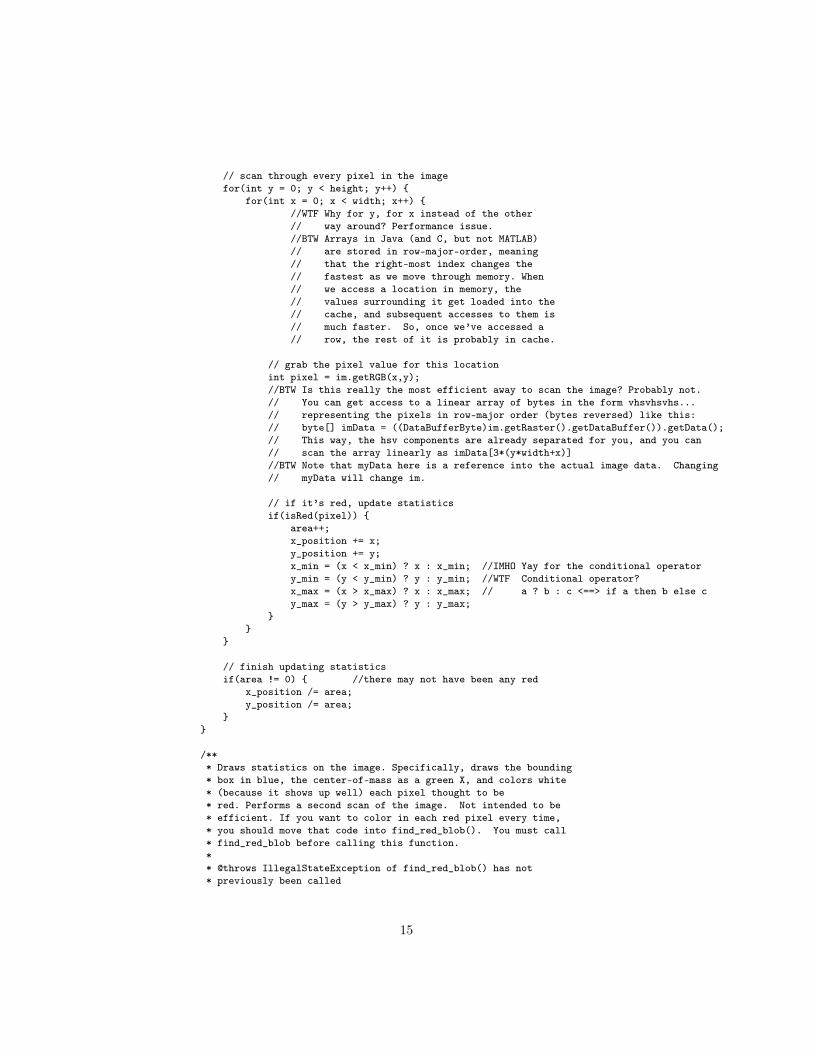
// scan through every pixel in the imagefor(int y = 0; y < height; y++) {
for(int x = 0; x < width; x++) {//WTF Why for y, for x instead of the other// way around? Performance issue.//BTW Arrays in Java (and C, but not MATLAB)// are stored in rowmajororder, meaning// that the rightmost index changes the// fastest as we move through memory. When// we access a location in memory, the// values surrounding it get loaded into the// cache, and subsequent accesses to them is// much faster. So, once we’ve accessed a// row, the rest of it is probably in cache.
// grab the pixel value for this locationint pixel = im.getRGB(x,y);//BTW Is this really the most efficient away to scan the image? Probably not.// You can get access to a linear array of bytes in the form vhsvhsvhs...// representing the pixels in rowmajor order (bytes reversed) like this:// byte[] imData = ((DataBufferByte)im.getRaster().getDataBuffer()).getData();// This way, the hsv components are already separated for you, and you can// scan the array linearly as imData[3*(y*width+x)]//BTW Note that myData here is a reference into the actual image data. Changing// myData will change im.
// if it’s red, update statisticsif(isRed(pixel)) {
area++;x_position += x;y_position += y;x_min = (x < x_min) ? x : x_min; //IMHO Yay for the conditional operatory_min = (y < y_min) ? y : y_min; //WTF Conditional operator?x_max = (x > x_max) ? x : x_max; // a ? b : c <==> if a then b else cy_max = (y > y_max) ? y : y_max;
}}
}
// finish updating statisticsif(area != 0) { //there may not have been any red
x_position /= area;y_position /= area;
}}
/*** Draws statistics on the image. Specifically, draws the bounding* box in blue, the centerofmass as a green X, and colors white* (because it shows up well) each pixel thought to be* red. Performs a second scan of the image. Not intended to be* efficient. If you want to color in each red pixel every time,* you should move that code into find_red_blob(). You must call* find_red_blob before calling this function.** @throws IllegalStateException of find_red_blob() has not* previously been called
15
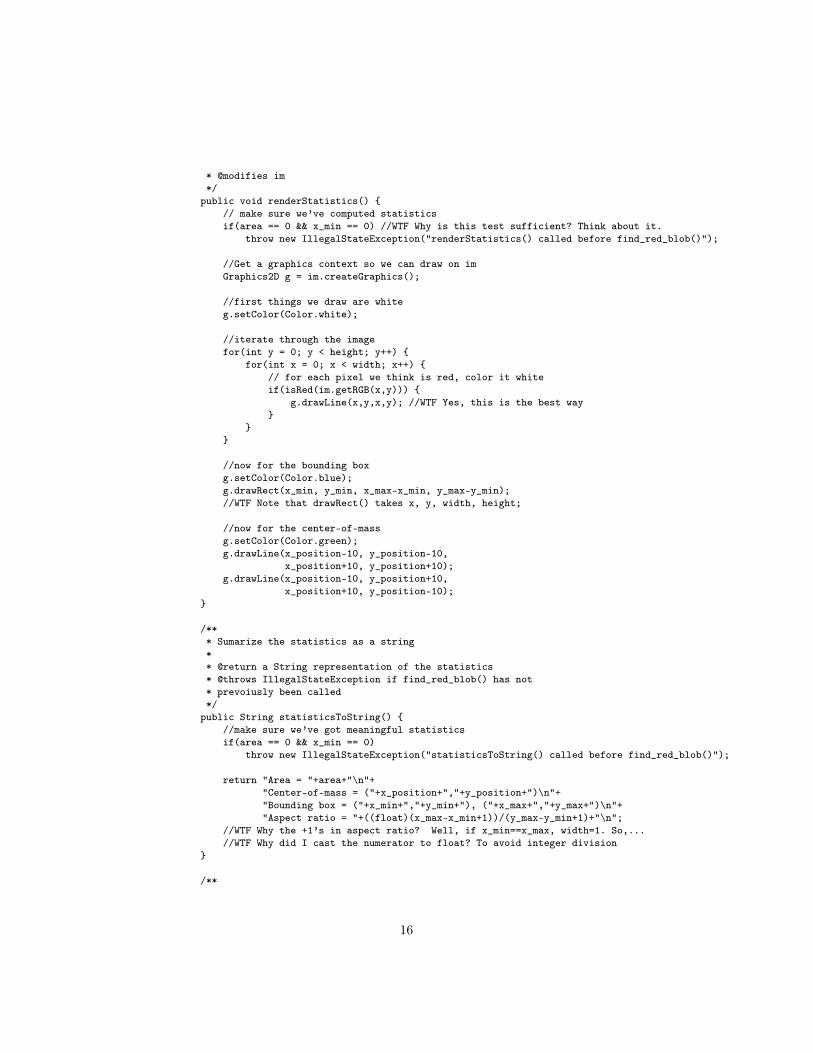
* @modifies im*/
public void renderStatistics() {// make sure we’ve computed statisticsif(area == 0 && x_min == 0) //WTF Why is this test sufficient? Think about it.
throw new IllegalStateException("renderStatistics() called before find_red_blob()");
//Get a graphics context so we can draw on imGraphics2D g = im.createGraphics();
//first things we draw are whiteg.setColor(Color.white);
//iterate through the imagefor(int y = 0; y < height; y++) {
for(int x = 0; x < width; x++) {// for each pixel we think is red, color it whiteif(isRed(im.getRGB(x,y))) {
g.drawLine(x,y,x,y); //WTF Yes, this is the best way}
}}
//now for the bounding boxg.setColor(Color.blue);g.drawRect(x_min, y_min, x_maxx_min, y_maxy_min);//WTF Note that drawRect() takes x, y, width, height;
//now for the centerofmassg.setColor(Color.green);g.drawLine(x_position10, y_position10,
x_position+10, y_position+10);g.drawLine(x_position10, y_position+10,
x_position+10, y_position10);}
/*** Sumarize the statistics as a string** @return a String representation of the statistics* @throws IllegalStateException if find_red_blob() has not* prevoiusly been called*/
public String statisticsToString() {//make sure we’ve got meaningful statisticsif(area == 0 && x_min == 0)
throw new IllegalStateException("statisticsToString() called before find_red_blob()");
return "Area = "+area+"\n"+"Centerofmass = ("+x_position+","+y_position+")\n"+"Bounding box = ("+x_min+","+y_min+"), ("+x_max+","+y_max+")\n"+"Aspect ratio = "+((float)(x_maxx_min+1))/(y_maxy_min+1)+"\n";
//WTF Why the +1’s in aspect ratio? Well, if x_min==x_max, width=1. So,...//WTF Why did I cast the numerator to float? To avoid integer division
}
/**
16
* Demonstrates the functions of ImageTutorial*/
public static void main(String[] args) {
// Create the ImageTutorial object, and all that that impliesImageTutorial it = null; //WTF initialize to null to placate the compilertry {
it = new ImageTutorial("capture3.png");}catch(IOException ioe) {
System.out.println("Failed to create ImageTutorial object.");ioe.printStackTrace();System.exit(1);
}
// Do the workit.find_red_blob();
// Show the workit.renderStatistics();
// Print the statisticsSystem.out.println(it.statisticsToString());
// Write the image back to disktry {
it.writeImage("capture3result.png");}catch(IOException ioe) {
System.out.println("Failed to write the image to disk");ioe.printStackTrace();System.exit(1);
}}
}
17