Microsoft Word - Writing Scripts With Windows PowerShelll
14
Writing Scripts with Windows PowerShell Microsoft ® Virtual Labs
-
Upload
harley63099 -
Category
Documents
-
view
219 -
download
0
Transcript of Microsoft Word - Writing Scripts With Windows PowerShelll

8/10/2019 Microsoft Word - Writing Scripts With Windows PowerShelll
http://slidepdf.com/reader/full/microsoft-word-writing-scripts-with-windows-powershelll 1/14
Writing Scripts w ith WindowsPowerShell
Microsoft ® Virtual Labs

8/10/2019 Microsoft Word - Writing Scripts With Windows PowerShelll
http://slidepdf.com/reader/full/microsoft-word-writing-scripts-with-windows-powershelll 2/14
Writing Scripts with Windows PowerShell
Table of Contents
Writing Scripts with Windows PowerShell ................................................................................ 1 Exercise 1 Adding Command-Line Arguments to a Script ........... .......... ........... ........... .......... ........... .......... ........... ...... 3 Exercise 2 Working with Arrays and with .NET Framework Classes ........... .......... ........... .......... ........... .......... ........... . 5 Exercise 3 Filtering Data ............................................................................................................................................... 7 Exercise 4 Creating a Custom Table............. .......... ........... .......... ........... .......... ........... .......... ........... .......... ........... ........ 8 Exercise 5 Extending the Custom Table ........................................................................................................................ 9 Exercise 6 Formatting Output ...................................................................................................................................... 10 Finished Script ............................................................................................................................................................. 11

8/10/2019 Microsoft Word - Writing Scripts With Windows PowerShelll
http://slidepdf.com/reader/full/microsoft-word-writing-scripts-with-windows-powershelll 3/14
Writing Scripts with Windows PowerShell
Page 1 of 12
Writing Scripts with Windows PowerShell
ObjectivesAfter completing this lab, you will be better able to:
Use Windows PowerShell to write system administration scripts
Scenario
This virtual lab is designed to introduce you to script writing in Windows
PowerShell. In this lab you will write a script that, using a folder name as acommand-line argument, connects to that folder and uses the .NET Framework toreturn file version information for all the .DLL files found in the folder. Duringthe course of the lab you will take that information and filter it, then display it ina custom table; in addition, you will use the Get-Item Cmdlet to retrieve the sizeof each .DLL file. The twist there? File size information is not found in the same.NET Framework class as file version information. That means your final tablewill actually combine information taken from two different classes.Along the way you will also be introduced to basic scripting techniques such asusing an If statement and a For Each loop, populating an array, and even clearingthe Windows PowerShell console window.Two things we should add regarding this lab. First, it’s not required that youlisten to the accompanying webcast; if you wish, you can try to complete the
virtual lab entirely on your own. (Suggested code is included at the end of eachexercise.) However, all of the scripting concepts required to complete the virtuallab are included in the webcast; if you encounter difficulties anywhere in the labyou will likely find the answer in the webcast.Second, some of the code and some of the techniques introduced in this lab leantowards the more advanced side of scripting; for beginners, these techniquesmight even be a little bit too advanced. That is by design. The primary goal ofthis virtual lab is to give you a taste of the kind of scripts you will, in no time, beable to write using Windows PowerShell; we weren’t concerned with whether ornot you could write this kind of a script today. We could, of course, have shownyou a “Hello, world” kind of script and guaranteed that everyone would be ableto complete the lab successfully. However, we were afraid that we would alsoguarantee that no one would learn anything particularly useful. By following
along with the webcast and by using the hints included in this manual, youshould be able to complete the lab with a minimal amount of difficulty. If youcan’t, well, don’t worry: scripting in Windows PowerShell can be a verydifferent experience, and it takes a little practice and a little getting used to.Fortunately, you can repeat this lab as many times as needed, either online, or onany computer running Windows PowerShell.
A Note About the Suggested Code . Due to line limitations in this document thesuggested code shown here might appear different than the code you write. Inmany cases that will be due to the need to break lines within this document.Remember, in Windows PowerShell the back tick character (`) is used to indicatea line break. In Windows PowerShell this represents one line of code:
write-host "Hey, how's it going?"
Technically, this is also one line of code; it looks like two lines simply becausethe back tick was used to break one line of code into two pieces:
write-host `
"Hey, how's it going?"

8/10/2019 Microsoft Word - Writing Scripts With Windows PowerShelll
http://slidepdf.com/reader/full/microsoft-word-writing-scripts-with-windows-powershelll 4/14
Writing Scripts with Windows PowerShell
Page 2 of 12
In order to display valid lines of code in this manual we probably used manymore line break characters than you did. Don’t worry about that: feel free tomake lines as long (or as short) as you are comfortable with.
PrerequisitesA basic knowledge of Windows PowerShell scripting fundamentals is highlyrecommended. For more information, see the TechNet Webcast New Kid on the
Scriptblock: Writing Scripts with Windows PowerShell .
Estimated Time toComplete This Lab 90 Minutes
Computers used in thisLab Paris
The password for the Administrator account on all computers in this lab is:pass@word1 .

8/10/2019 Microsoft Word - Writing Scripts With Windows PowerShelll
http://slidepdf.com/reader/full/microsoft-word-writing-scripts-with-windows-powershelll 5/14
Writing Scripts with Windows PowerShell
Page 3 of 12
Exercise 1Adding Command-Line Arguments to a Script
ScenarioIn this first exercise you will write a Windows PowerShell script that can determine whether or not at least onecommand-line argument was used when starting the script. If no such arguments were used the script should echoback a message stating that the user must supply a folder name when starting the script and then terminate itself. Ifat least one command-line argument was provided the script should take the value of the argument, append \*.dll ,and store the concatenated value in a variable named $strFolder. The value of that variable should be echoed back tothe screen.To successfully complete this exercise you will need to do the following:
• Use the arguments collection ($args) and the length property to determine if any command-line argumentswere supplied.
• Use an If statement to take action based on whether or not command-line arguments were supplied.• Use the Write-Warning Cmdlet to write a message to the screen.• Use the break statement to terminate the script as needed.
Tasks Detailed Steps
Start Notepad Click Start and then click Run .In the Run dialog box type notepad and then press ENTER.
Create a new script After Notepad starts, write a script that does the following. If you run into problems,the suggested code can be found at the end of this exercise. The script you writeshould include the following features:
• The script should store the number of command-line arguments in a variable
named $a.• The script should use an If statement to ensure that at least 1 argument was
passed to the script.• If no arguments were used the script should echo a warning that says, “You
must supply a folder name.” The script should then terminate.• If at least one command-line argument was supplied the script should
concatenate the value of the first command-line argument with the stringvalue \*.dll . That value should then be assigned to a variable named$strFolder.
Save the script to C:\Scripts, and name it as Test.ps1. Do not close Notepad; we'll bemodifying this same script throughout the lab.
Verify that the scriptworks
If you haven’t already done so, start Windows PowerShell. This can be done bydouble-clicking the Windows PowerShell shortcut on the desktop.
Type in command to enable executing scripts.Set-ExecutionPolicy RemoteSigned
Navigate to folder C:\Scripts by typing in command:

8/10/2019 Microsoft Word - Writing Scripts With Windows PowerShelll
http://slidepdf.com/reader/full/microsoft-word-writing-scripts-with-windows-powershelll 6/14
8/10/2019 Microsoft Word - Writing Scripts With Windows PowerShelll
http://slidepdf.com/reader/full/microsoft-word-writing-scripts-with-windows-powershelll 7/14
Writing Scripts with Windows PowerShell
Page 5 of 12
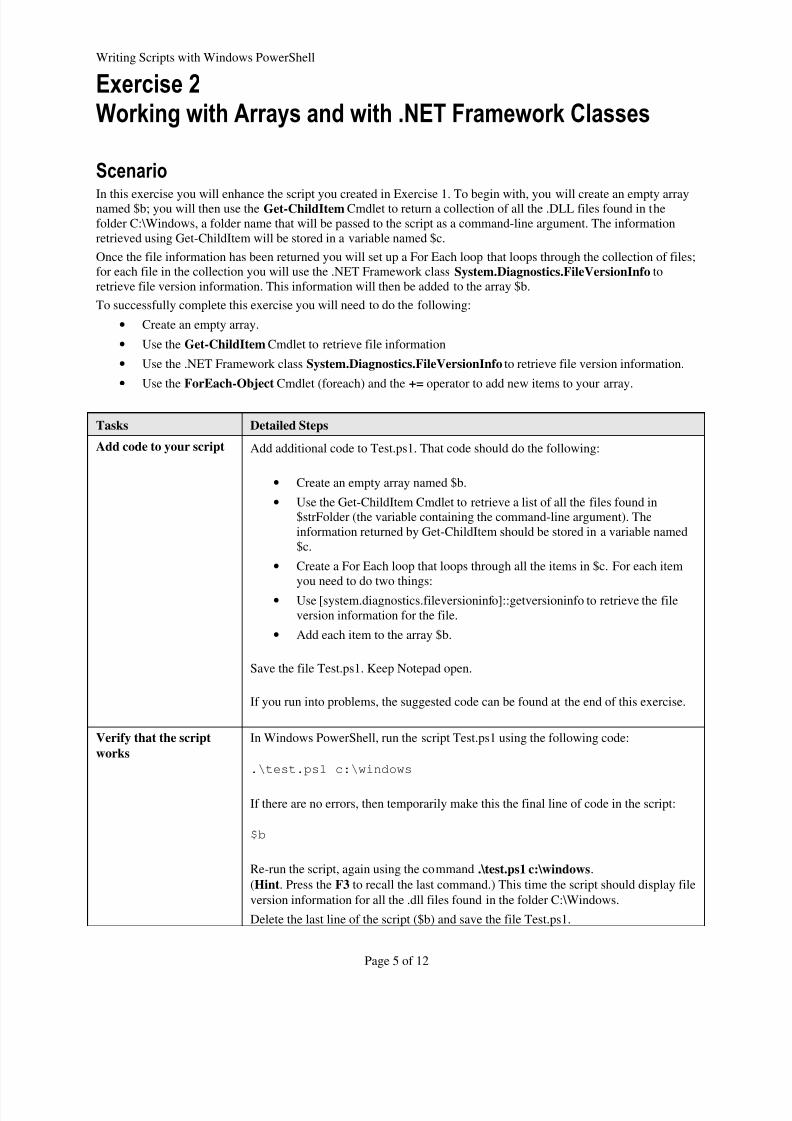
Exercise 2Working with Arrays and with .NET Framework Classes
ScenarioIn this exercise you will enhance the script you created in Exercise 1. To begin with, you will create an empty arraynamed $b; you will then use the Get-ChildItem Cmdlet to return a collection of all the .DLL files found in thefolder C:\Windows, a folder name that will be passed to the script as a command-line argument. The informationretrieved using Get-ChildItem will be stored in a variable named $c.Once the file information has been returned you will set up a For Each loop that loops through the collection of files;for each file in the collection you will use the .NET Framework class System.Diagnostics.FileVersionInfo toretrieve file version information. This information will then be added to the array $b.To successfully complete this exercise you will need to do the following:
• Create an empty array.• Use the Get-ChildItem Cmdlet to retrieve file information• Use the .NET Framework class System.Diagnostics.FileVersionInfo to retrieve file version information.• Use the ForEach-Object Cmdlet (foreach) and the += operator to add new items to your array.
Tasks Detailed Steps
Add code to your script Add additional code to Test.ps1. That code should do the following:
• Create an empty array named $b.• Use the Get-ChildItem Cmdlet to retrieve a list of all the files found in
$strFolder (the variable containing the command-line argument). Theinformation returned by Get-ChildItem should be stored in a variable named$c.
• Create a For Each loop that loops through all the items in $c. For each itemyou need to do two things:
• Use [system.diagnostics.fileversioninfo]::getversioninfo to retrieve the fileversion information for the file.
• Add each item to the array $b.
Save the file Test.ps1. Keep Notepad open.
If you run into problems, the suggested code can be found at the end of this exercise.
Verify that the scriptworks
In Windows PowerShell, run the script Test.ps1 using the following code:
.\test.ps1 c:\windows
If there are no errors, then temporarily make this the final line of code in the script:
$b
Re-run the script, again using the command .\test.ps1 c:\windows .(Hint . Press the F3 to recall the last command.) This time the script should display fileversion information for all the .dll files found in the folder C:\Windows.Delete the last line of the script ($b) and save the file Test.ps1.

8/10/2019 Microsoft Word - Writing Scripts With Windows PowerShelll
http://slidepdf.com/reader/full/microsoft-word-writing-scripts-with-windows-powershelll 8/14
Writing Scripts with Windows PowerShell
Page 6 of 12
Tasks Detailed Steps
Exercise answer The code that you added to the script should look similar to this:
$b = @()
$c = get-childitem $strFolder
foreach ($i in $c)
{$b += [system.diagnostics.fileversioninfo]::getversioninfo($i.fullname)}

8/10/2019 Microsoft Word - Writing Scripts With Windows PowerShelll
http://slidepdf.com/reader/full/microsoft-word-writing-scripts-with-windows-powershelll 9/14
Writing Scripts with Windows PowerShell
Page 7 of 12
Exercise 3Filtering Data
ScenarioIn this exercise you will modify your script so that it takes the file version information retrieved in Exercise 2 andfilters out all the .DLL files except for those created by the Microsoft Corporation. You will also use the script toclear the Windows PowerShell console window.To successfully complete this exercise you will need to do the following:
• Use the Where-Object Cmdlet to filter out all the .DLL files except for those where the CompanyName property is equal to ( -eq ) Microsoft Corporation .
• Use the Clear-Host (cls) Cmdlet to clear the console window.
Tasks Detailed Steps
Add code to your script Add additional code to Test.ps1. That code should include the following:
• A command that pipes the file version information ($b) to the Where-ObjectCmdlet. Where-Object should filter out all the items except for those wherethe value of the CompanyName property is equal to Microsoft Corporation.The filtered collection should be stored in a variable named $d.
• A command to clear the screen.
Save the file Test.ps1. Keep Notepad open.
If you run into problems, the suggested code can be found at the end of this exercise.
Verify that the script
works
In Windows PowerShell, run the script Test.ps1 using the following code:
.\test.ps1 c:\windows
If there are no errors, then temporarily make this the final line of code in the script:
$d
Re-run the script, again using the command .\test.ps1 c:\windows .(Hint . Press the F3 to recall the last command.) This time the script should clear thescreen, and then display file version information for the .dll files in the folderC:\Windows that were created by the Microsoft Corporation.Delete the last line of the script ($d) and save the file Test.ps1.
Exercise answer The code you added to the script should look similar to this:
$d = ($b | where-object {$_.CompanyName -eq "MicrosoftCorporation"})
cls

8/10/2019 Microsoft Word - Writing Scripts With Windows PowerShelll
http://slidepdf.com/reader/full/microsoft-word-writing-scripts-with-windows-powershelll 10/14
Writing Scripts with Windows PowerShell
Page 8 of 12
Exercise 4Creating a Custom Table
ScenarioIn this exercise you modify your script so that the filtered file version information is displayed in a custom table.To successfully complete this exercise you will need to do the following:
• Pipe the filtered file version information to the Format-Table Cmdlet.• Use Format-Table to create a custom table consisting of three columns. You will need to provide a Label
and an Expression for each column in the table.
Tasks Detailed Steps
Add code to your script Add additional code to Test.ps1. That code should do the following:
• Pipe the filtered file version information ($d) to the Format-Table Cmdlet.•
Create a custom table with three columns:• Column 1 should have the label DLL File and the expression $_.FileName
(representing the file name for the DLL file in question).• Column 2 should have the label Company Name and the expression
$_.CompanyName (representing the file name for the DLL file in question).• Column 3 should have the label Version Number and the expression
$_.FileVersion (representing the version number of the DLL file in question).
Save the file Test.ps1. Keep Notepad open.
If you run into problems, the suggested code can be found at the end of this exercise.
Verify that the scriptworks
In Windows PowerShell, run the script Test.ps1 using the following code:
.\test.ps1 c:\windows
You should see a custom table consisting of three columns, one labeled DLL File ;another labeled Company Name ; and the third labeled Version Number .
Exercise answer The code that you added to the script should look similar to this:
$d | format-table @{Label="DLLFile";Expression={$_.FileName}},@{Label="Company
Name";Expression={$_.CompanyName}},@{Label="VersionNumber";Expression={$_.FileVersion}}

8/10/2019 Microsoft Word - Writing Scripts With Windows PowerShelll
http://slidepdf.com/reader/full/microsoft-word-writing-scripts-with-windows-powershelll 11/14
Writing Scripts with Windows PowerShell
Page 9 of 12
Exercise 5Extending the Custom Table
ScenarioIn this exercise you will extend the custom table added to your script in Exercise 4. In particular, for each file in thecollection (and thus each row in the table) you will use the Get-Item Cmdlet to retrieve the size ( Length ) of the file.This has the net effect of combining data from two separate classes in a single table. The file version information, ofcourse, is derived from the System.Diagnostics.FileVersionInfo class, while the information retrieved using Get-Item comes from the System.IO.FileInfo class.To successfully complete this exercise you will need to do the following:
• Add a fourth column to your custom table, specifying a Label and Expression for the new column.• For the column Expression, use the Get-Item Cmdlet to retrieve the size ( Length ) of the file displayed in
each row of the table.
Tasks Detailed Steps
Add code to your script Add additional code to Test.ps1. That code should do the following:
• Add a fourth column to the custom table created in Exercise 4. This columnshould have the Label File Size . For the column Expression, use the Get-Item Cmdlet to bind to the file in question and retrieve the value of theLength property. In order to bind to the file you should use the same $_ special variable used in Exercise 4.
Save the file Test.ps1. Keep Notepad open.
If you run into problems, the suggested code can be found at the end of this exercise.
Verify that the scriptworks
In Windows PowerShell, run the script Test.ps1 using the following code:
.\test.ps1 c:\windows
You should see a custom table consisting of four columns, the three columns createdin Exercise 4 and a new column labeled File Size . This fourth column should displaythe size of the file in bytes.
Exercise answer The code that you added to the script should look similar to the code shown inboldface:
$d |
format-table @{Label="DLLFile";Expression={$_.FileName}},@{Label="CompanyName";Expression={($_.CompanyName)}} , @{Label="VersionNumber";Expression={$_.FileVersion}} ,@{Label="FileSize";Expression={(get-item $_.FileName).Length}}

8/10/2019 Microsoft Word - Writing Scripts With Windows PowerShelll
http://slidepdf.com/reader/full/microsoft-word-writing-scripts-with-windows-powershelll 12/14
Writing Scripts with Windows PowerShell
Page 10 of 12
Exercise 6Formatting Output
Scenario
To successfully complete this exercise you will need to do the following:• Use .NET Framework formatting commands to format file sizes.• Use Format-Table parameters to auto-size the columns in the table, enabling all the text in each column to
be displayed.
Tasks Detailed Steps
Add code to your script Add additional code to Test.ps1. That code should do the following:
• Use .NET Framework formatting commands to ensure that the file sizenumbers are displayed with commas used as digit separators (e.g., 18,944).
• Use the appropriate Format-Table parameter to auto-size the columns in thetable, enabling all the text in each column to be displayed.
Save the file Test.ps1. Keep Notepad open.
If you run into problems, the suggested code can be found at the end of this exercise.
Verify that the scriptworks
In Windows PowerShell, run the script Test.ps1 using the following code:
.\test.ps1 c:\windows
You should see a custom table consisting of four columns. The columns should besized so that all the text in each column can be displayed. In addition, the file sizesshould be displayed similar to this:
18,944
When you are finished, you can log off of the virtual lab.
Exercise answer The code that you added to the script should look similar to the code shown inboldface:
$d |
format-table @{Label="DLLFile";Expression={$_.FileName}},@{Label="CompanyName";Expression={($_.CompanyName)}}, @{Label="VersionNumber";Expression={$_.FileVersion}},
@{Label="File Size";Expression={ "{0:N0}"-f (get-item$_.FileName).Length}} -autosize

8/10/2019 Microsoft Word - Writing Scripts With Windows PowerShelll
http://slidepdf.com/reader/full/microsoft-word-writing-scripts-with-windows-powershelll 13/14

8/10/2019 Microsoft Word - Writing Scripts With Windows PowerShelll
http://slidepdf.com/reader/full/microsoft-word-writing-scripts-with-windows-powershelll 14/14
Writing Scripts with Windows PowerShell
Page 12 of 12
For More InformationFor more information about Windows PowerShell see the Scripting with Windows PowerShell page in the TechNetScript Center: http://www.microsoft.com/technet/scriptcenter/hubs/msh.mspx.