Merrymaker Stencil Dress - handmadecharlotte.com TWO Sew Bodice Front ... • Hook & eye (optional)...
27
Merrymaker Stencil Dress free pattern & tutorial
Transcript of Merrymaker Stencil Dress - handmadecharlotte.com TWO Sew Bodice Front ... • Hook & eye (optional)...

Merrymaker Stencil Dressfree pattern & tutorial

STEP FOURSerge any seams you’d like for nice, clean !nish. How-ever, there’s no need to serge the skirt hem or the bodice armholes.
Sewing Instructions
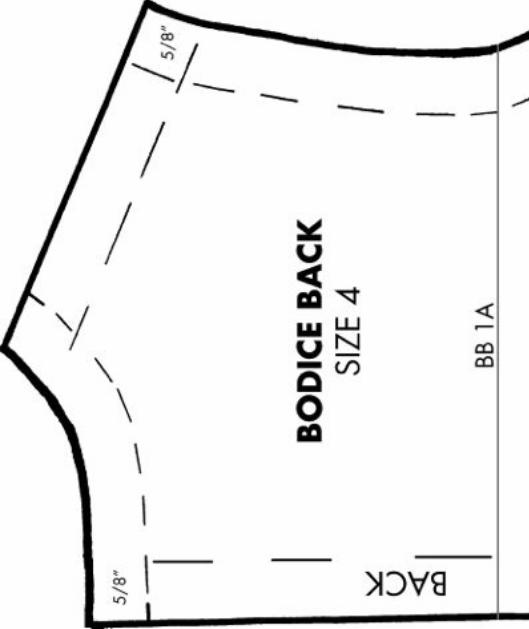
STEP ONEOn Bodice Front and Back, stitch along armhole at 5/8”. Trim away seam allowance up to 1/8” from stitching. "is is where your bias binding will be applied in a later step.
STEP TWOSew Bodice Front darts at marks. Press Darts towards the center of the Bodice Front. Stitch #” from upper edge of skirt front. Clip to stitching. With RIGHT sides together, join Skirt Front to Bodice matching centers; press seam up.
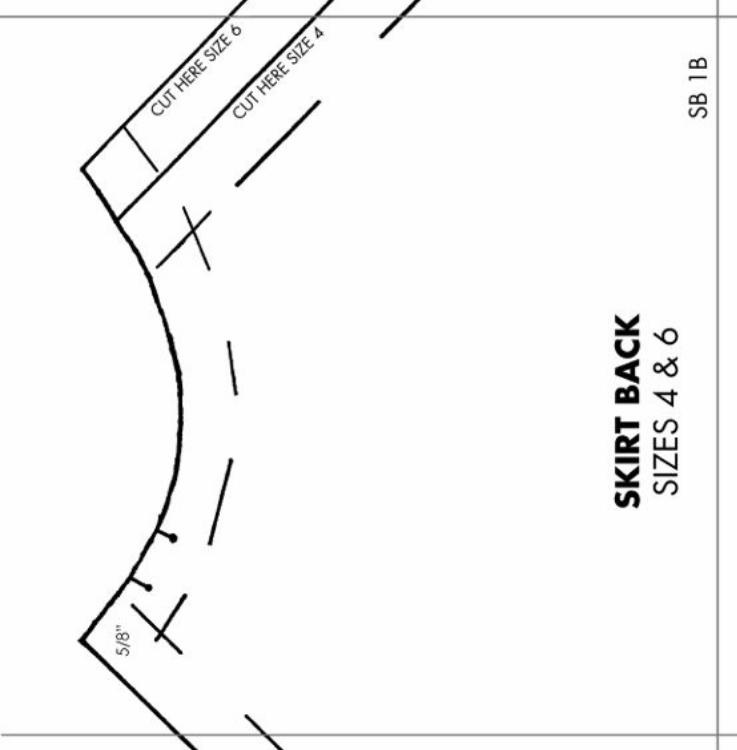
STEP THREEMake Darts at Bodice Back waistline. Press towards the center. Join center seam of Skirt Back below notch. Baste seam under 5/8” on back opening edges. Stitch #” from upper edge of skirt front. Clip to stitching. With RIGHT sides together, join skirt to Bodice Back, placing Skirt Back opening 5/8” in on Bodice seam allowance. Join Bodice Back to Front at shoulder, easing Back to !t. Press seams open.
STEP FOURJoin side seam of Bodice and Skirt sections, matching waistline seams.
STEP FIVESew Neck Facings together at shoulder seam. Press open. Stitch lower edge at $”. Press under at stitching and then under $” again. Stitch seam.
STEP SIXWith RIGHT sides together, sew collar front and back together at 5/8” leaving notched edge open. Trim seam and turn. Baste collar to neck edge, matching center front. With RIGHT sides together, place neck facing over collar and stitch at 5/8”. Trim seam and turn facing to the inside of the dress. Press thoroughly and tack facing down at shoulder seams. Baste under 5/8” on Bodice Back opening edges.
Materials + Supplies
FABRIC + NOTIONS• "read• # yard utility canvas (for bodice)• 1 yard light/neutral cotton fabric (for skirt + collar)• 1# yards contrasting cotton fabric (for skirt lining)• Contrasting bias banding (for armholes)• 12-inch neck-type zipper• Hook & eye (optional)
HANDMADE CHARLOTTE STENCILS• 4368 - Patterns• 4369 - Party
FOLK ART ACRYLIC PAINT• Textile Medium• Pure Gold Metallic• Six colors of your choice (collar & pendant border)• Stencil brushes/pouncers
OTHER SUPPLIES• Contact paper (optional)• Serger (optional)• Tape
Getting started
STEP ONEPrint out all of the pattern pieces and tape them together BEFORE cutting your fabric.
STEP TWOFollow the directions printed on the back of the textile medium and mix with paint colors of your choice.
It may help to do just one color at a time—that way, you can keep your workspace as neat & tidy as possible.
STEP THREEStencil each pattern piece and allow it to dry before head-ing over to your sewing machine.

STEP SEVENJoin center seam of Skirt Back Lining section just below notch. Join side seams. Stitch #” from upper edge of skirt front. Baste under 5/8” on back opening edges. With RIGHT sides together, join Lining to Skirt along lower edge matching centers and side seams. Trim seam. Turn lining to INSIDE. Clip upper edge of Lining to stitching and sew in place to waistline seam, having back opening edges of skirt even.
STEP EIGHTPlace closed zipper under back opening edges, placing lower end of zipper at lower end of opening, having edges meeting at center of zipper. Baste on each side of opening and across lower end turning in ends of zipper tape, Sew in place using the coils as a guide along your presser foot. Sew hook and eye at neck edge.
STEP NINEPurchase store bought binding or make your own cutting 1 #” wide strips of fabric on the bias. Fold one long edge under $”. Find the center of your strip and with RIGHT sides together and fold facing up, pin raw edge of binding to raw edge of armhole at shoulder seam. Pin binding along armhole until you get around about a quarter from the side seam on each side. Leave this area free for now and the binding loose. Sew around armhole from pin to pin at $”. Join ends of binding. Use the video link pro-vided below if you need clari!cation for how to join ends together so that no raw edge is shown.
Video tutorial for joining ends: http://www.youtube.com/watch?v=Ot7Trk6J2Vw
STEP TENNow sew the remainder of the binding to the armhole. Fold the other edge over to the inside and pin in place, making sure to pin just over your previous stitch line. Topstitch.
Press Dress thoroughly.