Meiridian Mail Voice Services Application Guide
460
Meridian Mail Voice Services Application Guide Product release 12 Standard 1.0 January 1998 555-7001-325
Transcript of Meiridian Mail Voice Services Application Guide

Meridian MailVoice Services Application Guide
Product release 12 Standard 1.0 January 1998
555-7001-325

P0875903

Meridian MailVoice Services Application Guide
Publication number: 555-7001-325Product release: 12
Document release: Standard 1.0Date: January 1998
© 1994, 1996, 1998 Northern TelecomAll rights reserved
Printed in the United States of America
Information is subject to change without notice. Northern Telecom reserves the right to make changes in design or components as progress in engineering and manufacturing may warrant.
Nortel, DMS, DMS SuperNode, DMS-STP, and MAP are trademarks of Northern Telecom.


iii
Publication histor y
January 1998 Standard 1.0 Issue of the Meridian Mail Release 11 Voice Services Application Guide.
November 1996 Standard 1.0 issue of the Meridian Mail Release 11 Voice Services Application Guide.
Standard 1.0 Voice Services Application Guide January 1998

iv Publication history
Standard 1.0 Voice Services Application Guide December 1997

Contents
-2-4-5
-6
-81-9103
-15181923-2425-267
30-3135
-2
-4-612
1 Overview of Voice Services 1-1Overview . . . . . . . . . . . . . . . . . . . . . . . . . . . . . . . . . . . . . . . . 1Typographic conventions . . . . . . . . . . . . . . . . . . . . . . . . . . . 1Multi-customer versus single-customer systems. . . . . . . . . . 1Maintaining your Voice Services . . . . . . . . . . . . . . . . . . . . . 1
Section A Description of Voice Services 1-7Overview of Voice Services . . . . . . . . . . . . . . . . . . . . . . . . . 1Announcements. . . . . . . . . . . . . . . . . . . . . . . . . . . . . . . . . . . Thru-dial services . . . . . . . . . . . . . . . . . . . . . . . . . . . . . . . . 1-Time-of-day controllers. . . . . . . . . . . . . . . . . . . . . . . . . . . . 1-1Voice menus . . . . . . . . . . . . . . . . . . . . . . . . . . . . . . . . . . . . 1Standard key functions . . . . . . . . . . . . . . . . . . . . . . . . . . . . 1-Automated attendants and information services . . . . . . . . . 1-Voice prompt maintenance and remote activation . . . . . . . 1-Choosing a speaker . . . . . . . . . . . . . . . . . . . . . . . . . . . . . . . 1Voice forms . . . . . . . . . . . . . . . . . . . . . . . . . . . . . . . . . . . . . 1-Fax on Demand . . . . . . . . . . . . . . . . . . . . . . . . . . . . . . . . . . 1Tip: Using the Find Function . . . . . . . . . . . . . . . . . . . . . . . 1-2
Section B Application scenarios 1-29Overview of application scenarios . . . . . . . . . . . . . . . . . . . 1-Examples of automated attendants . . . . . . . . . . . . . . . . . . . 1Examples of information services . . . . . . . . . . . . . . . . . . . . 1-
2 Setting up Meridian Mail for Voice Services 2-1
Overview . . . . . . . . . . . . . . . . . . . . . . . . . . . . . . . . . . . . . . . . 2
Section A Voice Services Profile 2-3Overview of the Voice Services Profile . . . . . . . . . . . . . . . . 2Identifying timeout values. . . . . . . . . . . . . . . . . . . . . . . . . . . 2Determining maximum prompt sizes . . . . . . . . . . . . . . . . . 2-Identifying whether any voice services will be used

vi Contents
134156719
-22
-23-33-5
-8-10112-13-14-15
617
2022-24-28-31-34
637-39
to accept networking calls . . . . . . . . . . . . . . . . . . . . . . . . . . 2-Identifying whether update logging is required . . . . . . . . . 2-1Identifying business hours. . . . . . . . . . . . . . . . . . . . . . . . . . 2-Identifying holidays. . . . . . . . . . . . . . . . . . . . . . . . . . . . . . . 2-1Configuring the Voice Services Profile . . . . . . . . . . . . . . . 2-1Configuring the class of service . . . . . . . . . . . . . . . . . . . . . 2-
Section B Display options 2-21The Set Display Options screen . . . . . . . . . . . . . . . . . . . . . 2
3 Voice announcements 3-1Overview . . . . . . . . . . . . . . . . . . . . . . . . . . . . . . . . . . . . . . . . 3How the announcement service handles calls . . . . . . . . . . . . A voice announcement scenario . . . . . . . . . . . . . . . . . . . . . .
Section A Planning an announcement 3-7Overview of planning an announcement. . . . . . . . . . . . . . . . 3Scripting the announcement . . . . . . . . . . . . . . . . . . . . . . . . 3Choosing an announcement ID and title . . . . . . . . . . . . . . . 3-Identifying the revert DN . . . . . . . . . . . . . . . . . . . . . . . . . . 3-1Choosing passwords . . . . . . . . . . . . . . . . . . . . . . . . . . . . . . 3Silent disconnect . . . . . . . . . . . . . . . . . . . . . . . . . . . . . . . . . 3Setting the number of times the announcement plays. . . . . 3Choosing the language for system prompts (multilingual systems only) . . . . . . . . . . . . . . . . . . . . . . . . . 3-1Identifying how the announcement will be accessed . . . . . 3-
Section B Configuring an announcement 3-19Overview of configuring an announcement . . . . . . . . . . . . 3-The Announcement Definitions data menu. . . . . . . . . . . . . 3-Adding a new announcement . . . . . . . . . . . . . . . . . . . . . . . 3Recording the announcement . . . . . . . . . . . . . . . . . . . . . . . 3Making the announcement accessible . . . . . . . . . . . . . . . . . 3Testing the announcement. . . . . . . . . . . . . . . . . . . . . . . . . . 3
Section C Modifying or deleting an announcement 3-35Overview of modifying or deleting an announcement . . . . 3-3Modifying an announcement. . . . . . . . . . . . . . . . . . . . . . . . 3-Deleting an announcement . . . . . . . . . . . . . . . . . . . . . . . . . 3
Standard 1.0 Voice Services Application Guide January 1998

Contents vii
-2-3-6-8
-113
61819021
32428
-293046
02
44495255
8961
-2-6
4 The thru-dial service 4-1Overview . . . . . . . . . . . . . . . . . . . . . . . . . . . . . . . . . . . . . . . . 4What is a thru-dial service?. . . . . . . . . . . . . . . . . . . . . . . . . . 4How a thru-dial service handles calls . . . . . . . . . . . . . . . . . . 4Thru-dial examples . . . . . . . . . . . . . . . . . . . . . . . . . . . . . . . . 4Security issues . . . . . . . . . . . . . . . . . . . . . . . . . . . . . . . . . . . 4Monitoring for hackers . . . . . . . . . . . . . . . . . . . . . . . . . . . . 4-1
Section A Planning a thru-dial service 4-15Overview of planning a thru-dial service . . . . . . . . . . . . . . 4-1Choosing a thru-dial ID. . . . . . . . . . . . . . . . . . . . . . . . . . . . 4-Choosing a thru-dial title. . . . . . . . . . . . . . . . . . . . . . . . . . . 4-Identifying the revert DN . . . . . . . . . . . . . . . . . . . . . . . . . . 4-2Identifying passwords . . . . . . . . . . . . . . . . . . . . . . . . . . . . . 4-Choosing the language for system prompts (multilingual systems only) . . . . . . . . . . . . . . . . . . . . . . . . . 4-2Determining the dialing method . . . . . . . . . . . . . . . . . . . . . 4-Identifying whether left pad characters are required. . . . . . 4-Identifying whether the prompt/greeting should be suppressed. . . . . . . . . . . . . . . . . . . . . . . . . . . . . . 4Scripting the thru-dial greeting . . . . . . . . . . . . . . . . . . . . . . 4-Identifying the restriction/permission codes . . . . . . . . . . . . 4-3Identifying how the thru-dial service will be accessed . . . . 4-3
Section B Configuring a thru-dial service 4-39Overview of configuring a thru-dial service . . . . . . . . . . . . 4-4The Thru-Dial Definition data menu. . . . . . . . . . . . . . . . . . 4-4Adding a new thru-dial service . . . . . . . . . . . . . . . . . . . . . . 4-Recording the thru-dial prompt . . . . . . . . . . . . . . . . . . . . . . 4-Making the thru-dial service accessible . . . . . . . . . . . . . . . 4-Testing the thru-dial service . . . . . . . . . . . . . . . . . . . . . . . . 4-
Section C Modifying or deleting a thru-dial service 4-57Overview of modifying or deleting a thru-dial service . . . . 4-5Modifying a thru-dial service . . . . . . . . . . . . . . . . . . . . . . . 4-5Deleting a thru-dial service . . . . . . . . . . . . . . . . . . . . . . . . . 4-
5 Voice menus 5-1Overview . . . . . . . . . . . . . . . . . . . . . . . . . . . . . . . . . . . . . . . . 5Modifying and maintaining voice menus . . . . . . . . . . . . . . . 5
Standard 1.0 Voice Services Application Guide January 1998

viii Contents
-8-911
13145
-1718192
324637
38
24
46
51-5356-57
0163
-26-3-6
-11
Section A Planning a voice menu 5-7Overview of planning a voice menu . . . . . . . . . . . . . . . . . . . 5Identifying and ranking the order of the menu items . . . . . . 5Creating a diagram of the voice menu application . . . . . . . 5-Identifying and configuring the services that will be included in the voice menu . . . . . . . . . . . . . . . . . . . . . . . . . 5-Choosing a voice menu ID and title . . . . . . . . . . . . . . . . . . 5-Identifying the revert DN . . . . . . . . . . . . . . . . . . . . . . . . . . 5-1Identifying necessary passwords . . . . . . . . . . . . . . . . . . . . . 5Scripting the voice menu greeting. . . . . . . . . . . . . . . . . . . . 5-Scripting the menu choices prompt . . . . . . . . . . . . . . . . . . . 5-Identifying whether silent disconnect is required . . . . . . . . 5-2Identifying the language for system prompts (multilingual systems only) . . . . . . . . . . . . . . . . . . . . . . . . . 5-2Assigning a menu action to keys 1 to 9. . . . . . . . . . . . . . . . 5-Identifying the initial no response action . . . . . . . . . . . . . . 5-3Identifying the delayed response action . . . . . . . . . . . . . . . 5-Identifying how the voice menu will be accessed. . . . . . . . 5-
5 Section B Configuring voice menus 5-41Overview of configuring a voice menu. . . . . . . . . . . . . . . . 5-4The Voice Menu Definitions data menu . . . . . . . . . . . . . . . 5-4Adding a voice menu. . . . . . . . . . . . . . . . . . . . . . . . . . . . . . 5-Recording the voice menu greeting, menu choices prompt, and play prompts . . . . . . . . . . . . . . . . . . . . . . . . . . 5-Making the voice menu accessible . . . . . . . . . . . . . . . . . . . 5Testing the voice menu . . . . . . . . . . . . . . . . . . . . . . . . . . . . 5-Creating personal voice menus . . . . . . . . . . . . . . . . . . . . . . 5
Section C Modifying or deleting a voice menu 5-59Overview of modifying or deleting a voice menu. . . . . . . . 5-6Modifying a voice menu . . . . . . . . . . . . . . . . . . . . . . . . . . . 5-6Deleting a voice menu. . . . . . . . . . . . . . . . . . . . . . . . . . . . . 5-
6 Automated attendants 6-1Overview . . . . . . . . . . . . . . . . . . . . . . . . . . . . . . . . . . . . . . . . 6Basic automated attendant. . . . . . . . . . . . . . . . . . . . . . . . . . . Automated attendant with menu choices . . . . . . . . . . . . . . . 6Announcement-only automated attendant. . . . . . . . . . . . . . 6
Standard 1.0 Voice Services Application Guide January 1998

Contents ix
-131719-22
-2-57-7-9
246
1725
1346724
-489
245686167970375
Leave-a-message auto attendant . . . . . . . . . . . . . . . . . . . . . 6Time-of-day controlled automated attendant . . . . . . . . . . . 6-Nested time-of-day controls . . . . . . . . . . . . . . . . . . . . . . . . 6-Mixed live and automated attendants . . . . . . . . . . . . . . . . . 6
7 Voice forms 7-1Overview . . . . . . . . . . . . . . . . . . . . . . . . . . . . . . . . . . . . . . . . 7Using voice forms . . . . . . . . . . . . . . . . . . . . . . . . . . . . . . . . . 7System engineering . . . . . . . . . . . . . . . . . . . . . . . . . . . . . . . . Application scenarios . . . . . . . . . . . . . . . . . . . . . . . . . . . . . . 7
Section A Planning a voice form 7-11Overview of planning a voice form. . . . . . . . . . . . . . . . . . . 7-1Identifying whether a voice form application is required . . 7-1Obtaining or drawing a copy of the form . . . . . . . . . . . . . . 7-1Flowcharting the application. . . . . . . . . . . . . . . . . . . . . . . . 7-Composing greetings, prompts, and instructions . . . . . . . . 7-Identifying how transcribers will be notified—overview . . 7-30MWI notification. . . . . . . . . . . . . . . . . . . . . . . . . . . . . . . . . 7-3Notification by voice message . . . . . . . . . . . . . . . . . . . . . . 7-If no method of notification is used . . . . . . . . . . . . . . . . . . 7-3Identifying the general characteristics of the form . . . . . . . 7-3Defining No Answer fields . . . . . . . . . . . . . . . . . . . . . . . . . 7-4Defining Voice Answer fields. . . . . . . . . . . . . . . . . . . . . . . 7-4Identifying the service through which the voice form will be accessed. . . . . . . . . . . . . . . . . . . . . . . . . . . . . . . . . . 7Identifying the transcription service DN. . . . . . . . . . . . . . . 7-4
7 Section B Configuring a voice form 7-51Overview of configuring a voice form . . . . . . . . . . . . . . . . 7-5Guidelines for configuring voice forms . . . . . . . . . . . . . . . 7-5The Voice Forms definitions data menu . . . . . . . . . . . . . . . 7-Adding a new voice form definition . . . . . . . . . . . . . . . . . . 7-5Inserting a new field . . . . . . . . . . . . . . . . . . . . . . . . . . . . . . 7-Recording field names and field prompts . . . . . . . . . . . . . . 7-Saving the voice form definition . . . . . . . . . . . . . . . . . . . . . 7-6Making the voice form accessible . . . . . . . . . . . . . . . . . . . . 7-Defining a VSDN for the transcription service . . . . . . . . . . 7-7Testing the voice form. . . . . . . . . . . . . . . . . . . . . . . . . . . . . 7-
Standard 1.0 Voice Services Application Guide January 1998

x Contents
-77
01
78914
8990001020405
-2-36
012145
-16
0
Providing training/support and making the service available to customers . . . . . . . . . . . . . . . . . . . . . . . . . . . . . 7
7 Section C Modifying or deleting voice forms 7-79Overview of modifying or deleting voice forms. . . . . . . . . 7-8Viewing a voice form definition . . . . . . . . . . . . . . . . . . . . . 7-8Modifying a voice form while it is in service . . . . . . . . . . . 7-82Modifying a voice form while it is out of service . . . . . . . . 7-84Moving a field . . . . . . . . . . . . . . . . . . . . . . . . . . . . . . . . . . . 7-8Deleting a field . . . . . . . . . . . . . . . . . . . . . . . . . . . . . . . . . . 7-Copying a voice form definition . . . . . . . . . . . . . . . . . . . . . 7-9Deleting a voice form definition . . . . . . . . . . . . . . . . . . . . . 7-9
7 Section D Monitoring and transcribing voice forms 7-97Overview of monitoring and transcribing voice forms . . . . 7-9Managing transcriber activity . . . . . . . . . . . . . . . . . . . . . . . 7-Conducting random caller surveys . . . . . . . . . . . . . . . . . . 7-1Conducting transcriber feedback forums . . . . . . . . . . . . . 7-1Transcribing voice forms . . . . . . . . . . . . . . . . . . . . . . . . . 7-1Processing the information collected by a voice form . . . 7-1Managing response IDs. . . . . . . . . . . . . . . . . . . . . . . . . . . 7-1
8 Time-of-day controllers 8-1Overview . . . . . . . . . . . . . . . . . . . . . . . . . . . . . . . . . . . . . . . . 8What is a time-of-day controller? . . . . . . . . . . . . . . . . . . . . . 8Maintaining time-of-day controllers . . . . . . . . . . . . . . . . . . . 8-
Section A Planning time-of-day controllers 8-9Overview of planning time-of-day controllers . . . . . . . . . . 8-1Identifying the business hours and holidays . . . . . . . . . . . . 8-Identifying and configuring the necessary voice services. . 8-Identifying the time-of-day control ID . . . . . . . . . . . . . . . . 8-1Identifying how the time-of-day controller will be accessed. . . . . . . . . . . . . . . . . . . . . . . . . . . . . . . . . . 8
Section B Configuring a time-of-day controller 8-17Overview of configuring a time-of-day controller . . . . . . . 8-18The Time-of-Day Control Definitions data menu. . . . . . . . 8-2
Standard 1.0 Voice Services Application Guide January 1998

Contents xi
247
13
-2-4-6-7-8
-2-3
-2
B-2
Adding a time-of-day controller . . . . . . . . . . . . . . . . . . . . . 8-2Making the time-of-day controller accessible . . . . . . . . . . . 8-2Testing the time-of-day controller. . . . . . . . . . . . . . . . . . . . 8-2
Section C Modifying or deleting a time-of-day controller8-29Overview of modifying or deleting a time-of-day controller8-30Modifying a time-of-day controller. . . . . . . . . . . . . . . . . . . 8-3Deleting a time-of-day controller . . . . . . . . . . . . . . . . . . . . 8-3
9 Voice prompt maintenance and remote activation 9-1
Overview . . . . . . . . . . . . . . . . . . . . . . . . . . . . . . . . . . . . . . . . 9Defining the voice prompt maintenance DN. . . . . . . . . . . . . 9Updating voice menu prompts . . . . . . . . . . . . . . . . . . . . . . . 9Updating announcement and thru-dial greetings. . . . . . . . . . 9Remote activation . . . . . . . . . . . . . . . . . . . . . . . . . . . . . . . . . 9
10 Monitoring voice services 10-1Overview . . . . . . . . . . . . . . . . . . . . . . . . . . . . . . . . . . . . . . . 10Monitoring operational measurements . . . . . . . . . . . . . . . . 10
A Worksheets A-1Worksheets . . . . . . . . . . . . . . . . . . . . . . . . . . . . . . . . . . . . . . A
B Sample voice form sessions B-1Sample sessions. . . . . . . . . . . . . . . . . . . . . . . . . . . . . . . . . . .
Standard 1.0 Voice Services Application Guide January 1998

xii Contents
Standard 1.0 Voice Services Application Guide January 1998

Chapter 1
Overview of Voice Services
In this chapter
Overview 1-2
Typographic conventions 1-4
Multi-customer versus single-customer systems 1-5
Maintaining your Voice Services 1-6
Section A: Description of Voice Services 1-7
Section B: Application scenarios 1-29

1-2 Overview of Voice Services Overview
to
:
g
a is
e
Overview
Introduction This chapter provides an overview of how the various voice services work. The later chapters describe in more detail howplan these applications and set them up on the system.
If Voice Menus is installed
The voice services available to you depend on the Meridian Mail features that are installed. If you have the Voice Menusfeature installed, you can set up the following voice services
• announcements
• thru-dial services
• time-of-day controllers
• voice menus
If Voice Forms is installed
If you have Voice Forms installed, you can set up the followinadditional services:
• voice form
• the transcription service for transcribing voice forms
If Fax on Demand is installed
If you have Fax on Demand installed, you can set up the following fax services:
• Fax Information Service, which allows a caller to choosefax item transmitted either on the same call (if the caller calling from a fax phone) or using callback delivery to another (fax device) number as specified by the caller
• Fax Item Maintenance Service, which allows the administrator to update fax items
Fax on Demand is documented in the Fax on Demand Application Guide (NTP 555-7001-327).
More than one feature The above features are not mutually exclusive. You can havmore than one of these features installed on your system.
Standard 1.0 Voice Services Application Guide January 1998

Overview of Voice Services 1-3Overview
ur
ax
Maintenance features Two additional features are available to help you maintain yovoice services:
• voice prompt maintenance
• remote activation
Procedure: Determining which features are installed
To check whether you have Voice Menus, Voice Forms, or Fon Demand installed on your system, follow these steps.
Starting Point: The Main Menu
Step Action
1 Select General Administration.
2 Select General Options.
3 Look at the Available Features list to see whether Voice Menus, Voice Forms, or Fax on Demand is listed. You can have more than one of these features installed on your system.
Standard 1.0 Voice Services Application Guide January 1998

1-4 Overview of Voice Services Typographic conventions
his
of re
el ,
Typographic conventions
The following typographic conventions are used throughout tdocument:
• Softkeys are referred to in a procedure by using the labelthe softkey (as displayed on a screen) enclosed by squabrackets (for example, [Exit], [OK to Delete]).
• Keyboard keys are referred to in a procedure using the labof the key enclosed by angle brackets (for example, <1><2>, <Return>).
• Text input/user input (where you are required to input specific text) is presented in bold print (for example, abcd ).
Standard 1.0 Voice Services Application Guide January 1998

Overview of Voice Services 1-5Multi-customer versus single-customer systems
gle-s
on .
be ce ,
the the
eled
Multi-customer versus single-customer systems
Introduction The screen examples in this manual are taken from both sincustomer and multi-customer systems. This section discussesome of the differences between voice services administration a multi-customer system versus a single-customer system
Administration level On multi-customer systems, voice services and VSDNs can added only at the customer administration level. However, oncreated, all voice services except voice forms can be viewedmodified, or deleted from the system administration level, orfrom the customer administration level. Voice forms can be accessed only from the customer administration level.
Screen examples On multi-customer systems, the customer name appears in top left corner of the screen. In addition, some fields display customer number and customer name.
If you have a single-customer system, please disregard the customer name that appears on the screen, or any fields labCustomer Number or Customer Name.
Standard 1.0 Voice Services Application Guide January 1998

1-6 Overview of Voice Services Maintaining your Voice Services
n to
e
Maintaining your Voice Services
Do the following to keep your voice services up to date:
• Keep your voice services worksheets so that you have aoutline of your voice services available if you ever need update them.
• Monitor the use of your voice services and make adjustments as necessary. See Chapter 10, "Monitoringvoice services".
• Modify the voice services profile when required to updatbusiness day schedules and holidays. See Chapter 2, "Setting up Meridian Mail for Voice Services".
Standard 1.0 Voice Services Application Guide January 1998

Overview of Voice Services 1-7
Section A Description of Voice Services
In this section
Overview of Voice Services 1-8
Announcements 1-9
Thru-dial services 1-10
Time-of-day controllers 1-13
Voice menus 1-15
Standard key functions 1-18
Automated attendants and information services 1-19
Voice prompt maintenance and remote activation 1-23
Choosing a speaker 1-24
Voice forms 1-25
Fax on Demand 1-26
Tip: Using the Find Function 1-27
Standard 1.0 Voice Services Application Guide January 1998

1-8 Overview of Voice Services Overview of Voice Services
s,
Overview of Voice Services
Introduction This section provides descriptions of Voice Services featureand some tips for implementing these features.
Standard 1.0 Voice Services Application Guide January 1998

Overview of Voice Services 1-9Announcements
is,
e
Announcements
Introduction An announcement is recorded information that is played to callers. An announcement can be a stand-alone service (andtherefore, directly dialed), or it can be indirectly accessed through a voice menu or time-of-day controller.
Example The following is an example of a basic announcement servicaccessed when the caller dials the announcement DN.
* This is a sample announcement only.
Announcement* “Thank you for calling Nadir Enterprises.Our offices are closed today due to theinclement weather. Please call againtomorrow. Goodbye.”
The caller hangs up.
Caller dials the announcement access DN.
G100591
Standard 1.0 Voice Services Application Guide January 1998

1-10 Overview of Voice Services Thru-dial services
en
ase ou n ho get or
N
Thru-dial services
Introduction A thru-dial service performs basic call handling. Its primary function is to prompt a caller for an extension number and thplace a phone call. Alternatively, you can create a thru-dial service that prompts a caller for a person’s name, in which cthe caller spells out the name using the telephone keypad. Ycan also give the caller the option to enter either an extensionumber or a name. This is useful because it allows callers wmay know a person’s name but not the person’s extension tothrough to the person using the thru-dial service. If a caller isonly allowed to enter an extension and does not know it, he she will have to revert to the revert DN which may be a live attendant.
A thru-dial service definition consists of a greeting which includes instructions about how to dial and a revert DN (the Dto which a caller will be transferred if he or she presses 0 forassistance).
Standard 1.0 Voice Services Application Guide January 1998

Overview of Voice Services 1-11Thru-dial services
are
Example The following is an example of a basic thru-dial service accessed when the caller dials the thru-dial DN.
Different types of thru-dial services can be created. For example, the three most common types of thru-dial services
• a thru-dial service that allows in-house calls only
• a thru-dial service that allows in-house and local calls
Thru-dial service
“Thank you for calling Nadir Enterprises.If you know the extension of the person you wish to speak to, enter the extensionnumber followed by number sign. If youdo not know the extension number,press 0 to connect to an operator. Ifyou have a rotary phone, please wait onthe line and someone will be with youshortly.”
Meridian Mail calls extension 2338.
The caller enters a user'sextension number.
Caller dials the thru-dial service access DN.
G100592
Standard 1.0 Voice Services Application Guide January 1998

1-12 Overview of Voice Services Thru-dial services
lls
g l e
l
ctly
• a thru-dial service that allows in-house calls and ESN caor long distance calls
These types of thru-dial services are created by specifying which dialing codes are restricted and which codes are permitted. In the first example, 9 would be a restricted dialincode. This would prevent callers from dialing 9 to make locacalls, 90 for operator-assisted calls, 91 to make long-distanccalls, or 9011 to make international calls.
The access numbers of thru-dial services that allow long distance calling are generally not published to everyone, butonly to select personnel. You can also protect these thru-diaservices by defining an access password. The thru-dial service can be accessed only if the person enters this password.
Like announcements, thru-dial services can be accessed direor indirectly through a voice menu or time-of-day controller.
ATTENTIONBecause of the potential for unauthorized access to the system, it is very important for you to apply the appropriate restriction codes to all your thru-dial services to prevent unauthorized people from placing long-distancecalls using your thru-dial services.
Standard 1.0 Voice Services Application Guide January 1998

Overview of Voice Services 1-13Time-of-day controllers
,
s.
ed the
of--of-
Time-of-day controllers
Introduction A time-of-day controller routes calls to a particular voice service (an announcement, a thru-dial service, a voice menuanother time-of-day controller, a voice form, or a fax item) based on the day and the time of day that a call is received.
A time-of-day controller has three defined time periods—onefor business hours, one for off-hours, and another for holidayEach time period has a voice service associated with it. Therefore, if the time-of-day controller is active, a call will berouted to one service if it is received during business hours, another service if it is received during off-hours, or a specialservice that has been created to handle calls that are receivduring a holiday (a day that has been defined as a holiday insystem).
Changes to the default business hours after creating a time-day controller will not change the business hours of the timeday controller.
Standard 1.0 Voice Services Application Guide January 1998

1-14 Overview of Voice Services Time-of-day controllers
.
Example The following is an example of a basic time-of-day controlleraccessed when the caller dials the time-of-day controller DN
Announcement A
“Thank you for calling Nadir Enterprises.Our offices have closed for the day. Our business hours are between 8:30 a.m. and 5:00 p.m. Please callagain. Goodbye.”
The caller hangs up.
Time-of-day controller
Caller dials the time-of-daycontroller access DN during off-hours.
G100593
Off-hours'''''
Announcement A
Holiday'''''
Announcement B
Business hours'''''
Voice menu
Standard 1.0 Voice Services Application Guide January 1998

Overview of Voice Services 1-15Voice menus
e
gle-
The
on
the
u
to
is
a
o
Voice menus
Introduction A voice menu presents callers with a series of choices or menu actions. A voice menu typically consists of a greeting, which identifies your organization to the caller, followed by a list of items from which the caller can choose by pressing one of thnumeric keys on the caller’s telephone keypad.
Voice menus can be comprised of only one voice menu (sinlevel), or can include choices that invoke other voice menus(multilevel). You can have up to 20 levels of voice menus.
Each voice menu can have up to nine choices (keys 1 to 9). keys 1 to 9 can be programmed to do any of the following:
• play an announcement
• prompt the caller for the extension (or name) of the persthe caller wants to talk to (Thru-Dial Service)
• connect the caller to another voice menu (a submenu of current menu)
• place a call to a specified DN (specified in the voice mendefinition, not by the caller)
• transfer the caller to a specified DN, usually that of an operator or receptionist (when the caller presses 0)
• prompt the caller to enter an extension number in order leave a message for someone (Express Messaging)
• play a prompt (different from an announcement)
• connect the caller to the prompt maintenance service (this intended for administrative delegates who are responsible for maintaining voice service prompts)
• repeat the menu choices if the caller has forgotten the choices
• return the caller to the main menu if he or she has mademistake
• prompt the caller, who is a Meridian Mail user, to log in this or her mailbox (Voice Messaging)
• activate a time-of-day controller
• disconnect the call
Standard 1.0 Voice Services Application Guide January 1998

1-16 Overview of Voice Services Voice menus
g
s or
re
ice
ns
o
If the VMUIF interface is installed on the system, the followinaction is also possible:
• connect the caller, who is a dial pulse user of voice messaging, to the greeting service in order to change hiher personal greeting (this service does not require any keypad input)
If the Voice Forms feature is installed, the following actions aalso possible:
• connect the caller to a voice form
• connect the caller (a transcriber) to the transcription serv
If the Fax on Demand feature is installed, the following actioare also possible:
• connect the caller to a fax item
• connect the caller (an administrative delegate) to the faxitem maintenance service
If the Hospitality feature is installed, the following actions arealso possible:
• prompt the caller, who is a Meridian Mail user, to log in this or her mailbox (Hospitality messaging)
• connect the caller to the post-checkout mailbox service
Standard 1.0 Voice Services Application Guide January 1998

Overview of Voice Services 1-17Voice menus
the
Example The following is an example of a voice menu accessed whencaller dials the voice menu DN.First level voice menu. “Thank you for calling Nadir Enterprises. If you know the extension of the person you want to speak to, press 1. If you know the name of the person you want to speak to, press 2. If you would like directions to our location, press 3. If you would likeinformation about our new products, press 4. To speak to someone in customerservice, press 5. If you would like to speak to an operator, press 0. If you have a rotary phone, please stay on the line. Someone will be with you shortly.”
Caller dials the voice menu access DN.
G100594
Thru-dialservice
(extensiondialing)
Thru-dialservice(namedialing)
DirectionsAnnouncement
Announcementfor product A
Announcementfor product B
Announcementfor product C
Call placed tocustomer service
department.
New ProductsVoice Menu
Standard 1.0 Voice Services Application Guide January 1998

1-18 Overview of Voice Services Standard key functions
ou ess
e er
er. a
ller
to
Standard key functions
Introduction The following key functions are standard in all applications.
0 = Attendant revert
At any time in any voice service, a caller who presses 0 is connected to the Revert DN which may be a live attendant. Adifferent Revert DN can be specified for each voice service ycreate. This should always be an option (at least during businhours) for callers who need to speak to a live attendant.
If a revert DN is not defined, a caller who presses 0 hears thprompt, “That selection is not recognized. Please make anothchoice.”
* = Help
In an announcement, the announcement is played again from beginning to end when star (*) is pressed.
In a voice menu, the menu choices are played (if recorded) when star (*) is pressed. If the choices are not recorded, themenu greeting is played.
In a thru-dial service, the caller is given instructions on how toenter a phone number if it is the first key pressed by the callIf it is pressed while entering a number, star is interpreted aspause.
In a fax item, the voice prompt is replayed when star (*) is pressed.
# = Return to previous menu
(Voice menus only) If the current menu was dialed directly, pressing # causes the menu choices to be repeated. The caremains in the current menu. If the menu was accessed indirectly (through another voice menu), # returns the caller the previous menu.
Standard 1.0 Voice Services Application Guide January 1998

Overview of Voice Services 1-19Automated attendants and information services
us f-
nd ing hat
he
ial nt, e of
Automated attendants and information services
Introduction The four voice services that are bundled with the Voice Menfeature package—announcements, thru-dial services, time-oday controllers, and voice menus—in addition to fax items avoice forms (if these features are installed), are used as buildblocks to create both simple and more complex applications tmay involve a number of voice services. All applications thatyou create using these voice services can be classified as belonging to one of two categories:
• automated attendants
• information services
Automated attendants An automated attendant is the electronic equivalent of a receptionist. It can do the following:
• answer calls within a predefined number of rings
• answer a large number of calls at the same time
• answer calls 24 hours a day
• allow callers to reach extensions without needing the assistance of a live attendant
Automated attendants improve efficiency by
• removing a significant percentage of the workload from clerical staff
• providing overflow handling during peak periods
• allowing employees to be reached after normal businesshours
All automated attendants are created using one or more of tfour voice services described above. The following are examples of the types of automated attendants that can be created.
Basic automated attendantThis type of automated attendant is created using the thru-dservice. When a caller reaches the basic automated attendathe caller is prompted to enter the extension number or nam
Standard 1.0 Voice Services Application Guide January 1998

1-20 Overview of Voice Services Automated attendants and information services
ing be
on ple
an be
hat . put e
ss
ed up,
ns ke
the person he or she wants to call. The caller then enters thenumber or name and the call is placed. If the caller does nothor presses 0, the call is routed to the Revert DN, which may an attendant.
This version of the automated attendant is useful for organizations whose employees have the same likelihood ofbeing called. The value of an automated attendant depends callers knowing the extension numbers or names of the peothey want to reach.
Automated attendant with menu choicesThis type of automated attendant is actually a voice menu. Itallows callers to choose from a number of actions. Rather thasking callers to enter extension numbers that they may notaware of, frequently called departments or people can be included in the voice menu. When the caller selects a department or person, the call is placed directly to the appropriate number. The caller does not have to know any extension numbers.
This type of automated attendant is useful for organizations thave people or departments receiving a high volume of callsThe directory number of such people or departments can bein a menu so that, when a caller selects that menu choice, thcall is routed directly to the appropriate number.
For example: “Thank you for calling the University of XYZ. Tocall the Economics department, press 1. To call the Biology department, press 2. To call the Philosophy department, pre3. To call the English department, press 4. To call the Mathematics department, press 5. If you know the person’s name or extension, please press 6.”
Announcement-only automated attendantThe announcement-only automated attendant plays a recordmessage to the caller. The caller’s options are to listen, hangor revert.
This type of automated attendant can be used by organizatiothat shut down completely after hours with no one there to ta
Standard 1.0 Voice Services Application Guide January 1998

Overview of Voice Services 1-21Automated attendants and information services
re
e
s an
u. key to a l ed to
urs ler ate
g -of-t r
he
tly
es
calls. The announcement informs callers that the premises aclosed, states business hours, and then disconnects.
Leave a messageThis type of automated attendant is similar to the announcement-only type, except that it allows callers to leavmessages for persons they are trying to reach. Like the announcement-only type of automated attendant, it is used aafter-hours attendant.
However, this type of attendant is created using a voice menOne of the menu choices presented to the caller is to select ain order to leave a message. This key will connect the caller mailbox (through express messaging). This will be a generamailbox, and callers can specify who the message is for andthen leave the message. The messages can then be forwardthe appropriate people the next day.
Time-of-day controlled automated attendantIf one type of automated attendant is required for business hoand another for off-hours and holidays, a time-of-day controlis required to make sure that calls are routed to the appropriservice based on the time of day at which it is received.
Mixed live and automated attendantsWhen an organization has a receptionist, an automated attendant is useful for handling overflow calls and for handlincalls when the receptionist is unavailable (after hours, lunchbreaks, and so on). This can be achieved by creating a timeday controller that routes callers to one automated attendanduring business hours (for overflow handling) and another foafter-hours treatment.
Information services Information services are intended to provide callers with prerecorded information. Information services are useful in tfollowing situations:
• to provide internal users or external callers with frequenrequested information, thus reducing the number of interruptions imposed on employees by repeated inquiri
Standard 1.0 Voice Services Application Guide January 1998

1-22 Overview of Voice Services Automated attendants and information services
he at
nt. a es he n
pe to o el s.
ice
• to provide callers with up-to-date information, thus reducing the amount of time spent by internal users or external callers seeking frequently changing information
All information services are created using one or more of announcements, voice menus, and time-of-day controllers. Tfollowing are examples of the types of information services thcan be created.
Announcement onlyThe simplest form of information service is the announcemeIt provides a single recording of information to what might belarge number of people who want or need to hear it. Examplof announcements are daily stock quotes, weather reports, ttime, train and bus schedules, equipment status, fares, storehours, daily restaurant menus, and daily or weekly specials istores.
Information menusInformation menus can be used when there is so much information to present that it is more practical to split the information into amounts that can be managed easily. This tyof application is created with voice menus that allow callers choose what they want to hear, rather than having to listen tlengthy recordings. These services can be simple single-levvoice menus, or multilevel menus with a number of submenu
Fax menusIf you have the Fax on Demand feature, you can create a vomenu to serve as a front end to a number of fax items. Whencallers phone in to the menu, all of the options they are presented with are fax items from which they can choose.
Standard 1.0 Voice Services Application Guide January 1998

Overview of Voice Services 1-23Voice prompt maintenance and remote activation
e ure
an e]
e. It
o DN
rm iate
e the
d.
Voice prompt maintenance and remote activation
Introduction There are two additional services, voice prompt maintenancand remote activation, which are part of the voice menus featpackage.
Voice prompt maintenance
Voice prompts (greetings, announcements, menu choices) cbe recorded from the administrative terminal using the [Voicsoftkey. An alternative method to recording and maintaining voice prompts is to use the voice prompt maintenance servicallows you or an administrative delegate to access a voice service from a remote touch-tone telephone set in order to record or modify the various prompts, greetings, and announcements that exist within the four types of voice services.
Remote activation Remote activation allows you or an administrative delegate tchange the voice service associated with a particular VSDNfrom a remote touch-tone telephone set. Changes to the VSare typically done from the administrative terminal (in the VSDN table). However, if, for example, there is a severe stoand the office is unexpectedly shut down, you would want tomake sure that the main office number activates the approprservice. Using remote activation, you can log in from your home phone (as long as it is a touch-tone phone) and changservice that is associated with the main number so that the announcement stating that your office is closed will be playe
Standard 1.0 Voice Services Application Guide January 1998

1-24 Overview of Voice Services Choosing a speaker
de
ult
n ,
al, be voice
ed, s be le
k
Choosing a speaker
Introduction Announcements, thru-dial services, and voice menus all incluvoice recordings. Part of your responsibility is to choose an appropriate speaker to record these prompts.
Remember that no matter how well your applications are designed, if the recorded voice you use is unpleasant or difficto understand, reaction to your voice services will not be positive.
If the application is very casual (such as an announcement intended for internal users only), you may decide that you cacreate it and record it yourself. For more formal applicationssuch as those that will be presented to external callers, you should consider the choice of speaker.
Though telephone lines reproduce low-pitched voices best, aclear voice is better than one that sounds “gravelly.” If practictry to use only one voice or one gender because callers maydistracted by changes in speakers. Choose a person whose and accent projects the image your organization wants to promote. The voice itself and the prompts should sound relaxconfident, efficient, and friendly. If you have a lot of recordingthat will need updating regularly, choose someone who can available to update them. If this is difficult, select a few peopwith similar voice qualities who can share the responsibility.
Audition prospective speakers in a quiet room, then play bacsamples of their voices over the telephone. A good way to audition speakers is to have them leave messages or read sample scripts in your mailbox.
Standard 1.0 Voice Services Application Guide January 1998

Overview of Voice Services 1-25Voice forms
e ay
s 0 r
way
Voice forms
Introduction A voice form is the electronic equivalent of a paper form. It is“filled out” by callers who dial a special number which connects them to the voice form. (Alternatively, callers can bconnected to a voice form through a voice menu or time-of-dcontroller.)
Voice forms are intended to help fulfill an organization’s information-gathering needs. Voice forms can replace paperforms as well as certain information-gathering tasks that arecurrently carried out over the phone (such as order taking).
How it works The form is made up of a series of questions that are playedover the telephone to the caller. The caller listens to each question and responds by giving a verbal answer. If callers require assistance while responding to a form, they can presto transfer to an operator (this functionality can be enabled odisabled for each voice form). The caller’s answers are recorded and stored in the system as a response.
The responses are later transcribed or collected in whatever suits the needs of your company.
Standard 1.0 Voice Services Application Guide January 1998

1-26 Overview of Voice Services Fax on Demand
Fax on Demand
Introduction The Fax on Demand feature is described in detail in the Fax on Demand Application Guide (NTP 555-7001-327).
Standard 1.0 Voice Services Application Guide January 1998

Overview of Voice Services 1-27
er s
Tip: Using the Find Function
Description Many of the Voice Services Administration screens have eitha [Find] or [Find Subset of VSDNs/Services] softkey. Use thisoftkey to retrieve a particular voice service definition or a listing of voice service definitions that meet particular searchcriteria.
For details, refer to the Meridian Mail System Administration Guide for your platform.
Standard 1.0 Voice Services Application Guide January 1998

1-28 Overview of Voice Services Tip: Using the Find Function
Standard 1.0 Voice Services Application Guide January 1998

Overview of Voice Services 1-29
Section B Application scenarios
In this section
Overview of application scenarios 1-30
Examples of automated attendants 1-31
Examples of information services 1-35
Standard 1.0 Voice Services Application Guide January 1998

1-30 Overview of Voice Services Overview of application scenarios
se
Overview of application scenarios
Introduction This section provides examples of when you might want to uone of the voice services. These examples should help you decide which service is appropriate for your needs.
Standard 1.0 Voice Services Application Guide January 1998

Overview of Voice Services 1-31Examples of automated attendants
ed ants
nt ts ant l o
is
nd
rt er r to r
he cy It is ive
Examples of automated attendants
Introduction This section provides examples of different types of automatattendants, and scenarios where the different types of attendmight be useful.
Basic automated attendant
The problemA large department deals mainly with long-term clients who know the extension numbers of the staff with whom they wato communicate. Still, there are always a few calls from clienwho do not know the extension number of the person they wto reach. The live receptionist has had to deal with every calcoming in to the agency with the result that there is no time tbe friendly, and many clients are irritated by frequently beingplaced on hold. The situation is worse when the receptionistaway and a temporary receptionist tries to fill in. The staff in this department all receive a roughly equal volume of calls ano one needs special treatment.
The solutionA basic automated attendant is created. The number is communicated to long-term clients. When a client dials this number and is answered by the automated attendant, a shocourteous greeting is played, followed by an invitation to entthe desired extension number. Also mentioned is the numbeenter if the caller wants to talk to a live attendant. If the calledoes nothing for a predetermined period of time, the call is automatically routed to a live attendant.
Automated attendant with menu choices
The problemA department receives a high volume of first-time calls from tgeneral public. The callers are not familiar with how the agenis set up, or with department names and extension numbers.desirable to respond to each call in a polite and comprehensmanner, but taking the time to explain the function of each department leaves other callers on hold for an unacceptablelength of time or unable to get through at all.
Standard 1.0 Voice Services Application Guide January 1998

1-32 Overview of Voice Services Examples of automated attendants
n n to o ill
s 1.
nal
f
a The pt ent
e oes nu
a
ny
The solutionA voice menu (automated attendant with menu choices) is created. After dialing the agency’s publicly listed number, thecaller hears a courteous greeting followed by a list of department names followed by a one-digit number to enter iorder to call that department. If any clients who do know theextension number of the person they want to speak to happeuse this publicly listed number, one of the choices is set up tconnect the client to a thru-dial service. These callers can stenter any extension number themselves.
For example: “Thank you for calling Orange Computers. If youknow the extension of the person you want to speak to, presFor customer service, press 2. To speak to a sales representative, press 3. To speak to someone in our EducatioProducts department, press 4. To speak to someone about consumer applications, press 5.”
Announcement-only automated attendant
The problemA university cafeteria gets a lot of phone calls from studentsasking about the daily menu. The people on the kitchen staffeel they are spending too much time answering the same questions over and over.
The solutionAn announcement-only automated attendant is created, andnumber is published to students as the daily menu number. people on the kitchen staff are trained to use the voice prommaintenance service so that they can update the announcemevery day themselves.
For example: “The menu specials for Monday October 18th aras follows: Menu one is a Salisbury steak with mashed potatand peas. Menu two is falafel on a pita and tomato soup. Methree is fish and chips. Today’s fish is haddock.”
Leave a message The problemThe personnel department receives a flood of responses to number of advertisements for new hires. Some of the best potential applicants may be reluctant to call from open-plan offices, or may be too busy during normal business hours. Ma
Standard 1.0 Voice Services Application Guide January 1998

Overview of Voice Services 1-33Examples of automated attendants
t’s f
to
y
ers o s that r on
’s s, llers hen ox e a
he ’s
lt
te ted
dle sy s is n
people give up calling after finding the personnel departmenline continually busy. The department would like to be sure oreceiving information from all interested applicants and, in order to weed out unsuitable applicants, would like to be ableexpand on the information given in the published advertisements without tying up the department’s phones.
The solutionA 24-hour, 7-day-a-week number is advertised. A time-of-dacontroller is created. During business hours, callers are connected to a voice menu. The initial greeting played to callcontains any information the personnel department wishes tconvey (for example, when a publicly advertised position habeen filled). Callers are then prompted to press the number corresponds to the advertisement they are interested in. Aftemaking a selection, callers are directly connected to the persresponsible for the appropriate advertisement. If that personline is busy, the caller can leave a message. During off-hourcallers are connected to another voice menu that prompts cato leave a message by entering a certain number (1 to 9). Wa caller selects this option, he or she is connected to a mailb(by the express messaging service) and is prompted to leavmessage and specify which advertised position he or she is interested in. The next day, messages are listened to and forwarded to the appropriate person.
Mixed live and automated attendant
The problemThis department supports a large team of field technicians. Tfield technicians report in regularly by phone, but the agencyreceptionist cannot handle the extra volume of calls at peak periods. Emergency calls after hours are a particularly difficuproblem to handle efficiently.
The solutionA time-of-day controller is built to route calls to the appropriaservice depending on when a call is received. A basic automaattendant (consisting of a thru-dial service) is created to hanoverflow calls during business hours (if the receptionist is buor taking a break). An automated attendant with menu choicecreated for off-hours. It offers the options to dial an extensionumber (thru-dial service) since some people do work after
Standard 1.0 Voice Services Application Guide January 1998

1-34 Overview of Voice Services Examples of automated attendants
a ds is
hours, or to connect to a voice form in order to verbally fill inproblem ticket. If the technician selects the voice form, he orshe is asked a series of questions to which he or she responverbally. When the voice form is transcribed, the informationpassed on to the appropriate person.
Standard 1.0 Voice Services Application Guide January 1998

Overview of Voice Services 1-35Examples of information services
of
ing
ed
ou
x
e of
vel
s,
Examples of information services
Introduction This section provides examples of different types of information services, and scenarios where the different typesinformation services might be useful.
Announcement only The problemThere is an upcoming Christmas party. The receptionist is beflooded with questions about the date, the time, the location,and directions.
The solutionAn announcement service is created. The number is publishto the people in the department so that employees can get directions at their leisure. If necessary, they can listen to theannouncement twice in order to get all the necessary information.
Example: “Thank you for calling for information about the Christmas party. The party will be held on Friday, December16th from 6:00 p.m. to 1:00 a.m. The party will be held in theRichelieu Ballroom at the Grand Hotel by the airport. To get there from downtown, take the 401 west to the Martin Groveexit. Go west on Martin Grove Road. The hotel is two blocksfrom the highway on your right side. You can’t miss it. See ythere.”
Information menu The problemA new release of Meridian Mail has just been installed. The company wants existing employees to be able to get information about new features such as Voice Forms and Faon Demand quickly. New employees will need access to information about all features as well as information about thMeridian Mail system as a whole. However, the total amountinformation is extensive.
The solutionThe company decides to present the information in a multilevoice menu. When employees dial the number for Meridian Mail information, they hear an initial menu of up to nine item
Standard 1.0 Voice Services Application Guide January 1998

1-36 Overview of Voice Services Examples of information services
the enu a
By uld to
each followed by a number. When they enter the number of item in which they are interested, they hear a second-level mlisting the topics related to the item they chose. After makingchoice from this menu, a third-level menu allows callers to select the specific piece of information they need to access. breaking up information into smaller amounts, new users shonot be intimidated and experienced users will not be requiredlisten to information with which they are already familiar.
Standard 1.0 Voice Services Application Guide January 1998

Chapter 2
Settin g up Meridian Mail for Voice Services
In this chapter
Overview 2-2
Section A: Voice Services Profile 2-3
Section B: Display options 2-21

2-2 Setting up Meridian Mail for Voice Services Overview
le up
t up
Overview
Introduction This chapter explains how to set up the Voice Services Profiand the Display Options. Perform these steps prior to settingyour voice service applications.
The Voice Services Profile is a profile of basic system parameters that affect voice services, such as the maximumlength for recordings and timeout values that determine howlong the system waits for a response during a voice menu orautomated attendant application.
The Display Options is a profile of how information is sorted and displayed on administration screens that are used to sevoice services.
Standard 1.0 Voice Services Application Guide January 1998

Setting up Meridian Mail for Voice Services 2-3
Section A Voice Services Profile
In this section
Overview of the Voice Services Profile 2-4
Identifying timeout values 2-6
Determining maximum prompt sizes 2-12
Identifying whether any voice services will be used to accept networking calls 2-13
Identifying whether update logging is required 2-14
Identifying business hours 2-15
Identifying holidays 2-16
Configuring the Voice Services Profile 2-17
Configuring the class of service 2-19
Standard 1.0 Voice Services Application Guide January 1998

2-4 Setting up Meridian Mail for Voice Services Overview of the Voice Services Profile
to e s.
ll rt
.
.
of--of-
s
Overview of the Voice Services Profile
Introduction Prior to setting up your voice service applications, you need set up system parameters for these voice services. The VoicServices Profile screen is where you define these parameter
These parameters include the following:
• the maximum length for announcements
• the maximum length for other recordings (thru-dial greetings, voice menu prompts)
• timeout values which determine how long the system wiwait for input from a caller before carrying out some kindof action (either repeating the choices, following the reveDN, or some other action defined by the administrator)
Time-of-day controllers
The voice services profile is also where holidays are definedThese holiday definitions are used by time-of-day controllersAlso used by time-of-day controllers are the default businesshours that are configured in the profile.
Changes to the default business hours after creating a time-day controller will not change the business hours of the timeday controller.
Multi-customer administration
On multi-customer systems, you must define a voice serviceprofile for each customer group. The Voice Services Profile screen, therefore, is only accessible from the customer administration level.
Creating the voice services profile—an outline
The creation of a voice services profile requires the followingplanning steps:
• Identify timeout values.
• Determine maximum prompt sizes.
• Identify business hours.
• Identify holidays.
• Configure the voice service profile in Meridian Mail.
• Configure the class of service in Meridian Mail.
Standard 1.0 Voice Services Application Guide January 1998

Setting up Meridian Mail for Voice Services 2-5Overview of the Voice Services Profile
e
Worksheet Make a copy of the Voice Services Profile Worksheet in Appendix A, “Worksheets.” As you plan the voice services profile, fill in the worksheet. Then, when you are ready to configure the profile in Meridian Mail, all you will have to do iscopy the information into the system. You will also have a written record of the voice services profile. If you ever modifythe profile, fill in a new worksheet so that you always have thmost up-to-date version on file.
Standard 1.0 Voice Services Application Guide January 1998

2-6 Setting up Meridian Mail for Voice Services Identifying timeout values
ne
r
, he in a y.
ot t.
F
cts as unt
m
and
Identifying timeout values
Introduction There are three different timeout values to define: commandentry, short disconnect, and record. These timeouts determihow long the system will wait if there is no caller response before taking some sort of action (such as disconnecting thecaller from a service or playing a delayed prompt).
Timeout values are used to determine how long the system waits before taking some sort of action (like disconnecting oplaying a prompt) under the following circumstances:
• A caller does not provide an initial response.
This means that after a caller connects to a voice serviceor she does not provide any keypad input. For example, voice menu, after the menu selection prompt is played, acaller is expected to select a menu item by pressing a keIf the caller does not press a key, this is considered an initial no response. X seconds after the greeting is played (where x is the number specified in the Command Entry field), an action will be taken by the system. (For voice menus, you can specify what action the system should take.)
Initial no response typically means that the caller does nhave a touch-tone phone and cannot provide DTMF inpu
• A caller delays in responding.
This means that a caller has provided some sort of DTMinput at some point, but is now delaying further input. (When a caller presses a key, this puts the system into “delayed response mode.”) For example, a caller conneto a voice menu which is password protected (the callerenters the password). After the menu greeting prompt hplayed, the caller does not respond within a certain amoof time. This is considered a delayed response.
Command entry This timeout value is used in the following situations:
• In an announcement that is accessed directly, the systewill wait this amount of time after playing the announcement, play the announcement a second time,
Standard 1.0 Voice Services Application Guide January 1998

Setting up Meridian Mail for Voice Services 2-7Identifying timeout values
n ase,
t a
se ort
for enu
a g
e
e . If r
or
nd
d
then disconnect the call. This timeout is not used when aannouncement is accessed from a voice menu. In this cthe announcement is played once, and then the caller isreturned to the menu and follows what is defined as the delayed response.
Callers are not really expected to provide input in an announcement. Therefore, this timeout is intended to pulimit on how long a caller will remain connected if he or she stays on the line and does nothing after the announcement is played.
• In a voice menu, this timeout is used for initial no responand delayed response. (The following timeout value, ShDisconnect, is used before a disconnect from a voice menu.)
For voice menus, you can define the action to be taken initial no response and delayed response in the voice mdefinition. Suitable actions include repeating the menu choices prompt, returning the caller to the main menu (inmultilevel menu), or disconnecting the call. (Disconnectinthe call is generally not recommended for initial no response.)
• In a thru-dial service, this timeout is used if the system iswaiting for an initial response (such as an extension number or name after the thru-dial greeting has been played), or if the caller has provided keypad input at sompoint (and, therefore, has a touch-tone phone) but is nowdelaying in providing further input. If the caller has not provided any keypad input and the system times out, thecaller is transferred to the revert DN that is defined for ththru-dial service. If the caller has provided keypad input,the system will play a series of prompts to help the callerthe caller still remains on the line without providing furtheinput, the caller is transferred to the revert DN or is disconnected.
• In the fax information service, a caller may be prompted fan action (such as entering a callback number or extension). If the caller does not respond and the commaentry timeout is exceeded, a help prompt is played. If thecaller still does not respond and the command entry timeout is exceeded again, the prompt is played a secon
Standard 1.0 Voice Services Application Guide January 1998

2-8 Setting up Meridian Mail for Voice Services Identifying timeout values
ed
g
no be
n y the nd
ng
he
time. If the system times out again, the caller is transferrto the revert DN that is defined in the session profile.
The default is 3.5 seconds. You can choose a value between 1.0 and 5.0 seconds.
Note: If you are using a voice menu to accept AMIS networkincalls, set this timeout to the maximum allowed value of five seconds. If this field is set to less than five seconds, an AMIScall may be prematurely disconnected. In addition, the initial response action defined in the voice menu definition should set to something other than revert DN, which is the default. Instead, it could be set to repeat menu choices. Otherwise, aAMIS call that connects to a voice menu may be prematureldisconnected. If the voice menu is password protected, thenvoice menu will never reach the Initial No Response action athe short disconnect timeout will be the timeout value that applies before the call is disconnected.
Short disconnect This timeout value is used in the following situations:
• In a thru-dial service, this timeout is used for disconnectithe thru-dial service.
• In a voice menu, this timeout is used for disconnecting tvoice menu.
Standard 1.0 Voice Services Application Guide January 1998

Setting up Meridian Mail for Voice Services 2-9Identifying timeout values
try ut
Voice menu examples The following examples show how these timeout values are used in a voice menu. In these examples, the Command Entimeout is set to 3.5 seconds and the Short Disconnect timeovalue is 10 seconds.
Initial no response in a voice menu.
Caller dials voice menuaccess DN.
System takes Initial No Response actionas defined in the voice menu.
Voice menu greeting isplayed.
Caller does not respond.System waits 3.5 seconds(Command Entry).
G100595
Standard 1.0 Voice Services Application Guide January 1998

2-10 Setting up Meridian Mail for Voice Services Identifying timeout values
Delayed response in a voice menu.
Caller dials voice menuaccess DN.
Caller is prompted for anaccess password.
Caller enters thepassword.
The menu greeting isplayed.
The Delayed Response action as defined in the voice menu is taken.
The following system prompt is played: “For more information press star.”
The system plays the “Goodbye”prompt and disconnects the call.
Caller does not respond.System waits 3.5 seconds(Command Entry).
Caller does not respond.System waits 3.5 seconds(Command Entry).
Caller does not respond.System waits 10 seconds(Short Disconnect).
G100613
Standard 1.0 Voice Services Application Guide January 1998

Setting up Meridian Mail for Voice Services 2-11Identifying timeout values
er
em nd l he
tem
to
ce
and
ing
You will notice that in a voice menu, callers are given a numbof chances to respond. If the caller has provided an initial response and then delays in providing further input, the systwaits x seconds (the amount of time specified as the CommaEntry timeout). The system takes the action defined for InitiaNo Response in the voice menu definition. After this action, tsystem waits another x seconds and if the caller does not respond, the system prompts the caller to press star for information (this action is not configurable). If the caller still does not respond (by pressing star or any other key), the syswaits y seconds (the amount of time specified as the Short Disconnect value), plays the system “goodbye” prompt, and then disconnects the call.
The default is 10.0 seconds. You may enter a value from 1.030.0 seconds.
Record This timeout value applies to the recording of prompts for voimenus, announcements, and thru-dial services. If during recording, x amount of silence is recorded (the amount of time specified as the record value), the system will disconnect thesession. For example, if an administrator is updating an announcement using the voice prompt maintenance service more than x minutes of silence are recorded (where x is the record timeout value), the system will disconnect the call.
The default is 02:00. You may enter a value from 00:06 to 05:00. This affects all voice services other than voice messagand its associated features (login, call answering, express messaging).
Standard 1.0 Voice Services Application Guide January 1998

2-12 Setting up Meridian Mail for Voice Services Determining maximum prompt sizes
ents
n is nts.
d, a arly the
ll
s
n t.
d, a arly n
Determining maximum prompt sizes
Introduction There are two separate values to define: one for announcemand one for other recordings.
Maximum prompt sizes for announcements
This parameter determines the maximum allowed recording length for announcements only. It does not affect thru-dial greetings or voice menu recordings.
Consider how long your announcements are likely to be. Plaahead for the longest probable announcement. If the defaultnot adequate, change it before you create any announceme
If 80 percent of the maximum prompt size has been recordetone is played to warn that the maximum prompt size has nebeen reached. The following error message is displayed on administration terminal when the maximum is reached: “Recording stopped. The time limit was exceeded.”
The default value is 00:30. You can specify a value between00:30 and 10:00.
Maximum prompt sizes for other recordings
This parameter determines the maximum allowed recording length for voice menu and thru-dial service recordings as weas all voice recordings other than announcements.
This value will most likely be determined by how many choiceyour voice menus will have. If you plan on creating voice menus with nine menu actions, you may need more time thathe default of two minutes to record the menu choices promp
If 80 percent of the maximum prompt size has been recordetone is played to warn that the maximum prompt size has nebeen reached. The following error message is displayed whethe maximum is reached: “Recording stopped. The time limit was exceeded.”
The default value is 02:00. You can specify a value between00:30 and 10:00.
Standard 1.0 Voice Services Application Guide January 1998

Setting up Meridian Mail for Voice Services 2-13Identifying whether any voice services will be used to accept networking calls
e
s. se
ing
n ice
e
Identifying whether any voice services will be used to accept networking calls
Description This step is applicable only if AMIS or Enterprise networking(or both) is installed.
Instead of creating a special VSDN for the AMIS or Enterprisnetworking service, voice menus or thru-dial services can beused to accept incoming AMIS or Enterprise networking callThis means that rather than publishing a new number for thenetworking services, you can publish the number of an existvoice menu or thru-dial service.
However, for a voice service to accept AMIS calls, the Act oAMIS (or AMIS/Enterprise or Enterprise) Initiator Tone field inthe Voice Services Profile screen must be set to Yes. The voservice will react to this tone and transfer the call to the appropriate networking agent. When this field is set to No, thvoice service will ignore the AMIS or Enterprise tone. In this case, a VSDN will have to be configured for the networking service.
Standard 1.0 Voice Services Application Guide January 1998

2-14 Setting up Meridian Mail for Voice Services Identifying whether update logging is required
ever
y DN .
Identifying whether update logging is required
Description When update logging is enabled, a SEER is generated whena VSDN entry, announcement, thru-dial service, time-of-daycontroller, voice menu, voice form, or fax item is added, modified, or deleted. This is a method of keeping track of anchanges made to DNs and services. The SEER specifies theor service ID and whether it was added, modified, or deletedYou may or may not require this level of monitoring.
The default is No.
Standard 1.0 Voice Services Application Guide January 1998

Setting up Meridian Mail for Voice Services 2-15Identifying business hours
the f-
en day
y d in
Identifying business hours
Description What are the regular business hours? The hours specified inVoice Services Profile screen are used as defaults in time-oday controller definitions. You will notice that in the Voice Services Profile, there is no way to indicate “odd” hours. Forexample, the organization may be open on Saturdays betwe10:00 and 3:00, yet you can only specify one set of businesshours. These sorts of exceptions are specified in the time-of-control definition itself.
The default is 08:30 to 17:00.
Note: Changes made to the business hours after a time-of-dacontroller has been created will not change the hours definethe time-of-day controller.
Standard 1.0 Voice Services Application Guide January 1998

2-16 Setting up Meridian Mail for Voice Services Identifying holidays
e-
s
ns
n s ay
.
Identifying holidays
Description This step is necessary if you will be defining and using a timof-day controller. If this is the case, identify the holidays thatare observed by your organization (that is, the holidays for which the organization closes). Up to 20 holidays can be defined. This allows different services to be used for holidayversus business hours or off-hours.
Holidays are defined in the following manner:
1. Specify the start date. The format in which the date is entered depends on format defined in the General Optioscreen (for the customer group).
2. Specify an (optional) end date.
If you specify an end date, it must be later than or the same as the start date.
If you do not specify an end date, the holiday will end othe start date. If the holiday ends on a regular businesday, the holiday will end at the end of the business day(five o’clock, for example). However, if the day on whichthe holiday ends is a nonbusiness day (such as Saturdor Sunday), the holiday will end at the end of the day (midnight).
3. Specify a start time. This is typically the normal start of abusiness day (specified using the 24-hour clock). This parameter must be defined.
4. Specify the holiday (such as Christmas or Good Friday)This can be entered in the Comment field in the Voice Services Profile screen.
Standard 1.0 Voice Services Application Guide January 1998

Setting up Meridian Mail for Voice Services 2-17Configuring the Voice Services Profile
Configuring the Voice Services Profile
Introduction This section describes how to configure the Voice Services Profile. Make sure you have your worksheet on hand.
Procedure: Defining the voice services profile
To define the voice services profile, follow these steps.
Starting Point: The Main menu or the Customer Administration menu (multi-customer systems)
Step Action
1 Select Voice Administration.
2 Select Voice Services Administration.
3 Select Voice Services Profile.
Result: The Voice Services Profile screen is displayed.
4 Change the timeout values and maximum prompt sizes if necessary.
5 Set the Act on AMIS/Enterprise Initiator Tone field to Yes if you plan on using a voice service to accept incoming AMIS or Enterprise networking calls.
Note: If only one of these networking features is installed, then only the name of the installed feature is listed in this field.
Standard 1.0 Voice Services Application Guide January 1998

2-18 Setting up Meridian Mail for Voice Services Configuring the Voice Services Profile
6 Enable update logging if you want a SEER to be generated whenever a DN or service is added, modified, or deleted.
7 Specify the default business hours.
8 Define each holiday on which the organization is closed. Scroll the screen to access additional fields.
9 Choose step 9a to save the changes or 9b to cancel.
a. Use [Save].
Result: The changes are saved, and you are returned to the Voice Services Administration menu.
b. Use [Cancel].
Result: Any changes are discarded, and you are returned to the Voice Services Administration menu.
Step Action
Standard 1.0 Voice Services Application Guide January 1998

Setting up Meridian Mail for Voice Services 2-19Configuring the class of service
s :
.
ber
Configuring the class of service
Introduction In a Call Answering session, one of two personal greetingmay be played to a caller if a mailbox user’s phone is busy
• the mailbox user’s personal verification
• the mailbox user’s mailbox number
Restrictions This feature is available only to MMUI mailbox subscribers
See also You establish whether a caller hears a user’s name or numwhen you configure classes of service.
For more information, see the “Class of Service Administration” chapter in the System Administration Guide for your platform.
Standard 1.0 Voice Services Application Guide January 1998

2-20 Setting up Meridian Mail for Voice Services Configuring the class of service
Standard 1.0 Voice Services Application Guide January 1998

Setting up Meridian Mail for Voice Services 2-21
Section B Display options
In this section
The Set Display Options screen 2-22
Standard 1.0 Voice Services Application Guide January 1998

2-22 Setting up Meridian Mail for Voice Services The Set Display Options screen
lay
e, o
at is
n.
The Set Display Options screen
Introduction The Set Display Options screen allows you to define how information is sorted and displayed on the voice services administration screens. For example, you can choose to dispthe Choice of Menu Actions list on the Add a Voice Menu Definition screen, or you can choose to hide it (if, for examplyou are familiar with the service names and acronyms and dnot need to be reminded of them).
See also For a complete description of the display options, refer to the“Display options” chapter in the Meridian Mail System Administration Guide.
Multi-customer systems
On multi-customer systems, display options can only be set the system administration level. The choices you make in thscreen will apply to all customer groups.
The Set Display Options screen
The following is an example of the Set Display Options scree
Standard 1.0 Voice Services Application Guide January 1998

Chapter 3
Voice announcements
In this chapter
Overview 3-2
How the announcement service handles calls 3-3
A voice announcement scenario 3-5
Section A: Planning an announcement 3-7
Section B: Configuring an announcement 3-19
Section C: Modifying or deleting an announcement 3-35

3-2 Voice announcements Overview
ts
n
y, e d
Overview
Introduction An announcement is a recorded message that is played automatically to callers. Announcements are the simplest of voice services, yet they can be very effective in providing specific and important information for callers. Announcemendo not take input from callers—they simply provide information for the callers.
Why use announcements?
Announcements can be used to off-load employees from answering commonly asked questions. Information such as service hours, schedules, directions, and product informatiocan be recorded, freeing up the time of employees.
Voice announcements can be made available 24 hours a dathus extending service levels beyond the staffed hours. Voicannouncements can be stand-alone applications or organizeinto a voice menu application.
The following is a list of information that is well suited for distribution by an announcement service:
• company mailing address
• health plan benefits
• job openings
• stock quotes
• office closings
• announcements of product sales and specials
• announcements of new products
• equipment status
Standard 1.0 Voice Services Application Guide January 1998

Voice announcements 3-3How the announcement service handles calls
ing ment
f-
hen y a
ugh as
in
e e
r ay
es
nt. re
How the announcement service handles calls
Introduction This section details what a caller will experience when reachan announcement service. Callers can access an announceeither directly by dialing the DN associated with the announcement, or indirectly through a voice menu or time-oday controller.
Direct access When a caller dials an announcement service directly, the announcement is played a set number of times, as defined wcreating the announcement. The announcement is followed b“Good-bye” prompt before the call is disconnected.
Indirect access through a voice menu
If a caller accesses an announcement service indirectly throa voice menu, the message is played a set number of times defined when creating the announcement. After playing the message the call is not disconnected, and the caller remainsthe menus.
The caller can access other menu functions at any time whilconnected to the announcement service. For details on voicmenus and menu functions, see Chapter 5, "Voice menus".
Indirect access through a time-of-day controller
An announcement accessed through a time-of-day controllewill play only at certain times as determined by the time-of-dcontroller design.
Suppose that when your office is closed, you wish to play anannouncement which states your office hours and encouragthe caller to phone when you are open. To do so, you woulddesign a time-of-day controller which connects to the announcement during off-hours.
In this case, the announcement service will respond as if thecaller accessed it directly. The announcement will play a setnumber of times, as defined when creating the announcemeThe announcement is followed by a “Good-bye” prompt befothe call is disconnected.
Standard 1.0 Voice Services Application Guide January 1998

3-4 Voice announcements How the announcement service handles calls
as
f tly
t will
t of
If the caller hangs up or presses keys
The caller, of course, may hang up after hearing the announcement once, or at any time while connected to the announcement service. The system detects that the caller hdisconnected and waits a specified timeout period before disconnecting. The timeout is defined in the Command Entrytimeout field in the Voice Services Profile.
Key pad entry — direct access
No keypad input is required of a caller during the playback oan announcement. If the announcement was accessed direcand the caller presses keys during playback, the keys listed below cause the following actions.
Key pad entry — indirect access
Should the caller press any keys on the telset during an announcement accessed through a menu, the announcemenbe stopped and the caller returned to the voice menu. In addition, the key that was pressed is interpreted in the contexthe voice menu.
Key Result
1–9 The following error message is played:“That selection is not recognized.”
0 Calls the revert DN. If no revert DN is defined, the following error message is played:“That selection is not recognized.”
* and # Cause the announcement to be repeated if the announcement definition allows repeats.
Standard 1.0 Voice Services Application Guide January 1998

Voice announcements 3-5A voice announcement scenario
ds.
tus so
nt.
e for pt
ver
s
f
A voice announcement scenario
Introduction The following scenario illustrates the advantages of using a voice announcement to satisfy business communication nee
Scenario At Peer Enterprises, almost everyone is interested in the staof the printers. This information must be current to be useful,it may need to be updated a number of times a day.
Solution The system administrator decides to create an announcemeWhen employees wish to verify the status of printers, they simply dial the DN published as the “printer hotline.” Once thannouncement has been configured, the person responsiblemaintaining the computer equipment can use the voice prommaintenance service to update the message content whenethe printer status changes.
The announcement at any time might be as follows:
“You have reached the printer status information line. As of Friday at 4:40 p.m., all printers are up, except printer three, which is down. A service call has been placed. If you are experiencing any other problems and need assistance, preszero.”
Features of the printer hotline
The printer hotline announcement service requires certain characteristics to make it effective:
1. The Revert DN should be set to the extension number othe person responsible for maintaining the computer equipment, the same person who is also responsible forupdating the printer hotline announcement.
2. An update password should be set so that the announcement can be updated from a remote phone.
Standard 1.0 Voice Services Application Guide January 1998

3-6 Voice announcements A voice announcement scenario
n
DN
e
pt tting mpt
e
.
ord
r a er
Revert DN The revert DN is the extension number, set when configuringthe announcement, that will ring if a caller hits the 0 key whethe announcement is played. In this case, setting the revert allows employees to report printer problems to the person responsible for both maintaining the printers and updating thprinter hotline announcement.
Update passwordIf you plan to update an announcement using the voice prommaintenance service, you must set an update password. Sethe access password both enables and restricts the voice promaintenance service. If the password is defined, the announcement can be changed using the voice prompt maintenance service if you correctly enter the password. If thpassword is not defined, then you cannot change the announcement using the voice prompt maintenance service
For the printer hotline announcement, set the access passwand convey the password to the employee charged with managing the computer equipment. With the password, he oshe can access the voice prompt maintenance service from remote phone and update the announcement when the printstatus changes.
Standard 1.0 Voice Services Application Guide January 1998

Voice announcements 3-7
Section A Planning an announcement
In this section
Overview of planning an announcement 3-8
Scripting the announcement 3-10
Choosing an announcement ID and title 3-11
Identifying the revert DN 3-12
Choosing passwords 3-13
Silent disconnect 3-14
Setting the number of times the announcement plays 3-15
Choosing the language for system prompts (multilingual systems only)
3-16
Identifying how the announcement will be accessed 3-17
Standard 1.0 Voice Services Application Guide January 1998

3-8 Voice announcements Overview of planning an announcement
plan , e
and em of
ps:
e
).
ix in
rd
Overview of planning an announcement
Introduction Once you have identified information which you would like todeliver using the announcement service, the next stage is to how best to create the announcement. With announcementslike all the voice services, planning is important. Investing timup front planning voice services will pay dividends when actually configuring the different services.
Announcements may be the easiest voice services to designconfigure. Yet, as you create more voice services and link ththrough voice menus or time-of-day controllers, the benefits planning will become apparent.
Process for planning an announcement
Planning an announcement service involves the following ste
1. Script the announcement.
2. Choose an announcement ID and title.
3. Identify the revert DN.
4. Identify necessary passwords.
5. Determine if the silent disconnect should be activated.
6. Determine how many times the announcement should bplayed.
7. Identify the language in which system prompts are to beplayed (if multiple languages are installed on the system
8. Determine how callers will access the announcement.
Announcement Definition Worksheet
The Announcement Definition Worksheet is found in AppendA, “Worksheets.” Use this worksheet as you plan and maintayour announcements. The worksheet contains all the information you require to configure each announcement.
As you plan your announcement, fill in the worksheet. Then,when you are ready to configure the announcement, all you have to do is copy the information into the system, and recothe announcement.
Standard 1.0 Voice Services Application Guide January 1998

Voice announcements 3-9Overview of planning an announcement
te
u
By using the worksheet, you ensure that you have an accurawritten record of all your announcements. Whenever you change an announcement, fill in a new worksheet so that yoalways have the most up-to-date version on file.
Standard 1.0 Voice Services Application Guide January 1998

3-10 Voice announcements Scripting the announcement
ent ent. re is
r, a
, a nu.
“#”
l
l is .
ly to ng u,
Scripting the announcement
Introduction Once you have determined the purpose of your announcemand how it is to be accessed, you can script the announcemRemember that an announcement is a single recording. Theno separate recorded greeting that will be played before theannouncement. All pertinent information (company name, business hours, and so on) needs to be included in the announcement recording.
Direct access and time-of-day controlled announcements
If the announcement will be played to external callers and accessed directly or accessed through a time-of-day controllegreeting should be included within the announcement itself. Also, ensure that your organization is identified so that the caller knows that he or she has dialed the correct number.
Voice menu announcements
If the announcement will be accessed through a voice menugreeting and identification are not necessary. Callers shouldalready have been greeted at the introduction to the voice me
The announcement should inform callers that they can pressto return to the main menu.
Script the announcement
Write the announcement on a piece of paper. Reword it untiyou are satisfied with it. When you are ready to fill in the Announcement Definition Worksheet, copy the final copy of the script into the worksheet.
Off-hours announcement script
The following is a possible announcement script for an off-hours announcement played to callers if they phone Peer Enterprises’ main number when the office is closed. The calrouted to the announcement through a time-of-day controller
“Thank you for calling Peer Enterprises. Our office is presentclosed. Our business hours are Monday to Friday from 8:30 5:30, and Saturday from noon to 5:00. Please call again duribusiness hours and we will be happy to serve you. Thank yoand good-bye.”
Standard 1.0 Voice Services Application Guide January 1998

Voice announcements 3-11Choosing an announcement ID and title
ur ice st
e
r
in
e t.
t to
t
Choosing an announcement ID and title
Announcement ID The announcement ID identifies the announcement within yosystem. The ID number must be unique among all voice servdefinitions. The ID can be up to eight digits in length and muconsist of the numeric digits 0 to 9 only.
You use this ID when you
• need to access the announcement from the perform voicprompt maintenance service
• want to include this announcement in a voice menu
• want to use this announcement in a time-of-day controlle
• create a service DN for the announcement in the VSDNtable
Note for multi-customer systems
For multi-customer systems, the ID need only be unique withthe customer group.
Select an announcement ID
Select a unique announcement ID number and record it in thappropriate field on the Announcement Definition Workshee
Announcement title The announcement title should be descriptive enough so thayou can easily identify the announcement. The title can be up29 characters in length. It cannot include the characters “+”, “?”, and “_”.
Choose an announcement title
Select an announcement title and record it in the appropriatefield in the Thru-Dial Definition Worksheet. Choose a title thadescribes the function of the announcement.
Standard 1.0 Voice Services Application Guide January 1998

3-12 Voice announcements Identifying the revert DN
ou ar
e
ers ou ny
Identifying the revert DN
Introduction A revert DN is optional, though recommended. When callerspress 0 during playback, they are routed to the revert DN if yhave specified one. If no revert DN is specified, callers will hethe following message if they press 0: “That selection is not recognized.”
The revert DN can be up to 30 characters in length. The following characters are acceptable.
The formatting characters can be used to make the screen display easier to read. (These characters only show up in thscreen; they do not generate any corresponding tones.) For example, it is easier to decipher 9-(416)-555-1212 than 94165551212. Note that the first character cannot be $.
Formatting character compatibilityCommon carriers may use some of these formatting charactfor other purposes. For example, number sign (#) is used bySkyPager as the numeric pager data terminator character. Ymay want to contact your common carrier to see if they use aof the other formatting characters.
Character Function
0–9 Dialed digits
# Dialed if present in the field
* 3-second pause in dialing
$ Formatting purposes only
( ) Formatting purposes only
_ Formatting purposes only (underscore)
- Formatting purposes only (hyphen)
spaces Formatting purposes only
Standard 1.0 Voice Services Application Guide January 1998

Voice announcements 3-13Choosing passwords
th it: onal.
ear , nt.
te
Choosing passwords
Introduction Each announcement can have two passwords associated wian access password and an update password. Both are opti
The access passwordUse an access password to restrict caller access to an announcement. This can be used in the case of classified information to ensure that only those who are authorized to hthe announcement can gain access. If a password is definedcallers will be prompted for it before hearing the announcemeWithout a valid password, they will be denied access to the announcement.
The access password must be between 4 and 16 numeric characters in length. Spaces are not allowed. The access password can be 0 to 16 numeric characters in length for a customer that uses VMUIF and is a residential service.
The update passwordIf you are planning on using the voice prompt maintenance service to update announcements, you must define an updapassword. If the update password is not defined, the voice prompt maintenance service cannot be used to update the announcement. You will only be able to modify the announcement from the administration screen.
The update password must be between 4 and 16 numeric characters in length. Spaces are not allowed. The update password can be 0 to 16 numeric characters in length for a customer that uses VMUIF and is a residential service.
Standard 1.0 Voice Services Application Guide January 1998

3-14 Voice announcements Silent disconnect
r
d
Silent disconnect
Introduction When silent disconnect is enabled, the system “Good-bye” prompt is not played when a caller is disconnected from the announcement. If your Meridian Mail system is a front end focall center applications, this allows announcements to be integrated into the call center where high volumes of inbouncalls are given a variety of treatments.
After leaving an announcement, a caller may be passed to aqueue for holding or to an Interactive Voice Response (IVR)application. In this case, the announcement is not the terminating application. If the caller hears the “Good-bye” prompt in this situation, he or she may hang up prematurely.
If the announcement is the terminating application, silent disconnect should be disabled. When the caller disconnectsfrom the announcement, the system plays the “Good-bye” prompt to indicate that the end of the application has been reached.
Default setting Silent disconnect is disabled by default.
Standard 1.0 Voice Services Application Guide January 1998

Voice announcements 3-15Setting the number of times the announcement plays
he
n it
fore for d
f it ent
u ed s.
ent the e
f it the
Setting the number of times the announcement plays
Introduction There are two values for defining the number of times an announcement is played. One defines the number of times tannouncement is played to direct access callers. The other defines the number of times the announcement is played wheis accessed through a voice menu.
Number of times to play if accessed directlyYou can set the number of times the announcement plays bethe caller is disconnected to between 1 and 10. The default announcements accessed directly is 2. For more complicatemessages where callers might wish to write down the information, you might wish to increase the number.
Determine the number of times the message will be played iis accessed directly, and enter the number in the AnnouncemDefinition Worksheet.
Number of times to play if accessed through a voice menuIf announcements are accessed through a voice menu, the default number of times the announcement is played is 1. Yocan increase the number of times the announcement is playbefore the caller is returned to the voice menu up to 10 time
Whatever the setting for the number of times an announcemis set to play, the caller can reach the revert DN by pressing0 key or return to the voice menu by pressing the appropriatkeys.
Determine the number of times the message will be played iis accessed through a voice menu, and enter the number in corresponding field in the Announcement Definition Worksheet.
Standard 1.0 Voice Services Application Guide January 1998

3-16 Voice announcements Choosing the language for system prompts (multilingual systems only)
on
Choosing the language for system prompts (multilingual systems only)
Description This is necessary only if more than one language is installedthe system. If this is the case, select the language in which system prompts are to be played. (Note that this is not a translation of the announcement.)
Standard 1.0 Voice Services Application Guide January 1998

Voice announcements 3-17Identifying how the announcement will be accessed
ent
, it is e
e
he the r ber
l DN.
ice .
o
e
Identifying how the announcement will be accessed
Introduction As previously mentioned, callers can access an announcemeither directly or indirectly. How the caller accesses the announcement affects both how the announcement is configured and the actual recorded announcement. Becausemany factors depend on how the announcement is accesseda good idea to determine how callers will access the messagfirst.
Of course, the purpose of the announcement will suggest thappropriate method of access.
Direct access announcements
With a direct access announcement, a caller accesses an announcement by dialing a DN specifically associated with tannouncement. The caller has limited options; the caller canlisten to the announcement, or press zero and be directed torevert DN if one is defined for the announcement. If the calledoes nothing, the announcement is played the specified numof times, and then the caller is disconnected.
Often with direct access, the announcement is the only interaction the caller will have with your telephone system. Inthis case, the announcement should begin with a welcominggreeting.
Examples of direct access announcements
Direct Dial DNAnnouncements which are meant to provide specific information to a known audience are best suited to direct diaannouncements. The callers must know the announcement
The example above of the printer hotline announcement servis a good example of a direct dial announcement applicationBecause it is an announcement for employees, it is easy to distribute the direct dial number for the announcement and tprovide the service.
Indirect access announcements
A caller can access announcements indirectly through a voicmenu or through a time-of-day controller.
Standard 1.0 Voice Services Application Guide January 1998

3-18 Voice announcements Identifying how the announcement will be accessed
he o ent
the
g.
ome lers ar.
a
ller
ime-
e, is ment
the
Indirect access through a voice menu
A caller accesses an announcement indirectly by choosing tannouncement option from a voice menu. While connected tthe announcement, the caller is able to leave the announcemand return to the voice menu.
When creating an announcement for access through a voicemenu, it is not necessary to include a welcoming greeting in announcement. In fact, a greeting would be inappropriate because the voice menu introduction would include a greetin
Example of voice menu access to an application
If you have a number of announcements that are related in sway (for example, they all relate to a particular product line),you can create a voice menu as a front end to allow your calto choose which product line announcement they wish to hePublish the number of the voice menu to your customers.
Indirect access through a time-of-day controller
If you wish to direct callers to an announcement only during certain time of the day, then you can route calls to the announcement through a time-of-day controller. An announcement accessed through a time-of-day controller behaves much like an announcement accessed directly. A cawould be unable to distinguish between a direct dial announcement and an announcement accessed through a tof-day controller.
Example of time-of-day controller access to an announcement
If no one is in your office during off-hours to answer the phonyou can set up an announcement which says that the office closed and states the business hours. To have the announceplayed to all callers, configure a time-of-day controller whichdirects all calls to the announcement during the off-hours.
Callers will automatically hear the announcement the set number of times, and then be disconnected. In this scenario,announcement should include a welcome greeting which identifies your business. As well, the Silent Disconnect field should be set to No so that the good-bye prompt is played before the caller is disconnected.
Standard 1.0 Voice Services Application Guide January 1998

Voice announcements 3-19
Section B Configuring an announcement
In this section
Overview of configuring an announcement 3-20
The Announcement Definitions data menu 3-22
Adding a new announcement 3-24
Recording the announcement 3-28
Making the announcement accessible 3-31
Testing the announcement 3-34
Standard 1.0 Voice Services Application Guide January 1998

3-20 Voice announcements Overview of configuring an announcement
s:
u
ent
his se Ns,
, or enu
ded ,
s
th
Overview of configuring an announcement
Introduction This section outlines the steps required to add a voice announcement. Refer to your Announcement Definition Worksheet in Appendix A, “Worksheets,” as you follow the procedures in this section.
Process for adding an announcement service
Adding an announcement service involves the following step
• Adding a new announcement definition
• Recording the announcement
• Making the announcement accessible
• Testing the announcement
Announcement Definitions screen
For a description of the Announcement Definitions data menscreen, see “The Announcement Definitions data menu” on page 3-22. This screen provides a list of existing announcemservices.
Tip: Voice Services first, VSDNs later
An announcement can be added to the system without a corresponding DN having been defined in the VSDN table. Tgives you greater flexibility when creating applications becauyou are free to create announcements first and then assign Dor vice versa. However, you must ensure that all announcements have a corresponding DN in the VSDN tableare associated with another voice service (such as a voice mor time-of-day controller). The system does not perform any sanity checking to guard against the possibility of an orphanservice definition (in other words, a service ID that does not have a corresponding VSDN).
Multi-customer administration
On multi-customer systems, announcements can only be adat the customer administration level. However, once createdthey can be viewed, modified, or deleted from the system administration level.
Starting points for procedures
On multi-customer systems, customer administration screenare invoked from the Customer Administration menu. Therefore, the starting point for some procedures refer to bo
Standard 1.0 Voice Services Application Guide January 1998

Voice announcements 3-21Overview of configuring an announcement
the r
r
the Main Menu (applicable to single-customer systems) and Customer Administration menu (applicable to multi-customesystems).
ATTENTION
Do not perform voice services administration during the nightly DR audit.
At 3:30 a.m. every day, an audit of the DR directory is performed. Do not add, modify, or delete voice service definitions during this audit. Depending on how unbalanced the system is, this audit can take anywhere from ten minutes (if the system has not been modified since the last audit) to two hours (if there have been manychanges, such as a lot of users or services being added omodified).
Standard 1.0 Voice Services Application Guide January 1998

3-22 Voice announcements The Announcement Definitions data menu
you
g
The Announcement Definitions data menu
Introduction The Announcement Definitions data menu lists all the configured announcements on the system. From this screencan also do the following:
• add a new announcement (see “Adding a new announcement” on page 3-24)
• view or modify an existing announcement (see “Modifyinan announcement” on page 3-37)
• delete an existing announcement (see “Deleting an announcement” on page 3-39)
The screen The following is an example of an Announcement Definitionsdata menu.
Standard 1.0 Voice Services Application Guide January 1998

Voice announcements 3-23The Announcement Definitions data menu
Procedure: Accessing the screen
To access the Announcement Definitions data menu, follow these steps.
Starting Point: The Main menu or the Customer Administration menu (on multi-customer systems)
Step Action
1 Select Voice Administration.
Result: The Voice Administration menu is displayed.
2 Select Voice Services Administration.
Result: The Voice Services Administration menu is displayed.
3 Select Announcement Definitions.
Result: The Announcement Definitions data menu is displayed.
Standard 1.0 Voice Services Application Guide January 1998

3-24 Voice announcements Adding a new announcement
ate
Adding a new announcement
Introduction This section and the sections that follow describe how to crea new announcement service. This process involves the following steps:
1. adding a new announcement definition
2. recording the announcement
3. making the announcement accessible
4. testing the announcement
Standard 1.0 Voice Services Application Guide January 1998

Voice announcements 3-25Adding a new announcement
he o ou
Procedure: Adding an announcement definition
Adding an announcement definition requires that you input tinformation from the Announcement Definition Worksheet intthe Meridian Mail system. Have your worksheet nearby as yfollow these steps.
To add an announcement definition, follow these steps.
Starting Point: The Voice Services Administration menu
Step Action
1 Select Announcement Definitions.
Result: The Announcement Definitions screen is displayed.
2 Press the [Add] softkey.
Result: The Add an Announcement Definition screen is displayed.
3 Fill in the fields using the information recorded on your announcements worksheet. Keep in mind that the Revert DN field and the password fields are optional and can be left blank.
4 If you are satisfied with the information you have entered, press the [Save] softkey. Otherwise, press [Cancel] to discard the announcement.
Result: Whether you save or cancel, you are returned to the Announcement Definition screen.
Standard 1.0 Voice Services Application Guide January 1998

3-26 Voice announcements Adding a new announcement
r. o
e
to
of r
Field descriptions The following fields appear in the Add an Announcement Definition screen.
Announcement ID
Description The Announcement ID must be a unique numbeOn a multi-customer system, the ID only needs tbe unique in the customer group.
Title
Description The announcement Title should indicate what thannouncement does. For example, an announcement related to current printer status might be called “Printer Hotline.”
Revert DN
Description The DN to which callers are transferred under particular circumstances.
Access Password
Description The access password restricts access to the announcement. This field should be left blank if you want to make the announcement accessibleall users.
Update Password
Description The Update Password allows you to update the announcement from a remote location using the Voice Prompt Maintenance Service.
Silent disconnect after direct access
Description If this field is set to Yes, the announcement terminates without playing the system “Good-bye” prompt.
Number of times to play if accessed directly
Description This field applies only to direct-access announcements. This field specifies the number times an announcement will play before the calleis disconnected.
Standard 1.0 Voice Services Application Guide January 1998

Voice announcements 3-27Adding a new announcement
ed
t
Number of times to play if accessed via a menu
Description This field applies only to announcements accessthrough a voice menu. This field specifies the number of times an announcement will play before the caller is returned to the voice menu.
Announcement Recorded (Voice)
Description This read-only field shows if the announcement has been recorded. No means the announcemenhas not been recorded.
Language for prompts
Description If more than one language is installed, this field displays the language for the announcement prompts.
Standard 1.0 Voice Services Application Guide January 1998

3-28 Voice announcements Recording the announcement
it
e
ent , nt.
om
Recording the announcement
Introduction This section describes the process for recording an announcement. An announcement cannot be recorded until has been defined as described in the section“Adding a new announcement” on page 3-24.
How to record announcements
Announcements can be recorded in one of two ways: from thadministration terminal using the [Voice] softkey, or from a remote DTMF telephone set using the Voice Prompt Maintenance service.
Voice softkeyTo record the announcement using the [Voice] softkey, you must be logged on to the Administration Terminal and have access to a telephone.
Voice prompt maintenanceIf you configured the announcement so that the announcemcan be accessed from the voice prompt maintenance servicethen you can use a remote phone to record the announceme
If the environment around your terminal is noisy, you may prefer to use the voice prompt maintenance service to call fra phone in a quiet location. For details on the voice prompt maintenance service, see Chapter 9, "Voice prompt maintenance and remote activation".
Standard 1.0 Voice Services Application Guide January 1998

Voice announcements 3-29Recording the announcement
an
Procedure: Recording the announcement with the [Voice] softkeyYou can record the announcement from two screens: the AddAnnouncement Definition Screen or the View/Modify Definition screen. Both screens are accessed from the corresponding softkeys available from the Announcement Definitions data menu.
To record the announcement, follow these steps.
Starting Point: The Add an Announcement Definition screen or the View/Modify an Announcement Definition screen
Step Action
1 Press the [Voice] softkey.
Result: You are prompted for a phone number.
2 Enter the number for the phone you will use to record the announcement.
Result: The phone you specified will ring.
3 Pick up the telephone handset.
Result: The following recording softkeys are displayed.
4 Press the [Record] softkey.
Result: A beep will sound when it is OK to record.
Standard 1.0 Voice Services Application Guide January 1998

3-30 Voice announcements Recording the announcement
5 At the sound of the beep, record the announcement. When finished recording, press the [Stop] softkey.
Result: The following softkeys are redisplayed.
Note: The recording stops automatically if you exceed the Maximum Prompt Size or the Record Timeout set in the Voice Services Profile.
6 Follow step 6a to review the announcement, or step 6b to disconnect the call.
a. Use the [Play] softkey to play the recording, [Delete] to delete the recording, or [Delete] followed by [Record] to rerecord the announcement.
b. To disconnect the call, press the [Disconnect] softkey, or just hang up the phone and press return.
Result: The original softkeys are redisplayed.
7 Press [Save] to save the recording and the announcement definition.
Step Action
Standard 1.0 Voice Services Application Guide January 1998

Voice announcements 3-31Making the announcement accessible
of
at to
n
Making the announcement accessible
Introduction You can make an announcement accessible to callers in onethree ways:
• direct access
• indirect access through a voice menu
• indirect access through a time-of-day controller
Direct access Callers access the announcement by dialing a special DN thconnects them directly to the announcement. The proceduremake announcements accessible directly involves creating aDN in the VSDN table for the announcement.
This procedure assumes that there are available ACD DNs othe Meridian 1 (or line DNs if your system is connected to a DMS switch).
Standard 1.0 Voice Services Application Guide January 1998

3-32 Voice announcements Making the announcement accessible
Procedure: Making an announcement directly accessible
Starting Point: The Voice Services Administration menu
Step Action
1 Select Voice Services-DN Table.
Result: The Voice Services-DN Table is displayed.
2 Press the [Add] softkey.
Result: The Add DN Information screen appears.
3 Enter the Access DN. This is the number that callers will dial to access the announcement. Get the DN from your switch administrator, or print the directory number block (DNB) at the switch to obtain an unused DN.
Note: The Access DN cannot match a mailbox number.
Standard 1.0 Voice Services Application Guide January 1998

Voice announcements 3-33Making the announcement accessible
n the
nu, ber
e f-
n
ay
Indirect access through a voice menu
Callers dial the DN of a voice menu. The announcement is presented as one of the menu choices and is accessed whecaller presses the appropriate key.
You can either add an announcement to an existing voice meor create a new voice menu to serve as a front end to a numof announcements. See Chapter 5, "Voice menus".
Indirect access through a time-of-day controller
You can set up a time-of day controller that directs calls to thannouncement. Any one of the three time periods in a time-oday controller ID (Business Hours, Off-Hours, or Holiday) cabe associated with an announcement ID.
Set up the announcement first. Then create a new time-of-dcontroller, or modify an existing one, to direct calls to the announcement.
For instructions on planning and creating a time-of-day controller, see Chapter 8, "Time-of-day controllers".
4 Enter AS in the Service field.
Result: An additional field, Announcement ID, is displayed.
5 Enter the announcement ID in the Announcement ID field.
6 Enter a comment.
Note: This step is optional, but a comment that identifies the announcement is useful here.
7 Press the [Save] softkey to save the VSDN Table.
Step Action
Standard 1.0 Voice Services Application Guide January 1998

3-34 Voice announcements Testing the announcement
e
ed.
st a
the
pt
Testing the announcement
Introduction It is important to test the announcement before you make thannouncement service available to callers. Testing simply involves making sure the announcement works as you intend
Testing the announcement
When you have finished configuring the announcement and have defined the VSDN through which it will be accessed, teit. To test the announcement, dial the announcement DN fromphone and verify the following:
• Is the wording of the announcement satisfactory?
• Is the quality of the voice acceptable?
• If you have defined a revert DN, press 0 during announcement playback to see if you are transferred to correct DN.
• If you have defined an update password, test the voice prompt maintenance service. See Chapter 9, "Voice prommaintenance and remote activation".
Standard 1.0 Voice Services Application Guide January 1998

Voice announcements 3-35
Section C Modifying or deleting an announcement
In this section
Overview of modifying or deleting an announcement 3-36
Modifying an announcement 3-37
Deleting an announcement 3-39
Standard 1.0 Voice Services Application Guide January 1998

3-36 Voice announcements Overview of modifying or deleting an announcement
tion
Overview of modifying or deleting an announcement
Introduction This section provides procedures for modifying and deletingannouncements.
Multi-customer administration
On multi-customer systems, you can modify and delete announcements at either the system or customer administralevel.
Standard 1.0 Voice Services Application Guide January 1998

Voice announcements 3-37Modifying an announcement
the s
-e
n".
Modifying an announcement
Introduction You can modify an announcement in three different ways:
• Modify the announcement definition.
• Update the announcement recording.
• Modify the access to the announcement.
While an announcement is being updated, the old version ofannouncement is still played to callers. The new version takeeffect after the updated announcement has been saved.
Tip: Modifying the recorded announcement
You can modify the recorded announcement from any touchtone phone using the Voice Prompt Maintenance service. SeChapter 9, "Voice prompt maintenance and remote activatio
Procedure To modify an announcement definition, follow these steps.
Starting Point: The Voice Services Administration menu
Step Action
1 Select Announcement Definitions.
Result: The Announcement Definitions screen is displayed.
2 Move the cursor to the announcement definition you want to view or modify.
3 Press the <spacebar> to select it.
Standard 1.0 Voice Services Application Guide January 1998

3-38 Voice announcements Modifying an announcement
4 Press the [View/Modify] softkey.
Result: The View/Modify an Announcement Definition screen is displayed.
For a description of the fields in this screen, see “Field descriptions” on page 3-26.
5 Modify the announcement definition as required.
6 Modify the voice recording if required. Use the [Voice] softkey.
7 If you are satisfied with the information you have entered, press the [Save] softkey. Otherwise, press [Cancel] to discard the changes. If you changed the recording and you now press [Cancel], the announcement reverts to the previously saved recording.
Result: Whether you save or cancel, you are returned to the Announcement Definitions screen.
Step Action
Standard 1.0 Voice Services Application Guide January 1998

Voice announcements 3-39Deleting an announcement
ent e
ice
ent
ure
Deleting an announcement
Introduction Announcements are deleted from the Delete an AnnouncemDefinition screen. The fields in this screen are read-only. If thannouncement is currently being modified through the voiceprompt maintenance service, you cannot delete the announcement until it has been saved.
Announcements associated with a voice menu or time-of-day controller
If the announcement you are deleting is associated with a vomenu or time-of-day controller, be sure to modify the appropriate definitions to account for the absence of this announcement (that is, remove references to this announcemID within the voice menu or time-of-day controller definition).If the announcement is associated with an entry in the VSDNtable, be sure to delete it. VSDNs must not point to deleted services. The system does not perform a sanity check to ensagainst this.
Procedure To delete an announcement definition, follow these steps.
Starting Point: The Voice Services Administration menu
Step Action
1 Select Announcement Definitions.
Result: The Announcement Definitions screen is displayed.
2 Move the cursor to the announcement definition you want to delete.
3 Press the <spacebar> to select it.
Standard 1.0 Voice Services Application Guide January 1998

3-40 Voice announcements Deleting an announcement
4 Press the [Delete] softkey.
Result: The announcement definition is displayed under the heading Delete an Announcement Definition, and new softkeys are displayed. This screen is displayed so that you can see which announcement definition you have selected to delete.
5 Review the announcement definition to make sure you are deleting the right announcement.
6 Press the [OK to Delete] softkey to delete the announcement, or press [Cancel] to exit this screen without deleting.
Result: Whether you delete or cancel, you are returned to the Announcement Definitions screen.
7 If the announcement was associated with a DN in the VSDN table, go to the VSDN table and delete the DN.
If the announcement was associated with a voice menu or time-of-day controller, go to the appropriate service definition and delete references to the announcement.
Step Action
Standard 1.0 Voice Services Application Guide January 1998

Chapter 4
The thru-dial service
In this chapter
Overview 4-2
What is a thru-dial service? 4-3
How a thru-dial service handles calls 4-6
Thru-dial examples 4-8
Security issues 4-11
Monitoring for hackers 4-13
Section A: Planning a thru-dial service 4-15
Section B: Configuring a thru-dial service 4-39
Section C: Modifying or deleting a thru-dial service 4-57

4-2 The thru-dial service Overview
en e
s on
w ch
r it ial
. The ich
an l nes
Overview
Introduction A thru-dial service performs basic call handling. Thru-dial services allow callers to direct their own calls. Their primary function is to prompt a caller for an extension number and thplace the call to that number. Alternatively, you can create athru-dial service that prompts a caller for a person’s name, inwhich case the caller spells out the name using the telephonkeypad.
You can also give the caller the option to enter either an extension number or a name. This is useful because it allowcallers who may know a person’s name but not their extensito get through to the person using the thru-dial service. If a caller is only allowed to enter an extension and does not knoit, the caller will have to press 0 to access the revert DN whimay be a live attendant.
Why use the thru-dial feature?
A thru-dial service can reduce the need for live attendants, ocan be used to back up live attendants at peak times. Thru-dservices are often created as part of an automated attendantmost basic of automated attendants is a thru-dial service whprompts callers for the information to direct the call.
A second significant benefit of thru-dial services is that they cextend the hours for business communication beyond typicabusiness hours because they permit callers to reach the phoand voice mailboxes of employees 24 hours a day.
Standard 1.0 Voice Services Application Guide January 1998

The thru-dial service 4-3What is a thru-dial service?
en
rs
es
g l e
ed to
-
What is a thru-dial service?
Introduction A thru-dial service performs basic call handling. Its primary function is to prompt a caller for an extension number and thplace a phone call.
Types of thru-dial services
A thru-dial service places a call from Meridian Mail for the caller. The thru-dial service must be controlled to limit the ability of callers to make unauthorized calls from Meridian Mail.
You do not want to create a thru-dial service that allows calleto place unrestricted long distance calls with your thru-dial service. To prevent unauthorized long distance calls throughthru-dial services, Meridian Mail allows you to set restriction/permission codes which restrict the allowable calls for each thru-dial. For example, you might set up three thru-dial servicto allow the following:
• in-house calls only
• in-house and local calls only
• in-house, local, ESN, and long-distance calls
These types of thru-dial services are created by specifying which dialing codes are restricted and which codes are permitted. In the first example, 9 would be a restricted dialincode. This would prevent callers from dialing 9 to make locacalls, 90 for operator-assisted calls, 91 to make long distanccalls, or 9011 to make international calls.
Each thru-dial service can be used as many times as you newithin different applications. For example, any time you needallow callers to place local calls from within an automated attendant or voice menu, simply refer to the appropriate thrudial service.
Standard 1.0 Voice Services Application Guide January 1998

4-4 The thru-dial service What is a thru-dial service?
l
ers
le.
he es g.
he a y
Restricting access to thru-dial services that allow long distance calls
The access numbers of thru-dial services that allow long distance calling are generally not published to everyone, butonly to select personnel. You can also protect these thru-diaservices by defining an access password. The thru-dial service can only be accessed if the caller enters this password.
Dialing methods For each thru-dial service, you can specify how the caller entthe number to be dialed. The choices are the following:
• name dial
• extension dial
• both name or extension dial
Fixed or variable DN length
You can also specify whether the DN length is fixed or variab
Fixed DN lengthIf the DN length is fixed, the thru-dialer places the call when tset number of digits have been entered. The number sign donot need to be entered to indicate that you are finished dialin
Variable length DNsIf the DN length is variable, the number of digits required by tthru-dial service to place the call is not fixed. When enteringvariable length DN, you must signify the end of the number bentering the number sign (#). All name dial thru-dial servicesare set to accept variable length entries.
ATTENTION
Apply restriction codes to all thru-dial services.
Because of the potential for unauthorized access to the system, it is very important that you apply the appropriate restriction codes to all of your thru-dial services to prevent unauthorized people from placing long distance calls.
Standard 1.0 Voice Services Application Guide January 1998

The thru-dial service 4-5What is a thru-dial service?
of le, u
ers ront
ial
Left pad characters If the thru-dial service is going to be used to dial extensions the same length and with the same starting digits (for exampnetwork calls that always begin with the same site prefix), yocan specify a string of left pad characters. If left pad charactare defined, the thru-dial service inserts these characters in fof the numbers entered before dialing the DN.
Left pad characters are only relevant for extension dial thru-dservices.
Standard 1.0 Voice Services Application Guide January 1998

4-6 The thru-dial service How a thru-dial service handles calls
hru-u, a
t d ru-
ny.
ial
sion
ave
In
How a thru-dial service handles calls
Introduction This section details what a caller experiences when using a tdial service. The service can be reached from a voice mentime-of-day controller, or directly. Typically, thru-dial servicesare not dialed directly but are part of an automated attendanbuilt using voice menus or time-of-day controllers or both, anthe caller does not realize that he or she is connected to a thdial service.
In the following explanation of the thru-dial service, it is assumed that the caller has dialed directly to the thru-dial service. As such, the prompts for the dialer must include a greeting which welcomes the caller and identifies the compa
When a caller reaches a thru-dial service, the caller typicallyhears a prompt requesting information needed for the thru-dservice to place the call. The format for the requested information depends on the thru-dial service definition. In thefollowing case (extension dial thru-dial service with variable length DN), the following prompt requests the extension number followed by the character key number sign (#).
“Thank you for calling Nadir Enterprises. If you know the extension of the person you wish to speak to, enter the extennumber followed by number sign. If you do not know the extension number, press 0 to connect to an operator. If you ha rotary phone, please wait on the line and someone will be with you shortly.”
The caller enters the number followed by number sign and Meridian Mail places the call to the specified extension.
Example The following diagram shows the flow of a call to a thru-dial service. The thru-dial service requires the caller to enter the extension number for the person he or she wishes to reach. this case, if the caller knew only the name of the person, thecaller would press zero to connect to the attendant.
Standard 1.0 Voice Services Application Guide January 1998

The thru-dial service 4-7How a thru-dial service handles calls
m
Once the call has been placed, the caller is disconnected frothe thru-dial service.Thru-dial service
“Thank you for calling Nadir Enterprises.If you know the extension of the person you wish to speak to, enter the extensionnumber followed by number sign. If youdo not know the extension number,press 0 to connect to an operator. Ifyou have a rotary phone, please wait onthe line and someone will be with youshortly.”
Meridian Mail calls extension 2338.
The caller enters a user'sextension number.
Caller dials the thru-dial service access DN.
G100592
Standard 1.0 Voice Services Application Guide January 1998

4-8 The thru-dial service Thru-dial examples
ws t is
de is cal
ate
n er at
d
g
ith sed
ly
Thru-dial examples
Introduction This section provides two examples of how you might use a thru-dial service to make dialing easier or more efficient.
Use this section to provide you with ideas on how to design your thru-dial service. Then follow the steps in Section A: Planning a thru-dial service on page 4-15.
Network site example This example shows how to plan a thru-dial service that allocallers to reach someone at your site or at a remote site thaconnected through a network.
ScenarioYour site and another site in the organization are on the ESNnetwork. Employees at your site communicate with the employees at the remote site frequently. The ESN access co6 and the ESN prefix of the remote site is 775. (Therefore, lousers enter numbers in the format 6775XXXX.) To make it more convenient for employees to call this other site, you crea thru-dial service using pad characters.
SolutionCreate a thru-dial service with a fixed DN length of eight characters. The left pad characters are 6775. Local users caaccess the thru-dial service and enter the extension of the usthe remote site (XXXX).
Quick dial example Callers who frequently use a thru-dial service that is accessethrough a voice menu do not want to have to touch a key to access the thru-dial feature first. They just want to start dialinthe extension.
Suppose that the DNs for all users at your local site begin w2, 3, or 4. You can create a quick dial thru-dial service accesfrom a voice menu which allows callers to combine the voicemenu choice with the thru-dial extension data so that callersonly have to enter the DN for the person they wish to reach.
The voice menu prompt for the quick dial service requires onthe following instruction:
Standard 1.0 Voice Services Application Guide January 1998

The thru-dial service 4-9Thru-dial examples
d
set y
e.
ch
the
-
to
a ee
ller
ials
“If you know your party’s extension, start dialing now.”
Of course, you may need a greeting before the instruction anan option for callers who do not know the extension of the person they wish to call.
Solution To create this service, you build a voice menu front end andthe menu options which correspond to the first number of anlocal DNs to a unique thru-dial service. The following steps outline the process for creating the quick dial thru-dial servicIt actually requires three separate thru-dial services.
• Build the voice menu and assign a thru-dial service to eaof the digits 2, 3, and 4. See Chapter 5, "Voice menus".
• Create three thru-dial services to correspond to each of digits 2, 3, and 4 respectively.
- For the service assigned to key 2 in the menu, fix theDN length (to four in this example). The left pad character is 2.
- For the service assigned to key 3 in the menu, fix theDN length (to four). The left pad character is 3.
- For the service assigned to key 4, fix the DN length (four). The left pad character is 4.
- For each of the thru-dial services configured, record greeting and set the Suppress Prompt field to Yes (s“Identifying whether the prompt/greeting should be suppressed” on page 4-29). This ensures that the cais not interrupted by an initial thru-dial greeting. But ifthe caller has a problem with the number, or stops dialing and has to start over, the greeting is heard.
When a caller reaches the quick dial thru-dial serviceWhen a caller dials the quick dial thru-dial service, which is avoice menu, the caller hears the menu greeting and the instruction prompt to enter the DN. When the caller starts dialing 2339 for example, the 2 selects the thru-dial service assigned to key 2. The 339 completes the DN. The thru-dialservice puts the left pad character 2 in front of the 339, and d2339.
Standard 1.0 Voice Services Application Guide January 1998

4-10 The thru-dial service Thru-dial examples
e al
Extending the quick dial thru-dial serviceTo make the quick dial service functional for all callers, you need to include the following:
• a voice menu greeting which welcomes the caller
• an option for callers who do not know the extension of thperson they wish to reach—perhaps a name dial thru-diservice, or a Revert DN which connects them to a live attendant
Standard 1.0 Voice Services Application Guide January 1998

The thru-dial service 4-11Security issues
se u
m n
d t
em-
to It
e in s
Security issues
Introduction Because thru-dial services allow callers to dial calls directly from Meridian Mail, thru-dials are a potential site for system abuse by legitimate Meridian Mail users or phone hackers. Uthe security features available to you in Meridian Mail and yocan all but eliminate the risk of system abuse.
See also For additional instructions on securing your system, see the “Setting up Meridian Mail security” chapter in the Meridian Mail System Administration Guide for your platform.
Security features The following is a list of features for ensuring that your systeremains secure. The access password feature is described opage 4-21. The other features are described in detail in the Meridian Mail System Administration Guide:
• Restriction/Permission codes
• Hacker Monitoring
• Voice Security Options screen
• Access password for any thru-dial service which permitscalls to leave the local switch
These features can virtually eliminate the risk of unauthorizeuse of Meridian Mail. However, other areas of security cannobe ignored, including the development and practice of a systwide policy on user passwords.
Before configuring any thru-dial services, it is very important identify how the thru-dial service will affect system security. is also recommended that you obtain approval from the organization first. Before you configure a thru-dial service, carry out the following steps:
• Review the class of service configuration of the ACD agents on the switch.
Although the restrictions/permissions of a thru-dial servicmay deny/allow specific access, the restrictions defined the PBX will ultimately determine whether those accessewill be allowed.
Standard 1.0 Voice Services Application Guide January 1998

4-12 The thru-dial service Security issues
and en
the
ery be fore
tion/
se, ion
ff
nel.
ed
• Identify the organization’s thru-dial policies.
Make sure the organization understands the advantagesdisadvantages of allowing thru-dial access, especially whthat access allows outbound calling.
• Review the Restriction/Permission Lists screen.
Four sets of restriction/permission codes are defined in Restriction/Permission Lists screen (at the system administration level for multi-customer systems). Their default names are “On Switch,” “Local,” “Long Distance 1,” and “Long Distance 2.”
Since you must assign a restriction/permission set to evthru-dial service you create, one of the existing sets mayadequate. Review what types of calls each set allows beyou begin. If none of the existing restriction/permission sets are adequate, you can create a custom set of restricpermission codes.
Most thru-dial services you use will probably only allow callers to dial extensions that are on the switch. In this camake sure you apply the appropriate restriction/permisscodes to ensure security.
If you are going to use thru-dial services that allow calls othe PBX (local, long distance, international dialing, or ESN), the following precautions should be followed:
• Assign an access password to the thru-dial service.
Give out the access password only to authorized personWithout this password, a caller will not be able to gain access to the service.
For details, see “Identifying passwords” on page 4-21.
• Give out the thru-dial service access number to authorizpersonnel only.
Standard 1.0 Voice Services Application Guide January 1998

The thru-dial service 4-13Monitoring for hackers
r
-
e,
a
Monitoring for hackers
Introduction You can monitor all or specific thru-dials by setting the Monitoall Thru-Dials during Monitoring Period field in the Voice Security Options screen to the appropriate option. When thrudials are attempted during the specified monitoring period, aclass 106 SEER is issued to indicate the Calling DN and thedestination of the thru-dial.
When this feature is combined with the SEER Mailbox featuryou can be notified through Remote Notification when a suspected unauthorized user attempts a Thru-Dial or entersparticular mailbox.
For details, refer to the “Setting up Meridian Mail security” chapter in the Meridian Mail System Administration Guide for your platform.
Standard 1.0 Voice Services Application Guide January 1998

4-14 The thru-dial service Monitoring for hackers
Standard 1.0 Voice Services Application Guide January 1998

The thru-dial service 4-15
Section A Planning a thru-dial service
In this section
Overview of planning a thru-dial service 4-16
Choosing a thru-dial ID 4-18
Choosing a thru-dial title 4-19
Identifying the revert DN 4-20
Identifying passwords 4-21
Choosing the language for system prompts (multilingual systems only) 4-23
Determining the dialing method 4-24
Identifying whether left pad characters are required 4-28
Identifying whether the prompt/greeting should be suppressed 4-29
Scripting the thru-dial greeting 4-30
Identifying the restriction/permission codes 4-34
Identifying how the thru-dial service will be accessed 4-36
Standard 1.0 Voice Services Application Guide January 1998

4-16 The thru-dial service Overview of planning a thru-dial service
the
e
e a
the lls
ider ial
).
Overview of planning a thru-dial service
Introduction This section outlines the process for planning a thru-dial service.
Once you have identified the need for a particular thru-dial service, the next stage is to carefully plan how best to createservice. With a thru-dial service, like all the voice services, planning is important. Investing time up front when planning voice services will pay dividends when actually configuring thdifferent services.
Security warning When planning the thru-dial service, it is critical that you carefully consider your system security. Thru-dial services arprime target for system abuse. If the thru-dial service is not designed to prevent unauthorized use, a hacker can accessthru-dial service and place long distance or other charged cawherever the thru-dial service permits.
Please review “Security issues” on page 4-11, and then conswhat security features you should put in place for your thru-dservice.
Process for planning a thru-dial service
Planning a thru-dial service involves the following steps:
1. Choose a thru-dial service ID.
2. Choose a thru-dial service title.
3. Identify the revert DN.
4. Identify necessary passwords.
5. Identify the language in which system prompts are to beplayed (if multiple languages are installed on the system
6. Choose the dialing method.
7. Identify if left pad characters are required.
8. Identify if the prompt/greeting should be suppressed.
9. Script the greeting.
Standard 1.0 Voice Services Application Guide January 1998

The thru-dial service 4-17Overview of planning a thru-dial service
nd n
e ial
te
ion
10. Identify the necessary restriction/permission codes.
11. Identify how the thru-dial service will be accessed.
Thru-Dial Definition Worksheet
The Thru-Dial Definition Worksheet is found in Appendix A, “Worksheets.” This worksheet is a valuable aid to help plan amaintain thru-dials. The worksheet contains all the informatioyou require to configure each thru-dial service.
As you plan your thru-dial, fill in the worksheet. Then, when you are ready to configure the thru-dial service, you only havto copy the information into the system and record the thru-dgreeting.
By using the worksheet, you ensure that you have an accurawritten record of all of the thru-dial services on your system.Whenever you change a thru-dial service, fill in a new worksheet so that you always have the most up-to-date verson file.
Standard 1.0 Voice Services Application Guide January 1998

4-18 The thru-dial service Choosing a thru-dial ID
e s.
f
pt
ler
in
Choosing a thru-dial ID
Introduction The thru-dial ID identifies the thru-dial within your system. ThID number must be unique among all voice service definition
Maximum length and valid digits
The ID can be up to eight digits in length and must consist othe numeric digits 0 to 9 only.
When the ID is used The ID is used when you
• need to access the thru-dial service from the voice prommaintenance service (see Chapter 9, "Voice prompt maintenance and remote activation")
• want to include this thru-dial service in a voice menu
• want to use this thru-dial service in a time-of-day control
• create a service DN for the thru-dial service in the VSDNtable
Select a thru-dial ID Select a unique thru-dial ID number and record it in the appropriate field on the Thru-Dial Definition Worksheet.
Note for multi-customer systems
On multi-customer systems, the ID need only be unique withthe customer group.
Standard 1.0 Voice Services Application Guide January 1998

The thru-dial service 4-19Choosing a thru-dial title
the
de
he
Choosing a thru-dial title
Introduction The thru-dial title provides an identifier that you will easily beable to recognize. It should be descriptive enough to identify purpose of the service.
Example A thru-dial service designed to permit only overseas calls forcompany executives might be called “Exec Overseas.”
Maximum length and valid characters
The title can be up to 29 characters in length. It cannot incluthe characters “+”, “?”, and “_”.
Choose a thru-dial title Select a thru-dial title and record it in the appropriate field in tThru-Dial Definition Worksheet.
Standard 1.0 Voice Services Application Guide January 1998

4-20 The thru-dial service Identifying the revert DN
e
ers ou ny
r
Identifying the revert DN
Introduction A revert DN is required. Callers are routed to the revert DN when they press 0 during playback.
Maximum length and valid characters
The revert DN can be up to 30 characters in length. The following characters are acceptable.
The formatting characters can be used to make the screen display easier to read. (These characters only show up in thscreen; they do not generate any corresponding tones.) For example, it is easier to decipher 9-(416)-555-1212 than 94165551212.
Formatting character compatibility
Common carriers may use some of these formatting charactfor other purposes. For example, number sign (#) is used bySkyPager as the numeric pager data terminator character. Ymay want to contact your common carrier to see if they use aof the other formatting characters.
Select a Revert DN Select a Revert DN and record the number with formatting characters in the Thru-Dial Definition Worksheet.
0–9 Dialed digits
# Dialed if present in field
* 3-second pause in dialing
$ Formatting purposes only; note that the first charactecannot be $
( ) Formatting purposes only
_ Formatting purposes only (underscore)
- Formatting purposes only (hyphen)
spaces Formatting purposes only
Standard 1.0 Voice Services Application Guide January 1998

The thru-dial service 4-21Identifying passwords
he e se ru-
rect hat s
e to
a .
the e
Identifying passwords
Introduction This section deals with the access and update passwords. Taccess password restricts access to the thru-dial service. Thupdate password, if defined, both enables and controls the uof the Voice Prompt Maintenance service for updating the thdial prompts.
The access password If you define an access password, callers must enter the corpassword to use the thru-dial service. For thru-dial services tallow on-switch (or local) dialing only, an access password isprobably not necessary. However, for those thru-dial servicethat allow long distance or international dialing, an access password guarantees that only authorized personnel are ablgain access to the service.
You have to provide authorized personnel with the access password and inform them whenever it is changed. Without valid password, callers are not allowed access to the service
Access password formatThe access password must be between 4 and 16 numeric characters in length. Spaces are not allowed. The access password can be 0 to 16 numeric characters in length for a customer that uses VMUIF and is a residential service.
Select an access passwordSpecify an access password and record it in the Thru-Dial Definition Worksheet. Keep the Thru-Dial Definition Worksheets secure so that the password remains private.
The update password If you are planning on using the voice prompt maintenance service to update the thru-dial greeting, you must define an update password. If the update password is not defined, thevoice prompt maintenance service cannot be used to updategreeting. You will only be able to modify the greeting from thadministration terminal.
Standard 1.0 Voice Services Application Guide January 1998

4-22 The thru-dial service Identifying passwords
The update password must be between 4 and 16 numeric characters in length. Spaces are not allowed. The update password can be 0 to 16 numeric characters in length for a customer that uses VMUIF and is a residential service.
Select an update passwordSpecify an update password and record it in the Thru-Dial Definition Worksheet. Keep the Thru-Dial Definition Worksheets secure so that the password remains private.
Standard 1.0 Voice Services Application Guide January 1998

The thru-dial service 4-23Choosing the language for system prompts (multilingual systems only)
ary his
ru-
Choosing the language for system prompts (multilingual systems only)
Description If you have multiple languages on your system, you need to specify the language for the system prompts. This is necessonly if more than one language is installed on the system. If tis the case, select the language in which all system prompts are to be played. (Note that this is not a translation of a custom thdial greeting.)
Standard 1.0 Voice Services Application Guide January 1998

4-24 The thru-dial service Determining the dialing method
s
)
to
ow ial he o
hat N
e ).
N
.
s
Determining the dialing method
Introduction Depending on how you configure the thru-dial service, callercan reach the person they wish to reach by dialing
• the extension number of the person (extension dialing)
• the name of the person they want to reach (name dialing
• either name dialing or extension dialing
The dialing method you choose affects the greeting that yourecord because the greeting must include instructions on howplace a call.
Extension dialing (Dial by number)
If you select the extension dialing method, the caller must knthe extension of the person that the caller is dialing. A thru-dservice which only uses extension dialing is effective when tcallers know the extension number of the person they wish treach.
A thru-dial service using the extension dialing also requires tyou specify whether the DN length be fixed or variable. The Dis the number dialed by the caller.
Fixed DN lengthWith a fixed DN length, the system requires that the proper number of digits are entered. Once the digits are entered, thcall is placed (provided the DN matches a DN on the system
Variable length DNIf the variable length DN is specified, callers must enter the Dof the person they wish to reach followed by the (#). The (#)notifies the system that they have completed entering the DNAfter receiving the (#), the call can be connected.
Extension dialing example
Suppose you have configured a thru-dial service which allowcallers to reach in-house extensions only. An outside caller wishes to reach John Smith at his extension, 7673. John receives many calls from regular customers who know his extension.
Standard 1.0 Voice Services Application Guide January 1998

The thru-dial service 4-25Determining the dialing method
s a
rt
t,
to rt
he y . (If
ld
the
Dial fixed length DNTo reach John if the DN length is fixed at four, the caller hearprompt:
“Please enter the number of the extension of the person youwish to dial. If you need assistance just press zero.”
The caller responds by dialing 7673, and the call is routed toJohn’s extension. The zero option sends callers to the ReveDN if one is specified. In this scenario, it is likely the Revert DN is the DN of a live attendant.
Dial variable length DNTo reach John when the thru-dial service is configured to receive a variable length extension, the caller hears a prompsuch as the following:
“Please enter the number of the extension you wish to dial, followed by number sign. If you need assistance, just press zero.”
The caller responds by dialing 7673#, and the call is routed John’s extension. The zero option sends callers to the ReveDN if one is specified. In this scenario, it is likely the Revert DN is the DN of a live attendant.
Name dialing If the dialing method is dial by name only, callers must enter tperson’s name by spelling out the last name first, followed bthe first name, using the numeric keys on the telephone padthis method is selected, the DN length is automatically set tovariable.)
Name dialing exampleFor example, to spell out the name John Smith, a caller wouenter SMITHJOHN
As soon as a match is made (this will likely occur before thecaller has finished entering the name), the system plays the message “Calling <personal verification>” and then places thecall. If no personal verification is recorded, the system plays letters of the name it is trying to reach, starting with the last name.
Standard 1.0 Voice Services Application Guide January 1998

4-26 The thru-dial service Determining the dialing method
f
on
e the
n to to
its t
at
e ers
What if there are matching names?If more than one name matching the digits dialed is found, Meridian Mail prompts the caller to enter more of the name ihe or she knows it. For example, if the caller has entered SMITHJ, there may be more than one person matching this pattern. The caller is asked to specify more of the first nameuntil a unique match is found.
If Meridian Mail finds more than one occurrence of the full name, the caller is asked to press 1 or 2, and so on, for eachoccurrence found. This plays the person’s personal verificati(if recorded). The caller can choose which person he or she wants to speak to and then press the appropriate key to placcall.
Name dialing requirementTo choose dial by name, name dialing and name addressingmust be enabled. Check the Voice Messaging Options scree(for the customer group if yours is a multi-customer system) verify that this feature is enabled if you want to allow callers dial by name.
Dial by number or by name (caller choice)
If you wish to give callers the flexibility to dial by extension ifthey know the number, or by name if they do not, you can configure a thru-dial service to do so. The caller is given thechoice of dialing by number or by name.
In this case, the caller controls the dialing method by the digentered. If a caller wants to dial by number, the caller simplyenters the extension number followed by number sign. If thecaller wants to dial by name, the caller must enter the namedialing prefix first, followed by the last name and then the firsname.
The name dialing prefixThe name dialing prefix “warns” the system that the digits thare about to be entered are to be interpreted as alphabetic characters. The name dialing prefix is configured in the VoicMessaging Options screen. (This prefix is also used when usperform name addressing when composing messages.) Thedefault is 11.
Standard 1.0 Voice Services Application Guide January 1998

The thru-dial service 4-27Determining the dialing method
n to to
r
e
Name dialing requirementTo choose dial by name, name dialing and name addressingmust be enabled. Check the Voice Messaging Options scree(for the customer group if yours is a multi-customer system) verify that this feature is enabled if you want to allow callers dial by name.
Record the dialing method
On the thru-dial worksheet, record the following:
• the dialing method (number, name, or both)
• if the dialing method is “Dial by number,” specify whethethe DN length is fixed or variable
• if the dialing method is “Dial by number” and the DN length is fixed, record the fixed length of the DN and if ththru-dial prompt should be suppressed
Standard 1.0 Voice Services Application Guide January 1998

4-28 The thru-dial service Identifying whether left pad characters are required
u llers
he
in
d to
Identifying whether left pad characters are required
Introduction If the dialing method is by number only (extension dialing), yocan use left pad characters to reduce the number of digits cahave to dial. Left pad characters are prefix digits that are automatically placed before whatever digits the caller dials. Tfollowing example shows how left pad characters can make dialing easier.
Example The thru-dial service is going to be used to call another site your ESN network. The ESN access code is 6 and the ESN prefix of the remote site is 775. If you specify 6775 as left pacharacters, callers only have to dial the extension they wish reach.
When a caller uses the thru-dial service, Meridian Mail automatically dials 6775 followed by the extension number dialed by the caller.
Standard 1.0 Voice Services Application Guide January 1998

The thru-dial service 4-29Identifying whether the prompt/greeting should be suppressed
ugh is
pt at
, or
Identifying whether the prompt/greeting should be suppressed
Introduction If you are setting up a thru-dial service that is accessed throa voice menu, you may find that playing a thru-dial greeting redundant (see the scenario described on page 4-8).
How to suppress the greeting
You can suppress the greeting by setting the Suppress Promfield to Yes on the Add a Thru-Dial Definition screen. Note ththis field appears only when the dialing method is “Dial by number” and the “DN length” is fixed.
Mark your choice on your worksheet.
Exceptions If the caller encounters a problem (dials an incorrect numberstops entering the number), then the greeting is played.
Standard 1.0 Voice Services Application Guide January 1998

4-30 The thru-dial service Scripting the thru-dial greeting
ich
e
the
in
. ld
ial
Scripting the thru-dial greeting
Introduction This section outlines the greetings required for a thru-dial service. There are a number of system greetings, one of whplays if a custom greeting is not recorded.
Definition The thru-dial greeting is played when a caller connects to ththru-dial service. The primary purpose of the greeting is to inform the callers how to enter the information necessary for thru-dial service to route the call.
If you do not record a custom greeting, a system greeting is played. The wording of the system greeting depends on the dialing method chosen. The system greetings are described“System greetings” on page 4-33.
Suppressing the greeting
In some situations, you may not want a greeting to be playedFor details, see “Identifying whether the prompt/greeting shoube suppressed” on page 4-29.
Scripting the greeting There are several factors to consider when scripting a thru-dgreeting, including
• the dialing method of the thru-dial service
• how the thru-dial service is accessed
• the intended users of the thru-dial service
- internal users
- external callers
Standard 1.0 Voice Services Application Guide January 1998

The thru-dial service 4-31Scripting the thru-dial greeting
er u-
d
n
Dialing method The dialing method determines both how the caller must entthe data for the thru-dial service to place the call, and the thrdialer greeting, so that the caller can correctly enter the information. The following tables show how the dialing methoaffects the data input.
IF the dialing method is extension dialing and IF THEN
the extension number and the DN length are fixed
the caller only needs to enter the extension number.
the DN length is variable the caller must enter number sig(#) after entering the number.
IF THEN
the only choice is to enter a name
the caller must enter the last namefirst, followed by the first name.
the caller can choose either name dialing or extension dialing
include instructions about using the name dialing prefix.
Standard 1.0 Voice Services Application Guide January 1998

4-32 The thru-dial service Scripting the thru-dial greeting
ist
he
th to a
a
Greetings for external callers
It is important to consider how the thru-dial service is to be accessed and who the intended users are when scripting a greeting. The following are points to consider based on the intended users of the thru-dial service.
The following table outlines some of the requirements for greetings for thru-dialers intended for external callers.
Internal callers If the thru-dial service is intended for internal callers, an introductory greeting is not required. The greeting need consof instructions only.
Special considerations
It is important to consider how to handle callers that are connected to the thru-dial service yet are unable to provide tnecessary information for the service to place their call. Thisgenerally results from two possibilities:
1. The caller is using a rotary dial phone.
2. The caller does not have specific information about the name or extension. Such a caller may want to “speak wisomeone in accounts payable” and has been connectedthru-dial service.
In both cases, it is a good idea to advise them how to reach live attendant or how to get the help they need.
IF THEN
accessed directly or through a time-of-day controller
include a courteous introductory greeting that identifies your organization to the caller.
accessed through a voice menu an introductory greeting is notrequired since the voice menu greeting will have already been played to the caller. The thru-dial greeting will consist of instructions only.
Standard 1.0 Voice Services Application Guide January 1998

The thru-dial service 4-33Scripting the thru-dial greeting
il u-o
g is
Script the custom prompt
Write the thru-dial prompt on a piece of paper. Reword it untyou are satisfied with it. When you are ready to fill in the ThrDial Definition Worksheet, copy the final copy of the script intthe worksheet.
System greetings If you do not record a custom greeting, then a system greetinplayed to callers.
The following table lists the system prompts that play.
IF the thru-dial definition is THEN the system prompt is
extension dial with a fixed DN length
“Please enter the number of the extension you wish to dial. If you need assistance, just press zero.”
extension only, variable DN length
“Please enter the number of the extension you wish to dial, followed by number sign. If you need assistance, just press zero.”
Dial by name only “Please enter the name of the person you wish to reach, followed by number sign. To enter a name, spell the last name and then spell the first name.”
Dial by number or name “Please enter number or the name of the person you wish to reach, followed by number sign. To enter a name, press one-one, spell the last name and then spell the first name.” (where one-one is the name dialing prefix, which is the default and can be changed)
Standard 1.0 Voice Services Application Guide January 1998

4-34 The thru-dial service Identifying the restriction/permission codes
al r
are
r t
w
al
set
e
e up
if
Identifying the restriction/permission codes
Introduction As system administrator, you are responsible for taking all necessary precautions to prevent security breaches. Thru-diservices, if not adequately protected, are a potential target founauthorized persons to abuse the Meridian Mail system. Review the Security Issues section before planning your restriction permission codes.
Definition Restriction/permission codes allow you to specify which extension/phone numbers are restricted and which numbersallowed. Any dialing code can be entered as a restriction or permission code. A dialing code can be an extension numbe(on the switch) or any dialing prefix that is used for dialing ouof the switch (such as 9 for local calls, 91 for long distance calls, or 6 for ESN calls).
Restriction/permission codes listMeridian Mail allows you to define 80 restriction/permission codes in the Restriction/Permission List screen. You can viethe Restriction/ Permission list by selecting the Restriction/Permission Lists menu item from the Voice Administration menu.
Select the restriction/permission codes
When selecting the restriction/permission codes for a thru-diservice, you have two options. You can use one of the 80 restriction/permission codes as defined in the Restriction/Permission List screen. Otherwise, you can specify a customof restriction/permission codes when defining the thru-dial definition which applies strictly to the thru-dial service you arcreating.
Custom restriction/permission codes
Each custom restriction/permission set can contain up to 30restriction codes and 30 permission codes. Each code can bto 20 digits in length.
Restriction codesYou are restricted from placing a call from a thru-dial servicethe first digits of the extension that you enter match the restriction list.
Standard 1.0 Voice Services Application Guide January 1998

The thru-dial service 4-35Identifying the restriction/permission codes
. t
for
are 11
l cess
all ed gits and
9,
Permission codesAny digits that are not in the restriction codes list are allowedIn addition, if you enter digits in the permission codes set thaare also present in the restricted codes set, then they are allowed. In this way, the permission codes set allows you to define exceptions to the restriction codes set.
Example You might want to create a custom restriction/permission seta particular thru-dial service that allows only on-switch calls (local calls, long distance calls, ESN, and international calls restricted). The exception is that you want to allow calls to 9in case of an emergency.
In this case, you need to know the range of digits for local extensions and the ESN access code. Suppose that all locaextensions start with 3, the ESN access code is 6, and the accode for all local calls is 9.
The restriction/permission set would look as follows for this example:
Restriction codes: _1 _2 _4 _5 _6 _7 _8 _9
Permission codes: 9911
Notice that you do not have to enter 9, 91 and 9011 as restriction codes. You only need to enter 9 and this restricts dialing codes beginning with 9. All ESN calls are also restrictin this example since 6 is the ESN access code. The only dinot restricted are 0, because it is used to dial the revert DN, 3, because on-switch extensions all begin with 3 in this example.
However, because you want to allow 911 which begins with you must define a permission code of 9911 (9 to dial out, followed by the number 911). The permission code is an exception to the restriction codes set.
Standard 1.0 Voice Services Application Guide January 1998

4-36 The thru-dial service Identifying how the thru-dial service will be accessed
ate
s a e. vice
ed
he
r a to a
an
me,
Identifying how the thru-dial service will be accessed
Introduction Callers can access a thru-dial service in one of three ways:
• directly
• indirectly through a voice menu
• indirectly through a time-of-day controller
The purpose of the thru-dial service will suggest the approprimethod of access.
Direct access thru-dial service
A caller accesses a thru-dial service directly if he or she dialDN that has been programmed to access the thru-dial servicDirect access means that the caller reaches the thru-dial serwithout being given specific alternatives. In such cases, the caller has limited options. The caller can enter the necessaryinput to use the thru-dial service, or press zero and be directto the revert DN if one is defined.
With a direct access thru-dial designed for external callers, tprompt should include a welcome greeting followed by the instructions.
Indirect access through a voice menu
Often it is convenient to design a voice menu as a front end fothru-dial service. The published number connects the caller voice menu. The caller accesses the thru-dial service by pressing the appropriate menu key.
ScenarioSuppose you want to create a thru-dial service where callershave the option of dialing by name or by number, but you donot want them to have to enter a name dialing prefix.
SolutionYou create two thru-dial services: one that allows dialing by number only and one that allows dialing by name only. You cthen create a voice menu as a front end to the two services.When a caller connects to the voice menu, the caller hears something like the following: “To dial the extension of the person you want to talk to, press 1. To enter the person’s napress 2.”
Standard 1.0 Voice Services Application Guide January 1998

The thru-dial service 4-37Identifying how the thru-dial service will be accessed
he rs
he nt ice
-lers
wer rs of
s an
Indirect access through a time-of-day controller
You can direct calls to a thru-dial service at certain times of tday by creating a time-of-day controller which connects calleto a thru-dial service during specified times.
ScenarioSuppose that at your office the telephone attendant leaves toffice at 4:30, but many other workers remain longer. You wacallers to be able to reach the other workers, or reach their vomailboxes if they have left.
SolutionCreate a time-of-day controller which directs callers to a thrudial service on non-business hours. Be certain to give the calthe option of using name dial or extension dial.
In a case like this where the attendant is not available to anscalls, the Revert DN needs to be set elsewhere, so that callehave an option when they do not know the name or number who they wish to reach. You could set the Revert DN to an announcement service which plays the office hours and askthem to call back, or to a general voice mailbox where they cleave a message that gets redirected.
Standard 1.0 Voice Services Application Guide January 1998

4-38 The thru-dial service Identifying how the thru-dial service will be accessed
Standard 1.0 Voice Services Application Guide January 1998

The thru-dial service 4-39
Section B Configuring a thru-dial service
In this section
Overview of configuring a thru-dial service 4-40
The Thru-Dial Definition data menu 4-42
Adding a new thru-dial service 4-44
Recording the thru-dial prompt 4-49
Making the thru-dial service accessible 4-52
Testing the thru-dial service 4-55
Standard 1.0 Voice Services Application Guide January 1998

4-40 The thru-dial service Overview of configuring a thru-dial service
n,
his
gn or ity
e
s
oth the
Overview of configuring a thru-dial service
Introduction This section outlines the steps required to add a thru-dial service. Refer to your Thru-Dial Definition Worksheet (see Appendix A, “Worksheets”) as you follow the procedures in this section.
Process for adding a thru-dial service
Adding a thru-dial service involves the following steps:
• adding a new thru-dial definition
• recording the necessary prompts
• making the thru-dial service accessible
• testing the service
Thru-Dial Definitions screen
For a description of the Thru-Dial Definitions data menu screesee “The Thru-Dial Definition data menu” on page 4-42. Thisscreen provides a list of existing thru-dial services.
Tip: Voice Services first, VSDNs later
A thru-dial service can be added to the system without a corresponding DN having been defined in the VSDN table. Tallows you greater flexibility when creating applications because you can create thru-dial services first and then assiDNs, or vice versa. However, you must ensure that all voiceservices have a corresponding DN in the VSDN table, or areassociated with another voice service (such as a voice menutime-of-day controller). The system does not perform any sanchecking to guard against the possibility of an orphan servicdefinition (in other words, a service ID that does not have a corresponding VSDN).
Multi-customer administration
On multi-customer systems, thru-dial services can only be added at the customer administration level. However, once created, they can be viewed, modified, or deleted from the system administration level.
Starting points for procedures
On multi-customer systems, customer administration screenare invoked from the Customer Administration menu. Therefore, the starting point for some procedures refers to bthe Main Menu (applicable to single-customer systems) and
Standard 1.0 Voice Services Application Guide January 1998

The thru-dial service 4-41Overview of configuring a thru-dial service
r
r
Customer Administration menu (applicable to multi-customesystems).
ATTENTION
Do not perform voice services administration during the nightly DR audit.
At 3:30 a.m. every day, an audit of the DR directory is performed. Do not add, modify, or delete voice service definitions during this audit. Depending on how unbalanced the system is, this audit can take anywhere from ten minutes (if the system has not been modified since the last audit) to two hours (if there have been manychanges, such as a lot of users or services being added omodified).
Standard 1.0 Voice Services Application Guide January 1998

4-42 The thru-dial service The Thru-Dial Definition data menu
also
The Thru-Dial Definition data menu
Introduction The Thru-Dial Definition data menu lists all the configured thru-dial services on the system. From this screen, you can do the following:
• add a new thru-dial service (see “Adding a new thru-dialservice” on page 4-44)
• view or modify an existing thru-dial service (see “Modifying a thru-dial service” on page 4-59)
• delete an existing thru-dial service (see “Deleting a thru-dial service” on page 4-61)
The screen The following is an example of the Thru-Dial Definitions screen.
Standard 1.0 Voice Services Application Guide January 1998

The thru-dial service 4-43The Thru-Dial Definition data menu
Procedure: Accessing the screenTo access the Thru-Dial Definitions data menu, follow thesesteps.
Starting Point: The Main menu or the Customer Administration menu (on multi-customer systems)
Step Action
1 Select Voice Administration.
Result: The Voice Administration menu is displayed.
2 Select Voice Services Administration.
Result: The Voice Services Administration menu is displayed.
3 Select Thru-Dial Definitions.
Result: The Thru-Dial Definitions data menu is displayed.
Standard 1.0 Voice Services Application Guide January 1998

4-44 The thru-dial service Adding a new thru-dial service
ate
Adding a new thru-dial service
Introduction This section and the sections that follow describe how to crea new thru-dial service. This process involves the following steps:
1. adding a new thru-dial definition
2. recording the necessary prompts
3. making the thru-dial service accessible
4. testing the service
Procedure: Adding a thru-dial definition
Adding a thru-dial definition requires that you input the information from the Thru-Dial Definition Worksheet into the Meridian Mail system. Have your worksheet available as youfollow these steps. To add a thru-dial definition, follow the steps below.
Starting Point: The Voice Services Administration menu
Step Action
1 Select Thru-Dial Definitions.
Result: The Thru-Dial Definitions screen is displayed.
2 Press the [Add] softkey.
Result: The Add a Thru-Dial Definition screen is displayed.
Standard 1.0 Voice Services Application Guide January 1998

The thru-dial service 4-45Adding a new thru-dial service
/
The screen The following is an example of the Add a Thru-Dial Definitionscreen with data. Note that the DN Length field is displayed only if “Dial by Number” is selected. Also, the Restriction/Permission Codes fields are displayed only if the RestrictionPermission Set is 0 (Custom).
3 Fill in the fields using the information recorded on your thru-dial worksheet.
4 If you are satisfied with the information you have entered, press the [Save] softkey. Otherwise, press [Cancel] to discard the information.
Result: Whether you save or cancel, you are returned to the Thru-Dial Definitions screen.
Step Action
Standard 1.0 Voice Services Application Guide January 1998

4-46 The thru-dial service Adding a new thru-dial service
Field descriptions The following fields appear in the Add a Thru-Dial Definition screen.
Thru-Dial ID
Description The Thru-Dial ID must be a unique number.
Title
Standard 1.0 Voice Services Application Guide January 1998

The thru-dial service 4-47Adding a new thru-dial service
-
ll
e
ial
.
Description The thru-dial Title should indicate what the thru-dial does. For example, a thru-dial service allowing overseas calls might be called “Overseas-restricted.”
Revert DN
Description The DN to which callers are transferred under particular circumstances.
Access Password
Description The access password restricts access to the thrudial service. This field should be left blank if you want to make the thru-dial service accessible to ausers.
Update Password
Description The Update Password allows you to update the thru-dial prompts from a remote location using thVoice Prompt Maintenance Service. For details, see Chapter 9, "Voice prompt maintenance and remote activation".
Greeting Recorded (Voice)
Description This read-only field shows whether the thru-dial prompt has been recorded. No means the thru-dprompt has not been recorded.
Language for prompts
Description If more than one language is installed this field displays the language for the thru-dial prompt if the system greeting is used (if a custom greetingor prompt was not recorded).
Dial by
Description This is the dialing method for the thru-dial service
Standard 1.0 Voice Services Application Guide January 1998

4-48 The thru-dial service Adding a new thru-dial service
e.
DN Length
Description This field is displayed only if the selected dialingmethod is Number. The choices for this field areFixed and Variable. If the DN Length field is set to Fixed, then the following fields are displayed:
• Digits—the number of digits in the fixed length DN
• Left Pad—the digits prepended in front of the caller’s entered digits to complete the DN
• Suppress Prompt—if this field is set to Yes, thesystem does not play an initial thru-dial promptto the caller
Restriction/Permission Set
Description This is the code and name for the restriction/permission set to be used for this thru-dial servic
Restriction/Permission Codes
Description If you enter 0 (for Custom) as the restriction/permission set, then the fields for Restriction Codes and Permission Codes appear. Enter therestricted and permissible digits in these fields.
Standard 1.0 Voice Services Application Guide January 1998

The thru-dial service 4-49Recording the thru-dial prompt
for e
he
a
sed e a
om
Recording the thru-dial prompt
Introduction This section describes the process for recording the prompt the thru-dial service. The prompt cannot be recorded until ththru-dial service has been defined as described in “Adding anew thru-dial service” on page 4-44.
How to record a custom thru-dial prompt
Thru-dial prompts can be recorded in one of two ways: from tadministration terminal using the [Voice] softkey, or from a remote DTMF telephone set using the Voice Prompt Maintenance service.
Voice softkeyTo record the prompt using the [Voice] softkey, you must belogged on to the Administration Terminal and have access totelephone.
Voice prompt maintenanceIf you configured the thru-dial service so that it can be accesfrom the voice prompt maintenance service, then you can usremote phone to record the thru-dial prompt.
If the environment around your terminal is noisy, you may prefer to use the voice prompt maintenance service to call fra phone in a quiet location. See Chapter 9, "Voice prompt maintenance and remote activation".
Standard 1.0 Voice Services Application Guide January 1998

4-50 The thru-dial service Recording the thru-dial prompt
dd
le at
Procedure: Recording the prompt with the [Voice] softkey
You can record the thru-dial prompt from two screens: the Aa Thru-Dial Definition screen or the View/Modify Definition screen. Both screens are accessed from the softkeys availabthe Thru-Dial Definitions data menu.
To record the prompt, follow these steps.
Starting Point: The Add a Thru-Dial Definition screen or the View/Modify a Thru-Dial Definition screen
Step Action
1 Press the [Voice] softkey.
Result: You are prompted for a phone number.
2 Enter the number for the phone you will use to record the prompt.
Result: The phone you specify rings.
3 Pick up the telephone handset.
Result: The following recording softkeys are displayed.
4 Press the [Record] softkey.
Result: A beep sounds when it is OK to record.
Standard 1.0 Voice Services Application Guide January 1998

The thru-dial service 4-51Recording the thru-dial prompt
ed
System prompt If you do not record a thru-dial prompt, a system prompt is us(see “System greetings” on page 4-33).5 At the sound of the beep, record the prompt. When finished recording, press the [Stop] softkey.
Result: The following softkeys are redisplayed.
Note: The recording stops automatically if you exceed the Maximum Prompt Size or the Record Time-out set in the Voice Services Profile.
6 Follow step 6a to review the prompt, or step 6b to disconnect the call.
a. Use the [Play] softkey to play the recording, [Delete] to delete the recording, or [Delete] followed by [Record] to rerecord the prompt.
b. To disconnect the call, press the [Disconnect] softkey or just hang up the phone and press return.
Result: The original softkeys are redisplayed.
7 Press [Save] to save the recording and the thru-dial definition.
Step Action
Standard 1.0 Voice Services Application Guide January 1998

4-52 The thru-dial service Making the thru-dial service accessible
of
e N
n
Making the thru-dial service accessible
Introduction You can make a thru-dial service accessible to callers in onethree ways:
• direct access
• indirect access through a voice menu
• indirect access through a time-of-day controller
Direct access Callers access the thru-dial service by dialing a DN that connects them directly to the service. The procedure to makthe thru-dial service accessible directly involves creating a Din the VSDN table for the thru-dial service.
Procedure: Accessing the thru-dial service
This procedure assumes that there are available ACD DNs othe Meridian 1 (or line DNs if your system is connected to a DMS switch).
To access the thru-dial service, follow these steps.
Starting Point: The Voice Services Administration menu
Step Action
1 Select Voice Services-DN Table.
Result: The Voice Services-DN Table is displayed.
Standard 1.0 Voice Services Application Guide January 1998

The thru-dial service 4-53Making the thru-dial service accessible
ed is of
nu, ber
Indirect access through a voice menu
Callers dial the DN of a voice menu. The thru-dial is presentas one of the menu choices and is accessed when the callerpresses the appropriate key. Generally, the thru-dial servicelisted in the menu as an option to dial the extension or namethe person you wish to reach.
You can either add a thru-dial service to an existing voice meor create a new voice menu to serve as a front end to a numof thru-dialers, such as in the quick dialer example in
2 Press the [Add] softkey.
Result: The Add DN Information screen appears.
3 Enter the Access DN. This is the number that callers will dial to access the thru-dial service. Get the DN from your switch administrator, or print the directory number block (DNB) at the switch to obtain an unused DN.
Note: The Access DN cannot match a mailbox number.
4 Enter TS in the Service field.
Result: An additional field, Thru-Dial ID, is displayed.
5 Enter the thru-dial ID in the Thru-Dial ID field.
6 Enter a comment.
This step is optional, but a comment that identifies the thru-dial service is useful here.
7 Press the [Save] softkey to save the VSDN Table.
Step Action
Standard 1.0 Voice Services Application Guide January 1998

4-54 The thru-dial service Making the thru-dial service accessible
ay u-
“Identifying whether left pad characters are required” on page 4-28. Also, see Chapter 5, "Voice menus".
Indirect access through a time-of-day controller
You can set up a time-of day controller that directs calls to athru-dial service.
Set up the thru-dial service first. Then create a new time-of-dcontroller, or modify an existing one, to direct calls to the thrdial service.
For instructions on planning and creating a time-of-day controller, see Chapter 8, "Time-of-day controllers".
Standard 1.0 Voice Services Application Guide January 1998

The thru-dial service 4-55Testing the thru-dial service
e
st
to
g
pt
Testing the thru-dial service
Introduction It is important to test the thru-dial service before you make thannouncement service available to callers. Testing simply involves making sure the thru-dial service works as you intended.
Testing the thru-dial service
When you have finished configuring the thru-dial service andhave defined the VSDN through which it will be accessed, teit. To test the thru-dial, access the thru-dial service from a phone and verify the following:
• Do you reach the extension of the person you intended reach?
• Does the wording of the thru-dial prompt match the dialinmethod?
• Do the restriction/permission codes work properly to restrict callers from abusing the service?
• Is the quality of the voice acceptable?
• Press 0 while connected to the thru-dial service to see ifyou are transferred to the correct revert DN.
• If you have defined an update password, test the voice prompt maintenance service. See Chapter 9, "Voice prommaintenance and remote activation".
Standard 1.0 Voice Services Application Guide January 1998

4-56 The thru-dial service Testing the thru-dial service
Standard 1.0 Voice Services Application Guide January 1998
The thru-dial service 4-57
Section C Modifying or deleting a thru-dial service
In this section
Overview of modifying or deleting a thru-dial service 4-58
Modifying a thru-dial service 4-59
Deleting a thru-dial service 4-61
Standard 1.0 Voice Services Application Guide January 1998

4-58 The thru-dial service Overview of modifying or deleting a thru-dial service
Overview of modifying or deleting a thru-dial service
Introduction This section provides procedures for modifying and deletingthru-dial services.
Multi-customer administration
On multi-customer systems, you can modify and delete thru-dial services at either the system or customer administrationlevel.
Standard 1.0 Voice Services Application Guide January 1998

The thru-dial service 4-59Modifying a thru-dial service
he
ved.
n".
Modifying a thru-dial service
Introduction You can modify a thru-dial in three ways:
• Modify the thru-dial definition.
• Update the thru-dial prompts.
• Modify the access to the thru-dial service.
While a thru-dial service is being updated, the old version of tthru-dial service is still available to callers. The new version takes effect when the updated thru-dial service has been sa
Tip: Modifying the recorded thru-dial prompt
You can modify the recorded prompt from any touch-tone phone using the Voice Prompt Maintenance service. See Chapter 9, "Voice prompt maintenance and remote activatio
Procedure To modify a thru-dial definition, follow these steps.
Starting Point: The Voice Services Administration menu
Step Action
1 Select Thru-Dial Definitions.
Result: The Thru-Dial Definitions screen is displayed.
2 Move the cursor to the thru-dial definition you want to view or modify.
3 Press the <spacebar> to select it.
Standard 1.0 Voice Services Application Guide January 1998

4-60 The thru-dial service Modifying a thru-dial service
4 Press the [View/Modify] softkey.
Result: The View/Modify a Thru-Dial Definition screen is displayed.
For a description of the fields in this screen, see “The screen” on page 4-45.
5 Modify the thru-dial definition as required.
6 Modify the voice recording if required. Use the [Voice] softkey.
7 If you are satisfied with the information you have entered, press the [Save] softkey. Otherwise, press [Cancel] to discard the changes. If you changed the recording and you now press [Cancel], the thru-dial definition reverts to the previously saved recording.
Result: Whether you save or cancel, you are returned to the Thru-Dial Definitions screen.
Step Action
Standard 1.0 Voice Services Application Guide January 1998

The thru-dial service 4-61Deleting a thru-dial service
e
-
ure
Deleting a thru-dial service
Introduction Thru-dial services are deleted from the Delete a Thru-Dial Definition screen. The fields in this screen are read-only. If ththru-dial is being modified through the voice prompt maintenance service, you cannot delete the thru-dial serviceuntil it has been saved.
Thru-dial services associated with a voice menu or time-of-day controller
If the thru-dial service you are deleting is associated with a voice menu or time-of-day controller, be sure to modify the appropriate definitions to account for the absence of this thrudial service (that is, remove references to this thru-dial ID within the voice menu or time-of-day controller definition). If the thru-dial service is associated with an entry in the VSDNtable, be sure to delete it. VSDNs must not point to deleted services. The system does not perform a sanity check to ensagainst this.
Procedure To delete a thru-dial definition, follow these steps.
Starting Point: The Voice Services Administration menu
Step Action
1 Select Thru-Dial Definitions.
Result: The Thru-Dial Definitions screen is displayed.
2 Move the cursor to the thru-dial definition you want to delete.
3 Press the <spacebar> to select it.
Standard 1.0 Voice Services Application Guide January 1998

4-62 The thru-dial service Deleting a thru-dial service
4 Press the [Delete] softkey.
Result: The thru-dial definition is displayed under the heading Delete a Thru-Dial Definition, and new softkeys are displayed. This screen is displayed so that you can see which thru-dial definition you have selected to delete.
5 Review the thru-dial definition to make sure you are deleting the right thru-dial service.
6 Press the [OK to Delete] softkey to delete the thru-dial, or press [Cancel] to exit this screen without deleting.
Result: Whether you delete or cancel, you are returned to the Thru-Dial Definitions screen.
7 If the thru-dial service was associated with a DN in the VSDN table, go to the VSDN table and delete the DN.
If the thru-dial service was associated with a voice menu or time-of-day controller, go to the appropriate service definition and delete references to the thru-dial service.
Step Action
Standard 1.0 Voice Services Application Guide January 1998

Chapter 5
Voice menus
In this chapter
Overview 5-2
Modifying and maintaining voice menus 5-6
Section A: Planning a voice menu 5-7
Section B: Configuring voice menus 5-41
Section C: Modifying or deleting a voice menu 5-59

5-2 Voice menus Overview
a of to
e s 3.
, of e a
s
Overview
Introduction A voice menu offers callers choices. When a caller activatesvoice menu, a courteous greeting is played followed by a listoptions and the corresponding key that the caller must pressmake a selection.
For example: “Thank you for calling the University of XYZ. Tofind out how to register for classes, press 1. For our part-timprograms, press 2. To speak with the student registrar, presFor student record inquiries, press 4. To speak with the operator, press 0 or wait on the line and an operator will be with you shortly.” Callers make a choice by pressing the appropriate number on their telephone keypads. This meanscourse, that callers require a DTMF (touch-tone) phone to usvoice menu.
A simple voice menu consists of only one voice menu (one layer). More complex applications involve creating several layers of voice menus and linking them together to create multilevel menus. With this capability, voice menu applicationcan become very complex, branching off in many directions.However, more common voice menu applications typically involve three layers or less.
Diagram The following is an example of a layered voice menu application.
Standard 1.0 Voice Services Application Guide January 1998

Voice menus 5-3Overview
ne dard .
A voice menu offers a maximum of 12 actions to the caller (ofor each key on the telephone keypad). There are three stanmenu functions and nine functions which can be customized
G100597
Extensiondialing
Namedialing
Visitinghours
Pharmacy Nursing Food services
Specificdepartment(2nd-level
menu)
Blood donorclinic
First-level voice menu “You have reached General Hospital. If you know the extension of the personyou want to speak to, press 1...”
Standard 1.0 Voice Services Application Guide January 1998

5-4 Voice menus Overview
ys
his
”
Standard menu functions
The following function keys are standard for all voice menu services.
Custom menu functions
You can assign one of the following actions to the numeric ke1 to 9:
• play an announcement
• prompt the caller for an extension or name (thru-dial service)
• connect the caller to another voice menu
• play a prompt
• play the menu choices prompt
• return to the Main menu (from a submenu)
• call a DN (no number is requested from the caller since tDN is defined in the voice menu)
• request a mailbox number so that the caller can leave amessage (express messaging)
• transfer the caller to a mailbox (as specified in the voicemenu) to leave a message (also express messaging)
• prompt the caller to log on to Voice Messaging
• activate a time-of-day controller
• disconnect the call
Key Function
0 Operator Revert The caller is transferred to the revert DN that has been defined in the voice menu definition. This revert DN can be different for each voice menu if necessary. If the revert DN is not defined, the following message is played when a caller presses 0: “That selection is not recognized, please make another choice.
# Return to Previous Menu The caller who presses <#> is returned to the previous menu. If the current voice menuis the first-level menu, the first-level menu choices are repeated.
* Help When a caller presses <*>, the menu choices are played. If no menu prompt exists, the greeting is played.
Standard 1.0 Voice Services Application Guide January 1998

Voice menus 5-5Overview
ller l
e
• transfer the caller to the Revert DN
• activate the voice prompt maintenance service
If the VMUIF interface is installed, you can also do the following:
• connect the caller to the greetings service so that the cacan update his or her personal greeting (intended for diapulse users since this service requires no keypad input)
If Voice Forms are installed, you can also do the following:
• activate a voice form
• prompt the caller for a voice form ID in order to transcribthe voice form (transcription service)
If Fax on Demand is installed, you can also do the following:
• transmit a fax item (same call delivery), or prompt the caller for a callback number so that a fax item can be transmitted to a fax phone
• activate the fax item maintenance service
If Hospitality is installed, you can also do the following:
• prompt the caller to log on to his or her mailbox (Hospitality Messaging)
• activate the post-checkout mailbox service
Standard 1.0 Voice Services Application Guide January 1998

5-6 Voice menus Modifying and maintaining voice menus
e
Modifying and maintaining voice menus
Introduction Modifying and maintaining a voice menu service involves thefollowing steps:
1. Monitor the use of the voice menu using operational measurements. See Chapter 10, "Monitoring voice services".
2. Retain your original voice menu worksheets in case youneed to later modify the voice menu.
3. Update the voice menu when necessary.
4. Delete the voice menu when it is no longer needed.
Note: The procedures in this manual assume that multimediaports and ACD DNs have been configured. This must be donbefore implementing voice menus. For information on how todo this, refer to the following:
• System Installation and Modification Guide (NTP 555-7001-215)
• System Administration Guide (see the guide for your platform)
Standard 1.0 Voice Services Application Guide January 1998

Voice menus 5-7
Section A Planning a voice menu
In this section
Overview of planning a voice menu 5-8
Identifying and ranking the order of the menu items 5-9
Creating a diagram of the voice menu application 5-11
Identifying and configuring the services that will be included in the voice menu 5-13
Choosing a voice menu ID and title 5-14
Identifying the revert DN 5-15
Identifying necessary passwords 5-17
Scripting the voice menu greeting 5-18
Scripting the menu choices prompt 5-19
Identifying whether silent disconnect is required 5-22
Identifying the language for system prompts (multilingual systems only) 5-23
Assigning a menu action to keys 1 to 9 5-24
Identifying the initial no response action 5-36
Identifying the delayed response action 5-37
Identifying how the voice menu will be accessed 5-38
Standard 1.0 Voice Services Application Guide January 1998

5-8 Voice menus Overview of planning a voice menu
n
).
er e sfer ail
Overview of planning a voice menu
Introduction Planning a voice menu service involves the following steps.
1. Identify and rank the order of the menu items.
2. Create a diagram of the voice menu application.
3. Identify and configure the services that will be included ithe voice menu.
4. Choose a voice menu ID and title.
5. Identify the revert DN.
6. Identify necessary passwords.
7. Script the voice menu greeting.
8. Script the menu choices prompt.
9. Identify whether silent disconnect is required.
10. Identify the language in which system prompts are to beplayed (if multiple languages are installed on the system
11. Assign an action to each of the menu keys from 1 to 9.
12. Identify the initial no response action.
13. Identify the delayed response action.
14. Identify how the voice menu will be accessed.
Voice Menu Worksheet
Make a copy of the Voice Menu Worksheet found in Appendix A, “Worksheets.” As you read through the remaindof this section, fill in the appropriate values for your site on thworksheet. When you are ready to create a voice menu, tranthe values from this worksheet to the appropriate Meridian Mscreens.
Standard 1.0 Voice Services Application Guide January 1998

Voice menus 5-9Identifying and ranking the order of the menu items
ns
to
st
Identifying and ranking the order of the menu items
Introduction The first step in voice menu planning is to decide which optioyou want to present to callers and in what order.
Procedure To identify and rank menu items, follow these steps.
Example You want to create a voice menu to serve as an automated attendant during business hours. You want callers to be abledo the following:
• call the customer support line directly
• dial a person by extension number
• dial a person by name
• complete a customer satisfaction survey
• access a voice menu which provides new product information
• find out your full address and fax number
The menu items should now be ranked, starting with the moused service and ending with the least used service. For example, the above list of actions is ranked as follows:
1. dial by extension
2. dial by name
3. connect to customer support line
Step Action
1 Identify the choices that will be made available to callers.
2 Order the menu choices in the following manner: rank the menu actions from the most popular (or most used) option to least used option. This will help callers to get through a menu more quickly and will lead to more satisfied callers. Of course, at this stage, all you can do is make your best guess.
3 Assign a number to each menu option. This will be the number that callers press to select an action.
Standard 1.0 Voice Services Application Guide January 1998

5-10 Voice menus Identifying and ranking the order of the menu items
4. full address and fax number
5. new product information
6. customer satisfaction survey
Standard 1.0 Voice Services Application Guide January 1998

Voice menus 5-11Creating a diagram of the voice menu application
re
ou he
nu, n
the
Creating a diagram of the voice menu application
Introduction Once you have decided what the menu items and choices agoing to be, it is a good idea to draw a diagram of the voice menu application.
Since voice menus can get quite complex, it is important for yto have the big picture. This step is recommended for even tsimplest voice menus. A diagram helps you plan the voice menu, and it gives you a record of the structure of the voice menu. If you draw a diagram every time you plan a voice meyou will have a record of the structure of each voice menu oyour system.
Example To continue with the example on page 5-9, you end up with following diagram.
G100598
Extensiondialing
Namedialing
Customersupport
Full addressand fax #
Product A Product B Product C
New productinformation
(2nd-level menu)
Customersurvey
First-level voice menu
Standard 1.0 Voice Services Application Guide January 1998

5-12 Voice menus Creating a diagram of the voice menu application
to y,
re
In this example, another voice menu for “new products” has be planned. All submenus should also be planned separatelcomplete with diagrams and worksheets. The main menu diagram shows how all the submenus (and other services) aorganized at the highest level.
Standard 1.0 Voice Services Application Guide January 1998

Voice menus 5-13Identifying and configuring the services that will be included in the voice menu
ut n rst
end elf. our If
Identifying and configuring the services that will be included in the voice menu
Introduction Identify which actions invoke other services. The following services have to be designed and built before they can be incorporated in a voice menu:
• announcements
• thru-dial services
• time-of-day controllers
• other voice menus
• voice forms
• voice form transcription services
• fax items
See Also For details on any of the above services except fax items, see the appropriate chapter in this guide. For details on fax items, see the Fax on Demand Application Guide (NTP 555-7001-327).
Configuring the other services
For each service that will be included in the voice menu, fill oa worksheet and configure the service in Meridian Mail. Youcan either create each of the individual services first and thereturn to complete the voice menu, or build the voice menu fiand then create the services that are required.
For each voice menu application that you create, you should up with a package of worksheets: one for each service withinthe voice menu, as well as a worksheet for the voice menu itsKeep all of these worksheets on hand as a written record of yvoice menu application. This makes it much easier for you tomaintain and keep your voice menu applications up to date. you do not have a written record and an overall picture of theapplication, the only way you have of telling what the voice menu does is to run through the entire application.
Standard 1.0 Voice Services Application Guide January 1998

5-14 Voice menus Choosing a voice menu ID and title
ws
he
e d in
you ss re
e
er to
er
le
u
,
Choosing a voice menu ID and title
Introduction The voice menu ID is a reference number that identifies the voice menu within the system.
The voice menu title is more descriptive than the ID and allothe administrator to more easily identify the voice menu (for example, in Operational Measurements reports).
ID requirements The ID must be unique among all other service definitions. TID can be up to eight digits in length and must consist of thenumeric digits 0 to 9 only.
Note: For multi-customer systems, the ID need only be uniquwithin the customer group. For example, ID 2334 can be usecustomer groups x and y.
Creating a sensible numbering method for voice menu IDs
When you create an ID, use a numbering method that helps to identify the service it represents. For example, if the acceDN is 4054, the first menu might have an ID of 405401 (whe01 is your code for a voice menu), and the first time-of-day controller might have an ID of 405402 (where 02 is your codfor a time-of-day controller). Identifying all of your services using a system that you can understand makes it much easiwork with them later on.
When to use the ID You use this ID when you
• need to perform remote maintenance on voice prompts
• want to include this voice menu in another voice menu
• want to include this voice menu in a time-of-day controll
• create a service DN for the voice menu in the VSDN tab
Voice menu title requirements
The voice menu title should be descriptive enough so that yocan easily identify it (when looking at Operational Measurement reports, for example). The title can be up to 29characters in length. It cannot include the characters “+”, “?”and “_”.
Standard 1.0 Voice Services Application Guide January 1998

Voice menus 5-15Identifying the revert DN
ed
e n hen
n ,
an
Identifying the revert DN
Introduction The revert DN is the phone number to which callers are transferred when they press 0. The revert DN can include special characters that serve particular functions, as explainbelow in “Revert DN maximum length.”
A revert DN should be defined. If no revert DN is specified, callers hears the following message if they press 0: “That selection is not recognized. Please make another selection.”
Note: This revert DN only applies as long as the caller is in thvoice menu. If, for example, the caller chooses a menu actiothat connects him or her to a thru-dial service and he or she tpresses 0, the revert DN of the thru-dial service is used.
Deciding an appropriate revert DN
Consider who should receive calls from the voice menu whecallers press 0. Depending on the function of the voice menuyou may wish to revert callers to the main switchboard, or toemployee whose job is to field calls that “pass through” the voice menu.
Revert DN maximum length
The revert DN can be up to 30 characters in length.
Standard 1.0 Voice Services Application Guide January 1998

5-16 Voice menus Identifying the revert DN
e
ers ou ny
Allowable characters The following characters are acceptable:
The formatting characters can be used to make the screen display easier to read. (These characters only show up in thscreen; they do not generate any corresponding tones.) For example, it is easier to decipher 9-(416)-555-1212 than 94165551212. Note that the first character cannot be $.
Formatting character compatibilityCommon carriers may use some of these formatting charactfor other purposes. For example, number sign (#) is used bySkyPager as the numeric pager data terminator character. Ymay want to contact your common carrier to see if they use aof the other formatting characters.
Character Function
0–9 Dialed digits
# Dialed if present in the field
* 3-second pause in dialing
$ Formatting purposes only
( ) Formatting purposes only
_ Formatting purposes only (underscore)
- Formatting purposes only (hyphen)
spaces Formatting purposes only
Standard 1.0 Voice Services Application Guide January 1998

Voice menus 5-17Identifying necessary passwords
ord
enu. g
y
a
0 to
nd . If
ice
0 to
Identifying necessary passwords
Introduction Each voice menu can have two passwords: an access passwand an update password. Both are optional.
The access password Use an access password to restrict caller access to a voice mYou may want to create an access password for the followintypes of voice menus:
• personal voice menus that are intended for one user onl
• voice menus that include thru-dial services which allow long distance calling
• voice menus that contain classified information
• voice menus that are intended for internal users only
If a password is defined, callers are prompted for it. Without valid password, they are denied access to the voice menu.
Maximum lengthPasswords must be between 4 and 16 numeric characters inlength. Spaces are not allowed. The access password can be16 numeric characters in length for a customer that uses VMUIF and is a residential service.
The update password If you are planning on using the voice prompt maintenance service to update menu prompts (the voice menu greeting amenu choices prompt), you must define an update passwordthe update password is not defined, the voice prompt maintenance service cannot be used. You can modify the vomenu prompts only from the administration screen.
Maximum lengthPasswords must be between 4 and 16 numeric characters inlength. Spaces are not allowed. The update password can be16 numeric characters in length for a customer that uses VMUIF and is a residential service.
Standard 1.0 Voice Services Application Guide January 1998

5-18 Voice menus Scripting the voice menu greeting
he N
h-ith
r, til out
yed enu
Scripting the voice menu greeting
Introduction The voice menu greeting is the first prompt that callers hear when they are connected to a voice menu.
Purpose of the greeting
The purpose of this greeting is to do the following:
• Identify your organization to let callers know where the call is being answered.
• Inform callers to wait on the line if they have a rotary phone. (If the caller does not provide any keypad input, tsystem times out and transfers the caller to the revert Dthat has been defined for the voice menu.)
• Inform callers to press star to hear the menu choices.
Example: menu greeting
The following is an example of a voice menu greeting:
“Thank you for calling ZUNI Radio. If you do not have a touctone phone, please wait on the line and an operator will be wyou shortly. To hear the menu choices, press star.”
Note: Alternatively, you can include the menu choices in the greeting so that callers do not have to press star (*). Howevecallers who do not have a touch-tone phone have to wait unall the menu choices are presented before the system timesand transfers the caller to an attendant.
Tips Always record a greeting for first-level menus. If the voice menu is not a first-level menu (that is, it is a submenu in a layered menu application), this greeting is not necessary.
If no greeting is recorded, the recorded menu choices are plawhen a caller accesses the voice menu (see “Scripting the mchoices prompt” on page 5-19).
Standard 1.0 Voice Services Application Guide January 1998

Voice menus 5-19Scripting the menu choices prompt
e its
enu
u f
of
in n
s
s
ave
his
d
Scripting the menu choices prompt
Introduction The menu choices prompt explains the options that are availablto the caller and solicits an action, after which the system wafor the caller to press a key. This prompt is played
• when a caller accesses a menu that is not a first-level m
• when a caller requests to hear menu choices again (if yohave assigned RP—Repeat Menu Choices—with one othe action keys)
• when a caller presses star <*> for assistance
• when a caller does not enter anything for a certain periodtime (that is, it acts as a delayed prompt if RP—Repeat Menu Choices—is defined as the delayed prompt actionthe voice menu definition). Note that a different action cabe defined for the initial no response. Initial no response only applies to first-level menus. If a caller does not presanything after the greeting in a first-level menu, this is usually a good indication that the caller does not have atouch-tone phone. Since the caller cannot press any keyand essentially cannot use the voice menu, instead of replaying the menu choices you might want to revert thecaller to a live attendant
• when a caller accesses a first-level menu that does not ha recorded greeting
Purpose of the menu choices prompt
The purpose of this prompt is to do the following:
• Inform callers of the menu choices that are available at tpoint.
• Inform callers of any additional information they may neein order to use the voice menu effectively. This usually includes information about the use of standard function keys. You should inform callers that they can
- Press star <*> to hear the menu choices again.
- Press <0> to revert to an attendant.
- Wait on the line if they have a rotary phone. (If the caller does not provide any keypad input, the system
Standard 1.0 Voice Services Application Guide January 1998

5-20 Voice menus Scripting the menu choices prompt
t
o
ess
peak
u
h hen ess,
times out and transfers the caller to the revert DN thahas been defined for the voice menu.)
- If this is not a first-level menu, this prompt should alsinform callers that they can press <#> to return to theprevious menu.
Example The following is an example of a menu choices prompt:
“To dial the extension of the person you want to speak to, pr1. To hear the latest weather report, press 2. To talk to the broadcaster, press 3. To leave a song request, press 4. To swith an operator, press 0. To hear your choices again, pressstar. To return to the main menu, press number sign.”
Tips When scripting the menu choices, it is recommended that yodescribe the item first and then provide information about which key to press. Callers tend to listen for the item in whicthey are interested and may not be paying close attention wthe number is announced first. If the caller has to repeat themenu choices to make sure he or she knows which key to prthe caller will be kept on the line longer.
Standard 1.0 Voice Services Application Guide January 1998

Voice menus 5-21Scripting the menu choices prompt
u
Diagram This flowchart illustrates a possible call sequence to show yowhen the various menu prompts are played.Caller dials the voice menuaccess number.
The voice menu greeting is played.
Caller presses * to listen tomenu choices again.
The menu choices prompt is played.
The caller makes a selection whichconnects him to a voice menu.
The menu choices prompt for voice menu 2 is played.
The caller presses #.
The menu choices prompt for voice menu 1 is played.
G100599
Standard 1.0 Voice Services Application Guide January 1998

5-22 Voice menus Identifying whether silent disconnect is required
ll
ue
nt. . If r
pt
Identifying whether silent disconnect is required
Description When silent disconnect is enabled, the system “Good-bye” prompt is not played when a caller is disconnected from the voice menu. If your Meridian Mail system is a front end for cacenter applications, this allows voice menus to be integratedinto the call center where high volumes of inbound calls are given a variety of treatments.
After leaving a voice menu, a caller may be passed to a quefor holding or to an Interactive Voice Response (IVR) application, or the caller may be played a RAN announcemeIn this case, the voice menu is not the terminating applicationthe caller hears the “Good-bye” prompt in this situation, he oshe may hang up prematurely.
If the voice menu is the terminating application, silent disconnect should be disabled. When the caller disconnectsfrom the voice menu, the system plays the “Good-bye” promto indicate that the end of the application has been reached.
Default setting Silent disconnect is disabled by default.
Standard 1.0 Voice Services Application Guide January 1998

Voice menus 5-23Identifying the language for system prompts (multilingual systems only)
on ll
Identifying the language for system prompts (multilingual systems only)
Description This is necessary only if more than one language is installedthe system. If this is the case, select the language in which asystem prompts are to be played. (Note that this is not a translation of the voice menu prompts.)
Standard 1.0 Voice Services Application Guide January 1998

5-24 Voice menus Assigning a menu action to keys 1 to 9
ed
:
do
e.
See
Assigning a menu action to keys 1 to 9
Introduction Using your ordered list of menu items, identify the corresponding menu actions. For example, if callers are to press 1 to dial an extension, this is the thru-dial service. Therefore, in the voice menu definition, the thru-dial service must be assigned to key 1.
If your voice menu has less than nine items, it is recommendthat you assign an action to those numeric keys that are notused.
Voice menu choices Using the previous example, the voice menu has six choices
1. dial by extension
2. dial by name
3. connect to customer support line
4. full address and fax number
5. new product information
6. customer satisfaction survey
What happens if the caller presses <7> inadvertently? If younot define an action, the following system prompt is played: “That selection is not recognized. Please make another choic” Since this is not very user friendly, it is suggested that you decide the action that should be taken if 7, 8, or 9 is pressed.“Assigning actions to undefined keys” on page 5-32.
Standard 1.0 Voice Services Application Guide January 1998

Voice menus 5-25Assigning a menu action to keys 1 to 9
to
),
- a
Example The following example shows the actions that are assigned the nine keys of our sample voice menu.
List of possible actions in response to a menu item
TS—Thru-dial serviceTo allow callers to place a call (dialing by number or by nameassign the thru-dial service to a voice menu key.
Identify the ID of the appropriate thru-dial service. (If the thrudial service has not yet been configured, create it and assignthru-dial ID to it.)
Example: Callers are instructed to press <2> if they know the extension of the person they want to speak to. The caller is
G100600
TS – Thru-dial service (dial by number)
TS – Thru-dial service (dial by name)
CL – Call customer support extension
AS – Announcement (address and fax number)
MS – New Product Information Menu Service
VF – Customer Satisfaction Voice Form Survey
PP – Play custom error message
PP – Play custom error message
PP – Play custom error message
Standard 1.0 Voice Services Application Guide January 1998

5-26 Voice menus Assigning a menu action to keys 1 to 9
e ave ent lly.
ssign
as ent
te
nu
s his of
connected to a thru-dial service that is set up for dialing by number only.
CL—Call If you want a call to be placed to a specific DN when a key ispressed, assign the call function to that key.
Identify the calling number.
Example: Callers are instructed to press <2> if they require technical support. When <2> is pressed, a call is placed to thcustomer support number (extension 2445). Callers do not hto know the extension or the name of anyone in this departmsince the call is placed to the appropriate number automatica
AS—Announcement serviceTo cause an announcement to play when a key is pressed, athe announcement service to a voice menu key.
Identify the ID of the announcement. (If the announcement hnot yet been configured, create it and assign an announcemID to it.)
Example: Callers are instructed to press <1> if they require directions to your office. When <1> is pressed, the appropriaannouncement is played.
MS—Voice menu serviceTo connect a caller to another voice menu, assign the voice menu service to a voice menu key.
Identify the ID of the voice menu service. (If the voice menu has not yet been configured, create it and assign a voice meID to it.)
Example: One of the choices in your main menu allows callerto call through to a specific department. When they choose toption, they are transferred to another voice menu, each itemwhich represents a department in your organization. (For example, “For customer support, press 1. To talk to a sales representative, press 2 ...”)
Standard 1.0 Voice Services Application Guide January 1998

Voice menus 5-27Assigning a menu action to keys 1 to 9
in
ff-
s. o
to u can
sed at
For ing e
not
r is a ay,
TD—Time-of-day controlIf a time-of-day controller is associated with a key in a voice menu, the caller is routed to a particular service (as defined the time-of-day control definition), depending on the day (holiday or non-holiday) and time of day (business hours or ohours).
Identify the ID of the time-of-day controller. (If the time-of-daycontroller has not yet been configured, create it and assign atime-of-day control ID to it.)
Example: You have a menu that is just a list of people’s nameFor example, “Press 1 to speak to Dr. Evenshire, 2 to speak tDr. Bradley ...” Each person in the list may want a different service to be invoked depending on the time of day that callsarrive. For example, Dr. Evenshire might be in surgery everymorning, so if a call arrives on a weekday morning, express messaging is invoked. If a call arrives in the afternoon, Meridian Mail rings his office phone.
EM—Express messagingIf you want the caller to be transferred to a mailbox in order leave a message, assign express messaging to that key. Yoconfigure express messaging to work in one of two ways:
1. When the key is pressed, the caller is automatically pasto a specific mailbox. The caller hears the greeting for thmailbox and is prompted to leave a message.
Use this method to create a general messages mailbox.example, you are going to use a voice menu service duroff-hours. You want callers to be able to leave a messagfor the person they are trying to reach. If the caller does know the extension number, he or she cannot leave a message. To get around this, create a special mailbox inwhich callers can leave messages. This mailbox numbeentered into the voice menu definition. The caller leavesmessage specifying who the message is for. The next dthe owner of the mailbox (a receptionist or secretary) listens to the messages and transfers them to the appropriate people.
Standard 1.0 Voice Services Application Guide January 1998

5-28 Voice menus Assigning a menu action to keys 1 to 9
a
to ws
n
w
ed. ral lti-
its .
he
.
2. When the key is pressed, the caller is prompted to entermailbox number.
When a caller enters the extension, he or she hears thepersonal greeting of the mailbox owner and is promptedleave a message after the tone. This type of service allocallers to leave messages directly in the mailbox of the person for whom the message is intended.
The following fields may also appear when defining a DN forexpress messaging:
• Mailbox ID In the first scenario, you need to identify themailbox ID. The Mailbox ID can be up to 18 digits in length.
In the second scenario, do not specify a Mailbox ID, to allow for caller input.
If you do not specify a mailbox ID, you can use ExpansioDigits and Enforce Prefix (described below).
• Expansion Digits
Note: Usually for Meridian 1 systems, the System Addressing Length in the General Options screen will beset to 0. If this field is set to 0, the Expansion Digits and Enforce Prefix fields does not show up. Expansion digitsare normally intended for Meridian Mail systems that areconnected to DMS switches (or an SL-100 switch) to allousers to enter a shorter form of mailbox number called local addressing lengths.
To use expansion digits, both the System Addressing Length and the local addressing lengths must be specifiThe System Addressing Length is specified in the GeneOptions screen (at the system administration level in mucustomer systems). The local addressing lengths are defined in the Voice Messaging Options screen (at the customer administration level).
For example, the System Addressing Length is seven dig(598-2339). Local Meridian Mail DNs are four digits long
If expansion digits are not used, the caller has to enter tfull seven-digit DN. However, if expansion digits are implemented, the user need only enter the four-digit DN
Standard 1.0 Voice Services Application Guide January 1998

Voice menus 5-29Assigning a menu action to keys 1 to 9
d.
n a
is at e n-s 75
a ote
em ions
s
g
nd rded
ed e
The shortened DN is expanded out to the full System Addressing Length using the expansion digits in this fiel
The expansion digits in this example would be 598. Whecaller specifies the DN 2339, it is expanded to 5982339.
• Enforce Prefix If expansion digits are used, you can alsoenable a feature called Enforce Prefix. If Enforce Prefix implemented, callers will not be allowed to enter a DN thconflicts with the expansion digits. For example, if EnforcPrefix is disabled, users would be able to specify a sevedigit DN such as 575-2115. If, however, Enforce Prefix ienabled, the call would not be placed in this case since 5conflicts with the expansion digits (598).
VM—Voice messagingTo allow Meridian Mail users to log on to their mailbox from voice menu, assign the voice messaging service to a key. (Nthat callers cannot return to the voice menu once they have invoked voice messaging.)
As with express messaging, you have the option of enteringexpansion digits to make dialing more convenient if the SystAddressing Length is greater than 0. See the above descriptof Expansion Digits and Enforce Prefix.
Example: You have set up an automated attendant (a voice menu) which is active during off-hours. If Meridian Mail usercall in to the office from home, they can log in to their mailboxes in order to listen to any new messages by choosinthis menu option.
PM—Prompt maintenanceTo allow administrative delegates to call in to a voice menu athen access the prompt maintenance service to update recoprompts, assign the prompt maintenance service to a voice menu key.
GS—Greetings serviceIf the VMUIF interface is installed on your system (and enablfor the customer group), you can assign this action to a voicmenu key.
Standard 1.0 Voice Services Application Guide January 1998

5-30 Voice menus Assigning a menu action to keys 1 to 9
a r
r it
this d
y
rms.
on o a
ill
The greetings service allows callers to update their personalgreeting using a simplified interface that requires no keypadinput. The service simply prompts callers to speak at certaintimes to record a new greeting.
Note: This service is primarily intended for users with rotary phones. However, rotary phone users cannot access it fromvoice menu. Therefore, there must be a VSDN configured fothis service in the VSDN table. However, if any users with touch-tone service prefer this simplified service, you can offeto them through a voice menu.
Possible actions if Voice Forms is installed
The following two actions can be included in a voice menu ifthe Voice Forms feature is installed.
VF—Voice forms serviceTo make a voice form accessible from a voice menu, assign service to the appropriate voice menu key. A voice form is aservice which must be planned and configured separately anthen incorporated into the voice menu.
Identify the ID of the voice form.
Example: You have created a number of voice forms to survecustomer satisfaction with a number of products. You could create a voice menu to serve as a front end to these voice foCallers are prompted to “Press 1 to tell us what you think aboutProduct A. Press 2 to make comments about Product B...”
TR—Transcription serviceTo allow transcribers of voice forms to access the transcriptiservice from a voice menu, assign the transcription service tmenu key.
If you want transcribers to be automatically logged in to a particular voice form, identify the ID of the voice form. To allow transcribers to specify which voice form they want to transcribe, do not specify a voice form ID. The transcriber wbe prompted for the voice form number.
Standard 1.0 Voice Services Application Guide January 1998

Voice menus 5-31Assigning a menu action to keys 1 to 9
r
g
. If heir ord
a
d
be
ead
at
s can
Possible actions if HVS is installed
The following two actions can be included in a voice menu ifHospitality Voice Services (HVS) is installed (not available foMeridian Mail GP systems).
HM—Hospitality messagingIf Hospitality is installed, this option is available instead of Voice Messaging. It allows users in a hospitality system to loon to their mailboxes from a voice menu.
Identify whether autologon should be enabled. When it is enabled, the system tries to automatically log the user on, depending on the class of service to which the user belongslogon is automatic, guests can only retrieve messages from town rooms as they are not given a chance to specify a passwthat is different from the one associated with the phone fromwhich they are dialing. When disabled, the user has to entermailbox number and password. In this manner, guests can access their messages while they are in other rooms providethey know their password.
CO—Post-checkout mailboxAssign this action to a voice menu key if you want guests to able to connect to the post-checkout mailbox service from a voice menu. This service allows hotel guests to hear any unrmessages that may have arrived prior to their checkout.
Example: You want guests who have recently checked out ofyour hotel to be able to call in and listen to any messages tharrived before checkout, but that they did not get a chance tolisten to. Assign CO to a voice menu and then give the voicemenu access number to guests when they check out. Guestcall in later that day to make sure they have received all messages.
Possible actions if Fax on Demand is installed
If Fax on Demand is installed (and enabled for the customergroup), the following two actions can be included in a voice menu.
FI—Fax Information serviceAssign this action to a voice menu key to allow callers to retrieve fax items from a voice menu. Fax items must be
Standard 1.0 Voice Services Application Guide January 1998

5-32 Voice menus Assigning a menu action to keys 1 to 9
ated
.
rs.
ate
er
r de ice
nal
a
uld )
if a
pt.
m e tly
planned and configured separately and then can be incorporin voice menus. See the Fax on Demand Application Guide (NTP 555-7001-327) for information about creating fax items
Identify the ID of the fax item that is to be transmitted to calle
Example: Instead of providing directions to your office in the form of an announcement, you decide to draw a map and crea fax item out of it. The menu greeting and menu choices prompt would say something like: “If you require directions to our location and are at a fax phone or can provide the numbof a fax phone, press 3 to have a map faxed to you.”
FIM—Fax item maintenanceThe fax item maintenance service allows the administrator oadministrative delegates to update fax items and can be maaccessible from a voice menu by assigning this action to a vomenu key.
If multiple languages are installed on the system, identify theLanguage of Service. This is the language in which instructioprompts will be played. If administrative delegates have different language preferences, you can assign this action tonumber of keys and specify different languages.
Assigning actions to undefined keys
If your voice menu has less than nine choices, an action shostill be assigned to each of the remaining undefined (or extrakeys. This allows you to decide what action should be taken caller inadvertently presses a key that is undefined. These actions, however, are not real choices and should not be included in the menu greeting prompt or menu choices prom
For example, callers are given five choices (“Press 1 to ... Press 2 to ... Press 3 to ... Press 4 to ... Press 5 to ...”). The caller presses <8> instead of <5>. One of the following actions canoccur: the caller can be transferred to the revert DN, a custoprompt can be played, the menu choices can be repeated, thcaller can be returned to the main menu (if the caller is currenin a submenu), or the call can be disconnected.
If you do not define an action, the system plays the followingerror prompt: “That selection is not recognized. Please make
Standard 1.0 Voice Services Application Guide January 1998

Voice menus 5-33Assigning a menu action to keys 1 to 9
s at
t ler
ur ith
a
an the
to a
ined u
nu
another choice.” Since this prompt is not very friendly and doenot provide much information, it is generally recommended thyou assign PP or RV to any extra (undefined) keys.
PP—Play promptIf this action is associated with a menu key, a custom promp(recorded by the administrator) is played. This allows you tocreate your own custom error messages and instruct the calwhat to do if an invalid key was pressed.
An example of a custom error prompt is “That is not an option. Please choose a number from 1 to 6 or press <*> to hear yochoices again. If you require assistance, press 0 to speak wan operator.”
If this action is assigned to a key but you have not recorded custom prompt, the following prompt is played to callers: “No prompt has been recorded. Please make another choice.”
RV—Call revert DNIf you want a caller to be transferred to a live attendant whenundefined key is pressed, select this action. Make sure that Revert DN for the voice menu is defined. (If this DN is not defined, the following message is played: “That selection is not recognized. Please make another choice.”) The attendant can now give the caller personal assistance.
RP—Repeat menu choicesThe menu choices prompt is played if this action is assigned pressed key.
MM—Return to main menuIf the caller is in a submenu and he or she presses an undefkey, this action returns the caller to the main menu. The menchoices prompt for the main menu is repeated. If the currentmenu is the main menu (that is, the first-level menu), the mechoices prompt is repeated.
Standard 1.0 Voice Services Application Guide January 1998
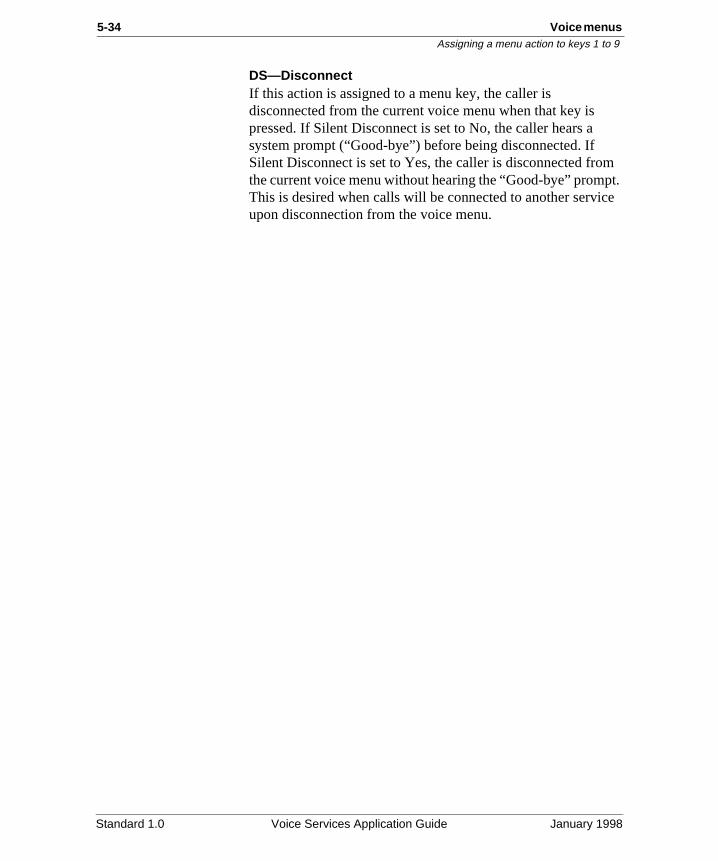
5-34 Voice menus Assigning a menu action to keys 1 to 9
m pt. ce
DS—DisconnectIf this action is assigned to a menu key, the caller is disconnected from the current voice menu when that key is pressed. If Silent Disconnect is set to No, the caller hears a system prompt (“Good-bye”) before being disconnected. If Silent Disconnect is set to Yes, the caller is disconnected frothe current voice menu without hearing the “Good-bye” promThis is desired when calls will be connected to another serviupon disconnection from the voice menu.
Standard 1.0 Voice Services Application Guide January 1998

Voice menus 5-35Assigning a menu action to keys 1 to 9
ign n, d.
Summary of menu actions and related fields
The following table summarizes the actions that you can assto any one of the numeric keys (1 to 9). For each menu actioany required or optional fields (such as service IDs) are liste
Menu action Related fields
AS: announcement Announcement ID (required)
TS: thru-dial service Thru-Dial ID (required)
TD: time-of-day controller Time-of-Day Control ID (required)
MS: voice menu service Voice Menu ID (required)
CL: call Calling Number (required)
EM: express messaging Mailbox ID (optional)If no Mailbox ID is specified, Expansion Digits and Enforce Prefix (both optional)
VM: voice messaging Expansion Digits (optional)Enforce Prefix (optional if Expansion Digits are used)
PM: prompt maintenance service Language of Service (multilingual systems only)
GS: greetings service N/A
VF: voice form Voice Form ID (required)
TR: transcription service Voice Form ID (optional)
HM: hospitality messaging Autologon (disable or enable)
CO: post-checkout mailbox N/A
FI: fax information service Fax Item ID (required)
FIM: fax item maintenance service Language of Service (multilingual systems only)
PP: play prompt N/A
RV: call revert DN (a revert DN must be defined for the voice menu)
RP: repeat menu choices N/A
MM: return to main menu N/A
DS: disconnect N/A
Standard 1.0 Voice Services Application Guide January 1998

5-36 Voice menus Identifying the initial no response action
t
ut to to n.
r ly
,
a on.
Identifying the initial no response action
Description In addition to defining an action for the keys 1 to 9, you musspecify the action that should be taken if there is no initial response on the part of the caller within a certain amount of time.
This amount of time is defined as the Command Entry timeovalue in the Voice Services Profile. If Command Entry is set five seconds, for example, and a caller who has just listenedthe menu choices greeting waits longer than five seconds tomake a selection, then the Initial No Response action is take
Initial No Response is primarily intended to deal with callers who do not have touch-tone phones. If no keypad input is provided by the caller, the most likely reason is that the callehas a rotary phone. In your voice menu greeting, you probabincluded the statement “If you do not have a touch-tone phoneplease wait on the line and an operator will be with you shortly.” To transfer a caller to an operator for assistance fromlive attendant, you should assign the RV (call revert DN) acti
Standard 1.0 Voice Services Application Guide January 1998

Voice menus 5-37Identifying the delayed response action
ing
at t ),
ve . If the
te
Identifying the delayed response action
Description A delayed response means that the caller is slow in respondto a prompt (by pressing a key on the telephone keypad). Delayed Response is different from Initial No Response, in thit is used only if the caller has already provided keypad inpu(therefore, it is known that the caller has a touch-tone phonebut is now delaying in providing subsequent input.
For example, a caller has accessed a voice menu that has fichoices, but pressed <7> by mistake. The menu choices arerepeated and the caller is now delaying in choosing an optionthe caller waits longer than a predetermined amount of time, Delayed Response action is taken.
Since the caller does have a touch-tone phone, an appropriaaction would be RP (repeat menu choices) or RV (call revertDN) since the caller may need assistance at this point.
Standard 1.0 Voice Services Application Guide January 1998

5-38 Voice menus Identifying how the voice menu will be accessed
nu.
a ce.
Identifying how the voice menu will be accessed
Description Identify how the voice menu will be accessed by callers. A voice menu can be accessed in one of the following ways:
• directly; the caller dials the VSDN of the voice menu.
• directly, as a call forward from a DN.
• indirectly, through another voice menu application.
The published number connects the caller to a voice meThe caller accesses the voice menu by pressing the appropriate menu key in a higher level menu.
• indirectly, through a time-of-day controller.
If the voice menu is associated with the time of day at which the call is received (business hours, off-hours, or holiday), the caller is connected to the voice menu servi
• directly.
The caller calls a trunk that is auto-terminated to the VSDN.
Standard 1.0 Voice Services Application Guide January 1998

Voice menus 5-39Identifying how the voice menu will be accessed
Standard 1.0 Voice Services Application Guide January 1998

5-40 Voice menus Identifying how the voice menu will be accessed
Standard 1.0 Voice Services Application Guide January 1998

Chapter 5
Voice menus 5-41Section B Confi gurin g voice menus
In this section
Overview of configuring a voice menu 5-42
The Voice Menu Definitions data menu 5-44
Adding a voice menu 5-46
Recording the voice menu greeting, menu choices prompt, and play prompts
5-51
Making the voice menu accessible 5-53
Testing the voice menu 5-56
Creating personal voice menus 5-57
Standard 1.0 Voice Services Application Guide January 1998

5-42 Voice menusOverview of configuring a voice menu
u
e
ting
his
Ns,
st , a
at ey
Overview of configuring a voice menu
Introduction This section outlines the steps required to add a voice menuservice. Refer to your Voice Menu Definition Worksheet as yofollow the procedures in this section.
Process for adding a voice menu service
Adding a voice menu service involves the following steps:
1. Add a new voice menu definition.
2. Record the voice menu greeting and menu choices prompts.
3. Make the voice menu accessible.
4. Test the voice menu.
Voice Menu Definitions screen
For a description of the Voice Menu Definitions data menu screen, see “The Voice Menu Definitions data menu” on pag5-44. This screen provides a list of existing voice menus.
Personal voice menus For a discussion on creating personal voice menus, see “Testhe voice menu” on page 5-56.
Tip: Voice Services first, VSDNs later
A voice menu can be added to the system without a corresponding DN having been defined in the VSDN table. Tallows you greater flexibility when creating applications because you can create voice menus first and then assign Dor vice versa.
However, you must ensure that all voice services have a corresponding DN in the VSDN table, or are associated withanother voice service (such as a time-of-day controller). Thesystem does not perform any sanity checking to guard againthe possibility of an orphan service definition (in other wordsservice ID that does not have a corresponding VSDN).
Multi-customer administration
On multi-customer systems, voice menus can only be addedthe customer administration level. However, once created, thcan be viewed, modified, or deleted from the system administration level.
Standard 1.0 Voice Services Application Guide January 1998

Voice menus 5-43Overview of configuring a voice menu
s
th the r
r
Starting points for procedures
On multi-customer systems, customer administration screenare invoked from the Customer Administration menu. Therefore, the starting point for some procedures refer to bothe Main Menu (applicable to single-customer systems) and Customer Administration menu (applicable to multi-customesystems).
ATTENTION
Do not perform voice services administration during the nightly DR audit.
At 3:30 a.m. every day, an audit of the DR directory is performed. Do not add, modify, or delete voice service definitions during this audit. Depending on how unbalanced the system is, this audit can take anywhere from ten minutes (if the system has not been modified since the last audit) to two hours (if there have been manychanges, such as a lot of users or services being added omodified).
Standard 1.0 Voice Services Application Guide January 1998

5-44 Voice menusThe Voice Menu Definitions data menu
d do
ge
u”
The Voice Menu Definitions data menu
Introduction The Voice Menu Definitions data menu lists all the configurevoice menus on the system. From this screen, you can also the following:
• add a new voice menu (see “Adding a voice menu” on pa5-46)
• view or modify an existing voice menu (see “Modifying avoice menu” on page 5-61)
• delete an existing voice menu (see “Deleting a voice menon page 5-63)
The screen The following is an example of the Voice Menu Definitions screen.
Standard 1.0 Voice Services Application Guide January 1998

Voice menus 5-45The Voice Menu Definitions data menu
se
Procedure: Accessing the screenTo access the Voice Menu Definitions data menu, follow thesteps.
Starting Point: The Main menu or the Customer Administration menu (on multi-customer systems)
Step Action
1 Select Voice Administration.
Result: The Voice Administration menu is displayed.
2 Select Voice Services Administration.
Result: The Voice Services Administration menu is displayed.
3 Select Voice Menu Definitions.
Result: The Voice Menu Definitions data menu is displayed.
Standard 1.0 Voice Services Application Guide January 1998

5-46 Voice menusAdding a voice menu
ate g
Adding a voice menu
Introduction This section and the sections that follow describe how to crea new voice menu service. This process involves the followinsteps:
1. Add a new voice menu definition.
2. Record the necessary greetings and prompts.
3. Make the voice menu accessible.
4. Test the voice menu.
Procedure Adding a voice menu definition requires that you input the information from the Voice Menu Definition Worksheet into the Meridian Mail system. Have your worksheet available asyou follow these steps.
To add a new voice menu, follow these steps.
Starting Point: The Voice Services Administration menu
Step Action
1 Select Voice Menu Definitions.
Result: The Voice Menu Definitions screen is displayed.
2 Press the [Add] softkey.
Result: The Add a Voice Menu Definition screen is displayed. See the screen example starting on page 5-47.
3 Fill in the fields using the information recorded on your Voice Menu Worksheet. Keep in mind that the Revert DN field and the password fields are optional and can be left blank.
4 If you are satisfied with the information you have entered, press the [Save] softkey. Otherwise, press [Cancel] to discard the information.
Result: Whether you save or cancel, you are returned to the Voice Menu Definitions screen.
Standard 1.0 Voice Services Application Guide January 1998

Voice menus 5-47Adding a voice menu
The screen The following is an example of the Add a Voice Menu Definition screen.
Standard 1.0 Voice Services Application Guide January 1998

5-48 Voice menusAdding a voice menu
Standard 1.0 Voice Services Application Guide January 1998

Voice menus 5-49Adding a voice menu
ce
g
e
Field descriptions The following fields appear in the Add a Voice Menu Definition screen.
Voice Menu ID
Description The voice menu ID must be a unique number.
Title
Description The voice menu title should indicate what the voice menu does.
Revert DN
Description The DN to which callers are transferred under particular circumstances.
Access Password
Description The access password restricts access to the voimenu service. This field should be left blank if you want to make the voice menu service accessible to all users.
Update Password
Description The Update Password allows you to update the voice menu prompts from a remote location usinthe Voice Prompt Maintenance Service. For details, see Chapter 9, "Voice prompt maintenancand remote activation".
Standard 1.0 Voice Services Application Guide January 1998

5-50 Voice menusAdding a voice menu
a
”
by
.
g g
y
Greeting Recorded (Voice)
Description This read-only field shows whether the voice menu greeting has been recorded. You can add voice menu greeting by selecting the [Voice] softkey while your cursor is positioned in this field. For details, see “Recording the voice menugreeting, menu choices prompt, and play promptson page 5-51.
Menu Choices Recorded (Voice)
Description This read-only field shows if the menu choices have been recorded. You can add menu choicesselecting the [Voice] softkey while your cursor ispositioned in this field. For details, see “Recording the voice menu greeting, menu choices prompt, and play prompts” on page 5-51
Silent Disconnect
Description If this field is set to Yes, the voice menu terminates without playing the system “Good-bye” sign-off.
Language for prompts
Description If more than one language is installed, this field displays the language for the voice menu greetinif the system greeting is used (if a custom greetinwas not recorded).
Key/Action
Description These are the menu actions assigned to each keor digit that the caller may press.
Initial No Response
Description This is the action taken when there is no initial response from the caller.
Delayed Response
Description This is the action taken when there is a delayed response from the caller.
Standard 1.0 Voice Services Application Guide January 1998

Voice menus 5-51Recording the voice menu greeting, menu choices prompt, and play prompts
l g
e
er 9,
,
Recording the voice menu greeting, menu choices prompt, and play prompts
Introduction The menu greeting and the menu choices prompt can be recorded in one of two ways: from the administration terminausing the [Voice], or from a remote DTMF telephone set usinthe voice prompt maintenance service. If the environment around your terminal is noisy, you may prefer to use the voicprompt maintenance service to call from a phone in a quiet location.
This section describes how to use the [Voice] softkey. For details on the voice prompt maintenance service, see Chapt"Voice prompt maintenance and remote activation".
Procedure To record the voice menu greeting and menu action promptsfollow these steps.
Starting Point: The Add a Voice Menu Definition screen
Step Action
1 To record the menu greeting, go to step 1a. To record the menu choices prompt, go to step 1b. To record a play prompt, go to step 1c.
a. Move the cursor to the Greeting Recorded field.
b. Move the cursor to the Menu Choices Recorded field.c. Move the cursor to the key for which you want to record a
prompt and enter PP in the Action field.Result: Another field, Recorded (Voice), is displayed. If no prompt is currently recorded, the new field displays No.
2 Press [Voice].
Result: You are prompted for a phone number.
3 Enter the number for the phone set you are going to use to make the recording.
Result: The phone you specified rings.
Standard 1.0 Voice Services Application Guide January 1998

5-52 Voice menusRecording the voice menu greeting, menu choices prompt, and play prompts
4 Pick up the telephone handset.
Result: The following recording softkeys are displayed.
5 Press the [Record] softkey.
Result: A beep sounds when it is OK to record.
6 At the sound of the beep record the prompt. When finished recording, press the [Stop] softkey.
Result: The following softkeys are redisplayed.
Note: The recording stops automatically if you exceed the Maximum Prompt Size or the Record Time-out set in the Voice Services Profile.
7 Follow step 7a to review the greeting or prompt, or step 7b to disconnect the call.
a. Use the [Play] softkey to play the recording, [Delete] to delete the recording, or [Delete] followed by [Record] to rerecord the prompt.
b. To disconnect the call, press the [Disconnect] softkey or just hang up the phone and press return.
Result: The original softkeys are redisplayed.
8 Repeat steps 1 to 7 for any other greetings or prompts that you need to record for this voice menu.
9 Press [Save] to save the recording and the voice menu definition. Or press [Cancel] to discard the recording and revert to the previously saved version of the voice menu.
Step Action
Standard 1.0 Voice Services Application Guide January 1998

Voice menus 5-53Making the voice menu accessible
ree
1
Making the voice menu accessible
Introduction You can make a voice menu accessible to callers in one of thways:
• direct access
• indirect access through another voice menu
• indirect access through a time-of-day controller
Direct access Callers access the voice menu by dialing a special DN that connects them directly to the voice menu. This procedure assumes that there are available ACD DNs on the Meridian (or line DNs if your system is connected to a DMS switch).
Procedure To make the voice menu accessible, follow these steps.
Starting Point: The Voice Services Administration menu
Step Action
1 Select Voice Services-DN Table.
Result: The Voice Services-DN Table is displayed.
Standard 1.0 Voice Services Application Guide January 1998

5-54 Voice menusMaking the voice menu accessible
2 Press the [Add] softkey.
Result: The Add DN Information screen appears.
3 Enter the Access DN. This is the number that callers dials to access the voice menu. Get the DN from your switch administrator, or print the directory number block (DNB) at the switch to obtain an unused DN.
Note: The Access DN cannot match a mailbox number.
4 Enter MS in the Service field.
Result: An additional field, Voice Menu ID, is displayed.
5 Enter the voice menu ID in the Voice Menu ID field.
6 Select the Session Profile according to one of the following criteria:
a. If the voice menu activates a multimedia service, you must choose Full-Multimedia.
b. If it activates only voice services, choose Full_Voice.
c. If it activates only basic voice services, choose Basic.d. You can also choose Custom and then design the custom
session profile to support the level of service required. For details on configuring a custom session profile, refer to the Meridian Mail System Administration Guide for your platform
7 Enter a comment.
This step is optional, but a comment that identifies the voice menu is useful here.
8 Press the [Save] softkey to save the VSDN Table.
Step Action
Standard 1.0 Voice Services Application Guide January 1998

Voice menus 5-55Making the voice menu accessible
u and
re ay. D ith
f-d.
Indirect access through another voice menu
Callers dial the DN of the first-level voice menu. The menu yoare creating is a menu action (a submenu) of the main menuis accessed when the caller presses the appropriate key.
The VSDN of the main menu is entered in the VSDN table since the submenu is accessed from the main menu.
Indirect access through a time-of-day controller
Callers dial the DN of the active time-of-day controller and arouted to the voice menu depending on the day and time of dAny one of the three time periods in a time-of-day controller I(Business Hours, Off-Hours, or Holiday) can be associated wa voice menu ID.
You can either modify an existing time-of-day controller definition or create a new time-of-day controller. If the time-oday controller already exists, the VSDN will already be define
For instructions on planning and creating a time-of-day controller, see Chapter 8, "Time-of-day controllers".
Standard 1.0 Voice Services Application Guide January 1998

5-56 Voice menusTesting the voice menu
e s ally
Testing the voice menu
Introduction Call the menu service (or time-of-day controller) VSDN and test every menu action. Have your diagram and worksheet infront of you to verify that the correct actions are taken. For items that do not work, return to the definition screen and correct the mistake. If, for example, the wrong service is accessed, you probably entered the wrong service ID in the voice menu definition. After making any modifications, test thmenu again. If you have to go back and modify again, alwaytest the service afterwards to ensure your modifications actufixed the problem.
Standard 1.0 Voice Services Application Guide January 1998

Voice menus 5-57Creating personal voice menus
ho ons 0 for
d
N
(or
Creating personal voice menus
Introduction Voice menus can be created specially for particular users wrequire more options than the standard call answering optithat are presented to callers (to leave a message or pressassistance). These are known as personal voice menus. Discuss with your user the various actions that are requireand determine an appropriate design.
The user’s DN is entered as a voice service DN in the VSDtable. When the DN is called, the voice menu application associated with the DN takes the call. Unlike regular voicemenus, personal voice menus do not require an ACD DN hunt group) because there is a real DN already associatedwith the user’s phone or mailbox.
Procedure To set up a personal voice menu, follow these steps.
Step Action
1 Create a voice menu application, as described in this chapter, that meets the needs of the user.
2 Return to the Voice Services Administration menu.
3 Select Voice Services-DN Table.
4 Press [Add].
Result: The Add DN Information screen is displayed.
5 Enter the user’s extension DN as the access DN.
6 Enter MS (voice menu service) as the service.
7 Enter the service ID.
8 Save the DN information.
Standard 1.0 Voice Services Application Guide January 1998

5-58 Voice menusCreating personal voice menus
Standard 1.0 Voice Services Application Guide January 1998

Voice menus 5-59
Section C Modif ying or deletin g a voice menu
In this section
Overview of modifying or deleting a voice menu 5-60
Modifying a voice menu 5-61
Deleting a voice menu 5-63
Standard 1.0 Voice Services Application Guide January 1998

5-60 Voice menusOverview of modifying or deleting a voice menu
e .
Overview of modifying or deleting a voice menu
Introduction This section provides procedures for modifying and deletingvoice menus.
Multi-customer administration
On multi-customer systems, you can modify and delete voicmenus at either the system or customer administration level
Standard 1.0 Voice Services Application Guide January 1998

Voice menus 5-61Modifying a voice menu
ice.
Modifying a voice menu
Introduction While a voice menu is being updated, the old version of the voice menu is still played to callers. The new version takes effect when the updated voice menu has been saved.
Tip: Modifying the recorded greeting and prompts
You can modify the recorded greeting and prompts from anytouch-tone phone using the Voice Prompt Maintenance servSee Chapter 9, "Voice prompt maintenance and remote activation".
Procedure To modify a voice menu definition, follow these steps.
Starting Point: The Voice Services Administration menu
Step Action
1 Select Voice Menu Definitions.
Result: The Voice Menu Definitions screen is displayed.
2 Move the cursor to the voice menu definition you want to view or modify.
3 Press the <spacebar> to select it.
Standard 1.0 Voice Services Application Guide January 1998
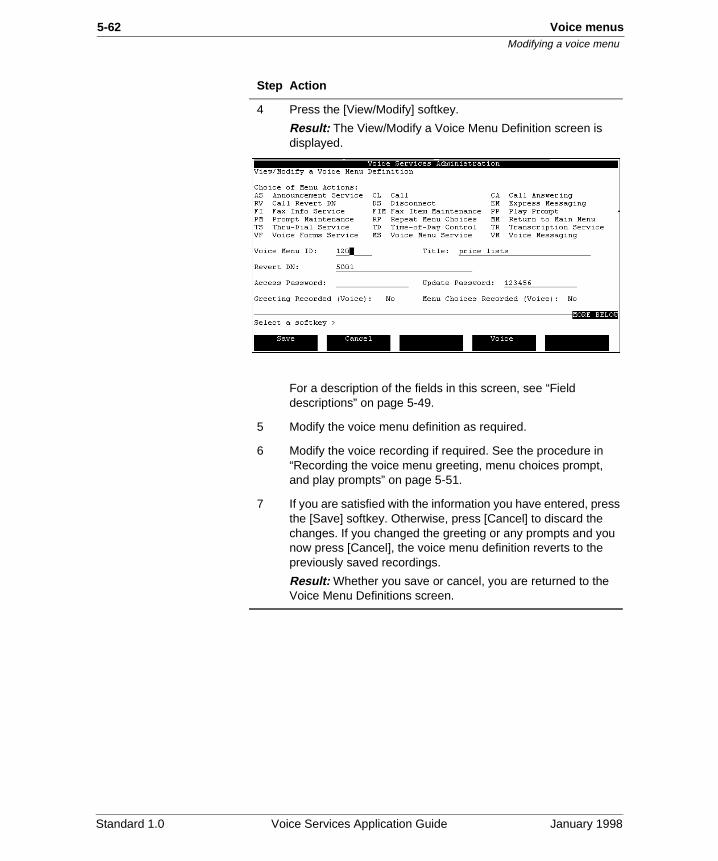
5-62 Voice menusModifying a voice menu
4 Press the [View/Modify] softkey.
Result: The View/Modify a Voice Menu Definition screen is displayed.
For a description of the fields in this screen, see “Field descriptions” on page 5-49.
5 Modify the voice menu definition as required.
6 Modify the voice recording if required. See the procedure in “Recording the voice menu greeting, menu choices prompt, and play prompts” on page 5-51.
7 If you are satisfied with the information you have entered, press the [Save] softkey. Otherwise, press [Cancel] to discard the changes. If you changed the greeting or any prompts and you now press [Cancel], the voice menu definition reverts to the previously saved recordings.
Result: Whether you save or cancel, you are returned to the Voice Menu Definitions screen.
Step Action
Standard 1.0 Voice Services Application Guide January 1998

Voice menus 5-63Deleting a voice menu
e
l it
r
ce n
e he is.
s, the
Deleting a voice menu
Introduction Voice menus are deleted from the Delete a Voice Menu Definition screen. The fields in this screen are read-only. If thvoice menu is being modified through the voice prompt maintenance service, you cannot delete the voice menu untihas been saved.
Voice menus associated with other voice services
If the voice menu you are deleting is associated with anothevoice menu or a time-of-day controller, be sure to modify theappropriate definitions to account for the absence of this voimenu (that is, remove references to this voice menu ID withithe voice menu or time-of-day controller definition). If the voice menu is associated with an entry in the VSDN table, bsure to delete it. VSDNs must not point to deleted services. Tsystem does not perform a sanity check to ensure against th
Also, if the voice menu contains any thru-dial services, announcements, time-of-day controllers, voice forms, fax itemor other voice menus, these services will not be deleted fromsystem.
Procedure To delete a voice menu definition, follow these steps.
Starting Point: The Voice Services Administration menu
Step Action
1 Select Voice Menu Definitions.
Result: The Voice Menu Definitions screen is displayed.
2 Move the cursor to the voice menu definition you want to delete.
3 Press the <spacebar> to select it.
Standard 1.0 Voice Services Application Guide January 1998

5-64 Voice menusDeleting a voice menu
4 Press the [Delete] softkey.
Result: The voice menu definition is displayed under the heading Delete a Voice Menu Definition, and new softkeys are displayed. This screen is displayed so that you can see which voice menu definition you have selected to delete.
5 Review the voice menu definition to make sure you are deleting the right voice menu.
6 Press the [OK to Delete] softkey to delete the voice menu, or press [Cancel] to exit this screen without deleting.
Result: Whether you delete or cancel, you are returned to the Voice Menu Definitions screen.
7 If the voice menu service was associated with a DN in the VSDN table, go to the VSDN table and delete the DN.
If the voice menu was associated with a time-of-day controller or another voice menu, go to the appropriate service definition and delete references to the voice menu.
Step Action
Standard 1.0 Voice Services Application Guide January 1998

Chapter 6
Automated attendants
In this chapter
Overview 6-2
Basic automated attendant 6-3
Automated attendant with menu choices 6-6
Announcement-only automated attendant 6-11
Leave-a-message auto attendant 6-13
Time-of-day controlled automated attendant 6-17
Nested time-of-day controls 6-19
Mixed live and automated attendants 6-22

6-2 Automated attendants Overview
ers h
nly
ns use
Overview
Introduction An automated attendant is a service that automatically answcalls within a predefined number of rings, with no assistancefrom a live attendant (operator). It then allows callers to reacan extension by prompting the caller to enter the extension number or name, or it offers other services such as announcements or voice menus choices. An automated attendant can process multiple calls simultaneously, and is olimited by the number of ports on the Meridian Mail system.
This chapter provides an example of the following types of automated services:
• basic automated attendant
• automated attendant with menu choices
• announcement-only automated attendant
• leave-a-message automated attendant
• time-of-day controlled automated attendant
• automated attendants used with nested time-of-day controllers
• mixed live and automated attendants
These examples are here to illustrate the types of applicatiothat are possible, and to stimulate ideas about how you can automated attendants in your organization.
Standard 1.0 Voice Services Application Guide January 1998

Automated attendants 6-3Basic automated attendant
nt, a ler
on
ple
e line
h.
e
tary that
ide
to
l
Basic automated attendant
Introduction The most basic automated attendant uses only the thru-dial service. When a caller reaches the basic automated attendaprompt for the extension number or name is played. The calthen enters the number or name and the call is placed. If thecaller does nothing, the call is routed to a live attendant.
This version of the automated attendant is useful for organizations whose employees have the same likelihood ofbeing called. The value of this automated attendant dependscallers knowing the extension numbers or names of the peothey want to reach.
This automated attendant can be set up as a separate outsidso that this number would be given to callers who know the extension numbers or names of the people they wish to reacAnother line with a live attendant could then handle the one-time callers who do not have the necessary information.
To plan and configure a thru-dial service, see Chapter 4, "Ththru-dial service".
Example Peer Enterprises does not have a receptionist, and the secreis too busy to answer the phone all day. It has been decideda basic automated attendant that allows callers to thru-dial issufficient.
Setup 1. The secretary’s number is used as the revert DN to provcallers with assistance if necessary.
2. An access password is not needed since all callers needbe able to access the thru-dial service.
3. An update password is needed so that the voice promptmaintenance service can be used to update the thru-diagreeting.
4. The dialing method is by number or by name (caller preference).
Standard 1.0 Voice Services Application Guide January 1998

6-4 Automated attendants Basic automated attendant
lls
. If al, ou
e d.”
5. Only internal extensions are permitted—no off-switch caare allowed (the existing OnSwitch restriction/permissionset is applied to the thru-dial service).
6. The thru-dial greeting is as follows:
“Thank you for calling Peer Enterprises. If you would like to speak to the receptionist, or if you have a rotary-dial phone, please wait on the line and someone will be with you shortlyyou know the extension number of the person you wish to dienter the extension number followed by the number sign. If yknow only the person’s name, please press 11, then spell thlast name followed by the first, using the letters on the keypa
Standard 1.0 Voice Services Application Guide January 1998

Automated attendants 6-5Basic automated attendant
ic
Example The following flowchart shows the call sequence for this basautomated attendant.Caller dials main number to Peer Enterprises.
Call terminates on a dummy ACD queue (or hunt group).
Call is forwarded to the Prime Voice Messaging Queue.
Call is sent to the VSDN table.
Call is sent to the Thru-Dial Service (with the ID 100).
Caller listens to greeting and does one of the following:• Caller dials an extension number.• Caller dials a user by name using the telephone keypad.• Caller dials 0 and the revert DN is dialed.• Caller does nothing for x seconds and the revert DN is dialed.
G100601
VSDN TABLE
DN1001
SERVICETS ID 100
COMMENTInternal only
Standard 1.0 Voice Services Application Guide January 1998

6-6 Automated attendants Automated attendant with menu choices
let n
hat . put e
l f
Automated attendant with menu choices
Introduction This version of an automated attendant can be configured tocallers choose to be routed to predefined numbers rather thaenter an extension number or name.
This type of automated attendant is useful for organizations thave people or departments receiving a high volume of callsThe directory number of such people or departments can bein a menu so that, when a caller selects that menu choice, thcall is routed directly to the appropriate number.
Having predefined numbers available to callers is also usefuwhen callers may not know the extension number or name othe person they need to reach.
Standard 1.0 Voice Services Application Guide January 1998

Automated attendants 6-7Automated attendant with menu choices
ves llers s
can
he
ow to the
Example Nadir International receives many calls for sales representatiand for product servicing. Because a large percentage of caare first-time callers, they are not familiar with people’s nameor extensions.
An automated attendant is, therefore, created so that callersdial an extension or name themselves, but it will also have predefined menu choices that route callers automatically to tsales or customer service representative they want. The following flowchart illustrates the structure of this automatedattendant service.
Setup 1. Greeting
“Welcome to Nadir International. If you would like to talk to one of our sales representatives, press 1. If you would like totalk to someone in the service department, press 2. If you knthe extension number or name of the person you would like reach, press 3. If you need assistance, press 0 or just wait online.”
G100602
Salesrepresentative
Customer servicerepresentative
Dial person'sextension or name
Nadir main menu
“Welcome to Nadir International. If you wouldlike to talk to one of our sales representatives,press 1...”
1ABC2
DEF3
Standard 1.0 Voice Services Application Guide January 1998

6-8 Automated attendants Automated attendant with menu choices
er r or eed
Call
he
l f
he , or
3. r.”
es e.
is
2. Menu choices prompt
“To talk to a sales representative, press 1. To talk to a customservice representative, press 2. To dial the extension numbename of the person you would like to reach, press 3. If you nassistance, press 0.”
3. Key 1
Key 1 is set up to call the sales representative. The action is (CL) and the number is the extension number (4389) of the sales representative.
4. Key 2
Key 2 is set up to call the customer service representative. Taction is Call (CL) and the number is the extension number (4399) of the customer service representative.
5. Key 3
Key 3 is set to go to a thru-dial service. The action is thru-diaservice (TS), and the ID is that of the thru-dial service (100).This allows callers to dial the extension numbers or names othe people they want to reach.
6. Keys 4 to 9
Keys 4 to 9 are programmed to play a custom error prompt. Taction is PP. If a caller presses a numeric key other than 1, 23, he or she hears the following prompt:
“That selection is not valid. Please enter a number from 1 toIf you would like to hear your choices again, please press sta
7. Initial No Response
RV (revert) is selected as the action to be taken if a caller donot make an initial response in a predetermined amount of timRV transfers the caller to the revert DN of the voice menu.
8. Delayed Response
If a caller has provided keypad input but is now delaying in providing a subsequent response, the following prompt (PP)played:
Standard 1.0 Voice Services Application Guide January 1998

Automated attendants 6-9Automated attendant with menu choices
d.
e
se
e
pt enu
“Please enter a number from 1 to 3 on your telephone keypaTo hear the menu choices again, press star. If you require assistance, please press 0.”
Since the caller has provided keypad input, you know that thcaller has a touch-tone phone.
9. The receptionist’s number is used as the revert DN in cacallers require assistance.
10. No access password is required since all callers must bable to access the service.
11. An update password is necessary so that the voice prommaintenance service can be used to update the voice mprompts.
12. Silent disconnect is set to No so that the system “Good-bye” prompt is played before the caller is disconnected.
Standard 1.0 Voice Services Application Guide January 1998

6-10 Automated attendants Automated attendant with menu choices
n
Flowchart showing setupThis flowchart shows the path a call takes when accessing aautomated attendant with menu choices.
Caller dials main number to Nadir International.
Call terminates on a dummy ACD queue (or hunt group).
Call is forwarded to the Prime Voice Messaging Queue.
Call is sent to the VSDN table.
Call is sent to the voice menu service.
G100603
VSDN TABLEDN1001
SERVICEMS ID 200
VOICE MENU 200KEY 1Call Ext. 4389
KEY 2Call Ext. 4399
KEY 3Thru-dialer TS ID 100
COMMENTNadir main menu
Thru-dialer TS ID 100
Ext. 4389 Ext. 4399
Standard 1.0 Voice Services Application Guide January 1998
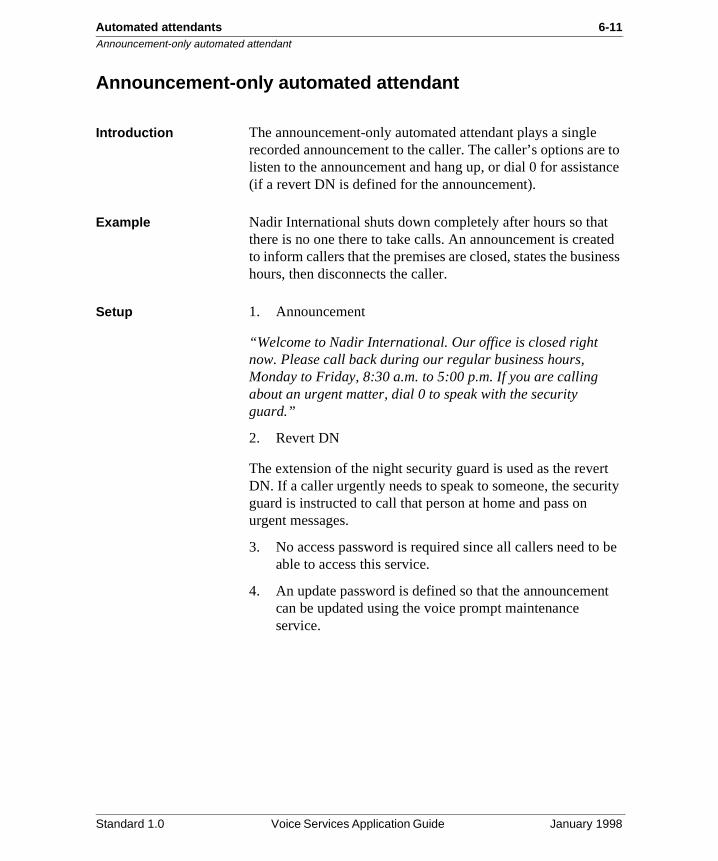
Automated attendants 6-11Announcement-only automated attendant
e to nce
t ted ness
rt rity
be
nt
Announcement-only automated attendant
Introduction The announcement-only automated attendant plays a singlerecorded announcement to the caller. The caller’s options arlisten to the announcement and hang up, or dial 0 for assista(if a revert DN is defined for the announcement).
Example Nadir International shuts down completely after hours so thathere is no one there to take calls. An announcement is creato inform callers that the premises are closed, states the busihours, then disconnects the caller.
Setup 1. Announcement
“Welcome to Nadir International. Our office is closed right now. Please call back during our regular business hours, Monday to Friday, 8:30 a.m. to 5:00 p.m. If you are calling about an urgent matter, dial 0 to speak with the security guard.”
2. Revert DN
The extension of the night security guard is used as the reveDN. If a caller urgently needs to speak to someone, the secuguard is instructed to call that person at home and pass on urgent messages.
3. No access password is required since all callers need toable to access this service.
4. An update password is defined so that the announcemecan be updated using the voice prompt maintenance service.
Standard 1.0 Voice Services Application Guide January 1998

6-12 Automated attendants Announcement-only automated attendant
n
Flowchart showing setupThis flowchart shows the path a call takes when accessing aannouncement-only automated attendant.
Employee calls the printer hotline number.
Call terminates on a dummy ACD queue (or a line DN).
Call is forwarded to the Prime Voice Messaging Queue.
Call is sent to the VSDN table.
Call is sent to the Announcement Service.
Caller listens to the announcement. Then one of the following happens:• Caller dials 0 to speak with printer technician.• Caller listens to announcement and hangs up.• Caller does nothing and the call is disconnected after the announcement is played.
G100609
VSDN TABLE
DN5500
SERVICEAS ID 409
COMMENTPrinter Hotline
Standard 1.0 Voice Services Application Guide January 1998

Automated attendants 6-13Leave-a-message auto attendant
e
re n
a
er rs lk
of
e y, or now ill t
l be
than art
Leave-a-message auto attendant
Introduction This type of automated attendant is similar to the announcement-only type, except that it allows callers to leavmessages for persons they are trying to reach. Like announcement-only, it is used as an after-hours attendant.
Example As with Nadir International in the previous example, the Orlando Trust Company shuts down during off-hours and theis no one to answer calls. However, instead of just playing aannouncement, it is decided that it would be useful if callers could leave a message either directly in the mailbox of the person they want to talk to (if they know the extension), or inpredefined mailbox, in which case the receptionist will sort through the messages the following business day and transfthem to the appropriate people. This option is useful for callewho do not know the extension of the person they want to tato.
This requires a voice menu application. The announcement the company’s business hours is included in the voice menugreeting. Callers are then offered the choice of entering an extension number, or leaving a message.
Setup 1. Greeting
“Thank you for calling the Orlando Trust Company. Our officis closed right now. Our business hours are Monday to Frida8:30 a.m. to 5:00 p.m. If you would like to leave a message fsomeone whose extension you know, press 1. If you do not kthe extension but would still like to leave a message which wbe forwarded to the appropriate person, press 2. If you do nohave a touch-tone phone, please wait on the line and you wilasked to leave a message which will be forwarded to the appropriate person.”
Note: If callers choose option 2, they must state who the message is for before recording the actual message. Ratherincluding this instruction in the menu greeting, include it as pof the external greeting for the mailbox. Callers may not wait
Standard 1.0 Voice Services Application Guide January 1998

6-14 Automated attendants Leave-a-message auto attendant
ller
w, to
.
is n
ars
ou
se
t is a
long enough to hear these instructions if you include it in themenu greeting. (As soon as the caller hears “press 2,” the camay not wait for additional information and will press 2 right away.) If you provide these instructions after the caller has pressed 2, he or she will be sure to hear them.
2. Menu Choices Prompt
“To leave a message for someone whose extension you knopress 1. If you do not know the extension but would still like leave a message which will be forwarded to the appropriate person, press 2.”
3. Key 1
Express Messaging (EM) is the action associated with Key 1The Mailbox ID field should be left blank so that callers can enter the number they want.
4. Key 2
Express Messaging (EM) is also associated with Key 2. However, a particular Mailbox ID is defined. The owner of thmailbox logs in every morning, listens to new messages, theforwards them to the appropriate people.
5. Keys 3 to 9
A prompt (PP) is associated with the unused menu keys. If acaller presses a numeric key other than 1 or 2, he or she hethe following prompt:
“That selection is not valid. Please choose option 1 or 2. If ywould like to hear your choices again, please press star.”
6. Initial No Response
Express Messaging (EM) is defined as the Initial No Responaction. Since there is no one to revert the call to during the evening, the caller is transferred to the same Mailbox ID thaused in step 4. This way, rotary phone users can also leave message without having to provide any keypad input.
Standard 1.0 Voice Services Application Guide January 1998
Automated attendants 6-15Leave-a-message auto attendant
is
e
pt enu
7. Delayed Response
If a caller has provided keypad input but is now delaying in providing a subsequent response, the following prompt (PP)played:
“Please press 1 or 2 on your telephone keypad to make a choice. To hear the menu choices again, press star.”
8. No access password is required since all callers must bable to access the service.
9. An update password is necessary so that the voice prommaintenance service can be used to update the voice mprompts.
10. Silent disconnect is set to No so that the system “Good-bye” prompt is played before the caller is disconnected.
11. No revert DN is defined since there is no one to take thecall.
Standard 1.0 Voice Services Application Guide January 1998

6-16 Automated attendants Leave-a-message auto attendant
Flowchart showing setupThis flowchart shows the path a call takes when accessing aleave-a-message style automated attendant.
Caller dials main number to the Orlando Trust Company (after-hours night service).
Call terminates on a dummy ACD queue (or hunt group).
Call is forwarded to the Prime Voice Messaging Queue.
Call is sent to the VSDN table.
Call is sent to the voice menu service.
G100604
VSDN TABLEDN5000
SERVICEMS ID 200
VOICE MENU 200KEY 1Express Messaging
KEY 2Express Messaging Mailbox 2411
COMMENTOrlando nite
Caller enters mailbox number.
Mailbox 2411 External Greeting:
“Please state who this messageis for, followed by your name,number, and message.”
Standard 1.0 Voice Services Application Guide January 1998

Automated attendants 6-17Time-of-day controlled automated attendant
nts
e is
ted e e
er.
)
ss
Time-of-day controlled automated attendant
Introduction An organization may decide that different automated attendaare required at different times of the day. For example, an automated attendant offering menu choices during the day would be appropriate, but at night when there is no one in thoffice, an announcement-only attendant would be better. Thsituation can be handled through time-of-day controls.
Example During the day, Nadir International wishes to use the automaattendant with menu choices (described on page 6-6), but atnight wants to play the announcement that informs callers thoffice is closed and then states the business hours (see pag6-11).
This section describes how to set up the time-of-day controllThe time-of-day control definition must associate the appropriate service ID for the different times of the day.
Setup 1. Business-Hours Service ID
Automated attendant with menu choices (Voice Menu ID 200
2. Off-Hours Service ID
Announcement-only (Announcement ID 400)
3. Holiday Service ID
Announcement-only service ID. A special announcement is played if a call is received on one of the holidays specified inthe Voice Services Profile.
4. Business Hours
For Monday to Friday, the business hours are 8:30 to 17:00.Saturday and Sunday are non-business days. During businehours, the automated attendant with menu choices is used. Outside these hours, the announcement-only automated attendant is used (unless it is a holiday).
Standard 1.0 Voice Services Application Guide January 1998

6-18 Automated attendants Time-of-day controlled automated attendant
le.
Flowchart showing setupThis flowchart shows the path a call would take in this examp
Caller dials main number to Nadir International(NXX-2000).
Call terminates on a dummy ACD queue (or hunt group).
Call is forwarded to the Prime Voice Messaging Queue.
Call is sent to the VSDN table.
G100605
VSDN TABLEDN2000
SERVICETODC ID 500
TIME-OF-DAY CONTROL 500Business Hours: 08:30 to 17:00Business Hours ID: 200
Business Days Mon through FriOff-Hours ID: 400
COMMENTAuto attendant
Menu Service 200Caller listens to greeting andresponds by pressing a key,remaining on the line ordialing "0".
Announcement Service 400Caller listens to greeting. Callereither presses "0" or isdisconnected after time-outperiod has expired.
Standard 1.0 Voice Services Application Guide January 1998

Automated attendants 6-19Nested time-of-day controls
) ou
nt ue.
to me es
.
ek.
Nested time-of-day controls
Introduction If you have a single facility (for example, a single DID queueserving multiple departments with different business hours, ycan nest several time-of-day controllers in order to meet theneeds of all departments.
Example Burroughs and Bowles Inc. has four departments with differebusiness hours, and they are all served by a single DID queDepartment A’s business hours are between 8:00 a.m. and 12:00 noon. At noon, Department A wants calls to be routedDepartment B. Department B closes at 4:00 p.m., at which tithey want their calls to be routed to Department C which closat midnight. After midnight, calls are to be routed to Department D.
To nest time-of-day controls, the following rules apply:
• The time-of-day controllers must cover a 24-hour period
• The time-of-day controllers must cover seven days a we
• The maximum allowable nesting levels is six.
Diagram The following flowchart illustrates the general setup.
D.I.D queue
08:00-12:00
Dept. A Dept. B Dept. C Dept. D
12:00-16:00 16:00-24:00 24:00-08:00
G100606
Standard 1.0 Voice Services Application Guide January 1998

6-20 Automated attendants Nested time-of-day controls
sed. trol
Setup You must program a separate time-of-day control for each department. In this example, you end up with four different time-of-day controls.
For each time-of-day control, configure the following:
1. Business-Hours Service ID
Menu service ID for the department
2. Off-Hours Service ID
Time-of-Day Control ID of the following department
3. Holiday Service ID
Announcement-only service ID. A special announcement is given on the holidays specified in the Voice Services Profile.
4. Business Hours
The department’s business hours should be filled in. During these hours, the automated attendant with menu choices is uOutside these hours, calls are directed to the time-of-day conof the department whose business hours begin when the business hours of this department end.
Standard 1.0 Voice Services Application Guide January 1998

Automated attendants 6-21Nested time-of-day controls
le.
ns
Flowchart showing setup
This flowchart shows the path a call would take in this examp
Note: In this example, TD means time of day, and TODC meatime-of-day controller.
Caller dials published number (NPA)-NXX-2000.
Call terminates on a dummy ACD queue (or line DN) 2000.
Call is forwarded to the Prime Voice Messaging Queue.
Call is sent to the VSDN table where TD DN is found (TODC ID is 150)
G100607
TIME-OF-DAY CONTROL 150 FOR DEPARTMENT ABusiness Hours: 08:00 to 12:00Business Hours ID: 101 (Menu)
Business Days Sun through SatOff-Hours ID: 250
TIME-OF-DAY CONTROL 250 FOR DEPARTMENT BBusiness Hours: 12:00 to 16:00Business Hours ID: 201 (Menu)
Business Days Sun through SatOff-Hours ID: 350
TIME-OF-DAY CONTROL 350 FOR DEPARTMENT CBusiness Hours: 16:00 to 24:00Business Hours ID: 301 (Menu)
Business Days Sun through SatOff-Hours ID: 401 (Department D)
Standard 1.0 Voice Services Application Guide January 1998

6-22 Automated attendants Mixed live and automated attendants
g
at a andle
ice
the
f-e-
y e
s
Mixed live and automated attendants
Introduction When an organization has a receptionist, an automated attendant is useful for handling overflow calls and for handlincalls when the receptionist is unavailable (after hours, lunchbreaks, and so on).
Example The Orlando Trust Company has a receptionist available; however, during peak periods, she is sometimes unable to answer all calls. At night, no one is in the office. The administrator suggests that a basic automated attendant be created to handle call overflow during business hours, and thleave-a-message style automated attendant be created to hcalls that are received during off-hours. A time-of-day controller is also required to ensure that the appropriate servis played depending on the time of day at which a call is received.
Setup See “Basic automated attendant” on page 6-3 The setup for leave-a-message style automated attendant is described in “Leave-a-message auto attendant” on page 6-13. The time-oday control setup is very similar to the one described in “Timof-day controlled automated attendant” on page 6-17.
The attendant console must be set up to have the time-of-dacontrol VSDN as the night number. This VSDN should also bspecified as the overflow handling DN so that when the receptionist is dealing with a call and the line is busy, all callgo to the appropriate automated attendant.
Standard 1.0 Voice Services Application Guide January 1998

Automated attendants 6-23Mixed live and automated attendants
le.
Flowchart showing setupThis flowchart shows the path a call would take in this examp
Note: TODC means time-of-day controller.
Caller dials main number to the Orlando Trust Co.(NXX-2000)
Call terminates on attendant console.
Call is forwarded to the Prime Voice Messaging Queue.
Call is sent to the VSDN table.
Call is sent to DN 2000 due to overflow or by night service.
G100608
VSDN TABLEDN2000
SERVICETODC ID 500
TIME-OF-DAY CONTROL 500Business Hours: 08:30 to 17:00Business Hours ID: 101 (Thru-Dial)
Business Days Mon through FriOff-Hours ID: 200 (Voice Menu)
COMMENTAuto attendant
Leave a Message Auto Attendant: 200Caller listens to greeting. Callerchooses 1 to specify the extension of the person for whom they want to leave message, or 2 if the callerdoes not know the extension.
Thru-Dial Service 100Caller listens to greeting and responds by entering an extension or name, remaining on the line, or dialing 0.
Standard 1.0 Voice Services Application Guide January 1998

6-24 Automated attendants Mixed live and automated attendants
Standard 1.0 Voice Services Application Guide January 1998

Chapter 7
Voice forms
In this chapter
Overview 7-2
Using voice forms 7-5
System engineering 7-7
Application scenarios 7-9
Section A: Planning a voice form 7-11
Section B: Configuring a voice form 7-51
Section C: Modifying or deleting voice forms 7-79
Section D: Monitoring and transcribing voice forms 7-97

7-2 Voice forms Overview
ice
g,
e ay
are ach
s 0 r
rnal es
a
b
Overview
Introduction This chapter discusses how to plan, create, and maintain voforms.
Multi-customer systems
On a multi-customer system, the Voice Forms service is accessible only from the customer administration level. Addinmodifying, and deleting voice forms must be done at the customer administration level.
Definition: voice form
A voice form is the electronic equivalent of a paper form. It is“filled out” by callers who dial a special number which connects them to the voice form. (Alternatively, callers can bconnected to a voice form through a voice menu or time-of-dcontroller.) The form is made up of a series of questions thatplayed over the telephone to the caller. The caller listens to equestion and responds by giving a verbal answer. If callers require assistance while responding to a form, they can presto transfer to an operator (this functionality can be enabled odisabled for each voice form). The caller’s answers are recorded and stored in the system as a response.
Voice forms are intended to help fulfil an organization’s information-gathering needs. Voice forms can replace paperforms as well as certain information-gathering tasks that arecurrently carried out over the phone (such as order taking).
What voice forms are used for
Voice forms can be used to collect information from externalsources (such as customers or potential clients) or from intesources (employees). The following are examples of both typof information-gathering functions.
Depending on the type of business you have, you might usevoice form to collect the following types of information:
• application forms (credit cards, mortgages, new jobs, clumemberships)
• order taking (mail order catalogs)
• requests for equipment service and repairs
• customer complaints
Standard 1.0 Voice Services Application Guide January 1998

Voice forms 7-3Overview
ces ice
ials
a e: a or,
n
• customer satisfaction surveys
• registrations for a convention
• ordering tickets to an event
You might use a voice form to collect the following types of information from your employees:
• notification of change of address
• suggestion box
• nominating employee of the month
• application for benefits
• registration for company picnic
• employee surveys
Voice forms can enhance your organization’s ability to reachcustomers, potential clients, and employees by making serviavailable 24 hours a day from any location. If you are a servprovider, you can also rent out voice forms to customers to fulfill a temporary need, or on a permanent basis.
A voice form can be a stand-alone application that a caller ddirectly, or it can be integrated with other Meridian Mail features such as voice menus. For example, you could havevoice menu that offers a series of voice forms for a product linordering the item, requesting service and repairs, completingcustomer satisfaction survey, and applying for a credit card; you could have a voice form activated during off-hours by a time-of-day controller so that orders can continue to be takethroughout the evening and on weekends.
Standard 1.0 Voice Services Application Guide January 1998

7-4 Voice forms Overview
e
Example: Typical voice formThe following is an example of the structure of a typical voicform.
G100611
Introductory greeting.
General instructions.
Ask for callers name.
Caller records name.
Ask for address and phone number.
Ask for credit card information.
Ask for catalog item # and quantity.
Confirmation instructions.
Caller confirms answers.
Thank you and farewell greeting.
Caller connects to voice form.
Caller disconnects from voice form.
Caller records address and phone number.
Caller records credit card information.
Caller records catalog item and quantity desired.
Standard 1.0 Voice Services Application Guide January 1998

Voice forms 7-5Using voice forms
pal
d
nd e (by e es
job nt.
rm.
r
rm
Using voice forms
Introduction The use and implementation of a voice form has three princistages:
1. The voice form is planned, designed, and configured.
2. Customers, potential clients, or employees call the voiceform to provide the necessary information.
3. The information collected by the voice form is transcribeand processed.
With each of these stages, a different group of people is involved:
• the administrator
• the caller
• the transcriber
The administrator The administrator identifies the need for a voice form, plans adesigns the form, and configures it in Meridian Mail. Once thform has been created, the administrator also tests the formcalling it and then transcribing it). The administrator keeps thvoice form up-to-date by modifying or deleting the service asthe needs of the organization change. He or she also managany technical problems that may arise. This is generally the person who manages the overall Meridian Mail system. This may be delegated, especially in a multi-customer environme
The caller This is the person who actually calls in and uses the voice foAll caller input is made by responding to the questions in thevoice form verbally. Depending on how the voice form is configured, the caller may also be asked to confirm his or hequestions by providing input from a telephone keypad (if thecaller has a touch-tone phone).
For a detailed example of a caller session, including samplequestions and responses, see Appendix B, “Sample voice fosessions.”
Standard 1.0 Voice Services Application Guide January 1998

7-6 Voice forms Using voice forms
er’s
e
e
g ys
the
ch that
ple
The transcriber When a caller completes a voice form and hangs up, the callresponse is stored in Meridian Mail. It is the transcriber’s responsibility to listen to the caller’s response and process thinformation. You may even have an entire department of transcribers who are dedicated to transcribing voice forms. Transcribers should be trained by the administrator and havaccess to the Meridian Mail Voice Forms Transcriber User Guide (P0875902).
To transcribe a voice form, the transcriber logs on to the transcription service using an access DN (much like users loon to Meridian Mail to listen to new messages). He or she plaback the responses that have been collected and processesinformation (by entering the information into a database for tabulating or order processing, for example). The way in whithe information is processed depends entirely on the reasonyou are collecting the information.
See Appendix B, “Sample voice form sessions,” for an examof a transcriber session.
Notification featuresTranscribers can be notified that a voice form has received responses through either a message waiting indicator, or a system-generated voice message, or both. For details, see “Identifying how transcribers will be notified—overview” on page 7-30.
Standard 1.0 Voice Services Application Guide January 1998

Voice forms 7-7System engineering
ve
ice
ify s
of are
ns
S1
us
nus
System engineering
Introduction Before you configure any voice forms on your system, you hato consider whether your current system configuration is capable of supporting this feature.
Determining system size
Review your system size and configuration with a qualified engineer. This is especially important if you are also using vomenus, because both voice menus and voice forms take a significant portion of storage space. The number of storage hours and channel allocations may change as a result. Identyour voice form (and voice menu) needs in as much detail apossible—how many do you plan on creating, and how longwill they be? The more detail the engineer has, the more accurate he or she can be when determining an appropriatesystem size.
Refer to the Site and Installation Planning Guide (NTP 555-70x1-200) for more details on determining the system size required.
Storage Voice forms are stored in volume server 1 (VS1), regardlessthe number of nodes on the system. (Note that voice menusalso stored on VS1). After you have configured your voice forms, back up VS1 to ensure the security of your applicatioand continue to back up this volume on a regular basis.
Note: Caller responses to voice forms are not stored in the Vvolume, but are stored in a user volume along with voice messages.
If you are planning on implementing a large number of voiceforms/menus (20 or more), or if any of your voice forms/menare lengthy (longer than 10 minutes), review this with your system engineer. It may be necessary to move your voice meand voice forms to another volume. This can be done by a representative of your Nortel (Northern Telecom) support organization or distributor.
Standard 1.0 Voice Services Application Guide January 1998

7-8 Voice forms System engineering
l ur
If the system becomes full while you are in the process of creating voice forms (or menus, or both), contact your Nortesupport organization. They will probably have to reassign yomenus and forms to another volume.
Standard 1.0 Voice Services Application Guide January 1998

Voice forms 7-9Application scenarios
ials n
ow of
s on
are
e
d e ow
y,
to
ling . l o s the
Application scenarios
Introduction A voice form can be a stand-alone application that a caller ddirectly, or it can be part of a larger voice menu application iwhich it is one of many menu options.
The following scenarios are intended to give you an idea of hvoice forms can be used. You may already have some ideasyour own about how you would like to implement voice formin your organization. This section may stimulate the recognitiof opportunities you had not originally considered.
Scenario 1 You have just installed the voice forms feature on your Meridian Mail system, and you are keen to put it to use. You responsible for determining the need for voice form applications in your organization, designing the applications,and configuring them. You need some way of discovering thcurrent information-gathering functions that go on. You also want to know how these functions are currently handled in order to determine which ones would effectively transfer to avoice form application.
Since this is in itself an information-gathering function, and because you would like to get some practice at designing anconfiguring a voice form application, you could create a voicform to survey the department managers to find where and hinformation is collected. This is a simple stand-alone application that is directly dialable by internal callers (an entrtherefore, is needed in the VSDN table). You yourself can record the prompts (this is generally true for any internal surveys that you would like to create). Send out a message the managers asking them to take part in a survey about thetypes of information-gathering functions that occur in their departments.
Scenario 2 Your human resources department has some problems deawith responses to a number of advertisements for new hiresThe first problem is that many applicants are reluctant to calfrom open-plan offices or are too busy during normal hours trespond. Furthermore, there tends to be a flood of response
Standard 1.0 Voice Services Application Guide January 1998

7-10 Voice forms Application scenarios
gh ll
a
1
on.
h a ing.
nd, or gh f
day after several new ads appear in the newspapers, and potential applicants get frustrated when they cannot get throuto staff. The department wants to receive information from ainterested applicants and would like to get more detailed information from applicants before calling back.
You could help solve this problem by creating an automatedattendant. The number is published in the newspaper ads as24-hour, seven-days-a-week service which provides more information about each position and which takes informationfrom the caller. For example, the ad could say “Call 555-001to find out more about these positions and to tell us about yourself.” The automated attendant is a voice menu applicatiEach menu option corresponds to one of the advertised positions. When a caller selects an option, he or she is connected to the appropriate voice form. The form begins witgreeting which gives more detail about the selected job open(If, for example, a particular position has been filled, the greeting is rerecorded to reflect this.) It then asks interested callers to stay on the line and respond to various questions which will help the department to screen applicants. At the ecallers are given the opportunity to leave a general messagecomment. The person who is notified of new responses (throua message waiting indicator) is the staff member in charge othe advertisement, interviewing, or hiring for a particular position.
Standard 1.0 Voice Services Application Guide January 1998

Voice forms 7-11
Section A Planning a voice form
In this section
Overview of planning a voice form 7-12
Identifying whether a voice form application is required 7-14
Obtaining or drawing a copy of the form 7-16
Flowcharting the application 7-17
Composing greetings, prompts, and instructions 7-25
Identifying how transcribers will be notified—overview 7-30
MWI notification 7-31
Notification by voice message 7-34
If no method of notification is used 7-36
Identifying the general characteristics of the form 7-37
Defining No Answer fields 7-42
Defining Voice Answer fields 7-44
Identifying the service through which the voice form will be accessed 7-48
Identifying the transcription service DN 7-49
Standard 1.0 Voice Services Application Guide January 1998

7-12 Voice forms Overview of planning a voice form
ore r e
a
s.
le
on ds he in
ld
e to
and to
Overview of planning a voice form
Introduction Even the simplest of voice forms requires some planning befit can be configured. Be sure to plan the voice form on papefirst. You should have a good overall picture of how the voicform will work before you begin to configure it.
Process for planning a voice form service
1. Identify the need for a voice form application.
2. If a paper form already exists, obtain a copy. If not, drawcopy of it.
3. Flow chart or sequence the voice form.
4. Compose greetings, prompts, and instructions.
5. Identify how transcribers will be notified of new response
6. Identify the general characteristics of the form.
7. Identify the fields within the form.
8. Identify the service through which the voice form will be accessed.
9. Identify the transcription service DN.
Depending on your organization, a number of different peopwill probably be involved in this process. For example, an analyst (either internal to the organization or hired externally a consulting basis) may be responsible for performing a neeanalysis to determine the applications that will be created. Tanalyst may also be responsible for designing the applicationthe form of a flowchart. Otherwise, the administrator will be responsible for these stages of voice form creation.
At this stage, the administrator would take over and use the flowchart to configure the application. The administrator wouthen see to the scripting and recording of prompts. There areservices which specialize in writing, editing, and recording prompts. These services are especially useful when you havcreate a complex application that involves voice menu applications (that may include announcements, thru-dialers, voice menus), as well as voice forms. A service is more likely
Standard 1.0 Voice Services Application Guide January 1998

Voice forms 7-13Overview of planning a voice form
l tyle
ng
bly tor ng
he ally,
create a professional-sounding application because they wiltake care to ensure a high standard and consistency in the sand tone in which prompts are written. They will also have contacts with professionals who have been trained in speaki(such as actors). Smaller applications (and those that are internal to the organization, such as staff surveys) can probabe scripted by the administrator. In this case, the administracould interview staff to find people who have suitable speakivoices. The administrator would also be responsible for arranging or delivering training, or both, for those people in torganization who have been designated as transcribers. Finthe administrator will be responsible for maintaining the application and keeping it up-to-date.
Before you begin Obtain the following materials to plan your voice form application:
• one blank copy of the Voice Form Sequence Worksheet(Appendix A, “Worksheets”)
• one blank copy of the Voice Form Definition Worksheet (Appendix A, “Worksheets”)
• one blank copy of the No Answer Field Worksheet (Appendix A, “Worksheets”); you will have to make extracopies for each No Answer Field
• one blank copy of the Voice Answer Field Worksheet (Appendix A, “Worksheets”); you will have to make extracopies for each Voice Answer Field
• one notepad and pencil
Standard 1.0 Voice Services Application Guide January 1998

7-14 Voice forms Identifying whether a voice form application is required
ng
ed,
r
s. er e.
-in
t
, re
Identifying whether a voice form application is required
Introduction The first step in creating a voice form application is recognizithe need for one. Use the following guidelines to determine where information-gathering needs can be met with voice forms.
1. If some voice form applications have already been creatcheck the system to confirm if any of the existing voice forms can fulfill the need as they are, or with some minomodifications.
2. Investigate the information-gathering functions that are currently being carried out. Talk to middle managers, department heads, directors, executives, and employeeSome of these functions may currently be fulfilled by papforms, whereas others may be carried out over the phonFor example, the following functions could be performedusing voice forms:
• monthly mail-out material
• employee surveys
• order forms that are mailed out in response to calledrequests
• applications (for membership, credit card, mortgage,and so on)
• order taking
• requests for service and repairs
• customer complaints
• customer satisfaction surveys
• update information (address change, new phone number)
• polls
3. Identify which information-gathering functions could besbe served by using a voice form.
For every function that you identify, describe how information is gathered today. If a form is currently usedget a copy of the form. Would a voice form provide a moreliable way of gathering information? Would a voice form
Standard 1.0 Voice Services Application Guide January 1998

Voice forms 7-15Identifying whether a voice form application is required
s
n
will
be more convenient for your customers? If information isgathered over the phone, could a voice form do the job awell or better? Also, look at how the collected informatiois currently processed. For example, is the information transferred to a database? Being aware of these issues help you identify how the transcription process might work. You may need to design the voice form to supportthis process.
A poll of all the members of your organization could uncovermajor or minor communications problems that would not be apparent otherwise. In fact, you could create a voice form application to do this survey for you.
Standard 1.0 Voice Services Application Guide January 1998

7-16 Voice forms Obtaining or drawing a copy of the form
m,
s.
ht
Obtaining or drawing a copy of the form
Introduction If you are going to create a voice form to replace a paper forget a copy of the form. If there is no existing paper form, imagine what it would be like and draw a copy for yourself. This will give you a good starting point for the design proces
For longer, more complex forms, group together similar questions. For example, in a credit card application, you miggroup together personal information (name, social insurancenumber, address, and so on), employment information, or financial obligations (current credit cards, mortgages, and loans).
Example The following is an example of a possible Address Change form.
Address Change
Date change goes into effect:
Name:
Social Insurance Number:
Old Address: Street Apt.
City Province/State Postal/Zip Code
Old Telephone Number: ( ) Area Code
New Address: Street Apt.
City Province/State Postal/Zip Code
New Telephone Number: ( ) Area Code
Standard 1.0 Voice Services Application Guide January 1998

Voice forms 7-17Flowcharting the application
d (if
r
At
re le
, on or his on
ing
Flowcharting the application
Introduction Get your notepad and a copy of the Voice Form Sequence Worksheet. In this step, you will take the written form and either draw a flowchart or simply put it into a numbered sequence or list.
You will use your list to verify whether the order is sound andlogical, and to spot any “information holes” (did you forget toask a question or provide an instruction to the caller?). You might even find that a particular form simply cannot be completed by using voice forms. Obviously, it is better to findthis out early in the process.
Before you create your list or flowchart, read the following sections on “Confirmation mode,” “Answer length limit,” “Additional requests,” and “Access to the form.” These voiceform elements will affect the structure of your voice form. Builthe considerations brought up in these sections into your listappropriate).
Confirmation mode Confirmation is the process of asking a caller to confirm his oher answer to a question. This gives the caller a chance to rerecord an answer up to three times. There are three confirmation modes to choose from: None, Whole Form, andEach Field, and they are described below. Because the confirmation mode that you select affects the flow and structuof the voice form, you should consider how you want to handconfirmation at this stage.
As you identify each question that will be included in the formdecide whether it needs to be confirmed. Try to decide earlywhether you want the confirmation mode to be Whole Form At Each Field (see the descriptions below), and incorporate tin your list or flowchart to get the most accurate representatiof the form structure.
For each voice form that you create, select one of the followconfirmation modes:
Standard 1.0 Voice Services Application Guide January 1998

7-18 Voice forms Flowcharting the application
eir
es
ly
ou
ll
u for
rm
NoneIf you select None, callers are not asked to confirm any of thanswers.
Whole FormIf you select Whole Form, callers are asked to confirm their answers when the confirmation marker is reached.
When you select Whole Form as the confirmation mode, it donot mean that callers will automatically be asked to confirm each question in the voice form. The confirmation mode simpindicates where confirmation should occur. When you configure a voice form field in Meridian Mail, you specify whether it should be included for confirmation. Therefore, if you only want callers to confirm seven out of ten questions, ywould “tag” those seven fields for confirmation. The seven questions are played back when the confirmation marker is reached (typically near the end of the form before the farewegreeting), and callers have the opportunity to confirm or rerecord their answers.
The caller hears the following prompts:
“Selected answers will now be played back to you so that yocan confirm them.” (This prompt is played if some, but not all,questions were tagged for confirmation. See the note below other prompts that may be played.)The first answer requiring confirmation is played:
“If this is correct, press 1. To rerecord the answer, press 2.”
Note: If only one question was marked for confirmation, the caller hears “The following answer will now be played back toyou so that you can confirm it.” If all questions were marked forconfirmation, the caller hears “Your answers will now be playedback to you so that you can confirm them.”
At Each FieldIf you select At Each Field, callers are asked to confirm an answer immediately after it is recorded.
As with Whole Form confirmation, when you select At Each Field, this does not mean that callers will be required to confi
Standard 1.0 Voice Services Application Guide January 1998
Voice forms 7-19Flowcharting the application
e he
d,
one t 1
m not F
a
n
rs.
each question. You decide which specific questions are to bincluded in the confirmation process when you are defining tparticular fields. This is described in detail later on.
If you select At Each Field as the confirmation mode, and a caller has just answered a question that is marked for confirmation, the caller hears the following:
“Your answer will now be played back to you so that you canconfirm it.”
The caller’s answer is played back:
“If this is correct, press 1. To rerecord the answer, press 2.”
Confirmation for rotary phone usersBecause confirmation requires input from a telephone keypacallers that are using rotary phones will not be able to confirmtheir answers.
If confirmation mode is either Whole Form or At Each Field, the system tries to determine if the caller has a touch-tone phby playing the following prompt just before asking for the firsconfirmation: “If you are using a touch-tone telephone, press now.” If the caller does not respond with dual tone multifrequency (DTMF) input within a few seconds, the systeassumes that this is a rotary phone user and the system willask for confirmation of questions. (If the caller has used DTMduring their session (for example, to access the voice form through a voice menu), the system knows that the caller hastouch-tone phone and will not play this prompt.)
If you expect that a significant number of callers will have rotary phones, you may want to design a special confirmatioprocess into your voice form especially for these users. Consider the following solutions.
Solution 1: At the end of the form, create a prompt that asks rotary phone users to stay on the line to confirm their answeFor example: “If you have a rotary phone, please stay on the line to confirm some of your answers. If you have already confirmed your answers using a touch-tone phone, you mayhang up now. Thank you for calling.” Then create one prompt
Standard 1.0 Voice Services Application Guide January 1998

7-20 Voice forms Flowcharting the application
ot
ss.”
s
a ng. a
.
t is
at it you or our
you an
ep
for each field that needs to be confirmed. However, you will nbe able to play the caller’s initial answer back. Your prompt should say something like: “If the new address you provided was correct, say YES. If not, please tell us the correct addre
Note: Solution 1 is a very laborious process. Solution 2 is recommended.
Solution 2: At the end of the form, insert a single step that allowcallers to correct any of their answers. You could create a prompt along the following lines: “If you have a rotary phone, please stay on the line if you need to correct any of your answers. If you have already confirmed your answers using touch-tone phone, you may hang up now. Thank you for calliIf any of your original answers were incorrect, please recordcorrect response now.”
Answer length limit There is a maximum answer length limit for callers’ answersThe default maximum length for any answer is 30 seconds. (This value can be changed by your Nortel representative if inot sufficient.) Keep this in mind as you identify your steps. Make sure that no one step demands so much information thwould take a caller longer than the maximum time allowed torespond. For questions demanding longer responses, see if can break them down into several steps (questions) asking fmore specific information. Make any necessary changes to ysequence now if you anticipate this problem.
Additional requests In the case of a voice form designed to take product orders, should consider what to do if the caller wants to order more thone item, or a different product. One solution is to insert a stasking callers to indicate the number of items (of the same product) they want to order. To handle callers who want to order a different product, you could insert a step to inform callers of how to order other products (this could be anothervoice form). Modify your sequence accordingly.
Access to the form Consider how callers will access the form. You have the following options:
• Callers dial directly into the voice form. In other words, aVSDN is created specifically for the voice form.
Standard 1.0 Voice Services Application Guide January 1998

Voice forms 7-21Flowcharting the application
to
up tion
e
is re
or er
in
m
u
ce,
nse
ce
nd
• Callers dial into a voice menu service.
One of the options in the voice menu connects the callerthe voice form when selected. If you have a number of voice forms to be made available, you may be able to grosome of them together and create a voice menu applicaas a front end. (For example, “To order Product A, press 1. To order Product B, press 2.”) If this is the case, you will have two applications to design: the voice form and the voice menu. For details on voice menu configuration, seChapter 5, "Voice menus".
• Callers dial into a time-of-day controller.
The caller is connected to the voice form application thatindicated in the time-of-day control definition for the dayand time at which the call is received. Two applications arequired: the voice form and the time-of-day controller. Fdetails on time-of-day controller configuration, see Chapt8, "Time-of-day controllers".
Create a list of steps Working from your copy of the paper form (an actual copy oryour hand-drawn version) and keeping the preceding points mind, do the following.
1. On your notepad, create a numbered list where each iterepresents a “step” in the voice form.
A step might be a greeting that is played to a caller, a question that is asked, or a request for confirmation. (Yocan, of course, change the order of this list at any time.)The list should include every prompt, the order in which prompts are played to callers, and the point(s) at which confirmation occurs. Once you have finished the sequenrun through it in your head or, better still, with someone else, to see if the sequence you have devised makes seand to see if you have left anything out.
2. Once you are satisfied with your list, transfer it to the VoiForm Sequence Worksheet.
In this worksheet, you classify each field as either a No Answer field or a Voice Answer field. Greetings and instructional prompts that do not require an answer fromthe caller are considered No Answer fields. Questions a
Standard 1.0 Voice Services Application Guide January 1998

7-22 Voice forms Flowcharting the application
,
er
the
t et
,
requests are examples of Voice Answer fields. They require the caller to respond. (See“Composing greetingsprompts, and instructions” on page 7-25 for more information about the types of greetings and instructionsyou may have to include in your voice form.)
3. For each No Answer field, make a copy of the No AnswField Worksheet. For each Voice Answer field, make a copy of the Voice Answer Field Worksheet.
For example, in the change of address voice form, youwould need seven copies of the Voice Answer Field Worksheet and three copies of the No Answer Field Worksheet.
Example The following example shows a sample sequence based onchange of address form.
If you want to include more detail (such as information aboufield type and confirmation), you might want to use a workshethat includes those fields as in this example. In this exampleWhole Form confirmation has been selected, and two fields have been tagged for confirmation.
Prompt (Field Name)
1 Welcome
2 General instructions
3 Date of address change
4 Name
5 Social insurance number
6 Old street address, city, province, postal code
7 Old telephone number (and area code)
8 New street address, city, province, postal code
9 New telephone number (and area code)
10 Caller confirms new address and phone number
11 Thank you and goodbye
12 Disconnect
Standard 1.0 Voice Services Application Guide January 1998

Voice forms 7-23Flowcharting the application
f
the
e, n
*Although you do not create a confirmation field, you shouldprepare a No Answer Field Worksheet for it as a reminder owhere the confirmation marker will be.
The list follows the original copy of the form. The main difference is that it includes any greetings, instructions, and confirmation process. Notice that some of the steps are combined into one prompt (address, apartment, city, provincand postal code). This information can be readily managed ione prompt.
Prompt (Field Name) Answer? Confirm?
1 Welcome no
2 General instructions no
3 Date of address change yes no
4 Name yes no
5 Social insurance number yes no
6 Old street address, city, province, postal code yes no
7 Old telephone number (and area code) yes no
8 New street address, city, province, postal code yes yes
9 New telephone number (and area code) yes yes
10 Caller confirms new address and phone number no*
11 Thank you and goodbye no
12 Disconnect
Standard 1.0 Voice Services Application Guide January 1998

7-24 Voice forms Flowcharting the application
a ls
Flowchart If you prefer to follow the structure of an application by usingflowchart, refer to this sample flowchart. In this example, ovarepresent prompts and rectangles represent points of confirmation.
G100612
Welcome.
General instructions.
Get date that change goes into effect.
Get name.
Get social insurance number.
Goodbye.
Disconnect.
Get old address, apt., city, prov/state, postal/zip code.
Get old telephone #.
Get new telephone #.
Get new address, apt., city, prov/state, postal/zip code.
Caller connects to voice form.
Confirm new address.
Confirm new telephone #.
Standard 1.0 Voice Services Application Guide January 1998

Voice forms 7-25Composing greetings, prompts, and instructions
or e e ll
ed ell ly.
t rs y
e
ly f ve
e
Composing greetings, prompts, and instructions
Introduction When using a voice form, callers cannot see the instructionsblank spaces as they can with a paper form. Therefore, theselements need to be provided verbally. Ask yourself what thcaller needs to know in order to fill in the form. For example, avoice forms should begin with an introductory greeting to welcome the caller (this usually includes the name of your organization as a means of identification). In addition, you nea thank you and farewell greeting at the end of the form, as was instructional prompts to help callers use the form effective
The introductory greeting
The introductory greeting (or welcome) is the first prompt thacallers hear. It should identify your organization so that calleknow where the call is being answered. It should also identifthe service to which they have been connected. The introductory greeting is the first field in your voice form. Somexamples are
“Welcome to the Bank of Moosejaw FastCredit application system.”
“Thank you for calling the Corona Confection Company. Weappreciate you taking some time out to participate in our customer survey to help us assess your satisfaction with ourproducts.”
Instructional prompts Instructions are necessary if callers are to use the form easiand effectively. Some of your instructions will inform callers othe keys they can press while using the voice form (if they haa touch-tone phone); others will outline how the form is structured or what information is expected from the caller. Thfollowing are examples of the types of instructional prompts you may need to include.
Number sign to stop recordingIf a caller has finished responding to a question, or does notwant to respond to a particular question, he or she can pressnumber sign (#) to stop recording. Once recording stops, thenext action in the voice form (next field, confirmation,
Standard 1.0 Voice Services Application Guide January 1998

7-26 Voice forms Composing greetings, prompts, and instructions
er
r r
ct ith if te
ve -
-
of
if ill
d our rth
disconnection) is carried out immediately. This makes it fastfor callers to complete a form since they do not have to wait until the time specified in the Answer Length Limit field has expired. Appropriate wording would be “After answering a question, press number sign to stop recording. You will eithebe presented with the next question or asked to confirm youanswer.”
Zero (0) for assistanceIf the Caller “0” Allowed field in the Voice Form Definition screen is set to Yes, callers can press 0 at any time to connewith an operator. This gives callers the option of speaking wsomeone should they have problems completing the form orthey become uncomfortable using the application. Appropriawording would be “If you require assistance, press 0 to speakwith an operator.”
Note: If there are rotary phone users in your area, you will hato modify your prompt to indicate that only callers with touchtone phones can use this feature. For example: “After answering a question, please wait on the line for the next question, or ifyou have a touch-tone phone, you can go immediately to thenext question by pressing number sign. If you would like to speak to an operator at any time, press 0 if you have a touchtone phone.”
Organization of the formSince callers cannot “glance” over a voice form to get an ideawhat information is expected of them, a brief summary at or near the beginning of the form may be useful. For example, you have created a credit card application, your questions wbe organized into several categories. This summary could provide a breakdown of the categories in the order in which they will be presented.
For example: “This application is broken down into four parts.The first part asks personal questions such as your name ancurrent address. The second part asks questions regarding yemployer. The third part asks about your resources. The foupart asks about your financial obligations.”
Standard 1.0 Voice Services Application Guide January 1998

Voice forms 7-27Composing greetings, prompts, and instructions
t
ve the
ll ck. h
,
t
he
ers ut
g
er
y
Information required on-handWill you be asking for any information that the caller may nohave on hand? For example, if you require a bank account number, the caller may not have this information handy and may have to look for it. If you suspect that callers may not haall of the necessary information on hand, include a prompt at beginning of the voice form to point out the information they will need to complete the voice form. If callers do not have aof the necessary information, they should hang up and call baThis can save callers the frustration of getting halfway througa voice form and then having to hang up to retrieve the necessary information.
For example: “You will need your current credit card numbersbank account numbers, driver’s license number, and employer’s address to complete this application. If you do nohave all of this information on hand, please hang up, find thenecessary information, and call back.”
ConfirmationIf you will be requiring callers to confirm (some of) their answers, you might want to tell them so at the beginning of tform. You could also specify when confirmation will occur (after each answer or at the end of the form.) This gives callan idea of what to expect. Because confirmation requires inpfrom a telephone keypad, callers with rotary phones must beoffered an alternative procedure for confirmation.
You might want to create a very brief prompt at the beginninof your voice form such as: “At the end of this survey, you will have an opportunity to confirm your answers.” Just before the caller is asked to confirm his or her first answer, you should have a more detailed prompt to identify how each type of us(rotary and touch-tone) will confirm. For example: “You have reached the end of the survey. You will now have the opportunity to confirm your answers. If you are using a rotarphone, please stay on the line. Thank you.”
Standard 1.0 Voice Services Application Guide January 1998

7-28 Voice forms Composing greetings, prompts, and instructions
d is
, od on h
his to
if r
at
n
d is
in
General guidelines for creating instructional prompts
You can combine all necessary instructions into one single announcement. When a number of these prompts are playeback one after the other, the only silence that separates themany silence that was recorded along with the prompt itself. Therefore, even if you split up the information into several prompts, they will string together nicely when played back aslong as there is not any extra recorded silence. Alternativelyyou can divide them up into separate segments. This is a goidea if you think you may need to update just a small sectiona regular basis or if you feel that you are presenting too mucinformation at one time if you put all instructions into one prompt.
Write down your general instructions on your notepad. If youneed to cover several or all of the above-mentioned points, tcan be a rather long prompt. If possible, read the script aloudsomeone else to see if you are trying to present too much information at one time. If your general instructions are too long, they will not be effective since most people will not remember much past the first three or four points. If you feelthat there is too much information, review the script and seeyou can inset some of the information during other steps. Foexample, if you will be offering your callers the chance to change their mind and cancel an order, insert the informationthe field where this action takes place, rather than at the beginning. Once you have come to a decision about how to present your instructions, write out a good copy on your notepad. You can transfer this information to the field definitioworksheets when you are defining your fields.
The farewell greeting This greeting should let the caller know that they have completed the form. Although there is a system “Good-bye” prompt, it is recommended that you turn it off and then recor“Good-bye” as part of your farewell greeting so that the voicethe same for the greeting and the goodbye. For example: “Thank you for calling the Corona Confection Company. Weappreciate your business. Your order will be processed with24 hours. Good-bye.”
Standard 1.0 Voice Services Application Guide January 1998

Voice forms 7-29Composing greetings, prompts, and instructions
rm
le u it ntil ant
later u
Testing your sequence
When you have finished, the best way to see if your entire foworks is to read each individual script aloud to someone. Asyou do so, write down the responses. Do not let the person responding to the form see the scripts or your copy of the written form. Ask your colleague for feedback on the flow of the form and the instructions/prompts. If your colleague is abto respond to your scripts and the form is complete when yohave finished, your script works. If it does not work, fine-tuneand find someone else to test it. Continue with this process uyou have scripts that work. This process is especially importfor long voice forms.
Before proceeding to the next section, you should have the following:
• a blank copy of the Voice Form Definition Worksheet
• one copy of the No Answer Field Worksheet for each NoAnswer field
• one copy of the Voice Answer Field Worksheet for eachVoice Answer field
Staple these forms together to create a booklet that you can use to configure the information in Meridian Mail and that yocan keep as a record of this voice form.
Standard 1.0 Voice Services Application Guide January 1998

7-30 Voice forms Identifying how transcribers will be notified—overview
a
is ial
,
e
be
to if or
Identifying how transcribers will be notified—overview
Introduction The Voice Forms feature offers the following methods for notifying transcribers that a response has been recorded forvoice form:
• Turn on the MWI on a specified phone when a new response is recorded.
• Turn on the MWI on a specified phone when a responsemarked as “special”; a response can be marked as specby a transcriber if there is a problem transcribing the response.
• Send a notification message to a specified mailbox.
In addition, if you choose the “notification message” methodyou can also do the following:
• tag the message as urgent
• use the Outcalling remote notification feature to notify thtranscriber at a remote location
Note: The MWI method and the notification message methodcan both be used. The methods for notifying transcribers cancombined in whatever way satisfies the needs of your organization.
See also For details on these notification methods, see the following sections:
• “MWI notification” on page 7-31
• “Notification by voice message” on page 7-34
If you do not use any of these notification methods, you haveinform transcribers to log in on a regular basis to determine any new responses have arrived. See the following section fdetails:
• “If no method of notification is used” on page 7-36
Standard 1.0 Voice Services Application Guide January 1998

Voice forms 7-31MWI notification
ing
ice
a
e if
onse bed w in a
tion ne the
MWI notification
Introduction This section discusses the MWI method for notifying transcribers.
MWI method for new responses
Use the MWI method if the transcriber is not a voice messaguser.
When this method is used, the MWI of a specified phone is turned on when a response is recorded for a voice form. However, if untranscribed responses already exist for the voform, then the MWI is not turned back on. The transcriber would have already been notified when the currently untranscribed responses were initially recorded.
If you are going to use the MWI method, transcribers need separate telephones for notification of new voice form responses. Persons handling special responses also requireseparate telephone for notification.
Note: If the transcriber was a voice messaging user, then theMWI would be turned on any time a voice mail was left for thuser. As a result, the transcriber would not be able to identifythe MWI was turned on because a voice form response wasrecorded or because a voice mail was received.
DN characteristicsThe DN may be from 1 to 30 characters in length using the following characters: 0–9, #, *, (,), -, _, $ (however, the DN cannot start with $).
MWI method for special responses
Responses can be marked as special by transcribers. A respmay be marked special if the response could not be transcrifor some reason, yet needed to be taken out of the list of neresponses. For example, the response may have been givenlanguage that the transcriber could not translate.
The notification for special responses works the same as theMWI method for new responses and can be used in conjuncwith the MWI for new responses method. If you specify a phofor special responses and one for any new responses, then
Standard 1.0 Voice Services Application Guide January 1998

7-32 Voice forms MWI notification
the N
.
ne e r ldy.
es
s
but se,
ne ral ame
MWI will be turned on at the appropriate phone based on whether the voice form response is new or “special.”
Requirements for the MWI method
The paragraphs that follow discuss requirements for transcribing voice forms based on the number of voice formsand the number of transcribers.
One form with multiple transcribersIf more than one person will be transcribing the same form, acentral telephone can be installed, allowing everyone to seemessage waiting indicator. If the transcribers are in differentlocations, the telephone sets must all be defined for multipleappearance. In this scenario, the new response notification Dis the primary DN for the sets.
Multiple forms with one transcriberIf you assign several forms to one transcriber, you need to provide a separate telephone set for MWI for each voice formNote that because the new responses MWI notification DN must be unique across all notification DNs, you must assign otelephone set per voice form since you cannot enter the samnotification DN for two different voice forms. If the transcribeis responsible for many voice forms, this can become unwie
Note: If you use the notification message method, then one telephone will be enough since the notification message statthe ID of the voice form that received a response.
Multiple forms with multiple transcribersYou may decide to have several transcribers transcribing a number of voice forms. For example, there are 5 transcriberwho are collectively responsible for 12 voice forms. Transcribers are not responsible for a particular voice form, the first available transcriber is expected to log on to a voiceform for which a new response has been recorded. In this cayou can install a row of telephones with MWI in a central location. Label each phone for a particular voice form. Any oof the transcribers can call any voice form to transcribe. Sevetranscribers can even transcribe the same voice form at the stime because each transcriber is presented with the oldest response that has not been transcribed.
Standard 1.0 Voice Services Application Guide January 1998

Voice forms 7-33MWI notification
is I
is I g
is s:
s
lds ge
Identify the new responses SMDI link name (for MSM or GP)
This is necessary only for MSM or Modular GP systems. Thisthe name of the simplified message desk interface link in thehardware database which should be used for setting the MWfor new responses. Check the SMDI data port screen using Hardware Administration to determine the setting.
Identify the special responses SMDI link name (for MSM or GP)
This is necessary only for MSM or Modular GP systems. Thisthe name of the simplified message desk interface link in thehardware database which should be used for setting the MWfor special responses. Check the SMDI data port screen usinHardware Administration to determine the setting.
Worksheet Based on the method of notification that you decide on for thvoice form, record an appropriate value for the following field
• New Responses MWI Notification DN
• New Responses SMDI Link Name (MSM or GP systemsonly)
• Special Responses MWI Notification DN
• Special Responses SMDI Link Name (MSM or GP systemonly)
• Send Notification to Mailbox
• Tag the Message as Urgent
For any methods that you are not using, leave the relevant fieblank. Note that both the MWI method and notification messamethod can both be used for the same voice form.
Standard 1.0 Voice Services Application Guide January 1998

7-34 Voice forms Notification by voice message
log nse
t
he
set es nt
N
Notification by voice message
Introduction This section discusses the notification message method for notifying transcribers.
Notification message method
If the transcriber is a voice messaging user, then use the notification message method. When this method is used, a notification message is sent to a specified mailbox when a response is recorded for a voice form. The transcriber must in to the mailbox and listen to new messages to see if a respohas been recorded for a voice form.
The notification messageThe notification message is a standard system message thaincludes the voice form ID.
Tagging the notification message as urgentYou can tag the notification message as urgent. When the transcriber logs in to listen to messages, the notification message is played ahead of normal voice mail. In this way, ttranscriber is notified sooner.
In addition, if you use the Outcalling remote notification (RN)feature to notify the transcriber at a remote location, you canup the RN to notify the transcriber only when urgent messagare deposited in the mailbox. In this way, the transcriber willnot be disturbed by a remote notification unless it is an urgemessage, which will usually be the voice form notification message.
Using remote notificationIf you use the notification message method to notify transcribers, you can also set up the Outcalling remote notification feature on the mailbox to notify the transcriber at a remote location. When a message is deposited in the mailbox, a remote notification call is sent to the predefined Dor paging device (refer to the Outcalling Application Guide, NTP 555-7001-320, for details). Therefore, when the voice form notification message is deposited, the transcriber is notified.
Standard 1.0 Voice Services Application Guide January 1998

Voice forms 7-35Notification by voice message
ry
ly
is s:
s
lds ge
If the transcriber does not want to receive notification for evevoice mail received, you can do the following:
1. In the Voice Form Definition Worksheet, specify that thenotification message should be tagged as urgent.
2. Set up the remote notification to notify the transcriber onwhen urgent voice mail is received.
Worksheet Based on the method of notification that you decide on for thvoice form, record an appropriate value for the following field
• New Responses MWI Notification DN
• New Responses SMDI Link Name (MSM or GP systemsonly)
• Special Responses MWI Notification DN
• Special Responses SMDI Link Name (MSM or GP systemonly)
• Send Notification to Mailbox
• Tag the Message as Urgent
For any methods that you are not using, leave the relevant fieblank. Note that both the MWI method and notification messamethod can be used for the same voice form.
Standard 1.0 Voice Services Application Guide January 1998

7-36 Voice forms If no method of notification is used
ge a
up
n a ion
on
If no method of notification is used
Introduction If you use neither the MWI method nor the notification messamethod, then transcribers need to check the voice forms on regular basis to check for new responses.
Scenario If you cannot provide separate telephone sets to your transcribers or simply find it too unwieldy, an alternative solution is to assign a number of transcribers to a specific groof voice forms. The transcribers then log on to their assignedvoice forms and check for new responses on a regular basis(every hour, twice a day, once a day, and so on).
In this scenario, you have to determine how often responsesneed to be transcribed for each voice form. This depends onhow critical the responses are to a particular voice form. Forexample, if the voice form logs customer requests for equipment repairs, you want transcribers to check the form oregular basis, such as every hour. Customer surveys or opinpolls that do not require a rapid response do not need to be transcribed as often. Inform each transcriber how often to logto each voice form for which he or she is responsible.
Standard 1.0 Voice Services Application Guide January 1998

Voice forms 7-37Identifying the general characteristics of the form
the et
s:
an tics r in .
to
.
ice of t
et.
e ,
to ID,
m er
Identifying the general characteristics of the form
Introduction For each voice form that you create, fill out a Voice Form Definition Worksheet to define the general characteristics of voice form application. There is a blank copy of this workshein Appendix A, “Worksheets.”
Voice form characteristics can be classified into three groupgeneral form characteristics, caller characteristics, and transcriber characteristics. In the Voice Form Definition Worksheet, general form characteristics are designated withF, caller characteristics with a C, and transcriber characteriswith a T. The worksheet lists these characteristics in the ordewhich they appear in the Add a Voice Form Definition screenHowever, when you are planning your form, you might want plan the form characteristics, followed by the caller characteristics, and finish with the transcriber characteristics
Each item in the worksheet represents a field in the Add a VoForm Definition screen. The following sections describe eachthe fields in this screen in detail. As you decide how you wanto configure these general characteristics, fill in the workshe
Identify the voice form ID
This is the identification number that uniquely identifies this voice form definition. Within a customer group, this ID must bunique among all voice service application IDs (voice menusannouncements, thru-dialers, time-of-day controllers, voice forms, and fax items). You can, however, duplicate IDs between customer groups. For example, you can assign thevoice form ID 1001 to a form in Customer Group 1 and then another form in Customer Group 5. If you assign a duplicate an error message is displayed on the command line of the administration terminal. (In a single-customer system, this IDmust be unique among all IDs on the system.) The voice fordefinition cannot be saved until you assign a unique ID numbto it.
Standard 1.0 Voice Services Application Guide January 1998

7-38 Voice forms Identifying the general characteristics of the form
you
u
e
um ) If ave
xist
e ,
ually er ms nts, n
.
ific e is
Come up with some sort of numbering scheme so that when look at an ID, you know that it belongs to a voice form. For example, if all of your voice menus are numbered 333xxx, yomay want to number your voice forms 444xxx.
Choose a title Choose a title for the voice form. Ensure that it is descriptiveenough of the form’s purpose to allow you to easily recognizwhich voice form application you are dealing with.
Choose a transcription password
This password is optional. If you define a transcription password, transcribers trying to access the voice form must enter this password before being allowed to listen to caller responses. You may enter a password of 4 to 16 numeric characters in length (no spaces allowed). (To alter the minimpassword length, contact your Nortel support representative.you do not want transcribers to have to enter a password, lethis field blank.
Identify the maximum number of untranscribed responses
Decide how many untranscribed responses are allowed to eat any one time for this voice form application. It is not recommended that you enter a value greater than 1000 (although this field will accept higher values).
If you will be creating a large number of voice form applications, be careful of how high you set this value. As thnumber of untranscribed responses is allowed to accumulatethe amount of free disk space decreases and you may eventreach full capacity. Prioritize your voice forms in terms of theimportance of the responses you are expecting. Assign highvalues to your more important applications. For example, forthat are designed to take orders or record customer complaior problems, or both, may be considered more important thacustomer surveys and probably warrant a higher value. In general, you should advise your transcribers to retrieve newresponses as soon as possible. When this maximum limit is reached, callers can be reverted to an overflow handling DN
You can also use this field to limit caller responses to a specnumber. A good example is a phone-in giveaway in which thfirst 100 callers receive some sort of complimentary gift. In th
Standard 1.0 Voice Services Application Guide January 1998

Voice forms 7-39Identifying the general characteristics of the form
d ssed, e rs
m ll d-
e ne,
es ield
wer.
situation, you could enter 100 as the maximum value so thatonly the first 100 caller responses are recorded.
Identify the overflow handling DN
This DN is used when the maximum number of untranscriberesponses is reached. If the limit has been reached or surpacallers who try to access the voice form are transferred to thoverflow handling DN. The DN may be from 1 to 30 charactein length using the following characters: 0–9, #, *, (,), -, _, $ (however, the DN cannot start with $).
If you do not define an overflow DN (that is, if you leave the field blank when configuring the voice form definition), the following prompt is played to callers who reach the voice forwhen the maximum number of untranscribed responses hasbeen recorded: “No more responses can be recorded. Your cacannot be completed at this time. Please try again later. Goobye.”
Identify the transcription field separator
This field separator is used to indicate the start of an answerduring transcriber playback. The field separator is heard immediately before an answer is played back. There are thretranscription field separators to choose from: Field name, Toor Silence.
Field nameIf this option is selected, a recording of the field name precedthe answer. The actual name is recorded in the Insert New For View/Modify Field screen using the [Voice] softkey.
ToneIf this option is selected, the transcriber hears a short tone before hearing the answer.
SilenceIf this option is selected, each answer is preceded by a briefperiod of silence.
Identify the default field separator delay
This delay is used to provide some sort of pause after each answer to give the transcriber a chance to transcribe an ansThere are two options.
Standard 1.0 Voice Services Application Guide January 1998

7-40 Voice forms Identifying the general characteristics of the form
Skip
ed, he the
re, the his s,
n
a ed: ns
,
e. ed.
ond
l 7)
StopIf this option is selected, the voice form stops playback aftereach answer is played. The transcriber must use the Play or Forward command to go to the next answer.
DelayThis delay is specified in deciseconds. If this option is selectplayback pauses for the amount of time you have specified. Tsystem then automatically resumes playback and goes on tonext answer.
A decisecond equals one tenth (1/10th) of a second. Therefoto determine the number of deciseconds required, decide onrequired duration of the delay in seconds and then multiply tvalue by 10. For example, to configure a delay of 1.5 secondenter 15 in this field. This delay can range from 0 to 32767 deciseconds.
Note: This parameter is also configurable for each field in thevoice form. The value entered here is used as a default whenew voice form fields are created.
Decide if the envelope should be played as the header
The header is played to transcribers each time they retrieve new caller response. There are two headers that can be playthe standard response header, or the envelope which contaiadditional information.
The standard header contains the status (new, special, or deleted) and the response number. The full header envelopecontains the status, response number, form ID or form nameand the date and time that the response was recorded.
Identify the length of the delay after header
This is the delay that follows the standard header or envelopThis delay is useful if part of the header needs to be transcrib
The delay can range from 0 to 32767 deciseconds (1 decisec= 1/10th of a second).
Identify the caller confirmation mode
Confirmation and confirmation modes are described in detaiearlier in this chapter (see “Confirmation mode” on page 7-1because the confirmation mode affects the structure of your
Standard 1.0 Voice Services Application Guide January 1998

Voice forms 7-41Identifying the general characteristics of the form
r
e om –9,
rm
fer in a t no
.
this .
voice form. You should, therefore, have already chosen youconfirmation mode.
Identify the default revert DN
This is the DN to which callers are transferred if there is a problem accessing the voice form or if they explicitly ask to btransferred to an attendant by pressing 0. The DN may be fr1 to 30 characters in length using the following characters: 0#, *, (,), -, _, $ (however, the DN cannot start with $).
A revert DN can also be configured for each field in the voiceform. The DN here is used as a default for each new voice fofield that is created.
Decide if callers are allowed to press 0 to transfer to an attendant
If Caller 0 is allowed, callers are permitted to press 0 to transto an attendant. (Callers are transferred to the DN specified the Revert DN field.) If it is not allowed in the voice form and caller presses 0 anyway, a message is played indicating thaoperator is available. The caller has the option of continuingwith the voice form or canceling the call.
Note: If you allow callers to use 0, your introductory greeting should inform callers of this capability.
Identify the language for system messages
This is necessary only if more than one language is installedThe selection you make determines the language in which system prompts are played to callers and transcribers usingvoice form. This field does not affect your custom recordings
Standard 1.0 Voice Services Application Guide January 1998

7-42 Voice forms Defining No Answer fields
ured
to
d
gth.
?
t
is
t
d
Defining No Answer fields
Introduction This section describes the parameters that have to be configfor No Answer fields. You fill out one No Answer Field Worksheet per field (see the following). As you fill out these worksheets, keep the Voice Form Definition Worksheet nextyou as you will probably refer to it several times.
Assign a name to the field
Choose a name for the field. This name should be unique andescriptive enough to identify the function of the field. You may enter a name that is between 1 and 29 characters in len(You cannot save the field without a name.)
Identify the action after field
Once the field prompt is played, what action should be takenChoose from one of the following.
Next fieldIf this option is selected, the next field prompt is played.
RevertIf this option is selected, the caller is transferred to the reverDN (see next field description).
DisconnectIf this option is selected, the call is disconnected. This actiontypically selected for the last field in the voice form that playsthe farewell greeting and is used to disconnect the caller fromthe voice form.
Identify the revert DN This is necessary only if the action after field is to revert the caller to another number. If this is the case, identify the DN.
Determine if the system disconnect message is necessary
This is necessary only if the action after field is to disconnecthe call (because this is the last field in the form). If this is the last field, do you want the system to play its generic “Good-bye” prompt before disconnecting? If you have includea “Good-bye” in your farewell greeting, it is not necessary to do so.
Standard 1.0 Voice Services Application Guide January 1998

Voice forms 7-43Defining No Answer fields
ld o far,
. d to
ase, p lar n
s r he
Determine whether the response should be saved if the caller hangs up
If the caller hangs up while listening to this field prompt, shouthe system save the response (all of the answers recorded sif any) or discard it?
This should be given some consideration. If you want to be informed of all calls made to the voice form (complete and incomplete), set this field to Yes for all fields in the voice formIf you are not interested in incomplete responses, set this fielNo for all fields except the last one. If you want to keep incomplete responses only if they contain some useful information, you have to decide at which point in the form enough usable information has been gathered. In the third cyou would probably set this field to No for the fields at the toof the form, and then set it to Yes for all fields after a particupoint (the point at which you believe enough useful informatiohas been gathered). However, be sure that all fields after thipoint are set to Yes because whether a response is saved odiscarded is determined by the setting of the field on which tcaller hangs up.
Standard 1.0 Voice Services Application Guide January 1998

7-44 Voice forms Defining Voice Answer fields
ured
he
d
gth.
or
is tive en
iled in
d.
on
t or in
Defining Voice Answer fields
Introduction This section describes the parameters that have to be configfor Voice Answer fields. You fill out one Voice Answer Field Worksheet per field. As you fill out these worksheets, keep tVoice Form Definition Worksheet next to you as you will probably refer to it several times.
Assign a name to the field
Choose a name for the field. This name should be unique andescriptive enough to identify the function of the field. You may enter a name that is between 1 and 29 characters in len(You cannot save the field without a name.)
Identify the answer length limit
This is the maximum recording length (in seconds) allowed fa caller’s answer to the prompt recorded for this field. The minimum value is 1 second and the default maximum value 30 seconds. This upper limit can be changed by a representaof your Nortel support organization (and may have already bechanged during installation). Use shorter limits for yes/no answers and longer limits for answers that require more detainformation. If you feel that the question cannot be answeredthe maximum time allowed, reword it so that it asks for morespecific information or break it into several questions if possible. If you find that this is the case for many of the questions you are including in voice forms, call your Nortel support organization and ask to have this upper limit change
Identify how to handle “no answer” situations
If a caller does not provide an answer for this field, what actishould the system take? There are four options.
Next fieldIf this option is selected, the next field prompt is played. Transcribers hear the message “No answer was recorded” when this field is reached during transcription.
RevertIf this option is selected, the caller is transferred to the reverDN specified for this field. This could be the DN of an operatdesignated to handle calls from people having trouble filling
Standard 1.0 Voice Services Application Guide January 1998

Voice forms 7-45Defining Voice Answer fields
her
d ice if .
use
d e
o
t.
at. er e
n ing
forms or a transcriber if he or she is usually situated at his or telephone set.
DisconnectIf this option is selected, the call is disconnected if the callerdoes not record an answer. The system plays “Goodbye” before disconnecting. (Do not mistake this with the Action After Fieldisconnect.) This action may be selected for high-volume voforms where it is important that callers do not tie up lines or all questions must be answered for the form to be processedOtherwise, this option is not recommended.
If during testing, or while the form is in use, it is noticed that callers are being disconnected unexpectedly, it may be beca“Disconnect” was unintentionally selected for a field. This is the first thing to check should this occur.
RepeatIf this option is selected, the field prompt is repeated. If the caller still fails to record an answer, the field prompt is playeagain. This continues until the number of repeats specified inthe Repeats Before Disconnect field has been reached. Oncthis limit is reached, the caller is disconnected from the voiceform. The next field is not played.
Note: Silence compression must be enabled for this feature twork. For details, refer to the System Administration Tools Guide (NTP 555-7001-305).
Identify the revert DN This is necessary only if “No answer handling” is set to reverIf this is the option you selected, identify the DN to which thecaller should be reverted.
Identify the number of repeats before disconnecting
This is necessary only if “No answer handling” is set to repeIf this is the option you selected, identify the maximum numbof times the prompt is to be repeated before disconnecting thcaller from the voice form.
Determine whether recording should stop if silence is detected
If there is silence (four seconds) while a caller is recording aanswer, you have the option of stopping recording or record
Standard 1.0 Voice Services Application Guide January 1998

7-46 Voice forms Defining Voice Answer fields
or
to
he t
s
s,
r our-
is
r
r d
the silence until the maximum answer length limit has been reached.
It is generally recommended that you do not record silence ftwo reasons:
1. Rotary phone users cannot press # (number sign) to gothe next question. This means that they have to wait a considerable amount of time between their recorded answer and the next question.
2. Even though you may inform callers to press # to go to tnext question in your greeting, many will not and will juswait on the line. As with rotary phone users, they are required to wait until the maximum answer length limit habeen reached.
If callers find they have to wait a long time between questionthey may get frustrated and hang up.
If you find that callers are being inadvertently cut off (if they are searching for information, for example), you can call youNortel technical support center and ask them to change the fsecond default.
Note: Silence compression must be enabled for this feature to work. Refer to the System Administration Tools Guide (555-7001-305)for details.
Identify whether the field needs to be confirmed
This is necessary if the confirmation mode for this voice formWhole Form or At Each Field. You can selectively choose tohave this field confirmed or not confirmed by the caller.
If the confirmation mode is At Each Field and this field is marked to be confirmed, callers are asked to confirm their answer for this voice form field immediately after their answehas been recorded.
If the confirmation mode is Whole Form and this field is marked to be confirmed, callers are asked to confirm their answer for this voice form field when the confirmation markeis reached, along with any other fields that have been markefor confirmation.
Standard 1.0 Voice Services Application Guide January 1998

Voice forms 7-47Defining Voice Answer fields
ld o far,
. d to
ase, p lar n
s r he
wer.
the lay
ed, d. n to
re, the his s,
Determine whether the response should be saved if the caller hangs up
If the caller hangs up while listening to this field prompt, shouthe system save the response (all of the answers recorded sif any) or discard it?
This should be given some consideration. If you want to be informed of all calls made to the voice form (complete and incomplete), set this field to Yes for all fields in the voice formIf you are not interested in incomplete responses, set this fielNo for all fields except the last one. If you want to keep incomplete responses only if they contain some useful information, you have to decide at which point in the form enough usable information has been gathered. In the third cyou would probably set this field to No for the fields at the toof the form, and then set it to Yes for all fields after a particupoint (the point at which you believe enough useful informatiohas been gathered). However, be sure that all fields after thipoint are set to Yes, because whether a response is saved odiscarded is determined by the setting of the field on which tcaller hangs up.
Identify the field separator delay
This delay is used to provide some sort of pause after each answer to give the transcriber a chance to transcribe an ansThere are two options.
StopIf this option is selected, the voice form stops playback after answer to this field is played. The transcriber must use the Por Skip Forward command to go to the next answer.
DelayThis delay is specified in deciseconds. If this option is selectplayback will pause for the amount of time you have specifieThe system then automatically resumes playback and goes othe next answer.
A decisecond equals one tenth (1/10th) of a second. Therefoto determine the number of deciseconds required, decide onrequired duration of the delay in seconds and then multiply tvalue by 10. For example, to configure a delay of 1.5 secondenter 15 in this field. This delay can range from 0 to 32767 deciseconds.
Standard 1.0 Voice Services Application Guide January 1998

7-48 Voice forms Identifying the service through which the voice form will be accessed
ce
to e
he te
d.
on.
ller uld
the
Identifying the service through which the voice form will be accessed
Introduction Decide how the voice form will be accessed by callers. A voiform can be accessed in one of three ways:
• Directly The caller dials a DN that has been dedicated the voice form and is immediately connected to the voicform application. The VSDN of the voice form is the published number.
• Indirectly, through a voice menu application The published number connects the caller to a voice menu. Tcaller accesses the voice form by pressing the appropriamenu key.
If you have a number of voice forms that are related in some way (for example, they all relate to a particular product line), you can create a voice menu as a front enPublish the number of the voice menu to your customersand tell them to call it if they would like to place an orderfor Product X, register a complaint against Product X, respond to a customer satisfaction survey, or apply for acredit card. Each of these options would be a menu acti
• Indirectly, through a time-of-day controller If the voice form is associated with the time of day when the call is received (business hours, off-hours, or a holiday), the cais connected to the voice form. This is useful if you wantoperators to take customer orders during the day, but wolike to continue to take orders in the evenings or on weekends when they are not on duty. Simply associate voice form with off-hours in the time-of-day control definition.
If you are going to modify an existing voice menu or time-of-day controller, find the service DN in the Voice Service Directory Number (VSDN) table. If you are going to create aspecial voice form service, or a new menu or time-of-day controller, find an available DN. Enter the DN on the secondpage of the Voice Form Definition Worksheet.
Standard 1.0 Voice Services Application Guide January 1998

Voice forms 7-49Identifying the transcription service DN
a ke u
m is
d, orm.
he
r
u rm on e
he
Identifying the transcription service DN
Introduction Once you have completed your first voice form, you will haveto define a VSDN for the transcription service. To transcribeform, you must first access the transcription service, much liyou access voice messaging to retrieve voice messages. Yocan either configure one generic transcription service, or youcan create a number of transcription services.
Using one generic transcription service
This configuration allows any transcriber to log on to any forfor transcription. When the transcriber dials the DN, he or sheprompted for the voice form ID (as entered in the Voice FormDefinition Worksheet). If you specify a transcription passworthe transcriber must also provide a password to access the fThis is the most flexible way of configuring the transcription service.
Identify an available DN and enter it on the second page of tVoice Form Definition Worksheet.
Using a number of transcription services
In this configuration, you create one transcription service pevoice form. When a transcriber dials the DN, he or she is automatically logged on to the voice form that is associated with the VSDN. The transcriber has to enter a password if yohave defined a transcription password in the Add a Voice FoDefinition screen. If you have a small number of voice forms the system, you might want to use this method. However, thfirst method is recommended in most situations.
Identify an available DN and enter it on the second page of tVoice Form Definition Worksheet.
Standard 1.0 Voice Services Application Guide January 1998

7-50 Voice forms Identifying the transcription service DN
Standard 1.0 Voice Services Application Guide January 1998

Chapter 7
Voice forms 7-51Section B Configuring a voice form
In this section
Overview of configuring a voice form 7-52
Guidelines for configuring voice forms 7-54
The Voice Forms definitions data menu 7-56
Adding a new voice form definition 7-58
Inserting a new field 7-61
Recording field names and field prompts 7-67
Saving the voice form definition 7-69
Making the voice form accessible 7-70
Defining a VSDN for the transcription service 7-73
Testing the voice form 7-75
Providing training/support and making the service available to customers 7-77
Standard 1.0 Voice Services Application Guide January 1998

7-52 Voice formsOverview of configuring a voice form
rk ines to f
,
ne
s
a s t of
s:
rate
tor
.
he
e urs.
Overview of configuring a voice form
Introduction With the planning phase behind you, the majority of your wois already done. The worksheets that you completed are outlof the Meridian Mail administration screens you will be using configure your voice form application. Now it is just a matter ocopying the data in your worksheets directly into the systemrecording the prompts you have scripted, and testing the service.
You can configure a voice form in stages or all at once. However, it is recommended that you configure the form in osession, if possible, because you are less likely to make mistakes. Furthermore, the voice form administration screenare designed so that one step leads you into the next. For example, general form characteristics are defined in the AddVoice Form Definition screen. Once you are finished with thistage and are ready to define your fields, you access the LisFields screen from the Add a Voice Form Definition screen. From the List of Fields screen, you insert a new field.
Recording the prompts
You can approach voice form configuration in one of two wayyou can either (a) make the necessary recordings (the field name and the field prompt) for each field as you define the fields, or (b) define the fields first without recording the prompts, and then go back and record the prompts in a separecording session.
Note: Voice form prompts cannot be recorded or maintained using the voice prompt maintenance service. The administramust access the voice form through the local administration terminal (or a remote terminal) to make or update recordings
Record as you define fieldsThis is the recommended method for short voice forms. Youneed to coordinate a time when both the administrator and tperson doing the recordings can work together. Choose a timwhen the environment is quiet—perhaps outside business hoMinimize air-conditioning noise if it is intrusive, and allow onlythe people essential to the recording in the room while recording is taking place.
Standard 1.0 Voice Services Application Guide January 1998

Voice forms 7-53Overview of configuring a voice form
g ing lity , if
you
ult e.
l,
y be nt he
, ble
k
res ve
Record after the fields are definedThis is the recommended procedure for lengthy or complex applications. It can take quite a while just to define the fieldswhich tends to break up the flow of the recordings. By havin90 percent of the configuration process complete before yourecord, you (and the speaker) can totally focus on the recordprocess, and the recording can be done in one session. Thismakes it easier for the person to maintain the same voice quathroughout the application as much as possible. Furthermoreyou are using a professional service to record your prompts, should not have to interrupt a recording session to configurefields.
Choosing the speaker Remember that no matter how well your applications are designed, if the recorded voice you use is unpleasant or difficto understand, reaction to the applications will not be positiv
Though telephone lines reproduce low-pitched voices best, aclear voice is better than one that sounds gravelly. If practicatry to use only one voice or one gender, because callers madistracted by changes in speakers. Choose a voice and accethat projects the image your organization wants to promote. Tvoice itself and the prompts should sound relaxed, confidentefficient, and friendly. If you have a lot of recordings that willneed updating regularly, choose someone who can be availato update them. If this is difficult, select a few people with similar voice qualities who can share the responsibility.
Audition prospective speakers in a quiet room, then play bacsamples of their voices over the telephone. A good way to audition speakers is to have them leave messages or read sample scripts in your mailbox. The same technology that stothe voice in a mailbox is used for voice forms, so you will haan accurate account of the end result.
Standard 1.0 Voice Services Application Guide January 1998

7-54 Voice formsGuidelines for configuring voice forms
in
he
-
at ey
s
th
Guidelines for configuring voice forms
Introduction The following steps are necessary to configure a voice form Meridian Mail.
1. Add a new voice form definition.
If there is an existing voice form on your system that is similar to the form you want to create, consider copying texisting voice form and then modifying any fields or recordings as required. For details, see “Copying a voiceform definition” page 7-91.
2. Insert new fields.
3. Record the field prompts.
4. Save the voice form definition.
5. Make the voice form accessible.
6. Set up the transcription service.
7. Test the voice form.
8. Provide training/support for the voice form.
Voice Form Definitions screen
For a description of the Voice Form Definitions data menu screen, see “The Voice Forms definitions data menu” page 756. This screen provides a list of existing voice forms.
Multi-customer administration
On multi-customer systems, voice forms can only be added the customer administration level. However, once created, thcan be viewed, modified, or deleted from the system administration level.
Starting points for procedures
On multi-customer systems, customer administration screenare invoked from the Customer Administration menu. Therefore, the starting point for some procedures refer to bothe Main Menu (applicable to Single-Customer systems) andthe Customer Administration menu (applicable to multi-customer systems).
Standard 1.0 Voice Services Application Guide January 1998

Voice forms 7-55Guidelines for configuring voice forms
r
ATTENTION
Do not perform voice services administration during the nightly DR audit.
At 3:30 a.m. every day, an audit of the DR directory is performed. Do not add, modify, or delete voice form definitions during this audit. Depending on how unbalanced the system is, this audit can take anywhere from ten minutes (if the system has not been modified since the last audit) to two hours (if there have been manychanges, such as a lot of users or services being added omodified).
Standard 1.0 Voice Services Application Guide January 1998

7-56 Voice formsThe Voice Forms definitions data menu
d o
ice re or
The Voice Forms definitions data menu
Introduction The Voice Form Definitions data menu lists all the configurevoice forms on the system. From this screen, you can also dthe following:
• add a new voice form (see “Adding a new voice form definition” page 7-58)
• copy a voice form (see “Copying a voice form definition”page 7-91)
• view or modify an existing voice form (see “Modifying a voice form while it is in service” page 7-82, or “Modifyinga voice form while it is out of service” on page 7-84)
• delete an existing voice form (“Deleting a voice form definition” on page 7-94)
The screen The following is an example of the Voice Forms definitions screen.
Incomplete recordings The message “*Incomplete Recordings” appears beside a voform title on the Voice Forms definitions screen if one or moof its required field prompts or field names was not recorded,if the form does not contain at least one field.
Standard 1.0 Voice Services Application Guide January 1998

Voice forms 7-57The Voice Forms definitions data menu
te
as
se
A voice form application cannot be used if there are incomplerecordings.
You may have to check the Voice Forms definitions screen from time to time to verify the forms that are loaded, as well to check which forms are incomplete and, therefore, nonfunctional.
Accessing the screen To access the Voice Forms definitions data menu, follow thesteps.
Starting Point: The Main menu or the Customer Administration menu (on multi-customer systems)
Step Action
1 Select Voice Administration.
Result: The Voice Administration menu is displayed.
2 Select Voice Form Definitions.
Result: The Voice Form definitions data menu is displayed.
Standard 1.0 Voice Services Application Guide January 1998

7-58 Voice formsAdding a new voice form definition
e
Adding a new voice form definition
Introduction If you are creating your first voice form, or if the required application is significantly different from other existing voice form applications, you will need to add a new voice form definition.
If the voice form is similar to an existing voice form, considercopying an existing voice form and then modifying it. See “Copying a voice form definition” on page 7-91.
Procedure Adding a voice form definition requires that you input the information from the Voice Form Definition Worksheet into thMeridian Mail system. Have your worksheet available as youfollow these steps.
To add a new voice form definition, follow these steps.
Starting Point: The Voice Administration menu
Step Action
1 Select Voice Form Definitions.
Result: The Voice Form definitions screen is displayed.
2 Press the [Add/Copy] softkey.
Result: A new set of softkeys is displayed.
Note: If this is the first voice form to be created on this system, then the first softkey reads [Add], and the Add a Voice Form Definition screen is displayed immediately after you press the [Add] softkey. The [Add New Form] and [Copy Forms] softkeys are not displayed. If this is the first voice form, go to step 4.
Standard 1.0 Voice Services Application Guide January 1998

Voice forms 7-59Adding a new voice form definition
The screen The following is an example of the Add a Voice Form Definition screen with only the default values entered.
3 Press [Add New Form].
Result: The Add a Voice Form Definition screen is displayed. See the screen example starting on page 7-59.
4 Fill in the screen using the information recorded on your Voice Form Definition Worksheet.
5 To define the voice form fields, continue with the procedure in “Inserting a new field” on page 7-61.
Step Action
Standard 1.0 Voice Services Application Guide January 1998

7-60 Voice formsAdding a new voice form definition
Standard 1.0 Voice Services Application Guide January 1998

Voice forms 7-61Inserting a new field
s
Inserting a new field
Introduction This section describes how to add fields to a voice form.
Worksheets You will need the New Field Worksheets for No Answer Fieldand the New Field Worksheets for Voice Answer Fields that you filled out while planning your voice form. You will have one worksheet per field. Simply enter the values from these worksheets into the Insert a New Field screen.
Note: You can define up to 150 fields for a single voice form application.
Procedure To insert a new field, follow these steps.
Starting Point: The Add a Voice Form Definition screen, or the View/Modify a Voice Form Definition screen
Step Action
1 Press the [Open/Modify Fields] softkey.
Result: The List of Fields screen is displayed. When no fields have been defined yet, the screen appears as follows.
Standard 1.0 Voice Services Application Guide January 1998

7-62 Voice formsInserting a new field
If some fields have been defined already, the message at the bottom of the screen and the softkeys change as follows.
2 If this is the first field to be added to the voice form, go to step 2a. For subsequent fields, go to step 2b.
a. Position the cursor on the <CONFIRMATION> marker (if it is present). If there is no <CONFIRMATION> marker, position the cursor on the <END-OF-FORM> marker.
b. Position the cursor to indicate where the new row should be inserted. The new row will be inserted above the row in which the cursor is placed. When you are ready to insert the last field in the form, position the cursor on the <END-OF-FORM> marker.
3 Press <spacebar> to select the row.
4 Press [Insert New Field].
Result: The Insert New Field screen is displayed.
Step Action
Standard 1.0 Voice Services Application Guide January 1998

Voice forms 7-63Inserting a new field
5 Select the Field Type.
Result: Your selection will affect the screen display. If you select [No-Answer], the Insert New Field screen appears as follows.
Result: If you select [Voice-Answer], the Insert New Field screen will appear as follows.
6 Fill in the required information (according to your New Field worksheets).
Step Action
Standard 1.0 Voice Services Application Guide January 1998

7-64 Voice formsInserting a new field
7 For Voice Answer fields, record the field names and field prompts. For instructions, see “Recording field names and field prompts” page 7-67.
Notes:
1. If you are using a professional to record the prompt, or if this is a long voice form and you want to record all prompts in one session, this step can be done later. However, the same voice should be used to record the field names (since it is heard by callers during confirmation) and the field prompts.
2. All field names must be recorded before the voice form can be used.
8 To save the field definition, go to step 8a. If you do not want to save the field definition, go to step 8b.
a. Press [Save].Result: If all of the mandatory fields have been filled in, the field definition is saved. If something is missing from your definition, you are informed and the field definition is not saved until all of the required information has been entered. In either case, the List of Fields screen is displayed. Note that the cursor is automatically positioned on the first row.
b. Press [Cancel].Result: Any changes that have been made are discarded. The List of Fields screen is displayed.
9 If you need to move the position of one of the fields you have defined, follow steps 2 to 8 in the procedure on page 7-87. Then continue with step 10 in this procedure.
If you need to delete one of the fields you have defined, follow steps 2 to 4 in the procedure on page 7-89. Then continue with step 10 in this procedure.
10 To define another field, repeat steps 2 to 9.
11 If you are planning to record field names and field prompts, continue with the procedure in “Recording field names and field prompts” on page 7-67.
If you are finished modifying this voice form, follow the procedure in “Saving the voice form definition” on page 7-69 to exit the List of Fields screen and save the voice form.
If you do not save the voice form, the fields you have just created will not be saved.
Step Action
Standard 1.0 Voice Services Application Guide January 1998

Voice forms 7-65Inserting a new field
d
e
Field descriptions for the List of Fields screen
The following read-only fields are displayed on the List of Fields screen.
Title
Description This serves to remind you of the voice form definition you have selected to modify.
Field Name
Description This is the name of the existing field.
Type
Description This field indicates whether an answer is expectefor the field. There are, therefore, two types of fields:
• No Answer fields play only a prompt. No answer is expected from the caller.
• Voice Answer fields play a prompt and record an answer.
In addition, the Type field can contain the following markers:
• <CONFIRMATION> This field is present only if you set the Caller Confirmation mode to WholeForm in the Add a Voice Form Definition screen. For details on this marker, see “Markers” on page 7-66.
• <END-OF-FORM> This marker is always present and cannot be deleted or moved. It indicates the end of the list of fields for this form.
Prompt Rec.
Description This field indicates whether a voice prompt has been recorded for the associated field. (A voice prompt can be a welcome or farewell greeting, aquestion or an instruction.) If there are incompletrecordings (that is, fields for which there is no prompt recording), callers will not be able to usethe voice form.
Standard 1.0 Voice Services Application Guide January 1998

7-66 Voice formsInserting a new field
ed. he
is he
e a al a
ers ed.
is
Markers Two markers can appear in the Type field.
<END OF FORM>
This marker is always present and cannot be deleted or movIt is the final entry in the Type field and indicates the end of tlist of fields for this form. All of the fields that you create will appear above this marker.
<CONFIRMATION>
This marker only appears if you set the Caller Confirmation mode to Whole Form in the Add a Voice Form Definition screen.
It indicates the place at which the caller is asked to confirm hor her answers. By default, this marker appears just before t<END-OF-FORM> marker, but you can move it using [Move Field]. This may be necessary if you want to include a thankyou or farewell prompt just before the caller is disconnected from the form (and, therefore, after confirmation); or, after thcaller confirms his or her answers, you may want to include prompt that asks callers to leave comments of a more genernature. For instructions on how to move a field, see “Movingfield” page 7-87.
If At Each Field was selected as the confirmation mode, callare asked to confirm an answer immediately after it is recordYou will not, however, see the <CONFIRMATION> marker in the List of Fields screen.
Name Rec.
Description This field indicates whether a recording of the field name has been made. Only Voice Answer fields can have field names recorded. This nameannounced to callers during confirmation and to transcribers during transcription.
Modified
Description An asterisk (*) in this field indicates that the fieldhas been modified at any time since this voice form has been opened for editing.
Standard 1.0 Voice Services Application Guide January 1998

Voice forms 7-67Recording field names and field prompts
th
if d to to n.
Recording field names and field prompts
Introduction For each Voice Answer field in the form, you must record boa field name and a field prompt.
For each No Answer field, you only need to record a field prompt.
The field name is played to transcribers during transcription the Field Name is used as the field separator. It is also playecallers during Whole Form confirmation. You can record thefield name as you define each field. However, you may wantrecord your field prompts during a separate recording sessioFor a discussion on recording prompts, see “Overview of modifying or deleting voice forms” on page 7-80.
Procedure To record field names and field prompts, follow these steps.
Starting Point: The Insert New Field screen, or the View/Modify Field screen
Step Action
1 To record a field name, position the cursor on the Field Name Recorded field.
To record a field prompt, position the cursor on the Field Prompt Recorded field.
2 Press [Voice].
Result: You are prompted for a phone number.
3 Enter the number for the phone set you are going to use to make the recording.
Result: The phone you specified rings.
4 Pick up the telephone handset.
Result: The following recording softkeys are displayed.
5 Press the [Record] softkey.
Result: A beep sounds when it is OK to record.
Standard 1.0 Voice Services Application Guide January 1998

7-68 Voice formsRecording field names and field prompts
6 At the sound of the beep, record the prompt or greeting. When finished recording, press the [Stop] softkey.
Result: The following softkeys are redisplayed.
Note: The recording stops automatically if you exceed the Maximum Prompt Size or the Record Time-out set in the Voice Services Profile.
7 To review or rerecord the prompt, go to step 7a. If you are planning to record more field names or field prompts during this session, go to step 7b. I f you are finished recording, go to step 7c.
a. Press the [Play] softkey to play the recording, or [Delete] to delete the recording, or [Delete] followed by [Record] to rerecord the prompt.
b. Press the [Return] softkey. The original softkeys are redisplayed, but the call remains connected unless you hang up the phone. When you reach the stage to record the next field name or field prompt, you will be able to skip steps 3 and 4.
c. To disconnect the call, press the [Disconnect] softkey, or just hang up the phone and press return.The original softkeys are redisplayed.
8 Press [Save] to save the recording, or [Cancel] to discard the recording.
Result: Whether you save or cancel, the List of Fields screen is redisplayed.
Note: When you have finished recording names and prompts and modifying the voice form, follow the procedure in “Saving the voice form definition” on page 7-69 to exit the List of Fields screen and save the voice form.
If you do not save the voice form, the fields you have just created will not be saved.
Step Action
Standard 1.0 Voice Services Application Guide January 1998

Voice forms 7-69Saving the voice form definition
the
Saving the voice form definition
Introduction Follow the procedure in this section to save the voice form when you are finished adding or modifying fields for this session. If the confirmation mode is Whole Form, make sure <CONFIRMATION> marker is positioned correctly.
Procedure To save the voice form definition, follow these steps.
Starting Point: The List of Fields screen
Step Action
1 Press [Close Fields].
Result: The Add or View/Modify a Voice Form Definition screen is displayed.
2 Press [Save] to save the entire voice form definition, including fields and recordings.
Result: The Voice Form Definitions screen is displayed.
Standard 1.0 Voice Services Application Guide January 1998

7-70 Voice formsMaking the voice form accessible
ible
s t if
Making the voice form accessible
Introduction Once a voice form has been created, it can be made accessfor testing and for callers in one of three ways:
• direct access
• indirect access through a voice menu
• indirect access through a time-of-day controller
Direct access Callers access the form by dialing a special DN that connectthem directly to the voice form. This procedure assumes thathere are available ACD DNs on the Meridian 1 (or line DNsyour system is connected to a DMS switch).
Procedure To make the voice form accessible, follow these steps.
Starting Point: The Voice Services Administration menu
Step Action
1 Select Voice Services-DN Table.
Result: The Voice Services-DN Table is displayed.
Standard 1.0 Voice Services Application Guide January 1998

Voice forms 7-71Making the voice form accessible
n the
r r of ice
Indirect access through a voice menu
Callers dial the DN of a voice menu. The voice form is presented as one of the menu choices and is accessed whecaller presses the appropriate key.
You can either add a voice form to an existing voice menu, ocreate a new voice menu to serve as a front end to a numbevoice forms. For details on voice menus, see Chapter 5, "Vomenus".
2 Press the [Add] softkey.
Result: The Add DN Information screen appears.
3 Enter the Access DN. This is the number that callers dial to access the voice form. Get the DN from your switch administrator, or print the directory number block (DNB) at the switch to obtain an unused DN.
Note: The Access DN cannot match a mailbox number.
4 Enter VF in the Service field.
Result: An additional field, Voice Form ID, is displayed.
5 Enter the voice form ID in the Voice Form ID field.
6 Enter a comment.
This step is optional, but a comment that identifies the voice form is useful here.
7 Press the [Save] softkey to save the VSDN Table.
Step Action
Standard 1.0 Voice Services Application Guide January 1998

7-72 Voice formsMaking the voice form accessible
e
Indirect access through a time-of-day controller
You can set up a time-of-day controller that directs calls to avoice form.
Set up the voice form first. Then create a new time-of-day controller, or modify an existing one, to direct calls to the voicform.
For instructions on planning and creating a time-of-day controller, see Chapter 8, "Time-of-day controllers".
Standard 1.0 Voice Services Application Guide January 1998

Voice forms 7-73Defining a VSDN for the transcription service
e
by
Defining a VSDN for the transcription service
Introduction After you have created your first voice form application, defina DN for the transcription service in the VSDN table.
You can have one generic transcription service that is used all transcribers to log on to all voice forms.
Procedure To define a VSDN, follow these steps.
Starting Point: The Voice Services Administration menu
Step Action
1 Select Voice Services-DN Table.
Result: The Voice Services-DN Table is displayed.
2 Press the [Add] softkey.
Result: The Add DN Information screen appears.
3 Enter the Access DN. This is the number that the voice forms transcribers dial to access the transcription service. Get the DN from your switch administrator, or print the directory number block (DNB) at the switch to obtain an unused DN.
Note: The Access DN cannot match a mailbox number.
4 Enter TR in the Service field.
Result: An additional field, Voice Form ID, is displayed.
5 Leave the Voice Form ID field blank. This allows transcribers to specify the voice form they want to retrieve. If you enter an ID in this field, the transcriber automatically logs on to the specified voice form.
Note: If you want to create a special transcription DN for each voice form application, enter the voice form ID in the ID field instead of leaving it blank. Using this method, transcribers do not have to specify the voice form ID when they log on. However, they have to remember a different transcription service access DN for each voice form. Also, keep in mind that you need an ACD DN/line DN on the switch for each VSDN you add in Meridian Mail.
Standard 1.0 Voice Services Application Guide January 1998

7-74 Voice formsDefining a VSDN for the transcription service
6 Enter a comment.
This step is optional. However, if you choose to create a separate VSDN for each voice form or for a group of voice forms, then a comment may help distinguish the different transcription services. The comment appears beside the Transcription ID on the VSDN table.
7 Press the [Save] softkey to save the VSDN table.
Step Action
Standard 1.0 Voice Services Application Guide January 1998

Voice forms 7-75Testing the voice form
it
to
he
a y to , if WI .
ng
N s,
e the e e.
the
u
Testing the voice form
Description When you have finished configuring a voice form and have defined a DN for the form and the transcription service, test before making it available. Test the caller interface and the transcriber interface. If you have to make any modifications the voice form based on your testing, be sure to test the formagain. Continue with this process until you are satisfied with tway in which the voice form and the transcription service operate.
The administrator should be the first one to test the form to verify that it works as planned and configured. Call the form few times and record a few responses. As you are testing, tractivate each feature that you have configured. For exampleyou configured the New Responses MWI Notification DN as2005, record a response and see if extension 2005 has its Mturned on. Then log on to the transcription service and test it
Once you have tested it, find a few people who would be willito call the voice form and review it from the caller’s perspective. Ask them to complete the caller survey that is included in Appendix A, “Worksheets.” Give the callers the Dand the survey form only. Do not provide any other instructionclues, things to look out for, and so on. Real callers will not have the benefit of such “inside information.”
Have a few people (actual transcribers if possible) access thtranscription service and transcribe the test responses. Use Transcriber Survey that is included in Appendix A to get somfeedback on the voice form from the transcriber’s perspectiv
Based on the information collected from your callers and transcribers, identify solutions that resolve the needs of bothcaller and the transcriber.
Note: If an improvement to the transcription interface has an adverse effect on the caller interface, consider the change carefully. The voice form is there for the caller’s use, and yoshould try to avoid sacrificing customer service.
Standard 1.0 Voice Services Application Guide January 1998

7-76 Voice formsTesting the voice form
do re
Modify the voice form definition as required, save it, and conduct a backup to save this most recent version. (If voice forms are stored on VS1, only a partial backup is required. Ifvoice forms are saved on any other volume, you will have toa full backup.) Update your worksheets and file them for futureference.
Standard 1.0 Voice Services Application Guide January 1998

Voice forms 7-77Providing training/support and making the service available to customers
,
t e
f are
s
rs The
rs g
:
rm
is
Providing training/support and making the service available to customers
Introduction If this is the first voice form implemented for the organizationor if this voice form is for a new group of transcribers, you will have to provide training for the transcribers before cutting over to the voice form. For detailed information abouthe transcription process, see “Transcribing voice forms” pag7-102.
1. Schedule training time for the transcribers. A minimum oone hour is recommended (especially if the transcribers not familiar with voice messaging). This allows time to review how a voice form works, and how to transcribe, awell as time for practice and questions.
2. Provide an overview of voice forms, and let the transcribeaccess the voice form and leave responses themselves.more familiar they are with the service, the better.
3. Review the transcription process allowing the transcribeto use the service and practice transcribing. Keep addinresponses to the voice form if they need more practice.
4. Review the administrative procedures for collecting datawho will transcribe what form; the importance of transcribing on a regular basis to protect storage limits; how to report system problems. If the transcribers are anticipating a large number of responses, they may alsowant to work out some administrative procedures beforegoing live.
5. When the transcribers are comfortable with the voice foand the transcription service, make sure you reset the response ID number back to zero before going live. Thisdescribed in “Managing response IDs” on page 7-105.
Upon completion of these steps, your voice form is ready forgeneral use.
Standard 1.0 Voice Services Application Guide January 1998

7-78 Voice formsProviding training/support and making the service available to customers
Standard 1.0 Voice Services Application Guide January 1998

Chapter 7
Voice forms 7-79Section C Modifying or deleting voice forms
In this section
Overview of modifying or deleting voice forms 7-80
Viewing a voice form definition 7-81
Modifying a voice form while it is in service 7-82
Modifying a voice form while it is out of service 7-84
Moving a field 7-87
Deleting a field 7-89
Copying a voice form definition 7-91
Deleting a voice form definition 7-94
Standard 1.0 Voice Services Application Guide January 1998

7-80 Voice formsOverview of modifying or deleting voice forms
u der
s.
Overview of modifying or deleting voice forms
Introduction After testing your voice form, you will probably discover that modifications are necessary to make the voice form work properly or more smoothly. Depending on the application, yomay also need to modify a voice form on a regular basis in orto keep it up-to-date.
This section provides methods for modifying your voice form
Multi-customer administration
On multi-customer systems, you must be at the customer administration level to modify or delete voice forms.
Standard 1.0 Voice Services Application Guide January 1998

Voice forms 7-81Viewing a voice form definition
Viewing a voice form definition
Introduction This section describes how to view a voice form definition inread-only mode.
If you intend to modify the voice form, see “Modifying a voiceform while it is in service” on page 7-82, or “Modifying a voiceform while it is out of service” on page 7-84.
Procedure To view a voice form in read-only mode, follow these steps.
Starting Point: The Voice Form Definitions screen
Step Action
1 Position the cursor on the voice form definition that you want to view and press <spacebar> to select it.
2 Press [View/Modify].
Result: A new set of softkeys is displayed, including [View Only].
3 Press [View Only].
Result: The View/Modify a Voice Form Definition screen is displayed. (It is identical to the Add a Voice Form Definition screen except that all fields are read-only since you have chosen the View Only option.)
4 Press [Open Fields] if you want to view any of the field definitions.
Result: The List of Fields screen is displayed.
5 Move the cursor to the field definition that you want to view and press <spacebar> to select it.
6 Press [View Field].
Result: The View Field screen is displayed.
Standard 1.0 Voice Services Application Guide January 1998

7-82 Voice formsModifying a voice form while it is in service
it. not
u
s
the
s.
Modifying a voice form while it is in service
Introduction When you use the [Modify In-Service] softkey, the voice formstays active and available to callers while you are modifyingIncoming calls to the form and existing caller responses are affected.
What you can modify However, because the form is still functional, you can only make simple changes to it that do not affect its structure. Yocan modify all of the fields in the Modify Field screen exceptField Type. You can also rerecord voice prompts without affecting incoming calls. You cannot, however, make changethat will alter the structure of the voice form application.
While the form is in service, you cannot do the following:
• insert, delete, or move the fields within the selected form
• change the Field Type (from “No Answer” to “Voice Answer” or vice-versa)
If you need to make any of these changes, you have to use [Modify Out-Of-Service] softkey.
Procedure To modify a voice form while it is in service, follow these step
Starting Point: The Voice Form Definitions screen
Step Action
1 Position the cursor on the voice form definition that you want to modify and press <Spacebar> to select it.
2 Press [View/Modify].
Result: A new set of softkeys is displayed, including [Modify In-Service].
3 Press [Modify In-Service].
Result: The View/Modify a Voice Form Definition screen is displayed. (It is identical to the Add a Voice Form Definition screen.)
4 Make any necessary changes to the voice form definition.
Standard 1.0 Voice Services Application Guide January 1998

Voice forms 7-83Modifying a voice form while it is in service
5 Press [Open Fields] if you want to modify any of the field definitions. Otherwise, go to step 10.
Result: If you pressed [Open Fields], the List of Fields screen is displayed.
6 Move the cursor to the field definition that you want to modify and press <Spacebar> to select it.
7 Press [View/Modify Field].
Result: The View/Modify Field screen is displayed.
8 Make the necessary changes, including rerecording the field prompt and field name if required.
For instructions on recording, see “Recording field names and field prompts” on page 7-67.
9 To save the field definition, go to step 9a. If you do not want to save the field definition, go to step 9b.
a. Press [Save].Result: If all of the mandatory fields have been filled in, the field definition is saved and the List of Fields screen is displayed. If something is missing from your definition, you will be informed and the field definition will not be saved until all of the required information has been entered.
b. Press [Cancel].Result: Any changes that have been made are discarded. The List of Fields screen is displayed.
10 Press [Close Fields].
Result: The View/Modify a Voice Form Definition screen is displayed again.
11 Press [Save] to save the entire voice form definition, including fields and recordings.
Result: The Voice Form Definitions screen is displayed.
Note: If you do not save the voice form, the modifications you have made will not be saved.
Step Action
Standard 1.0 Voice Services Application Guide January 1998

7-84 Voice formsModifying a voice form while it is out of service
es the
for ller new l ith
ed
the s) e s.
ric” o n .
Modifying a voice form while it is out of service
Introduction When you use the [Modify Out-of-Service] softkey, the voiceform is taken out of service while you are modifying it.
While a voice form is out-of-service, you can make any changyou wish. Callers that try to connect to the form are told that form is not available at this time and to try calling again at a later time.
What happens to calls in progress
If you take the form out-of-service while a call is in progress,the caller’s response is discarded when he or she hangs up.
What happens to untranscribed responses
When you press [Modify Out-of-Service], the system checks any untranscribed responses. If there are any outstanding caresponses, a message is displayed on the command line. A layer of softkeys is also presented allowing you to [Delete AlResponses] or [Cancel] the current command. To proceed wthe modification, you must transcribe all existing responses first, or press [Delete All Responses]. (This is not recommendunless you are sure you do not need the responses.)
Taking a voice form out of service
If the voice form generates a lot of calls, the best way to put form out of service (without dropping calls or losing responseis to build an announcement that informs callers that the voicform is currently being serviced. To do this, follow these step
1. Create an announcement. You can make a single “geneannouncement which can be used whenever you need ttake a form out of service. For instructions on creating aannouncement, see Chapter 3, "Voice announcements"
2. Reassign the VSDN for the voice form to the announcement service.
3. Transcribe any existing responses. For detailed instructions, see the Meridian Mail Voice Forms Transcriber User Guide (P0875902). (You can ask the transcriber to do this step.)
4. Modify the voice form and save the changes.
Standard 1.0 Voice Services Application Guide January 1998

Voice forms 7-85Modifying a voice form while it is out of service
rm.
5. Reassign the announcement VSDN back to the voice fo
Modifying the voice form while it is out of service
To modify a voice form while it is out of service, follow thesesteps.
Starting Point: The Voice Form Definitions screen
Step Action
1 Position the cursor on the voice form definition that you want to modify and press <Spacebar> to select it.
2 Press [View/Modify].
Result: A new set of softkeys is displayed, including [Modify Out-of-Service].
3 Press [Modify Out-of-Service].
Result: If there are untranscribed responses for this form, the following softkeys are displayed. Go to step 4.
If there are no untranscribed responses, the View/Modify a Voice Form Definition screen is displayed. (It is identical to the Add a Voice Form Definition screen.) Go to step 5.
4 Do not press the [Delete All Responses] softkey unless you are sure you do not need the responses. Use [Cancel] to exit the form so that you can transcribe the responses.
See “Taking a voice form out of service” on page 7-84 for steps to take to ensure that the voice form does not receive calls while you are modifying it.
5 Make any necessary changes to the voice form definition.
6 Press [Open Fields] if you want to modify any of the field definitions. Otherwise, go to step 12.
Result: If you pressed [Open Fields], the List of Fields screen is displayed.
7 Move the cursor to the field definition that you want to modify and press <Spacebar> to select it.
8 Press [View/Modify Field].
Result: The View/Modify Field screen is displayed.
Standard 1.0 Voice Services Application Guide January 1998

7-86 Voice formsModifying a voice form while it is out of service
9 Make the necessary changes, including rerecording the field prompt and field name if required.
For instructions on recording, see “Recording field names and field prompts” on page 7-67.
10 To save the field definition, go to step 10a. If you do not want to save the field definition, go to step 10b.
a. Press [Save].Result: If all of the mandatory fields have been filled in, the field definition is saved and the List of Fields screen is displayed. If something is missing from your definition, you are informed and the field definition is not saved until all of the required information has been entered.
b. Press [Cancel].Result: Any changes that have been made are discarded. The List of Fields screen is displayed.
11 Press [Close Fields].
Result: The View/Modify a Voice Form Definition screen is displayed again.
12 Press [Save] to save the entire voice form definition, including fields and recordings.
Result: The Voice Form Definitions screen is displayed.
Note: If you do not save the voice form, the modifications you have made will not be saved.
Step Action
Standard 1.0 Voice Services Application Guide January 1998

Voice forms 7-87Moving a field
he of
t is ion
pt
.
Moving a field
Introduction It may be necessary to move some fields if you decide that tapplication would flow more smoothly by changing the order voice form fields.
The <CONFIRMATION> marker can be moved to a differenlocation in the field list but cannot be modified or deleted. Thenables you to place additional questions after the confirmatfield. These questions could, for example, inquire as to the caller’s opinion about the current level of service he or she ispresently receiving when dealing with your organization. It isalso recommended that you play a thank you or farewell promto the caller after confirmation, before disconnecting the call
Procedure To move a field, follow these steps.
Starting Point: The List of Fields screen
Step Action
1 If you are modifying an existing voice form, follow steps 1 to 6 in the procedure on page 7-85 to access the List of Fields screen in out-of-service mode.
2 Move the cursor to the field definition that you want to move and press <Spacebar> to select it.
3 Press [Move Field].
Result: The following softkeys are displayed.
4 Press <Spacebar> to deselect the field you want to move. This allows you to move the cursor to the new position for the field.
5 Move the cursor to indicate where the row should be inserted. (When positioning the cursor, remember that the row will be moved to the row above the cursor location.)
6 Press <Spacebar> to indicate the new location.
Standard 1.0 Voice Services Application Guide January 1998

7-88 Voice formsMoving a field
7 Press [Done] to continue, or [Cancel] to cancel the operation.
Result: If [Done] is pressed, the field is moved to the specified location.
Whether you press [Done] or [Cancel], the Move Field softkeys are removed from the screen and the original List of Fields softkeys are displayed.
8 To move another field, repeat steps 2 to 7.
9 Press [Close Fields].
Result: The View/Modify a Voice Form Definition screen is displayed.
10 Press [Save] to save the entire voice form definition, including fields and recordings.
Result: The Voice Form Definitions screen is displayed.
Step Action
Standard 1.0 Voice Services Application Guide January 1998
Voice forms 7-89Deleting a field
ist er
Deleting a field
Introduction Once you have created your voice form application, you maydiscover that certain fields are not very effective or that theyhave become obsolete with time. The [Delete Field] on the Lof Fields screen allows you to remove fields that are no longneeded.
Procedure To delete a field, follow these steps.
Starting Point: The List of Fields screen
Step Action
1 If you are deleting fields from an existing voice form, follow steps 1 to 6 in the procedure on page 7-85 to access the List of Fields screen in out-of-service mode.
2 Move the cursor to the field definition that you want to delete, and press <Spacebar> to select it.
3 Press [Delete Field].
Result: The Delete Field screen is displayed with the following softkeys.
The Delete Field screen is identical to the Insert New Field screen except that all of the fields are read-only. This allows you to view the field definition and verify that this is the field you want to delete.
4 To delete the field, press [OK to Delete]. To exit this screen without deleting, press [Cancel].
Result: Whether you choose to delete or cancel, the List of Fields screen is displayed.
Standard 1.0 Voice Services Application Guide January 1998

7-90 Voice formsDeleting a field
5 Repeat steps 2 to 4 if you want to delete more fields.
6 Press [Close Fields].
Result: The View/Modify a Voice Form Definition screen is displayed.
7 Press [Save] to save the entire voice form definition, including fields and recordings.
Result: The Voice Form Definitions screen is displayed.
Step Action
Standard 1.0 Voice Services Application Guide January 1998

Voice forms 7-91Copying a voice form definition
to ,
Copying a voice form definition
Introduction If the voice form application you are about to create is similaran existing one, you may want to copy the existing definitionand then modify only those fields that need to be changed. Depending on the length of the voice form, this method can save you a lot of time.
When you copy a voice form, all fields will remain the same with the exception of
• Voice Form ID
• New Responses MWI Notification DN
• Special Responses MWI Notification DN
• Send Notification Message to Mailbox
• Tag Notification Message as Urgent
These fields are intentionally left blank (except Tag Notification Message as Urgent which is reset to its default).You are required to enter new values.
When you copy from an existing definition, you will be working with the Copy a Voice Form Definition screen. The fields in this screen are identical to those in the Add a VoiceForm Definition screen.
Procedure To copy a voice form definition, follow these steps.
Starting Point: The Voice Administration menu
Standard 1.0 Voice Services Application Guide January 1998

7-92 Voice formsCopying a voice form definition
Step Action
1 Select Voice Form Definitions.
Result: The Voice Form Definitions screen is displayed.
2 Position the cursor on the voice form definition that you want to copy and press <Spacebar> to select it.
3 Press the [Add/Copy] softkey.
Result: A new set of softkeys is displayed.
4 Press [Copy Form].
Result: The Copy a Voice Form Definition screen is displayed. It is identical to the original voice form definition except that the following fields are blank or reset to the default: Voice Form ID, New Responses MWI Notification DN, Special Responses MWI Notification DN, Send Notification Message to Mailbox, and Tag Notification Message as Urgent.
5 Assign a new voice form ID and title and modify the necessary fields. Refer to your voice form worksheets.
6 Press [Open Fields] if you want to modify any of the field definitions. Otherwise, go to step 12.
Result: If you pressed [Open Fields], the List of Fields screen is displayed.
Standard 1.0 Voice Services Application Guide January 1998

Voice forms 7-93Copying a voice form definition
7 Move the cursor to the field definition that you want to modify and press <Spacebar> to select it.
8 Press [View/Modify Field].
Result: The View/Modify Field screen is displayed.
9 Make the necessary changes, including rerecording the field prompt and field name if required.
For instructions on recording, see “Recording field names and field prompts” on page 7-67.
10 To save the field definition, go to step 10a. If you do not want to save the field definition, go to step 10b.
a. Press [Save].Result: If all the mandatory fields have been filled in, the field definition is saved and the List of Fields screen is displayed. If something is missing from your definition, you are informed, and the field definition is not saved until all required information has been entered.
b. Press [Cancel].Result: Any changes that have been made are discarded. The List of Fields screen is displayed.
11 Press [Close Fields].
Result: The Copy a Voice Form Definition screen is displayed again.
12 Press [Save] to save the entire voice form definition, including fields and recordings.
Result: The Voice Form Definitions screen is displayed.
Step Action
Standard 1.0 Voice Services Application Guide January 1998

7-94 Voice formsDeleting a voice form definition
a w
ibe
new ll ith
or
ntly ny te
er
the s) e
ice
Deleting a voice form definition
Introduction This section describes how to remove an existing voice formdefinition from the system. During the procedure, the DeleteVoice Form Definition screen is displayed so that you can viethe voice form definition and confirm that it is really the one you want to delete. The fields in this screen are read-only.
What happens to untranscribed responses
You cannot delete a voice form definition if there are any outstanding untranscribed responses unless you first transcror delete all of the untranscribed responses.
When you press [Delete], the system checks for any untranscribed responses. If there are any outstanding caller responses, a message is displayed on the command line. A layer of softkeys is also presented, allowing you to [Delete AResponses] or [Cancel] the current command. To proceed wthe deletion, you must transcribe all existing responses first,press [Delete All Responses]. (Deleting all responses is not recommended unless you are sure you do not need the responses.)
If you choose to delete all responses, any calls that are currein progress are discarded when the caller(s) hang up, and afuture calls to the voice form application result in an appropria“Out of Service” recording. This remains in effect until the VSDN for the voice form has been removed or the form has been removed from the menu service or time-of-day controllthrough which it is accessed.
Taking a voice form out of service
If the voice form generates a lot of calls, the best way to put form out of service (without dropping calls or losing responseis to build an announcement that informs callers that the voicform is no longer available, or that directs callers to a new voform. To do this, follow these steps.
Standard 1.0 Voice Services Application Guide January 1998

Voice forms 7-95Deleting a voice form definition
n
f d,
1. Create an appropriate announcement. For instructions ocreating an announcement, see Chapter 3, "Voice announcements".
2. Reassign the VSDN for the voice form to the announcement service.
3. Transcribe any existing responses. See the Meridian Mail Voice Forms Transcriber User Guide (P0875902). (You can ask the transcriber to do this step.)
4. Delete the voice form.
5. After you feel enough time has passed to inform users othe voice form that the form has been deleted or replacereassign or delete the announcement VSDN.
Standard 1.0 Voice Services Application Guide January 1998

7-96 Voice formsDeleting a voice form definition
Procedure To delete a voice form definition, follow these steps.
Starting Point: The Voice Administration menu
Step Action
1 Select Voice Form Definitions.
Result: The Voice Form definitions screen is displayed.
2 Position the cursor on the voice form definition that you want to delete and press <spacebar> to select it.
3 Press the [Delete] softkey.
a. If there are untranscribed responses for this form, the following softkeys are displayed. Go to step 4.
b. If there are no untranscribed responses, the Delete a Voice Form Definition screen is displayed with the following softkeys.
The Delete a Voice Form Definition screen is identical to the Add a Voice Form Definition screen except that all of the fields are read-only. This allows you to view the voice form definition and verify that this is the voice form you want to delete. Go to step 5.
4 Do not press the [Delete All Responses] softkey unless you are sure you do not need the responses. Use [Cancel] to exit the form so that you can transcribe the responses.
See “Taking a voice form out of service” on page 7-94 for steps to take to ensure the voice form does not receive calls while you are deleting it.
Standard 1.0 Voice Services Application Guide January 1998

7-97
Voice formsChapter 7Section D Monitoring and transcribing voice forms
In this section
Overview of monitoring and transcribing voice forms 7-98
Managing transcriber activity 7-99
Conducting random caller surveys 7-100
Conducting transcriber feedback forums 7-101
Transcribing voice forms 7-102
Processing the information collected by a voice form 7-104
Managing response IDs 7-105
Standard 1.0 Voice Services Application Guide January 1998

7-98 Voice formsOverview of monitoring and transcribing voice forms
ce
the e
pter
Overview of monitoring and transcribing voice forms
Introduction This section discusses how to monitor and manage your voiforms.
Keep good records Make sure all worksheets are kept up-to-date and filed. Whenever a change is made to a voice form, always updateworksheets. You may also want to keep a master list of all thvoice forms on your system for quick reference.
Monitor operational measurement reports
Monitor how voice forms are used by observing the traffic statistics in the operational measurements reports. See Cha10, "Monitoring voice services".
Standard 1.0 Voice Services Application Guide January 1998

Voice forms 7-99Managing transcriber activity
nt h to
e
ay
k er
Managing transcriber activity
Introduction Transcribers should be guided regarding the frequency with which they transcribe responses. As the number of untranscribed responses is allowed to accumulate, the amouof free disk space decreases significantly and you may reacfull capacity. Work with the transcribers and their supervisorsprioritize voice forms in terms of the importance of the responses expected, and have transcribers monitor the voicforms carefully.
Be very careful of departments that work in cycles. For example, accounting departments go through month end closings. Everyone’s work load increases and transcribers mbe too busy to transcribe until closing is over. Develop an alternate procedure for transcribing during busy periods. Theresponses should not be allowed to stack up on the system.
If transcribers are not transcribing on a regular basis and disspace is in jeopardy, access the voice form definition and lowthe maximum untranscribed responses that are allowed. All overflow calls will be routed to the overflow handling DN.
Standard 1.0 Voice Services Application Guide January 1998

7-100 Voice formsConducting random caller surveys
e if ” the and
Conducting random caller surveys
Introduction If the voice form is a permanent feature, it is a good idea to conduct random caller surveys, perhaps once a month, to secaller needs have changed. Find people who can be “callersand have them access the voice form. Ask them to completecaller survey. Determine if the callers’ needs have changed if the voice form is, therefore, in need of maintenance.
Standard 1.0 Voice Services Application Guide January 1998

Voice forms 7-101Conducting transcriber feedback forums
ith
ok
this
WI rm
at nd
Conducting transcriber feedback forums
Introduction If the voice form is a permanent feature, arrange meetings wyour transcribers occasionally to see how things are going. Bring your operational measurement reports if necessary. Lofor the following:
• Has the department changed the way it operates? If so, may change the way transcribers are managing the transcription process.
• Do they get caller complaints? Is the special response Mnotification DN getting good use? What are the reasonsresponses are being marked special? Does the voice foneed to be modified?
• Are there any voice forms that are not being transcribedall? Identify all voice forms that are no longer needed, adelete them from the system.
Standard 1.0 Voice Services Application Guide January 1998

7-102 Voice formsTranscribing voice forms
s r es. ot g in
the tus
ice
n to also
t the r
r the ing ing
Transcribing voice forms
Description When a caller has completed a voice form and hangs up, theresponse is saved in Meridian Mail. If you use one of the notification features described in “Identifying how transcriberwill be notified—overview” on page 7-30, then the transcribeis notified that the voice form has new untranscribed responsThe transcriber knows to log on to the voice form. If you do nuse one of the notification methods, the transcriber has to loto the voice form periodically to check for new responses.
Turning off the MWI indicatorThe transcriber dials the VSDN of the transcription service tolog on to the transcription service and hear the responses forvoice form. If the transcriber just listens to the response anddoes not delete it, the response keeps its New response staand the MWI stays on if you use the MWI method for notification. The MWI is turned off only after all responses have been deleted or marked as special. If there are multipleresponses, the MWI stays on until all responses have been deleted (or marked as special).
Deleting the notification messageIf you use the notification message method, the system-generated notification message is managed like any other vomail. It turns on the phone’s MWI like any other voice mail would. The user (transcriber) hears the message by logging ithe mailbox and listening to new messages. The message isdeleted in the same manner that other voice mail is deleted.
Handling untranscribable responsesIf, for some reason, a transcriber cannot fully transcribe a response, he or she can mark it as special. This indicates tharesponse needs further attention, usually from a supervisor othe administrator. For example, the response may be in a foreign language that the transcriber does not understand, oresponse may have been left by an irate customer. After tagga response as special, the transcriber can continue transcribany remaining responses.
Standard 1.0 Voice Services Application Guide January 1998

Voice forms 7-103Transcribing voice forms
rs y
with and
ice
y ate ses
on
If no notification methods are usedIf you choose not to use any notification features, transcribeare not notified automatically of new responses. Instead, thesimply have to log on to the voice form on a regular basis in order to check for new responses. In this case, you have to direct your transcribers regarding the frequency with which they should transcribe responses.
Managing disk space for responsesAs the number of untranscribed responses is allowed to accumulate, the amount of free disk space decreases. Work transcribers and their supervisors to prioritize voice forms interms of the importance of the responses that are collected, have transcribers monitor the voice forms carefully. Under certain circumstances, you may need to lower the maximumnumber of untranscribed responses that are allowed for a voform.
Note: Be very careful of departments that work in cycles. Forexample, accounting departments go through a month end closing. Everyone’s work load increases and transcribers mabe too busy to transcribe until closing is over. Develop alternprocedures for transcribing during busy periods. The responshould not be allowed to stack up on the system.
Read the Meridian Voice Forms Transcriber User Guide (P0875902)for detailed information about how the transcriptiservice works.
Standard 1.0 Voice Services Application Guide January 1998

7-104 Voice formsProcessing the information collected by a voice form
it
ta, h
oth
ey
fore n
Processing the information collected by a voice form
Introduction It is up to the organization to identify how it compiles the datacollects from voice forms. Your organization probably has specific processes for compiling data.
Although Nortel cannot recommend how you process your dait does recommend the following if you are anticipating a higvolume of responses to a voice form:
• Provide your transcribers with headsets to help free up bhands for writing down or typing in information.
• Wherever possible, have your transcribers transcribe directly into your data collection/processing system as thlisten to the responses.
Make sure you set the response ID numbers back to zero begoing “live” with the service (see “Managing response IDs” opage 105).
Standard 1.0 Voice Services Application Guide January 1998

Voice forms 7-105Managing response IDs
ng
ed
nse on.
s to an
ck
it to
t it
.
in
d, ne
Managing response IDs
Introduction When a caller completes a call into a voice form, the caller’sresponse is assigned a response ID.
Each voice form has its own independent response numberiplan. For example, you have two voice forms: a credit card application and a customer survey. The first response that isrecorded for the credit card application voice form is number1, the second is numbered 2, and so on. This is also true of responses recorded for the customer survey. The first respothat is left is numbered 1, the second is numbered 2, and so
When the existing responses for a voice form have been transcribed, the response ID numbering is not reset to zero. Instead, as new responses are recorded, the count continueincrease. This creates a running total and allows you to haveinventory/tracking system for each voice form.
Obviously, the count can go on indefinitely, but there may besome situations where you would want to reset the count bato zero. For example:
• Once you have tested a voice form and are ready to put use, you should reset the count to zero in order to get anaccurate count of the voice form’s use from the time thais put into general use.
• You may decide to reset the count at the beginning of a fiscal/calendar year or other business cycle. This allowsyou to compare results from one cycle to the next.
• Each time the form is slightly modified, reset the count tozero. In the truest sense, it is no longer the original form
• Meridian Mail does not announce the response number the conventional counting manner (that is, “response eleven” or “response one hundred and fifty-one”). Insteathe transcriber hears “response one one” or “response ofive one.” Some transcribers may not like this format.
Resetting response ID numbers
There is no way to “set the clock” back to zero. Instead, you“trick” the system by copying the voice form and giving the
Standard 1.0 Voice Services Application Guide January 1998

7-106 Voice formsManaging response IDs
d r ted
copy a new voice form ID, deleting the original voice form, anthen reassigning the original voice form ID to the copy. As faas the system is concerned, a new voice form has been creaand response ID numbering is set to zero.
Procedure To reset response ID numbers, follow these steps.
Starting Point: The Voice Administration menu
Step Action
1 Select Voice Form Definitions.
Result: The Voice Form Definitions screen is displayed.
2 Position the cursor on the voice form definition for which you want to reset the response IDs. Press <Spacebar> to select it.
3 Press [Add/Copy].
Result: A new set of softkeys is displayed.
4 Press [Copy Form].
Result: The Copy a Voice Form Definition screen is displayed.
5 Enter a unique voice form ID and then press [Save]. This is necessary because you cannot save a voice form if the ID field is blank.
Result: The Voice Form Definitions screen is displayed.
6 Move the cursor to the original voice form definition and press <Spacebar> to select it.
7 Press [Delete].
Result: The Delete a Voice Form Definition screen is displayed, with the following softkeys:
8 Press [OK to Delete] to remove the original voice form.
Result: The Voice Form Definitions screen is displayed.
9 Position the cursor on the newly copied voice form definition, and press <Spacebar> to select it.
Standard 1.0 Voice Services Application Guide January 1998

Voice forms 7-107Managing response IDs
10 Press [Add/Copy].
Result: A new set of softkeys is displayed.
11 Press [Copy Form].
Result: The Copy a Voice Form Definition screen is displayed.
12 Enter the original voice form ID. Also fill in the new and special responses MWI notification DNs, the Send Notification to Mailbox field, and the Tag Message as Urgent field as you did in the original voice form.
13 Press [Save].
Result: The Voice Form Definitions screen is displayed.
The new voice form now has response ID numbering reset to zero. The next response will be assigned an ID of 1.
14 Position the cursor on the intermediate copied voice form definition, and press <Spacebar> to select it.
15 Press [Delete].
Result: The Delete a Voice Form Definition screen is displayed.
16 Press [OK to Delete].
Step Action
Standard 1.0 Voice Services Application Guide January 1998

7-108 Voice formsManaging response IDs
Standard 1.0 Voice Services Application Guide January 1998

Chapter 8
Time-of-da y controllers
In this chapter
Overview 8-2
What is a time-of-day controller? 8-3
Maintaining time-of-day controllers 8-6
Section A: Planning time-of-day controllers 8-9
Section B: Configuring a time-of-day controller 8-17
Section C: Modifying or deleting a time-of-day controller 8-29

8-2 Time-of-day controllers Overview
on .
y or
the
and
y he
Overview
Introduction A time-of-of day controller passes calls to other existing voice services. The voice service that is selected dependsthe day (business day versus holiday) and the time of day
In other words, you can set up a time-of-day controller to pass calls to voice services that are appropriate for that dathat time of day.
Example If you have an announcement that you like to have playedduring business hours and another that you like to have played after business hours, you can define a time-of-daycontroller to pass calls to the appropriate announcement depending on the time of day that the call is received.
You can either create the services that will be activated by time-of-day controller first and then define the time-of-daycontroller, or create the time-of-day controller and then goback and create the services that will be activated.
Worksheet Make a copy of the Time-of-Day Control Definition Worksheet found in Appendix A, “Worksheets.” (You may also want to have a copy of the Voice Services Profile Worksheet on hand, which defines default business hours holidays.) As you plan your time-of-day controller, fill in theworksheet. See Section A on page 8-9.
Then, when you are ready to configure the time-of-day control definition in Meridian Mail, you copy the informationinto the system. You also have a written record of all yourtime-of-day controllers. Whenever you alter the time-of-dacontroller, fill in a new worksheet so that you always have tmost up to date version on file.
Standard 1.0 Voice Services Application Guide January 1998

Time-of-day controllers 8-3What is a time-of-day controller?
nu, , d.
ne
s d s,
iday
es
iate
. If
What is a time-of-day controller?
Introduction This section describes the time-of-day controller from the administrator’s perspective, and illustrates how calls to a time-of-day controller are handled.
Definition A time-of-day controller routes calls to a particular voice service (an announcement, a thru-dial service, a voice meanother time-of-day controller, a voice form, or a fax item)based on the day and the time of day that a call is receive
A time-of-day controller has three defined time periods—ofor business hours, one for off-hours, and another for holidays. For each time period, you assign a specific voiceservice.
When a caller reaches the time-of-day controller, the call irouted to the service specified as a function of the date antime of the call. If the call is received during business hourthe caller is routed to the service assigned to the businesshours. Similarly, the call is routed to another service if it isreceived during off-hours, or to a special service that has been created to handle calls that are received during a hol(a day that has been defined as a holiday in the system).
Default business hours and holidays
The default business hours are set in the Voice Services Profile. The Voice Services Profile must be set up properlyfor a time-of-day controller to work since, in addition to containing the default business hours, the profile also definthe holidays for which the organization closes.
How a time-of-day controller handles calls
Each call that is processed by the time-of-day controller ishandled the same way to ensure it is routed to the approprservice.
Check if holiday service is requiredFirst, the system determines if a holiday service is definedso, then it checks the Voice Services Profile to see if it is aholiday. If it is a holiday, the holiday service ID defined in the time-of-day controller is activated.
Standard 1.0 Voice Services Application Guide January 1998
8-4 Time-of-day controllers What is a time-of-day controller?
ess ted. s,
Business or off-hours If it is not a holiday, the time-of-day controller checks the defined business hours. If the call has arrived during businhours, the service associated with business hours is activaIf the call has arrived outside of the defined business hourthe service associated with the off-hours is activated.
The process is outlined in the following flowchart.
Standard 1.0 Voice Services Application Guide January 1998

Time-of-day controllers 8-5What is a time-of-day controller?
Check holiday
schedule
G100596
Voice Menu
KEY ACTION1 TD
VOICESERVICESPROFILE
Holiday?
Checkbusiness
hours
YES
YES
NO
NO
BUSINESS DAYSMON TUE WED THU FRI
BUSINESS HOURSMONDAY 8:30 TO 5:00TUESDAY 8:30 TO 5:00WEDNESDAY 8:30 TO 5:00THURSDAY 8:30 TO 5:00FRIDAY 8:30 TO 5:00SATURDAY NOSUNDAY NO
AreWe
Open?
ANNOUNCEMENT ID
MENU ID
THRU-DIAL ID
VOICE FORM ID
TOD 100
OFFHOURS
ID
BUSINESS HOURS ID
HOLIDAY SERVICE ID
Standard 1.0 Voice Services Application Guide January 1998

8-6 Time-of-day controllers Maintaining time-of-day controllers
l is e
e ar ay ear 3rd.
te.
ted
r t
of-
er n
Maintaining time-of-day controllers
Introduction After you have created your time-of-day controllers, you must maintain them.
Maintaining a time-of-day controller essentially involves
• monitoring its use (see Chapter 10, "Monitoring voice services")
• changing the services associated with the three time periods when necessary
• keeping holiday definitions up to date in the Voice Services Profile (see “Voice Services Profile” on page2-3).
Changing the service associated with a time-of-day controtime period is very simple. Just change the service ID thatassociated with business hours, off-hours, or holidays. Se“Modifying a time-of-day controller” on page 8-31.
You will have to change the holiday definitions in the VoicServices Profile at least once a year. For example, one yeyour office may be closed for Christmas and New Year’s Dbetween December 22nd and January 2nd, and the next yyou may be closed between December 23rd and January To make sure that the holiday service is activated for the appropriate days, holiday definitions must be kept up to da
You may also have to modify the holiday service betweenholidays to keep it up to date. For example, you have creathe following announcement for Labor Day: “Thank you for calling the Orlando Trust Company. Our office is closed fothis Labor Day Monday. We will be open again tomorrow a8:30. Please call back then and have a good Labor Day.” Its ID (2009) is entered as the Holiday Service ID in the time-day control definition.
The next holiday that is defined in your Voice Services Profile is Columbus Day. Obviously, you do not want the Labor Day announcement to play on Columbus Day. Raththan defining a new announcement for this holiday, you ca
Standard 1.0 Voice Services Application Guide January 1998

Time-of-day controllers 8-7Maintaining time-of-day controllers
09) he
or
simply update Announcement 2009 to something like: “Thank you for calling the Orlando Trust Company. Our office is closed for Columbus Day. We will be open again tomorrow at 8:30. Please call back then and enjoy this holiday.”
In this manner, one announcement (Announcement ID 20will always be your holiday service. Rather than updating ttime-of-day controller, you update the announcement. Immediately after one holiday (Labor Day) is over, you update Announcement 2009 so that it will be appropriate fthe next upcoming holiday that is defined in the Voice Services Profile (Columbus Day).
Standard 1.0 Voice Services Application Guide January 1998

8-8 Time-of-day controllers Maintaining time-of-day controllers
Standard 1.0 Voice Services Application Guide January 1998

Time-of-day controllers 8-9
Section A Planning time-of-day controllers
In this section
Overview of planning time-of-day controllers 8-10
Identifying the business hours and holidays 8-12
Identifying and configuring the necessary voice services 8-14
Identifying the time-of-day control ID 8-15
Identifying how the time-of-day controller will be accessed 8-16
Standard 1.0 Voice Services Application Guide January 1998

8-10 Time-of-day controllers Overview of planning time-of-day controllers
f-
d s
s.
d.
e
u ure
re
ill
Overview of planning time-of-day controllers
Introduction Once you have identified a use for a time-of-day controllerwhich you would like to make available to callers, the nextstage is to plan how best to create the service. With time-oday controllers, like all the voice services, planning is important. Investing time up front planning voice services will pay dividends when actually configuring the different services.
Define other voice services
Planning a time-of-day controller requires that you plan anconfigure other voice services. The time-of-day controller’function is to pass calls to other existing services. The services accessed from the time-of-day controller can be defined before or after the time-of-day controller.
Process for planning a time-of-day controller
Planning a time-of-day controller service involves the following steps:
1. Identify regular business hours, off-hours, and holiday
2. Identify and configure the services that are needed.
3. Identify the time-of-day control ID.
4. Identify how the time-of-day controller will be accesse
Time-of-Day Control Definition Worksheet
The Time-of-Day Control Definition Worksheet is found in Appendix A, “Worksheets.” This is a valuable aid to help plan and maintain your time-of-day controllers. The worksheet contains all the information which you will requirto configure a time-of-day controller.
As you plan your service, fill in the worksheet. Then, whenyou are ready to configure the time-of-day controller, all yohave to do is copy the information into the system, and ensthat the linked services are configured.
By using a worksheet for all your voice services, you ensuthat you have an accurate written record of all your active services. Whenever you change a time-of-day controller, f
Standard 1.0 Voice Services Application Guide January 1998

Time-of-day controllers 8-11Overview of planning time-of-day controllers
o
in a new worksheet so that you always have the most up tdate version on file.Standard 1.0 Voice Services Application Guide January 1998

8-12 Time-of-day controllers Identifying the business hours and holidays
ice s not
his d
It rs.
ces u u
n
er
for
Identifying the business hours and holidays
Introduction Holidays and regular business hours are defined in the VoServices Profile screen. Off-hours are defined as the hourwhich are not holidays or business hours and, as such, arespecifically defined.
Voice Services Profile The Voice Services Profile should be set up before you configure any voice services, as there are parameters in tprofile that apply to announcements, thru-dial services, anvoice menus.
Business hours and holidays
HolidaysHolidays are defined in the Voice Services Profile screen.is important that you keep the holiday definitions current ifyou have a specified voice service defined for holiday houIf the holidays are not kept current, you create a situation where the voice service defined for holidays can become active on regular business days.
Default business hoursDefault business hours are also defined in the Voice ServiProfile. The default business hours are used whenever yocreate a new time-of-day control definition, so that you donot have to define them for every time-of-day controller yocreate.
In the Voice Services Profile, you can define the businesshours in one continuous range. An example might be from08:30 to 17:00. In the time-of-day control definition, you cadefine more flexible business hours.
Custom business hoursFor each time-of-day control definition, you can choose touse the default business hours or define custom businesshours in the time-of-day control definition.
In the actual time-of-day control definition, you have greatflexibility in defining business hours. You can specify the business days of the week, as well as the business hours
Standard 1.0 Voice Services Application Guide January 1998

Time-of-day controllers 8-13Identifying the business hours and holidays
as a d se
f-
ays
ss the
ice r
each business day. For example, Saturday can be definedbusiness day with business hours from 10:00 to 16:00, anWednesday can be defined as a non-business day becauyou are closed each Wednesday to go golfing.
Off-hoursOff-hours are not explicitly defined. Instead, you specify non-business days in the time-of-day control definition. Ofhours implicitly include
• non-business days that are not holidays
• hours that fall outside of business hours on business d
Identify the business hours
This step is necessary if you wish to create custom businehours rather than use the default business hours defined inVoice Services Profile. For example, if during the summeryou close an hour early on Fridays, you would have to modify the business hours for Fridays (08:30 to 16:00, instead of the default 08:30 to 17:00).
The changes made to the default business hours in the VoServices Profile will not affect existing time-of-day controlledefinitions.
Standard 1.0 Voice Services Application Guide January 1998

8-14 Time-of-day controllers Identifying and configuring the necessary voice services
l
ns
e-
Identifying and configuring the necessary voice services
Introduction Identify the type of service that will be activated during
• business hours
• off-hours
• holidays
Will it be a voice menu, an announcement, a thru-dial service, a voice form, or a fax item? If the service already exists, find its corresponding service ID. If it does not yet exist, design it, create it, and assign an ID to it. This ID wilbe referenced in the time-of-day controller.
Refer to the appropriate chapter in this guide for instructioon planning and configuring other types of voice services.For fax services, refer to the Fax on Demand Application Guide (NTP 555-7001-327).
Record the service IDs Record the service IDs you wish to be activated by the timof-day controller in the Time-of-Day Control Definition Worksheet.
Standard 1.0 Voice Services Application Guide January 1998

Time-of-day controllers 8-15Identifying the time-of-day control ID
ups
of
Identifying the time-of-day control ID
Introduction The time-of-day control ID identifies the time-of-day controller within the system. This number must be unique among all other service definitions. (For multi-customer systems, the ID need only be unique within the customer group. For example, ID 2334 can be used in customer grox and y.)
You use this ID when you
• want to include the time-of-day controller in a voice menu
• want to include the time-of-day controller in another time-of-day controller to create nested time-of-day controllers
• create a VSDN for the time-of-day controller
Maximum length The ID can be up to eight digits in length and must consistthe numeric digits 0 to 9 only.
Identify the time-of-day ID
Identify a time-of-day controller ID and copy it to the ID field in the Time-of-Day Control Definition Worksheet. Remember, the ID must be unique for all services.
Standard 1.0 Voice Services Application Guide January 1998

8-16 Time-of-day controllers Identifying how the time-of-day controller will be accessed
-
r
. the
that
ller e
he
r 19.
Identifying how the time-of-day controller will be accessed
Introduction Callers can access a time-of-day controller in one of threeways:
• directly
• indirectly through a voice menu
• indirectly through another time-of-day controller
The purpose of the time-of-day controller will suggest the appropriate method of access.
Direct access When the time-of-day controller is set up to be accessed directly, the caller is immediately connected to the time-ofday controller after dialing the DN assigned to the time-of-day controller. The caller reaches the time-of-day controllewithout being given specific alternatives.
Indirect access through a voice menu
The published number connects the caller to a voice menuThe caller accesses the time-of-day controller by pressingappropriate menu key.
ScenarioOne of the options in the voice menu is an announcement should vary depending on the time of day.
SolutionYou set up the voice menu to access a time-of-day controwhen the caller presses the key that is supposed to play thannouncement. The time-of-day controller then activates tappropriate announcement.
Indirect access through another time-of-day controller
You can nest one time-of-day controller inside another. Foan example, see “Nested time-of-day controls” on page 6-
You can have up to six levels of nested time-of-day controllers.
Standard 1.0 Voice Services Application Guide January 1998

Time-of-day controllers 8-17
Section B Configuring a time-of-day controller
In this section
Overview of configuring a time-of-day controller 8-18
The Time-of-Day Control Definitions data menu 8-20
Adding a time-of-day controller 8-22
Making the time-of-day controller accessible 8-24
Testing the time-of-day controller 8-27
Standard 1.0 Voice Services Application Guide January 1998

8-18 Time-of-day controllers Overview of configuring a time-of-day controller
ay
.
ns
ut le. s en all e, ice to n
ly nce
Overview of configuring a time-of-day controller
Introduction This section outlines the steps required to add a time-of-dcontroller. Refer to your Time-of-Day Control Definition Worksheet (found in Appendix A, “Worksheets”) as you follow the procedures in this section.
Process for adding a time-of-day control service
Adding a time-of-day control service involves the followingsteps:
1. Add the time-of-day control definition in Meridian Mail
2. Make the time-of-day controller accessible through direct access, a voice menu, or another time-of-day controller.
3. Test the time-of-day controller.
Time-of-Day Control Definitions screen
For a description of the Time-of-Day Control Definitions data menu screen, see “The Time-of-Day Control Definitiodata menu” on page 8-20. This screen provides a list of existing time-of-day control services.
Tip: Voice Services first, VSDNs later
A time-of-day controller can be added to the system withoa corresponding DN having been defined in the VSDN tabThis allows you greater flexibility when creating applicationbecause you can create time-of-day controllers first and thassign DNs, or vice versa. However, you must ensure thatvoice services have a corresponding DN in the VSDN tablor are associated with another voice service (such as a vomenu). The system does not perform any sanity checkingguard against the possibility of an orphan service definitio(in other words, a service ID that does not have a corresponding VSDN).
Multi-customer administration
On multi-customer systems, time-of-day controllers can onbe added at the customer administration level. However, ocreated, they can be viewed, modified, or deleted from thesystem administration level.
Standard 1.0 Voice Services Application Guide January 1998

Time-of-day controllers 8-19Overview of configuring a time-of-day controller
ens
s) ti-
r
Starting points for procedures
On multi-customer systems, customer administration screare invoked from the Customer Administration menu. Therefore, the starting point for some procedures refer to both the Main Menu (applicable to single-customer systemand the Customer Administration menu (applicable to mulcustomer systems).
ATTENTION
Do not perform voice services administration during the nightly DR audit.
At 3:30 a.m. every day, an audit of the DR directory is performed. Do not add, modify, or delete voice service definitions during this audit. Depending on how unbalanced the system is, this audit can take anywhere from ten minutes (if the system has not been modified since the last audit) to two hours (if there have been manychanges, such as a lot of users or services being added omodified).
Standard 1.0 Voice Services Application Guide January 1998

8-20 Time-of-day controllers The Time-of-Day Control Definitions data menu
s
f-
a
The Time-of-Day Control Definitions data menu
Introduction The Time-of-Day Control Definition data menu lists all theconfigured time-of-day controllers on the system. From thiscreen you can also do the following:
• add a new time-of-day controller (see “Adding a time-oday controller” on page 8-22)
• view or modify an existing time-of-day controller (see “Modifying a time-of-day controller” on page 8-31)
• delete an existing time-of-day controller (see “Deletingtime-of-day controller” on page 8-33)
The screen The following is an example of the Time-of-Day Control Definitions screen.
Standard 1.0 Voice Services Application Guide January 1998

Time-of-day controllers 8-21The Time-of-Day Control Definitions data menu
,
Procedure: Accessing the screenTo access the Time-of-Day Control Definitions data menufollow these steps .
Starting Point: The Main menu or the Customer Administration menu (on multi-customer systems)
Step Action
1 Select Voice Administration.
Result: The Voice Administration menu is displayed.
2 Select Voice Services Administration.
Result: The Voice Services Administration menu is displayed.
3 Select Time-of-Day Control Definitions.
Result: The Time-of-Day Control Definitions data menu is displayed.
Standard 1.0 Voice Services Application Guide January 1998

8-22 Time-of-day controllers Adding a time-of-day controller
the
.
Adding a time-of-day controller
Introduction This section and the sections that follow describe how to create a new time-of-day controller. This process involves following steps.
1. Add the time-of-day control definition in Meridian Mail
2. Make the time-of-day controller accessible through direct access, a voice menu, or another time-of-day controller.
3. Test the time-of-day controller.
Standard 1.0 Voice Services Application Guide January 1998

Time-of-day controllers 8-23Adding a time-of-day controller
Procedure: Adding a time-of-day control definition
Adding a time-of-day control definition requires that you input the information from the Time-of-Day Control Definition Worksheet into the Meridian Mail system. Have your worksheet nearby as you follow these steps.
To add a time-of-day control definition, follow these steps.
Starting Point: The Voice Services Administration menu
Step Action
1 Select Time-of-Day Control Definitions.
Result: The Time-of-Day Control Definitions screen is displayed.
2 Press the [Add] softkey.
Result: The Add a Time-of-Day Control Definition screen is displayed.
3 Fill in the fields using the information recorded on your Time-of-Day Control Definition Worksheet.
4 If you are satisfied with the information you have entered, press the [Save] softkey. Otherwise, press [Cancel] to discard the information.
Result: Whether you save or cancel, you are returned to the Time-of-Day Control Definitions screen.
Standard 1.0 Voice Services Application Guide January 1998

8-24 Time-of-day controllers Making the time-of-day controller accessible
in
on a
Making the time-of-day controller accessible
Introduction You can make a time-of-day controller accessible to callersone of three ways:
• direct access
• indirectly through a voice menu
• indirectly through another time-of-day controller
Direct access Callers access the time-of-day controller by dialing the VSDN of the time-of-day controller.
Procedure: Making a time-of-day controller directly accessible
This procedure assumes that there are available ACD DNsthe Meridian 1 (or line DNs if your system is connected to DMS switch).
To make a time-of-day controller directly accessible, followthese steps.
Starting Point: The Voice Services Administration menu
Step Action
1 Select Voice Services-DN Table.
Result: The Voice Services-DN Table is displayed.
Standard 1.0 Voice Services Application Guide January 1998

Time-of-day controllers 8-25Making the time-of-day controller accessible
2 Press the [Add] softkey.
Result: The Add DN Information screen appears.
3 Enter the Access DN. This is the number that callers dial to access the time-of-day controller. Get the DN from your switch administrator, or print the directory number block (DNB) at the switch to obtain an unused DN.
Note: The Access DN cannot match a mailbox number.
4 Enter TD in the Service field.
Result: An additional field, Time-of-Day Control ID, is displayed.
5 Enter the time-of-day control ID in the Time-of-Day Control ID field.
6 Select the Session Profile according to one of the following criteria.
a. If the time-of-day controller activates a multimedia service, you must choose Full-Multimedia.
b. If it activates only voice services, choose Full_Voice.
c. If it activates only basic voice services, choose Basic.d. You can also choose Custom and then design the custom
session profile to support the level of service required. For details on configuring a custom session profile, refer to the Meridian Mail System Administration Guide for your platform
7 Enter a comment.
This step is optional but a comment that identifies the time-of-day controller service is useful here.
8 Press the [Save] softkey to save the VSDN Table.
Step Action
Standard 1.0 Voice Services Application Guide January 1998

8-26 Time-of-day controllers Making the time-of-day controller accessible
riate
nt ,
e-
Indirect access through a voice menu
Callers dial the DN of a voice menu. The time-of-day controller is accessed when the caller presses the appropkey.
You can either add a time-of-day controller to an existing voice menu, or create a new voice menu to serve as a froend to a number of time-of-day controllers. See Chapter 5"Voice menus".
Indirect access through another time-of-day controller (nested time-of-day controllers)
Time-of-day controllers can be nested by including one timof-day controller inside of another.
For example, if you have a single facility (for example, a single DID queue) serving multiple departments with different business hours, you can nest several time-of-daycontrollers in order to meet the needs of all departments.
Standard 1.0 Voice Services Application Guide January 1998

Time-of-day controllers 8-27Testing the time-of-day controller
l
g ot,
s.
e
re
nge
d in
,
d
Testing the time-of-day controller
Introduction When you have finished configuring the time-of-day controller and have defined the VSDN through which it wilbe accessed, test it before making it available.
Dial the DN which accesses the time-of-day controller durinbusiness hours. Are you connected to the right service? If ncheck the service ID that is associated with business hour
To test off-hours routing on a new system, you can changthe time on the Meridian 1/SL-1 (by setting it ahead or behind by a few hours—the fewer the better; see the following caution). Be sure to set the time back when you adone testing.
If you are testing a live system during business hours, chathe off-hours for the time-of-day controller. Changing the time on the switch can result in a loss of data, as describethe caution.
CAUTION
Risk of data loss
To test a time-of-day controller, do not resetthe system time by a few days to “fool” the system into thinking it is the weekend. If you set the time ahead by a number of daysall read messages that meet the Read Message Retention Value (set in the Add Local Voice User screen) will be deleted. For example, say today is December 9th anthe read message retention limit is 7 days. You set the time ahead by 72 hours. Any messages that are 4, 5, or 6 days old will bedeleted before they are supposed to be, according to the read message retention maximum. Resetting the system time can also affect reports on the SL-1.
Standard 1.0 Voice Services Application Guide January 1998

8-28 Time-of-day controllers Testing the time-of-day controller
nd
To test holiday routing, create a holiday with today’s date athe call access DN of the time-of-day controller.
Modify the time-of-day control definition, if necessary, andsave it. See the following section for details. Update your worksheet and file it for future reference.
Standard 1.0 Voice Services Application Guide January 1998

Time-of-day controllers 8-29
Section C Modifying or deleting a time-of-day controller
In this section
Overview of modifying or deleting a time-of-day controller 8-30
Modifying a time-of-day controller 8-31
Deleting a time-of-day controller 8-33
Standard 1.0 Voice Services Application Guide January 1998

8-30 Time-of-day controllers Overview of modifying or deleting a time-of-day controller
g
e-
Overview of modifying or deleting a time-of-day controller
Introduction This section provides procedures for modifying and deletintime-of-day controllers.
Multi-customer administration
On multi-customer systems, you can modify and delete timof-day controllers at either the system or customer administration level.
Standard 1.0 Voice Services Application Guide January 1998

Time-of-day controllers 8-31Modifying a time-of-day controller
e-
Modifying a time-of-day controller
Introduction While a time-of-day controller is being updated, the old version of the time-of-day controller is still available to callers. The new version takes effect when the updated timof-day controller has been saved.
Procedure To modify a time-of-day controller, follow these steps.
Starting Point: The Voice Services Administration menu
Step Action
1 Select Time-of-Day Control Definitions.
Result: The Time-of-Day Control Definitions screen is displayed.
2 Move the cursor to the time-of-day control definition you want to view or modify.
3 Press <Spacebar> to select it.
4 Press the [View/Modify] softkey.
Result: The View/Modify a Time-of-Day Control Definition screen is displayed.
Standard 1.0 Voice Services Application Guide January 1998

8-32 Time-of-day controllers Modifying a time-of-day controller
5 Modify the time-of-day control definition as required.
6 If you are satisfied with the information you have entered, press the [Save] softkey. Otherwise, press [Cancel] to discard the changes.
Result: Whether you save or cancel, you are returned to the Time-of-Day Control Definitions screen.
Step Action
Standard 1.0 Voice Services Application Guide January 1998

Time-of-day controllers 8-33Deleting a time-of-day controller
e-
re
e . inst
s.
Deleting a time-of-day controller
Introduction Time-of-day controllers are deleted from the Delete a Timof-Day Control Definition screen. The fields in this screen are read-only.
Time-of-day controllers associated with a voice menu or another time-of-day controller
If the time-of-day controller you are deleting is associated with a voice menu or another time-of-day controller, be suto modify the appropriate definitions to account for the absence of this time-of-day controller (that is, remove references to this time-of-day control ID within the voice menu or time-of-day controller definition). If the time-of-daycontroller is associated with an entry in the VSDN table, bsure to delete it. VSDNs must not point to deleted servicesThe system does not perform a sanity check to ensure agathis.
Procedure To delete a time-of-day control definition, follow these step
Starting Point: The Voice Services Administration menu
Step Action
1 Select Time-of-Day Control Definitions.
Result: The Time-of-Day Control Definitions screen is displayed.
2 Move the cursor to the time-of-day control definition you want to delete.
3 Press <Spacebar> to select it.
Standard 1.0 Voice Services Application Guide January 1998

8-34 Time-of-day controllers Deleting a time-of-day controller
4 Press the [Delete] softkey.
Result: The time-of-day control definition is displayed under the heading Delete a Time-of-Day Control Definition, and new softkeys are displayed. This screen is displayed so that you can see which time-of-day control definition you have selected to delete.
5 Review the time-of-day control definition to make sure you are deleting the right time-of-day control service.
6 Press the [OK to Delete] softkey to delete the time-of-day controller, or press [Cancel] to exit this screen without deleting.
Result: Whether you delete or cancel, you are returned to the Time-of-Day Control Definitions screen.
7 If the time-of-day controller was associated with a DN in the VSDN table, go to the VSDN table and delete the DN.
If the time-of-day controller was associated with a voice menu or another time-of-day controller, go to the appropriate service definition and delete references to the time-of-day controller.
Step Action
Standard 1.0 Voice Services Application Guide January 1998

Chapter 9
Voice prompt maintenance and remote activation
In this chapter
Overview 9-2
Defining the voice prompt maintenance DN 9-4
Updating voice menu prompts 9-6
Updating announcement and thru-dial greetings 9-7
Remote activation 9-8

9-2 Voice prompt maintenance and remote activation Overview
at e
sy
ts.
a ile ho
een
u
can s, or d
use on ce ant
to
Overview
Introduction The Voice Prompt Maintenance service allows you to recordannouncements, thru-dial service greetings, and voice menuprompts from a remote touch-tone telephone. This means thyou do not have to be at the administration terminal to updatrecordings. This is especially useful for recordings that are updated frequently or if the administration terminal is in a noilocation which interferes with the recording quality.
Note: This service cannot be used to update voice form prompVoice form prompts can only be recorded from the administration terminal. For fax items, use the Fax Item Maintenance Service. This service is documented in the Fax on Demand Application Guide (NTP 555-7001-327).
Although you cannot delete recordings through this service, newly recorded prompt overwrites any previous prompt. Whyou are in the process of updating a recording, any callers wreach the voice service continue to hear the old recording. Callers who reach the application once the new prompt has bsaved hear the new prompt.
To make the voice prompt maintenance service available, yohave to define a DN for it in the VSDN table, or make it accessible through a voice menu. Furthermore, this service only be used to change announcements, voice menu promptthru-dialer greetings if an Update Password has been definefor the application. If no password is specified in the voice service definition, prompts can only be updated from the administration terminal.
Under certain circumstances, you have to decide whether tothe voice prompt maintenance service or the remote activatiservice (described in the next section). For example, the offiis unexpectedly closed due to inclement weather, and you wto ensure that callers are aware that this is the reason for theoffice closure. During normal business hours, you use an automated attendant which is a thru-dialer that allows callerscall through to the desired extension. You could either (a) change the thru-dialer greeting with the voice prompt
Standard 1.0 Voice Services Application Guide January 1998

Voice prompt maintenance and remote activation 9-3Overview
the se, the
al
e can on
maintenance service, or (b) use remote activation to changeservice that is accessed when the number is dialed. Of couryou need some sort of announcement already recorded (seefollowing section). If you choose to change the thru-dialer greeting, you must remember to change it back to the origingreeting once the office is open. However, if an operator answers the phone during normal business hours, you will probably use the remote activation feature to ensure that anannouncement is played.
Multi-customer administration
On multi-customer systems, VSDNs can only be added at thcustomer administration level. However, once created, they be viewed, modified, or deleted from the system administratilevel.
Standard 1.0 Voice Services Application Guide January 1998

9-4 Voice prompt maintenance and remote activation Defining the voice prompt maintenance DN
.
Defining the voice prompt maintenance DN
Introduction The procedure in this section explains how to define the DNyou will use to access the voice prompt maintenance feature
Procedure To define the voice prompt maintenance DN, follow these steps.
Starting Point: The Voice Services Administration menu
Step Action
1 Select Voice Services-DN Table.
Result: The Voice Services-DN Table is displayed.
Standard 1.0 Voice Services Application Guide January 1998

Voice prompt maintenance and remote activation 9-5Defining the voice prompt maintenance DN
2 Press the [Add] softkey.
Result: The Add DN Information screen appears.
3 Enter the Access DN. This is the number that callers dial to access the voice prompt maintenance service. Get the DN from your switch administrator, or print the directory number block (DNB) at the switch to obtain an unused DN.
Note: The Access DN cannot match a mailbox number.
4 Enter PM in the Service field.
5 If multiple languages are installed on your system, select the language for system prompts.
6 Enter a comment.
This step is optional, but a comment that identifies the service is useful here.
7 Press the [Save] softkey to save the VSDN Table.
Step Action
Standard 1.0 Voice Services Application Guide January 1998

9-6 Voice prompt maintenance and remote activation Updating voice menu prompts
Updating voice menu prompts
Introduction The procedure in this section explains how to update voice menu prompts.
Procedure To update voice menu prompts, follow these steps.
Starting Point: A DTMF telephone set
Step Action
1 Dial the Voice Prompt Maintenance Service DN.
Result: The system prompts you for an ID.
2 Enter the ID of the voice menu you want to modify and press #.
Result: The system prompts you for the Update Password.
3 Enter the Update Password and press #.
Result: The system plays a menu with the following choices:
a. Update Greeting prompt—press <1>.b. Update Menu Choices prompt—press<2>.c. Update No Response prompt—press<3>.
d. Update Other Menu prompts—press <4>.e. Update Password—press <8><4>.
4 Select the required function.
Result: If you select a, b, or c, you are prompted to play the existing prompt or record a prompt.
Option d allows you to update prompts associated with particular keys. You are prompted to enter the prompt number. Enter the keypad number that a caller must press to hear the prompt.
If you select option e, you are prompted to enter the new password once and then a second time (to verify it). You are then prompted to enter the old password.
5 Play or record the prompt.
If you are following option d from step 3, then when you are finished, press <#> to go back to where you can enter the (key) number of another prompt.
6 To return to the ID prompt, enter a number sign.
Result: You can now work on another menu by going to step 2.
Standard 1.0 Voice Services Application Guide January 1998

Voice prompt maintenance and remote activation 9-7Updating announcement and thru-dial greetings
se
Updating announcement and thru-dial greetings
Introduction The procedure in this section explains how to update announcement and thru-dial greetings.
Procedure To update announcements and thru-dial greetings, follow thesteps.
Starting Point: A DTMF telephone set
Step Action
1 Dial the Voice Prompt Maintenance Service DN.
Result: The system prompts you for an ID.
2 Enter the ID of the announcement or thru-dial ID that you want to modify and press the number sign (#).
Result: The system prompts you for the Update Password.
3 Enter the Update Password and press the number sign (#).
Result: You are prompted to use Play or Record (use Play to hear the entire prompt from start to finish).
4 The system plays a menu with three choices:
a. Record a new announcement/thru-dial greeting—press<5>.
b. Listen to the existing announcement/thru-dial greeting—press <2>.
c. Update Password—press <8><4>.You are prompted to enter the new password once and then a second time (to verify it). You are then prompted to enter the old password.
5 To return to the ID prompt, press the number sign (#).
Result: You can now work on another announcement or thru-dial greeting by going to step 2.
Standard 1.0 Voice Services Application Guide January 1998

9-8 Voice prompt maintenance and remote activation Remote activation
f-
by of
e ve to
all
n
e
l
his
.
Remote activation
Introduction The Remote Activation service allows you to switch voice services (voice menus, announcements, thru-dialers, time-oday controllers, voice forms, or the fax information service), off-site through a standard DTMF telephone set. This is donereassigning a service’s VSDN entry. For example, in the casea storm, you (along with most of the office personnel) may bstranded at home due to the bad weather. As long as you haaccess to a touch-tone phone, you can activate a predefinedannouncement informing callers that the office is closed dueinclement weather.
For example, you may have a regular “closed” greeting that goes as follows:
“Thank you for calling the First Bank of Moose Jaw. We are open Monday to Friday from 8:00 a.m. to 4:00 p.m. Please cagain when we are open.”
You create the following “snow storm” greeting in preparatiofor the upcoming winter:
“Thank you for calling the First Bank of Moose Jaw. Due to threcent snow storm, our offices will be closed today. We are normally open Monday to Friday from 8:00 a.m. to 4:00 p.m.Please call again. Thank you.”
Whenever the office is closed due to a snow storm, call the Remote Activation service from home and change the normaclosed greeting to the snow storm greeting.
To use the Remote Activation feature, you must first define aDN for the Remote Activation service so that an entry can bemade in the Voice Services-DN Table. (On multi-customer systems, this is done at the customer administration level.) Tmakes the service available through a dialable DN.
A password is required to use the Remote Activation serviceThis password is defined in the Add DN Information screen. Callers dialing the Remote Activation DN cannot access thisservice without the password.
Standard 1.0 Voice Services Application Guide January 1998

Voice prompt maintenance and remote activation 9-9Remote activation
s
ill
ice at
nd
is e
.
Note: If the password field is left blank, this effectively disablethe remote activation service itself. Therefore, to temporarilydisable remote activation, you do not have to delete the RA service from the VSDN table.
You should also create a complete listing of all voice menu services. Keep a copy of the list at home (or wherever you wbe calling from to make changes). Make sure the place you choose to keep it is secure. This listing should include the voservice DN, the title (or a brief description of the service) so thyou can easily identify it, the update password (if defined), athe access password (if defined).
Remote Activation only allows you to change which service accessed when a particular DN is dialed. You cannot changany recorded prompts using this service. To change promptsremotely, use the Voice Prompt Maintenance feature.
Procedure:Defining a Remote Activation password
To define a Remote Activation password, follow these steps
Starting Point: The Voice Services Administration menu
Step Action
1 Select Voice Services-DN Table.
Result: The Voice Services-DN Table is displayed.
2 Press the [Add] softkey.
Result: The Add DN Information screen appears.
3 Enter the Access DN. This is the number that callers dial to access the remote activation service. Get the DN from your switch administrator, or print the directory number block (DNB) at the switch to obtain an unused DN.
Note: The Access DN cannot match a mailbox number.
4 Enter RA in the Service field.
Result: A password field is displayed.
Standard 1.0 Voice Services Application Guide January 1998

9-10 Voice prompt maintenance and remote activation Remote activation
ne
Once you have defined a DN and a password for Remote Activation, you may use a remote DTMF telephone to redefiwhich services are accessed by particular DNs.Procedure:Defining accessible services
To define accessible services, follow these steps.
Starting Point: A DTMF telephone set
5 Enter the password, up to 16 numeric characters in length, that users must know to use the remote activation service.
6 Enter a comment.
Note: This step is optional, but a comment that identifies the service is useful here.
7 Press the [Save] softkey to save the VSDN Table.
Step Action
Step Action
1 Call the Remote Access DN as defined in the Voice Services-DN Table.
Result: You are prompted for a password.
2 Enter the Remote Activation Password, followed by #.
Result: You are prompted to enter a voice service DN.
3 Enter the DN of the voice service you want to change, followed by #.
Result: A voice prompt confirms your selection by stating the DN and the associated service ID, and you are prompted to enter a new service ID.
4 Enter the ID of the application you want to associate with the DN entered in step 3.
Result: You hear a confirmation that the new service is now associated with the DN. You are then prompted to enter a new service ID. This gives you the opportunity to change the service ID you just entered in case of an error.
5 If you want to change the service ID you entered in step 4, enter the new service ID followed by #.
If you want to change another voice service, enter # and you are prompted for another voice service DN. Repeat from step 3 for each voice service you want to change.
If no further changes are required, hang up the phone.
Standard 1.0 Voice Services Application Guide January 1998
Voice prompt maintenance and remote activation 9-11Remote activation
at a ays ote
When you check the Voice Services-DN Table, you notice thin the Comments field for those services that were changed,message, “Changed by RA,” appears. The Service field displthe service that was associated with the DN during the RemActivation session.
Standard 1.0 Voice Services Application Guide January 1998

9-12 Voice prompt maintenance and remote activation Remote activation
Standard 1.0 Voice Services Application Guide January 1998

Chapter 10
Monitorin g voice services
In this chapter
Overview 10-2
Monitoring operational measurements 10-3

10-2 Monitoring voice services Overview
ts
Overview
Introduction This section discusses how to use operational measuremenreports to monitor how your voice services are being used.
Standard 1.0 Voice Services Application Guide January 1998

Monitoring voice services 10-3Monitoring operational measurements
at .
rts
n in
l,
h
nt
tic. one
Monitoring operational measurements
Introduction There are a number of operational measurements reports thwill help you monitor how your voice services are being usedThese include
• Services Summary report
• Services Detail report
• Disk Usage Detail report
When a new voice service application is introduced, it is especially important to monitor it on a daily basis.
Multi-customer administration
On multi-customer systems, operational measurements repoare accessible only from the system administration level.
See also For more details on operational measurements and for screeexamples, refer to the “Operational Measurements” chapter the Meridian Mail System Administration Guide for your platform.
Services Summary report
The Services Summary report provides a summary of the activity of all voice services in the system, including transcription services for voice forms.
Each report covers a certain interval of time. For that intervathe following information is provided:
• the number of times that all voice services have been accessed during the reporting interval
This includes indirect accesses to these services througtime-of-day controllers or voice menus.
• the average length of all voice service sessions that occurred during the interval
• the voice mail usage (in CCS), which indicates the amouof time that voice service applications were active duringthe interval
CCS (centi-call-seconds) is a traffic measurement statisOne CCS equals 100 seconds of call connection time in
Standard 1.0 Voice Services Application Guide January 1998

10-4 Monitoring voice services Monitoring operational measurements
e
her der
e,
y r,
m e
y e
is .
nu
n
y
hour. See the “Operational Measurements” chapter in thSystem Administration Guide for more details.
How this report relates to voice services
The Services Summary report is useful for determining whetvoice services in general are generating a lot of traffic. Consithe following points when analyzing the Services Summary report:
• If the number of accesses is lower than you expected, itcould be because of the following:
- the feature is not working properly, and attempts to access it have fallen off
- people are not aware of the feature and are, therefornot using it
• If an unusually high amount of traffic is being generated bvoice services, you may encounter system performanceproblems, such as no free channels. As the administratoyou may need to do more research beyond checking theOM reports to learn more about the nature of the probleand possibly come up with a solution. For example, youneed to determine if the high traffic level was due to somunusual event that affected your organization (if so, the high traffic would not be expected to continue).
If the high traffic is expected to continue, one solution mabe to dedicate a channel to the feature so that the featurdoes not tie up the whole system. Another solution is to expand the system if overall traffic for the whole system higher than what was originally anticipated for the system
• Another area to check is the average length for voice meor voice form accesses. If the average length is long, review your voice menus or voice forms to see if they cabe shortened or rearranged for more efficient use.
Services Detail report The Services Detail report provides statistics about voice menus, announcements, thru-dials, time-of-day controllers, voice forms, and fax information services.
Monitoring voice menusFor voice menus, this report is useful for identifying how mantimes each item in a voice menu was accessed during the
Standard 1.0 Voice Services Application Guide January 1998

Monitoring voice services 10-5Monitoring operational measurements
nu er o
at
u he
r the
tly so r the
be a hat in
es cide .
n h al
reporting period. This report helps you to decide if a voice meis structured efficiently. For example, if you notice that the latmenu options are being accessed more often than the first twor three options, you should rearrange the menu items so ththe most popular menu item is the first choice, and so on.
If a voice form has been integrated within a voice menu, thisreport may provide additional information for voice forms. Yocan determine how many times a menu item that accesses tvoice form has been accessed by checking the number of accesses for the menu item that corresponds to the form. Foexample, if users press 3 to connect to the voice form, checknumber of accesses for menu item 3.
When reviewing this report, consider the following:
• If the menu items that are at the end of the menu (for example, item 8 or 9) are being accessed more frequenthan earlier items, you may wish to reorganize the menuthat the popular items are presented first. This structureprevents users from having to wait through all the earlieoptions before hearing the one they want, thus reducing call length.
• If a menu item has few or no accesses, the reason may lack of training or awareness regarding those items, or tthose items are simply not required. If you find that certamenu actions are not required, either remove them or replace them with a more useful menu action. Be sure torerecord the greetings and menu choices to reflect the changes.
Monitoring other voice servicesThis report also shows how often other voice services besidvoice menus are being used. These figures can help you deif any particular voice service application is being fully utilized
Disk Usage Detail report
This report tells you how much voice storage space has beeused on each volume. It does not, however, report how mucspace is being used by different voice services. It is a generstatistic.
Standard 1.0 Voice Services Application Guide January 1998

10-6 Monitoring voice services Monitoring operational measurements
ice is ly ge is ge e
this
ored,
Generate this report periodically to monitor the volume on which voice services are stored. Since a large number of voservice applications can potentially take up a lot of space, it important that you notice potential shortage problems as earas possible. As a guideline, if the voice space used percentaover 80 percent, monitor the volume carefully. If the percentais over 90 percent, a SEER is generated, and steps should btaken to reduce the amount of voice space used.
If you have voice form applications, you should also monitorthe user volumes. This is where the responses are stored andcould fill up these volumes if it is not checked on a regular basis. These volumes are also where voice messages are stso it is very important that they do not fill up with voice form responses.
Standard 1.0 Voice Services Application Guide January 1998

Appendix A
Worksheets
In this appendix
Worksheets A-2
Voice Services Profile Worksheet page 1 of 2 A-3
Announcement Definition Worksheet A-5
Thru-Dial Definition Worksheet page 1 of 2 A-6
Time-of-Day Control Definition Worksheet A-8
Voice Menu Definition Worksheet page 1 of 3 A-9
Voice Form Sequence Worksheet A-12
Voice Form Definition Worksheet page 1 of 2 A-13
No Answer Field Worksheet A-15
Voice Answer Field Worksheet page 1 of 2 A-16
Caller Survey page 1 of 2 A-18
Transcriber Survey page 1 of 2 A-20

A-2 Worksheets
s of ou
Worksheets
Introduction This appendix contains a blank copy of each of the worksheets required in the planning stages of various typevoice services. Make copies of these worksheets so that yalways have a blank original.
Standard 1.0 Voice Services Application Guide January 1998

A-3 Worksheets
Voice Services Profile Worksheet page 1 of 2
Prompt Treatment: Normal ❑ Call Answering ❑ Choose Normal if you want callers to hear a mailbox user’s personal verification if the line is busy. Choose Call Answering if you want callers to hear the mailbox user’s phone number instead.
Timeouts
Command Entry: ____________________ secondsEnter a value between 1.0 and 5.0 seconds. The default is 3.5 seconds.
Short Disconnect: ____________________ secondsEnter a value between 1.0 and 30.0 seconds. The default is 10.0 seconds.
Record: ____________________ secondsEnter a value between 00:06 seconds and 05:00. The default is 02:00.
Maximum Prompt Sizes
For announcements: _______________ (mm:ss)Enter a value between 00:30 and 10:00. The default is 00:30.
For other recordings: _______________ (mm:ss)Enter a value between 00:30 and 10:00. The default is 02:00.
Act on AMIS or Enterprise Initiation Tone: No ❑ Yes ❑Select Yes if a voice service will be used to accept incoming AMIS calls.
Enable Update Logging: No ❑ Yes ❑Select Yes if you want a SEER to be generated every time a DN or service is added, modified, or deleted.
Business Hours Default: ____________________ (hh:mm) to ______________________
- continued -
Standard 1.0 Voice Services Application Guide January 1998

A-4 Worksheets
Voice Services Profile Worksheet page 2 of 2
Holidays
# Start Date (mm/dd/yy)
End Date(mm/dd/yy)
Start Time(hh:mm) Comments
1 ____________ _______________ _______________ _________________________
2 ____________ _______________ _______________ _________________________
3 ____________ _______________ _______________ _________________________
4 ____________ _______________ _______________ _________________________
5 ____________ _______________ _______________ _________________________
6 ____________ _______________ _______________ _________________________
7 ____________ _______________ _______________ _________________________
8 ____________ _______________ _______________ _________________________
9 ____________ _______________ _______________ _________________________
10 ____________ _______________ _______________ _________________________
11 ____________ _______________ _______________ _________________________
12 ____________ _______________ _______________ _________________________
13 ____________ _______________ _______________ _________________________
14 ____________ _______________ _______________ _________________________
15 ____________ _______________ _______________ _________________________
16 ____________ _______________ _______________ _________________________
17 ____________ _______________ _______________ _________________________
18 ____________ _______________ _______________ _________________________
19 ____________ _______________ _______________ _________________________
20 ____________ _______________ _______________ _________________________
Standard 1.0 Voice Services Application Guide January 1998

A-5 Worksheets
Announcement Definition Worksheet
Announcement ID: _________________________The ID number you have assigned to the announcement. This number can be up to 8 digits long and must be unique among service IDs.
Title: ________________________________________________________________________The title of the announcement (up to 29 characters).
Revert DN: __________________________________________________________________(Optional.) The DN to which the caller will be transferred if he or she presses 0.
Access Password: ____________________________________________________________(Optional.) The password required to access the announcement to listen to it. The password can be between 4 and 16 numeric characters in length.
Update Password: ___________________________________________________________(Optional.) The password required to access the announcement in order to update it using the voice prompt maintenance service. This password can be between 4 and 16 numeric characters in length.
Silent disconnect after direct access: No ❑ Yes ❑ The default is No.
Number of times to play if accessed directly: ______________________________________The default is 2.
Number of times to play if accessed through a voice menu: __________________________The default is 1.
Language for prompts: ________________________________________________________If multiple languages are installed, select the one in which system prompts will be played.
Announcement:
____________________________________________________________________________
____________________________________________________________________________
____________________________________________________________________________
____________________________________________________________________________
____________________________________________________________________________
Method of access: Direct ❑ Voice Menu ❑ Time-of-Day Controller ❑
VSDN ___________________________________
Standard 1.0 Voice Services Application Guide January 1998

A-6 Worksheets
Thru-Dial Definition Worksheet page 1 of 2
Thru-Dial ID: _________________________________________________________________The ID you have assigned to the Thru-Dial service. The number can be up to 8 digits long and must be unique among service IDs.
Title: _______________________________________________________________________The title of the Thru-Dial service. The title can be up to 29 characters long.
Revert DN: __________________________________________________________________The DN to which the caller is transferred if he or she presses 0.
Access Password: ____________________________________________________________(Optional.) The password required to use the Thru-Dial service. This password can be between 4 and 16 numeric characters in length.
Update Password: ____________________________________________________________(Optional.) The password required to update the Thru-Dial greeting using the voice prompt maintenance service. This password can be between 4 and 16 numeric characters in length.
Monitor this service during monitoring period? No ❑ Yes ❑The default is No.
Thru-Dial greeting:
____________________________________________________________________________
____________________________________________________________________________
____________________________________________________________________________
____________________________________________________________________________
____________________________________________________________________________
____________________________________________________________________________
____________________________________________________________________________
____________________________________________________________________________
____________________________________________________________________________
____________________________________________________________________________
Language for Prompts: ________________________________________________________If multiple language are installed, select the language in which system prompts are played.
- continued -
Standard 1.0 Voice Services Application Guide January 1998

A-7 Worksheets
Thru-Dial Definition Worksheet page 2 of 2
Dial by: Number ❑ Name ❑ Both ❑ The method by which callers can dial.
(If Dial by Number) DN Length: Fixed ❑ Variable ❑ Choose Fixed if all DNs are of the same length. Choose Variable if they are of varying lengths.
If Fixed: Digits: _______ Left Pad: ______ Suppress Prompt: No ❑ Yes ❑Digits is the number at which the DN length is fixed.
Restriction/Permission Set: ____________________________________________________Enter the number (code) for the restriction/permission set you want to use, or enter Custom. If you choose Custom, specify the restricted and permitted dialing codes for this Thru-Dial service in the following fields.
Custom Restriction Codes:
_____ _____ _____ _____ _____ _____ _____ _____ _____ _____
Custom Permission Codes:
_____ _____ _____ _____ _____ _____ _____ _____ _____ _____
Method of access: Direct ❑ Voice Menu ❑ Time-of-Day Controller ❑
VSDN: ______________________________________________________________________
Standard 1.0 Voice Services Application Guide January 1998

A-8 Worksheets
.
Time-of-Day Control Definition Worksheet
Time-of-Day Control ID: ________________________________________________________The ID you have assigned to this time-of-day controller. This number can be up to 8 digits long and must be unique among service IDs.
Business Hours Service ID: _________________ Type of Service: ____________________The ID of the service that will be activated during business hours.
Off-Hours Service ID: _________________ Type of Service: ____________________The ID of the service that will be activated during off-hours.
Holiday Service ID: _________________ Type of Service: ____________________The ID of the service that will be activated during holidays.
Business Days Business Hours
Sunday No ❑ Yes ❑ _____________ to _____________
Monday No ❑ Yes ❑ _____________ to _____________
Tuesday No ❑ Yes ❑ _____________ to _____________
Wednesday No ❑ Yes ❑ _____________ to _____________
Thursday No ❑ Yes ❑ _____________ to _____________
Friday No ❑ Yes ❑ _____________ to _____________
Saturday No ❑ Yes ❑ _____________ to _____________
Method of access: Direct ❑ Voice Menu ❑ Time-of-Day Controller ❑
VSDN: ______________________________________________________________________
Standard 1.0 Voice Services Application Guide January 1998

A-9 Worksheets
Voice Menu Definition Worksheet page 1 of 3
Voice Menu ID: _______________________________________________________________The ID you have assigned to this voice menu. The number can be up to 8 digits long and must be unique among service IDs.
Title: _______________________________________________________________________The title of the voice menu. The title can be up to 29 characters long.
Revert DN: __________________________________________________________________(Optional.) The DN to which the caller is transferred if he or she presses 0.
Access Password: ____________________________________________________________(Optional.) The password required to access the voice menu. This password can be between 4 and 16 numeric characters in length.
Update Password: ____________________________________________________________(Optional.) The password required to access the voice menu in order to update the prompts using the voice prompt maintenance service. This password can be between 4 and 16 numeric characters in length.
Greeting:
____________________________________________________________________________
____________________________________________________________________________
____________________________________________________________________________
____________________________________________________________________________
____________________________________________________________________________
____________________________________________________________________________
____________________________________________________________________________
____________________________________________________________________________
____________________________________________________________________________
____________________________________________________________________________
- continued -
Standard 1.0 Voice Services Application Guide January 1998

A-10 Worksheets
Voice Menu Definition Worksheet page 2 of 3
Menu choices:
____________________________________________________________________________
____________________________________________________________________________
____________________________________________________________________________
____________________________________________________________________________
____________________________________________________________________________
____________________________________________________________________________
____________________________________________________________________________
____________________________________________________________________________
____________________________________________________________________________
____________________________________________________________________________
____________________________________________________________________________
____________________________________________________________________________
____________________________________________________________________________
____________________________________________________________________________
____________________________________________________________________________
____________________________________________________________________________
Are you installing Call Answering? No ❑ Yes ❑ If Yes, Mailbox ID: __________ ______Call Answering enables you to specify whether callers hear a user’s personal verification or the user’s mailbox number if the line is busy.
Silent Disconnect: No ❑ Yes ❑Should the system “Good-bye” prompt be played upon disconnection? The default is No.
Language for Prompts: ________________________________________________________If multiple language are installed, select the language in which system prompts are played.
- continued -
Standard 1.0 Voice Services Application Guide January 1998

A-11 Worksheets
Voice Menu Definition Worksheet page 3 of 3
Key Action Comment
1 _____ _____________________________________ __________________
2 _____ _____________________________________ __________________
3 _____ _____________________________________ __________________
4 _____ _____________________________________ __________________
5 _____ _____________________________________ __________________
6 _____ _____________________________________ __________________
7 _____ _____________________________________ __________________
8 _____ _____________________________________ __________________
9 _____ _____________________________________ __________________
Initial No Response
_____ _____________________________________ __________________
Delayed Response
_____ _____________________________________ __________________
Method of access: Direct ❑ Voice Menu ❑ Time-of-day Controller ❑
VSDN: ______________________________________________________________________
Note: In the Comment column, enter any associated IDs, calling numbers, or expansion digits.
Standard 1.0 Voice Services Application Guide January 1998

A-12 Worksheets
Voice Form Sequence Worksheet
For Voice Form: ______________________________________________________________
Page _____ of _____ Confirmation mode: _________________
Step Prompt (Field Name) Answer? Confirm?
Standard 1.0 Voice Services Application Guide January 1998

A-13 Worksheets
Voice Form Definition Worksheet page 1 of 2
F: Voice Form ID: _______________________________________________________This is a unique Voice Services ID. It is not the VSDN.
F: Title: _______________________________________________________________
T: Transcription Password: _______________________________________________If you do not want transcribers to require a password to access the form for transcription, leave blank.
C: Maximum Untranscribed Responses: _____________________________________How many untranscribed responses will you allow to be stored on the system? If you have a lot of voice forms, or if the voice form is long, keep this number low. When the maximum is reached, callers are transferred to the DN specified below.
C: Overflow Handling DN: ________________________________________________When the number of untranscribed responses exceeds the maximum limits, where should callers be transferred?
T: New Responses MWI Notification DN: ____________________________________When a new response is recorded, who should be notified? If you are not using the notification feature, leave this field blank.
T: New Responses SMDI Link Name: _______________________________________If you have multi-SMDI links (available only on DMS-100, DMS-10, or SL-100), what is the name of the SMDI link (as defined in the hardware database) on which you want to send the new responses notification?
T: Special Responses MWI Notification DN: _________________________________When a response is marked as Special, who should be notified? If you are not using the notification feature, leave this field blank.
T: Special Responses SMDI Link Name: ____________________________________If you have multi-SMDI links (available only on DMS-100, DMS-10, or SL-100), what is the name of the SMDI link (as defined in the hardware database) on which you want to send the special responses notification?
T: Send Notification Message to Mailbox: ___________________________________If you are not using the notification feature, leave this field blank.
T: Tag Message as Urgent? No ❑ Yes ❑Do you want the notification message to be tagged as urgent?
T: Transcription Field Separator: Field Name ❑ Tone ❑ Silence ❑ What do you want the transcriber to hear before the answer to each field is played?
- continued -
Standard 1.0 Voice Services Application Guide January 1998

A-14 Worksheets
Voice Form Definition Worksheet page 2 of 2
T: Default Field Separator Delay: Stop No ❑ Yes ❑ Delay ______ decisecondsDuring transcription, should playback stop after an answer is played, or should it delay for a number of deciseconds between each response? This gives the transcriber time to process the answer.
T: Play Envelope for Header? No ❑ Yes ❑Do you want the transcriber to hear only the header (response status and number) or the entire envelope (also includes the form name or ID and a date and time stamp)?
T: Delay after header: _____________ decisecondsDo you want a delay to follow the header/envelope? (Only necessary if the header information needs to be transcribed.)
C: Caller Confirmation Mode: None ❑ At Each Field ❑ Whole Form ❑ When will confirmation occur, if at all?
C: Default Revert DN: ____________________________________________________If there is a problem using the form or the caller presses 0 (if allowed), where should he or she be transferred?
C: Caller “0” Allowed? No ❑ Yes ❑Do you wish callers to be able to press 0 for direct access to an operator?
C: System Message File: _____________________________ (language)If you have a multilingual system, in what language should SYSTEM prompts be played?
How will callers access the service?
1 Direct Access: VSDN: _____________________________________________
2 Through a Voice Menu service: VSDN: ______________________________
Menu ID #: ___________________________________________
Title of Menu Service:__________________________________
3 Through a Time-of-Day Controller: VSDN: ______________________________
Time-of-Day Controller ID: ______________________________
Transcription Service VSDN: ___________________________________________________
Standard 1.0 Voice Services Application Guide January 1998

A-15 Worksheets
No Answer Field Worksheet
Field Name: _______________________________________________
Field Prompt:
____________________________________________________________________________
____________________________________________________________________________
____________________________________________________________________________
____________________________________________________________________________
____________________________________________________________________________
____________________________________________________________________________
____________________________________________________________________________
____________________________________________________________________________
____________________________________________________________________________
____________________________________________________________________________
____________________________________________________________________________
____________________________________________________________________________
____________________________________________________________________________
____________________________________________________________________________
Action After Field: NextField ❑ Revert ❑ Disconnect ❑ Choose the action that takes place after the field prompt is played to the caller.
Revert DN: __________________________________________________________________If Revert is selected, enter the DN to which the caller is transferred.
System Disconnect Message? No ❑ Yes ❑If Disconnect is selected, choose Yes if you want the system to play “Good-bye” when disconnecting.
Save Response if Hang-up? No ❑ Yes ❑Choose Yes if you want the voice form to be saved if the caller hangs up at this prompt (that is, enough valuable information has been saved at this point). Choose No if the information collected so far is not of use on its own.
Standard 1.0 Voice Services Application Guide January 1998

A-16 Worksheets
Voice Answer Field Worksheet page 1 of 2
Field Name: _______________________________________________
Field Prompt:
____________________________________________________________________________
____________________________________________________________________________
____________________________________________________________________________
____________________________________________________________________________
____________________________________________________________________________
____________________________________________________________________________
____________________________________________________________________________
____________________________________________________________________________
____________________________________________________________________________
____________________________________________________________________________
____________________________________________________________________________
____________________________________________________________________________
____________________________________________________________________________
____________________________________________________________________________
Field Name Recorded: _________________________________________________________State a descriptive field name. Callers and transcribers hear this “label” before the response is played back to them.
Answer Length Limit: _________________________________________________ secondsThis field determines the maximum length of the caller’s answer to this prompt. The default maximum value is 30 seconds. This maximum value can be changed.
- continued -
Standard 1.0 Voice Services Application Guide January 1998

A-17 Worksheets
Voice Answer Field Worksheet page 2 of 2
No Answer Handling: NextField ❑ Revert ❑ Disconnect ❑ Repeat ❑ Choose the action that should be taken if the caller does not record an answer once the field prompt is played. NextField: the next field prompt is played. Revert: the caller is transferred to the revert DN specified for this field. Disconnect: the call is disconnected. Repeat: the field prompt is repeated for an adjustable but limited number of times; when this limit is reached, the caller is disconnected, and the next field is not played.
Revert DN: __________________________________________________________________If Revert is selected for No Answer Handling, enter the DN to which the caller is transferred. If no DN is entered, the default revert DN for the form is used.
Repeats before Disconnect _____________________________________________________If Repeat is selected for No Answering Handling, enter the number of times the current prompt should be repeated before the caller is disconnected from the voice form. Note that the next field is not played when Repeat is selected.
Stop Recording on Silence: No ❑ Yes ❑This field determines what happens if the caller is silent for a predetermined length of time during recording. (This time period, in seconds, can be adjusted by the Nortel support organization.) If Yes is selected, recording stops, and the next action in the form is taken. If No is selected, the recording period continues for the amount of time specified in the Answer Length Limit field.
Field to Be Confirmed: No ❑ Yes ❑If confirmation mode is Whole Form or At Each Field, select Yes if you want callers to confirm their answer to
this question.
Save Response if Hang-up: No ❑ Yes ❑Choose Yes if you want the voice form to be saved if the caller hangs up at this prompt (that is, enough valuable information has been saved at this point). Choose No if the information collected so far is not of use on its own.
Field Separator Delay: Stop ❑ Delay ❑ (deciseconds: __________________)This field affects the transcription process. Choose Stop if you want playback to stop after the caller’s answer has been played (the transcriber has to enter a specific command to resume playback). Choose Delay (and specify a value) if you want playback to pause for a specified amount of time, after which playback automatically resumes.
Standard 1.0 Voice Services Application Guide January 1998

A-18 Worksheets
Caller Survey page 1 of 2
For Voice Form ID: ____________________________________________________________
Title: _______________________________________________________________________
1 Was the voice form easy to use? If not, please explain.
2 Were you given all the instructions necessary to be able to use the form effectively? If not, explain.
3 Did you ever become frustrated while you were using the form? If so, at which prompt, and why?
4 Were there difficulties understanding any of the prompts? If so, which ones, and why?
5 Were any of the prompts or greetings too wordy? Which ones?
6 Did you want any of the prompts, greetings, or instructions repeated? If yes, which ones?
- continued -
Standard 1.0 Voice Services Application Guide January 1998

A-19 Worksheets
Caller Survey page 2 of 2
For Voice Form ID: ____________________________________________________________
Title: _______________________________________________________________________
7 Did you have enough time to answer all the questions? If not, which questions did not allow enough time?
8 Did the voice form take too long to complete? Would this dissuade you from using it?
9 Were you able to revert out of the voice form and speak to someone if you needed to?
10a Were you unexpectedly disconnected from the voice form at any time?
b When did the disconnect occur?
c Did you want any of the prompts, greetings, or instructions repeated? If yes, which ones?
11 When you heard your confirmation, did you understand what you were hearing? If not, what was wrong?
12 Do you have any additional comments or suggestions regarding this voice form?
Standard 1.0 Voice Services Application Guide January 1998

A-20 Worksheets
Transcriber Survey page 1 of 2
For Voice Form ID: ____________________________________________________________
Title: _______________________________________________________________________
1 Were you able to access the transcription service? If not, which part did not work?
Access number ❑ Password ❑ Other ❑
If other, please explain.
2 Were you notified of a new voice form through your message light?
No ❑ Yes ❑
3 After you logged on to the voice form, what did you hear before the first response was played back?
❑ Envelope (status, form ID or name, response number, date and time response was recorded)
❑ Header (status and response number only)
Did you find this helpful? No ❑ Yes ❑ If not, would you prefer the other option (and why)?
- continued -
Standard 1.0 Voice Services Application Guide January 1998

A-21 Worksheets
Transcriber Survey page 2 of 2
For Voice Form ID: ____________________________________________________________
Title: _______________________________________________________________________
4 After the header or envelope, what happened?
❑ There was a delay. ❑ It continued automatically and played back the first field.
If there was a delay, did it give you enough time to write down the information in the header? No ❑ Yes ❑
If there was no delay, would you have liked a delay? No ❑ Yes ❑
5 During transcription, what did you hear between each field?
Field name ❑ Tone ❑ Silence ❑
Did you find this helpful? If not, what would you prefer? Please explain.
6 During transcription, what happened after each answer was played back?
❑ It stopped.❑ There was a delay and then it continued automatically.
Did you find this helpful? If not, what would you prefer? Please explain.
7 Do you have any additional comments or suggestions regarding this voice form?
Standard 1.0 Voice Services Application Guide January 1998

A-22 Worksheets
Standard 1.0 Voice Services Application Guide January 1998

Appendix B
Sample voice form sessions
In this appendix
Sample sessions B-2
Sample caller session B-2
Sample transcriber session B-4

B-2 Sample voice form sessions
d
th
n go ou s
,
r
er
ity,
Sample sessions
Sample caller session The following is an example of how a caller session wouldrun. In this example, the caller has a touch-tone phone anconfirmation mode is Whole Form.
1. A caller dials the number published to submit an address change. This directly connects the caller withe voice form. The introductory greeting is played, followed by some caller instructions.
“Thank you for calling Laing’s Department Store to inform us of your new address and phone number.
“You will be asked for your old address and phone number followed by your new address and phone number. After each question, simply speak your answer into the receiver. Once you have recorded aanswer to a question, you can press number sign toto the next question. At the end of this application, ywill be asked to confirm some of your answers unlesyou are calling from a rotary phone. If you have a touch-tone phone and require assistance at any timepress “0” to speak to an operator.”
2. The first question is asked.
“Please speak your name after the tone. Speak youlast name first, followed by its spelling. Then speak your first name. When you are finished, press numbsign.”
The caller says: “Frith, f - r - i - t - h, Frank” and thenpresses number sign.
3. “Please speak your old address. Tell us the street, cstate or province, and zip or postal code. When youare finished, press number sign.”
The caller says: “801 Sparrow Crescent, London, Ontario L2T 7J7” and then presses number sign.
Standard 1.0 Voice Services Application Guide January 1998

B-3 Sample voice form sessions
r
,
ill
o
4. “Please speak your old phone number, starting withthe area code. When you are finished, press numbesign.”
The caller says: “519-555-1001” and then presses number sign.
5. “Please speak your new address. Include the streetcity, state or province, and zip or postal code.”
The caller says “90 Weatherview Avenue, London, Ontario L5E 1Z3” and then presses number sign.
6. “Please speak your new phone number.”
The caller says: “519-555-8290.”
7. Since DTMF input has been received, the answers wbe confirmed. The following prompt is played to indicate that confirmation is about to begin.
“Selected answers will now be played back to you sthat you can confirm them.
“New address. 90 Weatherview Avenue, London, Ontario L5E 1Z3.
“If this is correct, press 1. To rerecord the answer, press 2.”
The caller presses <1>.
8. “New phone number. 519-555-8290.
“If this is correct, press 1. To rerecord the answer, press 2.”
The caller has made a mistake and presses <2> to correct it. The field prompt is played.
“Please speak your new phone number.”
The caller says: “519-555-2890.”
9. “Your answer will now be played back to you.
“New phone number. 519-555-2890.
Standard 1.0 Voice Services Application Guide January 1998

B-4 Sample voice form sessions
k
en r .
r,
er
ses.
“If this is correct, press 1. To rerecord the answer, press 2.”
The caller presses <1>.
10. The good-bye greeting is played.
“Your new address will be entered in our files. Thanyou for shopping at Laing’s.”
11. The caller is disconnected.
Sample transcriber session
The following is a sample that has been run through a transcription session. In this example, transcription parameters are configured as follows.
1. A transcriber is notified that a new response has bereceived. The transcriber calls the telephone numbefor the voice forms transcription service and logs on
“Transcription service. Please enter the form numbefollowed by number sign.”
The transcriber presses <1> <#>.
2. “Please enter the form password, followed by numbsign.”
The transcriber enters the password by pressing <5><4><3><3><2><#>.
3. The login summary is played. This includes the recorded form name and the number of new respon
4. “Address change.
“Number of new responses: one.”
Form Name Recorded Yes
Transcription Password 54332
Play Envelope for Header Yes
Transcription Field Separator Field Name
Field Separator Delay Delay (different for each field)
Standard 1.0 Voice Services Application Guide January 1998

B-5 Sample voice form sessions
d, l
.”
r
5. Either the header or the envelope is played. In this example, the envelope is played, containing the following information: response status, form name, response number, date and time recorded.
“New, address change, response one, recorded October 31st at 11:13 a.m.”
6. The first field name is played followed by the caller’srecorded answer. The answer is followed by a delayduring which the transcriber transcribes the answer.After the specified delay, the next field name is playefollowed by the answer. This continues until the finaanswer is played back.
“Name.
“Frith, f - r - i - t - h, Frank.”
<delay>
“Old address.
“801 Sparrow Crescent, London, Ontario L2T 7J7.”
<delay>
“Old phone number.
“519-555-1001.”
<delay>
“New address.
“90 Weatherview Avenue, London, Ontario L5E 1Z3
<delay>
“New phone number.
“519-555-2890.”
<delay>
“End of response.”
7. While listening to the response, the transcriber transfers the information to another application. Afte
Standard 1.0 Voice Services Application Guide January 1998

B-6 Sample voice form sessions
d
finishing with this response, the transcriber presses <7><6> to delete it.
“Response deleted.”
8. The transcriber is finished transcribing responses anhangs up.
Standard 1.0 Voice Services Application Guide January 1998

Index
Aannouncement-only
automated attendantsdescription, 1-20, 6-11example, 1-32
information servicesdescription, 1-22example, 1-35
announcementsadding a VSDN for direct access, 3-32deleting, 3-39description, 1-9ID, 3-11indirect access through a time-of-day controller,
3-33indirect access through a voice menu, 3-33language for system prompts, 3-16making it accessible, 3-17modifying, 3-37number of times to playback, 3-15passwords
access, 3-13update, 3-13
revert DN, 3-12scripting, 3-10silent disconnect, 3-14testing, 3-34title, 3-11
automated attendantsannouncement-only, 1-32
description, 1-20, 6-11basic
description, 1-19, 6-3example, 1-31, 6-5
leave a messagedescription, 1-21, 6-13example, 1-32
mixed live and automateddescription, 1-21, 6-22example, 1-33
nested time-of-day controls, 6-19overview, 1-19time-of-day controlled, 1-21, 6-17with menu choices
description, 1-20, 6-6example, 1-31
Bbasic automated attendants
description, 1-19, 6-3example, 1-31
business hoursdefining, 2-15
Ffax menus information services
description, 1-22
Ggreeting
thru-dial services, 4-30voice menus, 5-18, 5-51
greetingsvoice forms, 7-25
Hholidays
defining, 2-16
Standard 1.0 Voice Services Application Guide January 1998

Index--2
e
Iindirect access
announcementsthrough time-of-day controller, 3-33
information menus information servicesdescription, 1-22example, 1-35
information servicesannouncement-only, 1-22
example, 1-35fax menus
description, 1-22information menus
description, 1-22example, 1-35
overview, 1-21
Kkey functions, 1-18
Lleave-a-message automated attendants
description, 1-21, 6-13example, 1-32
Mmenu actions
announcement service, 5-26call a DN, 5-26call revert DN, 5-33disconnect, 5-34express messaging, 5-27fax information service, 5-31fax item maintenance, 5-32greeting service, 5-29hospitality messaging, 5-31play prompt, 5-33post-checkout mailbox, 5-31prompt maintenance, 5-29repeat menu choices, 5-33return to main menu, 5-33thru-dial service, 5-25time-of-day controller, 5-27
transcription service, 5-30voice forms service, 5-30voice menu service, 5-26voice messaging, 5-29
mixed live and automated attendantexample, 1-33
mixed live and automated attendantsdescription, 1-21, 6-22
Nnetworking calls, 2-13
Ooperational measurements
monitoring, 10-3
Ppasswords
accessannouncements, 3-13thru-dial, 4-21voice menus, 5-17
updateannouncements, 3-13thru-dial, 4-21voice menus, 5-17
prompt maintenanceadding a VSDN for the voice prompt maintenanc
service, 9-4updating announcements, 9-7updating thru-dial greetings, 9-7updating voice menu prompts, 9-6
prompt sizesmaximum
determining, 2-12for announcements, 2-12for other recordings, 2-12
Rremote activation
adding a VSDN for the remote activation service, 9-9
Standard 1.0 Voice Services Application Guide January 1998
Index--3
associating a different service with an existing VSDN, 9-10
description, 1-23overview, 9-8
reportsDisk Usage Detail report, 10-5Services Detail report, 10-4Services Summary report, 10-3
revert DNannouncements, 3-12thru-dial services, 4-20voice forms, 7-41, 7-42, 7-45voice menus, 5-15
Sspeaker
choosing for voice services, 1-24
Tthru-dial services
accessing the thru-dial definitions data menu, 4-43adding a thru-dial definition, 4-44adding a VSDN for direct access, 4-52deleting, 4-61description, 1-10dialing method, 4-24examples, 4-8fixed-length DN, 4-25ID, 4-18language for system prompts, 4-23left pad digits, 4-28making it accessible, 4-36modifying, 4-59monitoring for hackers, 4-13name dialing
example, 4-25prefix, 4-26requirements, 4-27
passwordfor accessing, 4-21for updating, 4-21
preventing abuse of the service, 4-11recording the prompt/greeting, 4-49restriction/permission codes, 4-34revert DN, 4-20
scripting the greeting, 4-30security issues, 4-11suppressing the greeting, 4-29system greetings, 4-33testing the thru-dial service, 4-55title, 4-19variable-length DN, 4-25
time-of-day controlled automated attendants, 1-21description, 6-17
time-of-day controllersaccessing the time-of-day control definitions data
menu, 8-21adding, 8-23adding a VSDN for direct access, 8-24business hours, 8-12deleting, 8-33description, 1-13example, 8-4holidays, 8-12ID, 8-15making it accessible, 8-16modifying, 8-31overview, 8-2testing the time-of-day controller, 8-27
timeout valuescommand entry timeout, 2-6overview, 2-6recording timeout, 2-11short disconnect timeout, 2-8voice menu examples, 2-9
transcribinghow transcribers will access the form, 7-49
Vvoice form
copying a voice form definitionoverview, 7-91procedure, 7-91
voice formsaccessing the voice forms definitions data menu,
7-57adding a field, 7-61adding a voice form definition, 7-58adding a VSDN for direct access, 7-70adding a VSDN for the transcription service, 7-73allowing callers to press zero, 7-41answer length limit, 7-20
Standard 1.0 Voice Services Application Guide January 1998

Index--4
choosing the speaker, 7-53confirmation for rotary phones, 7-19CONFIRMATION marker, 7-66confirmation mode
description, 7-17defining general characteristics, 7-37delay after header, 7-40deleting a field, 7-89deleting a voice form definition
overview, 7-94procedure, 7-96
END OF FORM marker, 7-66envelope header, 7-40example, 7-4field separator delay, 7-39flowcharting the application, 7-17guidelines for configuring, 7-54how callers will access the form, 7-20ID, 7-37identifying need for voice forms, 7-14indirect access through a time-of-day controller,
7-72indirect access through a voice menu, 7-71language for system messages, 7-41making it accessible, 7-48managing transcriber activity, 7-99maximum number of untranscribed responses,
7-38modifying
in-service, 7-82out-of-service, 7-85
modifying a field, 7-61moving a field, 7-87no answer fields, 7-42overflow handling DN, 7-39overview, 7-2planning, 7-12providing training and support, 7-77recording field names, 7-67recording field prompts, 7-67recording the prompts
overview, 7-52resetting response IDs
overview, 7-105procedure, 7-106
revert DN, 7-41, 7-42, 7-45sample form, 7-16saving, 7-69scenarios for voice forms, 7-9
scripting the greetings and prompts, 7-25SMDI link name
new responses, 7-33storage requirements, 7-7system disconnect message, 7-42system engineering, 7-7testing, 7-75title, 7-38transcribing
adding a VSDN for the transcription service, 7-73
general procedures, 7-102notifying transcribers, 7-30overview, 7-6processing collected information, 7-104resetting response IDs
overview, 7-105procedure, 7-106
transcription field separator, 7-39transcription password, 7-38transcription service DN, 7-49viewing, 7-81Voice Answer fields, 7-44
voice menusadding a VSDN for direct access, 5-53creating a personal voice menu, 5-57creating diagram of the application, 5-11custom menu functions, 5-4delayed response action, 5-37deleting, 5-63description, 1-15greeting, 5-18ID, 5-14initial no response action, 5-36key functions, 1-18language for system prompts, 5-23menu choices prompt, 5-19modifying, 5-61overview, 5-2passwords
access, 5-17update, 5-17
possible menu actions. See also menu actions.recording the greeting and menu choices, 5-51revert DN, 5-15silent disconnect, 5-22standard menu functions, 5-4testing, 5-56
voice prompts
Standard 1.0 Voice Services Application Guide January 1998

Index--5
recording from remote location, 1-23updating from a remote location, 1-23
voice services profilebusiness hours, 2-15configuring, 2-17holidays, 2-16networking calls, 2-13planning, 2-4timeout values, 2-6update logging, 2-14
Standard 1.0 Voice Services Application Guide January 1998

Index--6
Standard 1.0 Voice Services Application Guide January 1998

____
____
____
____
____
____
____
____
____
Reader Response Form
Meridian Mail 12Voice Services Application GuideNTP 555-7001-325
Tell us about yourself:
Name:
Company:
Address:
Occupation: Phone:
1. What is your level of experience with this product?
New User Intermediate Experienced Programmer
2. How do you use this book?
Learning Procedural Reference Problem solving
3. Did this book meet your needs?
Yes No
If you answered No to this question, please answer the following questions.
4. What chapters, sections, or procedures did you find hard to understand?
____________________________________________________________________________
____________________________________________________________________________
____________________________________________________________________________
5. What information (if any) was missing from this book?
____________________________________________________________________________
____________________________________________________________________________
____________________________________________________________________________
6. How could we improve this book?
____________________________________________________________________________
____________________________________________________________________________
____________________________________________________________________________
Please return your comments by fax to (416) 597-7104, or mail your comments to: Toronto Information Products, Nortel, 522 University Avenue, 14th Floor, Toronto, ON,M5G 1W7, Canada.

Reader Response Form
Reader Response Form


Meridian MailVoice Services Application Guide
Toronto Information ProductsNortel522 University Avenue, 14th FloorToronto, Ontario, CanadaM5G 1W6
1994, 1996, 1998 Northern TelecomAll rights reserved
Information is subject to change without notice. Northern Telecom reserves the right to make changes in design or components as progress in engineering and manufacturing may warrant.
Nortel, DMS, DMS SuperNode, DMS-STP, and MAP are trademarks of Northern Telecom.
Publication number: 555-7001-325Product release: 12Document release: Standard 1.0Date: January 1998
Printed in the United States of America