March 19, 2013 4” Leg Valve Changeout. Required Tools and Materials 3” Wrench 9/16” Wrench...
9
March 19, 2013 4” Leg Valve Changeout
-
Upload
sandra-hancock -
Category
Documents
-
view
218 -
download
0
Transcript of March 19, 2013 4” Leg Valve Changeout. Required Tools and Materials 3” Wrench 9/16” Wrench...

March 19, 20134” Leg Valve Changeout

Required Tools and Materials•3” Wrench•9/16” Wrench•11/16 Wrench•Seal Pick•Clean hydraulic fluid
Old Valve Removal•Remove hydraulic lines•Remove fittings if necessary•Relieve pressure by carefully loosening check valve cartridges•Use a suitable wrench to remove valve body by rotating counter clockwise
•Note: fluid loss is minimized if valve removal is done with the leg in a vertical position
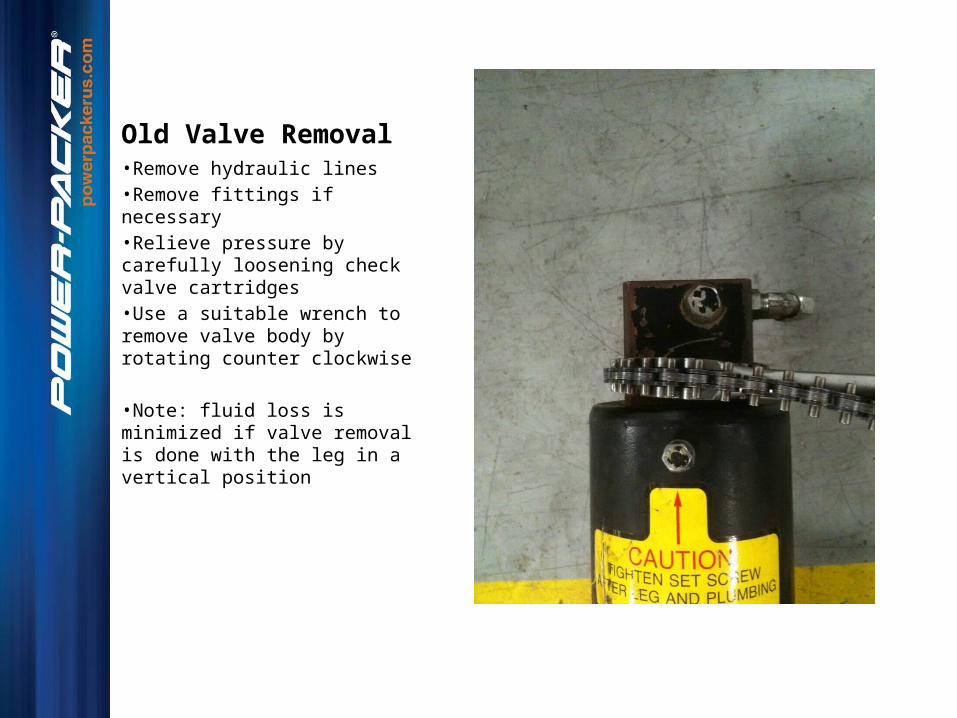
Replace Seals•Clean Rod end•Carefully remove old o-rings and backups•Be careful not to scratch sealing surfaces•Install new o-rings and backups
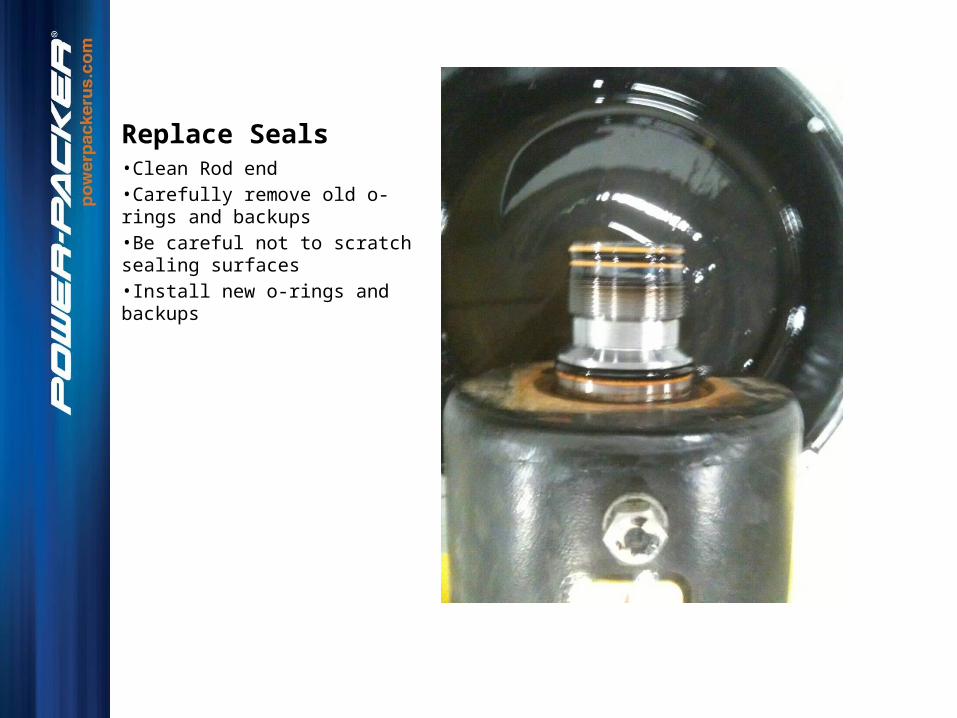
New Dual Counterbalance Valve Body•Remove new valve from packaging•Lightly lubricate rod seals and inside of valve body with clean hydraulic oil
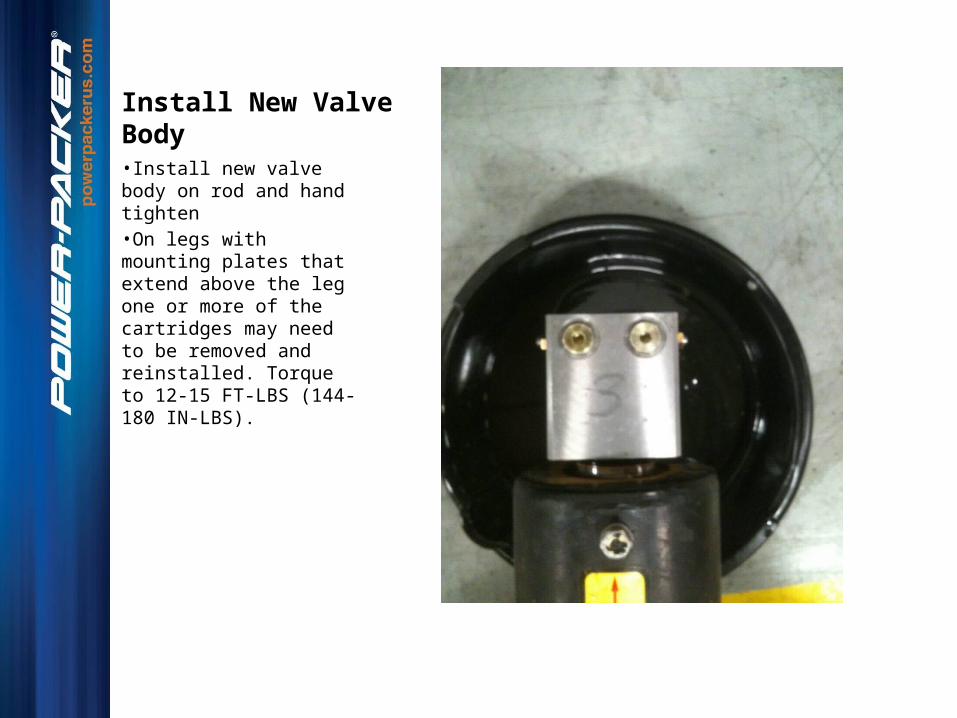
Install New Valve Body•Install new valve body on rod and hand tighten•On legs with mounting plates that extend above the leg one or more of the cartridges may need to be removed and reinstalled. Torque to 12-15 FT-LBS (144-180 IN-LBS).

Tighten Valve Body•Using a suitable wrench tighten Valve Body to Rod until fully seated•Torque approximately 100 ft*lbs

Adjust Port Orientation•If necessary adjust port orientation•Loosen screw on front of leg with 9/16” wrench•Rotate valve body to desired orientation•Retighten screw on front of leg•Ensure that the screw locates between the gear teeth•Reattach fittings and hoses

Do not adjust valve•Cartridges are preset to 3500 psi•Hex contains tamper evident sealing material

![Model 70160 Variable Displacement Piston Pumppub/... · Torque wrench (136 N.m [100 lbfft] capacity) Ratchet wrench 5/16 in. and 7/16 Allen wrenches or bit sockets Internal and external](https://static.fdocuments.us/doc/165x107/5f02d3577e708231d4063305/model-70160-variable-displacement-piston-pump-pub-torque-wrench-136-nm-100.jpg)