Making the Internet Easier to See - Karlen Communications
22
Karlen Communications Karen McCall, M.Ed. Make the Internet Easier to See Table of Contents Introduction .................................................................................................................................................. 3 Internet Explorer 9 ........................................................................................................................................ 3 Text Size – Internet Explorer ..................................................................................................................... 3 Zoom – Internet Explorer .......................................................................................................................... 4 Style – Internet Explorer ........................................................................................................................... 5 Accessibility Tools – Internet Explorer, Internet Options ......................................................................... 7 Colour – Internet Explorer .................................................................................................................... 7 Fonts – Internet Explorer ...................................................................................................................... 9 Accessibility – Internet Explorer ......................................................................................................... 10 Firefox 12.0 ................................................................................................................................................. 11 Zoom – Firefox ........................................................................................................................................ 11 Page Style – Firefox ................................................................................................................................. 12 Accessibility – Firefox .............................................................................................................................. 13 Colour – Firefox ....................................................................................................................................... 14 Advanced – Firefox.................................................................................................................................. 16 Magnifier in Windows 7 .............................................................................................................................. 17 Aero Themes ........................................................................................................................................... 17 Using Magnifier ....................................................................................................................................... 18
Transcript of Making the Internet Easier to See - Karlen Communications
Karlen Communications
Karen McCall, M.Ed.
Make the Internet Easier to See
Table of Contents
Introduction .................................................................................................................................................. 3
Internet Explorer 9 ........................................................................................................................................ 3
Text Size – Internet Explorer ..................................................................................................................... 3
Zoom – Internet Explorer .......................................................................................................................... 4
Style – Internet Explorer ........................................................................................................................... 5
Accessibility Tools – Internet Explorer, Internet Options ......................................................................... 7
Colour – Internet Explorer .................................................................................................................... 7
Fonts – Internet Explorer ...................................................................................................................... 9
Accessibility – Internet Explorer ......................................................................................................... 10
Firefox 12.0 ................................................................................................................................................. 11
Zoom – Firefox ........................................................................................................................................ 11
Page Style – Firefox ................................................................................................................................. 12
Accessibility – Firefox .............................................................................................................................. 13
Colour – Firefox ....................................................................................................................................... 14
Advanced – Firefox.................................................................................................................................. 16
Magnifier in Windows 7 .............................................................................................................................. 17
Aero Themes ........................................................................................................................................... 17
Using Magnifier ....................................................................................................................................... 18
2
Phone: 1-519-442-2856
E-mail: [email protected]
Web: karlencommunications.com
Twitter @KarlenInfo
Facebook: http://www.facebook.com/KarlenCommunications
LinkedIn http://www.linkedin.com/pub/karen-mccall/10/695/554
Microsoft MVP for Word.
This material copyright 2012.

3
Introduction Sometimes when we are looking intently at our computer screen and surfing the Internet we have visual
fatigue and just don’t think we can look at the screen any longer. This is “normal” and part of using a
computer.
There are some tools available to help make it easier to read information on the computer screen and
this how to booklet will guide you through some of them on a Windows 7 computer. There is some
information on earlier versions of Windows, but Windows 7 has the best options for magnifying
information on your computer screen.
There are some web pages that have a built-in ability to make text larger. This is handy but if you are
having problems seeing the information on the page, these tools might not be easily located. Typically
they are in the upper right corner of a web page. These tools only apply to that web page or sometimes
that web site. Using the tools in Internet Explorer, Firefox or on your computer gives you more control
over how you view and interact with web based content. Again the caveat is that the pages have to be
well-designed and accessible to begin with.
Internet Explorer 9 There are two ways to magnify or zoom into content on web pages if you are using Internet Explorer 9.
Text Size – Internet Explorer This tool depends on the person who designed the web page to have done it “correctly” using good web
design and accessibility standards. When people do this, you, the person reading the web page can
decide how you want to view the content.
To change the text size on web pages:
1. Choose View, Text Size and then choose from smallest to extra-large, or;
2. Press Alt + V, X to open the Text Size sub-menu and use the Up and Down Arrow keys on the
keyboard to choose a text size.

4
Figure 1 Text Size options in Internet Explorer 9.
Adjusting the Text Size will not affect the size of pictures on a web page, just the text.
Once you set a Text Size it will be your preferred setting until you change it. Remember it might not
work on all web pages because of poorly designed pages.
Zoom – Internet Explorer The ability to zoom closer or farther from content on a web page comes in handy. The Zoom tool lets
you zoom into the content at your mouse pointer on a web page. This means you can take a closer look
at some content and then zoom out again.
To adjust the Zoom for a web page:
1. Choose View, Zoom and then choose a Zoom level, or;
2. Press Alt + V, Z and then use the Up or Down Arrows to choose a Zoom level. There are
additional keyboard commands to quickly adjust the Zoom:
a. Press Ctrl + Plus Sign on the NumPad to increase the zoom.
b. Press Ctrl + Minus Sign on the NumPad to decrease the Zoom.
You can also hold down the Ctrl key on the keyboard and use the Mouse wheel to zoom in and out of an
area on a web page.
5
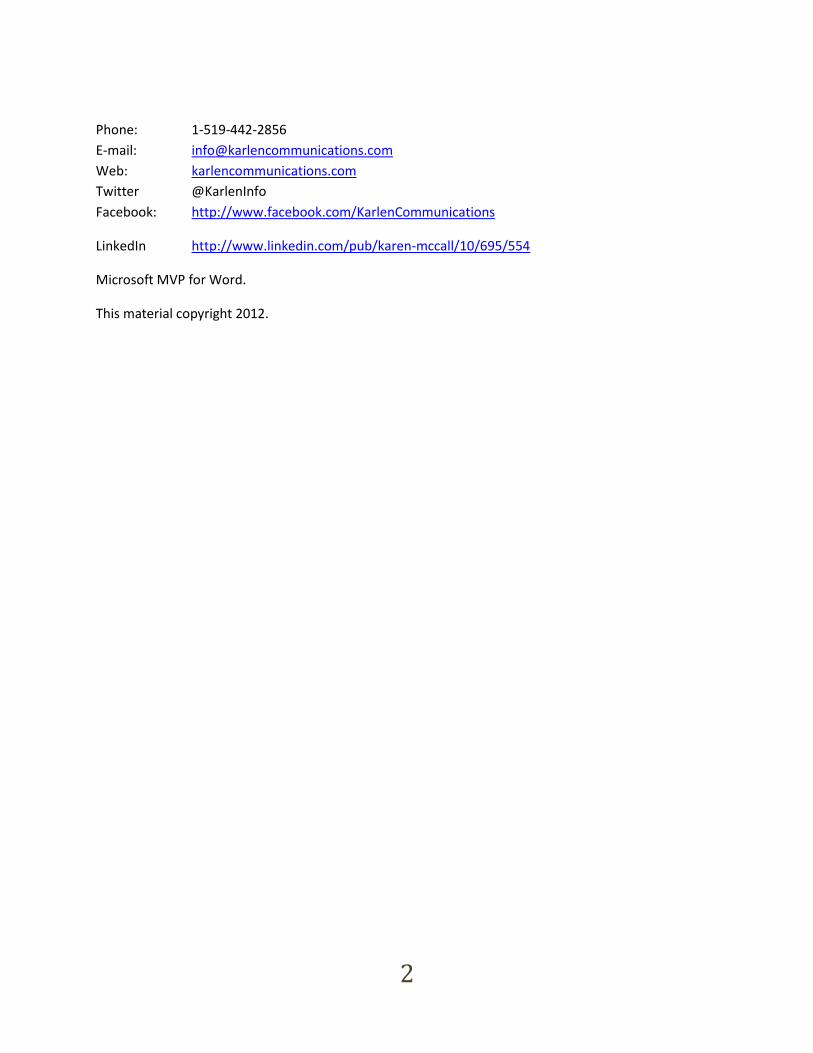
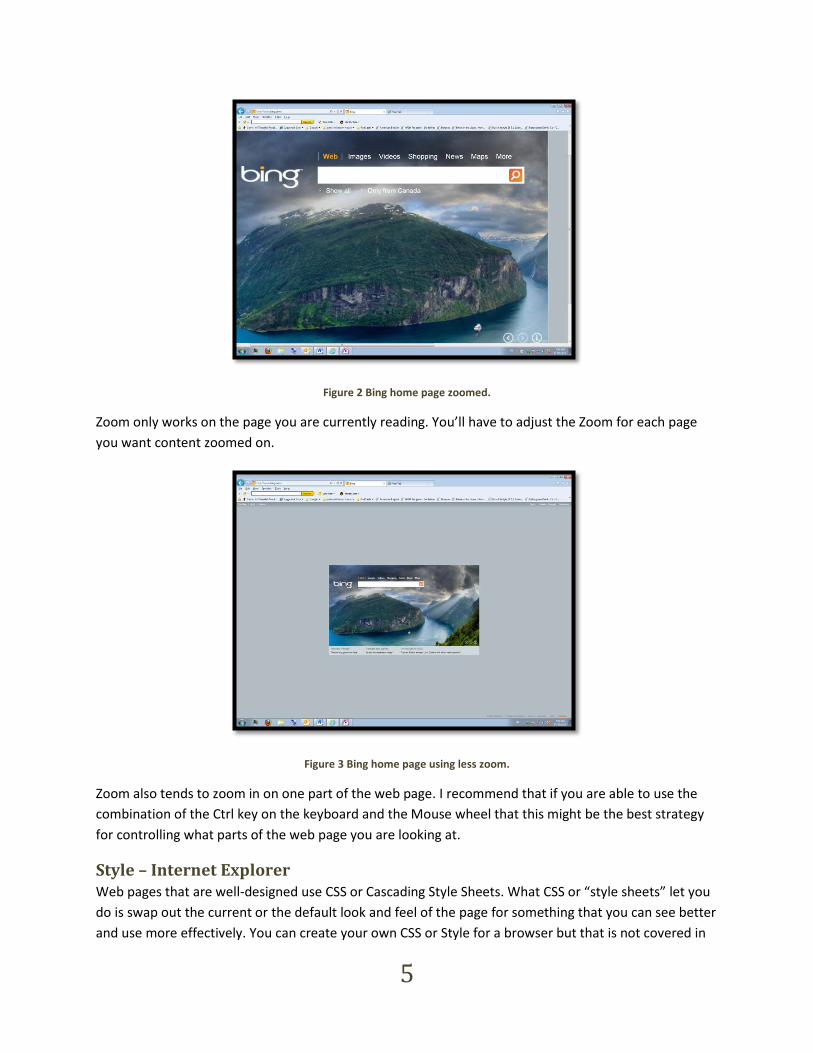
Figure 2 Bing home page zoomed.
Zoom only works on the page you are currently reading. You’ll have to adjust the Zoom for each page
you want content zoomed on.
Figure 3 Bing home page using less zoom.
Zoom also tends to zoom in on one part of the web page. I recommend that if you are able to use the
combination of the Ctrl key on the keyboard and the Mouse wheel that this might be the best strategy
for controlling what parts of the web page you are looking at.
Style – Internet Explorer Web pages that are well-designed use CSS or Cascading Style Sheets. What CSS or “style sheets” let you
do is swap out the current or the default look and feel of the page for something that you can see better
and use more effectively. You can create your own CSS or Style for a browser but that is not covered in
6
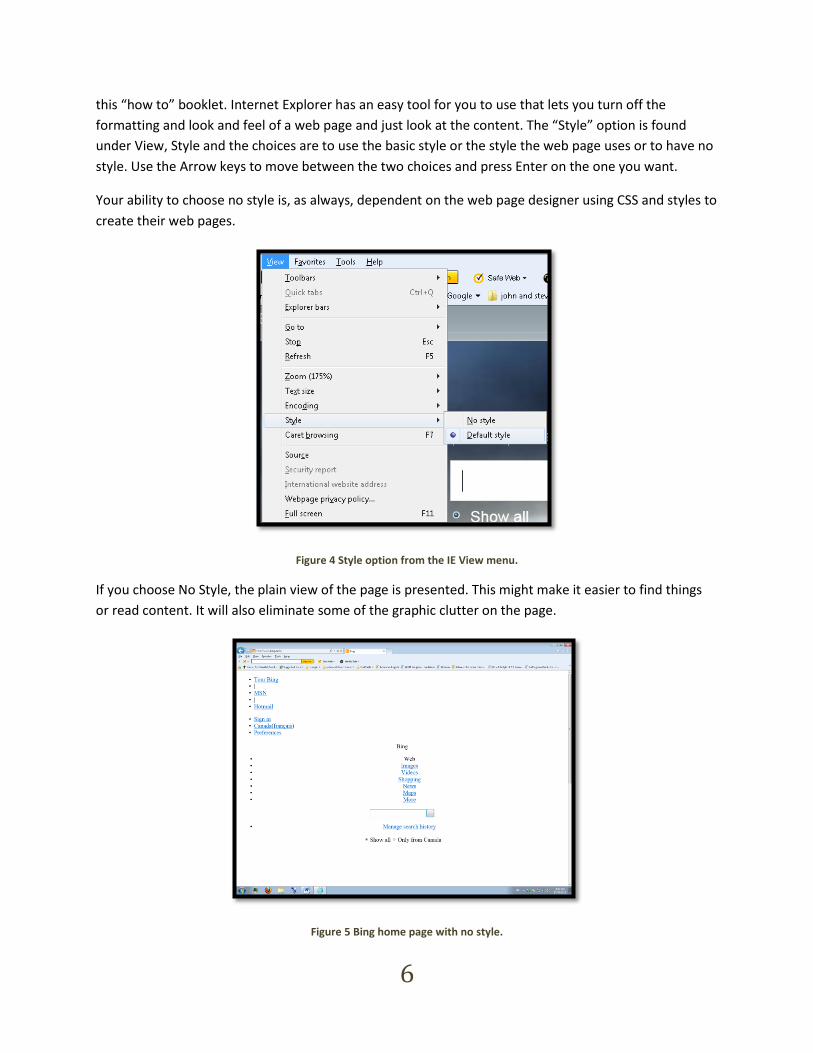
this “how to” booklet. Internet Explorer has an easy tool for you to use that lets you turn off the
formatting and look and feel of a web page and just look at the content. The “Style” option is found
under View, Style and the choices are to use the basic style or the style the web page uses or to have no
style. Use the Arrow keys to move between the two choices and press Enter on the one you want.
Your ability to choose no style is, as always, dependent on the web page designer using CSS and styles to
create their web pages.
Figure 4 Style option from the IE View menu.
If you choose No Style, the plain view of the page is presented. This might make it easier to find things
or read content. It will also eliminate some of the graphic clutter on the page.
Figure 5 Bing home page with no style.
7
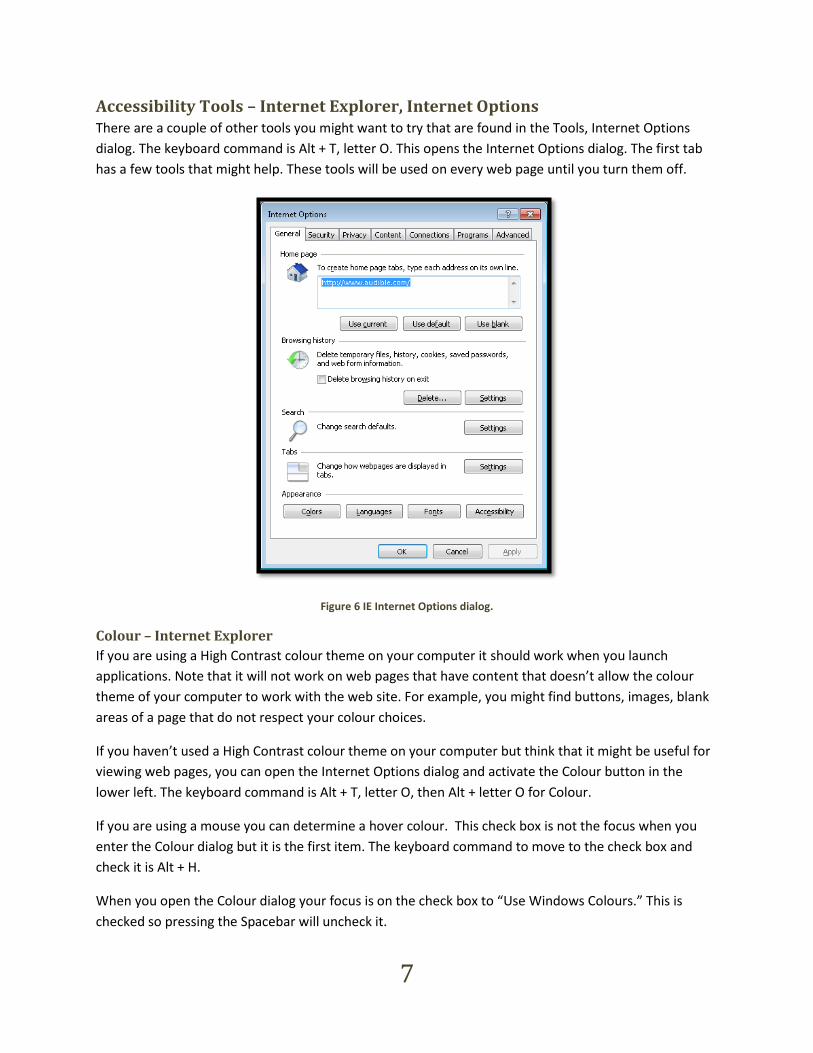
Accessibility Tools – Internet Explorer, Internet Options There are a couple of other tools you might want to try that are found in the Tools, Internet Options
dialog. The keyboard command is Alt + T, letter O. This opens the Internet Options dialog. The first tab
has a few tools that might help. These tools will be used on every web page until you turn them off.
Figure 6 IE Internet Options dialog.
Colour – Internet Explorer
If you are using a High Contrast colour theme on your computer it should work when you launch
applications. Note that it will not work on web pages that have content that doesn’t allow the colour
theme of your computer to work with the web site. For example, you might find buttons, images, blank
areas of a page that do not respect your colour choices.
If you haven’t used a High Contrast colour theme on your computer but think that it might be useful for
viewing web pages, you can open the Internet Options dialog and activate the Colour button in the
lower left. The keyboard command is Alt + T, letter O, then Alt + letter O for Colour.
If you are using a mouse you can determine a hover colour. This check box is not the focus when you
enter the Colour dialog but it is the first item. The keyboard command to move to the check box and
check it is Alt + H.
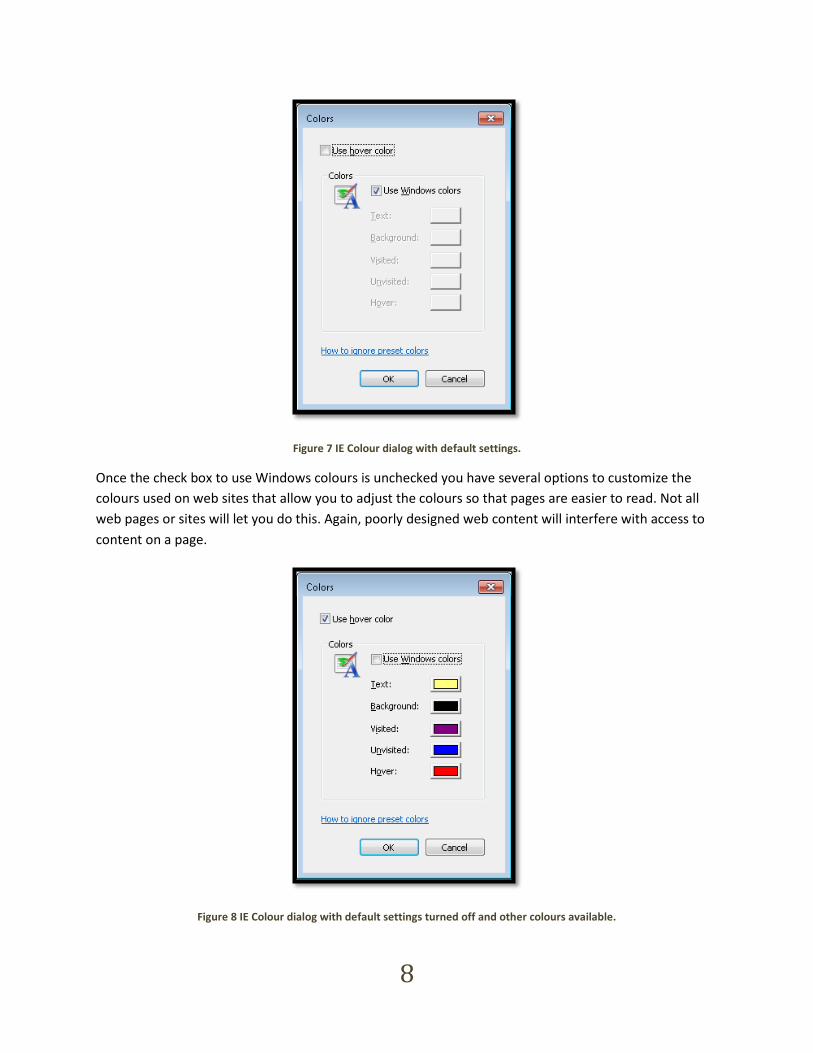
When you open the Colour dialog your focus is on the check box to “Use Windows Colours.” This is
checked so pressing the Spacebar will uncheck it.
8
Figure 7 IE Colour dialog with default settings.
Once the check box to use Windows colours is unchecked you have several options to customize the
colours used on web sites that allow you to adjust the colours so that pages are easier to read. Not all
web pages or sites will let you do this. Again, poorly designed web content will interfere with access to
content on a page.
Figure 8 IE Colour dialog with default settings turned off and other colours available.
9
Once you choose to use custom colours for web pages, there are some keyboard commands to help you
quickly move to the colours you want to change. Of course you can Tab through the colours if you want
to change all of them.
The keyboard commands to move to the colours that can be changed are:
Alt + T to change the Text colour.
Alt + B to change the Background colour.
Alt + V to change the Visited link colour.
Alt + N to change the unvisited link colour.
Alt + H to change the Hover colour. Remember the check box to use a hover colour is located
just before the “Use Windows colours” check box in this dialog.
Once you’ve changed your colours, Tab to and activate the OK button by pressing Enter.
Then either change more settings in IE or press Alt + A to Apply your settings then Press Enter on the OK
button to confirm everything and return to the browser.
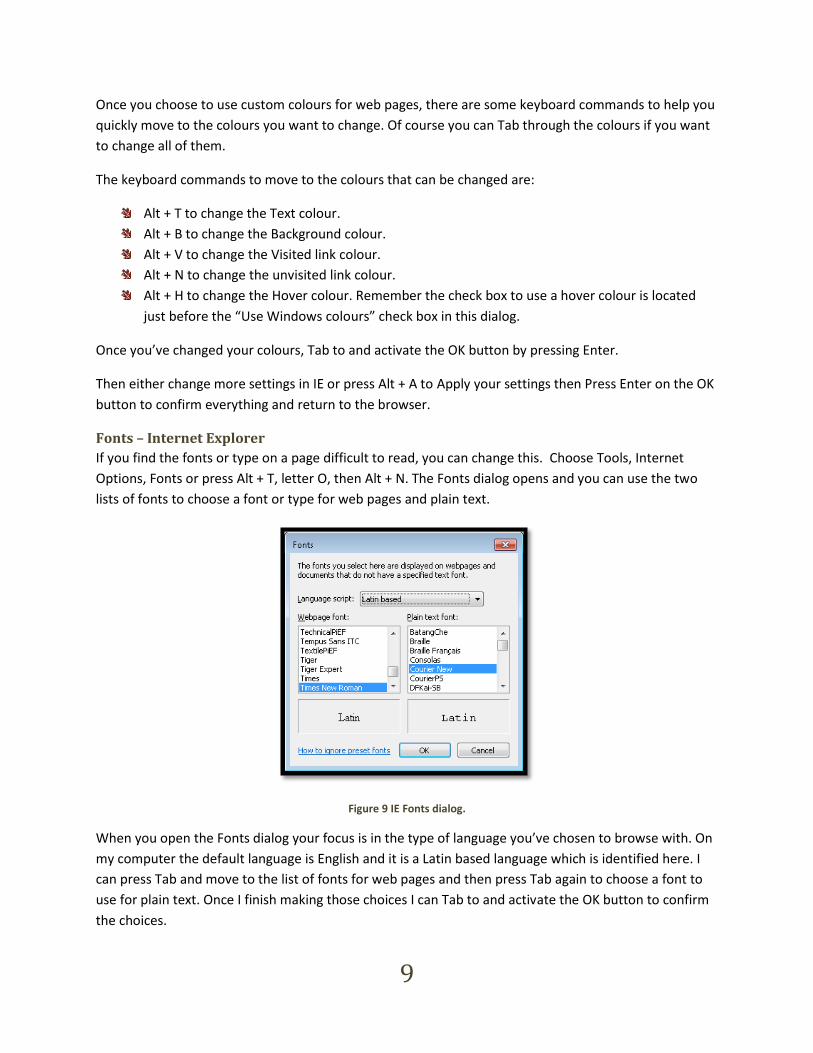
Fonts – Internet Explorer
If you find the fonts or type on a page difficult to read, you can change this. Choose Tools, Internet
Options, Fonts or press Alt + T, letter O, then Alt + N. The Fonts dialog opens and you can use the two
lists of fonts to choose a font or type for web pages and plain text.
Figure 9 IE Fonts dialog.
When you open the Fonts dialog your focus is in the type of language you’ve chosen to browse with. On
my computer the default language is English and it is a Latin based language which is identified here. I
can press Tab and move to the list of fonts for web pages and then press Tab again to choose a font to
use for plain text. Once I finish making those choices I can Tab to and activate the OK button to confirm
the choices.
10
I then need to press Alt + A in the Internet Options dialog if I’m finished making changes to the options
for Internet Explorer or I can move on to other options. Once I make all the changes I want I need to
make sure I’m on the OK button and Press Enter. I’m returned to my browser and am good to go.
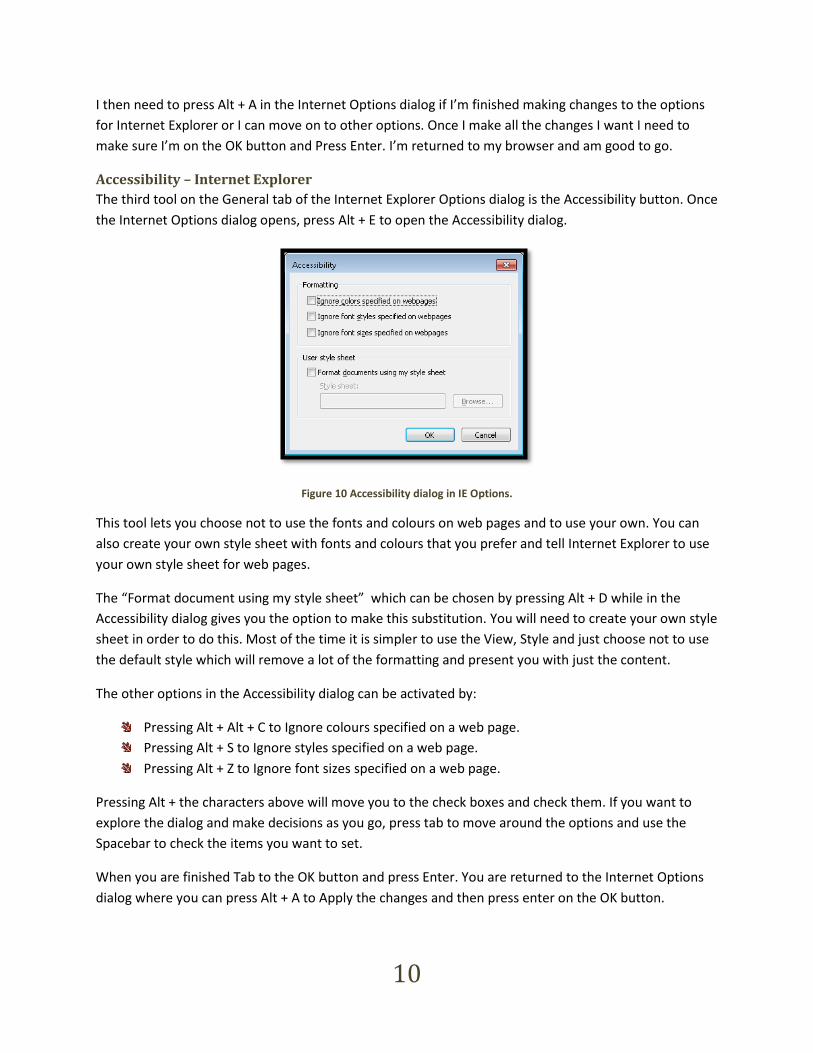
Accessibility – Internet Explorer
The third tool on the General tab of the Internet Explorer Options dialog is the Accessibility button. Once
the Internet Options dialog opens, press Alt + E to open the Accessibility dialog.
Figure 10 Accessibility dialog in IE Options.
This tool lets you choose not to use the fonts and colours on web pages and to use your own. You can
also create your own style sheet with fonts and colours that you prefer and tell Internet Explorer to use
your own style sheet for web pages.
The “Format document using my style sheet” which can be chosen by pressing Alt + D while in the
Accessibility dialog gives you the option to make this substitution. You will need to create your own style
sheet in order to do this. Most of the time it is simpler to use the View, Style and just choose not to use
the default style which will remove a lot of the formatting and present you with just the content.
The other options in the Accessibility dialog can be activated by:
Pressing Alt + Alt + C to Ignore colours specified on a web page.
Pressing Alt + S to Ignore styles specified on a web page.
Pressing Alt + Z to Ignore font sizes specified on a web page.
Pressing Alt + the characters above will move you to the check boxes and check them. If you want to
explore the dialog and make decisions as you go, press tab to move around the options and use the
Spacebar to check the items you want to set.
When you are finished Tab to the OK button and press Enter. You are returned to the Internet Options
dialog where you can press Alt + A to Apply the changes and then press enter on the OK button.
11
Firefox 12.0 If I choose Help, About, the version of Firefox that is up to date is version 12.0. Most of these tools
should be available in recent versions of Firefox.
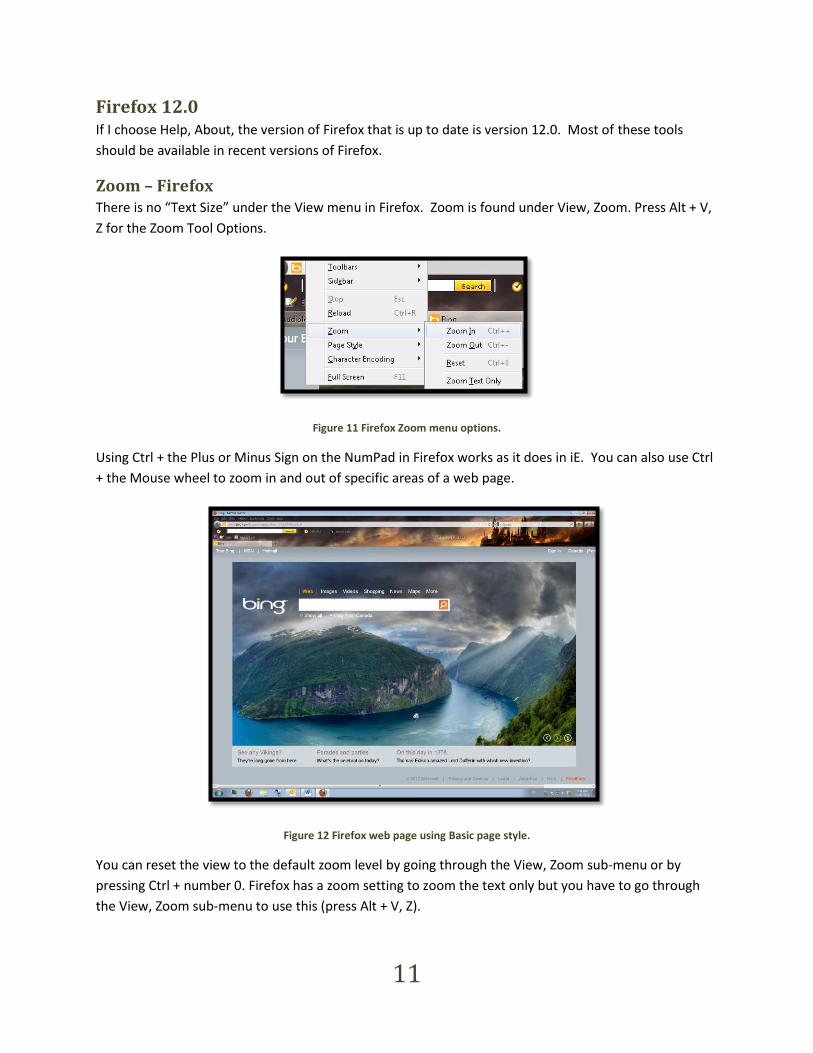
Zoom – Firefox There is no “Text Size” under the View menu in Firefox. Zoom is found under View, Zoom. Press Alt + V,
Z for the Zoom Tool Options.
Figure 11 Firefox Zoom menu options.
Using Ctrl + the Plus or Minus Sign on the NumPad in Firefox works as it does in iE. You can also use Ctrl
+ the Mouse wheel to zoom in and out of specific areas of a web page.
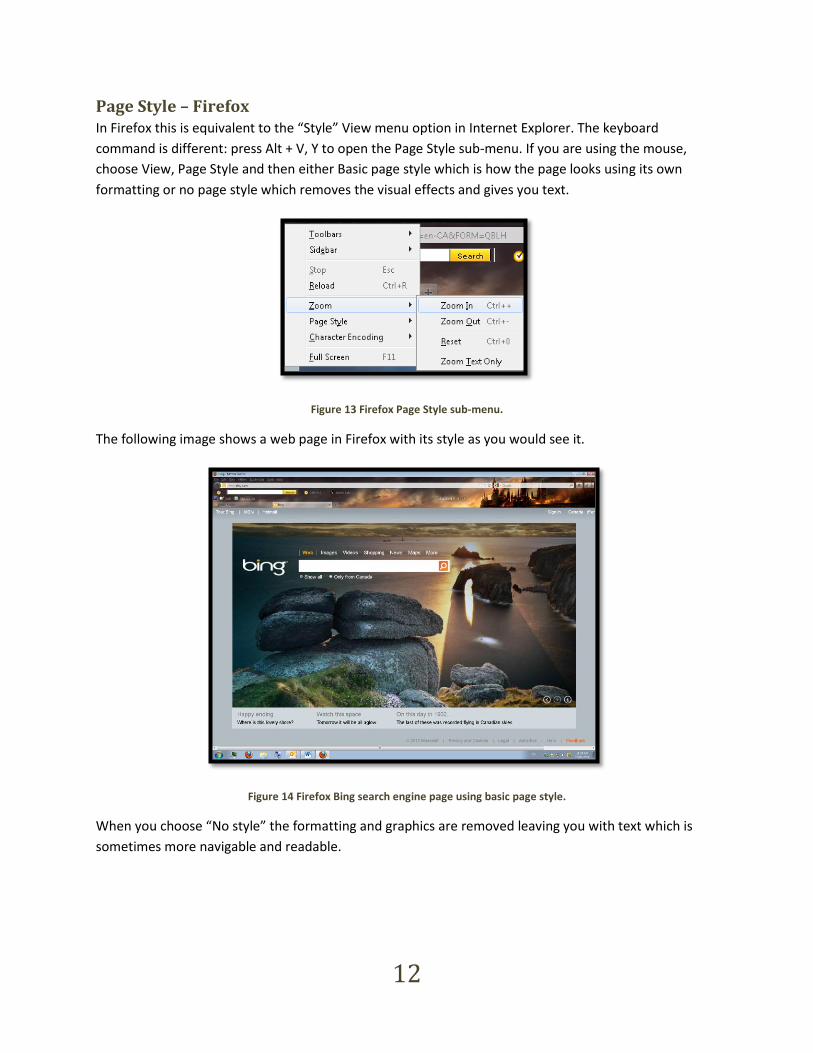
Figure 12 Firefox web page using Basic page style.
You can reset the view to the default zoom level by going through the View, Zoom sub-menu or by
pressing Ctrl + number 0. Firefox has a zoom setting to zoom the text only but you have to go through
the View, Zoom sub-menu to use this (press Alt + V, Z).
12
Page Style – Firefox In Firefox this is equivalent to the “Style” View menu option in Internet Explorer. The keyboard
command is different: press Alt + V, Y to open the Page Style sub-menu. If you are using the mouse,
choose View, Page Style and then either Basic page style which is how the page looks using its own
formatting or no page style which removes the visual effects and gives you text.
Figure 13 Firefox Page Style sub-menu.
The following image shows a web page in Firefox with its style as you would see it.
Figure 14 Firefox Bing search engine page using basic page style.
When you choose “No style” the formatting and graphics are removed leaving you with text which is
sometimes more navigable and readable.
13
Figure 15 Firefox Bing search engine page with no style.
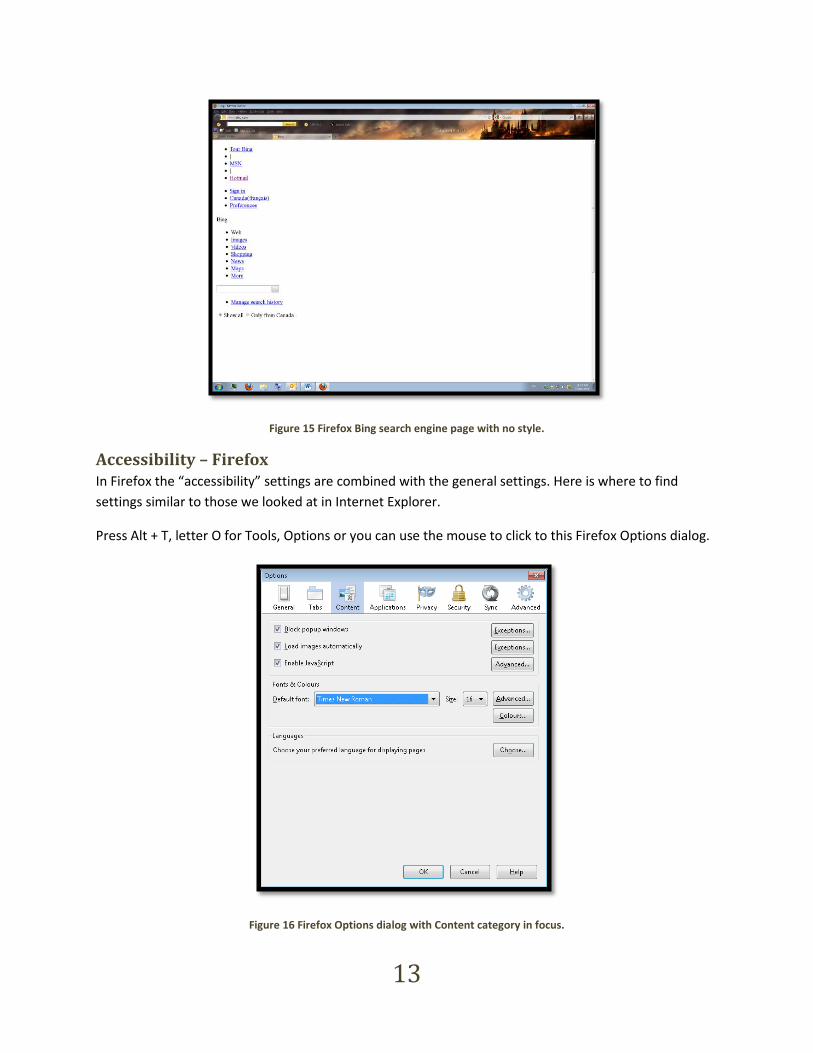
Accessibility – Firefox In Firefox the “accessibility” settings are combined with the general settings. Here is where to find
settings similar to those we looked at in Internet Explorer.
Press Alt + T, letter O for Tools, Options or you can use the mouse to click to this Firefox Options dialog.
Figure 16 Firefox Options dialog with Content category in focus.
14
By default your focus is on the General category. To modify the fonts, font sizes and colours used on
web pages that allow you to do so, move to the Content category by using the Right Arrow key or by
clicking on the word “Content.”
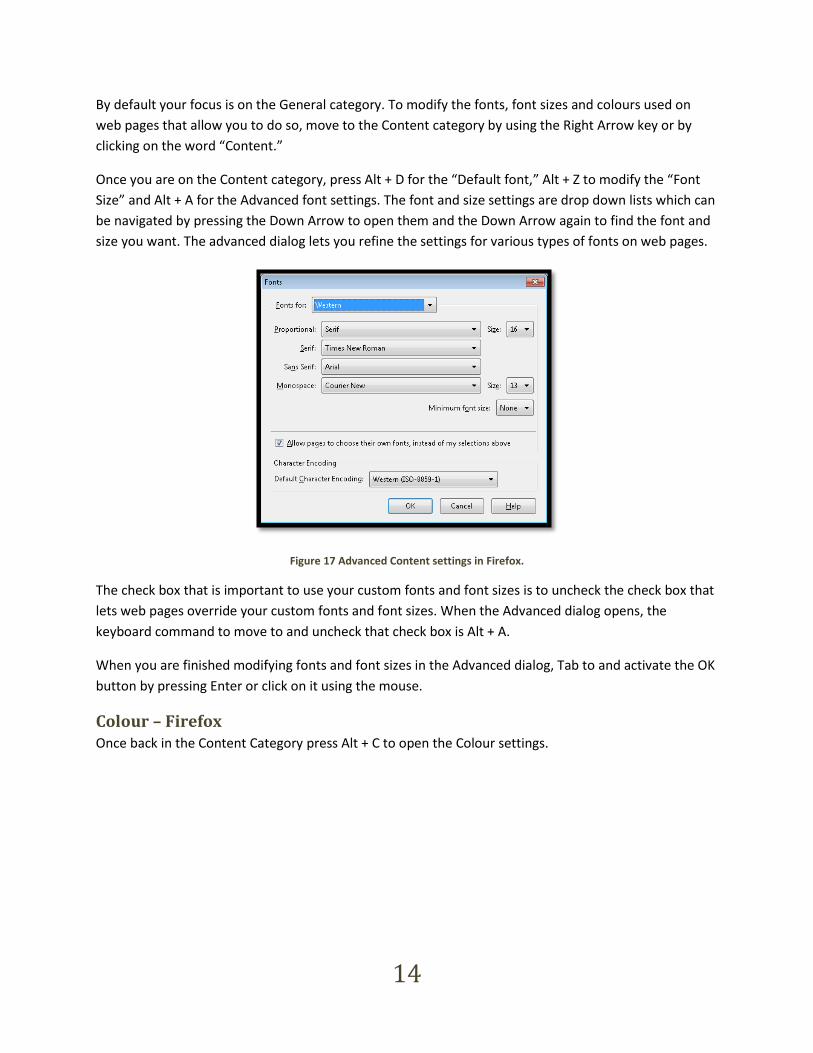
Once you are on the Content category, press Alt + D for the “Default font,” Alt + Z to modify the “Font
Size” and Alt + A for the Advanced font settings. The font and size settings are drop down lists which can
be navigated by pressing the Down Arrow to open them and the Down Arrow again to find the font and
size you want. The advanced dialog lets you refine the settings for various types of fonts on web pages.
Figure 17 Advanced Content settings in Firefox.
The check box that is important to use your custom fonts and font sizes is to uncheck the check box that
lets web pages override your custom fonts and font sizes. When the Advanced dialog opens, the
keyboard command to move to and uncheck that check box is Alt + A.
When you are finished modifying fonts and font sizes in the Advanced dialog, Tab to and activate the OK
button by pressing Enter or click on it using the mouse.
Colour – Firefox Once back in the Content Category press Alt + C to open the Colour settings.
15
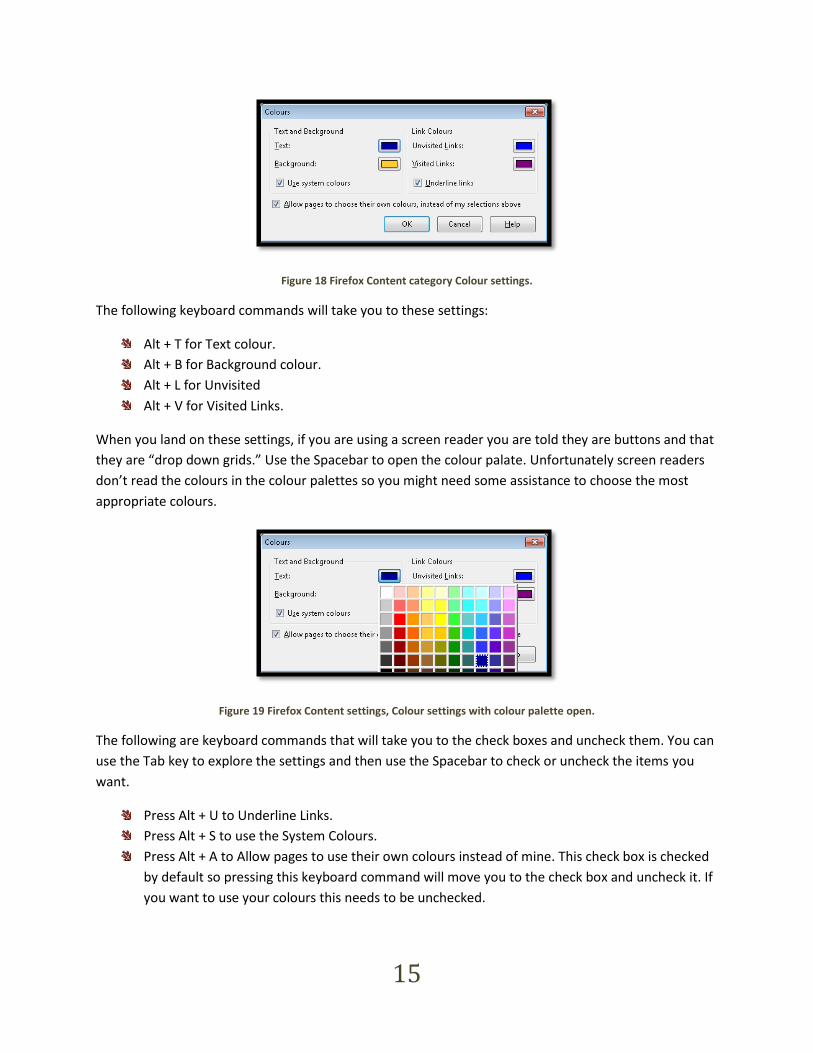
Figure 18 Firefox Content category Colour settings.
The following keyboard commands will take you to these settings:
Alt + T for Text colour.
Alt + B for Background colour.
Alt + L for Unvisited
Alt + V for Visited Links.
When you land on these settings, if you are using a screen reader you are told they are buttons and that
they are “drop down grids.” Use the Spacebar to open the colour palate. Unfortunately screen readers
don’t read the colours in the colour palettes so you might need some assistance to choose the most
appropriate colours.
Figure 19 Firefox Content settings, Colour settings with colour palette open.
The following are keyboard commands that will take you to the check boxes and uncheck them. You can
use the Tab key to explore the settings and then use the Spacebar to check or uncheck the items you
want.
Press Alt + U to Underline Links.
Press Alt + S to use the System Colours.
Press Alt + A to Allow pages to use their own colours instead of mine. This check box is checked
by default so pressing this keyboard command will move you to the check box and uncheck it. If
you want to use your colours this needs to be unchecked.
16
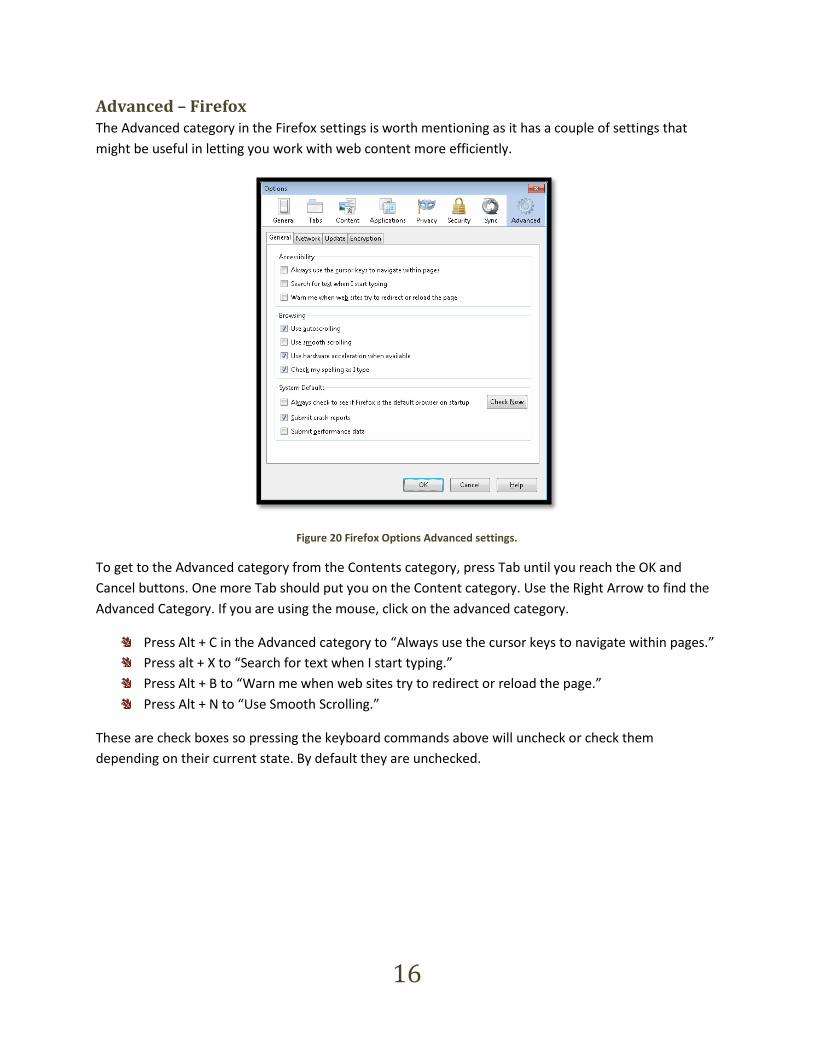
Advanced – Firefox The Advanced category in the Firefox settings is worth mentioning as it has a couple of settings that
might be useful in letting you work with web content more efficiently.
Figure 20 Firefox Options Advanced settings.
To get to the Advanced category from the Contents category, press Tab until you reach the OK and
Cancel buttons. One more Tab should put you on the Content category. Use the Right Arrow to find the
Advanced Category. If you are using the mouse, click on the advanced category.
Press Alt + C in the Advanced category to “Always use the cursor keys to navigate within pages.”
Press alt + X to “Search for text when I start typing.”
Press Alt + B to “Warn me when web sites try to redirect or reload the page.”
Press Alt + N to “Use Smooth Scrolling.”
These are check boxes so pressing the keyboard commands above will uncheck or check them
depending on their current state. By default they are unchecked.
17
Magnifier in Windows 7 If you can use an Aero Theme in Windows 7 you will have access to full screen magnification and it is
quite good. Unfortunately the Aero Themes use advanced video card integration and don’t work with
current adaptive technology such as screen readers or TTS/Text-to-Speech tools.
Magnifier can be used by anyone who has Most Windows versions. If you are not using Windows 7 you
will only have access to the docked view of your computer which is a magnified bar across the top or
bottom of your computer screen. Full Screen or Lens views work better but are only available in
Windows 7 and only available if you are using an Aero Theme on your desktop.
There are several ways to use Magnifier1:
1. You can press the Windows key or click on the Start menu and type “Magnifier” then select it
using either the keyboard or mouse. The Magnifier dialog will start and you can choose some
settings.
2. Once you type “Magnifier” in the Start menu search edit area and it appears in the list of found
items, you can drag it to your Desktop using the mouse or press the AppKey/equivalent to the
right mouse button and choose :Send To” and then Desktop as Shortcut.”
3. When “Magnifier” appears in the list of found items searched for from the Start menu, right
click on it using the mouse or the AppKey and choose Pin to Taskbar. You can also choose to pin
to Start Menu. This gives you some choices on how you want to interact with magnifier.
If you are using An Aero Theme, you can choose Full Screen or lens view of a document, web page or the
desktop. Lens works like a magnifying glass over your desktop or any document including web pages you
have open.
If you are not using an Aero Theme you can choose from a split screen view that is located either at the
top of your screen or the bottom.
Aero Themes To see if you are using an Aero Theme, click on the Start menu or press the Windows key. Type
“Personalization” in the search edit area. When the Personalization item appears at the top of the list of
found items, either click it or press Enter on it to open the Personalization dialog.
1 Microsoft, Making items on the screen bigger (Magnifier): http://windows.microsoft.com/en-US/windows7/Make-items-on-the-screen-appear-bigger-Magnifier
18
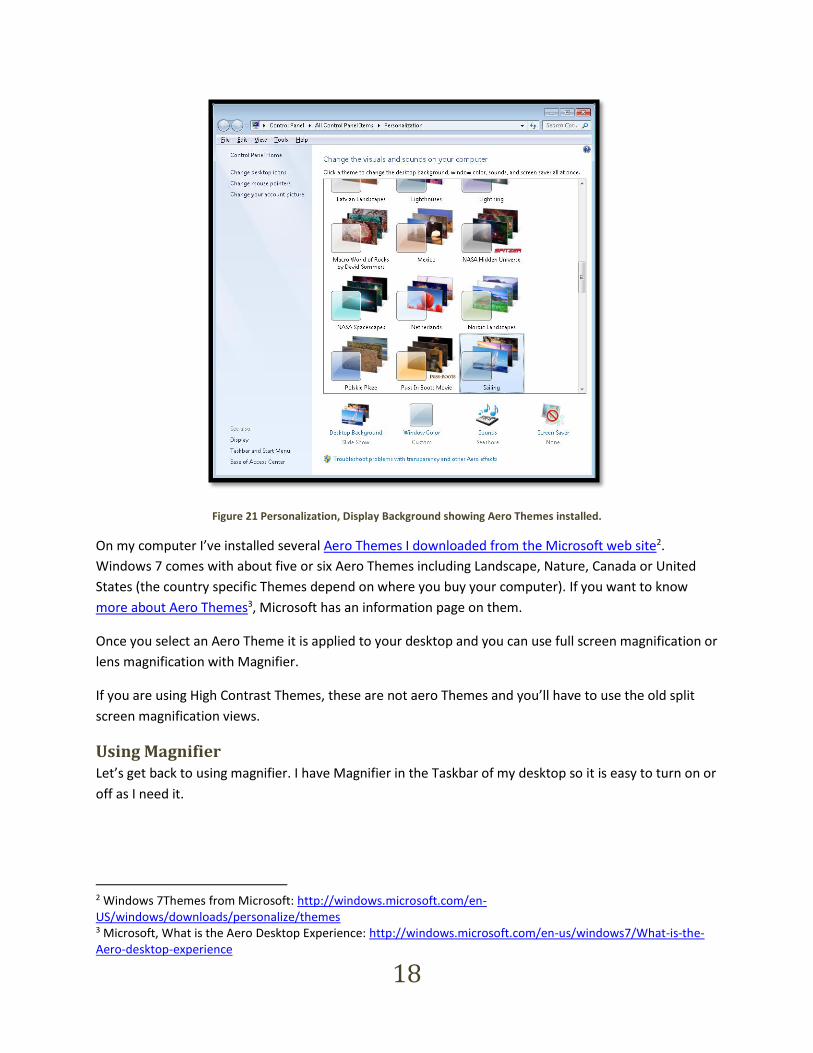
Figure 21 Personalization, Display Background showing Aero Themes installed.
On my computer I’ve installed several Aero Themes I downloaded from the Microsoft web site2.
Windows 7 comes with about five or six Aero Themes including Landscape, Nature, Canada or United
States (the country specific Themes depend on where you buy your computer). If you want to know
more about Aero Themes3, Microsoft has an information page on them.
Once you select an Aero Theme it is applied to your desktop and you can use full screen magnification or
lens magnification with Magnifier.
If you are using High Contrast Themes, these are not aero Themes and you’ll have to use the old split
screen magnification views.
Using Magnifier Let’s get back to using magnifier. I have Magnifier in the Taskbar of my desktop so it is easy to turn on or
off as I need it.
2 Windows 7Themes from Microsoft: http://windows.microsoft.com/en-US/windows/downloads/personalize/themes 3 Microsoft, What is the Aero Desktop Experience: http://windows.microsoft.com/en-us/windows7/What-is-the-Aero-desktop-experience
19
To put Magnifier in the Taskbar of your computer, press the Windows key or click on the Start button.
Type in magnifier and when Magnifier appears at the top of the list, right-click and choose “Pin to
Taskbar.” This will place the Magnifier icon in your Taskbar where it can easily be accessed.
The following images are from my computer showing the effect using Magnifier has on your computer
screen when reading documents. I’ve used the Karlen Communications web page to show the
differences in magnification. One of the nice things about using Magnifier is that you can turn it on or off
as you need it…just like the tools in your browser. The main difference is that if you need some extra
magnification for Word documents or Outlook or any other application, Magnifier is there for you.
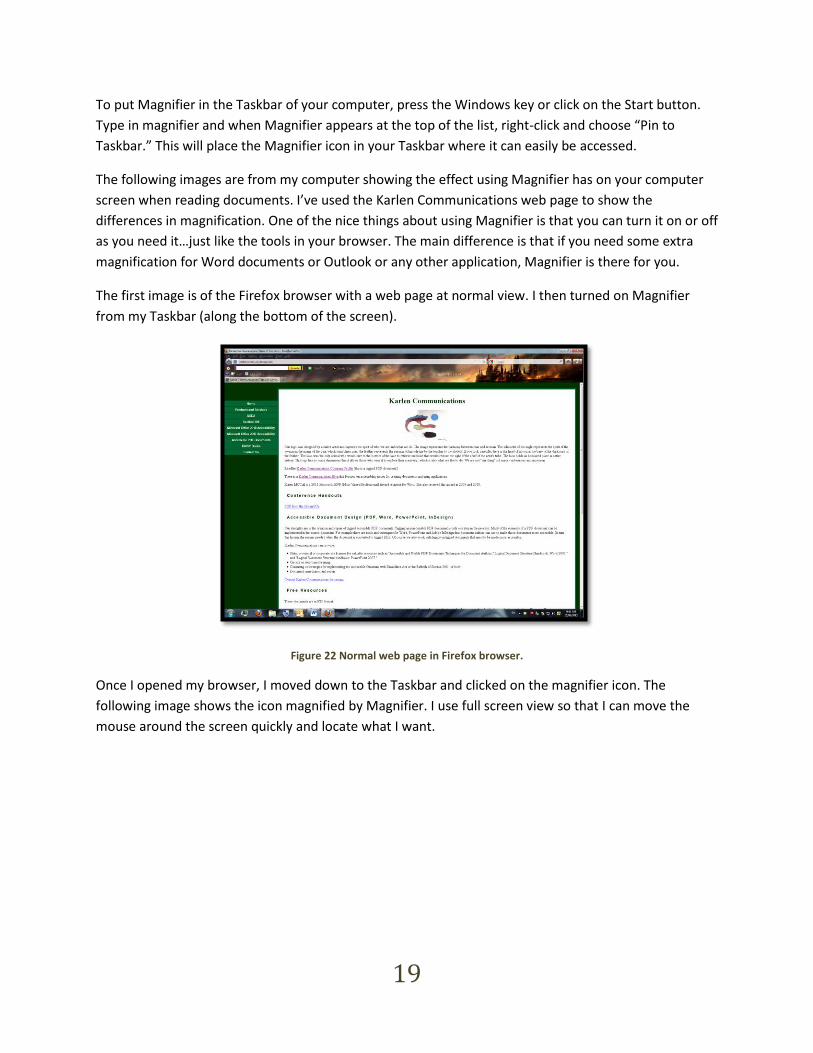
The first image is of the Firefox browser with a web page at normal view. I then turned on Magnifier
from my Taskbar (along the bottom of the screen).
Figure 22 Normal web page in Firefox browser.
Once I opened my browser, I moved down to the Taskbar and clicked on the magnifier icon. The
following image shows the icon magnified by Magnifier. I use full screen view so that I can move the
mouse around the screen quickly and locate what I want.

20
Figure 23 Taskbar on Windows 7 desktop with magnifier icon in focus.
You can see a bit of the Sailing Aero Theme I currently have as my desktop.
I can use Ctrl + Plus Sign on the NumPad to increase magnification or Ctrl + Minus Sign on the NumPad
to decrease magnification. You can see from the image that my magnification level is 2X.
Figure 24 Magnifier on full screen magnification on web page.
Notice that in the upper left corner of the screen that there is a magnifying glass. If you need to access
the controls for Magnifier, you can move the mouse over the magnifying glass and click it to open the
tools for Magnifier. Of course you can also use the keyboard commands for increasing or decreasing the
magnification level.
21
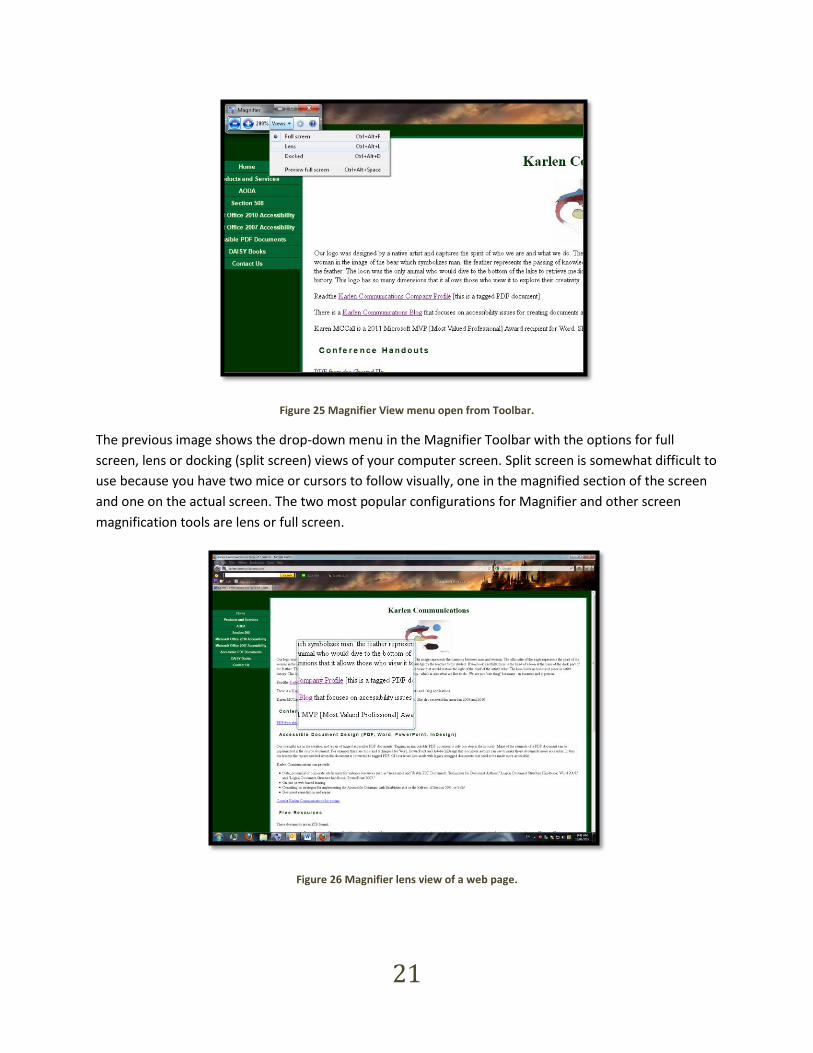
Figure 25 Magnifier View menu open from Toolbar.
The previous image shows the drop-down menu in the Magnifier Toolbar with the options for full
screen, lens or docking (split screen) views of your computer screen. Split screen is somewhat difficult to
use because you have two mice or cursors to follow visually, one in the magnified section of the screen
and one on the actual screen. The two most popular configurations for Magnifier and other screen
magnification tools are lens or full screen.
Figure 26 Magnifier lens view of a web page.

22
The preceding image is of the same web page with magnifier set to lens view. As you move your mouse
around the screen, parts of the screen or in this case document are magnified. This works like a
handheld magnifying glass over a printed page.
You can switch views in Magnifier either by using the keyboard commands or the mouse. To use the
mouse, right click on the Magnifier icon in the Taskbar and choose Open Magnifier. If you see the
silhouette of the magnifying glass in the upper left corner of your screen, you can also click on that.
When the Magnifier bar opens, click on View and choose the view you want: full screen, lens or Docked.
The keyboard commands to do this without opening the Magnifier bar are:
Ctrl + Alt + F for Full Screen.
Ctrl + Alt + L for Lens.
Ctrl + Alt + D for Docked.
Ctrl + Alt + Spacebar to Restore Full Screen.
To close Magnifier, either right-click on the Magnifier icon and choose “Close Window,” click on the X in
the Magnifier bar or press Alt + F4 when the Magnifier bar has focus.