MAH1E158 Lecture 1 David Harris Harvey Mudd College [email protected] Based on EE271 developed by...
48
E158 Lecture 1 MAH 1 David Harris Harvey Mudd College [email protected] Based on EE271 developed by Mark Horowitz, Stanford University Introduction to C M O S V LSID esign (E158) H arris Lecture 1
-
Upload
kristian-brooks -
Category
Documents
-
view
221 -
download
0
Transcript of MAH1E158 Lecture 1 David Harris Harvey Mudd College [email protected] Based on EE271 developed by...

E158 Lecture 1MAH 1
David HarrisHarvey Mudd College
Based on EE271 developed by Mark Horowitz, Stanford University
Introduction to CMOS VLSI Design (E158)Harris
Lecture 1

E158 Lecture 1MAH 2
Overview
• Reading
• W&E Chapter 1 from 1.1 to 1.9
• Background
– VLSI is pretty new; it has its beginning back in the early 60's with SSI, small scale integration, when a few bipolar transistors and resistors were fabricated on the same chip. Today chips are both simpler and more complex. They typically only contain two active elements (NMOS and PMOS transistors) and wires. But there might be millions of these transistors on the chip, and these chips can do amazing functions. You also find chips in everything. This lecture will look at why this has happened and what it hard about VLSI design. It will also take a quick look at the basic elements that make up VLSI chips: MOS transistors and wires.

E158 Lecture 1MAH 3
Big Picture
• Want to go from this:

E158 Lecture 1MAH 4
• To this:

E158 Lecture 1MAH 5
Magnified
E158 Lecture 1MAH 6
Why Integrated Circuits?
• Break this question into two questions– Why electronics– Why use ICs to build electronics
• Why use electronics– Electons are easy to move / contol
• Easier to move/control electrons than real stuff
– If you don’t believe me look at a mechanical computer• http://www.nmsi.ac.uk/on-line/treasure/objects/1862-89.html
– Move information, not things (phone, fax, WWW, etc.)• Takes much less energy and $

E158 Lecture 1MAH 7
Electronics
• Building electronics:– Started with tubes, then miniature tubes– Transistors, then miniature transistors– Components were getting cheaper, more reliable but:
• There is a minimum cost of a component (storage, handling …)
• Total system cost was proportional to complexity
• Integrated circuits changed that– Printed a circuit, like you print a picture,
• Create components in parallel
• Cost no longer depended on # of devices
– What happens as resolution goes up?

E158 Lecture 1MAH 8
Moore’s Law
First stated by Intel’s Gordon Moore in the early 80’s. Saw that the resolution of the printing process was improving exponentially (0.7x feature size every 3 years) and predicted that it would continue into the future
Since the cost of the printing process (called wafer fabrication) was growing at a modest rate, it implied that the cost per function, was dropping exponentially. At each new generations, each gate cost about 1/2 what it did 3 years ago. Shrinking an existing chip makes it cheaper!
ln(#dev)
year
good
yearyear
diecost
ln(cost/function)

E158 Lecture 1MAH 9
Bad News
• Although the cost of manufacturing IC's remained approximately constant, the design cost did not. In fact, while designer productivity has improved with time, it has not increased a the same rate as the complexity of the chips.
• So the cost of the chip design is growing exponentially with the complexity of the circuit. The integrating of a system on a piece of silicon has an attractive manufacturing cost but frightening design cost and risk. Need to build very complex stuff.
• In addition, the number of custom IC designers was (and is) fairly limited. Even if you were willing to take the risk, where would you find the people to do the design?
year
ln(design cost/function)
year
ln(design cost)

E158 Lecture 1MAH 10
Sense of Scale
• What fits on a VLSI Chip today?
• State of the art logic chip– 18mm on a side (324mm2)– 0.25m drawn gate length– 1.0m wire pitch– 5-level metal
• For comparison– 32b RISC processor
• 8K x 16K
– SRAM• about 32x 32 per bit 1000
• 8K x 16K is 128Kb, 16KB
– DRAM• 8 x 16 per bit 100
• 8K x16K is 1Mb, 128KB
20 G
18mm(18,000 wire pitches)
144,000
0.25m (2 )
32b RISCProcessor
64b FPProcessor
1m(8

E158 Lecture 1MAH 11
Technology Scaling
• Number of ‘grids’ per chip doubles every 3 years
– more functionality per chip
– harder to design
• Two problems
– What do you do with all that space -- what function?
– How do you make sure it works
2010
2004
1998

E158 Lecture 1MAH 12
VLSI Design
Managing Complexity• Simplify the design problem
• Can’t understand 10M transistors, or 100M rectangles
• Need to make less complex (and less numerous) models
– Abstraction
• Simplified model for a thing, works well in some subset of the design space
– Constraints
• Needed to ensure that the abstractions are valid
• Might work if you violate constraints, but guarantees are off
• Understand the underlying technology– Provide a feeling for what abstractions and constraints are needed
– Determine efficient solutions (in design time, or implementation area, power, or performance)

E158 Lecture 1MAH 13
VLSI Design
Besides all that,
I think it is a blast!
I hope you agree.
E158 Lecture 1MAH 14
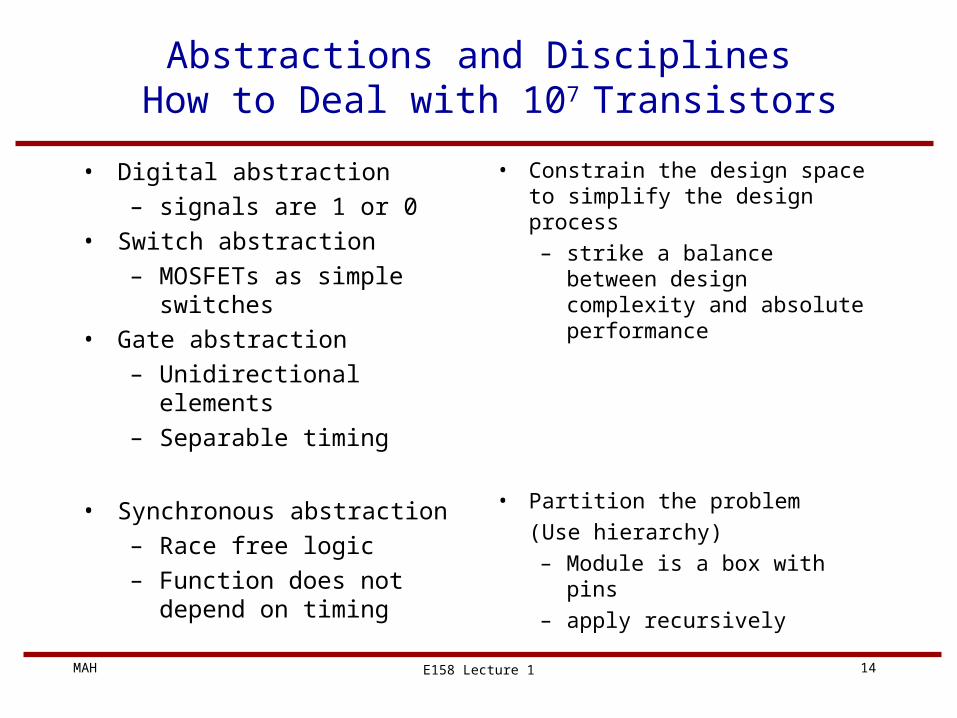
Abstractions and Disciplines How to Deal with 107 Transistors
• Digital abstraction
– signals are 1 or 0
• Switch abstraction
– MOSFETs as simple switches
• Gate abstraction
– Unidirectional elements
– Separable timing
• Synchronous abstraction
– Race free logic
– Function does not depend on timing
• Constrain the design space to simplify the design process
– strike a balance between design complexity and absolute performance
• Partition the problem
(Use hierarchy)
– Module is a box with pins
– apply recursively

E158 Lecture 1MAH 15
+ Design Levels
• Specification
– what the system (or component) is supposed to do
• Architecture
– high-level design of component
• state defined• logic partitioned into major
blocks
• Logic
– gates, flip-flops, and the connections between them
• Circuit
– transistor circuits to realize logic elements
• Device
– behavior of individual circuit elements
• Layout
– geometry used to define and connect circuit elements
• Process
– steps used to define circuit elements
Can describe design at many different levels of abstraction
High-lighted levels we will discuss in this class
E158 Lecture 1MAH 16
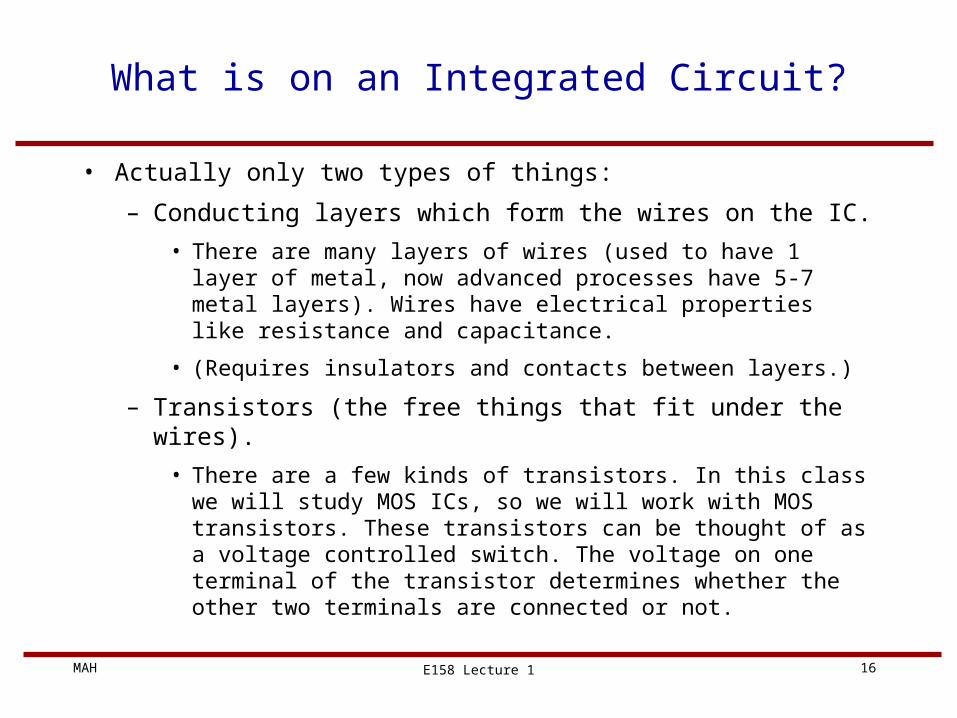
What is on an Integrated Circuit?
• Actually only two types of things:
– Conducting layers which form the wires on the IC.
• There are many layers of wires (used to have 1 layer of metal, now advanced processes have 5-7 metal layers). Wires have electrical properties like resistance and capacitance.
• (Requires insulators and contacts between layers.)
– Transistors (the free things that fit under the wires).
• There are a few kinds of transistors. In this class we will study MOS ICs, so we will work with MOS transistors. These transistors can be thought of as a voltage controlled switch. The voltage on one terminal of the transistor determines whether the other two terminals are connected or not.
E158 Lecture 1MAH 17
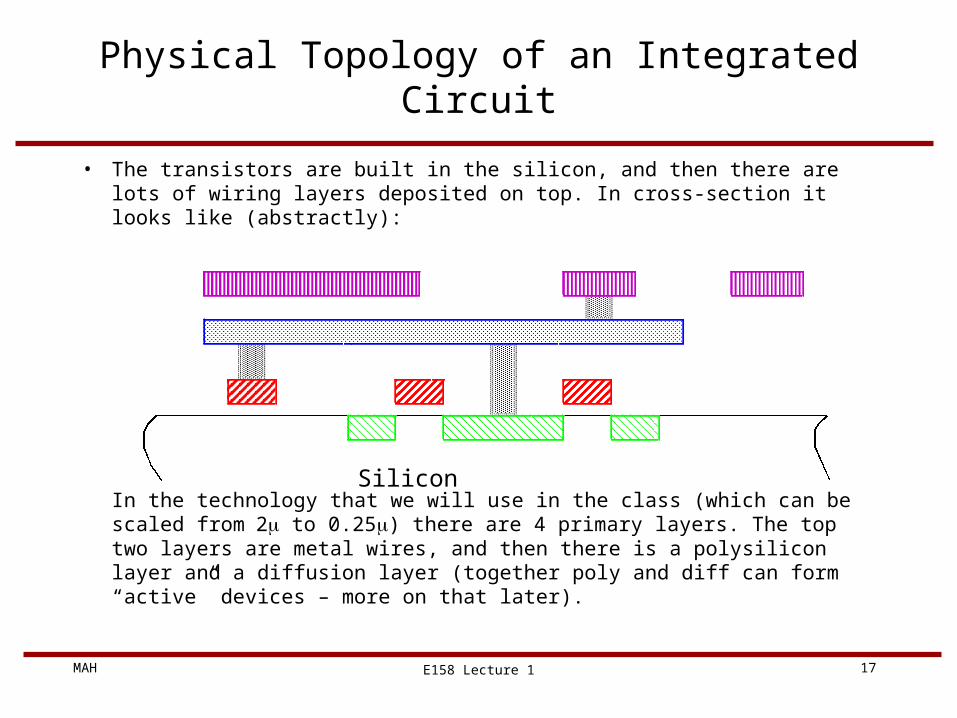
Physical Topology of an Integrated Circuit
• The transistors are built in the silicon, and then there are lots of wiring layers deposited on top. In cross-section it looks like (abstractly):
In the technology that we will use in the class (which can be scaled from 2 to 0.25) there are 4 primary layers. The top two layers are metal wires, and then there is a polysilicon layer and a diffusion layer (together poly and diff can form “active” devices – more on that later).
Silicon
E158 Lecture 1MAH 18
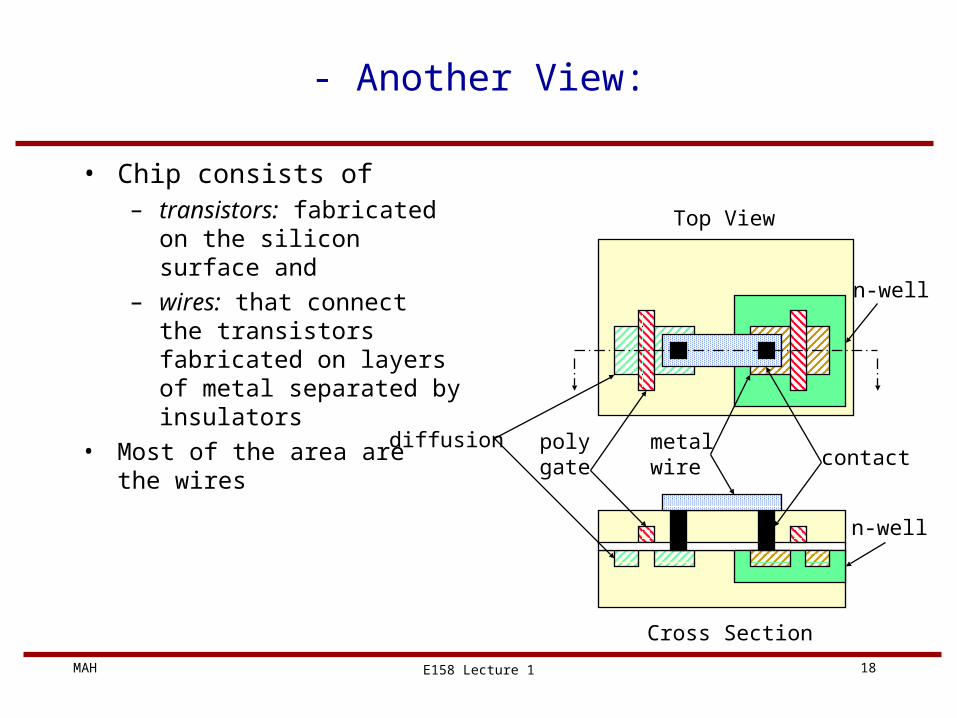
- Another View:
• Chip consists of – transistors: fabricated on the
silicon surface and
– wires: that connect the transistors fabricated on layers of metal separated by insulators
• Most of the area are the wires
Top View
Cross Section
polygate
metalwire contact
diffusion
n-well
n-well

E158 Lecture 1MAH 19
Layout: The Fabrication Specification
The end of the design process must create a set of drawings, one for each layer needed in the manufacturing process– Layout drawing are complicated
• There are many rules about the geometry to make sure the circuits can be reliably manufactured
– Minimum width of wire, minimum spacing between wires, alignment rules
• The layers represent transistors and wires, and need to create the correct function
• Many rectangles for each transistor and wire, and there are millions of transistors and wires.
– Different layers are represented by different colors
• People used to draw the layout on mylar (10s of transistors)
• But not any more, now use CAD tools, and premade cells.

E158 Lecture 1MAH 20
Layout Example
• Example from previous student project
• Use hierarchy to hide complexity
• Pads around chip
• Major blocks are shown
• Colored regions are really many wires

E158 Lecture 1MAH 21
Layout
• This picture is an expanded view of a portion of the layout of the other page.
• The next two slides will look at the controller layout and some layout in the datapath

E158 Lecture 1MAH 22
Controller Layout
• Right half shows cells in the design
• Left half has the cells expanded to show the layout layers
• This design style has random wires

E158 Lecture 1MAH 23
Datapath Layout
• Wires here are more regular
• Again
– Cells on right
– Expanded cells on left
• Transistor density is higher

E158 Lecture 1MAH 24
Stick Diagrams
• Stick diagrams are a simplified version of layout
• Abstract the layout so wires are just lines
– Don’t worry about width or spacing
– Just draw the center line of the wire
• Spacing on different parts of the page need not be the same
– Sneak another wire in when needed, without needing to redraw the whole layout
– But try to keep spacing the same
(since it will better estimate the real layout)
• Good starting point before doing layout
– But like most things, after you do some layout, you will have a better feeling for how to draw useful stick diagrams
• We will use stick diagrams often to demo stuff …

E158 Lecture 1MAH 25
Wire Layers
• We represent the different wiring layers with different colors
– metal2 - purple / orange
– metal1 - blue
– poly - red
– diff - green / yellow
• Wires on the same layer that touch ALWAYS connect. There is no way to jumper a wire without changing layers.
• Wires on different layers can cross without connections. To form connections between different layers you need to explicitly draw a contact.

E158 Lecture 1MAH 26
Transistors
Are formed when poly (red) crosses diffusion (green or yellow).
(lots of fab steps to make it seem that simple)
no connection
connection
transistorconnected
red
green

E158 Lecture 1MAH 27
Transistors
The voltage on the gate (poly connection) controls the current that flows between the source and drain (diffusion terminals). The transistor model is often displayed by drawing its current-Voltage curve.
0 0.5 1 1.5 2 2.50
100
200
300
400
500
600
Vds(V)
Id
s(
uA
)

E158 Lecture 1MAH 28
Digital Abstraction
Rather than worrying about the precise voltages on the terminals of the transistor, guarantee that voltages will fall within two regions, one represents a logic ‘0’ and the other a ‘1’.
– Need to compute the output only for inputs in the allowable range
• Much simpler than before
• Model transistor as being either conducting, or off
– Need to ensure that the output is always in the allowable voltage range
• Need to make sure you produce valid digital outputs to the next stage
• Also want to have level restore. Allowable voltage range for output range should be smaller than allowable input range
– Attenuate noise on the signals

E158 Lecture 1MAH 29
The Digital Abstraction
• Divide voltage into discrete regions
– logic 0
– logic 1
– X - between 0 and 1
– out of range• may damage devices
• Each logic gate restores the signal
– noise is not cumulative
– output voltage range is narrower than input range
– Noise margin (VOH-VIH)
X
0
1
Vol
tage
Noise
VIH
VIL
0
1
X
VOH
VOL

E158 Lecture 1MAH 30
Simple Model of a MOSFET
• Three terminal device
– source, drain• two ends of conductive
path
– gate• controls conductive path
– operation• conducts when gate is high• open circuit when gate is
low
– caveat• passes 0s well, not 1s
source
gate
drain

E158 Lecture 1MAH 31
Terminology
Note that the source and drain terminals are really the same, but by convention the source terminal is the one with the lower voltage on it. Thus, the maximum voltage between the gate and the {source, drain} is the voltage between the source and the gate. (This fact will be important later.)
The voltage on the gate controls the connection between the source and the drain. When the gate is high, the source and drain are connected together. When it is low, the terminals are disconnected.
CAUTION: do NOT use the words “open” and “closed” to describe switches. Is open an open electrical circuit (no flow), or an open fluid valve (flow)? You get opposite results, depending on which analogy you use.
This description is for NMOS transistors. For PMOS everything is reversed. The source is the higher voltage terminal, and the transistor is on when the gate is much lower than the source. More on PMOS
later

E158 Lecture 1MAH 32
- Transistor Examples
The state of these transistors:
0
1
0
1
0
01
1
1
Complicated, it is really off. More on this next lecture. Assume it is on for now

E158 Lecture 1MAH 33
Switch Networks
• Since transistors can be modeled as switches
– Look at what we can make out of switches
– Draw an abstract switch as
• Control (gate) terminal is on top
• Can build switch networks
– Are not logic gates themselves!!!
– Are a collection of switches that still only has two non-control terminals
• Define function of a switch network as the inputs conditions that connect the two terminals of the network
• Structure of switch network sets its logic functions:
• ‘OR’ functions are constructed by parallel switches
• ‘AND’ function are constructed by series switches

E158 Lecture 1MAH 34
- Switch Networks
• The function of a switch network is true when the two terminals of the network are connected together. Since for parallel switches the terminals are connected if either switch is on, the function is OR. For series switches the network is conducting only if both switches are on, hence an AND.
A
B
A + B
A B
A * BAND
OR

E158 Lecture 1MAH 35
General Switch Networks
• More complex connections are possible
• Composition rules are simple. Use a recursive definition:
– Parallel combination of switch networks yields an OR of the component switch networks’ functions
– Series combination of switch networks yields on AND of the component switch networks’ functions.
B
C
(A + B) C
A
B C
A D
(AD) + (BC)
E158 Lecture 1MAH 36
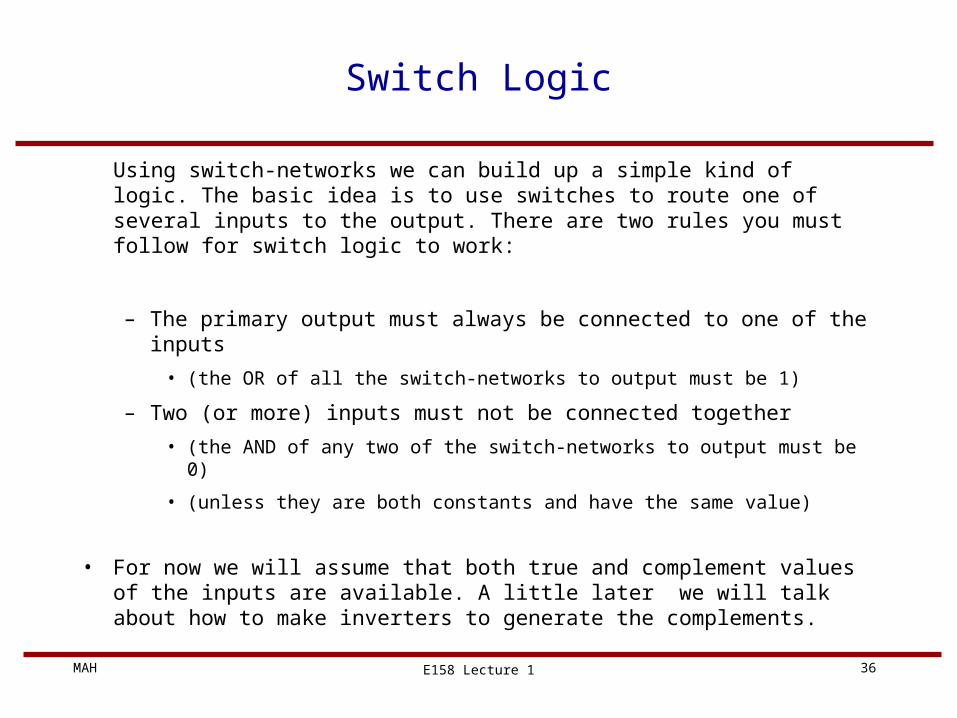
Switch Logic
Using switch-networks we can build up a simple kind of logic. The basic idea is to use switches to route one of several inputs to the output. There are two rules you must follow for switch logic to work:
– The primary output must always be connected to one of the inputs
• (the OR of all the switch-networks to output must be 1)
– Two (or more) inputs must not be connected together
• (the AND of any two of the switch-networks to output must be 0)
• (unless they are both constants and have the same value)
• For now we will assume that both true and complement values of the inputs are available. A little later we will talk about how to make inverters to generate the complements.

E158 Lecture 1MAH 37
Multiplexer
• A very useful switch network in an input multiplexer. It simply selects one of the inputs to the output. This structure can be used to easily map any logical function into switch logic -- all that needs to be done is present the right constant vector to the inputs of the multiplexer.
A BA BA B Z
0 0 0
1 0 1
0 1 1
1 1 0
Z
Constants
OutputNotice that the switch networks are exclusive of each other (AND is 0), and that the OR of all the terms is 1.
The layout shown is NOT a good way to build this function. It uses diffusion wires, which we will see later is not a good choice.
E158 Lecture 1MAH 38
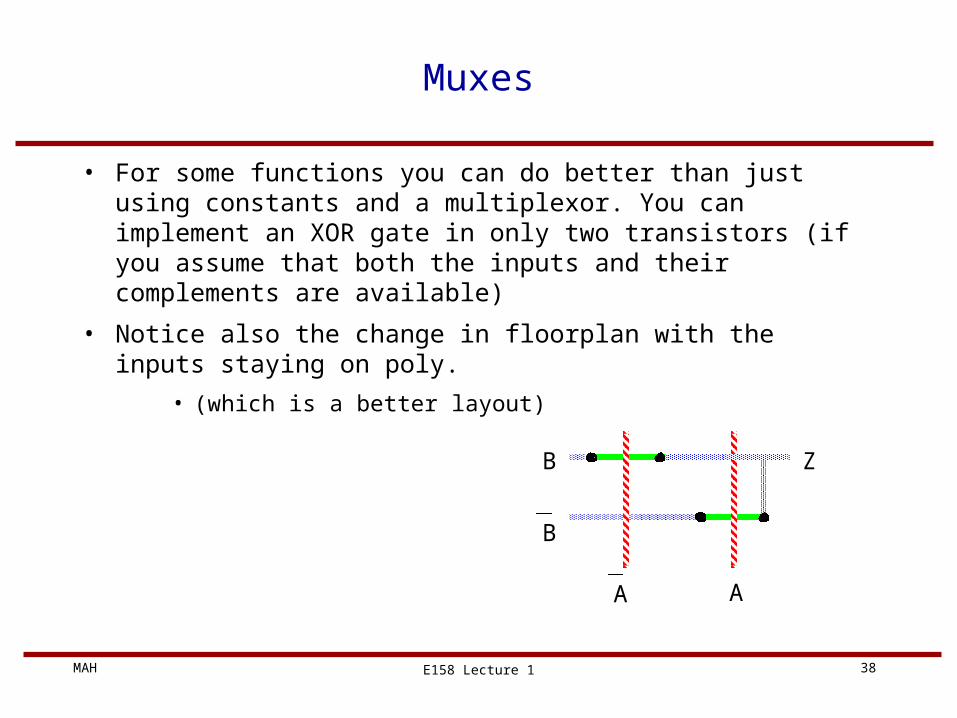
Muxes
• For some functions you can do better than just using constants and a multiplexor. You can implement an XOR gate in only two transistors (if you assume that both the inputs and their complements are available)
• Notice also the change in floorplan with the inputs staying on poly.
• (which is a better layout)
AA
Z
B
B

E158 Lecture 1MAH 39
Parity Function
• A more complex switch logic function:
• A XOR B XOR C XOR D …
• Try to minimize the work you need to do, so try for an iterating structure
• Parity of (…, An, An+1) = Parity (…, An) XOR An+1
• Looks promising but XOR switch logic needs both In and In_b
• Need to build both XOR XNOR
A B C(A,B,C … are in true and complement)
E158 Lecture 1MAH 40
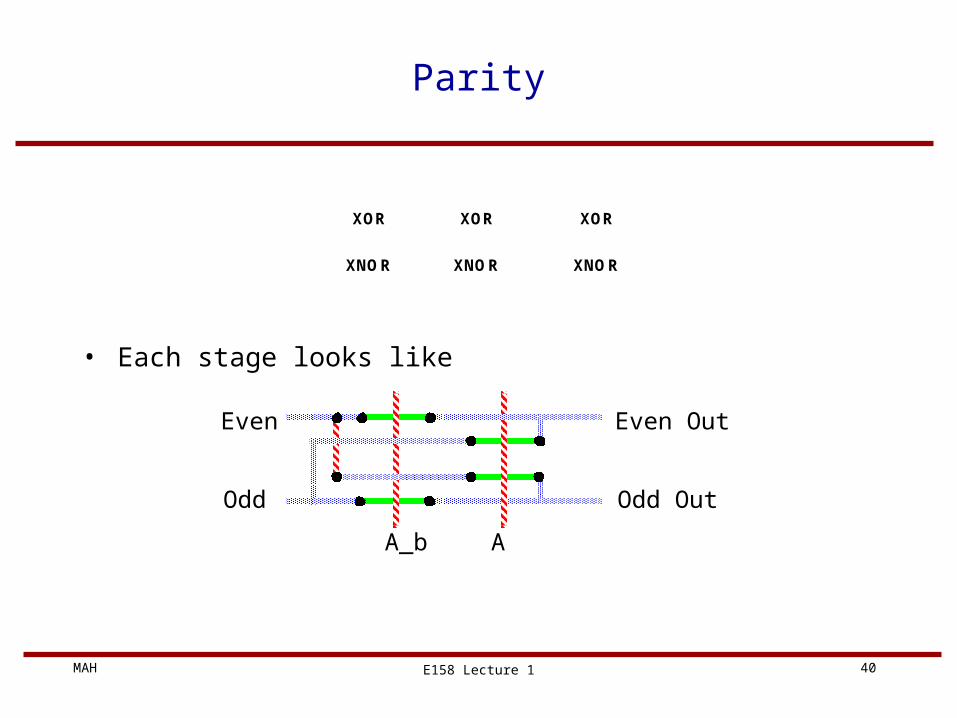
Parity
• Each stage looks like
XOR
XNOR
XOR
XNOR
XOR
XNOR
Even
Odd
A_b A
Even Out
Odd Out

E158 Lecture 1MAH 41
- Parity of Three Inputs
• Can cascade them to form a larger structure
C_b CB_b B
A_b
A
Even
Odd

E158 Lecture 1MAH 42
+ Tally Function
• This is a more complex function that can be implemented in switch logic. The function counts the number of ones in the input word:
• Zn is 1 if there are n 1’s in the input word
• For an n-bit number there are n+1 outputs
– Z0, Z1, … Zn
• Example:
Input Z0 Z1 Z2 Z3 Z4 Z5
00000 1 0 0 0 0 0
11010 0 0 0 1 0 0
10111 0 0 0 0 1 0
00001 0 1 0 0 0 0
E158 Lecture 1MAH 43
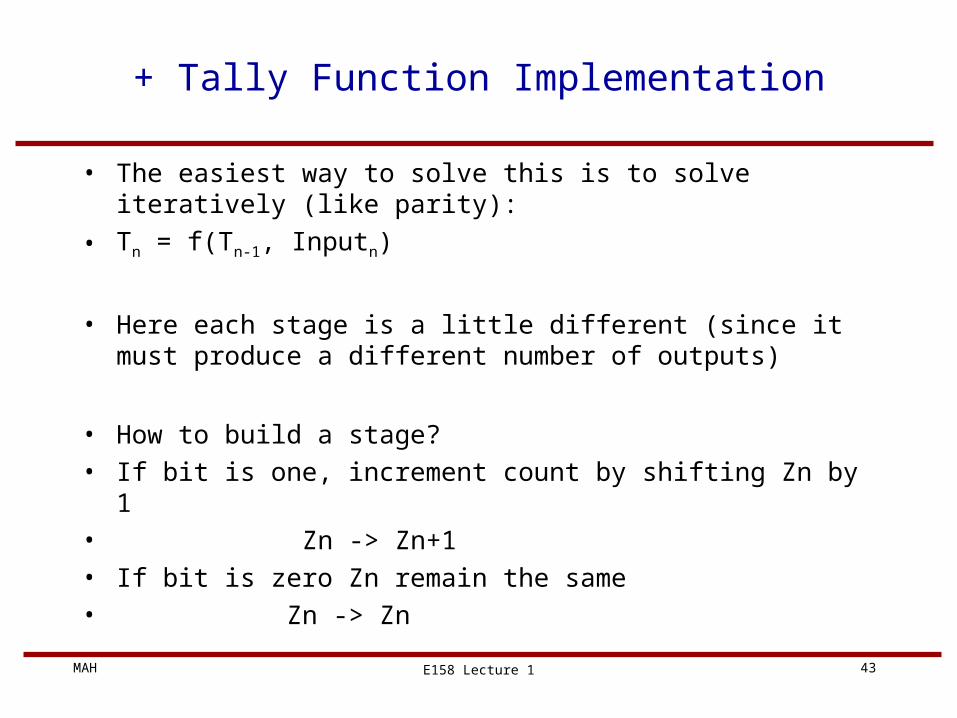
+ Tally Function Implementation
• The easiest way to solve this is to solve iteratively (like parity):
• Tn = f(Tn-1, Inputn)
• Here each stage is a little different (since it must produce a different number of outputs)
• How to build a stage?• If bit is one, increment count by shifting Zn by 1• Zn -> Zn+1• If bit is zero Zn remain the same• Zn -> Zn

E158 Lecture 1MAH 44
+ Tally Function
• Shown below is the tally function for one bit. It has two outputs, Z0 and Z1.
• When the data is 0, the diagonal transistors are off, and the horizontal path (complementary switches) are on.
• Output Z1 is set to 0
• Output Z0 is set to 1
• When the data is 1, the diagonal transistors are on, and the horizontal switches are off
• Output Z1 is set to 1
• Output Z0 is set to 0
• Note: Each output is always driven by one and only one value. (Switch logic rule)
Z0
Z1

E158 Lecture 1MAH 45
+ Two Input Tally
Simple generalization of the one input case
Built by cascading 1 input tally functions
Size of circuit is O(n2 ) where n is the number of data inputs
Simple cell (two transistors) can be replicated to build larger circuits
Z2
Z1
Z0
Switches are set for 1, 1, so the
diagonal path is connected (Z2 = 1)

E158 Lecture 1MAH 46
+ Two Input Tally
• Circuit works by routing inputs either across or up
0 1
0
1
0

E158 Lecture 1MAH 47
Inverters
• To build an inverter with switch networks, you want to connect the output to Gnd when the input is high (a simple switch) and connect the output to Vdd when the input is low (another simple switch). The problem is how to build the second switch -- NMOS transistors are on when the gate is high, and you can't use an inverter to build an inverter!
inout
1
0switch ~

E158 Lecture 1MAH 48
CMOS inverters
• In CMOS the solution is quite simple: use PMOS transistor. It connects its source/drain only when the gate is low.
• In the next lecture we will discuss how to create NMOS and PMOS transistors.
inout
1
0switch ~
PMOS
CMOS