Magazine construction powerpoint
6
Magazine Construction PowerPoint. Gelsomina De Lucia
-
Upload
jasminelight -
Category
Education
-
view
201 -
download
1
Transcript of Magazine construction powerpoint
Magazine Construction PowerPoint.Gelsomina De Lucia
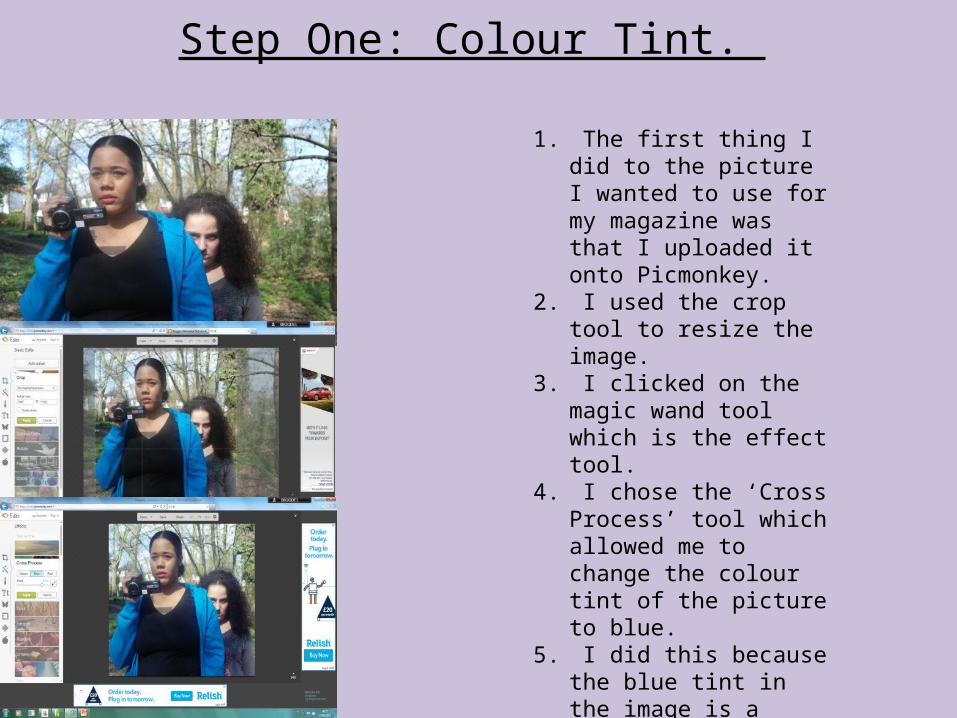
Step One: Colour Tint.
1. The first thing I did to the picture I wanted to use for my magazine was that I uploaded it onto Picmonkey.
2. I used the crop tool to resize the image.
3. I clicked on the magic wand tool which is the effect tool.
4. I chose the ‘Cross Process’ tool which allowed me to change the colour tint of the picture to blue.
5. I did this because the blue tint in the image is a convention of supernatural/thriller images.
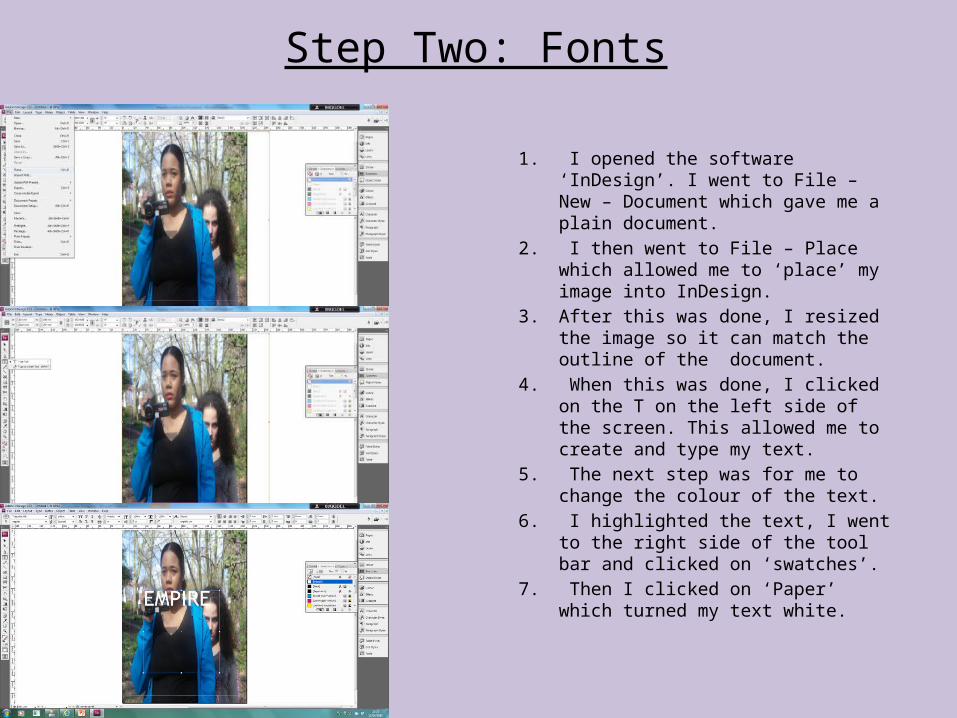
Step Two: Fonts
1. I opened the software ‘InDesign’. I went to File – New – Document which gave me a plain document.
2. I then went to File – Place which allowed me to ‘place’ my image into InDesign.
3. After this was done, I resized the image so it can match the outline of the document.
4. When this was done, I clicked on the T on the left side of the screen. This allowed me to create and type my text.
5. The next step was for me to change the colour of the text.
6. I highlighted the text, I went to the right side of the tool bar and clicked on ‘swatches’.
7. Then I clicked on ‘Paper’ which turned my text white.
Fonts: Part Two
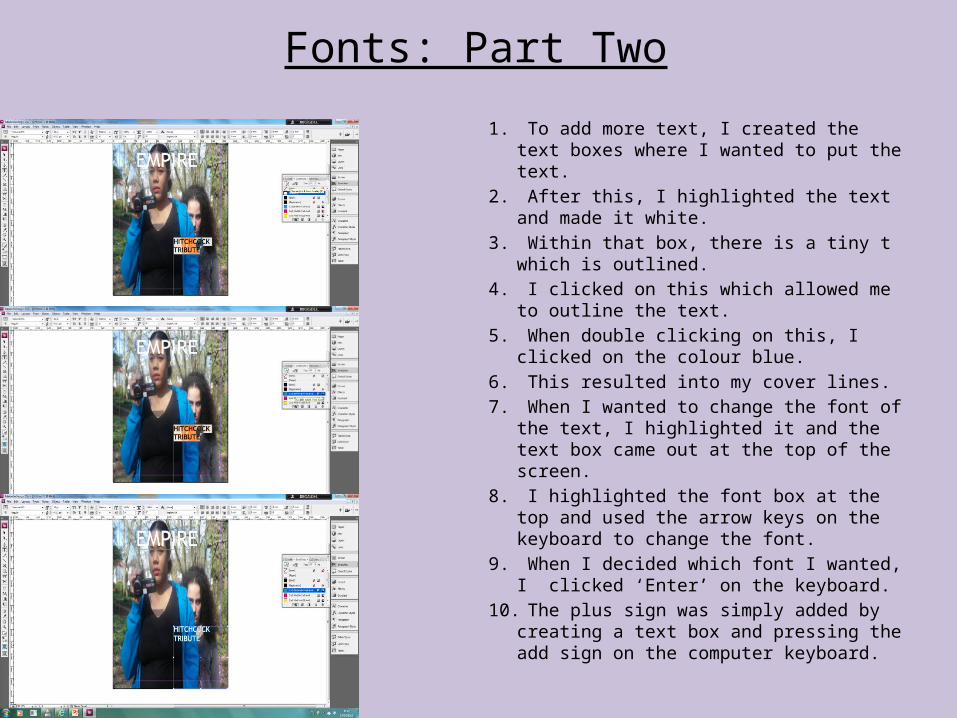
1. To add more text, I created the text boxes where I wanted to put the text.
2. After this, I highlighted the text and made it white.
3. Within that box, there is a tiny t which is outlined.
4. I clicked on this which allowed me to outline the text.
5. When double clicking on this, I clicked on the colour blue.
6. This resulted into my cover lines.7. When I wanted to change the font of the
text, I highlighted it and the text box came out at the top of the screen.
8. I highlighted the font box at the top and used the arrow keys on the keyboard to change the font.
9. When I decided which font I wanted, I clicked ‘Enter’ on the keyboard.
10. The plus sign was simply added by creating a text box and pressing the add sign on the computer keyboard.
Step Three: Boxes
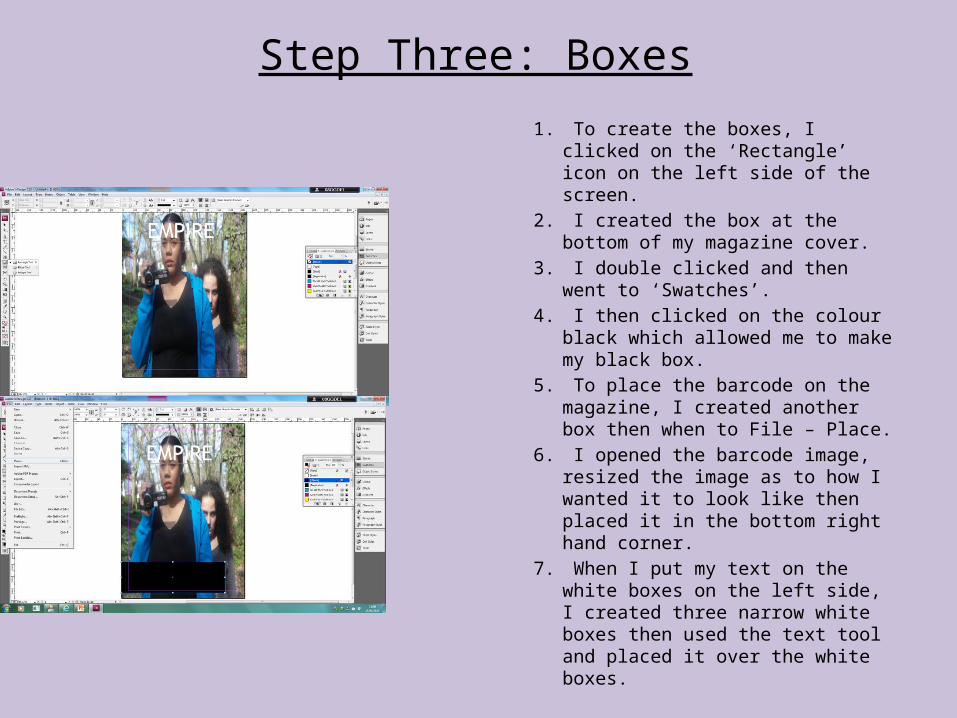
1. To create the boxes, I clicked on the ‘Rectangle’ icon on the left side of the screen.
2. I created the box at the bottom of my magazine cover.
3. I double clicked and then went to ‘Swatches’.
4. I then clicked on the colour black which allowed me to make my black box.
5. To place the barcode on the magazine, I created another box then when to File – Place.
6. I opened the barcode image, resized the image as to how I wanted it to look like then placed it in the bottom right hand corner.
7. When I put my text on the white boxes on the left side, I created three narrow white boxes then used the text tool and placed it over the white boxes.
Step Four: Ending Effect
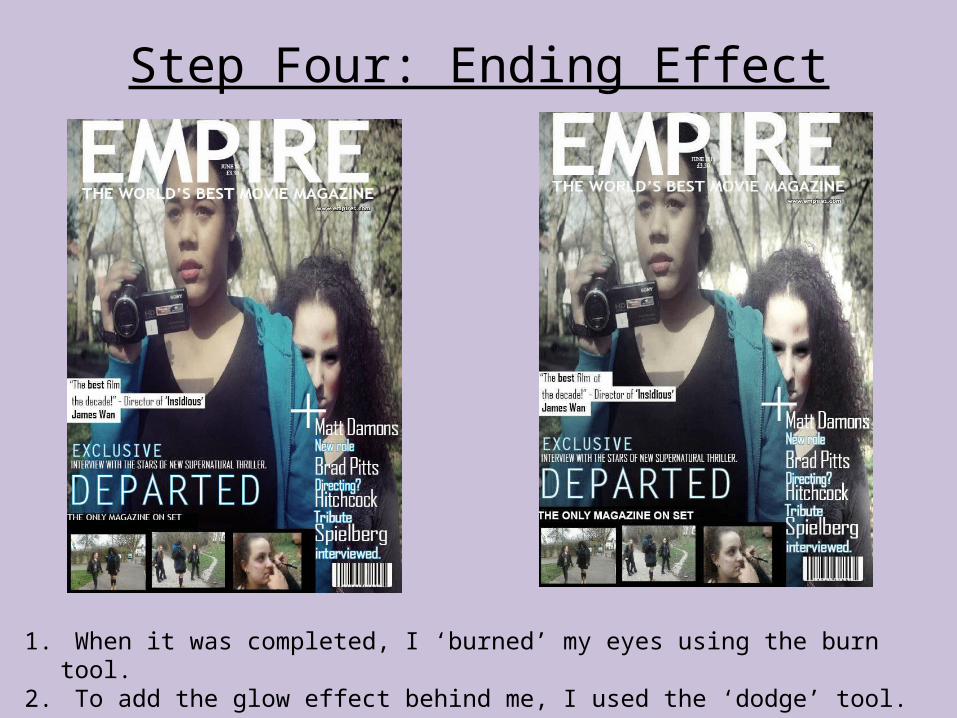
1. When it was completed, I ‘burned’ my eyes using the burn tool.2. To add the glow effect behind me, I used the ‘dodge’ tool.