
Macros - ASA Research Excel Macros.pdf · Excel Macros J. Carlton Collins Atlanta, Georgia...
19
Excel Macros J. Carlton Collins Atlanta, Georgia 770.842.5902 [email protected] www.ASAResearch.com ASA Research
Transcript of Macros - ASA Research Excel Macros.pdf · Excel Macros J. Carlton Collins Atlanta, Georgia...

Excel
Macros
J. Carlton Collins Atlanta, Georgia 770.842.5902
[email protected] www.ASAResearch.com
ASA Research

Excel Macros Copyright August 2013
www.CarltonCollins.com Page 2
Excel Macros Course Information
Learning Objectives To increase the productivity of accountants and CPAs using Excel by introducing them to advanced capabilities within Excel
Course Level Intermediate
Pre-Requisites Familiarity with Microsoft Excel
Advanced Preparation None
Presentation Method Live lecture using full color projection systems and live Internet access with follow up course materials
Recommended CPE Credit 8 hours
Handouts Templates, checklists, web examples, manual
Instructors J. Carlton Collins, CPA
Accounting Software Advisor is registered with the National Association of State Boards of Accountancy (NASBA) as a sponsor of continuing professional education on the National Registry of CPE Sponsors. State boards of accountancy have final authority on the acceptance of individual courses for CPE credit. Complaints regarding registered sponsors may be addressed to the national Registry of CPE Sponsors, 150 Fourth Avenue, Nashville, TN, 37219-2417. Telephone: 615-880-4200.
Copyright August 2013, ASA Research and Accounting Software Advisor, LLC 4480 Missendell Lane, Norcross, Georgia 30092 770.842.5904
All rights reserved. No part of this publication may be reproduced or transmitted in any form without the express written consent of ASA Research, a subsidiary of ASA Research. Request may be e-mailed to [email protected] or further information can be obtained by calling 770.842.5904 or by accessing the ASA Research home page at: http://www.asaresearch.com/ All trade names and trademarks used in these materials are the property of their respective manufacturers and/or owners. The use of trade names and trademarks used in these materials are not intended to convey endorsement of any other affiliations with these materials. Any abbreviations used herein are solely for the reader’s convenience and are not intended to compromise any trademarks. Some of the features discussed within this manual apply only to certain versions of Excel, and from time to time, Microsoft might remove some functionality. Microsoft Excel is known to contain numerous software bugs which may prevent the successful use of some features in some cases. ASA Research makes no representations or warranty with respect to the contents of these materials and disclaims any implied warranties of merchantability of fitness for any particular use. The contents of these materials are subject to change without notice.
Contact Information for J. Carlton Collins [email protected]
www.LinkedIn.com/CarltonCollins www.Facebook.com/CarltonCollins

Excel Macros Copyright August 2013
www.CarltonCollins.com Page 3
Copy Shop Sales Order Case Study
As an accounting software installer, I’ve learned from experience that most businesses can pick blindly from among the top accounting systems in the world and pretty much get the job done. From one business to the next, accounts payable needs, payroll needs, trial balance needs, reporting needs, and even inventory needs are similar and well covered by today’s top accounting systems. However, there is one area which differs dramatically - and that area is in the sales order. It turns out that each company sells differing kinds of products and services with options so varied, that few accounting systems are prepared to handle those needs. In this situation, I make a bold claim that an Excel template can be easily used to fill in the missing gaps and supplement any accounting software system to provide excellent order taking capabilities. In this case study, let us assume that we are working with a small copy shop – a small family owned company with about $300,000 in revenue. In this case they have determined that QuickBooks meets all of there needs, except for order taking. Therefore our goal will be to build a Sales Order system using Excel in only a few minutes. Listed below are the key elements that you will learn in this case study:
1. Neat and Organized Worksheet Design
2. =NOW()
3. Data Validation Lists
4. =VLOOKUP
Excel Macros Copyright August 2013
www.CarltonCollins.com Page 4
5. Creating Macro Buttons
6. Creating Macros
a. Simple Print macro
b. Simple erase and increment invoice number macro
c. More complicated posting macro
7. Relative versus Absolute Macros
8. Named Cells
9. Worksheet Protection
10. Adding Logic to the Product Configurator
11. Combining Macros
12. Locating the database on another sheet
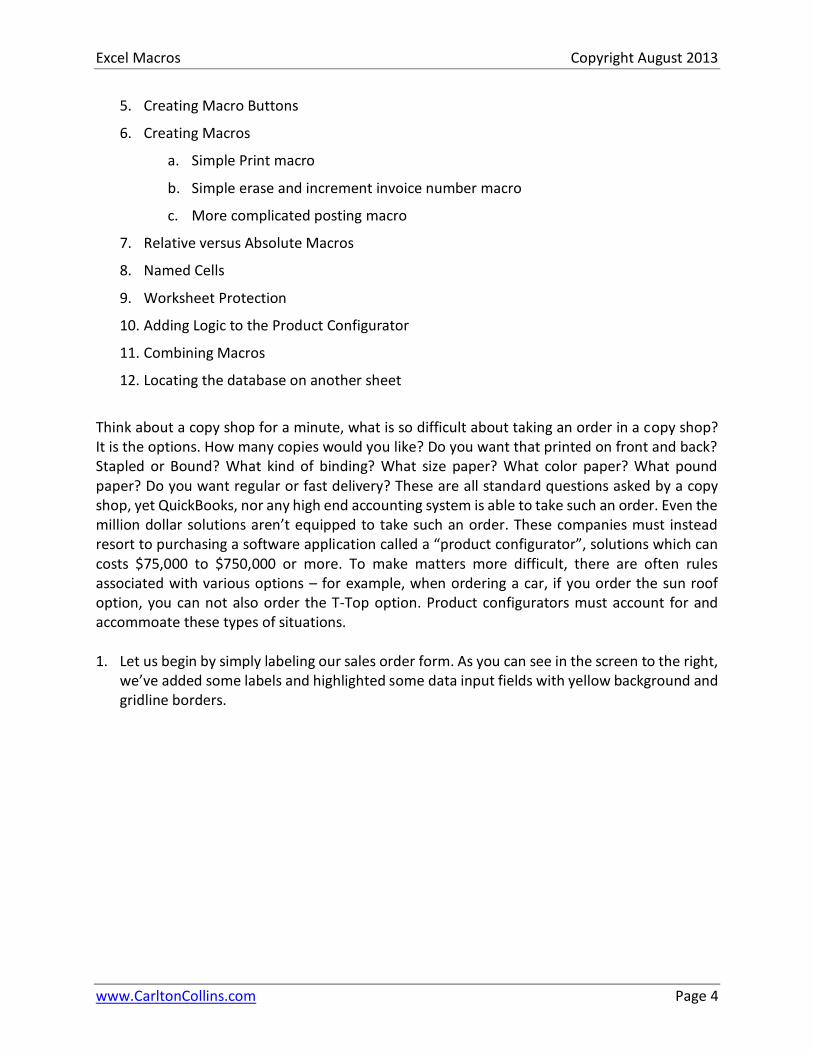
Think about a copy shop for a minute, what is so difficult about taking an order in a copy shop? It is the options. How many copies would you like? Do you want that printed on front and back? Stapled or Bound? What kind of binding? What size paper? What color paper? What pound paper? Do you want regular or fast delivery? These are all standard questions asked by a copy shop, yet QuickBooks, nor any high end accounting system is able to take such an order. Even the million dollar solutions aren’t equipped to take such an order. These companies must instead resort to purchasing a software application called a “product configurator”, solutions which can costs $75,000 to $750,000 or more. To make matters more difficult, there are often rules associated with various options – for example, when ordering a car, if you order the sun roof option, you can not also order the T-Top option. Product configurators must account for and accommoate these types of situations. 1. Let us begin by simply labeling our sales order form. As you can see in the screen to the right,
we’ve added some labels and highlighted some data input fields with yellow background and gridline borders.

Excel Macros Copyright August 2013
www.CarltonCollins.com Page 5
(For purposes of this case study, we will only build in options for color and size, but once you get the hang of it, adding in additional options for paper weight, binding, duplex printing, etc is a rather simple matter.)
2. =NOW() – Next we type in the Excel Function =NOW(). This will cause Excel to display the
computer’s date and time each time an order is produced. You can see the =NOW() function in the formula bar and the results displayed in cell B2 below.
3. Calculations for Base Rate – Next we add simple calculations to multiply the total number of pages to be copied by the total number of copies and the base rate per copy. To make it easier to visualize, I have added some customer data. (The formula contained in cell B11 is displayed in the formula bar.)

Excel Macros Copyright August 2013
www.CarltonCollins.com Page 6
4. Color Options – Next I created a table of the color options along with a sur-charge rate per page for each color. Notice that there is a “zero” sur-charge when selecting white paper. Make sure to sort your table in descending order because we plan to refer to that table via a Lookup function – and as we all know, lookup functions do not work properly unless the table array is sorted in descending order. To make the table of options more readable, I applied gridlines and a greenish background.
5. Data List Validation – Now this is where the excitement begins. Next I create a data validation list in cell B13 using column one of my options table. To do this, select B13, and choose Data validation from the Data Ribbon. Next select List and use the Cell Chooser to highlight the options in column one of your color options table.

Excel Macros Copyright August 2013
www.CarltonCollins.com Page 7
6. =VLOOKUP – Next I inserted a =VLOOKUP function in cell B14 to return the Sur-Charge rate based on the Color Selected.
Notice that when you select different colors in cell B13, the rate in Cell B14 changes according to the Color Option table.
7. Size Options - Repeat steps 4,5 & 6 above to also create Size Options.

Excel Macros Copyright August 2013
www.CarltonCollins.com Page 8
8. Invoice Total – From here it is an easy step to add calculations to total the invoice. Of course your complete invoice would also include sales tax calculations as well. Our example is kept as simple as possible to make sure that the key points come across as easy as possible. Here’s what we have so far:
9. Macro Buttons – To make the Sales Order form easier to use, next we will add three macro buttons. We start this process by creating a single text box, and use the Drawing Tools to make it look fancy. Here are steps:

Excel Macros Copyright August 2013
www.CarltonCollins.com Page 9
10. Create the Print Macro – Next create a print macro by selecting “Macro, Record Macro” from the “View Ribbon” (make sure that no spaces are used in your macro name and save the macro to “This Workbook). Set the “Print Area” appropriately to display your Sales Order Form. Next simply highlight your Sales Order Form and print three copies, then stop recording your macro by selecting “Macro, Stop Recording” from the “View Ribbon”. Once completed assign the Macro to the Print Sales Order Button by right mouse clicking and selecting “Assign Macro”. The right click menu and the Assign Macro Dialog box are shown in the two screens below.
You want to print three copies of the Sales Order as follows: One for your customer’s records; One for your product people to follow when making the copies, and one for bookkeeper to use when entering the invoice amount into QuickBooks.
11. Additional Macro Buttons – Next right click on the edge of the existing macro button
twice, and choose “Copy”; then click away from the button and Paste twice. This will create two exact copies of your macro button. (You must right click twice on the edge of the button to display the second menu of options.)

Excel Macros Copyright August 2013
www.CarltonCollins.com Page 10
Next select the “Select Objects” menu option from the “Home” Ribbon’s “Find and Select” menu in the “Edit” Group. Then lasso the three buttons and from the “Drawing Tools”, use the Alignment tools to left justify and Distribute Vertically the three buttons.
The results will appear as follows:
Press escape to deselect the “Object Pointer” tool, and return your cursor to normal.
12. Post Sales Order Macro Button – Next I created a macro to post the sales order information to a database. This is complicated and I will demonstrate several teaching points in class to help you fully understand the process of writing a combination relative and absolute Here are the steps:
a. Relabel the second Macro Button to Read “Post Sales Order”. This will require you to first right mouse click on the button and select the text, or if you prefer, remove the macro before continuing.
b. Highlight cells B2 thru B21 and label that range “salesorderdata” using the Name Box.
c. Go to Cell H1 and enter the phrase “Database” in cell H1.

Excel Macros Copyright August 2013
www.CarltonCollins.com Page 11
d. Label cell H1 “database” using the Name Box.
e. Copy the labels in cells A2 thru A21 and Paste Transpose them to cell H2.
f. Start recording a macro named “postsalesorder”.
g. Click the “Use Relative References” option from the Macros Group on the View Ribbon.
h. Press the F5 key to launch the GoTo Dialog Box.
i. Select the range “salesorderdata” by double clicking on the word “salesorderdata”.
j. With your cursor hovering above the selected range, right mouse click and choose “Copy”.
k. Press the F5 key to launch the GoTo Dialog Box.
l. Select the range “database” by double clicking on the word “database”.
m. Press the End key, followed by the Down Arrow. (You will now be on the last row.)
n. Press the Down Arrow. (You will now be on a blank row underneath the last row.)
o. With your cursor hovering above the selected range, right mouse click and choose “Paste Special”.
p. In the paste Special Dialog Box, check Values and Check Transpose, and click OK.
q. Place your cursor on cell A1.
r. Stop recording the macro by selecting “Macro, Stop Recording” from the “View Ribbon.
s. Assign the newly recorded macro to the Post Sales order macro Button.
t. Select Column H and format it to display Time and Date.
u. Adjust the width of your database columns to your preference.
13. New Sales Order Macro Button – Finally, edit the Third macro Button to Read “New sales
Order” and create a macro that selects the yellow background data cells and deletes the contents. (Make sure to toggle the “Use Relative References” option off because this macro needs to be an absolute macro.) (Also make sure to select Cell B4, then hold the CTRL key down while you also select the other yellow back ground cells). Before you Stop Recording this macro, click on cell B4 so your cursor will be in the correct place to start recording a new sales order.

Excel Macros Copyright August 2013
www.CarltonCollins.com Page 12
14. Testing – Test your three macros by filling in new sales order information, then click the three macro buttons in sequence to print, post and delete your data.
15. Unlock Data Input Cells – Next, select the cells containing the yellow background and also select the database columns (Hold the CTRL key down to make multiple selections. Then format the those cells to unlock them by right mouse clicking atop your selection and selecting “Format Cells, and unchecking the Locked Box on the protection tab – as shown below:
16. Protect Your Worksheet - Finally turn on worksheet protection by selecting “Protect Sheet” from the Review ribbon. Enter a password and repeat the password. This will prevent you or others from making accidental changes to the formulas and data contained in your template.
17. Keep in Mind – This case study covered the basics, but you could enhance this template a number of ways. Here are a few example hints:
a. Combine the three macro buttons into one button that performs all tasks – printing, posting, and deleting.
b. You might also add a grid for matrix pricing – pricing for volume below 1,000, 5,000, and 10,000 total pages copied.
Excel Macros Copyright August 2013
www.CarltonCollins.com Page 13
c. You might add an invoice number to the top of the page. Each time you post, your macro might also create a temporary formula in an empty cell that refers to the invoice number and adds one, then copies pastes that result atop the invoice number cell using the paste value command. Make sure the macro then deletes the formula in the temporary cell.
d. You could easily add more options to your order form.
e. Notice that we also included an option to decrease our price if a smaller paper size is selected.
f. The sales order form could be dressed up to look far more professional. Colors, grids, logos, etc. could all be added to make the sales order form match the accounting system, for example.
g. You could copy the worksheet and edit a second order for to be used in different situations. For example, Worksheet A might contain an order form that charges regular rates when a regular customer enters the store, and Worksheet B could charge higher rates when a lawyer enters the store – and so on.
h. The resulting database will continue to compile each sales order as posted, adding new orders to the bottom of the database area each time you post.
i. The bookkeeper need only record the date, customer name, address, and total amount due in QuickBooks. The printed Sales Order copies on file will serve as supporting documentation.
j. You can download a copy of this example template from www.CarltonCollins.com – click the Excel Link.
Excel Macros Copyright August 2013
www.CarltonCollins.com Page 14
Macro Points Macros offer a powerful and flexible way to extend the features of Excel. They allow the automation of repetitive tasks such as printing, formatting, configuring, or otherwise manipulating data in Excel. In its’ simplest form, a macro is a recording of your keystrokes. While macros represent one of the stronger features found in Excel, they are rather easy to create and use. There are six major points that I like to make about macros as follows.
Six Major Points for Creating Macros
1. Record, Use Excel, Stop Recording – To create a macro, simply turn on the macro recorder, use Excel as you normally do, then turn off the recorder. Presto – you have created a macro. While the process is simple from the user’s point of view, underneath the covers Excel creates a Visual Basic subroutine using sophisticated Visual Basic programming commands.
2. Macro Location – Macros can be stored in either of two locations, as follows: a. The workbook you are using, or b. Your Personal Macro Workbook (which by default is hidden from view) If your macro applies to all workbooks, then store it in the Personal Macro Workbook so it will always be available in all of your Excel workbooks; otherwise store it in your current workbook. A macro stored in your current workbook will be embedded and included in the workbook, even if you e-mail the workbook to another user.
3. Assign your Macro to an Icon, Text or a Button – To make it easy to run your macro, you should assign it to a toolbar icon so it will always be available no matter which workbooks you have open. If the macro applies only to your current workbook, then assign it to Text or a macro Button so it will be quickly available in your current workbook.
4. Absolute versus Relative Macros – An “Absolute” macro will always affect the same cells each time whereas a “Relative” macro will affect those cells relative to where your cursor is positioned when you invoke the macro. It is crucial that you understand the difference.
5. Editing Macros – Once created, you can view and/or edit your macro using the View Macros option. This will open the macro subroutine in a Visual basic programming window and provide you with a plethora of VB tools.
6. Advanced Visual Basic Programming – For the truly ambitious CPA, in the Visual Basic Programming window, you have the necessary tools you need to build very sophisticated macros with dialog boxes, drop down menu options, check boxes, radio buttons – the whole works. I

Excel Macros Copyright August 2013
www.CarltonCollins.com Page 15
invite you to knock yourself out. To see all of this power, turn on the “Developer Tab” in “Excel Options” (see below). Presented below are more detailed comments and step-by-step instructions for creating and invoking macros, followed by some example macros.
Steps for Creating A Macro 1. Launch Macro Recorder - Select Record Macros on the View tab, or in the Code Group on
the Developer Tab. A. Macro Name - Enter a name for the macro In the Macro Name box.
a. The first character of the macro name must be a letter. b. Subsequent characters can be letters, numbers, or underscore characters. c. Spaces cannot be used in a macro name (an underscore character is often used as
a word separator. d. If you use a macro name that is also a cell reference, you may get an error message
that the macro name is not valid.
B. Shortcut – (This is optional) Assign a CTRL key combination (such as CTRL+A to run the macro by typing any lowercase letter or uppercase letter that you want to use in the Shortcut key box.
a. The shortcut key will override any equivalent default Excel shortcut key while the
workbook that contains the macro is open.
C. Macro Location - In the Store Macro In dropdown box, select the workbook where you want to store the macro.
a. If you want a macro to be available in all Excel workbooks, select Personal Macro
Workbook. When you select Personal Macro Workbook, Excel creates a hidden personal macro workbook (Personal.xlsb) if it does not already exist, and saves the macro in this workbook.
i. In Windows Vista, this workbook is saved in the C:\Users\username\AppData\Local\Microsoft\Excel\XLStart folder.
ii. In Microsoft Windows XP, this workbook is saved in the C:\Documents andSettings\user name\Application Data\Microsoft\Excel\XLStart folder.
iii. Workbooks in the XLStart folder are opened automatically whenever Excel starts.
Excel Macros Copyright August 2013
www.CarltonCollins.com Page 16
b. Note - If you want the macro in the personal macro workbook to be run automatically in another workbook, you must also save that workbook in the XLStart folder so that both workbooks are opened when Excel starts.
D. Macro Description - In the Description box, type a description of the macro.
E. Start Recording - Click OK to start recording.
F. Start Typing - Perform the actions that you want to record. New in Excel 2010, macros can now record the manipulation of objects, such as inserting or moving a text box.
G. Stop Recording – When you are done click “Stop Recording” in the “Code Group” On the
“Developer Tab”. You can also click Stop Recording on the left side of the status bar.
H. Assign the Macro to an Object, Graphic in the Worksheet – Insert an object (like a Star shape or text box) or graphic image (like a picture) in your worksheet, then right-click on that object or graphic image and select Assign Macro from the popup menu. In the Macro Name box, select the macro that you want to assign to that object or graphic image and click OK.
2. Menu Navigation Not Recorded – Keep in mind that when you record a macro, the macro recorder records all the steps required to complete the actions that you want your macro to perform. Navigation on the Ribbon is not included in the recorded steps, only the commands that are executed are recorded in the macro.
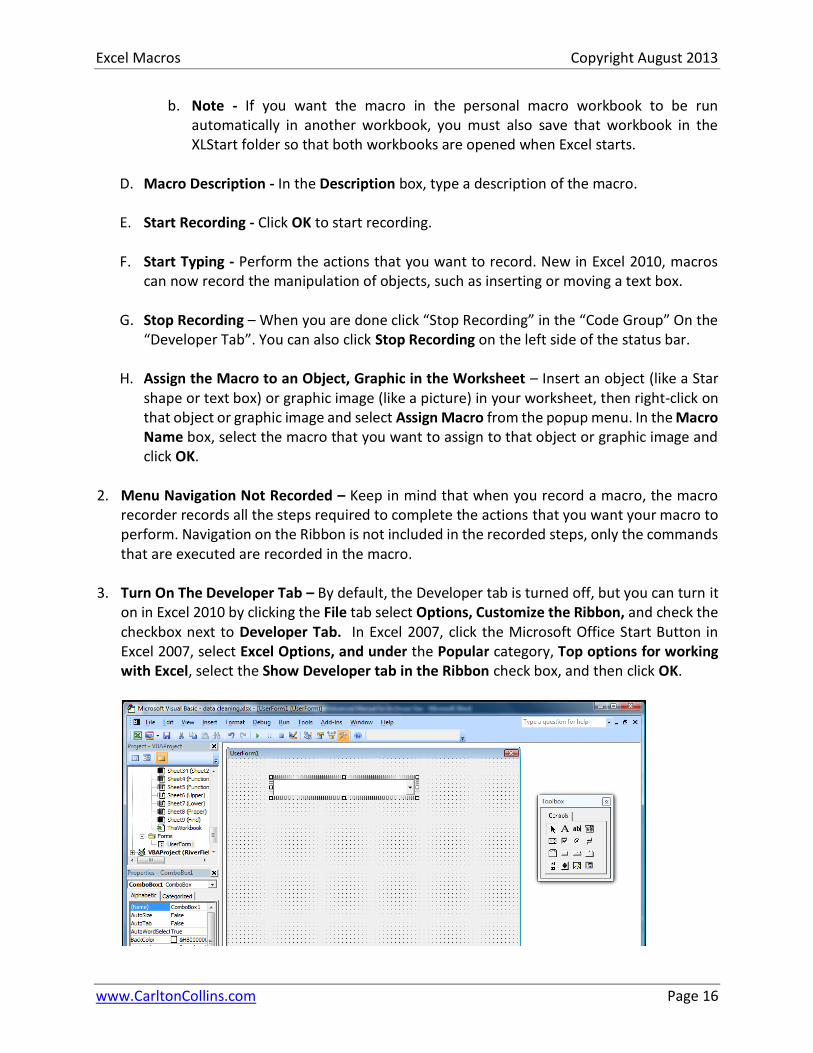
3. Turn On The Developer Tab – By default, the Developer tab is turned off, but you can turn it
on in Excel 2010 by clicking the File tab select Options, Customize the Ribbon, and check the checkbox next to Developer Tab. In Excel 2007, click the Microsoft Office Start Button in Excel 2007, select Excel Options, and under the Popular category, Top options for working with Excel, select the Show Developer tab in the Ribbon check box, and then click OK.

Excel Macros Copyright August 2013
www.CarltonCollins.com Page 17
4. Enable Macros – If the macro functions are disabled, you can enable them by selecting Macro
Security in the Code group on the Developer tab as shown below.
Under Macro Settings, click Enable All Macros (this is not recommended by Microsoft because potentially dangerous code can then run without your approval), and then click OK.
5. Example Macros
A. Headers and Footers Macro – Start recording a new macro called Insert_Headers. Select all of the worksheets, then from the Page Layout tab, double click the Page Setup dialog box button to display the Page Setup dialog box. Continue to customize the header and footers to include page numbers, date and time stamps, file locations, tab names, etc. Assign the macro to an Icon on your toolbar or Quick Access Bar for quick and easy access. Thereafter, inserting headers and footers in your worksheets will be a breeze.
B. Print Macros – Do you have a workbook containing multiple reports that you frequently print? If so, insert macro buttons to print each individual report, a group of reports, and even multiple reports, and in the future reporting will be a snap.
C. Delete Data Macro – Do you have a frequently used template that contains a lot of variables? If so, create a macro that visits each cell and erases that data, resetting the worksheet for use in a new set of criteria. Assign the macro to a macro button and you will never again have old assumptions mixed in with your newer template.
D. Macro Case Study – Carlton’s Copy Shop – See the following chapter for a detailed case study for using macros.

Excel Macros Copyright August 2013
www.CarltonCollins.com Page 18
Sample Code for Creating a User Input Form Dim iRow As Long Dim ws As Worksheet Set ws = Worksheets("Sheet1") 'find first empty row in database iRow = ws.Cells.Find(What:="*", SearchOrder:=xlRows, _ SearchDirection:=xlPrevious, LookIn:=xlValues).Row + 1 'check for a Name number If Trim(Me.t1.Value) = "" Then Me.textbox_Name.SetFocus MsgBox "Please complete the form" Exit Sub End If 'copy the data to the database ws.Cells(iRow, 1).Value = Me.t1.Value ws.Cells(iRow, 2).Value = Me.t2.Value ws.Cells(iRow, 3).Value = Me.t3.Value ws.Cells(iRow, 4).Value = Me.t4.Value MsgBox "Data added", vbOKOnly + vbInformation, "Data Added" 'clear the data Me.t1.Value = "" Me.t2.Value = "" Me.t3.Value = "" Me.t4.Value = "" Me.textbox_name.SetFocus

Excel Macros Copyright August 2013
www.CarltonCollins.com Page 19
Bio for J. Carlton Collins, CPA ASA Research [email protected] 770.842.5902
J. Carlton Collins, CPA is a Certified Public Accountant with experience in technology, tax, auditing, accounting systems, financial reporting, and bond financing. He is an author, lecturer, and technology & accounting systems consultant. He has published books, articles, and web pages and is the author of the monthly technology Q&A column for the Journal of Accountancy. As a public speaker, Mr. Collins has delivered more than 2,000 lectures in 44 states and 5 countries addressing more than 500,000 CPAs and business professionals. As a consultant, Mr. Collins has assisted 275+ large and small
companies with the selection and implementation of accounting systems. Mr. Collins has a Bachelor’s degree in Accounting from the University of Georgia, is a 25+ year member of the American Institute of CPAs and the Georgia Society of CPAs.
Summary of Selected Positions, Awards & Accomplishments:
1. Author of the monthly Technology Q&A column for the Journal of Accountancy. 2. Chairman of the 2013-2014 GSCPA IT Section. 3. Honored as one of the CPA Industries Top 25 Thought Leaders by CPA Technology Advisor Magazine
4. Recipient of the AICPA’s Lifetime Technical Contribution to the CPA Profession Award. 5. Chairman of the Southeast Accounting Show - the South’s largest CPA event. 6. Recipient of the Tom Radcliff Outstanding Discussion Leader Award. 7. Named “Top Ten CPA Technologists” by Accounting Technologies Magazine (multiple years). 8. Named “Top 100 Most Influential CPAs ” by Accounting Technologies Magazine (multiple years). 9. Has personally delivered over 2,000 technology lectures around the world. 10. Recipient of the Outstanding Discussion Leader Award from the Georgia Society of CPAs. 11. Lead author for PPC's Guide to Installing Microcomputer Accounting Systems. 12. Has installed accounting systems for more than 200 companies. 13. Chairperson of the AICPA Technology Conference. 14. Recipient of the ACCPAC Partner of the Year Award. 15. Determined by SAP to be one of the country's "Top Ten Most Influential ERP Systems Consultants". 16. Has delivered keynote and session lectures at dozens of accounting software conferences. 17. Sworn in as a Certified Public Accountant on September 18, 1985. 18. Member of the American Institute of CPAs since 1985. 19. Member of the Georgia Society of CPAs since 1982.
As an auditor, Mr. Collins has audited businesses in the areas of health care, construction, distribution, automobile dealerships, insurance, manufacturing, and general business. Mr. Collins' tax experience includes corporate, individual, partnership, fiduciary, and estate tax planning work. In the area of finance, Mr. Collins has prepared (or assisted in preparing) feasibility studies and financial forecasts for nearly 300 projects seeking more than $3 billion in startup capital. Mr. Collins is familiar with bond issues, Medicare and Medicaid reimbursement, and conventional financing matters. In 1992, Mr. Collins contributed and demonstrated more than 500 pages of suggested design improvements to the Microsoft Excel development team of programmers - and many of those improvements are found in Excel today. At the University of Georgia, Mr. Collins was elected President of the Phi Eta Sigma Honor Society, was initiated into the BIFTAD Honor Society, served three years in the Judicial Defender/Advocate program, and was a member of Alpha Tau Omega fraternity. At Glynn Academy High School, Mr. Collins was Senior Class President, Class Valedictorian (1 of 6), and received a principle nomination to Annapolis Naval Academy. Mr. Collins has been married for 27 years and has two children. He devotes his leisure time to family, travel, tennis, fishing, snow skiing, and riding motorcycles (both dirt and street). Mr. Collins is president of his homeowners association, participates in the Gwinnett Clean and Beautiful program, and volunteers for Cooperative Ministries food drive.