Mac Mini Late 2012 Teardown - ifixit-guide-pdfs.s3 ... Mini Logic Board Removal Tool (1) ... A few...
13
Mac Mini Late 2012 Teardown Released October 23, 2012. Available with Core i5 or Core i7 and Apple Fusion Drive. Written By: Andrew Optimus Goldberg Mac Mini Late 2012 Teardown © iFixit — CC BY-NC-SA www.iFixit.com Page 1 of 13
Transcript of Mac Mini Late 2012 Teardown - ifixit-guide-pdfs.s3 ... Mini Logic Board Removal Tool (1) ... A few...
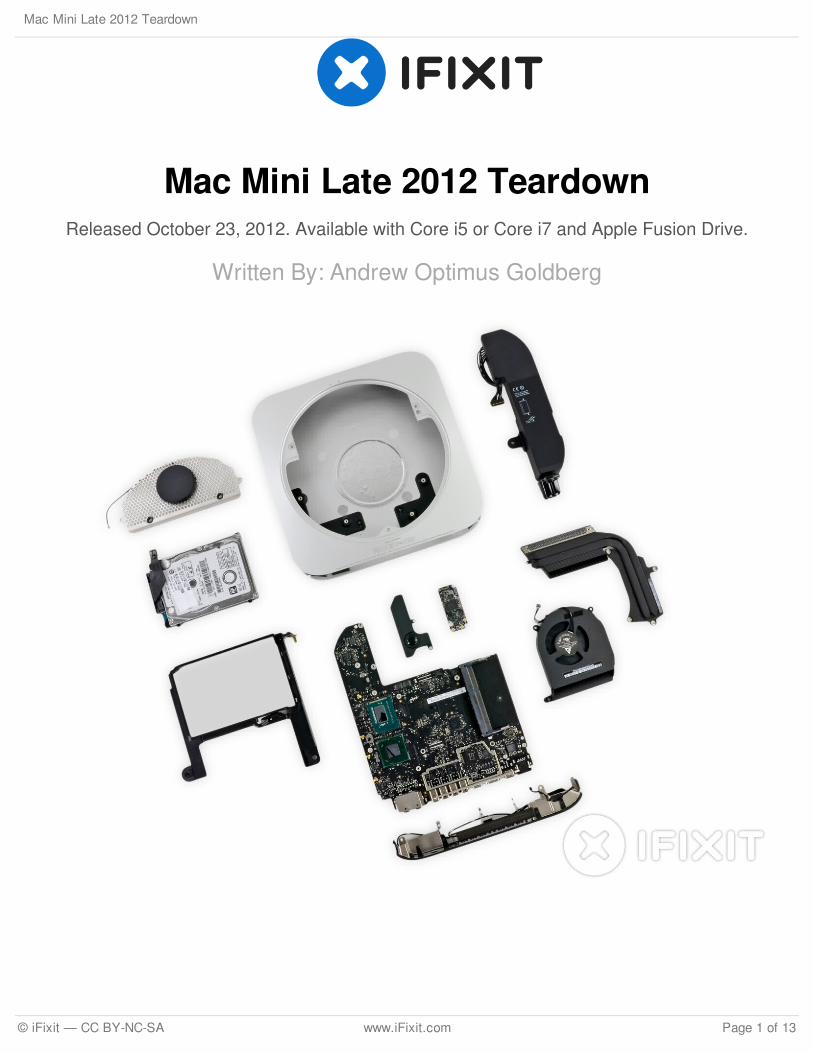
Mac Mini Late 2012 TeardownReleased October 23, 2012. Available with Core i5 or Core i7 and Apple Fusion Drive.
Written By: Andrew Optimus Goldberg
Mac Mini Late 2012 Teardown
© iFixit — CC BY-NC-SA www.iFixit.com Page 1 of 13
INTRODUCTION
Apple is shrinking! No, not in the AAPL stock way (that's high as ever), but in the 'Let's nameeverything Mini' way. Along with the announcement of the iPad Mini on October 23rd (teardowncoming soon; we promise) came the new and improved Mac Mini, the 2012 iteration of the optical-drive-less Mini from last year. With the current trend, we look forward to maybe one day tearingdown a smaller version of the Mac Mini: the Mac Mini Mini. But until then, we content ourselves withtearing into the Mac Mini Late 2012.
Want to be kept in the loop about all of our latest teardowns, big and small? Follow us on Twitter, orcheck us out on New Myspace to keep up with all the latest iFixit news.
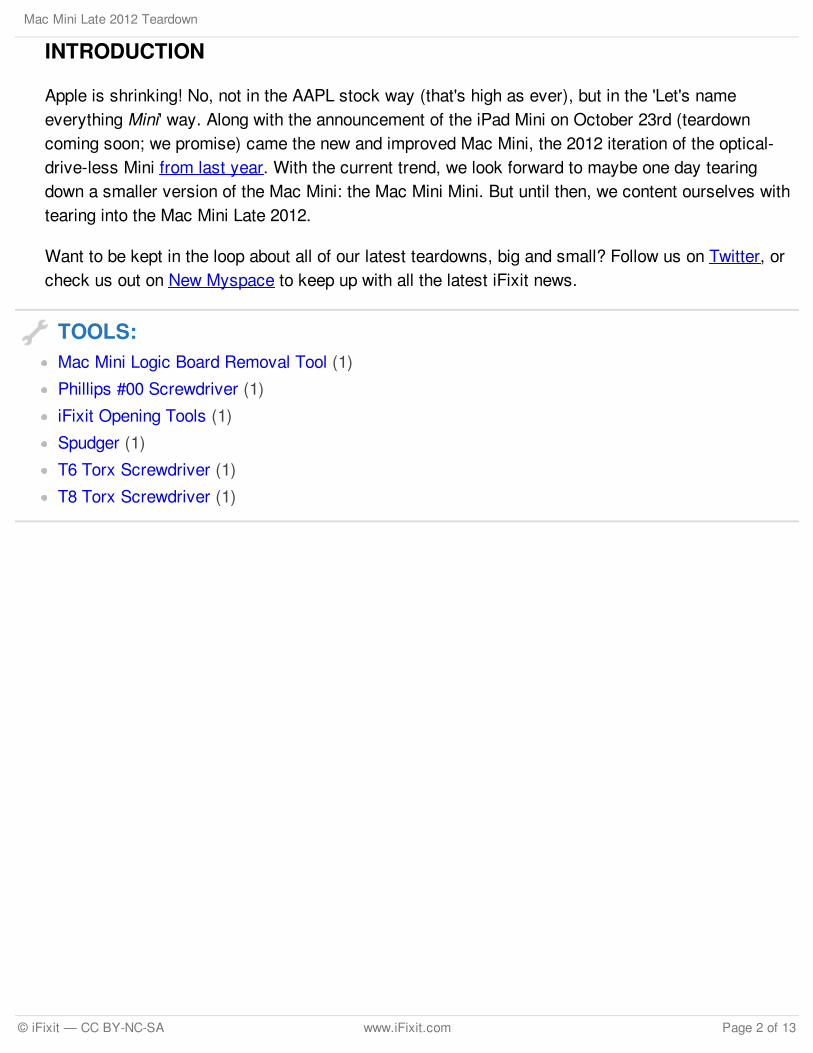
TOOLS:Mac Mini Logic Board Removal Tool (1)
Phillips #00 Screwdriver (1)
iFixit Opening Tools (1)
Spudger (1)
T6 Torx Screwdriver (1)
T8 Torx Screwdriver (1)
Mac Mini Late 2012 Teardown
© iFixit — CC BY-NC-SA www.iFixit.com Page 2 of 13
Step 1 — Mac Mini Late 2012 Teardown
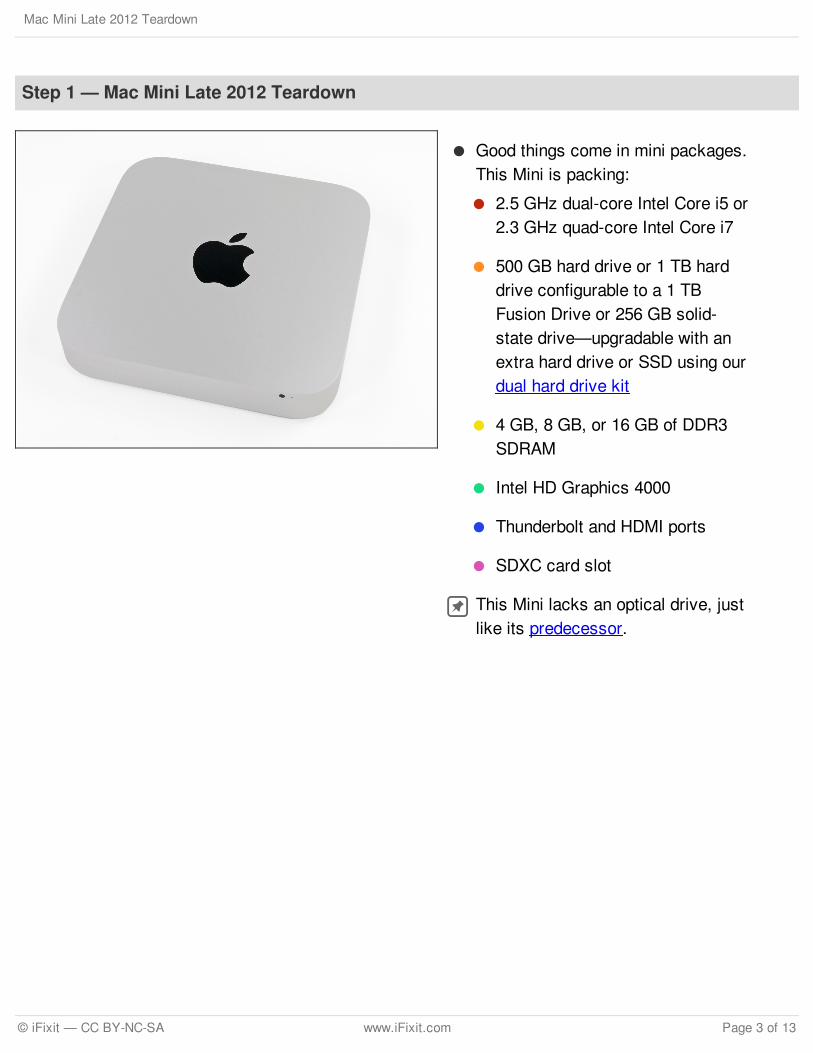
Good things come in mini packages.This Mini is packing:
2.5 GHz dual-core Intel Core i5 or2.3 GHz quad-core Intel Core i7
500 GB hard drive or 1 TB harddrive configurable to a 1 TBFusion Drive or 256 GB solid-state drive—upgradable with anextra hard drive or SSD using ourdual hard drive kit
4 GB, 8 GB, or 16 GB of DDR3SDRAM
Intel HD Graphics 4000
Thunderbolt and HDMI ports
SDXC card slot
This Mini lacks an optical drive, justlike its predecessor.
Mac Mini Late 2012 Teardown
© iFixit — CC BY-NC-SA www.iFixit.com Page 3 of 13
Step 2
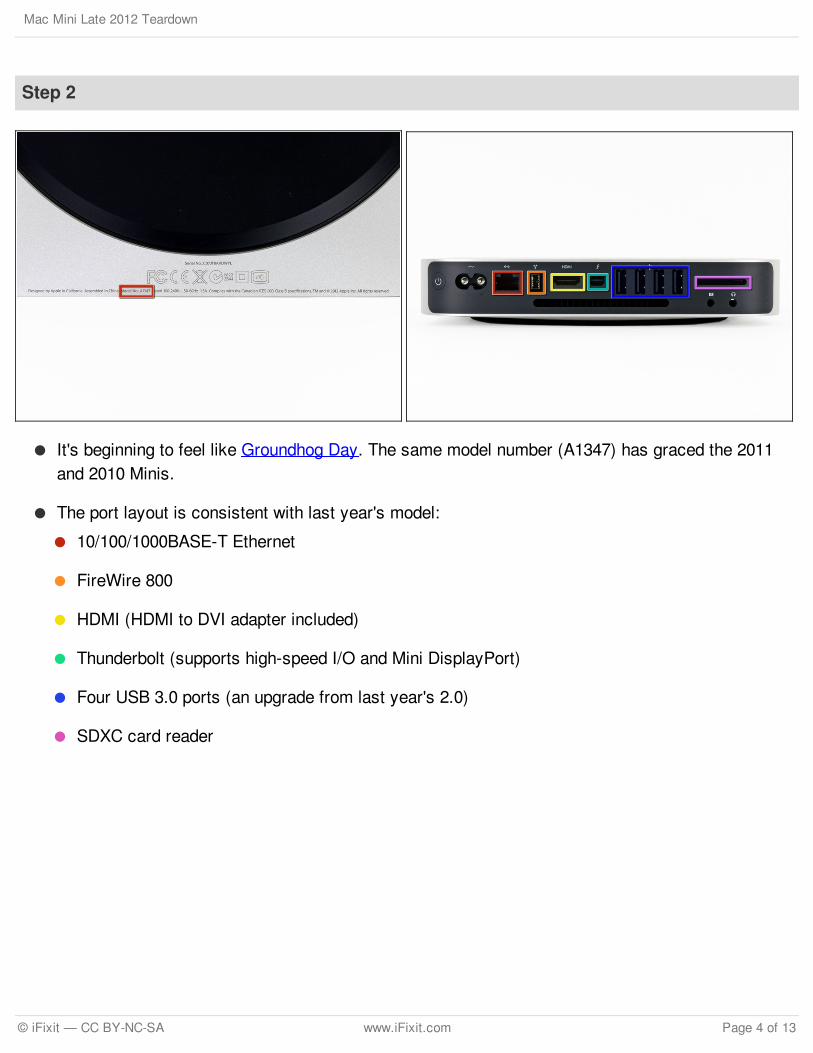
It's beginning to feel like Groundhog Day. The same model number (A1347) has graced the 2011and 2010 Minis.
The port layout is consistent with last year's model:
10/100/1000BASE-T Ethernet
FireWire 800
HDMI (HDMI to DVI adapter included)
Thunderbolt (supports high-speed I/O and Mini DisplayPort)
Four USB 3.0 ports (an upgrade from last year's 2.0)
SDXC card reader
Mac Mini Late 2012 Teardown
© iFixit — CC BY-NC-SA www.iFixit.com Page 4 of 13

Step 3
Twist and shout!
A simple twist of the bottom cover and we're in. That is plus one for repairability.
Upgradeable RAM!! Oh, how we've missed you!
The 2012 iteration of the Mac Mini is equipped with PC3-12800 DDR3 RAM.
It's refreshing to see an Apple product with user replaceable/upgradeable RAM.
Step 4
We're fans of easily removable fans.
Easily accessible fans mean soot sprites better run for cover, because cleaning dirty fans is noproblem.
Need to clean your fan? Directions can be found here.
Mac Mini Late 2012 Teardown
© iFixit — CC BY-NC-SA www.iFixit.com Page 5 of 13
Step 5
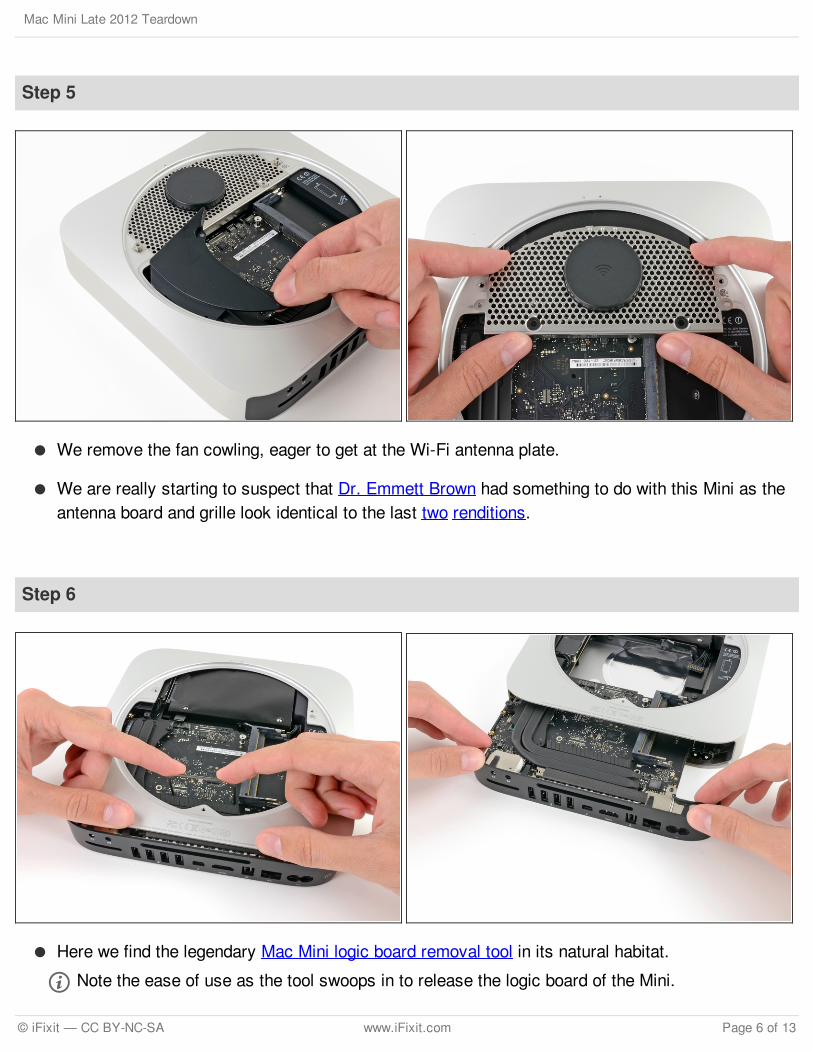
We remove the fan cowling, eager to get at the Wi-Fi antenna plate.
We are really starting to suspect that Dr. Emmett Brown had something to do with this Mini as theantenna board and grille look identical to the last two renditions.
Step 6
Here we find the legendary Mac Mini logic board removal tool in its natural habitat.
Note the ease of use as the tool swoops in to release the logic board of the Mini.
Mac Mini Late 2012 Teardown
© iFixit — CC BY-NC-SA www.iFixit.com Page 6 of 13

Step 7
The first component off the logic board assembly is the speaker assembly.
The speaker cable was arranged in a twisted pair, probably to reduce EMI that could distort thesweet, iconic tones of the Apple startup sound.
Mac Mini Late 2012 Teardown
© iFixit — CC BY-NC-SA www.iFixit.com Page 7 of 13
Step 8
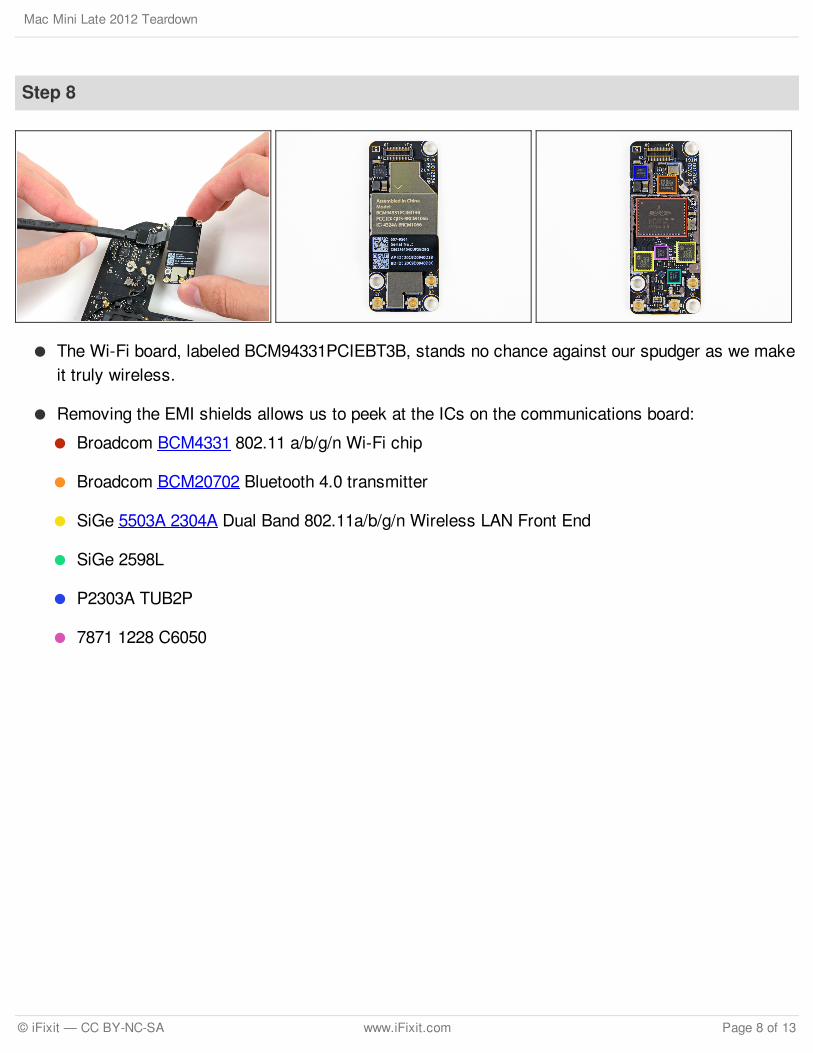
The Wi-Fi board, labeled BCM94331PCIEBT3B, stands no chance against our spudger as we makeit truly wireless.
Removing the EMI shields allows us to peek at the ICs on the communications board:
Broadcom BCM4331 802.11 a/b/g/n Wi-Fi chip
Broadcom BCM20702 Bluetooth 4.0 transmitter
SiGe 5503A 2304A Dual Band 802.11a/b/g/n Wireless LAN Front End
SiGe 2598L
P2303A TUB2P
7871 1228 C6050
Mac Mini Late 2012 Teardown
© iFixit — CC BY-NC-SA www.iFixit.com Page 8 of 13
Step 9
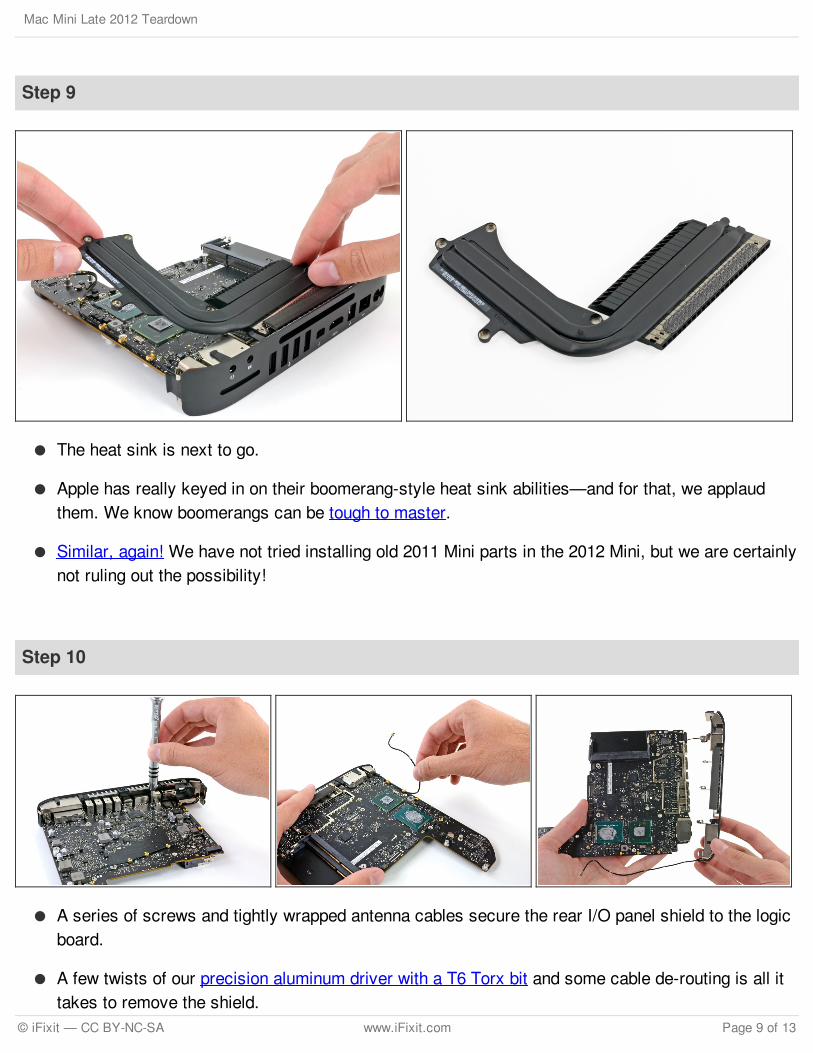
The heat sink is next to go.
Apple has really keyed in on their boomerang-style heat sink abilities—and for that, we applaudthem. We know boomerangs can be tough to master.
Similar, again! We have not tried installing old 2011 Mini parts in the 2012 Mini, but we are certainlynot ruling out the possibility!
Step 10
A series of screws and tightly wrapped antenna cables secure the rear I/O panel shield to the logicboard.
A few twists of our precision aluminum driver with a T6 Torx bit and some cable de-routing is all ittakes to remove the shield.
Mac Mini Late 2012 Teardown
© iFixit — CC BY-NC-SA www.iFixit.com Page 9 of 13
Step 11
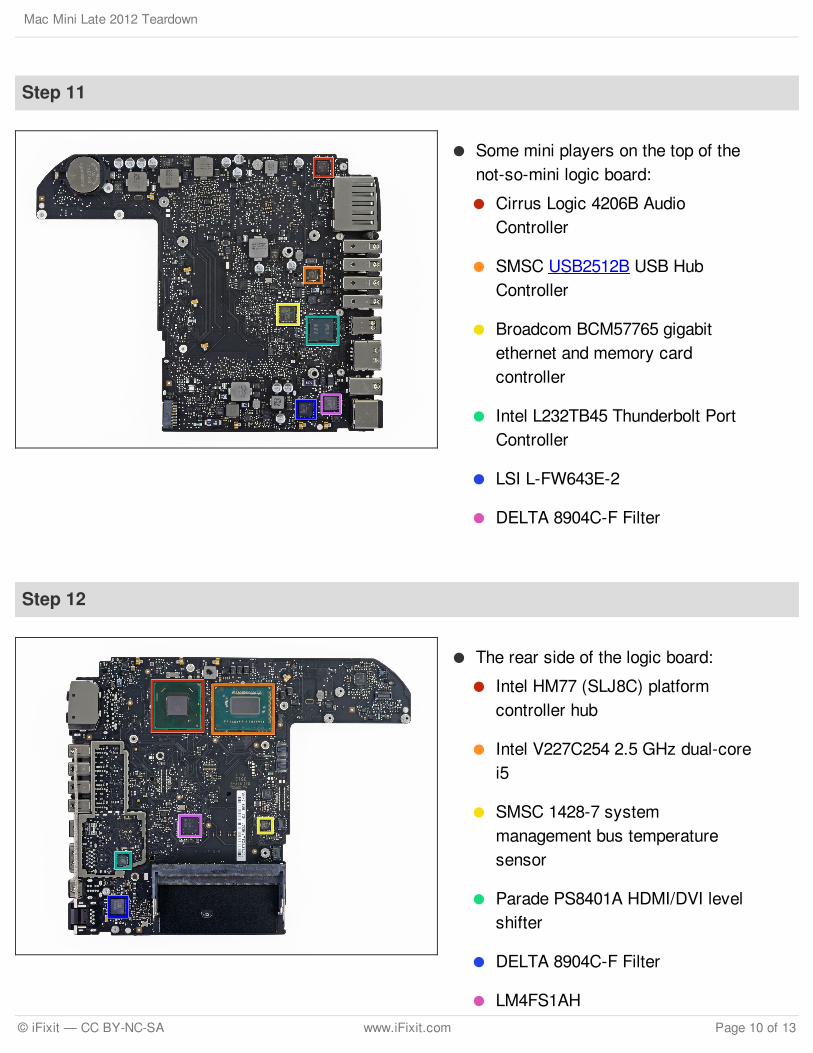
Some mini players on the top of thenot-so-mini logic board:
Cirrus Logic 4206B AudioController
SMSC USB2512B USB HubController
Broadcom BCM57765 gigabitethernet and memory cardcontroller
Intel L232TB45 Thunderbolt PortController
LSI L-FW643E-2
DELTA 8904C-F Filter
Step 12
The rear side of the logic board:
Intel HM77 (SLJ8C) platformcontroller hub
Intel V227C254 2.5 GHz dual-corei5
SMSC 1428-7 systemmanagement bus temperaturesensor
Parade PS8401A HDMI/DVI levelshifter
DELTA 8904C-F Filter
LM4FS1AH
Mac Mini Late 2012 Teardown
© iFixit — CC BY-NC-SA www.iFixit.com Page 10 of 13
Step 13
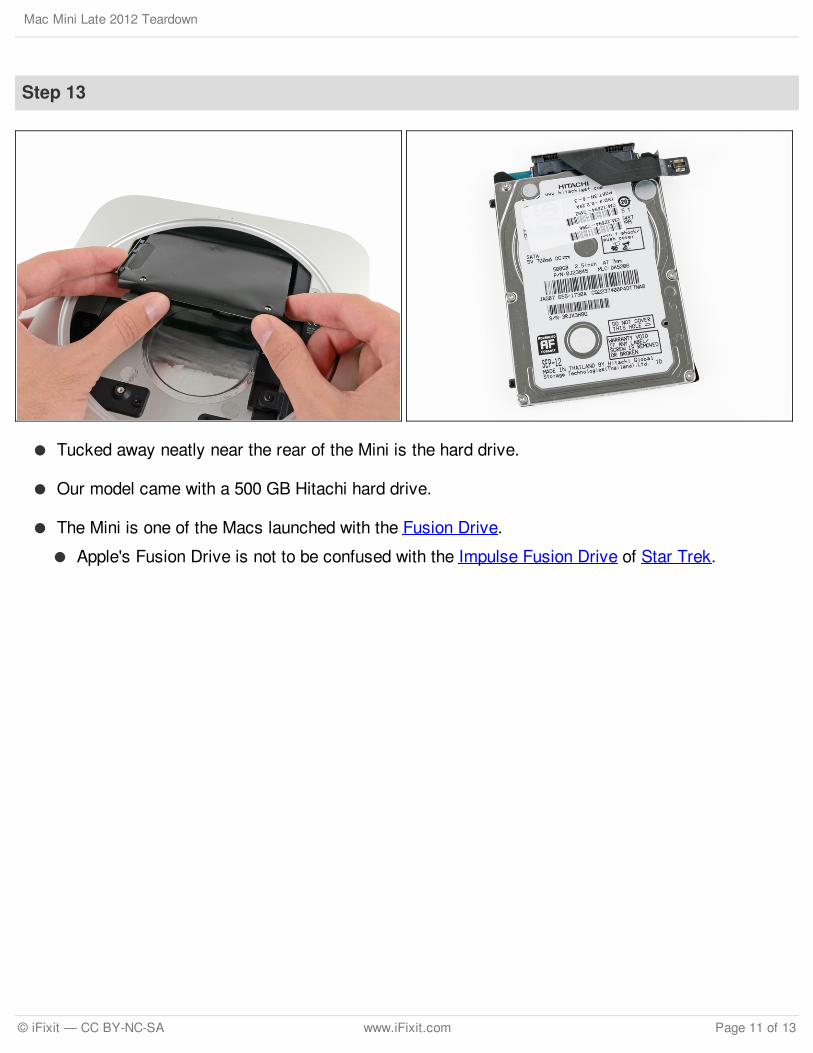
Tucked away neatly near the rear of the Mini is the hard drive.
Our model came with a 500 GB Hitachi hard drive.
The Mini is one of the Macs launched with the Fusion Drive.
Apple's Fusion Drive is not to be confused with the Impulse Fusion Drive of Star Trek.
Mac Mini Late 2012 Teardown
© iFixit — CC BY-NC-SA www.iFixit.com Page 11 of 13
Step 14
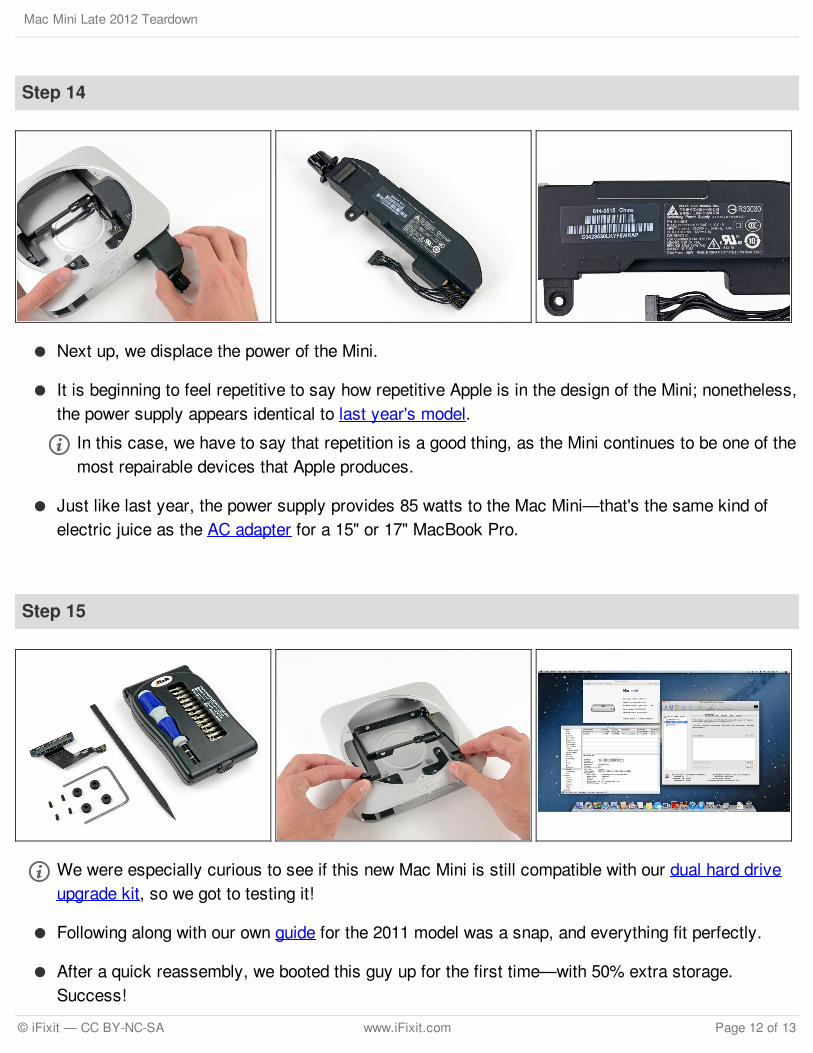
Next up, we displace the power of the Mini.
It is beginning to feel repetitive to say how repetitive Apple is in the design of the Mini; nonetheless,the power supply appears identical to last year's model.
In this case, we have to say that repetition is a good thing, as the Mini continues to be one of themost repairable devices that Apple produces.
Just like last year, the power supply provides 85 watts to the Mac Mini—that's the same kind ofelectric juice as the AC adapter for a 15" or 17" MacBook Pro.
Step 15
We were especially curious to see if this new Mac Mini is still compatible with our dual hard driveupgrade kit, so we got to testing it!
Following along with our own guide for the 2011 model was a snap, and everything fit perfectly.
After a quick reassembly, we booted this guy up for the first time—with 50% extra storage.Success!
Mac Mini Late 2012 Teardown
© iFixit — CC BY-NC-SA www.iFixit.com Page 12 of 13

This document was last generated on 2017-06-17 04:13:29 AM.
Step 16
Mac Mini Mid 2012 Repairability: 8 out of 10 (10 is easiest to repair).
No proprietary screws are found within the device.
You can easily upgrade your RAM and hard drive, as well as add a secondary drive.
There's no glue anywhere inside that needs to be removed while disassembling the Mini.
The CPU is soldered to the logic board and not user-upgradeable.
While not difficult to do, you still have to remove almost all the internals in order to replace thepower supply.
Mac Mini Late 2012 Teardown
© iFixit — CC BY-NC-SA www.iFixit.com Page 13 of 13