
Lone Star High School Ranger Band · Lone Star High School Ranger Band Marching Technique ... L....
35
1 Lone Star High School Ranger Band Marching Technique Manual 2016 - 2017 Melissa Hatheway Assistant Band Director
Transcript of Lone Star High School Ranger Band · Lone Star High School Ranger Band Marching Technique ... L....
1
Lone Star High School
Ranger Band
Marching Technique
Manual
2016 - 2017
Melissa Hatheway
Assistant Band Director

2
Table of Contents
I. Posture
A. Body Mapping
B. Six Points of Balance
C. Foot Placement
D. Knee Alignment
E. Movement from the Hip
F. The Torso and Spine
G. Shoulders
H. The A.O. Joint
I. “Stand-by” Position
J. “At Ease” Position
K. “Attention” Position
L. “Horns Down” Position
M. “Horns Up” Position
II. Mark Time
A. Technique
B. Timing
C. Pivots
III. Forward March
A. Technique
B. Cross-Through Position
C. The Halt
D. Timing
IV. Backward March
A. Technique
B. Cross-Through Position
C. Keeping Feet in Track
D. The Halt
E. Timing

3
V. Step Outs
A. Technique
B. Timing
C. Backward Step Out
VI. Direction Changes
A. Forward to Backward
B. Backward to Forward
C. Turns & Flanks
D. Secondary Direction Changes – Preps
VII. Slides
A. Standing Still
B. On the Move
VIII. Procedures
A. Marching Rehearsal
B. Football Games
C. Contests

4
I. Posture
A. Body Mapping
The Andover educators developed the “Six Points of Balance” from the Body Mapping
technique. An important aspect of learning this balanced posture is to develop an
anatomically correct Body Map. The Body Map is one’s self-representation of the
skeleton in one’s own brain. An inaccurate Body Map produces inefficient movement
that may lead to misuse and injury. An accurate body map is efficient, smooth and
produces elegant and controlled movement. By learning more about the anatomy of the
human body and pinpointing where these six points of balance lie on one’s own body, a
correct posture and use of the body can be obtained.

5
B. The Six Points of Balance
1. Ankles
2. Knees
3. Hips
4. Torso
5. Shoulders
6. A.O. Joint
The above “Six Points of Balance” correspond to six joints within the body that should
be balanced over each other in order to obtain a proper standing posture. The “point of
balance” is the place where movement in any direction is easiest.
6
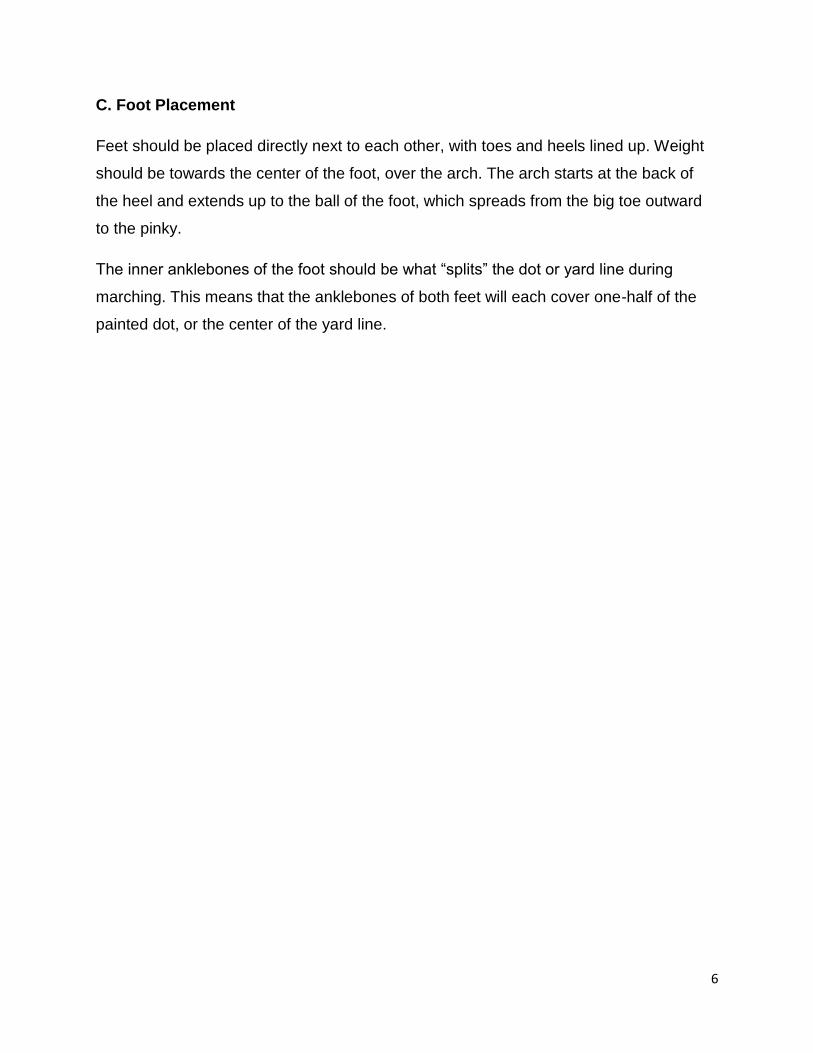
C. Foot Placement
Feet should be placed directly next to each other, with toes and heels lined up. Weight
should be towards the center of the foot, over the arch. The arch starts at the back of
the heel and extends up to the ball of the foot, which spreads from the big toe outward
to the pinky.
The inner anklebones of the foot should be what “splits” the dot or yard line during
marching. This means that the anklebones of both feet will each cover one-half of the
painted dot, or the center of the yard line.

7
D. Knee Alignment
It is vital to note that the kneecap floats on top of the actual knee joint. When putting the
knee in proper balance, be sure that the knee is not locked with the kneecap pulled
back. Instead, think of the knee joint as where the thigh and lower leg meet with the
kneecap appearing above the joint.
The previous picture shows the position of the leg bones in a locked, balanced, and
bent position. Proper marching technique dictates a straight leg and a balanced knee
joint.
Locked Knee Balanced Knee Bent Knee
8
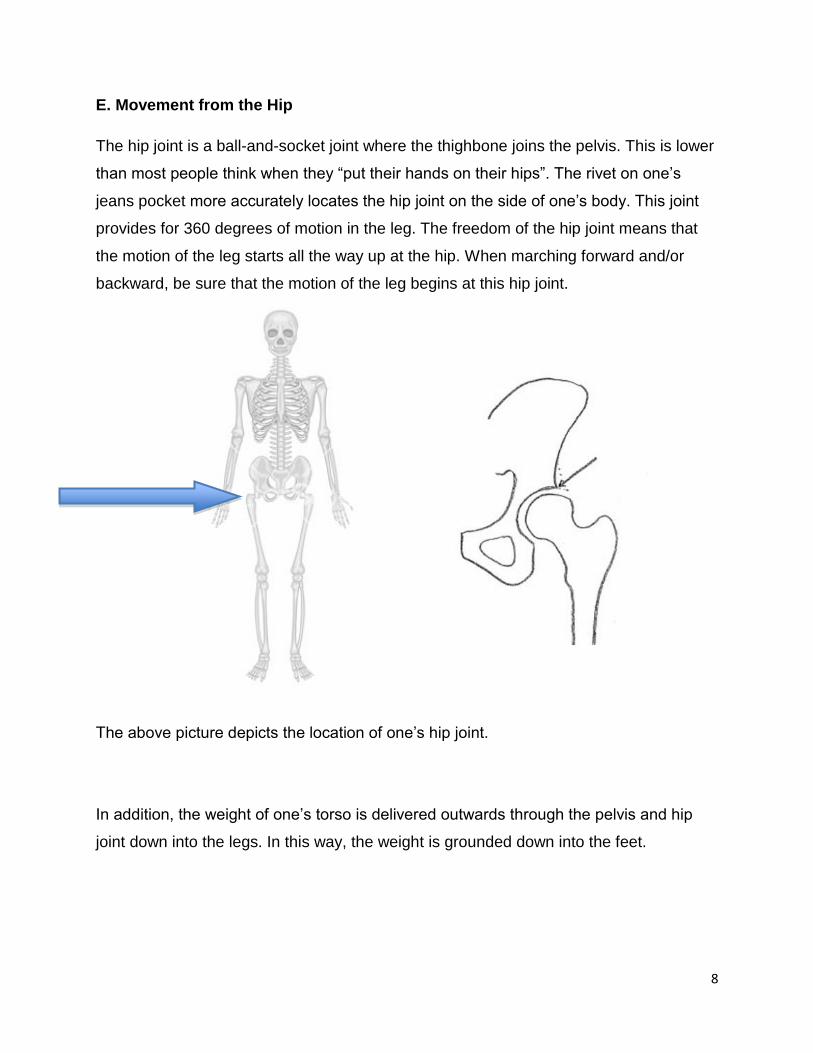
E. Movement from the Hip
The hip joint is a ball-and-socket joint where the thighbone joins the pelvis. This is lower
than most people think when they “put their hands on their hips”. The rivet on one’s
jeans pocket more accurately locates the hip joint on the side of one’s body. This joint
provides for 360 degrees of motion in the leg. The freedom of the hip joint means that
the motion of the leg starts all the way up at the hip. When marching forward and/or
backward, be sure that the motion of the leg begins at this hip joint.
The above picture depicts the location of one’s hip joint.
In addition, the weight of one’s torso is delivered outwards through the pelvis and hip
joint down into the legs. In this way, the weight is grounded down into the feet.

9
F. The Torso and Spine
The spine travels through the pelvis and torso into the neck and ultimately, the head.
The spine is intentionally curved so that it can absorb the impact of movement. The
spine is segmented by curves so that it can move in any direction and twist. It also
lengthens and gathers. Therefore, it is vital not to try and straighten the spine, but rather
lengthen it by avoiding tension. The lengthening and gathering of the spine vertebrae is
a reflexive movement that will occur constantly if one does not contract against it
through tension.
The back half of the spine (the bony points that one can feel through the skin) contains
the spinal cord and nerves. This is not the weight bearing half of the spine. Rather, the
weight bearing half of the spine is the core that is located more towards the middle of
the body. Keep one’s weight towards the core of the body to avoid putting weight and
pressure onto the nerves in the spinal cord.
In order for the muscles of the back to be free and allow the spine to curve and lengthen
as needed, the torso must be in proper balance. When locating this point of balance,
feel along the side of one’s body for the lowest rib. These bones should be balanced
over the hips. In addition, to fully enjoy a freedom of the leg muscles, one must let the
whole back release onto the core support of the spine. Therefore, the muscles that fan
from the lower back down through the pelvis and hips into the legs must release all
tension. This release will feel like a downward drop of the rear, but this is not the same
as tucking the butt underneath you. There should not be any rotation of the hips, but
rather a relaxation of the gluteus. This release will give the lower back a subtle and
natural curve.

10
G. Shoulders
The shoulders are another ball-and-socket joint, and therefore have 360 degrees of
available motion. When identifying the “point of balance”, be sure to identify the joint as
the end of the shoulder where the arm comes into the shoulder. This is the point that
should be balanced over the torso, hips, and so on.
Although the shoulder joint is the “point of balance”, there are three other joints in the
arm structure to be concerned about when marching. These are the wrist, elbow, and
sternoclavicular joint (the last of these being where the clavicle connects to the sternum
– or the top of the shoulder coming into the rib cage). Many muscles that move the arm
structure extend to the front and back. Therefore, free movement of the arms relies on
tension free muscles in these areas.
The above picture depicts the four joints of the arm structure: 1) sternoclavicular,
2) shoulder, 3) elbow and 4) wrist.

11
H. The A. O. Joint
The A. O. Joint is made up of the atlas (the top of the vertebra of the spine) and the
occiput (a round donut-like bone that is the base of the skull). This joint is located right
between – and in the same plane of – the ears. One can find the A. O. joint by nodding
and then shaking one’s head, and then locating the axis point for this motion. This joint
is the last “point of balance”. The A. O. joint should be centered between the shoulders.
In addition, this point should be where one lifts up. Using the A.O. joint as an axis point,
the chin should be raised to 15 degrees above parallel.
The above picture depicts the location of the A. O. joint right between the ears.

12
I. “Stand-by” Position
This is the position that all marching members will return to when not marching.
Instructors will give information to members while they are at this position.
Stand with the “Six Points of Balance” posture, as described in Section I. of the manual.
From here, simply form the left hand into a relaxed fist. The right hand will form a blade,
with all the fingers except the thumb touching, and cover the left fist. From here, the
arms will hang down naturally in front of the body. Captains will further describe this
position with instruments.

13
J. “At Ease” Position
This is the position that all marching members will assume when not being given
information or worked with. This is a more relaxed posture than the “Stand-by” position.
Marching members will only go to this position when given the verbal instruction “At
Ease” from an instructor.
Stand with the right foot on the dot. From here, the member can stand however if most
comfortable: with feet apart, knees bent, or instrument held to the side. The member
should be able to quickly return to the “Stand-by” position.

14
K. “Attention” Position
This is the position that all marching members will snap to before beginning a marching
exercise or portion of the production. Unless otherwise instructed, the position of
attention will always be with the horns down.
Again, stand with the “Six Points of Balance” posture, as described in Section I. of the
manual. The left hand will still be in a fist, with the right hand blade covering it. The right
hand thumb will be placed directly above the left hand fist, in the “swirl” created by the
index finger. The fist will come up to where the fist is level with the sternum. The fingers
will face in towards the center of the body. The arms will form a right angle with each
other, so that the plane of the wrist and arm is continuous (with no bend or break).
If instructed to go to the “horns up” from here, simply rotate at the wrist so that the
thumbs now face the body. There should be a straight plane from knuckles to elbow.
Picture examples of set with horns down and horns up are available on the next page.
An example of stand-by position can be seen below:
Stand-by Position

15
Set with Horns Down Set with Horns Up
L. “Horns Down” Position
This is the position that marching members will assume with their instruments in their
hands, but not in the playing position. This position will be used in both visual and
marching rehearsals. “Horn’s down” position without instruments is as described above.
Captains will further describe the details of this position for each section when using
instruments.
M. “Horns Up” Position
This is the position that marching members will assume with their instruments in their
hands and in the playing position. This position will be used in both visual and marching
rehearsals. When not holding instruments, the fist will come up to be level with the
student’s mouth. Imagine that the “swirl” created by the thumbs is the mouthpiece.
Captains will further describe the details of this position for each section.

16
II. Mark Time
A. Technique
Mark time serves as a way for marching
members to keep tempo while rehearsing music
only (standing still). Mark time technique should
be employed during all music ensemble
rehearsals.
Starting with the feet together, raise the left heel
until the bottom of one’s shoe is approximately
one inch off of the ground. As the heel raises,
the knee should pull straight forward over the
toe of the left foot. From here, simply reverse
the motion, and bring the left heel back down to
the ground. Repeat this process with the right
foot. This motion will continue, trading feet, until
the marching member is told to stop or the
exercise is complete.
Throughout the mark time motion, the hips
should not sway back and forth. Rather, one
should lift up, so as to maintain posture and
proper control of their body and instrument.
Heel should be about 1 inch off of the ground.

17
B. Timing
Motion will start on the “&” of the eighth beat of the preparation measure before the
exercise begins. Students will always receive two full measures of four counts each
before an exercise begins. The left heel will come down and hit the ground on the
downbeat of “1” in the first actual measure. The heels will continue to hit the ground on
each downbeat.
C. Pivots
Pivots are a slow turn of 90-degrees over four counts. During this turn, the toes will lift
naturally off to ground to allow for the motion of the foot. This motion is very similar to
that of mark time.

18
III. Forward March
A. Technique
Forward march technique is nothing more than defined walking. Forward march begins
before any movement is visible. This occurs during the eighth count of the preparation
measure, when the right leg muscles engage to prepare movement. This can be
achieved curling the toes in the right foot until the muscles all the way up through the
right leg engage. The right leg serves as the “push” into the first step of forward march.
As the right leg propels the marcher forward,
the left heel stays very close to the ground,
until it comes to rest of the back edge of the left
heel. The left foot will form a right angle, as the
foot remains flexed throughout the motion. The
toes of the left foot will pull back towards the
left shin to achieve “high toes”. Throughout the
motion of the left foot, the knee will remain
pulled back so that the leg is balanced at the
knee joint. Be mindful that the kneecap should
float on top of the knee joint. The knee joint is
not a part of the motion forward; rather, the hip
joint initiates the motion down to the ankle.
This process will repeat with the right foot.
During this motion, the left foot will roll down
onto the platform, before taking the third step
forward. In this way, the feet will remain in
constant motion.
Throughout this motion, the marcher’s weight must be split evening between both feet.
This will ensure that the marcher’s body remains directly in between both of their legs
and keep their rear tucked. The students must also lift up, to minimize bouncing will in
motion.
First step of forward march
19
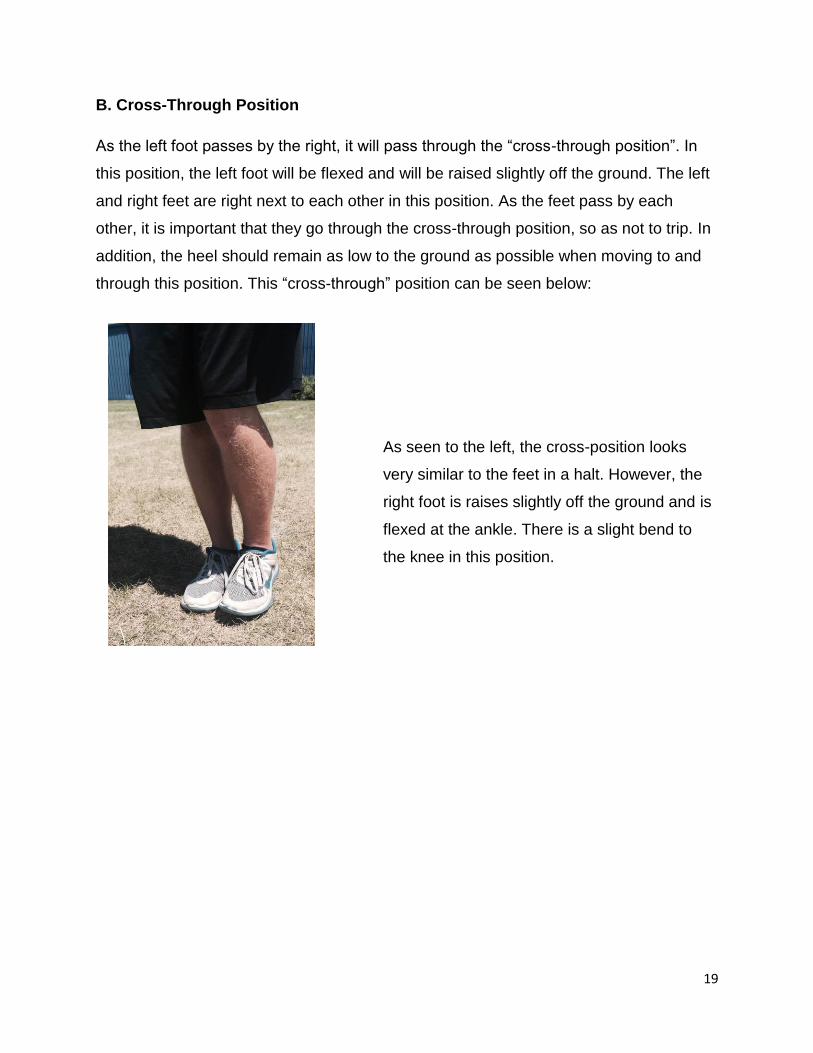
B. Cross-Through Position
As the left foot passes by the right, it will pass through the “cross-through position”. In
this position, the left foot will be flexed and will be raised slightly off the ground. The left
and right feet are right next to each other in this position. As the feet pass by each
other, it is important that they go through the cross-through position, so as not to trip. In
addition, the heel should remain as low to the ground as possible when moving to and
through this position. This “cross-through” position can be seen below:
As seen to the left, the cross-position looks
very similar to the feet in a halt. However, the
right foot is raises slightly off the ground and is
flexed at the ankle. There is a slight bend to
the knee in this position.

20
C. The Halt
To come to a halt from forward march, the platform of the foot will hit the ground instead
of the heel on whatever the last count is (for this example, that would be count eight).
On the downbeat of one of the next measure, the halt, the right platform will also hit the
ground, followed shortly by the rest of the foot. During this motion, the left heel will
slowly pull down towards the ground. The right toe and heel will be directly next to the
left in the halt position. The foot should remain flexed as it comes into the halt.
D. Timing
All exercises will begin with two four-count measures. The right leg will activate, or
engage, the muscles on beat eight of these preparation measures. The left foot will
begin to move on the “&” of beat eight. The left heel will hit the ground on the downbeat
of one of the first real measure. The heel of each foot will always hit on the downbeat.
All cross-through positions will occur on the “&” of each beat. During the halt, the right
platform will hit the ground on the last downbeat of the measure. The feet will close and
motion will stop on the downbeat of one.

21
IV. Backward March
A. Technique
Backward march technique was developed so that the body could still face the
audience, while the performer moved backwards. This development led to much more
interesting drill formations and possibilities. Backward marching technique utilizes the
calf muscles almost constantly, so strengthening of these muscles is encouraged. In
addition, it is important to equally strengthen the thigh muscles so as to balance around
the knee joint.
Backward marching technique begins
identically to forward marching technique –
with the activation of the right leg muscles.
Please refer to Section II.A for more instruction
on this topic. The movement of the left leg
differs only in that it is moving backward, rather
than forward. The movement still comes from
the hip joint down to the ankle. The knee will
remain straight and balanced while the left leg
moves straight back. The left foot will land on
the platform, or first two-thirds of the foot. It is
important that the heel pulls straight back in the
direction of travel, so that when landing on the
downbeat the heel is not turned underneath the
body. The foot should remain flexed throughout
this movement, and the heel should be as
close to the ground as possible without risk of
tripping. Upon landing on the platform, the left
heel should only be an inch or two off the
ground. This motion is identical in the right foot.
An example of proper backwards technique
can be seen to the left.

22
B. Cross-Through Position
Throughout the backward march, the marching member will always remain on their
platforms – the heel should never touch the ground. The “cross-through position” is very
similar in the backward march technique as the forward. Both feet will be lined up, with
heels and toes next to each other. The passing foot will be flexed and raised slightly off
the ground. Unlike during forward march, in the backward technique, the non-passing
foot will be on the platform, not rolled through and planted on the ground.
C. Keeping Feet in Track
As the marcher moves backward, it is vital that the heel pulls straight back. This is
commonly referred to as “keeping your feet in track”. If a student ever places one foot
directly behind the other, the risk for tripping increases dramatically. Therefore, as the
student marches backwards, they must keep their feet moving in their own independent
tracks straight behind them. In addition, when landing on the platform, be sure that the
weight of the body is centered towards the big toe. When the weight is thrown to the
outside of the foot, over the pinky toe, the ankle is thrown out of proper balance. This is
known as over supination.
As seen to the right, the heels must remain in
track while moving backwards.

23
D. The Halt
The halting process is very similar to that of the forward march technique. On the last
downbeat of the measure, say beat eight, the right platform will hit the ground. On the
first beat of the halt measure, the left platform will move backwards to meet the right.
During this motion, the right platform will slowly roll down to where the entire foot is on
the ground, as will the left. As with the forward halt, the foot will flex and keep the heel
as low to the ground as possible when coming into the halt.
E. Timing
The timing of this backward march technique is identical to that of the forward march.
Please refer to section II.D. for more information.

24
V. Step-Outs
A. Technique
Step-outs are used to designate the beginnings of drill sets during music ensemble
rehearsals. Marching members will begin all drill sets with a complete step-out in the
direction of travel, and then continue with mark time technique. Step-outs can be done
in both the forward and backward direction, as well as at an angle. For the purposes of
the general technique, a forward step-out will be described below.
A step-out begins with one step of forward march, at an 8 to 5 step size. The leg will
remain straight, but will land on the left platform. This is the same as the “prep step”
used before halts when marching forward. The right heel will come off the ground
naturally. From here, the marching member will simply push back so the feet are placed
next to each other. Mark time will begin immediately with the right foot and continue
from there. Once drill is learned, the step out should be in the size and direction the
marcher would travel to their dot.
B. Timing
Students will have two four-count measures of preparation before the step-out will
begin. On the eight count of the preparation measure, the students will engage the right
leg. Movement forward will begin on the “&” of beat eight. The marching member will
land on the platform of their left foot on the downbeat of one of the first measure. The
right heel will be placed back on the ground on the downbeat of two. The left foot will
come back on the next beat, and be placed next to the right foot on the downbeat of
three. The right foot will resume normal mark time technique on beat four.
C. Backward Step Out
The backward step-out differs only in that the step is backwards and not forwards. The
marcher still lands on the platform and with the same timing as above.
25
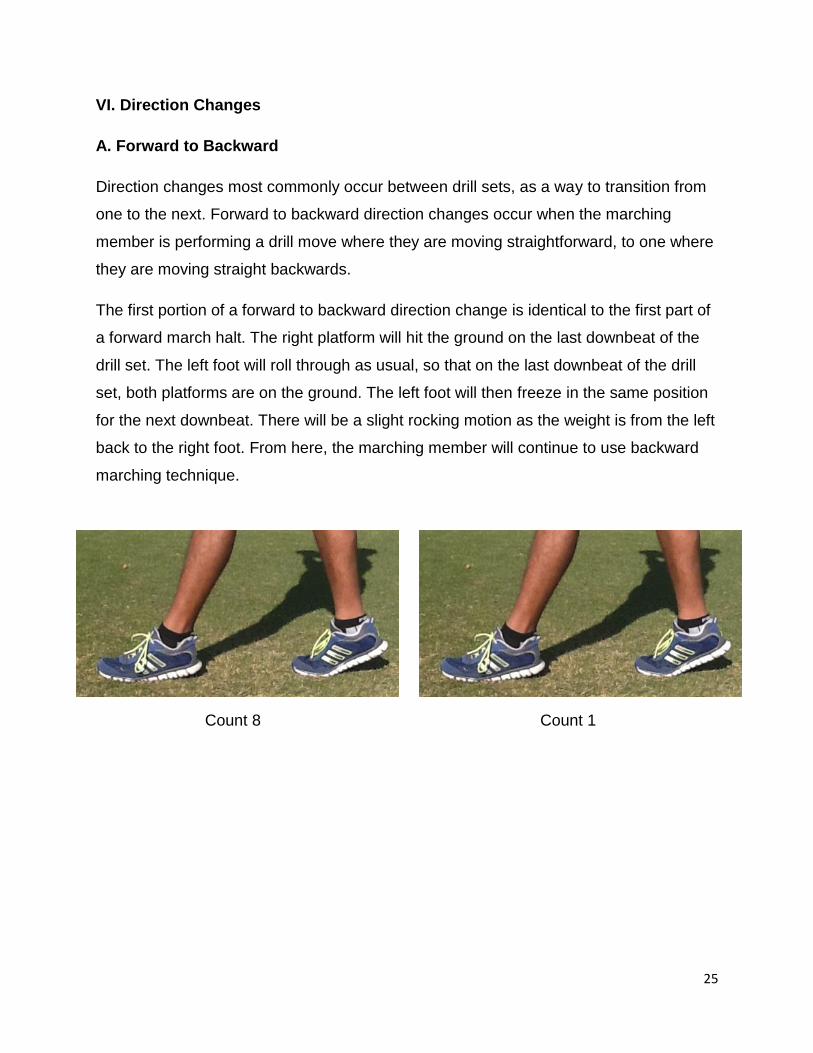
VI. Direction Changes
A. Forward to Backward
Direction changes most commonly occur between drill sets, as a way to transition from
one to the next. Forward to backward direction changes occur when the marching
member is performing a drill move where they are moving straightforward, to one where
they are moving straight backwards.
The first portion of a forward to backward direction change is identical to the first part of
a forward march halt. The right platform will hit the ground on the last downbeat of the
drill set. The left foot will roll through as usual, so that on the last downbeat of the drill
set, both platforms are on the ground. The left foot will then freeze in the same position
for the next downbeat. There will be a slight rocking motion as the weight is from the left
back to the right foot. From here, the marching member will continue to use backward
marching technique.
Count 8 Count 1

26
B. Backward to Forward
Backward to forward direction changes occur when the marching member transitions
from a drill set where they are moving straight backward, to one where they are moving
straight forward.
During a backward direction change, the marching member will march the drill set as
normal, and freeze on the last beat (for the purposes of this exercise, beat eight). On
the downbeat of eight, both platforms will be touching the ground. From beat eight to
beat one, the left foot will simply freeze. From here, the marching member will continue
to next drill set by marching forward. The foot will land on the heel for the downbeat of
two.
Count 8 Count 1

27
C. Turns and Flanks
A turn, also known as a flank, occurs when the feet and upper body rotate 90-degrees
either to the left or the right. The terms “turn” and “flank” will be used interchangeably.
The corner of this turn (on beat eight) will be a “prep step” with the platform down.
When using the standard roll through step, normal technique will be used through count
seven. Count eight will be a prep step with the platform down, still in the direction of
original travel. Step one in the new direction will occur immediately on the downbeat of
the next measure. Be sure that the inner ankle bone is still in track, even as the toes
point in the new direction of travel. In a right flank, the left foot will have to travel over
the right in order to take the first step in the new direction.
There will be a slight pivot on the left platform as the upper body moves to face the new
direction. This should be a natural and unforced motion.

28
D. Secondary Direction Changes - Preps
Secondary direction changes occur whenever the marcher must change directions at an
angle. Forward to backward and backward to forward direction change can be modified
and employed during direction changes at an acute angle. However, when the drill calls
for a student to march forward/backward and then to the side, a prep step must be
used.
Preps are very similar to those that precede
halts in that the marching member will land on
their platform on the last downbeat of the drill
set (again, beat eight for these examples).
When landing on the platform, be sure to keep
the weight towards the inside of the foot (over
the big toe) so not as to over supinate the foot.
In the case of prepped direction changes
however, these preps are merely pauses
before continuing on in a new direction. Preps
always split the distance between the old
direction of travel and the new. For example, if
the past drill set called for the marcher to move
straight forward, and the next called for them to
move to the left, the prep step would be a 45-
degree angle to the left.
When prepping, it is vital that the anklebone continues to split the dot, as described in
Section I.A. This may cause the platform of the foot to be placed slightly more forward
and turned out than one might expect. Immediately following a prep step, the marching
member will continue to the next drill set using proper marching technique.

29
VIII. Slides
A. Standing Still
Slides are employed so that the instrument will always face the audience; despite
whatever direction the student is marching. For the purposes of this manual, a 90-
degree slide will be described. However, it is important to note that any angle of a slide
can occur while marching. The same slide technique can be used for all angles of slides
called for by the drill.
To begin a 90-degree slide to the left, first stand with the posture described in Section I.
From here, rotate the pelvis 30 degrees to the left. This twisting motion occurs around
the spine. The upper body should follow the motion of the hips, and be facing 30-
degrees to the left as well. At this point, the torso is balanced over the hip joint. From
here, the torso will continue the rotation to 60-degrees. At this point the shoulders are
also facing the same direction.
From this position, the shoulders will rotate the remaining 30 degrees until the upper
body is facing directly to the left, while the feet still remain in their original position.
Despite this rotation, the shoulders should still be balanced over the torso and hips.
While the shoulders are rotating, focus on elongating the spine and rotating up as well
as to the left. The head should remain in the center of the body, with the collarbones
pointing directly to the left. Relaxation is key to performing a successful slide, so keep
the shoulders down and round.
To perform a 90-degree slide to the right, the same process is used, but rotating to the
right instead of the left. Again, the rotating motion should always begin with the hips and
torso, and then the shoulders.

30
B. On the Move
When performing a slide on the move the most important this is to rotate from the hips
and torso first. However, by doing so, one leg will be slightly longer than the other. For
example, when sliding to the left, the left leg will feel longer and easier to move than the
right. The marcher must compensate this, so that even step sizes are taken.
It is also vital that the marching member keeps their feet in track. The tendency is to
move one foot out at an angle, to lessen the degree of the slide. This just causes more
difficulties however, with drifting and taking curved paths to drill sets. When marching in
a slide, be sure to point the toes and heels of the moving foot in the same direction –
the direction of travel.
Slides both standing still and on the move can be seen below:
Standing Still On the Move (Backwards slide)

31
VIII. Procedures
A. Marching Rehearsal
There is absolutely NO talking on the marching field (both parking lot and grass)
once a student crosses the sidelines. Students may talk amongst themselves on the
sidelines during breaks, etc. There is absolutely no spitting on the marching field
(both parking lot and grass). The color guard uses the entire surface for their
choreography, and they do not want to roll in others’ bodily fluids. There is absolutely
NO cursing on the marching field (both parking lot and grass) or while at
performances. There is absolutely NO cursing when in uniform. Members of the
marching band represent the entire Lone Star High School student body and must
act accordingly.
Instruments are to be carefully laid down by sections on the sidelines of the
marching practice field in “stacks”. Section leaders will provide more information on
how to set instruments down properly. All instruments should look the same when
stacked on the sidelines - facing the same direction, keys up, etc.
When coming outside for marching band rehearsal, students will first set their
instruments down in stacks on the sideline (see above for more information on how
to do this). They will then immediately fall into attendance block. The drum majors
will blow a whistle one minute before rehearsal starts as a reminder. Students are all
expected to be in attendance block by 4:35 pm in order to be counted present for
rehearsal. Section leaders will take attendance at this time.
When standing in attendance block, students are to not talk and to be waiting at
stand by for further instruction. All dynamic stretching and visual fundamentals will
take place from this initial attendance block. The leadership team will provide
instructions regarding dynamic stretching.

32
During water breaks please move with purpose on and off the field. Although
students do not have to run, we need to be mindful of our time and move with a
sense of purpose. Students should use break time to drink water, stretch, etc.
Section leaders may also use this break time to clarify instructions or exercises as
needed.
During rehearsal, the default setting is stand by position. This is where students will
receive all instructions and teaching feedback. After running a portion of drill,
students are to remain frozen in your last step of the set, or “minus one” position.
When given the command “Check”, students are permitted to relax their upper body
and look down to check if they made their set. However, the lower body is still frozen
at this moment. When given the command “Adjust”, students are now permitted to fix
their set as needed. Once a student is in the correct spot, they are to immediately
return to stand by position.
Review the “Order of Commands” listed below; this is the expectation during all
rehearsals.
Order of Commands:
1. Stand by - this is where students will receive instructions on what set to run next
2. Complete the exercise as instructed, and freeze in the last step, or “Minus One”
position
3. Check - relax your upper body only to check your set
4. Adjust - relax your lower body and get on the correct dot (you are encouraged to
check your dot book at this time)
5. Stand by - return to this position while standing on your dot (again, you are
encouraged to check your dot book at this time)
6. Go Field - when given this instruction, both the field technicians and section
leaders may fall out to give more instruction as needed
7. Stand by - field instruction will come to an end and all members will return to
stand by for the next instruction

33
B. Football Games
Before the game each week the band directors will post an itinerary with the complete
schedule. All questions can be answered by referring to that itinerary including attire,
schedule, pick up time information, etc.
On typical game days, when students are released from class they are to proceed to the
cafeteria for the pre-game meal. These meals are paid for during band registration (an
optional fee, as students can also bring their own dinner). After eating, students will
dress according to the posted itinerary (full or partial uniform).
Please refer to the Band Handbook for full uniform guidelines.
Students will typically complete a walk-through rehearsal on game days, as time allows.
This allows students to practice that week’s performance in uniform before departing the
school. Following the walk-through, students will report to their captains for horn
inspection. Captains will be given a check off sheet to make sure that their sections
have their instrument (cleaned and polished), all necessary accessories, all parts of the
uniform, flip folder, lyre, and any other supplies. If a student does not pass inspection,
they must get the needed items before they will be allowed to load their instrument.
Students may see the Uniform Chiefs for loaner uniform parts (such as socks, Under
Armor shirt, etc.) These items will be charged for if not returned. Please refer again to
the Band Handbook for prices on those items.
Following inspection, students will stage their instruments for the Loading Crew to load.
Students are to stay out of the way of the Loading Crew.
Students will make rows in the designated zone (usually the Band Hall) to wait for the
buses to arrive. Buses will be released one by one to load. Students are to follow the
instructions of the bus captain, chaperones, and staff at all times. Bus captains will call
“Parking Lot” as the buses depart. Students are to remain completely silent during this
time, so that the staff and bus drivers can communicate as needed. Bus captains will let
their buses know when “Parking Lot” has ended; at this point students may talk.

34
However, students are to remain in their seats and keep the aisles clear. Students are
expected to follow all Frisco ISD policies as well as any additional rules set by the bus
driver.
When the buses arrive at the stadium, students will unload the buses and get their
instruments. Students are to stay out of the way of the Loading Crew as they unload.
Only when Loading Crew is done may students get their cases and horns out. Flutes
and Clarinets may take their cases on the buses, as they are small. These students will
get their horn out when exiting the bus. After the students get their instruments, they are
to get in “two’s”. There will be two lines: woodwind and brass, in score order (Flute
through low reeds, and trumpet through sousaphone). The horn line captain and drum
majors will inspect these lines to ensure that the band looks uniform. From here, the
band will enter the stadium and take their seats.
During the game, students are encouraged to enjoy themselves and get into the spirit of
the game! They must pay attention to their drum majors and staff in order to have the
correct stand tune up and ready to play. If a student needs to use the restroom, they
must ask a chaperone to take them. Students are NOT allowed to leave the band area
without a chaperone. None band members are not allowed into the band zone. Students
are not to eat concession food or use their cell phones during the game. The band is
there to do a job – support the football team and the school!
After the game is over, students will load back the buses and return to Lone Star High
School. Percussion and sousaphones will enter through the Choir door so as to cut
down on traffic in the Band Hall. All students will help bring in instrument cases after the
Loading Crew is done unloading. Students will change out of their uniforms and report
to their designated rack. Rack captains will check that each uniform is hung up correctly
before allowing that student to sit down. All students in the Lone Star Band will be
dismissed by the directors at the same time. The performance does not conclude for the
evening until this dismissal.

35
C. Contests
Before the contest each week the band directors will post an itinerary with the complete
schedule. All questions can be answered by referring to that itinerary including attire,
schedule, pick up time information, etc.
On a typical contest day, the itinerary will set a “call time”. This is the time that all
students are expected to be in the band hall. A rehearsal and/or walk-through will occur
at the time specified on the itinerary.
From here, procedures are the same as football games until the band arrives to the
contest site.
Upon arrival to the contest site, truck unloading will occur as usual. Upon getting their
instruments, students will get into “two’s”. Horn line captain and drum majors will inspect
the line to ensure that students look uniform. Students are expected to hold their
instrument and hat the same way. This will be a completely silent process. When
instructed by the band directors, the band will proceed in “two’s” to the Warm Up Zone.
The Lone Star High School Band will travel in “two’s” at all times at contests, unless
otherwise specified.
Students are expected to follow all instructions given by the band staff and chaperones.
Students are never to go anywhere alone, and must ask a chaperone to take them to
the restroom.
It is important to remember that while at band contests, students represent not only
themselves, but the entire band program, school, and Frisco community.
Please see the Band Handbook for additional details.