LIFE JACKET MANUAL - n Diver
22
LIFE JACKET MANUAL
Transcript of LIFE JACKET MANUAL - n Diver

L I F E J A C K E T M A N U A L

Northern BCD Manual | East Quarry Appley Lane North, Appley Bridge, Wigan, WN6 9AE, UK
WARNING
Read owner’s manual and the label, located under the right side of the cover bag, thoroughly before using this product. If you do not completely understand these instructions, do not use this lifejacket.
275N Automatic Life Jacket : ISO EN 12402-2
150N Manual and AutomaticLife Jacket : ISO EN 12402-3 150
275

Contact Northern Diver | +44 (0) 1257 25 44 44 | [email protected] | www.ndiver.com 3
MANUAL CONTENTS
Specifications . . . . . . . . . . . . . . . . . . . . . . . . . . . . . . . . . . . . . . . . . . . . . . . 04
Inflation . . . . . . . . . . . . . . . . . . . . . . . . . . . . . . . . . . . . . . . . . . . . . . . . . . . . 06
Deflation . . . . . . . . . . . . . . . . . . . . . . . . . . . . . . . . . . . . . . . . . . . . . . . . . . . . 07
Quick guide: Re-arming instructions UML manual . . . . . . . . . . . . . . . . . . . 08
Quick guide: Re-arming instructions auto/manual dissembly . . . . . . . . . . . 10
Re-folding and re-packing . . . . . . . . . . . . . . . . . . . . . . . . . . . . . . . . . . . . . 11
Care & maintenance instructions . . . . . . . . . . . . . . . . . . . . . . . . . . . . . . . . . 12
How & why to test your PFD . . . . . . . . . . . . . . . . . . . . . . . . . . . . . . . . . . . . 13
How to test using automatic inflator . . . . . . . . . . . . . . . . . . . . . . . . . . . . . . 14
How to test using manual inflator . . . . . . . . . . . . . . . . . . . . . . . . . . . . . . . . .15
How to test using oral inflator . . . . . . . . . . . . . . . . . . . . . . . . . . . . . . . . . . . 16
Wear your PFD . . . . . . . . . . . . . . . . . . . . . . . . . . . . . . . . . . . . . . . . . . . . . . . 17
Do’s & Don’ts . . . . . . . . . . . . . . . . . . . . . . . . . . . . . . . . . . . . . . . . . . . . . . . . 19
User indentification & service record . . . . . . . . . . . . . . . . . . . . . . . . . . . . . 20
Find us . . . . . . . . . . . . . . . . . . . . . . . . . . . . . . . . . . . . . . . . . . . . . . . . . . . . . 21

Northern BCD Manual | East Quarry Appley Lane North, Appley Bridge, Wigan, WN6 9AE, UK
SPECIFICATIONS
This harness is suitable for an adult wearer of more than 50 kg.
(If your PFD is equipped with harness).
This lifejacket is used for coastal or offshore navigation.
Chest size: 30-52 inches (76 to132 cm).
Age Limitation: 16 years of age and older
INSTRUCTIONS FOR USE 1. Where and how to check Inflation System Status Indicators:
Check Inflation System Status Indicators through the window panel.
Ensure the Inflation System Status Indicator is green. If the Inflation
System Status Indicator is red, the mechanism has been fired or
incorretly fitted.
Exiting types of personal flotationdevices and their application
Application
Offshore, extreme conditions, special protective clothing, heavy equipment
Offshore, foul weather clothing
Sheltered waters, light clothing
Swimmers only, sheltered waters, help at hand,limited protection against drowning, not a lifejacket.
Level of performance
Life
jack
etBu
oyan
cy a
id
275
150
100
50
Contact Northern Diver | +44 (0) 1257 25 44 44 | [email protected] | www.ndiver.com 5
Level of performance
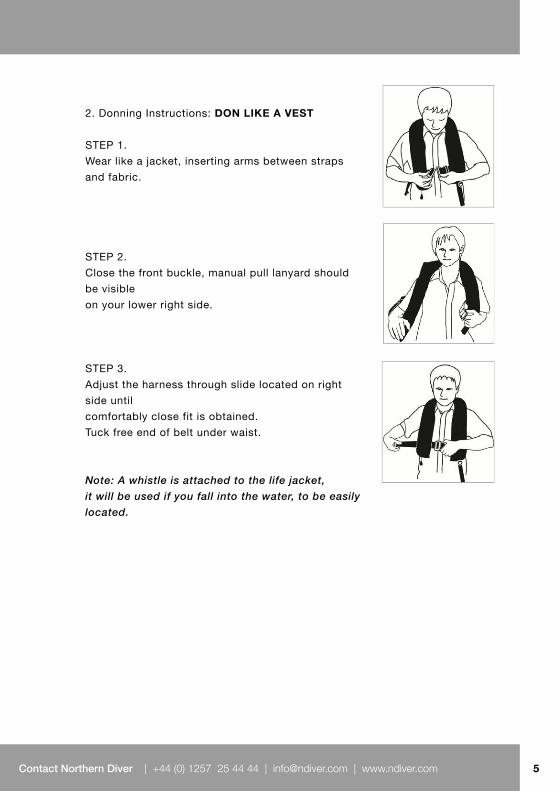
2. Donning Instructions: DON LIKE A VEST
STEP 1.
Wear like a jacket, inserting arms between straps
and fabric.
STEP 2.
Close the front buckle, manual pull lanyard should
be visible
on your lower right side.
STEP 3.
Adjust the harness through slide located on right
side until
comfortably close fit is obtained.
Tuck free end of belt under waist.
Note: A whistle is attached to the life jacket, it will be used if you fall into the water, to be easily located.

Northern BCD Manual | East Quarry Appley Lane North, Appley Bridge, Wigan, WN6 9AE, UK
NOTE:
1. It is not a PFD until fully inflated.
2. Train yourself in the use of the device, do not use as a cushion.
3. The gas cylinders and dangerous goods, they must be kept away
from children and not misused.
4. Full performance may not be achieved using waterproof clothing or
in other circumstances.
5. Do not apply nappies which provide buoyancy when using the
lifejacket.
6. The recommended temperature range on use is 2 to 40°C
Inflation and Deflation
INFLATION
Automatic inflation PFD: The PFD will inflate when fully immersed in
water. Automatic/Manual PFDs can be manually inflated by grasping the
manual inflation pull tab and pulling sharply downward.
Manual inflation PFD: The PFD is manually inflated by grasping the
manual inflation pull tab and pulling sharply downward.
Oral Inflation: The oral inflation tube is located inside the cover on the
wearer’s left side. To inflate orally, access the inflation tube by opening
the top portion of the cover, remove the dust cap, and blow air into the
tube until the inflatable is firm.
Note: Do not fully inflate the PFD orally and then inflate with CO2 cylinder as chamber could incur damage.

Contact Northern Diver | +44 (0) 1257 25 44 44 | [email protected] | www.ndiver.com 7
DEFLATION:
The deflation tab is located on top of the dust cap. Turn the dust cap
upside down and insert the deflation mechanism into the oral tube. Hold
the deflation mechanism in place with your finger and gently squeeze all
the air out of the PFD. If the PFD has inflated while being worn, it may be
necessary to partially deflate the PFD in order to remove it.
To remove all air, roll the PFD into a ball and squeeze while operating the
deflation mechanism. The PFD will be difficult to fold and re-pack properly
if not completely deflated.
PRACTICE wearing and adjusting your inflatable PFD in the water in order
to be prepared for an emergency!
Practice wearing and inflating your PFD using different types of clothing.
Wade into the water and manually inflate or allow your PFD to inflate
automatically. Practice until you have complete confidence in the
performance of your PFD.

Northern BCD Manual | East Quarry Appley Lane North, Appley Bridge, Wigan, WN6 9AE, UK
QUICK GUIDE: RE-ARMING INSTRUCTIONS
1.
3.
2.
UML MANUAL INFLATOR
The charge of the C02 cylinder for your jacket is 33g or 60g
Step 1. Unscrew used CO2 cylinder in an anticlockwise direction.
To avoid confusion later, we suggest discarding the old cylinder now in
an environmentally friendly manner. Do not insert new cylinder at this
time.
Step 2. Close manual inflator arm within inflator body and carefully insert
a new green indicator tab so that it fully covers the red semi-circle on the
body.
Step 3. Look into threaded cylinder receiver and view the gasket. If worn,
contact Northern Diver Repair Facility.

Contact Northern Diver | +44 (0) 1257 25 44 44 | [email protected] | www.ndiver.com 9
4.
5.
6.
Step 4. Inspect the face of the new cylinder. Be sure it is smooth and
has no holes or scratches. There is a gross weight on the cylinder. If you
have any questions about cylinder integrity, weigh the cylinder on a small
scale, such as a postage scale.
Compare the weight printed on the cylinder to the actual weight. If they
do not match within 5g, get another cylinder
Step 5. Screw new cylinder in a clockwise direction firmly into the
inflator. Do not over-tighten, but ensure the fit is tight
Step 6. Check the inflator arming indicator every boating trip. The
indicator and cylinder tightness tell you if there is a need for service.
Check the cylinder face regularly to ensure it is not punctured. Be sure
cylinder is screwed in tight.

Northern BCD Manual | East Quarry Appley Lane North, Appley Bridge, Wigan, WN6 9AE, UK
QUICK GUIDE: RE-ARMING INSTRUCTIONS
UML AUTOMATIC/MANUAL INFLATOR (MK5) DISASSEMBLY(see figure)
1. Unpack or open the lifejacket so that
the manual/automatic inflator is visible.
2. Remove gas CO2 cylinder by firmly
rotating cylinder anticlockwise.
Discard cylinder in an environmentally
friendly manner.
3. Remove cap by turning
anticlockwise. Discard automatic
firing cartridge.
4. Check the date on the automatic
firing cartridge in the rearm kit.
5. Check the bottom of that automatic
firing cartridge bottom is green.
6. IMPORTANTInstall automatic firing cartridge by
screwing clockwise until it meets
the inflator body shoulder (no gap).
7. Install cylinder by rotating clockwise
into inflator until cylinder is secured
firmly in inflator.
8. Place indicator clip over red lever by
aligning the arms on the clip with the
slots in the inflator. Push firmly in the
middle of the clip to snap in place.
9. Check to be sure service indicator
is green and green indicator clip
is firmly attached.

Contact Northern Diver | +44 (0) 1257 25 44 44 | [email protected] | www.ndiver.com 11
RE-FOLDING AND RE-PACKING INSTRUCTIONS
S TYPE PFD Step 1. Lay the device flat, fold the left lobe over and mate velcro strip.
Step 2. Fold the right lobe over and mate velcro strip
Step 3. Fold the top lobe over and mate velcro strip
Step 4. Examine velcro strips
Examine all strips, buckle and jerk to inflate tab to ensure that they are free from snag.
PRECAUTIONS FOR USE IN FREEZING TEMPERATURES
The gas in a CO2 cartridge expands in hot weather and contracts in cold weather.
At –33°C (–30°F) the bladder fill is 87% of the volume created at 22°C (70°F).
Under freezing conditions, the CO2 fills more slowly and achieves less buoyancy.
This can be compensated by partially inflating the PFD with one or two breaths of air
through the oral tube.
Caution: Do not fully inflate by blowing in the oral tube and then inflate with the CO2 cylinder. Repeated CO2 inflation after oral inflation may damage the PFD.
IS YOUR PFD IN GOOD AND SERVICEABLE CONDITION?
Check your PFD between outings to be sure that it is properly armed; that it is free
of tears or holes; that all seams are securely sewn; and that the fabric, straps and
hardware are still strong. Inspect the inflatable portion of the PFD in accordance with
the Care and Maintenance Instructions below.
Northern BCD Manual | East Quarry Appley Lane North, Appley Bridge, Wigan, WN6 9AE, UK
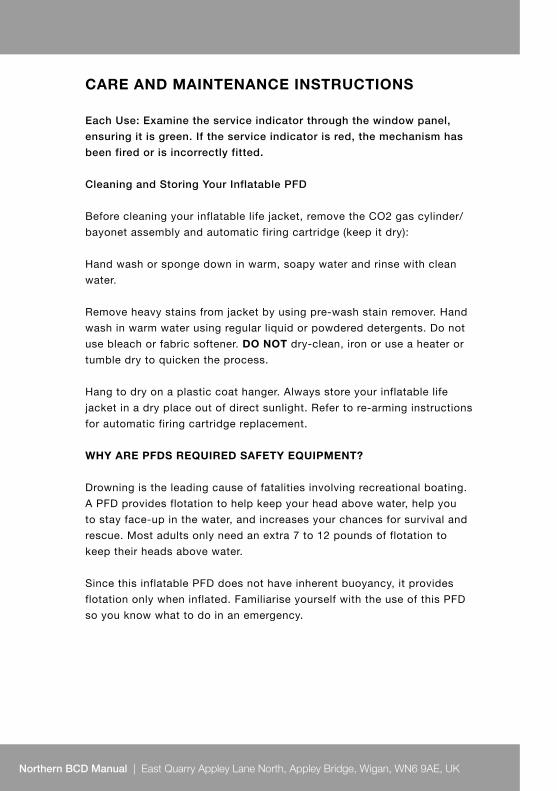
CARE AND MAINTENANCE INSTRUCTIONS
Each Use: Examine the service indicator through the window panel, ensuring it is green. If the service indicator is red, the mechanism has been fired or is incorrectly fitted.
Cleaning and Storing Your Inflatable PFD
Before cleaning your inflatable life jacket, remove the CO2 gas cylinder/
bayonet assembly and automatic firing cartridge (keep it dry):
Hand wash or sponge down in warm, soapy water and rinse with clean
water.
Remove heavy stains from jacket by using pre-wash stain remover. Hand
wash in warm water using regular liquid or powdered detergents. Do not
use bleach or fabric softener. DO NOT dry-clean, iron or use a heater or
tumble dry to quicken the process.
Hang to dry on a plastic coat hanger. Always store your inflatable life
jacket in a dry place out of direct sunlight. Refer to re-arming instructions
for automatic firing cartridge replacement.
WHY ARE PFDS REQUIRED SAFETY EQUIPMENT?
Drowning is the leading cause of fatalities involving recreational boating.
A PFD provides flotation to help keep your head above water, help you
to stay face-up in the water, and increases your chances for survival and
rescue. Most adults only need an extra 7 to 12 pounds of flotation to
keep their heads above water.
Since this inflatable PFD does not have inherent buoyancy, it provides
flotation only when inflated. Familiarise yourself with the use of this PFD
so you know what to do in an emergency.

Contact Northern Diver | +44 (0) 1257 25 44 44 | [email protected] | www.ndiver.com 13
HOW AND WHY TO TEST YOUR PFD
Inflate your PFD and try it out in the water to:
Make sure it floats you:
• Comfortably (when worn properly)
• Adequately for expected wave conditions
Body shapes/densities affect performance.
Make sure it works:
• Activating the CO2 inflation system
• Re-arming the CO2 inflation system
• Using the oral inflator tube
To check the manual inflation system (with CO2 cylinder/bayonet assembly
removed); determine that the CO2 cylinder piercing pin moves freely when
pushing up on the lever arm by pushing down on the pins and releasing the
pins followed by the lever arm. Repeat this several times to check the manual
inflation system.
We recommend that you purchase two automatic re-arming kits.
One kit is to be used immediately in testing the automatic inflation system
(see HOW DO YOU TEST YOUR PFD USING THE AUTOMATIC INFLATOR?)
and the other to carry on board as a spare.
We recommend you test the automatic inflation system in the water at the
beginning of each boating season. By doing this, you demonstrate that the
automatic inflation system is still working properly and reduce the likelihood
of premature inflation and its associated dangers.
Northern BCD Manual | East Quarry Appley Lane North, Appley Bridge, Wigan, WN6 9AE, UK
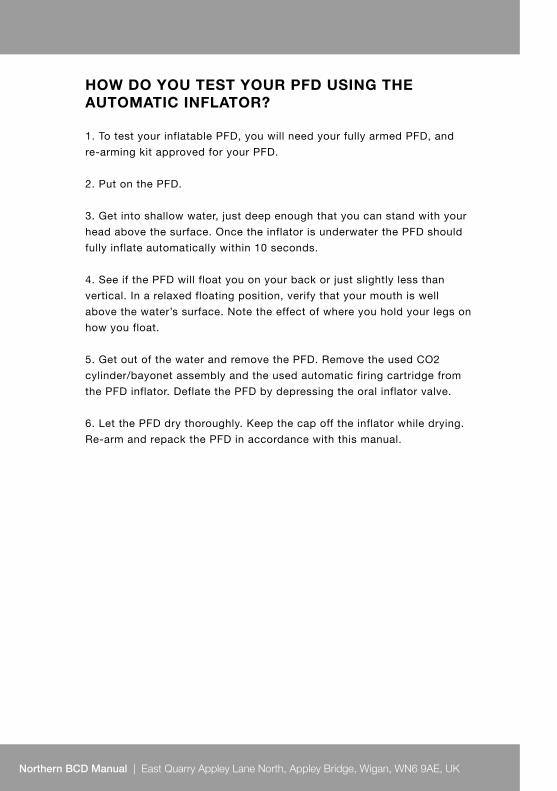
HOW DO YOU TEST YOUR PFD USING THE AUTOMATIC INFLATOR?
1. To test your inflatable PFD, you will need your fully armed PFD, and
re-arming kit approved for your PFD.
2. Put on the PFD.
3. Get into shallow water, just deep enough that you can stand with your
head above the surface. Once the inflator is underwater the PFD should
fully inflate automatically within 10 seconds.
4. See if the PFD will float you on your back or just slightly less than
vertical. In a relaxed floating position, verify that your mouth is well
above the water’s surface. Note the effect of where you hold your legs on
how you float.
5. Get out of the water and remove the PFD. Remove the used CO2
cylinder/bayonet assembly and the used automatic firing cartridge from
the PFD inflator. Deflate the PFD by depressing the oral inflator valve.
6. Let the PFD dry thoroughly. Keep the cap off the inflator while drying.
Re-arm and repack the PFD in accordance with this manual.
Contact Northern Diver | +44 (0) 1257 25 44 44 | [email protected] | www.ndiver.com 15
HOW DO YOU TEST YOUR PFD USING THE MANUAL INFLATOR?
1. To test your inflatable PFD, you will need your fully armed PFD, and
re-arming kit approved for your PFD.
2. Put on the PFD.
3. Actuate the inflation system by jerking firmly downward on the pull tab.
The PFD should fully inflate within five seconds.
4. Get into shallow water, just deep enough that you can stand with your
head above the surface.
5. See if the PFD will float you on your back or just slightly lower than
vertical. In a relaxed floating position, verify that your mouth is well above
the water’s surface. Note the effect of where you hold your legs on how you
float.
6. Get out of the water and remove the PFD. Remove the used CO2
cylinder/bayonet assembly from the PFD inflator. Completely deflate the
PFD using the oral inflator.
7. Let the PFD dry thoroughly. See ‘Cleaning and Storing’ of your PFD.
Re-arm and repack the PFD in accordance with this manual.
Northern BCD Manual | East Quarry Appley Lane North, Appley Bridge, Wigan, WN6 9AE, UK
HOW DO YOU TEST YOUR PFD USING THE ORAL INFLATOR?
1. To test your inflatable PFD, you will not need any spare parts, or
re-arming kits.
2. Remove the CO2 cylinder/bayonet assembly, to prevent inadvertent
activation of the manual inflation system, which could potentially damage
the PFD. Unscrew and remove the automatic firing cartridge. Otherwise,
the cartridge will disintegrate during water immersion.
3. Put on the PFD
4. Get into shallow water, just deep enough that you can stand with your
head above the surface.
5. Fully inflate the PFD using the oral inflator.
6. See if the PFD will float you on your back or just slightly back of
vertical. In a relaxed floating position, verify that your mouth is well
above the water’s surface. Note the effect of where you hold your legs on
how you float.
7. Get out of the water and remove the PFD. Completely deflate the PFD
using the oral inflator.
8. Let the PFD dry thoroughly. See ‘Cleaning and Stowage’ of your PFD.
Re-arm and repack the PFD in accordance with this manual.

Contact Northern Diver | +44 (0) 1257 25 44 44 | [email protected] | www.ndiver.com 17
In approximately 80 percent of all boating fatalities, the victims were not
wearing a PFD. Most fatal accidents happen on calm sunny days. This
inflatable PFD is much more comfortable to wear than other PFD types.
Get into the habit of wearing this PFD.
Non-swimmers and children especially should wear a hybrid or non-
inflatable PFD at all times when in or near the water.
HYPOTHERMIA Prolonged exposure to cold water causes a condition known as
hypothermia – a substantial loss of body heat, which leads to exhaustion
and unconsciousness. Most drowning victims first suffer from
hypothermia. The following chart shows the effects of hypothermia.
How hypothermia affects most adults
WEAR YOUR PFD
Water Temperature°C (°F)
0.3 (32.5)
0.3-4 (32.5-40)
4-10 (40-50)
10-16 (50-60)
16-21 (60-70)
21-27 (70-80)
Over 27 (over 80)
Exhaustion or Unconsciousness
Under 15 minutes
15-30 minutes
30-60 minutes
1-2 hours
2-7 hours
2-12 hours
Indefinite
Expected Timeof Survival
Under 15-45 minutes
30-90 minutes
1-3 hours
1-6 hours
2-40 hours
3 hours. to Indefinite
Indefinite

Northern BCD Manual | East Quarry Appley Lane North, Appley Bridge, Wigan, WN6 9AE, UK
WEAR YOUR PFD
PFDs can increase survival time because they allow you to float without
using energy treading water and because of their insulating properties.
Naturally, the warmer the water, less insulation you will require.
When operating in cold waters [below 15.6oC (60oF)] you should consider
using a coat or jacket style PFD or thermal protective PFD as they cover
more of the body than the lifejacket or belt style PFDs. Some points to
remember about hypothermia protection:
1. Always wear your inflatable PFD. Even if you become incapacitated due
to hypothermia, the Inflatable PFD will keep you afloat and greatly improve
your chances of rescue.
2. Do not attempt to swim unless it is to reach a nearby craft, fellow
survivor, or a floating object on which you can lean or climb. Swimming
increases the rate of body heat loss and is not recommended in cold water.
Keep your head out of the water as this will greatly lessen heat loss and
increase your survival time.
3. Use the standard HELP position when wearing an Inflatable PFD,
drawing the legs up to a second position, because doing so will help you
conserve body heat.
4. Keep a positive attitude about your survival and rescue. This will improve
your chances of extending your survival time until rescued. Your will-to-live
does make a difference!
5. If there is more than one person in the water, huddling is recommended
while waiting to be rescued. This action tends to reduce the rate of heat
loss and thus increase the survival time.
H.E.L.P POSITION

Contact Northern Diver | +44 (0) 1257 25 44 44 | [email protected] | www.ndiver.com 19
EACH OF THESE DEVICES IS INTENDED TO HELP YOU SAVE YOUR OWN LIFE For your PFD to function properly, follow these suggestions to verify that
it fits, floats, and remains in good condition.
1. Check the inflation mechanism status indicator before each use.
2. Get into the habit of re-arming the inflation mechanism immediately
after each CO2 inflation (be sure the inflator is dry before re-arming).
3. Try your wearable PFD on and adjust it until it fits comfortably in and
out of the water.
4. Mark your PFD with your name if you are the only wearer.
5. Do not alter your PFD. If it doesn’t fit properly, get one that does.
6. Your PFD is not intended for use as a fender or kneeling pad.
7. If your PFD is wet, allow it to dry thoroughly before storing it. Store it
in a well-ventilated area.
8. Do not dry your PFD in front of a radiator or other source of direct
heat.
DO NOT ATTACH PFDs TO YOUR BOAT
Each PFD has straps, hooks, buckles, or other means for securing the
device in place on the water. Some PFDs also incorporate decorative
d-ring or tabs. Such items are not to be used to attach the device to the
boat. Attaching the device to the boat will not permit it to perform as
intended.

Northern BCD Manual | East Quarry Appley Lane North, Appley Bridge, Wigan, WN6 9AE, UK
USE IDENTIFICATION AND SERVICE RECORD
TEST THIS DEVICE AT THE BEGINNING OF EACH SEASON AND PRIOR TO
A LENGTHY SEA VOYAGE. WE RECOMMEND THIS DEVICE BE SERVICED
BY NORTHERN DIVER’S AUTHORISED REPAIR FACILITY AT LEASTEVERY
TWO YEARS.
MODEL:
DATE: SERIAL NUMBER:
OWNER’S NAME:
SERVICENAME
NEXT SERVICEDATE
AUTHORIZEDFACILITY STAMP
Contact Northern Diver | +44 (0) 1257 25 44 44 | [email protected] | www.ndiver.com 21
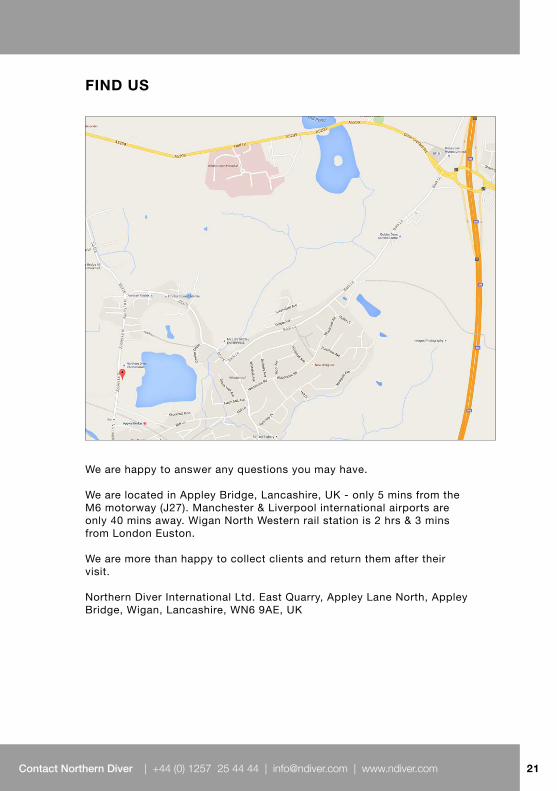
FIND US
We are happy to answer any questions you may have.
We are located in Appley Bridge, Lancashire, UK - only 5 mins from the M6 motorway (J27). Manchester & Liverpool international airports are only 40 mins away. Wigan North Western rail station is 2 hrs & 3 mins from London Euston.
We are more than happy to collect clients and return them after their visit.
Northern Diver International Ltd. East Quarry, Appley Lane North, Appley Bridge, Wigan, Lancashire, WN6 9AE, UK

Tel: +44 (0) 1257 25 44 44 Email: [email protected] Quarry, Appley Lane North, Appley Bridge, Wigan, Lancashire, WN6 9AE, UK
Find Us Online.
View our extensive product rangewww.ndiver-rescue.com