Lesson and Page Number - State · Lesson and Page Number ... •Predicting • Using inference...
45
4 | CONTENTS Theme Lesson and Page Number Grammar Vocabulary Academic Skills Proficiency Level COLLAGE Neighborhoods: It’s Important to Me Page 46 • Future tense using will • Community and world events • Making goals • Making and responding to suggestions • Political issues • Brainstorming • Predicting • Using inference • Researching • Presenting to an audience • Focused listening Intermediate to Advanced Space: Reflecting Patterns Page 51 • Contrastive nouns • Descriptive adjectives • Present participles • Imperatives • Opposites • Making and responding to directions • Focused listening • Evaluating • Poem writing Intermediate to Advanced Earth: The Earth around Me Page 56 • Similes • Simple present: be • Descriptive adjectives • Nature • Evaluating • Focused listening • Reviewing High Beginner to Intermediate Jackets: Do You Judge a Book by Its Cover? Page 60 • Wh- Questions • Simple present • Present continuous • Learning resources • Parts of a paragraph • Interpreting • Note taking • Predicting • Reviewing • Scanning • Skimming • Surveying • Peer review Intermediate Shelters: Community Lessons Page 66 • Imperatives • Prepositions of place • Directions • Buildings • Explaining • Focused listening • Presenting Beginner to Intermediate
Transcript of Lesson and Page Number - State · Lesson and Page Number ... •Predicting • Using inference...
4 | CONTENTS
ThemeLesson and
Page NumberGrammar Vocabulary Academic Skills Proficiency Level
COLL
AG
E
Neighborhoods: It’s Important to MePage 46
• Future tense using will • Community andworld events
• Making goals• Making and
responding tosuggestions
• Political issues
• Brainstorming• Predicting• Using inference• Researching• Presenting to an
audience• Focused listening
Intermediate to Advanced
Space: Reflecting PatternsPage 51
• Contrastive nouns• Descriptive adjectives• Present participles• Imperatives
• Opposites• Making and
responding todirections
• Focused listening• Evaluating• Poem writing
Intermediate to Advanced
Earth: The Earth around MePage 56
• Similes• Simple present: be
• Descriptiveadjectives
• Nature
• Evaluating• Focused listening• Reviewing
High Beginner to Intermediate
Jackets: Do You Judge a Book by Its Cover?Page 60
• Wh- Questions• Simple present• Present continuous
• Learning resources• Parts of a paragraph
• Interpreting• Note taking• Predicting• Reviewing• Scanning• Skimming• Surveying• Peer review
Intermediate
Shelters: Community LessonsPage 66
• Imperatives• Prepositions of place
• Directions• Buildings
• Explaining• Focused listening• Presenting
Beginner to Intermediate
CREATEtoCommunicateArt Activities for the English as a Foreign Language Classroom
Published by:
Office of English Language Programs
Bureau of Educational and Cultural Affairs
United States Department of State
Washington, D.C. 20037
americanenglish.state.gov
First Edition: 2013 ISBN (print) 978-1-624-25051-4 ISBN (PDF) 978-1-624-25052-1 ISBN (ePub) 978-1-624-25053-8 ISBN (mobi) 978-1-624-25055-2
In this publication, there are many links to other websites. These links to websites do not constitute an endorsement by the U.S. Department of State
of the site or the opinions presented therein.
Photographs: Images on pages 82, 88, 126, 128, 131, 138, 139 © 2011 Amy TarmeyAll other images © Shutterstock.com
| 7
CREATE TO COMMUNICATEArt Activities for the English as a Foreign Language Classroom
RationaleThere are unlimited advantages to using the visual arts for developing English language learning skills. The arts can be a source of inspiration, imagination, and motivation for learners. They can engage students in a variety of themes, subjects, and issues, as well as introduce learners to new ways of seeing the world. Most importantly, the arts can provide students with a voice in a world where they have limited English proficiency.
This activity book is intended for English language teachers who would like to reap the benefits that the visual arts provide, but are unsure of where or how to begin. By providing art ideas and guidelines, matched with language objectives, this book seeks to use the arts as a tool to build and strengthen English reading, writing, listening, and speaking skills and develop the confidence students need to take risks and explore within a new language. Designed to supplement regular coursework, the purpose of this book is not to provide art lessons, but rather to provide ideas of how to incorporate the arts into the language classroom to make English accessible and understandable to students.
OrganizationThe art and language activities in this book are designed for primary and secondary school students. Each activity lists a language objective and suggested skill level. There are four media explored in this book: drawing, collage, sculpture, and mixed media. The activities are designed to be used in-dependently rather than sequentially, giving the teacher the flexibility to choose an activity that best fits the desired topic, language focus, and available art materials of the language classroom.
In addition to flexibility, an important design feature of this book is adaptability. While art materials, language objectives, and skill levels are listed for each activity, most activities can be adapted and modified in numerous ways. Look for modification suggestions at the beginning and end of each les-son labeled as Art Options or Extension Activities, or at the Additional Resources to supplement and enhance the lesson plans. These features enable the teacher to use, adapt, and modify an activity in various ways to best suit the needs of the students.
The below grid is a model of what will be found at the beginning of each lesson:
Objective: This is the language-learning objective for the lesson plan.
Level: This indicates the student level for the lesson.
Materials: This lists the materials needed for the art project.
Teacher Preparation: This is what the teacher will need to do to prepare for the lesson.
Art Options: This will list variations in case the materials listed above do not work in the teacher’s specific setting.
8 |
Selecting an ActivityThere are three ways to select an activity to fit the needs of the students.
• Language Focus: The language focus of each activity is placed at the beginning of each activ-ity. Most activities in this book are organized around an authentic communication goal and discrete language structures. These objectives are designed to be adapted and modified to best suit the needs of the students.
• Topic: In each chapter, the activities are organized under topic headings.
• Art Medium or Materials: Each chapter of this activity book is organized by art medium. This enables the teacher to easily search for an activity depending on what materials are available. However, most activities also offer suggestions for art material variations. The Art Options listed at the beginning of each lesson offers valuable suggestions on alternate mate-rials. Likewise, adaptation and modification are encouraged.
Teaching the LessonThere are no exact rules or steps for making art. The tips outlined below offer broad guidelines and suggestions to take into consideration when creating art with students.
1. Choose an appropriate activity for the students.
Before beginning an art activity, read through the activity instructions, extensions, and varia-tions to make sure the activity is suitable or adaptable for the age and language ability levels of the students. Most activities can be adapted and modified in numerous ways to fit the needs of students.
2. Collect the necessary materials, or alternate materials, needed to complete the activity.
Read the materials list and the instructions for each lesson before beginning the activity with students. If the resources listed in the beginning of the activity are not available, read the Art Options section at the beginning of the activity for ideas on other ways to complete the activity.
3. Help students plan the basic design of the artwork: the composition.
Most art activities require some planning. The amount and type of planning will depend on the age of the students, the specific activity, and the amount of time desired to spend on the activity. With both two-dimensional and three-dimensional artwork, students have a limited amount of space to work with. The teacher can help students plan how they will use the space provided by asking them to think about the organization or arrangement of the subject(s), the size of the subjects(s), and the desired colors and color combinations to be used. In many cases, the teacher can also show students how to organize the design of a piece of artwork by doing an example with the class, or by demonstrating with a student example.
| 9
CREATE TO COMMUNICATEArt Activities for the English as a Foreign Language Classroom
Art TipsTips specific to each art medium can be found at the beginning of each chapter. Listed below are a few tips and suggestions that are common to all art media and activities included in this book.
• If possible, have students bring in old shirts or other old clothes that can be worn over their clothes to protect them from paint, glue, or any other messy art materials being used.
• If students are working with messy materials, try to cover and protect the surfaces students will be working on (desks, tables, and floor) with old newspapers or scrap (recycled) papers. By covering students’ workspace, the furniture in the classroom will not only be protected but clean-up will also be faster and easier.
• Old baking supplies such as muffin tins or metal baking sheets make good paint mixing trays or palettes.
• Recycled materials such as magazines, papers, cardboard, plastic containers, and glass jars are utilized in many art activities throughout this book. If possible, collect these items for use in the classroom or ask students and other teachers to collect such recycled materials to donate for art activities.
• Each chapter includes a materials list. The lists provided are broad suggestions of common materials used in art activities. They are intended to give the teacher an idea of possible materials that can be used with the art medium. Not all of the materials listed are needed to complete an activity. Feel free to adapt, modify, or add additional materials to any activity to best suit the resources available and the needs of the students.
• There is a glossary provided at the end of the book with definitions and images for art pro-cesses and materials that may be unfamiliar.
| 43
CREATE TO COMMUNICATEArt Activities for the English as a Foreign Language Classroom
A collage is a picture or design created by gluing different materi-als, objects, shapes, or colors onto a surface. Collage is a great tactile alternative to drawing and painting. When paired with a lan-guage focus, collage can generate enthusiasm and motivation for language use, engage students with English, and aid in the under-standing of the target structure, vocabulary, or grammatical forms.
Tips for Collage:• Gathering materials Collages can be made from a wide range of materials, as
the following lesson plans will show. Many recycled and free materials can be used to create collages. Look for and collect recycled paper, colored papers, magazines, card-board, newspapers, postcards, old greeting cards, string, yarn, fabrics, and buttons to use in collage activities.
• Bases and surfaces Every collage project needs a base to create the collage on. The base can be anything that
other materials can be glued or taped to, such as a piece of paper, cardboard, or poster board. If students are creating a small collage, with little layering, a piece of regular paper would be fine to use as the base. However, if students are creating a large collage or a col-lage with many different materials or many layers, the base should be something stronger and thicker, such as recycled cardboard, heavy paper, or poster board.
• Building by layering Layering materials is a common technique used to create collages. Have students start
with the large forms or shapes of the collage first and then layer the smaller details last. For example, if creating a collage of a person, begin with the large parts of the person’s body first, such as the torso, legs, arms and head. Then use smaller pieces of paper or other materials to make the small details, such as the hands, feet, eyes, ears, nose, and mouth.
• Using glue Glue is a common material used in collage. There are several types of glue that can be used
in collage activities: white glue, paste, or glue sticks. When using glue or paste, students can pour glue from the bottle, or paint glue onto the surface. To paint glue onto paper, first pour a small amount of glue on a piece of paper or in little jar. Then, use an old paintbrush to dip into the glue and paint it onto the surface.

44 | UNIT II: COLLAGE
Collage MaterialsThis is a list of all the materials that can be used to create collages. Each lesson plan in this chap-ter will have a list of the specific materials needed to complete that particular project, with sug-gestions for variations in case different resources are on hand.
Required • Collage surface: paper, cardboard, or the classroom board or wall • Material(s) to create the collage • Glue or tape
Optional• Brushes for glue or paint• Colored pencils • Crayons• Fabric
• Greeting cards • Magazines • Markers • Materials from nature: grass, straw,
twigs, sand, small rocks, flowers, leaves, seeds
• Newspaper • Paper • Pencils • Photographs • Recycled materials • Scissors • String or yarn
| 45
CREATE TO COMMUNICATEArt Activities for the English as a Foreign Language Classroom
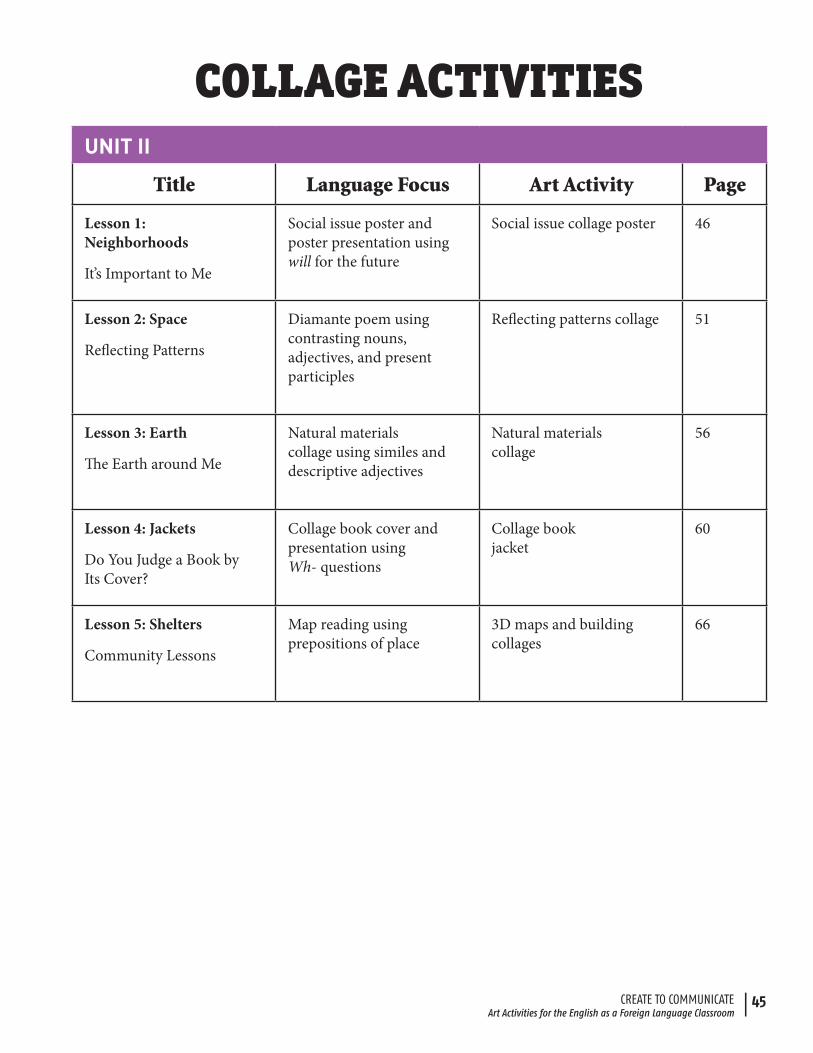
COLLAGE ACTIVITIESUNIT II
Title Language Focus Art Activity Page
Lesson 1: Neighborhoods
It’s Important to Me
Social issue poster and poster presentation using will for the future
Social issue collage poster 46
Lesson 2: Space
Reflecting Patterns
Diamante poem using contrasting nouns, adjectives, and present participles
Reflecting patterns collage 51
Lesson 3: Earth
The Earth around Me
Natural materials collage using similes and descriptive adjectives
Natural materials collage
56
Lesson 4: Jackets
Do You Judge a Book by Its Cover?
Collage book cover and presentation using Wh- questions
Collage book jacket
60
Lesson 5: Shelters
Community Lessons
Map reading using prepositions of place
3D maps and building collages
66
46 | UNIT II: COLLAGE
LESSON 1
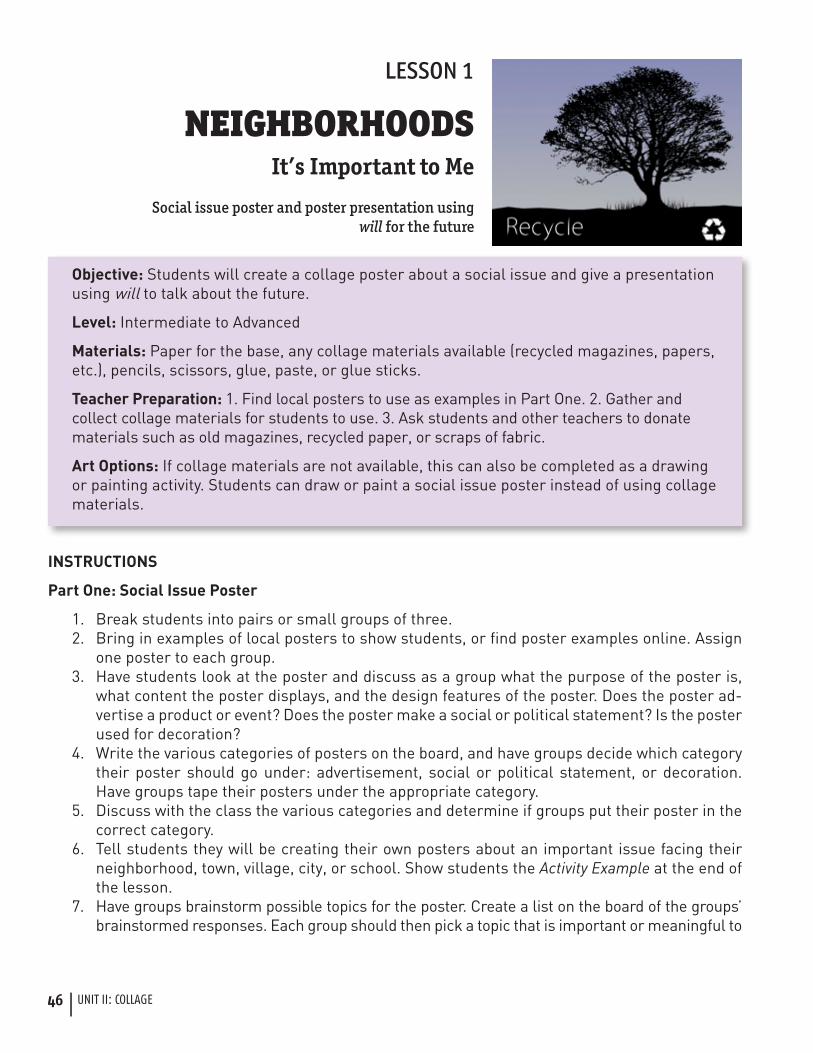
NEIGHBORHOODSIt’s Important to Me
Social issue poster and poster presentation using will for the future
Objective: Students will create a collage poster about a social issue and give a presentation using will to talk about the future.
Level: Intermediate to Advanced
Materials: Paper for the base, any collage materials available (recycled magazines, papers, etc.), pencils, scissors, glue, paste, or glue sticks.
Teacher Preparation: 1. Find local posters to use as examples in Part One. 2. Gather and collect collage materials for students to use. 3. Ask students and other teachers to donate materials such as old magazines, recycled paper, or scraps of fabric.
Art Options: If collage materials are not available, this can also be completed as a drawing or painting activity. Students can draw or paint a social issue poster instead of using collage materials.
INSTRUCTIONS
Part One: Social Issue Poster
1. Break students into pairs or small groups of three. 2. Bring in examples of local posters to show students, or find poster examples online. Assign
one poster to each group. 3. Have students look at the poster and discuss as a group what the purpose of the poster is,
what content the poster displays, and the design features of the poster. Does the poster ad-vertise a product or event? Does the poster make a social or political statement? Is the poster used for decoration?
4. Write the various categories of posters on the board, and have groups decide which category their poster should go under: advertisement, social or political statement, or decoration. Have groups tape their posters under the appropriate category.
5. Discuss with the class the various categories and determine if groups put their poster in the correct category.
6. Tell students they will be creating their own posters about an important issue facing their neighborhood, town, village, city, or school. Show students the Activity Example at the end of the lesson.
7. Have groups brainstorm possible topics for the poster. Create a list on the board of the groups’ brainstormed responses. Each group should then pick a topic that is important or meaningful to
| 47
CREATE TO COMMUNICATEArt Activities for the English as a Foreign Language Classroom
them. Possible topics might include education, pollution, transportation, or health care. Topics might be more specific, such as trash around the school, bullying, or graffiti on school walls.
8. If possible, have students research their issue or problem online. Ask groups to investigate whom the problem affects; what people, groups, or organizations are doing to help solve the problem; and what they can do to help spread awareness or help solve the problem. While researching, have one student from each group be the “secretary” and take notes in their journals.
9. After researching the problem or issue, have groups plan their poster with collage materials. Ask students questions to help them plan what to depict on their poster:
What type of picture, image, or design can you create that relates to your topic? How will the image grab the attention of people viewing the poster? Will you use words in your poster? If so, what do you want say? If not, how can you convey
your message without words?
10. Groups should agree on a plan for their poster before they begin working. Tell students to lightly draw the layout or design of their poster first.
11. Have students collect materials and make their collage posters. Invite students to bring in any materials from home or outside the classroom that might be useful for their collage poster. (Refer to the Optional Materials section in the beginning of this unit if needed.)
Part Two: Poster Presentations, Writing/Speaking Practice
1. When all groups have finished their poster, tell students they will educate the other students in the class about their social issue or problem by giving a presentation.
2. Groups should work collaboratively on their presentation. The presentation should have three parts:
a. Introduce and discuss the problem. (Groups can refer to their notes from researching the problem earlier.)
b. Show and discuss the poster the group created. (Groups should discuss what images and text they used to create their poster and why or how the images and text relate to the problem.)
c. Discuss the solutions the group came up to help solve the problem. (Groups will need to discuss how they can help solve the problem and what they will pledge to do in the future. Review the use of will to express actions in the future with the class. The lan-guage structure is outlined below.)
3. Review the use of will to talk about things in the future.
WILL for the FUTURE
Form: will + base of the infinitive
Use: To express future actions and predictions or assumptions
Examples: I will (I’ll) be a better student and study more.
I will (I’ll) turn the lights off when I am not in a room to conserve energy.
I will (I’ll) recycle plastic and paper more.
48 | UNIT II: COLLAGE
4. For example, if their poster is about littering, students might brainstorm solutions such as “Iwill pick up trash I see around the school,” or “I will organize a school clean-up day with myfriends.”
5. To help groups brainstorm solutions to the problem they depicted, ask students the ques-tions below, or write the questions on the board.
How does this problem affect you and your community?What are some daily things people can do to help solve the problem?What are some weekly or monthly things people can do to help solve the problem?What will you do in the future to help solve this issue or problem?
6. Give students time to practice their presentations.7. Have students give their presentation to the class. If possible, invite parents, teachers, or
administrators to come to the class for the groups’ presentations.a. If your class is large, you can have a “poster session” instead of a poster presentation.
For a poster session, instruct half of the groups to display their posters around theclassroom. The other groups, as well as any invited guests, circulate around the room,talking to the groups about their posters, the issues depicted, and the solutions thegroups came up with. After a sufficient amount of time, have the groups switch roles.
8. As a closing and assessment activity, have each student complete a survey about the socialissues and problems that were presented. A sample survey is included at the end of thischapter. Adapt or modify this survey to fit the needs and level of your students.
9. With permission, display the groups’ posters inthe school or other community buildings to show-case the work students did and also bring aware-ness to the various problems or issues depicted.
Extension Activities:
Community Project
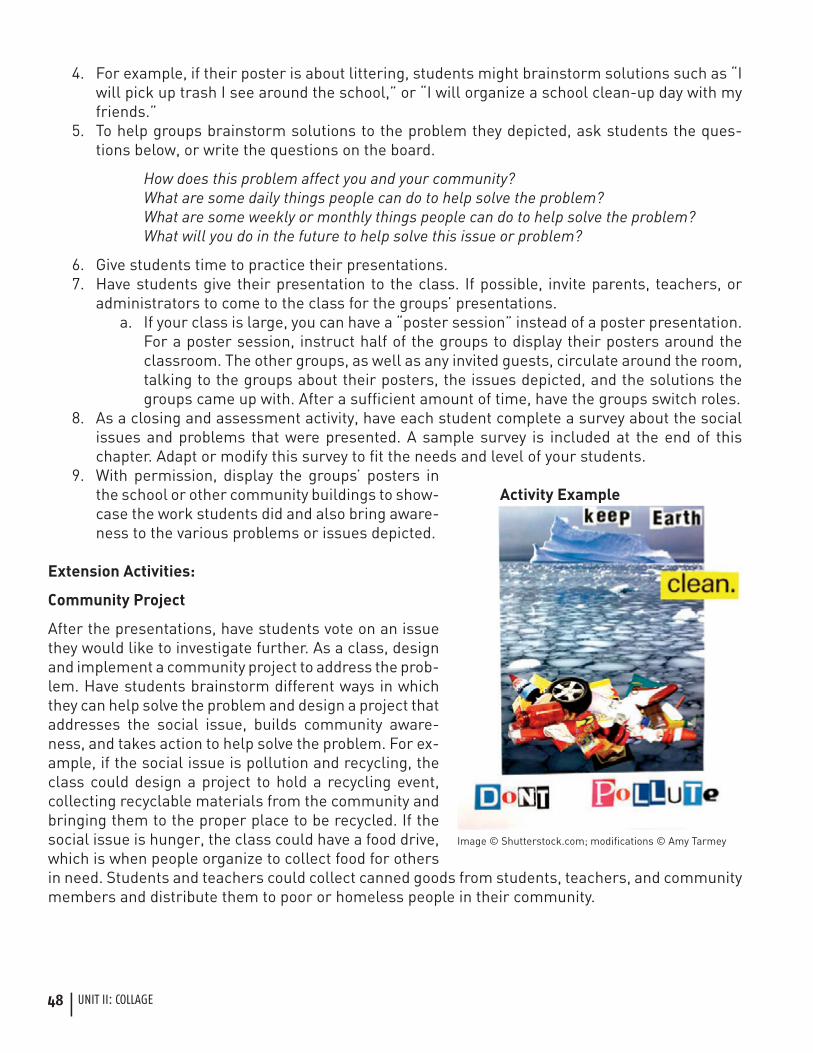
After the presentations, have students vote on an issue they would like to investigate further. As a class, design and implement a community project to address the prob-lem. Have students brainstorm different ways in which they can help solve the problem and design a project that addresses the social issue, builds community aware-ness, and takes action to help solve the problem. For ex-ample, if the social issue is pollution and recycling, the class could design a project to hold a recycling event, collecting recyclable materials from the community and bringing them to the proper place to be recycled. If the social issue is hunger, the class could have a food drive, which is when people organize to collect food for others in need. Students and teachers could collect canned goods from students, teachers, and community members and distribute them to poor or homeless people in their community.
Activity Example
Image © Shutterstock.com; modifications © Amy Tarmey
| 49
CREATE TO COMMUNICATEArt Activities for the English as a Foreign Language Classroom
Letter to the Press — Community Project
With more advanced students, have students write an article or letter to the local or school news-paper about their community service project. The article can include a description of their planned project or activity, include a picture or copy of the poster they made for the event, or describe how the project and social issue have influenced the class. A follow-up report or article can also be sent after the project is completed, with photos taken during the event, and a description of the outcome of the project.
50 | UNIT II: COLLAGE
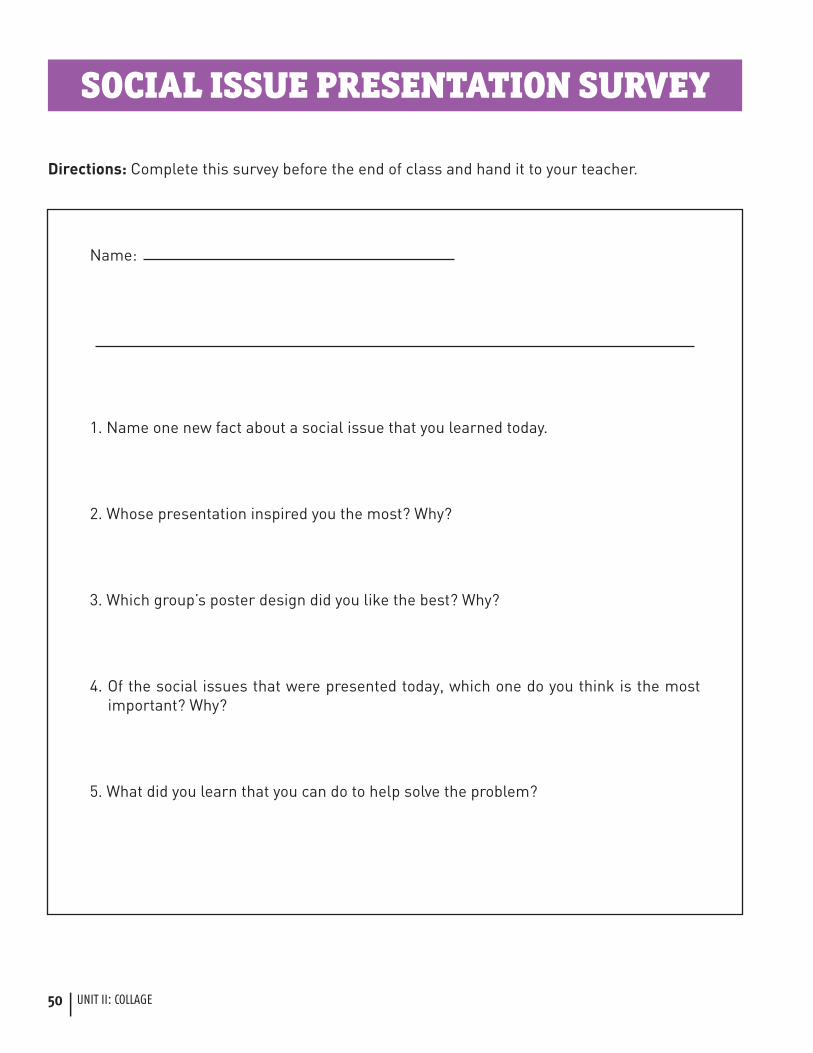
SOCIAL ISSUE PRESENTATION SURVEY
Directions: Complete this survey before the end of class and hand it to your teacher.
Name:
1. Name one new fact about a social issue that you learned today.
2. Whose presentation inspired you the most? Why?
3. Which group’s poster design did you like the best? Why?
4. Of the social issues that were presented today, which one do you think is the most important? Why?
5. What did you learn that you can do to help solve the problem?
| 51
CREATE TO COMMUNICATEArt Activities for the English as a Foreign Language Classroom
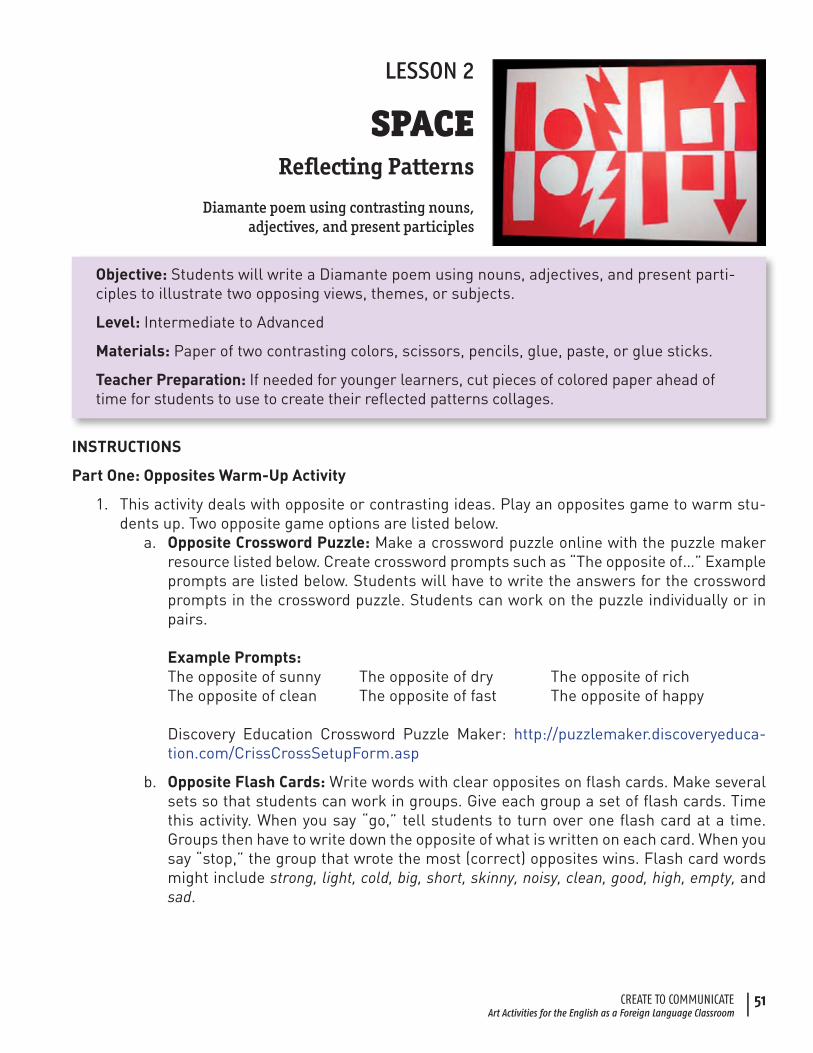
LESSON 2
SPACEReflecting Patterns
Diamante poem using contrasting nouns, adjectives, and present participles
Objective: Students will write a Diamante poem using nouns, adjectives, and present parti-ciples to illustrate two opposing views, themes, or subjects.
Level: Intermediate to Advanced
Materials: Paper of two contrasting colors, scissors, pencils, glue, paste, or glue sticks.
Teacher Preparation: If needed for younger learners, cut pieces of colored paper ahead of time for students to use to create their reflected patterns collages.
INSTRUCTIONS
Part One: Opposites Warm-Up Activity
1. This activity deals with opposite or contrasting ideas. Play an opposites game to warm stu-dents up. Two opposite game options are listed below.
a. Opposite Crossword Puzzle: Make a crossword puzzle online with the puzzle maker resource listed below. Create crossword prompts such as “The opposite of…” Example prompts are listed below. Students will have to write the answers for the crossword prompts in the crossword puzzle. Students can work on the puzzle individually or in pairs.
Example Prompts:The opposite of sunny The opposite of dry The opposite of richThe opposite of clean The opposite of fast The opposite of happy
Discovery Education Crossword Puzzle Maker: http://puzzlemaker.discoveryeduca-tion.com/CrissCrossSetupForm.asp
b. Opposite Flash Cards: Write words with clear opposites on flash cards. Make several sets so that students can work in groups. Give each group a set of flash cards. Time this activity. When you say “go,” tell students to turn over one flash card at a time. Groups then have to write down the opposite of what is written on each card. When you say “stop,” the group that wrote the most (correct) opposites wins. Flash card words might include strong, light, cold, big, short, skinny, noisy, clean, good, high, empty, and sad.
52 | UNIT II: COLLAGE
Part Two: Reflected Patterns Collage
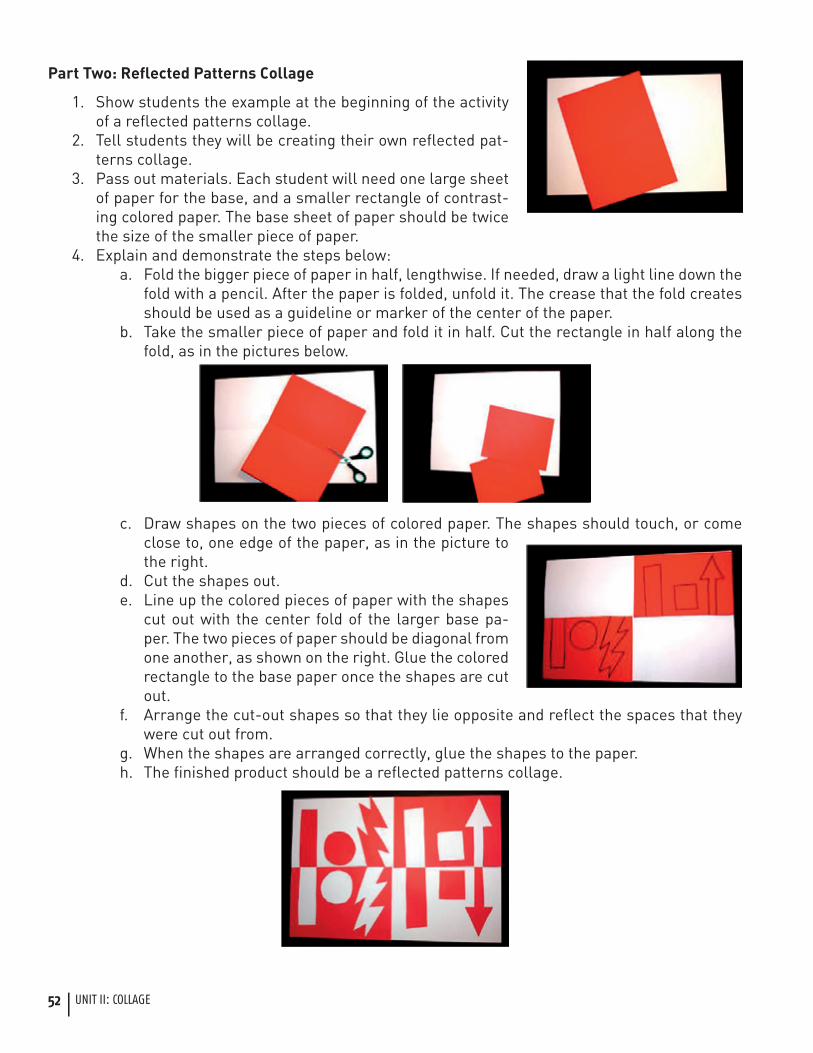
1. Show students the example at the beginning of the activity of a reflected patterns collage.
2. Tell students they will be creating their own reflected pat-terns collage.
3. Pass out materials. Each student will need one large sheet of paper for the base, and a smaller rectangle of contrast-ing colored paper. The base sheet of paper should be twice the size of the smaller piece of paper.
4. Explain and demonstrate the steps below:a. Fold the bigger piece of paper in half, lengthwise. If needed, draw a light line down the
fold with a pencil. After the paper is folded, unfold it. The crease that the fold creates should be used as a guideline or marker of the center of the paper.
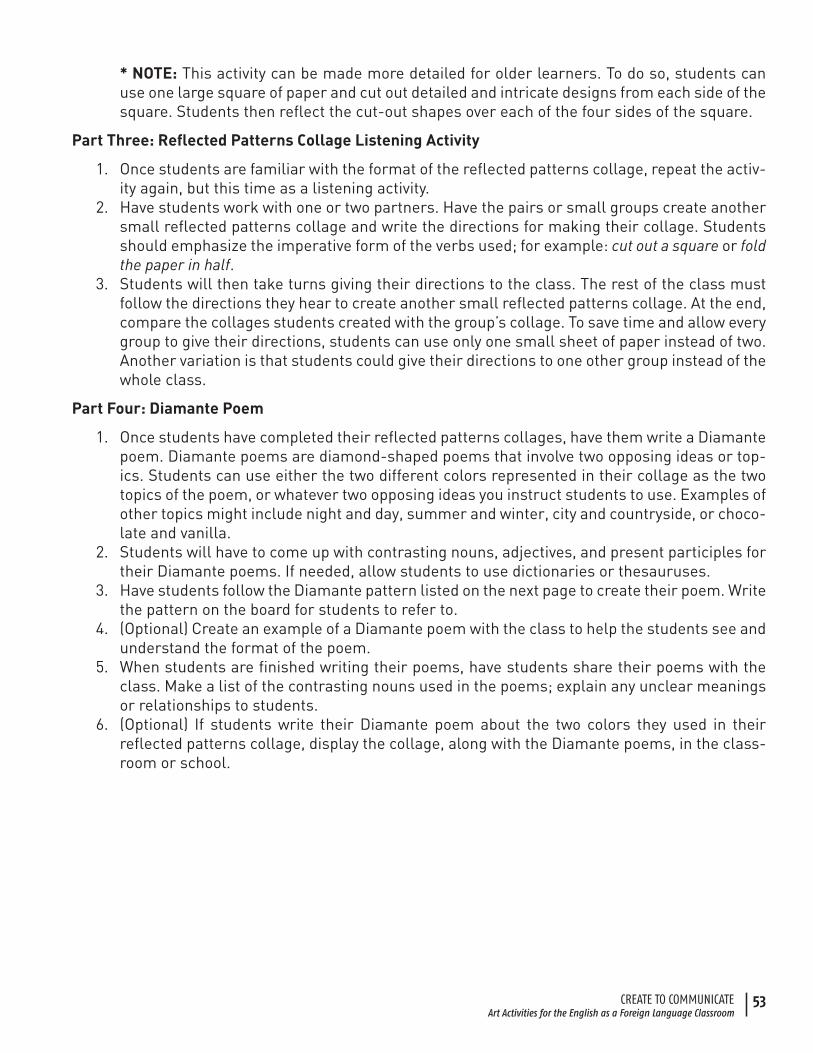
b. Take the smaller piece of paper and fold it in half. Cut the rectangle in half along the fold, as in the pictures below.
c. Draw shapes on the two pieces of colored paper. The shapes should touch, or come close to, one edge of the paper, as in the picture to the right.
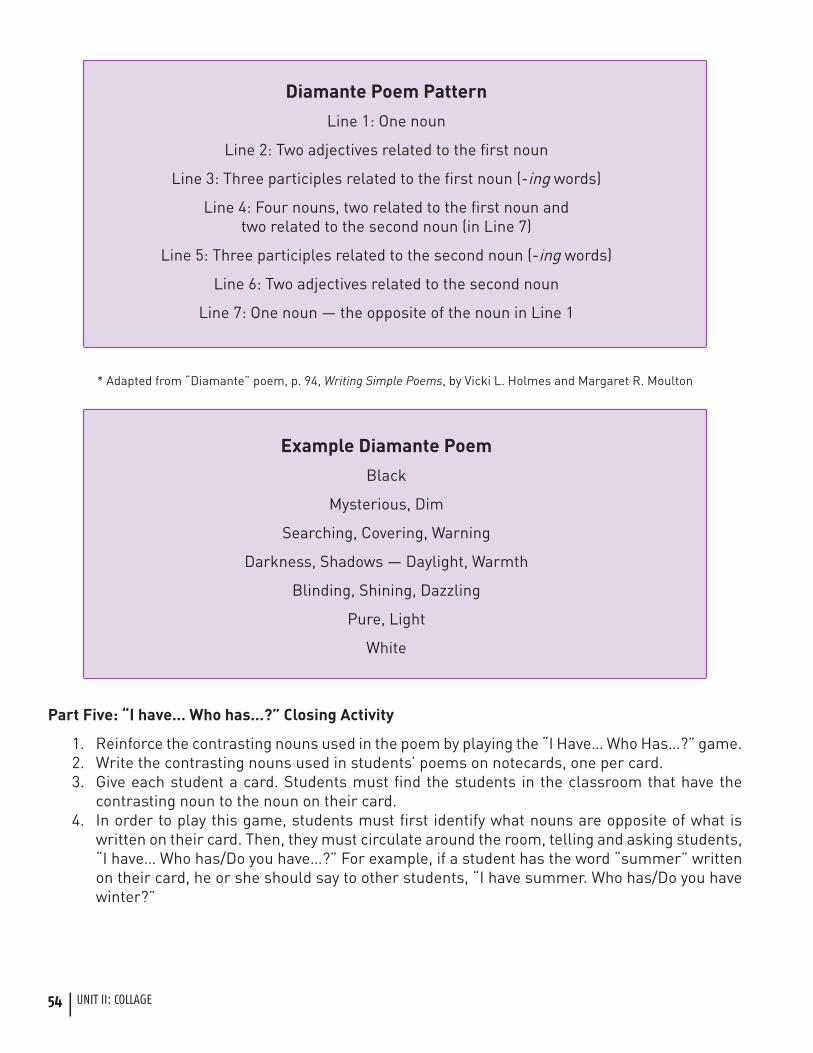
d. Cut the shapes out.e. Line up the colored pieces of paper with the shapes
cut out with the center fold of the larger base pa-per. The two pieces of paper should be diagonal from one another, as shown on the right. Glue the colored rectangle to the base paper once the shapes are cut out.
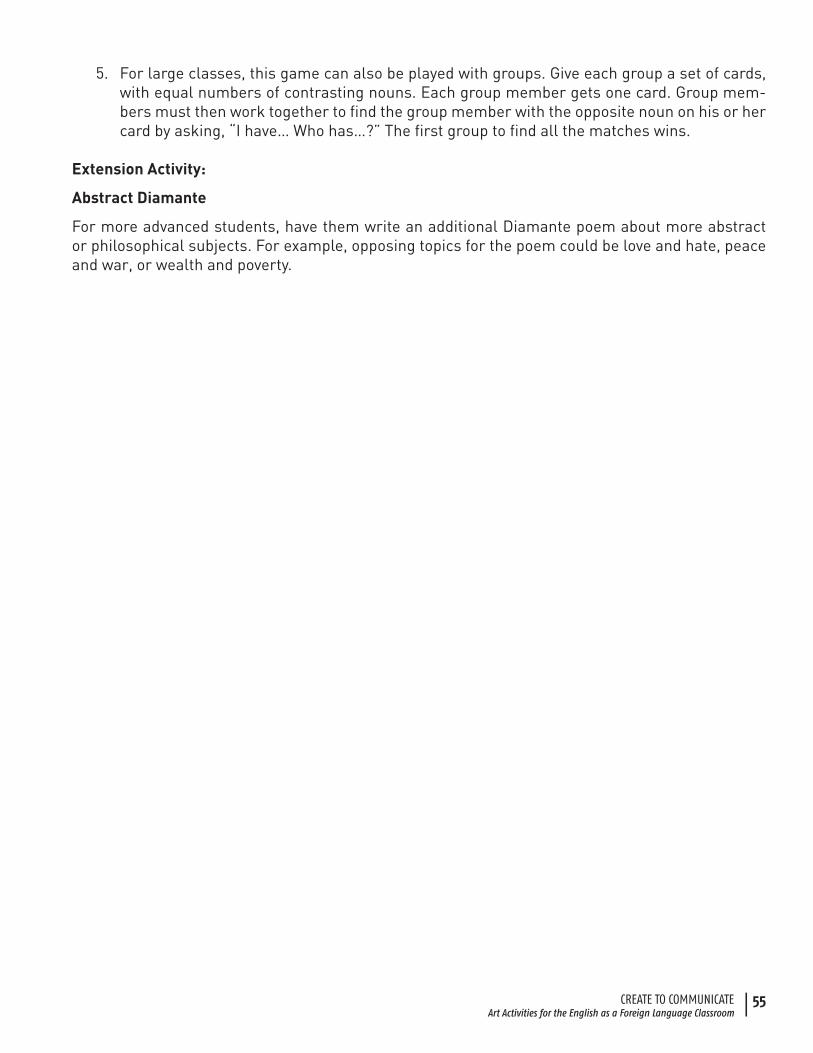
f. Arrange the cut-out shapes so that they lie opposite and reflect the spaces that they were cut out from.
g. When the shapes are arranged correctly, glue the shapes to the paper. h. The finished product should be a reflected patterns collage.
| 53
CREATE TO COMMUNICATEArt Activities for the English as a Foreign Language Classroom
* NOTE: This activity can be made more detailed for older learners. To do so, students can use one large square of paper and cut out detailed and intricate designs from each side of the square. Students then reflect the cut-out shapes over each of the four sides of the square.
Part Three: Reflected Patterns Collage Listening Activity
1. Once students are familiar with the format of the reflected patterns collage, repeat the activ-ity again, but this time as a listening activity.
2. Have students work with one or two partners. Have the pairs or small groups create another small reflected patterns collage and write the directions for making their collage. Students should emphasize the imperative form of the verbs used; for example: cut out a square or fold the paper in half.
3. Students will then take turns giving their directions to the class. The rest of the class must follow the directions they hear to create another small reflected patterns collage. At the end, compare the collages students created with the group’s collage. To save time and allow every group to give their directions, students can use only one small sheet of paper instead of two. Another variation is that students could give their directions to one other group instead of the whole class.
Part Four: Diamante Poem
1. Once students have completed their reflected patterns collages, have them write a Diamante poem. Diamante poems are diamond-shaped poems that involve two opposing ideas or top-ics. Students can use either the two different colors represented in their collage as the two topics of the poem, or whatever two opposing ideas you instruct students to use. Examples of other topics might include night and day, summer and winter, city and countryside, or choco-late and vanilla.
2. Students will have to come up with contrasting nouns, adjectives, and present participles for their Diamante poems. If needed, allow students to use dictionaries or thesauruses.
3. Have students follow the Diamante pattern listed on the next page to create their poem. Write the pattern on the board for students to refer to.
4. (Optional) Create an example of a Diamante poem with the class to help the students see and understand the format of the poem.
5. When students are finished writing their poems, have students share their poems with the class. Make a list of the contrasting nouns used in the poems; explain any unclear meanings or relationships to students.
6. (Optional) If students write their Diamante poem about the two colors they used in their reflected patterns collage, display the collage, along with the Diamante poems, in the class-room or school.
54 | UNIT II: COLLAGE
Diamante Poem Pattern
Line 1: One noun
Line 2: Two adjectives related to the first noun
Line 3: Three participles related to the first noun (-ing words)
Line 4: Four nouns, two related to the first noun and two related to the second noun (in Line 7)
Line 5: Three participles related to the second noun (-ing words)
Line 6: Two adjectives related to the second noun
Line 7: One noun — the opposite of the noun in Line 1
* Adapted from “Diamante” poem, p. 94, Writing Simple Poems, by Vicki L. Holmes and Margaret R. Moulton
Example Diamante Poem
Black
Mysterious, Dim
Searching, Covering, Warning
Darkness, Shadows — Daylight, Warmth
Blinding, Shining, Dazzling
Pure, Light
White
Part Five: “I have… Who has…?” Closing Activity
1. Reinforce the contrasting nouns used in the poem by playing the “I Have… Who Has…?” game. 2. Write the contrasting nouns used in students’ poems on notecards, one per card. 3. Give each student a card. Students must find the students in the classroom that have the
contrasting noun to the noun on their card. 4. In order to play this game, students must first identify what nouns are opposite of what is
written on their card. Then, they must circulate around the room, telling and asking students, “I have… Who has/Do you have…?” For example, if a student has the word “summer” written on their card, he or she should say to other students, “I have summer. Who has/Do you have winter?”
| 55
CREATE TO COMMUNICATEArt Activities for the English as a Foreign Language Classroom
5. For large classes, this game can also be played with groups. Give each group a set of cards, with equal numbers of contrasting nouns. Each group member gets one card. Group mem-bers must then work together to find the group member with the opposite noun on his or her card by asking, “I have… Who has…?” The first group to find all the matches wins.
Extension Activity:
Abstract Diamante
For more advanced students, have them write an additional Diamante poem about more abstract or philosophical subjects. For example, opposing topics for the poem could be love and hate, peace and war, or wealth and poverty.
56 | UNIT II: COLLAGE
LESSON 3
EARTHThe Earth around Me
Natural materials collage using similes and descriptive adjectives
Objective: Students will create a collage from natural materials and write similes using descriptive adjectives.
Level: High Beginner to Intermediate
Materials: Paper, pencils, glue or paste, elements found in nature (materials will vary).
Teacher Preparation: Collect materials from nature and divide the materials into groups. Try to have the same items for each group.
INSTRUCTIONS
Part One: Descriptive Adjectives Warm-Up Activity
1. Collect materials from outside to bring into the class, such as rocks, grass, straw, leaves, pebbles, twigs, or branches.
2. Divide the materials into four or five groups. Pass out a set of materials to each group. 3. Tell students that each group needs to have one sheet of paper and a pencil. When you say
“go,” each group has to write down as many adjectives as they can think of to describe natu-ral materials.
4. Give students about five minutes to look over the materials, feel the materials, and write their lists of descriptive adjectives.
5. After you say “stop,” have one person from each group show the class each material while describing it.
6. The group with the biggest list of accurate descriptive adjectives wins!
Part Two: Adjective Quiz Game
1. Compile a class list of descriptive adjectives on the board. Each group should contribute to the list, and groups should add onto their group list any adjectives that they don’t have. Again, have students hold up the material the adjective describes. The list may include adjectives such as smooth, bumpy, rough, coarse, hard, soft, slippery, prickly, shiny, stretchy, and stiff.
2. Once the class list is compiled, have each group pick two or three adjectives they would like to explore further. Make sure each group has different adjectives.
3. Students should write each adjective on a different sheet of paper.
| 57
CREATE TO COMMUNICATEArt Activities for the English as a Foreign Language Classroom
4. Tell students that to explore the word further they should use dictionaries and thesauruses to find the definition of the word, other meanings the word may have, collocations for the word, and synonyms for the word.
5. Students should write what they find on the piece of paper. Each group can also draw pictures to illustrate the adjective. For example, if a group is assigned the word bumpy, one student may draw a frog with bumps on its back, another student may draw a small picture of a bumpy piece of wood, or another student may draw a small picture of a bumpy road, with rocks and holes in it, all on the same sheet of paper.
6. When every group is finished, tape the adjective papers to the wall, whiteboard, or chalk-board where students can see them.
7. Have the groups present their adjectives to the whole class, giving the definitions and syn-onyms, and explaining the pictures if needed.
8. Students can also act out or find examples in the classroom that demonstrate the adjectives they were assigned. For example, for the adjective slippery, students could pretend the floor is very slippery or that they are holding a slippery snake that won’t stay in their hands. For bumpy, students could pretend they are riding in a car on a very bumpy road.
9. Now play “Adjective Quiz Game” with students. Students can stay in their groups, each stu-dent helping their group to come up with the correct answer. To play the game, you say the definition or synonym of one of the listed adjectives, and whichever group raises their hand first and answers correctly gets a point.
10. Students should listen to the definition you say instead of trying to read the papers on the board.
Part Three: Nature Materials Collage
1. Now that students are familiar with adjectives that describe materials found in nature, tell students they will be making a nature materials collage.
2. Pass out a sheet of paper to every student. Instruct students to fold their paper two ways: first, fold the paper in half, widthwise, and then fold it in half the other way, lengthwise.
3. Instruct students to look at the adjective papers hanging on the wall or board and choose four adjectives. Tell students to write the adjectives small, one in each box on their paper, in order to leave room for the collage materials. (For very young learners, you may have students only choose two adjectives.)
4. Tell students the class will be taking a trip outside to find things from nature that demon-strate the adjectives written on their papers. Ask students to remember their four adjectives so they don’t have to carry their papers with them, or have students write their adjectives on a small piece of paper that they can put in their pocket.
a. If it is not possible to take students outside of the classroom to search for things from nature, assign this part of the project for students to do at home. Ask them to find small items that demonstrate their adjectives at home or on their way to school. For example:
Rock — Rough Bark — Bumpy Flower — Soft
58 | UNIT II: COLLAGE
5. Before going outside, brainstorm with students for things they might look for. Help students come up with ideas such as rough bark, smooth rocks or pebbles, shiny blades of grass, coarse sand, or bumpy leaves.
6. If needed, give students bags, baskets, or plastic bags to collect their items in. Tell students to only collect one or two items that demonstrate each adjective. Students should be careful to not take too much so that the natural environment is not harmed.
7. Go outside, as a group, for students to look for and collect their items.8. Once students have collected things and items that demonstrate each of their adjectives,
have students glue those items in the boxes on the paper.
Part Four: Simile Game
1. Once students have finished their nature texture collage, play a simile game. 2. Demonstrate to students what a simile is by writing a few similes on the board. Examples
might include “She is as fast as a horse,” “The shirt is as black as night,” or “He is as quiet as a mouse.”
3. Review with students the definition and structure of a simile. A simile is an expression that compares a thing or person to something else using the words like or as. Give students more examples of similes if needed.
4. To play the simile game, divide students into groups of three or four. 5. Write the beginning of a simile on the board using the adjectives students have been working
with in this activity, and the objects that students have collected for their nature collage.6. Each time you write the first part of a simile on the board the groups have to think of a noun to
finish the sentence that demonstrates the adjective used in the sentence. For example, one group may come up with “The flower is as soft as velvet,” while another group may say, “The flower is as soft as a baby’s skin.”
7. Have each group say their completed sentence. Ask the class if they agree with the group’s sentence. For example, if a group said, “The rock is as rough as a piece of glass,” the rest of the class should not agree that it is correct, because glass is usually smooth.
8. Have each group think of and write the beginning of a simile on the board. The other groups then have to complete the simile.
Part Five: Closing Activity Options
1. Review the main components of this lesson, descriptive adjectives or similes, with students. There are several ways to do this:
a. Hold up different nature materials used in the group work at the beginning of the ac-tivity. Each student has to say a descriptive adjective that describes a nature material before they can leave class.
b. Say the beginning of a simile and have each student or group finish the simile with a correct noun before they leave class.
c. Have each student write an “exit ticket.” On a small piece of paper, have students write a descriptive adjective and its definition. They have to hand you their “exit ticket” before they can leave class.
| 59
CREATE TO COMMUNICATEArt Activities for the English as a Foreign Language Classroom
Extension Activity:
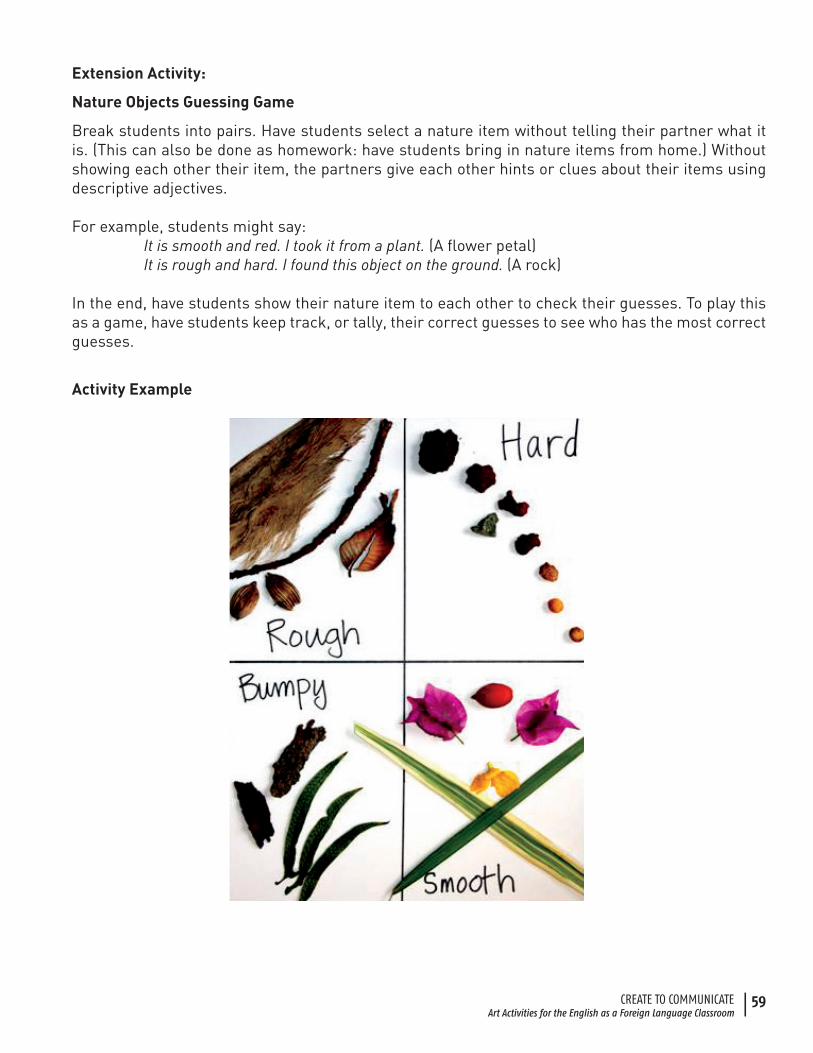
Nature Objects Guessing Game
Break students into pairs. Have students select a nature item without telling their partner what it is. (This can also be done as homework: have students bring in nature items from home.) Without showing each other their item, the partners give each other hints or clues about their items using descriptive adjectives.
For example, students might say: It is smooth and red. I took it from a plant. (A flower petal) It is rough and hard. I found this object on the ground. (A rock)
In the end, have students show their nature item to each other to check their guesses. To play this as a game, have students keep track, or tally, their correct guesses to see who has the most correct guesses.
Activity Example
60 | UNIT II: COLLAGE
LESSON 4
JACKETSDo You Judge a Book by Its Cover?
Collage book cover and presentation using Wh- questions
Objective: Students will create a collaged book cover, write a back cover paragraph for a book, and discuss their book in a book fair using Wh- questions.
Level: Intermediate
Materials: Recycled cardboard or poster board, any available collage materials (magazines, papers, postcards, etc.), pencils, scissors, and glue, paste, or glue sticks.
Teacher Preparation: 1. Collect materials, such as recycled magazines or papers, for students’ collage book covers. 2. Read the Art Variation section of this activity. If string or yarn is available, students can make a yarn collage book cover. 3. Find books to use as examples for Part One and Part Three.
INSTRUCTIONS
Part One: Do You Judge a Book by Its Cover?
1. Explain that jacket here means cover. Demonstrate what “judging a book by its cover” means by using other examples.
2. Find four or five books to show students. Show students the front covers only. 3. Ask the class to vote on which book they would like to read. 4. Tally the votes. Ask students why they think the chosen book won. Does this book have a more
appealing design or image on the front cover?5. Have students explain what judging a book by its cover means in their own words.
Part Two: Collage Book Cover
1. Assign students a story or book to work from, or have students pick a story or book that they are familiar with.
2. Once students have a book or story to work from, tell students they will be creating a new front and back cover for their book.
3. Have students identify a character or scene from the story that they would like to illustrate. 4. Cut the cardboard or poster board to the appropriate size for students’ book covers. (The cov-
ers should be larger than a normal book cover, in order for students to have more room to make their collage.)
5. If desired, students can draw the character, scene, or design on the poster board or card-board with pencil first to create a basic outline of their collage.
| 61
CREATE TO COMMUNICATEArt Activities for the English as a Foreign Language Classroom
6. Students should collect collage materials and begin cutting and gluing the materials to cre-ate their new book cover.
7. If possible, students can add extra details to their collages with collage materials such as beads, buttons, or fabric.
8. After the glue is dry, students should erase any pencil marks that are showing.
Part Three: Back Cover Paragraph
1. Once students have completed their front cover collage, they will need to write a paragraph for the back cover of their book.
2. Provide students several books to look at. Have students work in small groups or pairs to determine what general information is included on the back cover of books.
3. Explain to students that the back cover of the book is not a large space, so authors and editors need to try to provide es-sential information about the book, while also trying to grab the viewer’s attention, to make them want to read the book.
4. Show students that you can often find quotes and opinions on the back book cover from people who have read the book.
5. Select some books that your class has not read. Have stu-dents share books if needed, and read the back cover of the books. Ask students to vote on which book they would select after reading the back cover of the book and have them explain why.
6. Tell students they need to write a short description for the back of their collage book cover, as well as a reviewer’s quote about their opinion or reaction to the book. (Adapt this step to fit the needs and ability level of your students.)
7. To help students organize the key information to include on the back cover paragraph for their book, have them use a Five W’s graphic organizer. Draw the graphic organizer below on the board for students to copy, or photocopy the graphic organizer included at the end of this lesson.
WHO are the important characters in the book?
WHAT happens in the book? What is the book about?
WHY is this book special?
WHERE does the story take place?
WHEN does the story take place?
8. After students have completed the graphic organizer, have students use the information in the graphic organizer to write the back cover paragraph.
62 | UNIT II: COLLAGE
*NOTE: Not all of the information included in the graphic organizer should be included in the back cover paragraph. The purpose of the Five W’s graphic organizer is to help students remember the important information from the book in order to select what to write about for their back cover paragraph.
9. Next, have students write their reviewer’s quote for the book. If needed, review the use and purpose of quotation marks.
10. Have students write or glue their paragraph and quote to the back cover. Students can also add collage images or designs to the back cover of the book.
11. Have students bind the front and back covers together with three pieces of paper, yarn, or string. Cut each of the three pieces to the same size. Then, tape or glue one side of the paper, yarn, or string to the front book cover, at the top, middle, and bottom. Last, tape or glue the other side of the paper, yarn, or string to the back cover, at the top, middle, and bottom of the cover.
Part Four: Book Fair
1. Tell students the class is going to have a book fair or book party to present their book and new book covers to the rest of the class. (If possible, invite other classes, teachers, administrators or parents to attend the book fair.)
2. Divide students into two groups. One group of students should display their book and book covers on desks and tables around the classroom and stand next to them.
3. The other group of students should circulate around the room, asking questions to the stu-dents standing next to their book. Tell students to ask the “five W” questions, questions about the students’ opinion of the book, and questions about the collage book cover design.
4. After sufficient time, have the two groups switch roles.
Part Five: Book Fair Survey Closing Activity
1. To check students’ participation in the book fair, while also reviewing students’ comprehen-sion of the “five W’s,” have students complete a book fair survey. The survey can be found at the end of this chapter. Adapt or modify the survey to fit the needs and level of your students.
Extension Activity:
“Inside, Outside” Book Review Circle
Have students practice speaking and listening, and share information about their books, by do-ing an “inside circle, outside circle” activity. To begin, divide students into two groups. One group should form a circle in the classroom, facing outwards. The other group should form a circle around the first circle, facing inwards. The students should be equally matched up, each facing another student in the other circle. If there are an odd number of students, one student can be the student helper and help manage time or call “switch.” Tell the inside circle of students that their job is to talk about their books. The job of the outside students is to ask the inside students questions about their books. Remind the outside students to ask Wh- questions and questions about the students’ personal opinions about the book. Say “go” to start the activity. After a minute or two, tell students
| 63
CREATE TO COMMUNICATEArt Activities for the English as a Foreign Language Classroom
to switch (or have the student helper call “switch”). Tell the outside students to rotate one person to their right. Inside students stay where they are. Students are now matched up with a new partner to talk about their book with. Keep rotating students every few minutes. Then, change the directions. Have the outside students talk about their books, and the inside students ask questions.
Art Variation:
If yarn or string is available, students can create a yarn collage book cover. Students should first draw the character, scene, or design for their book cover with pencil. Students should then cut pieces of yarn to fit the different parts of the drawing. Next, have students glue the yarn to their drawings in several ways:
a. Gently squeezing glue onto the pencil lines and placing the yarn on top of it. b. Pouring a little glue into a small container and using an old paintbrush to brush glue
onto the yarn, and then placing the yarn over the pencil drawing. c. Using an old paintbrush to brush the glue directly onto the pencil lines, and then plac-
ing the yarn on top of it.
64 | UNIT II: COLLAGE
BOOK COVER GRAPHIC ORGANIZER
Directions: Read the back cover of your book. Then, with a partner, complete this worksheet.
WHO are the important characters in the book?
WHAT happens in the book? What is the book about?
WHY is this book special?
WHERE does the story take place?
WHEN does the story take place?

| 65
CREATE TO COMMUNICATEArt Activities for the English as a Foreign Language Classroom
BOOK FAIR SURVEY
Directions: After your art walk, complete this worksheet and hand it to your teacher.
BOOK FAIR SURVEY
Name:
1. Whose book cover did you like the best? Why?
2. What book would you like to read after hearing the book presentation in the book fair? Why?
a. Where does this story take place?
b. When does this story take place?
c. Who are the characters in the book?
3. Which back cover did you like best? Why?
4. What was your favorite part of this book fair?
5. What was your least favorite part of the book fair?
66 | UNIT II: COLLAGE
LESSON 5
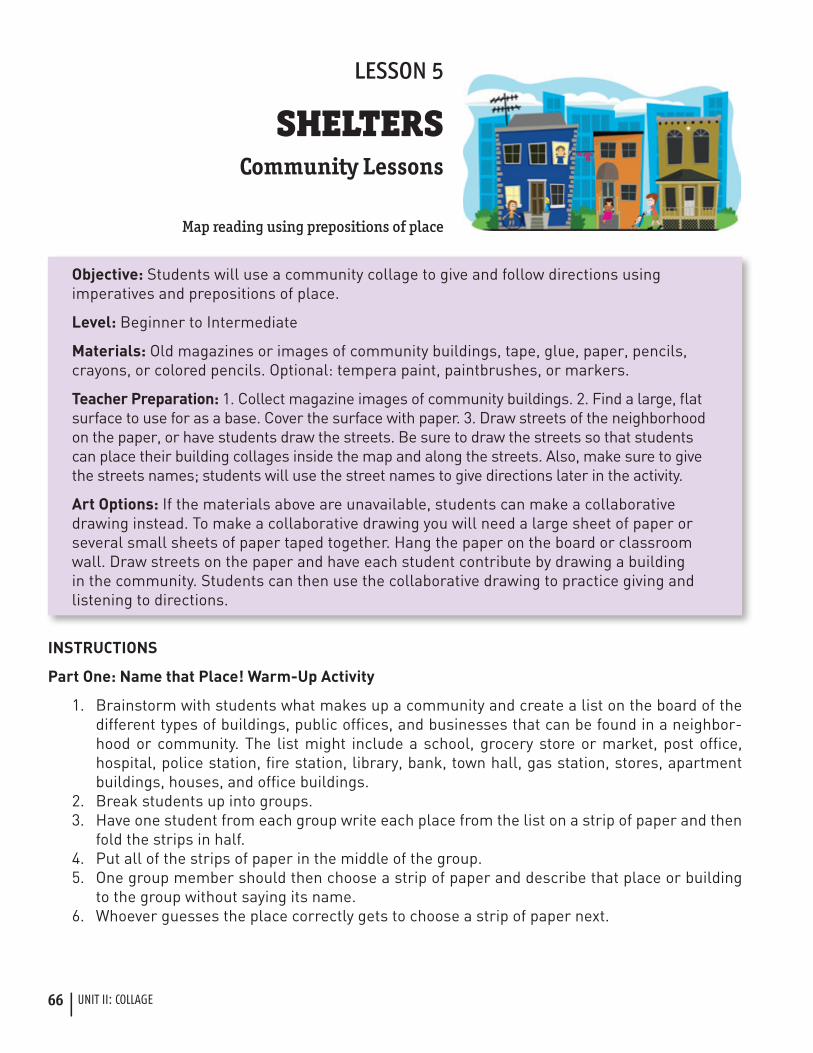
SHELTERSCommunity Lessons
Map reading using prepositions of place
Objective: Students will use a community collage to give and follow directions using imperatives and prepositions of place.
Level: Beginner to Intermediate
Materials: Old magazines or images of community buildings, tape, glue, paper, pencils, crayons, or colored pencils. Optional: tempera paint, paintbrushes, or markers.
Teacher Preparation: 1. Collect magazine images of community buildings. 2. Find a large, flat surface to use for as a base. Cover the surface with paper. 3. Draw streets of the neighborhood on the paper, or have students draw the streets. Be sure to draw the streets so that students can place their building collages inside the map and along the streets. Also, make sure to give the streets names; students will use the street names to give directions later in the activity.
Art Options: If the materials above are unavailable, students can make a collaborative drawing instead. To make a collaborative drawing you will need a large sheet of paper or several small sheets of paper taped together. Hang the paper on the board or classroom wall. Draw streets on the paper and have each student contribute by drawing a building in the community. Students can then use the collaborative drawing to practice giving and listening to directions.
INSTRUCTIONS
Part One: Name that Place! Warm-Up Activity
1. Brainstorm with students what makes up a community and create a list on the board of the different types of buildings, public offices, and businesses that can be found in a neighbor-hood or community. The list might include a school, grocery store or market, post office, hospital, police station, fire station, library, bank, town hall, gas station, stores, apartment buildings, houses, and office buildings.
2. Break students up into groups. 3. Have one student from each group write each place from the list on a strip of paper and then
fold the strips in half. 4. Put all of the strips of paper in the middle of the group. 5. One group member should then choose a strip of paper and describe that place or building
to the group without saying its name. 6. Whoever guesses the place correctly gets to choose a strip of paper next.
| 67
CREATE TO COMMUNICATEArt Activities for the English as a Foreign Language Classroom
7. “Guess that Sketch” is a variation for this activity. Have students draw — instead of describe — the places that they chose. The first group member to correctly guess the place gets to draw next.
Part Two: Community Collage
1. Tell students they will be creating a collaborative community collage. Each student will draw or construct a building to include in the collage.
2. Have each student choose a different building to create from the neighborhood list. If your class is small, students may need to make two or three places from the neighborhood list.
3. Help students find the right photos for their collages. 4. After students complete the basic forms, have them add details such as doors, windows, and
signs. These details can be added with crayons, markers, or paint and will help distinguish what types of buildings the sculptures are.
5. When students’ collages are completed, have them place their buildings within the map along a street or on a street corner. (See the instructions for creating the map in the Teacher Preparation section of this activity.)
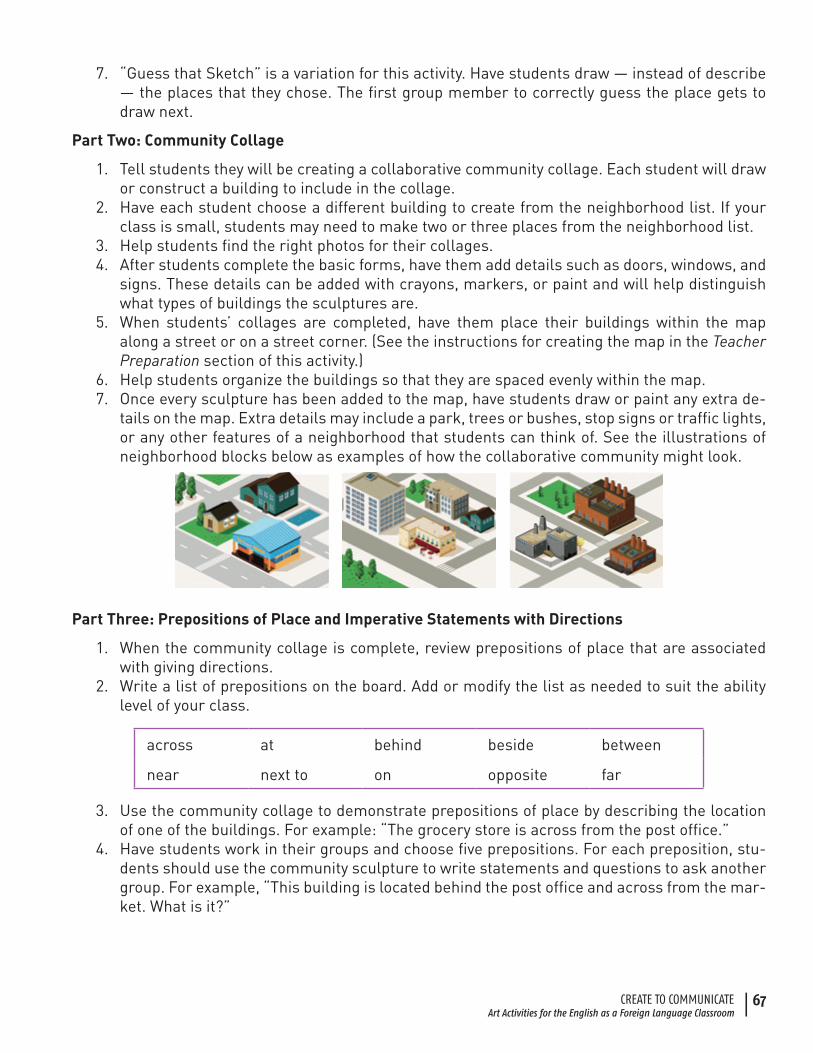
6. Help students organize the buildings so that they are spaced evenly within the map. 7. Once every sculpture has been added to the map, have students draw or paint any extra de-
tails on the map. Extra details may include a park, trees or bushes, stop signs or traffic lights, or any other features of a neighborhood that students can think of. See the illustrations of neighborhood blocks below as examples of how the collaborative community might look.
Part Three: Prepositions of Place and Imperative Statements with Directions
1. When the community collage is complete, review prepositions of place that are associated with giving directions.
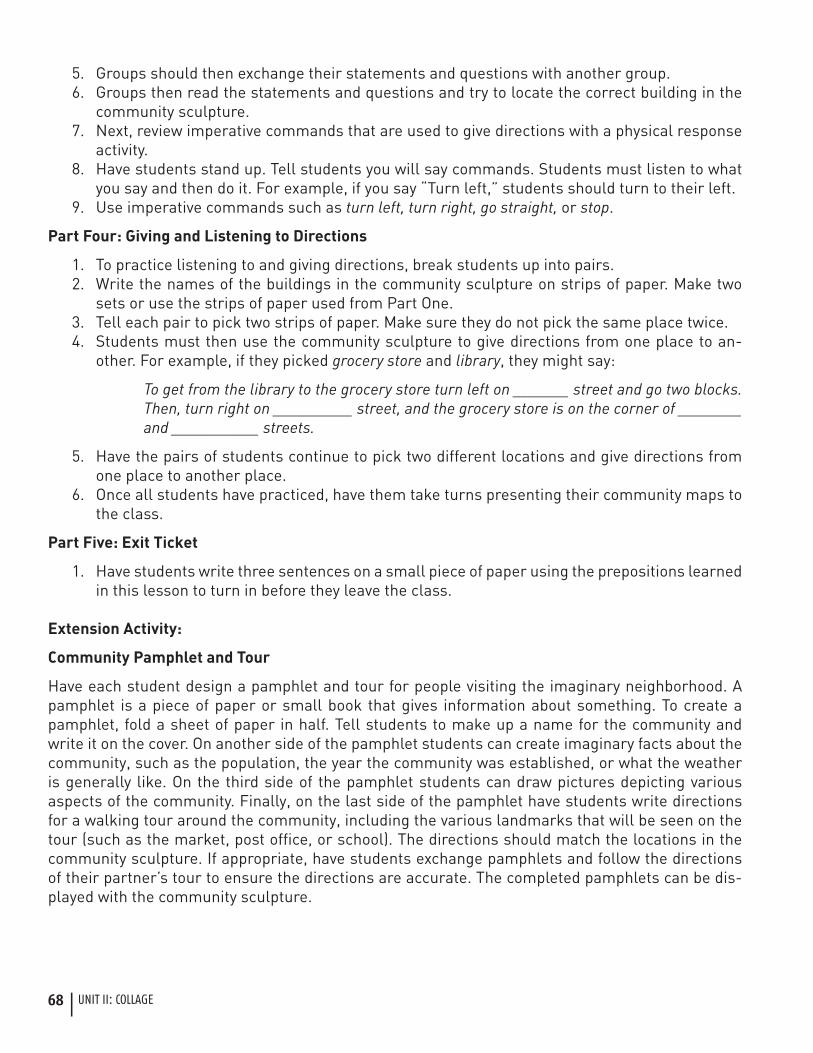
2. Write a list of prepositions on the board. Add or modify the list as needed to suit the ability level of your class.
across at behind beside between
near next to on opposite far
3. Use the community collage to demonstrate prepositions of place by describing the location of one of the buildings. For example: “The grocery store is across from the post office.”
4. Have students work in their groups and choose five prepositions. For each preposition, stu-dents should use the community sculpture to write statements and questions to ask another group. For example, “This building is located behind the post office and across from the mar-ket. What is it?”
68 | UNIT II: COLLAGE
5. Groups should then exchange their statements and questions with another group.6. Groups then read the statements and questions and try to locate the correct building in the
community sculpture.7. Next, review imperative commands that are used to give directions with a physical response
activity. 8. Have students stand up. Tell students you will say commands. Students must listen to what
you say and then do it. For example, if you say “Turn left,” students should turn to their left. 9. Use imperative commands such as turn left, turn right, go straight, or stop.
Part Four: Giving and Listening to Directions
1. To practice listening to and giving directions, break students up into pairs.2. Write the names of the buildings in the community sculpture on strips of paper. Make two
sets or use the strips of paper used from Part One. 3. Tell each pair to pick two strips of paper. Make sure they do not pick the same place twice. 4. Students must then use the community sculpture to give directions from one place to an-
other. For example, if they picked grocery store and library, they might say:
To get from the library to the grocery store turn left on _______ street and go two blocks. Then, turn right on __________ street, and the grocery store is on the corner of ________ and ___________ streets.
5. Have the pairs of students continue to pick two different locations and give directions from one place to another place.
6. Once all students have practiced, have them take turns presenting their community maps to the class.
Part Five: Exit Ticket
1. Have students write three sentences on a small piece of paper using the prepositions learned in this lesson to turn in before they leave the class.
Extension Activity:
Community Pamphlet and Tour
Have each student design a pamphlet and tour for people visiting the imaginary neighborhood. A pamphlet is a piece of paper or small book that gives information about something. To create a pamphlet, fold a sheet of paper in half. Tell students to make up a name for the community and write it on the cover. On another side of the pamphlet students can create imaginary facts about the community, such as the population, the year the community was established, or what the weather is generally like. On the third side of the pamphlet students can draw pictures depicting various aspects of the community. Finally, on the last side of the pamphlet have students write directions for a walking tour around the community, including the various landmarks that will be seen on the tour (such as the market, post office, or school). The directions should match the locations in the community sculpture. If appropriate, have students exchange pamphlets and follow the directions of their partner’s tour to ensure the directions are accurate. The completed pamphlets can be dis-played with the community sculpture.
| 69
CREATE TO COMMUNICATEArt Activities for the English as a Foreign Language Classroom
Additional Resources:
Visit the Housing and Urban Development Kids Next Door website to visit places virtually, get ideas for volunteering in your community, participate in online scavenger hunts, play interactive puzzles, and build virtual communities. http://www.hud.gov/kids/
Visit the EL Civics for ESL site to learn more about housing in the United States. http://www.elcivics.com/housing_lesson_1.html
Visit the Internet TESL Journal site for conversation questions about communities. http://iteslj.org/questions/home.html and http://iteslj.org/questions/community.html
| 159
CREATE TO COMMUNICATEArt Activities for the English as a Foreign Language Classroom
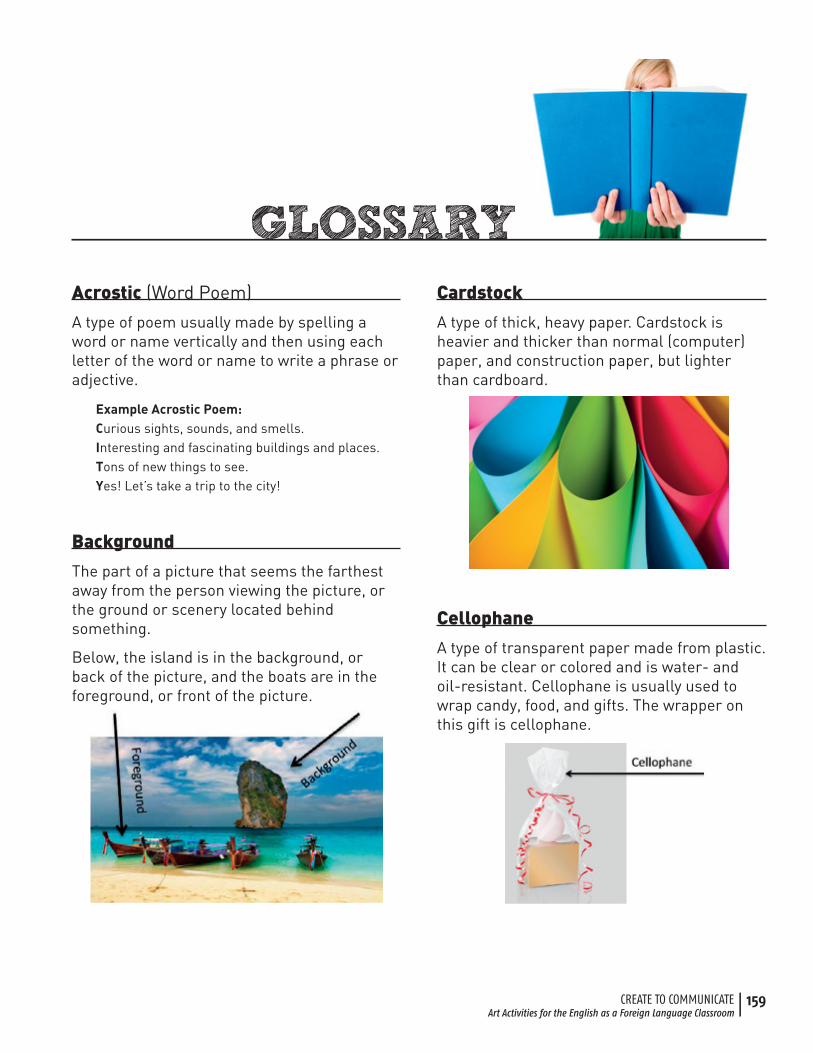
Acrostic (Word Poem)
A type of poem usually made by spelling a word or name vertically and then using each letter of the word or name to write a phrase or adjective.
Example Acrostic Poem:Curious sights, sounds, and smells.Interesting and fascinating buildings and places.Tons of new things to see.Yes! Let’s take a trip to the city!
Background
The part of a picture that seems the farthest away from the person viewing the picture, or the ground or scenery located behind something.
Below, the island is in the background, or back of the picture, and the boats are in the foreground, or front of the picture.
Cardstock
A type of thick, heavy paper. Cardstock is heavier and thicker than normal (computer) paper, and construction paper, but lighter than cardboard.
Cellophane
A type of transparent paper made from plastic. It can be clear or colored and is water- and oil-resistant. Cellophane is usually used to wrap candy, food, and gifts. The wrapper on this gift is cellophane.
160 | GLOSSARY
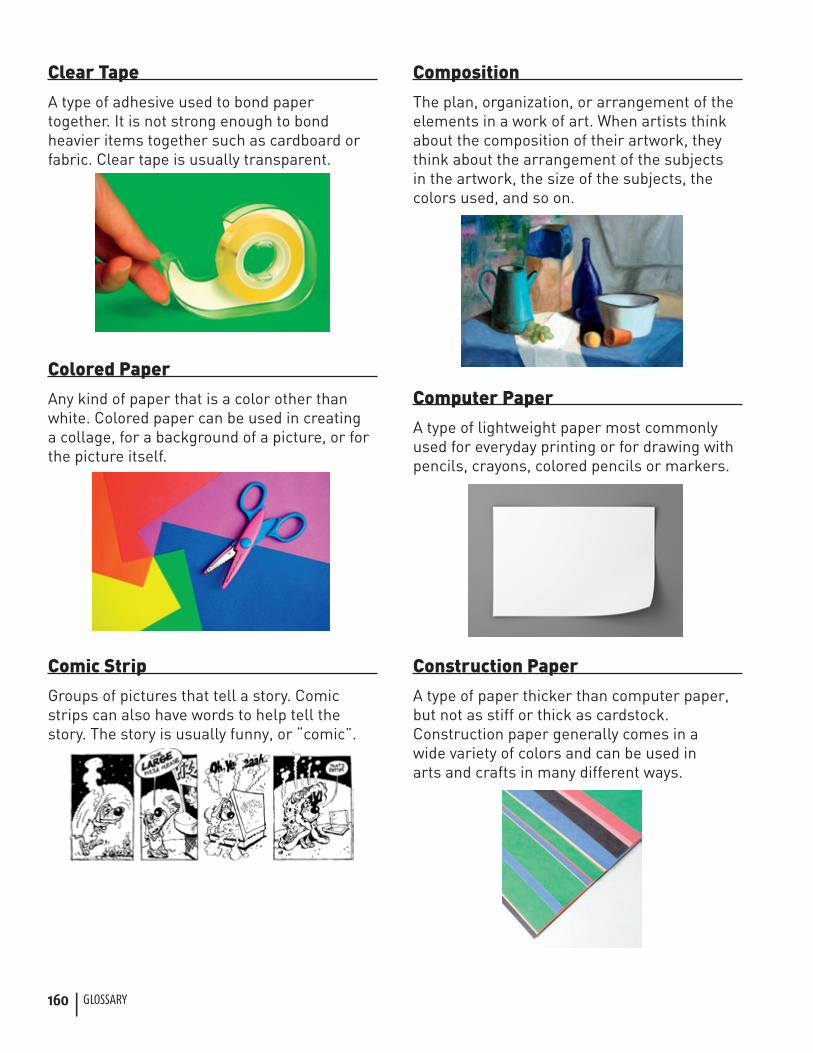
Clear Tape
A type of adhesive used to bond paper together. It is not strong enough to bond heavier items together such as cardboard or fabric. Clear tape is usually transparent.
Colored Paper
Any kind of paper that is a color other than white. Colored paper can be used in creating a collage, for a background of a picture, or for the picture itself.
Comic Strip
Groups of pictures that tell a story. Comic strips can also have words to help tell the story. The story is usually funny, or “comic”.
Composition
The plan, organization, or arrangement of the elements in a work of art. When artists think about the composition of their artwork, they think about the arrangement of the subjects in the artwork, the size of the subjects, the colors used, and so on.
Computer Paper
A type of lightweight paper most commonly used for everyday printing or for drawing with pencils, crayons, colored pencils or markers.
Construction Paper
A type of paper thicker than computer paper, but not as stiff or thick as cardstock. Construction paper generally comes in a wide variety of colors and can be used in arts and crafts in many different ways.
| 161
CREATE TO COMMUNICATEArt Activities for the English as a Foreign Language Classroom
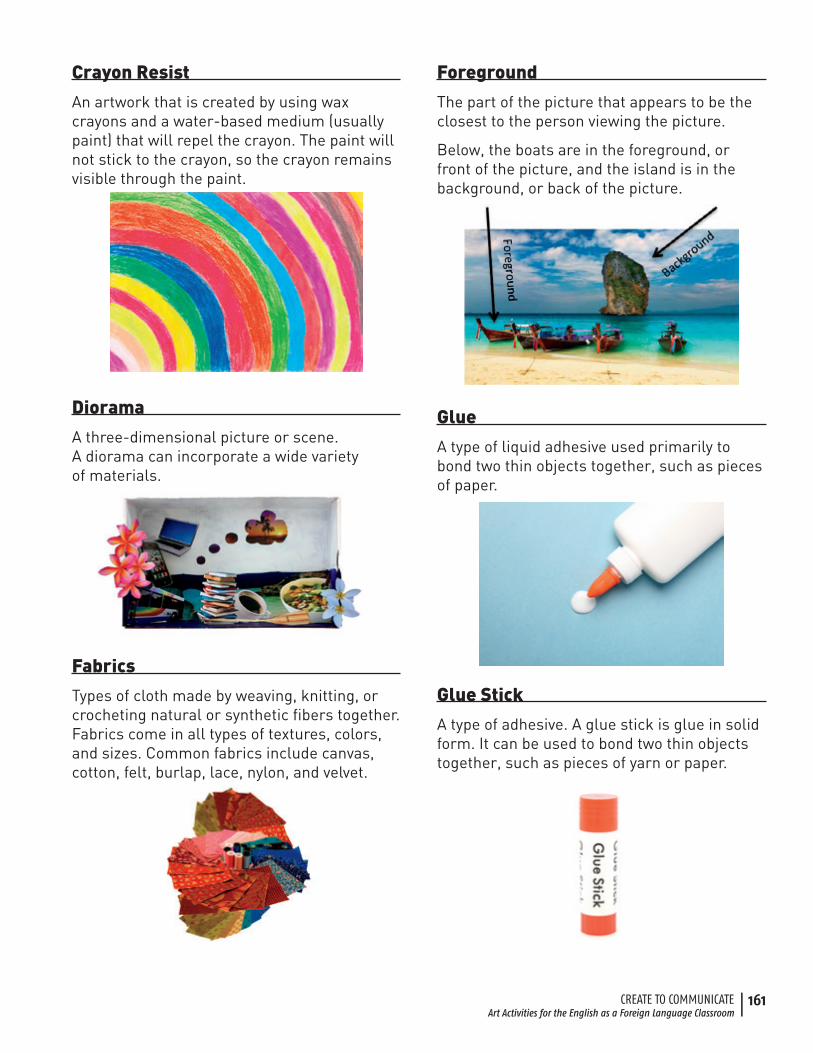
Crayon Resist
An artwork that is created by using wax crayons and a water-based medium (usually paint) that will repel the crayon. The paint will not stick to the crayon, so the crayon remains visible through the paint.
Diorama
A three-dimensional picture or scene. A diorama can incorporate a wide variety of materials.
Fabrics
Types of cloth made by weaving, knitting, or crocheting natural or synthetic fibers together. Fabrics come in all types of textures, colors, and sizes. Common fabrics include canvas, cotton, felt, burlap, lace, nylon, and velvet.
Foreground
The part of the picture that appears to be the closest to the person viewing the picture.
Below, the boats are in the foreground, or front of the picture, and the island is in the background, or back of the picture.
Glue
A type of liquid adhesive used primarily to bond two thin objects together, such as pieces of paper.
Glue Stick
A type of adhesive. A glue stick is glue in solid form. It can be used to bond two thin objects together, such as pieces of yarn or paper.
162 | GLOSSARY
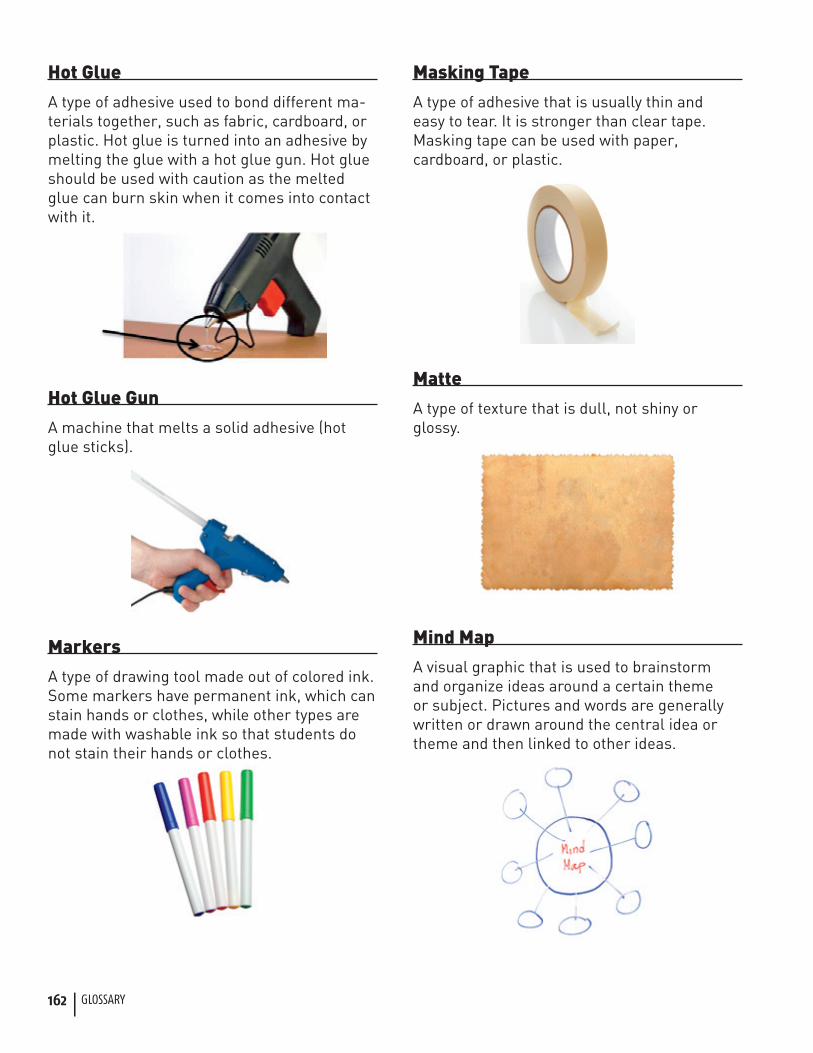
Hot Glue
A type of adhesive used to bond different ma-terials together, such as fabric, cardboard, or plastic. Hot glue is turned into an adhesive by melting the glue with a hot glue gun. Hot glue should be used with caution as the melted glue can burn skin when it comes into contact with it.
Hot Glue Gun
A machine that melts a solid adhesive (hot glue sticks).
Markers
A type of drawing tool made out of colored ink. Some markers have permanent ink, which can stain hands or clothes, while other types are made with washable ink so that students do not stain their hands or clothes.
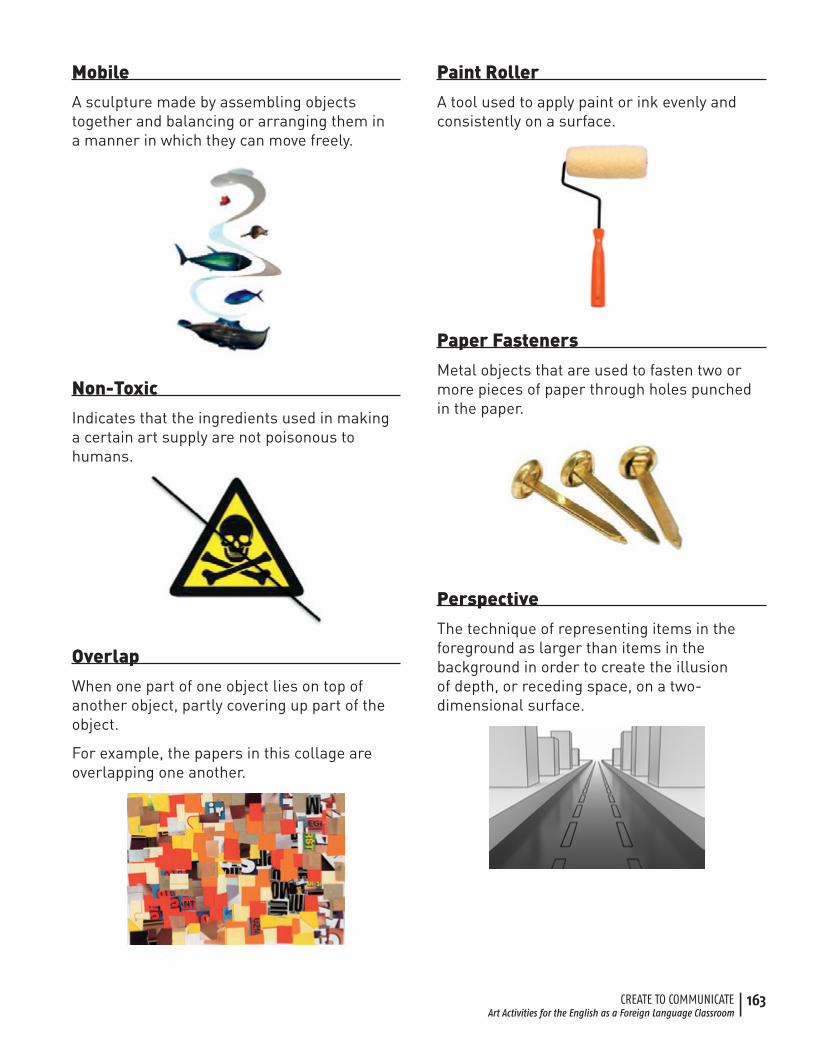
Masking Tape
A type of adhesive that is usually thin and easy to tear. It is stronger than clear tape. Masking tape can be used with paper, cardboard, or plastic.
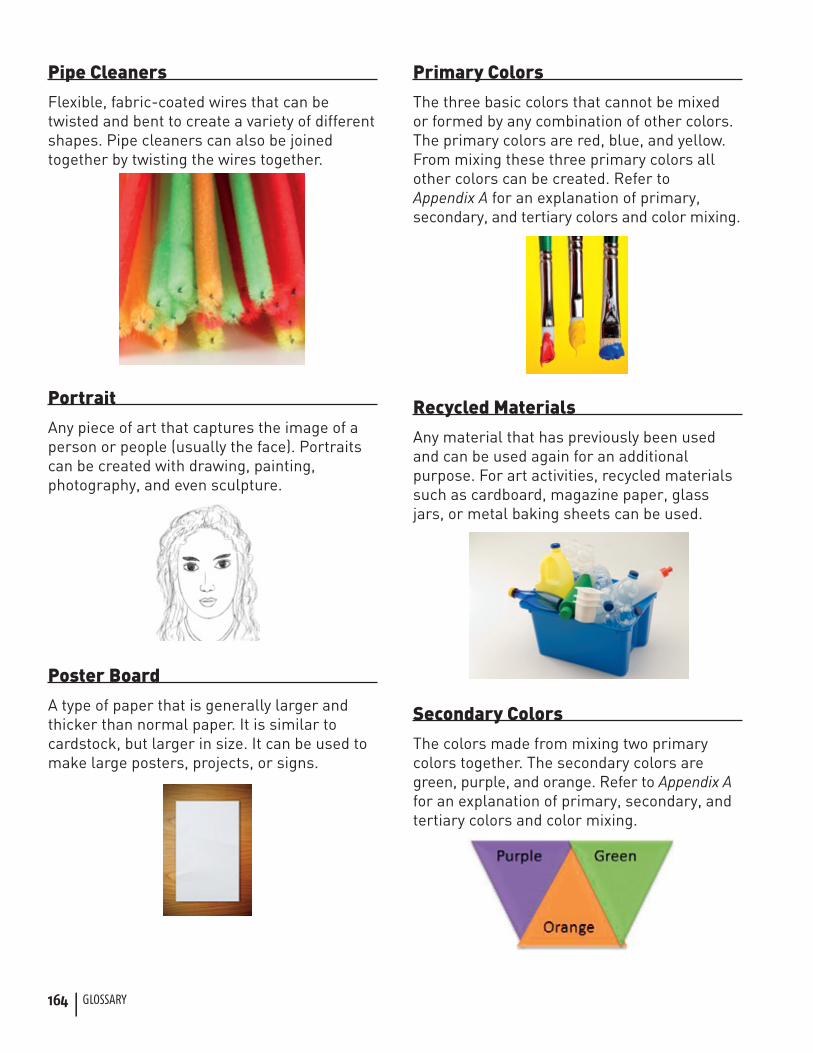
Matte
A type of texture that is dull, not shiny or glossy.
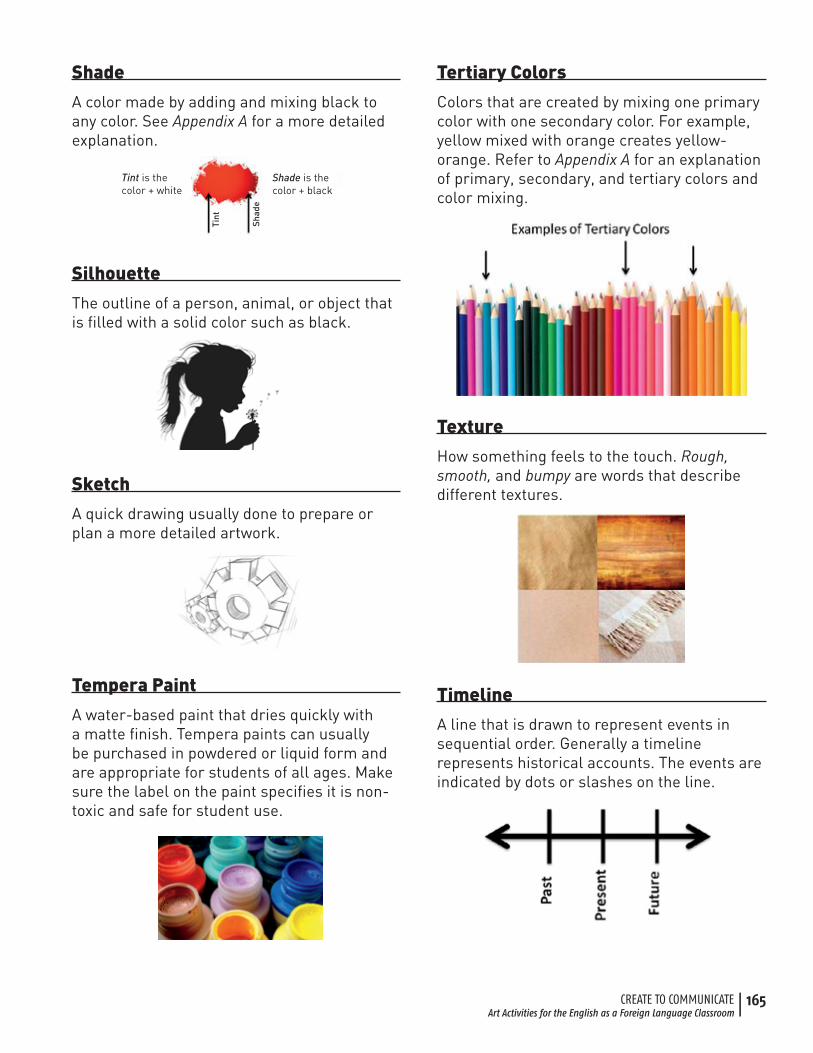
Mind Map
A visual graphic that is used to brainstorm and organize ideas around a certain theme or subject. Pictures and words are generally written or drawn around the central idea or theme and then linked to other ideas.
| 163
CREATE TO COMMUNICATEArt Activities for the English as a Foreign Language Classroom
Mobile
A sculpture made by assembling objects together and balancing or arranging them in a manner in which they can move freely.
Non-Toxic
Indicates that the ingredients used in making a certain art supply are not poisonous to humans.
Overlap
When one part of one object lies on top of another object, partly covering up part of the object.
For example, the papers in this collage are overlapping one another.
Paint Roller
A tool used to apply paint or ink evenly and consistently on a surface.
Paper Fasteners
Metal objects that are used to fasten two or more pieces of paper through holes punched in the paper.
Perspective
The technique of representing items in the foreground as larger than items in the background in order to create the illusion of depth, or receding space, on a two- dimensional surface.
164 | GLOSSARY
Pipe Cleaners
Flexible, fabric-coated wires that can be twisted and bent to create a variety of different shapes. Pipe cleaners can also be joined together by twisting the wires together.
Portrait
Any piece of art that captures the image of a person or people (usually the face). Portraits can be created with drawing, painting, photography, and even sculpture.
Poster Board
A type of paper that is generally larger and thicker than normal paper. It is similar to cardstock, but larger in size. It can be used to make large posters, projects, or signs.
Primary Colors
The three basic colors that cannot be mixed or formed by any combination of other colors. The primary colors are red, blue, and yellow. From mixing these three primary colors all other colors can be created. Refer to Appendix A for an explanation of primary, secondary, and tertiary colors and color mixing.
Recycled Materials
Any material that has previously been used and can be used again for an additional purpose. For art activities, recycled materials such as cardboard, magazine paper, glass jars, or metal baking sheets can be used.
Secondary Colors
The colors made from mixing two primary colors together. The secondary colors are green, purple, and orange. Refer to Appendix A for an explanation of primary, secondary, and tertiary colors and color mixing.
| 165
CREATE TO COMMUNICATEArt Activities for the English as a Foreign Language Classroom
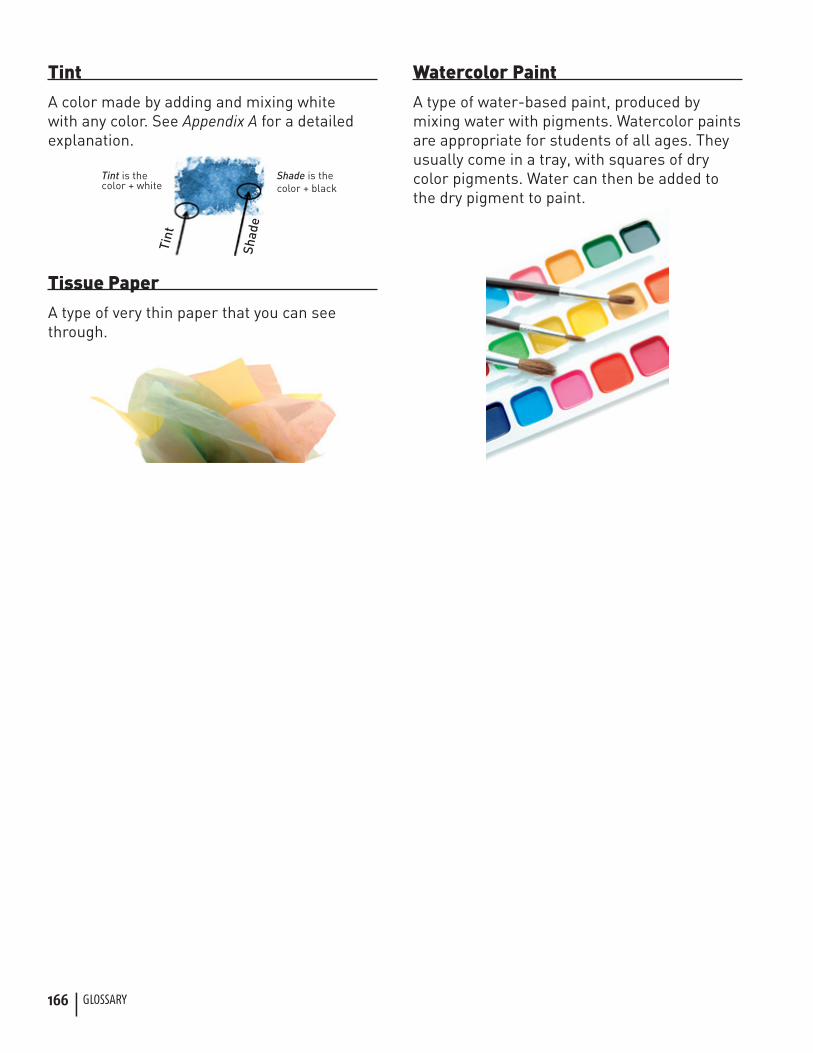
Shade
A color made by adding and mixing black to any color. See Appendix A for a more detailed explanation.
Silhouette
The outline of a person, animal, or object that is filled with a solid color such as black.
Sketch
A quick drawing usually done to prepare or plan a more detailed artwork.
Tempera Paint
A water-based paint that dries quickly with a matte finish. Tempera paints can usually be purchased in powdered or liquid form and are appropriate for students of all ages. Make sure the label on the paint specifies it is non-toxic and safe for student use.
Tertiary Colors
Colors that are created by mixing one primary color with one secondary color. For example, yellow mixed with orange creates yellow-orange. Refer to Appendix A for an explanation of primary, secondary, and tertiary colors and color mixing.
Texture
How something feels to the touch. Rough, smooth, and bumpy are words that describe different textures.
Timeline
A line that is drawn to represent events in sequential order. Generally a timeline represents historical accounts. The events are indicated by dots or slashes on the line.
166 | GLOSSARY
Tint
A color made by adding and mixing white with any color. See Appendix A for a detailed explanation.
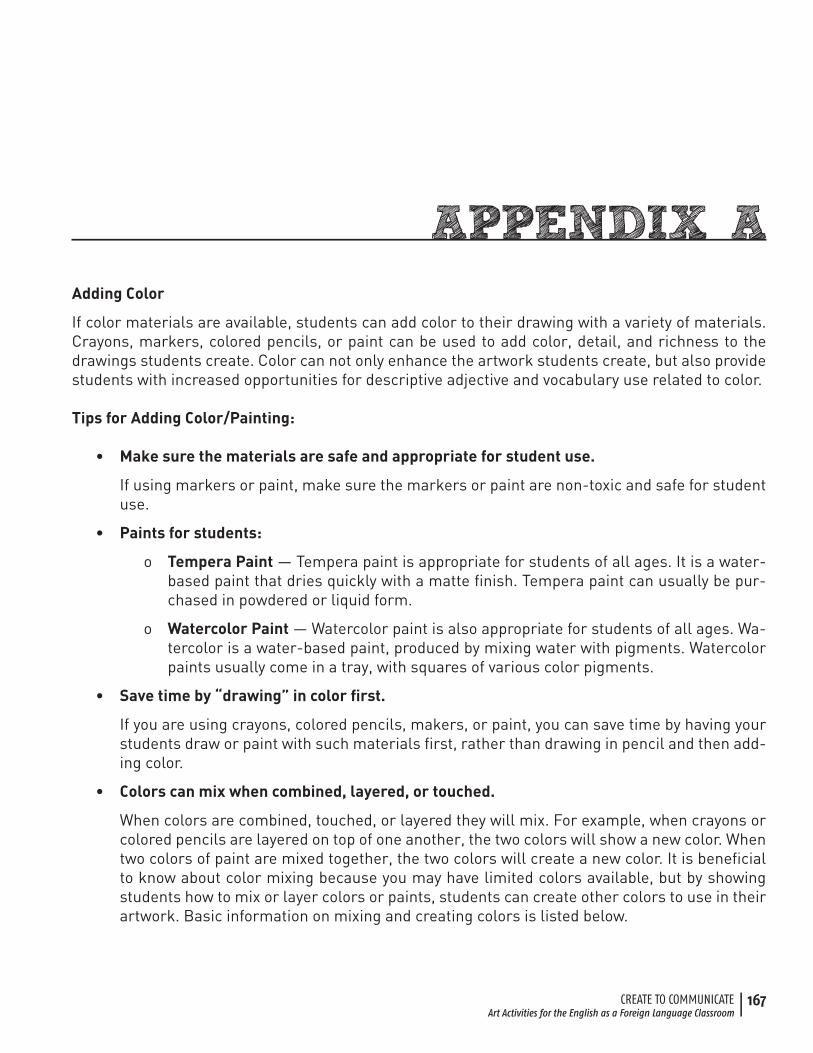
Tissue Paper
A type of very thin paper that you can see through.
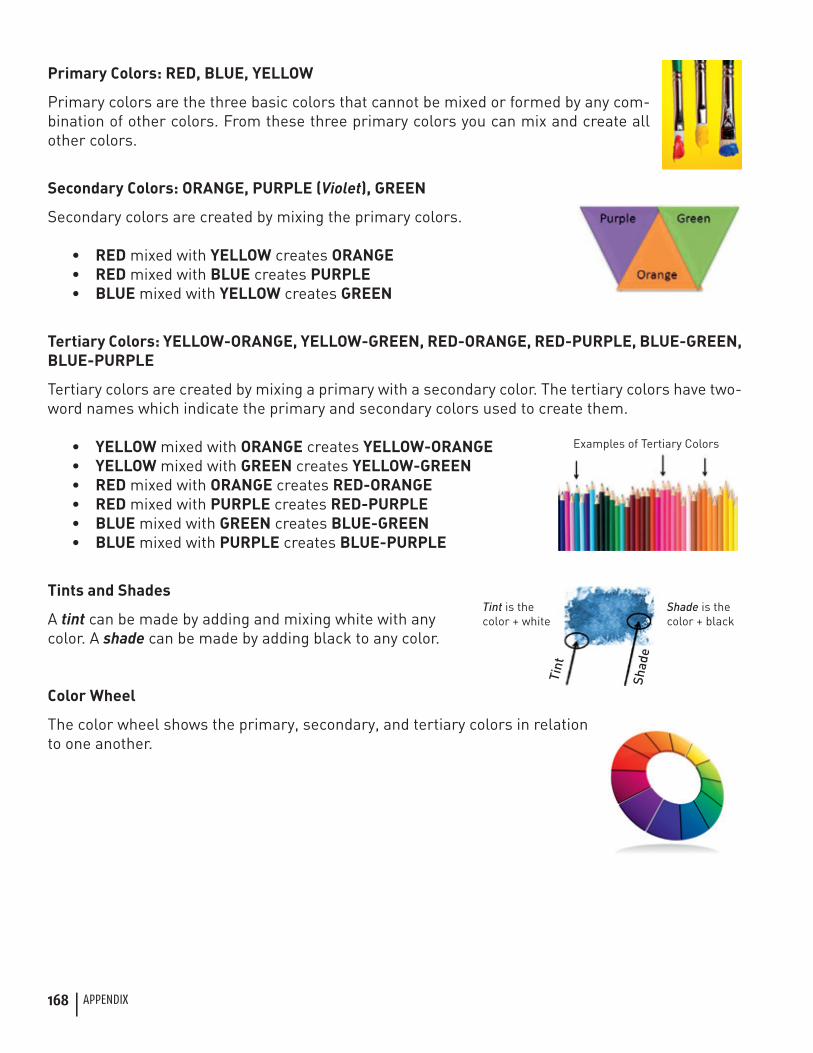
Watercolor Paint
A type of water-based paint, produced by mixing water with pigments. Watercolor paints are appropriate for students of all ages. They usually come in a tray, with squares of dry color pigments. Water can then be added to the dry pigment to paint.
| 167
CREATE TO COMMUNICATEArt Activities for the English as a Foreign Language Classroom
Adding Color
If color materials are available, students can add color to their drawing with a variety of materials. Crayons, markers, colored pencils, or paint can be used to add color, detail, and richness to the drawings students create. Color can not only enhance the artwork students create, but also provide students with increased opportunities for descriptive adjective and vocabulary use related to color.
Tips for Adding Color/Painting:
• Make sure the materials are safe and appropriate for student use.
If using markers or paint, make sure the markers or paint are non-toxic and safe for student use.
• Paints for students:
o Tempera Paint — Tempera paint is appropriate for students of all ages. It is a water-based paint that dries quickly with a matte finish. Tempera paint can usually be pur-chased in powdered or liquid form.
o Watercolor Paint — Watercolor paint is also appropriate for students of all ages. Wa-tercolor is a water-based paint, produced by mixing water with pigments. Watercolor paints usually come in a tray, with squares of various color pigments.
• Save time by “drawing” in color first.
If you are using crayons, colored pencils, makers, or paint, you can save time by having your students draw or paint with such materials first, rather than drawing in pencil and then add-ing color.
• Colors can mix when combined, layered, or touched.
When colors are combined, touched, or layered they will mix. For example, when crayons or colored pencils are layered on top of one another, the two colors will show a new color. When two colors of paint are mixed together, the two colors will create a new color. It is beneficial to know about color mixing because you may have limited colors available, but by showing students how to mix or layer colors or paints, students can create other colors to use in their artwork. Basic information on mixing and creating colors is listed below.
168 | APPENDIX
Primary Colors: RED, BLUE, YELLOW
Primary colors are the three basic colors that cannot be mixed or formed by any com-bination of other colors. From these three primary colors you can mix and create all other colors.
Secondary Colors: ORANGE, PURPLE (Violet), GREEN
Secondary colors are created by mixing the primary colors.
• RED mixed with YELLOW creates ORANGE• RED mixed with BLUE creates PURPLE• BLUE mixed with YELLOW creates GREEN
Tertiary Colors: YELLOW-ORANGE, YELLOW-GREEN, RED-ORANGE, RED-PURPLE, BLUE-GREEN, BLUE-PURPLE
Tertiary colors are created by mixing a primary with a secondary color. The tertiary colors have two-word names which indicate the primary and secondary colors used to create them.
• YELLOW mixed with ORANGE creates YELLOW-ORANGE• YELLOW mixed with GREEN creates YELLOW-GREEN• RED mixed with ORANGE creates RED-ORANGE• RED mixed with PURPLE creates RED-PURPLE• BLUE mixed with GREEN creates BLUE-GREEN• BLUE mixed with PURPLE creates BLUE-PURPLE
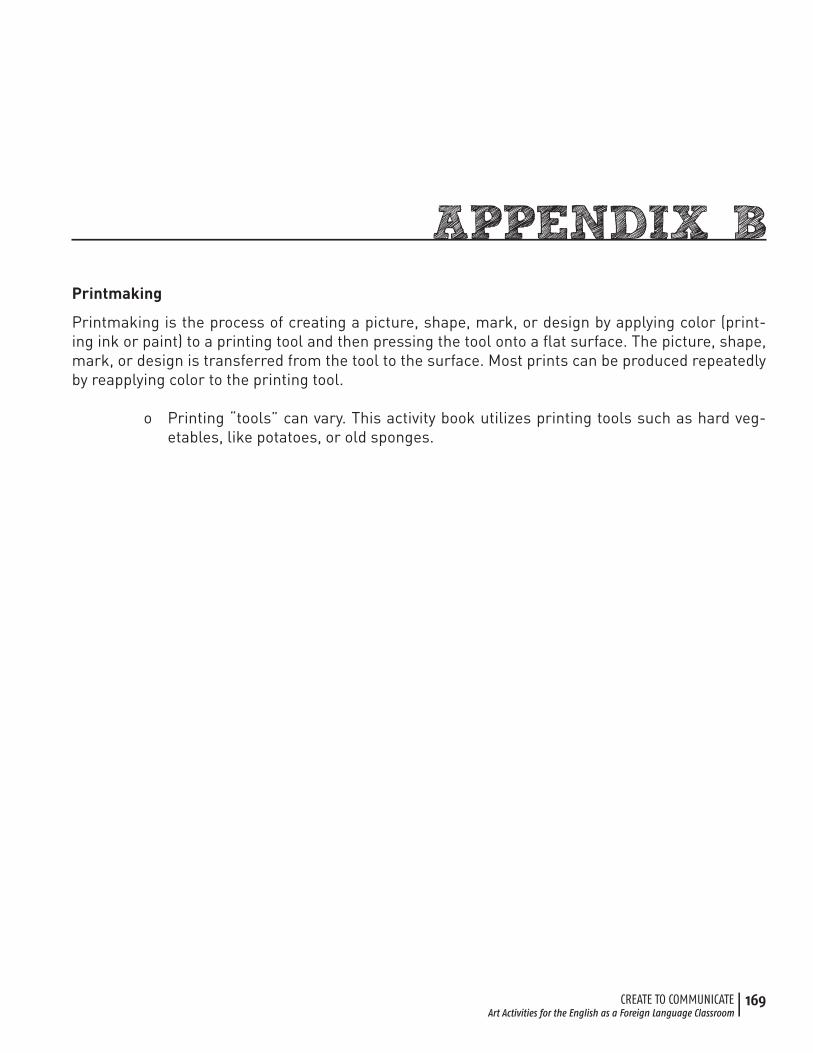
Tints and Shades
A tint can be made by adding and mixing white with any color. A shade can be made by adding black to any color.
Color Wheel
The color wheel shows the primary, secondary, and tertiary colors in relation to one another.
| 169
CREATE TO COMMUNICATEArt Activities for the English as a Foreign Language Classroom
Printmaking
Printmaking is the process of creating a picture, shape, mark, or design by applying color (print-ing ink or paint) to a printing tool and then pressing the tool onto a flat surface. The picture, shape, mark, or design is transferred from the tool to the surface. Most prints can be produced repeatedly by reapplying color to the printing tool.
o Printing “tools” can vary. This activity book utilizes printing tools such as hard veg-etables, like potatoes, or old sponges.
170 | APPENDIX
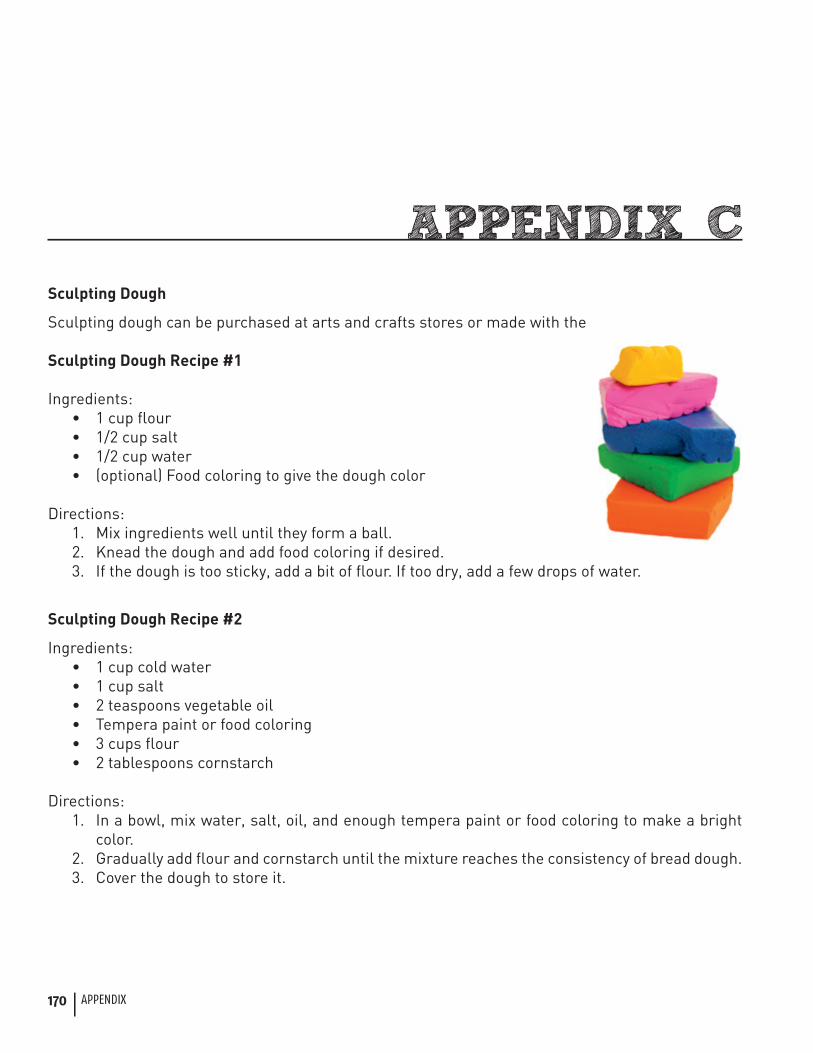
Sculpting Dough
Sculpting dough can be purchased at arts and crafts stores or made with the recipes below.
Sculpting Dough Recipe #1
Ingredients: • 1 cup flour• 1/2 cup salt• 1/2 cup water• (optional) Food coloring to give the dough color
Directions: 1. Mix ingredients well until they form a ball. 2. Knead the dough and add food coloring if desired. 3. If the dough is too sticky, add a bit of flour. If too dry, add a few drops of water.
Sculpting Dough Recipe #2
Ingredients: • 1 cup cold water • 1 cup salt • 2 teaspoons vegetable oil • Tempera paint or food coloring • 3 cups flour • 2 tablespoons cornstarch
Directions:1. In a bowl, mix water, salt, oil, and enough tempera paint or food coloring to make a bright
color. 2. Gradually add flour and cornstarch until the mixture reaches the consistency of bread dough. 3. Cover the dough to store it.