Lesson 7: eDrawing Basics - Jackson County School System 7... · Complete the previous lesson —...
14
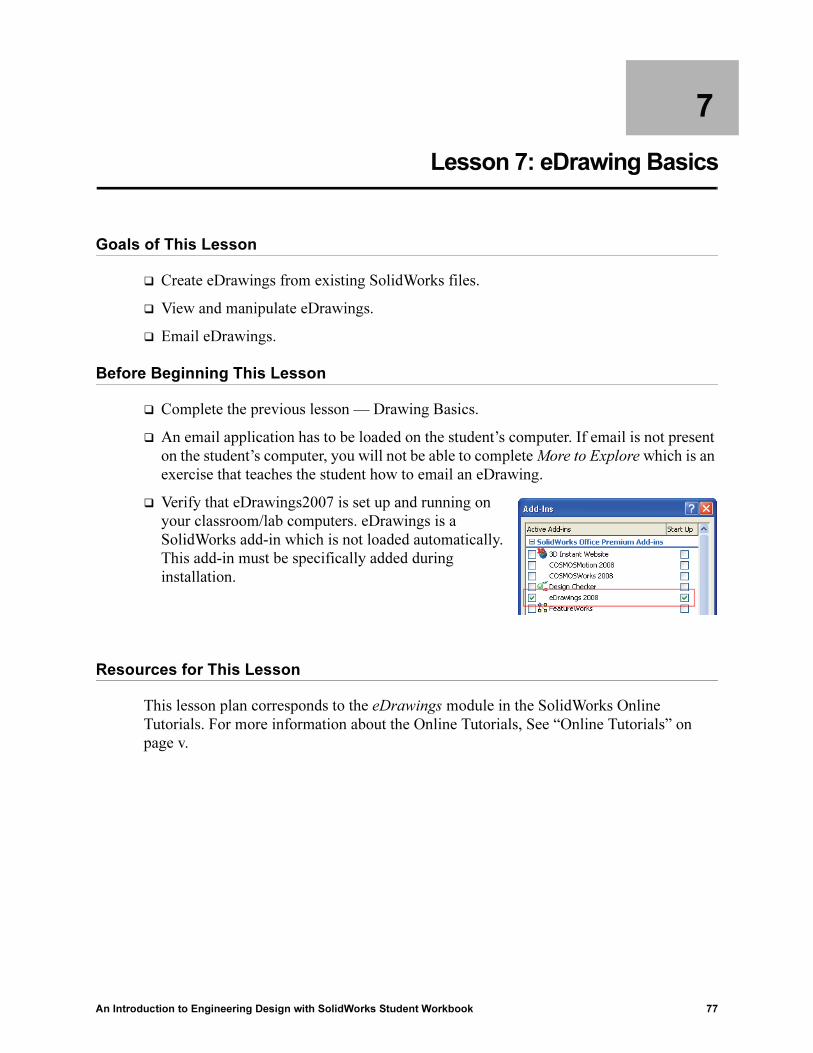
An Introduction to Engineering Design with SolidWorks Student Workbook 77 7 Lesson 7: eDrawing Basics Goals of This Lesson Create eDrawings from existing SolidWorks files. View and manipulate eDrawings. Email eDrawings. Before Beginning This Lesson Complete the previous lesson — Drawing Basics. An email application has to be loaded on the student’s computer. If email is not present on the student’s computer, you will not be able to complete More to Explore which is an exercise that teaches the student how to email an eDrawing. Verify that eDrawings2007 is set up and running on your classroom/lab computers. eDrawings is a SolidWorks add-in which is not loaded automatically. This add-in must be specifically added during installation. Resources for This Lesson This lesson plan corresponds to the eDrawings module in the SolidWorks Online Tutorials. For more information about the Online Tutorials, See “Online Tutorials” on page v.
-
Upload
trinhtuong -
Category
Documents
-
view
229 -
download
2
Transcript of Lesson 7: eDrawing Basics - Jackson County School System 7... · Complete the previous lesson —...
An Introduction to Engineering Design with SolidWorks Student Workbook 77
7
Lesson 7: eDrawing Basics
Goals of This Lesson
� Create eDrawings from existing SolidWorks files.
� View and manipulate eDrawings.
� Email eDrawings.
Before Beginning This Lesson
� Complete the previous lesson — Drawing Basics.
� An email application has to be loaded on the student’s computer. If email is not present on the student’s computer, you will not be able to complete More to Explore which is an exercise that teaches the student how to email an eDrawing.
� Verify that eDrawings2007 is set up and running on your classroom/lab computers. eDrawings is a SolidWorks add-in which is not loaded automatically. This add-in must be specifically added during installation.
Resources for This Lesson
This lesson plan corresponds to the eDrawings module in the SolidWorks Online Tutorials. For more information about the Online Tutorials, See “Online Tutorials” on page v.
Lesson 7: eDrawing Basics
78 An Introduction to Engineering Design with SolidWorks Student Workbook
Active Learning Exercises
Follow the instructions in the Working with Models: eDrawings module in the SolidWorks Online Tutorials. Then proceed with the exercises below.
Create and explore an eDrawing of the switchplate part created earlier.
Creating an eDrawing
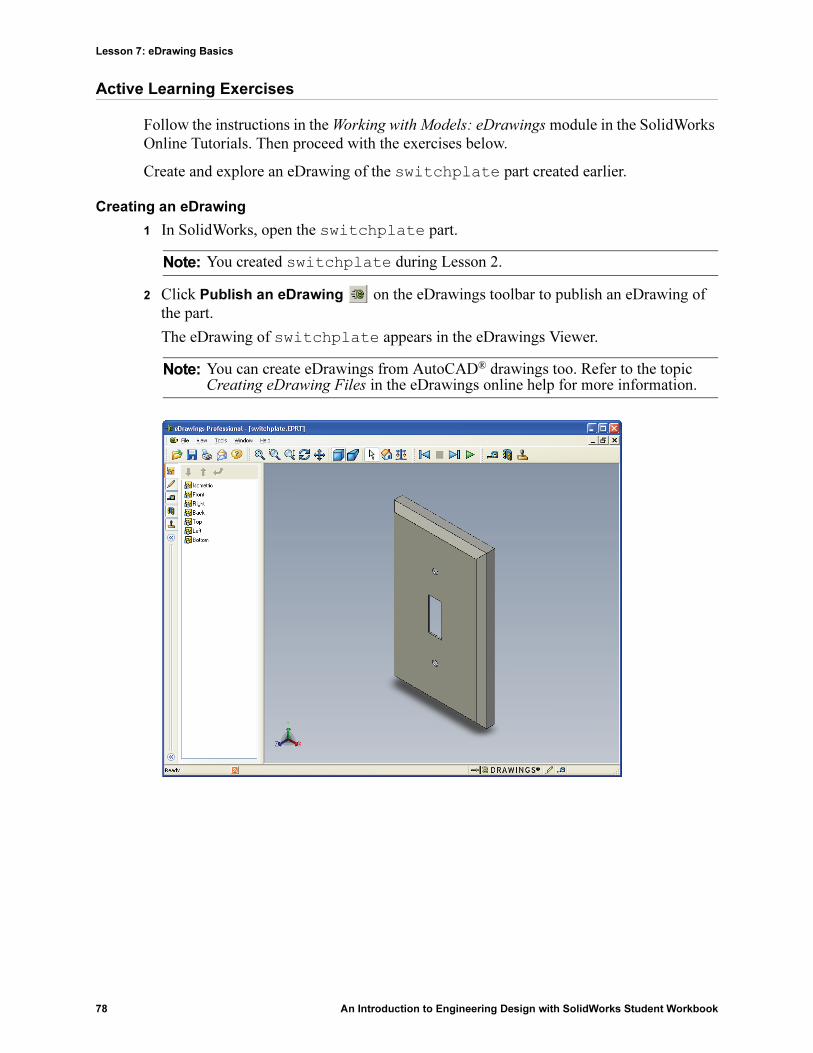
1 In SolidWorks, open the switchplate part.
2 Click Publish an eDrawing on the eDrawings toolbar to publish an eDrawing of the part.
The eDrawing of switchplate appears in the eDrawings Viewer.
Note: You created switchplate during Lesson 2.
Note: You can create eDrawings from AutoCAD® drawings too. Refer to the topic Creating eDrawing Files in the eDrawings online help for more information.

Lesson 7: eDrawing Basics
An Introduction to Engineering Design with SolidWorks Student Workbook 79
Viewing an Animated eDrawing
Animation enables you to dynamically view eDrawings.
1 Click Next .
The view changes to the Front view. You can click Next repeatedly to step through the views.
2 Click Previous .
The previous view is displayed.
3 Click Continuous Play .
Each view is displayed one by one in a continuous display.
4 Click Stop .
The continuous display of views halts.
5 Click Home .
The default or home view is displayed.
Viewing Shaded and Wireframe eDrawings
1 Click Shaded .
The display of the switch plate changes from shaded to wireframe.
2 Click Shaded again.
The display of the switch plate changes from wireframe to shaded.
Saving an eDrawing File
1 In the eDrawings Viewer click File, Save As.
2 Select Enable measure.
This option enables anyone viewing the eDrawing file to measure the geometry. This is called making the file “review-enabled”.
3 Select eDrawings Zip Files
(*.zip) from the Save as type: dropdown list.
This option saves the file as an eDrawings Zip file, which contains the eDrawings Viewer and the active eDrawings file.
4 Click Save.

Lesson 7: eDrawing Basics
80 An Introduction to Engineering Design with SolidWorks Student Workbook
Markup and Measure
You can markup eDrawings with tools from the Markup toolbar. Measure, if enabled (set at the time of eDrawing save in the save options dialog) allows for rudimentary dimension checking.
For tracking purposes markup comments appear as discussion threads on the Markup tab of the eDrawing Manager. In this example you will add a cloud with text and a leader.
1 Click Cloud with Leader on the Markup toolbar.
Move the cursor into the graphics area. The pointer changes to .
2 Click the front face of the switchplate.
This is where the leader will begin.
3 Move the pointer to where you want to place the text and then click. A text box appears.
4 In the text box, type the text you want to appear in the cloud and then click OK .
The cloud with text appears attached to the leader. If necessary, click Zoom to Fit .
5 Close the eDrawing file, saving your changes.

Lesson 7: eDrawing Basics
An Introduction to Engineering Design with SolidWorks Student Workbook 81
5 Minute Assessment
1 How do you create an eDrawing? __________________________________________
_____________________________________________________________________
_____________________________________________________________________
_____________________________________________________________________
_____________________________________________________________________
2 How do you send eDrawings to others?______________________________________
_____________________________________________________________________
3 What is the quickest way to return to the default view?__________________________
_____________________________________________________________________
4 True or False: You can make changes to a model in an eDrawing. _________________
_____________________________________________________________________
5 True or False: You need to have the SolidWorks application in order to view eDrawings. ____________________________________________________________
_____________________________________________________________________
6 What eDrawings feature enables you to dynamically view parts, drawings, and assemblies?____________________________________________________________
_____________________________________________________________________
Lesson 7: eDrawing Basics
82 An Introduction to Engineering Design with SolidWorks Student Workbook
Exercises and Projects
In this exercise, you explore eDrawings created from SolidWorks parts, assemblies, and drawings.
eDrawings of Parts
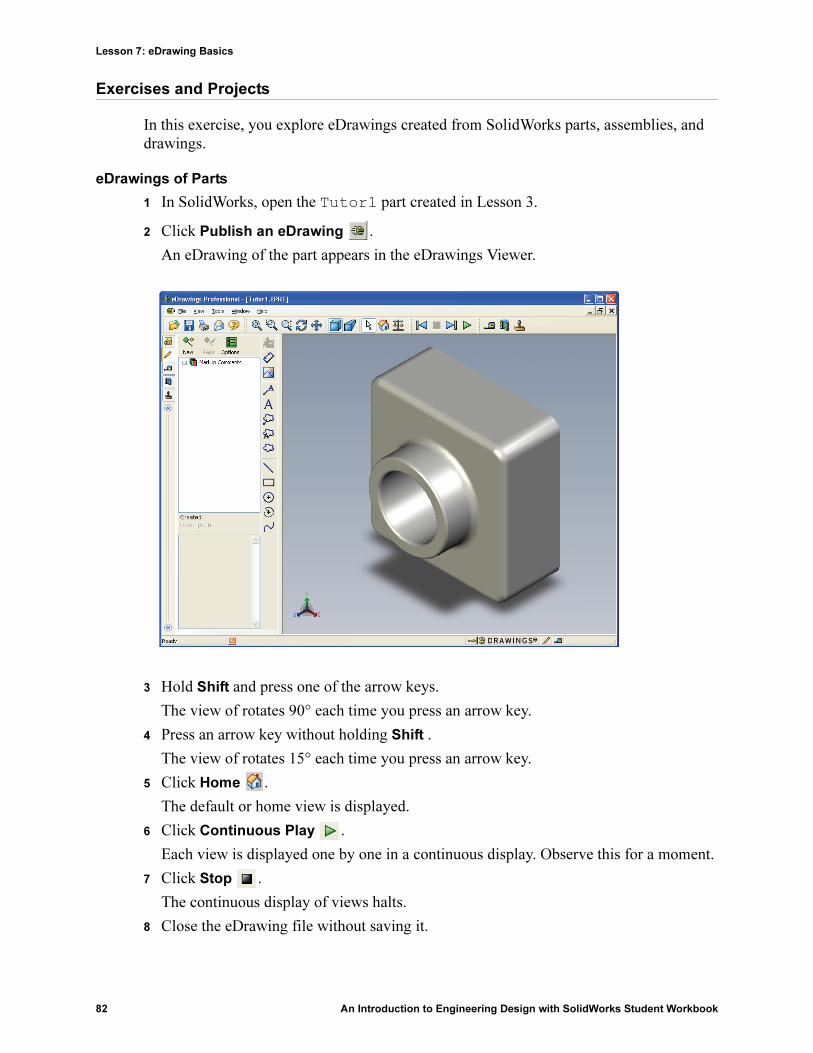
1 In SolidWorks, open the Tutor1 part created in Lesson 3.
2 Click Publish an eDrawing .
An eDrawing of the part appears in the eDrawings Viewer.
3 Hold Shift and press one of the arrow keys.
The view of rotates 90° each time you press an arrow key.
4 Press an arrow key without holding Shift .
The view of rotates 15° each time you press an arrow key.
5 Click Home .
The default or home view is displayed.
6 Click Continuous Play .
Each view is displayed one by one in a continuous display. Observe this for a moment.
7 Click Stop .
The continuous display of views halts.
8 Close the eDrawing file without saving it.

Lesson 7: eDrawing Basics
An Introduction to Engineering Design with SolidWorks Student Workbook 83
eDrawings of Assemblies
1 In SolidWorks, open the Tutor assembly created in Lesson 4.
2 Click Publish an eDrawing .
An eDrawing of the assembly appears in the eDrawings Viewer.
3 Click Continuous Play .
Each view is displayed one by one. Observe this for a moment.
4 Click Stop .
The continuous display of views halts.
5 Click Home .
The default or home view is displayed.
Lesson 7: eDrawing Basics
84 An Introduction to Engineering Design with SolidWorks Student Workbook
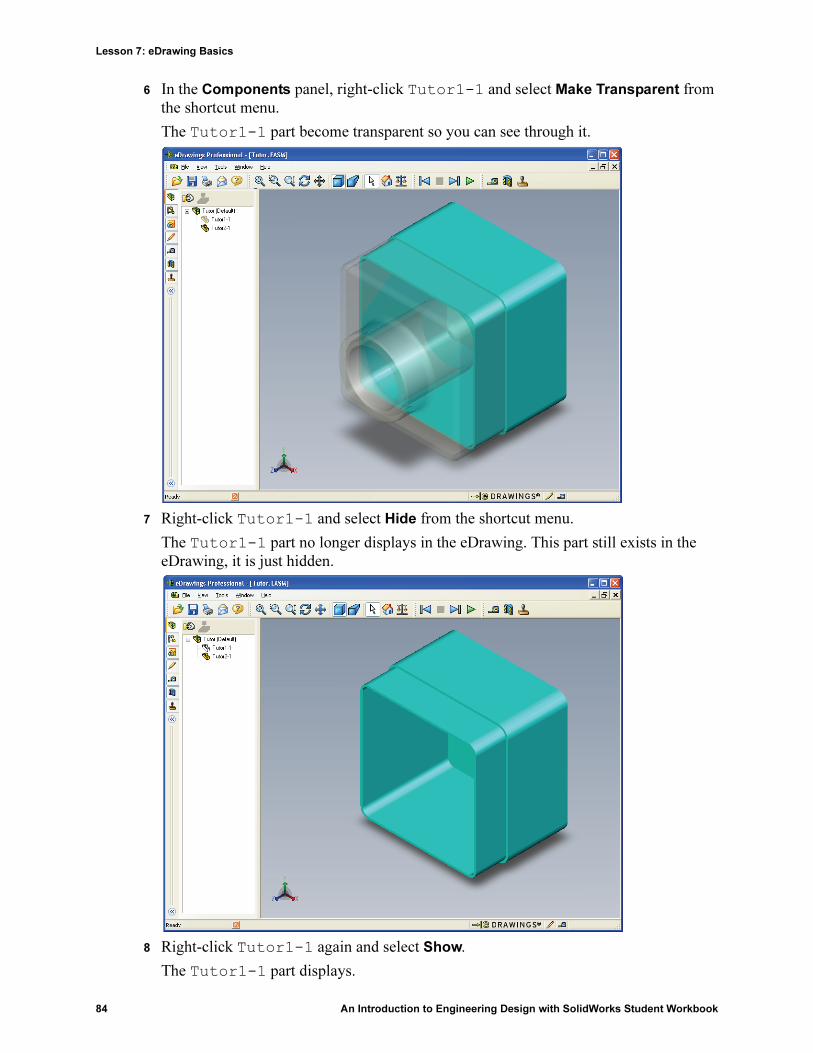
6 In the Components panel, right-click Tutor1-1 and select Make Transparent from the shortcut menu.
The Tutor1-1 part become transparent so you can see through it.
7 Right-click Tutor1-1 and select Hide from the shortcut menu.
The Tutor1-1 part no longer displays in the eDrawing. This part still exists in the eDrawing, it is just hidden.
8 Right-click Tutor1-1 again and select Show.
The Tutor1-1 part displays.
Lesson 7: eDrawing Basics
An Introduction to Engineering Design with SolidWorks Student Workbook 85
eDrawings of Drawings
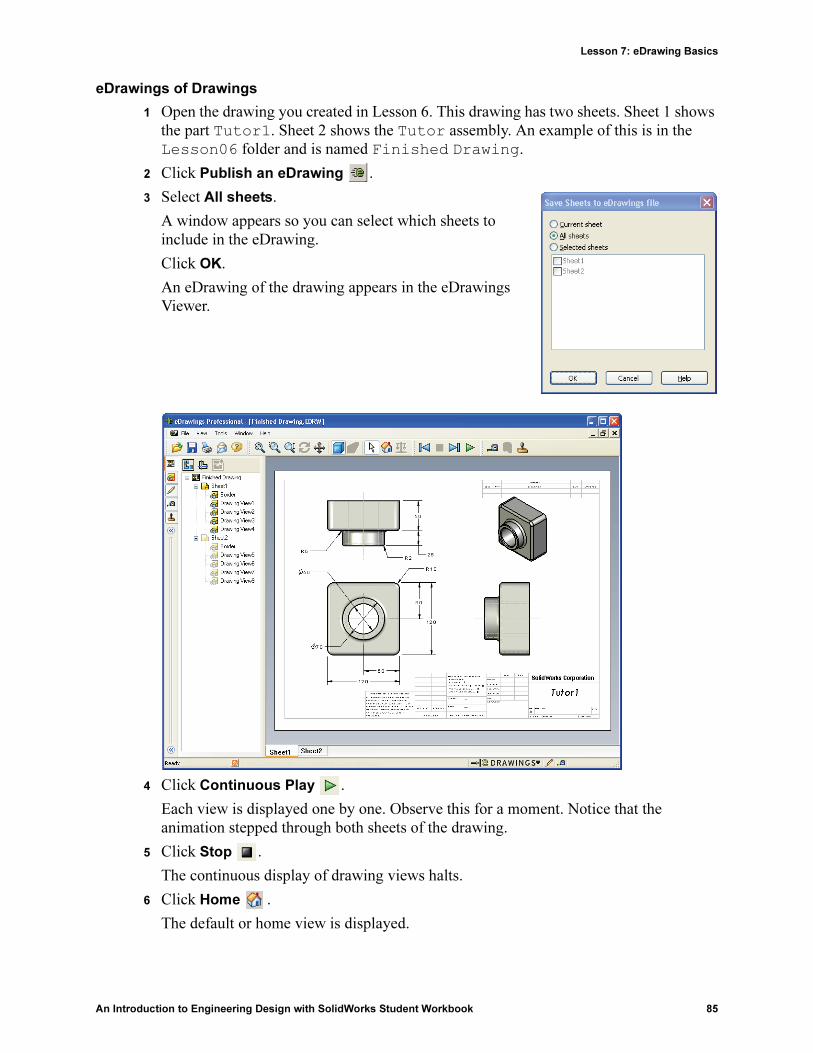
1 Open the drawing you created in Lesson 6. This drawing has two sheets. Sheet 1 shows the part Tutor1. Sheet 2 shows the Tutor assembly. An example of this is in the Lesson06 folder and is named Finished Drawing.
2 Click Publish an eDrawing .
3 Select All sheets.
A window appears so you can select which sheets to include in the eDrawing.
Click OK.
An eDrawing of the drawing appears in the eDrawings Viewer.
4 Click Continuous Play .
Each view is displayed one by one. Observe this for a moment. Notice that the animation stepped through both sheets of the drawing.
5 Click Stop .
The continuous display of drawing views halts.
6 Click Home .
The default or home view is displayed.
Lesson 7: eDrawing Basics
86 An Introduction to Engineering Design with SolidWorks Student Workbook
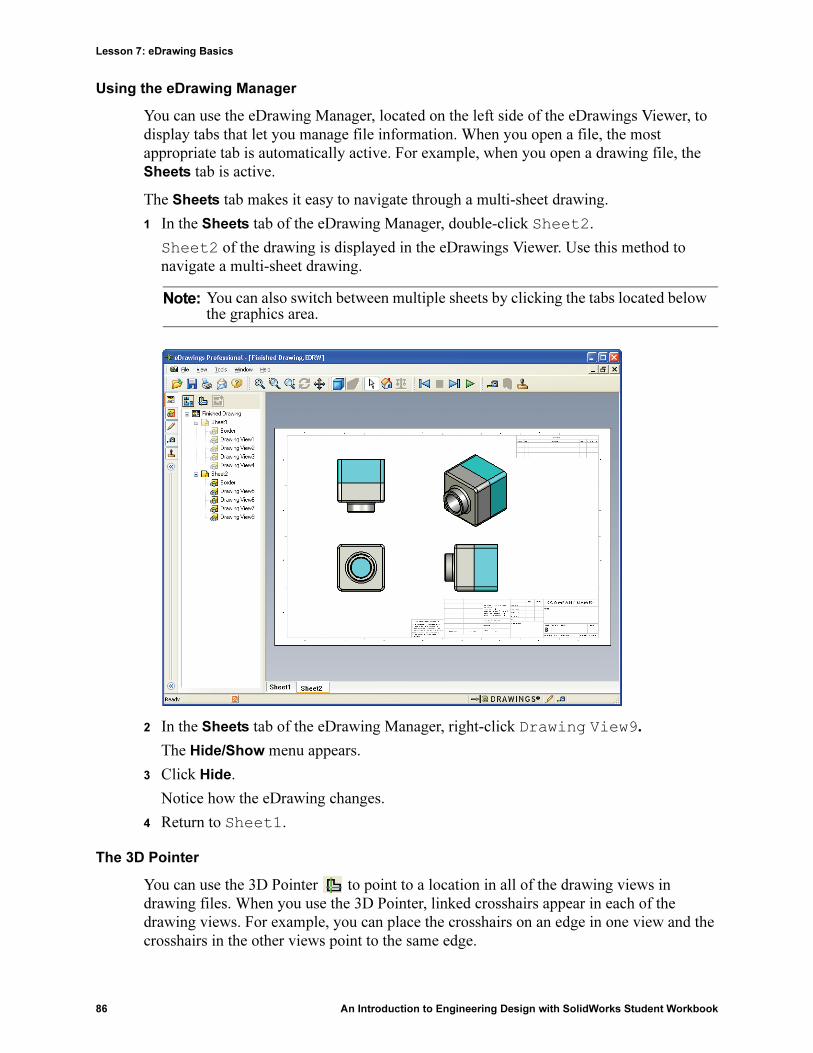
Using the eDrawing Manager
You can use the eDrawing Manager, located on the left side of the eDrawings Viewer, to display tabs that let you manage file information. When you open a file, the most appropriate tab is automatically active. For example, when you open a drawing file, the Sheets tab is active.
The Sheets tab makes it easy to navigate through a multi-sheet drawing.
1 In the Sheets tab of the eDrawing Manager, double-click Sheet2.
Sheet2 of the drawing is displayed in the eDrawings Viewer. Use this method to navigate a multi-sheet drawing.
2 In the Sheets tab of the eDrawing Manager, right-click Drawing View9.
The Hide/Show menu appears.
3 Click Hide.
Notice how the eDrawing changes.
4 Return to Sheet1.
The 3D Pointer
You can use the 3D Pointer to point to a location in all of the drawing views in drawing files. When you use the 3D Pointer, linked crosshairs appear in each of the drawing views. For example, you can place the crosshairs on an edge in one view and the crosshairs in the other views point to the same edge.
Note: You can also switch between multiple sheets by clicking the tabs located below the graphics area.

Lesson 7: eDrawing Basics
An Introduction to Engineering Design with SolidWorks Student Workbook 87
The crosshairs colors indicate the following:
1 Click 3D Pointer .
The eDrawing of the drawing displays the 3D pointer. The 3D pointer helps you to see the orientation of each view.
2 Move the 3D Pointer.
Notice how the pointer moves in each view.
Overview Window
The Overview Window gives you a thumbnail view of the entire drawing sheet. This is especially handy when working with large, complicated drawings. You can use the navigate among the views. In the Overview Window, click the view you want to look at.
1 Click Overview Window .
The Overview Window appears.
2 Click the Front view in the Overview Window.
Notice how the eDrawings Viewer changes.
Color Axis
Red X-Axis (perpendicular to YZ plane)
Blue Y-Axis (perpendicular to XZ plane)
Green Z-Axis (perpendicular to XY plane)

Lesson 7: eDrawing Basics
88 An Introduction to Engineering Design with SolidWorks Student Workbook
More to Explore
If your system is set up with an email application, you can see how easy it is to send an eDrawing to someone else.
1 Open one of the eDrawings that you created earlier in this lesson.
2 Click Send .
The Send As menu appears.
3 Select the file type to send and click OK.
An email message is created with the file attached.
4 Specify an email address to send the message to.
5 Add text to the email message if you would like to.
6 Click Send.
The email is sent with the eDrawing attached. The person receiving it can view it, animate it, send it on to others, and so forth.
Lesson 7: eDrawing Basics
An Introduction to Engineering Design with SolidWorks Student Workbook 89
Lesson 7 Vocabulary Worksheet
Name: _______________________________Class: _________ Date:_______________
Directions: Answer each question by writing the correct answer or answers in the space
provided.
1 The ability to dynamically view an eDrawing: ________________________________
2 Halting a continuous play of an eDrawing animation:___________________________
3 Command that enables you to step backwards one step at a time through an eDrawing animation:_____________________________________________________________
4 Non-stop replay of eDrawing animation:_____________________________________
5 Rendering of 3D parts with realistic colors and textures: ________________________
6 Go forward one step in an eDrawing animation: _______________________________
7 Command used to create an eDrawing: ______________________________________
8 Graphic aid that enables you to see the model orientation in an eDrawing created from a SolidWorks drawing: ____________________________________________________
9 Quickly return to the default view:__________________________________________
10 Command that enables you to use email to share eDrawings with others: ___________

Lesson 7: eDrawing Basics
90 An Introduction to Engineering Design with SolidWorks Student Workbook
Lesson Summary
� eDrawings can be created quickly from part, assembly, and drawing files.
� You can share eDrawings with others — even if they don’t have SolidWorks.
� Email is the easiest way to send an eDrawing to others.
� Animation enables you to see all views of a model.
� You can hide selected components of an assembly eDrawing and selected views of a drawing eDrawing.