LESSON 1 LEARNING THE MENUS LESSON AIM This lesson will
15
LESSON 1 LEARNING THE MENUS LESSON AIM This lesson will familiarize the Student with Photoshop CS and with all of the major menu options including: setting preferences, starting a new file, the foreground and the background, the image menu, the layers menu, selection menu, filters menu and views. LESSON TEXT Introduction to Photoshop CS Photoshop is a raster program, also known as a paint or image manipulation program. Adobe Photoshop is the industry standard software of raster programs. There are many other image manipulation programs include Macromedia's Xres, Paint Shop Pro and Corel's Photo Paint, all similar in content to Photoshop. Paint and image-editing software, such as Adobe Photoshop, generate bitmap images, Also called raster or pixel based imagery. The images use a grid of small squares, known as pixels, to represent graphics. Each pixel in a bitmap image has a specific location and colour value assigned to it. For example, a bicycle tyre in a bitmap image is made up of a collection of pixels in that location, with each pixel part of a mosaic that gives the appearance of a tyre. When working with bitmap images, you edit pixels rather than objects or shapes. Because they can represent subtle gradations of shades and colour, bitmap images are the most common electronic medium for continuous-tone images, such as photographs or images created in painting programs. Bitmap images are resolution dependent; they represent a fixed number of pixels. As a result, they can appear jagged and lose detail if they are scaled on-screen or if they are printed at a higher resolution than they were created for. Bitmap images are good at reproducing the subtle shading found in continuous-tone images, such as photographs. However, bitmap images do not enlarge well and can show jagged edges when magnified or output to higher-resolution devices. What’s New in Photoshop CS Photoshop CS has new features that where not present in previous versions of Photoshop. These new features are important to know if you are just beginning to use Photoshop. Improved File Browsing : It is possible now to quickly organise and locate image assets. Customised Keyboard Shortcuts : Create, edit and save multiple keyboard shortcuts for menu items, tools, and palette commands. Create Slide Shows and PDF Presentations: Bind multiple files into a single, multi-page Adobe PDF document. Track Editing History: Save your editing history in an external log file. If you need to track what has been done to Photoshop file. Enhanced Scripting : Automate repeated tasks, using custom or new built-in scripts.
Transcript of LESSON 1 LEARNING THE MENUS LESSON AIM This lesson will
LESSON 1 LEARNING THE MENUS
LESSON AIM This lesson will familiarize the Student with Photoshop CS and with all of the major menu options including: setting preferences, starting a new file, the foreground and the background, the image menu, the layers menu, selection menu, filters menu and views. LESSON TEXT Introduction to Photoshop CS Photoshop is a raster program, also known as a paint or image manipulation program. Adobe Photoshop is the industry standard software of raster programs. There are many other image manipulation programs include Macromedia's Xres, Paint Shop Pro and Corel's Photo Paint, all similar in content to Photoshop. Paint and image-editing software, such as Adobe Photoshop, generate bitmap images, Also called raster or pixel based imagery. The images use a grid of small squares, known as pixels, to represent graphics. Each pixel in a bitmap image has a specific location and colour value assigned to it. For example, a bicycle tyre in a bitmap image is made up of a collection of pixels in that location, with each pixel part of a mosaic that gives the appearance of a tyre. When working with bitmap images, you edit pixels rather than objects or shapes. Because they can represent subtle gradations of shades and colour, bitmap images are the most common electronic medium for continuous-tone images, such as photographs or images created in painting programs. Bitmap images are resolution dependent; they represent a fixed number of pixels. As a result, they can appear jagged and lose detail if they are scaled on-screen or if they are printed at a higher resolution than they were created for. Bitmap images are good at reproducing the subtle shading found in continuous-tone images, such as photographs. However, bitmap images do not enlarge well and can show jagged edges when magnified or output to higher-resolution devices. What’s New in Photoshop CS Photoshop CS has new features that where not present in previous versions of Photoshop. These new features are important to know if you are just beginning to use Photoshop. Improved File Browsing: It is possible now to quickly organise and locate image assets. Customised Keyboard Shortcuts: Create, edit and save multiple keyboard shortcuts for menu items, tools, and palette commands. Create Slide Shows and PDF Presentations: Bind multiple files into a single, multi-page Adobe PDF document. Track Editing History: Save your editing history in an external log file. If you need to track what has been done to Photoshop file. Enhanced Scripting: Automate repeated tasks, using custom or new built-in scripts.
Preferences The first step to creating digital artwork is to configure the Photoshop CS preferences. This can be done quite easily in the following steps. After you have installed Photoshop you’re your computer, Select ‘Preferences’ from the edit menu and choose ‘General’.
This will display the preferences dialog box. All the remaining preferences can be set from this dialog box using the ‘Next’ and ‘Prev’ menu buttons. Normally the default settings should be adequate for most Photoshop beginners, with a few exceptions. If your computer has a partitioned hard drive (a hard drive that has been divided into more that one area), then you might want to assign the drive other than ‘C’ as the main scratch disk. In most cases, the partitioned area will be identified as the ‘D’ or ‘E’ drive. Simply assign this drive as the
first, and then assign the ‘C’ or startup disk as the second. This will ensure that Photoshop will run as smooth as possible. If you do not have a partition, simply choose ‘C’ as the first.
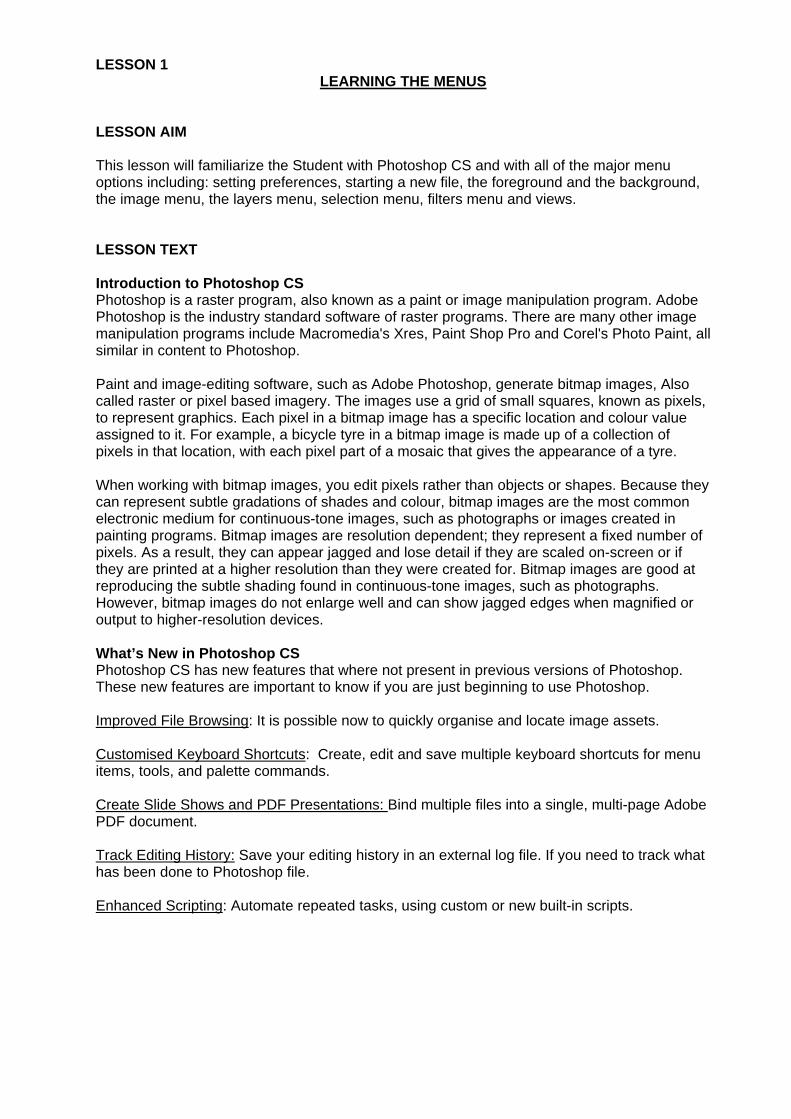
Other options that you may want to adjust are the ‘Display Cursors’ preferences. These preferences determine how you will see the various brushes and tools when you create artwork. Another is the grid display, which can be adjusted depending on the file size (pixels etc.) that has been chosen. Once you have familiarized yourself with the use of the Photoshop tools, you can always return to the Preferences menu and adjust to the settings that work best for you.
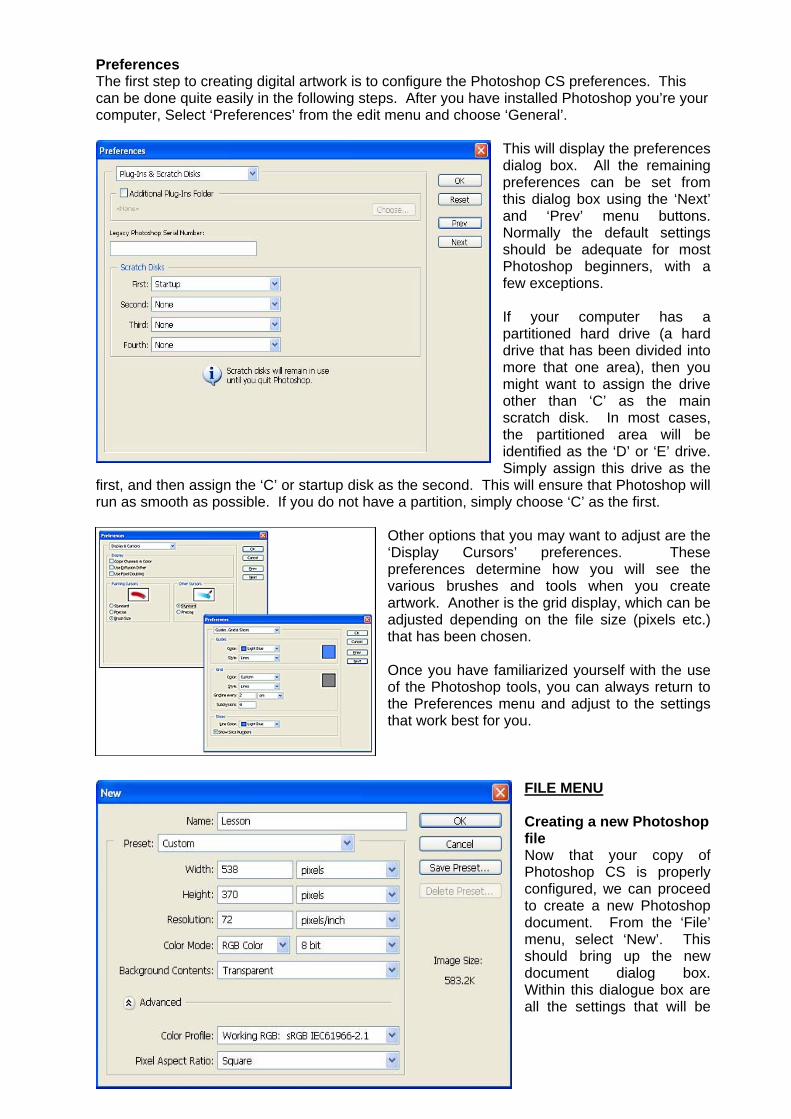
FILE MENU Creating a new Photoshop file Now that your copy of Photoshop CS is properly configured, we can proceed to create a new Photoshop document. From the ‘File’ menu, select ‘New’. This should bring up the new document dialog box. Within this dialogue box are all the settings that will be
applied to your new document. The first step is to name the file in the name field. You can name the file anything that you want. The next step is to decide how big or small the file should be. If you need your file to be a certain size, such as A4, then select the appropriate size from the ‘Preset Sizes’ drop-down menu. Otherwise, Photoshop CS allows the user to create any number of custom sizes by typing in ‘Width’ and ‘Height’ values. Normally when artwork is created for the web, CD-ROMS, TV or other digital media, pixels are used as a unit of measurement. Pixels are what comprise digital artwork. You may have decided to choose inches or centimetres as your unit of measurement. Whichever unit is chosen, they can be selected in the drop down menus to the right of the width and height fields. These units can be changed at any stage by going back to the images menu found under the image menu. The next step will be to choose a resolution size. The web and some other digital media use 72-pixels/inch resolution. For print work however, you might want to select 300-pixels/inch. Next you must choose your colour mode. If you are creating artwork for print, such as a brochure, business card or magazine print ads, select the CMYK colour mode. This colour mode is designed for print. If you wish to do a black and white image, select 8bit Greyscale. Normally, CMYK is only used for high quality printing, like packaging or magazines. If you are creating artwork for the web or anything that will be seen on a computer screen, choose RGB colour. Next, select ‘Transparent’ in the content section. This will ensure no background is created, and that you can decide what background, if any, to fill. There is no need to adjust the advanced settings unless you know what you are doing. After the above steps, there should now be a blank Photoshop file displayed on the screen, with a Layer named “Background”. The file is now ready for use.
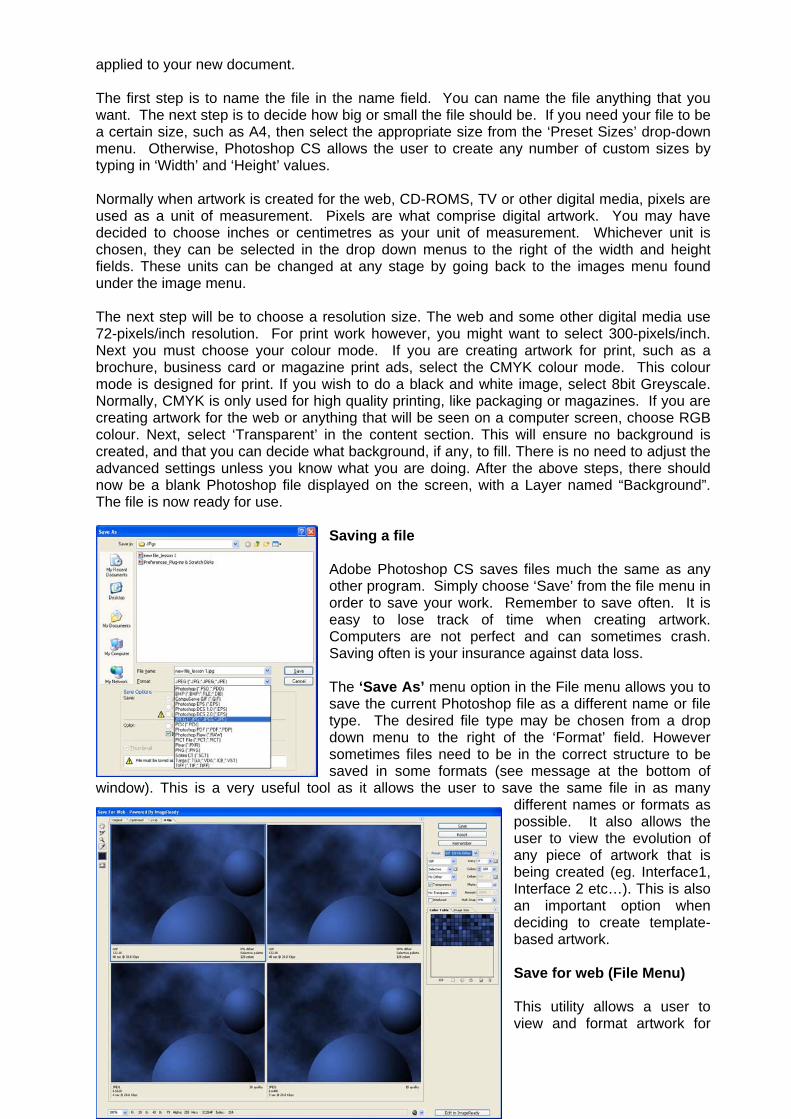
Saving a file Adobe Photoshop CS saves files much the same as any other program. Simply choose ‘Save’ from the file menu in order to save your work. Remember to save often. It is easy to lose track of time when creating artwork. Computers are not perfect and can sometimes crash. Saving often is your insurance against data loss. The ‘Save As’ menu option in the File menu allows you to save the current Photoshop file as a different name or file type. The desired file type may be chosen from a drop down menu to the right of the ‘Format’ field. However sometimes files need to be in the correct structure to be saved in some formats (see message at the bottom of
window). This is a very useful tool as it allows the user to save the same file in as many different names or formats as possible. It also allows the user to view the evolution of any piece of artwork that is being created (eg. Interface1, Interface 2 etc…). This is also an important option when deciding to create template-based artwork. Save for web (File Menu) This utility allows a user to view and format artwork for
the specific purpose of insertion on the World Wide Web. Once artwork is complete and ready for the web, select the ‘Save for Web’ option from the File menu. This will bring up the ‘save for web’ utility. ‘Save for web’ will display your artwork across 1, 2 or 4 windows, depending on your preference. There are a series of tabs at the top of the window that allow the user to decide. You can also find a small tool Palette, which will allow you to zoom in/out, a Hand tool to move the picture around, a Slice tool to prepare an image to be chopped up for web construction, and an Eye Drop tool to determine colour. The right side of the Palette contains the file and colour information. This allows a user to reduce colour depth and reduce file size for the web (optimization). There are several different file types used and several colour settings for each file type. Finally, there is a button that allows the user to preview their artwork in a web browser (eg. Internet Explorer or Netscape), which will give them a realistic preview of what it will look like on the web before it ever gets there! This process will be discussed more in depth in Lesson 9. Importing/Exporting a file (File Menu) Photoshop CS has the capability to import other types of files, such as a PDF image. Select ‘Import’ from the File menu and a dropout menu will appear with all of the available options. Normally novice users do not use this function. Similarly, Photoshop has the capability to export your artwork to allow it to be further manipulated by another program such as Adobe Illustrator. Simply choose ‘Export’ from the File menu and choose which option you need. EDIT MENU
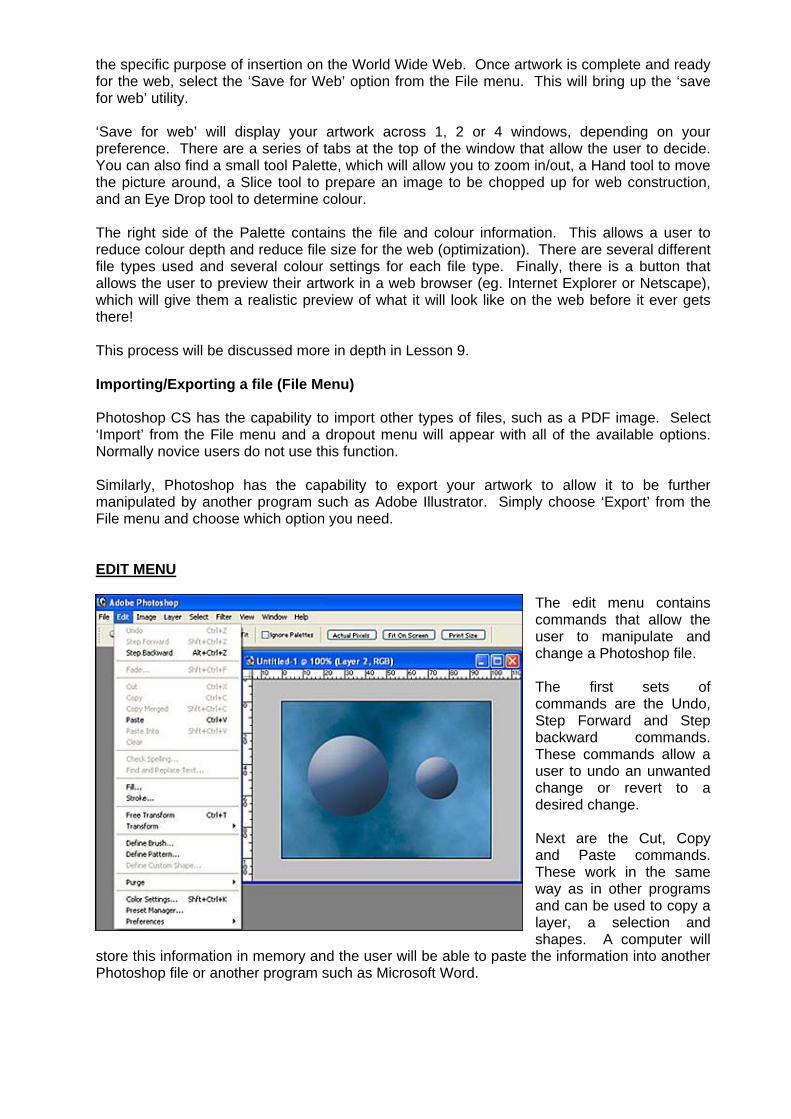
The edit menu contains commands that allow the user to manipulate and change a Photoshop file. The first sets of commands are the Undo, Step Forward and Step backward commands. These commands allow a user to undo an unwanted change or revert to a desired change. Next are the Cut, Copy and Paste commands. These work in the same way as in other programs and can be used to copy a layer, a selection and shapes. A computer will
store this information in memory and the user will be able to paste the information into another Photoshop file or another program such as Microsoft Word.
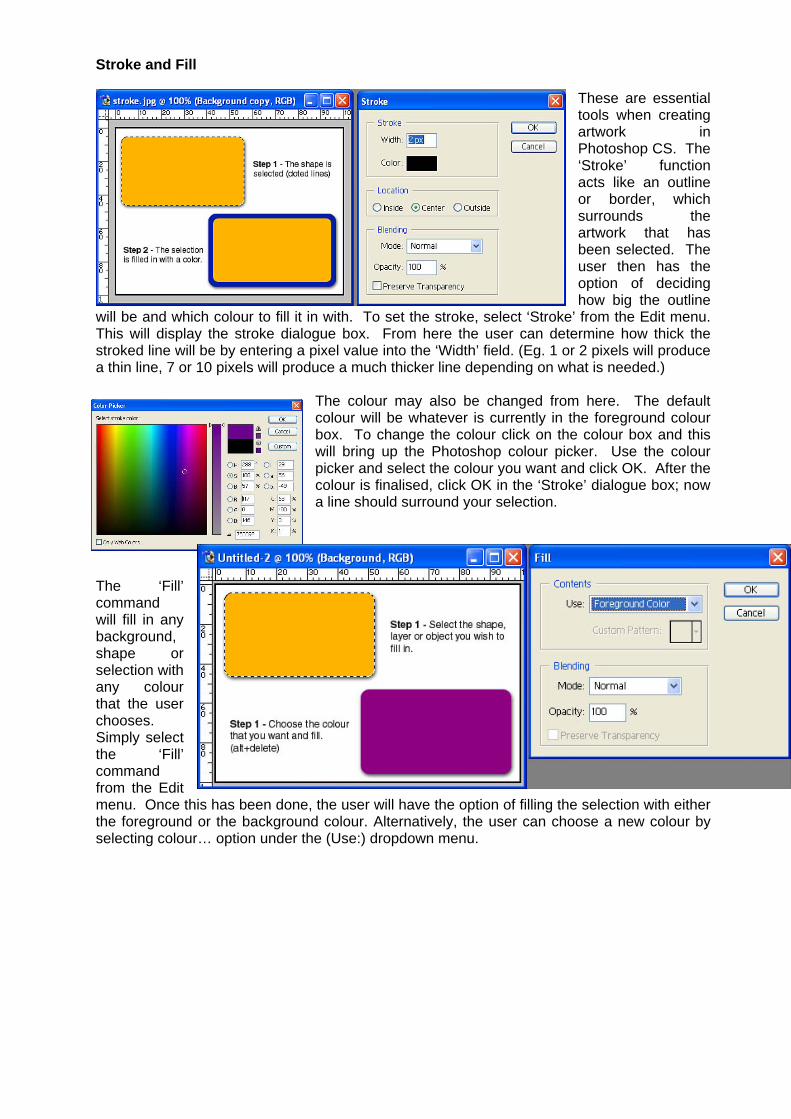
Stroke and Fill These are essential tools when creating artwork in Photoshop CS. The ‘Stroke’ function acts like an outline or border, which surrounds the artwork that has been selected. The user then has the option of deciding how big the outline
will be and which colour to fill it in with. To set the stroke, select ‘Stroke’ from the Edit menu. This will display the stroke dialogue box. From here the user can determine how thick the stroked line will be by entering a pixel value into the ‘Width’ field. (Eg. 1 or 2 pixels will produce a thin line, 7 or 10 pixels will produce a much thicker line depending on what is needed.)
The colour may also be changed from here. The default colour will be whatever is currently in the foreground colour box. To change the colour click on the colour box and this will bring up the Photoshop colour picker. Use the colour picker and select the colour you want and click OK. After the colour is finalised, click OK in the ‘Stroke’ dialogue box; now a line should surround your selection.
The ‘Fill’ command will fill in any background, shape or selection with any colour that the user chooses. Simply select the ‘Fill’ command from the Edit menu. Once this has been done, the user will have the option of filling the selection with either the foreground or the background colour. Alternatively, the user can choose a new colour by selecting colour… option under the (Use:) dropdown menu.
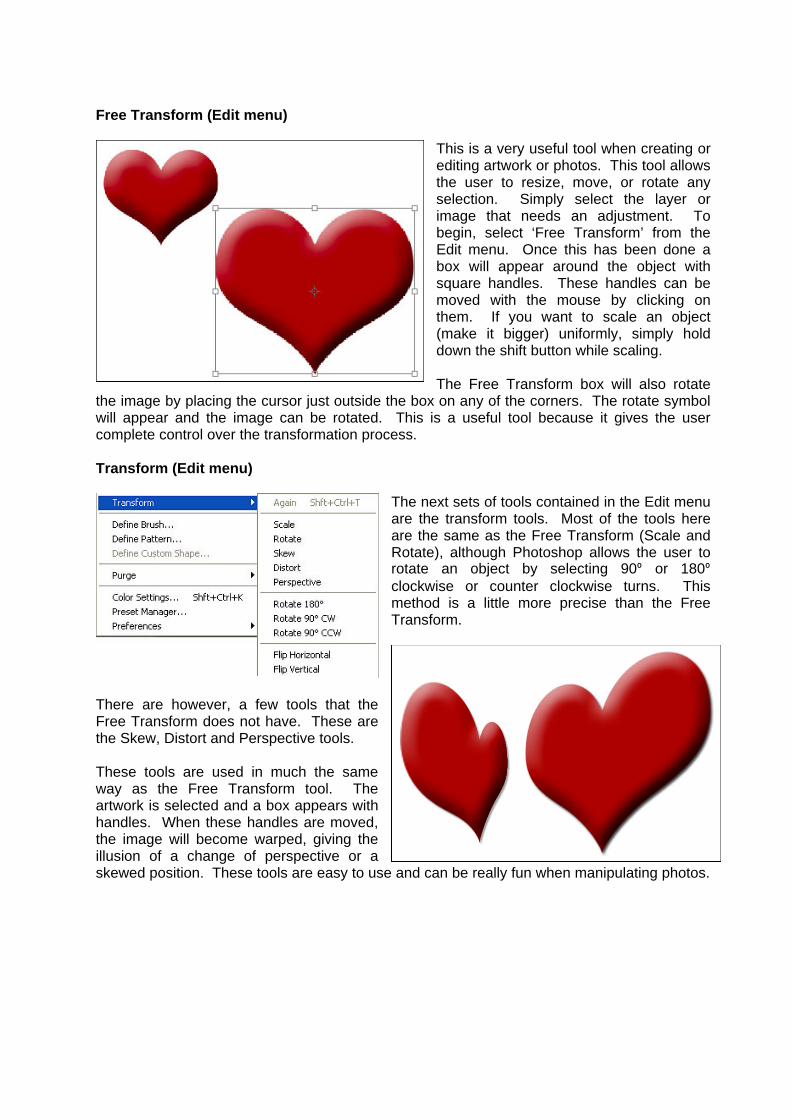
Free Transform (Edit menu)
This is a very useful tool when creating or editing artwork or photos. This tool allows the user to resize, move, or rotate any selection. Simply select the layer or image that needs an adjustment. To begin, select ‘Free Transform’ from the Edit menu. Once this has been done a box will appear around the object with square handles. These handles can be moved with the mouse by clicking on them. If you want to scale an object (make it bigger) uniformly, simply hold down the shift button while scaling. The Free Transform box will also rotate
the image by placing the cursor just outside the box on any of the corners. The rotate symbol will appear and the image can be rotated. This is a useful tool because it gives the user complete control over the transformation process. Transform (Edit menu)
The next sets of tools contained in the Edit menu are the transform tools. Most of the tools here are the same as the Free Transform (Scale and Rotate), although Photoshop allows the user to rotate an object by selecting 90º or 180º clockwise or counter clockwise turns. This method is a little more precise than the Free Transform.
There are however, a few tools that the Free Transform does not have. These are the Skew, Distort and Perspective tools. These tools are used in much the same way as the Free Transform tool. The artwork is selected and a box appears with handles. When these handles are moved, the image will become warped, giving the illusion of a change of perspective or a skewed position. These tools are easy to use and can be really fun when manipulating photos.
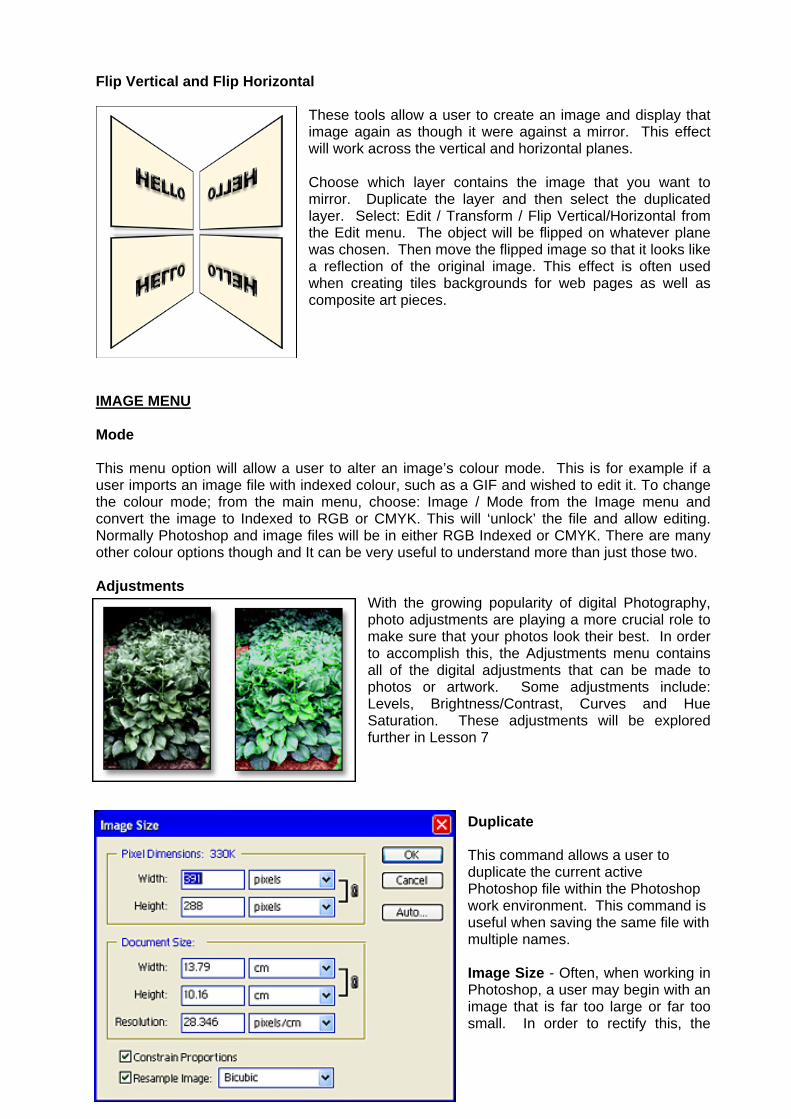
Flip Vertical and Flip Horizontal
These tools allow a user to create an image and display that image again as though it were against a mirror. This effect will work across the vertical and horizontal planes. Choose which layer contains the image that you want to mirror. Duplicate the layer and then select the duplicated layer. Select: Edit / Transform / Flip Vertical/Horizontal from the Edit menu. The object will be flipped on whatever plane was chosen. Then move the flipped image so that it looks like a reflection of the original image. This effect is often used when creating tiles backgrounds for web pages as well as composite art pieces.
IMAGE MENU Mode This menu option will allow a user to alter an image’s colour mode. This is for example if a user imports an image file with indexed colour, such as a GIF and wished to edit it. To change the colour mode; from the main menu, choose: Image / Mode from the Image menu and convert the image to Indexed to RGB or CMYK. This will ‘unlock’ the file and allow editing. Normally Photoshop and image files will be in either RGB Indexed or CMYK. There are many other colour options though and It can be very useful to understand more than just those two. Adjustments
With the growing popularity of digital Photography, photo adjustments are playing a more crucial role to make sure that your photos look their best. In order to accomplish this, the Adjustments menu contains all of the digital adjustments that can be made to photos or artwork. Some adjustments include: Levels, Brightness/Contrast, Curves and Hue Saturation. These adjustments will be explored further in Lesson 7
Duplicate This command allows a user to duplicate the current active Photoshop file within the Photoshop work environment. This command is useful when saving the same file with multiple names. Image Size - Often, when working in Photoshop, a user may begin with an image that is far too large or far too small. In order to rectify this, the
‘Image Size’ command must be used. This allows a user to shrink down or enlarge images until it the most desirable size for a particular project. Select ‘Image Size’ for the Image menu. A dialogue box will appear with the current dimensions of the photo. If for example your photo is 800 x 600 and you need to format it to 640 x 480, then simply type in 640 x 480 in the Width Height fields and press OK. The photo will automatically resize itself to the smaller size. The same steps should be followed if an image needs to be increased; only the larger image dimensions should be typed in. The dimensions are computer monitor screen sizes. Small monitors display at 640 x 480 pixels (width and height of the display area in pixels respectively), while larger monitors will display at 800 x 600 or 1024 x 768. This dialogue box also allows the user to control the image resolution size. Often if a large print file is opened, the resolution may be set to 300-pixels/cm. This must be decreased to 72 (standard screen resolution). Usually the Constrain proportions box should be checked. This ensures that the image will retain its proper aspect ratio. If this button is not checked, then the image may stretch to fit the new size. The result of this is vertical or horizontal stretching, which distorts the image. It is worthwhile to note that when a small image is increased, the quality will decrease, since it is limited to its original resolution.
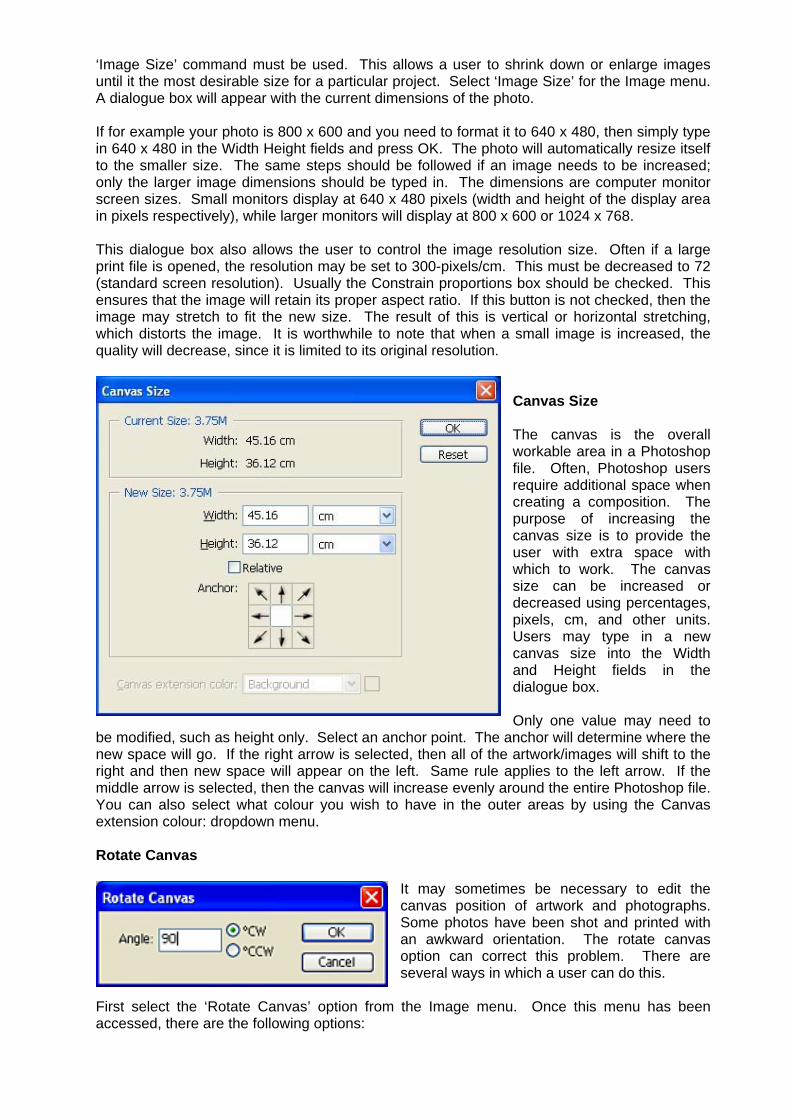
Canvas Size The canvas is the overall workable area in a Photoshop file. Often, Photoshop users require additional space when creating a composition. The purpose of increasing the canvas size is to provide the user with extra space with which to work. The canvas size can be increased or decreased using percentages, pixels, cm, and other units. Users may type in a new canvas size into the Width and Height fields in the dialogue box. Only one value may need to
be modified, such as height only. Select an anchor point. The anchor will determine where the new space will go. If the right arrow is selected, then all of the artwork/images will shift to the right and then new space will appear on the left. Same rule applies to the left arrow. If the middle arrow is selected, then the canvas will increase evenly around the entire Photoshop file. You can also select what colour you wish to have in the outer areas by using the Canvas extension colour: dropdown menu. Rotate Canvas
It may sometimes be necessary to edit the canvas position of artwork and photographs. Some photos have been shot and printed with an awkward orientation. The rotate canvas option can correct this problem. There are several ways in which a user can do this.
First select the ‘Rotate Canvas’ option from the Image menu. Once this menu has been accessed, there are the following options:
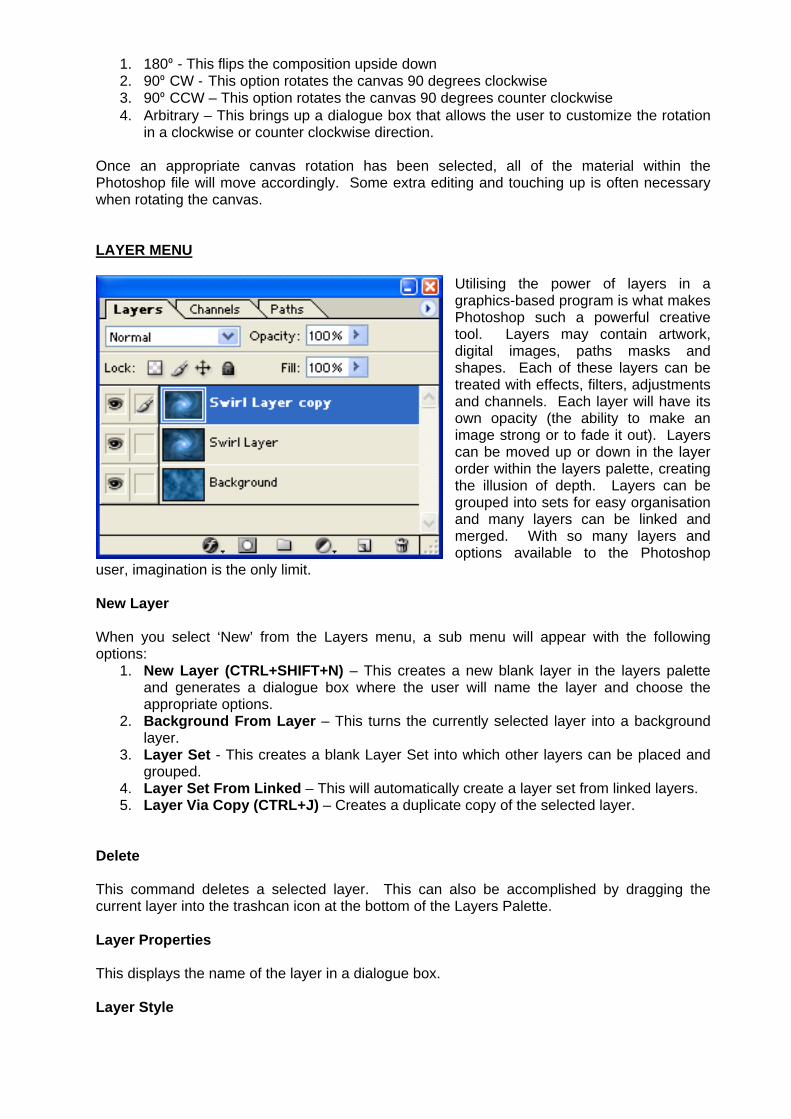
1. 180º - This flips the composition upside down 2. 90º CW - This option rotates the canvas 90 degrees clockwise 3. 90º CCW – This option rotates the canvas 90 degrees counter clockwise 4. Arbitrary – This brings up a dialogue box that allows the user to customize the rotation
in a clockwise or counter clockwise direction. Once an appropriate canvas rotation has been selected, all of the material within the Photoshop file will move accordingly. Some extra editing and touching up is often necessary when rotating the canvas. LAYER MENU
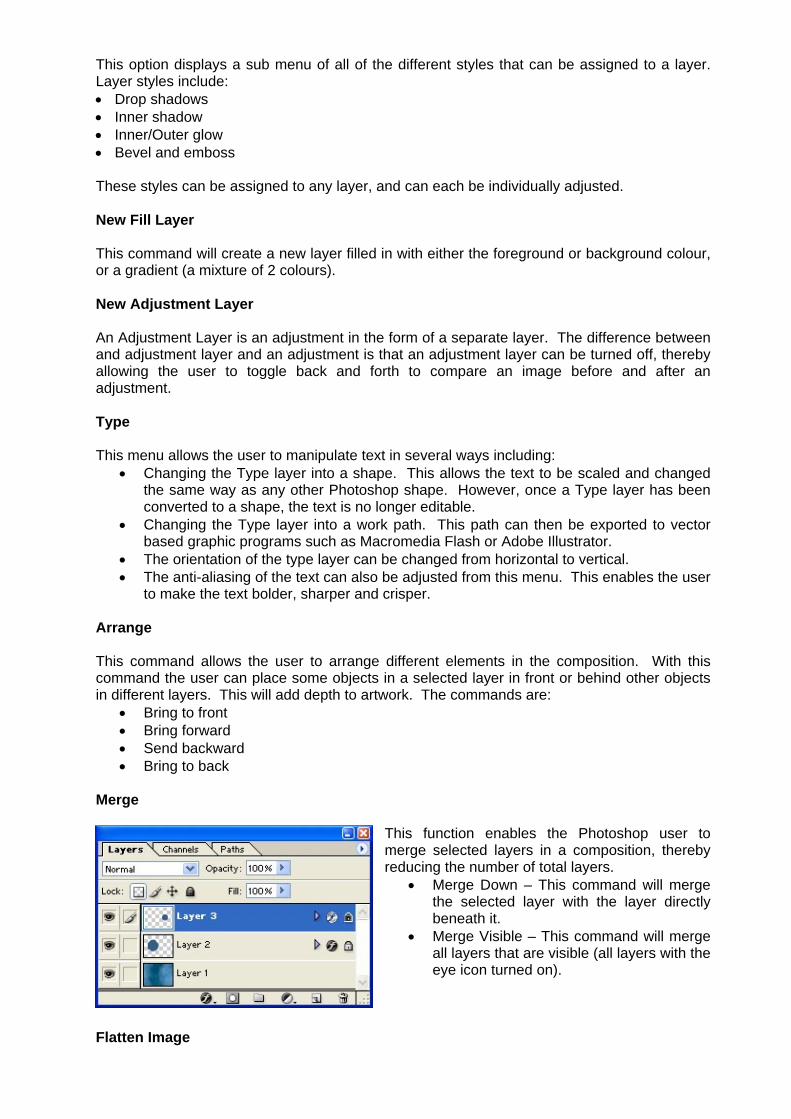
Utilising the power of layers in a graphics-based program is what makes Photoshop such a powerful creative tool. Layers may contain artwork, digital images, paths masks and shapes. Each of these layers can be treated with effects, filters, adjustments and channels. Each layer will have its own opacity (the ability to make an image strong or to fade it out). Layers can be moved up or down in the layer order within the layers palette, creating the illusion of depth. Layers can be grouped into sets for easy organisation and many layers can be linked and merged. With so many layers and options available to the Photoshop
user, imagination is the only limit. New Layer When you select ‘New’ from the Layers menu, a sub menu will appear with the following options:
1. New Layer (CTRL+SHIFT+N) – This creates a new blank layer in the layers palette and generates a dialogue box where the user will name the layer and choose the appropriate options.
2. Background From Layer – This turns the currently selected layer into a background layer.
3. Layer Set - This creates a blank Layer Set into which other layers can be placed and grouped.
4. Layer Set From Linked – This will automatically create a layer set from linked layers. 5. Layer Via Copy (CTRL+J) – Creates a duplicate copy of the selected layer.
Delete This command deletes a selected layer. This can also be accomplished by dragging the current layer into the trashcan icon at the bottom of the Layers Palette. Layer Properties This displays the name of the layer in a dialogue box. Layer Style
This option displays a sub menu of all of the different styles that can be assigned to a layer. Layer styles include: • Drop shadows • Inner shadow • Inner/Outer glow • Bevel and emboss These styles can be assigned to any layer, and can each be individually adjusted. New Fill Layer This command will create a new layer filled in with either the foreground or background colour, or a gradient (a mixture of 2 colours). New Adjustment Layer An Adjustment Layer is an adjustment in the form of a separate layer. The difference between and adjustment layer and an adjustment is that an adjustment layer can be turned off, thereby allowing the user to toggle back and forth to compare an image before and after an adjustment. Type This menu allows the user to manipulate text in several ways including:
• Changing the Type layer into a shape. This allows the text to be scaled and changed the same way as any other Photoshop shape. However, once a Type layer has been converted to a shape, the text is no longer editable.
• Changing the Type layer into a work path. This path can then be exported to vector based graphic programs such as Macromedia Flash or Adobe Illustrator.
• The orientation of the type layer can be changed from horizontal to vertical. • The anti-aliasing of the text can also be adjusted from this menu. This enables the user
to make the text bolder, sharper and crisper. Arrange This command allows the user to arrange different elements in the composition. With this command the user can place some objects in a selected layer in front or behind other objects in different layers. This will add depth to artwork. The commands are:
• Bring to front • Bring forward • Send backward • Bring to back
Merge
This function enables the Photoshop user to merge selected layers in a composition, thereby reducing the number of total layers.
• Merge Down – This command will merge the selected layer with the layer directly beneath it.
• Merge Visible – This command will merge all layers that are visible (all layers with the eye icon turned on).
Flatten Image
This command merges all layers (visible and invisible) into a single flattened layer. SELECT MENU Selecting items in Photoshop is an essential function that must be mastered. There are several ways in which to select items. An easy way is to hold down the CTRL button and click on the layer. An alternate way is to use the various commands contained in the Select Menu. Select All (CTRL+A) - This command selects everything in the selected layer. Deselect - This command will unselect whatever is currently selected. Reselect - This command will reselect what has been de-selected REMEMBER – Whenever a selection is made, it must be de-selected in order to make another separate selection or perform a different operation. Select Inverse This command will select the opposite of what has been selected. This command is useful for deleting everything around a selection. For example, if a layer contains a square surrounded by a separate colour, simply select the square. This will produce glowing dots around the square. Next, use the select inverse command. This will now change the selection to everything except the square. Next, press the delete button on the keyboard. Now there should be nothing left in the layer except the square. Feather
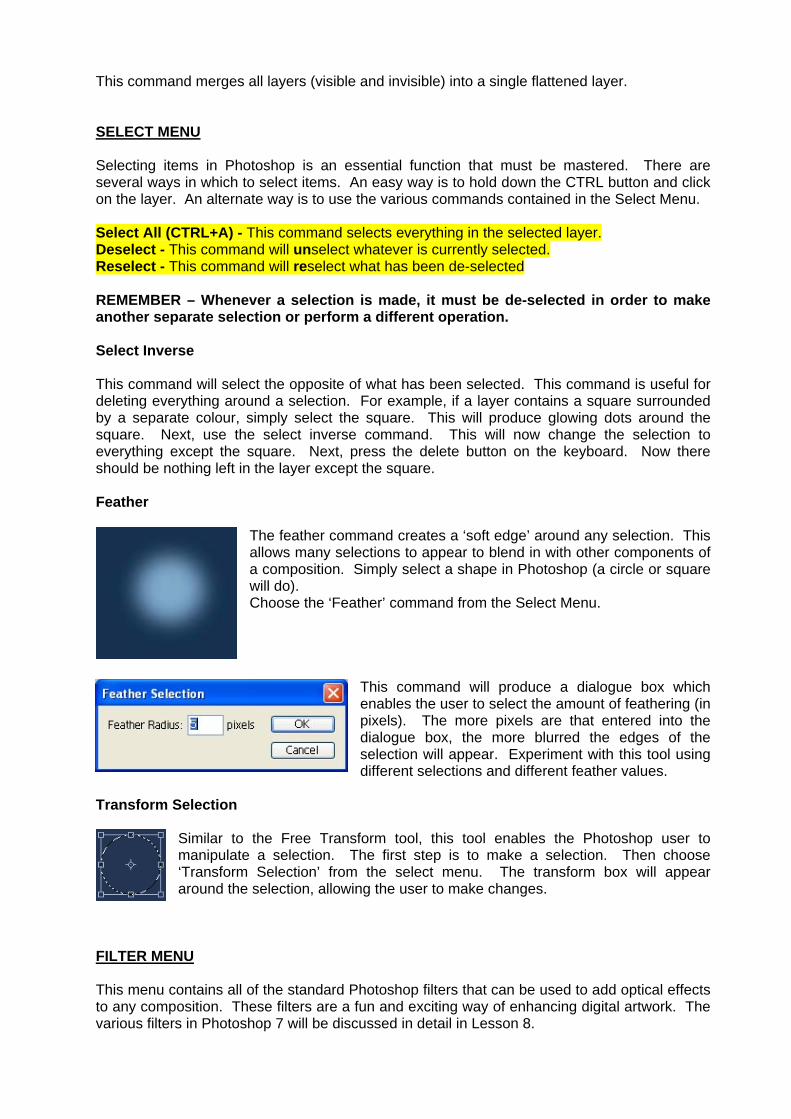
The feather command creates a ‘soft edge’ around any selection. This allows many selections to appear to blend in with other components of a composition. Simply select a shape in Photoshop (a circle or square will do). Choose the ‘Feather’ command from the Select Menu.
This command will produce a dialogue box which enables the user to select the amount of feathering (in pixels). The more pixels are that entered into the dialogue box, the more blurred the edges of the selection will appear. Experiment with this tool using different selections and different feather values.
Transform Selection
Similar to the Free Transform tool, this tool enables the Photoshop user to manipulate a selection. The first step is to make a selection. Then choose ‘Transform Selection’ from the select menu. The transform box will appear around the selection, allowing the user to make changes.
FILTER MENU This menu contains all of the standard Photoshop filters that can be used to add optical effects to any composition. These filters are a fun and exciting way of enhancing digital artwork. The various filters in Photoshop 7 will be discussed in detail in Lesson 8.
VIEW MENU The view menu contains commands that allow the Photoshop user to customise the view of the Photoshop file and the general work area.
• Zoom in/out – This feature zooms in the view of the current file in the work area. This command is useful when working with large files:
o Select the ‘Zoom in/out’ option from the View menu o Use the magnifying glass icon from the tool Palette o Use the shortcut command (CTRL+ or CTRL-)
• Show – This feature allows the Photoshop user to either display or hide various tools to
aid in a document set up: Guides – This sub-command will hide or display guides that can be placed either vertically or horizontally by the user in any position. These guides allow a user to
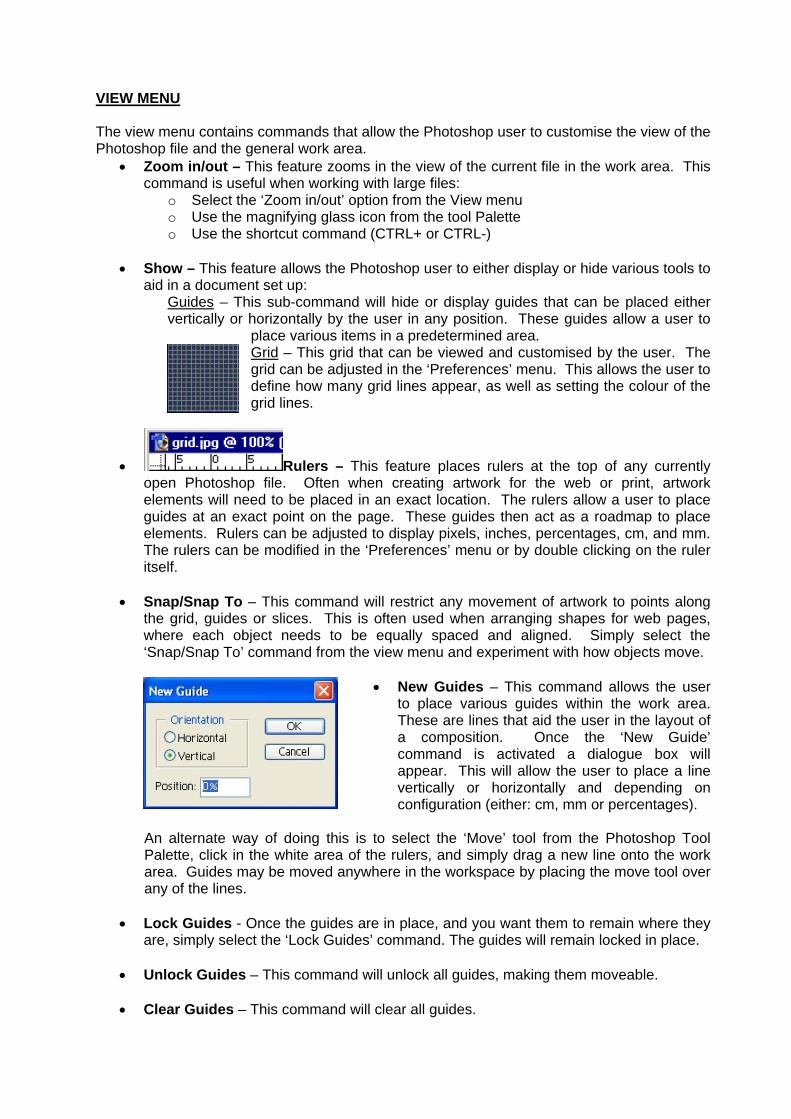
place various items in a predetermined area. Grid – This grid that can be viewed and customised by the user. The grid can be adjusted in the ‘Preferences’ menu. This allows the user to define how many grid lines appear, as well as setting the colour of the grid lines.
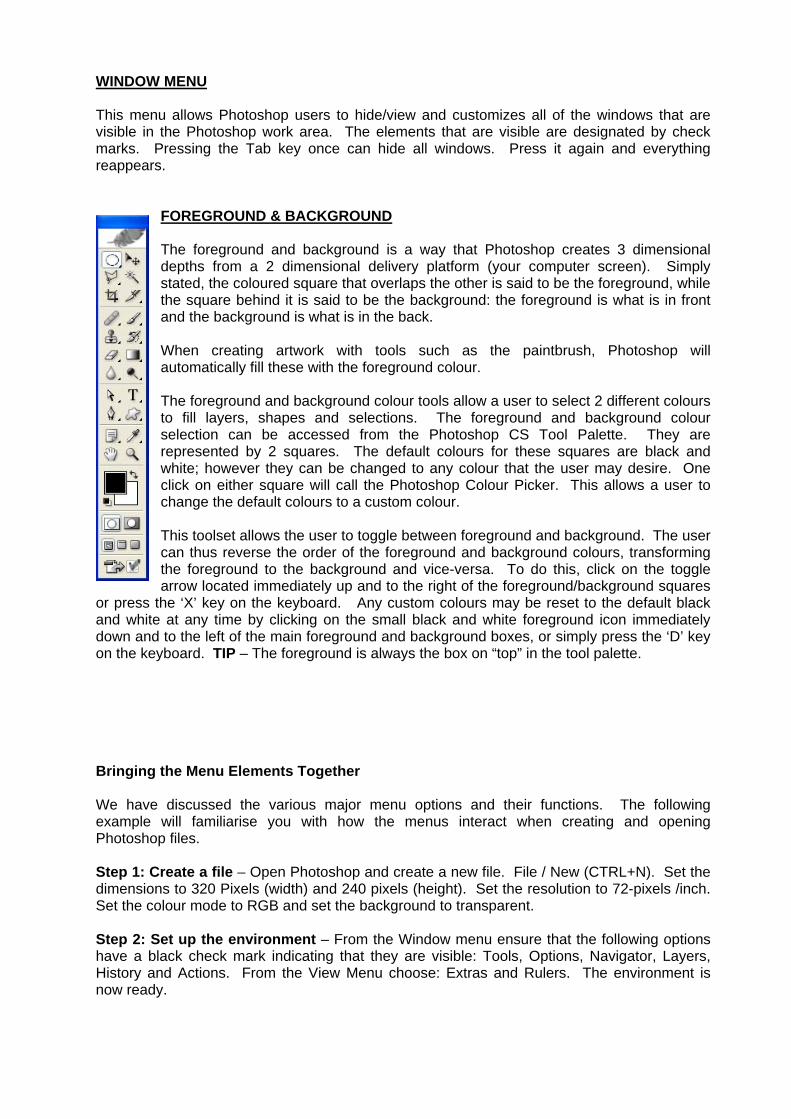
• Rulers – This feature places rulers at the top of any currently open Photoshop file. Often when creating artwork for the web or print, artwork elements will need to be placed in an exact location. The rulers allow a user to place guides at an exact point on the page. These guides then act as a roadmap to place elements. Rulers can be adjusted to display pixels, inches, percentages, cm, and mm. The rulers can be modified in the ‘Preferences’ menu or by double clicking on the ruler itself.
• Snap/Snap To – This command will restrict any movement of artwork to points along
the grid, guides or slices. This is often used when arranging shapes for web pages, where each object needs to be equally spaced and aligned. Simply select the ‘Snap/Snap To’ command from the view menu and experiment with how objects move.
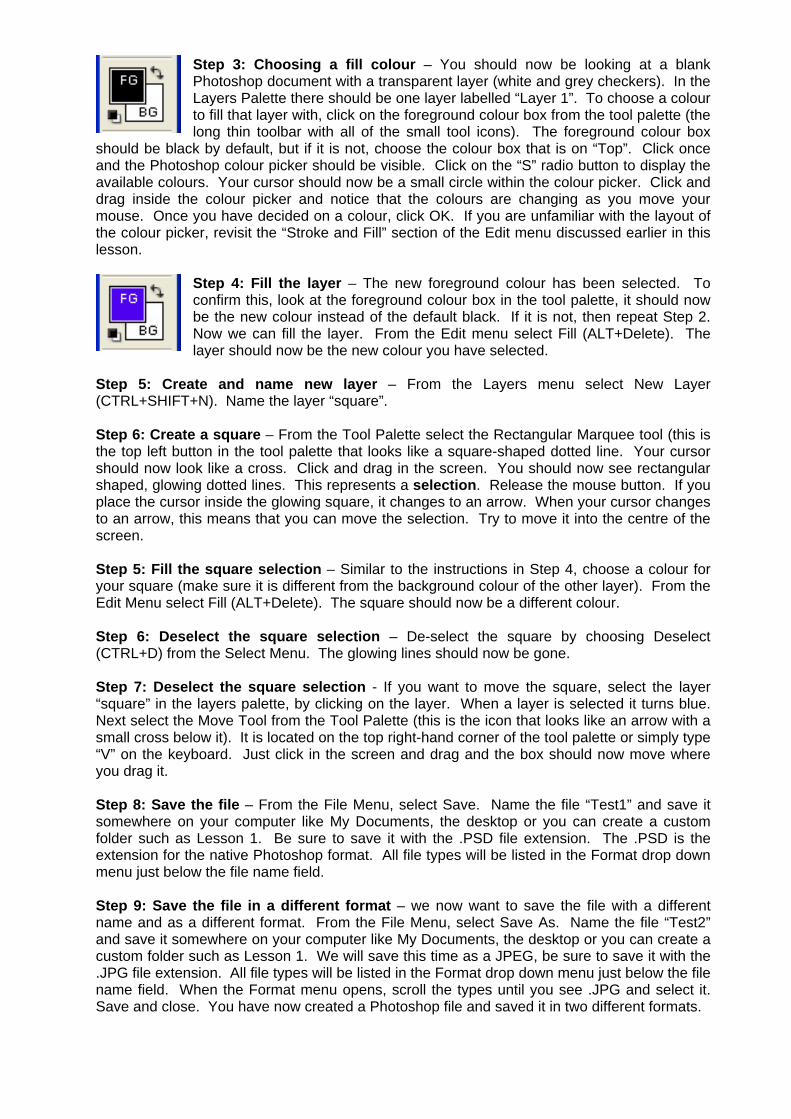
• New Guides – This command allows the user
to place various guides within the work area. These are lines that aid the user in the layout of a composition. Once the ‘New Guide’ command is activated a dialogue box will appear. This will allow the user to place a line vertically or horizontally and depending on configuration (either: cm, mm or percentages).
An alternate way of doing this is to select the ‘Move’ tool from the Photoshop Tool Palette, click in the white area of the rulers, and simply drag a new line onto the work area. Guides may be moved anywhere in the workspace by placing the move tool over any of the lines.
• Lock Guides - Once the guides are in place, and you want them to remain where they are, simply select the ‘Lock Guides’ command. The guides will remain locked in place.
• Unlock Guides – This command will unlock all guides, making them moveable.
• Clear Guides – This command will clear all guides.
WINDOW MENU This menu allows Photoshop users to hide/view and customizes all of the windows that are visible in the Photoshop work area. The elements that are visible are designated by check marks. Pressing the Tab key once can hide all windows. Press it again and everything reappears.
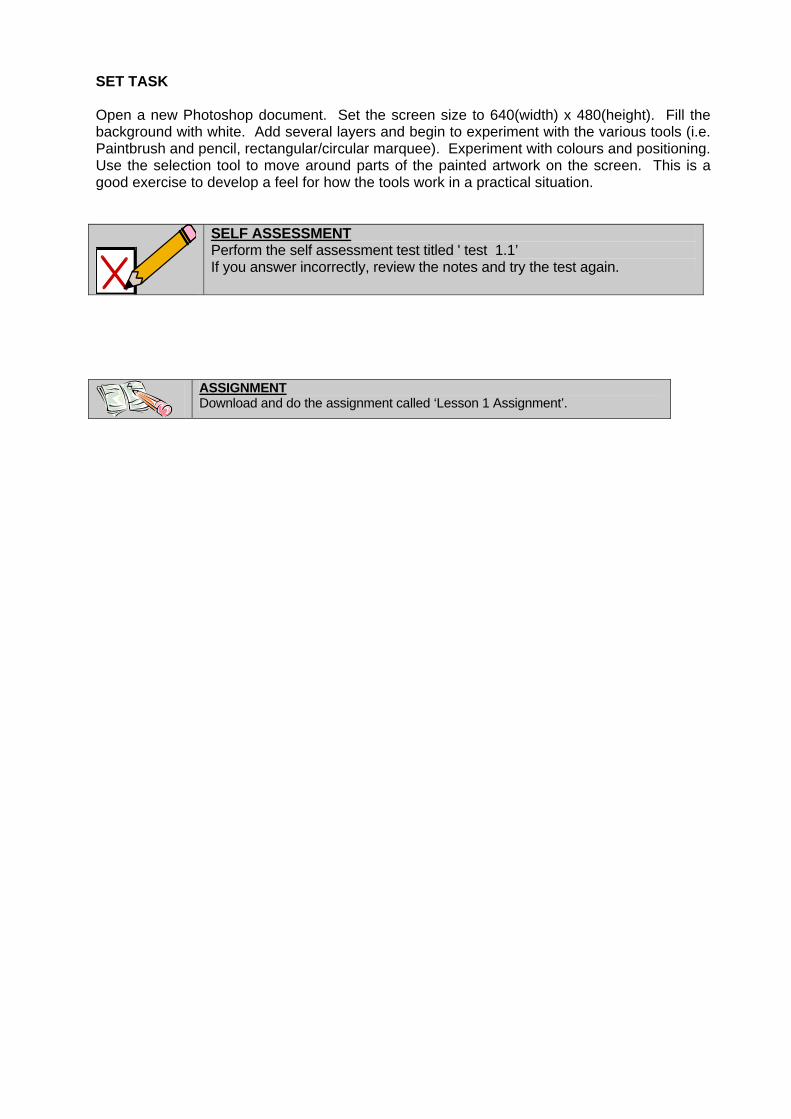
FOREGROUND & BACKGROUND The foreground and background is a way that Photoshop creates 3 dimensional depths from a 2 dimensional delivery platform (your computer screen). Simply stated, the coloured square that overlaps the other is said to be the foreground, while the square behind it is said to be the background: the foreground is what is in front and the background is what is in the back. When creating artwork with tools such as the paintbrush, Photoshop will automatically fill these with the foreground colour. The foreground and background colour tools allow a user to select 2 different colours to fill layers, shapes and selections. The foreground and background colour selection can be accessed from the Photoshop CS Tool Palette. They are represented by 2 squares. The default colours for these squares are black and white; however they can be changed to any colour that the user may desire. One click on either square will call the Photoshop Colour Picker. This allows a user to change the default colours to a custom colour. This toolset allows the user to toggle between foreground and background. The user can thus reverse the order of the foreground and background colours, transforming the foreground to the background and vice-versa. To do this, click on the toggle arrow located immediately up and to the right of the foreground/background squares
or press the ‘X’ key on the keyboard. Any custom colours may be reset to the default black and white at any time by clicking on the small black and white foreground icon immediately down and to the left of the main foreground and background boxes, or simply press the ‘D’ key on the keyboard. TIP – The foreground is always the box on “top” in the tool palette. Bringing the Menu Elements Together We have discussed the various major menu options and their functions. The following example will familiarise you with how the menus interact when creating and opening Photoshop files. Step 1: Create a file – Open Photoshop and create a new file. File / New (CTRL+N). Set the dimensions to 320 Pixels (width) and 240 pixels (height). Set the resolution to 72-pixels /inch. Set the colour mode to RGB and set the background to transparent. Step 2: Set up the environment – From the Window menu ensure that the following options have a black check mark indicating that they are visible: Tools, Options, Navigator, Layers, History and Actions. From the View Menu choose: Extras and Rulers. The environment is now ready.
Step 3: Choosing a fill colour – You should now be looking at a blank Photoshop document with a transparent layer (white and grey checkers). In the Layers Palette there should be one layer labelled “Layer 1”. To choose a colour to fill that layer with, click on the foreground colour box from the tool palette (the long thin toolbar with all of the small tool icons). The foreground colour box
should be black by default, but if it is not, choose the colour box that is on “Top”. Click once and the Photoshop colour picker should be visible. Click on the “S” radio button to display the available colours. Your cursor should now be a small circle within the colour picker. Click and drag inside the colour picker and notice that the colours are changing as you move your mouse. Once you have decided on a colour, click OK. If you are unfamiliar with the layout of the colour picker, revisit the “Stroke and Fill” section of the Edit menu discussed earlier in this lesson.
Step 4: Fill the layer – The new foreground colour has been selected. To confirm this, look at the foreground colour box in the tool palette, it should now be the new colour instead of the default black. If it is not, then repeat Step 2. Now we can fill the layer. From the Edit menu select Fill (ALT+Delete). The layer should now be the new colour you have selected.
Step 5: Create and name new layer – From the Layers menu select New Layer (CTRL+SHIFT+N). Name the layer “square”. Step 6: Create a square – From the Tool Palette select the Rectangular Marquee tool (this is the top left button in the tool palette that looks like a square-shaped dotted line. Your cursor should now look like a cross. Click and drag in the screen. You should now see rectangular shaped, glowing dotted lines. This represents a selection. Release the mouse button. If you place the cursor inside the glowing square, it changes to an arrow. When your cursor changes to an arrow, this means that you can move the selection. Try to move it into the centre of the screen. Step 5: Fill the square selection – Similar to the instructions in Step 4, choose a colour for your square (make sure it is different from the background colour of the other layer). From the Edit Menu select Fill (ALT+Delete). The square should now be a different colour. Step 6: Deselect the square selection – De-select the square by choosing Deselect (CTRL+D) from the Select Menu. The glowing lines should now be gone. Step 7: Deselect the square selection - If you want to move the square, select the layer “square” in the layers palette, by clicking on the layer. When a layer is selected it turns blue. Next select the Move Tool from the Tool Palette (this is the icon that looks like an arrow with a small cross below it). It is located on the top right-hand corner of the tool palette or simply type “V” on the keyboard. Just click in the screen and drag and the box should now move where you drag it. Step 8: Save the file – From the File Menu, select Save. Name the file “Test1” and save it somewhere on your computer like My Documents, the desktop or you can create a custom folder such as Lesson 1. Be sure to save it with the .PSD file extension. The .PSD is the extension for the native Photoshop format. All file types will be listed in the Format drop down menu just below the file name field. Step 9: Save the file in a different format – we now want to save the file with a different name and as a different format. From the File Menu, select Save As. Name the file “Test2” and save it somewhere on your computer like My Documents, the desktop or you can create a custom folder such as Lesson 1. We will save this time as a JPEG, be sure to save it with the .JPG file extension. All file types will be listed in the Format drop down menu just below the file name field. When the Format menu opens, scroll the types until you see .JPG and select it. Save and close. You have now created a Photoshop file and saved it in two different formats.
SET TASK Open a new Photoshop document. Set the screen size to 640(width) x 480(height). Fill the background with white. Add several layers and begin to experiment with the various tools (i.e. Paintbrush and pencil, rectangular/circular marquee). Experiment with colours and positioning. Use the selection tool to move around parts of the painted artwork on the screen. This is a good exercise to develop a feel for how the tools work in a practical situation.
SELF ASSESSMENT Perform the self assessment test titled ' test 1.1’ If you answer incorrectly, review the notes and try the test again.
ASSIGNMENT Download and do the assignment called ‘Lesson 1 Assignment’.