Legal Partner - Lexmarkpublications.lexmark.com/publications/lexmark_solutions/legal... ·...
49
Legal Partner Administrator's Guide May 2011 www.lexmark.com Lexmark and Lexmark with diamond design are trademarks of Lexmark International, Inc., registered in the United States and/or other countries. All other trademarks are the property of their respective owners.
Transcript of Legal Partner - Lexmarkpublications.lexmark.com/publications/lexmark_solutions/legal... ·...

Legal Partner
Administrator's Guide
May 2011 www.lexmark.com
Lexmark and Lexmark with diamond design are trademarks of Lexmark International, Inc., registered in the United States and/or other countries.All other trademarks are the property of their respective owners.

Edition notice
May 2011
The following paragraph does not apply to any country where such provisions are inconsistent with local law: LEXMARK INTERNATIONAL,INC., PROVIDES THIS PUBLICATION “AS IS” WITHOUT WARRANTY OF ANY KIND, EITHER EXPRESS OR IMPLIED, INCLUDING, BUT NOT LIMITEDTO, THE IMPLIED WARRANTIES OF MERCHANTABILITY OR FITNESS FOR A PARTICULAR PURPOSE. Some states do not allow disclaimer ofexpress or implied warranties in certain transactions; therefore, this statement may not apply to you.
This publication could include technical inaccuracies or typographical errors. Changes are periodically made to the information herein; thesechanges will be incorporated in later editions. Improvements or changes in the products or the programs described may be made at anytime.
References in this publication to products, programs, or services do not imply that the manufacturer intends to make these available in allcountries in which it operates. Any reference to a product, program, or service is not intended to state or imply that only that product,program, or service may be used. Any functionally equivalent product, program, or service that does not infringe any existing intellectualproperty right may be used instead. Evaluation and verification of operation in conjunction with other products, programs, or services,except those expressly designated by the manufacturer, are the user’s responsibility.
For Lexmark technical support, visit support.lexmark.com.For information on supplies and downloads, visit www.lexmark.com.If you don't have access to the Internet, you can contact Lexmark by mail:Lexmark International, Inc.Bldg 004-2/CSC740 New Circle Road NWLexington, KY 40550USA
© 2011 Lexmark International, Inc.All rights reserved.
UNITED STATES GOVERNMENT RIGHTSThis software and any accompanying documentation provided under this agreement are commercial computer software and documentationdeveloped exclusively at private expense.
TrademarksLexmark and Lexmark with diamond design are trademarks of Lexmark International, Inc., registered in the United States and/or othercountries.All other trademarks are the property of their respective owners.

Contents
Edition notice...............................................................................................2
Overview.....................................................................................................5
Managing licenses........................................................................................6Licensing the applications.........................................................................................................................6
Obtaining a license file........................................................................................................................................6Licensing the printer ...........................................................................................................................................7
Configuring the applications.........................................................................9Configuring applications using the Embedded Web Server (EWS)............................................................9
Accessing application configuration settings using the Embedded Web Server ................................................9Customizing the display icon ..............................................................................................................................9
Configuring applications using MarkVision Professional.........................................................................10Installing solution descriptors on the MarkVision Server .................................................................................10Accessing application configuration settings using MarkVision Professional...................................................11
Configuring Scan to Case Manager..........................................................................................................12Configuring a destination..................................................................................................................................12Configuring destination settings .......................................................................................................................12Configuring LDAP ..............................................................................................................................................19
Configuring Legal Forms..........................................................................................................................20Configuring bookmarks.....................................................................................................................................20
Configuring Scan to Court...................................................................................................... .................21Configuring the printer e‑mail function............................................................................................................21Adding a destination.........................................................................................................................................21Editing a destination .........................................................................................................................................22Deleting a destination.......................................................................................................................................22
Configuring the Background and Idle Screen..........................................................................................22Adding Background and Idle Screen images.....................................................................................................22
Exporting and importing configuration files............................................................................................23Exporting and importing a configuration using the Embedded Web Server ....................................................23Exporting and importing a configuration using MarkVision Professional.........................................................24
Using the applications................................................................................25Using Scan to Case Manager...................................................................................................................25
Scanning documents at the printer ..................................................................................................................25
Using Legal Forms....................................................................................................................................25Bookmarking forms...........................................................................................................................................25Configuring folders for bookmarks ...................................................................................................................26
Contents
3

Printing bookmarks...........................................................................................................................................27Searching for bookmarks and folders ...............................................................................................................27Saving bookmarks as shortcuts.........................................................................................................................27
Using Scan to Court.................................................................................................................................28Scanning and sending documents ....................................................................................................................28
Using Background and Idle Screen..........................................................................................................28Changing the background image using the printer control panel ....................................................................28
Troubleshooting.........................................................................................29Scan to Case Manager troubleshooting..................................................................................................29
The application icon is missing from the home screen.....................................................................................29An application error has occurred ....................................................................................................................29A network destination stopped working or is invalid .......................................................................................30Printer cannot scan to the selected destination...............................................................................................31An error occurs when opening a secure PDF file ..............................................................................................32Using the application in a Novell network environment ..................................................................................32
Legal Forms troubleshooting...................................................................................................................32Forms are not available or are not working......................................................................................................32Some bookmarks do not appear in an exported configuration file ..................................................................33
Scan to Court troubleshooting................................................................................................................33Cannot send an attachment .............................................................................................................................33
Background and Idle Screen troubleshooting.........................................................................................33“There are no images to display” error message appears................................................................................33“Image size exceeds limit” error message appears ..........................................................................................34
License error............................................................................................................................................34Make sure the application is licensed...............................................................................................................34Make sure the license is up‑to‑date .................................................................................................................34Make sure the license service is installed and running.....................................................................................34
Appendix....................................................................................................35
Notices.......................................................................................................36
Index..........................................................................................................48
Contents
4

OverviewLexmarkTM Legal Partner is a collection of applications used to customize your multifunction printer (MFP) for yourwork environment. Several applications have been installed on the MFP to help make frequently performed tasks fasterand more efficient. This allows users to do the following directly from the printer:
• Scan documents at the printer, and then send the scanned documents to a network destination. From the networkdestination, the documents can be either stored or rerouted.
• Easily access frequently used forms and other regularly printed information.
• Scan and send documents as e-mail attachments directly from the printer.
This guide will help you configure the applications to provide the custom features needed by your users. For informationon physically setting up your printer and installing it on the network, as well as using standard MFP features such ascopy, fax, and basic printing, see the Software and Documentation CD or User's Guide that came with the printer.
Overview
5

Managing licenses
Licensing the applicationsSome applications may require an electronic license to activate optional advanced features, or to run on select printers.
If individual licenses are used, then you must install them locally on each printer. If you plan to use the application withseveral printers, then you may prefer to install the Lexmark License Server and obtain a network license for theappropriate number of devices.
For more information on purchasing a license for an application, contact your Lexmark representative.
Obtaining a license file
For local (individual) licensing
1 From the Embedded Web Server, click Settings or Configuration.
2 Click Device Solutions > Solutions (eSF), or click Embedded Solutions.
3 Click System.
4 Record the host ID (serial number).
Record only the string that appears after Serial=.
5 Contact your Lexmark representative, and provide the host ID to obtain the license file.
For network licensing
The server host ID is required to generate the license file for network licensing. To collect the host ID, contact yoursystem support person and request the MAC address of the computer on which the license server resides. Then contactyour Lexmark representative, and provide the host ID (MAC address) to obtain the license file.
You can also find the host ID using the Lexmark License Server.
Installing the Lexmark License Server
Note: Lexmark License Server is intended for use with Windows operating systems.
1 From the application package, launch the LicenseServer.exe file.
This executable file is located in <install location>\esf‑license‑app.
2 Click Next.
3 Select the installation method you want to use, and then click Next.
You have the option to unpack the installation files to a temporary directory from which they will be removed afterthe installation is complete, or to specify a location where the files will remain after the installation is complete.
4 If you do not want the server installed in the default directory, then click Browse to select an alternate location.
5 Click Finish to complete the installation.
6 After the Lexmark License Server installation is complete, click Done.
Managing licenses
6

Collecting the host ID
1 Click or Start.
2 Click All Programs or Programs, and then click Lexmark > Lexmark License Server > License Administration Tools.
3 Click the System Settings tab.
4 Record the host ID (MAC address).
5 Contact your Lexmark representative, and provide the host ID.
The host ID is required to generate the license file.
Licensing the printer
Using a local license
Using the Embedded Web Server
1 From the Embedded Web Server, click Settings or Configuration.
2 Click Device Solutions > Solutions (eSF), or click Embedded Solutions.
3 From Installed Solutions, click the appropriate application link.
4 Click License > Update License.
5 Make sure Local is selected, and then click Browse to locate the license file.
6 Click Update License.
Using MarkVision Professional
1 In MarkVision Professional, select the device where the application is installed.
2 Click Settings > Embedded Solutions > Solutions Management.
3 Under the appropriate application, click Update License.
4 In the Update License window, select Use a local license file.
5 Click Browse to locate the license file.
6 Click Update License.
Using a network license
Copying the license file to the Lexmark License Server
Note: Before installing a network license using either the Embedded Web Server or MarkVision Professional, copythe license files to the license server.
1 Copy the license file to the following directory on the network license server:
C:\Program Files\Lexmark\LicenseServer\Licenses
2 On the host computer, click , or click Start and then click Run.
3 In the Start Search or Run box, type control admintools.
Managing licenses
7

4 Press Enter, or click OK.
5 Click Services > License Server.
6 Stop the License Server service, and then restart it.
Configuring the network license
1 From the Embedded Web Server, click Settings or Configuration.
2 Click Device Solutions > Solutions (eSF), or click Embedded Solutions.
3 Click Network License.
4 Enter the IP address or host name and optional port for the network license server where the license is stored. Youcan enter values for up to three separate servers.
5 In the Heartbeat Period field, enter a value of 2 to 60 minutes to designate how often the printer will ping thenetwork license server to check for updates and maintain access to an electronic license.
6 In the “Number of Retries” field, enter a number of 1 to 5 to set the maximum number of times the printer canattempt to obtain a license before quitting.
7 Click Apply.
Updating the network license
Using the Embedded Web Server
1 Click Solutions.
2 From Installed Solutions, click the appropriate application link.
3 Click License > Update License > Network > Update License.
Using MarkVision Professional
1 In MarkVision Professional, select the device where the application is installed.
2 Click Settings > Embedded Solutions > Solutions Management.
3 Under the appropriate application, click Update License.
4 In the Update License window, select Use a network license server.
5 Click Update License.
Managing licenses
8

Configuring the applications
Configuring applications using the Embedded Web Server(EWS)The application can be manually configured using the Embedded Web Server (EWS) of a device. However, the setupprocedure has to be completed for each device running the application. Setting up the application using the EmbeddedWeb Server is recommended for networks where a relatively small number of devices will be used.
Larger networks should use MarkVisionTM Professional (MVP) to configure multiple devices at one time.
Accessing application configuration settings using the Embedded Web Server1 Obtain the printer IP address:
• From the printer control panel home screen
• From the TCP/IP section in the Network/Ports menu
• By printing a network setup page or menu settings page, and then finding the TCP/IP section
Note: An IP address appears as four sets of numbers separated by periods, such as 123.123.123.123.
2 Open a Web browser, and then type the printer IP address in the address field.
The Embedded Web Server page appears.
3 From the navigation menu on the left, click Settings or Configuration.
4 Click Device Solutions > Solutions (eSF), or click Embedded Solutions.
5 From the Installed Solutions list, click the application you want to configure, and then click Configure.
Customizing the display icon1 Access the application configuration settings from the Embedded Web Server or MarkVision Professional.
2 From the Configure, Profile, or Profiles page, add or edit a profile, and then change the settings as necessary:
• Button Text or Icon Text—Type up to 20 characters that will appear above the profile button on the printerhome screen. This field is required.
• Button Icon or Icon—Browse to a new image file that represents the profile on the printer home screen. Thisfield is optional.
• Button Icon when pressed or Icon when pressed—Browse to a new image file that will be displayed while theprofile icon is being pressed. This field is optional.
Configuring the applications
9

Notes:
– For printers running the Embedded Solutions Framework (eSF) version 3.0 or later, the image should bea PNG file with a transparent background, and should measure 192 x 302 pixels. It should not exceed11KB in size.
– For printers running eSF version 2.0, the image should be a GIF, PNG, or JPEG file, and should measure120 x 75 pixels.
– For printers running eSF version 1.2, the image should be a GIF file and should measure 120 x 75 pixels.
– If you are unsure about which version of eSF your printer is running, then see “Checking which version ofthe Embedded Solutions Framework is installed on a printer” on page 35.
3 Do one of the following:
Using the Embedded Web Server• Click Return to go back to the main configuration page without making any changes.
• Click Restore Defaults to restore all fields to factory default settings.
• Click Reset to cancel changes to all fields and begin again.
• Click Apply to save changes.
Note: Reset and Apply are the only options available on certain devices.
Using MarkVision Professional• Click OK to save changes.
• Click Cancel to exit without making changes.
Configuring applications using MarkVision ProfessionalUse MarkVision Professional (MVP) to configure multiple printers at one time.
Note: MVP can be used only for printers that support the Embedded Solutions Framework (eSF) 1.2 and 2.0.
Installing solution descriptors on the MarkVision ServerSolution descriptors are XML files that are installed on the MarkVision Server. They describe to MVP how to configurean embedded solution, providing information about supported settings such as types, descriptions, ranges, defaults,and internationalization values and strings. Each embedded application includes a solution descriptor, which must beinstalled before the application can be configured.
Use one of the following methods to install a solution descriptor on the MarkVision Server:
Method one
1 From the MarkVision Professional Home screen, select Embedded Solutions ‑ Solutions Management from the AllTasks list.
2 Use the Quick Find or Folders tabs to select a device.
Note: When a device managed by MVP is not supported by a specific task, its name will appear with a black linethrough it in the Quick Find or Folders tabs. Password-protected network devices are displayed in red. Enter thedevice password to gain access to the device.
Configuring the applications
10

3 Select the application from the list.
4 Click Fetch Descriptor(s). This will read the solution descriptor from the device if this method is supported by thedevice. If it is not, a dialog will open so that you can browse to the file to be installed.
Method two
1 From the MarkVision Professional Home screen, select Embedded Solutions ‑ Solutions Management from the AllTasks list.
2 Use the Quick Find or Folders tabs to select a device.
Note: When a device managed by MVP is not supported by a specific task, its name will appear with a black linethrough it in the Quick Find or Folders tabs. Password-protected network devices are displayed in red. Enter thedevice password to gain access to the device.
3 Click Manage Descriptors.
4 Click Add.
5 Browse to find the solution descriptor for the application.
6 Click Open.
Notes:
• The installed solution descriptor appears in the Plug-ins/Solutions on Server box. The solution descriptordetails appear in the Details box.
• If the descriptor file is not valid, MVP 11.2 will display an error message.
7 Click Close.
Accessing application configuration settings using MarkVision ProfessionalNote: MarkVision Professional 11.2 or later required.
To configure a solution in MVP:
1 From the MarkVision Professional Home screen, select Embedded Solutions ‑ Solutions Management from the AllTasks list.
2 Select devices using the Quick Find or Folders tabs.
Use Ctrl + click and Shift + click to select multiple devices.
Note: When a device managed by MVP is not supported by a specific task, its name will appear with a black linethrough it in the Quick Find or Folders tabs. Password-protected network devices are displayed in red. Enter thedevice password to gain access to the device.
All installed embedded solutions appear.
3 Select the solution to be configured.
4 Click Fetch Descriptor(s) to install the necessary solution descriptor onto the MVP server from the device.
5 Click Configure, and then adjust settings as needed.
Configuring the applications
11

Configuring Scan to Case ManagerScan to Case Manager allows users at the printer to scan their documents to network destinations specified by theadministrator.
After the destinations (shared network folders) have been established in the network, the setup process for theapplication involves installing and configuring the application on the appropriate printers.
Configuring a destination1 From the Embedded Web Server, click Settings or Configuration.
2 Click Device Solutions > Solutions (eSF), or click Embedded Solutions.
3 From Installed Solutions, click the name of the application.
4 Under Scan Destination, click Add.
Note: You can also edit or delete existing destinations.
5 Type a name for the destination.
6 Select Network Folder or FTP Address, and then configure the selected destination.
7 Under Authentication Options, select whether to require user authentication for this destination. The credentialsare used to access the network destination.
8 In the sections that follow, adjust the settings as necessary:
• Select check boxes to allow users to modify settings.
• Use radio buttons and drop‑down menus to specify the default settings.
9 Click OK.
10 Click Apply.
Configuring destination settings
The following are explanations of settings available when adding or editing a destination. Some scan settings may notbe available on certain devices or in certain situations. For more information, see the documentation that came withthe printer.
Name
Type a name for the destination.
Location
Select Network Folder or FTP, and then configure the selected destination.
Notes:
• To use the LDAP features, the printer must be configured to use an LDAP server. For more information, see“Configuring LDAP” on page 19.
• For a list of protocols used or required by the application, see the Readme.
Configuring the applications
12

Network Folder
Use To
Address Type the server name or IP Address of the network folder in the \\server\share format.
LDAP Path Attribute Type the path attribute for the LDAP server.
Path Suffix Type the path suffix for the LDAP server.
LDAP User IDAttribute
Type the attribute for the User ID on the LDAP server. This setting will not be visible until somethingis typed in the LDAP Path Attribute field.
Domain Type the Windows domain for the destination if the destination resides within a different Windowsdomain than the printer.
WINS Server Type the WINS Server address if the printer has difficulty connecting with a network folderdestination.
Broadcast Address Type the network Broadcast Address if the printer has difficulty connecting with a network folderdestination.
FTP
Use To
Address Type the server name or IP Address of the network folder in the \\server\share format.
Port Type the port number that the MFP uses to communicate with the FTP server.
LDAP Path Attribute Type the path attribute for the LDAP server.
Path Suffix Type the path suffix for the LDAP server.
LDAP User IDAttribute
Type the attribute for the User ID on the LDAP server. This setting will not be visible until somethingis typed in the LDAP Path Attribute field.
Scan Settings
Adjust settings in this section to determine the default settings that will be used for each scan.
Note: Some scan settings may not be available on certain devices or in certain situations. For a complete list ofavailable scan settings, see the documentation that came with your printer.
1 Select the radio button or use the drop‑down menu next to each setting to set the default value.
2 If you want to allow users to modify the default values from the printer, then select the check box next to theappropriate feature. If you want to prevent users from modifying the default settings, then clear the check box.
Select To
Paper size Select an option that corresponds to the paper size of theoriginal document.
Orientation Specify whether the original document is in portrait orlandscape orientation. Select Portrait if the height of thepage is greater than the width; select Landscape if the widthof the page is greater than the height.
Configuring the applications
13

Select To
Content Select the content of the original document to enhance scanquality.
• Text—Scan original documents that are mostly text orline art.
• Text/Photo—Scan original documents that are a mixtureof text and graphics or pictures.
• Photo—Scan original documents that are high-qualityphotographs or inkjet prints.
Sides (Duplex) Allow users to scan one‑sided or two‑sided documents.Select 1 Sided to scan one‑sided documents. Select 2 Sided‑ Short Edge to scan two‑sided documents that are boundalong the short edge of the paper; or select 2 Sided ‑ LongEdge to scan two‑sided documents that are bound along thelong edge of the paper.
Format Specify the output (TIFF, JPEG, PDF, Raw, Secure PDF, or XPS)for the scanned image.
Note: The Raw and Secure PDF file formats are notavailable on devices running the Embedded SolutionsFramework (eSF) 1.2.
• TIFF—This creates multiple files or a single file. The filesize is usually larger than an equivalent JPEG.
Note: If Multi-page TIFF is turned off in the Settingsmenu of the Embedded Web Server, then this optionsaves one page in each file.
• JPEG—This creates and attaches a separate file for eachpage of the original document, viewable by most Webbrowsers and graphics programs.
• PDF—This creates a single file with multiple pages,viewable with Adobe Reader.
• Raw—This saves the scan job as raw data.
• Secure PDF—This creates an encrypted PDF file thatprotects the file contents from unauthorized access.
• XPS—This creates a single XPS file with multiple pages,viewable using an Internet Explorer–hosted viewer andthe .NET Framework, or by downloading a third‑partystandalone viewer.
Resolution Adjust the quality of the scanned document. If users will bescanning photographs, drawings with fine lines, ordocuments with very small text, then increase the resolutionsetting.
Notes:
• Higher resolution settings result in larger files.
• The maximum scan resolution for color images is300 dpi, and the maximum for grayscale images is600 dpi.
Configuring the applications
14

Select To
Color Determine whether the document will be scanned in coloror in black and white. Select this option to scan in color, orclear it to scan in black and white.
Custom Job Scan documents of mixed paper sizes into a single file.
Edge to Edge Specify that the original document is treated as borderlessand will be scanned edge to edge.
Contrast Increase or decrease the difference between lights and darksin a scanned image. Select a value from 0 (least contrast) to5 (most contrast).
Darkness Adjust how light or dark images will turn out in relation tothe original document. Specify darkness from 1 (very light)to 9 (very dark).
Shadow Detail Increases or decrease the amount of detail in shadows on ascanned image. Enter a value from ‑4 (least detail) to 4 (mostdetail).
Background Removal Lighten or darken the background of a scanned image. Entera value from 4 (lightest) to ‑4 (darkest).
Scan Preview Select whether the user should see a scan preview of onlythe first page or not at all (Off).
In the licensed version of the application, the user can alsopreview all pages. When Advanced Scan Preview is enabled,the user has additional options available from the previewscreen, such as automatic and manual crop, rotate pages,contrast, and darkness.
Note: For more information on purchasing a license,contact your Lexmark representative.
Scan Adjustments
Note: These settings are available only with the licensed version of the application. For more information onpurchasing a license, contact your Lexmark representative.
1 Select the radio button next to each adjustment to set the default value.
2 If you want to allow users to modify the default values from the printer, then select the check box next to theappropriate feature. If you want to prevent users from modifying the default settings, then clear the check box.
Note: When the check boxes are selected, users may access these features from the printer using both the ScanAdjustments section of the application or the Advanced Scan Preview. To help prevent Scan Adjustments from beingenabled in multiple locations, allow user modification only when the default value is set to Off.
Select To
Auto Crop Select whether to allow the printer to determine the best crop area for a scanned image.
Despeckle Select whether to allow the printer to remove specks automatically from a scanned image.
Deskew Select whether to allow the printer to straighten images automatically following a scan.
Configuring the applications
15

Select To
Blank PageRemoval
Select whether to allow the printer to remove blank pages automatically from a scan file.
Tolerance Select a Tolerance level for Blank Page Removal. This establishes the sensitivity of the printer indetermining which pages are considered blank (0 means more pages can be removed; 10 means fewerpages can be removed).
Custom Prompts
Note: These settings are available only with the licensed version of the application. For information on purchasing alicense, contact your Lexmark representative.
With custom prompts, you can require input from, or deliver messages to, users through the printer touch screen. Toadd a custom prompt:
1 Under Custom Prompts, select Enable Custom Prompts.
2 Click Add.
3 From the drop‑down list, select the type of custom prompt you want to add.
4 Configure the settings as necessary.
5 Click Save.
6 Use the up and down arrows to arrange the prompts in the order you want them to appear to the user.
You can add six types of prompts to each destination (required fields are in italics):
Select To
String Require users to enter a text string, such as a user ID.
• Name—This is the name of the prompt and is not displayed to the user on the printer touch screen.
• Prompt Text—This is the text that will appear on the printer touch screen.
• Default Value—Type a default value for the prompt response. Users can keep this response or create theirown.
• Minimum Length—This is the minimum number of characters users will be allowed to enter in response tothe Prompt Text.
• Maximum Length—This is the maximum number of characters users will be allowed to enter in responseto the Prompt Text.
• Password (Mask Characters)—If this is set to Yes, asterisks are displayed for each character entered.
Integer Require users to enter a numerical value, such as a PIN.
• Name—This is the name of the prompt and is not displayed to the user on the printer touch screen.
• Prompt Text—This is the text that will appear on the printer touch screen.
• Default Value—Type a default value for the prompt response. Users can keep this response or create theirown.
• Minimum—This is the minimum value users will be allowed to enter in response to the Prompt Text.
• Maximum—This is the maximum value users will be allowed to enter in response to the Prompt Text.
• Password (Mask Numbers)—If this is set to Yes, asterisks are displayed for each number entered.
Configuring the applications
16

Select To
Message Deliver a message on the printer touch screen. This requires no user input.
• Name—This is the name of the prompt and is not displayed to the user on the printer touch screen.
• Prompt Text—This is the text that will appear on the printer touch screen.
• Justification—This determines how the text will be justified on the printer touch screen (Center, Left, orRight).
MultipleSelect
Allow users to make multiple selections from a list of options.
• Name—This is the name of the prompt and is not displayed to the user on the printer touch screen.
• Prompt Text—This is the text that will appear on the printer touch screen.
• Items—This is the list of choices that will be displayed to users. Items in this field should be separated bycommas.
SingleSelect
Require users to make a single selection from a list of options.
• Name—This is the name of the prompt and is not displayed to the user on the printer touch screen.
• Prompt Text—This is the text that will appear on the printer touch screen.
• Items—This is the list of choices that will be displayed to users. Items in this field should be separated bycommas.
• Default Item Position (Starts at 0)—This determines which item will be the default selection. Type 0 toindicate that the first item in the list is the default. Leave this field blank if you want no default selection.
Boolean Require users to choose whether an option is true or false.
• Name—This is the name of the prompt and is not displayed to the user on the printer touch screen.
• Prompt Text—This is the text that will appear on the printer touch screen.
• Default Value—This determines the default value that will be displayed to users on the printer touch screen.Choose True or False.
Bar code
Notes:
• These settings are available only with the licensed version of the application. For information on purchasing alicense, contact your Lexmark representative.
• Bar code templates must be created using Bar Code Discovery. For more information on creating bar codetemplates, see the documentation that came with the application. If you need to purchase Bar Code Discovery,then contact your Lexmark representative.
• The application scans for bar codes before performing any other operations, including blank page removal.Remove any blank pages from the document before scanning if bar codes are enabled.
Select To
Enable bar codes on firstpage
Recognize bar code templates on the first page of a scanned document. Choose existing barcode templates from the Choose a template drop‑down list.
Enable bar codes on otherpages
Recognize bar code templates on subsequent pages of a scanned document. Choose existingbar code templates from the Choose a template drop‑down list.
Configuring the applications
17
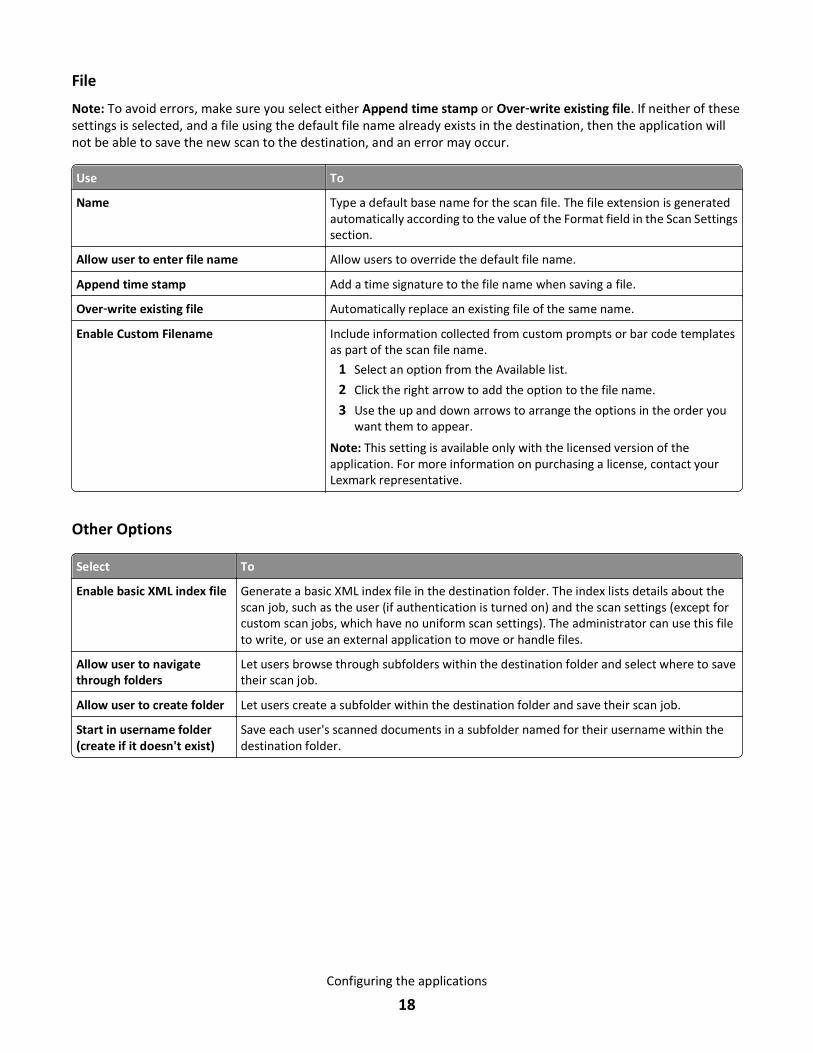
File
Note: To avoid errors, make sure you select either Append time stamp or Over‑write existing file. If neither of thesesettings is selected, and a file using the default file name already exists in the destination, then the application willnot be able to save the new scan to the destination, and an error may occur.
Use To
Name Type a default base name for the scan file. The file extension is generatedautomatically according to the value of the Format field in the Scan Settingssection.
Allow user to enter file name Allow users to override the default file name.
Append time stamp Add a time signature to the file name when saving a file.
Over‑write existing file Automatically replace an existing file of the same name.
Enable Custom Filename Include information collected from custom prompts or bar code templatesas part of the scan file name.
1 Select an option from the Available list.
2 Click the right arrow to add the option to the file name.
3 Use the up and down arrows to arrange the options in the order youwant them to appear.
Note: This setting is available only with the licensed version of theapplication. For more information on purchasing a license, contact yourLexmark representative.
Other Options
Select To
Enable basic XML index file Generate a basic XML index file in the destination folder. The index lists details about thescan job, such as the user (if authentication is turned on) and the scan settings (except forcustom scan jobs, which have no uniform scan settings). The administrator can use this fileto write, or use an external application to move or handle files.
Allow user to navigatethrough folders
Let users browse through subfolders within the destination folder and select where to savetheir scan job.
Allow user to create folder Let users create a subfolder within the destination folder and save their scan job.
Start in username folder(create if it doesn't exist)
Save each user's scanned documents in a subfolder named for their username within thedestination folder.
Configuring the applications
18

Scan Confirmation Page
Select To
IncludeThumbnail
Select whether to include a thumbnail of only the first page, all pages, or none at all (Off) with the scanconfirmation page.
Note: This setting is available only with the licensed version of the application. For more informationon purchasing a license, contact your Lexmark representative.
PrintConfirmationPage
Select whether to print a confirmation page, or select Allow User to Choose to prompt the user tochoose whether to print a confirmation page after the job is complete.
EmailConfirmation
E‑mail a confirmation page. To include the status of the associated scan in the subject line of the e-mailmessage, select Append scan status to Subject line.
Note: When Email Confirmation is used, the printer must be configured to use an e-mail server. Formore information, see the documentation that came with your printer.
Configuring LDAPIf your network uses LDAP, then the printer may be required to connect to the LDAP authentication server to retrievenetwork share or FTP path information for network destinations.
Notes:
• If your printer has been configured to use LDAP authentication for user access, then some or all of the neededsettings may have been configured previously.
• Modifying or deleting an existing LDAP profile can affect user access to the printer or to individual printerfunctions.
Address Book Setup
1 From the Embedded Web Server, click Settings > Security > Security Setup.
2 In the Advanced Security Setup section, click LDAP > Address Book Setup.
3 Configure or verify the following settings:
• Server Address—This is the IP address or host name of the LDAP server where authentication will be performed.
• Server Port—This is the port number the Embedded Web Server will use to communicate with the LDAP server.The default port is 389.
• Use SSL/TLS—Make sure you select None for this setting.
• LDAP Certificate Verification—Make sure you Select Allow for this setting.
• Use GSSAPI—Make sure the check box is cleared.
• Mail Attribute—This is the mail attribute of the LDAP server.
• Search Base—This is the search base used on the LDAP server.
• Search Timeout—This can be from 5 to 300 seconds.
• Use user credentials—Make sure the check box is cleared.
4 Click Submit to save changes or Reset Form to clear all fields.
Configuring the applications
19

Device Credentials
1 From the Embedded Web Server, click Settings > Security > Security Setup.
2 In the Advanced Security Setup section, click LDAP > Address Book Setup > Device Credentials.
3 Configure or verify the following settings:
• Anonymous LDAP Bind—Make sure this check box is cleared.
• Distinguished Name—This is the distinguished name of the print server or servers.
• MFP's Password—This is the password for the print servers.
4 Click Submit to save changes or Reset Form to clear all fields.
Specifying the Domain Search Order
Your printer will use the Domain Search Order list to locate devices and resources residing in different domains on yournetwork.
1 From the Embedded Web Server, click Settings > Network/Ports > TCP/IP.
2 In the Domain Search Order box, type the names of all domains found on your network.
3 Click Submit.
Configuring Legal FormsLegal Forms lets users quickly and easily print frequently used documents directly from the printer control panel. Afterconfiguring a bookmark that points to the location of an electronic file, users can access the form or other documentby touching the application icon on the printer home screen.
Configuring bookmarks1 Open a Web browser, and then type the printer IP address in the address field.
Note: View the printer IP address on the printer control panel home screen. The IP address appears as four setsof numbers separated by periods, such as 123.123.123.123.
2 Click Settings or Configuration.
3 Click Device Solutions > Solutions (eSF), or click Embedded Solutions.
4 In the Installed Solutions section, click the name of the application.
5 Click Configure > Add.
Note: You can also edit or delete existing bookmarks.
6 Type a name for the bookmark.
7 Adjust the remaining configuration settings as necessary.
Note: See the mouse-over help beside each field for a description of each configuration option.
8 Click Apply.
Configuring the applications
20

Configuring Scan to CourtScan to Court allows you to set a maximum file size for e-mail attachments, accommodate size limits that may exist oneither the sending or receiving mail servers, and handle files that exceed the maximum size.
Configuring the printer e‑mail functionThis application uses the e‑mail server setup and options from the e‑mail function of the printer. Before running theapplication, you must first complete the e‑mail server setup.
For more information on configuring the e‑mail function of the printer, see the User's Guide and other networkinginformation on the Software and Documentation CD that came with the printer.
Adding a destination1 Access the application configuration settings from the Embedded Web Server or MarkVision Professional.
2 Click Add.
3 Add a destination:
Note: For more information about the destination settings, see the mouse‑over help next to each field.
• Destination Name—Specify a unique name for the destination.
• Destination Address—Specify the default e‑mail address for the destination.
• E‑mail Subject—Specify the default subject of e‑mails sent to the destination.
• Attachment File Name—Specify the base file name for the documents you are scanning.
• Maximum File Size (KB)—Specify a value for maximum file size in KB for e-mail attachments.
Note: Each file contains at least one page. If any single page of a scanned document exceeds the maximumfile size, then the scanned document will not be sent. You must increase the maximum file size or adjust thescan settings to send the document.
• Attachment Exceeding Size—Select which action the printer should take if a file exceeds the maximum sizeallowed for e-mail attachments:
– Show warning and cancel sending e‑mail—This cancels the send action and alerts you that the file beingsent is too large.
– Split attachment and send the pieces in one e‑mail—This automatically divides the attachment into smallerfiles and sends them together in a single e-mail.
– Split attachment and send each piece in separate e‑mails—This automatically divides the attachment intosmaller files and sends them in separate e-mails.
Note: If you select JPEG as the format type, or if you select TIFF as the format type while Multi‑Page TIFF isturned off in the printer e-mail settings menu, then each file will contain only one page.
4 Do one of the following:
Using the Embedded Web Server• Click Restore Defaults to restore all fields to factory default settings.
• Click Reset to cancel changes to all fields and begin again.
Configuring the applications
21

• Click Apply to save changes.
Note: Reset and Apply are the only options available on certain devices.
Using MarkVision Professional• Click OK to save changes.
• Click Cancel to exit without saving changes.
Editing a destination1 Access the application configuration settings from the Embedded Web Server or MarkVision Professional.
2 Select the name of the destination you want to edit, and then click Edit.
3 Change the destination settings as necessary.
4 Do one of the following:
Using the Embedded Web Server• Click Restore Defaults to restore all fields to factory default settings.
• Click Reset to cancel changes to all fields and begin again.
• Click Apply to save changes.
Note: Reset and Apply are the only options available on certain devices.
Using MarkVision Professional• Click OK to save changes.
• Click Cancel to exit without saving changes.
Deleting a destination1 Access the application configuration settings from the Embedded Web Server or MarkVision Professional.
2 Select the name of the destination you want to delete, and then click Delete.
Note: If you want to delete multiple destinations, then press and hold the CTRL key, and then click the names ofthe destinations you want to delete.
3 Click Delete.
Configuring the Background and Idle Screen
Adding Background and Idle Screen imagesWhen selecting images to include for the home screen background or idle screen, resize or crop the source images tothe size you want before use. The application does not resize or crop images automatically.
Configuring the applications
22

Maximum file sizes and supported file types vary by printer model. For more information, see the mouse‑over help inthe Embedded Web Server.
1 Access the application configuration settings from the Embedded Web Server.
2 Under Idle Screen Images, click Add.
Note: You can also edit and delete existing images.
3 Enter an image name, and then upload the file you want to use.
4 Click Apply.
5 Repeat step 2 through step 4 to add more idle screen images. You can add up to ten images.
6 Under Idle Screen Settings, make sure Enable is selected, and then adjust the settings as necessary.
7 Under Home Screen Background, make sure Enable is selected.
8 Select one of the default images, or select Custom, and then upload the file you want to use.
9 Click Apply.
Exporting and importing configuration files
Exporting and importing a configuration using the Embedded Web ServerYou can export configuration settings into a text file that can then be imported and used to apply the settings to oneor more additional printers.
Exporting a configuration
1 From the Embedded Web Server, click Settings or Configuration.
2 Click Device Solutions > Solutions (eSF), or click Embedded Solutions.
3 From Installed Solutions, click the name of the application you want to configure.
4 Click Configure > Export.
5 Follow the instructions on the computer screen to save the configuration file, and then enter a unique file name oruse the default name.
Note: If a JVM Out of Memory error occurs, then repeat the export until the configuration file is saved.
Importing a configuration
1 From the Embedded Web Server, click Settings or Configuration.
2 Click Device Solutions > Solutions (eSF), or click Embedded Solutions.
3 From Installed Solutions, click the name of the application you want to configure.
4 Click Configure > Import.
5 Browse to the saved configuration file, and then load or preview it.
Note: If a timeout occurs and a blank screen appears, then refresh the browser, and then click Apply.
Configuring the applications
23
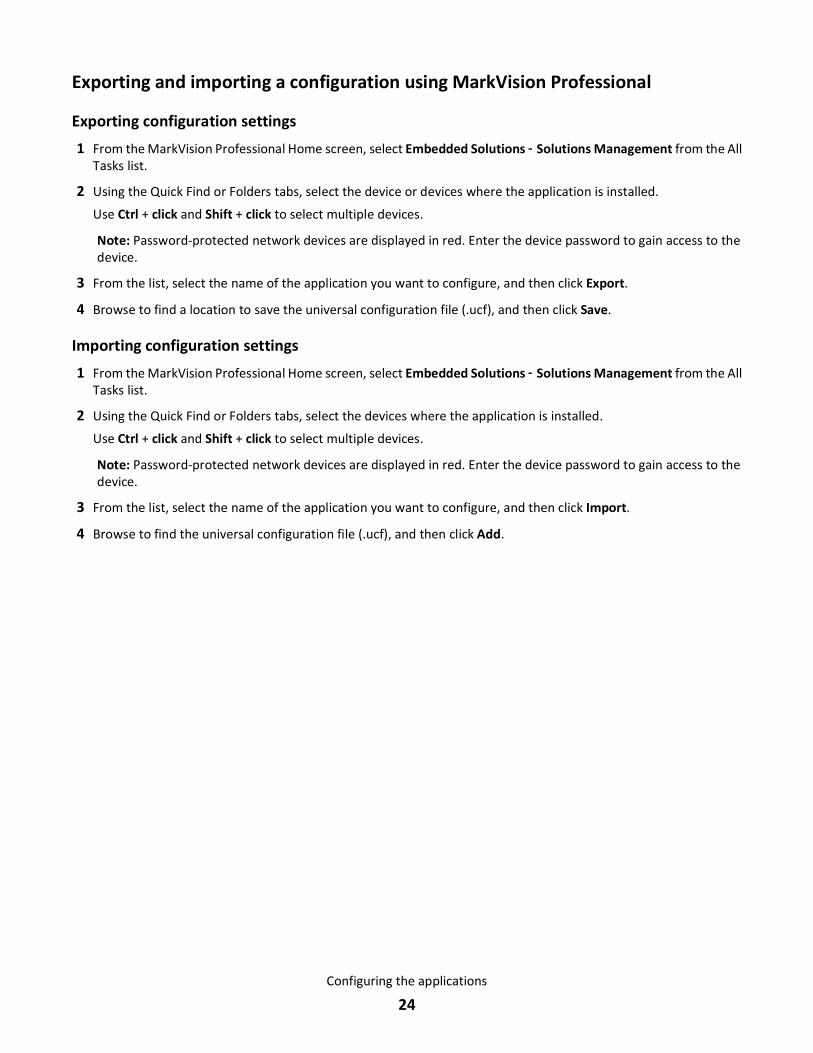
Exporting and importing a configuration using MarkVision Professional
Exporting configuration settings
1 From the MarkVision Professional Home screen, select Embedded Solutions ‑ Solutions Management from the AllTasks list.
2 Using the Quick Find or Folders tabs, select the device or devices where the application is installed.
Use Ctrl + click and Shift + click to select multiple devices.
Note: Password-protected network devices are displayed in red. Enter the device password to gain access to thedevice.
3 From the list, select the name of the application you want to configure, and then click Export.
4 Browse to find a location to save the universal configuration file (.ucf), and then click Save.
Importing configuration settings
1 From the MarkVision Professional Home screen, select Embedded Solutions ‑ Solutions Management from the AllTasks list.
2 Using the Quick Find or Folders tabs, select the devices where the application is installed.
Use Ctrl + click and Shift + click to select multiple devices.
Note: Password-protected network devices are displayed in red. Enter the device password to gain access to thedevice.
3 From the list, select the name of the application you want to configure, and then click Import.
4 Browse to find the universal configuration file (.ucf), and then click Add.
Configuring the applications
24

Using the applications
Using Scan to Case Manager
Scanning documents at the printer1 Load the document into the scanner.
Note: Documents may be loaded into the scanner in multiple ways. For information on the different methods ofloading documents into the scanner, see the User's Guide that came with the printer.
2 Touch the application icon. If prompted, enter the user name and password used to access the printer. Contactyour system support person for login information.
3 Select the destination where you want to receive the scanned document. If prompted, enter the user name andpassword required to access the destination. Contact your system support person for login information.
4 Some additional job options may be available depending on how the application has been configured. Follow theinstructions on the screen to update the options. Contact your system support person for more information oneach option.
5 Touch Scan It. Depending on how the application has been configured, you may have the option to preview andmake adjustments to scanned pages.
6 To scan additional documents, load the next document into the scanner and select one of the following from theconfirmation screen:
• Touch Yes, to same destination to scan the document to the previous destination.
• Touch Yes, to a different destination to scan the document to a different destination.
• Touch No to finish the operation and return to the printer Home screen.
Using Legal Forms
Bookmarking forms
Adding a bookmark using the printer control panel
1 From the printer home screen, touch the application icon.
2 If necessary, touch Options.
3 Touch .
4 Type a name for the new bookmark. This name will be displayed when selecting a form to print.
5 If you want to use a PIN to limit access to the bookmark, then touch Confidential, select On, and then touch .
6 Touch .
Using the applications
25

7 If prompted, enter a four‑digit PIN, and then touch
8 Touch the location of the file you want to bookmark, and then touch .
• Network—The form is on a network share.
• FTP—The form is on an FTP site.
• HTTP—The form is on a Web page.
• HTTPS—The form is on a secure Web page.
9 If you selected HTTP or HTTPS, then enter the URL of the bookmark.
10 If you selected Network or FTP, then select an authentication option, and then touch .
Authentication options include the following:
• Guest(Network Folder)/Anonymous—This does not require users to be authenticated.
• Use device authentication credential—This requires users to enter the authentication credentials as specifiedon the printer.
• Prompt for username and password—This requires users to enter their system user name and password.
• Use static username and password—This requires administrators to specify a static user name and passwordwhen they configure the bookmark. Users will not be prompted to enter these credentials at the printer.
11 Follow the instructions on the touch screen to enter the location of the file you want to bookmark. Use toprogress through the screens.
Editing or deleting a bookmark using the printer control panel
1 From the printer home screen, touch the application icon.
2 Touch the bookmark you want to edit or delete.
3 If necessary, touch Options.
4 Touch to edit a bookmark or to delete a bookmark.
5 Follow the instructions on the touch screen to edit or delete the bookmark or bookmarks. Use to progressthrough the screens.
Note: If the bookmark is confidential, then you will be prompted for the four‑digit PIN.
Configuring folders for bookmarks
Adding a folder using the printer control panel
1 From the home screen of the printer control panel, touch the application icon.
2 If necessary, touch Options.
3 Touch .
4 Enter a name for the folder, and then touch .
The folder will appear in the list of bookmarks.
Using the applications
26
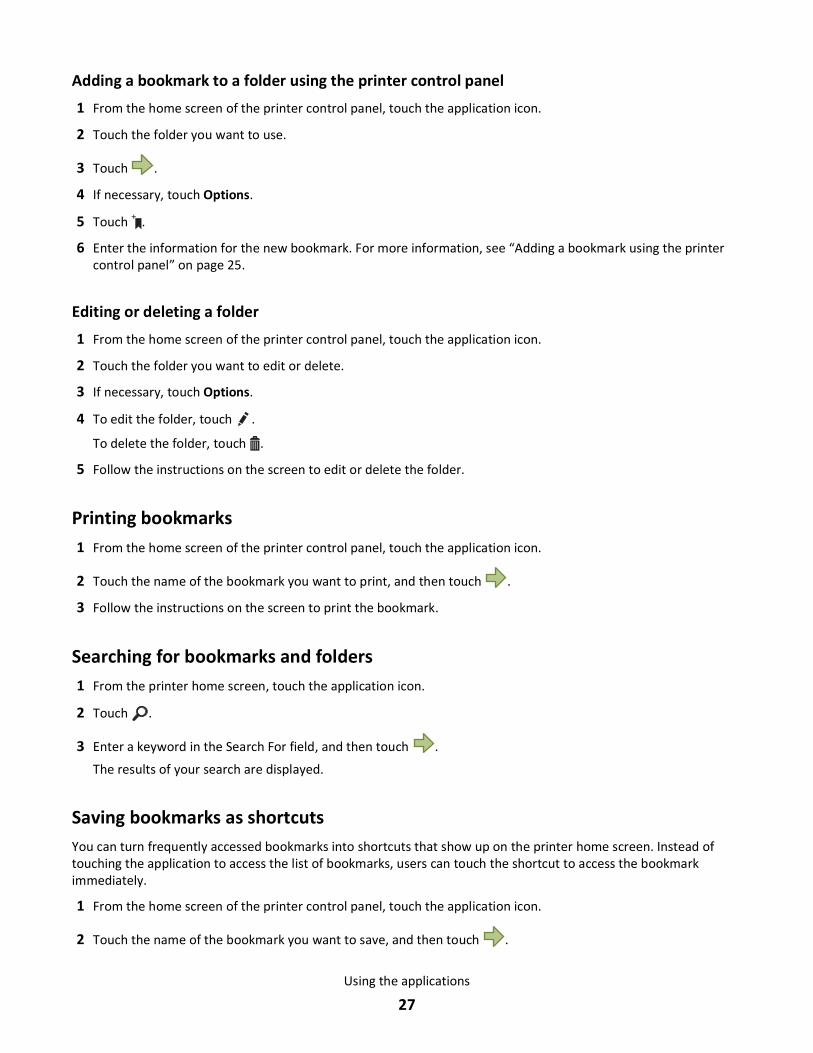
Adding a bookmark to a folder using the printer control panel
1 From the home screen of the printer control panel, touch the application icon.
2 Touch the folder you want to use.
3 Touch .
4 If necessary, touch Options.
5 Touch .
6 Enter the information for the new bookmark. For more information, see “Adding a bookmark using the printercontrol panel” on page 25.
Editing or deleting a folder
1 From the home screen of the printer control panel, touch the application icon.
2 Touch the folder you want to edit or delete.
3 If necessary, touch Options.
4 To edit the folder, touch .
To delete the folder, touch .
5 Follow the instructions on the screen to edit or delete the folder.
Printing bookmarks1 From the home screen of the printer control panel, touch the application icon.
2 Touch the name of the bookmark you want to print, and then touch .
3 Follow the instructions on the screen to print the bookmark.
Searching for bookmarks and folders1 From the printer home screen, touch the application icon.
2 Touch .
3 Enter a keyword in the Search For field, and then touch .
The results of your search are displayed.
Saving bookmarks as shortcutsYou can turn frequently accessed bookmarks into shortcuts that show up on the printer home screen. Instead oftouching the application to access the list of bookmarks, users can touch the shortcut to access the bookmarkimmediately.
1 From the home screen of the printer control panel, touch the application icon.
2 Touch the name of the bookmark you want to save, and then touch .
Using the applications
27

3 Touch .
4 Enter the name for the shortcut as you want it to appear on the printer home screen, and then touch .
5 Select an icon graphic for the shortcut, and then touch .
6 From the confirmation screen, touch .
7 Touch to print the shortcut, or touch .
Note: The icon appears on the printer home screen. Because of space constraints, users may need to scrollthrough the printer home screen to access all of the available icons.
Using Scan to Court
Scanning and sending documentsYou can use eMail Size Limiter to scan and E‑mail documents directly from the printer.
1 Load the document into the automatic document feeder (ADF) or place on the scanner glass.
For more information about scanning documents, see the User's Guide that came with the printer.
2 From the printer home screen, touch the eMail Size Limiter icon. A list of possible destinations will be displayed.
3 From the list, select the destination you wish to send the file to. After selecting a destination you can:
• Verify the default E-mail address.
• Select the default E‑mail address and then use the displayed keyboard to make changes.
• Search the printer address book for previously stored E-mail addresses.
• Touch Next Address to add additional recipients.
Note: If the destination you wish to send your file to does not appear in the list of possible destinations, contactyour system support person.
4 After making any needed recipient changes, touch E‑mail It. The printer will scan the first page of your document.
5 Touch Scan the Next Page to scan each additional page, or Finish the Job, to finish and send your document.
Note: The size of the scanned file can affect whether or not the file is delivered successfully. Contact yoursystem support person for more information about file size limits and delivery options.
Using Background and Idle Screen
Changing the background image using the printer control panel1 From the home screen, touch Change Background.
2 Select the background you want to use, and then touch OK.
Using the applications
28

Troubleshooting
Scan to Case Manager troubleshooting
The application icon is missing from the home screenFor the application to work, at least one valid destination must be enabled. If no valid destinations are available, thenthe application icon will disappear from the home screen.
To display the application icon when no destinations are available:
1 From the application configuration settings, under Home Screen Button, select Always show button under DisplayOption.
2 Click Apply.
An application error has occurredTry one or more of the following:
CHECK THE SYSTEM LOG
1 Obtain the printer IP address:
• From the printer control panel home screen
• From the TCP/IP section in the Network/Ports menu
• By printing a network setup page or menu settings page, and then finding the TCP/IP section
Note: An IP address appears as four sets of numbers separated by periods, such as 123.123.123.123.
2 Open a Web browser, and then type the printer IP address in the address field.
The Embedded Web Server page appears.
3 From the navigation menu on the left, click Settings or Configuration.
4 Click Device Solutions > Solutions (eSF), or click Embedded Solutions.
5 Click System tab > Log.
6 From the Filter menu, select an application status.
7 From the application menu, select an application, and then click Submit.
ADJUST THE SCAN SETTINGS
Note: This applies only to applications that support scanning.
In the application configuration settings, select a lower scan resolution. You can select Off or a lower resolution fromthe Scan Color drop‑down menu.
Troubleshooting
29

CONTACT YOUR SOLUTIONS PROVIDER
If you still cannot isolate the problem, then contact your solutions provider for additional help.
A network destination stopped working or is invalidTry one or more of the following:
MAKE SURE THE PRINTER AUTHENTICATION IS CONFIGURED
If the application is configured to use MFP authentication credentials, then the printer authentication settings mustbe configured from the Embedded Web Server.
For more information on configuring the printer authentication settings, see the Embedded Web ServerAdministrator's Guide available on www.lexmark.com.
MAKE SURE DESTINATION IS SHARED AND HAS A VALID NETWORK ADDRESS
Check that the folder or source file is set to be shared across the network.
If the destination has been moved, then the network address may have changed. The destination network addresscan be accessed from the Embedded Web Server.
MAKE SURE THE PRINTER IS CONNECTED TO THE NETWORK
Make sure that all appropriate network cables are securely connected and that the network settings of the printerare correctly configured. For information on networking the printer, see the Networking Guide on the Software andDocumentation CD that came with the printer.
IF THE SOURCE FILE AND PRINTER RESIDE IN DIFFERENT DOMAINS, THEN MAKE SURE THE DOMAIN
INFORMATION IS SPECIFIED
If the source file exists within a different domain than the printer, then you can edit the destination from theapplication configuration page and enter the appropriate domain information in the Network Address and NetworkDomain fields. If you do not know the network address of the computer where your source file resides, then consultyour system support person.
You can also add the domain name to the Domain Search Order list under the printer network setup.
CHECK THE SYSTEM LOG FOR RELEVANT DETAILS
1 Obtain the printer IP address:
• From the printer control panel home screen
• From the TCP/IP section in the Network/Ports menu
• By printing a network setup page or menu settings page, and then finding the TCP/IP section
Note: An IP address appears as four sets of numbers separated by periods, such as 123.123.123.123.
2 Open a Web browser, and then type the printer IP address in the address field.
The Embedded Web Server page appears.
3 From the navigation menu on the left, click Settings or Configuration.
Troubleshooting
30

4 Click Device Solutions > Solutions (eSF), or click Embedded Solutions.
5 Click System tab > Log.
6 From the Filter menu, select an application status.
7 From the Application menu, select an application, and then click Submit.
Printer cannot scan to the selected destination
MAKE SURE THE DESTINATION IS VALID
Verify that the destination is valid in the application configuration settings.
If the destination has been moved, then the network address may have changed. The destination network addresscan be accessed from the Embedded Web Server.
IF THE PRINTER AND DESTINATION RESIDE IN DIFFERENT DOMAINS, THEN MAKE SURE THE DOMAIN
INFORMATION IS SPECIFIED
If the destination exists within a different Windows domain than the printer, then you can edit the destination fromthe application configuration page and enter the appropriate Windows domain information in the domain field aspart of the Network Folder Address. You can also add the domain name to the Domain Search Order list under theprinter network setup.
MAKE SURE THE FIREWALL SOFTWARE IS ALLOWING COMMUNICATION
If the destination resides on a computer that uses a newer version of the Windows operating system (Windows XPor later), and the Windows Firewall is enabled, then the printer may have difficulty sending information to thedestination if the destination and the printer reside on different subnets. The Windows Firewall must either beconfigured to allow communication with the subnet the printer resides on, or the destination should be set up onthe same subnet as the printer. For more information, contact your system support person.
MAKE SURE A FILE WITH THE DEFAULT FILE NAME DOES NOT ALREADY EXIST IN THE DESTINATION
If the three configuration settings for the File Name section of the application configuration page are not selected(allow user to enter file name; append time stamp; overwrite existing file), and a file using the default file namealready exists within the destination, then there will be no method in place to distinguish the newly scanned file fromthe file present in the destination. The printer will not be able to overwrite the old file, the new file will not receivea time stamp to differentiate it from the old file, and the user will not be able to give the new file a different name.In this case, the old file must either be removed from the destination, or one of the previously mentioned settingsmust be turned on.
MAKE SURE THE NETWORK IS FUNCTIONING AND THE PRINTER CAN COMMUNICATE
Verify all network connections and that the network settings of the printer are configured appropriately. Forinformation on networking the printer, see the Networking Guide on the Software and Documentation CD that camewith the printer.
Troubleshooting
31

FOR NETWORKS USING LDAP AUTHENTICATION, MAKE SURE LDAP SETTINGS HAVE BEEN CONFIGURED
CORRECTLY
Verify that LDAP settings are configured appropriately in your printer setup, and in the setup dialog. For moreinformation on LDAP settings, contact your system support person.
MAKE SURE YOU HAVE PERMISSION TO SAVE SCANS TO THIS DESTINATION
On the application Edit Destination screen, clear the contents of the Path Suffix field; or on the destination server,change the user home folder to match the contents of the Path Suffix field.
An error occurs when opening a secure PDF file
MAKE SURE THE PDF VERSION FOR THE DEVICE IS NOT SET TO A‑1A
1 From the Embedded Web Server, click Settings or Configuration.
2 Click E‑mail/FTP Settings > E‑mail Settings.
3 Under E‑mail Settings, select a PDF version other than A‑1a.
Using the application in a Novell network environmentIn order to function correctly in a Novell network environment, the network server must have the following installed:
• Novell OES SuSe 10 (Linux)
• NetWare CIFS protocol (CIFS.nlm)
In the Novell Create User dialog, the following must be configured:
• Set simple password
• Create home directory
From the adding or editing a destination configuration screen, use the static username and password authenticationoption.
Legal Forms troubleshooting
Forms are not available or are not workingThese are possible solutions. Try one or more of the following:
MAKE SURE THE BOOKMARK IS CONFIGURED PROPERLY
For information on configuring bookmarks, see “Configuring Legal Forms” on page 20.
Troubleshooting
32

MAKE SURE THE BOOKMARK IS POINTING TO THE CORRECT LOCATION
Verify that the form resides in the correct network location. The printer will not validate the location that thebookmark points to. As a result, if the URL or network location that was specified when the bookmark was createdis incorrect, the printer will not be able to access the document.
Some bookmarks do not appear in an exported configuration file
MORE THAN 60 BOOKMARKS CANNOT BE EXPORTED IN A .UCF FILE
Only up to 60 bookmarks can be exported in a single .ucf file. Any bookmarks that are not included in the file mustbe added to the printer manually.
Scan to Court troubleshooting
Cannot send an attachmentCheck any of the following:
• Maximum File Size—Each file contains at least one page. If any single page of a scanned document exceeds themaximum file size, then the scanned document will not be sent. You must increase the maximum file size or adjustthe scan settings to send the document.
• Attachment Exceeding Size—Select which action the printer should take if a file exceeds the maximum size allowedfor e‑mail attachments.
• E‑mail settings—Make sure that the printer e-mail settings are correctly configured. For more information aboutconfiguring e-mail settings, see the Software and Documentation CD or User's Guide that came with the printer.
Background and Idle Screen troubleshooting
“There are no images to display” error message appears
For Idle Screen images
From the application configuration settings in the Embedded Web Server:
• Make sure there is a list of image files under Idle Screen Images.
• Make sure Enable is selected under Idle Screen Images.
• Make sure the file size and type are supported. For more information, see the mouse‑over help in the EmbeddedWeb Server.
• Click Apply to make sure the configuration has been saved.
Troubleshooting
33

For the Background image
From the application configuration settings in the Embedded Web Server:
• Make sure Enable is selected under Home Screen Background.
• If you have selected a custom image, then click View Current Value to make sure the image has been properlyloaded.
• If you load a custom image, then make sure the file size and type are supported. For more information, see themouse‑over help in the Embedded Web Server.
• Click Apply to make sure the configuration has been saved.
“Image size exceeds limit” error message appearsIf the “Image size exceeds limit” appears, then verify that each image file stored on the USB drive or in the EmbeddedWeb Server is no larger than the specified limit.
License errorTry one or more of the following:
MAKE SURE THE APPLICATION IS LICENSED
The application requires a license to run. For more information on licensing the printer, see “Licensing theapplications” on page 6.
For more information on purchasing a license, contact your Lexmark representative.
MAKE SURE THE LICENSE IS UP‑TO‑DATE
Make sure the license for the application has not yet expired. Check the license expiry date using the Embedded WebServer or MarkVision Professional.
MAKE SURE THE LICENSE SERVICE IS INSTALLED AND RUNNING
For more information on licensing the printer, see “Licensing the applications” on page 6.
Troubleshooting
34

Appendix
Checking which version of the Embedded Solutions Frameworkis installed on a printer1 Obtain the printer IP address:
• From the printer control panel home screen
• From the TCP/IP section in the Network/Ports menu
• By printing a network setup page or menu settings page, and then finding the TCP/IP section
Note: An IP address appears as four sets of numbers separated by periods, such as 123.123.123.123.
2 Open a Web browser, and then type the printer IP address in the address field.
3 From the Embedded Web Server, click Reports > Device Settings.
4 Scroll down until you see Embedded Solutions (usually found near the bottom).
5 In the Embedded Solutions section, see the value next to Framework =. This signifies the installed version.
Note: To view the complete list of supported printers for each version of the Embedded Web Server, see theReadMe file.
Appendix
35

NoticesThis product includes software developed by the Apache Software Foundation (http://www.apache.org).
Apache License Version 2.0, January 2004
http://www.apache.org/licenses/
TERMS AND CONDITIONS FOR USE, REPRODUCTION, AND DISTRIBUTION
1 Definitions.
"License" shall mean the terms and conditions for use, reproduction, and distribution as defined by Sections 1through 9 of this document.
"Licensor" shall mean the copyright owner or entity authorized by the copyright owner that is granting the License.
"Legal Entity" shall mean the union of the acting entity and all other entities that control, are controlled by, or areunder common control with that entity. For the purposes of this definition, "control" means (i) the power, director indirect, to cause the direction or management of such entity, whether by contract or otherwise, or (ii) ownershipof fifty percent (50%) or more of the outstanding shares, or (iii) beneficial ownership of such entity.
"You" (or "Your") shall mean an individual or Legal Entity exercising permissions granted by this License.
"Source" form shall mean the preferred form for making modifications, including but not limited to software sourcecode, documentation source, and configuration files.
"Object" form shall mean any form resulting from mechanical transformation or translation of a Source form,including but not limited to compiled object code, generated documentation, and conversions to other media types.
"Work" shall mean the work of authorship, whether in Source or Object form, made available under the License,as indicated by a copyright notice that is included in or attached to the work (an example is provided in the Appendixbelow).
"Derivative Works" shall mean any work, whether in Source or Object form, that is based on (or derived from) theWork and for which the editorial revisions, annotations, elaborations, or other modifications represent, as a whole,an original work of authorship. For the purposes of this License, Derivative Works shall not include works that remainseparable from, or merely link (or bind by name) to the interfaces of, the Work and Derivative Works thereof.
"Contribution" shall mean any work of authorship, including the original version of the Work and any modificationsor additions to that Work or Derivative Works thereof, that is intentionally submitted to Licensor for inclusion inthe Work by the copyright owner or by an individual or Legal Entity authorized to submit on behalf of the copyrightowner. For the purposes of this definition, "submitted" means any form of electronic, verbal, or writtencommunication sent to the Licensor or its representatives, including but not limited to communication on electronicmailing lists, source code control systems, and issue tracking systems that are managed by, or on behalf of, theLicensor for the purpose of discussing and improving the Work, but excluding communication that is conspicuouslymarked or otherwise designated in writing by the copyright owner as "Not a Contribution."
"Contributor" shall mean Licensor and any individual or Legal Entity on behalf of whom a Contribution has beenreceived by Licensor and subsequently incorporated within the Work.
2 Grant of Copyright License. Subject to the terms and conditions of this License, each Contributor hereby grants toYou a perpetual, worldwide, non-exclusive, no-charge, royalty-free, irrevocable copyright license to reproduce,prepare Derivative Works of, publicly display, publicly perform, sublicense, and distribute the Work and suchDerivative Works in Source or Object form.
3 Grant of Patent License. Subject to the terms and conditions of this License, each Contributor hereby grants to Youa perpetual, worldwide, non-exclusive, no-charge, royalty-free, irrevocable (except as stated in this section) patentlicense to make, have made, use, offer to sell, sell, import, and otherwise transfer the Work, where such license
Notices
36

applies only to those patent claims licensable by such Contributor that are necessarily infringed by theirContribution(s) alone or by combination of their Contribution(s) with the Work to which such Contribution(s) wassubmitted. If You institute patent litigation against any entity (including a cross-claim or counterclaim in a lawsuit)alleging that the Work or a Contribution incorporated within the Work constitutes direct or contributory patentinfringement, then any patent licenses granted to You under this License for that Work shall terminate as of thedate such litigation is filed.
4 Redistribution. You may reproduce and distribute copies of the Work or Derivative Works thereof in any medium,with or without modifications, and in Source or Object form, provided that You meet the following conditions:
a (a) You must give any other recipients of the Work or Derivative Works a copy of this License; and
b (b) You must cause any modified files to carry prominent notices stating that You changed the files; and
c (c) You must retain, in the Source form of any Derivative Works that You distribute, all copyright, patent,trademark, and attribution notices from the Source form of the Work, excluding those notices that do not pertainto any part of the Derivative Works; and
d (d) If the Work includes a "NOTICE" text file as part of its distribution, then any Derivative Works that Youdistribute must include a readable copy of the attribution notices contained within such NOTICE file, excludingthose notices that do not pertain to any part of the Derivative Works, in at least one of the following places:within a NOTICE text file distributed as part of the Derivative Works; within the Source form or documentation,if provided along with the Derivative Works; or, within a display generated by the Derivative Works, if andwherever such third-party notices normally appear. The contents of the NOTICE file are for informationalpurposes only and do not modify the License. You may add Your own attribution notices within Derivative Worksthat You distribute, alongside or as an addendum to the NOTICE text from the Work, provided that suchadditional attribution notices cannot be construed as modifying the License.
You may add Your own copyright statement to Your modifications and may provide additional or different licenseterms and conditions for use, reproduction, or distribution of Your modifications, or for any such Derivative Worksas a whole, provided Your use, reproduction, and distribution of the Work otherwise complies with the conditionsstated in this License.
5 Submission of Contributions. Unless You explicitly state otherwise, any Contribution intentionally submitted forinclusion in the Work by You to the Licensor shall be under the terms and conditions of this License, without anyadditional terms or conditions. Notwithstanding the above, nothing herein shall supersede or modify the terms ofany separate license agreement you may have executed with Licensor regarding such Contributions.
6 Trademarks. This License does not grant permission to use the trade names, trademarks, service marks, or productnames of the Licensor, except as required for reasonable and customary use in describing the origin of the Workand reproducing the content of the NOTICE file.
7 Disclaimer of Warranty. Unless required by applicable law or agreed to in writing, Licensor provides the Work (andeach Contributor provides its Contributions) on an "AS IS" BASIS, WITHOUT WARRANTIES OR CONDITIONS OF ANYKIND, either express or implied, including, without limitation, any warranties or conditions of TITLE, NON-INFRINGEMENT, MERCHANTABILITY, or FITNESS FOR A PARTICULAR PURPOSE. You are solely responsible fordetermining the appropriateness of using or redistributing the Work and assume any risks associated with Yourexercise of permissions under this License.
8 Limitation of Liability. In no event and under no legal theory, whether in tort (including negligence), contract, orotherwise, unless required by applicable law (such as deliberate and grossly negligent acts) or agreed to in writing,shall any Contributor be liable to You for damages, including any direct, indirect, special, incidental, or consequentialdamages of any character arising as a result of this License or out of the use or inability to use the Work (includingbut not limited to damages for loss of goodwill, work stoppage, computer failure or malfunction, or any and allother commercial damages or losses), even if such Contributor has been advised of the possibility of such damages.
9 Accepting Warranty or Additional Liability. While redistributing the Work or Derivative Works thereof, You maychoose to offer, and charge a fee for, acceptance of support, warranty, indemnity, or other liability obligationsand/or rights consistent with this License. However, in accepting such obligations, You may act only on Your ownbehalf and on Your sole responsibility, not on behalf of any other Contributor, and only if You agree to indemnify,
Notices
37

defend, and hold each Contributor harmless for any liability incurred by, or claims asserted against, such Contributorby reason of your accepting any such warranty or additional liability.
END OF TERMS AND CONDITIONS
APPENDIX: How to apply the Apache License to your work.
To apply the Apache License to your work, attach the following boilerplate notice, with the fields enclosed by brackets"[]" replaced with your own identifying information. (Don't include the brackets!) The text should be enclosed in theappropriate comment syntax for the file format. We also recommend that a file or class name and description of purposebe included on the same "printed page" as the copyright notice for easier identification within third-party archives.
Copyright [yyyy] [name of copyright owner]
Licensed under the Apache License, Version 2.0 (the "License"); you may not use this file except in compliance with theLicense. You may obtain a copy of the License at
http://www.apache.org/licenses/LICENSE-2.0
Unless required by applicable law or agreed to in writing, software distributed under the License is distributed on an"AS IS" BASIS, WITHOUT WARRANTIES OR CONDITIONS OF ANY KIND, either express or implied. See the License for thespecific language governing permissions and limitations under the License.
GNU LESSER GENERAL PUBLIC LICENSEVersion 2.1, February 1999
Copyright (C) 1991, 1999 Free Software Foundation, Inc. 59 Temple Place, Suite 330, Boston, MA 02111-1307 USA
Everyone is permitted to copy and distribute verbatim copies of this license document, but changing it is not allowed.
[This is the first released version of the Lesser GPL. It also counts as the successor of the GNU Library Public License,version 2, hence the version number 2.1.]
Preamble
The licenses for most software are designed to take away your freedom to share and change it. By contrast, the GNUGeneral Public Licenses are intended to guarantee your freedom to share and change free software--to make sure thesoftware is free for all its users.
This license, the Lesser General Public License, applies to some specially designated software packages--typicallylibraries--of the Free Software Foundation and other authors who decide to use it. You can use it too, but we suggestyou first think carefully about whether this license or the ordinary General Public License is the better strategy to usein any particular case, based on the explanations below.
When we speak of free software, we are referring to freedom of use, not price. Our General Public Licenses are designedto make sure that you have the freedom to distribute copies of free software (and charge for this service if you wish);that you receive source code or can get it if you want it; that you can change the software and use pieces of it in newfree programs; and that you are informed that you can do these things.
To protect your rights, we need to make restrictions that forbid distributors to deny you these rights or to ask you tosurrender these rights. These restrictions translate to certain responsibilities for you if you distribute copies of thelibrary or if you modify it.
For example, if you distribute copies of the library, whether gratis or for a fee, you must give the recipients all the rightsthat we gave you. You must make sure that they, too, receive or can get the source code. If you link other code withthe library, you must provide complete object files to the recipients, so that they can relink them with the library aftermaking changes to the library and recompiling it. And you must show them these terms so they know their rights.
Notices
38

We protect your rights with a two-step method: (1) we copyright the library, and (2) we offer you this license, whichgives you legal permission to copy, distribute and/or modify the library.
To protect each distributor, we want to make it very clear that there is no warranty for the free library. Also, if thelibrary is modified by someone else and passed on, the recipients should know that what they have is not the originalversion, so that the original author's reputation will not be affected by problems that might be introduced by others.
Finally, software patents pose a constant threat to the existence of any free program. We wish to make sure that acompany cannot effectively restrict the users of a free program by obtaining a restrictive license from a patent holder.Therefore, we insist that any patent license obtained for a version of the library must be consistent with the full freedomof use specified in this license.
Most GNU software, including some libraries, is covered by the ordinary GNU General Public License. This license, theGNU Lesser General Public License, applies to certain designated libraries, and is quite different from the ordinaryGeneral Public License. We use this license for certain libraries in order to permit linking those libraries into non-freeprograms.
When a program is linked with a library, whether statically or using a shared library, the combination of the two islegally speaking a combined work, a derivative of the original library. The ordinary General Public License thereforepermits such linking only if the entire combination fits its criteria of freedom. The Lesser General Public License permitsmore lax criteria for linking other code with the library.
We call this license the "Lesser" General Public License because it does Less to protect the user's freedom than theordinary General Public License. It also provides other free software developers Less of an advantage over competingnon-free programs. These disadvantages are the reason we use the ordinary General Public License for many libraries.However, the Lesser license provides advantages in certain special circumstances.
For example, on rare occasions, there may be a special need to encourage the widest possible use of a certain library,so that it becomes a de-facto standard. To achieve this, nonfree programs must be allowed to use the library. A morefrequent case is that a free library does the same job as widely used non-free libraries. In this case, there is little to gainby limiting the free library to free software only, so we use the Lesser General Public License.
In other cases, permission to use a particular library in non-free programs enables a greater number of people to usea large body of free software. For example, permission to use the GNU C Library in non-free programs enables manymore people to use the whole GNU operating system, as well as its variant, the GNU/Linux operating system.
Although the Lesser General Public License is Less protective of the users' freedom, it does ensure that the user of aprogram that is linked with the Library has the freedom and the wherewithal to run that program using a modifiedversion of the Library.
The precise terms and conditions for copying, distribution and modification follow. Pay close attention to the differencebetween a "work based on the library" and a "work that uses the library". The former contains code derived from thelibrary, whereas the latter must be combined with the library in order to run.
GNU LESSER GENERAL PUBLIC LICENSE
TERMS AND CONDITIONS FOR COPYING, DISTRIBUTION AND MODIFICATION
0. This License Agreement applies to any software library or other program which contains a notice placed by thecopyright holder or other authorized party saying it may be distributed under the terms of this Lesser General PublicLicense (also called "this License"). Each licensee is addressed as "you".
A "library" means a collection of software functions and/or data prepared so as to be conveniently linked withapplication programs (which use some of those functions and data) to form executables.
The "Library", below, refers to any such software library or work which has been distributed under these terms. A "workbased on the Library" means either the Library or any derivative work under copyright law: that is to say, a workcontaining the Library or a portion of it, either verbatim or with modifications and/or translated straightforwardly intoanother language. (Hereinafter, translation is included without limitation in the term "modification".)
Notices
39

"Source code" for a work means the preferred form of the work for making modifications to it. For a library, completesource code means all the source code for all modules it contains, plus any associated interface definition files, plusthe scripts used to control compilation and installation of the library.
Activities other than copying, distribution and modification are not covered by this License; they are outside its scope.The act of running a program using the Library is not restricted, and output from such a program is covered only if itscontents constitute a work based on the Library (independent of the use of the Library in a tool for writing it). Whetherthat is true depends on what the Library does and what the program that uses the Library does.
1 You may copy and distribute verbatim copies of the Library's complete source code as you receive it, in any medium,provided that you conspicuously and appropriately publish on each copy an appropriate copyright notice and disclaimerof warranty; keep intact all the notices that refer to this License and to the absence of any warranty; and distribute acopy of this License along with the Library.
You may charge a fee for the physical act of transferring a copy, and you may at your option offer warranty protectionin exchange for a fee.
2 You may modify your copy or copies of the Library or any portion of it, thus forming a work based on the Library, andcopy and distribute such modifications or work under the terms of Section 1 above, provided that you also meet all ofthese conditions:
a The modified work must itself be a software library.
b You must cause the files modified to carry prominent notices stating that you changed the files and the date of anychange.
c You must cause the whole of the work to be licensed at no charge to all third parties under the terms of this License.
d If a facility in the modified Library refers to a function or a table of data to be supplied by an application program thatuses the facility, other than as an argument passed when the facility is invoked, then you must make a good faith effortto ensure that, in the event an application does not supply such function or table, the facility still operates, and performswhatever part of its purpose remains meaningful.
(For example, a function in a library to compute square roots has a purpose that is entirely well-defined independentof the application. Therefore, Subsection 2d requires that any application-supplied function or table used by thisfunction must be optional: if the application does not supply it, the square root function must still compute squareroots.)
These requirements apply to the modified work as a whole. If identifiable sections of that work are not derived fromthe Library, and can be reasonably considered independent and separate works in themselves, then this License, andits terms, do not apply to those sections when you distribute them as separate works. But when you distribute thesame sections as part of a whole which is a work based on the Library, the distribution of the whole must be on theterms of this License, whose permissions for other licensees extend to the entire whole, and thus to each and everypart regardless of who wrote it.
Thus, it is not the intent of this section to claim rights or contest your rights to work written entirely by you; rather, theintent is to exercise the right to control the distribution of derivative or collective works based on the Library.
In addition, mere aggregation of another work not based on the Library with the Library (or with a work based on theLibrary) on a volume of a storage or distribution medium does not bring the other work under the scope of this License.
3 You may opt to apply the terms of the ordinary GNU General Public License instead of this License to a given copy ofthe Library. To do this, you must alter all the notices that refer to this License, so that they refer to the ordinary GNUGeneral Public License, version 2, instead of to this License. (If a newer version than version 2 of the ordinary GNUGeneral Public License has appeared, then you can specify that version instead if you wish.) Do not make any otherchange in these notices.
Once this change is made in a given copy, it is irreversible for that copy, so the ordinary GNU General Public Licenseapplies to all subsequent copies and derivative works made from that copy.
Notices
40

This option is useful when you wish to copy part of the code of the Library into a program that is not a library.
4 You may copy and distribute the Library (or a portion or derivative of it, under Section 2) in object code or executableform under the terms of Sections 1 and 2 above provided that you accompany it with the complete correspondingmachine-readable source code, which must be distributed under the terms of Sections 1 and 2 above on a mediumcustomarily used for software interchange.
If distribution of object code is made by offering access to copy from a designated place, then offering equivalent accessto copy the source code from the same place satisfies the requirement to distribute the source code, even though thirdparties are not compelled to copy the source along with the object code.
5 A program that contains no derivative of any portion of the Library, but is designed to work with the Library by beingcompiled or linked with it, is called a "work that uses the Library". Such a work, in isolation, is not a derivative work ofthe Library, and therefore falls outside the scope of this License.
However, linking a "work that uses the Library" with the Library creates an executable that is a derivative of the Library(because it contains portions of the Library), rather than a "work that uses the library". The executable is thereforecovered by this License. Section 6 states terms for distribution of such executables.
When a "work that uses the Library" uses material from a header file that is part of the Library, the object code for thework may be a derivative work of the Library even though the source code is not. Whether this is true is especiallysignificant if the work can be linked without the Library, or if the work is itself a library. The threshold for this to be trueis not precisely defined by law.
If such an object file uses only numerical parameters, data structure layouts and accessors, and small macros and smallinline functions (ten lines or less in length), then the use of the object file is unrestricted, regardless of whether it islegally a derivative work. (Executables containing this object code plus portions of the Library will still fall under Section6.)
Otherwise, if the work is a derivative of the Library, you may distribute the object code for the work under the termsof Section 6. Any executables containing that work also fall under Section 6, whether or not they are linked directlywith the Library itself.
6 As an exception to the Sections above, you may also combine or link a "work that uses the Library" with the Libraryto produce a work containing portions of the Library, and distribute that work under terms of your choice, providedthat the terms permit modification of the work for the customer's own use and reverse engineering for debugging suchmodifications.
You must give prominent notice with each copy of the work that the Library is used in it and that the Library and itsuse are covered by this License. You must supply a copy of this License. If the work during execution displays copyrightnotices, you must include the copyright notice for the Library among them, as well as a reference directing the user tothe copy of this License. Also, you must do one of these things:
a Accompany the work with the complete corresponding machine-readable source code for the Library includingwhatever changes were used in the work (which must be distributed under Sections 1 and 2 above); and, if the workis an executable linked with the Library, with the complete machine-readable "work that uses the Library", as objectcode and/or source code, so that the user can modify the Library and then relink to produce a modified executablecontaining the modified Library. (It is understood that the user who changes the contents of definitions files in theLibrary will not necessarily be able to recompile the application to use the modified definitions.)
b Use a suitable shared library mechanism for linking with the Library. A suitable mechanism is one that (1) uses at runtime a copy of the library already present on the user's computer system, rather than copying library functions into theexecutable, and (2) will operate properly with a modified version of the library, if the user installs one, as long as themodified version is interface-compatible with the version that the work was made with.
c Accompany the work with a written offer, valid for at least three years, to give the same user the materials specifiedin Subsection 6a, above, for a charge no more than the cost of performing this distribution.
Notices
41

d If distribution of the work is made by offering access to copy from a designated place, offer equivalent access to copythe above specified materials from the same place.
e Verify that the user has already received a copy of these materials or that you have already sent this user a copy.
For an executable, the required form of the "work that uses the Library" must include any data and utility programsneeded for reproducing the executable from it. However, as a special exception, the materials to be distributed neednot include anything that is normally distributed (in either source or binary form) with the major components (compiler,kernel, and so on) of the operating system on which the executable runs, unless that component itself accompaniesthe executable.
It may happen that this requirement contradicts the license restrictions of other proprietary libraries that do notnormally accompany the operating system. Such a contradiction means you cannot use both them and the Librarytogether in an executable that you distribute.
7 You may place library facilities that are a work based on the Library side-by-side in a single library together with otherlibrary facilities not covered by this License, and distribute such a combined library, provided that the separatedistribution of the work based on the Library and of the other library facilities is otherwise permitted, and providedthat you do these two things:
a Accompany the combined library with a copy of the same work based on the Library, uncombined with any otherlibrary facilities. This must be distributed under the terms of the Sections above.
b Give prominent notice with the combined library of the fact that part of it is a work based on the Library, and explainingwhere to find the accompanying uncombined form of the same work.
8 You may not copy, modify, sublicense, link with, or distribute the Library except as expressly provided under thisLicense. Any attempt otherwise to copy, modify, sublicense, link with, or distribute the Library is void, and willautomatically terminate your rights under this License. However, parties who have received copies, or rights, from youunder this License will not have their licenses terminated so long as such parties remain in full compliance.
9 You are not required to accept this License, since you have not signed it. However, nothing else grants you permissionto modify or distribute the Library or its derivative works. These actions are prohibited by law if you do not accept thisLicense. Therefore, by modifying or distributing the Library (or any work based on the Library), you indicate youracceptance of this License to do so, and all its terms and conditions for copying, distributing or modifying the Libraryor works based on it.
10 Each time you redistribute the Library (or any work based on the Library), the recipient automatically receives alicense from the original licensor to copy, distribute, link with or modify the Library subject to these terms and conditions.You may not impose any further restrictions on the recipients' exercise of the rights granted herein. You are notresponsible for enforcing compliance by third parties with this License.
11 If, as a consequence of a court judgment or allegation of patent infringement or for any other reason (not limitedto patent issues), conditions are imposed on you (whether by court order, agreement or otherwise) that contradict theconditions of this License, they do not excuse you from the conditions of this License. If you cannot distribute so as tosatisfy simultaneously your obligations under this License and any other pertinent obligations, then as a consequenceyou may not distribute the Library at all. For example, if a patent license would not permit royalty-free redistributionof the Library by all those who receive copies directly or indirectly through you, then the only way you could satisfyboth it and this License would be to refrain entirely from distribution of the Library.
If any portion of this section is held invalid or unenforceable under any particular circumstance, the balance of thesection is intended to apply, and the section as a whole is intended to apply in other circumstances.
It is not the purpose of this section to induce you to infringe any patents or other property right claims or to contestvalidity of any such claims; this section has the sole purpose of protecting the integrity of the free software distributionsystem which is implemented by public license practices. Many people have made generous contributions to the widerange of software distributed through that system in reliance on consistent application of that system; it is up to the
Notices
42

author/donor to decide if he or she is willing to distribute software through any other system and a licensee cannotimpose that choice.
This section is intended to make thoroughly clear what is believed to be a consequence of the rest of this License.
12 If the distribution and/or use of the Library is restricted in certain countries either by patents or by copyrightedinterfaces, the original copyright holder who places the Library under this License may add an explicit geographicaldistribution limitation excluding those countries, so that distribution is permitted only in or among countries not thusexcluded. In such case, this License incorporates the limitation as if written in the body of this License.
13 The Free Software Foundation may publish revised and/or new versions of the Lesser General Public License fromtime to time. Such new versions will be similar in spirit to the present version, but may differ in detail to address newproblems or concerns.
Each version is given a distinguishing version number. If the Library specifies a version number of this License whichapplies to it and "any later version", you have the option of following the terms and conditions either of that versionor of any later version published by the Free Software Foundation. If the Library does not specify a license versionnumber, you may choose any version ever published by the Free Software Foundation.
14 If you wish to incorporate parts of the Library into other free programs whose distribution conditions areincompatible with these, write to the author to ask for permission. For software which is copyrighted by the FreeSoftware Foundation, write to the Free Software Foundation; we sometimes make exceptions for this. Our decisionwill be guided by the two goals of preserving the free status of all derivatives of our free software and of promotingthe sharing and reuse of software generally.
NO WARRANTY
15 BECAUSE THE LIBRARY IS LICENSED FREE OF CHARGE, THERE IS NO WARRANTY FOR THE LIBRARY, TO THE EXTENTPERMITTED BY APPLICABLE LAW. EXCEPT WHEN OTHERWISE STATED IN WRITING THE COPYRIGHT HOLDERS AND/OROTHER PARTIES PROVIDE THE LIBRARY "AS IS" WITHOUT WARRANTY OF ANY KIND, EITHER EXPRESSED OR IMPLIED,INCLUDING, BUT NOT LIMITED TO, THE IMPLIED WARRANTIES OF MERCHANTABILITY AND FITNESS FOR A PARTICULARPURPOSE. THE ENTIRE RISK AS TO THE QUALITY AND PERFORMANCE OF THE LIBRARY IS WITH YOU. SHOULD THELIBRARY PROVE DEFECTIVE, YOU ASSUME THE COST OF ALL NECESSARY SERVICING, REPAIR OR CORRECTION.
16 IN NO EVENT UNLESS REQUIRED BY APPLICABLE LAW OR AGREED TO IN WRITING WILL ANY COPYRIGHT HOLDER,OR ANY OTHER PARTY WHO MAY MODIFY AND/OR REDISTRIBUTE THE LIBRARY AS PERMITTED ABOVE, BE LIABLE TOYOU FOR DAMAGES, INCLUDING ANY GENERAL, SPECIAL, INCIDENTAL OR CONSEQUENTIAL DAMAGES ARISING OUTOF THE USE OR INABILITY TO USE THE LIBRARY (INCLUDING BUT NOT LIMITED TO LOSS OF DATA OR DATA BEINGRENDERED INACCURATE OR LOSSES SUSTAINED BY YOU OR THIRD PARTIES OR A FAILURE OF THE LIBRARY TO OPERATEWITH ANY OTHER SOFTWARE), EVEN IF SUCH HOLDER OR OTHER PARTY HAS BEEN ADVISED OF THE POSSIBILITY OFSUCH DAMAGES.
END OF TERMS AND CONDITIONS
How to Apply These Terms to Your New Libraries
If you develop a new library, and you want it to be of the greatest possible use to the public, we recommend makingit free software that everyone can redistribute and change. You can do so by permitting redistribution under theseterms (or, alternatively, under the terms of the ordinary General Public License).
To apply these terms, attach the following notices to the library. It is safest to attach them to the start of each sourcefile to most effectively convey the exclusion of warranty; and each file should have at least the "copyright" line and apointer to where the full notice is found.
<one line to give the library's name and a brief idea of what it does.>
Copyright (C) <year> <name of author>
Notices
43

This library is free software; you can redistribute it and/or modify it under the terms of the GNU Lesser General PublicLicense as published by the Free Software Foundation; either version 2.1 of the License, or (at your option) any laterversion.
This library is distributed in the hope that it will be useful, but WITHOUT ANY WARRANTY; without even the impliedwarranty of MERCHANTABILITY or FITNESS FOR A PARTICULAR PURPOSE. See the GNU Lesser General Public Licensefor more details.
You should have received a copy of the GNU Lesser General Public License along with this library; if not, write to theFree Software Foundation, Inc., 59 Temple Place, Suite 330, Boston, MA 02111-1307 USA
Also add information on how to contact you by electronic and paper mail.
You should also get your employer (if you work as a programmer) or your school, if any, to sign a "copyright disclaimer"for the library, if necessary. Here is a sample; alter the names:
Yoyodyne, Inc., hereby disclaims all copyright interest in the library `Frob' (a library for tweaking knobs) written byJames Random Hacker.
<signature of Ty Coon>, 1 April 1990
Ty Coon, President of Vice
That's all there is to it!
The MIT LicenseCopyright (c) 2008 John Resig, http://jquery.com/
Permission is hereby granted, free of charge, to any person obtaining a copy of this software and associateddocumentation files (the "Software"), to deal in the Software without restriction, including without limitation the rightsto use, copy, modify, merge, publish, distribute, sublicense, and/or sell copies of the Software, and to permit personsto whom the Software is furnished to do so, subject to the following conditions:
The above copyright notice and this permission notice shall be included in all copies or substantial portions of theSoftware.
THE SOFTWARE IS PROVIDED "AS IS", WITHOUT WARRANTY OF ANY KIND, EXPRESS OR IMPLIED, INCLUDING BUT NOTLIMITED TO THE WARRANTIES OF MERCHANTABILITY, FITNESS FOR A PARTICULAR PURPOSE AND NONINFRINGEMENT.IN NO EVENT SHALL THE AUTHORS OR COPYRIGHT HOLDERS BE LIABLE FOR ANY CLAIM, DAMAGES OR OTHER LIABILITY,WHETHER IN AN ACTION OF CONTRACT, TORT OR OTHERWISE, ARISING FROM, OUT OF OR IN CONNECTION WITH THESOFTWARE OR THE USE OR OTHER DEALINGS IN THE SOFTWARE.
LEXMARK SOFTWARE LIMITED WARRANTY AND LICENSE AGREEMENTS
PLEASE READ CAREFULLY BEFORE SELECTING THE "Agree" OR "I accept" BUTTON ON THIS PAGE: BY SELECTING THE"Agree" OR "I accept" BUTTON, YOU AGREE TO BE BOUND BY ALL THE TERMS AND CONDITIONS OF THIS SOFTWARELIMITED WARRANTY AND LICENSE AGREEMENTS. IF YOU DO NOT SO AGREE, SELECT THE "Disagree" OR "I do not accept"BUTTON ON THIS PAGE AND DO NOT INSTALL, COPY, DOWNLOAD, OR OTHERWISE USE THE SOFTWARE PROGRAM. IFYOU ARE INSTALLING THIS SOFTWARE PROGRAM FOR USE BY OTHER PARTIES, YOU AGREE TO INFORM THE USERSTHAT USE OF THE SOFTWARE PROGRAM INDICATES ACCEPTANCE OF THESE TERMS.
LEXMARK SOFTWARE LICENSE AGREEMENT
This Software License Agreement (“Software License Agreement”) is a legal agreement between you (either anindividual or a single entity) and Lexmark International, Inc. (“Lexmark”) that, to the extent your Lexmark product or
Notices
44

Software Program is not otherwise subject to a written software license agreement between you and Lexmark or itssuppliers, governs your use of any Software Program installed on or provided by Lexmark for use in connection withyour Lexmark product. The term “Software Program” includes machine-readable instructions, audio/visual content(such as images and recordings), and associated media, printed materials and electronic documentation, whetherincorporated into, distributed with or for use with your Lexmark product.
1 DISCLAIMER AND LIMITATION OF WARRANTIES. EXCEPT AS PROVIDED IN THIS SOFTWARE LICENSE AGREEMENTAND TO THE MAXIMUM EXTENT PERMITTED BY APPLICABLE LAW, LEXMARK AND ITS SUPPLIERS PROVIDE THESOFTWARE PROGRAM "AS IS" AND HEREBY DISCLAIM ALL OTHER WARRANTIES AND CONDITIONS, EITHER EXPRESSOR IMPLIED, INCLUDING, BUT NOT LIMITED TO, TITLE, NON-INFRINGEMENT, MERCHANTABILITY AND FITNESS FORA PARTICULAR PURPOSE, AND ABSENCE OF VIRUSES, ALL WITH REGARD TO THE SOFTWARE PROGRAM. TO THEEXTENT LEXMARK CANNOT BY LAW DISCLAIM ANY COMPONENT OF THE IMPLIED WARRANTIES OFMERCHANTABILITY OR FITNESS FOR A PARTICULAR PURPOSE, LEXMARK LIMITS THE DURATION OF SUCHWARRANTIES TO THE 90-DAY TERM OF THE EXPRESS SOFTWARE LIMITED WARRANTY.
This Agreement is to be read in conjunction with certain statutory provisions, as that may be in force from time totime, that imply warranties or conditions or impose obligations on Lexmark that cannot be excluded or modified.If any such provisions apply, then to the extent Lexmark is able, Lexmark hereby limits its liability for breach of thoseprovisions to one of the following: providing you a replacement copy of the Software Program or reimbursementof the price paid for the Software Program.
The Software Program may include internet links to other software applications and/or internet web pages hostedand operated by third parties unaffiliated with Lexmark. You acknowledge and agree that Lexmark is not responsiblein any way for the hosting, performance, operation, maintenance, or content of, such software applications and/orinternet web pages.
2 LIMITATION OF REMEDY. TO THE MAXIMUM EXTENT PERMITTED BY APPLICABLE LAW, ANY AND ALL LIABILITY OFLEXMARK UNDER THIS SOFTWARE LICENSE AGREEMENT IS EXPRESSLY LIMITED TO THE GREATER OF THE PRICE PAIDFOR THE SOFTWARE PROGRAM AND FIVE U.S. DOLLARS (OR THE EQUIVALENT IN LOCAL CURRENCY). YOUR SOLEREMEDY AGAINST LEXMARK IN ANY DISPUTE UNDER THIS SOFTWARE LICENSE AGREEMENT SHALL BE TO SEEK TORECOVER ONE OF THESE AMOUNTS, UPON PAYMENT OF WHICH LEXMARK SHALL BE RELEASED AND DISCHARGEDOF ALL FURTHER OBLIGATIONS AND LIABILITY TO YOU.
IN NO EVENT WILL LEXMARK, ITS SUPPLIERS, SUBSIDIARIES, OR RESELLERS BE LIABLE FOR ANY SPECIAL, INCIDENTAL,INDIRECT, EXEMPLARY, PUNITIVE, OR CONSEQUENTIAL DAMAGES (INCLUDING BUT NOT LIMITED TO LOST PROFITSOR REVENUES, LOST SAVINGS, INTERRUPTION OF USE OR ANY LOSS OF, INACCURACY IN, OR DAMAGE TO, DATAOR RECORDS, FOR CLAIMS OF THIRD PARTIES, OR DAMAGE TO REAL OR TANGIBLE PROPERTY, FOR LOSS OF PRIVACYARISING OUT OR IN ANY WAY RELATED TO THE USE OF OR INABILITY TO USE THE SOFTWARE PROGRAM, OROTHERWISE IN CONNECTION WITH ANY PROVISION OF THIS SOFTWARE LICENCE AGREEMENT), REGARDLESS OFTHE NATURE OF THE CLAIM, INCLUDING BUT NOT LIMITED TO BREACH OF WARRANTY OR CONTRACT, TORT(INCLUDING NEGLIGENCE OR STRICT LIABILITY), AND EVEN IF LEXMARK, OR ITS SUPPLIERS, AFFILIATES, ORREMARKETERS HAVE BEEN ADVISED OF THE POSSIBILITY OF SUCH DAMAGES, OR FOR ANY CLAIM BY YOU BASEDON A THIRD-PARTY CLAIM, EXCEPT TO THE EXTENT THIS EXCLUSION OF DAMAGES IS DETERMINED LEGALLY INVALID.THE FOREGOING LIMITATIONS APPLY EVEN IF THE ABOVE-STATED REMEDIES FAIL OF THEIR ESSENTIAL PURPOSE.
3 U.S.A. STATE LAWS. This Software Limited Warranty gives you specific legal rights. You may also have other rightsthat vary from state to state. Some states do not allow limitations on how long an implied warranty lasts or theexclusion of limitation of incidental or consequential damages, so the above limitations may not apply to you.
4 LICENSE GRANT. Lexmark grants you the following rights provided you comply with all terms and conditions of thisSoftware License Agreement:
a Use. You may Use one (1) copy of the Software Program. The term “Use” means storing, loading, installing,executing, or displaying the Software Program. If Lexmark has licensed the Software Program to you forconcurrent use, you must limit the number of authorized users to the number specified in your agreement withLexmark. You may not separate the components of the Software Program for use on more than one computer.You agree that you will not Use the Software Program, in whole or in part, in any manner that has the effect ofoverriding, modifying, eliminating, obscuring, altering or de-emphasizing the visual appearance of any
Notices
45

trademark, trade name, trade dress or intellectual property notice that appears on any computer display screensnormally generated by, or as a result of, the Software Program.
b Copying. You may make one (1) copy of the Software Program solely for purposes of backup, archiving, orinstallation, provided the copy contains all of the original Software Program’s proprietary notices. You may notcopy the Software Program to any public or distributed network.
c Reservation of Rights. The Software Program, including all fonts, is copyrighted and owned by LexmarkInternational, Inc. and/or its suppliers. Lexmark reserves all rights not expressly granted to you in this SoftwareLicense Agreement.
d Freeware. Notwithstanding the terms and conditions of this Software License Agreement, all or any portion ofthe Software Program that constitutes software provided under public license by third parties (“Freeware”) islicensed to you subject to the terms and conditions of the software license agreement accompanying suchFreeware, whether in the form of a discrete agreement, shrink-wrap license, or electronic license terms at thetime of download or installation. Use of the Freeware by you shall be governed entirely by the terms andconditions of such license.
5 TRANSFER. You may transfer the Software Program to another end-user. Any transfer must include all softwarecomponents, media, printed materials, and this Software License Agreement and you may not retain copies of theSoftware Program or components thereof. The transfer may not be an indirect transfer, such as a consignment.Prior to the transfer, the end-user receiving the transferred Software Program must agree to all these SoftwareLicense Agreement terms. Upon transfer of the Software Program, your license is automatically terminated. Youmay not rent, sublicense, or assign the Software Program except to the extent provided in this Software LicenseAgreement.
6 UPGRADES. To Use a Software Program identified as an upgrade, you must first be licensed to the original SoftwareProgram identified by Lexmark as eligible for the upgrade. After upgrading, you may no longer use the originalSoftware Program that formed the basis for your upgrade eligibility.
7 LIMITATION ON REVERSE ENGINEERING. You may not alter, decrypt, reverse engineer, reverse assemble, reversecompile or otherwise translate the Software Program or assist or otherwise facilitate others to do so, except as andto the extent expressly permitted to do so by applicable law for the purposes of inter-operability, error correction,and security testing. If you have such statutory rights, you will notify Lexmark in writing of any intended reverseengineering, reverse assembly, or reverse compilation. You may not decrypt the Software Program unless necessaryfor the legitimate Use of the Software Program.
8 ADDITIONAL SOFTWARE. This Software License Agreement applies to updates or supplements to the originalSoftware Program provided by Lexmark unless Lexmark provides other terms along with the update or supplement.
9 TERM. This Software License Agreement is effective unless terminated or rejected. You may reject or terminatethis license at any time by destroying all copies of the Software Program, together with all modifications,documentation, and merged portions in any form, or as otherwise described herein. Lexmark may terminate yourlicense upon notice if you fail to comply with any of the terms of this Software License Agreement. Upon suchtermination, you agree to destroy all copies of the Software Program together with all modifications,documentation, and merged portions in any form.
10 TAXES. You agree that you are responsible for payment of any taxes including, without limitation, any goods andservices and personal property taxes, resulting from this Software License Agreement or your Use of the SoftwareProgram.
11 LIMITATION ON ACTIONS. No action, regardless of form, arising out of this Software License Agreement may bebrought by either party more than two years after the cause of action has arisen, except as provided under applicablelaw.
12 APPLICABLE LAW. This Software License Agreement is governed by the laws of the Commonwealth of Kentucky,United States of America. No choice of law rules in any jurisdiction shall apply. The UN Convention on Contracts forthe International Sale of Goods shall not apply.
13 UNITED STATES GOVERNMENT RESTRICTED RIGHTS. The Software Program has been developed entirely at privateexpense. Rights of the United States Government to use the Software Program are as set forth in this Software
Notices
46

License Agreement and as restricted in DFARS 252.227-7014 and in similar FAR provisions (or any equivalent agencyregulation or contract clause).
14 CONSENT TO USE OF DATA. You agree that Lexmark, its affiliates, and agents may collect and use information youprovide in relation to support services performed with respect to the Software Program and requested by you.Lexmark agrees not to use this information in a form that personally identifies you except to the extent necessaryto provide such services.
15 EXPORT RESTRICTIONS. You may not (a) acquire, ship, transfer, or reexport, directly or indirectly, the SoftwareProgram or any direct product therefrom, in violation of any applicable export laws or (b) permit the SoftwareProgram to be used for any purpose prohibited by such export laws, including, without limitation, nuclear, chemical,or biological weapons proliferation.
16 AGREEMENT TO CONTRACT ELECTRONICALLY. You and Lexmark agree to form this Software License Agreementelectronically. This means that when you click the “Agree” or “I accept” button on this page, you acknowledge youragreement to these Software License Agreement terms and conditions and that you are doing so with the intentto “sign” a contract with Lexmark.
17 CAPACITY AND AUTHORITY TO CONTRACT. You represent that you are of the legal age of majority in the place yousign this Software License Agreement and, if applicable, you are duly authorized by your employer or principal toenter into this contract.
18 ENTIRE AGREEMENT. This Software License Agreement (including any addendum or amendment to this SoftwareLicense Agreement that is included with the Software Program) is the entire agreement between you and Lexmarkrelating to the Software Program. Except as otherwise provided for herein, these terms and conditions supersedeall prior or contemporaneous oral or written communications, proposals, and representations with respect to theSoftware Program or any other subject matter covered by this Software License Agreement (except to the extentsuch extraneous terms do not conflict with the terms of this Software License Agreement, any other writtenagreement signed by you and Lexmark relating to your Use of the Software Program). To the extent any Lexmarkpolicies or programs for support services conflict with the terms of this Software License Agreement, the terms ofthis Software License Agreement shall control.
EU5‑0020
Notices
47

IndexAaccessing application configurationsettings
using the Embedded WebServer 9
adding background image 22idle screen images 22
adding a new destination 21Address Book Setup
configuring LDAP 19application configuration settings
accessing 9application error
troubleshooting 29
Bbackground image
adding 22changing 28deleting 22editing 22
bar codes configuring 17
bookmarks adding to folder using the printer
control panel 27adding using the Embedded Web
Server 20adding using the printer control
panel 25creating folders using the printer
control panel 26deleting using the Embedded Web
Server 20deleting using the printer control
panel 26editing using the Embedded Web
Server 20editing using the printer control
panel 26printing 27saving as shortcuts 27searching for 27
Ccannot send an attachment 33
changing the background image 28using the printer control panel 28
configuration deleting a destination 22
configuring adding a new destination 21custom prompts 16destination settings 12editing an existing destination 22e‑mail function 21FTP destination 12maximum file size 21network folder destination 12
configuring bookmarks using the Embedded Web
Server 20configuring printer e‑mailfunction 21configuring the application
adding bookmarks from theprinter control panel 25
deleting bookmarks using theprinter control panel 26
editing bookmarks using theprinter control panel 26
customizing the display icon 9
Ddeleting
background image 22idle screen images 22
deleting a destination 22descriptor file
fetching 10installing 10
destination adding 12deleting 12editing 12
destination settings bar code 17custom prompts 16file 18location 12name 12other options 18scan adjustments 15scan confirmation page 19
scan settings 13Device Credentials
configuring LDAP 19display icon
customizing 9Domain Search Order
specifying 19
Eediting
background image 22idle screen images 22
editing an existing destination 22eMail Size Limiter
using 28Embedded Solutions Framework
checking version number 35Embedded Web Server
accessing applicationconfiguration settings 9
enable multiple file attachments 21exporting a configuration
using MarkVision Professional 24using the Embedded Web
Server 23exporting a configuration usingMarkVision Professional 24exporting a configuration using theEmbedded Web Server 23e‑mail function
configuring 21
Ffolder
deleting 27editing 27
folders adding using the printer control
panel 26searching for 27
Hhost ID
local (individual) 6network 6
Index
48

Iidle screen images
adding 22deleting 22editing 22
image size error troubleshooting 34
importing a configuration using MarkVision Professional 24using the Embedded Web
Server 23importing a configuration usingMarkVision Professional 24importing a configuration using theEmbedded Web Server 23installing
descriptor file 10
LLDAP
configuring 19Lexmark License Server
installing 6license error 34license files
local (individual) 6network 6
licensing individual 7local 7network 7
MMarkVision Professional
installing descriptor file 10using 11
maximum file size 21multiple file attachments 21
Nnetwork license
configuring 7copying license files to the License
Server 7updating 7using 7
no images to display error troubleshooting 33
notices 2Novell networks 32
Pprinting bookmarks 27
Sscanning documents at theprinter 25searching for bookmarks 27searching for folders 27shortcuts
creating 27
Ttroubleshooting
A network destination stoppedworking or is invalid 30
an application error hasoccurred 29
application icon is missing 29cannot send an attachment 33error occurs when opening a
secure PDF 32Forms are not available or are not
working 32image size error 34license error 34no images to display error 33Novell networks 32printer cannot scan to selected
destination 31Scan to Case Manager 30Some bookmarks do not appear in
an exported configuration file 33
Uusing a network license 7
Index
49