Learning Swift - Sample Chapter
32
Community Experience Distilled Build a solid foundation in Swift to develop smart and robust iOS and OS X applications Learning Swift Andrew J Wagner
-
Upload
packt-publishing -
Category
Technology
-
view
37 -
download
1
Transcript of Learning Swift - Sample Chapter

C o m m u n i t y E x p e r i e n c e D i s t i l l e d
Build a solid foundation in Swift to develop smart and robust iOS and OS X applications
Learning Swift
Andrew
J Wagner
Learning Swift
Swift is Apple's new programming language and the future of iOS and OS X app development. At its surface, Swift is easy to jump into, but it has complex elements that are critical to becoming profi cient at turning an idea into reality.
Develop the skills and confi dence to dive passionately into creating compelling, maintainable, and elegant apps in Swift. This book provides an approachable, step-by-step introduction into programming with Swift. Each topic is separated into comprehensive sections that are full of practical examples and easy-to-understand explanations. Each section builds on the previous topics to develop a comprehensive understanding of app development in Swift.
It begins by giving an overview of the key features with practical examples and progresses to more advanced topics that help differentiate the skillful developers from the mediocre ones. It covers topics, such as variables, optionals, closures, generics, and memory management. In addition, this book also covers the art of programming, such as maintainability, useful design patterns, and resources for furthering your knowledge. This all culminates in writing a basic iOS app that will get you well on your way to turning your own app ideas into a reality.
Who this book is written forIf you are looking to build iOS or OS X apps using the most modern technology, this book is ideal for you. You will fi nd this book especially useful if you are new to programming or if you have yet to develop for iOS or OS X.
$ 44.99 US£ 29.99 UK
Prices do not include local sales tax or VAT where applicable
Andrew J WagnerVisit www.PacktPub.com for books, eBooks,
code, downloads, and PacktLib.
What you will learn from this book
Form a solid understanding of the Swift language
Learn the practical aspects of how a computer program actually works
Understand the paradigms used by Apple's frameworks and not be intimidated by them
Utilize the vast resources written in Objective-C to better inform your Swift programming
Develop a basic portfolio of Swift code, covering and practicing critical concepts
Discover resources to ensure you never stop becoming a better developer
Write and understand concise but expressive functional style code
Implement various Swift design patterns to solve real-world problems
Create your own generics for existing applications
Learning Swift
"CommunityExperienceDistilled"

In this package, you will find: The author biography
A preview chapter from the book, Chapter 2 'Building Blocks – Variables,
Collections, and Flow Control'
A synopsis of the book’s content
More information on Learning Swift

About the Author
Andrew J Wagner is an independent software developer who concentrates on iOS development and backend web services and has a degree in computer engineering from Rensselaer Polytechnic Institute, New York. He has also been developing his own iOS apps through his company, Learn Brigade LLC, since 2008 and has experience working with and for large-scale companies and small-scale companies. He is passionate about using computers as a creative outlet and writing software that is beautiful in implementation, functionality, and experience.

PrefaceThis book will help you get started with Swift in no time. It will help you to understand the nuances of iOS programming not only from a conceptual point of view, but also from an implementation perspective. This book is an invaluable resource if you are looking forward to a dive deep into the world of iOS application programming.
What this book coversChapter 1, Introducing Swift, takes you through the process of installing Swift and running your fi rst Swift program to expose its power right away.
Chapter 2, Building Blocks – Variables, Collections, and Flow Control, introduces you to the various built-in mechanisms Swift has to represent complex information in expressive and accessible ways with the help of a real-world example.
Chapter 3, One Piece at a Time – Types, Scopes, and Projects, introduces the tools necessary to more closely model the real world with code. It will teach you to defi ne your own custom types using structures, classes, and enumerations. It also explores the concept of scope and access control.
Chapter 4, To Be or Not to Be – Optionals, focuses on a special and critical type in Swift called optionals. It includes a detailed explanation of how optionals work and how they can be used to turn a seemingly complex topic into a very intuitive concept.
Chapter 5, A Modern Paradigm – Closures and Functional Programming, introduces you to a new way of thinking about code called functional programming. We learn how Swift supports this technique and how we can apply it to our programs to make them even more understandable and expressive code.
Chapter 6, Make Swift Work for You – Protocols and Generics, describes what generic protocols are and how they can provide power and safety at the same time.

Preface
Chapter 7, Everything is Connected – Memory Management, discusses how a computer stores information and how we can use that knowledge in combination with some new tools in Swift, to ensure that our code remains responsive and minimizes its effect on battery life. In this chapter, we dive deeper into the inner workings of Swift.
Chapter 8, Writing Code the Swift Way – Design Patterns and Techniques, introduces you to the art of programming by taking you through a number of specifi c design patterns that help reduce the complexity of code.
Chapter 9, Harnessing the Past – Understanding and Translating Objective-C, develops a basic understanding of Objective-C with a focus on how it compares to Swift. This allows you to make use of the vast resources that exist in Objective-C to help with your Swift development.
Chapter 10, A Whole New World – Developing an App, explains the process of creating a real-world iOS application with the help of an example.
Chapter 11, What's Next? Resources, Advice, and Next Steps, discusses how to move forward to become the best app developer you possibly can. It will also provide you with a list of resources you can use to continue your Swift and app development learning process.

[ 7 ]
Building Blocks – Variables, Collections, and Flow Control
One of the coolest things about programming is the way its concepts build on each other. If you've never programmed anything before, even the most basic app can seem very complex. The reality is that if you analyze everything going on in an app down to the ones and zeroes fl owing through the processor, it is incredibly complex. However, every aspect of using a computer is an abstraction. When you use an app, the complexity of the programming is abstracted away for you. Learning to program is just a way of going one level deeper to make a computer work for you.
As you learn the basic concepts behind programming, they will become your second nature and this will free your mind to comprehend even more complex concepts. Just as when you fi rst learn to read, sounding out each word is challenging. However, at some point, you reach a level where you glance at a word and you know the meaning instantaneously. This frees you up to start looking for a deeper meaning from the text.
In this chapter, we will build up your knowledge of the building blocks of programming in Swift. Each of these building blocks is an exciting topic on its own and they will become even more exciting as we start to see the possibilities that they open up for us. No matter how complex programming might seem to you now, I guarantee that one day, you will look back and marvel at how all of these concepts have become second nature to you.
In this chapter, we will cover:
• Core Swift types• Swift's type system• Printing to the console• Controlling the flow of your program• A comprehensive example of all the concepts we've covered

Building Blocks – Variables, Collections, and Flow Control
[ 8 ]
Core Swift typesEvery programming language needs the ability to name a piece of information to be referenced later. This is the fundamental way that a collection of code remains readable after it is written. Swift provides a number of core types that help you represent your information in a very comprehensible way.
Constants and variablesSwift provides two types of information: a constant and a variable:
// Constantlet pi = 3.14 // Variablevar name = "Sarah"
All constants are defi ned using the let keyword followed by a name, and all variables are defi ned using the var keyword. Both the constants and variables in Swift must contain a value before they are used. This means that when you defi ne a new constant or variable, you will most likely give it an initial value. You do so using the assignment operator (=) followed by a value.
The only difference between the two is that a constant can never be changed, while a variable can be. In the previous example, the code defi nes a constant called pi that stores the information 3.14 and a variable called name that stores the information "Sarah". It makes sense to make pi a constant because pi will always be 3.14. However, we want to change the value of name in the future to something else, so we defi ned it as a variable.
One of the hardest parts to manage in a program is the state of all the variables. As a programmer, it can often be impossible to reason out all the different possible values a variable might have, even in relatively small programs. Especially because variables can often be changed by distant, seemingly unrelated code, so that more state will likely cause more bugs that are harder to track down. It is always best to use constants until you run into a practical scenario where you need to modify the value of the information.
ContainersIt is often helpful to give a name to the more complex information we might encounter. We often deal with a related information or a series of information, such as lists. Swift provides three main collection types called tuples, arrays, and dictionaries.

Chapter 2
[ 9 ]
TuplesA tuple is a fi xed size collection of two or more pieces of information. For example, a card in a deck of playing cards has three properties: color, suit, and value. We could use three separate variables to fully describe a card, but it would be better to express it in one:
var card = (color: "Red", suit: "Hearts", value: 7)
Each piece of information consists of a name and a value separated by a colon (:) and each is separated by a comma (,). Finally, the whole thing is surrounded by parentheses (()).
Each part of a tuple can be accessed separately by name using a period (.), which is otherwise referred to as a dot:
card.color // "Red"card.suit // "Hearts"card.value // 7
You are also able to create a tuple without names for each of its part. In that case, you can access them based on where they are in the list, zero being the fi rst element:
var diceRoll = (4, 6)diceRoll.0 // 4diceRoll.1 // 6
Another way to access specifi c values in a tuple is to capture each in a separate variable:
let (first, second) = diceRollfirst // 4second // 6
If you want to change a value within a tuple, you must reassign every value:
diceRoll = (4, 5)
ArraysAn array is essentially a variable length list of information. For example, we could create a list of people we want to invite to a party:
var invitees = ["Sarah", "Jamison", "Marcos", "Roana"]
An array always starts and ends with a square bracket and each element is separated by a comma. You can even declare an empty array with just an open and closed bracket: [].

Building Blocks – Variables, Collections, and Flow Control
[ 10 ]
You can then add values to an array by adding another array to it:
invitees += ["Kai", "Naya"]
Note that += is the short-hand for writing:
invitees = invitees + ["Kai", "Naya"]
You can access values within an array based on their position, usually referred to as their index, in the array:
invitees[2] // Marcos
The index is specifi ed using square brackets ([]), which are placed immediately after the name of the array. Similar to tuples, indexes start at 0 and go up from there. So, in the preceding example, the index 2 returned the third element in the array, "Marcos". There is additional information you can retrieve about an array, such as the number of elements, which you will see as we move forward.
DictionariesA dictionary is a collection of keys and values. Keys are used to store and look up specifi c values within the container. This container type is named after the word dictionary, where you can look up the defi nition of a word. In a real-life example, the word would be the key and the defi nition would be the value. As an example, we can defi ne a dictionary of television shows organized by their genre:
var showsByGenre = [ "Comedy": "Modern Family", "Drama": "Breaking Bad",]
A dictionary looks similar to an array, but each key and value is separated by a colon (:) here. Note that Swift is pretty forgiving with how the whitespace is used. The array could be defi ned with each element on its own line and the dictionary could be defi ned with every element on a single line. It is up to you to use whitespace to make your code as readable as possible.
With the dictionary defi ned previously, you would get the value "Modern Family" if you looked up the key "Comedy". In code, you can access a value similar to an array, but instead of providing an index in the square brackets, you provide the key:
showsByGenre["Comedy"] // Modern Family
You can defi ne an empty dictionary similar to an empty array, but with a dictionary, you must also include a colon in-between the brackets: [:].

Chapter 2
[ 11 ]
Adding a value to a dictionary looks similar to retrieving a value, but you use the assignment operator (=):
showsByGenre["Variety"] = "The Colbert Report"
As a bonus, this can also be used to change the value of an existing key.
You might have noticed that all of my variable and constant names begin with a lowercase letter, and each subsequent word starts with a capital letter. This is called Camel case and it is the widely accepted way to write variable and constant names. The use of this technique will make it easier for other programmers to understand your code.
Now that we know about Swift's basic containers, let's explore what they are in a little more detail.
Swift's type systemSwift is a strongly typed language, which means that every constant and variable is defi ned with a specifi c type. Only values of a matching type can be assigned to them. So far, we have been taking advantage of a feature of Swift called type inference. This makes it such that the code does not have to explicitly declare a type if it can be inferred from the value assigned to it during declaration.
Without the type inference, the name variable declaration from before would be written as:
var name: String = "Sarah"
This code explicitly declares name as the type String with the value "Sarah". A constant or variable's type can be specifi ed by adding a colon (:) and a type after its name.
A String type is defi ned by a series of characters. This is perfect for storing text like our name example. The reason that we don't actually need to specify the type is that "Sarah" is a String literal. The text surrounded by quotation marks is a String literal and is inferred to be of the type String. This means that the name it can infer must be of the type String if you make its initial value "Sarah".
Similarly, if we did not use type inference for our other variable declarations, they would look like this:
let pi: Double = 3.14
var invitees: [String] = ["Sarah", "Jamison", "Roana"]

Building Blocks – Variables, Collections, and Flow Control
[ 12 ]
let showsByGenre: [String:String] = [ "Comedy": "Modern Family", "Drama": "Breaking Bad", "Variety": "The Colbert Report",]
Double is a number type that can store decimal numbers. An array's type is declared by putting the type of element it stores within square brackets. Finally, a dictionary's type is defi ned in the form [KeyType:ValueType]. All of these types can be inferred because each of them is assigned to a value that has an inferable type.
This code is much cleaner and easier to understand if we leave the types out, as the original examples showed. Just keep in mind that these types are always implied to be there, even if they are not written explicitly. If we tried to assign a number to the name variable, we would get an error as:
Here, we are trying to assign a number, specifi cally an Int type, to a variable that was inferred to be of a String type. Swift will not allow that.
Especially when dealing with inferred types, it can be extremely useful to ask Xcode what type a variable is inferred to be. You can do this by holding the option key on your keyboard and by clicking on the variable name. This will display a popup that looks like this:
As expected, the variable was indeed inferred to be of the type String.
Types are an integral part of Swift. They are one of the major reasons that Swift is so safe as a programming language. They help the compiler know more about your code and because of that, the compiler can automatically warn you about bugs without even running your code.

Chapter 2
[ 13 ]
Printing on the consoleIt can be very useful to write output to a log so that you can trace the behavior of some code. As a code base grows in complexity, it can be hard to reason about the order in which things happen and exactly what the data looks like as it fl ows through the code. Playgrounds can help a lot with this, but this is not always enough.
In Swift, this process is called printing to the console. To do this, you use something called println, which is short for print line. It is used by writing println followed by some text surrounded by parenthesis. For example, to print Hello World! to the console, the code would look like this:
println("Hello World!")
If you put that code into a playground, you will see "Hello World!" written in the results pane. However, this is not truly the console. To view the console, you can go to View | Assistant Editor | Assistant Editor. A new view will appear to the right of the results pane and it will have a section called Console Output that will include all the text the code has printed to the console.
Not only can you print static text to the console, you can also print any variable. For example, if you wanted to print the name variable, you would write:
println(name)
You can even use a feature of Swift called string interpolation to insert variables into a string:
println("Hello \(name)!")
At any point in a string literal, even when you're not printing, you can insert the results of code by surrounding the code with \ (and). Normally, this will simply be the name of a variable, but it can be any code that returns a value.
Printing to the console will become even more useful as we start using more complex code.

Building Blocks – Variables, Collections, and Flow Control
[ 14 ]
Control fl owA program wouldn't be very useful if it were a single fi xed list of commands that always did the same thing. With a single code path, a calculator app would only be able to perform one operation. To make an app more powerful, there are a number of ways in which we can use the data to make decisions as to what to do next.
ConditionalsThe most basic way to control the fl ow of a program is to specify certain code that should only be executed if a certain condition is met. In Swift, we do that with an if statement. Let's look at an example:
if invitees.count > 20 { println("Too many people invited")}
Semantically, the preceding code reads, "If the number of invitees is greater than 20, print Too many people invited. This example only executes one line of code if the condition is true, but you can put as much code as you like within the curly brackets ({}).
Anything that can be evaluated as either true or false can be used in an if statement. You can then chain multiple conditions together using an else if and/or an else statement:
if invitees.count > 20 { println("Too many people invited")}else if invitees.count <= 3 { println("Not really a party")}else { println("Just right")}
Each successive condition that is linked together will not even be evaluated unless all of the previous conditions fail. Similarly, once a condition passes, the remaining conditions in the chain are skipped.
As an exercise, I recommend you try adding an additional scenario to the previous code, where if there were exactly zero invitees, it would print One is the loneliest number. You can test out your code by adjusting how many invitees you add to the invitees declaration. Remember that the order of the conditions is very important.

Chapter 2
[ 15 ]
As useful as conditionals are, they can become very verbose if you have a lot of them chained together. To solve this type of problem, there is another control structure called a switch.
SwitchesA switch is a more expressive way of writing a series of if statements. A direct translation of the example from the conditionals section would look like this:
switch invitees.count { case let x where x > 20: println("Too many people invited") case let x where x <= 3: println("Not really a party") default: println("Just right")}
A switch consists of a value and a list of conditions for that value with the code to execute if the condition is true. The value to be tested is written immediately after the switch command and all of the conditions are contained within the curly brackets ({}). Each condition is a called a case. Using that terminology, the semantics of the previous code is "Considering the number of invitees, in the case that it is greater than 20, print Too many people invited; otherwise, in the case that it is less than or equal to 3, print Not really a party; otherwise, by default, print Just right.
The way that each of these cases work is that it creates a temporary variable x that is given the value that the switch is testing. It then performs a test on x. If the condition passes, it executes the code for that case and then exits the switch.
Just like in conditionals, each case is only considered if all the previous cases are not satisfi ed. Unlike conditionals, all the cases need to be exhaustive. This means that you need to have a case for every possible value that the variable passed in could be. For example, our invitees.count value is an integer, so it could theoretically be any value from negative infi nity to positive infi nity.
The most common way to handle this is using a default case, as designated by the default keyword. Sometimes, you don't actually want to do anything in the default case, or possibly, even in a specific case. For that, you can use the break keyword:
switch invitees.count { case let x where x > 20: println("Too many people invited") case let x where x <= 3: println("Not really a party")

Building Blocks – Variables, Collections, and Flow Control
[ 16 ]
default: break}
Note that the default case must always be the last case.
So far, switches are nice because they enforce the fact that they must be exhaustive. This is great for letting the compiler catch bugs for you. However, switches can also be much more concise. We can rewrite the preceding code like this:
switch invitees.count { case 0...3: println("Not really a party") case 4...20: println("Just right") default: println("Too many people invited")}
Here, we are describing each case as a range of possible values. The fi rst case includes all the values between and including 0 and 3. This is way more expressive than using a where clause. It, however, did require a rethinking of the logic. There is no way to express an open-ended range that goes to infi nity, so we could not specify a case for the number of invitees above 20. Instead, we have cases for the closed ranges that we know of and then capture all the required details for the above 20 cases in the default case. Note that this version of the code does not properly handle the situation where the count might be negative, which the original version did. In this version, if the count is -1, it will fall all the way through to the default case and print out Too many people invited. For this use case, this is ok because the count of an array can never be negative.
Switches don't only work with numbers, they are great to perform any type of test as well:
switch name { case "Marcos", "Amy": println("\(name) is an honored guest") case let x where x.hasPrefix("A"): println("\(name) will be invited first") fallthrough default: println("\(name) is someone else")}

Chapter 2
[ 17 ]
This code shows some other interesting abilities for switches. The fi rst case is actually made up of two separate conditions. Each case can have any number of conditions separated by commas (,). This is useful when you have multiple cases that you want to use the exact code for.
The second case uses a custom test on the name to check whether it starts with the letter A. This is also great for demonstrating the fundamental way in which switches are executed. Even though the string Amy would also satisfy the second condition, this code would only print, "Amy is an honored guest" because other cases are not evaluated once one case is satisfi ed. For now, don't worry if you don't completely understand how the hasPrefix works.
Lastly, the second case uses the fallthrough keyword. This tells the program to also execute the code in the following case. Importantly, this bypasses the condition of the next case; it doesn't matter if the value passes the condition, the code is still executed.
To make sure that you understand how a switch is executed, put the following code into a playground and try to predict what will be printed out with various names:
let testName = "Andrew"switch testName { case "Marcos", "Amy": println("\(name) is an honored guest") case let x where x.hasPrefix("A"): println("\(name) will be invited first") fallthrough case "Jamison": println("\(name) will help arrange food") default: println("\(name) is someone else")}
Some good names to try are "Andrew", "Amy", and "Jamison".
Now we have full control over what code we want executed and in what circumstances. However, a program often requires that we execute the same code more than once. For example, if we want to perform an operation on every element in an array, it would not be very maintainable to copy and paste a bunch of code. Instead, we can use control structures called loops.

Building Blocks – Variables, Collections, and Flow Control
[ 18 ]
LoopsThere are multiple types of loops, but all of them offer a way to execute the same code repeatedly until a condition is no longer true. The most basic type of loop is called a while loop:
var index = 0while index < invitees.count { println("\(invitees[index]) is invited")
index++}
A while loop consists of a condition to be tested and the code to be run until that condition fails. In the preceding example, we looped through every element in the invitees array. We used the variable index to track which invitee we were currently on. To move to the next index, we use a new operator ++, which adds 1 to the existing value. This is the same as writing index += 1 or index = index + 1.
There are two important things to note about this loop. First, our index starts at 0 and not 1 and it goes until it is less than the number of invitees, not less than or equal. This is because, if you remember, array indexes start at 0. If we started at 1, we would miss the fi rst element and if we included invitees.count, the code would crash because it would try to access an element beyond the end of the array. Always remember that the last element of an array is always at the index: one less than the count.
The other thing to note is that if we forget to include index++ within the loop, we would have an infi nite loop. The loop would continue to run forever because index would never go beyond invitees.count.
Note that this example while loop is made up of three distinct types of operations. It has some initial set up (var index = 0), it has a condition to test (index < invitees.count), and it has code to run every iteration to set up the next value (index++). This is such a common pattern that there is a loop called a for loop that makes this more concise:
for var index = 0; index < invitees.count; index++ { println("\(invitees[index]) is invited")}
This type of loop is easier to read and it is also a little safer to write because the compiler will give an error if you forget any of those three steps. Each of the operations are separated by a semicolon (;). The fi rst operation is run once before the loop starts, the second operation is tested every time the loop is going to run, and the third is run at the end of every iteration.

Chapter 2
[ 19 ]
However, wanting to loop through a collection or a series of values is so common that there is an even more concise and safe loop called a for-in loop:
for invitee in invitees { println("\(invitee) is invited")}
Now this is getting pretty cool. We no longer have to worry about indexes. There is no risk of accidentally starting at 1 or going past the end. Also, we get to give our own name to the specifi c element as we go through the array. Something to note here is that we did not declare the invitee variable with let or var. This is special for a for-in loop because the constant used there is always newly declared each time through the loop.
For-in loops are great for looping through many types of containers. They can also be used to loop through a dictionary:
for (genre, show) in showsByGenre { println("\(show) is a great \(genre) series")}
In this case, we get access to both the key and value of the dictionary. This should look familiar because the value we are looping through with (genre, show) is actually a tuple. It may be confusing for you to determine whether you are getting a single when looping over things like arrays or a tuple like when looping over dictionaries. At this point, it would be best for you to just remember these two common cases. The underlying reasons will become clear when we start talking about sequences in Chapter 6, Make Swift Work for You – Protocols and Generics.
These loops are great, but sometimes we do need access to the index we are currently on and at other times, we may want to loop through a set of numbers without an array. For this, we can use a range similar to a switch:
for index in 0 ..< invitees.count { println("\(index). \(invitees[index])")}
This code runs the loop using the variable index from the value 0, up to but not including invitees.count. There are actually two types of ranges. The fi rst one is called an open range because it does not include the last value. The other type of range, which we saw with switches, is called a closed range:
println("Counting to 10:")for number in 1 ... 10 { println(number)}

Building Blocks – Variables, Collections, and Flow Control
[ 20 ]
The closed range includes the last value, so this loop will print out every number starting from 1 and ending at 10.
All loops have two special keywords available that let you modify their behavior called continue and break. The continue keyword is used to skip the rest of the loop and move back to the condition to check whether the loop should be run again. For example, if we don't want to print invitees whose name begin with A, we'll run the following code:
for invitee in invitees { if invitee.hasPrefix("A") { continue }
println("\(invitee) is invited")}
If the condition invitee.hasPrefix("A") passes, the continue command is run and it skips the rest of the loop, moving onto the next invitee. Because of this, only the invitees whose names' do not start with A are printed.
The break keyword is used to immediately exit a loop:
for invitee in invitees { println("\(invitee) is invited")
if invitee == "Tim" { println("Oh wait, Tim can't come") break }}println("Jumps here")
As soon as break is encountered, the execution jumps to after the loop. In this case, it jumps to the fi nal line.
Loops are great tools to deal with variable amounts of data, such as our list of invitees. When writing your code, you probably won't know how many people will be in that list. The use of a loop provides you with the fl exibility to handle a list of any length.
As an exercise, I recommend you try to write a loop that will fi nd the sum of all multiples of 3 under 10,000. You should get 16668333.

Chapter 2
[ 21 ]
Loops are also a great way to reuse code without having to duplicate it, but they are just the fi rst step toward quality code reuse. Next, we will talk about functions, which open up a whole new world of writing understandable and reusable code.
FunctionsAll of the code we have explored so far is very linear down the fi le. Each line is processed one at a time and then, the program moves onto the next. This is one of the great things about programming: everything the program does can be predicted by mentally stepping through the program yourself, one line at a time.
However, as your program gets larger, you will notice that there are many places that reuse very similar or identical code that you cannot reuse using loops. Also, the more code you write, the harder it will become to reason in your head about what it is doing. Code comments can help with that, but there is an even better solution to both of these problems and they're called functions. A function is essentially a named collection of code that can be executed and reused by name.
There are various types of functions but each builds on the previous type.
Basic functionsThe most basic type of function simply has a name with some static code to be executed later. Let's look at a simple example. The following code defi nes a function named sayHello:
func sayHello() { println("Hello World!")}
Functions are defi ned using the keyword func followed by a name and parenthesis (()). The code to be run within the function is surrounded by curly brackets ({}). Just as with loops, a function can contain any number of lines of code.
From our knowledge of printing, we know that this function will print out the text "Hello World!". However, when will it do that? The terminology used to command a function to execute is "calling a function". You call a function using its name followed by parenthesis (()):
sayHello() // Prints "Hello World!"

Building Blocks – Variables, Collections, and Flow Control
[ 22 ]
This is a very simple function and is not that useful, but already we can see some pretty great benefi ts of functions. In reality, what happens when you call this function is that the execution moves into the function and when it fi nishes every line of the function, it exits out and continues on where the function was called. However, as programmers, we are often not concerned with what is happening inside a function unless something is going wrong. Especially when functions are named well, they tell you what they do and that is all you need to know in order to reason about the rest of the code. In fact, well-named functions can almost always take the place of comments in your code. This really reduces the clutter without reducing the understandability of your code.
The other advantage this function has over simply using println directly is that the code becomes more maintainable. If you use println in multiple places in your code and you change your mind about how you want to say "hello", you have to change multiple pieces of the code. If, instead, you use a function similar to the one in the previous example you can easily change how it says "hello" by changing the function, and it will be changed everywhere you use that function.
You may have noticed a similarity between how we call our sayHello function and how we use println. This is because println is actually a function that is built into Swift itself. There is actually complex code within the println function that makes printing to the console possible and accessible to all programmers. But hey, println is able to take in a value and do something with it; how do we write a function like that? The answer is with parameters.
Parameterized functionsA function can take zero or more parameters, which are input values. Let's modify our sayHello function so that it is able to say "hello" to an arbitrary name using string interpolation:
func sayHelloToName(name: String) { println("Hello \(name)!")}
Now, our function takes in an arbitrary parameter called name of the type string and prints hello to it. We would say that the name of this function is now sayHelloToName:. We don't include the parameter name because when you call the method, you do not use the fi rst parameter's name by default:
sayHelloToName("World") // Prints "Hello World!"

Chapter 2
[ 23 ]
We include a colon (:) at the end of the name to indicate that it takes a parameter there. This makes it different from a function named sayHelloToName that does not take a parameter. The naming may seem unimportant and arbitrary, but it is very important that we all be able to communicate our code using common and precise terminology, so that we can more effectively learn from and collaborate with each other.
As mentioned before, a function can take more than one parameter. A parameter list looks a lot like a tuple. Each parameter is given a name and a type separated by a colon (:), which are then separated by commas (,). On top of that, functions can not only take in values, but they can return values to the calling code as well.
Functions that return valuesThe type of value to be returned from a function is defi ned after the end of all the parameters separated by an arrow (->). Let's write a function that takes a list of invitees and a person to add to the list. If there are spots available, the function will add the person to the list and return the new version; if there are no spots available, it will just return the original list:
func addInviteeToListIfSpotAvailable ( invitees: [String], newInvitee: String ) -> [String]{ if invitees.count >= 20 { return invitees } return invitees + [newInvitee]}
In this function, we test the number of names on the invite list and if it is greater than 20, we return the same list that is passed in to the invitees parameter. Note that return is used in a function similar to break in a loop. As soon as the program executes a return, it exits the function and provides that value to the calling code. So, the fi nal return line is only run if the if statement doesn't get passed. In that case, it adds the new invitee parameter to the list and returns that parameter to the calling code.
You can call this function as follows:
var list = ["Sarah", "Jamison", "Marcos"]var newInvite = "Roana"list = addInviteeToListIfSpotAvailable(list, newInvite)

Building Blocks – Variables, Collections, and Flow Control
[ 24 ]
It is important that we assign the list variable to the value returned from our function because it is possible that the new value will be changed by the function. If we haven't assigned a list, nothing would actually happen to the list.
If you try typing this code into a playground, you will notice something very cool. As you begin typing the name of the function, you will see a small popup that suggests a name of the function that you might want to type:
You can use the arrow keys to move up and down the list to select the function you want to type and then press the tab key to have Xcode fi nish typing the function for you. Not only this, it will also highlight the fi rst parameter so that you can immediately start typing what you would like to pass in. When you are done defi ning the fi rst parameter, you can press tab again to move to the next parameter. This will greatly increase the speed at which you can write your code.

Chapter 2
[ 25 ]
Now, this is a pretty well-named function because it is clear as to what it does. However, we can give it a more natural and expressive name by making it read more like a sentence:
func addInvitee ( invitee: String, ifPossibleToList invitees: [String] ) -> [String]{ if invitees.count >= 20 { return invitees } return invitees + [invitee]}list = addInvitee(newInvite, ifPossibleToList: list)
This is a great feature of Swift that allows you to call a function with its named parameters. We achieved this by actually giving the second parameter two names separated by a space. The fi rst name is the name to be used when calling the function; otherwise, it is referred to as the external name. The second name is the name to be used when referring to the constant passed in from within the function; otherwise, it is referred to as the internal name. As an exercise, try changing the function to use the same external and internal name and see what Xcode suggests you do. For more of a challenge, write a function that takes a list of invitees and an index for a specifi c invitee to write a message asking them to just bring themselves. For example, it would print "Sarah, just bring yourself" for index 0 of our preceding list.
Functions with default argumentsThe last feature of functions that we will discuss is the ability to provide default values for the arguments to a function. This allows the calling code to leave out the parameter from the call if they are satisfi ed with the default. To defi ne a default value for an argument, you simply add an equal sign after the argument followed by the value. We can add a default argument to our previously used sayHelloToName: function, as follows:
func sayHelloToName(name: String = "World") { println("Hello \(name)!")}
This makes it such that we can call this function with or without specifying a name:
sayHelloToName(name: "World") // Prints "Hello World!"sayHelloToName() // Also Print "Hello World!"

Building Blocks – Variables, Collections, and Flow Control
[ 26 ]
Note that while using the argument, we now need to specify its name, even though it is the fi rst argument. In fact, while using default arguments, the order of the arguments becomes unimportant. We can add default arguments to our addInvitee:ifPossibleToList: function and then we can call it with any combination or order of arguments:
func addInvitee ( invitee: String = "Default Invitee", ifPossibleToList invitees: [String] = [] ) -> [String]{ // ...}list = addInvitee(ifPossibleToList: list, invitee: newInvite)list = addInvitee(invitee: newInvite, ifPossibleToList: list)list = addInvitee(ifPossibleToList: list)list = addInvitee(invitee: newInvite)list = addInvitee()
Clearly, the call still reads much better when it is written in the same order, but not all functions will be designed this way. The more important part of this feature is that you can specify only the arguments that you want to be different from the defaults.
Bringing it all togetherAt this point, you have learned a lot about the basic workings of Swift. Let's take a moment to bring many of these concepts together in a single program. We will also see some new variations on what we learned.
The goal of the program will be to take a list of invitees and television shows and to ask random people to bring a show of each genre and to ask the rest to just bring themselves.
Before we look at the code, there are three small new features that we will use:
• We will generate a random number• We will use a variable to store only true or false• We will use a new type of loop called a do-while loop
The most important feature is the ability to generate a random number. To do this, we have to import Foundation Framework. This is the most basic framework made available by Apple. As the name suggests, it forms the foundation for both the frameworks for OS X and iOS.

Chapter 2
[ 27 ]
Foundation includes a function called rand that returns a random number. Computers are not actually capable of generating truly random numbers, and by default, rand will always return the same values in the same order. To make it return different values each time the program is run, we will use a function called srand that stands for "seed random". Seeding random means that we provide a value to help rand generate a unique sequence of numbers each time. Using the same seed each time would cause rand to generate the same sequence every time so a common way to seed it is to use the current time. For that, we will use a method called clock that is also from Foundation.
Lastly, rand returns a number anywhere from 0 to a very large number, but, as you will see, we want to restrict the random number to be between 0 and the number of invitees. To do this, we will use the remainder operator (%) otherwise referred to as the modulus operator. This operator gives you the remainder after dividing the fi rst number by the second number. For example, 14 % 4 will return 2 because 4 goes into 14 a total of 3 times with 2 left over. The great feature of this operator is that it forces a number of any size to always be between 0 and 1 less than the number you are dividing it by. This is perfect for changing the possible random values.
The full code to generate a random number looks like this:
// Import Foundation so that "rand" can be usedimport Foundation
// Seed the random number generatorsrand(UInt32(clock()))
// Random number between 0 and 9var randomNumber = Int(rand()) % 10
You may notice one other thing in particular about this code. We are using the new syntaxes UInt32() and Int(). This is a way of changing one type into another. For example, the clock function returns a value of the type clock_t, but srand takes a parameter of the type UInt32. Remember, just as with variables, you can hold the option key and click on a function to see which types it takes and returns.
The second feature we will use is the ability to have a variable that can store only true or false. This is called bool, which is short for boolean. We have actually used this type many times before, as it is used in all conditionals and loops, but this is the fi rst time we will be storing bool directly in a variable. At its most basic level, a boolean variable is defi ned and used as:
var someBool = falseif someBool { println("Do This")}
Building Blocks – Variables, Collections, and Flow Control
[ 28 ]
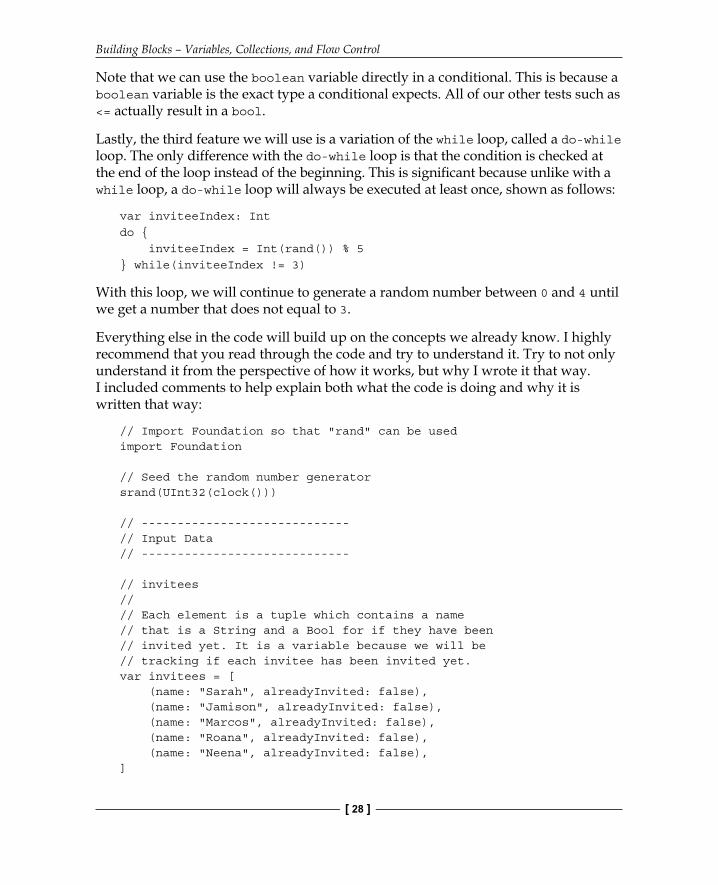
Note that we can use the boolean variable directly in a conditional. This is because a boolean variable is the exact type a conditional expects. All of our other tests such as <= actually result in a bool.
Lastly, the third feature we will use is a variation of the while loop, called a do-while loop. The only difference with the do-while loop is that the condition is checked at the end of the loop instead of the beginning. This is signifi cant because unlike with a while loop, a do-while loop will always be executed at least once, shown as follows:
var inviteeIndex: Intdo { inviteeIndex = Int(rand()) % 5} while(inviteeIndex != 3)
With this loop, we will continue to generate a random number between 0 and 4 until we get a number that does not equal to 3.
Everything else in the code will build up on the concepts we already know. I highly recommend that you read through the code and try to understand it. Try to not only understand it from the perspective of how it works, but why I wrote it that way. I included comments to help explain both what the code is doing and why it is written that way:
// Import Foundation so that "rand" can be usedimport Foundation
// Seed the random number generatorsrand(UInt32(clock()))
// -----------------------------// Input Data// -----------------------------
// invitees//// Each element is a tuple which contains a name// that is a String and a Bool for if they have been// invited yet. It is a variable because we will be// tracking if each invitee has been invited yet. var invitees = [ (name: "Sarah", alreadyInvited: false), (name: "Jamison", alreadyInvited: false), (name: "Marcos", alreadyInvited: false), (name: "Roana", alreadyInvited: false), (name: "Neena", alreadyInvited: false),]

Chapter 2
[ 29 ]
// showsByGenre//// Constant because we will not need to modify// the show list at alllet showsByGenre = [ "Comedy": "Modern Family", "Drama": "Breaking Bad", "Variety": "The Colbert Report",]
This fi rst section of code gives us a localized place to put all of our data. We can easily come back to the program and change the data if we want to, and we don't have to go searching through the rest of the program to update it:
// -----------------------------// Helper functions// -----------------------------
// markInviteeAsInvitedAtIndex://// The process of marking an invitee as invited is// slightly complex. The other code will be more// understandable if we use a function with a// representative name. We can also then reuse// this function in multiple placesfunc markInviteeAsInvitedAtIndex(index: Int){ // We are replacing the old invitee value with // a new one using the same name but with // alreadyInvited set to true let invitee = invitees[index] invitees[index] = ( name: invitee.name, alreadyInvited: true )}
// inviteAtIndex:toBringShow://// Another function to help make future code// more comprehensible and maintainablefunc inviteAtIndex ( index: Int, toBringShow show: (genre: String, name: String) ){

Building Blocks – Variables, Collections, and Flow Control
[ 30 ]
let name = invitees[index].name println("\(name), bring a \(show.genre) show") println("\(show.name) is a great \(show.genre)")
markInviteeAsInvitedAtIndex(index)}
// inviteToBringThemselvesAtIndex://// Similar to the previous function but this time for// the remaining inviteesfunc inviteToBringThemselvesAtIndex(index: Int) { let invitee = invitees[index] println("\(invitee.name), just bring yourself")
markInviteeAsInvitedAtIndex(index)}
Here, I have provided a number of functions that will simplify more complex code later in the program. Each is given an understandable name, so that when they are used, we do not have to go look at their code to understand what they do:
// -----------------------------// Now the core logic// -----------------------------
// First, we want to make sure each genre is assigned // to an inviteefor show in showsByGenre { // We need to pick a random invitee that has not // already been invited. With the following loop // we will continue to pick an invitee until we // find one that has not already been invited var inviteeIndex: Int do { inviteeIndex = Int(rand()) % invitees.count } while(invitees[inviteeIndex].alreadyInvited)
// Now that we have found an invitee that has not // been invited, we will invite them inviteAtIndex(inviteeIndex, toBringShow: (show))}
// Now that we have assigned each genre, we// will ask the remaining people to just bring// themselves

Chapter 2
[ 31 ]
for index in 0 ..< invitees.count { let invitee = invitees[index] if !invitee.alreadyInvited { inviteToBringThemselvesAtIndex(index) }}
This last section is where the real logic of the program is, which is commonly referred to as the business logic. The functions from the previous sections are just details and the fi nal section is the logic that really defi nes what the program does.
This is far from the only way to organize a program. This will become even clearer as you learn more advanced organization techniques. However, this breakdown shows you the general philosophy behind how you should organize your code. You should strive to write every piece of code as if it were going to be published in a book. Many of the comments in this example will become excessive as you get better with Swift, but when in doubt, explain what you are doing using either a comment or a well-named function. Not only will this help others understand your code, but it will also help you understand it when you come back to it in 6 months and you are basically a stranger to the code again. Not only that, if you force yourself to formalize your thoughts as you write the code, you will fi nd yourself creating many fewer bugs.
Let's also discuss an interesting limitation of this implementation. This program is going to run into a major problem if the number of invitees is less than the number of shows. The do-while loop will continue forever, not ever fi nding an invitee that has not been invited yet. Your program doesn't have to handle every possible input, but you should at least be aware of its limitations.
SummaryIn this chapter, we developed a great foundation of Swift knowledge. You learned the various built-in mechanisms Swift has to represent complex information in expressive and accessible ways. We know that by default, we should declare information as constant until we fi nd a practical need to change it and then we should make it a variable. We explored how every piece of information in Swift has a type associated with it by the compiler, whether it is through type inference or it is declared specifi cally. We are familiar with many of the built-in types, including simple types, such as String, Int and Bool, as well as containers, such as tuples, arrays, and dictionaries. We can use console output to better investigate our programs, especially with the use of string interpolation for dynamic output. We recognized the power of controlling the fl ow of our programs with if statements, conditionals, switches, and loops. We have functions in our skill set to write more understandable, maintainable, and reusable code. Finally, we saw an example of how all of these concepts can be combined to write a full program.

Building Blocks – Variables, Collections, and Flow Control
[ 32 ]
As a challenge to you, I suggest you fi x the fi nal program to stop it from trying to assign shows if there are not enough invitees. When you can do that, you are more than ready to move onto the next topic, which is types, scopes, and projects.
These are all tools that we can use to write even more organized code and they become critical as we write larger and larger projects.

Where to buy this book You can buy Learning Swift from the Packt Publishing website.
Alternatively, you can buy the book from Amazon, BN.com, Computer Manuals and most internet
book retailers.
Click here for ordering and shipping details.
www.PacktPub.com
Stay Connected:
Get more information Learning Swift