Learn Puppet : Quest Guide for the Learning VM
88
Learn Puppet: Quest Guide for the Learning VM
-
Upload
kumaran-balachandran -
Category
Education
-
view
249 -
download
10
Transcript of Learn Puppet : Quest Guide for the Learning VM
Learn Puppet:
Quest Guide for the Learning VM

Table of Contents:
▪ 1Learning VM Setup
▪ 5Welcome
▪ 10The Power of Puppet
▪ 21Resources
▪ 28Manifests
▪ 33Variables
▪ 40Conditional Statements
▪ 47Resource Ordering
▪ 53Classes
▪ 60Modules
▪ 67The Forge and the Puppet Module Tool
▪ 71Afterword
▪ 72Troubleshooting
▪ 73Glossary of Puppet Vocabulary
Contents
Learning VM Setup
About the Learning Virtual MachineThe Learning Virtual Machine (VM) is a sandbox environment equipped witheverything you'll need to get started learning Puppet and Puppet Enterprise (PE).Because we believe exploration and playfulness are key to successful learning,we've done our best to make getting started with Puppet a fun and frictionlessprocess. The VM is powered by CentOS Linux and for your convenience, we've pre-installed Puppet Enterprise (PE) along with everything you'll need to put it intoaction. Before you get started, however, we'll walk you through a few steps to getthe VM configured and running.
The Learning VM comes in two flavors. You downloaded this guide with either aVMware (.vmx) file or an Open Virtualization Format (.ovf) file. The .vmx versionworks with VMware Player or VMware Workstation on Linux and Windows basedmachines, and VMware Fusion for Mac. The .ovf file is suitable for Oracle'sVirtualbox as well as several other virtualization players that support this format.
We've included instructions below for VMware Fusion, VMware Player, andVirtualbox. If you run into issues getting the Learning VM set up, feel free tocontact us at [email protected], and we'll do our best to help out.
Getting started with the Learning VMIf you haven't already downloaded VMware Player, VMware Fusion, or OracleVirtualbox, please see the links below:
• VMWare Player• VMWare Fusion• VirtualBox
You'll also need an SSH client to interact with the Learning VM over a SecureShell (SSH) connection. This will be more comfortable than interacting with thevirtualization software directly. If you're using Mac OS, you will be able to run SSH
© 2014 Puppet Labs 1
by way of the default Terminal application or a third party application like iTerm.If you are on a Windows OS, we recommend PuTTY, a free SSH client for Windows.
Once you have an up-to-date virtualization application and the means to SSH tothe Learning VM you're ready to configure the Learning VM itself.
If you're reading this guide, you've already extracted the .zip file that contains theLearning VM. Keep that .zip file around in case you want to create a fresh instanceof the Learning VM without having the re-do the download.
VM SetupStart by launching your virtualization software. (Don't be tempted by anydialogues or wizards that pop up the first time you open the software. These willwalk you through creating a new virtual machine, and will mislead you if you'retrying to open the existing Learning VM file.)
Depending on what virtualization software you're using, there are some slightvariations in how you'll open Learning VM file.
• In VMware Player there will be an Open a Virtual Machine option on theWelcome screen. You can also select File > Open... from the Player menu inthe top left.
• For VMWare Fusion, select File > Open... from the menu bar.
• For VirtualBox, select File > Import Appliance... from the menu bar.
• If you're using different virtualization software, just be sure to open orimport, rather than create new.
Don't launch the VM just yet. There are a few configuration steps that youshould complete before launching the Learning VM for the first time. (If youskipped ahead and already launched the VM, shut it down by logging in with thecredentials root and puppet and entering the command shutdown -P now . Andif you run into errors, remember that you can simply delete the VM and createanother by unpacking the .zip archive and following the instructions above.)
With the Learning VM selected in the library or manager window, open theSettings panel. There are a few things to adjust here.
First, in under Network or Network Adapter, confirm that the Network Adapter isenabled, and configure it to use Bridged networking.
Learning VM Setup
© 2014 Puppet Labs 2
Next, you'll need to increase the memory allocation and processors to the VM toensure that it has the resources neccessary to run smoothly. These options areunder System in VirtualBox and Processors & Memory in VMware Fusion. Allocate4 GB of memory (4096 MB) and two processor cores. You can run the Learning VMwith less memory and fewer processor cores, but you may encounter performanceissues.
Now that your settings are configured, select Start or Power On to boot up the VM.
Input Capture
Virtualization software uses mouse and keyboard capture to 'own' these devices andcommunicate input to the guest operating system. The keystroke to release the mouseand keyboard will be displayed at the top right of the VM window.
Next StepsOnce the VM is booted, you may have to hit enter to see to the login prompt. Login using the following credentials:
• username: root• password: puppet
All you'll want to do for now is get the Learning VM's IP address. Use the Factertool bundled with Puppet Enterprise tool to find it.
facter ipaddress
Make a note of the IP address displayed. You'll need it to open an SSH connectionto the Learning VM and in order to access to the PE Console later.
For the Learning VM's quest tool to work smoothly, you'll need to log out beforestarting your SSH session. The file that tracks your command line history will onlybe created after you log out for the first time. Enter the command:
exit
Now that you have the IP address, open an SSH connection to the Learning VM.
Learning VM Setup
© 2014 Puppet Labs 3

On a Linux system or a Mac, you can open a Terminal application and run thefollowing command, replacing <ip-address> with the IP address of your LearningVM:
ssh root@<ip-address>
If you are on a Windows system, use an SSH client. We recommend Putty. Enterthe IP address into the Hostname textbox and click Open to start your session.
Use the same credentials:
• username: root• password: puppet
Now that the Learning VM is configured and you're connected, you're all set to takeon your first quest! We hope you have fun learning Puppet!
In addition to the VM, the following resources may be handy in your journey tolearn Puppet:
• Puppet users group• Puppet Ask - Q&A site• #puppet IRC channel on irc.freenode.net• Learning VM Issue Tracker• You can also email us at [email protected]
Learning VM Setup
© 2014 Puppet Labs 4
“
Welcome
Quest Objectives• Learn about the value of Puppet and Puppet Enterprise• Familiarize yourself with the Quest structure and tool
The Learning VM
Welcome to the Quest Guide for the Learning Virtual Machine. This guide will beyour companion as you make your way through a series of interactive quests onthe accompanying VM. This first quest serves as an introduction to Puppet andgives you an overview of the quest structure and the integrated quest tool. We'vedone our best to keep it short so you can get on to the meatier stuff in the queststhat follow.
You should have started up the VM by now, and have an open SSH session fromyour terminal or SSH client.
If you need to, return to the Setup section and review the instructions to getcaught up. Remember, the credentials to log in to the Learning VM via SSH are:
• username: root• password: puppet
If you're comfortable in a Unix command-line environment, feel free to take a lookaround and get a feel for what you're working with.
Getting StartedThe Learning VM includes a quest tool that will provide structure and feedbackas you progress. You'll learn more about this tool below, but for now, type thefollowing command to start your first quest: the "Welcome" quest.
Any sufficiently advanced technology is indistinguishable from magic.-Arthur C. Clarke
© 2014 Puppet Labs 5
quest --start welcome
What is Puppet?So what is Puppet, and why should you take the time to learn it?
Puppet is an open-source IT automation tool. The Puppet Domain SpecificLanguage (DSL) is a Ruby-based coding language that provides a precise andadaptable way to describe a desired state for each machine in your infrastructure.Once you've described a desired state, Puppet does the work to bring your systemsin line and keeping them there.
The easy-to-read syntax of Puppet's DSL gives you an operating-system-independent language to specify which packages should be installed, whatservices you want running, which users accounts you need, how permissions areset, and just about any other detail of a system you might want to manage. Ifyou're the DIY type or have unique needs, you can write the Puppet code todo all these things from scratch. But if you'd rather not re-invent the wheel, awide variety of pre-made Puppet modules let you get the setup you're looking forwithout churning out the code yourself.
And what's the 'Enterprise' part?
Puppet Enterprise (PE) is a complete configuration management platform, with anoptimized set of components proven to work well together. It combines a versionof open source Puppet (including a preconfigured production-grade Puppet masterstack), with MCollective, PuppetDB, Hiera, and more than 40 other open sourceprojects that Puppet Labs has integrated, certified, performance-tuned, andsecurity-hardened to make a complete solution for automating mission-criticalenterprise infrastructure.
In addition to these integrated open source projects, PE has many of its ownfeatures, including a graphical web interface for analyzing reports and controllingyour infrastructure, orchestration features to keep your applications runningsmoothly as you coordinate updates and maintenance, event inspection, role-based access control, certification management, and cloud provisioning tools.
Task 1 :
Now that you know what Puppet and Puppet Enterprise are, check and see whatversions of are running on this Learning VM. Type the following command:
Welcome
© 2014 Puppet Labs 6
puppet -V # That's a capital 'V'
You will see something like the following:
3.4.3 (Puppet Enterprise 3.2.2)
This indicates that Puppet Version 3.4.3 Puppet Enterprise 3.2.2 are installed.
But why learn something new?
Why not just run a few shell commands or write a script? If you're comfortablewith shell scripting and concerned with a few changes on a few machines, thismay indeed be simpler. The appeal of Puppet is that allows you to describe allthe details of a configuration in a way that abstracts away from operating systemspecifics, then manage those configurations on as many machines as you like. Itlets you control your whole infrastructure (think hundreds or thousands of nodes)in a way that is simpler to maintain, understand, and audit than a collection ofcomplicated scripts.
What is a Quest?At this point we've introduced you to the Learning VM and Puppet. You'll getyour hands on Puppet soon enough. But first, what's a quest? This guide containscollection structured tutorials that we call quests. Each quest includes interactivetasks that give you a chance to try things out yourself.
If you executed the puppet -V command earlier, you've already completed yourfirst task. (If not, go ahead and do so now.)
The Quest ToolThe Learning VM includes a quest tool that will help you keep track of whichquests and tasks you've completed successfully and which are still pending. We'vewritten a couple of tasks in this quest to demonstrate the features of the questtool itself.
Welcome
© 2014 Puppet Labs 7
Task 2 :
To explore the command options for the quest tool, type the following command:
quest --help
The quest --help command provides you with a list of all the options for thequest command. You can invoke the quest command with each of those options,such as:
quest --progress # Displays details of tasks completedquest --completed # Displays completed questsquest --list # Shows all available questsquest --start <name> # Provide the name of a quest to start tracking progress
Task 3 :
Find out how much progress you have made so far:
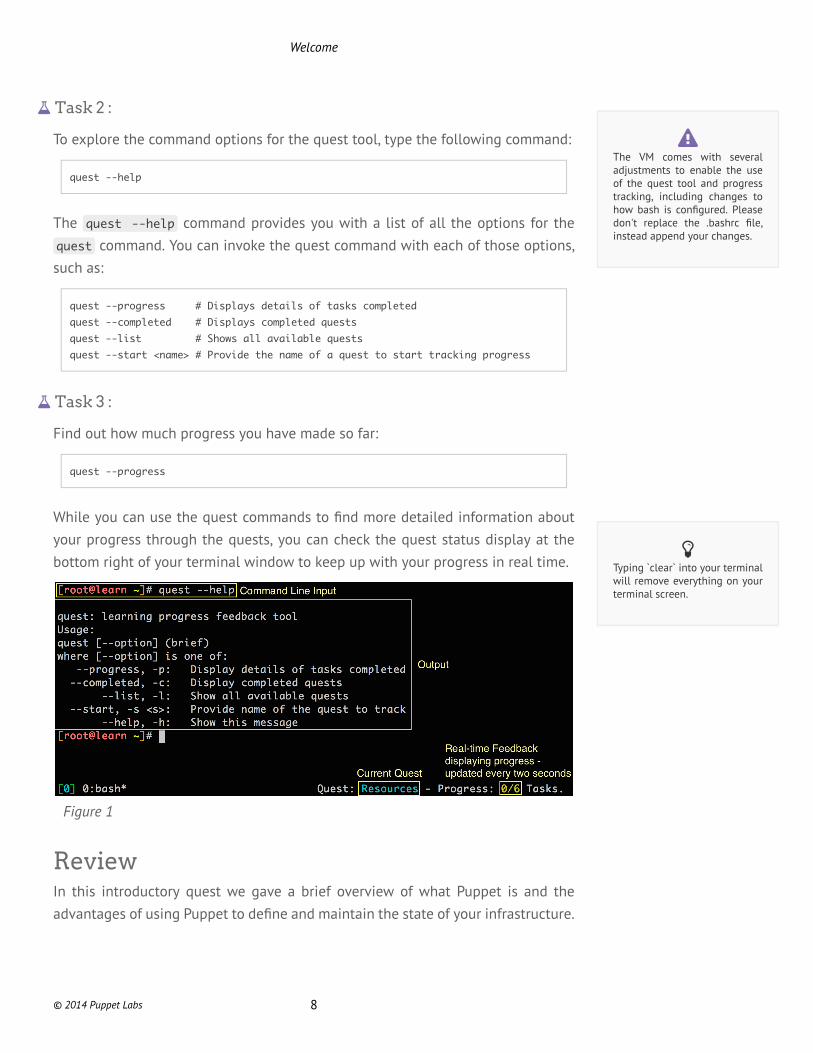
quest --progress
While you can use the quest commands to find more detailed information aboutyour progress through the quests, you can check the quest status display at thebottom right of your terminal window to keep up with your progress in real time.
Figure 1
ReviewIn this introductory quest we gave a brief overview of what Puppet is and theadvantages of using Puppet to define and maintain the state of your infrastructure.
The VM comes with severaladjustments to enable the useof the quest tool and progresstracking, including changes tohow bash is configured. Pleasedon't replace the .bashrc file,instead append your changes.
Typing `clear` into your terminalwill remove everything on yourterminal screen.
Welcome
© 2014 Puppet Labs 8
We also introduced the concept of the quest and interactive task. You tried out thequest tool and reviewed the mechanics completing quests and tasks.
Now that you know what Puppet and Puppet Enterprise are, and how to use thequest tool, you're ready to move on to the next quest: The Power of Puppet.
Welcome
© 2014 Puppet Labs 9
The Power of Puppet
Prerequisites• Welcome Quest
Quest Objectives• Using existing Puppet modules, configure the Learning VM to serve a
web version of the Quest Guide.• Learn how the Puppet Enterprise (PE) Console's node classifier can
manage the Learning VM's configuration.
Getting StartedIn this quest you will use the Puppet Enterprise (PE) Console in conjunction withexisting modules to cut away much of the complexity of a common configurationtask. You'll configure the Learning VM to serve the content of this Quest Guide asa locally accessible static HTML website. We'll show you how you can Puppet andfreely available Puppet modules to fully automate the process instead of writingcode or using standard terminal commands.
As you go through this quest, remember that while Puppet can simplify manytasks, it's a powerful and complex tool. There's a lot to learn if you want to use it toits full potential. We will explain concepts as needed to complete and understandeach task in this quest, but sometimes we'll hold off on a fuller explanation ofsome detail until a later quest. Don't worry if you don't feel like you're getting thewhole story right away; keep at it and we'll get there when the time is right!
When you're ready to get started, type the following command:
quest --start power
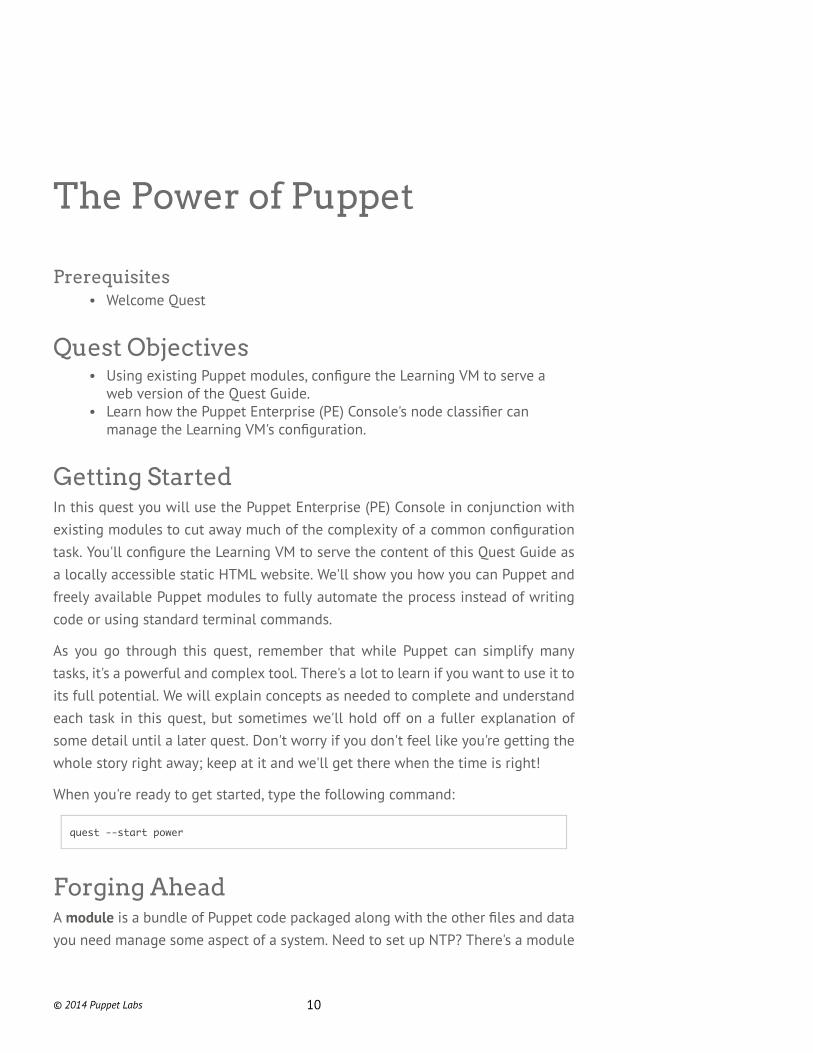
Forging AheadA module is a bundle of Puppet code packaged along with the other files and datayou need manage some aspect of a system. Need to set up NTP? There's a module
© 2014 Puppet Labs 10
for that. Manage system users? That too. But likely you'll want to do both of thesethings and more. Modules let you mix and match reusable bits of Puppet code tomake achieving your desired configuration as painless as possible. Modules aredesigned to be, well, modular.
But where do these modules come from? The Puppet Forge is a public repositoryof modules contributed by members of the Puppet community, including manywritten and maintained by Puppet Labs employees and partners. The Forge alsoincludes a list PE Supported Modules, which Puppet Labs has rigorously testedand is committed to supporting and maintaining through their lifecycle.
Task 1 :
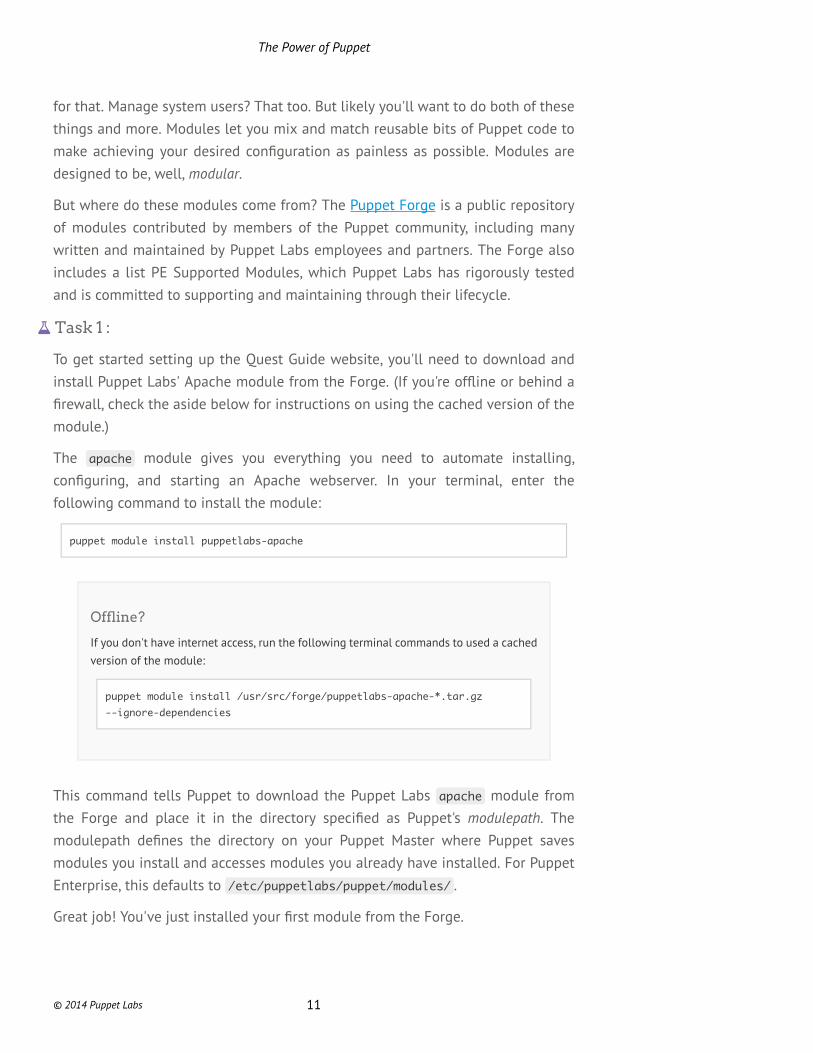
To get started setting up the Quest Guide website, you'll need to download andinstall Puppet Labs' Apache module from the Forge. (If you're offline or behind afirewall, check the aside below for instructions on using the cached version of themodule.)
The apache module gives you everything you need to automate installing,configuring, and starting an Apache webserver. In your terminal, enter thefollowing command to install the module:
puppet module install puppetlabs-apache
Offline?
If you don't have internet access, run the following terminal commands to used a cachedversion of the module:
puppet module install /usr/src/forge/puppetlabs-apache-*.tar.gz--ignore-dependencies
This command tells Puppet to download the Puppet Labs apache module fromthe Forge and place it in the directory specified as Puppet's modulepath. Themodulepath defines the directory on your Puppet Master where Puppet savesmodules you install and accesses modules you already have installed. For PuppetEnterprise, this defaults to /etc/puppetlabs/puppet/modules/ .
Great job! You've just installed your first module from the Forge.
The Power of Puppet
© 2014 Puppet Labs 11
To help set up the Quest Guide website, we've also prepared an lvmguide module.It's already in the VM's module path, so there's no need to fetch it from the Forge.This small lvmguide module draws on some resources from the Apache moduleand uses some code and content of its own to finish the configuration of the QuestGuide website.
The lvmguide and Apache modulesBefore using these modules, you should know a little more about how they work.
The lvmguide module includes Puppet code that defines an lvmguide class. InPuppet, a class is simply a named block of Puppet code organized in a way thatdefines a set of associated system resources. A class might install a package,customize an associated configuration file for that package, and start a serviceprovided by that package. These are related and interdependent processes, so itmakes sense to organize them into a single configurable unit: a class.
While a module can include many classes, it will always have a main class thatshares the name of the module. This class serves as the access point for themodule's functionality and calls on other classes within the module or from pre-requisite modules as needed.
Put your Modules to UseIn order to configure the Learning VM to serve you the Quest Guide website, you'llneed to classify it with the lvmguide class. Classification tells Puppet whichclasses to apply to which machines in your infrastructure. Though there are a fewdifferent ways to classify nodes, we'll be using the PE Console's node classifier forthis quest.
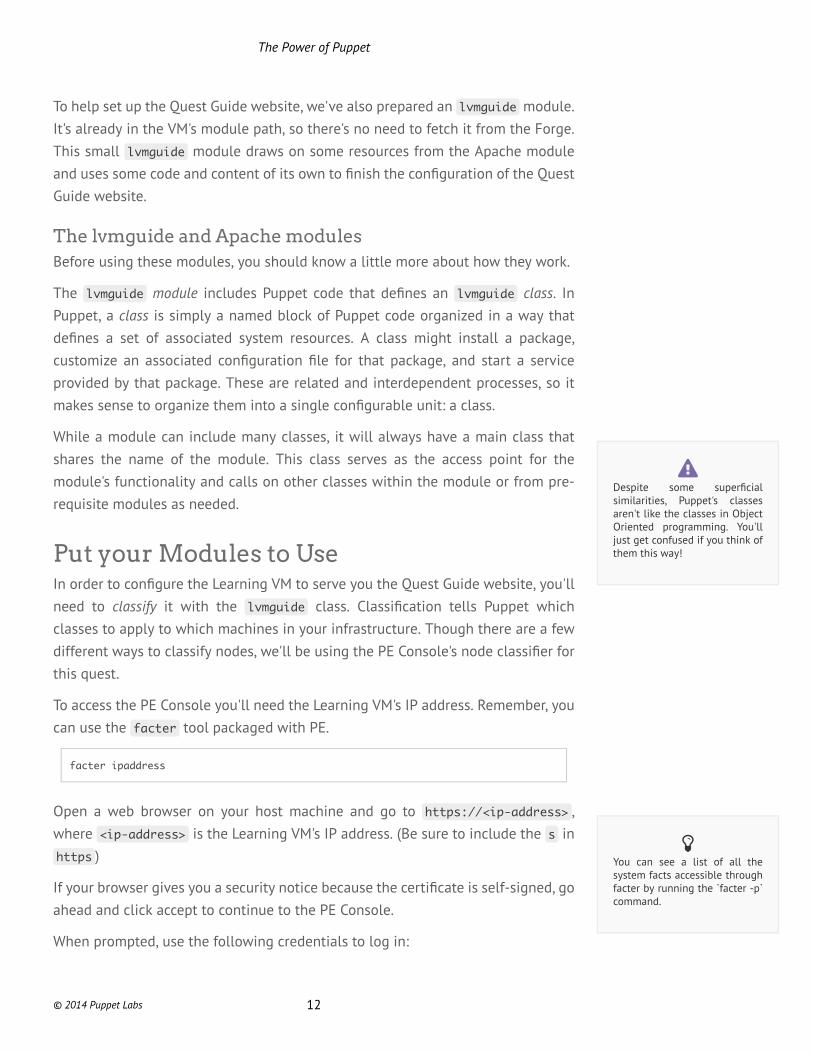
To access the PE Console you'll need the Learning VM's IP address. Remember, youcan use the facter tool packaged with PE.
facter ipaddress
Open a web browser on your host machine and go to https://<ip-address> ,where <ip-address> is the Learning VM's IP address. (Be sure to include the s inhttps )
If your browser gives you a security notice because the certificate is self-signed, goahead and click accept to continue to the PE Console.
When prompted, use the following credentials to log in:
Despite some superficialsimilarities, Puppet's classesaren't like the classes in ObjectOriented programming. You'lljust get confused if you think ofthem this way!
You can see a list of all thesystem facts accessible throughfacter by running the `facter -p`command.
The Power of Puppet
© 2014 Puppet Labs 12

Username: [email protected]: learningpuppet
Figure 1
You're in! Now that you have access to the PE Console, we'll go over the stepsyou'll take to classify the "learning.puppetlabs.vm" node (i.e. the Learning VM)with the lvmguide class.
Add a ClassFirst, you need to add the lvmguide class to the list of classes available to the PEConsole.
To do this, click the Add classes button on the Classes panel. (You may need toscroll to the bottom of the page to find the panel.)
The Power of Puppet
© 2014 Puppet Labs 13
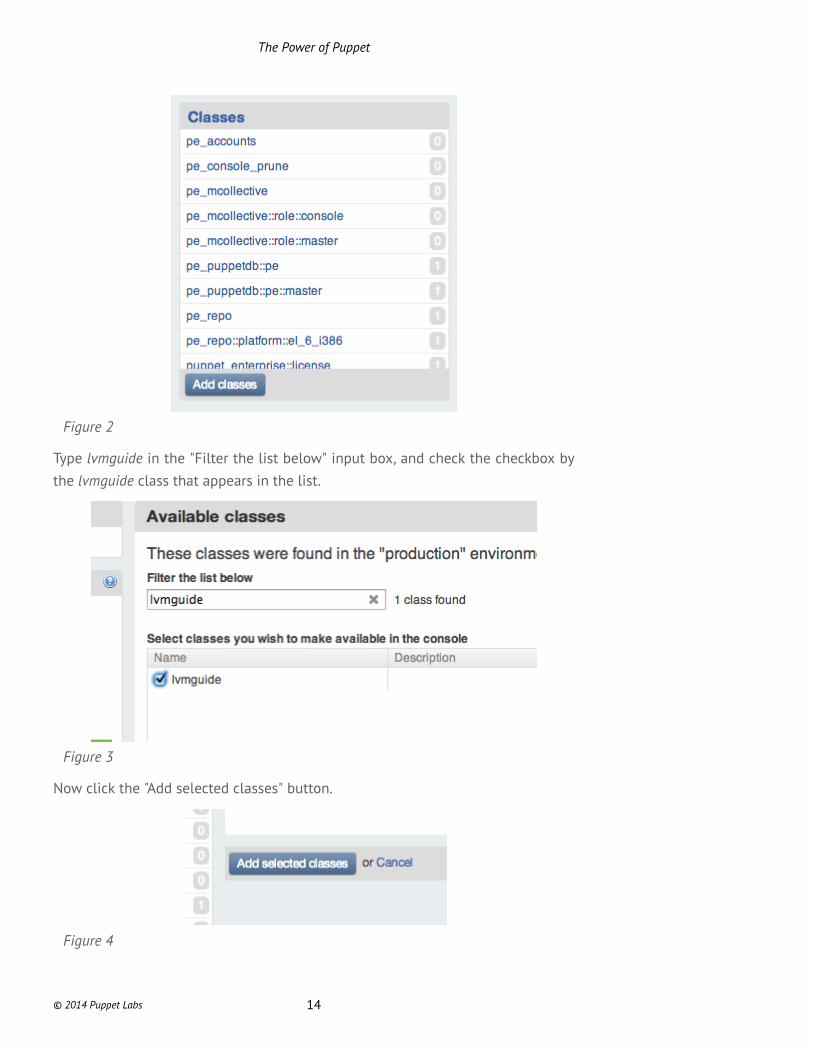
Figure 2
Type lvmguide in the "Filter the list below" input box, and check the checkbox bythe lvmguide class that appears in the list.
Figure 3
Now click the "Add selected classes" button.
Figure 4
The Power of Puppet
© 2014 Puppet Labs 14
You should see a verification message at the top of the PE Console and the thelvmguide class will appear in the list of available classes on the left side of theconsole interface.
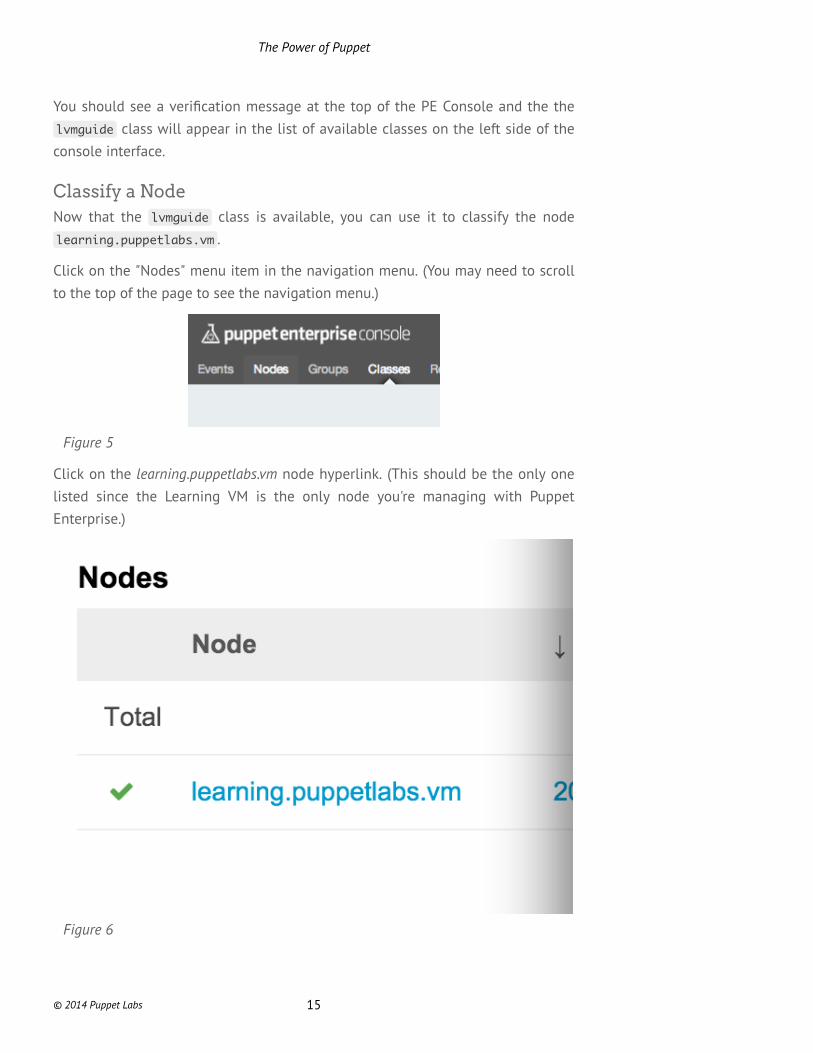
Classify a NodeNow that the lvmguide class is available, you can use it to classify the nodelearning.puppetlabs.vm .
Click on the "Nodes" menu item in the navigation menu. (You may need to scrollto the top of the page to see the navigation menu.)
Figure 5
Click on the learning.puppetlabs.vm node hyperlink. (This should be the only onelisted since the Learning VM is the only node you're managing with PuppetEnterprise.)
Figure 6
The Power of Puppet
© 2014 Puppet Labs 15
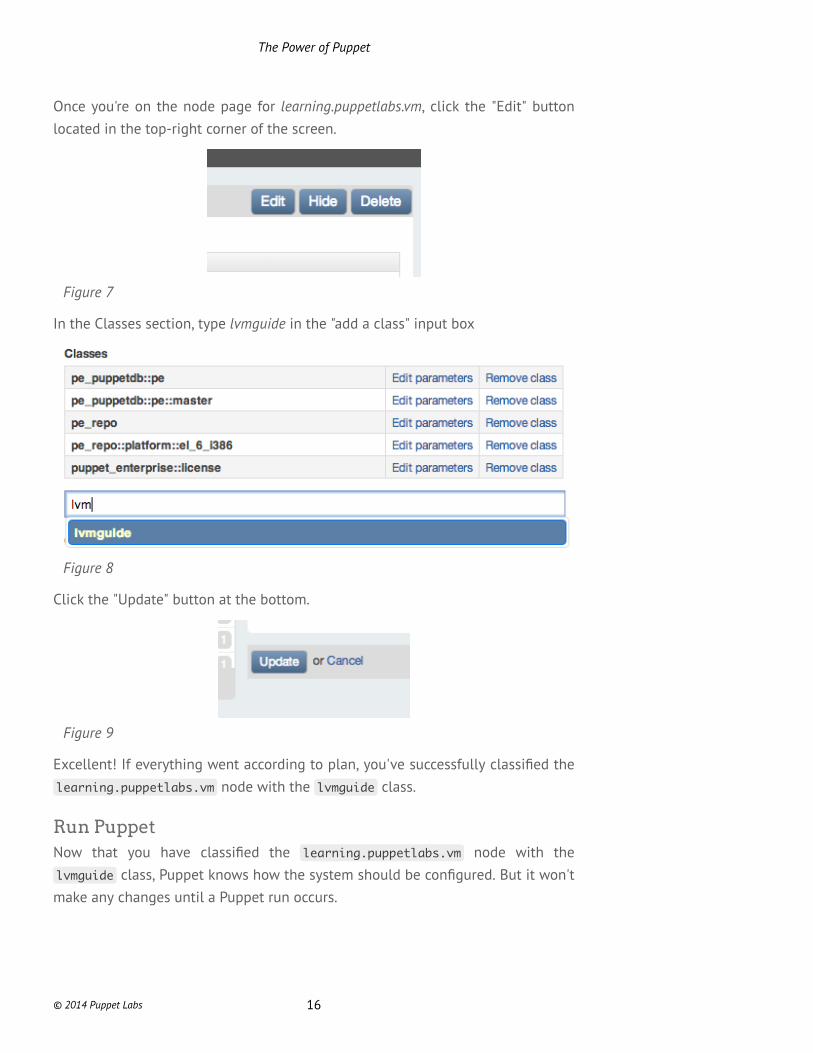
Once you're on the node page for learning.puppetlabs.vm, click the "Edit" buttonlocated in the top-right corner of the screen.
Figure 7
In the Classes section, type lvmguide in the "add a class" input box
Figure 8
Click the "Update" button at the bottom.
Figure 9
Excellent! If everything went according to plan, you've successfully classified thelearning.puppetlabs.vm node with the lvmguide class.
Run PuppetNow that you have classified the learning.puppetlabs.vm node with thelvmguide class, Puppet knows how the system should be configured. But it won'tmake any changes until a Puppet run occurs.
The Power of Puppet
© 2014 Puppet Labs 16

The Puppet agent daemon runs in the background on any nodes you managewith Puppet. Every 30 minutes, the Puppet agent daemon requests a catalog fromthe Puppet Master. The Puppet Master parses all the classes applied to that nodeand builds the catalog to describes how the node is supposed to be configured. Itreturns this catalog to the node's Puppet agent, which then applies any changesnecessary to bring the node into the line with the state described by the catalog.
Task 3 :
Instead of waiting for the Puppet agent to make its scheduled run, use the puppetagent tool to trigger one yourself. In your terminal, type the following command:
puppet agent --test
Please note this may take about a minute to run. This is about the time it takesfor the software packages to be downloaded and installed as needed. After a briefdelay, you will see text scroll by in your terminal indicating that Puppet has madeall the specified changes to the Learning VM.
Check out the Quest Guide! In your browsers address bar, type the following URL:http://<ip-address> . Though the IP address is the same, using https will loadthe PE Console, while http will load the Quest Guide as a website.
From this point on you can either follow along with the website or with the PDF,whichever works best for you.
IP TroubleshootingThe website for the quest guide will remain accessible for as long as the VM'sIP address remains the same. If you move your computer or laptop to a differentnetwork, or if you suspend your laptop and resumed work on the Learning VM aftera while, the website may not be accessible.
In case any of the above issues happen, and you end up with a stale IP address, runthe following commands on the Learning VM to get a new IP address. (Remember,if you're ever unable to establish an SSH session, you can log in directly throughthe interface of your virtualization software.)
Refresh your DHCP lease:
service network restart
The Power of Puppet
© 2014 Puppet Labs 17
Find your IP address:
facter ipaddress
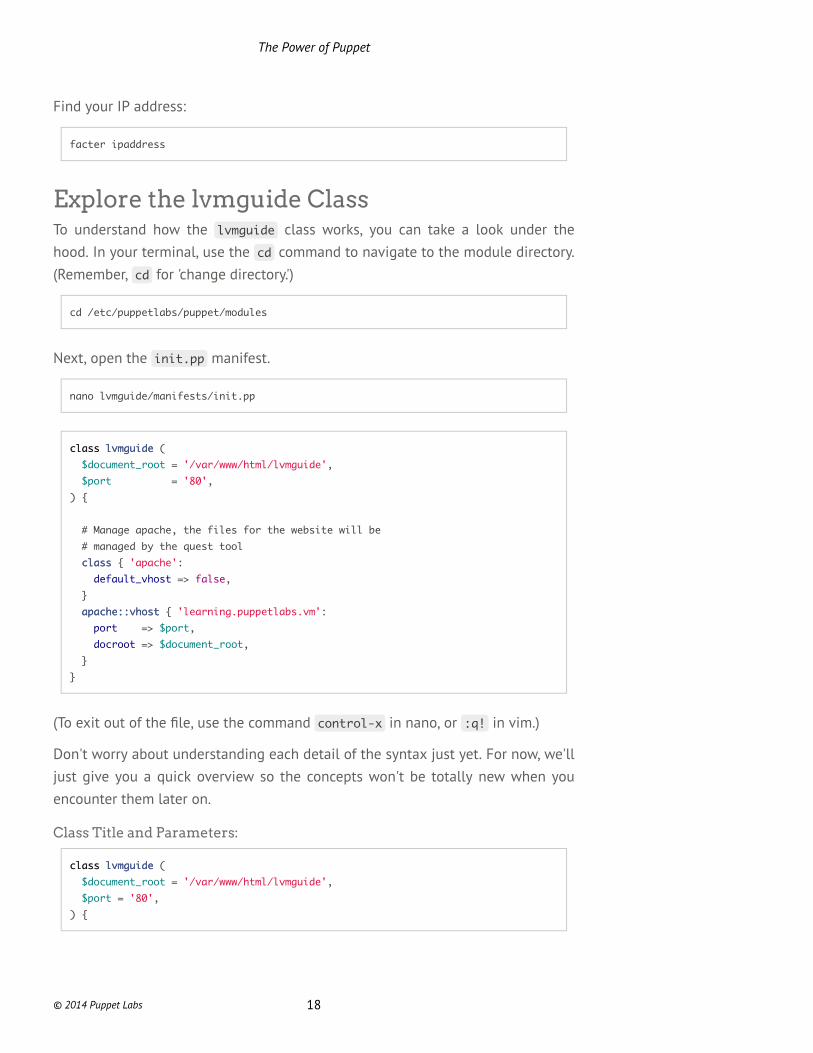
Explore the lvmguide ClassTo understand how the lvmguide class works, you can take a look under thehood. In your terminal, use the cd command to navigate to the module directory.(Remember, cd for 'change directory.')
cd /etc/puppetlabs/puppet/modules
Next, open the init.pp manifest.
nano lvmguide/manifests/init.pp
classclass lvmguidelvmguide ($document_root = '/var/www/html/lvmguide',$port = '80',
) {
# Manage apache, the files for the website will be# managed by the quest toolclassclass { 'apache':
default_vhost => false,}apache::vhostapache::vhost { 'learning.puppetlabs.vm':
port => $port,docroot => $document_root,
}}
(To exit out of the file, use the command control-x in nano, or :q! in vim.)
Don't worry about understanding each detail of the syntax just yet. For now, we'lljust give you a quick overview so the concepts won't be totally new when youencounter them later on.
Class Title and Parameters:
classclass lvmguidelvmguide ($document_root = '/var/www/html/lvmguide',$port = '80',
) {
The Power of Puppet
© 2014 Puppet Labs 18
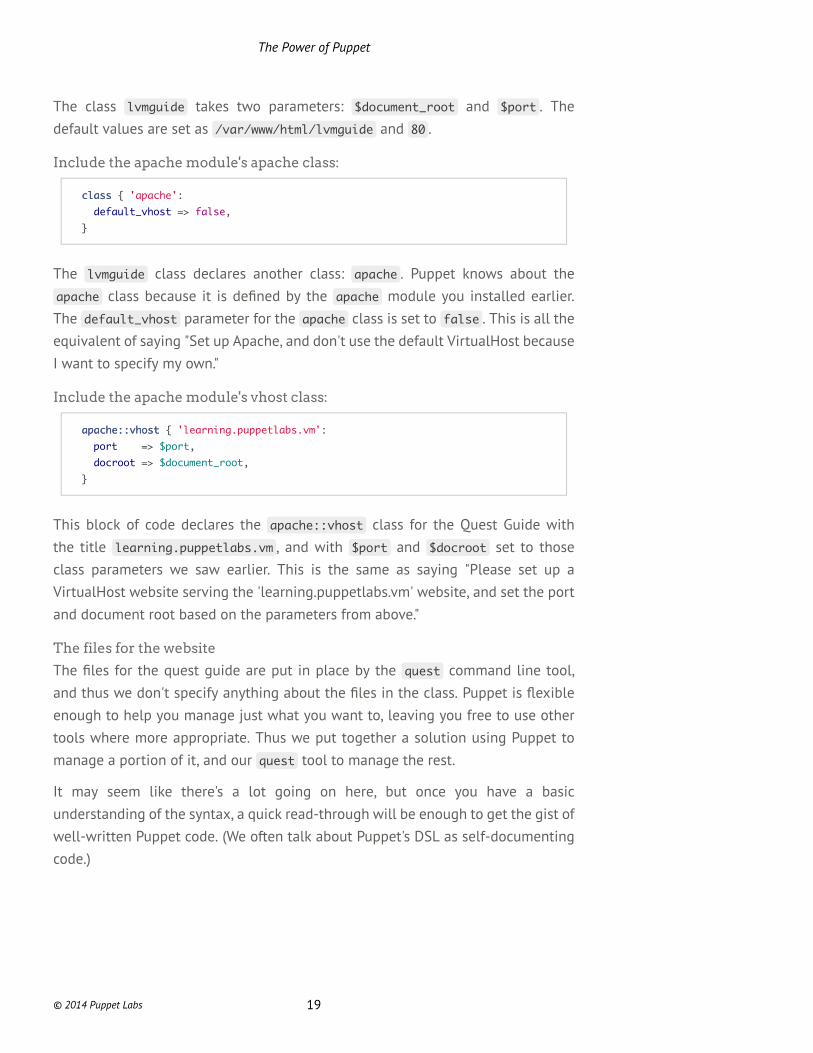
The class lvmguide takes two parameters: $document_root and $port . Thedefault values are set as /var/www/html/lvmguide and 80 .
Include the apache module's apache class:
classclass { 'apache':default_vhost => false,
}
The lvmguide class declares another class: apache . Puppet knows about theapache class because it is defined by the apache module you installed earlier.The default_vhost parameter for the apache class is set to false . This is all theequivalent of saying "Set up Apache, and don't use the default VirtualHost becauseI want to specify my own."
Include the apache module's vhost class:
apache::vhostapache::vhost { 'learning.puppetlabs.vm':port => $port,docroot => $document_root,
}
This block of code declares the apache::vhost class for the Quest Guide withthe title learning.puppetlabs.vm , and with $port and $docroot set to thoseclass parameters we saw earlier. This is the same as saying "Please set up aVirtualHost website serving the 'learning.puppetlabs.vm' website, and set the portand document root based on the parameters from above."
The files for the website
The files for the quest guide are put in place by the quest command line tool,and thus we don't specify anything about the files in the class. Puppet is flexibleenough to help you manage just what you want to, leaving you free to use othertools where more appropriate. Thus we put together a solution using Puppet tomanage a portion of it, and our quest tool to manage the rest.
It may seem like there's a lot going on here, but once you have a basicunderstanding of the syntax, a quick read-through will be enough to get the gist ofwell-written Puppet code. (We often talk about Puppet's DSL as self-documentingcode.)
The Power of Puppet
© 2014 Puppet Labs 19
Repeatable, Portable, TestableIt's cool to install and configure an Apache httpd web server with a few lines ofcode and some clicks in the console, but keep in mind that the best part can'tbe shown with the Learning VM: once the lvmguide module is installed, you canapply the lvmguide class to as many nodes as you like, even if they have differentspecifications or run different operating systems.
And once a class is deployed to your infrastructure, Puppet gives you the abilityto manage the configuration from a single central point. You can implementyour updates and changes in a test environment, then easily move them intoproduction.
Updated ContentBefore continuing on to the remaining quests, let's ensure that you have the mostup to date version of the quest-related content. Now that we have the websiteconfigured, please run the following command:
quest update
This will download an updated PDF, files for the quest guide website, as well asthe tests for the quests.
You can find a copy of the update Quest Guide PDF at: http://<your-vm's-ip-address>/Quest_Guide.pdf , or in the /var/www/html/lvmguide/ directory on theVM.
ReviewGreat job on completing the quest! You should now have a good idea of how todownload exising modules from the Forge and use the PE Console node classifierto apply them to a node. You also learned how to use the puppet agent --testcommand to manually trigger a puppet run.
Though we'll go over many of the details of the Puppet DSL in later quests, youhad your first look at a Puppet class, and some of the elements that make it up.
The Power of Puppet
© 2014 Puppet Labs 20
Resources
Prerequisites• Welcome Quest• Power of Puppet Quest
Quest Objectives• Understand how resources on the system are modeled in Puppet's
Domain Specific Language (DSL)• Learn about the Resource Abstraction Layer (RAL)• Use Puppet to inspect resources on your system
Getting StartedIn this quest, you will be introduced to Resources and how system configurationsare represented using Resource definitions. You will learn how to inspect resourceson the Learning VM using Puppet. Please note though, that we are not going touse Puppet to manage any resources. Instead, we are going to use basic Unixcommands in this quest, and then look at how the resultant resource changesare represented in Puppet's Domain Specific Language (DSL). As an aspiringpractitioner of Puppet, it is important for you to have a thorough understanding ofthe Puppet syntax as well as the puppet resource and puppet describe tools.When you're ready to get started, type the following command:
quest --start resources
ResourcesResources are the fundamental units for modeling system configurations. Eachresource describes some aspect of a system, like a service that must be runningor a package that must be installed. The block of Puppet code that describesa resource is called a resource declaration. Resource declarations are written inPuppet's own Domain Specific Language.
© 2014 Puppet Labs 21
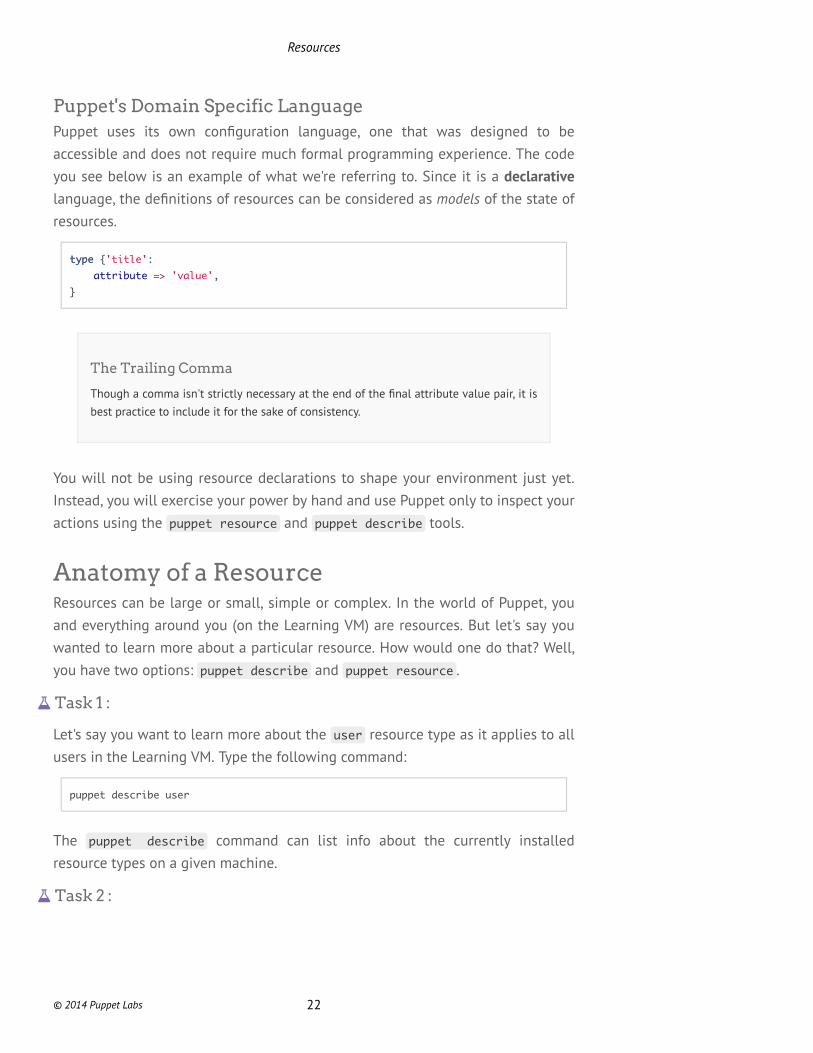
Puppet's Domain Specific LanguagePuppet uses its own configuration language, one that was designed to beaccessible and does not require much formal programming experience. The codeyou see below is an example of what we're referring to. Since it is a declarativelanguage, the definitions of resources can be considered as models of the state ofresources.
typetype {'title':attribute => 'value',
}
The Trailing Comma
Though a comma isn't strictly necessary at the end of the final attribute value pair, it isbest practice to include it for the sake of consistency.
You will not be using resource declarations to shape your environment just yet.Instead, you will exercise your power by hand and use Puppet only to inspect youractions using the puppet resource and puppet describe tools.
Anatomy of a ResourceResources can be large or small, simple or complex. In the world of Puppet, youand everything around you (on the Learning VM) are resources. But let's say youwanted to learn more about a particular resource. How would one do that? Well,you have two options: puppet describe and puppet resource .
Task 1 :
Let's say you want to learn more about the user resource type as it applies to allusers in the Learning VM. Type the following command:
puppet describe user
The puppet describe command can list info about the currently installedresource types on a given machine.
Task 2 :
Resources
© 2014 Puppet Labs 22
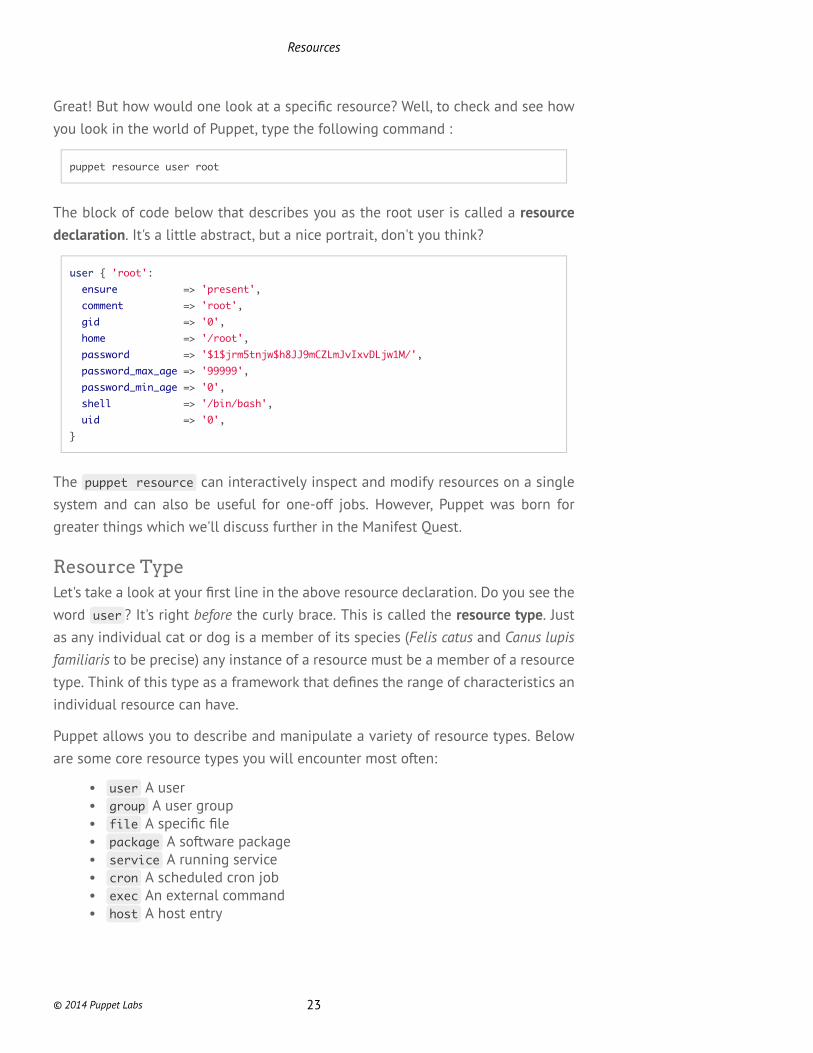
Great! But how would one look at a specific resource? Well, to check and see howyou look in the world of Puppet, type the following command :
puppet resource user root
The block of code below that describes you as the root user is called a resourcedeclaration. It's a little abstract, but a nice portrait, don't you think?
useruser { 'root':ensure => 'present',comment => 'root',gid => '0',home => '/root',password => '$1$jrm5tnjw$h8JJ9mCZLmJvIxvDLjw1M/',password_max_age => '99999',password_min_age => '0',shell => '/bin/bash',uid => '0',
}
The puppet resource can interactively inspect and modify resources on a singlesystem and can also be useful for one-off jobs. However, Puppet was born forgreater things which we'll discuss further in the Manifest Quest.
Resource TypeLet's take a look at your first line in the above resource declaration. Do you see theword user ? It's right before the curly brace. This is called the resource type. Justas any individual cat or dog is a member of its species (Felis catus and Canus lupisfamiliaris to be precise) any instance of a resource must be a member of a resourcetype. Think of this type as a framework that defines the range of characteristics anindividual resource can have.
Puppet allows you to describe and manipulate a variety of resource types. Beloware some core resource types you will encounter most often:
• user A user• group A user group• file A specific file• package A software package• service A running service• cron A scheduled cron job• exec An external command• host A host entry
Resources
© 2014 Puppet Labs 23
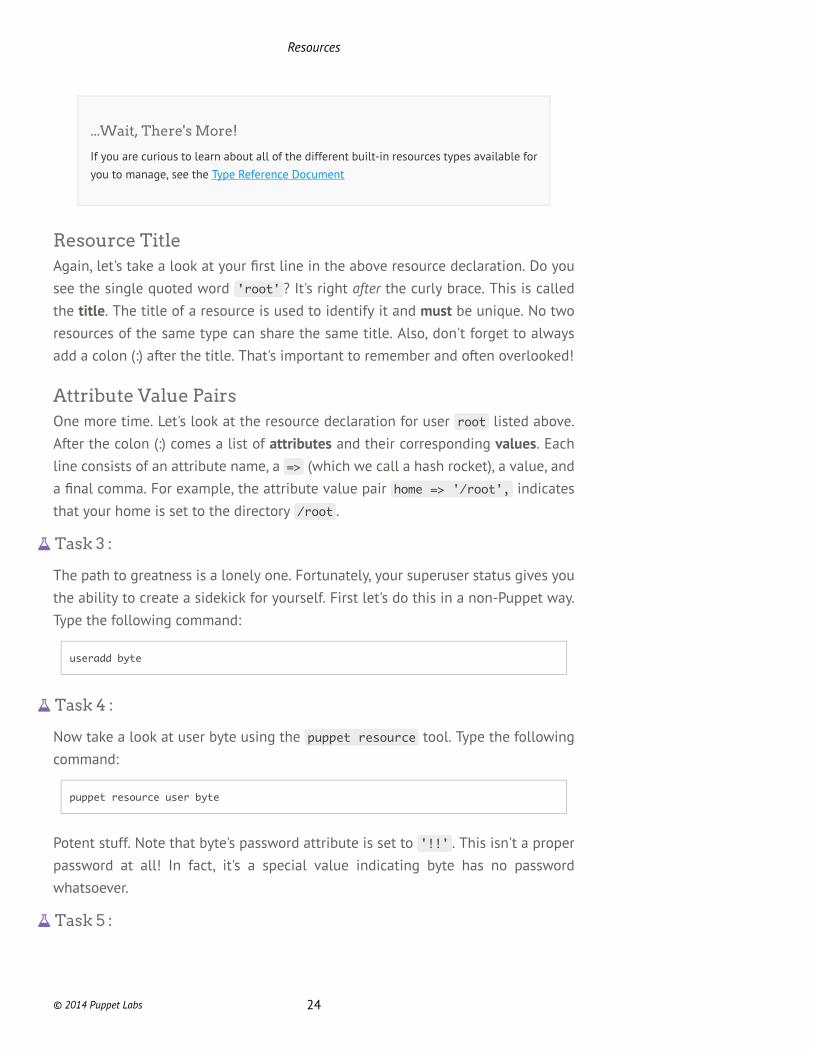
...Wait, There's More!
If you are curious to learn about all of the different built-in resources types available foryou to manage, see the Type Reference Document
Resource TitleAgain, let's take a look at your first line in the above resource declaration. Do yousee the single quoted word 'root' ? It's right after the curly brace. This is calledthe title. The title of a resource is used to identify it and must be unique. No tworesources of the same type can share the same title. Also, don't forget to alwaysadd a colon (:) after the title. That's important to remember and often overlooked!
Attribute Value PairsOne more time. Let's look at the resource declaration for user root listed above.After the colon (:) comes a list of attributes and their corresponding values. Eachline consists of an attribute name, a => (which we call a hash rocket), a value, anda final comma. For example, the attribute value pair home => '/root', indicatesthat your home is set to the directory /root .
Task 3 :
The path to greatness is a lonely one. Fortunately, your superuser status gives youthe ability to create a sidekick for yourself. First let's do this in a non-Puppet way.Type the following command:
useradd byte
Task 4 :
Now take a look at user byte using the puppet resource tool. Type the followingcommand:
puppet resource user byte
Potent stuff. Note that byte's password attribute is set to '!!' . This isn't a properpassword at all! In fact, it's a special value indicating byte has no passwordwhatsoever.
Task 5 :
Resources
© 2014 Puppet Labs 24
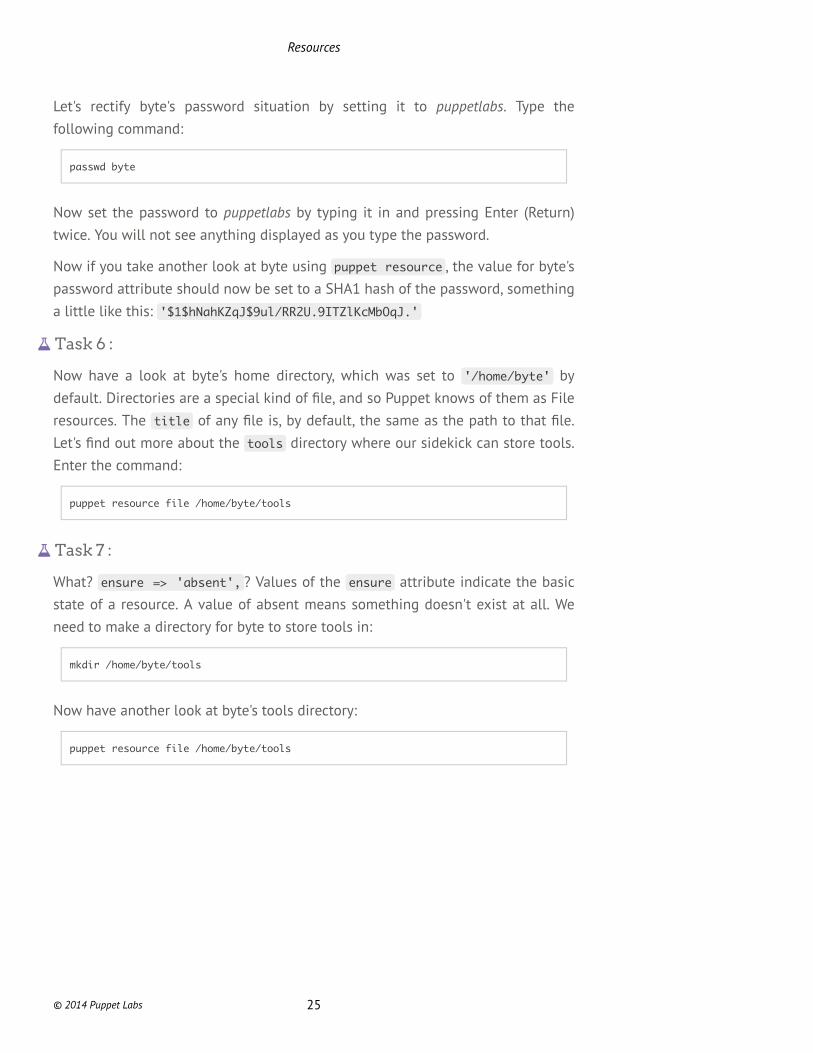
Let's rectify byte's password situation by setting it to puppetlabs. Type thefollowing command:
passwd byte
Now set the password to puppetlabs by typing it in and pressing Enter (Return)twice. You will not see anything displayed as you type the password.
Now if you take another look at byte using puppet resource , the value for byte'spassword attribute should now be set to a SHA1 hash of the password, somethinga little like this: '$1$hNahKZqJ$9ul/RR2U.9ITZlKcMbOqJ.'
Task 6 :
Now have a look at byte's home directory, which was set to '/home/byte' bydefault. Directories are a special kind of file, and so Puppet knows of them as Fileresources. The title of any file is, by default, the same as the path to that file.Let's find out more about the tools directory where our sidekick can store tools.Enter the command:
puppet resource file /home/byte/tools
Task 7 :
What? ensure => 'absent', ? Values of the ensure attribute indicate the basicstate of a resource. A value of absent means something doesn't exist at all. Weneed to make a directory for byte to store tools in:
mkdir /home/byte/tools
Now have another look at byte's tools directory:
puppet resource file /home/byte/tools
Resources
© 2014 Puppet Labs 25

Quest Progress
Awesome! Have you noticed when you successfully finish a task, the 'completed tasks'in the lower right corner of your terminal increases? To check on your progress type thefollowing command:
quest --progress
This shows your progress by displaying the tasks you've completed and tasks that stillneed completing.
Task 8 :
We want byte to be the owner of the tools directory. To do this, type the followingcommands:
chown -R byte:byte /home/byte/tools
Inspect the state of the directory one more time, to make sure everything is inorder:
puppet resource file /home/byte/tools
The Resource Abstraction LayerBy now, we have seen some examples of how Puppet 'sees' resources on thesystem. A common pattern you might observe is that these are descriptions of howthe resource in question should or does look. In subsequent quests, we will seehow, instead of just inspecting resources, we can declare how specific resourcesshould look, providing us the ability to model the state of these resources.
Puppet provides us this ability to describe resources of different types. Our job ofdefining how a system should be configured is reduced to one of creating a high-level model of the desired state of the system. We don't need to worry about howthat model is realized.
Puppet takes the descriptions expressed by resource declarations and usesproviders that are specific to the Operating System to realize them. TheseProviders abstract away the complexity of managing diverse implementations ofresource types on different systems. As a whole, this system of resource types and
Resources
© 2014 Puppet Labs 26
the providers that implement them is called the Resource Abstraction Layer, orRAL.
You can describe the ideal state of a user resource. Puppet will choose a suitableprovider to realize your definition - in the case of users, Puppet can use providersto manage user records in /etc/passwd files or NetInfo , or LDAP . Similarly, whenyou wish to install a package, you can stand back and watch Puppet figure outwhether to use yum or apt for package management. This lets you ignore theimplementation-related details of managing the resources, such as the names ofthe commands (is it adduser or useradd ?), the arguments for the commands, fileformats etc and lets you focus on the more important job of modeling the desiredstate for your systems.
By harnessing the power of the RAL, you can be confident of the potency of yourPuppet skills wherever your journey takes you.
ReviewLet's rehash what we learned in this quest. First, we learned two very importantPuppet topics: the Resource Abstraction Layer and the anatomy of a resource.To dive deeper into these two important topics, we showed you how to use thepuppet describe and puppet resource tools, which also leads us to a betterunderstanding of Puppet's Language. These tools will be tremendously useful toyou in the succeeding quests. Unfortunately we didn't get to write any Puppetcode in this quest, but that's okay. We're going to start doing that in the ManifestQuest (the next quest)!
Resources
© 2014 Puppet Labs 27
Manifests
Prerequisites• Welcome Quest• Power of Puppet Quest• Resources Quest
Quest Objectives• Understand the concept of a Puppet manifest• Construct and apply manifests to manage resources
Getting StartedAs you saw in the Resources Quest, Puppet's resource declarations can be usedto keep track of just about anything in this Learning VM. So far, you have madechanges to the Learning VM without using Puppet. You looked at resourcedeclarations using puppet describe and puppet resource only in order to trackyour effects. In this quest, you will learn to craft your own resource declarationsand inscribe them in a special file called a manifest. When you're ready to getstarted, type the following command:
quest --start manifest
Let's See What Quests You've Completed
Before you get started, let's take a look at the quests you have completed. Type thefollowing command:
quest --completed
This is useful in case you forget which Quests you've already done. In this case it showsthat you have completed three quests: (1)Welcome Quest (2)Power of Puppet Quest and(3)Resources Quest.
© 2014 Puppet Labs 28

Puppet ManifestsManifests are files containing Puppet code. They are standard text files savedwith the .pp file extension. The core of the Puppet language is the resourcedeclaration as it describes a desired state for one resource. Puppet manifestscontain resource declarations. Manifests, like the resource declarations theycontain, are written in Puppet Language.
Don't Forget These Tools Too
You can use puppet describe and puppet resource for help using and
understanding the user resource...and any other resource type you're curious about.
Let's get started by making sure you're in your home directory: /root . This iswhere you want to place newly created manifests.
cd /root
Text Editors
For the sake of simplicity and consistency, we use the text editor nano in our
instructions, but feel free to use vim or another text editor of your choice.
Task 1 :
Create a manifest to remove user byte:
Unfortunately byte just doesn't seem to be working out as a sidekick. Let's createa manifest to get rid of byte. We will create a manifest, with some code in it. Typethe following command, after you make sure you are in the /root directory asmentioned above:
nano byte.pp
Type the following instructions into Byte's manifest:
Manifests
© 2014 Puppet Labs 29

useruser { 'byte':ensure => 'absent',
}
Save the file and exit your text editor. We touched on this in the Resources Quests,but the ensure => absent attribute/value pair states that we are going to makesure user byte does not exist in the Learning VM.
Puppet ParserWhat if we made an error when writing our Puppet code? The puppet parsertool is Puppet's version of a syntax checker. When provided with a file as anargument, this tool validates the syntax of the code in the file without acting onthe definitions and declarations within. If no manifest files are provided, Puppetwill validate the default site.pp manifest. If there are no syntax errors, Puppetwill return nothing when this command is ran, otherwise Puppet will display thefirst syntax error encountered.
Task 2 :
Using the puppet parser tool, let's you check your manifest for any syntax errors.Type the following command:
puppet parser validate byte.pp
Again, if the parser returns nothing, continue on. If not, make the necessarychanges and re-validate until the syntax checks out.
Puppet ApplyOnce you've created a manifest you will use the puppet apply tool to enforce it.The puppet apply tool enables you to apply individual manifests locally. In thereal world, you may want an easier method to apply multiple definitions acrossmultiple systems from a central source. We will get there when we talk aboutclasses and modules in succeeding quests. For now, manifests and puppet applyaid in learning the Puppet language in small, iterative steps.
When you run puppet apply with a manifest file as the argument, a catalogis generated containing a list of all resources in the manifest, along with thedesired state you specified. Puppet will check each resource in your environmentagainst the resource declaration in the manifest. Puppet's providers will then do
The `puppet parser` tool canonly ensure that the syntax ofa manifest is well-formed. Itcannot guarantee that yourvariables are correctly named,your logic is valid, or that yourmanifest does what you want itto.
Manifests
© 2014 Puppet Labs 30

everything necessary to bring the state of those resources in line with the resourcedeclarations in your manifest.
Task 3 :
Once your byte.pp manifest is error free, we're going to simulate the changein the Learning VM without actually enforcing those changes. Let's see whathappens:
puppet apply --noop byte.pp
In the returned output, Puppet tells us that it has not made the changes to theLearning VM, but if it had, this is what would be changed.
Task 4 :
Since the simulated change is what we want, let's enforce the change on theLearning VM.
puppet apply byte.pp
How is byte doing?
HINT: Use the puppet resource command discussed in the Resource Quest.
byte does not seem to be doing well. Actually, the user's gone. The ensure =>'absent' value clearly made short work of the user account.
Task 5 :
With Puppet manifests you can create as well as destroy. Lets create a new,stronger sidekick by adding user gigabyte to the Learning VM using Puppet. Ifyou need help on how to do this, refer to the previous tasks you've just completedin this quest. One thing to note: ensure => 'present' will make sure GigaByteexists in the Learning VM.
The steps include creating a manifest file, and writing the minimal amount ofPuppet code required to ensure that the user account is created. This task will bemarked complete when the user exists on the system.
Manifests
© 2014 Puppet Labs 31

ReviewThis is a foundational quest you must understand in order to successfully usePuppet. As you saw when completing this quest, we've added two new tools toyour toolbox: puppet parser and puppet apply . You always want to use puppetparser to check the syntax of your manifest before using puppet apply to enforceit. This quest contained a walkthrough of the "best practice" methods to creating,checking, applying your manifest. We've also created a simplified version belowfor your reference:
1. Open or create a manifest with the .pp extension2. Add or edit your Puppet code3. Use the puppet parser tool to check for syntax errors (recommended)4. Simulate your manifest using puppet apply --noop (recommended)5. Enfore your manifest using puppet apply6. Check to make sure everything is working correctly (recommended)
On a final note, if you go back to the Power of Puppet quest, you will notice thatthe init.pp file containing the definition for class lvmguide is a manifest.
Manifests
© 2014 Puppet Labs 32
“
Variables
Prerequisites• Welcome Quest• Power of Puppet Quest• Resources Quest• Manifest Quest
Quest Objectives• Learn how to make Puppet manifests more flexible using variables• Learn how to interpolate variables in manifests• Understand how facts can be used
Getting StartedManifests contain instructions for automating tasks related to managingresources. Now it's time to learn how to make manifests more flexible. In thisquest you will learn how to include variables, interpolate variables, and use Facterfacts in your manifests in order to increase their portability and flexibility. Whenyou're ready to get started, type the following command:
quest --start variables
Variables
Puppet can be used to manage configurations on a variety of different operatingsystems and platforms. The ability to write portable code that accomodatesvarious platforms is a significant advantage in using Puppet. It is important thatyou learn to write manifests in such a way that they can function in different
The green reed which bends in the wind is stronger than the mighty oakwhich breaks in a storm.-Confucius
© 2014 Puppet Labs 33
contexts. Effective use of variables is one of the fundamental methods you willuse to achieve this.
If you've used variables before in some other programming or scripting language,the concept should be familiar. Variables allow you to assign data to a variablename in your manifest and then use that name to reference that data elsewherein your manifest. In Puppet's syntax, variable names are prefixed with a $ (dollarsign). You can assign data to a variable name with the = operator. You can alsouse variables as the value for any resource attribute, or as the title of a resource.In short, once you have defined a variable with a value you can use it anywhereyou would have used the value or data.
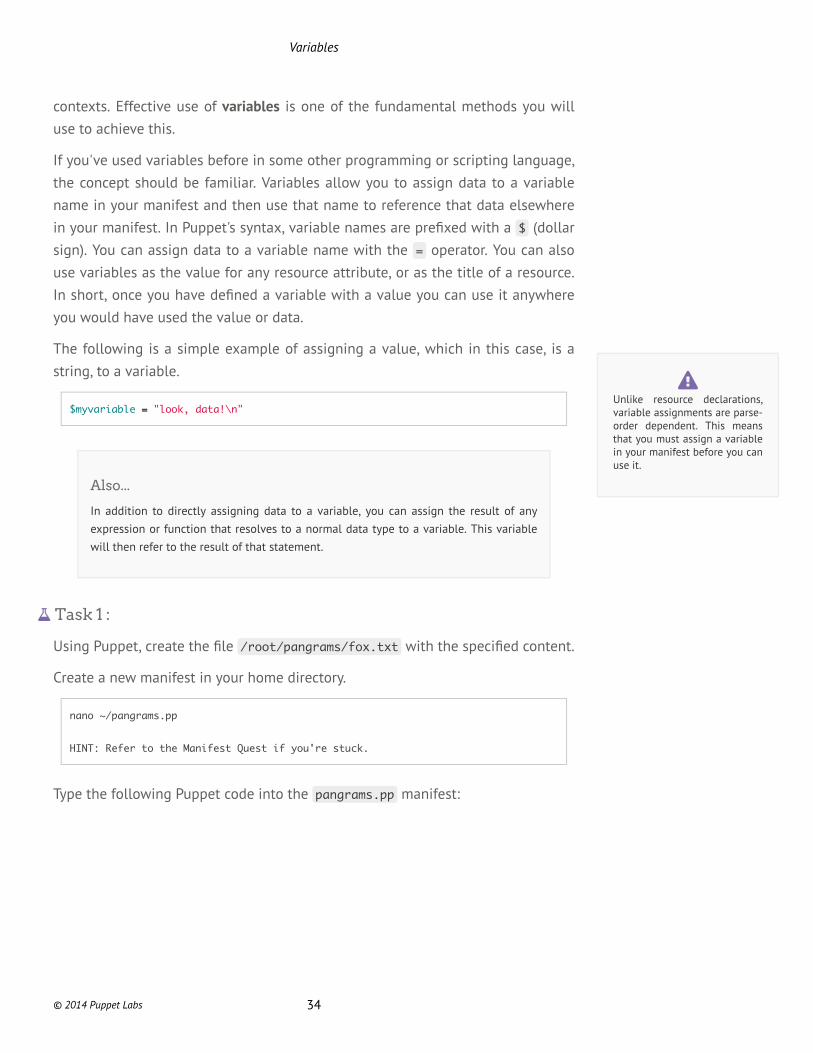
The following is a simple example of assigning a value, which in this case, is astring, to a variable.
$myvariable == "look, data!\n"
Also...
In addition to directly assigning data to a variable, you can assign the result of anyexpression or function that resolves to a normal data type to a variable. This variablewill then refer to the result of that statement.
Task 1 :
Using Puppet, create the file /root/pangrams/fox.txt with the specified content.
Create a new manifest in your home directory.
nano ~/pangrams.pp
HINT: Refer to the Manifest Quest if you're stuck.
Type the following Puppet code into the pangrams.pp manifest:
Unlike resource declarations,variable assignments are parse-order dependent. This meansthat you must assign a variablein your manifest before you canuse it.
Variables
© 2014 Puppet Labs 34
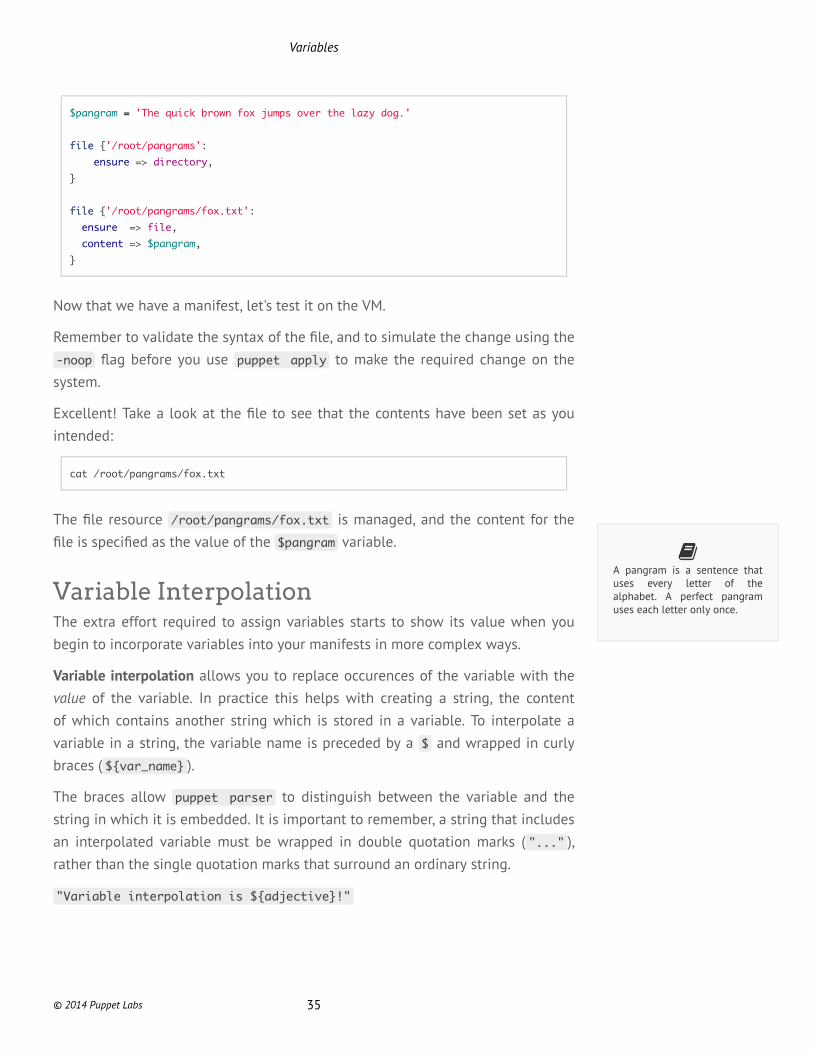
$pangram == 'The quick brown fox jumps over the lazy dog.'
filefile {'/root/pangrams':ensure => directory,
}
filefile {'/root/pangrams/fox.txt':ensure => file,content => $pangram,
}
Now that we have a manifest, let's test it on the VM.
Remember to validate the syntax of the file, and to simulate the change using the-noop flag before you use puppet apply to make the required change on thesystem.
Excellent! Take a look at the file to see that the contents have been set as youintended:
cat /root/pangrams/fox.txt
The file resource /root/pangrams/fox.txt is managed, and the content for thefile is specified as the value of the $pangram variable.
Variable InterpolationThe extra effort required to assign variables starts to show its value when youbegin to incorporate variables into your manifests in more complex ways.
Variable interpolation allows you to replace occurences of the variable with thevalue of the variable. In practice this helps with creating a string, the contentof which contains another string which is stored in a variable. To interpolate avariable in a string, the variable name is preceded by a $ and wrapped in curlybraces ( ${var_name} ).
The braces allow puppet parser to distinguish between the variable and thestring in which it is embedded. It is important to remember, a string that includesan interpolated variable must be wrapped in double quotation marks ( "..." ),rather than the single quotation marks that surround an ordinary string.
"Variable interpolation is ${adjective}!"
A pangram is a sentence thatuses every letter of thealphabet. A perfect pangramuses each letter only once.
Variables
© 2014 Puppet Labs 35
Task 2 :
Create a file called perfect_pangrams. We will use variable substitution andinterpolation in doing this.
Now you can use variable interpolation to do something more interesting. Goahead and create a new manifest called perfect_pangrams.pp .
nano ~/perfect_pangrams.pp
HINT: Refer to the Manifest Quest if you're stuck
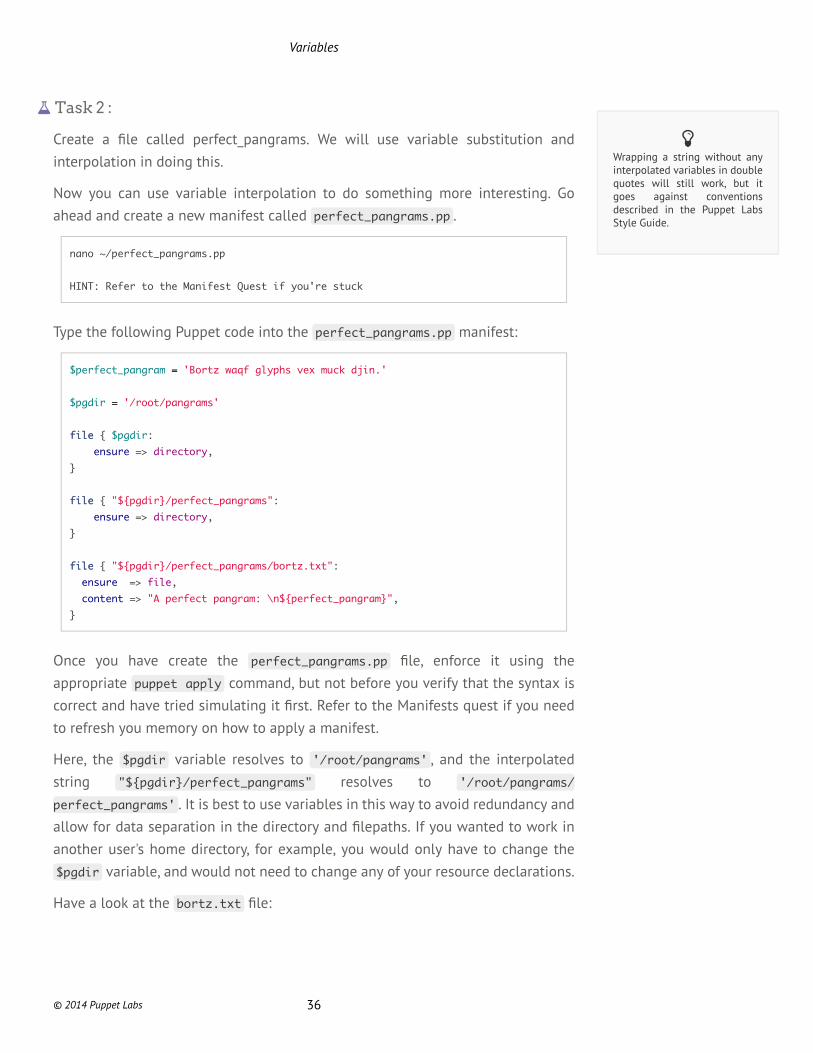
Type the following Puppet code into the perfect_pangrams.pp manifest:
$perfect_pangram == 'Bortz waqf glyphs vex muck djin.'
$pgdir == '/root/pangrams'
filefile { $pgdir:ensure => directory,
}
filefile { "${pgdir}/perfect_pangrams":ensure => directory,
}
filefile { "${pgdir}/perfect_pangrams/bortz.txt":ensure => file,content => "A perfect pangram: \n${perfect_pangram}",
}
Once you have create the perfect_pangrams.pp file, enforce it using theappropriate puppet apply command, but not before you verify that the syntax iscorrect and have tried simulating it first. Refer to the Manifests quest if you needto refresh you memory on how to apply a manifest.
Here, the $pgdir variable resolves to '/root/pangrams' , and the interpolatedstring "${pgdir}/perfect_pangrams" resolves to '/root/pangrams/perfect_pangrams' . It is best to use variables in this way to avoid redundancy andallow for data separation in the directory and filepaths. If you wanted to work inanother user's home directory, for example, you would only have to change the$pgdir variable, and would not need to change any of your resource declarations.
Have a look at the bortz.txt file:
Wrapping a string without anyinterpolated variables in doublequotes will still work, but itgoes against conventionsdescribed in the Puppet LabsStyle Guide.
Variables
© 2014 Puppet Labs 36

“
cat /root/pangrams/perfect_pangrams/bortz.txt
You should see something like this, with your pangram variable inserted into thefile's content string:
A perfect pangram:Bortz waqf glyphs vex muck djin.
What this perfect pangram actually means, however, is outside the scope of thislesson!
Facts
Puppet has a bunch of built-in, pre-assigned variables that you can use. Rememberusing the Facter tool when you first started? The Facter tool discovers informationabout your system and makes it available to Puppet as variables. Puppet’s compileraccesses those facts when it’s reading a manifest.
Remember running facter ipaddress told you your IP address? What if youwanted to turn facter ipaddress into a variable? It would look like this:$::ipaddress as a stand-alone variable, or like this: ${::ipaddress} wheninterpolated in a string.
The :: in the above indicates that we always want the top-scope variable, theglobal fact called ipaddress , as opposed to, say a variable called ipaddress youdefined in a specific manifest.
In the Conditions Quest, you will see how Puppet manifests can be designed toperform differently depending on facts available through facter . For now, let'splay with some facts to get a feel for what's available.
Task 3 :
We will write a manifest that will interpolate facter variables into a string assignedto the $message variable. We can then use a notify resource to post anotification when the manifest is applied. We will also declare a file resource. Wecan use the same $string to assign our interpolated string to this file's contentparameter.
Get your facts first, then distort them as you please.-Mark Twain
Variables
© 2014 Puppet Labs 37
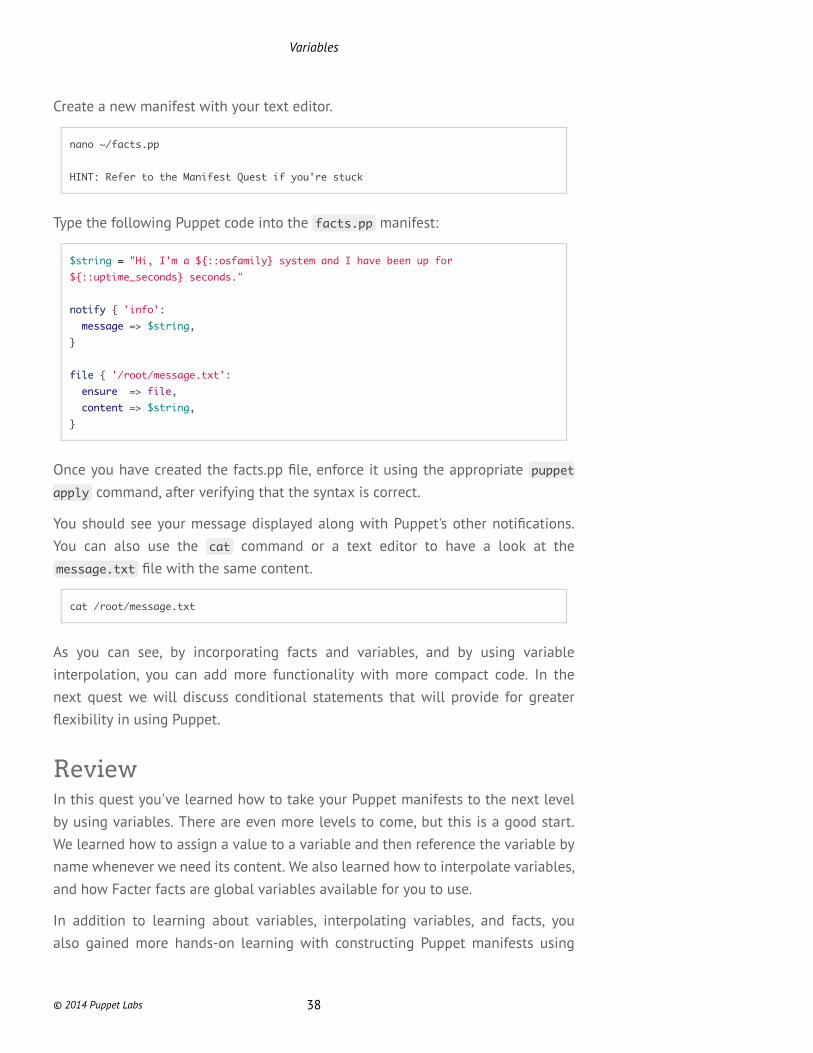
Create a new manifest with your text editor.
nano ~/facts.pp
HINT: Refer to the Manifest Quest if you're stuck
Type the following Puppet code into the facts.pp manifest:
$string == "Hi, I'm a ${::osfamily} system and I have been up for${::uptime_seconds} seconds."
notifynotify { 'info':message => $string,
}
filefile { '/root/message.txt':ensure => file,content => $string,
}
Once you have created the facts.pp file, enforce it using the appropriate puppetapply command, after verifying that the syntax is correct.
You should see your message displayed along with Puppet's other notifications.You can also use the cat command or a text editor to have a look at themessage.txt file with the same content.
cat /root/message.txt
As you can see, by incorporating facts and variables, and by using variableinterpolation, you can add more functionality with more compact code. In thenext quest we will discuss conditional statements that will provide for greaterflexibility in using Puppet.
ReviewIn this quest you've learned how to take your Puppet manifests to the next levelby using variables. There are even more levels to come, but this is a good start.We learned how to assign a value to a variable and then reference the variable byname whenever we need its content. We also learned how to interpolate variables,and how Facter facts are global variables available for you to use.
In addition to learning about variables, interpolating variables, and facts, youalso gained more hands-on learning with constructing Puppet manifests using
Variables
© 2014 Puppet Labs 38

Puppet's DSL. We hope you are becoming more familar and confident with usingand writing Puppet code as you are progressing.
Looking back to the Power of Puppet Quest, can you identify where and howvariables are used in the lvmguide class?
Variables
© 2014 Puppet Labs 39
“
Conditional Statements
Prerequisites• Welcome Quest• Power of Puppet Quest• Resources Quest• Manifest Quest• Variables Quest
Quest Objectives• Learn how to use conditional logic to make your manifests adaptable.• Understand the syntax and function of the if , unless , case , and
selector statements.
Getting StartedConditional statements allow you to write Puppet code that will return differentvalues or execute different blocks of code depending on conditions you specify.This, in conjunction with Facter facts, will enable you to write Puppet code thataccomodates different platforms, operating systems, and functional requirements.
To start this quest enter the following command:
quest --start conditionals
Conditions
Conditional statements let your Puppet code behave differently in differentsituations. They are most helpful when combined with facts or with datapertaining to the systems. This enables you to write code to perform as desired on
Just dropped in (to see what condition my condition was in)-Mickey Newbury
© 2014 Puppet Labs 40

a variety of operating systems and under differing system conditions. Pretty neat,don't you think?
Puppet supports a few different ways of implementing conditional logic:
• if statements• unless statements• case statements, and• selectors
The 'if' StatementPuppet’s if statements behave much like those in many other programming andscripting languages.
An if statement includes a condition followed by a block of Puppet code that willonly be executed if that condition evaluates as true. Optionally, an if statementcan also include any number of elsif clauses and an else clause. Here are somerules:
• If the if condition fails, Puppet moves on to the elsif condition (if oneexists)
• If both the if and elsif conditions fail, Puppet will execute the code inthe else clause (if one exists)
• If all the conditions fail, and there is no else block, Puppet will donothing and move on
The following is an example of an if statement you might use to raise a warningwhen a class is included on an unsupported system:
ifif $::is_virtual ==== 'true' {# Our NTP module is not supported on virtual machines:warningwarning( 'Tried to include class ntp on virtual machine.' )
}elsifelsif $::operatingsystem ==== 'Darwin' {
# Our NTP module is not supported on Darwin:warningwarning( 'This NTP module does not yet work on Darwin.' )
}elseelse {
# Normal node, include the class.include ntpntp
}
In addition to the == operator, which tests for equality, there is also a regularexpression match operator =~ . The == operator is not case sensitive. In the aboveexample, if you had:
Conditional Statements
© 2014 Puppet Labs 41

ifif $::is_virtual ==== 'TRUE' {# Our NTP module is not supported on virtual machines:warningwarning( 'Tried to include class ntp on virtual machine.' )
}elsifelsif $::operatingsystem ==== 'darwin' {
# Our NTP module is not supported on Darwin:warningwarning( 'This NTP module does not yet work on Darwin.' )
}elseelse {
# Normal node, include the class.include ntpntp
}
. . . the behavior would remain unchanged.
The Warning Function
The warning() function will not affect the execution of the rest of the manifest, butif you were running Puppet in the usual Master-Agent setup, it would log a message onthe server at the 'warn' level.
The regular expression operator =~ helps you test whether a string matches apattern you specify. For example, in the following, we capture the digits thatfollow www in the hostname, such as www01 or www12 and store them in the $1variable for use in the notice() function.
ifif $::hostname =~=~ /^www(\d+)\./ {noticenotice("Welcome to web server number $1")
}
Task 1 :
Just as we have done in the Variables Quest, let's create a manifest and add asimple conditional statement. The file should report on how long the VM has beenup and running.
nano ~/conditionals.pp
Enter the following code into your conditionals.pp manifest:
Conditional Statements
© 2014 Puppet Labs 42
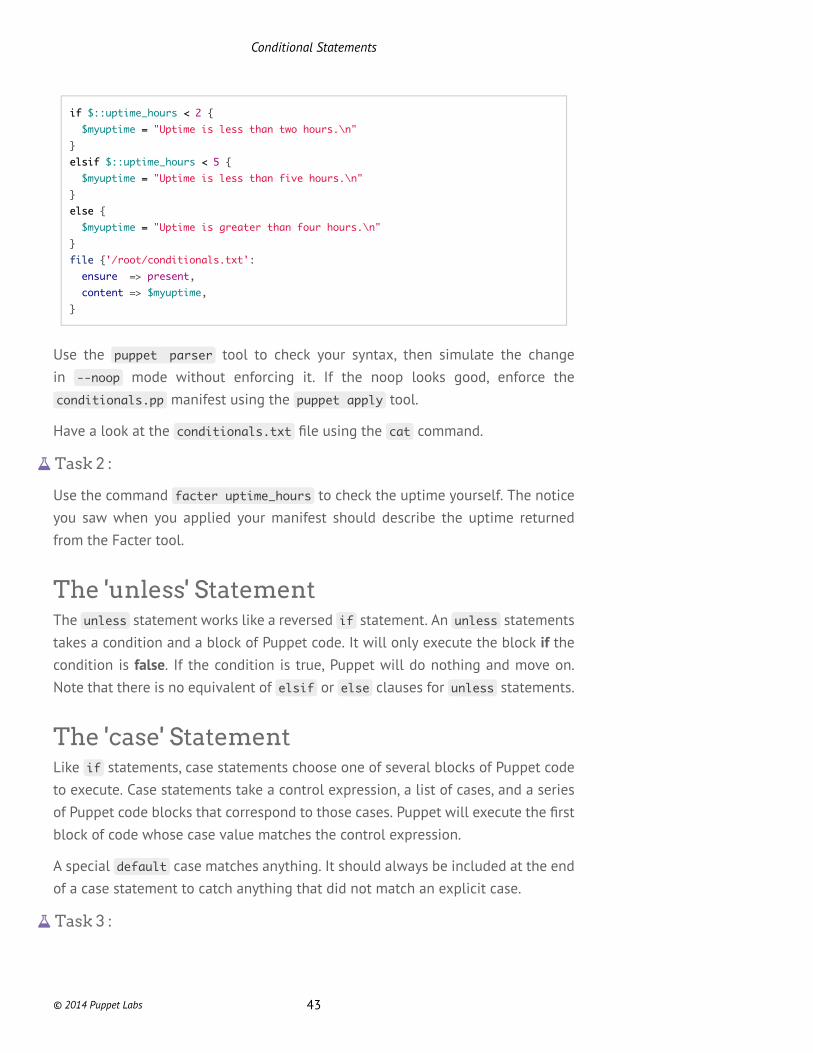
ifif $::uptime_hours << 2 {$myuptime == "Uptime is less than two hours.\n"
}elsifelsif $::uptime_hours << 5 {
$myuptime == "Uptime is less than five hours.\n"}elseelse {
$myuptime == "Uptime is greater than four hours.\n"}filefile {'/root/conditionals.txt':
ensure => present,content => $myuptime,
}
Use the puppet parser tool to check your syntax, then simulate the changein --noop mode without enforcing it. If the noop looks good, enforce theconditionals.pp manifest using the puppet apply tool.
Have a look at the conditionals.txt file using the cat command.
Task 2 :
Use the command facter uptime_hours to check the uptime yourself. The noticeyou saw when you applied your manifest should describe the uptime returnedfrom the Facter tool.
The 'unless' StatementThe unless statement works like a reversed if statement. An unless statementstakes a condition and a block of Puppet code. It will only execute the block if thecondition is false. If the condition is true, Puppet will do nothing and move on.Note that there is no equivalent of elsif or else clauses for unless statements.
The 'case' StatementLike if statements, case statements choose one of several blocks of Puppet codeto execute. Case statements take a control expression, a list of cases, and a seriesof Puppet code blocks that correspond to those cases. Puppet will execute the firstblock of code whose case value matches the control expression.
A special default case matches anything. It should always be included at the endof a case statement to catch anything that did not match an explicit case.
Task 3 :
Conditional Statements
© 2014 Puppet Labs 43

Create a case.pp manifest with the following conditional statement and fileresource declaration.
casecase $::operatingsystem {'CentOS': { $apache_pkg == 'httpd' }'Redhat': { $apache_pkg == 'httpd' }'Debian': { $apache_pkg == 'apache2' }'Ubuntu': { $apache_pkg == 'apache2' }defaultdefault: { failfail("Unrecognized operating system for webserver") }
}
filefile {'/root/case.txt':ensure => present,content => "Apache package name: ${apache_pkg}\n"
}
When you've validated your syntax and run a --noop , apply the manifest:
puppet apply case.pp
Use the cat command to inspect the case.txt file. Because the Learning VM isrunning CentOS, you will see that the selected Apache package name is 'httpd'.
For the sake of simplicity, we've output the result of the case statement to a file,but keep in mind that instead of using the result of the case statement like theone above to define the contents of a file, you could use it as the title of a packageresource declaration, as shown below:
packagepackage { $apache_pkg :ensure => present,
}
This would allow you to always install and manage the right Apache package fora machine's operating system. Aaccounting for the differences between variousplatforms is an important part of writing flexible and re-usable Puppet code. It isa paradigm you will encounter frequently in published Puppet modules.
Also note that Puppet will choose the appropriate provider for the packagedepending on the operating system, without you having to mention it. On Debian-based systems, for example, it may use apt and on RedHat systems, it will useyum .
Conditional Statements
© 2014 Puppet Labs 44

The 'selector' StatementSelector statements are very similar to case statements, but instead of executinga block of code, a selector assigns a value directly. A selector might looksomething like this:
$rootgroup == $::osfamily ? {'Solaris' => 'wheel','Darwin' => 'wheel','FreeBSD' => 'wheel','default' => 'root',
}
Here, the value of the $rootgroup is determined based on the control variable$osfamily . Following the control variable is a ? (question mark) symbol. In theblock surrounded by curly braces are a series of possible values for the $::osfamilyfact, followed by the value that the selector should return if the value matches thecontrol variable.
Because a selector can only return a value and cannot execute a function likefail() or warning() , it is up to you to make sure your code handles unexpectedconditions gracefully. You wouldn't want Puppet to forge ahead with aninappropriate default value and encounter errors down the line.
Task 4 :
By writing a Puppet manifest that uses a selector, create a file /root/architecture.txt that lists whether the VM is a 64-bit or a 32-bit machine.
To accomplish this, create a file in the root directory, called architecture.pp :
nano architecture.pp
We know that i386 machines have a 32-bit architecture, and x86_64 machineshave a 64-bit architecture. Let's set the content of the file based on this fact:
filefile { '/root/architecture.txt' :ensure => file,content => $::architecture ? {
'i386' => "This machine has a 32-bit architecture.\n",'x86_64' => "This machine has a 64-bit architecture.\n",
}}
Conditional Statements
© 2014 Puppet Labs 45
See what we did here? Instead of having the selector return a value and savingit in a variable, as we did in the previous example with $rootgroup , we use it tospecify the value of the content attribute in-line.
Once you have created the manifest, check the syntax and apply it.
Inspect the contents of the /root/architecture.txt file to ensure that thecontent is what you expect.
Before you move onWe have discussed some intense information in the Variables Quest and thisQuest. The information contained in all the quests to this point has guided youtowards creating flexible manifests. Should you not understand any of the topicspreviously discussed, we highly encourage you to revisit those quests beforemoving on to the Resource Ordering Quest.
Conditional Statements
© 2014 Puppet Labs 46

Resource Ordering
Prerequisites• Welcome Quest• Power of Puppet Quest• Resources Quest• Manifest Quest• Variables Quest• Conditions Quest
Quest Objectives• Understand why some resources must be managed in a specific order.• Use the before , require , notify , and subscribe metaparameters to
effectively manage the order that Puppet applies resource declarations.
Getting StartedThis quest will help you learn more about specifying the order in which Puppetshould manage resources in a manifest. When you're ready to get started, type thefollowing command:
quest --start ordering
Explicit OrderingWe are likely to read instructions from top to bottom and execute them in thatorder. When it comes to resource declarations in a Puppet manifest, Puppet doesthings a little differently. It works through the problem as though it were givena list of things to do, and it was left to decide the most efficient way to getthem done. We have referred to the catalog vaguely in the previous sections. Thecatalog is a compilation of all the resources that will be applied to a given system,and the relationships between those resources. In building the catalog, unless weexplicitly specify the relationship between the resources, Puppet will manage themin its own order.
© 2014 Puppet Labs 47
For the most part, Puppet specifies relationships between resources in theappropriate manner while building the catalog. For example, if you say that usergigabyte should exist, and the directory /home/gigabyte/bin should be presentand be owned by user gigabyte , then Puppet will specify a relationship betweenthe two - that the user should be managed before the directory. These are implicit(shall we call them obvious?) relationships.
Sometimes, however, you will need to ensure that a resource declaration is appliedbefore another. For instance, if you wish to declare that a service should berunning, you need to ensure that the package for that service is installed andconfigured before you can start the service. One might ask as to why there is notan implicit relationship in this case. The answer is that, often times, more thanone package provides the same service, and what if you are using a package youbuilt yourself? Since Puppet cannot always conclusively determine the mappingbetween a package and a service (the names of the software package and theservice or executable it provides are not always the same either), it is up to us tospecify the relationship between them.
When you need a group of resources to be managed in a specific order, you mustexplicitly state the dependency relationships between these resources within theresource declarations.
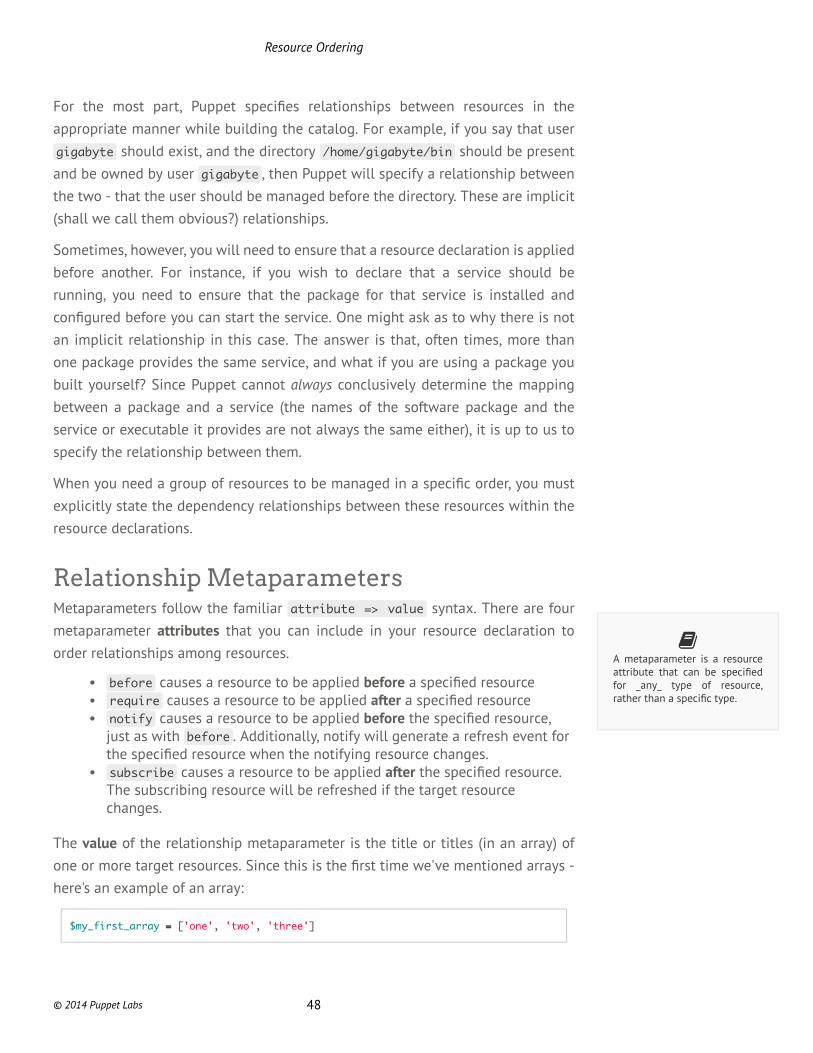
Relationship MetaparametersMetaparameters follow the familiar attribute => value syntax. There are fourmetaparameter attributes that you can include in your resource declaration toorder relationships among resources.
• before causes a resource to be applied before a specified resource• require causes a resource to be applied after a specified resource• notify causes a resource to be applied before the specified resource,
just as with before . Additionally, notify will generate a refresh event forthe specified resource when the notifying resource changes.
• subscribe causes a resource to be applied after the specified resource.The subscribing resource will be refreshed if the target resourcechanges.
The value of the relationship metaparameter is the title or titles (in an array) ofone or more target resources. Since this is the first time we've mentioned arrays -here's an example of an array:
$my_first_array == ['one', 'two', 'three']
A metaparameter is a resourceattribute that can be specifiedfor _any_ type of resource,rather than a specific type.
Resource Ordering
© 2014 Puppet Labs 48

Here's an example of how the notify metaparameter is used:
filefile {'/etc/ntp.conf':ensure => file,source => 'puppet:///modules/ntp/ntp.conf',notify => ServiceService['ntpd'],
}
serviceservice {'ntpd':ensure => running,
}
In the above, the file /etc/ntp.conf is managed. The contents of the file aresourced from the file ntp.conf in the ntp module's files directory. Whenever thefile /etc/ntp.conf changes, a refresh event is triggered for the service with thetitle ntpd . By virtue of using the notify metaparameter, we ensure that Puppetmanages the file first, before it manages the service, which is to say that notifyimplies before .
Refresh events, by default, restart a service (such as a server daemon), but youcan specify what needs to be done when a refresh event is triggered, using therefresh attribute for the service resource type, which takes a command as thevalue.
In order to better understand how to explicitly specify relationships betweenresources, we're going to use SSH as our example. Setting theGSSAPIAuthentication setting for the SSH daemon to no will help speed up thelogin process when one tries to establish an SSH connection to the Learning VM.
Let's try to disable GSSAPIAuthentication, and in the process, learn about resourcerelationships.
Task 1 :
Create a puppet manifest to manage the /etc/ssh/sshd_config file
Create the file /root/sshd.pp using a text editor, with the following content in it.
filefile { '/etc/ssh/sshd_config':ensure => file,mode => 600,source => '/root/examples/sshd_config',
}
Resource Ordering
© 2014 Puppet Labs 49
What we have done above is to say that Puppet should ensure that the file /etc/ssh/sshd_config exists, and that the contents of the file should be sourced fromthe file /root/examples/sshd_config . The source attribute also allows us to usea different URI to specify the file, something we will discuss in the Modules quest.For now, we are using a file in /root/examples as the content source for the SSHdaemon's configuration file.
Now let us disable GSSAPIAuthentication.
Task 2 :
Disable GSSAPIAuthentication for the SSH service
Edit the /root/examples/sshd_config file.Find the line that reads:
GSSAPIAuthentication yes
and edit it to read:
GSSAPIAuthentication no
Save the file and exit the text editor.
Even though we have edited the source for the configuration file for the SSHdaemon, simply changing the content of the configuration file will not disable theGSSAPIAuthentication option. For the option to be disabled, the service (the SSHserver daemon) needs to be restarted. That's when the newly specified settingswill take effect.
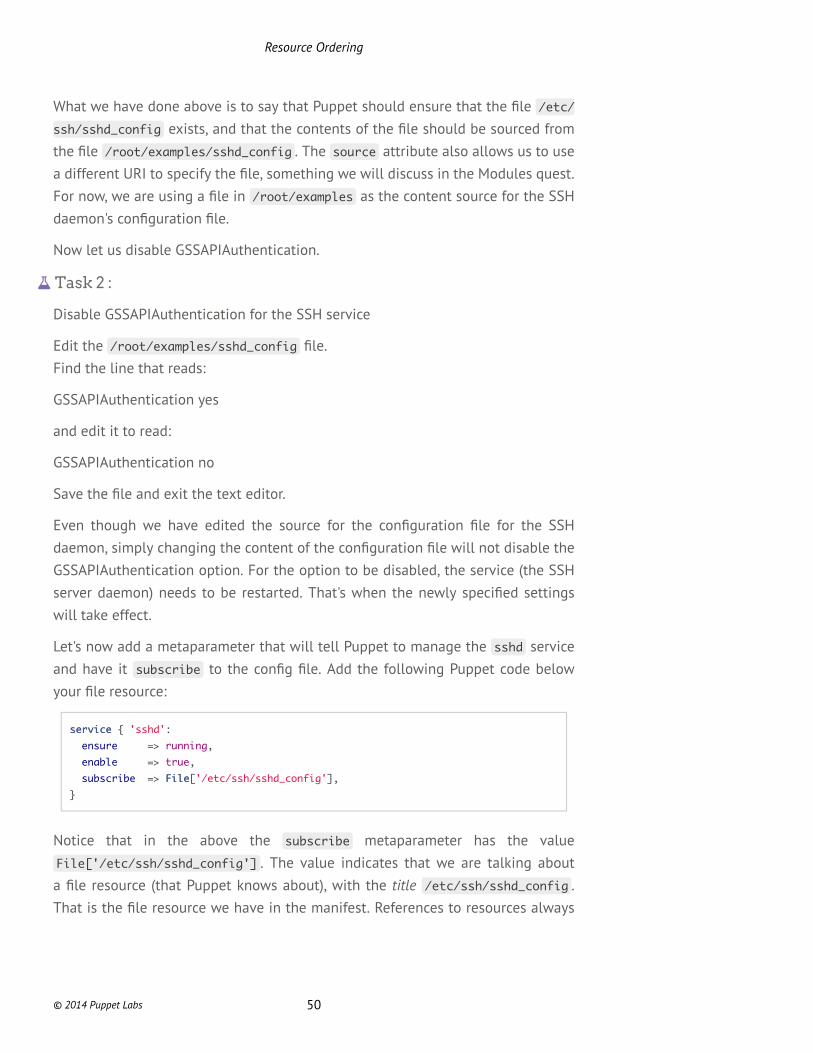
Let's now add a metaparameter that will tell Puppet to manage the sshd serviceand have it subscribe to the config file. Add the following Puppet code belowyour file resource:
serviceservice { 'sshd':ensure => running,enable => true,subscribe => FileFile['/etc/ssh/sshd_config'],
}
Notice that in the above the subscribe metaparameter has the valueFile['/etc/ssh/sshd_config'] . The value indicates that we are talking abouta file resource (that Puppet knows about), with the title /etc/ssh/sshd_config .That is the file resource we have in the manifest. References to resources always
Resource Ordering
© 2014 Puppet Labs 50
take this form. Ensure that the first letter of the type ('File' in this case) is alwayscapitalized when you refer to a resource in a manifest.
Now, let's apply the change. Remember to check syntax, and do a dry-run usingthe --noop flag first, before using puppet apply /root/sshd.pp to apply yourchanges.
You will see Puppet report that the content of the /etc/ssh/sshd_config filechanged. You should also be able to see that the SSH service was restarted.
In the above example, the service resource will be applied after the fileresource. Furthermore, if any other changes are made to the targeted file resource,the service will refresh.
Package/File/ServiceWait a minute! We are managing the service sshd , we are managing itsconfiguration file, but all that would mean nothing if the SSH server package isnot installed. So, to round it up, and make our manifest complete with regardsto managing the SSH server on the VM, we have to ensure that the appropriatepackage resource is managed as well.
On CentOS machines, such as the VM we are using, the openssh-server packageinstalls the SSH server.
• The package resource makes sure the software and its config file areinstalled.
• The file resource config file depends on the package resource.• The service resources subscribes to changes in the config file.
The package/file/service pattern is one of the most useful idioms in Puppet. It’shard to overstate the importance of this pattern! If you only stopped here andlearned this, you could still get a lot of work done using Puppet.
To stay consistent with the package/file/service idiom, let's dive back into thesshd.pp file and add the openssh-server package to it.
Task 3 :
Manage the package for the SSH server
Type the following code in above your file resource in file /root/sshd.pp
Resource Ordering
© 2014 Puppet Labs 51
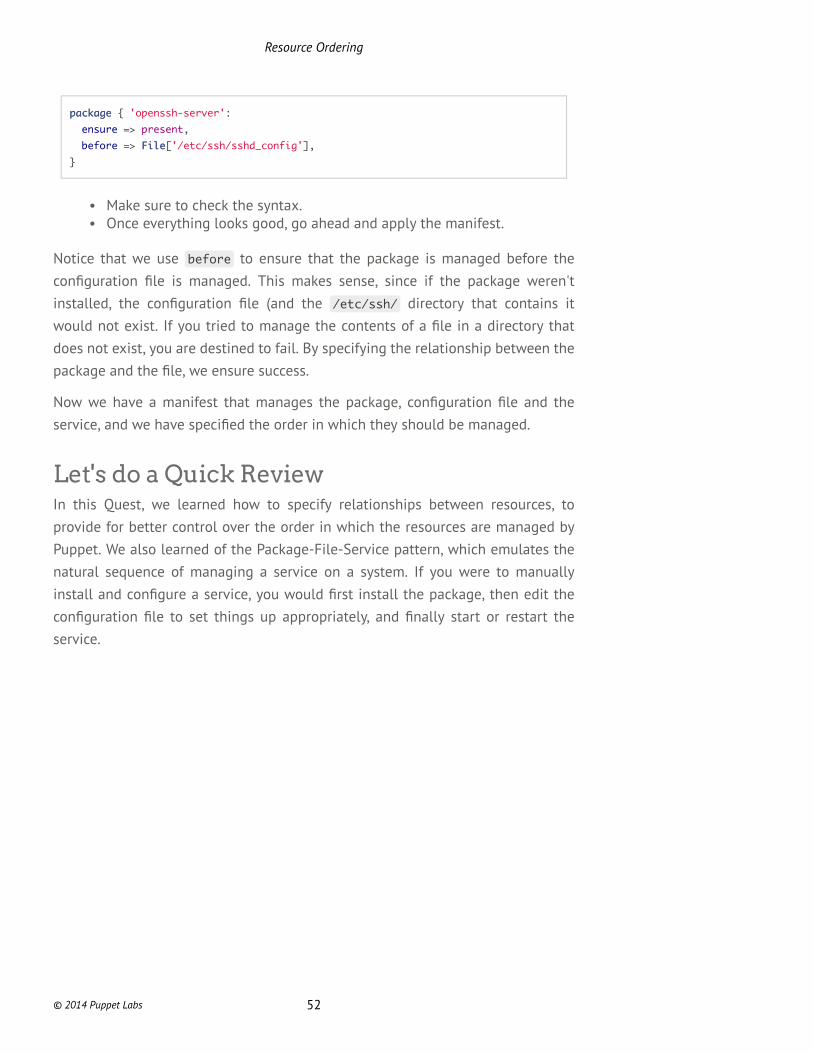
packagepackage { 'openssh-server':ensure => present,before => FileFile['/etc/ssh/sshd_config'],
}
• Make sure to check the syntax.• Once everything looks good, go ahead and apply the manifest.
Notice that we use before to ensure that the package is managed before theconfiguration file is managed. This makes sense, since if the package weren'tinstalled, the configuration file (and the /etc/ssh/ directory that contains itwould not exist. If you tried to manage the contents of a file in a directory thatdoes not exist, you are destined to fail. By specifying the relationship between thepackage and the file, we ensure success.
Now we have a manifest that manages the package, configuration file and theservice, and we have specified the order in which they should be managed.
Let's do a Quick ReviewIn this Quest, we learned how to specify relationships between resources, toprovide for better control over the order in which the resources are managed byPuppet. We also learned of the Package-File-Service pattern, which emulates thenatural sequence of managing a service on a system. If you were to manuallyinstall and configure a service, you would first install the package, then edit theconfiguration file to set things up appropriately, and finally start or restart theservice.
Resource Ordering
© 2014 Puppet Labs 52

Classes
Prerequisites• Welcome Quest• Power of Puppet Quest• Resources Quest• Manifest Quest• Variables Quest• Conditions Quest• Ordering Quest
Quest Objectives• Understand what a class means in Puppet's Language• Learn how to use a class definition• Understand the difference between defining and declaring a class
Getting StartedSo we've mentioned the term class in previous quests. In this quest we coverthe use of classes within a Puppet manifest to group resource declarations (andeverything we've learned up to this point) into reusable blocks of Puppet code.When you're ready to get started, type the following command:
quest --start classes
This is just an example
We've written this quest to help you learn the functionality and purpose of classes. Tokeep things simple, we will write code to both define classes and include them withina single manifest. Keep in mind however, that in practice you will always define yourclasses in a separate manifest. In the Modules Quest we will show you the proper wayto define classes and declare classes.
© 2014 Puppet Labs 53
Defining ClassesIn Puppet's language classes are named blocks of Puppet code. Once you havedefined a class, you can invoke it by name. Puppet will manage all the resourcesthat are contained in the class defintion once the class is invoked. Pleaseremember that classes in Puppet are not related to classes in Object OrientedProgramming. In Puppet, classes serve as named containers for blocks of Puppetcode.
Let's dive right in, and look at an example of a class definition. We have createda class definition for you. Look at the contents of the file /root/examples/modules1-ntp1.pp . Open it using nano or your favorite text editor.
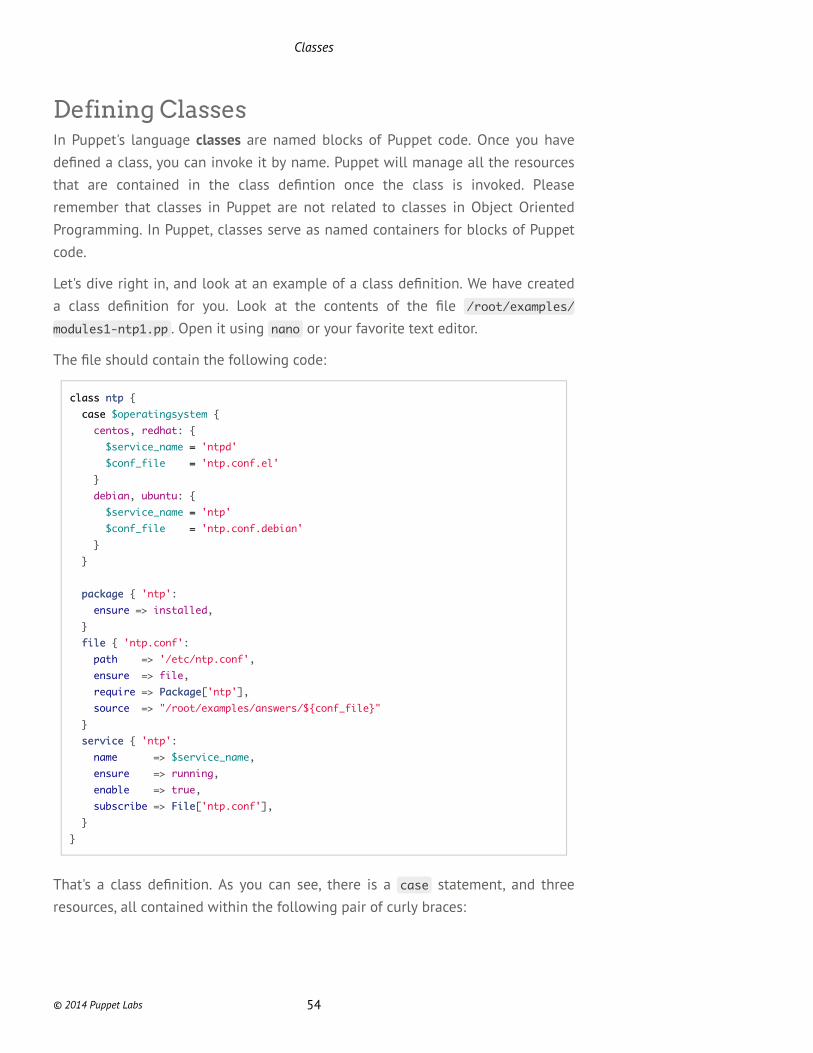
The file should contain the following code:
classclass ntpntp {casecase $operatingsystem {
centos, redhat: {$service_name == 'ntpd'$conf_file == 'ntp.conf.el'
}debian, ubuntu: {
$service_name == 'ntp'$conf_file == 'ntp.conf.debian'
}}
packagepackage { 'ntp':ensure => installed,
}filefile { 'ntp.conf':
path => '/etc/ntp.conf',ensure => file,require => PackagePackage['ntp'],source => "/root/examples/answers/${conf_file}"
}serviceservice { 'ntp':
name => $service_name,ensure => running,enable => true,subscribe => FileFile['ntp.conf'],
}}
That's a class definition. As you can see, there is a case statement, and threeresources, all contained within the following pair of curly braces:
Classes
© 2014 Puppet Labs 54
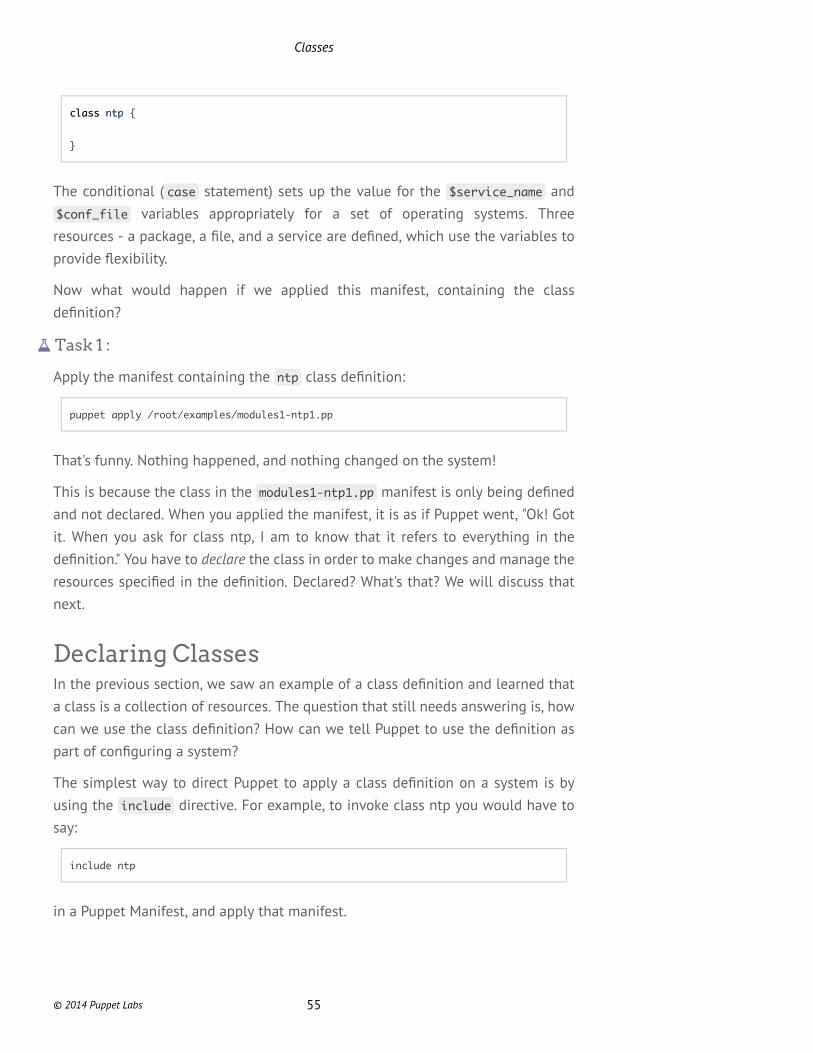
classclass ntpntp {
}
The conditional ( case statement) sets up the value for the $service_name and$conf_file variables appropriately for a set of operating systems. Threeresources - a package, a file, and a service are defined, which use the variables toprovide flexibility.
Now what would happen if we applied this manifest, containing the classdefinition?
Task 1 :
Apply the manifest containing the ntp class definition:
puppet apply /root/examples/modules1-ntp1.pp
That's funny. Nothing happened, and nothing changed on the system!
This is because the class in the modules1-ntp1.pp manifest is only being definedand not declared. When you applied the manifest, it is as if Puppet went, "Ok! Gotit. When you ask for class ntp, I am to know that it refers to everything in thedefinition." You have to declare the class in order to make changes and manage theresources specified in the definition. Declared? What's that? We will discuss thatnext.
Declaring ClassesIn the previous section, we saw an example of a class definition and learned thata class is a collection of resources. The question that still needs answering is, howcan we use the class definition? How can we tell Puppet to use the definition aspart of configuring a system?
The simplest way to direct Puppet to apply a class definition on a system is byusing the include directive. For example, to invoke class ntp you would have tosay:
include ntp
in a Puppet Manifest, and apply that manifest.
Classes
© 2014 Puppet Labs 55
Now you might wonder how Puppet knows where to find the definition for theclass. Fair question. The answer involves Modules, the subject of our next lesson.For now, since we want to try applying the definition for class ntp, let's put the lineinclude ntp right after the class definition.
We have already done that for you, open the file /root/examples/modules1-ntp2.pp :
nano /root/examples/modules1-ntp2.pp
You should see the line:
include ntp
as the very last line of the file.
Task 2 :
Declare class ntp
Go ahead and now apply the manifest /root/examples/modules1-ntp2.pp .
HINT: Use the puppet apply tool. Refer to the Manifests Quest.
Great! This time Puppet actually managed the resources in the definition of classntp.
Again, please do not ever do this above example in real life, since you always wantto separate the definition from the declaration. This is just an example to showyou the functionality and benefit of classes. In the Modules Quest we will showyou the proper way to define classes and declare classes separately.
A detailed look at the lvmguide classIn the Power of Puppet Quest, we used a class called lvmguide to help us setup the website version of this Quest Guide. The lvmguide class gives us a niceillustration of structuring a class definition. We've included the code from thelvmguide class declaration below for easy reference as we talk about definingclasses. Don't worry if a few things remain unclear at this point. For now, we'regoing to focus primarily on how class definitions work.
Classes
© 2014 Puppet Labs 56
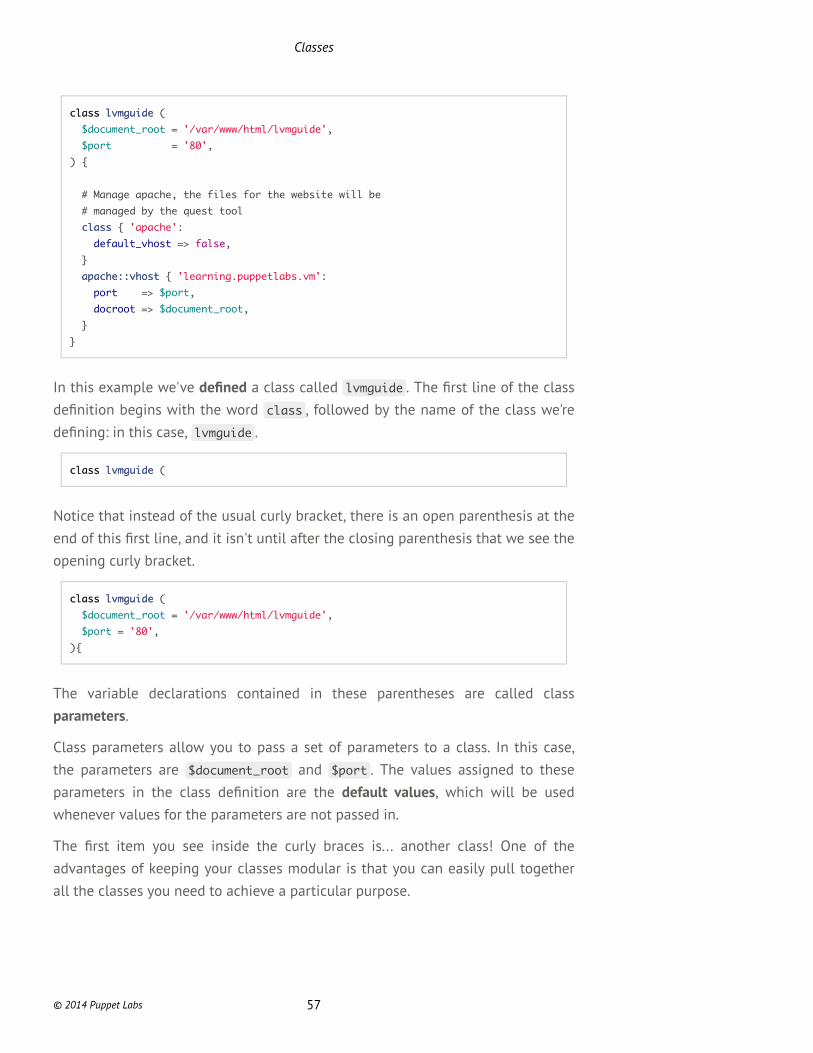
classclass lvmguidelvmguide ($document_root = '/var/www/html/lvmguide',$port = '80',
) {
# Manage apache, the files for the website will be# managed by the quest toolclassclass { 'apache':
default_vhost => false,}apache::vhostapache::vhost { 'learning.puppetlabs.vm':
port => $port,docroot => $document_root,
}}
In this example we've defined a class called lvmguide . The first line of the classdefinition begins with the word class , followed by the name of the class we'redefining: in this case, lvmguide .
classclass lvmguidelvmguide (
Notice that instead of the usual curly bracket, there is an open parenthesis at theend of this first line, and it isn't until after the closing parenthesis that we see theopening curly bracket.
classclass lvmguidelvmguide ($document_root = '/var/www/html/lvmguide',$port = '80',
){
The variable declarations contained in these parentheses are called classparameters.
Class parameters allow you to pass a set of parameters to a class. In this case,the parameters are $document_root and $port . The values assigned to theseparameters in the class definition are the default values, which will be usedwhenever values for the parameters are not passed in.
The first item you see inside the curly braces is... another class! One of theadvantages of keeping your classes modular is that you can easily pull togetherall the classes you need to achieve a particular purpose.
Classes
© 2014 Puppet Labs 57
classclass { 'apache':default_vhost => false,
}
Notice how the code looks similar to how you might describe a user, file orpackage resource. It looks like a declaration. It is, indeed, a class declaration. Thisis an alternative to using include to invoke existing class definitions. In thiscase, we wanted to set up an apache server to host our Quest Guide content as awebsite. Instead of trying to reinvent the wheel, we are able to pull in the existingapache class from the apache module we downloaded from the Forge.
If we had wanted to include the apache class with its default parameter settings,we could have used the include apache syntax. Turns out that just like thelvmguide class, the apache class is defined to accept parameters. Since wewanted to set the default_vhost parameter, we used the resource-like classdeclaration syntax. This allows us to set default_vhost to false .
Our final code block in the class definition is a resource declarations:
apache::vhostapache::vhost { 'learning.puppetlabs.vm':port => $port,docroot => $document_root,
}
First, we declare an apache::vhost resource type, and pass along values fromour class parameters to its port and docroot attributes. The apache::vhostresource type is defined in, and provided by the apache module that we installed,and helps manage the configuration of Apache2 Virtual Hosts.
As in the above example, class definitions give you a concise way to group otherclasses and resource declarations into re-usable blocks of Puppet code. You canthen selectively assign these classes to different machines across your Puppetizednetwork in order to easily configure those machines to fulfill the defined function.Now that the lvmguide class is defined, enabling the Quest Guide website onother machines would be as easy as assigning that class in the PE Console.
ReviewWe learned about classes, and how to define them. We also learned two ways toinvoke classes - using the include keyword, and declaring classes using a syntax
Classes
© 2014 Puppet Labs 58

similar to resource declarations. Classes are a whole lot more useful once weunderstand what modules are, and we will learn about modules in the next quest.
Classes
© 2014 Puppet Labs 59
Modules
Prerequisites• Welcome Quest• Power of Puppet Quest• Resources Quest• Manifest Quest• Variables Quest• Conditions Quest• Ordering Quest• Classes Quest
Quest Objectives• Understand the purpose of Puppet modules• Learn the basic structure and layout of modules• Write and test a simple module
Getting StartedSo far we've seen some simple examples of Puppet code, but what makes Puppetsuch an adaptable tool? When it comes to getting things done, it's all about themodule. A Puppet module is a self-contained bundle of code and data, organizedaround a particular purpose. The code would encompass manifests, the datawould include all the source files, templates etc that you need to accomplish thepurpose of the module. Everything we have learned until this point and morecan come together as part of a module. When you're ready, type the followingcommand:
quest --start modules
What's a Module?If resources and classes are the atoms and molecules of Puppet, we might considermodules our amoebas: the first self-contained organisms of the Puppet world.
© 2014 Puppet Labs 60
Thus far, in order to gain insight into Puppet's language features and syntax, wehave been writing one-off manifests, perhaps using a source file for the contentsof some configuration file (as we did for the SSH daemon configuration) etc. Wehave to remember, however that Puppet is designed to help you manage lots ofsystems (not just one system) from a central point - the master.
Although it is possible to list all the resources (users, files, package, services, crontasks etc) that you need to manage on a system in one huge manifest, and thenapply that manifest on the system, this is not scalable. Neither is it composable,or flexible enough to be reused. Classes were our first stop on the path tolearning how to create 'blocks' - building blocks that we can use to describe theconfiguration of the systems we seek to manage.
There is still a missing part of the puzzle. When you ask Puppet to, say, includessh on a particular node, or, as we did in the Power of Puppet quest, classify anode (learn.localdomain) with a class (lvmguide), how does Puppet know where tofind the definition for the class, in order to ensure that the specified configurationis realized?
The answer is, we agree to put the class definitions in a standard location on thefile system, by placing the manifest containing the class definition in a specificdirectory in a module.
Simply put, a Module is a directory with a specific structure - a means for us topackage everything needed to achieve a certain goal. Once we agree to stick tothe standard way of doing this, a significant benefit is the ability to share ourwork, such that others who seek to achieve the same goal can re-use our work.The Forge is the central location where you can find modules that have beendeveloped by others.
In our initial Quest, we were able to use an Apache module from the Forge. Thislet us easily install and configure an Apache webserver to host the website versionof this Quest Guide. The vast majority of the necessary code had already beenwritten, tested, documented, and published to the Puppet Forge.
Modules provide a structure to make these collections of pre-written Puppet code,well, modular. In order to enable Puppet to access the classes and types defined ina module's manifests, modules give us a standard pattern for the organization ofand naming of Puppet manifests and other resources.
Modules
© 2014 Puppet Labs 61

Module PathAll modules are located in a directory specified by the modulepath variable inPuppet's configuration file. On the Learning VM, Puppet's configuration file can befound at /etc/puppetlabs/puppet/puppet.conf .
Task 1 :
Find the modulepath on the Learning VM.
If you're ever wondering where your modulepath is, you can find it by runningthe puppet agent command with the --configprint flag and specifyingmodulepath :
puppet agent --configprint modulepath
What the returned value tells us is that Puppet will look in the directories /etc/puppetlabs/puppet/modules and then in /opt/puppet/share/puppet/modules tofind the modules in use on the system. Classes and types defined by modules inthese directories will be available to Puppet.
Module StructureThe skeleton of a module is a pre-defined structure of directories that Puppetalready knows how to traverse to find the module's manifests, templates,configuration files, plugins, and anything else necessary for the module tofunction. Of these, we have encountered manifests and files that serve as thesource for configuration files. We will learn about the rest in due course.
Remember, /etc/puppetlabs/puppet/modules is in our modulepath. Use the lscommand to see what's in that directory:
ls /etc/puppetlabs/puppet/modules
There's the apache module we installed before. There is also the lvmguidemodule that was used to set up the quest guide website, that was already in placewhen we started. Use the tree command to take a look at the basic directorystructure of the module. (To get a nice picture, we can use a few flags with the treecommand to limit our output to directories, and limit the depth to two directories.)
tree -L 2 -d /etc/puppetlabs/puppet/modules/
Modules
© 2014 Puppet Labs 62

You should see a list of directories, like so:
/etc/puppetlabs/puppet/modules/└── apache
├── files├── lib├── manifests├── spec├── templates└── tests
Once you get down past this basic directory structure, however, the apachemodule begins to look quite complex. To keep things simple, we can create ourown first module to work with.
Task 2 :
First, be sure to change your working directory to the modulepath. We need ourmodule to be in this directory if we want Puppet to be able to find it.
cd /etc/puppetlabs/puppet/modules
You have created some users in the Resources and Manifests quests, so thisresource type should be fairly familiar. Let's make a users module that will helpus manage users on the Learning VM.
The top directory of any module will always be the name of that module. Use themkdir command to create your module directory:
mkdir users
Task 3 :
Now we need two more directories, one for our manifests, which must be calledmanifests , and one for our tests, which must be called (you guessed it!) tests .As you will see shortly, tests allow you to easily apply and test classes definedin your module without having to deal with higher level configuration tasks likenode classification.
Go ahead and use the mkdir command to create users/manifests and users/tests directories within your new module.
mkdir users/{manifests,tests}
Modules
© 2014 Puppet Labs 63

If you use the tree users command to take a look at your new module, youshould now see a structure like this:
users├── manifests└── tests
2 directories, 0 files
Task 4 :
Create a manifest defining class users:
The manifests directory can contain any number of the .pp manifest files thatform the bread-and-butter of your module. If there is a class with the samename as the module, the definition for that class should be in a file nameinit.pp . In our case, we need a class called users in our module with thesame name. The defintion for class users should be in a file called init.pp inthe manifests directory. This is necessitated by the mechanism by which Puppetlocates class definitions when you name a class. If for example, you had a filecalled settings.pp in the manifests directory, you will have to refer to it as classusers::settings for Puppet to be able to find the class defintion contained in it.By placing the definition for class users in init.pp , we can refer to that classdefintion by the name of the module - users .
Go ahead and create the init.pp manifest in the users/manifests directory.(We're assuming you're still working from the /etc/puppetlabs/puppet/modules .The full path would be /etc/puppetlabs/puppet/modules/users/manifests.init.pp )
nano users/manifests/init.pp
Now in that file, add the following code:
classclass usersusers {useruser { 'alice':
ensure => present,}
}
We have defined a class with just the one resource in it. A resource of type userwith title alice .
Modules
© 2014 Puppet Labs 64
Use the puppet parser tool to validate your manifest:
puppet parser validate users/manifests/init.pp
For now, we're not going to apply anything. This manifest defines the users class,but so far, we haven't declared it. That is, we've described what the users class is,but we haven't told Puppet to actually do anything with it.
Declaring Classes from ModulesRemember when we talked about declaring classes in the Classes Quest? We saidwe would discuss more on the correct way to use classes in the Modules Quest.Once a class is defined in a module, there are actually several ways to declare it. Asyou've already seen, you can declare classes by putting include [class name] inyour main manifest, just as we did in the Classes Quest.
The include function declares a class, if it hasn’t already been declaredsomewhere else. If a class has already been declared, include will notice that anddo nothing.
This lets you safely declare a class in several places. If some class depends onsomething in another class, it can declare that class without worrying whether it’salso being declared elsewhere.
Task 5 :
Write a test for our new class:
In order to test our users class, we will create a new manifest in the testsdirectory that declares it. Create a manifest called init.pp in the users/testsdirectory.
nano users/tests/init.pp
All we're going to do here is declare our users class with the include directive.
include usersusers
Try applying the new manifest with the --noop flag first. If everything looks good,apply the users/tests/init.pp manifest without the --noop flag to take yourusers class for a test drive, and see how it works out when applied.
Use the puppet resource tool to see if user alice has been successfully created.
Modules
© 2014 Puppet Labs 65
So what happened here? Even though the users class was in a different manifest,we were able to declare our test manifest. Because our module is in Puppet'smodulepath, Puppet was able to find the correct class and apply it.
You just created your first Puppet module!!
ClassificationWhen you use a Node Classifier, such as the Puppet Enterprise Console, you canclassify nodes - which is to say that you can state which classes apply to whichnodes, using the node classifier. This is exactly what we did when we used the PEConsole to classify our Learning VM node with the lvmguide class in the Powerof Puppet quest. In order to be able to classify a node thus, you must ensure all ofthe following:
1. There is a module (a directory) with the same name as the class in themodulepath on the Puppet master
2. The module has a file called init.pp in the manifests directorycontained within it
3. This init.pp file contains the definition of the class
With modules, you can create composable configurations for systems. Forexample, let's say that you have a module called 'ssh' which provides class ssh,another called 'apache' and a third called 'mysql'. Using these three modules, andthe classes provided by them, you can now classify a node to be configured withany combination of the three classes. You can have a server that has mysql andssh managed on it (a database server), another with apache and ssh managed onit (a webserver), and a server with only ssh configured on it. The possibilities areendless. With well-written, community-vetted, even Puppet Supported Modulesfrom the Forge, you can be off composing and managing configuration for yoursystems in no time. You can also write your own modules that use classes fromthese Forge modules, as we did with the lvmguide class, and reuse them too.
Review1. We identified what the features of a Puppet Module are, and understood
how it is useful2. We wrote our first module!3. We learned how modules (and the classes within them) can be used to
create composable configurations by using a node classifier such as thePE Console.
Modules
© 2014 Puppet Labs 66
The Forge and the PuppetModule Tool
Prerequisites• Welcome Quest• Power of Puppet Quest• Resources Quest• Manifest Quest• Variables Quest• Conditions Quest• Ordering Quest• Classes Quest• Modules Quest
Quest Objectives• Confidently use the puppet module tool in association with Forge
modules
Getting StartedIn the previous Modules Quest we primarily learned about the structure of amodule and how to create a module. Next we want to answer questions like:
• How do I install a module?• How do I use a module?• What about upgrading an existing module?• How can I do all this and more from the command line?
To complete this quest, the Learning VM will need to be connected to the Internet.
When you're ready to take your Puppet knowledge to the next level, type thefollowing command:
© 2014 Puppet Labs 67
quest --start forge
The puppet module tool is one of the most important tools in expanding youruse of Puppet. The puppet module tool allows you to create, install, search, (andso much more) for modules on the Forge. We'll also discuss the Puppet Forge ingreater detail below.
The puppet module tool has subcommands that make finding, installing, andmanaging modules from the Forge much easier from the command line. It can alsogenerate empty modules, and prepare locally developed modules for release onthe Forge.
Actions• list - List installed modules.• search - Search the Puppet Forge for a module.• install - Install a module from the Puppet Forge or a release archive.• upgrade - Upgrade a puppet module.• uninstall - Uninstall a puppet module.• build - Build a module release package.• changes - Show modified files of an installed module.• generate - Generate boilerplate for a new module.
Task 1 :
List all the installed modules
Let's see what modules are already installed on the Learning VM and where they'relocated. To do this, we want Puppet to show it to us in a tree format. Go ahead andtype the following command:
puppet module list --tree
Task 2 :
Search the forge for a module
Wow! you have a lot installed. That's great. Let's install one more - thepuppetlabs-mysql module. You should search the Forge modules that help youconfigure mysql. To do so from the command line, type the following command:
puppet module search mysql
The Forge and the Puppet Module Tool
© 2014 Puppet Labs 68

The results list all the modules that have mysql in their name or description.Modules on the Forge are always named as authorname-modulename. You willnotice that one of the modules listed in the serach results is puppetlabs-mysql .The puppetlabs-mysql module is a module authored and curated primarily by thepuppetlabs organization.
Task 3 :
Install a module
Let's install the puppetlabs-mysql module. In fact, let us specify a specific versionof the module. Run the following command:
puppet module install puppetlabs-mysql --version 2.2.2 --ignore-requirements
You will see that the module is downloaded and installed. With the --ignore-requirements flag, we specify that there is no need to verify that all of it'srequirements are met.
By default, modules are installed in the modulepath .
Task 4 :
Upgrade an installed module
Okay, now let's go ahead and upgrade the mysql module to the latest version:
puppet module upgrade puppetlabs-mysql
Great, if you needed to uninstall a module, you can do so by running the followingcommand:
puppet module uninstall puppetlabs-mysql
The Puppet ForgeThe Puppet Forge is a public repository of modules written by members of thepuppet community for Puppet. These modules will provide you with classes, newresource types, and other helpful tools such as functions, to manage the variousaspects of your infrastructure. This reduces your task from describing the classesusing Puppet's DSL to using existing descriptions with the appropriate values forthe parameters.
The Forge and the Puppet Module Tool
© 2014 Puppet Labs 69
If you would like to further inspect the puppetlabs-mysql module Puppet code,you need to cd to the path then open the init.pp manifest.
cd /etc/puppetlabs/puppet/modules/mysql/manifestsnano init.pp
However, there is a much easier way to inspect this module by visiting the pagefor the puppetlabs-mysql module on the Forge.
The documentation on the page provides insight into how to use the providedclass definitions in the module to accomplish tasks. If we wanted to install mysqlwith the default options, the module documentation suggests we can do it asfollows:
include '::mysql::server'
It's as simple as that! So if we wanted our machine to have the mysql serverinstalled on it, all we need to do is ensure that the above class declaration is insome manifest that applies it to our node.
Puppet Enterprise Supported ModulesPuppet Enterprise Supported Modules make it easy to ensure common servicescan be set up, configured and managed easily with Puppet Enterprise. These aremodules that are tested with Puppet Enterprise, and officially supported underthe umbrella of Puppet Enterprise support. They will be maintained, with bug andsecurity patches as needed, and are vetted to work on multiple platforms. Thelist of modules is growing, and includes modules to manage, among others, NTP,Firewall, the Windows registry, APT, MySQL, Apache, and many others. Here's a Listof all supported modules at the Forge.
ReviewWe familiarized ourselves with the Puppet Module tool, which allows us todownload and manage modules from the Puppet Forge. Once a module isinstalled, we have access to all the definitions and tools provided by the installedmodule. This allows us to accelerate the process of managing system configrationswith Puppet, by providing us the ability to re-use the work of the Puppetcommunity. Once you become familiar with Puppet, you might even contribute tothe Forge yourself, sharing your work with the community!
The Forge and the Puppet Module Tool
© 2014 Puppet Labs 70
Afterword
Thank you for embarking on the journey to learn Puppet. We hope that theLearning VM and the Quest Guide helped you get started on this journey.
We had a lot of fun writing the guide, and hope it was fun to read and use aswell. This is just the beginning for us, too. We want to make Learning VM the bestpossible first step in a beginner's journey to learning Puppet. With time, we willadd more quests covering more concepts.
If you are interested in learning more about Puppet, please visit the Puppet LabsWorkshop.
To get started with Puppet Enterprise download it for free.
Please let us know about your experience with the Learning VM.
Please report issues at the Learning VM issue tracker.
You can also reach us at [email protected]. We look forward to hearingfrom you.
© 2014 Puppet Labs 71
Troubleshooting
If you have feedback or run into any issues with the Learning VM, please visit ourpublic issue tracker or email us at [email protected].
Puppet Labs maintains a list of known Puppet Enterprise issues.
Common Issues:I've completed a task, but it hasn't registered in the quest tool.
Some tasks are verified on the presence of a specific string in a file, so a typo canprevent the task from registering as complete even if your Puppet code validatesand your puppet agent run is successful. You can check the actual spec tests weuse with the quest tool in the ~/.testing/spec/localhost directory.
While most tasks validate some change you have made to the system, there area few that check for a specific line in your bash history. The file that tracks thishistory isn't created until you log out from the VM for the first time. In the setupinstructions, we suggest that you log out from the VM before establishing an SSHconnection. If you haven't done this, certain tasks won't register as complete. Also,because the quest tool looks for a specific command, the tasks may not register ascomplete if you've included a slight variation even if it has the same effect.
I can't access the PE Console with Safari.
This is a known issue with the way Safari handles certificates. You may encountera dialog box prompting you to select a certificate. If this happens, you may haveto click Cancel several times to access the console. This issue will be fixed in afuture release of PE.
The Learning VM cannot complete a Puppet run, or does so very slowly.
It's likely that you haven't assigned enough memory or processor cores to theLearning VM, or that your host system doesn't have the available resources toallocate. Power down the VM and increase the processor cores to 2 and thememory to 4 GB. You may also need to close other processes running on the hostmachine to free up resources.
© 2014 Puppet Labs 72

Glossary of PuppetVocabulary
An accurate, shared vocabulary goes a long way to ensure the success of a project.To that end, this glossary defines the most common terms Puppet users rely on.
attributeAttributes are used to specify the state desired for a given configuration resource.Each resource type has a slightly different set of possible attributes, and eachattribute has its own set of possible values. For example, a package resource (likevim ) would have an ensure attribute, whose value could be present , latest ,absent , or a version number:
package {'vim':ensureensure =>=> present,provider =>=> apt,
}
The value of an attribute is specified with the => operator; attribute/value pairsare separated by commas.
agent(or agent node)
Puppet is usually deployed in a simple client-server arrangement, and the Puppetclient daemon is known as the "agent." By association, a computer running puppetagent is usually referred to as an "agent node" (or simply "agent," or simply "node").
Puppet agent regularly pulls configuration catalogs from a puppet master serverand applies them to the local system.
© 2014 Puppet Labs 73
catalogA catalog is a compilation of all the resources that will be applied to a givensystem and the relationships between those resources.
Catalogs are compiled from manifests by a puppet master server and served toagent nodes. Unlike the manifests they were compiled from, they don't containany conditional logic or functions. They are unambiguous, are only relevant to onespecific node, and are machine-generated rather than written by hand.
classA collection of related resources, which, once defined, can be declared as asingle unit. For example, a class could contain all of the elements (files, settings,modules, scripts, etc) needed to configure Apache on a host. Classes can alsodeclare other classes.
Classes are singletons, and can only be applied once in a given configuration,although the include keyword allows you to declare a class multiple times whilestill only evaluating it once.
Note:
Being singletons, Puppet classes are not analogous to classes in object-orientedprogramming languages. OO classes are like templates that can be instantiated multipletimes; Puppet's equivalent to this concept is defined types.
classify(or node classification)
To assign classes to a node, as well as provide any data the classes require. Writinga class makes a set of configurations available; classifying a node determines whatits actual configuration will be.
Nodes can be classified with node definitions in the site manifest, with an ENC, orwith both.
Glossary of Puppet Vocabulary
© 2014 Puppet Labs 74

declareTo direct Puppet to include a given class or resource in a given configuration.To declare resources, use the lowercase file {'/tmp/bar':} syntax. To declareclasses, use the include keyword or the class {'foo':} syntax. (Note thatPuppet will automatically declare any classes it receives from an external nodeclassifier.)
You can configure a resource or class when you declare it by including attribute/value pairs.
Contrast with "define."
defineTo specify the contents and behavior of a class or a defined resource type. Defininga class or type doesn't automatically include it in a configuration; it simply makesit available to be declared.
define (noun)(or definition)
An older term for a defined resource type.
define (keyword)The language keyword used to create a defined type.
defined resource type(or defined type)
See "type (defined)."
ENCSee external node classifier.
Glossary of Puppet Vocabulary
© 2014 Puppet Labs 75
environmentAn arbitrary segment of your Puppet site, which can be served a different setof modules. For example, environments can be used to set up scratch nodes fortesting before roll-out, or to divide a site by types of hardware.
expressionThe Puppet language supports several types of expressions for comparison andevaluation purposes. Amongst others, Puppet supports boolean expressions,comparision expressions, and arithmetic expressions.
external node classifier(or ENC)
An executable script, which, when called by the puppet master, returnsinformation about which classes to apply to a node.
ENCs provide an alternate method to using the main site manifest ( site.pp ) toclassify nodes. An ENC can be written in any language, and can use informationfrom any pre-existing data source (such as an LDAP db) when classifying nodes.
An ENC is called with the name of the node to be classified as an argument, andshould return a YAML document describing the node.
factA piece of information about a node, such as its operating system, hostname, or IPaddress.
Facts are read from the system by Facter, and are made available to Puppet asglobal variables.
Facter can also be extended with custom facts, which can expose site-specificdetails of your systems to your Puppet manifests.
FacterFacter is Puppet's system inventory tool. Facter reads facts about a node (suchas its hostname, IP address, operating system, etc.) and makes them available toPuppet.
Glossary of Puppet Vocabulary
© 2014 Puppet Labs 76
Facter includes a large number of built-in facts; you can view their names andvalues for the local system by running facter at the command line.
In agent/master Puppet arrangements, agent nodes send their facts to the master.
filebucketA repository in which Puppet stores file backups when it has to replace files. Afilebucket can be either local (and owned by the node being managed) or site-global (and owned by the puppet master). Typically, a single filebucket is definedfor a whole network and is used as the default backup location.
functionA statement in a manifest which returns a value or makes a change to the catalog.
Since they run during compilation, functions happen on the puppet master in anagent/master arrangement. The only agent-specific information they have accessto are the facts the agent submitted.
Common functions include template , notice , and include .
global scopeSee scope.
hostAny computer (physical or virtual) attached to a network.
In the Puppet docs, this usually means an instance of an operating system withthe Puppet agent installed. See also "Agent Node".
host (resource type)An entry in a system's hosts file, used for name resolution.
idempotentAble to be applied multiple times with the same outcome. Puppet resources areidempotent, since they describe a desired final state rather than a series of stepsto follow.
Glossary of Puppet Vocabulary
© 2014 Puppet Labs 77

“(The only major exception is the exec type; exec resources must still beidempotent, but it's up to the user to design each exec resource correctly.)
inheritance (class)A Puppet class can be derived from one other class with the inherits keyword.The derived class will declare all of the same resources, but can override some oftheir attributes and add new resources.
inheritance (node)Node statements can be derived from other node statements with the inheritskeyword. This works identically to the way class inheritance works.
Note:
Node inheritance should almost always be avoided. Many new users attempt to
use node inheritance to look up variables that have a common default value and a rarespecific value on certain nodes; it is not suited to this task, and often yields the oppositeof the expected result. If you have a lot of conditional per-node data, we recommendusing the Hiera tool or assigning variables with an ENC instead.
masterIn a standard Puppet client-server deployment, the server is known as the master.The puppet master serves configuration catalogs on demand to the puppet agentservice that runs on the clients.
The puppet master uses an HTTP server to provide catalogs. It can run as astandalone daemon process with a built-in web server, or it can be managed by aproduction-grade web server that supports the rack API. The built-in web server ismeant for testing, and is not suitable for use with more than ten nodes.
Note: Most users should avoid inheritance most of the time. Unlike object-oriented programming languages, inheritance isn't terribly important inPuppet; it is only useful for overriding attributes, which can be done equallywell by using a single class with a few parameters.
Glossary of Puppet Vocabulary
© 2014 Puppet Labs 78
manifestA file containing code written in the Puppet language, and named with the .ppfile extension. The Puppet code in a manifest can:
• Declare resources and classes• Set variables• Evaluate functions• Define classes, defined types, and nodes
Most manifests are contained in modules. Every manifest in a module shoulddefine a single class or defined type.
The puppet master service reads a single "site manifest," usually located at /etc/puppet/manifests/site.pp . This manifest usually defines nodes, so that eachmanaged agent node will receive a unique catalog.
metaparameterA resource attribute that can be specified for any type of resource. Metaparametersare part of Puppet's framework rather than part of a specific type, and usuallyaffect the way resources relate to each other.
moduleA collection of classes, resource types, files, and templates, organized around aparticular purpose. For example, a module could be used to completely configurean Apache instance or to set-up a Rails application. There are many pre-builtmodules available for download in the Puppet Forge.
namevar(or name)
The attribute that represents a resource's unique identity on the target system.For example: two different files cannot have the same path , and two differentservices cannot have the same name .
Every resource type has a designated namevar; usually it is simply name , but sometypes, like file or exec , have their own (e.g. path and command ). If the namevaris something other than name , it will be called out in the type reference.
If you do not specify a value for a resource's namevar when you declare it, it willdefault to that resource's title.
Glossary of Puppet Vocabulary
© 2014 Puppet Labs 79
node (definition)(or node statement)
A collection of classes, resources, and variables in a manifest, which will only beapplied to a certain agent node. Node definitions begin with the node keyword,and can match a node by full name or by regular expression.
When a managed node retrieves or compiles its catalog, it will receive thecontents of a single matching node statement, as well as any classes or resourcesdeclared outside any node statement. The classes in every other node statementwill be hidden from that node.
node scopeThe local variable scope created by a node definition. Variables declared in thisscope will override top-scope variables. (Note that ENCs assign variables at topscope, and do not introduce node scopes.)
noopNoop mode (short for "No Operations" mode) lets you simulate your configurationwithout making any actual changes. Basically, noop allows you to do a dry runwith all logging working normally, but with no effect on any hosts. To run in noopmode, execute puppet agent or puppet apply with the --noop option.
notifyA notification relationship, set with the notify metaparameter or the wavychaining arrow. ( ~> )
notificationA type of relationship that both declares an order for resources and causes refreshevents to be sent.
orderingWhich resources should be managed before which others.
Glossary of Puppet Vocabulary
© 2014 Puppet Labs 80

By default, the order of a manifest is not the order in which resources aremanaged. You must declare a relationship if a resource depends on otherresources.
parameterGenerally speaking, a parameter is a chunk of information that a class or resourcecan accept.
patternA colloquial term, describing a collection of related manifests meant to solve anissue or manage a particular configuration item. (For example, an Apache pattern.)See also module.
plusignment operatorThe +> operator, which allows you to add values to resource attributes usingthe ('plusignment') syntax. Useful when you want to override resource attributeswithout having to respecify already declared values.
providerProviders implement resource types on a specific type of system, using thesystem's own tools. The division between types and providers allows a singleresource type package to manage packages on many different systems (using, forexample, yum on Red Hat systems, dpkg and apt on Debian-based systems, andports on BSD systems).
Typically, providers are simple Ruby wrappers around shell commands, so they areusually short and easy to create.
pluginA custom type, function, or fact that extends Puppet's capabilities and isdistributed via a module.
realizeTo specify that a virtual resource should actually be applied to the current system.Once a virtual resource has been declared, there are two methods for realizing it:
Glossary of Puppet Vocabulary
© 2014 Puppet Labs 81
1. Use the "spaceship" syntax <||>2. Use the realize function
A virtually declared resource will be present in the catalog, but will not be appliedto a system until it is realized.
refreshA resource gets refreshed when a resource it subscribes to (or which notifies it) ischanged.
Different resource types do different things when they get refreshed. (Servicesrestart; mount points unmount and remount; execs usually do nothing, but willfire if the refreshonly attribute is set.)
relationshipA rule stating that one resource should be managed before another.
resourceA unit of configuration, whose state can be managed by Puppet. Every resourcehas a type (such as file , service , or user ), a title, and one or more attributeswith specified values (for example, an ensure attribute with a value of present ).
Resources can be large or small, simple or complex, and they do not alwaysdirectly map to simple details on the client -- they might sometimes involvespreading information across multiple files, or even involve modifying devices.For example, a service resource only models a single service, but may involveexecuting an init script, running an external command to check its status, andmodifying the system's run level configuration.
resource declarationA fragment of Puppet code that details the desired state of a resource and instructsPuppet to manage it. This term helps to differentiate between the literal resourceon disk and the specification for how to manage that resource. However, mostoften, these are just referred to as "resources."
scopeThe area of code where a variable has a given value.
Glossary of Puppet Vocabulary
© 2014 Puppet Labs 82
Class definitions and type definitions create local scopes. Variables declared in alocal scope are available by their short name (e.g. $my_variable ) inside the scope,but are hidden from other scopes unless you refer to them by their fully qualifiedname (e.g. $my_class::my_variable ).
Variables outside any definition (or set by an ENC) exist at a special "top scope;"they are available everywhere by their short names (e.g. $my_variable ), but canbe overridden in a local scope if that scope has a variable of the same name.
Node definitions create a special "node scope." Variables in this scope are alsoavailable everywhere by their short names, and can override top-scope variables.
Note:
Previously, Puppet used dynamic scope, which would search for short-named variablesthrough a long chain of parent scopes. This was deprecated in version 2.7 and will beremoved in the next version.
siteAn entire IT ecosystem being managed by Puppet. That is, a site includes allpuppet master servers, all agent nodes, and all independent masterless Puppetnodes within an organization.
site manifestThe main "point of entry" manifest used by the puppet master when compilinga catalog. The location of this manifest is set with the manifest setting inpuppet.conf. Its default value is usually /etc/puppet/manifests/site.pp or/etc/puppetlabs/puppet/manifests/site.pp .
The site manifest usually contains node definitions. When an ENC is being used,the site manifest may be nearly empty, depending on whether the ENC wasdesigned to have complete or partial node information.
site moduleA common idiom in which one or more modules contain classes specific to a givenPuppet site. These classes usually describe complete configurations for a specificsystem or a given group of systems. For example, the site::db_slave class might
Glossary of Puppet Vocabulary
© 2014 Puppet Labs 83

describe the entire configuration of a database server, and a new database servercould be configured simply by applying that class to it.
subclassA class that inherits from another class. See inheritance.
subscribeA notification relationship, set with the subscribe metaparameter or the wavychaining arrow. ( ~> )
templateA partial document which is filled in with data from variables. Puppet can useRuby ERB templates to generate configuration files tailored to an individualsystem.
titleThe unique identifier (in a given Puppet catalog) of a resource or class.
• In a class, the title is simply the name of the class.• In a resource declaration, the title is the part after the first curly brace
and before the colon; in the example below, the title is /etc/passwd :
file { '/etc/passwd':owner =>=> 'root',group =>=> 'root',
}
• In native resource types, the name or namevar will use the title as itsdefault value if you don't explicitly specify a name.
• In a defined resource type or a class, the title is available for usethroughout the definition as the $title variable.
Unlike the name or namevar, a resource's title need not map to any actual attributeof the target system; it is only a referent. This means you can give a resource asingle title even if its name has to vary across different kinds of system, like aconfiguration file whose location differs on Solaris.
Glossary of Puppet Vocabulary
© 2014 Puppet Labs 84

top scopeSee scope.
typeA kind of resource that Puppet is able to manage; for example, file , cron ,and service are all resource types. A type specifies the set of attributes that aresource of that type may use, and models the behavior of that kind of resourceon the target system. You can declare many resources of a given type.
type (defined)(or defined resource type; sometimes called a define or definition)
A resource type implemented as a group of other resources, written in the Puppetlanguage and saved in a manifest. (For example, a defined type could use acombination of file and exec resources to set up and populate a Git repository.)Once a type is defined, new resources of that type can be declared just like anynative or custom resource.
Since defined types are written in the Puppet language instead of as Ruby plugins,they are analogous to macros in other languages. Contrast with native types.
type (native)A resource type written in Ruby. Puppet ships with a large set of built-in nativetypes, and custom native types can be distributed as plugins in modules. See thetype reference for a complete list of built-in types.
Native types have lower-level access to the target system than defined types, andcan directly use the system's own tools to make changes. Most native types haveone or more providers, so that they can implement the same resources on differentkinds of systems.
variableA named placeholder in a manifest that represents a value. Variables in Puppetare similar to variables in other programming languages, and are indicated witha dollar sign (e.g. $operatingsystem ) and assigned with the equals sign (e.g.$myvariable = "something" ). Once assigned, variables cannot be reassigned
Glossary of Puppet Vocabulary
© 2014 Puppet Labs 85
within the same scope; however, other local scopes can assign their own value toany variable name.
Facts from agent nodes are represented as variables within Puppet manifests, andare automatically pre-assigned before compilation begins.
variable scopingSee scope above.
virtual resourceA resource that is declared in the catalog but will not be applied to a systemunless it is explicitly realized.
Glossary of Puppet Vocabulary
© 2014 Puppet Labs 86