Lead Rocket Training Manual - Amazon Web...
18
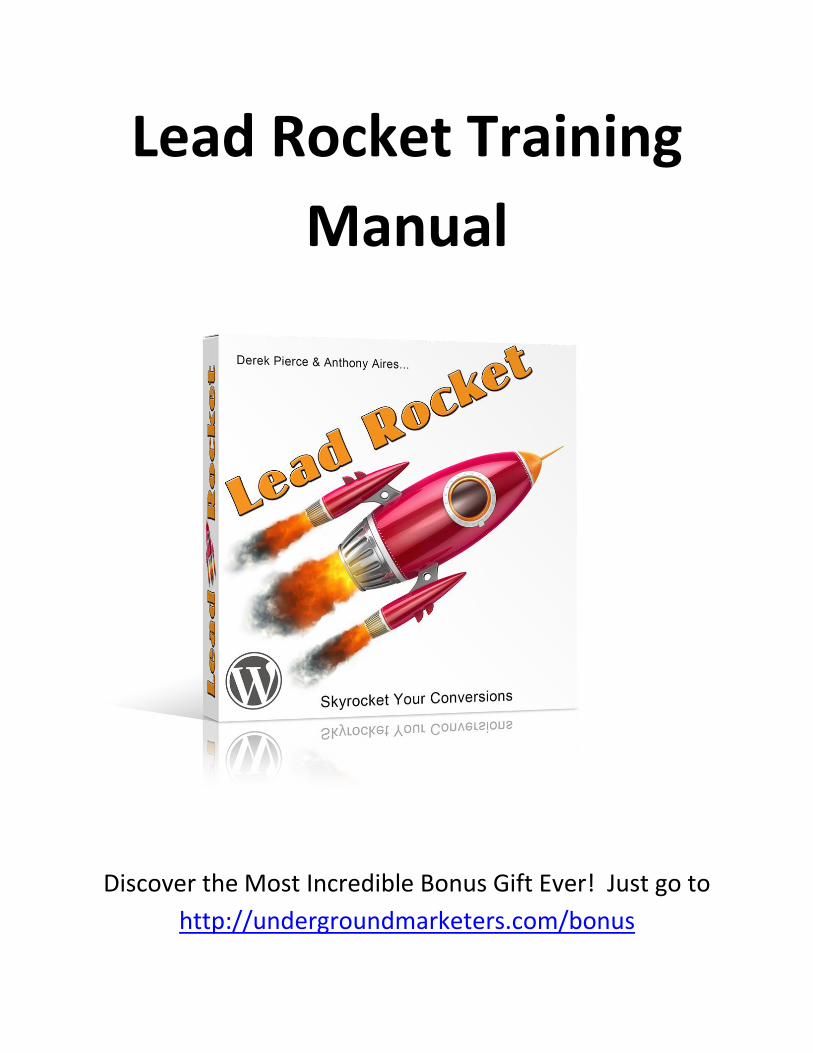
Lead Rocket Training Manual Discover the Most Incredible Bonus Gift Ever! Just go to http://undergroundmarketers.com/bonus
-
Upload
phungkhanh -
Category
Documents
-
view
223 -
download
4
Transcript of Lead Rocket Training Manual - Amazon Web...
Lead Rocket Training
Manual
Discover the Most Incredible Bonus Gift Ever! Just go to
http://undergroundmarketers.com/bonus
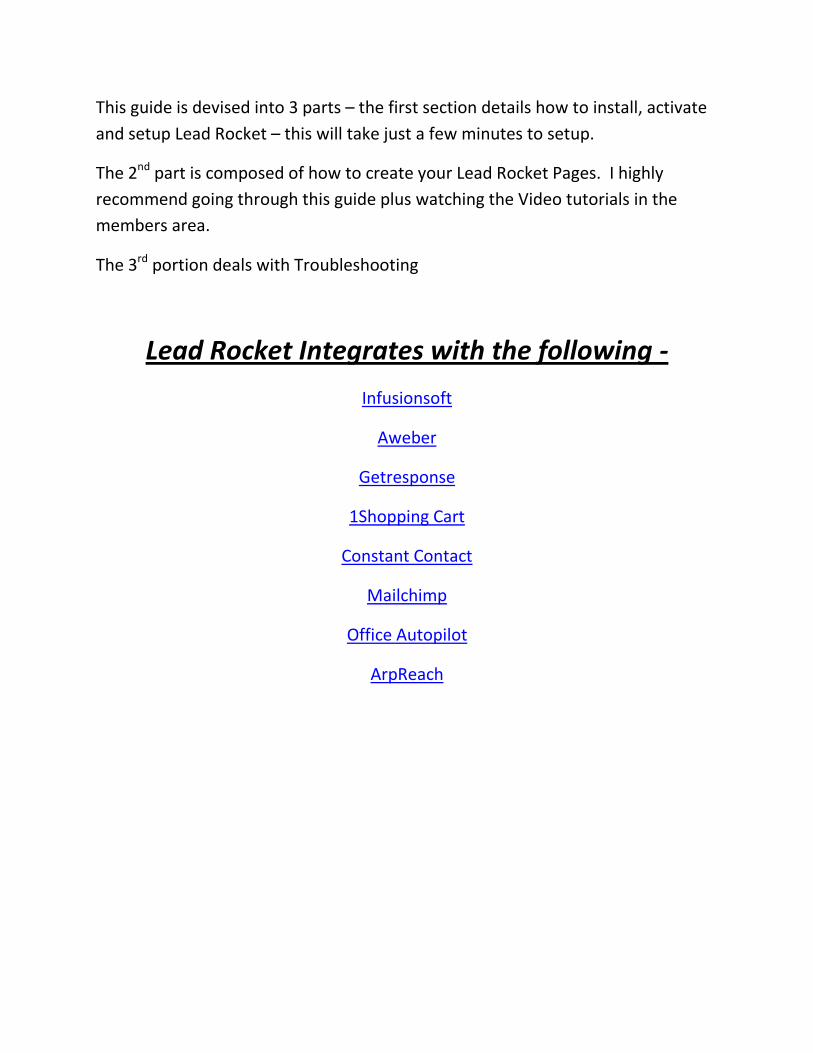
This guide is devised into 3 parts – the first section details how to install, activate
and setup Lead Rocket – this will take just a few minutes to setup.
The 2nd part is composed of how to create your Lead Rocket Pages. I highly
recommend going through this guide plus watching the Video tutorials in the
members area.
The 3rd portion deals with Troubleshooting
Lead Rocket Integrates with the following -
Infusionsoft
Aweber
Getresponse
1Shopping Cart
Constant Contact
Mailchimp
Office Autopilot
ArpReach
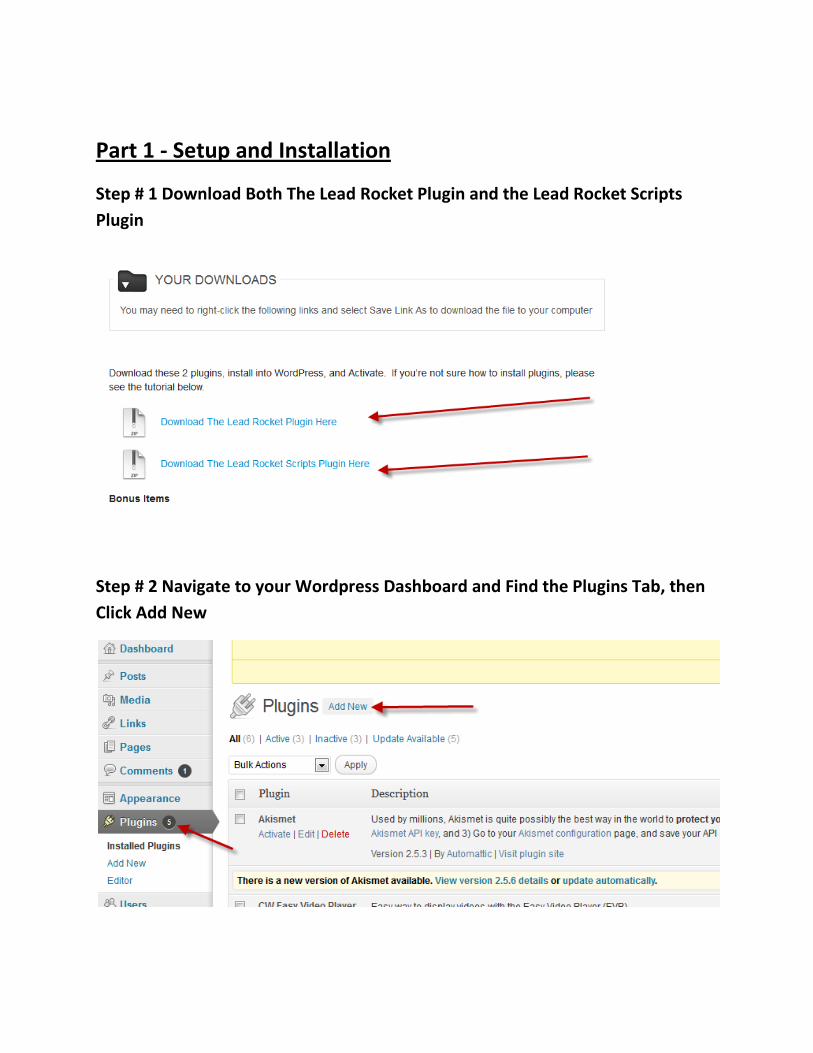
Part 1 - Setup and Installation
Step # 1 Download Both The Lead Rocket Plugin and the Lead Rocket Scripts
Plugin
Step # 2 Navigate to your Wordpress Dashboard and Find the Plugins Tab, then
Click Add New
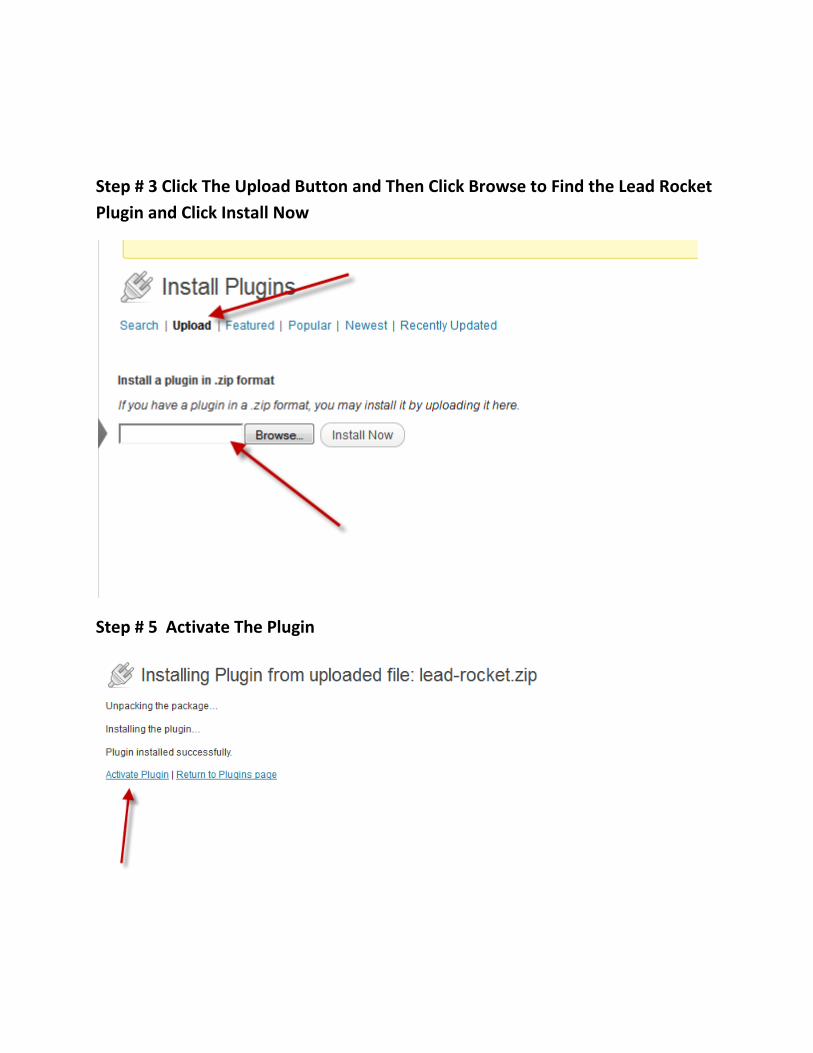
Step # 3 Click The Upload Button and Then Click Browse to Find the Lead Rocket
Plugin and Click Install Now
Step # 5 Activate The Plugin
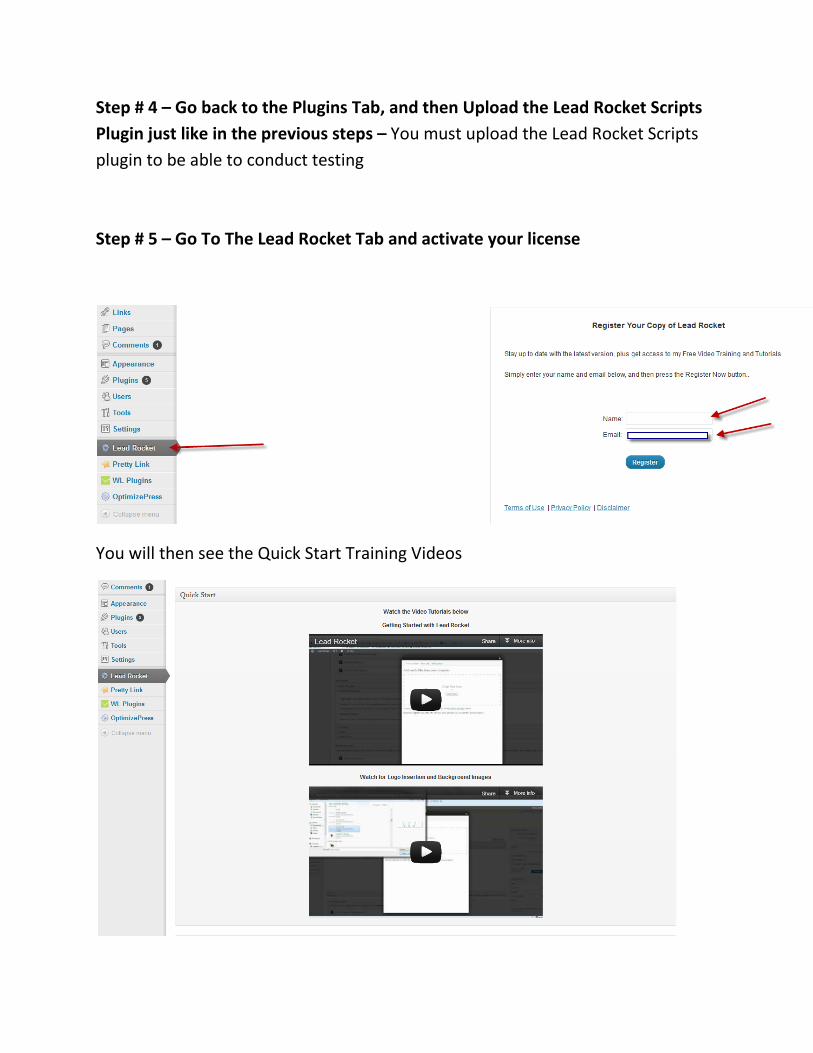
Step # 4 – Go back to the Plugins Tab, and then Upload the Lead Rocket Scripts
Plugin just like in the previous steps – You must upload the Lead Rocket Scripts
plugin to be able to conduct testing
Step # 5 – Go To The Lead Rocket Tab and activate your license
You will then see the Quick Start Training Videos
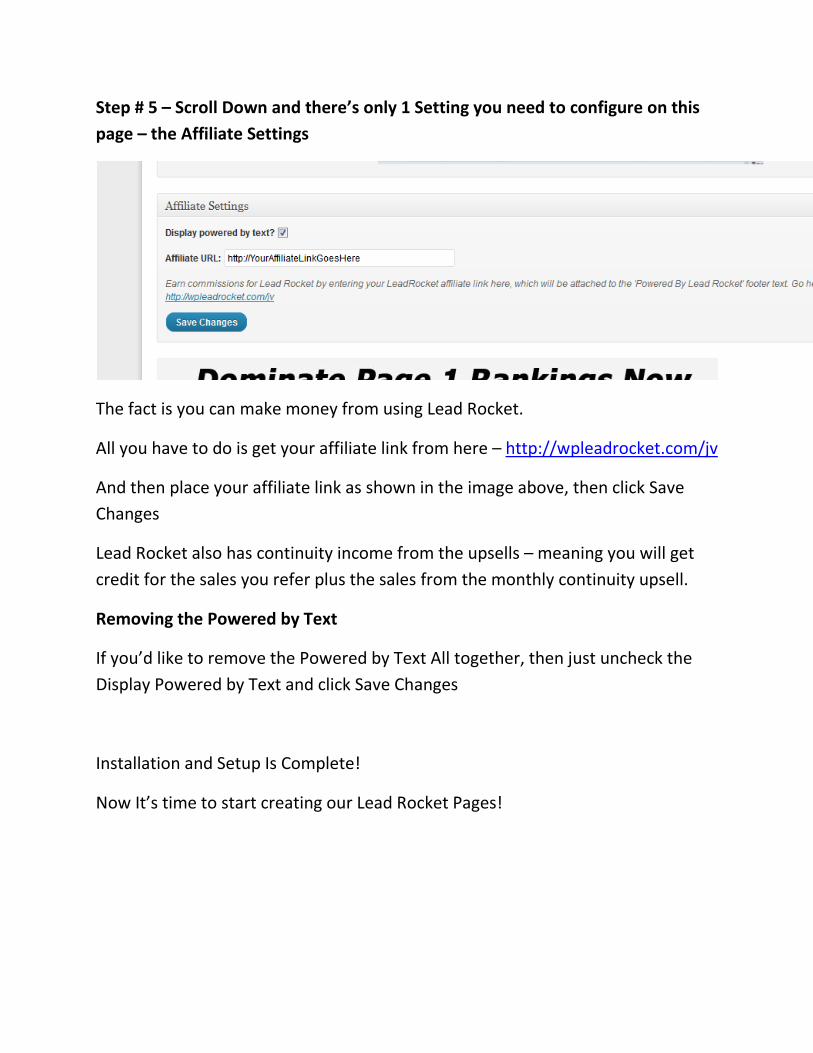
Step # 5 – Scroll Down and there’s only 1 Setting you need to configure on this
page – the Affiliate Settings
The fact is you can make money from using Lead Rocket.
All you have to do is get your affiliate link from here – http://wpleadrocket.com/jv
And then place your affiliate link as shown in the image above, then click Save
Changes
Lead Rocket also has continuity income from the upsells – meaning you will get
credit for the sales you refer plus the sales from the monthly continuity upsell.
Removing the Powered by Text
If you’d like to remove the Powered by Text All together, then just uncheck the
Display Powered by Text and click Save Changes
Installation and Setup Is Complete!
Now It’s time to start creating our Lead Rocket Pages!
Part 2 – Creating Your Lead Rocket Squeeze Pages
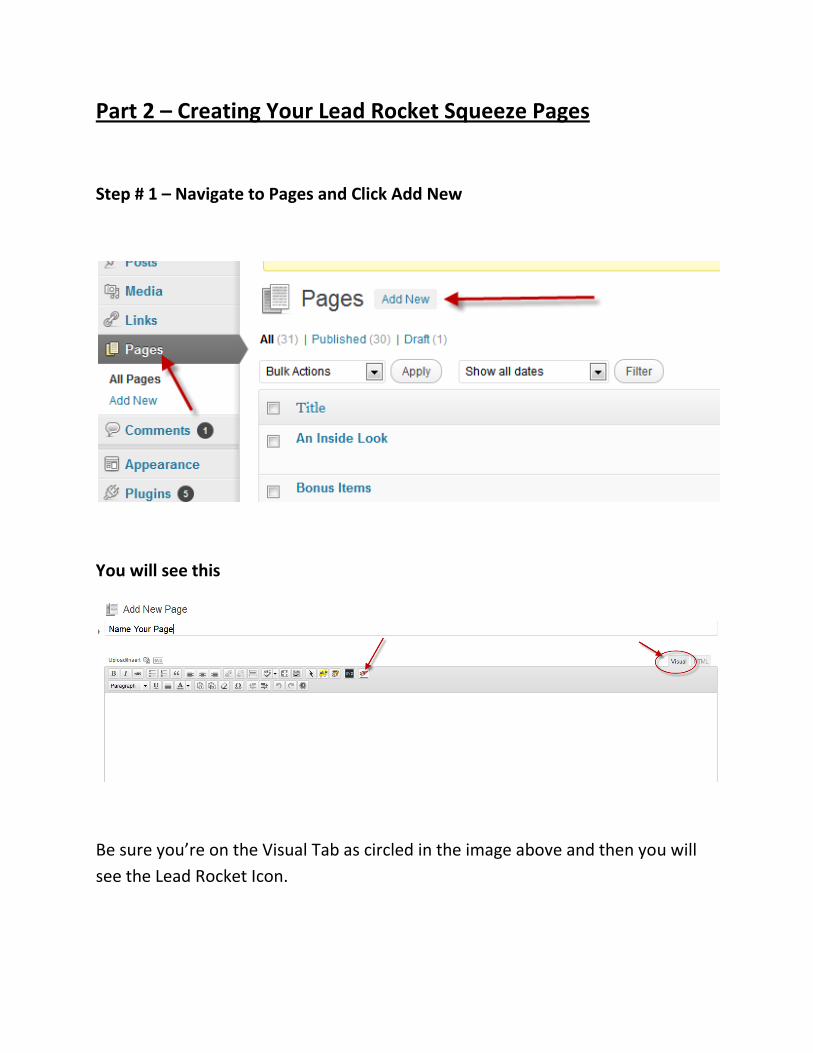
Step # 1 – Navigate to Pages and Click Add New
You will see this
Be sure you’re on the Visual Tab as circled in the image above and then you will
see the Lead Rocket Icon.
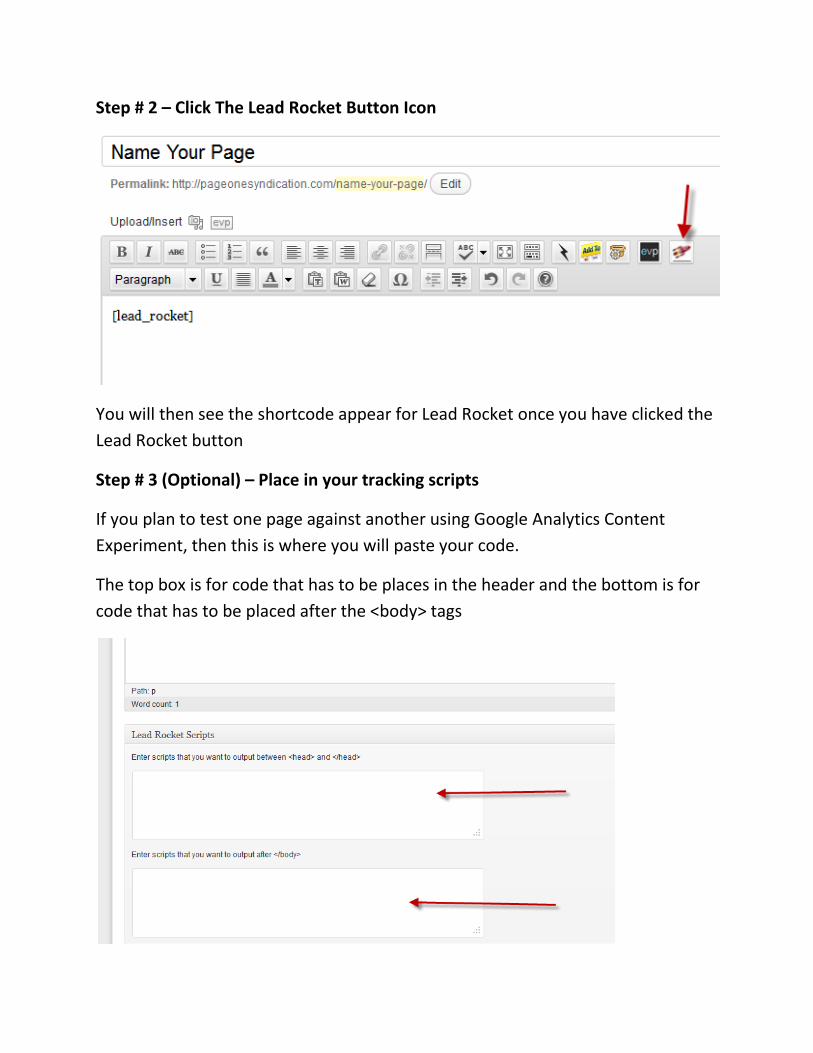
Step # 2 – Click The Lead Rocket Button Icon
You will then see the shortcode appear for Lead Rocket once you have clicked the
Lead Rocket button
Step # 3 (Optional) – Place in your tracking scripts
If you plan to test one page against another using Google Analytics Content
Experiment, then this is where you will paste your code.
The top box is for code that has to be places in the header and the bottom is for
code that has to be placed after the <body> tags
Again, this is optional and not required for Lead Rocket to work – this is just if you
plan to test or if you have scripts to run exit popups, etc on your pages.
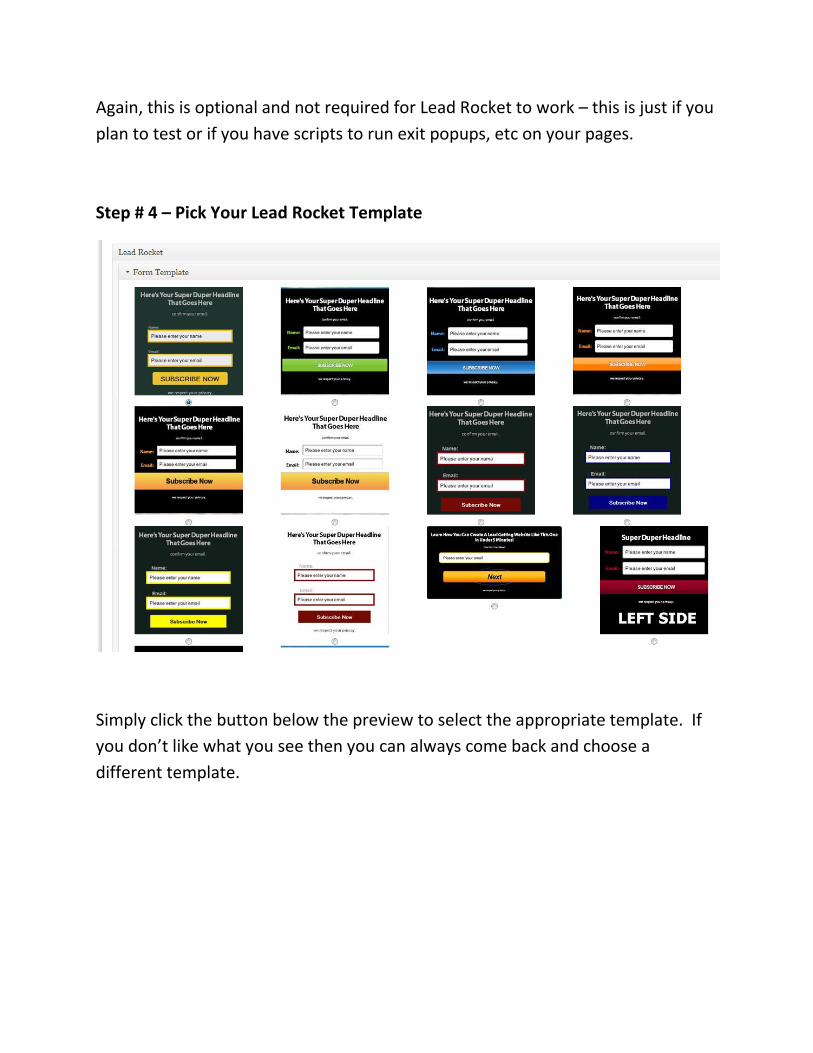
Step # 4 – Pick Your Lead Rocket Template
Simply click the button below the preview to select the appropriate template. If
you don’t like what you see then you can always come back and choose a
different template.
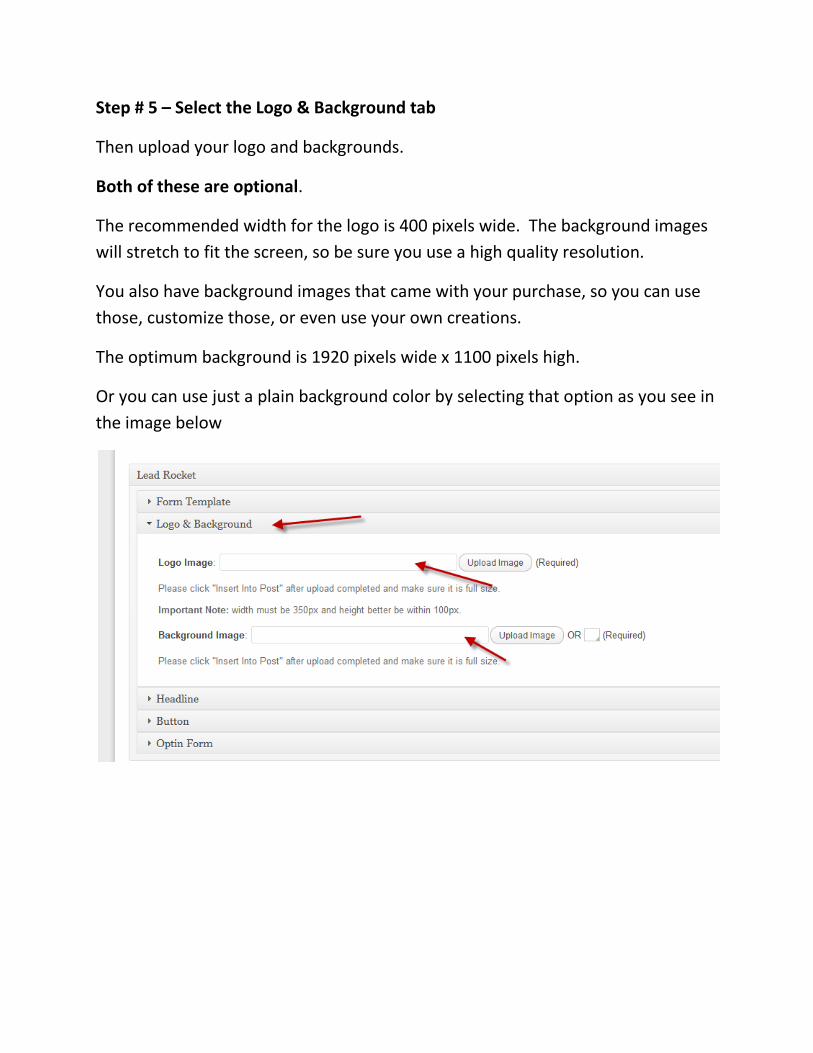
Step # 5 – Select the Logo & Background tab
Then upload your logo and backgrounds.
Both of these are optional.
The recommended width for the logo is 400 pixels wide. The background images
will stretch to fit the screen, so be sure you use a high quality resolution.
You also have background images that came with your purchase, so you can use
those, customize those, or even use your own creations.
The optimum background is 1920 pixels wide x 1100 pixels high.
Or you can use just a plain background color by selecting that option as you see in
the image below
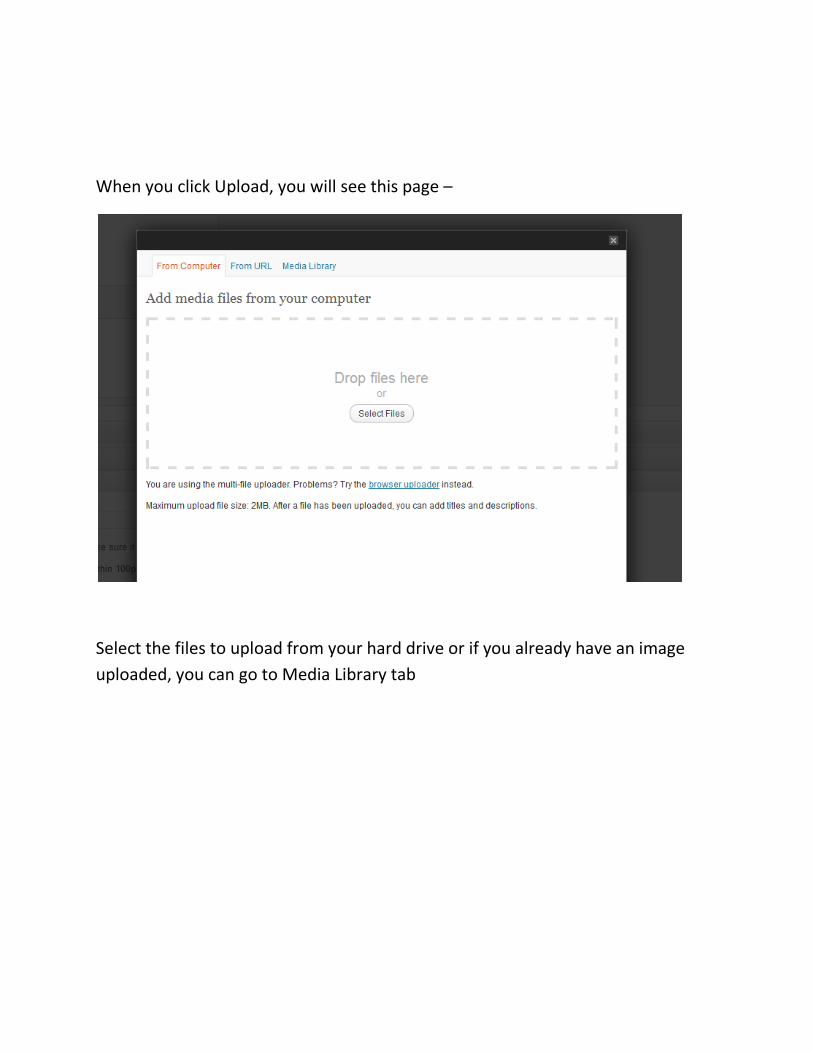
When you click Upload, you will see this page –
Select the files to upload from your hard drive or if you already have an image
uploaded, you can go to Media Library tab
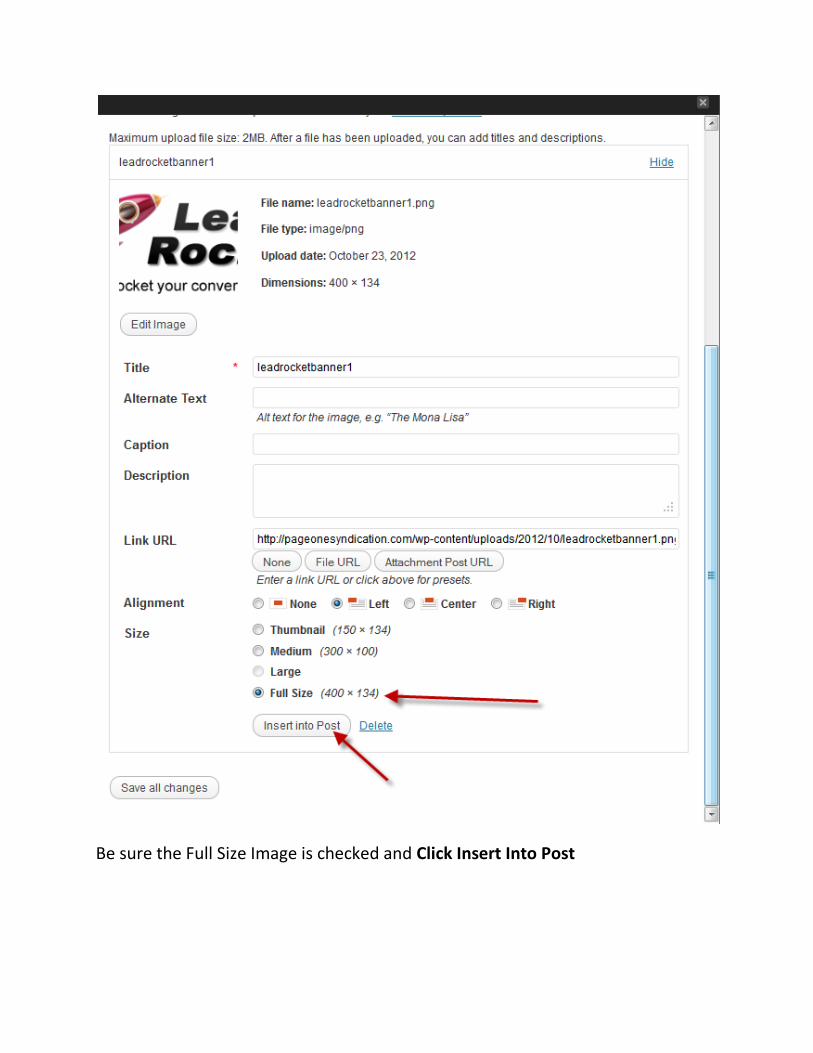
Be sure the Full Size Image is checked and Click Insert Into Post
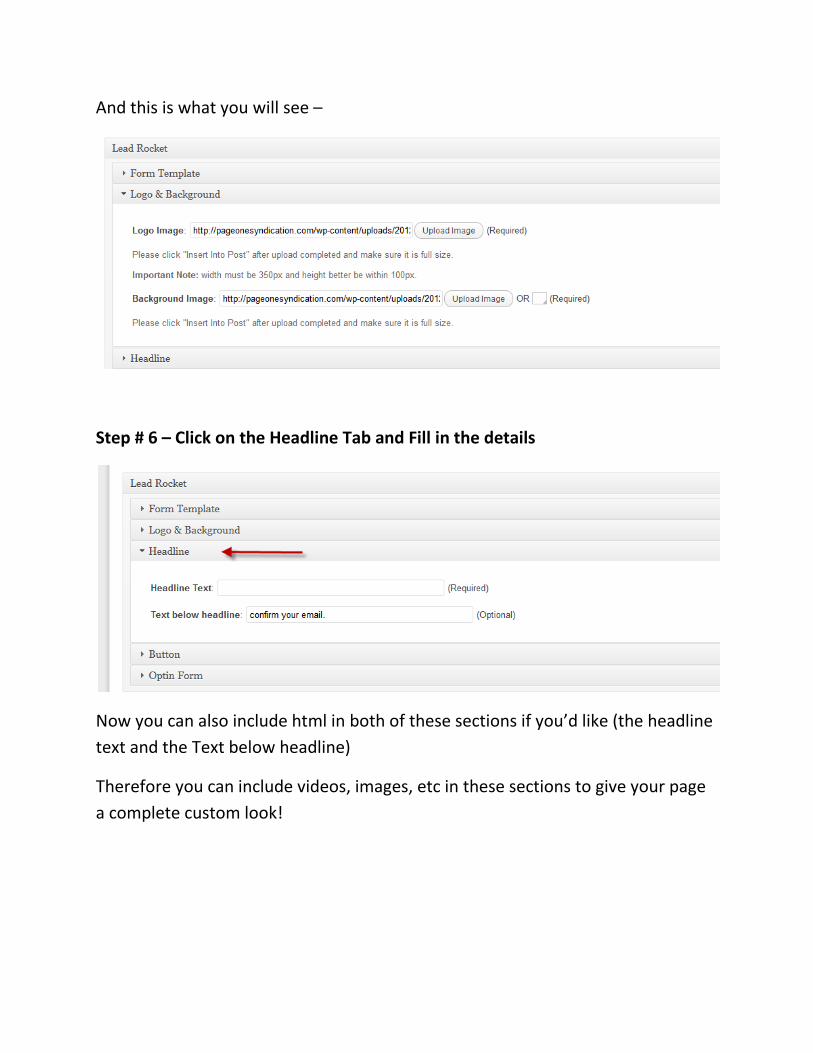
And this is what you will see –
Step # 6 – Click on the Headline Tab and Fill in the details
Now you can also include html in both of these sections if you’d like (the headline
text and the Text below headline)
Therefore you can include videos, images, etc in these sections to give your page
a complete custom look!
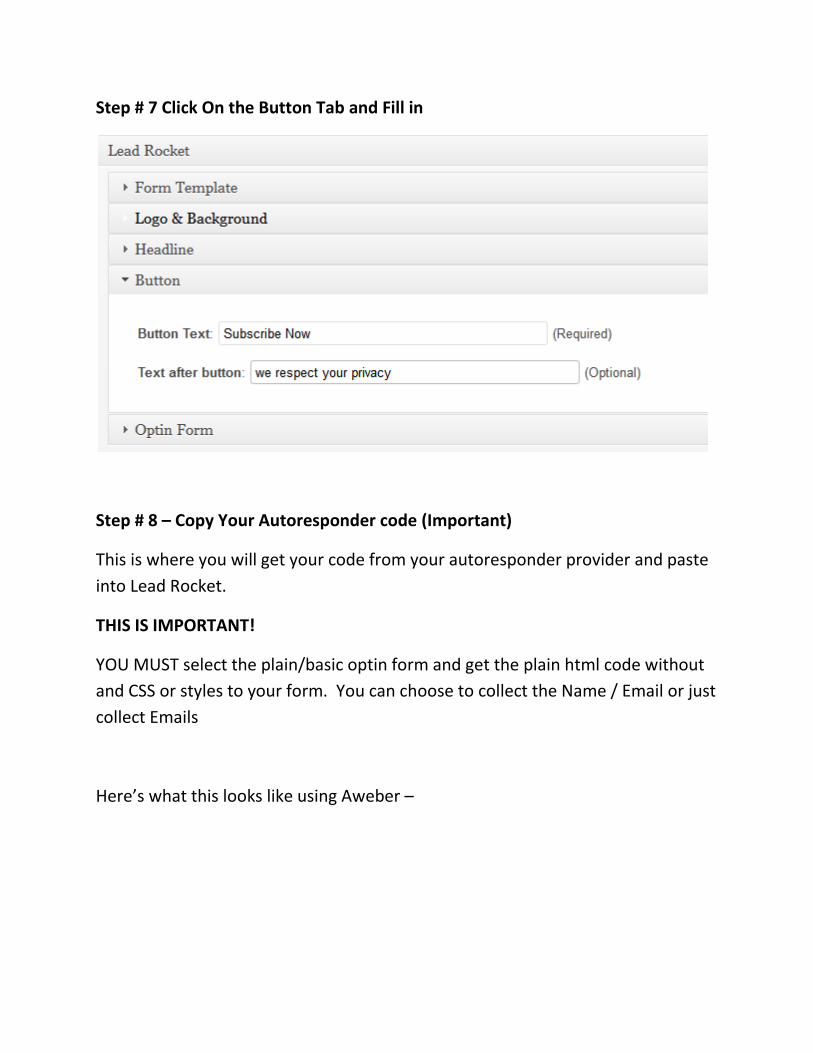
Step # 7 Click On the Button Tab and Fill in
Step # 8 – Copy Your Autoresponder code (Important)
This is where you will get your code from your autoresponder provider and paste
into Lead Rocket.
THIS IS IMPORTANT!
YOU MUST select the plain/basic optin form and get the plain html code without
and CSS or styles to your form. You can choose to collect the Name / Email or just
collect Emails
Here’s what this looks like using Aweber –
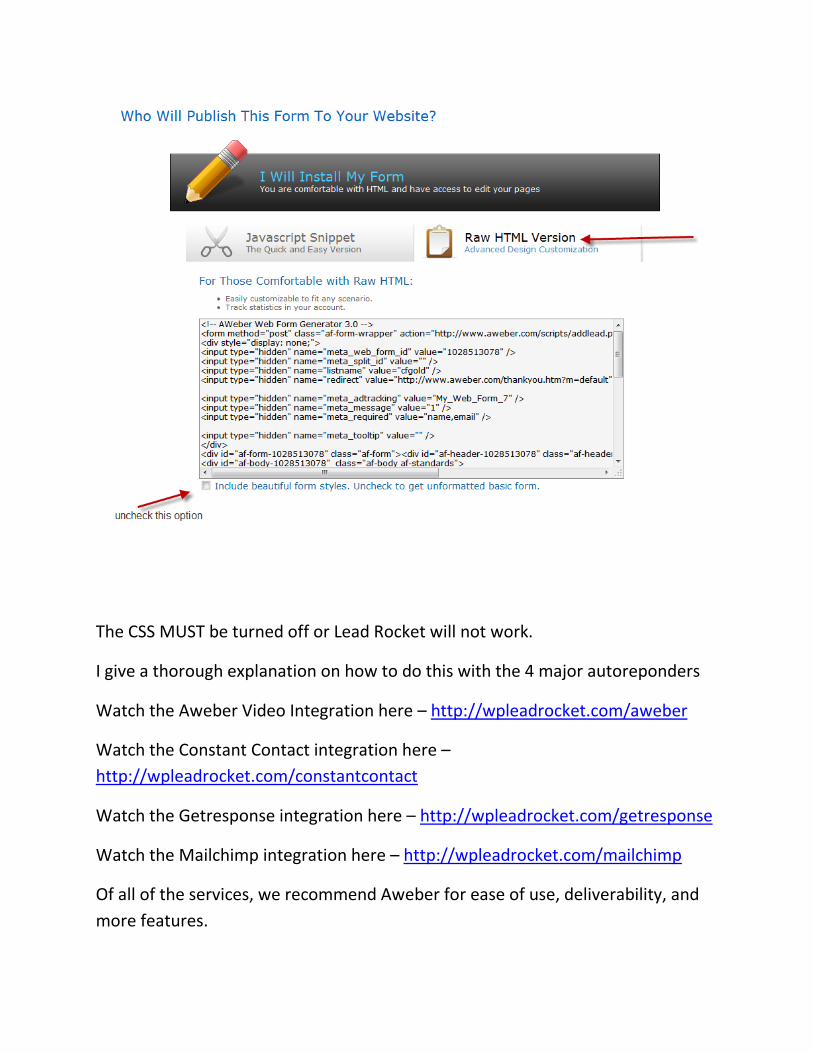
The CSS MUST be turned off or Lead Rocket will not work.
I give a thorough explanation on how to do this with the 4 major autoreponders
Watch the Aweber Video Integration here – http://wpleadrocket.com/aweber
Watch the Constant Contact integration here –
http://wpleadrocket.com/constantcontact
Watch the Getresponse integration here – http://wpleadrocket.com/getresponse
Watch the Mailchimp integration here – http://wpleadrocket.com/mailchimp
Of all of the services, we recommend Aweber for ease of use, deliverability, and
more features.
You can get a Trial of Aweber by going to http://undergroundmarketers.com/go/aweber/
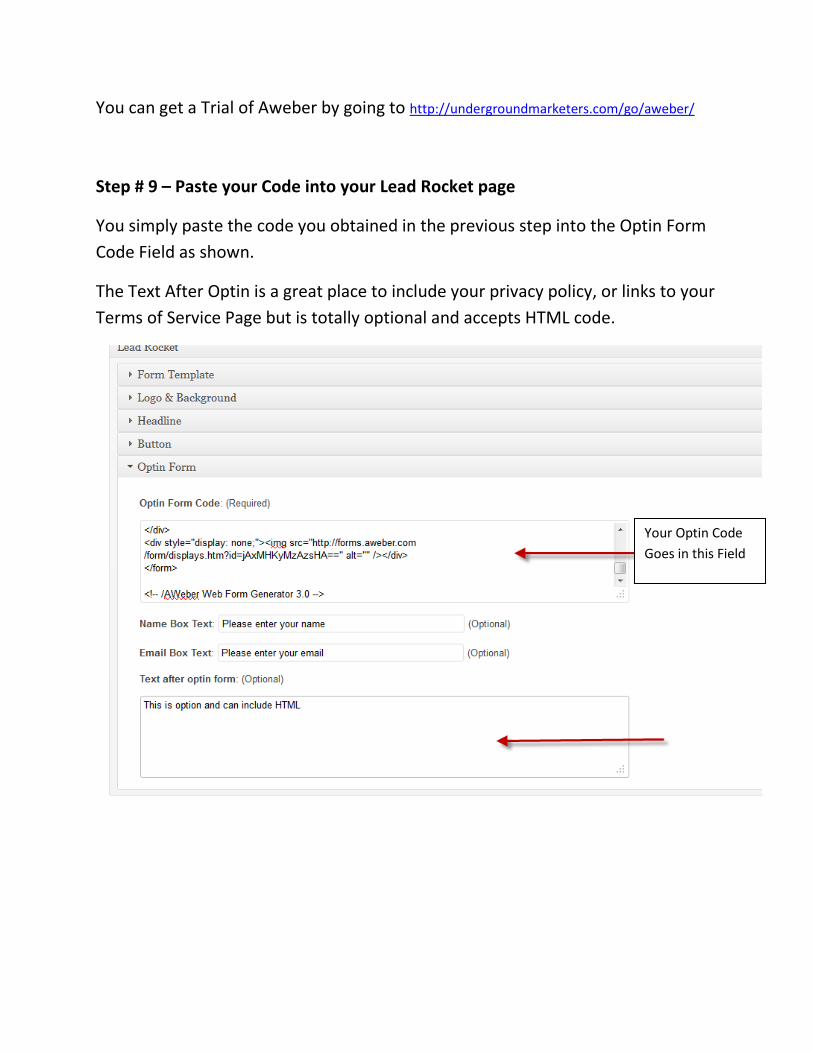
Step # 9 – Paste your Code into your Lead Rocket page
You simply paste the code you obtained in the previous step into the Optin Form
Code Field as shown.
The Text After Optin is a great place to include your privacy policy, or links to your
Terms of Service Page but is totally optional and accepts HTML code.
Your Optin Code
Goes in this Field
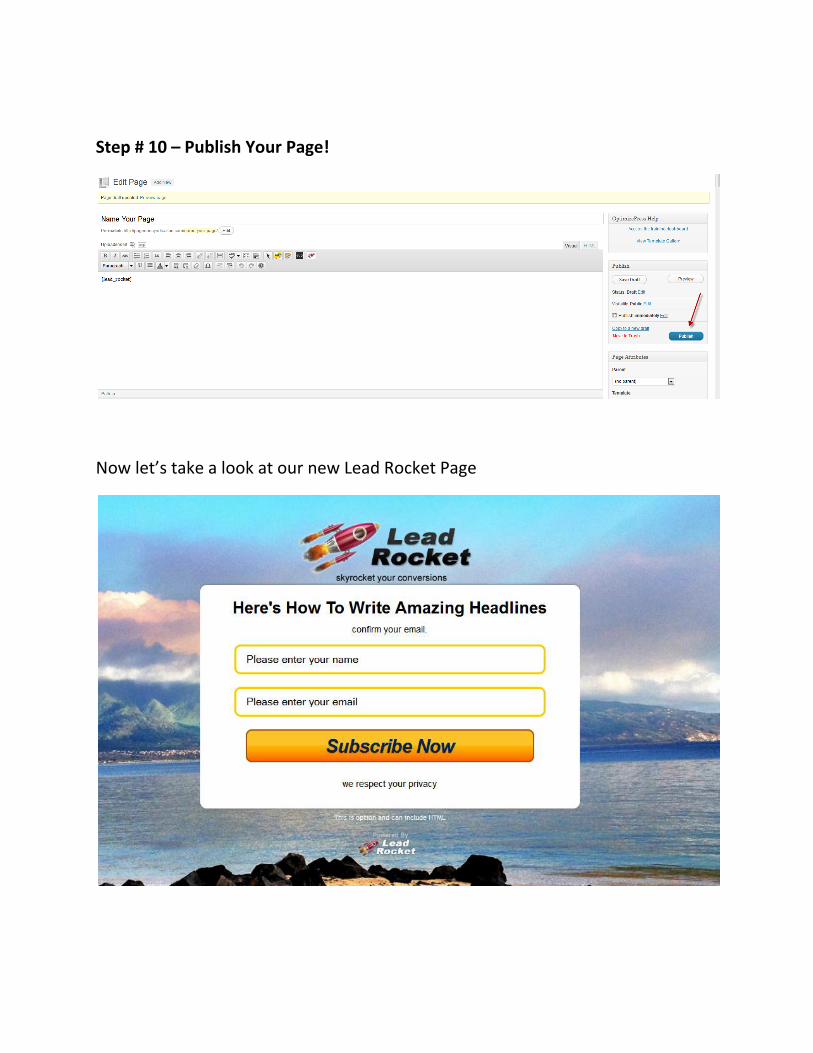
Step # 10 – Publish Your Page!
Now let’s take a look at our new Lead Rocket Page
Troubleshooting & FAQ’s
How do I set the Thank You Page of the Lead Rocket page after someone optins?
This is all setup with your autoresponder service. This is setup when you are
creating your forms.
I get an error from my Autoresponder Service saying Fields are Missing
This happens when you copy the CSS code with your form. Be sure to have your
CSS turned off and just use the basic HTML forms
Please see steps 8 & 9 above
I don’t see the Lead Rocket Icon on the Editor of the Wordpress Page
Please refer back to Part 2 Step # 1. If you’re on the Visual tab and still do not see
the Lead Rocket Icon, then you have a conflict with another plugin or the theme
you are using.
You will need to deactivate the plugins one by one to find out where the conflict
is coming from.
We’ve only seen a handful of plugins that cause this conflict.
All I See Is a Black Box when I publish my Page?
This happens when you don’t have your autoresponder code copied into the
page. Please see Steps 8 & 9 above.
There’s an Optin Form Below the Black Box
This happens when the autoresponder code is pasted into the Text After Optin
section.
Please see steps 8 & 9 for complete instructions.
If you need support, please visit http://dreambiggroup.com/support