Lazarian World Homes
24
Lazarian World Homes LAZARIAN WORLD HOMES Eco-friendly - Affordable and Easy to Build - 40-50 Year Economic Life Can Withstand a 8.0 Earthquake The Lazarian World Home Project is a non-profit Partnership between Point Loma Nazarene University, Baylor University, and ARDA. The Partnership is building Lazarian World Homes in Armenia, Mexico, Brazil, and the Torres Martinez Indian Reservation. Other individuals or organizations are invited to join the Partnership in building homes for the World’s poor. The Lazarian World Homes are Green The major components of the Lazarian World Home are Green in the true spirit of eco-friendly housing. The wall systems of the home comprise recyclable polystyrene (EPS) blocks, concrete and steel rebar. These basic construction materials are readily available in most countries of the world and present a sustainable solution to
Transcript of Lazarian World Homes

Lazarian World Homes
LAZARIAN WORLD HOMES
Eco-friendly - Affordable and Easy to Build - 40-50 Year Economic Life
Can Withstand a 8.0 Earthquake
The Lazarian World Home Project is a non-profit Partnership between Point Loma
Nazarene University, Baylor University, and ARDA. The Partnership is building
Lazarian World Homes in Armenia, Mexico, Brazil, and the Torres Martinez Indian
Reservation. Other individuals or organizations are invited to join the Partnership in
building homes for the World’s poor.
The Lazarian World Homes are Green
The major components of the Lazarian World Home are Green in the true spirit of
eco-friendly housing. The wall systems of the home comprise recyclable polystyrene
(EPS) blocks, concrete and steel rebar. These basic construction materials are readily
available in most countries of the world and present a sustainable solution to
providing cost effective, energy efficient housing for the poor. The Lazarian World
Home is simple and inexpensive to build. The homes are energy efficient with a
minimum R-Value of 20. Because the resulting “skeleton” inside the walls of the
Lazarian World Homeis a type of structural system commonly known as Reinforced
Concrete Post and Beam Construction, the homes will withstand major earthquakes,
storms, and natural disasters. The polystyrene (EPS) walls do not absorb moisture and
resist pests. The homes have an economic life of 40-50 years. When the economic life
of the home is complete, the EPS blocks may be ground up and used as an amendment
to gardens to allow for better watering, especially in clayey soils. The recycled
EPS material may also be combined with cement products to fabricate new building
blocks to build more homes. In addition, the concrete in the EPS walls may be
recycled and used for base material under buildings and roads, and the steel rebar
scrap metal may be recycled for other uses. There are a variety of roof systems that
may be utilized on the Lazarian World Home. The most common choice is wood
trusses installed with corrugated metal roof sheeting as the waterproof roof
membrane. It is clear that the metal roofing may be recycled while the wood in the
trusses may be recycled into particleboard and other engineered wood products. The
Lazarian World Home is the new standard for durable, affordable, eco-friendly
housing.
Lazarian ICF Polystyrene Foam Block
The Lazarian Insulated Concrete Form (ICF) polystyrene foam block is the basis for
the Lazarian World Home. The polystyrene beads that expand into the ICF block
contain fire retardant and pest resistant chemicals.. The Standard Wall Block and
Lintel/Header Block comprise the wall system. There is also a lintel end cap and a
plug. The plug enables the builder to determine where to locate concrete columns and
the lintel end cap terminates lintels/headers. The tooling/molding for the ICF blocks
for homes to be built in Armenia and Mexico is provided by the Partnership. All
parties interested in building homes utilizing this system may purchase the ICF blocks

through Lazarian World Homes.
Home Parts and Equipment ListNOTE - THE FOLLOWING ARE QUANTITIES FOR ONE (1) HOME: 1. ENTRY DOOR - Home Depot SKU # 208588 Left Hand Entry - pre hung - Fanlite style 32"X 80"R.O. 33 3/4" X 82" (Jambs 4 9/16" wide with 2 3/8" backset for Quikset key bore style lock). Qty (1) Exterior Door and Key Lock. (Qty - 1 Left Hand) 2. INTERIOR DOORS - Home Depot SKU # 699051 Left Hand and SKU # 699065 Right Hand32" X 80" pre hung slab doors, R.O. 33 3/8 X 81 ½" (same jamb width and Quikset

privacy bore style lock - backset as entry doors) Qty (3) Interior doors and Privacy Locksets. (Qty -1 Left Hand and Qty - 2 Right Hand) 3. LIVING ROOM AND BEDROOM WINDOWS - Jeldwen 4030 Vinyl sliding/bypass windows RO 47 ½”W X 35 ½"H. Two in living room and one in each bedroom. Home depot special order with NO tabs - order replacement type windows) Qty (4) 4030 Windows. 4. BATH WINDOW- Jeldwen 2020 Vinyl sliding/bypass window RO 23 ½"W X 23 ½"H. Bath window with OBSCURE glass. Home Depot special order with NO nailing tabs - order replacement type windows). Qty (1) 2020 Window. 5. KITCHEN WINDOW- Jeldwen 3030 Vinyl double hung window RO 35 ½"W X 35 ½"H. Kitchen window. Home Depot special order with no nailing tabs - order replacement type windows Qty (1) 3030 Window. Note: This window requires a min ½" chipping of concrete from columns to fit RO. NOTE: ALL windows dual pane. All glass is clear - bath is obscure glass. 6. LAZARIAN ICF POLYSTYRENE FOAM BLOCKS - Ext Lin ft 104'--- Int Lin ft 60' ---- Total Lin Ft = 164' X 8' = 1,312 lin ft. (8' PLATE LINE THROUGH OUT) Order 1500 lin ft ORDER: STANDARD BLOCK - 260 pieces LINTEL BLOCK 90 pieces (lintel block is installed at 4' mid height and 8' top plate) HOLE PLUGS - 310 pieces (every other hole plus every hole at headers) LINTEL END GATE - 60 pieces (header ends and wall corner - ends) NOTE: ALL FOAM MATERIAL TO BE FIREPROOF 7. CONCRETE SLAB -24' X 28' - footings 12" X 24" deep w/#3 rebar T&B continuous at EXTERIOR walls only. Install a 4" concrete slab w/#3 - 24" OC both ways. Alt: Use 6-6-10-10 WWM. Thicken slab to 8" under interior/ non-bearing walls. Install Qty (1)- #3 rebar, 3' length 16"OC vertical in all EXTERIOR walls only and embed 12" into the wet concrete slab/footing: tie to top #3 bar in footing. When this

is done, 2' of the #3 rebar will be exposed vertically. INTERIOR walls -after slab is poured and prior to installing ICF foam block at interior walls, drill and epoxy #3 rebar 3' long at 16" OC 6" into slab. IMPORTANT - Layout of ALL vertical rebar is 4" IN from OUTSIDE edge of slab, including corners. Qty: (8 double tubes) two part EPOXY - caulking gun)Qty: (3) - 5/8" masonry/concrete drill bits - NOTE: end of bit to fit ½" roto hammer drillQty: (800 sq ft) 6 mil. visqueen (1 box) - moisture barrier under concrete slabQty: (2,500 lin ft #3 rebar) - 200 lin ft horizontal in footings, including non bearing wall thicken slab + 2,300 lin ft #3 rebar in walls.Qty: (750 sq ft) 6-6-10-10 wire mesh under slab 8. INSTALL LINTELS at 4', and 8' high. All lintels/ headers to have 1- #3 continuous horizontal. Install 1- #3 bar horizontal at all corners: 90 degrees and lap rebar 12" - 18"to tie in/ lock the walls together. Walls to be poured in 2 pours -4' mid height and 8' top out to top plate. ALL int. and ext. ICF foam walls to be 8' high.
9. 2"X4" WOOD TRUSS - Qty (13) - 24" OC. There are Qty (13) 2" X 4" wood trusses per home. The top and bottom cord of the truss's are made of 2" X 4"s and the middle webbing is made with 2" X 3"s. The pieces of the truss are attached with 1/2" plywood gussets using 2" ring shank nails. See Plans. Design for snow load (if required). The trusses bear at 28' to the outside edge of the ext wall, PLUS 12" tails/overhangs each end. Total truss length with 12" overhangs is 30'. The trusses should be designed for a 28' free span. The gable ends are at the side of the home. It is best to install 2"X4" wood backing 24" OC into the truss’s (backing for the T1-11 at gable ends) prior to installing the trusses. The truss’s at the gable ends are held in 1" from the outside wall and have 3/8" T 1-11 plywood on the exterior from the 8' plate line to the ridge. All truss’s are attached to the 2"X 8"wood top plate by teco clips and toe nailing 2 - 16d nails to the side of 2"X 8" wood backing. ALTERNATE: Instead of Teco clips and toe nailing 16d nails to connect the trusses to the 2"X8" top plate, USE Qty (2) Simpson S/H3 Hurricane Ties - one to each side of each truss. The plans show the 2"X 8" wood backing is connected/screwed with 3 1/4" Tapcon Hex Head blue screws into the top of the concrete beam/lintel at the ICF form and held in to the interior 2"- 2 1/2" to provide backing for drywall nailing. ALTERNATE to connecting the 2X8" plate to the concrete beam at 8' plate line: Install 5/8" anchor bolts (layout so as to avoid trusses), with Simpson bp 5/8" square washers, into the 2'X8" top plate and place in wet concrete at the 8' plate line lintel/concrete beam immediately after pouring -pressing the anchor bolts into wet concrete. After concrete is set/hard, then cut notches for truss placement. ALL trusses sit directly on the concrete beam/lintel at the top of the ICF forms and are connected at the side of the bottom cord to the 2"X 8" wood backing. The 2" X 8" wood backing is continuous on

the gable end walls, and are cut so as to create a slot for the truss’s on the front and back walls. Screw 1/2" drywall to bottom of truss for ceiling with drywall screws to 2"X 8" backing at 8' plate line for all exterior walls. Install ½" plywood backing for drywall nailing at interior (non bearing) walls. Qty: (13) 2X4 wood truss’s - bearing at 28' long + 12" tails at each end - (total length 30' each truss). 1" camber in each truss Qty: (8) Sheets 3/8" T1 -11 Resawn plywood - no grooves - for gable ends (Best to Install Prior to installing Corrugated Metal Roofing)Qty (16) Sheets 1/2" CDX Plywood for Truss gussetsQty (1 box) 2" ring shank nails for nailing gun to nail plywood gussets to truss's.Qty: (250 sq ft) - Tyvek 3' wide sheetsQty: (60 lin ft) Z bar flashing per Detail 1 of plans - Z bar (3"X 1"X 2")Qty: (1 box) 8d sinker nails for nailing gun Qty: (1 box) 16d - 3 1/2" sinker nails for nailing gun Qty: (130 lin ft 2X8 #2 Doug Fir) - connect truss and backing for drywall at exterior walls.Qty: (300 lin ft 2X4 #2 Doug Fir) -for blocking between truss’s at plate line, ridge line, & corrugated roof lap line.Qty: (60) Teco clips with nailsQty: (100) 1/4" Tapcon masonry hex head blue screws - 5" longQty: (200) 1/4" Tapcon masonry hex head blue screws- 3 1/4" longQty: (150) 1/4" Tapcon masonry hex head blue screws - 2 3/4" longQty: (3) extra drill bits for 1/4" masonry blue screws (3/16" bits - long bits to drill for 5" screws) Qty: (52) Simpson S/H3 Hurricane Ties (Alternate connection - anchoring ends of trusses to 2"X8" top plate)Qty: (54) 5/8"X8" anchor bolts with Simpson bp 5/8" square washers and nuts (Alternate method of anchoring 2" X 8" wood top plate 24" OC to concrete beam at 8' high) 10. CORRUGATED METAL ROOF- screw through metal to wood truss. Use self-sealing screws. Overlap roof panels min 24" on the pitch side, with 13" overhangs at the front and back of home (12" plus 1" to the weather/ past truss tails). Qty (50 sheets) - corrugated steel roof - 29 gauge galv 10' L X 26" WQty (40') ridge cap for corrugated steel roof Qty: 20 boxes@50 each - 2" screws -Self sealing screws 11. DRYWALL CEILINGS - Screw ½" drywall to 2" X 8" nailer/ledger backing and to truss’s.

Qty: (800) sq ft of ½" drywall board Qty: Misc tools - hand and pole sanders, 120 and 220 grit sandpaper, 12" mud pans, mixers, 8" taping knives, utility jab saw, etcQty: (500') Yellow Fiba Tape with mastic (fiber mesh self sticking tape) Qty: (2) boxes Drywall compound/ Mud Qty: Bucket - 1 1/4" Drywall ScrewsQty: (10) Drywall Phillips Screw setter driver bits (#1 and #2)Qty: (2) 24" wide steel trowels for drywall taping and plaster knockdown texture. 12. EXTERIOR / INTERIOR PLASTER - Expo Pro Bond Dry Adhesive (fine) 17-PRO (ph # 858-5664343) or Omega Dry Bond (ph # 800-6006634). ALTERNATE: Mix 3 parts sand with 1 part cement and add 2% (by volume) Vinnapas Epoxy binder. Then add water to achieve a wet mix. See plastering instructions in Construction Steps section. Vinnapas is a powdered polymer, which allows the plaster to bond with the polystyrene ICF foam block and is made by Wacker Polymes in Germany. The California distributor is PT Hutchins Company LTD (626) 333-3329 Att: Michael Duarte cell #(310) 567-2931.Apply with trowel to all interior and exterior surface areas approx 1/4" thick. Total surface area is approx. 2,500 sq ft. (2 sides of walls- interior and exterior) Qty: (1 home-55 sacks) Expo Pro Bond @ 50 lbs each. (55 sacks @ 40 sq ft/ sack includes waste)ALTERNATE: Qty (2) sacks Vinnapas epoxy binder 13. CAULKING: Caulk perimeter of all windows and doors both sides. Also, caulk in electric outlets, light cans/boxes - All Holes. Qty: ( 8) tubes of Liquid Nails Adhesive- Projects and Foam board Qty (4) caulking gunsQty (60) tubes Dap caulking with Silicone (5 boxes of 12) 14. ALL PAINTING, PLUMBING (rough and finish), Heating, 100 AMP Electric (rough and finish), Cabinets/Countertops, Lighting, Kitchen and Bath fixtures by others. Qty (1) Cadet Baseboard Heater 6F1500W (6' long) - living room Qty (2) Cadet Baseboard Heater 4F1000W (4' long) - each bed room. Qty (1) Ariston GL2.5 Water heater - kitchen sink Qty (1) Ariston GL4 Water heater at tub/shower/sink. Note: Use remodel type electric boxes with flanges for compression fitting. Rough in electric and plumbing installed in horizontal lintel channels and “vacant” vertical cavities in ICF forms. Rough plumbing installed in slab.

15. ATTIC VENTS: Qty (2) Metal gable end attic vents (18" X 18") 16. CLOSET SHELVING: Qty (2) 1"X12" MDF shelving -8' long Qty (2) 1"X4" cleats/ledgers for shelving -12' longQty (2) metal shelf bracketsQty (4) plastic or wood holders for closet polesQty (2) 8' long wood closet poles
17 A. KITCHEN SHELVING: Qty (1) A. MDF - KD adjustable shelving for kitchen -8' W X 6' H (2 base cabinets + 2 upper cabinets) B. KITCHEN (36"W) AND BATH BASE (30"W) CABINET 18. FIBERGLASS BATTS: Install R-19 fiberglass batts insulation in all lids. Qty: (750 sq ft) - 24" wide R-19 Kraft paper face. 19. MILLWORK: Kitchen cabinets, top for sink and bath vanity furnished by others. 20. LIGHTS: Qty: (3) ceiling fan- lights for living room and bedroomsQty: (1) kitchen ceiling light Qty: (1) Broan/ Nutone bath ceiling fan/lightQty: (1) Exterior entry wall hung lightQty: (2) Halo H7 Can lights - for kitchen sink and bath vanity 21. SHUTTERS: (OPTIONAL) Qty: (4) plastic shutters 36" H for living room windowsQty: (2) plastic shutters 36" H for kitchen window 22. FIBERGLASS TUB/SHOWER Qty (1) Lasco 2 piece tub/shower - left hand

23. MISC ITEMS Qty:( 1 Box) 8d wood nails (sinkers)Qty: (1 Box) 16d wood nails. (sinkers) Qty: (2) Electric wire wands, with Extra Wire - to cut ICF foam block to fit door and window rough openings - snug fit to 2X6 wood frame.Qty: (1) Transformer to cut foam (for use with electric wands)Qty: (4) rolls of tie wire for rebar (Alt: If necessary -use as replacement for zip ties)Qty: (5) Linesman pliers to tie rebarQty: (600) 3/16" wide plastic Zip Ties - to tie rebarQty: (3) Wood saws Qty: (8) Hole sawsQty: (1) Electric Milwaukee Sawszall Qty: (12) blades for sawszall - 4 blades each to cut foam ,wood, steel (8", 10", 12")Qty: (1) 4 ½" Makita cutter/grinder Qty: (12) Blades for Makita grinders to cut concrete, steel/ rebar - Also diamond bladesQty: (1) Dewalt compound mitre saw Qty: (1) Skil saw with 3 blades - woodQty:(2) Hack saws with 6 bladesQty: (3) DeWalt - 5" Orbital sandersQty: (20) cartons of 60 grit, 8 hole sandpaper for Dewalt orbital sanderQty: (5) cartons of 100 grit, 8 hole sandpaper for DeWalt orbital sanderQty: (1) Porter Cable Nail Gun - nail gun to handle up to 16d nailsQty:( 6) 16 oz. hammers Qty: (4) Sheets ½" 4'X8' CDX Plywood (gussets, etc.) Note: Qty (20) including gussets for trusses.Qty (50) 2"X 6"-8' long for window/door cutouts and lintel supports to pour concrete.Qty: (3) tubes Henrys waterproof mastic for roof vents/penetrations.Qty: (8) cans plumbing Great Stuff spray foam big gap filler Qty: (2) sheets 4'X8' 1/4" masonite Qty: (2) metal “L” squares Qty: (2) large “T” squares Qty: (8) Large Trowels to apply plaster - 4 with foam backing and 4 steelQty: (18) 5 gal buckets, Qty: (4) caulking guns. Qty: (1) gallon Bondo with extra catalyst.Qty: (10) 2" Steel putty bladesQty: (6) 6" Steel putty bladesQty: (9) Utility knives - extra bladesQty: (2) Milwaukee Electric Drills - heavy duty Drill/Roto Hammer Combo with ½" chuckQty: (6) 50' Electric cords

Qty: (3) Long mixing blades for plaster and drywall compoundQty: (2) Sets -Wood drill bitsQty: (2) Sets - Masonry bits (all bits to fit in ½" chuck)Qty: (2) 14.4V De Walt Battery drills - 2 batteries and charger per drillQty: (6) 4" paint brushes - cut in brushesQty: (48) Weenie rollers for rough texture Qty: (6 Long handles for weenie rollersQty: (3) metal grids for painting - 5 gal bucketsQty: (20) Plastic paint traysQty: (300) 3" concrete nailsQty: (200) 2" concrete nailsQty: (2) 4' levelsQty: (2) Chalk lines + chalkQty: (1) Can red spray paint Qty: (2) screw driver setsQty: (4) work bench/ saw horsesQty: (2) Small wrench and socket setsQty: (2) Gang Boxes -metal toolboxes to hold small power and hand toolsQty: (24) Rolls of 1 1/2" masking tape (4packs @ 6 ea)Qty: (24) Rolls of Red plaster tapeQty: (4) rolls duct tapeQty: (2) Boxes -painters 4 mil VisqueenQty: (2) DeWalt Emglo gas air compressors #D55275 -- 9HP Honda, 16.2 cfm@100psi, 17 gal quad tankQty: (6) Drywall Hoppers for air compressor - to spray on plasterQty: (6) 50' Air hoses and fittings - set up air compressor with 3 way fittings to handle 3 hoppers at the same time.Qty: (3) 6' Husky fiberglass laddersQty: (2) 8' Husky fiberglass laddersQty: (1) roll of teflon tapeQty: (4) 100 foot water hosesQty: (1) Electric Concrete MixerQty: (3) Boxes ragsQty: (2) Set masonry chiselsQty: (1) Gasoline Generator (110/220) - 6500WQty: (6) Quarts motor oil Qty: (4) 25' tape measuresQty: (1) 100' tape measureQty: (1) Large Bolt cutter - to cut and bend rebarQty: (1) Staple gun (for stapling Tyvek and Insulation to truss’s))Qty: (2) Boxes of staplesQty: (6) Nail bags (one pocket)Qty: (2) Small boxes 3 1/2" drywall nails - grey exteriorQty :(10) #3 Phillips screwdriver bits - De Walt - for Tapcon Blue Screws

Qty: (10) 1/4" hex drive bits for roofing screws - De WaltQty: (1) Small concrete pump - to handle transit mix concrete truckQty: (1) First aid KitQty: (6) Cans WD40 - for plaster hopperQty: (4) BroomsQty: (2) 6' pipe clampsQty: (2) 8" “C” clamps
Construction StepsThe following information details requirements for the construction of the Lazarian World Home. These procedures may easily be adapted for the LAZARIAN 4PLEX HOME, LAZARIAN 4 CLASSROOM SCHOOL BUILDING, and the LAZARIAN CHURCH/COMMUNITY MEETING BUILDING.
Pre-build: Tools and MaterialsPre-build: Construction GroundworkStep 1: Laying the FoundationStep 2: Building the Foam Block WallsStep 3: Preparing for ConcreteStep 4: Tightening WallsStep 5: Pouring ConcreteStep 6: Windows and DoorsStep 7: ElectricalStep 8: PlasteringStep 9: Repairing ICF Foam DamageStep 10: RoofStep 11: Insulation and DrywallStep 12: Exterior PaintingStep 13: Cabinets/Tub-Shower/Closet Shelving/Window ShuttersStep 14: Painting/Finish Hardware-Electric-Plumbing/Counter

Tops/Lighting/Appliances/Water Heaters/Baseboard/Heaters
PRE-BUILD: TOOLS AND MATERIALSHaving the proper tools and materials on hand prior to starting construction is essential. Acquire and verify that all tools, parts and equipment (as described in the materials list) are on-site, and secure in a safe place. There must be a reliable water source on-site and bathroom facilities/port-a-potty available for workers. If working cross-culturally, ensure there is a driver and translator on site at all times. It is important that local hardware stores and suppliers are identified and located nearby. Charge accounts and discounts with the suppliers must be established ahead of time. It is also important to locate emergency medical facilities in case of injury.
Always have a well-stocked medical kit on hand at the worksite and make sure that leaders are familiar with local emergency medical facilities and can readily access them with a driver and translator.
PRE-BUILD: CONSTRUCTION GROUNDWORK
It is important that certain pre- construction materials be acquired prior to beginning construction. Someone local to the construction project site should organize and order certain items. The following is what is required to begin construction of a Qty (1) Lazarian World Home. The roof trusses can be delivered or fabricated on site. If the truss's are to be fabricated on site using truss jigs, then required quantities of 2X4's (top and bottom cord), 2 X 3's (interior webbing) and 3/8" Struct I or CDX plywood for gussets need to be available to immediately begin fabrication of the roof truss's. Also, 2,500' (lineal feet) of #3 rebar in minimum 12' lengths (to be cut to lengths per plans), plus 750 sq ft of 6 x 6 x 10 x 10 wire mesh should be delivered to the site. Qty (5) - 50 lb bags of ready mix concrete should be delivered to the site to be used to fill the 4"- 6" of concrete in a minimum of two holes per ICF foam block for the walls as described below. This cement stabilizes/sets the foam blocks to the slab prior to stacking. Rough plumbing, electrical wire, outlet boxes and service gear must be delivered to the site. Gas and oil for the construction equipment should be purchased and the machines prepared for use. A ready mix concrete truck (4 yards), including a concrete pump, should be scheduled to arrive at noon of the second primary working day (after slabs are poured).

STEP 1: LAYING THE FOUNDATIONFoundation
Prior to starting construction (before a team arrives), a concrete foundation must be poured with the required rough-in ground plumbing put in place. A concrete slab/footing will be poured per house plans with #3 rebar 3' length embedded 12" into exterior footings of slab at 16" on center (OC). Verify that the slab is square, flat, and level. Grind or chip where necessary.
IMPORTANT: Layout of rebar to be 16" on center and to be held in 4" from outside edge of slab, including corners. As the ICF foam blocks are stacked, rough plumbing and electric wiring is installed simultaneously. There should be NO extra time allotted for this work.
The home MUST be laid out square. Run a diagonal tape measurement to the slab corners to verify the slab is square. These 2 diagonal measurements must be equal to each other for the slab to be square. In order to "square up" the building to be built on an "out of square" slab - to achieve the required overall equal dimensions, it may be necessary to hang part of the foam blocks over the edge of the slab.
STEP 2: BUILDING FOAM BLOCK WALLSConnecting First Row of Blocks to Foundation Stacking the Foam Blocks Once the foundation/slab is poured and can be walked on, EXTERIOR WALL construction can begin. Cut #3 steel rebar (enough for the first ICF blocks to stack 4' high), into 5' lengths, lap 12" and tie to existing #3 vertical rebar embedded in slab. This rebar should extend above the first pour/1/2 wall height of 4 blocks (4' high) 12” in order to tie on rebar for the second step to take it to 8’ high. Tie rebar with 3/16" wide, medium duty plastic zip ties. Make sure there are rebar and concrete posts/columns at ends of all walls, that there are posts/columns at all inside and outside corners and for both sides of all rough openings for all doors and windows. Always stack ICF blocks running bond style, meaning staggered on top of each other. Stagger joints a minimum of one hole (8") when building walls and never have ICF block seams lined up vertically to each other. Place the 1st course of the ICF foam blocks on the entire exterior perimeter of slab per the architect drawings. Cut off rebar that has been installed in slab at door openings/ locations flush with the concrete slab (use grinder if necessary).Pour relatively stiff (high slump) concrete 4"- 6" high in ICF foam block cavities where there is vertical rebar. This concrete will hold the 1st course of the foam blocks in place to allow for stacking the walls. NEXT: Snap chalk lines for all interior walls. For the INTERIOR WALLS,

place one course of the ICF foam blocks on center of the layout lines and mark concrete (with spray paint, chalk, or marker) 16" OC to the center of the foam block holes. Then remove blocks and drill with 5/8" masonry bit holes 6" to 8" deep at marks. Prior to installing rebar, use air compressor to blow the holes clean and free of all debris. Also, drill holes and add rebar for all inside and outside corner or end posts/columns and on each side of door and window rough openings. Use epoxy and install #3 rebar 3' long into slab 6-8" deep into each hole drilled.
STEP 3: PREPARING FOR CONCRETE Reinforcing Steel for Foam Blocks Walls Ready for Concrete Pour Reinstall the 1st course of the foam ICF blocks for the Interior Walls and pour stiff concrete 4"-6" high – minimum two holes per block, PLUS all inside and outside corner or end posts/columns at all interior walls. Once the epoxy has set, then pour 4-6” of stiff pre-mix concrete into the holes with the rebar for the interior walls. After the cement has set up, add the 4’ rebar to the rebar that was just installed - exactly as was done previously for the Exterior Walls..
IMPORTANT: RE-VERIFY all wall layout/dimensions and check for wall squareness prior to stacking block after the 4"- 6" concrete in the first course of the ICF foam block has set up.
Fabricate 2" X 6" wood box frames with plywood gussets 12" solid from the top for all door and window rough openings (overall dimension is 1/4" over the stated rough opening sizes). Use 3" concrete/masonry nails to nail/secure the doorframes to the slab. Window box frames can be nailed through their base to the concrete lintels at 4' high (after the first concrete pour to 4') or use 3 1/2" drywall screws to connect to the foam blocks.
Reminder: Install Qty (1) #3 rebar (connect with plastic zip ties) vertical 16" OC and lap rebar 12" to each existing vertical rebar in slab for all Exterior and Interior Walls. Use Qty (1) #3-rebar horizontal in all lintels/headers at 4' and 8' high plate line.
NOTE: ALL rebar must be lapped minimum 12" vertical and horizontal.
Place ICF foam blocks for all exterior and interior walls on the base course of existing blocks and stack 4' high using beam/lintel blocks for the top block course. (See foam block stacking drawings)
Cut the foam blocks (with electric wire or Sawzall) as required and stack

foam blocks snug to the 2" X 6" wood frames at the door and window rough openings.
NOTE: To tighten wire in electric wire (wand), compress ends of wand handle, and then add wire by twisting each end in eyehook. Install wire and then release tension of the metal wand ends and the wire will be tight.
Install foam Hole Plugs in the top of ALL ICF foam block lintel/header openings at 4' and 8' where there is NO vertical rebar.
At ALL window and door openings, block out ALL beam/lintel vertical holes at the 8' plate line with foam Hole Plugs.
Cut a hole (with the hole saw) in the shape and size of the beam/ lintel at the 4' and 8' beam/lintel line where walls intersect to provide a CONTINUOUS concrete and rebar (90 degree bends) CHANNEL BEAM/LINTEL to tie the walls together in the lintels at ALL corners and “T” intersections.
Install 90 degree #3 rebar bends (right angles) in beams/lintels 2' long each end (4' total length) at ALL inside/outside corners and “T” intersections to TIE/LOCK ALL walls together at 4' and 8' high.
Install rough electric and plumbing using the horizontal lintel cavities at 4' and 8' high as a chase and use open ICF foam vertical block holes (vertical holes, which will not have rebar/concrete) as chases.
THERE ARE TWO CONCRETE POURS TO 8' WALL HEIGHT: When you pour concrete into all open ICF foam block holes, FIRST fill the "U" shaped channels in the beams/lintels with concrete to 4' high walls. Make sure that you pour concrete in posts/columns next to BOTH sides of all doors and windows AND all inside/outside corners and end posts/ columns. NEXT, repeat the same steps as above and pour walls using the "U" shaped lintels/headers as concrete pour channels to complete the walls at 8' high.
STEP 4: TIGHTENING WALLSTightening Walls Photo Gallery Before pouring concrete, at all Wall Intersections and Wall Corners, use two-part Epoxy to secure ICF foam block walls to each other at the

beam/lintel only (4' and 8' high beams/lintels). Also, epoxy beam/Lintel End Pieces into the ICF foam block. This will strengthen the connections, keep the walls from moving, and avoid blowouts of the Lintel End Pieces.
If wall “T” intersections and/ or wall corners seem loose, suck them in to each other by using metal rebar tie wire connected to vertical rebar, 18"-24" inside the wall at the beam/lintel and run to outside the wall. Use a wood block to prevent the wire from cutting into the foam block from the outside as you twist the tie wire to force the walls to lock together STEP 5: POURING CONCRETEPouring Concrete Process After Concrete is Poured The Lazarian World Home requires approximately 7-8 cubic yards of concrete for all the walls to 8' high. Order 4 cubic yards for the first pour to 4' high. Pour concrete (MUST USE CONCRETE PUMP TO CONTROL FLOW VOLUME OF CONCRETE). Fabricate shields by cutting a piece of the corrugated metal roofing length-wise into two pieces and adding handles. Place the two metal shields on both sides of the beam/lintel "U" shaped channel and direct the flow of wet concrete to the lintel. The concrete will find its way down to the holes of the posts/columns. Vibrators are not necessary. It is best to pour a “wet” 3/8" rock 2,000psi concrete/slurry mix.
Plumb and Line wall braces are normally not necessary due to the designed stability of the Lazarian ICF foam block and limiting the concrete pours to 4' height at a time. Prior to concrete pours, have available extra 8'&10' length - 2 X 4's to serve as bracing for plumb and line in case of ICF form movement or failure. Use concrete nails to secure wood bracing to the existing slab.
Immediately after the pour, check all walls for plumb and line. Then check every half hour, hour, and two hours and brace as necessary. As the concrete dries, the walls tend to move and twist slightly.
The NEXT DAY, stack ICF foam blocks to full 8' height. Install beams/lintels as the top block at the 8' plate line for all exterior and interior walls.
Follow the same procedure as the first 4' high ICF foam block stacking method. Install Qty (1) #3 rebar – 3'6" lengths vertical to full 8' plate line height in all wall posts/columns at 16" OC. Tie to existing 5' vertical rebar from first pour (to 4' high) and lap 12" so there is rebar flush to the top (and not further) of the 8’ block.

Install Qty (1) #3 rebar horizontal in beams/lintels continuous at 8' plate line – all Exterior and Interior walls. Use a hole saw to cut a channel in the foam beam/lintel blocks in the size and shape of the adjacent beam/lintel the same as was done at the 4' high beam/lintel to have a continuous reinforced concrete beam at the 8' plate line. Install 90 degree right angle rebar and lap existing rebar at all inside/outside corners and “T” intersections same as 4' high beam/lintel to tie/lock all the walls together.
Do not block the ICF foam block holes that will tie the reinforced concrete posts/columns to the reinforced concrete beam/lintels as support for the rough openings for the doors and windows. Connect the horizontal #3 rebar in the beam/lintels to the vertical #3 rebar in the posts/columns with plastic zip ties to complete the rough openings with 2' long 90 degree/right angles of #3 rebar to tie in the columns with the beams/lintels.
Block the rest of the vertical holes (that do not contain rebar) in the ICF foam blocks at the 8' plate line with foam Hole Plugs to create beams/lintels for this window and door openings.
Install rough plumbing and electric to ceiling light fixtures, roof vents, etc. prior to pouring concrete to the 8' plate line.
Cut or break off the foam tabs (that are used to interlock/connect ICF foam blocks to each other) at the TOP of the beam/lintel foam blocks, making the top of the beam/lintel a flat surface at 8' high. The roof truss system will now have a level concrete beam/lintel area to install the 2"X8" wood plate.
Pour concrete to full height of 8'. Fill the channel cavity of the beam/lintel flush to the top of the ICF foam block at 8'.
Remember: Do not pour concrete above the flow line in the trough space into the foam tab area. Level the concrete for a flat plate line. STEP 6: WINDOWS AND DOORSWindows and Doors The sides of the rough openings for the doors and windows, by design have a minimum 1" of foam as separation from the concrete posts/columns. This foam is to remain untouched or trimmed as necessary to serve as a “trimmer” so that the doors and windows will be a snug to the rough opening size.Prior to window and door installation: Fill all bottoms of holes in the beam/lintel ICF foam block directly ABOVE windows and doors with foam

hole plugs. If these plugs are not available, cut 1/4" Masonite board to fit and install with caulking.
If the windows supplied have plastic/vinyl nailing tabs designed to nail windows to the exterior of a conventionally framed building, and then cut off the tabs. The windows will then be able to slide into the center of the rough openings similar to a “retrofit” type window. Use a utility knife to cut into the plastic tabs and then use lineman’s pliers to break the tabs off with a clean break.
Install all doors and windows using various length “blue” concrete screws and screw minimum 1" into concrete posts/columns. The foam between the concrete columns and the window or door unit is to remain and serve as a trimmer/adjustment.
Use Qty (6) screws total per opening for doors and Qty (4) screws total for windows and screw from the sides of the doors and windows into concrete columns only. Screws into the top and bottom beam/lintels are not necessary. Screw WINDOWS through the wall of the vinyl side frames of the track that do not have glass. Screw DOORS through the wood of the side jambs. It is not necessary to recess the screws.
After the windows and doors are screwed in place, caulk the perimeter of the unit on both sides (interior and exterior) of the wall to make them waterproof and air tight.
STEP 7: ELECTRICALElectrical
Install rough-in boxes for all switches, outlets, electric baseboard heating, water heaters, and ceiling lights and leave tails to tie in at finish. Install service gear.
STEP 8: PLASTERINGPlastering Photo - Gallery General Notes: Prior to plastering, mask both sides of all window and door openings with Visqueen and plasterer’s Red Tape. Leave windows open and center of visqueen cut for ventilation. Caulk and patch plaster all noticeable seam

cracks, foam block defects, etc. before spraying plaster. REPEAT the caulking process between each coat of plaster. Use drywall hoppers with largest orifice available with air compressor to “plaster” exterior and interior of the home. With Ben Ron Plastering machine, use smallest orifice and strictly follow directions in Manual. If the drywall hopper seems to be clogged, shake hopper up and down and continue to blow air. If this does not clear the problem, then stop plastering. Then remove and clean nozzle of debris.
EXTERIOR of home is to receive three coats of plaster (minimum 1/2") and INTERIOR to receive two coats of plaster (minimum 3/8".
Steps for Plastering Using Drywall Hoppers1. Spray a mist of water on the foam wall surfaces before applying
plaster material. The foam surface should be damp, not wet. 2. Use a 5-gallon plastic bucket and notch out an approximate 3" W X
5" D area for the drywall hopper to be placed when filling with plaster.
3. Add approximately 3" of water into the bottom of an electric mixer. 4. Pour a 50 lb. bag of Expo Pro Bond or Omega brand plaster into the
Imer mortar mixer. 5. ALTERNATE: Mix 3 parts sand with 1 part cement and add 2 %
Vinnapas Epoxy binder. Vinnapas is a powdered polymer, which allows the plaster to bond with the polystyrene ICF foam block and is made by Wacker Polymes in Germany. The California distributor is PT Hutchins Company LTD (626) 333-3329 Att: Michael Duarte cell # (310) 567-2931.
6. Mix until the plaster is thoroughly mixed with the water. Add water as necessary.
7. Scrape all interior surfaces of the mixer to eliminate clumping. 8. Mix thoroughly to a smooth “milkshake-like” texture. 9. The material should basically hang onto the paddle when removed
and fall into a 5-gallon bucket with about a 1" slump. 10. Wait 5 to 10 minutes to allow the plaster material to “rest.” 11. Mix the material again. 12. Use a heavy-duty 1/4" open metal screen encased in a 2" X 4" wood
frame and pass all the plaster material through it into a bucket. This will eliminate residual clumping and small pebbles that will block/clog the hopper orifice.
13. Prior to placing plaster material into the drywall hopper, Spray WD-40 or rub vegetable oil into spray hopper to "grease" and keep
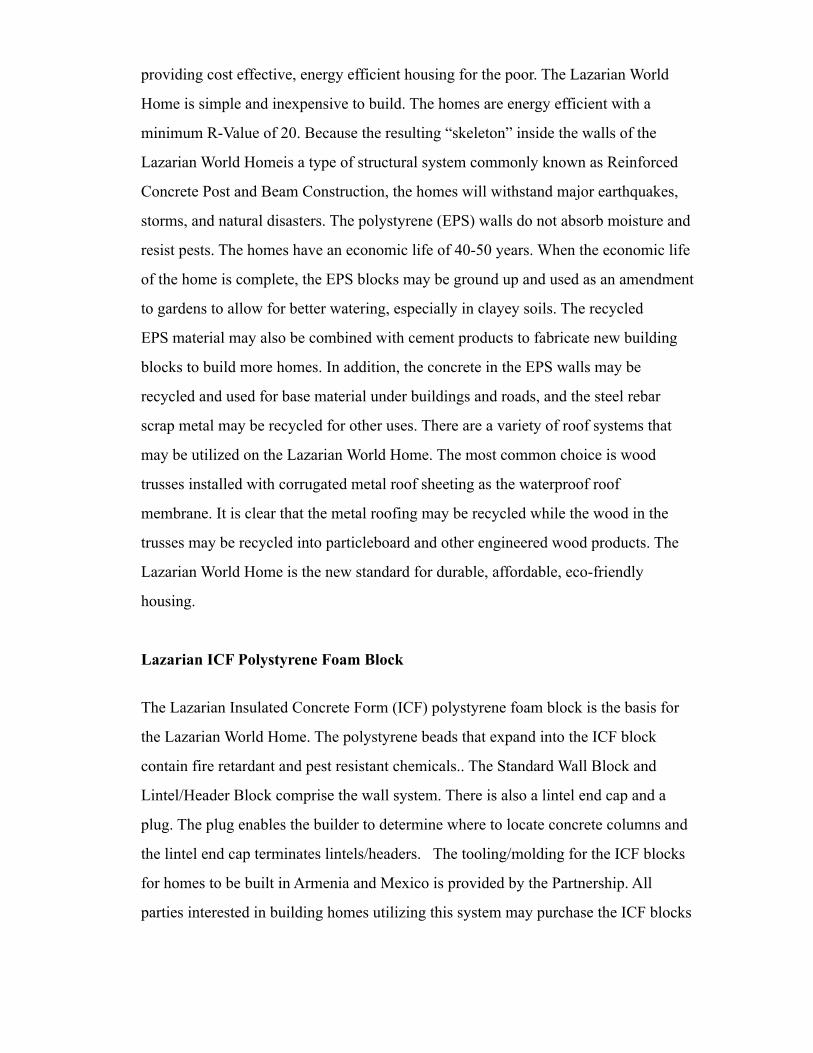
plaster material from sticking to the sides. 14. Connect 2 to 3 drywall hoppers to the air supply and pour material
into hopper – about half full. Use both heavy-duty Dewalt/Emglo gasoline powered air compressors with 2-3 drywall hoppers connected to each air compressor.
15. Use spray head with large orifice and adjust air pressure as needed. 16. Hold hopper approximately 12" from intended surface and spray on
plaster min 1/8" thick. 17. Steadily move hopper back and forth to avoid heavy build up. 18. After material dries, spray min 1/8" second lift of plaster. 19. Exterior plaster three coats of heavy spray sand texture. Leave
plaster finish with natural texture as sprayed. 20. Interior plaster is two coats. After each coat, use 24" wide steel
trowel to lightly knock down texture within 5-10 minutes of spraying.
21. Minimum total thickness is 3/8" to1/2". 22. When plastering is finished, use a putty knife or sanding block to
clean up rough edges on interior and exterior windowsills and wall corners.
23. It is imperative to clean the hoppers and spray nozzles thoroughly with water after plastering.
STEP 9: REPAIRING ICF FOAM DAMAGE
Cut out a piece from a ICF foam block that will fit snug in the damaged area/hole. Then take the foam patch and cover edges with plaster or epoxy and push gently into damaged area until the patch is flush with the surrounding surface area. (Sand foam patch as necessary) Then cover area with plaster.
STEP 10: ROOFTop Plate Preparation for Trusses Truss Installation Gable Ends Corrugated Metal Roofing TOP PLATE: Install a continuous 2" X 8" wood plate on the perimeter of the house with 3 1/4" Tapcon Hex Head Blue screws embedded a minimum of 1 1/2" into reinforced concrete beam/lintel at the 8' plate line per Detail 1 and Detail 2 of plans. TO INSTALL THE TOP PLATE: Hold in the 2" X 8" plate to the interior of the home approximately 2 1/2"

from the exterior sides of the home. Verify dimensions (1" for T1-11 Plywood/Tyvek and 1 1/2" for Truss width). Layout for trusses. Between each truss position, at the FRONT AND REAR of the home, layout and install Qty (2) Tapcon Blue Screws minimum 1 1/2" into the concrete beam/lintel to connect the 2" X 8" plate to the reinforced concrete beam/lintel. Then cut a (plus or minus) 1 3/4" slot (adjust width of slot depending on the width of the truss including the plywood gussets) for the truss installation. (SEE architect details) Therefore layout for the approximate 1 1/2" wide trusses at 24" OC and allow for plates/blocks at 22 1/4" to create a (plus or minus) 1 3/4" slot between each truss with two Tapcon Blue Screw anchors per block between each truss. On the GABLE END SIDES of the home, install the Tapcon Blue Screws at 24" OC to connect the 2"X8" plate to the reinforced concrete beam/lintel.
Alternative to connecting 2" X 8" Plate to the reinforced concrete lintel/beam:: Instead of using Tapcon Blue screws to connect the 2" X 8" plate to the concrete lintel/beam at the 8' plate line, install 5/8" X 8" anchor bolts with Simpson bp 5/8" square washers into the 2" X 8" plate at 24" OC (layout to avoid the truss locations) and place the 2" X 8" wood plate level onto the wet concrete beam/lintel – pressing the bolts into wet cement. Cut the notches in the 2" X 8" wood top plate for the trusses after the concrete has set up.
Note: The perimeter 2" X 8" plates are also used as backing for nailing the ceiling drywall at all the exterior walls. Hold the 2" X 8" plate to the inside of the wall per plans to allow for drywall nailing. At the interior walls, use 2" concrete/masonry nails driven into the concrete lintel/beam to install 1/2" plywood backing for drywall nailing. TRUSS AND ROOF INSTALLATION:
• After truss's are set in place into the slots of the 2"X8" plate, nail blocks between trusses with Qty (2) rows of 2" X 4"s at the truss ridge line and at corrugated roof lap lines. See architect plans for additional blocking depending on snow loads.
• IMPORTANT: Install minimum Qty (4) 45 degree wood braces from the top cord of the truss's connecting to the 2"X8" plate at the top of the 8' walls. This will hold the truss system in place, create a stronger roof diaphragm and keep the trusses from rolling in a storm or earthquake.
• Install Teco Clips (one side of truss) connecting trusses to the 2" X 8" top plate 24" OC plate/blocks per plans at perimeter of ALL exterior walls. Toe nail the other side of the truss into the 2" X 8" top plate.

• Install (toe nail) 2X blocking (bird stop) BETWEEN the trusses at 8' plate line flush to the face of the ICF foam block at the front and back side of the home per Detail 2 of plans and caulk all edges.
• Screw corrugated metal roofing to trusses with self tapping/sealing screws (waterproof with rubber/plastic washers) at approximately 14" OC on the ridge cap and pitch/slope sides and one screw 12" OC in the middle of the corrugated sheet roofing wherever there is added wood blocking below. Use 2" special self-tapping/self sealing sheet metal corrugated roofing screws. Begin installation at one side/edge of the home and lap (therefore screw through two sheets of metal roofing that are lapped for water tight) corrugated roofing sheets to center on trusses at 24" OC.
• Install metal ridge cap for corrugated metal roofing with screws 14" OC.
• Lap all corrugated metal roofing vertically at pitched areas a minimum of 24" and ridge cap a minimum of 12".
• Install corrugated metal roofing beginning from the lower 8' plate line (bottom) finishing at the ridgeline (top).
• There is a 12" eave/overhang on the front and rear of home. Install corrugated metal roofing 13" overhang or 1" to the weather per the drawings.
• Install Z-bar flashing, tyvek and T1-11 Plywood to gable end truss’s per Detail 1, per plans. Install backing by adding 2" X 4"s as required for a flat nailing surface for the T1-11 siding. (Note: It may be easier to install the T1-11 siding prior to installing the corrugated metal roofing.)
• Install Qty 2 gable end vents • Staple Tyvek to gable end trusses. • Use nail gun with #8 common nails to install T1-11. • Alternative to connecting truss's to 2" X 8" top plate:
Connect/anchor the ends of the trusses to the 2" X 8" wood plate with Qty 2 Simpson S/H3 Hurricane Ties, one on each side on the ends of each truss. This method of attachment may replace the A34 Teco clips and 2-16d nails toe nailing the trusses to the wood plate as per plan details. On gable ends, connect trusses to the 2" X 8" wood plate with A34 Teco clips per plans.
STEP 11: INSULATION AND DRYWALLInsulation and Drywall
DRYWALL CEILINGS:Prior to insulation and drywall: Check for nails that
missed the trusses/blocking. These are “shiners” and will cause leaks. Leave nail in place and patch with Henry’s roof sealant.
• Staple R19 Kraft faced bats to bottom of trusses in ceilings only. • At exterior walls, 2" X 8" top plates are backing for drywall. • At both sides of all Interior Walls, install 1/2" plywood flat between
the trusses for drywall nailing. • Run drywall perpendicular and screw 6" OC to the wood trusses.
There is no need for additional backing – butt ends of drywall screw to the trusses and drywall sides are not screwed except where there are trusses.
• Tape all drywall joints with self-sticking fiberglass mesh tape. • Hand trowel Qty (2) coats of drywall joint compound on all tape
joints and sand smooth. • Texture ceilings with Qty (1) coat of plaster texture using drywall
hopper and knock down with 24" trowel.
STEP 12: EXTERIOR PAINTINGExterior Painting STEP 13: CABINETS/TUB-SHOWER/CLOSET SHELVING/WINDOW SHUTTERS STEP 14: PAINTING/FINISH HARDWARE-ELECTRIC-PLUMBING/COUNTER TOPS/LIGHTING; APPLIANCES/WATER HEATERS/BASEBOARD/HEATERS
• Any connections to walls, such as installing cabinets and shelving - use blue screws and connect to concrete columns in ICF foam blocks
• Ariston 2.5 gallon water heater is installed under the kitchen sink. • Ariston 4 gal water heater is installed above the toilet in the bath.
Install in a box made with T1-11 and 2" X 4" framework connected to the wall with blue screws.
• Plumbing fixtures and appliances are from local suppliers. • Baseboard wall heaters (electric or gas - see plans) are from local
suppliers • Counter tops may be Formica or tile. • Balance of finish work, use conventional methods. • Paint with heavy texture weenie rollers to completely cover the
rough wall and ceiling surfaces.


![A. Lazarian and Thiem Hoang arXiv:0901.0146v1 [astro-ph.GA] 31 … · 2018-10-28 · Spitzer & McGlynn 1979, Mathis 1986, Roberge et al. 1993, Lazarian 1997, ... ian & Hoang (2008)](https://static.fdocuments.us/doc/165x107/5f532b5bf0183d0b0c5927b5/a-lazarian-and-thiem-hoang-arxiv09010146v1-astro-phga-31-2018-10-28-spitzer.jpg)