Laravel 5.1 Beautysamples.leanpub.com/l5-beauty-sample.pdf · Laravel 5.1 Beauty goes through the...
69
Transcript of Laravel 5.1 Beautysamples.leanpub.com/l5-beauty-sample.pdf · Laravel 5.1 Beauty goes through the...
Laravel 5.1 BeautyCreating Beautiful Web Apps with Laravel 5.1
Chuck Heintzelman
This book is for sale at http://leanpub.com/l5-beauty
This version was published on 2015-07-16
This is a Leanpub book. Leanpub empowers authors and publishers with the Lean Publishingprocess. Lean Publishing is the act of publishing an in-progress ebook using lightweight tools andmany iterations to get reader feedback, pivot until you have the right book and build traction onceyou do.
©2014 - 2015 Chuck Heintzelman

Also By Chuck HeintzelmanGetting Stuff Done with Laravel 4
Getting Stuff Done with Laravel 4 (TR) Türkçe
Laravel4でこなすプログラム術 Getting Stuff Done
Contents
Thank You . . . . . . . . . . . . . . . . . . . . . . . . . . . . . . . . . . . . . . . . . . . . . iFeedback . . . . . . . . . . . . . . . . . . . . . . . . . . . . . . . . . . . . . . . . . . . . . iOther places to learn Laravel 5.1 . . . . . . . . . . . . . . . . . . . . . . . . . . . . . . . . i
Chapter 1 - Introduction . . . . . . . . . . . . . . . . . . . . . . . . . . . . . . . . . . . . . 1Chapter Contents . . . . . . . . . . . . . . . . . . . . . . . . . . . . . . . . . . . . . . . . 1Long Term Support . . . . . . . . . . . . . . . . . . . . . . . . . . . . . . . . . . . . . . . 1Why This Book . . . . . . . . . . . . . . . . . . . . . . . . . . . . . . . . . . . . . . . . . 1GitHub and the Blog . . . . . . . . . . . . . . . . . . . . . . . . . . . . . . . . . . . . . . 1What is the Application? . . . . . . . . . . . . . . . . . . . . . . . . . . . . . . . . . . . . 2Conventions Used This Book . . . . . . . . . . . . . . . . . . . . . . . . . . . . . . . . . . 2Have Fun . . . . . . . . . . . . . . . . . . . . . . . . . . . . . . . . . . . . . . . . . . . . 4
Chapter 2 - Required Software and Components . . . . . . . . . . . . . . . . . . . . . . . 5Chapter Contents . . . . . . . . . . . . . . . . . . . . . . . . . . . . . . . . . . . . . . . . 5The Rise of the Virtual Machines . . . . . . . . . . . . . . . . . . . . . . . . . . . . . . . . 5About Laravel Homestead . . . . . . . . . . . . . . . . . . . . . . . . . . . . . . . . . . . 5Installing Virtual Box . . . . . . . . . . . . . . . . . . . . . . . . . . . . . . . . . . . . . . 6Installing Vagrant . . . . . . . . . . . . . . . . . . . . . . . . . . . . . . . . . . . . . . . . 7Where Do I Execute Things? . . . . . . . . . . . . . . . . . . . . . . . . . . . . . . . . . . 8Recap . . . . . . . . . . . . . . . . . . . . . . . . . . . . . . . . . . . . . . . . . . . . . . 10
Chapter 3 - Setting up a Windows Machine . . . . . . . . . . . . . . . . . . . . . . . . . . 11Chapter Contents . . . . . . . . . . . . . . . . . . . . . . . . . . . . . . . . . . . . . . . . 11Multiple Ways to Setup Windows . . . . . . . . . . . . . . . . . . . . . . . . . . . . . . . 11Step 1 - Installing PHP Natively . . . . . . . . . . . . . . . . . . . . . . . . . . . . . . . . 11Step 2 - Install Node.js . . . . . . . . . . . . . . . . . . . . . . . . . . . . . . . . . . . . . 13Step 3 - Install Composer . . . . . . . . . . . . . . . . . . . . . . . . . . . . . . . . . . . . 15Step 4 - Install GIT and set up SSH Key . . . . . . . . . . . . . . . . . . . . . . . . . . . . 16Step 5 - Adding the Homestead box . . . . . . . . . . . . . . . . . . . . . . . . . . . . . . 17Step 6. Installing Homestead . . . . . . . . . . . . . . . . . . . . . . . . . . . . . . . . . . 18Step 7 - Bring up the Homestead VM . . . . . . . . . . . . . . . . . . . . . . . . . . . . . 19Step 8 - Setting up PuTTY . . . . . . . . . . . . . . . . . . . . . . . . . . . . . . . . . . . 20Step 9 - Installing Laravel’s Installer . . . . . . . . . . . . . . . . . . . . . . . . . . . . . . 21
CONTENTS
Recap . . . . . . . . . . . . . . . . . . . . . . . . . . . . . . . . . . . . . . . . . . . . . . 22
Chapter 4 - Setting up an OS X or Linux Machine . . . . . . . . . . . . . . . . . . . . . . . 23Chapter Contents . . . . . . . . . . . . . . . . . . . . . . . . . . . . . . . . . . . . . . . . 23Slight Variations with Linux . . . . . . . . . . . . . . . . . . . . . . . . . . . . . . . . . . 23Step 1 - Installing PHP . . . . . . . . . . . . . . . . . . . . . . . . . . . . . . . . . . . . . 23Step 2 - Install Node.js . . . . . . . . . . . . . . . . . . . . . . . . . . . . . . . . . . . . . 24Step 3 - Install Gulp . . . . . . . . . . . . . . . . . . . . . . . . . . . . . . . . . . . . . . . 25Step 4 - Install Composer . . . . . . . . . . . . . . . . . . . . . . . . . . . . . . . . . . . . 26Step 5 - Adding SSH Keys . . . . . . . . . . . . . . . . . . . . . . . . . . . . . . . . . . . . 27Step 6 - Adding the Homestead box . . . . . . . . . . . . . . . . . . . . . . . . . . . . . . 28Step 7 - Installing Homestead . . . . . . . . . . . . . . . . . . . . . . . . . . . . . . . . . . 28Step 8 - Bring up the Homestead VM . . . . . . . . . . . . . . . . . . . . . . . . . . . . . 30Step 9 - Installing the Laravel Installer . . . . . . . . . . . . . . . . . . . . . . . . . . . . . 31Recap . . . . . . . . . . . . . . . . . . . . . . . . . . . . . . . . . . . . . . . . . . . . . . 32
Chapter 5 - Homestead and Laravel Installer . . . . . . . . . . . . . . . . . . . . . . . . . . 33Chapter Contents . . . . . . . . . . . . . . . . . . . . . . . . . . . . . . . . . . . . . . . . 33The Homestead Tool . . . . . . . . . . . . . . . . . . . . . . . . . . . . . . . . . . . . . . 33Overview of Common Homestead Commands . . . . . . . . . . . . . . . . . . . . . . . . 34Examining Homestead.yaml . . . . . . . . . . . . . . . . . . . . . . . . . . . . . . . . . . 35Adding Software to the Homestead VM . . . . . . . . . . . . . . . . . . . . . . . . . . . . 37Daily Workflow . . . . . . . . . . . . . . . . . . . . . . . . . . . . . . . . . . . . . . . . . 38Six Steps to Starting a New Laravel 5.1 Project . . . . . . . . . . . . . . . . . . . . . . . . 38Other Homestead Tips . . . . . . . . . . . . . . . . . . . . . . . . . . . . . . . . . . . . . 41Recap . . . . . . . . . . . . . . . . . . . . . . . . . . . . . . . . . . . . . . . . . . . . . . 42
Chapter 6 - Testing . . . . . . . . . . . . . . . . . . . . . . . . . . . . . . . . . . . . . . . . 43Chapter Contents . . . . . . . . . . . . . . . . . . . . . . . . . . . . . . . . . . . . . . . . 43Creating the l5beauty Project . . . . . . . . . . . . . . . . . . . . . . . . . . . . . . . . . . 43Running PHPUnit . . . . . . . . . . . . . . . . . . . . . . . . . . . . . . . . . . . . . . . . 46Using Gulp for TDD . . . . . . . . . . . . . . . . . . . . . . . . . . . . . . . . . . . . . . 51Creating a Markdown Service . . . . . . . . . . . . . . . . . . . . . . . . . . . . . . . . . 53Other Ways to Test . . . . . . . . . . . . . . . . . . . . . . . . . . . . . . . . . . . . . . . 59Recap . . . . . . . . . . . . . . . . . . . . . . . . . . . . . . . . . . . . . . . . . . . . . . 60
End of Preview . . . . . . . . . . . . . . . . . . . . . . . . . . . . . . . . . . . . . . . . . . . 61Chapter 7 - The 10 Minute Blog . . . . . . . . . . . . . . . . . . . . . . . . . . . . . . . . 61Chapter 8 - Starting the Admin Area . . . . . . . . . . . . . . . . . . . . . . . . . . . . . . 61Chapter 9 - Using Bower . . . . . . . . . . . . . . . . . . . . . . . . . . . . . . . . . . . . 61Chapter 10 - Blog Tags . . . . . . . . . . . . . . . . . . . . . . . . . . . . . . . . . . . . . 61Chapter 11 - Upload Manager . . . . . . . . . . . . . . . . . . . . . . . . . . . . . . . . . 61Chapter 12 - Posts Administration . . . . . . . . . . . . . . . . . . . . . . . . . . . . . . . 62Chapter 13 - Cleaning Up the Blog . . . . . . . . . . . . . . . . . . . . . . . . . . . . . . . 62
CONTENTS
Chapter 14 - Sending Mail and Using Queues . . . . . . . . . . . . . . . . . . . . . . . . . 62Chapter 15 - Adding Comments, RSS, and a Site Map . . . . . . . . . . . . . . . . . . . . 62Chapter 16 - General Recap and Looking Forward . . . . . . . . . . . . . . . . . . . . . . 62
Thank YouThank you for sampling this book. I hope you find it informative and useful.
Feedback
Feedback is encouraged!
If you find a typo, have a correction, or just want to comment on something you’ve found usefulplease drop by LaravelCoding.com¹ and comment on the appropriate chapter where you’ve foundan issue.
Other places to learn Laravel 5.1
• The Laravel Web Site² - The documentation there is a great place to start.• Laracasts³ - The video tutorials created by Jeffrey Way are unparalleled.
¹http://LaravelCoding.com/blog/?tag=L5+Beauty²http://laravel.com³http://laracasts.com
Chapter 1 - IntroductionChapter Contents
• Long Term Support• Why This Book• GitHub and the Blog• What is the Application?• Conventions Used This Book• Have Fun
Long Term Support
Laravel version 5.1 is the first LTS (long term support) Laravel release. This means bug fixes areprovided for 2 years and security fixes are provided for 3 years.
This is important because the applications you build today will still be supported by the frameworktomorrow.
Why This Book
Myprevious book on Laravel,Getting Stuff Done with Laravel 4⁴ waswell received. Now that Laravel5.1 is available, I briefly thought of updating my previous book to work with Laravel 5.1. The newversion of Laravel implements big changes from Laravel 4, but Laravel 5.1 is mostly backwardscompatible.
But theGetting Stuff Done with Laravel 4 book isn’t really a manual covering every aspect of Laravel4. It’s a process and design book. The principles discussed within that book still are valid in Laravel5.1, even if the implementation may vary slightly.
Instead of updating my previous book, I’ve created a new book, Laravel 5.1 Beauty, to highlightsome of the new features. This book is bigger and better than Getting Stuff Done with Laravel 4.
GitHub and the Blog
I’m publishing Laravel 5.1 Beauty simultaneously, as it is being built, on my web site LaravelCod-ing.com⁵ and on Leanpub⁶.
⁴https://leanpub.com/gettingstuffdonelaravel⁵http://laravelcoding.com⁶http://leanpub.com
Chapter 1 - Introduction 2
The Source Code is on GitHubThe source code for the application built in this book is available on GitHub at Chuck-Heintzelman/l5beauty⁷. Just switch the branch at github to the chapter you’re workingon.
This book has a different tone than my previous book. No lame attempts to be funny. (I guess we allcan’t be Dayle Rees.)
Laravel 5.1 Beauty goes through the process of creating, designing and coding a real-worldapplication while focusing on the the architecture that makes Laravel the number one PHPframework available today.
What is the Application?
Throughout this book we’ll build a simple, clean and beautiful blogging application along with theadministration required to maintain the blog.
My own Laravel blog, LaravelCoding.com, uses the same blogging application developed here.
Conventions Used This Book
There are a few conventions used throughout this book.
Code is indented two spaces
The standard indentation for PHP code is 4 spaces. Since this book is available in a variety of eBookformats and some devices with small screens don’t have much horizontal space, code within thisbook is indented 2 spaces instead of 4 to save space.
for ($i = 1; $i <= 10; $i++) {
echo "I can count to $i\n";
}
Lines that end with backslash (\) should be continued
If you see any line ending with a backslash, that means the code should continue uninterrupted withtext from the next line.
⁷https://github.com/ChuckHeintzelman/l5beauty
Chapter 1 - Introduction 3
$ here_is_a_really_really_long_command that_has_a_long list of_arguments\
which should continue
In the above line, even though two lines are shown you should type in everything, excluding thebacklash into one line.
Be Careful of This OneWhen you’re typing code and miss this it can cause an issue. When in doubt check theGitHub l5beauty repository.
Different prompts used for Windows, OS X (or Linux), and Homestead
Whenever a Windows command prompt is used, the prompt always begins with C: and ends withthe > symbol.
C:\some\path>
Whenever the OS X Console or Linux console is used, the prompt also ends with the > symbol, butslashes are used instead of backslashes. Often there’s a tilde (∼) in the path.
~/some/path>
Whenever the console is generic (meaning it could be Windows, OS X, or Linux console dependingon your host operating system) a prompt ending with a percent sign % is used.
/some/path%
Finally, whenever the console for the Homestead Virtual Machine is used, the standard dollar sign$ prompt is used. (The majority of the book uses the Homestead Virtual Machine.)
~/somepath$
With the Homestead Virtual Machine, your prompt actually shows the username and hostnamebefore the path. For example: vagrant@homestead:∼$, but the username and hostname are onlyoccasionally illustrated.
Sometimes the path is missingWhenever the path is omitted from the prompt in one of the versions of the consolewindows, it is assumed you are in the current project directory.
Chapter 1 - Introduction 4
Have Fun
I hope you enjoy this book and learn Laravel 5.1 with it. Be sure and follow along, set up yourdevelopment machine, and create the application step-by-step, chapter-by-chapter.
Above all. Have fun. Coding in Laravel 5.1 is great fun.
Chapter 2 - Required Software andComponentsThis chapter discusses what software and components are required to develop applications withLaravel 5.1 and why they’re required. Instructions to install VirtualBox and Vagrant are provided.
Chapter Contents
• The Rise of the Virtual Machines• About Laravel Homestead• Installing Virtual Box• Installing Vagrant• Where Do I Execute Things?• Recap
The Rise of the Virtual Machines
Over the last few years, virtual machines have come into their own. Virtual Machines (or VMs)allow one computer system (the host operating system) to emulate another one. Sure, VMs havebeen around for a while, but now with increased processor speed and cheap memory VMs can beon every developer’s desktop.
Laravel embraces VM technology and packages it’s own “box” with the most common requirementsfor web applications. This pre-packaged development environment is called Laravel Homestead⁸.
About Laravel Homestead
One of the driving philosophies behind Laravel is to make PHP development both fun and easy.To this end Laravel provides a development environment called Laravel Homestead. Vagrant⁹ isused to manage the virtual machine. Under the hood VirtualBox¹⁰ provides the interface to the hostoperating system.
⁸http://laravel.com/docs/5.1/homestead⁹http://vagrantup.com¹⁰http://virtualbox.org
Chapter 2 - Required Software and Components 6
A car is the perfect metaphor for how this all works together. Homestead is the driver’s seat ofthe car, Vagrant is the car’s frame, and VirtualBox is the engine. Once Vagrant and VirtualBox areinstalled, there’s no need to worry about them again. All interaction with the VM occurs throughHomestead. (Just like when driving a car, there’s no need to worry about the frame or engine.)
Laravel Homestead allows you to use a virtual Ubuntu Linux machine, pre-installed with thesoftware required for web development. This VM includes:
• Ubuntu 14.04• PHP 5.6• HHVM• Nginx• MySQL• PostgresSQL• Node (With Bower, Grunt, and Gulp)• Redis• Memcached• Beanstalkd• Laravel Envoy• Fabric + HipChat Extension
And best of all, Laravel Homestead allows the same development environment to be used onWindows, OS X, or Linux systemswithout worrying about conflicting software on the host machine.
Installing Virtual Box
Vagrant requires a back-end provider to provide the virtual machine it will manage. If you alreadyhave VirtualBox, VMWare, or another compatible provider¹¹ you can skip this step.
But if you don’t yet have a back-end installed, use the VirtualBox platform package. It’s free andworks on every major platform.
¹¹https://docs.vagrantup.com/v2/getting-started/providers.html
Chapter 2 - Required Software and Components 7
VirtualBox Download Page
Go to ‘www.virtualbox.org](https://www.virtualbox.org/wiki/Downloads), download and installthe package for your operating system.
Installing Vagrant
Once you have VirtualBox (or another back-end provider) installed, you need to install Vagrant.
Vagrant Home Page
Go to www.vagrantup.com, download and install the package for your operating system.
When the Vagrant installation is complete, you may need to reboot your machine. After the reboot,verify Vagrant is installed by opening the console (command prompt in Windows, terminal in OS Xor Linux) and checking the version.
Chapter 2 - Required Software and Components 8
Checking the Vagrant Version
% vagrant --version
Vagrant 1.6.5
Vagrant Windows Install LocationUnlike most software installed within Windows, Vagrant is not available inthe Windows Start menu. It installs into the C:\HashiCorp directory and addsC:\HashiCorp\Vagrant\bin to your Windows system path.
Where Do I Execute Things?
After going through the next few chapters installing and running Laravel Homestead a commonquestion is “Where do I run …?” or “Where does … run?” This section provides a brief overview ofthe major components of Laravel development within Homestead and answers the questions.
The Web Server
The Web Server runs in the Homestead Virtual Machine.
Nginx is the web server used to serve the web pages. The Host OS can access the web pages usingthe standard HTTP port (80) at the address 192.168.10.10. The Host OS can also access web pages at127.0.0.1 on port 8000.
Editing Files
Always edit your source code from the Host OS.
The edited files are immediately available in the Homestead VM through shared folders.
MySQL
MySQL runs within the Homestead Virtual Machine.
You can access MySQL from your Host OS with the following information.
Setting Name Setting Value
Host 127.0.0.1Port 33060Username homesteadPassword secret
Chapter 2 - Required Software and Components 9
Memcached
Memcached is an in-memory key/value cache. It runs within the Homestead Virtual Machine.
Beanstalkd
Beanstalkd is a simple and fast work queue. It runs within the Homestead Virtual Machine.
Git or Subversion
Run from your Host OS.
Although you can run these version control systems from either place, it is strongly recommendedto only run them from your Host OS. Consistently running them in one location avoids potentialconflicts.
For example, let’s say you install subversion in the Homestead Virtual Machine and it’s version 1.8.You check out source code within the Homestead Virtual Machine and then try to check it in fromyour Host OS. If subversion v1.7 is installed on your Host OS you won’t be able to do anything untilupgrading subversion on your Host OS.
Bower
Bower is a simple to use package manager for the web. You can run this from either place if bower’sinstalled on your Host OS.
Gulp
Gulp is a simple build system Laravel Elixir uses to concatenate assets, minify assets, combine assets,copy assets, and automate unit tests.
ONLY run this from your Host OS.
When runningGulp from your Host OS, growl-like notifications will appear in your OSwhen certaintasks are performed (such as LESS files compiled). If you execute Gulp within the Homestead VirtualMachine there will be warning errors when these notification attempts are made.
Composer
Only run Composer from your Host OS.
If you’re Host OS is OS X or Linux you can run from either place, but if your Host OS is Windowsthen Composer creates necessary batch files required to operate correctly.
Chapter 2 - Required Software and Components 10
Artisan
Only run artisan from the Homestead Virtual Machine. The main reason for this is that any specificdatabase, queue, and cache drivers are installed within Homestead and may not be available (orinstalled) on your Host OS. Also, the database setting of localhost is from the Homestead VMperspective, not from your Host OS’s perspective.
The rule for running commands in the consoleThe rule is:Only run artisan in the Homestead VM. Everything else can or must be executedfrom your Host OS.
Recap
In this chapter we discussed the various software required to develop applications in Laravel 5.1 andinstalled VirtualBox and Vagrant.
If your machine is a Windows box, continue to the next chapter, Setting up a Windows Machine.Otherwise, skip to the chapter Setting up an OS X or Linux Machine.
Chapter 3 - Setting up a WindowsMachineThis chapter goes through the steps required to set up and install the supporting software for LaravelHomestead on a Windows machine. It is assumed VirtualBox and Vagrant were already installedfrom the previous chapter.
If you’re using OS X or Linux, please skip to the next chapter.
Chapter Contents
• Multiple Ways to Setup Windows• Step 1 - Installing PHP Natively• Step 2 - Install Node.js• Step 3 - Install Composer• Step 4 - Install GIT and set up SSH Key• Step 5 - Adding the Homestead box• Step 6 - Installing Homestead• Step 7 - Bring up the Homestead VM• Step 8 - Setting up PuTTY• Step 9 - Installing Laravel’s Installer• Recap
Multiple Ways to Setup Windows
WithWindows, there’s quite a few different paths you can go down to install the required software. Itried multiple methods searching for the combination presented below. This chapter has been testedwith Windows 8.1 but should work fine with Windows 7.
Step 1 - Installing PHP Natively
The first step is to get PHP running on Windows.
Chapter 3 - Setting up a Windows Machine 12
Step 1.1 - Download / Unzip PHP
Go to windows.php.net/download¹² and download the latest Zip file for your machine. For mymachine I downloaded the VC11 x64 Thread Safe version. (php-5.6.10-Win32-VC11-x64.zip atthe time of this writing.)
Unzip this file into the C:\Php directory.
Step 1.2 - Update PHP.INI
Open up a command prompt and do the following to create the php.ini file.
Copy php.ini-development to php.ini
C:\Users\Chuck> cd \php
C:\Php> copy php.ini-development php.ini
Then edit php.ini in a text editor and change the following lines.
Changes in php.ini
// change
; extension_dir = "ext"
// to
extension_dir = "ext"
// change
;extension=php_openssl.dll
// to
extension=php_openssl.dll
// change
;extension=php_mbstring.dll
// to
extension=php_mbstring.dll
Now, within the C:\Php directory, you should be able to execute php.
¹²http://windows.php.net/download
Chapter 3 - Setting up a Windows Machine 13
Checking the PHP version
C:\Php> php --version
PHP 5.6.10 (cli) (built: Oct 30 2014 16:05:53)
Copyright (c) 1997-2014 The PHP Group
Zend Engine v2.6.0, Copyright (c) 1998-2014 Zend Technologies
Step 1.3 - Add C:\Php to the path
• Open up theWindows Control Panel• Search for env in the top right corner• Click on the Edit environment variables for your account link• If PATH is already in your User variables, then [Edit…] it, adding ;C:\Php to the end, otherwiseadd it.
Adding PHP to Windows Path
The next time you open up a command prompt, php will be available in your path.
Step 2 - Install Node.js
We’ll install Node.js natively in Windows because later it’ll make it easy to use Gulp directly fromthe Windows command prompt.
Go to nodejs.org/download¹³ and download the Windows Installer for your version of windows.(Either 32-bit or 64-bit.)
¹³http://nodejs.org/download
Chapter 3 - Setting up a Windows Machine 14
Node.js Download Page
Install using defaults. Once installed, open up a new command prompt and check the installation bylooking at the versions installed.
Checking node and npm versions
C:\Users\Chuck> node --version
v0.10.33
C:\Users\Chuck> npm --version
1.4.28
Installing gulp globally
C:\Users\Chuck> npm install -g gulp
C:\Users\Chuck\AppData\Roaming\npm\gulp -> C:\Users\Chuck\AppData/
Roaming\npm\node_modules\gulp\bin\gulp.js
[email protected] C:\Users\Chuck\AppData\Roaming\npm\node_modules\gulp
[snip]
Checking the gulp version
C:\Users\Chuck> gulp --version
[10:13:44] CLI version 3.8.10
Optionally Install BowerYou can optionally install bower globally if youwish to run bower from aWindows prompt.Personally, I usually run bower within the Homestead Virtual Machine, but it’s your choice.
Using the Node package manager (NPM), install bower globally.
Chapter 3 - Setting up a Windows Machine 15
Installing bower globally
C:\Users\Chuck> npm install -g bower
C:\Users\Chuck\AppData\Roaming\npm\bower -> C:\Users\Chuck\AppData\
Roaming\npm\node_modules\bower\bin\bower
[email protected] C:\Users\Chuck\AppData\Roaming\npm\node_modules\bower
[snip]
Checking the bower version
C:\Users\Chuck> bower --version
1.3.12
Remember this only installs the programs globallyIf you use gulp (or bower) within a particular project you’ll still need to install them locallywithin that project with a npm install (omitting the -g option). This will be covered later.
Step 3 - Install Composer
Composer is the package manager for PHP.
Composer Page
Download and install the Windows setup program, Composer-Setup.exe¹⁴. Use the defaults wheninstalling and if it asks you the path to PHP, enter C:\Php\php.exe.
Once Composer installs, close any command prompts and open up a new one. Check the version ofcomposer to see if installed correctly.
¹⁴https://getcomposer.org/Composer-Setup.exe
Chapter 3 - Setting up a Windows Machine 16
Checking the Composer version
C:\Users\Chuck> composer --version
Composer version 1.0-dev (b23a3cd36870ff0eefc161a4638d9fcf49d998ba)\
2014-11-21 17:59:11
Installing Composer Updates Your PathThe installation will move C:\Php from your personal path and add it to the system path.It will also add C:\ProgramData\ComposerSetup\bin to your system path.
Step 4 - Install GIT and set up SSH Key
For Windows we’ll install the native GIT application and use GIT BASH for setting up the SSH Key.Any other GIT usage in Windows will be through the Windows command prompt.
Step 4.1 - Download the git installer
Go to git-scm.com/downloads¹⁵ and click on the [Downloads for Windows] button. This willdownload the latest version of Git for windows.
(At the time of this writing, the file downloaded is named Git-1.9.4-preview20140920.exe.)
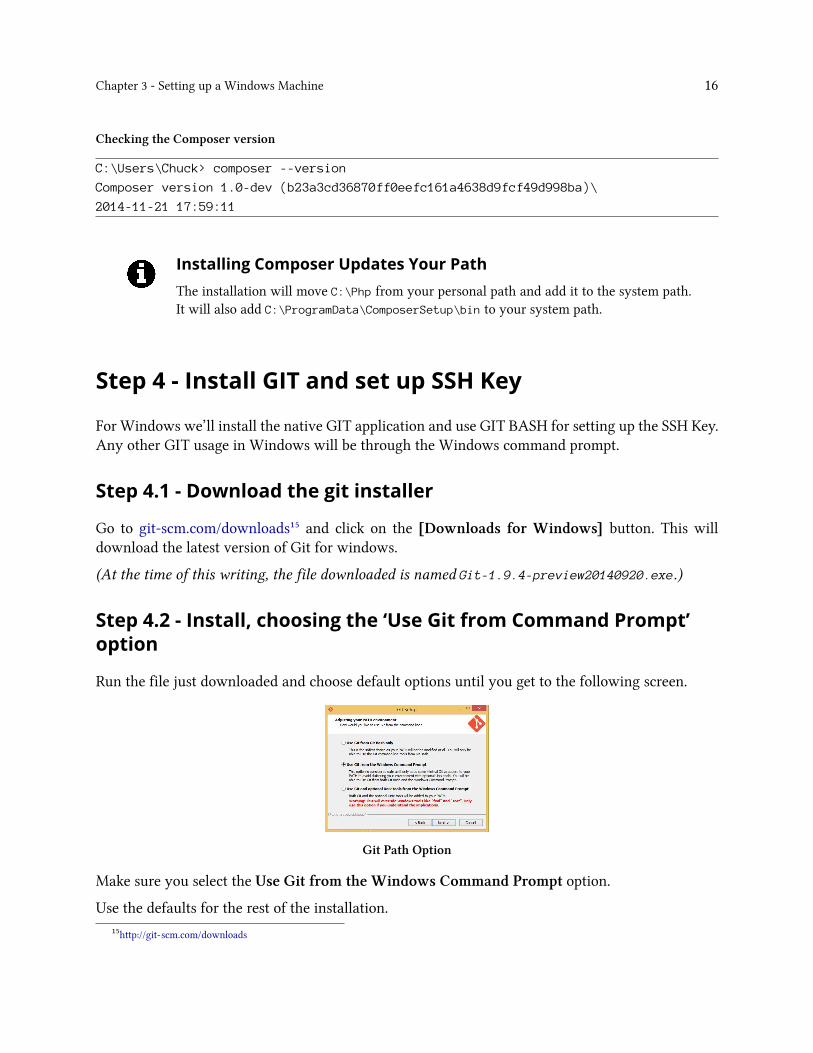
Step 4.2 - Install, choosing the ‘Use Git from Command Prompt’option
Run the file just downloaded and choose default options until you get to the following screen.
Git Path Option
Make sure you select the Use Git from the Windows Command Prompt option.
Use the defaults for the rest of the installation.
¹⁵http://git-scm.com/downloads
Chapter 3 - Setting up a Windows Machine 17
Step 4.3 - Checking the Git Version
Close any existing command prompts and open a new command prompt. Make sure Git installedsuccessfully by executing the command below.
Checking the Git Version
C:\Users\Chuck> git --version
git version 1.9.4.msysgit.2
Step 4.4 - Setup the SSH Key
Find Git Bash in the Windows Start Menu and execute the ssh-keygen command below. Press[Enter] all the way through to use the defaults and set up the SSH key with no pass phrase.
Creating SSH Key in Git Bash
Chuck@Windows ~
$ ssh-keygen -t rsa -C "[email protected]"
Generating public/private rsa key pair.
Enter file in which to save the key (/c/Users/Chuck/.ssh/id_rsa):
Created directory '/c/Users/Chuck/.ssh'.
Enter passphrase (empty for no passphrase):
Enter same passphrase again:
$
Step 5 - Adding the Homestead box
This step downloads the Laravel Homestead Vagrant box.
Adding the Homestead box in Windows
C:\Users\Chuck> vagrant box add laravel/homestead
==> box: Loading metadata for box 'laravel/homestead'
box: URL: https://vagrantcloud.com/laravel/homstead
[snip]
It can take a while to download on slow connections.
Chapter 3 - Setting up a Windows Machine 18
Step 6. Installing Homestead
Nowwe’ll use composer to install the homestead command. This command line utility makes it easyto control the Homestead VM.
Step 6.1 - Globally requiring Homestead
Globally requiring Homestead 2.0
C:\Users\Chuck> composer global require "laravel/homestead=~2.0"
Changed current directory to C:\Users/Chuck/AppData/Roaming/Composer
./composer.json has been updated
Loading composer repositories with package information
Updating dependencies (including require-dev)
- Installing symfony/process (v2.5.7)
Loading from cache
- Installing symfony/console (v2.5.7)
Loading from cache
- Installing laravel/homestead (v2.0.7)
Loading from cache
Writing lock file
Generating autoload files
Step 6.2 - Updating Path
Composer just installed Homestead into the vendor directory of your Composer installation. (Forexample, C:\Users\YOU\AppData\Roaming\Composer).
In order to access homestead from any command prompt, add this path to your User path variable.
Follow the same steps to do this as you did back in Step 1.3 - Adding C:\Php to the path but thistime the path to add will be below (replacing YOU as appropriate).
Paths to addC:\Users\YOU\AppData\Roaming\Composer\vendor\bin;vendor\bin
Notice the extra ‘vendor\bin’ in the path?We’re adding this so any time you’re within the base directory of a Laravel project you caneasily access any vendor utilities provided in that project. For example, Phpunit is installedin the vendor/bin directory of every Laravel application.
Chapter 3 - Setting up a Windows Machine 19
Step 6.3 - Verifying Homestead Installed
Close any existing command prompts and open a new command prompt so the latest changes to thepath will be in effect. Then check the version of homestead to verify it installed.
Checking the Homestead Version
C:\Users\Chuck>homestead --version
Laravel Homestead version 2.0.7
Step 6.4 - Initialize Homestead
Once you’ve installed the homestead command and added the composer bin directory to your path,then you need to initialize Homestead.
Initializing Homestead
C:\Users\Chuck> homestead init
Creating Homestead.yaml file...
Homestead.yaml file created at: C:\Users\Chuck\.homestead/Homestead.yaml
RememberYou only need to initialize Homestead once on your machine
Step 7 - Bring up the Homestead VM
To bring up Homestead for the first time we’ll create a Code directory to store our projects and usethe homestead up command.
Bringing up Homestead for the 1st time
C:\Users\Chuck> mkdir Code
C:\Users\Chuck> homestead up
Bringing machine 'default' up with 'virtualbox' provider...
==> default: Importing base box 'laravel/homestead'...
==> default: Matching MAC address for NAT networking...
==> default Checking if box 'laravel/homestead' is up to date...
[snip]
Chapter 3 - Setting up a Windows Machine 20
Now the Homestead Virtual Machine is running. If you exit theWindows command prompt, the VMis still running. It’ll remain active until you issue a homestead halt command from the Windowscommand prompt.
You can log onto the Homestead Virtual Machine, but onWindows we won’t use the homestead ssh
command, we’ll use PuTTY.
Step 8 - Setting up PuTTY
Windows does not provide a SSH client so we need to download and install one. For this book we’lluse PuTTY and set it up to log onto the Homestead VM.
Step 8.1 - Download and install PuTTY
Download putty-0.63-installer¹⁶. Run this file to install PuTTY. You can just use the defaultinstallation settings.
Step 8.2 - Convert the SSH Key
Next find PuTTYgen in the Windows Start Menu and run it. Select the Conversions menu andthen Import key. Navigate to the id_rsa file created in Step 4.4. Then click the [Save private key]button. Yes, you want to save the key without a pass phrase, and save it to the same directory–inmy case it’s C:\Users\Chuck\.ssh–using the filename id_rsa.ppk.
Step 8.3 - Setup a Homestead PuTTY Session
Start up PuTTY and set the Connection | SSH | Auth private key to the id_rsa.ppk just created.Set the Session Hostname to [email protected] and the port to 2222.
Save the session as the name homestead.
The first time you run this session you’ll have a confirmation box, but after that you’ll log onto theHomestead Virtual Machine without having to type a password.
You may want to create a shortcut on your desktop. The item you want the shortcut to point to is:"C:\Program Files (x86)\PuTTY\Putty.exe" -load homestead and name the shortcut homestead.
Change PuTTY’s FontThe default font PuTTY uses is Courier New, which to my eyes is ugly. You can go intoWindow | Appearance in the PuTTY configuration and change the font, size, colors, etc.
¹⁶http://the.earth.li/~sgtatham/putty/latest/x86/putty-0.63-installer.exe

Chapter 3 - Setting up a Windows Machine 21
Step 8.4 - Connecting to Homestead via PuTTY
Execute the homestead session you just created in PuTTY and you should receive a screen similarto the follows.
Homestead’s first screen
Using username "vagrant".
Authenticating with public key "imported-openssh-key"
Welcome to Ubuntu 14.04.1 LTS (GNU/Linux 3.13.0-11-generic x86_64)
* Documentation: https://help.ubuntu.com/
System information as of Fri Nov 28 04:24:01 UTC 2014
System load: 0.0 Processes: 92
Usage of /: 5.2% of 39.34GB Users logged in: 0
Memory usage: 33% IP address for eth0: 10.0.2.15
Swap usage: 0% IP address for eth1: 192.168.10.10
Graph this data and manage this system at:
https://landscape.canonical.com/
Get cloud support with Ubuntu Advantage Cloud Guest:
http://www.ubuntu.com/business/services/cloud
Last login: Fri Nov 28 04:24:01 2014 from 10.0.2.2
vagrant@homestead:~$
Step 9 - Installing Laravel’s Installer
For the last step we’ll install the Laravel installer
Chapter 3 - Setting up a Windows Machine 22
Globally requiring Laravel Installer
C:\Users\Chuck> composer global require "laravel/installer=~1.1"
Changed current directory to C:\Users/Chuck/AppData/Roaming/Composer
./composer.json has been updated
Loading composer repositories with package information
Updating dependencies (including require-dev)
- Installing guzzlehttp/streams (2.1.0)
Downloading: 100%
- Installing guzzlehttp/guzzle (4.2.3)
Downloading: 100%
- Installing laravel/installer (v1.1.3)
Downloading: 100%
Writing lock file
Generating autoload files
Since your path was already updated in Step 6.2 to contain composer’s bin directory, the laravelcommand should already be accessible from a DOS Prompt. Verify it by checking the version.
Checking the Laravel Version
C:\Users\Chuck>laravel --version
Laravel Installer version 1.1
Congratulations!You now have a virtual Ubuntu 64-bit machine, ready for developing your Laravel 5.1 webapplications.
Recap
This chapter was basically a laundry list of steps to follow in order to get Laravel Homestead up andrunning on your Windows machine. The good news is, these steps only have to be performed once.
Now, skip to the Using Homestead chapter for some information about Laravel Homestead.
Chapter 4 - Setting up an OS X orLinux MachineThis chapter goes through the steps required to set up and install the supporting software for LaravelHomestead on an OS X or Linux machine. It is assumed VirtualBox and Vagrant were alreadyinstalled from the Required Software and Components chapter.
Chapter Contents
• Slight Variations with Linux• Step 1 - Installing PHP• Step 2 - Install Node.js• Step 3 - Install Bower and Gulp• Step 4 - Install Composer• Step 5 - Adding SSH Keys• Step 6 - Adding the Homestead box• Step 7 - Installing Homestead• Step 8 - Bring up the Homestead VM• Step 9 - Installing the Laravel Installer• Recap
Slight Variations with Linux
There are slight variations between the different Linux distributions. In particular, the packagemanager. CentOS and Fedora use yum as the package manager, Ubuntu uses apt. There is no official“package manager” with OS X other than the App Store, but homebrew is the unofficial OS Xpackage manager. Regardless of the differences, the essence is pretty much the same across all *nixsystems, including OS X.
Step 1 - Installing PHP
Often PHP will be pre-installed on your system. You can check the version from a terminal window.
Chapter 4 - Setting up an OS X or Linux Machine 24
Checking the PHP version
~> php --version
PHP 5.5.9-1ubuntu4.5 (cli) (built: Oct 29 2014 11:59:10)
Copyright (c) 1997-2014 The PHP Group
Zend Engine v2.5.0, Copyright (c) 1998-2014 Zend Technologies
with Zend OPcache v7.0.3, Copyright (c) 1999-2014, by Zend Technologies
Laravel 5.1 requires PHP version 5.5.9 or above. If you don’t have PHP installed, or it’s not at leastversion 5.5.9, then you’ll need to use your package manager to install PHP.
OS X YosemiteYosemite (the version of OS X at the time of this writing) ships with PHP 5.5.14. So noworries there.
Example installing PHP in Ubuntu
~> sudo apt-get install php5
Reading package lists... Done
Building dependency tree
Reading state information... Done
The following NEW packages will be installed:
php5
0 upgraded, 1 newly installed, 0 to remove and 0 not upgraded.
[snip]
Step 2 - Install Node.js
You’ll need Node.js installed to later use Gulp.
Often, Node.js is already installed. You can check the version of npm to see if Node.js is installedon your system.
Checking the npm version
$> npm --version
1.5.0-alpha-4
Chapter 4 - Setting up an OS X or Linux Machine 25
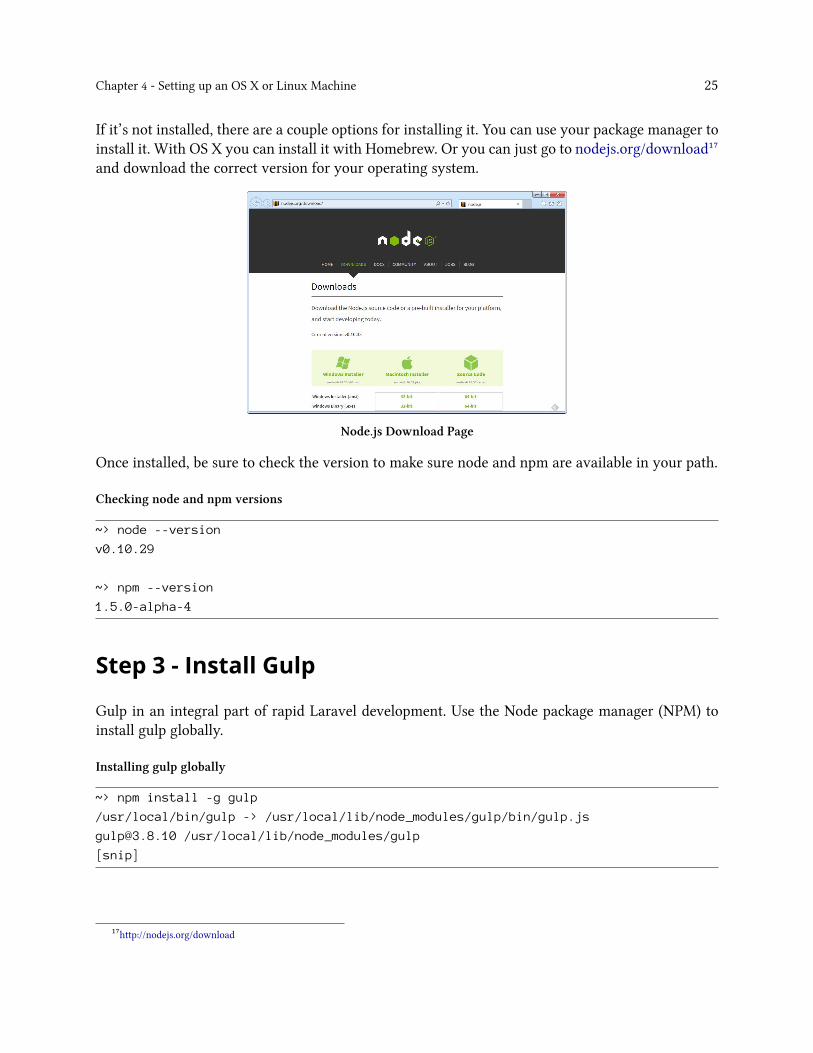
If it’s not installed, there are a couple options for installing it. You can use your package manager toinstall it. With OS X you can install it with Homebrew. Or you can just go to nodejs.org/download¹⁷and download the correct version for your operating system.
Node.js Download Page
Once installed, be sure to check the version to make sure node and npm are available in your path.
Checking node and npm versions
~> node --version
v0.10.29
~> npm --version
1.5.0-alpha-4
Step 3 - Install Gulp
Gulp in an integral part of rapid Laravel development. Use the Node package manager (NPM) toinstall gulp globally.
Installing gulp globally
~> npm install -g gulp
/usr/local/bin/gulp -> /usr/local/lib/node_modules/gulp/bin/gulp.js
[email protected] /usr/local/lib/node_modules/gulp
[snip]
¹⁷http://nodejs.org/download
Chapter 4 - Setting up an OS X or Linux Machine 26
Checking the gulp version
~> gulp --version
[10:13:44] CLI version 3.8.10
Optionally Install BowerYou can optionally install bower globally if you wish to run bower from your Linux (or OSX) console. Personally, I use bower both from my OS X console and within the HomesteadVirtual Machine, whichever I’m currently in.
Use the Node package manager (NPM), install bower globally.
Installing bower globally
~> npm install -g bower
/usr/local/bin/bower -> /usr/local/lib/node_modules/bower/bin/bower
[email protected] /usr/local/lib/node_modules/bower
[snip]
Checking the bower version
~> bower --version
1.3.12
Remember this only installs the programs globallyIf you use gulp (or bower) within a particular project you’ll still need to install them locallywithin that project with a npm install (omitting the -g option). This will be covered later.
Step 4 - Install Composer
Composer is the package manager for PHP. It can easily be installed from a terminal window in *nixsystems (including both OS X and Linux). An alternative method of installing Composer in OS Xusing Homebrew is presented at the bottom of this section.
Chapter 4 - Setting up an OS X or Linux Machine 27
Installing Composer
~> curl -sS https://getcomposer.org/installer | php
#!/usr/bin/env php
All settings correct for using Composer
Downloading...
Composer successfully installed to: /Users/chuck/composer.phar
Use it: php composer.phar
Once you have composer.phar downloaded, move it to the global path.
Moving composer.phar
~> sudo mv composer.phar /usr/local/bin/composer
And then check the version to make sure it’s accessible.
Checking the Composer version
~> composer --version
Composer version 1.0-dev (b23a3cd36870ff0eefc161a4638d9fcf49d998ba)\
2014-11-21 17:59:11
Install using HomebrewIn OS X, if you are using Homebrew, you can install composer using the instructions below.
Alternative installation in OS X with Homebrew
~> brew update
~> brew tap homebrew/dupes
~> brew tap homebrew/php
~> brew install composer
Step 5 - Adding SSH Keys
If you haven’t already added a SSH key for your machine, you’ll need to do it.
Chapter 4 - Setting up an OS X or Linux Machine 28
Checking for SSH Keys
~> ls ~/.ssh
config id_rsa id_rsa.pub
If you don’t see id_rsa and id_rsa.pub create them with the following command. (Press [Enter] allthe way through to use the defaults and set up the SSH key with no pass phrase.)
Creating SSH Keys
~> ssh-keygen -t rsa -C "[email protected]"
Generating public/private rsa key pair.
Enter file in which to save the key (/Users/Chuck/.ssh/id_rsa):
Created directory '/Users/Chuck/.ssh'.
Enter passphrase (empty for no passphrase):
Enter same passphrase again:
Step 6 - Adding the Homestead box
This step downloads the Laravel Homestead Vagrant box.
Adding the Homestead box in Linux
~> vagrant box add laravel/homestead
==> box: Loading metadata for box 'laravel/homestead'
box: URL: https://vagrantcloud.com/laravel/homstead
[snip]
It can take a while to download on slow connections.
Step 7 - Installing Homestead
Now we’ll use composer to install the homestead command. The homestead command line utilitymakes it easy to control the Homestead Virtual Machine.
Step 7.1 - Globally requiring Homestead
Chapter 4 - Setting up an OS X or Linux Machine 29
Globally requiring Homestead 2.0
~> composer global require "laravel/homestead=~2.0"
Changed current directory to /home/chuck/.composer
./composer.json has been updated
Loading composer repositories with package information
Updating dependencies (including require-dev)
- Installing symfony/process (v2.5.7)
Loading from cache
- Installing symfony/console (v2.5.7)
Loading from cache
- Installing laravel/homestead (v2.0.7)
Loading from cache
Writing lock file
Generating autoload files
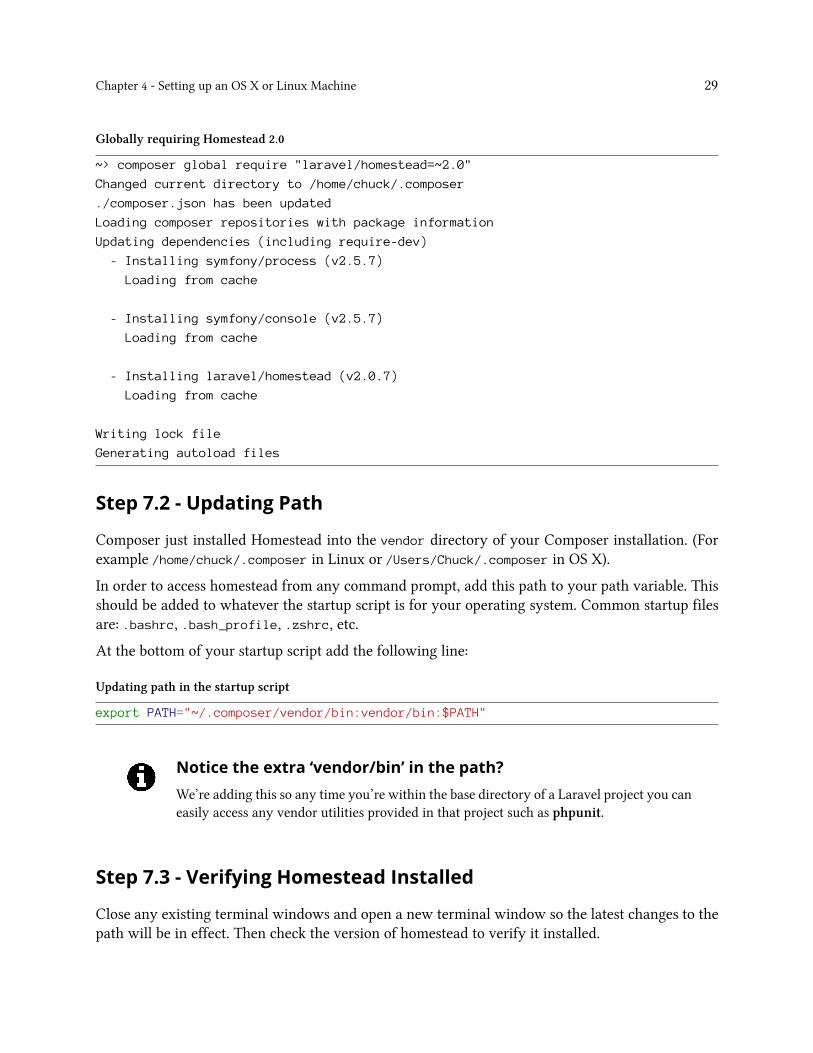
Step 7.2 - Updating Path
Composer just installed Homestead into the vendor directory of your Composer installation. (Forexample /home/chuck/.composer in Linux or /Users/Chuck/.composer in OS X).
In order to access homestead from any command prompt, add this path to your path variable. Thisshould be added to whatever the startup script is for your operating system. Common startup filesare: .bashrc, .bash_profile, .zshrc, etc.
At the bottom of your startup script add the following line:
Updating path in the startup script
export PATH="~/.composer/vendor/bin:vendor/bin:$PATH"
Notice the extra ‘vendor/bin’ in the path?We’re adding this so any time you’re within the base directory of a Laravel project you caneasily access any vendor utilities provided in that project such as phpunit.
Step 7.3 - Verifying Homestead Installed
Close any existing terminal windows and open a new terminal window so the latest changes to thepath will be in effect. Then check the version of homestead to verify it installed.
Chapter 4 - Setting up an OS X or Linux Machine 30
Checking the Homestead Version
~>homestead --version
Laravel Homestead version 2.0.7
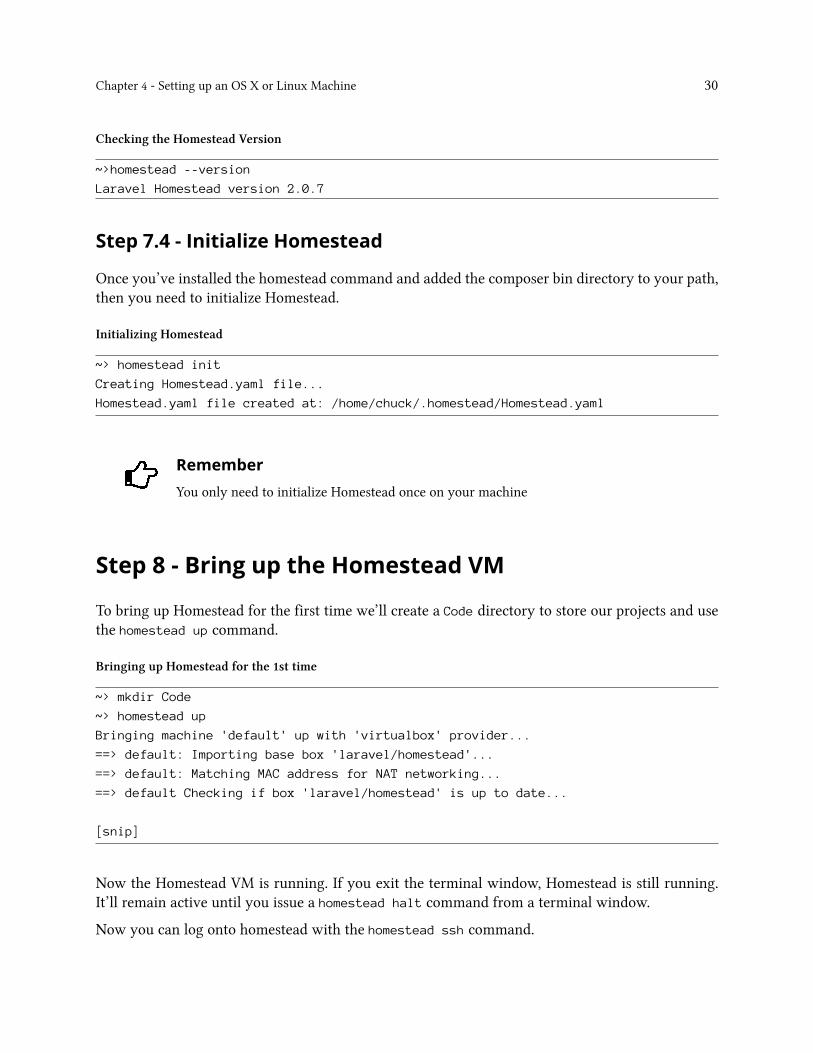
Step 7.4 - Initialize Homestead
Once you’ve installed the homestead command and added the composer bin directory to your path,then you need to initialize Homestead.
Initializing Homestead
~> homestead init
Creating Homestead.yaml file...
Homestead.yaml file created at: /home/chuck/.homestead/Homestead.yaml
RememberYou only need to initialize Homestead once on your machine
Step 8 - Bring up the Homestead VM
To bring up Homestead for the first time we’ll create a Code directory to store our projects and usethe homestead up command.
Bringing up Homestead for the 1st time
~> mkdir Code
~> homestead up
Bringing machine 'default' up with 'virtualbox' provider...
==> default: Importing base box 'laravel/homestead'...
==> default: Matching MAC address for NAT networking...
==> default Checking if box 'laravel/homestead' is up to date...
[snip]
Now the Homestead VM is running. If you exit the terminal window, Homestead is still running.It’ll remain active until you issue a homestead halt command from a terminal window.
Now you can log onto homestead with the homestead ssh command.
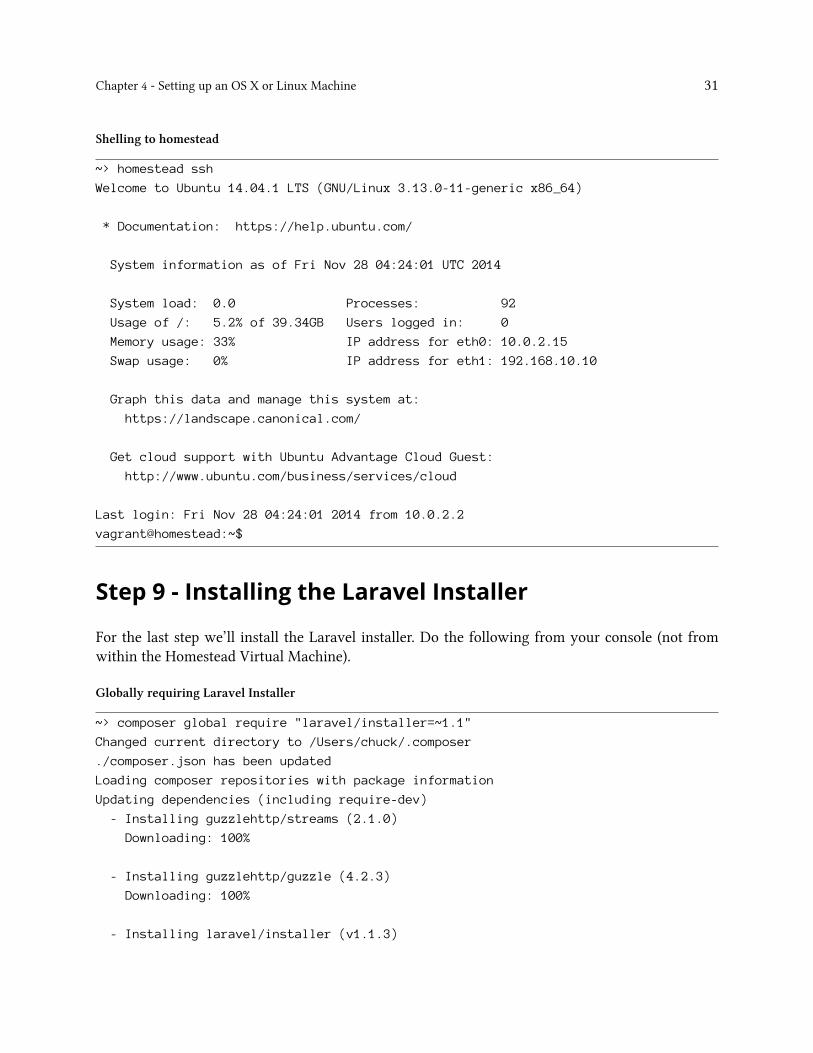
Chapter 4 - Setting up an OS X or Linux Machine 31
Shelling to homestead
~> homestead ssh
Welcome to Ubuntu 14.04.1 LTS (GNU/Linux 3.13.0-11-generic x86_64)
* Documentation: https://help.ubuntu.com/
System information as of Fri Nov 28 04:24:01 UTC 2014
System load: 0.0 Processes: 92
Usage of /: 5.2% of 39.34GB Users logged in: 0
Memory usage: 33% IP address for eth0: 10.0.2.15
Swap usage: 0% IP address for eth1: 192.168.10.10
Graph this data and manage this system at:
https://landscape.canonical.com/
Get cloud support with Ubuntu Advantage Cloud Guest:
http://www.ubuntu.com/business/services/cloud
Last login: Fri Nov 28 04:24:01 2014 from 10.0.2.2
vagrant@homestead:~$
Step 9 - Installing the Laravel Installer
For the last step we’ll install the Laravel installer. Do the following from your console (not fromwithin the Homestead Virtual Machine).
Globally requiring Laravel Installer
~> composer global require "laravel/installer=~1.1"
Changed current directory to /Users/chuck/.composer
./composer.json has been updated
Loading composer repositories with package information
Updating dependencies (including require-dev)
- Installing guzzlehttp/streams (2.1.0)
Downloading: 100%
- Installing guzzlehttp/guzzle (4.2.3)
Downloading: 100%
- Installing laravel/installer (v1.1.3)
Chapter 4 - Setting up an OS X or Linux Machine 32
Downloading: 100%
Writing lock file
Generating autoload files
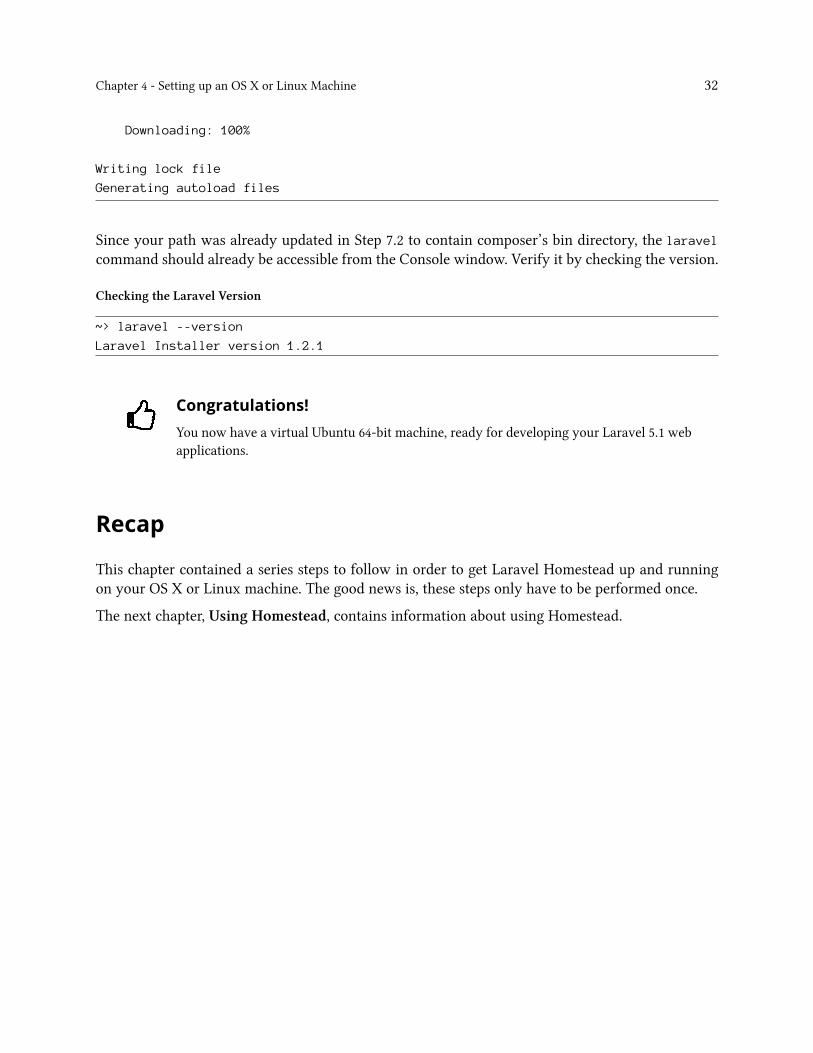
Since your path was already updated in Step 7.2 to contain composer’s bin directory, the laravelcommand should already be accessible from the Console window. Verify it by checking the version.
Checking the Laravel Version
~> laravel --version
Laravel Installer version 1.2.1
Congratulations!You now have a virtual Ubuntu 64-bit machine, ready for developing your Laravel 5.1 webapplications.
Recap
This chapter contained a series steps to follow in order to get Laravel Homestead up and runningon your OS X or Linux machine. The good news is, these steps only have to be performed once.
The next chapter, Using Homestead, contains information about using Homestead.
Chapter 5 - Homestead and LaravelInstallerThis chapter explores the two composer tools previously installed: homestead and laravel. A typicaldaily workflow is examined, as are the six steps to set up any new Laravel 5.1 project.
Chapter Contents
• The Homestead Tool• Overview of Common Homestead Commands• Examining Homestead.yaml• Adding Software to the Homestead VM• Daily Workflow• Six Steps to Starting a New Laravel 5.1 Project
– Step 1 - Create the app skeleton– Step 2 - Configure the web server– Step 3 - Add the Host to Your Hosts File– Step 4 - NPM Local Installs– Step 5 - Create the app’s database– Step 6 - Testing in the Browser
• Other Homestead Tips• Recap
The Homestead Tool
Console DefinedWhenever you are prompted to do something from the console, context is important.
The homestead console means connecting to the Homestead VM via SSH. For Windows,this means using PuTTY (explained in the chapter on setting up aWindows machine). Withother operating systems you can execute the homestead ssh command from within theterminal. Whenever you see the $ prompt in this book you are in the homestead console.
The OS console means either the Windows command prompt or the terminal applicationyou use. (The % prompt in the book is used for your OS specific console.)
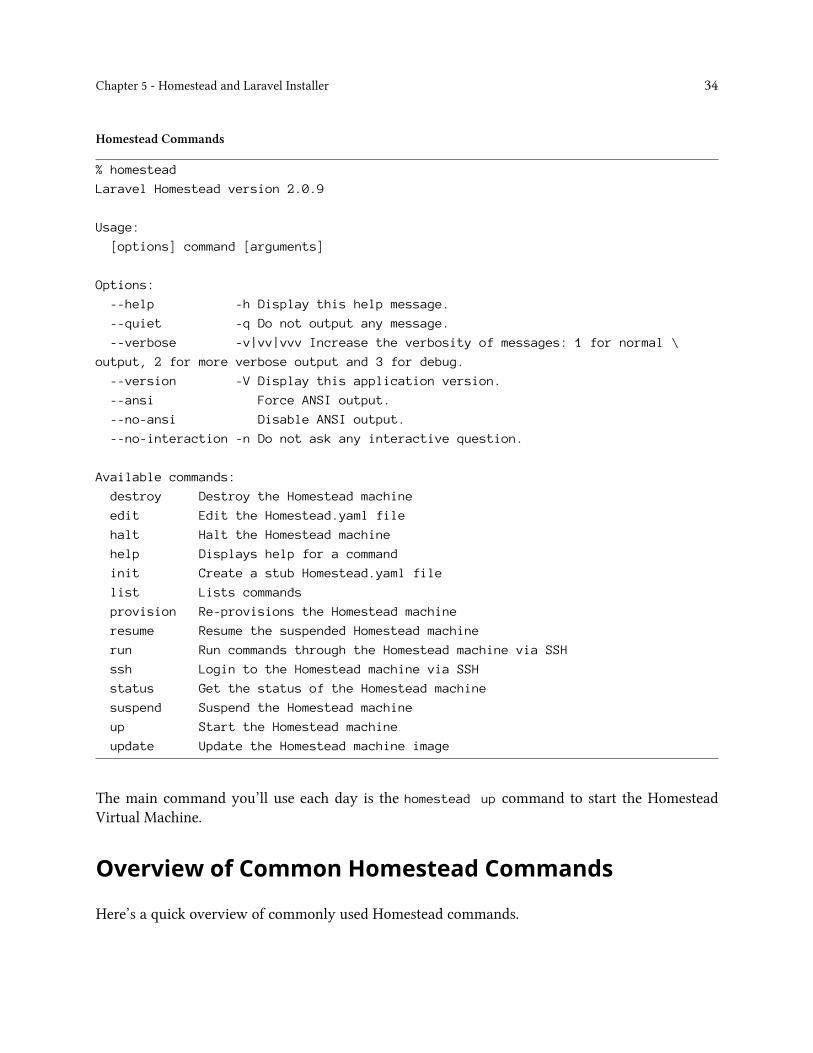
From the console of your host operating system, you can easily see what the valid homesteadcommands are by typing the homestead command without any arguments.
Chapter 5 - Homestead and Laravel Installer 34
Homestead Commands
% homestead
Laravel Homestead version 2.0.9
Usage:
[options] command [arguments]
Options:
--help -h Display this help message.
--quiet -q Do not output any message.
--verbose -v|vv|vvv Increase the verbosity of messages: 1 for normal \
output, 2 for more verbose output and 3 for debug.
--version -V Display this application version.
--ansi Force ANSI output.
--no-ansi Disable ANSI output.
--no-interaction -n Do not ask any interactive question.
Available commands:
destroy Destroy the Homestead machine
edit Edit the Homestead.yaml file
halt Halt the Homestead machine
help Displays help for a command
init Create a stub Homestead.yaml file
list Lists commands
provision Re-provisions the Homestead machine
resume Resume the suspended Homestead machine
run Run commands through the Homestead machine via SSH
ssh Login to the Homestead machine via SSH
status Get the status of the Homestead machine
suspend Suspend the Homestead machine
up Start the Homestead machine
update Update the Homestead machine image
The main command you’ll use each day is the homestead up command to start the HomesteadVirtual Machine.
Overview of Common Homestead Commands
Here’s a quick overview of commonly used Homestead commands.
Chapter 5 - Homestead and Laravel Installer 35
homestead up
Starts theHomestead VirtualMachine. It turns on the power to the VM. If you use the provisionoption (homestead up --provision) then any new sites you’ve added will be provisioned.
homestead halt
Stops the Homestead Virtual Machine. In other words, powering off.
homestead suspend
Suspends the Homestead Virtual Machine. It’s like hibernate.
homestead resume
Resumes the suspended Homestead Virtual Machine.
homestead edit
Edit the Homestead.yaml file. This launches whatever editor is associated with YAML files onyour operating system.
homestead status
See the current status of the Homestead Virtual Machine.
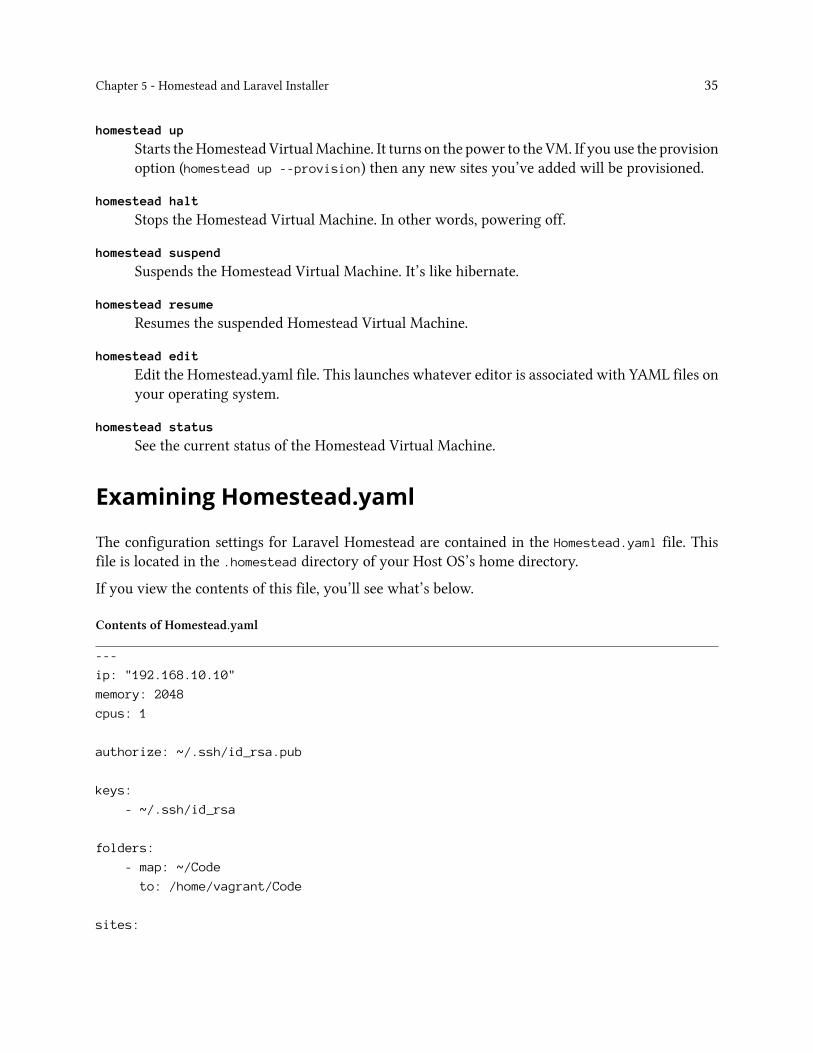
Examining Homestead.yaml
The configuration settings for Laravel Homestead are contained in the Homestead.yaml file. Thisfile is located in the .homestead directory of your Host OS’s home directory.
If you view the contents of this file, you’ll see what’s below.
Contents of Homestead.yaml
---
ip: "192.168.10.10"
memory: 2048
cpus: 1
authorize: ~/.ssh/id_rsa.pub
keys:
- ~/.ssh/id_rsa
folders:
- map: ~/Code
to: /home/vagrant/Code
sites:
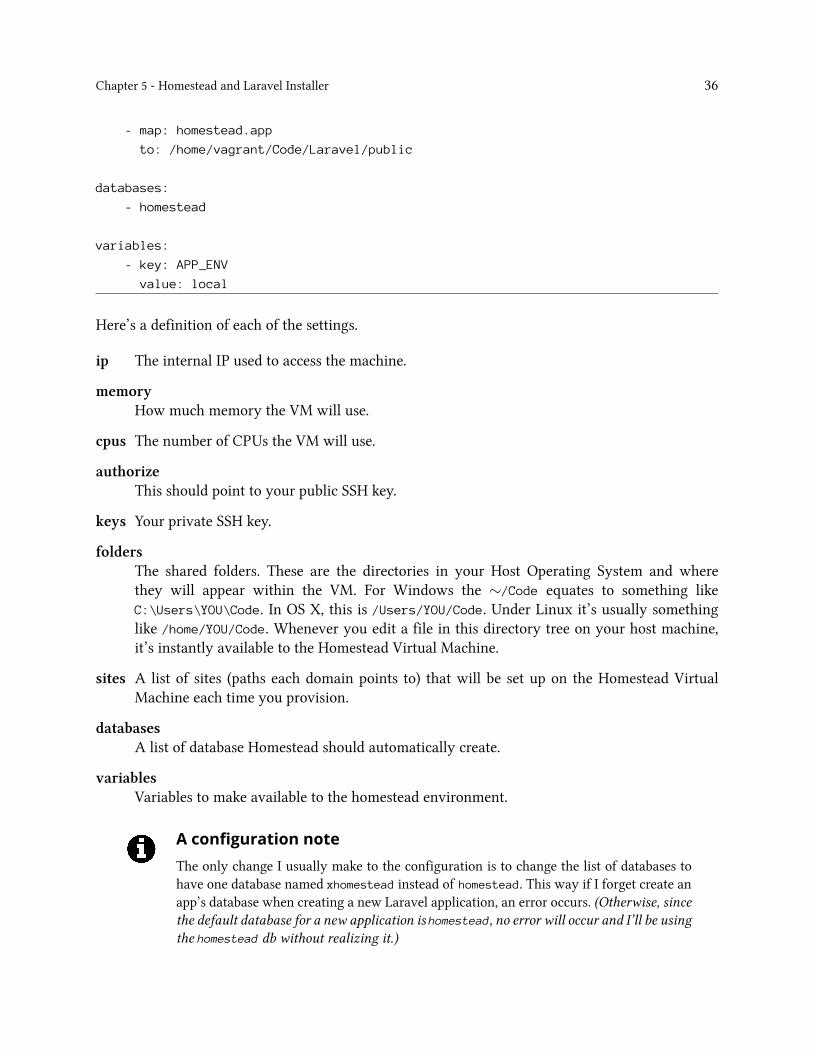
Chapter 5 - Homestead and Laravel Installer 36
- map: homestead.app
to: /home/vagrant/Code/Laravel/public
databases:
- homestead
variables:
- key: APP_ENV
value: local
Here’s a definition of each of the settings.
ip The internal IP used to access the machine.
memoryHow much memory the VM will use.
cpus The number of CPUs the VM will use.
authorizeThis should point to your public SSH key.
keys Your private SSH key.
foldersThe shared folders. These are the directories in your Host Operating System and wherethey will appear within the VM. For Windows the ∼/Code equates to something likeC:\Users\YOU\Code. In OS X, this is /Users/YOU/Code. Under Linux it’s usually somethinglike /home/YOU/Code. Whenever you edit a file in this directory tree on your host machine,it’s instantly available to the Homestead Virtual Machine.
sites A list of sites (paths each domain points to) that will be set up on the Homestead VirtualMachine each time you provision.
databasesA list of database Homestead should automatically create.
variablesVariables to make available to the homestead environment.
A configuration noteThe only change I usually make to the configuration is to change the list of databases tohave one database named xhomestead instead of homestead. This way if I forget create anapp’s database when creating a new Laravel application, an error occurs. (Otherwise, sincethe default database for a new application is homestead, no error will occur and I’ll be usingthe homestead db without realizing it.)
Chapter 5 - Homestead and Laravel Installer 37
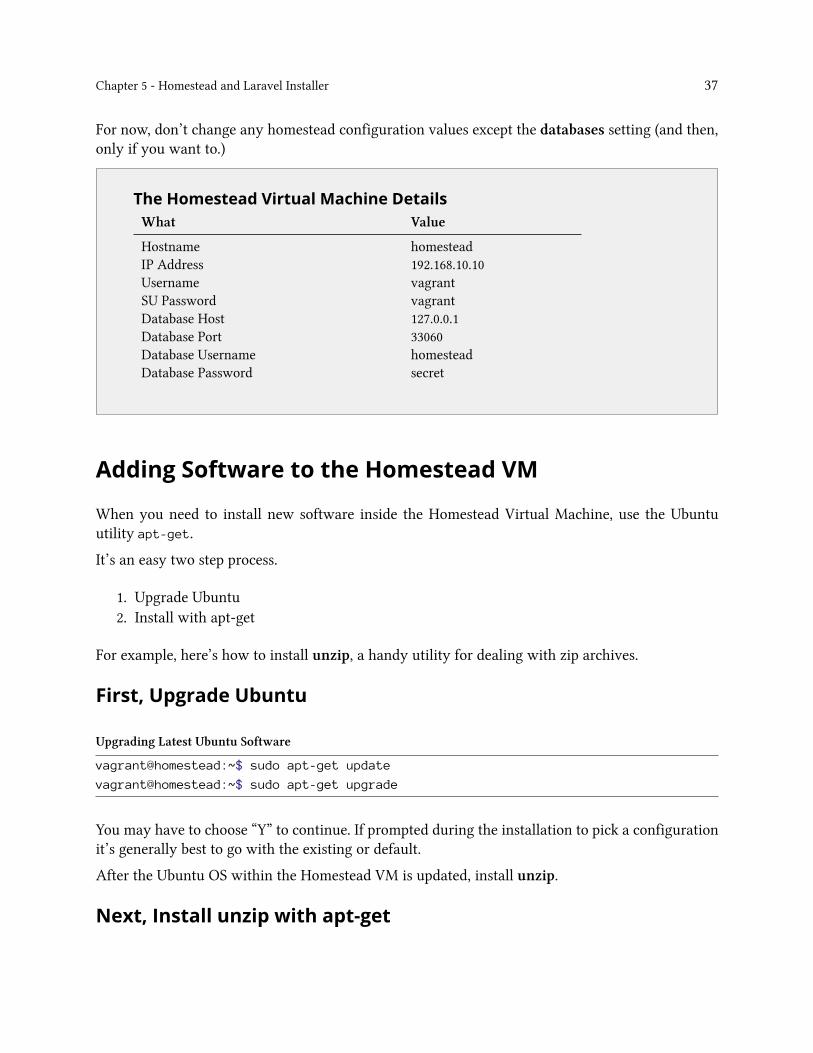
For now, don’t change any homestead configuration values except the databases setting (and then,only if you want to.)
..
The Homestead Virtual Machine DetailsWhat Value
Hostname homesteadIP Address 192.168.10.10Username vagrantSU Password vagrantDatabase Host 127.0.0.1Database Port 33060Database Username homesteadDatabase Password secret
Adding Software to the Homestead VM
When you need to install new software inside the Homestead Virtual Machine, use the Ubuntuutility apt-get.
It’s an easy two step process.
1. Upgrade Ubuntu2. Install with apt-get
For example, here’s how to install unzip, a handy utility for dealing with zip archives.
First, Upgrade Ubuntu
Upgrading Latest Ubuntu Software
vagrant@homestead:~$ sudo apt-get update
vagrant@homestead:~$ sudo apt-get upgrade
You may have to choose “Y” to continue. If prompted during the installation to pick a configurationit’s generally best to go with the existing or default.
After the Ubuntu OS within the Homestead VM is updated, install unzip.
Next, Install unzip with apt-get
Chapter 5 - Homestead and Laravel Installer 38
Installing unzip in the Homestead VM
vagrant@homestead:~$ sudo apt-get install unzip
Daily Workflow
The daily workflow when working with homestead consists of three steps:
Step 1 - homestead up - Start the day by booting your Homestead Virtual Machine.
Step 2 - homestead ssh or PuTTY - SSH to the Homestead VM to access files directly and executeartisan commands.
Step 3 - write beautiful code - In your favorite code editor, on your host operating system, writecode.
Optional 4th Step - homestead halt - When you are done for the day, you can optionally poweroff the Homestead Virtual Machine with the halt command.
Six Steps to Starting a New Laravel 5.1 Project
There are six simple steps to follow whenever starting a new Laravel 5.1 application.
Let’s say we want to create a project called test.app and use test as the project folder.
Step 1 - Create the app skeleton
Using the Laravel Installer (the laravel command installed in a previous chapter) it’s easy to createa new project skeleton.
Creating a new app skeleton
~/Code % laravel new test
Crafting application...
Generating optimized class loader
Compiling common classes
Application key [rzUhyDksVxzTXFjzFYiOWToqpunI2m6X] set successfully.
Application ready! Build something amazing.
Step 2 - Configure the web server
After there’s an application skeleton in place you can set up the Nginx webserver within thehomestead environment to serve pages from your app’s public directory.
The homestead environment makes this easy with the serve command.
Chapter 5 - Homestead and Laravel Installer 39
Setting up a new virtual host in Homestead
~/Code$ serve test.app ~/Code/test/public
dos2unix: converting file /vagrant/scripts/serve.sh to Unix format ...
* Restarting nginx nginx [ OK ]
php5-fpm stop/waiting
php5-fpm start/running, process 2169
The serve command sets up a new configuration file in /etc/nginx/sites-available for thedomain we’ll be using (test.app) and a symbolic link to this file within the /etc/nginx/sites-
enabled directory.
Even when you reboot the machine, this configuration file will be there.
Why not edit Homestead.yamlYes. Another alternative is to set up the parameters for the test.app virtual host using thehomestead edit command and adding a new entry to the sites: section. But this is easier,and there’s no need to continuously re-provision the Homestead VM.
But, if you’re setting up an app you always want configured, it’s not a bad idea to editHomestead.yaml and set up the configuration there.
Step 3 - Add the Host to Your Hosts File
Since test.app does not exist in any DNS, an entry must be added to the Host OS’s hosts file. Edit/etc/hosts in Linux or OS X. In Windows the file is C:\Windows\System32\drivers\etc\hosts. Inthis hosts file point test.app to the IP specified in Homestead.yaml.
Add the following line to this file.
Host entry for test.app
192.168.10.10 test.app
Windows requires admin privileges to edit hostsIn Windows you must launch your editor (such as Notepad, Wordpad, or Sublime Text) asan administrator. In Linux or OS X you can use the sudo command.
Chapter 5 - Homestead and Laravel Installer 40
Editing hosts with Linux or OS X
sudo nano /etc/hosts
// or
sudo vi /etc/hosts
Step 4 - NPM Local Installs
In order to later use gulp it’s important to make sure all the required npm modules are locallyinstalled.
You can skip this step if you know you will not use gulp.
Change to your project directory in your Host OS’s console and execute the following.
NPM Local Installs
~% cd Code/test
~/Code/test% npm install
npm WARN package.json @ No repository field.
> [email protected] install /Users/chuck/Code/test/node_modules/gulp/\
node_modules/v8flags
> node fetch.js
flags for v8 3.14.5.9 cached.
[snip]
This will install everything required by gulp locally into the node_modules directory of your project.
Step 5 - Create the app’s database
If your application requires a database, it’s easy to create it within the Homestead VM using themysql console.
Creating a Database in the Homestead VM
$ mysql --user=homestead --password=secret
mysql> create database test;
mysql> exit;
Once the database is created, edit the .env file in your project’s root directory and change theDB_NAME appropriately.
Chapter 5 - Homestead and Laravel Installer 41
Change DB_NAME in .env// Change the following line
DB_DATABASE=homestead
// To the correct value
DB_DATABASE=test
Easy. Now you’ll be able to migrate and create tables. This is covered in a later chapter.
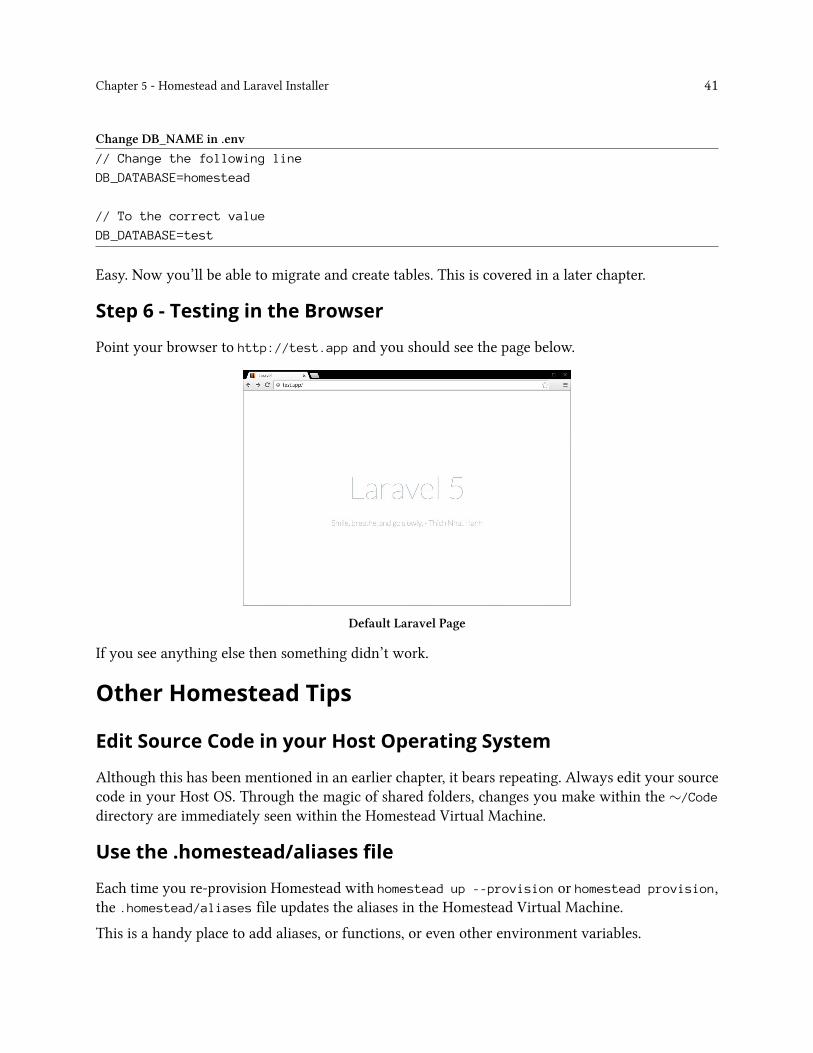
Step 6 - Testing in the Browser
Point your browser to http://test.app and you should see the page below.
Default Laravel Page
If you see anything else then something didn’t work.
Other Homestead Tips
Edit Source Code in your Host Operating System
Although this has been mentioned in an earlier chapter, it bears repeating. Always edit your sourcecode in your Host OS. Through the magic of shared folders, changes you make within the ∼/Code
directory are immediately seen within the Homestead Virtual Machine.
Use the .homestead/aliases file
Each time you re-provision Homestead with homestead up --provision or homestead provision,the .homestead/aliases file updates the aliases in the Homestead Virtual Machine.
This is a handy place to add aliases, or functions, or even other environment variables.

Chapter 5 - Homestead and Laravel Installer 42
Keep the Homestead VM up-to-date
As mentioned earlier, two commands will keep the Ubuntu operating system within the HomesteadVirtual Machine up to date.
Keeping Ubuntu Updated
$ sudo apt-get update
$ sudo apt-get upgrade
Recap
This chapter provided details on the homestead and laravel commands. And the Six Steps to a NewLaravel 5.1 Project were outlined.
In the next chapter where we’ll do a bit of testing.
Chapter 6 - TestingIn this chapter we’ll create a project to use throughout the rest of the book and explore variousoptions for testing. We’ll create a class to convert Markdown formatted files to HTML. This classwill be created using TDD principles.
Chapter Contents
• Creating the l5beauty Project• Running PHPUnit
– Laravel 5.1’s PHPUnit Configuration– Laravel 5.1 Crawler Methods and Properties– Laravel 5.1 PHPUnit Application methods and properties– Laravel 5.1 PHPUnit Assertions
• Using Gulp for TDD• Creating a Markdown Service
– Pulling in Markdown Packages– Creating the Markdown Test Class– Creating the Markdowner Service– A Few More Tests
• Other Ways Test– phpspec– Unit Testing– Functional / Acceptance Testing– Behavior Driven Development
• Recap
Creating the l5beauty Project
Follow the Six Steps to Starting a New Laravel 5.1 Project below to create the l5beauty project.
First, from your Host OS, install the app skeleton.
Chapter 6 - Testing 44
Step 1 - Install the app skeleton
~/Code % laravel new l5beauty
Crafting application...
Generating optimized class loader
Compiling common classes
Application key [rzUhyDksVxzTXFjzFYiOWToqpunI2m6X] set successfully.
Application ready! Build something amazing.
Next, from within the Homestead VM, set up l5beauty.app as the virtual host.
Step 2 - Configure the web server
~/Code$ serve l5beauty.app ~/Code/l5beauty/public
dos2unix: converting file /vagrant/scripts/serve.sh to Unix format ...
* Restarting nginx nginx [ OK ]
php5-fpm stop/waiting
php5-fpm start/running, process 2169
Back in your Host OS, add the following line to your hosts file.
Step 3 - Add l5beauty.app to Your Hosts File
192.168.10.10 l5beauty.app
From your Host OS, do the step to install the NPM packages locally.
Step 4 - NPM Local Installs
~% cd Code/l5beauty
~/Code/l5beauty% npm install
|
> [email protected] install /Users/chuck/Code/l5beauty/node_modules/laravel-\
elixir/node_modules/gulp-sass/node_modules/node-sass
> node scripts/install.js
> [email protected] postinstall /Users/chuck/Code/l5beauty/node_modules/\
laravel-elixir/node_modules/gulp-sass/node_modules/node-sass
> node scripts/build.js
`darwin-x64-node-0.10` exists; testing
Binary is fine; exiting
Chapter 6 - Testing 45
[email protected] node_modules/gulp
[snip]
Go back within the Homestead VM and create the database for this project.
Step 5 - Create the app’s database
$ mysql --user=homestead --password=secret
mysql> create database l5beauty;
Query OK, 1 row affected (0.00 sec)
mysql> exit;
Bye
Then edit the .env file, changing the database to l5beauty.
Changing DB_NAME in configuration
// Change the following line
DB_DATABASE=homestead
// To the correct value
DB_DATABASE=l5beauty
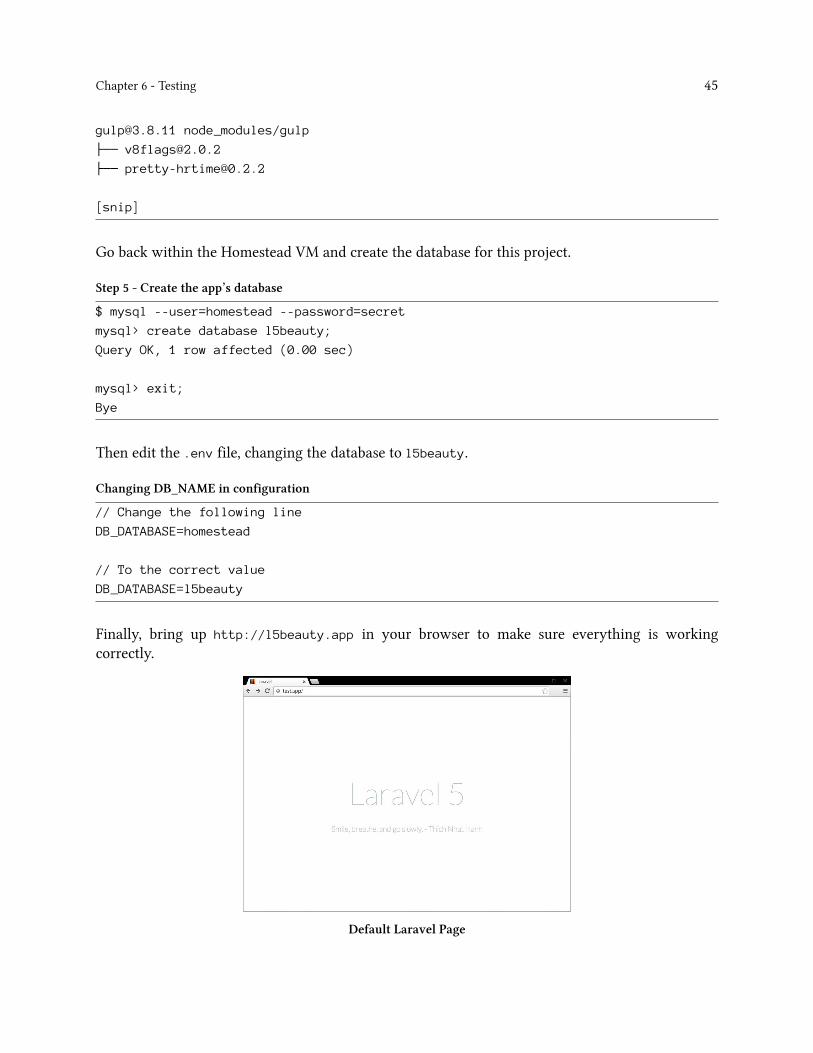
Finally, bring up http://l5beauty.app in your browser to make sure everything is workingcorrectly.
Default Laravel Page
Chapter 6 - Testing 46
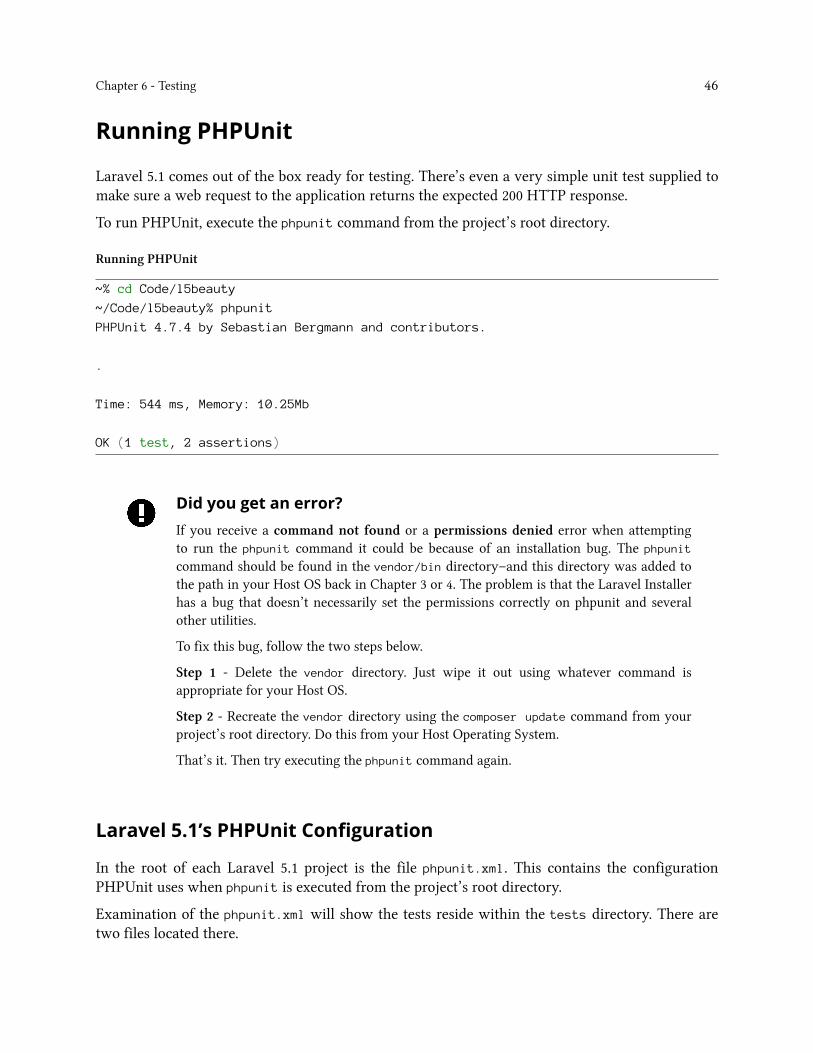
Running PHPUnit
Laravel 5.1 comes out of the box ready for testing. There’s even a very simple unit test supplied tomake sure a web request to the application returns the expected 200 HTTP response.
To run PHPUnit, execute the phpunit command from the project’s root directory.
Running PHPUnit
~% cd Code/l5beauty
~/Code/l5beauty% phpunit
PHPUnit 4.7.4 by Sebastian Bergmann and contributors.
.
Time: 544 ms, Memory: 10.25Mb
OK (1 test, 2 assertions)
Did you get an error?If you receive a command not found or a permissions denied error when attemptingto run the phpunit command it could be because of an installation bug. The phpunit
command should be found in the vendor/bin directory–and this directory was added tothe path in your Host OS back in Chapter 3 or 4. The problem is that the Laravel Installerhas a bug that doesn’t necessarily set the permissions correctly on phpunit and severalother utilities.
To fix this bug, follow the two steps below.
Step 1 - Delete the vendor directory. Just wipe it out using whatever command isappropriate for your Host OS.
Step 2 - Recreate the vendor directory using the composer update command from yourproject’s root directory. Do this from your Host Operating System.
That’s it. Then try executing the phpunit command again.
Laravel 5.1’s PHPUnit Configuration
In the root of each Laravel 5.1 project is the file phpunit.xml. This contains the configurationPHPUnit uses when phpunit is executed from the project’s root directory.
Examination of the phpunit.xml will show the tests reside within the tests directory. There aretwo files located there.
Chapter 6 - Testing 47
1. ExampleTest.php - Contains one test testBasicExample(). The ExampleTest class is derivedfrom the TestCase parent provided in the other file.
2. TestCase.php - The base class from which to derive Laravel tests.
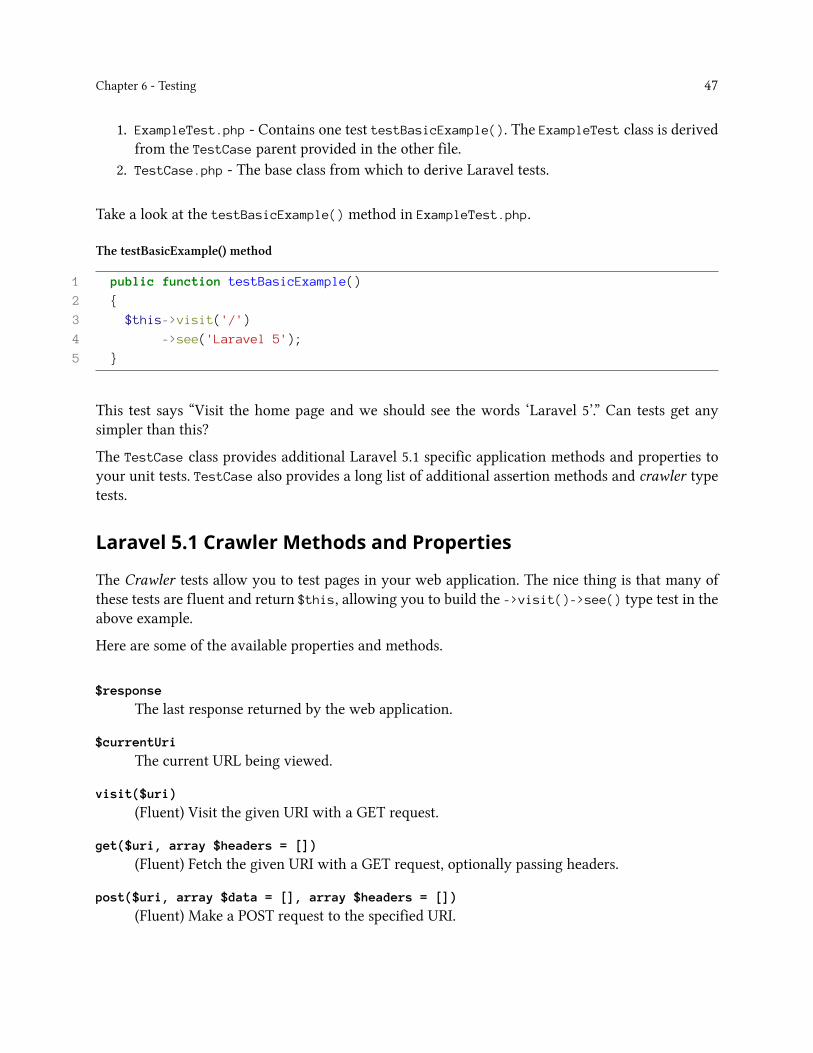
Take a look at the testBasicExample() method in ExampleTest.php.
The testBasicExample() method
1 public function testBasicExample()
2 {
3 $this->visit('/')
4 ->see('Laravel 5');
5 }
This test says “Visit the home page and we should see the words ‘Laravel 5’.” Can tests get anysimpler than this?
The TestCase class provides additional Laravel 5.1 specific application methods and properties toyour unit tests. TestCase also provides a long list of additional assertion methods and crawler typetests.
Laravel 5.1 Crawler Methods and Properties
The Crawler tests allow you to test pages in your web application. The nice thing is that many ofthese tests are fluent and return $this, allowing you to build the ->visit()->see() type test in theabove example.
Here are some of the available properties and methods.
$response
The last response returned by the web application.
$currentUri
The current URL being viewed.
visit($uri)
(Fluent) Visit the given URI with a GET request.
get($uri, array $headers = [])
(Fluent) Fetch the given URI with a GET request, optionally passing headers.
post($uri, array $data = [], array $headers = [])
(Fluent) Make a POST request to the specified URI.
Chapter 6 - Testing 48
put($uri, array $data = [], array $headers = [])
(Fluent) Make a PUT request to the specified URI.
patch($uri, array $data = [], array $headers = [])
(Fluent) Make a PATCH request to the specified URI.
delete($uri, array $data = [], array $headers = [])
(Fluent) Make a DELETE request to the specified URI.
followRedirects()
(Fluent) Follow any redirects from latest response.
see($text, $negate = false)
(Fluent) Assert the given text appears (or doesn’t appear) on the page.
seeJson(array $data = null)
(Fluent) Assert the response contains JSON. If $data passed, also asserts the JSON valueexactly matches.
seeStatusCode($status)
(Fluent) Assert the response has the expected status code.
seePageIs($uri)
(Fluent) Assert current page matches given URI.
seeOnPage($uri) and landOn($uri)
(Fluent) Aliases to seePageIs()
click($name)
(Fluent) Click on a link with the given body, name or id.
type($text, $element)
(Fluent) Fill an input field with the given text.
check($element)
(Fluent) Check a checkbox on the page.
select($option, $element)
(Fluent) Select an option from a dropdown.
attach($absolutePath, $element)
(Fluent) Attach a file to a form field.
press($buttonText)
(Fluent) Submit a form using the button with the given text.
withoutMiddleware()
(Fluent) Disable middleware for the test.
Chapter 6 - Testing 49
dump()
Dump the content of the latest response.
Laravel 5.1 PHPUnit Application methods and properties
Here’s a brief rundown of some of the additional application methods and properties Laravel 5.1provides to PHPUnit.
$app The instance of the Laravel 5.1 application.
$code
The latest code returned by artisan
refreshApplication()
Refreshes the application. Automatically called by the TestCase’s setup() method.
call($method, $uri, $parameters = [], $cookies = [], $files = [], $server = [], $content
= null)
Calls the given URI and returns the response.
callSecure($method, $uri, $parameters = [], $cookies = [], $files = [], $server = [],
$content = null)
Calls the given HTTPS URI and returns the response.
action($method, $action, $wildcards = [], $parameters = [], $cookies = [], $files =
[], $server = [], $content = null)
Calls a controller action and returns the response.
route($method, $name, $routeParameters = [], $parameters = [], $cookies = [], $files
= [], $server = [], $content = null)
Calls a named route and returns the response.
instance($abstract, $object)
Register an instance of an object in the container.
expectsEvents($events)
Specify a list of events that should be fired for the given operation.
withoutEvents()
Mock the event dispatcher so all events are silenced.
expectsJobs($jobs)
Specify a list of jobs that should be dispatched for the given operation.
withSession(array $data)
Set the session to the given array.
Chapter 6 - Testing 50
session(array $data)
Starts session and sets the session values from the array.
flushSession()
Flushes the contents of the current session.
startSession()
Starts the application’s session.
actingAs($user)
(Fluent) Sets the currently logged in user for the application.
be($user)
Sets the currently logged in user for the application.
seeInDatabase($table, array $data, $connection = null)
(Fluent) Asserts a given where condition exists in the database.
notSeeInDatabase($table, $array $data, $connection = null)
(Fluent) Asserts a given where condition does not exist in the database.
missingFromDatabase($table, array $data, $connection = null)
(Fluent) Alias to notSeeInDatabase().
seed()
Seeds the database.
artisan($command, $parameters = [])
Executes the artisan command and returns the code.
Any of these methods or properties can be accessed within your test classes. The providedExampleTest.php file contains a line using $this->call(...) inside the testBasicExample()
method.
Laravel 5.1 PHPUnit Assertions
In addition to the standard PHPUnit assertions (such as assertEquals(), assertContains(),assertInstanceOf(), …), Laravel 5.1 provides many additional assertions to help write tests dealingwith the web application.
assertPageLoaded($uri, $message = null)
Assert the latest page loaded; throw exception with $uri/$message if not.
assertResponseOk()
Assert that the client response has an OK status code.
Chapter 6 - Testing 51
assertReponseStatus($code)
Assert that the client response has a given code.
assertViewHas($key, $value = null)
Assert that the response view has a given piece of bound data.
assertViewHasAll($bindings)
Assert that the view has a given list of bound data.
assertViewMissing($key)
Assert that the response view is missing a piece of bound data.
assertRedirectedTo($uri, $with = [])
Assert whether the client was redirected to a given URI.
assertRedirectedToRoute($name, $parameters = [], $with = [])
Assert whether the client was redirected to a given route.
assertRedirectedToAction($name, $parameters = [], $with = [])
Assert whether the client was redirected to a given action.
assertSessionHas($key, $value = null)
Assert that the session has given key(s)/value(s).
assertSessionHasAll($bindings)
Assert that the session has a given list of values.
assertSessionHasErrors($bindings = [])
Assert that the session has errors bound.
assertHasOldInput()
Assert that the session has old input.
Using Gulp for TDD
Gulp¹⁸ is a build and automation system written in JavaScript. It allows common tasks such asminification of source files to be automated. Gulp can even watch your source code for changes andautomatically run tasks when this occurs.
Laravel 5.1 includes Laravel Elixir¹⁹ which allows Gulp tasks to be built in easy ways. Elixir adds anelegant syntax to gulp. Think of it this way … what Laravel is to PHP, Elixir is to Gulp.
One of the most common uses of Gulp is to automate unit tests. We’ll follow the TDD (Test DrivenDevelopment) process here and let Gulp automatically run our tests.
First, edit the gulpfile.js file in the l5beauty project’s root directory to match what’s below.
¹⁸http://gulpjs.com/¹⁹http://laravel.com/docs/5.1/elixir
Chapter 6 - Testing 52
Configuring Gulp to run PHPUnit Tests
var elixir = require('laravel-elixir');
elixir(function(mix) {
mix.phpUnit();
});
Here we call the elixir() function, passing a function. The mix object this function receives is astream on which multiple things can occur. You might want to build LESS files into CSS files here,then concatenate those CSS files together, and then provide versioning on the resulting concatenatedfiles. All of those things can be specified by using a fluent interface on the mix object.
But for now, we’re only running PHPUnit tests.
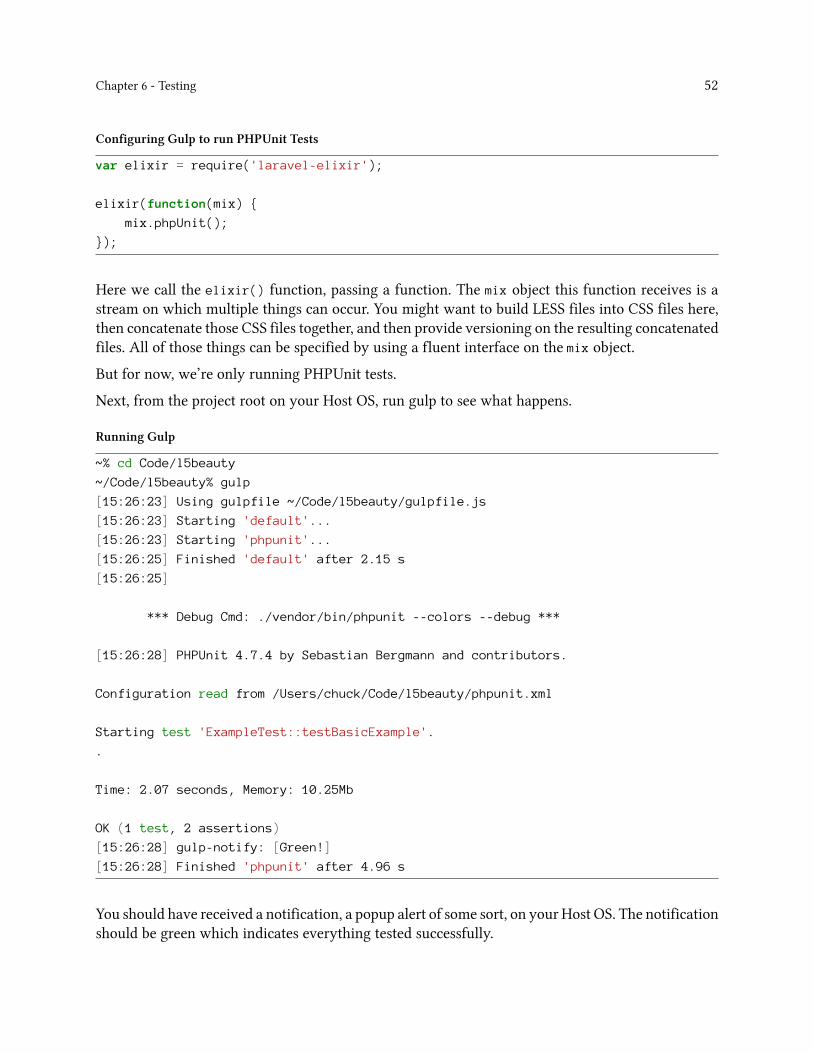
Next, from the project root on your Host OS, run gulp to see what happens.
Running Gulp
~% cd Code/l5beauty
~/Code/l5beauty% gulp
[15:26:23] Using gulpfile ~/Code/l5beauty/gulpfile.js
[15:26:23] Starting 'default'...
[15:26:23] Starting 'phpunit'...
[15:26:25] Finished 'default' after 2.15 s
[15:26:25]
*** Debug Cmd: ./vendor/bin/phpunit --colors --debug ***
[15:26:28] PHPUnit 4.7.4 by Sebastian Bergmann and contributors.
Configuration read from /Users/chuck/Code/l5beauty/phpunit.xml
Starting test 'ExampleTest::testBasicExample'.
.
Time: 2.07 seconds, Memory: 10.25Mb
OK (1 test, 2 assertions)
[15:26:28] gulp-notify: [Green!]
[15:26:28] Finished 'phpunit' after 4.96 s
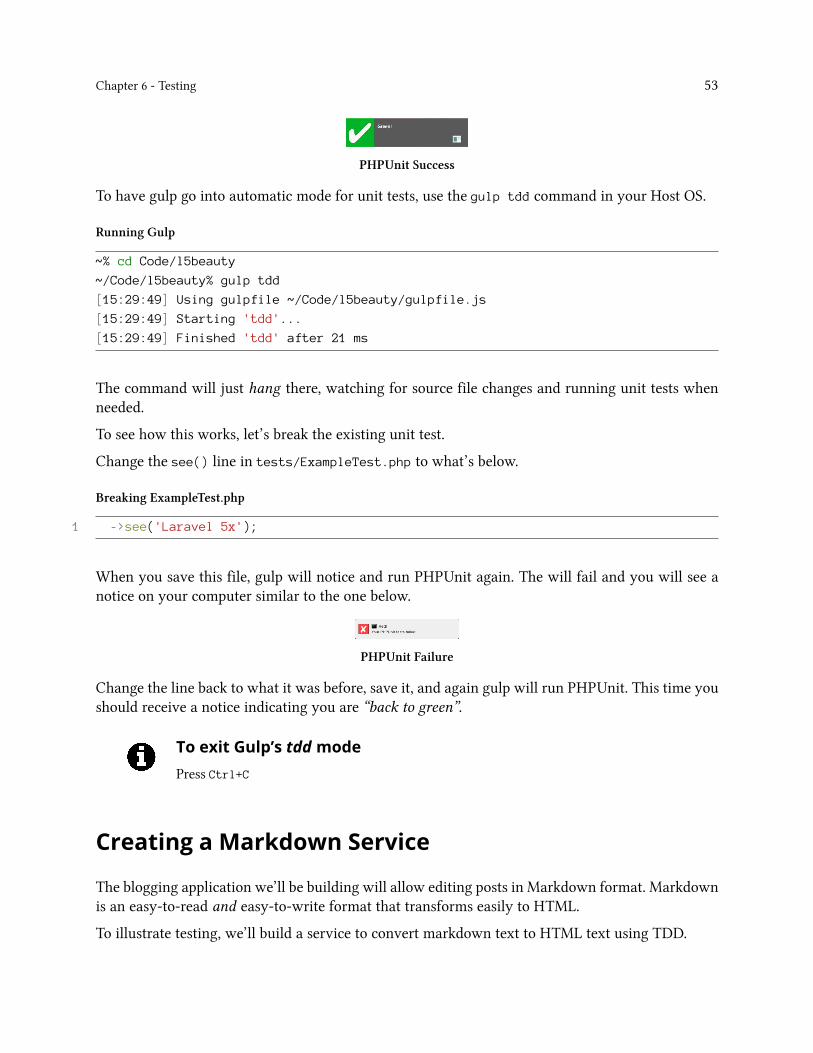
You should have received a notification, a popup alert of some sort, on your Host OS. The notificationshould be green which indicates everything tested successfully.
Chapter 6 - Testing 53
PHPUnit Success
To have gulp go into automatic mode for unit tests, use the gulp tdd command in your Host OS.
Running Gulp
~% cd Code/l5beauty
~/Code/l5beauty% gulp tdd
[15:29:49] Using gulpfile ~/Code/l5beauty/gulpfile.js
[15:29:49] Starting 'tdd'...
[15:29:49] Finished 'tdd' after 21 ms
The command will just hang there, watching for source file changes and running unit tests whenneeded.
To see how this works, let’s break the existing unit test.
Change the see() line in tests/ExampleTest.php to what’s below.
Breaking ExampleTest.php
1 ->see('Laravel 5x');
When you save this file, gulp will notice and run PHPUnit again. The will fail and you will see anotice on your computer similar to the one below.
PHPUnit Failure
Change the line back to what it was before, save it, and again gulp will run PHPUnit. This time youshould receive a notice indicating you are “back to green”.
To exit Gulp’s tddmodePress Ctrl+C
Creating a Markdown Service
The blogging application we’ll be building will allow editing posts in Markdown format. Markdownis an easy-to-read and easy-to-write format that transforms easily to HTML.
To illustrate testing, we’ll build a service to convert markdown text to HTML text using TDD.
Chapter 6 - Testing 54
Pulling in Markdown Packages
There are many PHP packages out there for converting Markdown to HTML. If you go tohttp://packagist.org and search for markdown, there are twenty pages of packages.
We’ll use the package created by Michel Fortin because there’s another package called SmartyPantsby the same author that converts quotation marks to the nice looking curly quotes.
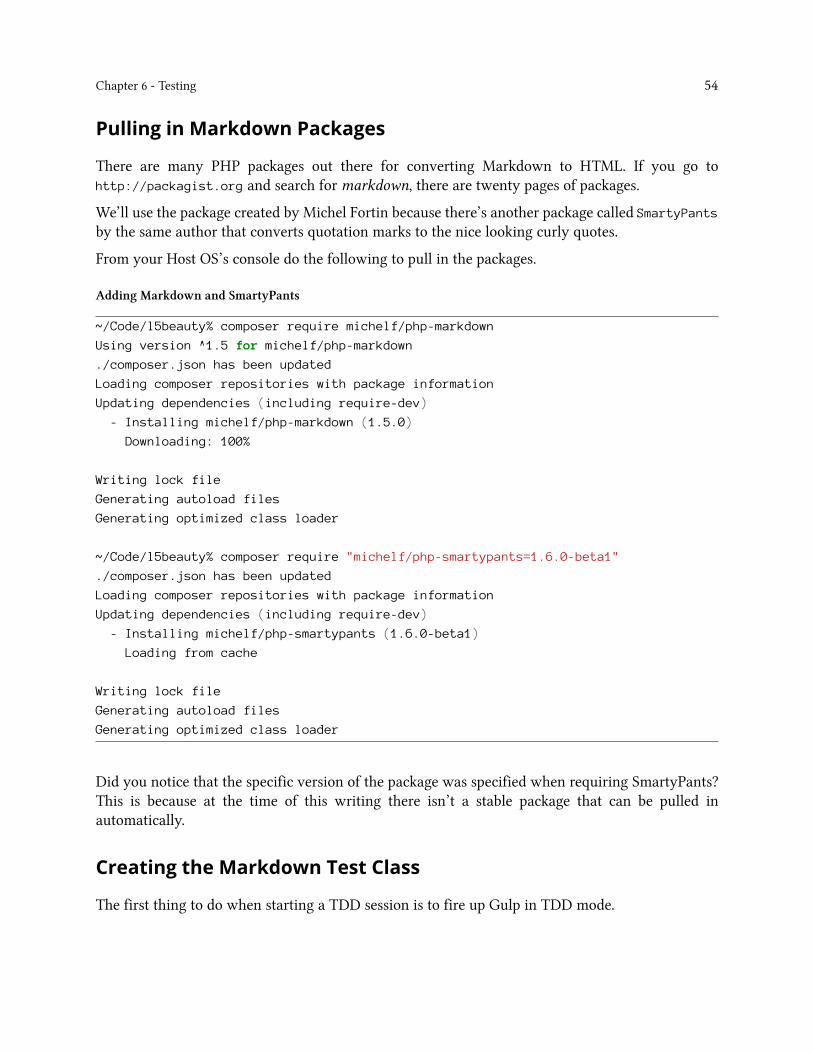
From your Host OS’s console do the following to pull in the packages.
Adding Markdown and SmartyPants
~/Code/l5beauty% composer require michelf/php-markdown
Using version ^1.5 for michelf/php-markdown
./composer.json has been updated
Loading composer repositories with package information
Updating dependencies (including require-dev)
- Installing michelf/php-markdown (1.5.0)
Downloading: 100%
Writing lock file
Generating autoload files
Generating optimized class loader
~/Code/l5beauty% composer require "michelf/php-smartypants=1.6.0-beta1"
./composer.json has been updated
Loading composer repositories with package information
Updating dependencies (including require-dev)
- Installing michelf/php-smartypants (1.6.0-beta1)
Loading from cache
Writing lock file
Generating autoload files
Generating optimized class loader
Did you notice that the specific version of the package was specified when requiring SmartyPants?This is because at the time of this writing there isn’t a stable package that can be pulled inautomatically.
Creating the Markdown Test Class
The first thing to do when starting a TDD session is to fire up Gulp in TDD mode.
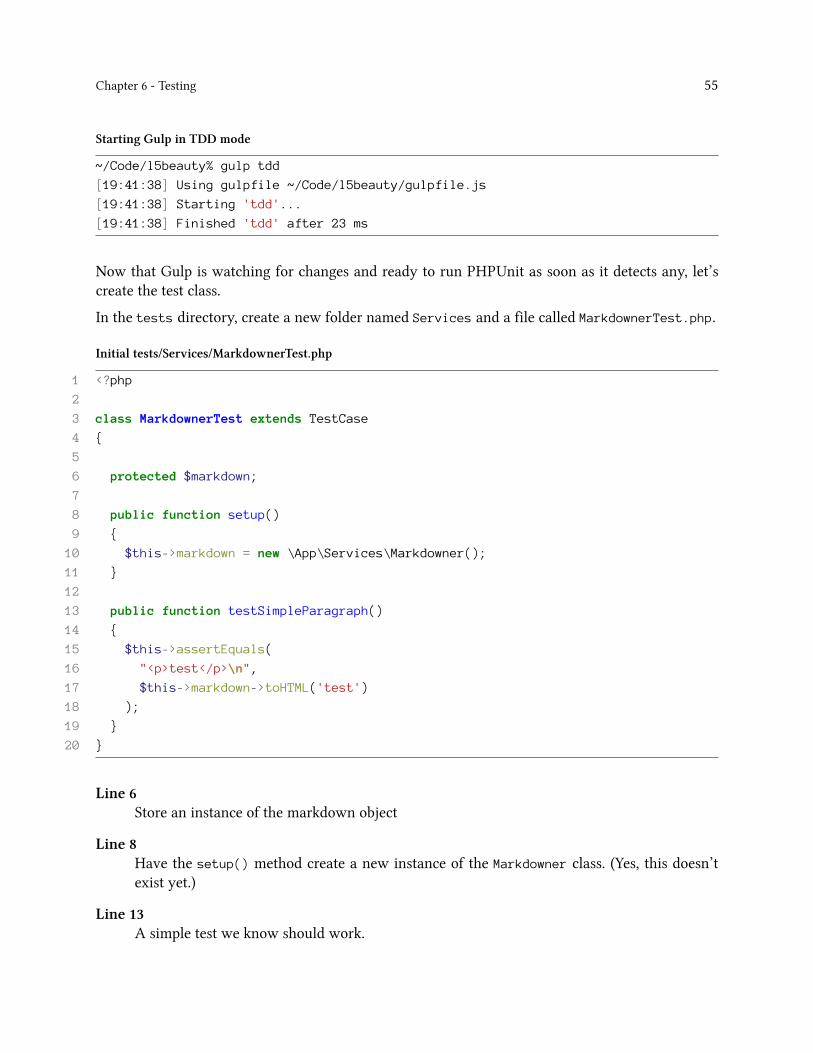
Chapter 6 - Testing 55
Starting Gulp in TDD mode
~/Code/l5beauty% gulp tdd
[19:41:38] Using gulpfile ~/Code/l5beauty/gulpfile.js
[19:41:38] Starting 'tdd'...
[19:41:38] Finished 'tdd' after 23 ms
Now that Gulp is watching for changes and ready to run PHPUnit as soon as it detects any, let’screate the test class.
In the tests directory, create a new folder named Services and a file called MarkdownerTest.php.
Initial tests/Services/MarkdownerTest.php
1 <?php
2
3 class MarkdownerTest extends TestCase
4 {
5
6 protected $markdown;
7
8 public function setup()
9 {
10 $this->markdown = new \App\Services\Markdowner();
11 }
12
13 public function testSimpleParagraph()
14 {
15 $this->assertEquals(
16 "<p>test</p>\n",
17 $this->markdown->toHTML('test')
18 );
19 }
20 }
Line 6Store an instance of the markdown object
Line 8Have the setup() method create a new instance of the Markdowner class. (Yes, this doesn’texist yet.)
Line 13A simple test we know should work.
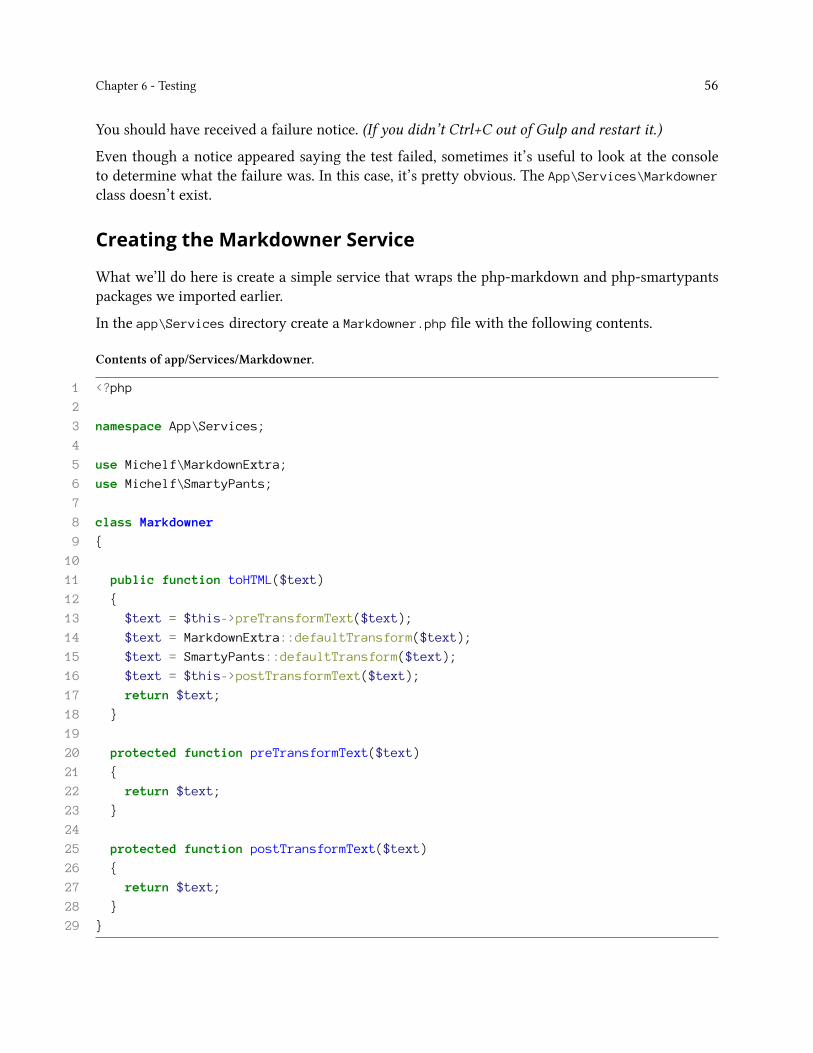
Chapter 6 - Testing 56
You should have received a failure notice. (If you didn’t Ctrl+C out of Gulp and restart it.)
Even though a notice appeared saying the test failed, sometimes it’s useful to look at the consoleto determine what the failure was. In this case, it’s pretty obvious. The App\Services\Markdownerclass doesn’t exist.
Creating the Markdowner Service
What we’ll do here is create a simple service that wraps the php-markdown and php-smartypantspackages we imported earlier.
In the app\Services directory create a Markdowner.php file with the following contents.
Contents of app/Services/Markdowner.
1 <?php
2
3 namespace App\Services;
4
5 use Michelf\MarkdownExtra;
6 use Michelf\SmartyPants;
7
8 class Markdowner
9 {
10
11 public function toHTML($text)
12 {
13 $text = $this->preTransformText($text);
14 $text = MarkdownExtra::defaultTransform($text);
15 $text = SmartyPants::defaultTransform($text);
16 $text = $this->postTransformText($text);
17 return $text;
18 }
19
20 protected function preTransformText($text)
21 {
22 return $text;
23 }
24
25 protected function postTransformText($text)
26 {
27 return $text;
28 }
29 }
Chapter 6 - Testing 57
Line 3Don’t forget the namespace.
Lines 5 and 6The classes we’ll be using.
Line 11The toHTML() method which runs the text through the transformations.
Line 14Notice we’re using the Markdown Extra version of the library.
Line 20In case we want to later do our own transformations before anything else.
Line 25Like preTransformText(), but this time if we later want to add our own final transformations.
When you save this file, Gulp should notice and you will receive a “GREEN” alert telling youeverything worked as expected.
If you don’t receive the green alert, go back and check for typos in both the App\Services\Markdownerand MarkdownerTest classes.
A Few More Tests
Admittedly, this isn’t a great example of TDD because it’s simple a test and a complete class createdto fix the test. In actual practice TDD would have many more iterations, resulting in a flow like theone below:
• Create MarkdownerTest w/ testSimpleParagraph()• Tests Fail• Create Markdowner class, hard-coding toHTML() to pass the test• Tests Succeed• Update Markdowner class to use MarkdownExtra• Tests Succeed• Add a testQuotes() to MarkdownerTest class• Tests Fail• Update Markdowner class to use SmartyPants• Tests Succeed
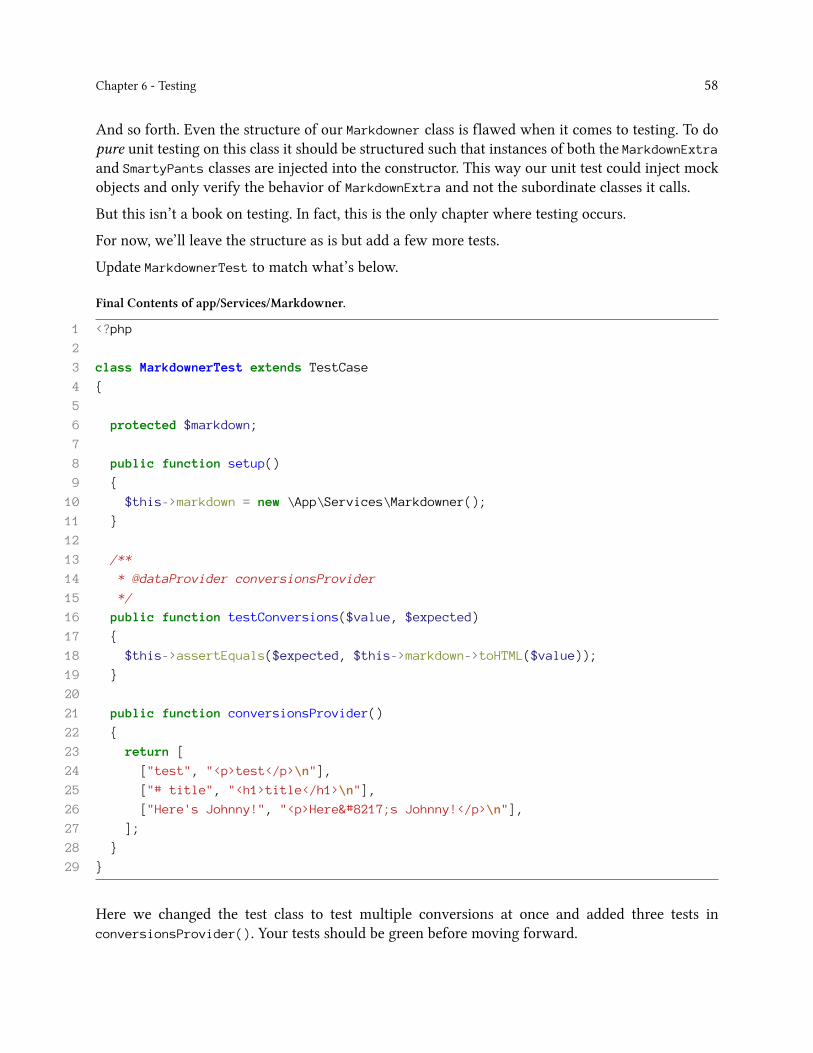
Chapter 6 - Testing 58
And so forth. Even the structure of our Markdowner class is flawed when it comes to testing. To dopure unit testing on this class it should be structured such that instances of both the MarkdownExtraand SmartyPants classes are injected into the constructor. This way our unit test could inject mockobjects and only verify the behavior of MarkdownExtra and not the subordinate classes it calls.
But this isn’t a book on testing. In fact, this is the only chapter where testing occurs.
For now, we’ll leave the structure as is but add a few more tests.
Update MarkdownerTest to match what’s below.
Final Contents of app/Services/Markdowner.
1 <?php
2
3 class MarkdownerTest extends TestCase
4 {
5
6 protected $markdown;
7
8 public function setup()
9 {
10 $this->markdown = new \App\Services\Markdowner();
11 }
12
13 /**
14 * @dataProvider conversionsProvider
15 */
16 public function testConversions($value, $expected)
17 {
18 $this->assertEquals($expected, $this->markdown->toHTML($value));
19 }
20
21 public function conversionsProvider()
22 {
23 return [
24 ["test", "<p>test</p>\n"],
25 ["# title", "<h1>title</h1>\n"],
26 ["Here's Johnny!", "<p>Here’s Johnny!</p>\n"],
27 ];
28 }
29 }
Here we changed the test class to test multiple conversions at once and added three tests inconversionsProvider(). Your tests should be green before moving forward.
Chapter 6 - Testing 59
Once the tests are green hit Ctrl+C in your Host OS console to stop Gulp.
Other Ways to Test
It’s not the intent here to provide a definitive list of all the ways to test with Laravel 5.1 becausethere’s really no single way to do testing in PHP. Therefore, there’s no single way to test in Laravel5.
But, we’ll explore some alternatives.
phpspec
Besides PHPUnit, Laravel 5.1 also provides phpspec²⁰ out of the box. This is another popular PHPtest suit with more of a focus on Behavior Driven Development.
Here’s a few notes on phpspec.
• The binary is in vendor/bin, thus you can call phpspec from your project’s root directory.• The configuration file is in the project root. It’s named phpspec.yml.• To run phpspec from Gulp, Laravel Elixir provides the phpSpec() function you can call on themix object.
• If you change your application’s namespace from App to something else, be sure to updatephpspec.yml accordingly.
Unit Testing
Although PHPUnit is the standard when it comes to PHP unit testing, there are other packages youcan use.
• Enhance PHP²¹ - A unit testing framework with support for mocks and stubs.• SimpleTest²² - Another unit testing framework with mock objects.
Integration and Acceptance Testing
These tests actually use your application instead of just verifying that units of code within yourapplication work as expected. When using the fluent test methods Laravel 5.1 provides you cando some integration tests using PHPUnit. ExampleTest.php shows a simple example. But there areother testing frameworks that focus on integration and acceptance testing.
²⁰http://phpspec.net²¹https://github.com/Enhance-PHP/Enhance-PHP²²http://simpletest.org
Chapter 6 - Testing 60
• Codeception²³ - Problem the most popular framework for acceptance testing.• Selenium²⁴ - Browser automation.• Mink²⁵ - Brower automation.
Behavior Driven Development
BDD comes in two flavors: SpecBDD and StoryBDD.
SpecDD focuses on the technical aspects of your code. Laravel 5.1 includes phpspec which is thestandard for SpecDD.
StoryBDD emphasizes business or feature testing. Behat is the most popular StoryBDD framework.Although, Codeception can also be used for StoryBDD.
Recap
The first thing we did in this chapter was creating a project named l5beauty. Then we exploredunit testing using PHPUnit within this project. Finally, we created a Markdowner service class forthe dual purposes of having something to test and to use later to convert markdown text to HTML.
This was a pretty long chapter because testing is a large topic and a single chapter cannot give itjustice. But, as I’ve mentioned, testing is not the focus of this book. There will be no more testing insubsequent chapters.
How about something quicker? In the next chapter we’ll create a blog in 10 minutes.
²³http://codeception.com²⁴http://seleniumhq.org²⁵http://mink.behat.org
End of PreviewAlthough this was a very large sample, there’s so much more to this book.
Chapter 7 - The 10 Minute Blog
In this chapter we’ll turn the l5beauty project into a blog, complete with test data. Harnessing thepower of Laravel 5 a blog can be created in less than 10 minutes. This time is from start to finish,without spending time reviewing the detailed discussions below. There’s not many bells or whistles,and no administration of the blog, but what do you expect for less than 10 minutes of developmenttime.
Chapter 8 - Starting the Admin Area
In this chapter we’ll continue building on the l5beauty project and start developing the administra-tion area. Laravel 5 provides some basic boilerplate for user authentication and registration. We’lluse this to create the skeleton of our administration area.
Chapter 9 - Using Bower
In this chapter we’ll work on some of the supporting software the administration area will be builton. Namely, how the assets are pulled in and which assets are used. The build system will use bowerand gulp to automatically download and combine jQuery, Bootstrap, Font Awesome, and DataTablesfrom the Internet.
Chapter 10 - Blog Tags
The basic blog built in the 10 Minute Blog chapter wasn’t very fancy. Most blogging platforms allowblog posts to be categorized or “tagged” in different ways. In this chapter we’ll develop a taggingsystem for the l5beauty project.
Chapter 11 - Upload Manager
In this chapter we’ll create an UploadManager for the blog administration. First, the local file systemwill be used to store any uploaded files. Then, we’ll change the configuration to allow files to bestored on Amazon’s S3 cloud storage.

End of Preview 62
Chapter 12 - Posts Administration
In this chapter we’ll finish the post functionality in the blog’s administration area. This includesmodifying the structure of the posts table with a new migration, pulling in some additional assets,and adding the basic Create, Update, and Delete methods.
Chapter 13 - Cleaning Up the Blog
In this chapter we’ll get the front end of our blog cleaned up. This includes both the index pageshowing the list of posts and the pages showing individual posts.
Chapter 14 - Sending Mail and Using Queues
In this chapter we’ll add a Contact Us form to the blog. To do this we’ll explore Laravel’s mailingfunctions and set up a queue for asynchronous processing.
Chapter 15 - Adding Comments, RSS, and a Site Map
In this chapter we’ll add comments and social links to the blog. Then we’ll create a RSS feed for theLaravel 5.1 Beauty blog. Finally, we’ll add a Site Map which finishes the project.
Chapter 16 - General Recap and Looking Forward
The L5Beauty project is complete, but there’s an additional chapter exploring various features ofLaravel 5.1.