Ladies flat cap sewing instructions
58
Please read the entire document prior to sewing, as there are two different methods of constructing the hat band, and it is best to choose the method suited to your sewing ability. e child sized version has been achieved by addition of elastic in the back of the band of the cap.
description
Ladies flat cap sewing instructions
Transcript of Ladies flat cap sewing instructions
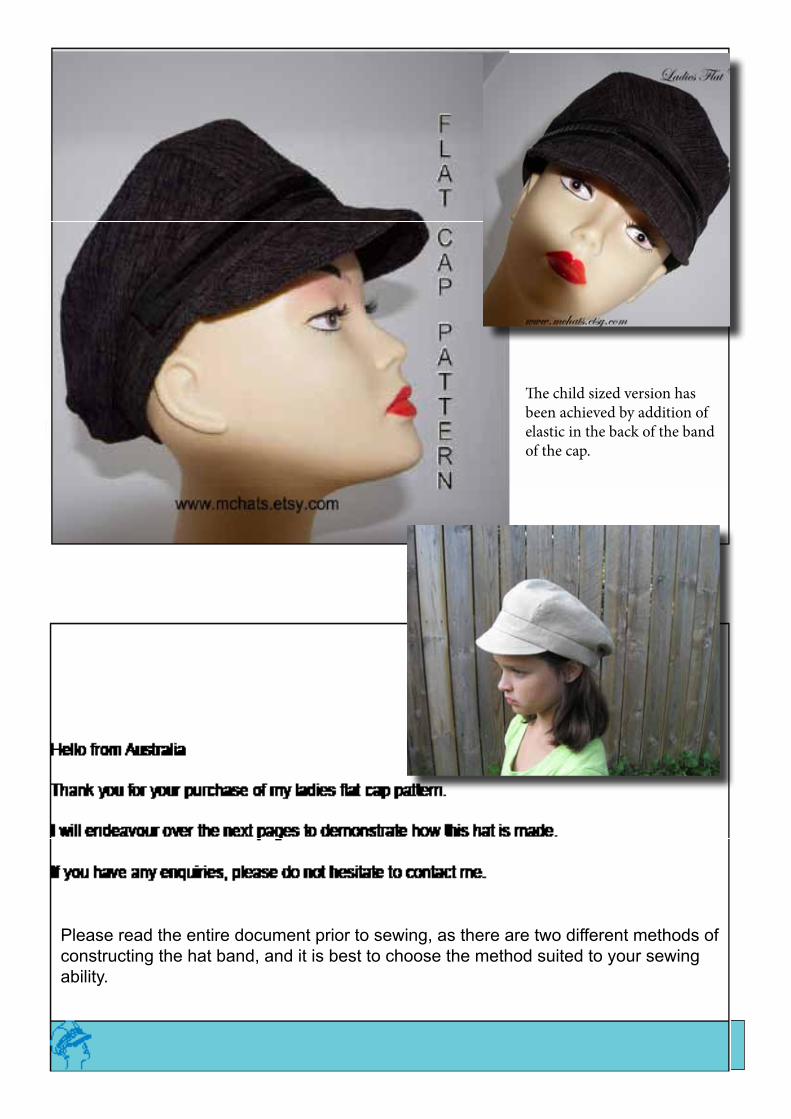
Please read the entire document prior to sewing, as there are two different methods of constructing the hat band, and it is best to choose the method suited to your sewing ability.
The child sized version has been achieved by addition of elastic in the back of the band of the cap.
Ladies flat cap sewing instructions
Join
pattern to
PART
1
along
solid
line
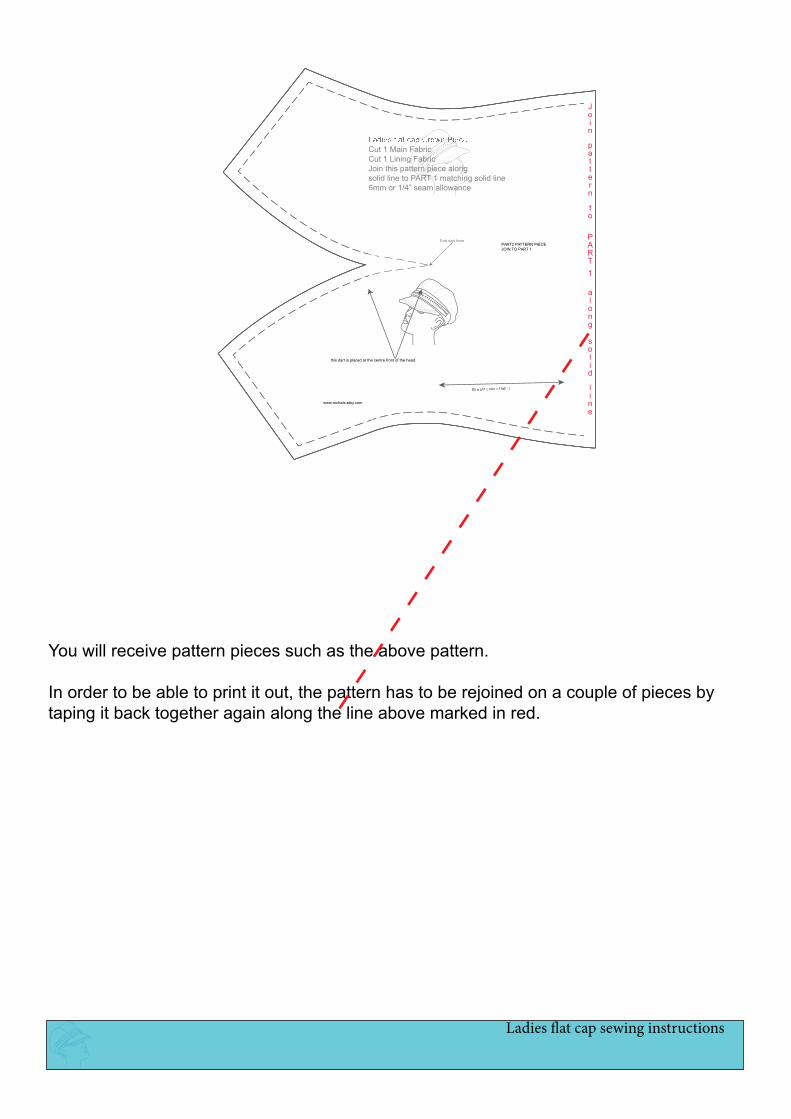
Cut 1 Main Fabric Cut 1 Lining FabricJoin this pattern piece alongsolid line to PART 1 matching solid line6mm or 1/4” seam allowance
End dart here
Straight grain of fabric
this dart is placed at the centre front of the head
PART2 PATTERN PIECEJOIN TO PART 1
www.mchats.etsy.com
You will receive pattern pieces such as the above pattern.
In order to be able to print it out, the pattern has to be rejoined on a couple of pieces by taping it back together again along the line above marked in red.

The back of the cap has a flat back.
The front of the cap has a centre dart.
The side on view has side panels.
It is finished off with a brim set into a band.

Ladies flat cap sewing instructions
I decided to use a winter weight wool skirt to make my hat, bought from our local opportunity store. It is hard to buy fabric like this in Australia, so it’s good to recycle + reuse fabric. The wool was fairly light, so I decided to interface it to offer stability. I also decided to reuse the lin-ing fabric to line the hat as well. If you’re going to do the same try to find the straight grain of the fabric
I use narrow seams but you can make your seams larger if you want to by marking out the pattern prior to cut-ting out the paper + then cut out all pat-tern pieces after you have decided if you want larger seam allowances or those on the pattern.The reason I have used a very small seam allowance, as I don’t like grading or trimming back bulky seams later on, as like to save myself time, but I must say it doesn’t give you much mar-gin for error.

Cut out all your fabric pieces. If you’re reusing a gar-ment for this hat, please make sure to find the straight grain of the fabric, so that your hat lies flat when it is made up and doesn’t go out of shape.
Ladies flat cap sewing instructions
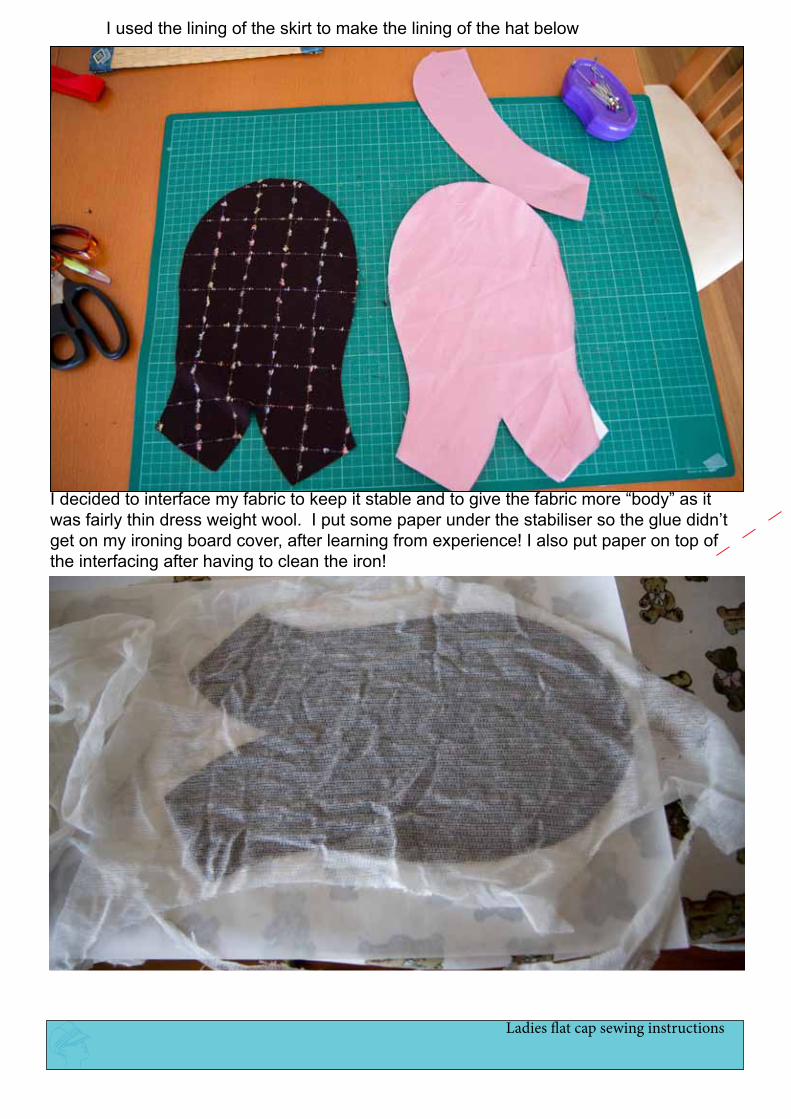
I used the lining of the skirt to make the lining of the hat below
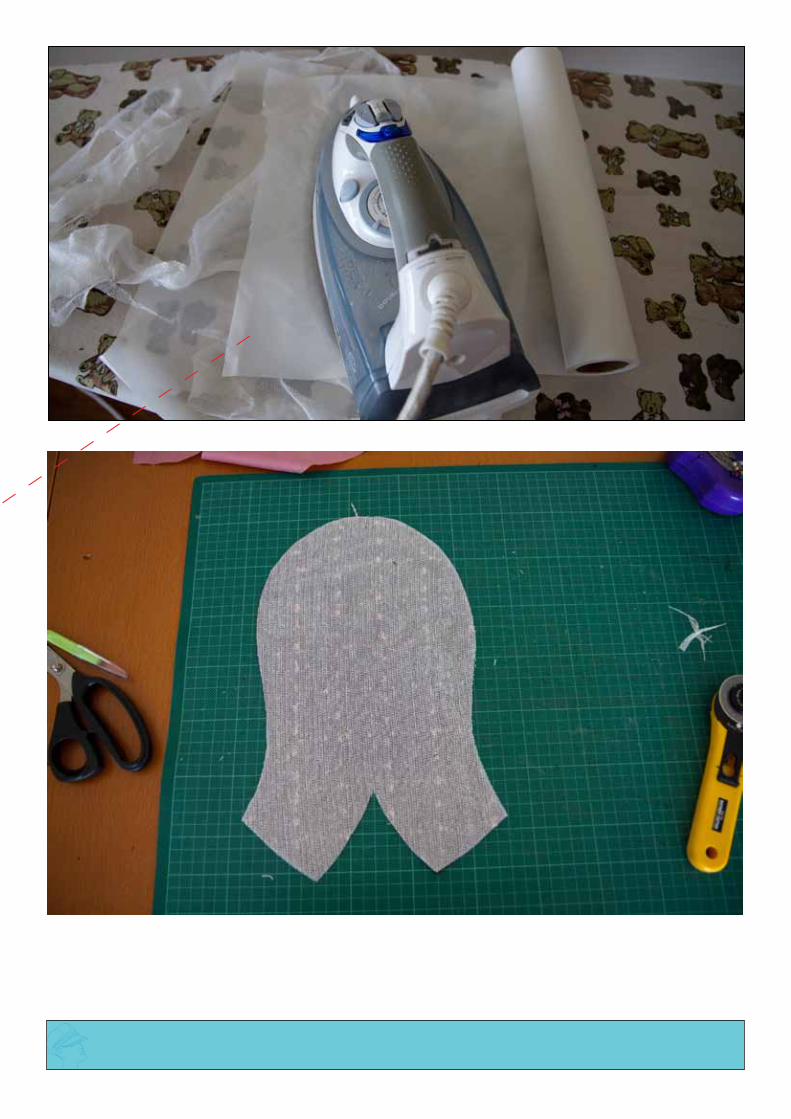
I decided to interface my fabric to keep it stable and to give the fabric more “body” as it was fairly thin dress weight wool. I put some paper under the stabiliser so the glue didn’t get on my ironing board cover, after learning from experience! I also put paper on top of the interfacing after having to clean the iron!

Ladies flat cap sewing instructions
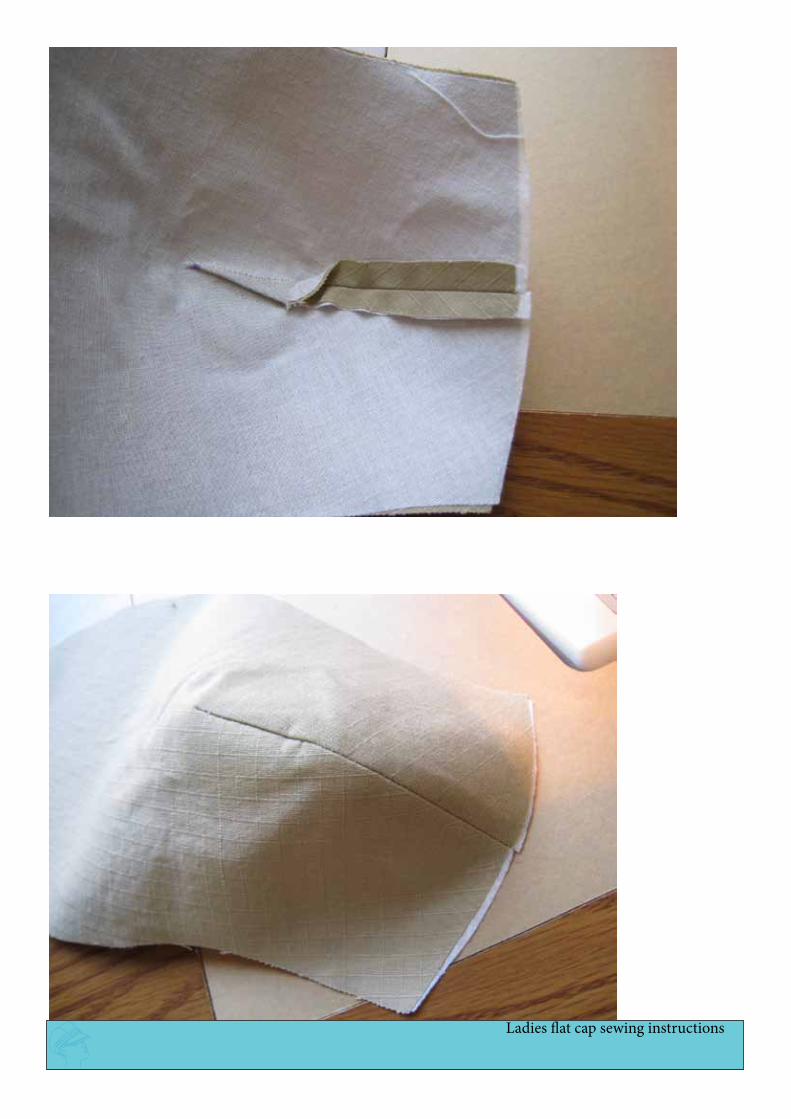
After cutting out all of your pattern pieces for the hat, I then set about marking where the dart ends, so that I know where to finish sewing the dart. You can achieve this by marking the end of the dart with a tailor tack, or if you own an awl, I make a small hole by piercing the paper with my awl, just prior to sewing which makes a small hole. I then mark the small hole with a pin on the wrong side of the fab-ric so I know where to stop sewing

I had decided to interface the back of this fabric to give it more “body” and to help it from going out of shape. This step is an optional step, due to the stability of the fabric
I then sew up the dart, which will be situated at the front of the head making sure to sew it up to the marked point so that it flows up over the top of the curve of the head when wearing.

Ladies flat cap sewing instructions
Side walls pinned together, then sewn together in the next photo following the seam allowance given on the pattern
Sew the back seam of the two side wall pieces together following the seam allowance given
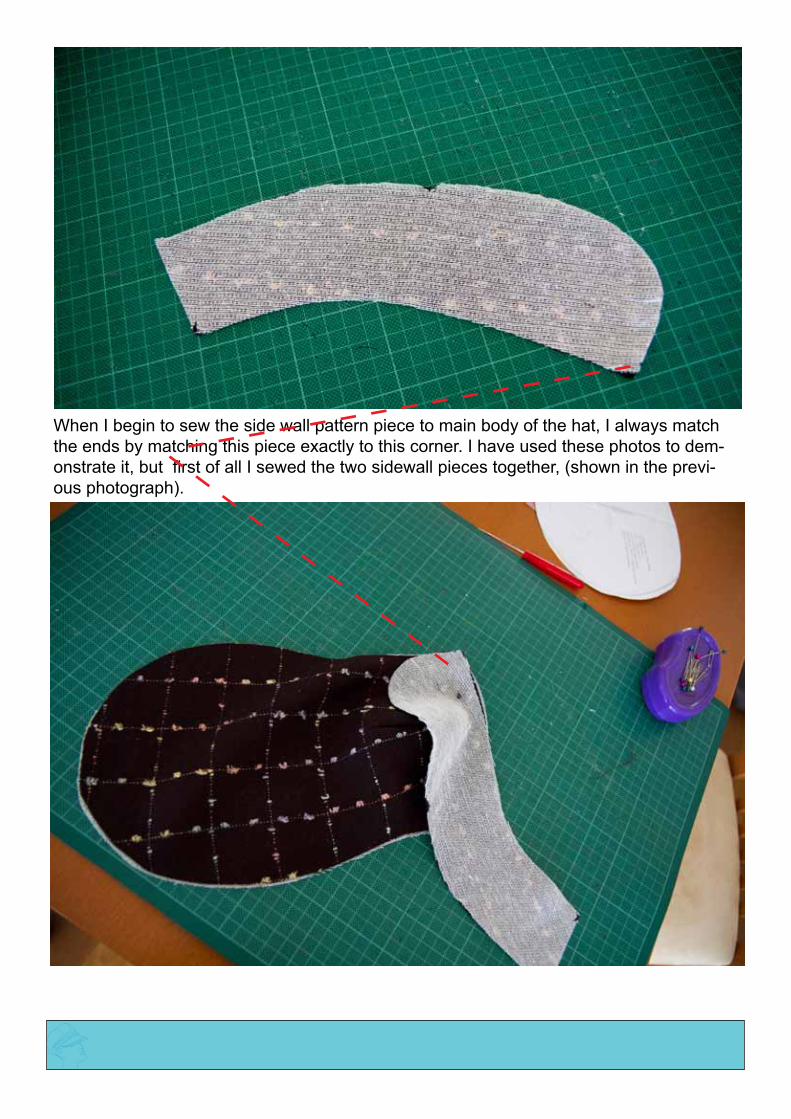
When I begin to sew the side wall pattern piece to main body of the hat, I always match the ends by matching this piece exactly to this corner. I have used these photos to dem-onstrate it, but first of all I sewed the two sidewall pieces together, (shown in the previ-ous photograph).
Ladies flat cap sewing instructions
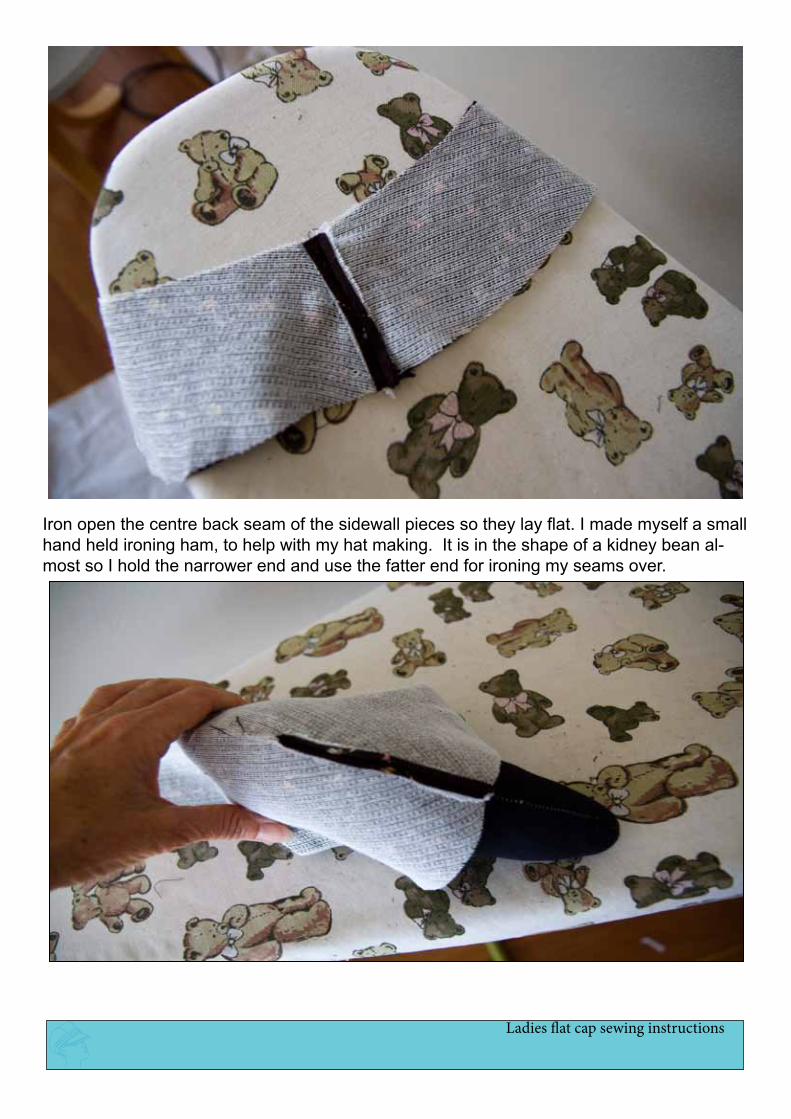
Iron open the centre back seam of the sidewall pieces so they lay flat. I made myself a small hand held ironing ham, to help with my hat making. It is in the shape of a kidney bean al-most so I hold the narrower end and use the fatter end for ironing my seams over.
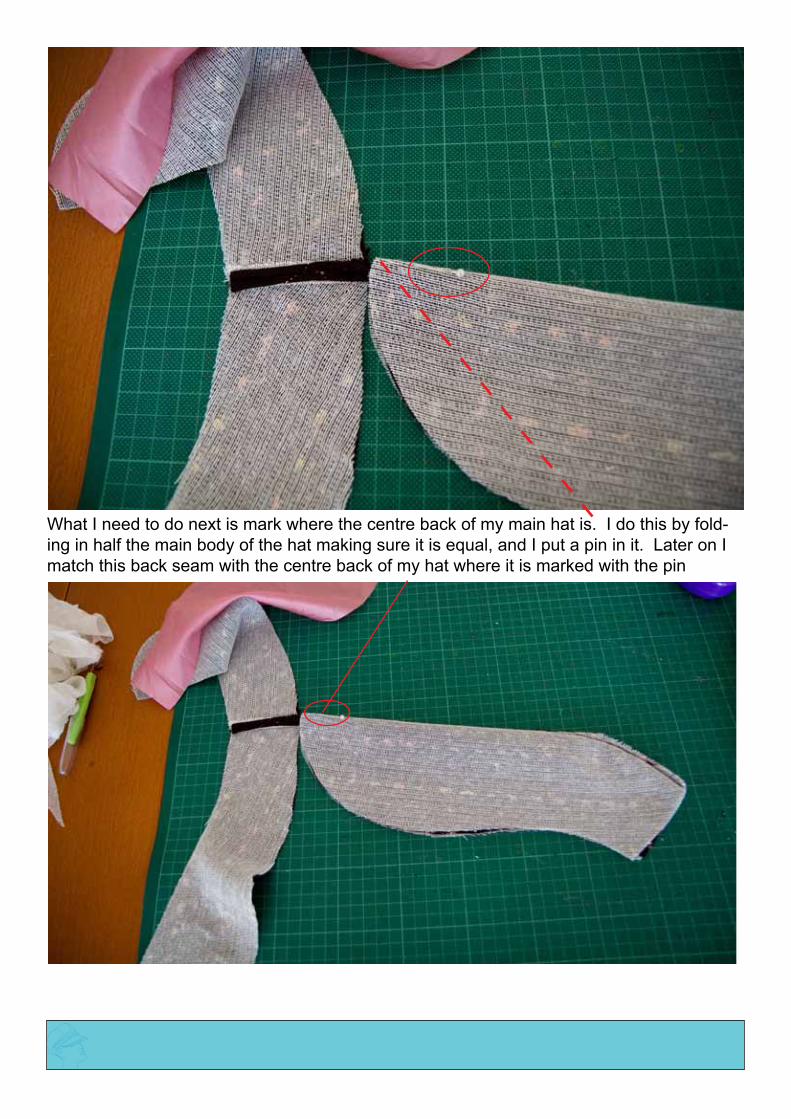
What I need to do next is mark where the centre back of my main hat is. I do this by fold-ing in half the main body of the hat making sure it is equal, and I put a pin in it. Later on I match this back seam with the centre back of my hat where it is marked with the pin
Ladies flat cap sewing instructions
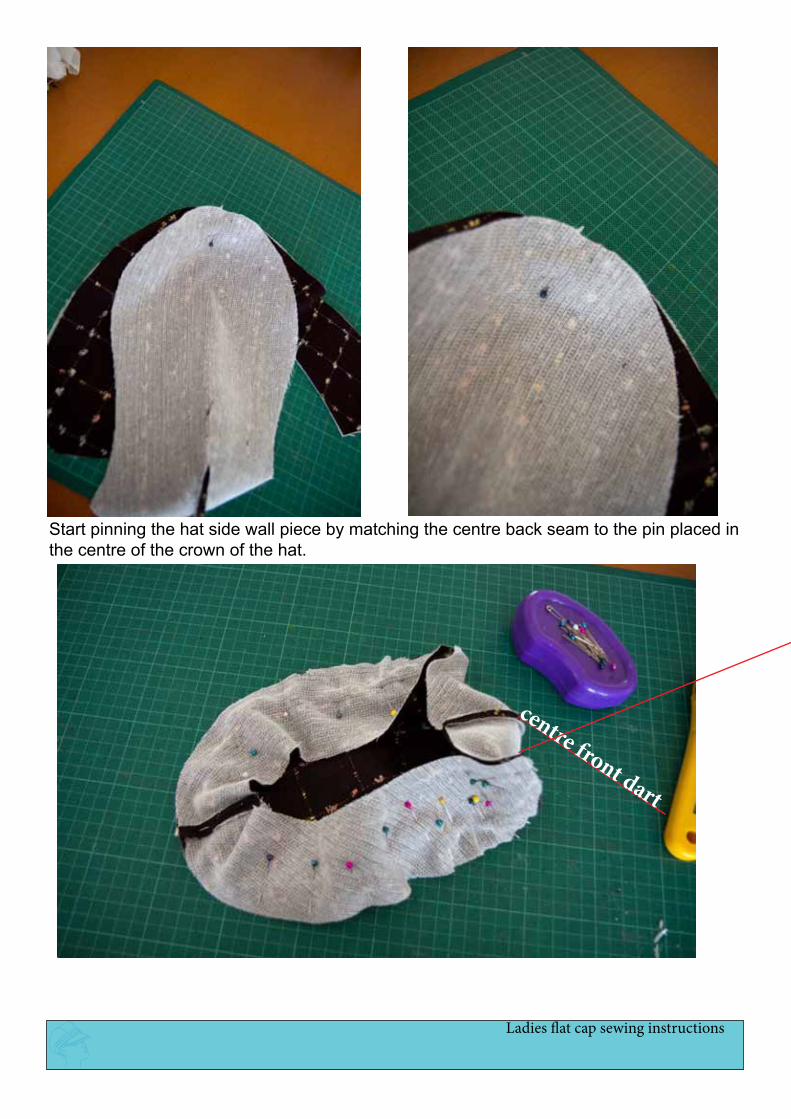
Start pinning the hat side wall piece by matching the centre back seam to the pin placed in the centre of the crown of the hat.
centre front dart
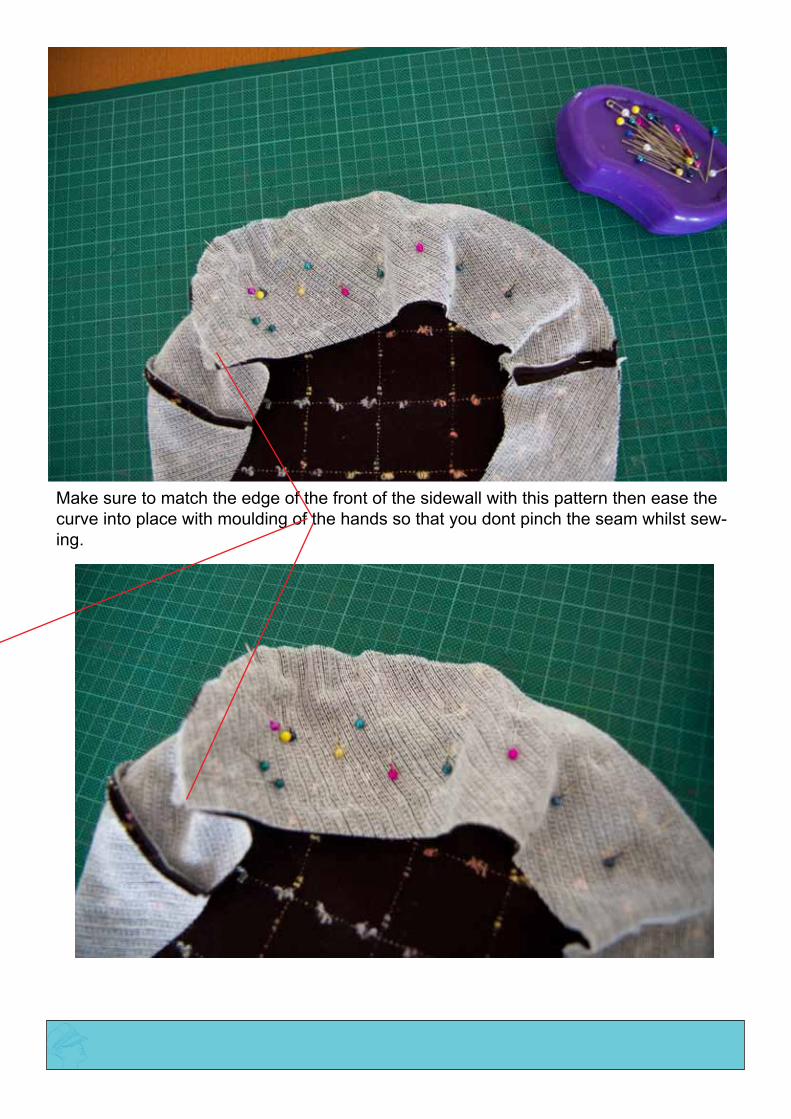
Make sure to match the edge of the front of the sidewall with this pattern then ease the curve into place with moulding of the hands so that you dont pinch the seam whilst sew-ing.

Ladies flat cap sewing instructions
Stitch the sidewalls to the main part of the hat, a machine foot width away from the edge (unless you have added on ex-tra onto the pattern pieces).
The hat is then turned to the right side out. See below photo.

I then decided I wanted to topstich the outside of the hat to give it more definition. I thought I might even bind the inside seams to finish it off well, and give more body on the outside, but this step adds extra work + is not really necessary. I just wanted to push my-self a bit more. I made my own bias strips, but you could use commercially bought ones as well.
this proved to be a lot of extra work, lining the seams, so I would skip this step unless youlike a challenge. It give the seam greater defi-nition, but is very fiddly to do.

Ladies flat cap sewing instructions
Here comes my trusted ironing ham again. I use this handy little tool over + over. If you decide to make one I would recommend making it out of very tightly woven wool. The kind they used to make school uniforms out of, wool serge. Iron your seams nice + flat on your hat now, for a nicely finished product.
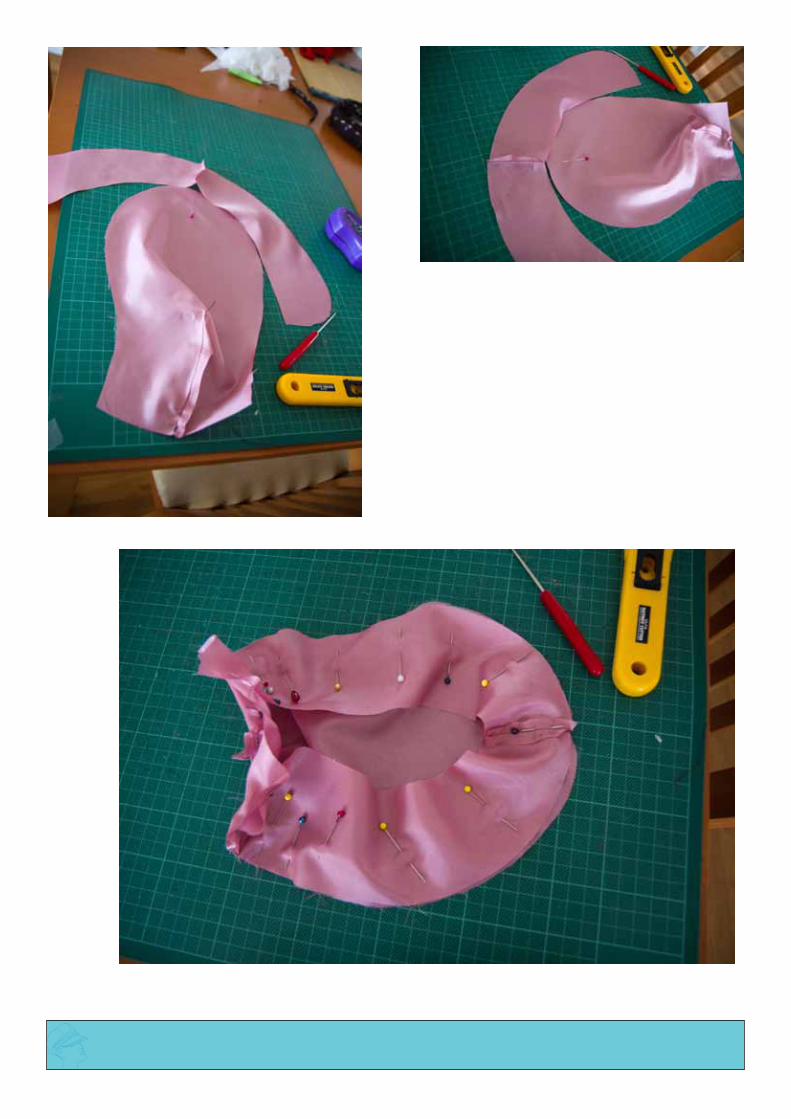
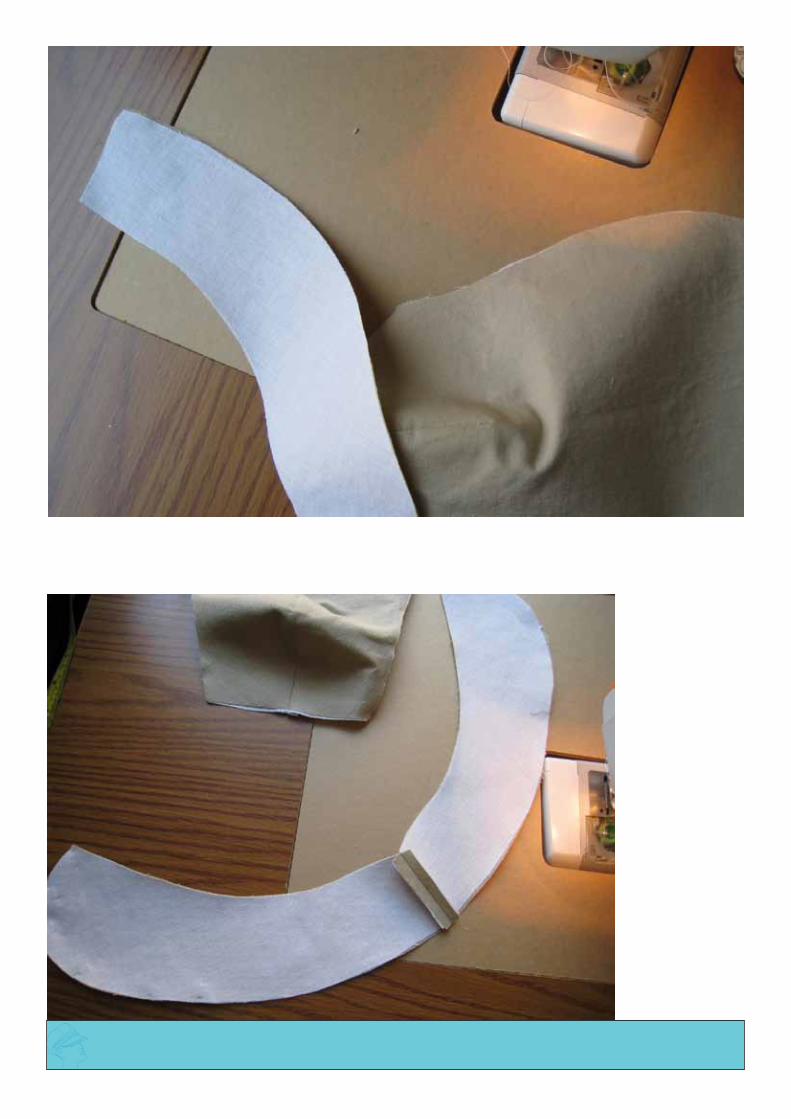
I then cut our my lining pieces, and followed the same steps as the main hat. I sewed up the cen-tre seam and pressed it open. Then put an awl mark whre to stop sew-ing my back dart. Then sewed up the back dart. I then matched the back of the head and pinned the side pieces to the brim and sewed the two pieces together.
Ladies flat cap sewing instructions
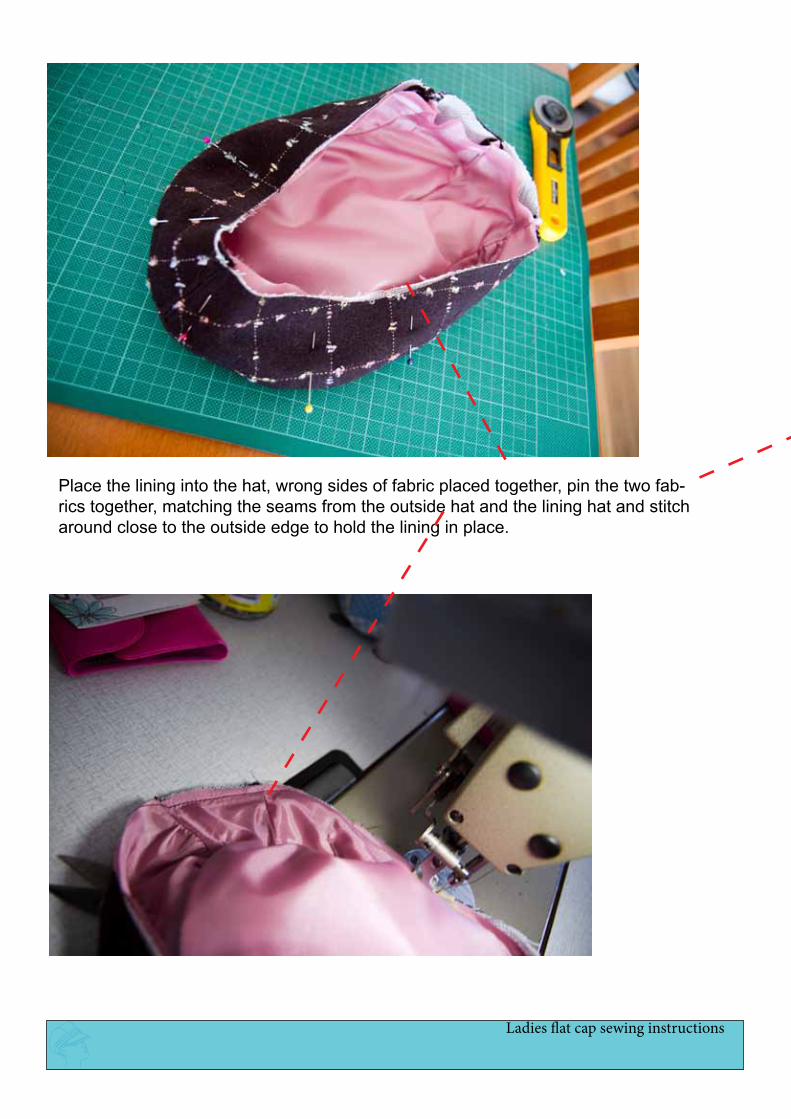
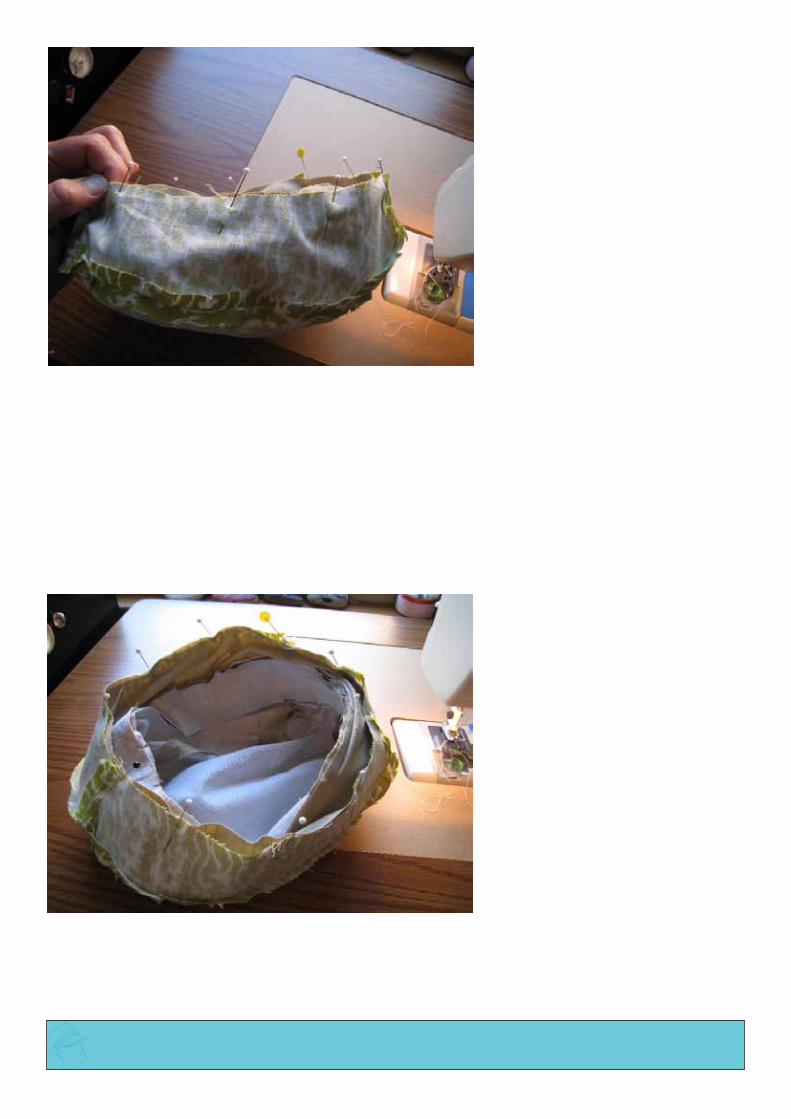
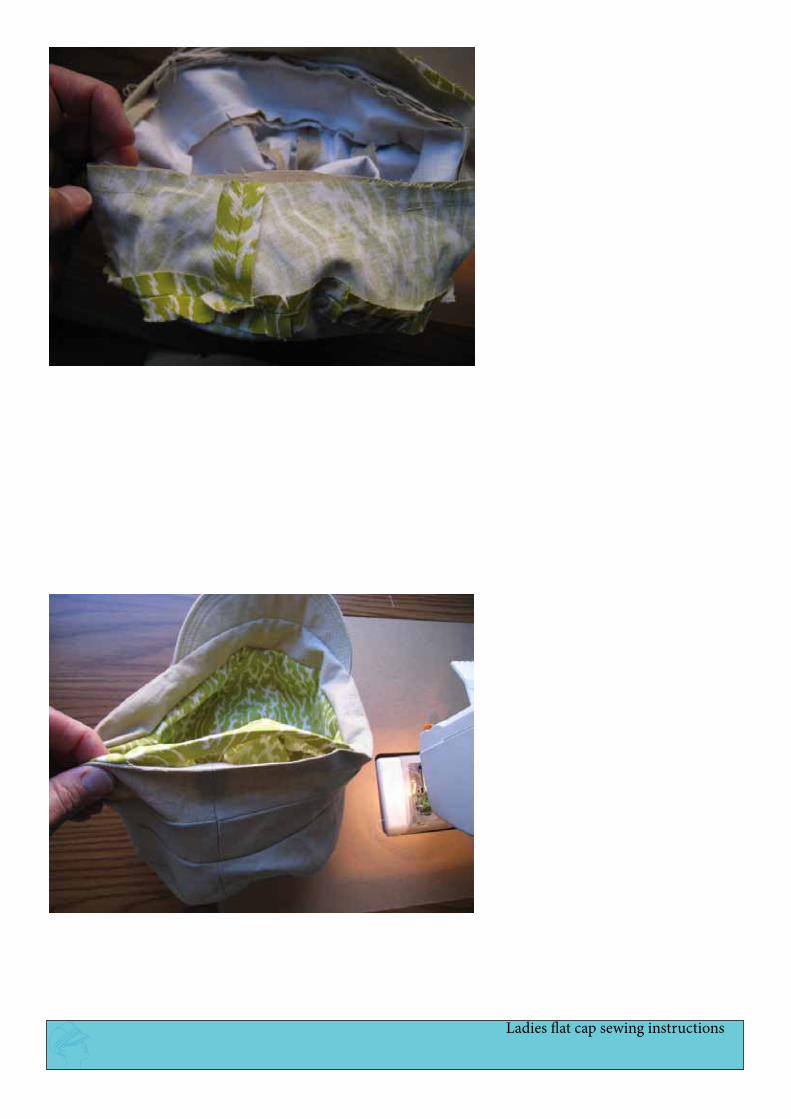
Place the lining into the hat, wrong sides of fabric placed together, pin the two fab-rics together, matching the seams from the outside hat and the lining hat and stitch around close to the outside edge to hold the lining in place.
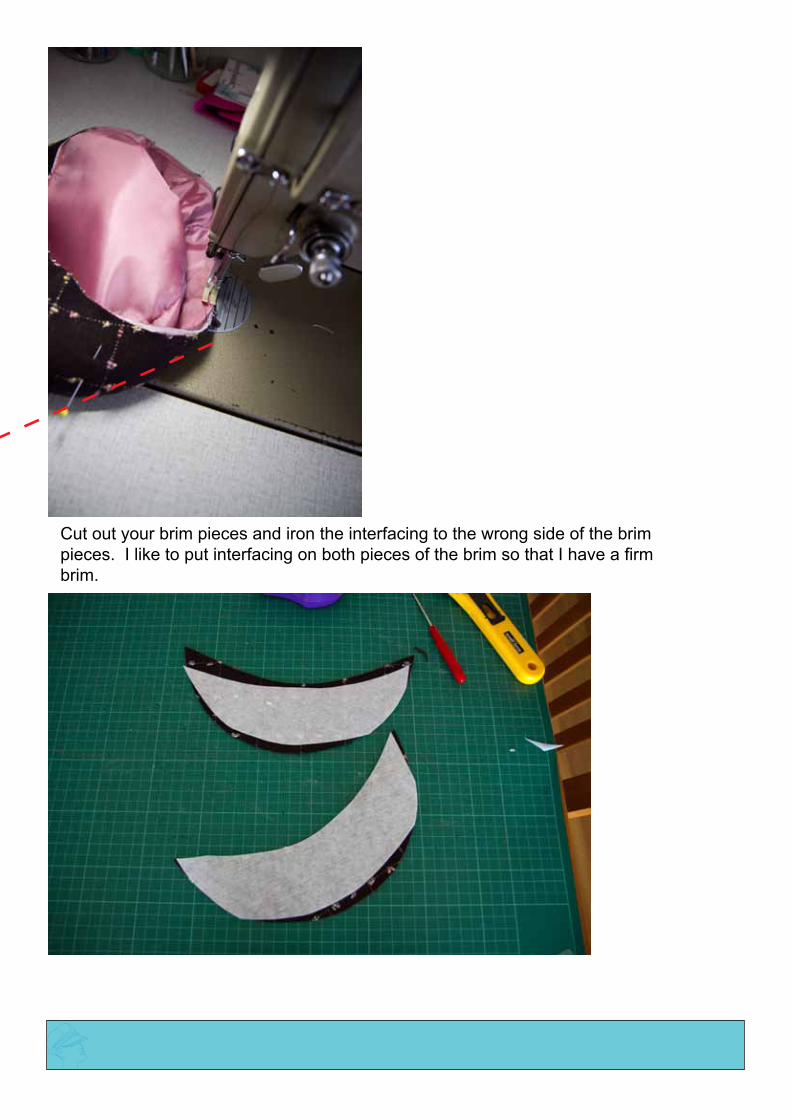
Cut out your brim pieces and iron the interfacing to the wrong side of the brim pieces. I like to put interfacing on both pieces of the brim so that I have a firm brim.
Ladies flat cap sewing instructions
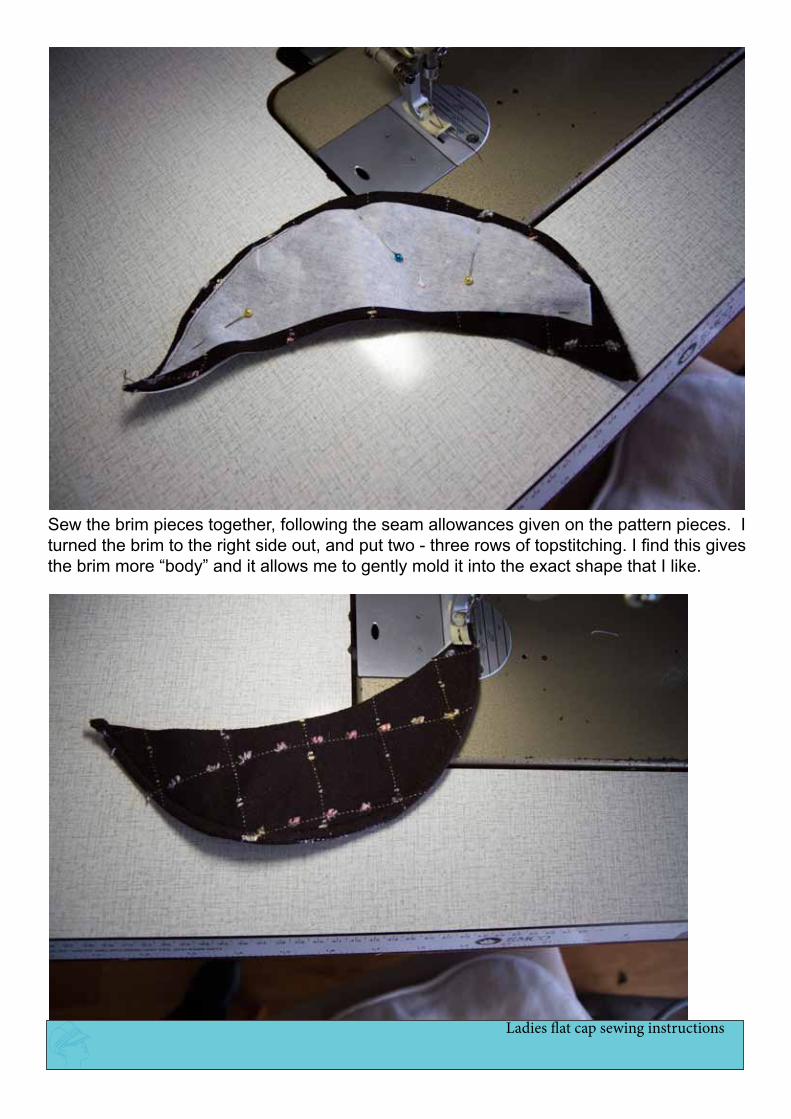
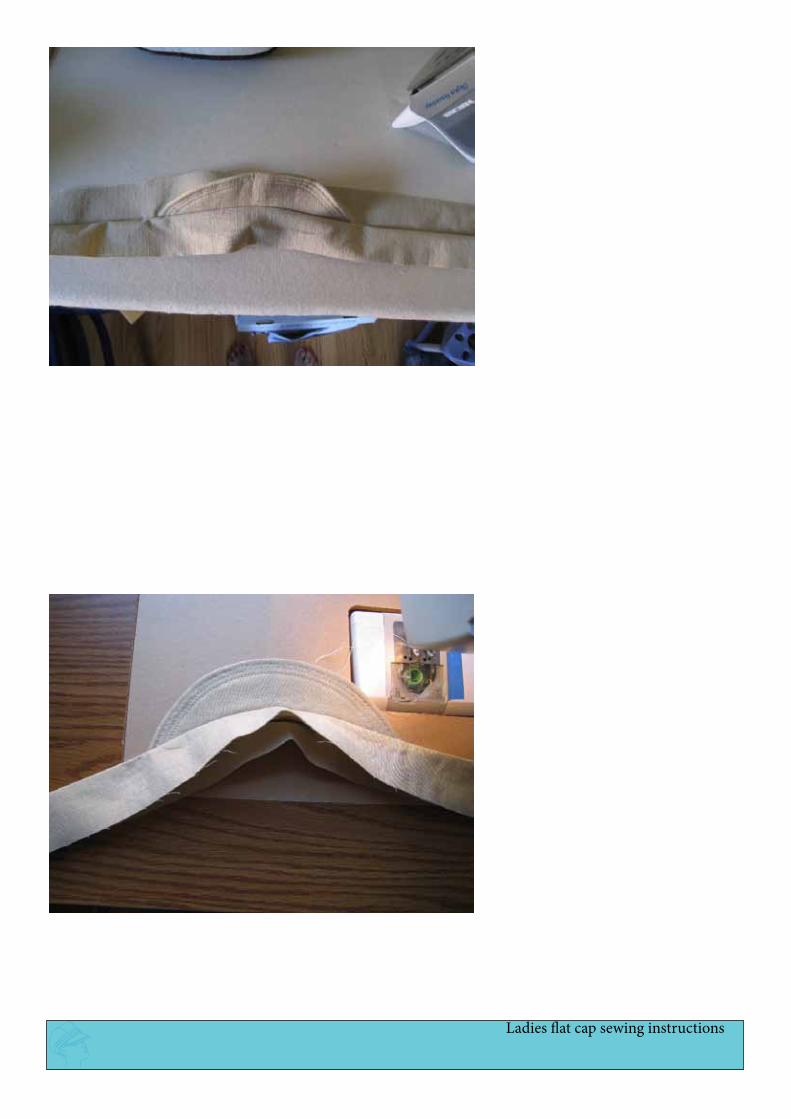
Sew the brim pieces together, following the seam allowances given on the pattern pieces. I turned the brim to the right side out, and put two - three rows of topstitching. I find this gives the brim more “body” and it allows me to gently mold it into the exact shape that I like.

I fold the brim piece exactly in half and mark that halfway mark with a pin this half way mark will be matched up with the main body of the hat, so that the brim is set-ting in the correct place on the hat.
Ladies flat cap sewing instructions
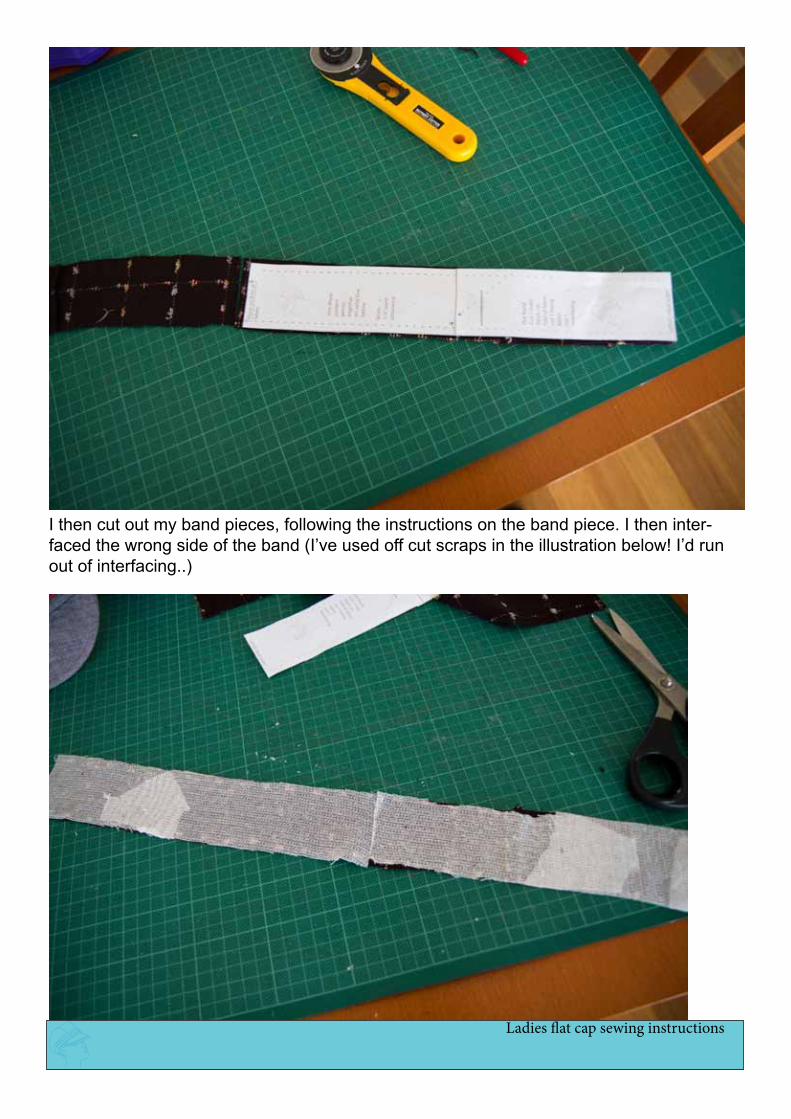
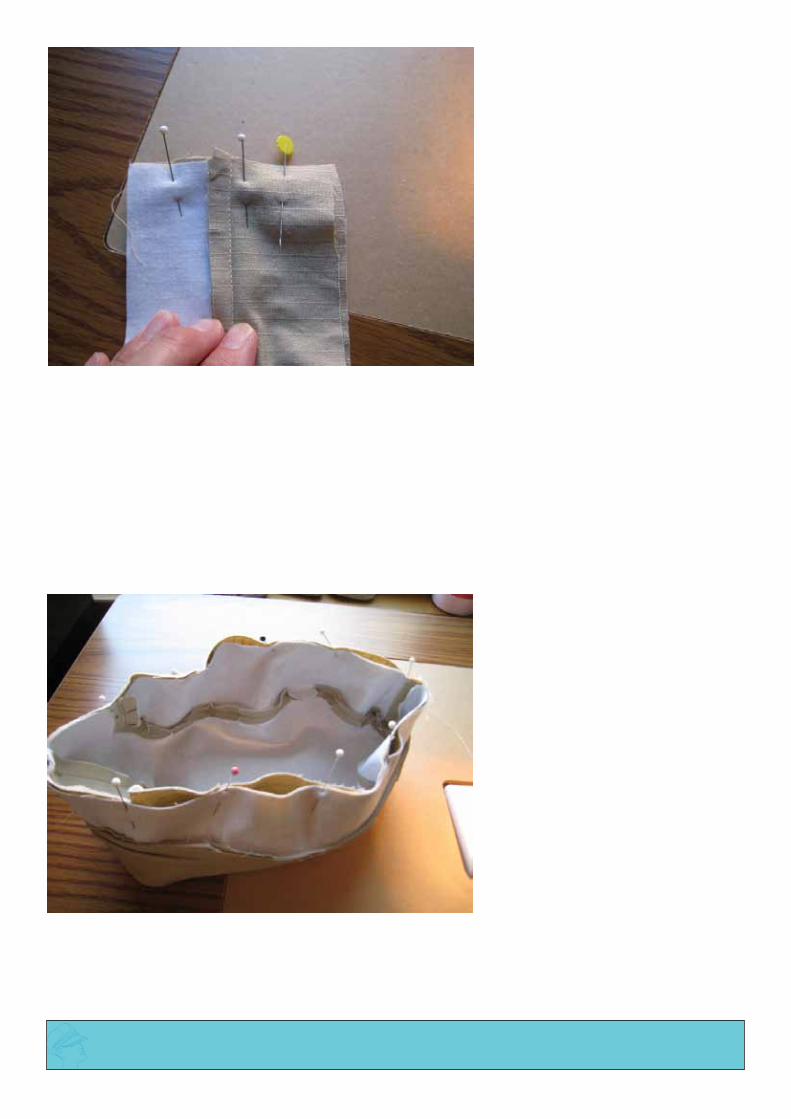
I then cut out my band pieces, following the instructions on the band piece. I then inter-faced the wrong side of the band (I’ve used off cut scraps in the illustration below! I’d run out of interfacing..)

Sew the back seam of the band together following the seam allowance given on the pat-tern. Then fold the band in half exactly, by using the back seam you have just sewn up previously, as the starting point, and mark the centre front of the band with a pin, see below. this will then be used to match the centre of the brim to the band ready for sewing together.
Ladies flat cap sewing instructions
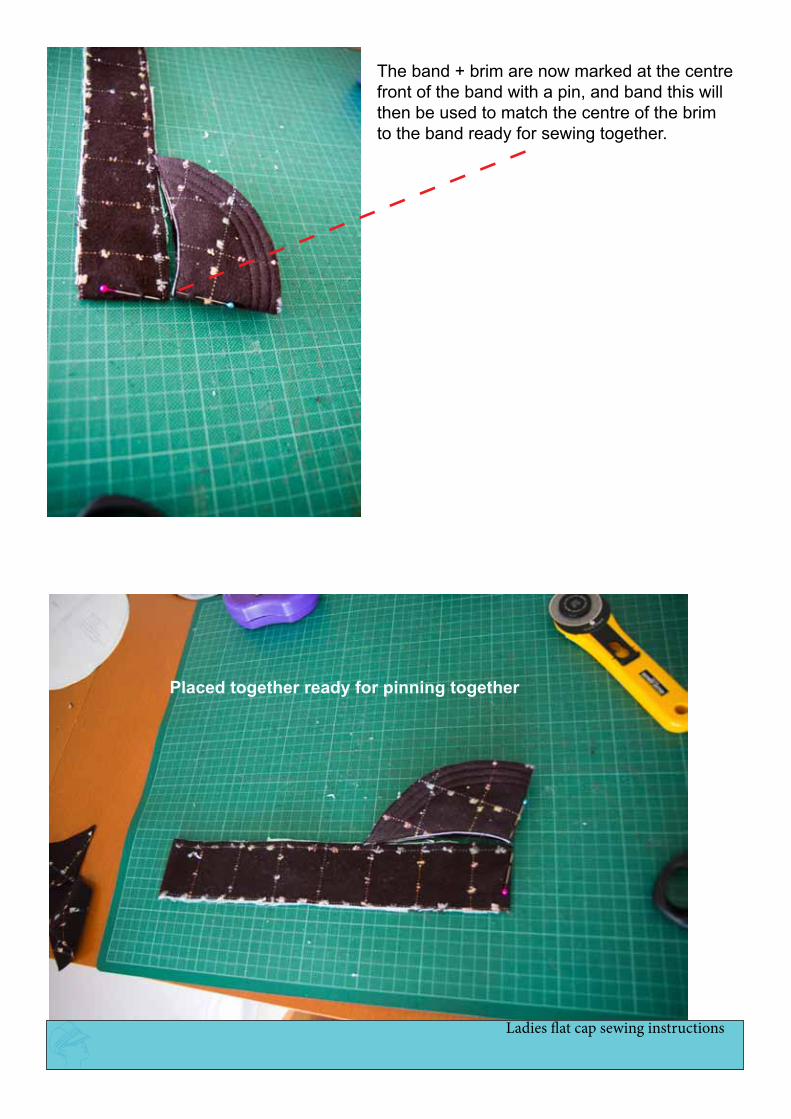
The band + brim are now marked at the centre front of the band with a pin, and band this will then be used to match the centre of the brim to the band ready for sewing together.
Placed together ready for pinning together

Matched band and brim (sorry for the overexposed photo!) Pin the 2 pieces together and then these two pieces will be sewn together.
Pinned together ready for sewing

Ladies flat cap sewing instructions
Pinned together ready for sewing
Stitch the brim to the band follow-ing the seam allow-ance given on the pattern
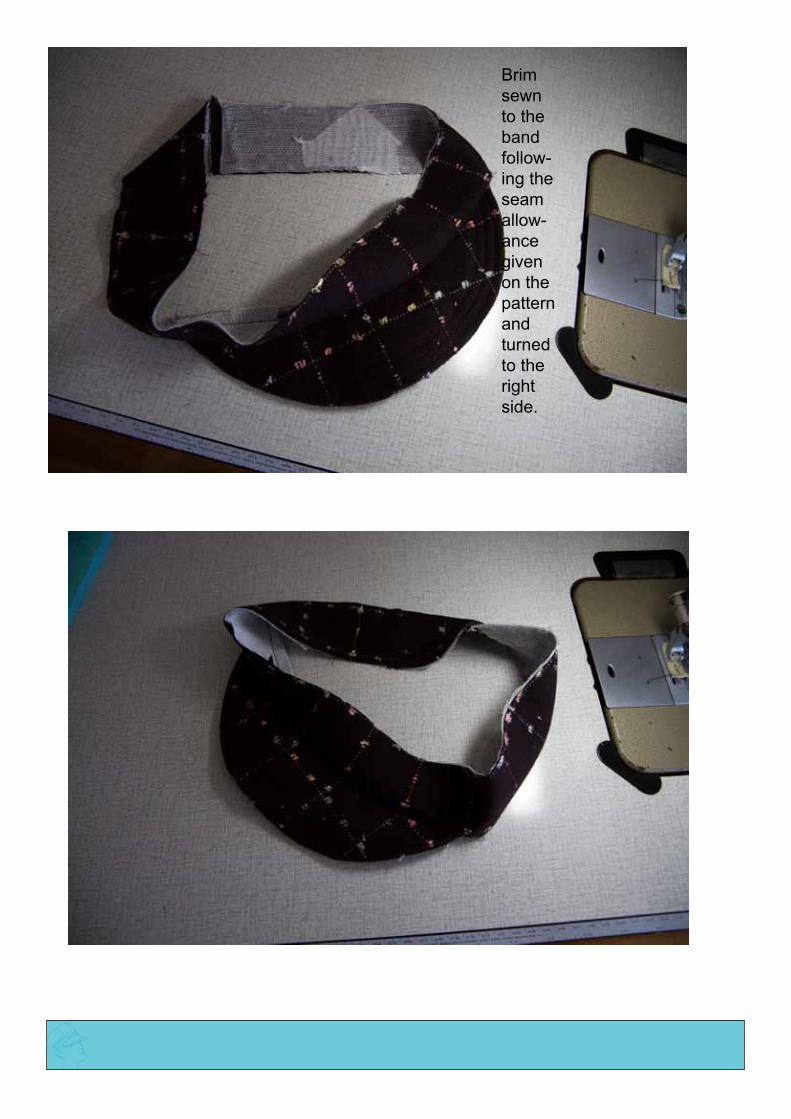
Brim sewn to the band follow-ing the seam allow-ance given on the pattern and turned to the right side.
Ladies flat cap sewing instructions
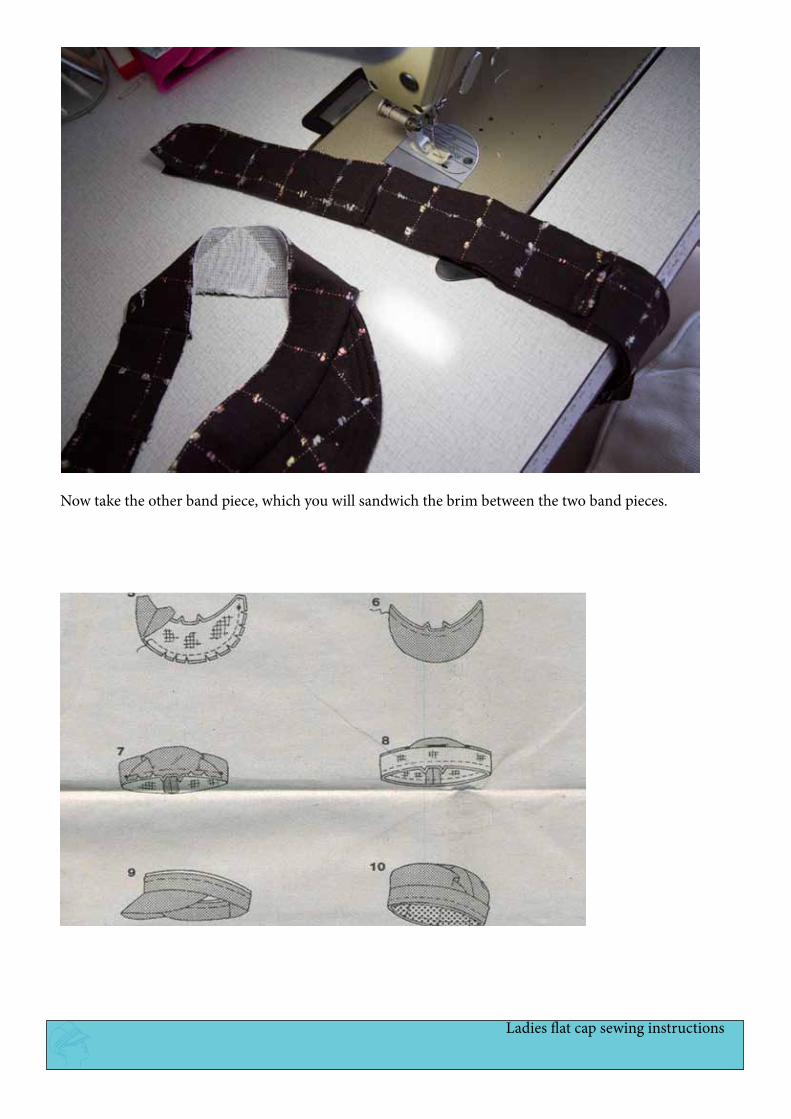
Now take the other band piece, which you will sandwich the brim between the two band pieces.
3
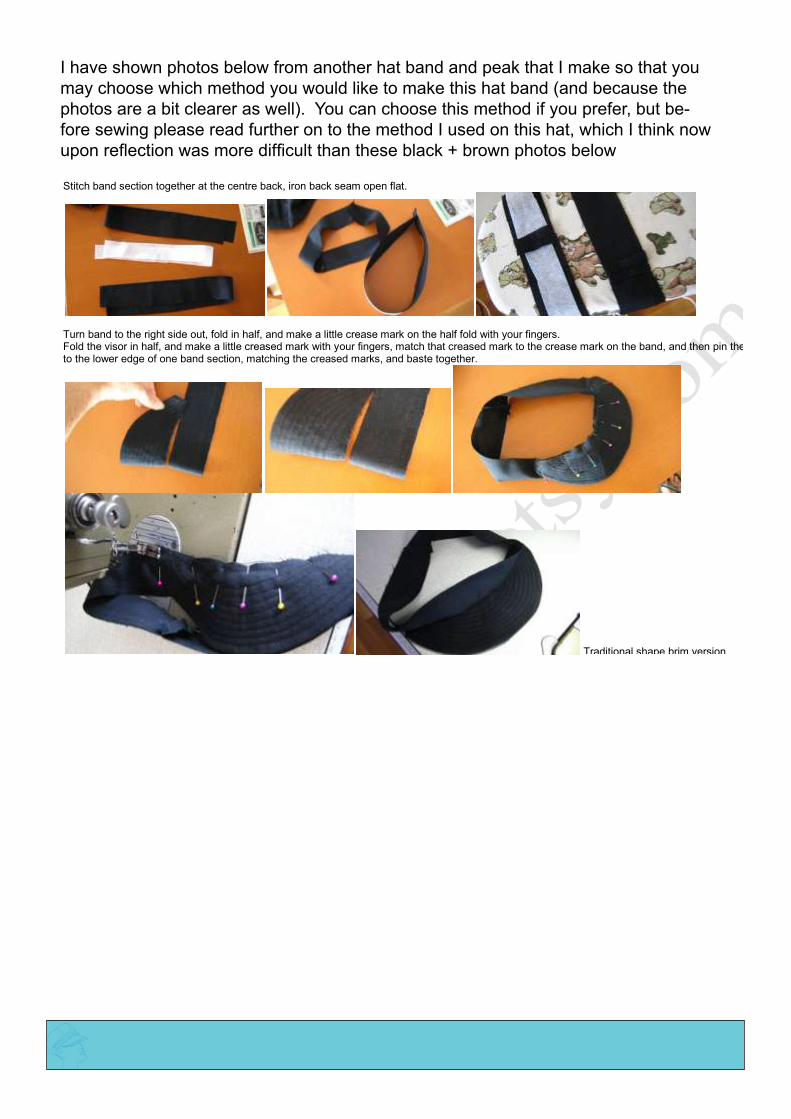
Stitch band section together at the centre back, iron back seam open flat.
Turn band to the right side out, fold in half, and make a little crease mark on the half fold with your fingers. Fold the visor in half, and make a little creased mark with your fingers, match that creased mark to the crease mark on the band, and then pin the visor to the lower edge of one band section, matching the creased marks, and baste together.
Traditional shape brim version
Flipped brim version
I have shown photos below from another hat band and peak that I make so that you may choose which method you would like to make this hat band (and because the photos are a bit clearer as well). You can choose this method if you prefer, but be-fore sewing please read further on to the method I used on this hat, which I think now upon reflection was more difficult than these black + brown photos below

Ladies flat cap sewing instructions
4
Stitch lower edges of band and band facing together, and under stitch band facing.
I’ve tried to take lots of photos of this one as it is a bit tricky to explain Turn the band to the right side out, and press well and baste raw edges together. Pin band to lower edge of hat, which has also been folded in half, and creased marked, then match those crease marks and back seams together, and baste raw edges together.

I decided that I had wanted to do a hat band and ribbon in one piece. so what I did was cut three lots of hat band. I had attached one to the brim, then sewed the other two together in the above picture. It is an uneccessary step I feel, but at the time I thought I’d make a self ribbon so to speak.So after sewing these two pieces together, I top-stitched one of them
Ladies flat cap sewing instructions
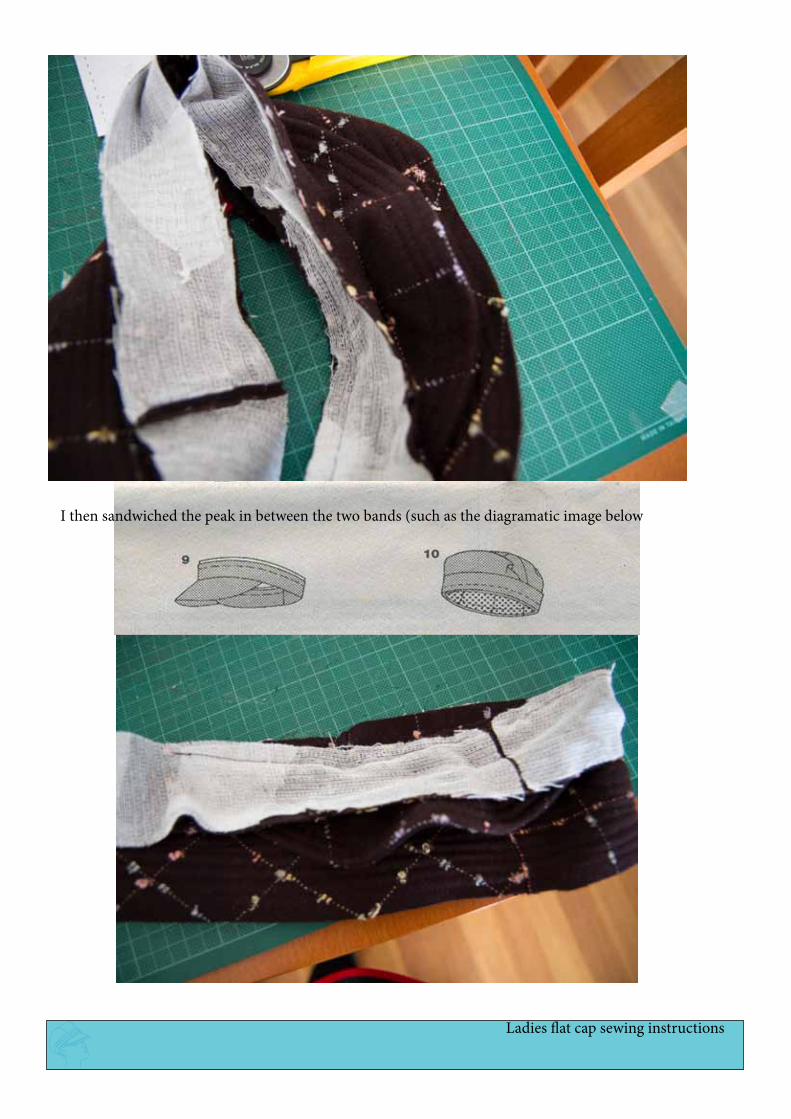
I then sandwiched the peak in between the two bands (such as the diagramatic image below
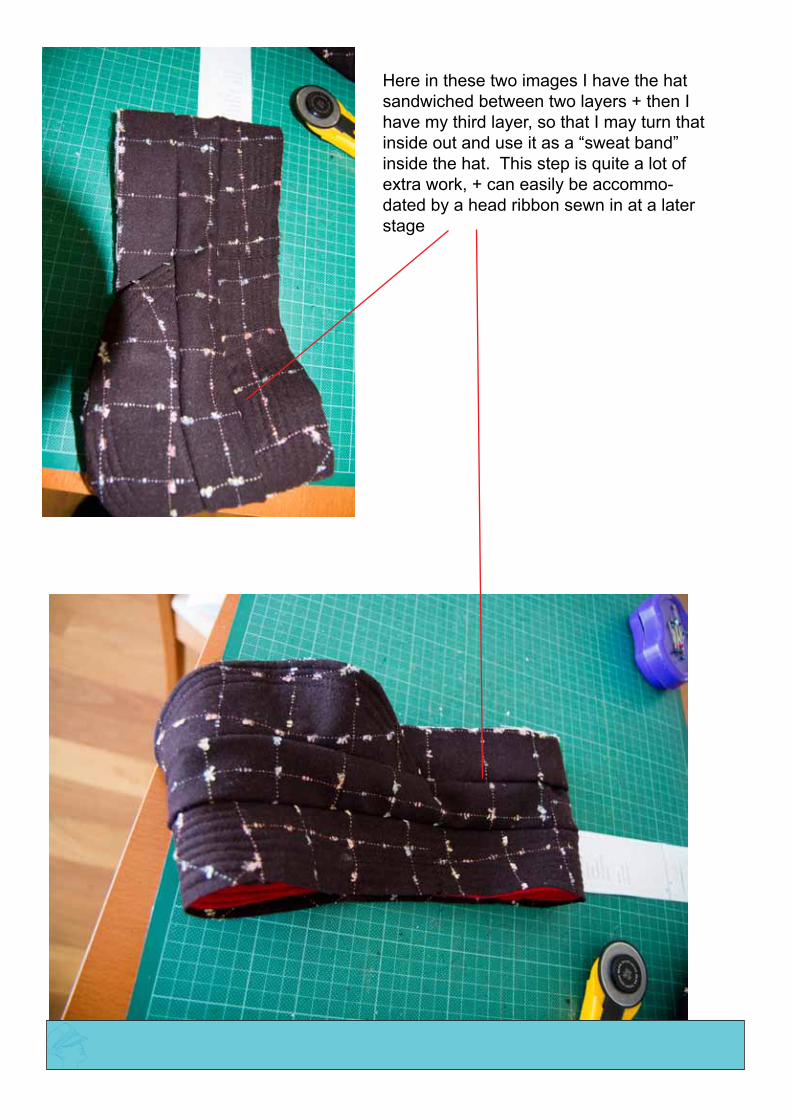
Here in these two images I have the hat sandwiched between two layers + then I have my third layer, so that I may turn that inside out and use it as a “sweat band” inside the hat. This step is quite a lot of extra work, + can easily be accommo-dated by a head ribbon sewn in at a later stage

Ladies flat cap sewing instructions
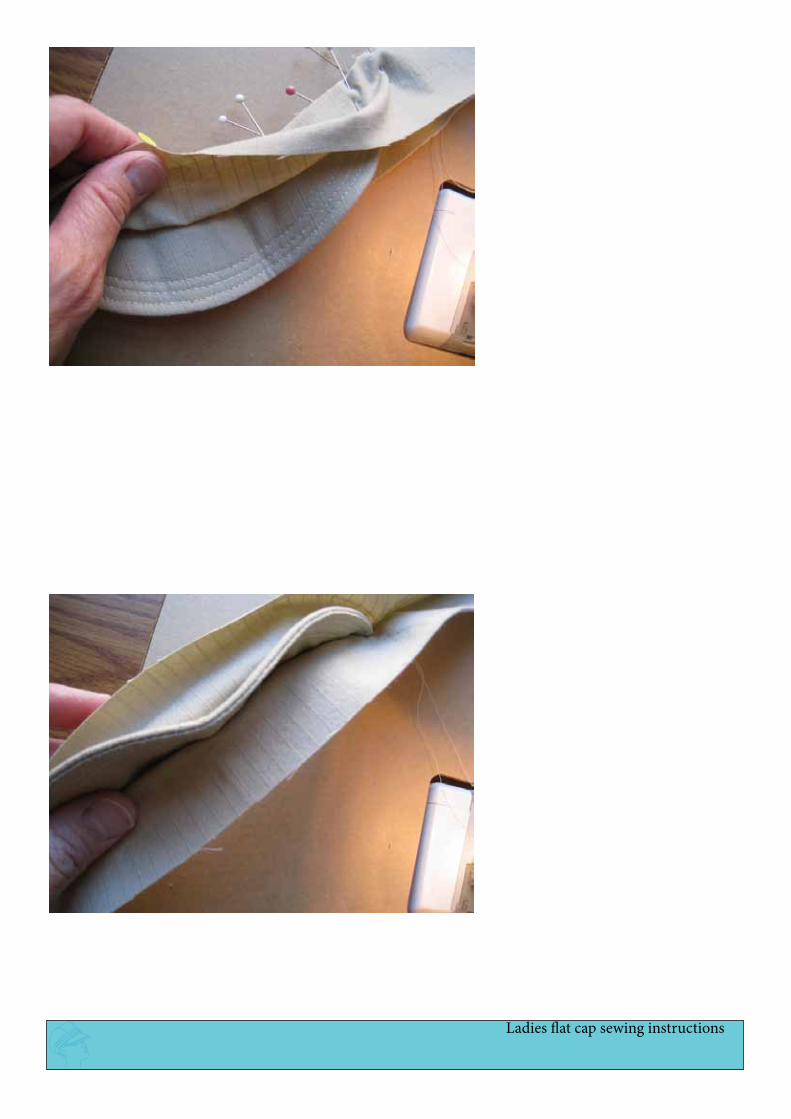
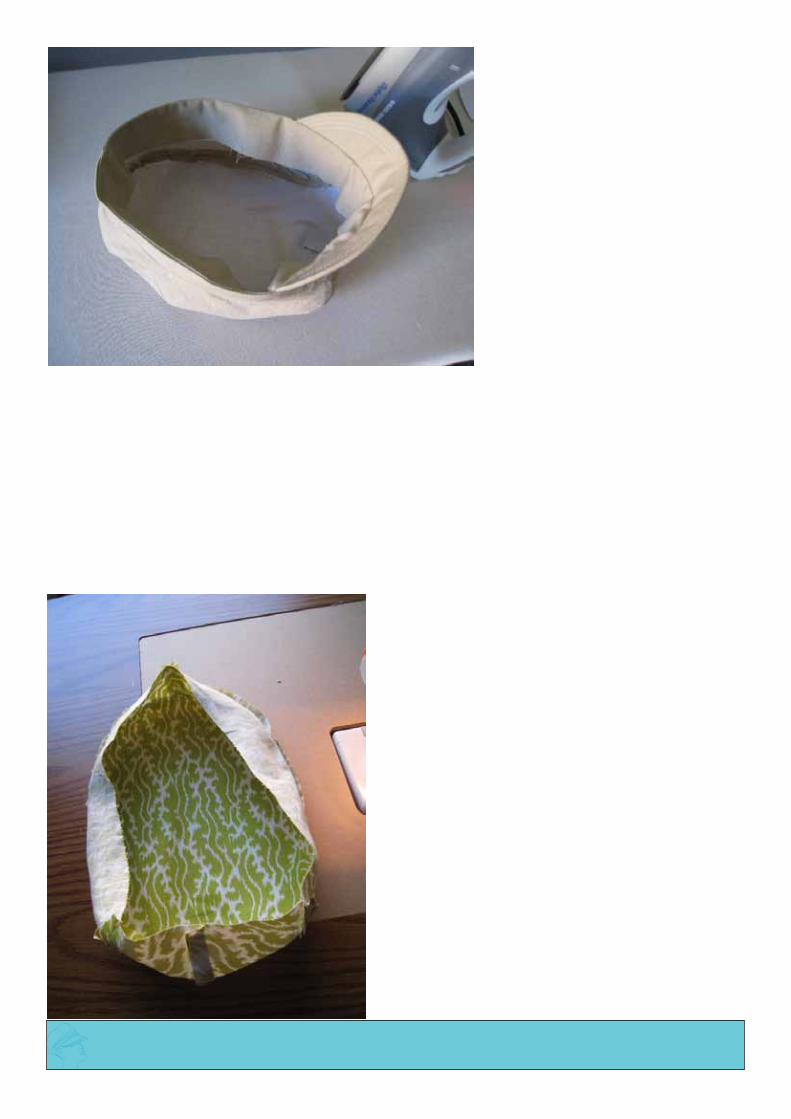
I now sew the hat band to the hat. First of all I find the centre of the brim (by folding it in half and marking with a pin, then match-ing that to the centre of the hat where the dart is, and also by matching the centre back seam to the centre of the hat, and pinning all around, easing in prior to stitch-ing

The sweat band is then hand stitched down into place inside the band and the band cov-ers the lining + is slip stitched down, and then the hat is finished. Another method you could use is like the following hat below by constructing the hat attaching the band, then making the lining and leaving a hole in it to turn the hat right side out through the hole + slip stitch it shut. Whichever is the best method for your sewing ability.
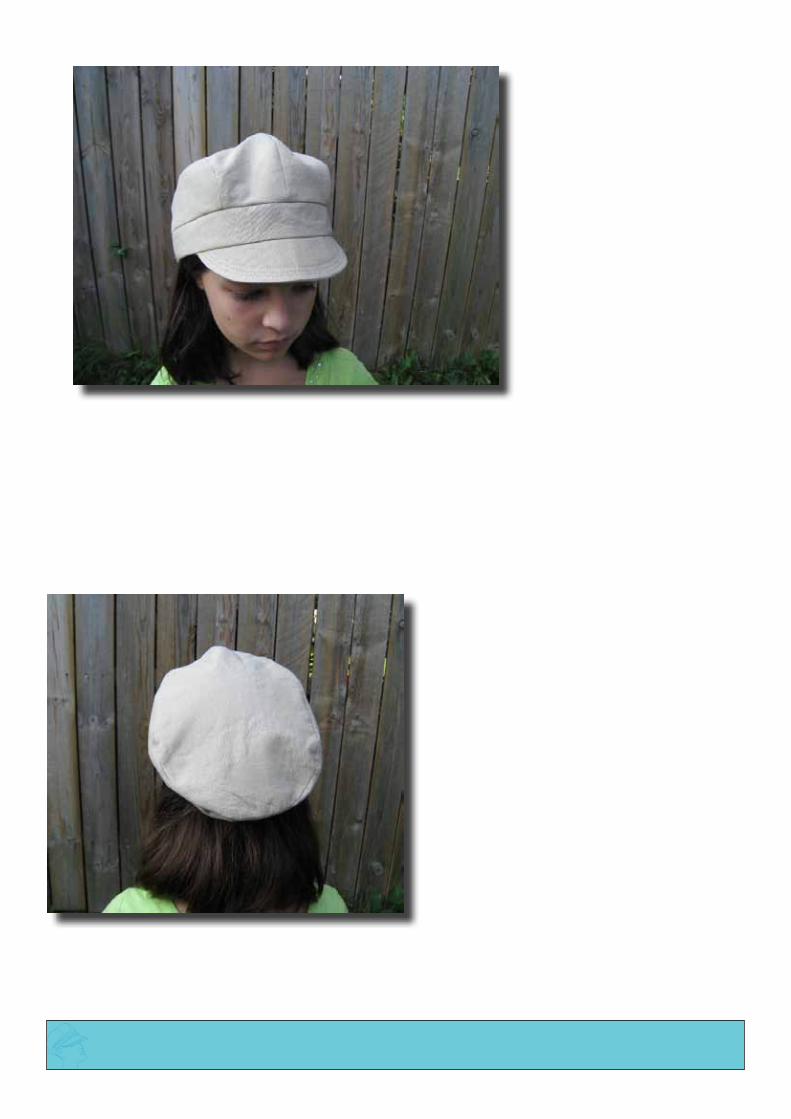
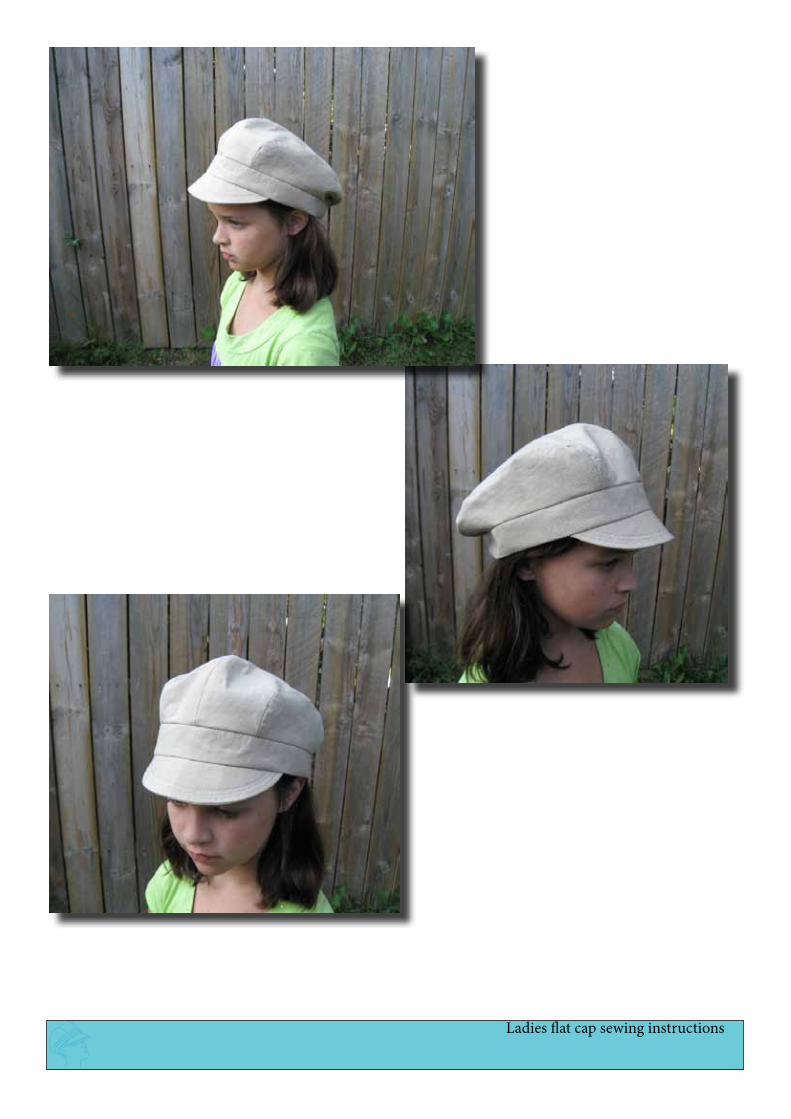
finished hat

Ladies flat cap sewing instructions
6
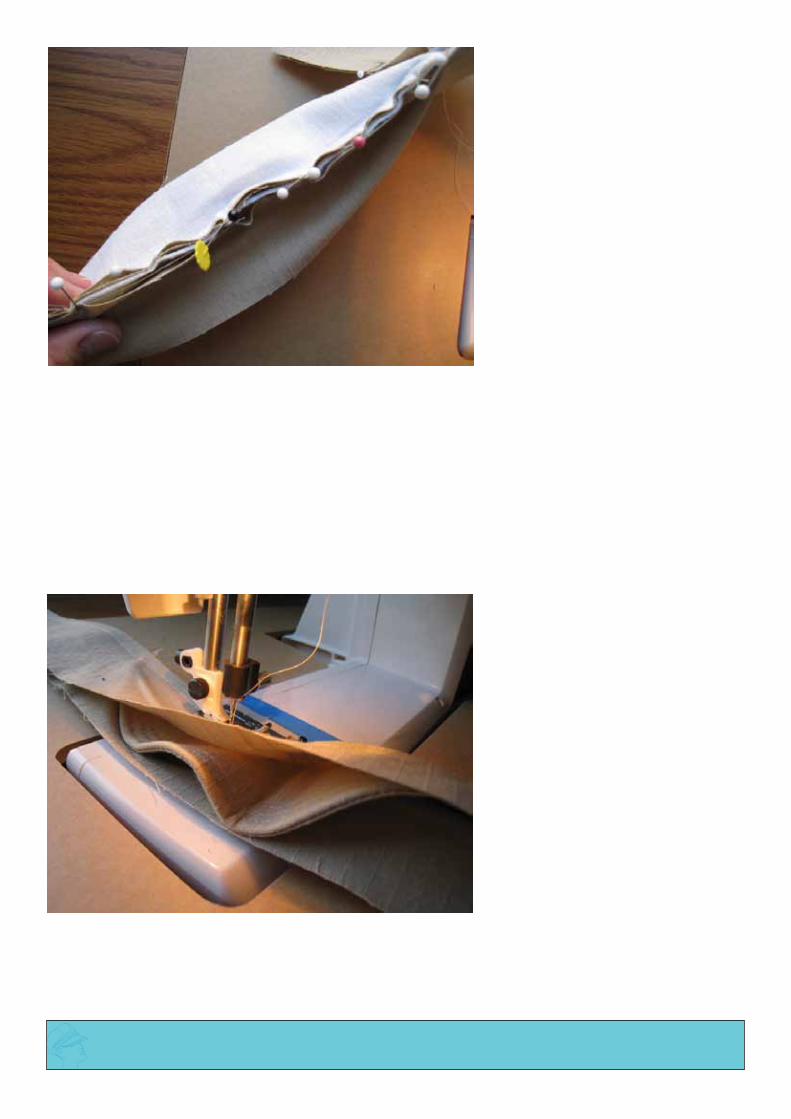
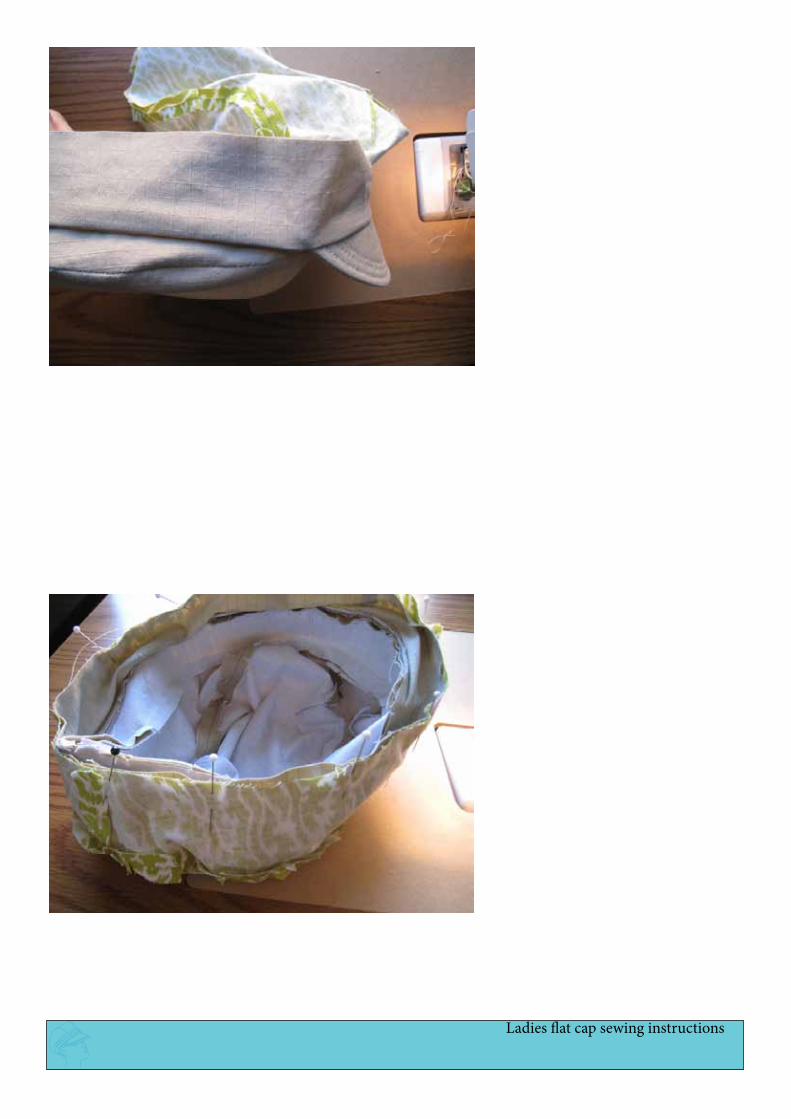
Place the right side of the lining fabric to the right side of the hat fabric, and sew all around the bottom of the hat, using the seam allowance given.
Then the hat gets turned to the right side out, and the hole in the back lining is slip stitched closed.
Place a self covered button on the top of the hat if you would like. Trim the outside band of the hat with a ribbon or bow optional, if you are using the traditional shape brim, otherwise if you are using the flip brim, just fold it up along the fold line and attach either a pin back button or sew on button. Please contact me if you need help with these instructions.
Or you can use this style of putting the lining in the hat and leaving a hole in the lining and turning the finished hat to the right side out through the hole, + slip stitching shut.

These photos below are larger photos of what we have talked about in the document, only these photos show a different way to attach the brim. Please take a look through them to see which method you prefer for making, both methouds achieve the same end, but depending on your sewing ability please choose the method which suits your style of working. The hat pattern has been made to fit the child in the photo by the addition of elastic in the back of the hat. Please take note of how the brim is attached and the lining is attached to see your preference.
Ladies flat cap sewing instructions

Ladies flat cap sewing instructions


Ladies flat cap sewing instructions


Ladies flat cap sewing instructions

Ladies flat cap sewing instructions
Ladies flat cap sewing instructions

Ladies flat cap sewing instructions
Ladies flat cap sewing instructions
Ladies flat cap sewing instructions
Ladies flat cap sewing instructions