LABORATORY MANUAL CONTENTS
66
ONLY FOR ARMIET STUDENTS………. LABORATORY MANUAL CONTENTS This manual is intended for the Third year students of Information Technology in the subject of System And Web Security. This manual typically contains practical/Lab Sessions related Software Engineering covering various aspects related the subject to enhanced understanding. Although, as per the syllabus, study of Vulnerabilities ,OS, Authentication, Web Security is prescribed, we have made the efforts to cover various aspects of System and web securities covering different Techniques to prevent and secured software to develop the project which contains most important criteria of security etc. elaborative understandable concepts and conceptual visualization. Students are advised to thoroughly go though this manual rather than only topics mentioned in the syllabus as practical aspects are the key to understanding and conceptual visualization of theoretical aspects covered in the books. Good Luck for your Enjoyable Laboratory Sessions Mr. Likhesh Kolhe Mr. Likhesh Kolhe HOD,IT Department Lecturer, IT Department
Transcript of LABORATORY MANUAL CONTENTS

ONLY FOR ARMIET STUDENTS……….
LABORATORY MANUAL CONTENTS
This manual is intended for the Third year students of Information Technology
in the subject of System And Web Security. This manual typically contains
practical/Lab Sessions related Software Engineering covering various aspects related the
subject to enhanced understanding.
Although, as per the syllabus, study of Vulnerabilities ,OS, Authentication, Web
Security is prescribed, we have made the efforts to cover various aspects of System and
web securities covering different Techniques to prevent and secured software to
develop the project which contains most important criteria of security etc. elaborative
understandable concepts and conceptual visualization.
Students are advised to thoroughly go though this manual rather than only topics
mentioned in the syllabus as practical aspects are the key to understanding and
conceptual visualization of theoretical aspects covered in the books.
Good Luck for your Enjoyable Laboratory Sessions
Mr. Likhesh Kolhe Mr. Likhesh Kolhe
HOD,IT Department Lecturer, IT Department

ONLY FOR ARMIET STUDENTS……….
Do’s and Don’ts in Laboratory:
1. Make entry in the Log Book as soon as you enter the Laboratory.
2. All the students should sit according to their roll numbers starting from their left to
right.
3. All the students are supposed to enter the terminal number in the log book.
4. Do not change the terminal on which you are working.
5. All the students are expected to get at least the algorithm of the program/concept to be
implemented.
6. Strictly observe the instructions given by the teacher/Lab Instructor.
Instruction for STUDENTS
1. Submission related to whatever lab work has been completed should be done during the
next lab session. The immediate arrangements for printouts related to submission on the
day of practical assignments.
2. Students should be taught for taking the printouts under the observation of lab
teacher.
3. The promptness of submission should be encouraged by way of marking and
evaluation patterns that will benefit the sincere students.

ONLY FOR ARMIET STUDENTS……….
PREREQUISITES
Define Software.
Define System.
What Do you mean by security?
What is Vulnerabilities?
What is Virus?
What are the different types of virus?
What Is Network & how to maintain its security.
What is IP Address?
What is SQL injection?
What is strong and Weak Security?
What is CAPTCHA?
What are the different types of attacks?

ONLY FOR ARMIET STUDENTS……….
SUBJECT INDEX
Sr No NAME OF EXPERIMENT
1 To Design and implement the RSA cryptosystem.
2 To Implement Digital signature scheme using RSA.
3 To Simulate the Buffer overflow attack.
4 To Simulate the Salami attack.
5 To Design and implement a program for adding passwords to a file.
The program should be able to filter out weak passwords (based on
dictionary words or variants) and store the strong passwords by creating
a hash of user ID and password.
6 To Study of a packet sniffer like wireshark, or tcpdump. Use this tool to
capture and analyze data in packets.
7 To Study and install nmap. Use it with different options to scan open
ports, perform OS fingerprinting, do a ping scan, tcp port scan, udp port
scan, etc
8 To Detect ARP spoofing using open source tool ARPWATCH
9 To Install an IDS (e.g. SNORT) and study the logs.
10 To study Use of iptables in linux to create firewalls.
11 To Implement a simple SQL injection attack.

ONLY FOR ARMIET STUDENTS……….
EXPERIMENT NO 1
AIM :- To Design and implement the RSA cryptosystem.
THEORY:- RSA is one of the first practicable public-key cryptosystems and
is widely used for secure data transmission. In such a cryptosystem,
the encryption key is public and differs from the decryption key which is kept
secret. In RSA, this asymmetry is based on the practical difficulty
of factoring the product of two large prime numbers, the factoring problem.
RSA stands for Ron Rivest, Adi Shamir andLeonard Adleman, who first
publicly described the algorithm in 1977. Clifford Cocks, an English
mathematician, had developed an equivalent system in 1973, but it was
not declassified until 1997.
A user of RSA creates and then publishes a public key based on the two
large prime numbers, along with an auxiliary value. The prime numbers must
be kept secret. Anyone can use the public key to encrypt a message, but with
currently published methods, if the public key is large enough, only someone
with knowledge of the prime numbers can feasibly decode the
message. Breaking RSA encryption is known as the RSA problem; whether it
is as hard as the factoring problem remains an open question.
Key generation
RSA involves a public key and a private key. The public key can be known by
everyone and is used for encrypting messages. Messages encrypted with the
public key can only be decrypted in a reasonable amount of time using the
private key. The keys for the RSA algorithm are generated the following way:

ONLY FOR ARMIET STUDENTS……….
1. Choose two distinct prime numbers p and q.
For security purposes, the integers p and q should be chosen at
random, and should be of similar bit-length. Prime integers can be efficiently
found using a primality test.
2. Compute n = pq.
n is used as the modulus for both the public and private keys. Its length,
usually expressed in bits, is the key length.
3. Compute φ(n) = φ(p)φ(q) = (p − 1)(q − 1) = n - (p + q -1), where φ is Euler's
totient function.
4. Choose an integer e such that 1 < e < φ(n) and gcd(e, φ(n)) = 1; i.e., e and
φ(n) are coprime.
e is released as the public key exponent.
e having a short bit-length and small Hamming weight results in more
efficient encryption – most commonly 216 + 1 = 65,537. However, much smaller
values of e (such as 3) have been shown to be less secure in some settings.
5. Determine d as d ≡ e−1 (mod φ(n)); i.e., d is the multiplicative
inverse of e (modulo φ(n)).
This is more clearly stated as: solve for d given d⋅e ≡ 1 (mod φ(n))
This is often computed using the extended Euclidean algorithm. Using the
pseudocode in the Modular integers section, inputs a and n correspond
to e and φ(n), respectively.
d is kept as the private key exponent.
The public key consists of the modulus n and the public (or encryption)
exponent e. The private key consists of the modulus n and the private (or

ONLY FOR ARMIET STUDENTS……….
decryption) exponent d, which must be kept secret. p, q, and φ(n) must also be
kept secret because they can be used to calculate d.
An alternative, used by PKCS#1, is to choose d matching de ≡ 1 (mod
λ) with λ = lcm(p − 1, q − 1), where lcm is the least common multiple. Using λ
instead of φ(n) allows more choices for d. λ can also be defined using
the Carmichael function, λ(n).
The ANSI X9.31 standard prescribes, IEEE 1363 describes,
and PKCS#1 allows, that p and q match additional requirements: being strong
primes, and being different enough that Fermat factorization fails.
Encryption
Alice transmits her public key (n, e) to Bob and keeps the private key d secret.
Bob then wishes to send message M to Alice.
He first turns M into an integer m, such that 0 ≤ m < n by using an agreed-
upon reversible protocol known as a padding scheme. He then computes the
ciphertext ccorresponding to
This can be done efficiently, even for 500-bit numbers, using Modular
exponentiation. Bob then transmits c to Alice.
Note that at least nine values of m will yield a ciphertext c equal to m, but this
is very unlikely to occur in practice.
Decryption

ONLY FOR ARMIET STUDENTS……….
Alice can recover m from c by using her private key exponent d via computing
Given m, she can recover the original message M by reversing the padding
scheme.
ALGORITHM:-
1) Pick two large prime numbers p and q, p != q;
2) Calculate n = p × q;
3) Calculate ø (n) = (p − 1)(q − 1);
4) Pick e, so that gcd(e, ø (n)) = 1, 1 < e < ø (n);
5) Calculate d, so that d · e mod ø (n) = 1, i.e., d is the multiplicative inverse of
e in mod ø (n);
6) Get public key as KU = {e, n};
7) Get private key as KR = {d, n}.
Encryption
For plaintext block P < n, its ciphertext C = P^e (mod n).
Decryption
For ciphertext block C, its plaintext is P = C^d (mod n).
CONCLUSION:- Hence we have studied and successfully implemented RSA
algorithm.
ONLY FOR ARMIET STUDENTS……….
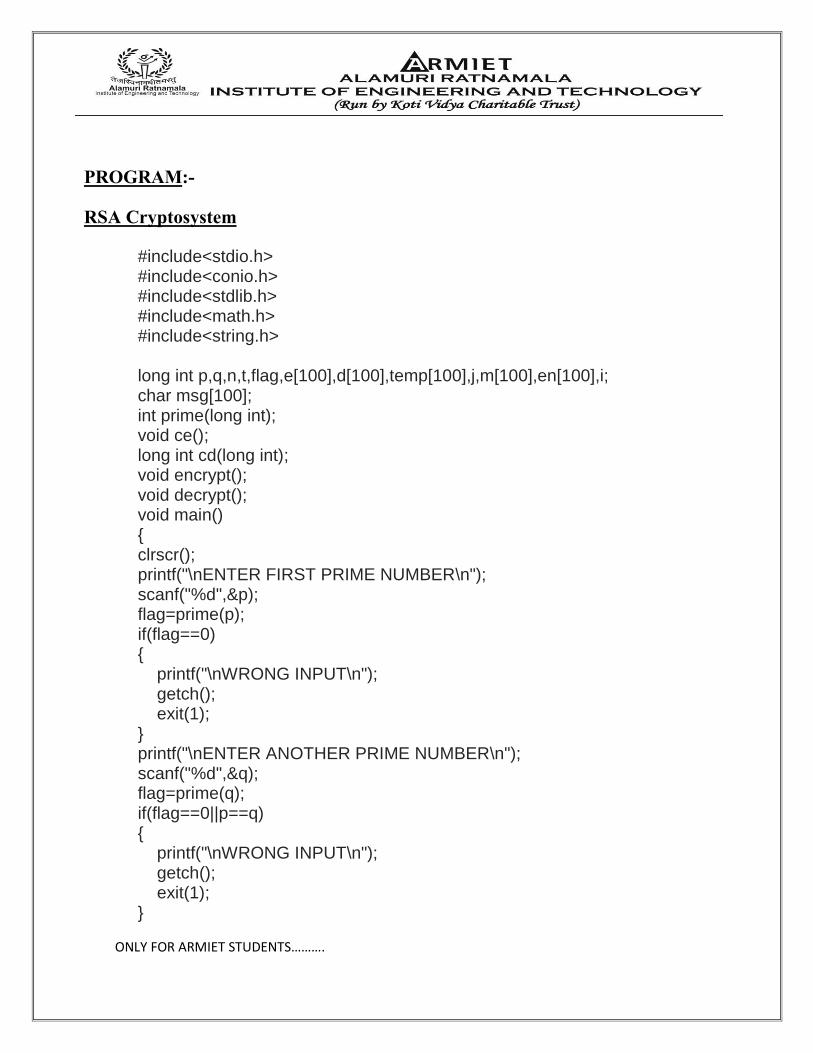
PROGRAM:-
RSA Cryptosystem
#include<stdio.h> #include<conio.h> #include<stdlib.h> #include<math.h> #include<string.h> long int p,q,n,t,flag,e[100],d[100],temp[100],j,m[100],en[100],i; char msg[100]; int prime(long int); void ce(); long int cd(long int); void encrypt(); void decrypt(); void main() { clrscr(); printf("\nENTER FIRST PRIME NUMBER\n"); scanf("%d",&p); flag=prime(p); if(flag==0) { printf("\nWRONG INPUT\n"); getch(); exit(1); } printf("\nENTER ANOTHER PRIME NUMBER\n"); scanf("%d",&q); flag=prime(q); if(flag==0||p==q) { printf("\nWRONG INPUT\n"); getch(); exit(1); }

ONLY FOR ARMIET STUDENTS……….
printf("\nENTER MESSAGE\n"); fflush(stdin); scanf("%s",msg); for(i=0;msg[i]!=NULL;i++) m[i]=msg[i]; n=p*q; t=(p-1)*(q-1); ce(); printf("\nPOSSIBLE VALUES OF e AND d ARE\n"); for(i=0;i<j-1;i++) printf("\n%ld\t%ld",e[i],d[i]); encrypt(); decrypt(); getch(); } int prime(long int pr) { int i; j=sqrt(pr); for(i=2;i<=j;i++) { if(pr%i==0) return 0; } return 1; } void ce() { int k; k=0; for(i=2;i<t;i++) { if(t%i==0) continue; flag=prime(i); if(flag==1&&i!=p&&i!=q) { e[k]=i;

ONLY FOR ARMIET STUDENTS……….
flag=cd(e[k]); if(flag>0) { d[k]=flag; k++; } if(k==99) break; } } } long int cd(long int x) { long int k=1; while(1) { k=k+t; if(k%x==0) return(k/x); } } void encrypt() { long int pt,ct,key=e[0],k,len; i=0; len=strlen(msg); while(i!=len) { pt=m[i]; pt=pt-96; k=1; for(j=0;j<key;j++) { k=k*pt; k=k%n; } temp[i]=k; ct=k+96;

ONLY FOR ARMIET STUDENTS……….
en[i]=ct; i++; } en[i]=-1; printf("\nTHE ENCRYPTED MESSAGE IS\n"); for(i=0;en[i]!=-1;i++) printf("%c",en[i]); } void decrypt() { long int pt,ct,key=d[0],k; i=0; while(en[i]!=-1) { ct=temp[i]; k=1; for(j=0;j<key;j++) { k=k*ct; k=k%n; } pt=k+96; m[i]=pt; i++; } m[i]=-1; printf("\nTHE DECRYPTED MESSAGE IS\n"); for(i=0;m[i]!=-1;i++) printf("%c",m[i]); } //Output Of the above program:-

ONLY FOR ARMIET STUDENTS……….
RSA Inputs
RSA Result

ONLY FOR ARMIET STUDENTS……….
EXPERIMENT NO 2
AIM :- To Study Digital signature scheme using RSA.
THEORY:- A digital signature is a mathematical scheme for demonstrating the
authenticity of a digital message or document. A valid digital signature gives a recipient
reason to believe that the message was created by a known sender, such that the
sender cannot deny having sent the message (authentication and non-repudiation) and
that the message was not altered in transit (integrity). Digital signatures are commonly
used for software distribution, financial transactions, and in other cases where it is
important to detect forgery or tampering.

ONLY FOR ARMIET STUDENTS……….
How it Works??
To create RSA signature keys, generate an RSA key pair containing a modulus N that is
the product of two large primes, along with integers e and d such that e d ≡ 1 (mod φ(N)),
where φ is the Euler phi-function. The signer's public key consists of N and e, and the
signer's secret key contains d.
To sign a message m, the signer computes σ ≡ md (mod N). To verify, the receiver
checks that σe ≡ m (mod N).
As noted earlier, this basic scheme is not very secure. To prevent attacks, one can first
apply a cryptographic hash function to the message m and then apply the RSA algorithm
described above to the result. This approach can be proven secure in the so-
called random oracle model Most early signature schemes were of a similar type: they
involve the use of atrapdoor permutation, such as the RSA function, or in the case of the
Rabin signature scheme, computing square modulo composite n. A trapdoor permutation
family is a family ofpermutations, specified by a parameter, that is easy to compute in the
forward direction, but is difficult to compute in the reverse direction without already
knowing the private key. However, for every parameter there is a "trapdoor" (private key)
which when known, easily decrypts the message. Trapdoor permutations can be viewed
as public-key encryption systems, where the parameter is the public key and the
trapdoor is the secret key, and where encrypting corresponds to computing the forward
direction of the permutation, while decrypting corresponds to the reverse direction.
Trapdoor permutations can also be viewed as digital signature schemes, where
computing the reverse direction with the secret key is thought of as signing, and
computing the forward direction is done to verify signatures. Because of this
correspondence, digital signatures are often described as based on public-key
cryptosystems, where signing is equivalent to decryption and verification is equivalent to
encryption, but this is not the only way digital signatures are computed.

ONLY FOR ARMIET STUDENTS……….
Used directly, this type of signature scheme is vulnerable to a key-only existential forgery
attack. To create a forgery, the attacker picks a random signature σ and uses the
verification procedure to determine the message m corresponding to that signature.[15] In
practice, however, this type of signature is not used directly, but rather, the message to
be signed is first hashed to produce a short digest that is then signed. This forgery
attack, then, only produces the hash function output that corresponds to σ, but not a
message that leads to that value, which does not lead to an attack. In the random oracle
model, this hash-then-sign form of signature is existentially unforgeable, even against
a chosen-plaintext attack. There are several reasons to sign such a hash (or message
digest) instead of the whole document.
For efficiency: The signature will be much shorter and thus save time since hashing
is generally much faster than signing in practice.
For compatibility: Messages are typically bit strings, but some signature schemes
operate on other domains (such as, in the case of RSA, numbers modulo a composite
number N). A hash function can be used to convert an arbitrary input into the proper
format.
For integrity: Without the hash function, the text "to be signed" may have to be split
(separated) in blocks small enough for the signature scheme to act on them directly.
However, the receiver of the signed blocks is not able to recognize if all the blocks are
present and in the appropriate order.

ONLY FOR ARMIET STUDENTS……….
Algorithm
With the above considerations, the algorithm below can be used for implementing public key
cryptography in Java.
1. Encrypt the message using a symmetric key.
2. Concatenate the symmetric key + Hash of symmetric key + Hash of message.
3. Encrypt the concatenated string using the receivers public key.
4. Sign the data to be transmitted (Encrypted symmetric key + Hash of the key + Hash of message).
5. Validate the Signature.
6. Decrypt the message using Receiver private key to get the symmetric key.
7. Validate the integrity of the key using the Hash of the key.
8. Decrypt the actual message using the symmetric key which has been decrypted and parsed and
checked for integrity.
9. Compute MessageDigest of data.
10. Validate if the Message Digest of the decrypted text matches the Message Digest of the Original
Message.
CONCLUSION:- Hence we have studied and successfully implemented Digital
signature scheme using RSA.

ONLY FOR ARMIET STUDENTS……….
EXPERIMENT NO 3
AIM :- To Simulate the Buffer overflow attack.
THEORY:-
Use of the Stack
The stack is a region in a program's memory space that is only accessible from the top.
There are two operations, push and pop, to a stack. A push stores a new data item on top of
the stack, a pop removes the top item. Every process has its own memory space (at least in
a decent OS), among them a stack region and a heap region. The stack is used heavily to
store local variables and the return address of a function.
For example, assume that we have a function
void foo(const char* input) {
char buf[10];
printf("Hello World\n");
}
When this function is called from another function, for example main:
int main(int argc, char* argv[])
{
foo(argv[1]);

ONLY FOR ARMIET STUDENTS……….
return 0;
}
then the following happens: The calling function pushes the return address, that is the
address of the return statement onto the stack. Then the called function pushes zeroes on
the stack to store its local variable. Since foo has a variable buf, this means there will be
space for 10 characters allocated. The stack thus will look like depicted in Figure 3.
Figure 3: The stack holds the return address, the arguments, and the local variables..

ONLY FOR ARMIET STUDENTS……….
Figure 1: The push operation takes an item and puts it on the top of the stack.
Figure 2: The pop operation removes the top from the stack and makes it available to the
application.
This is a simple C-program. Function main uses the command line input. Recall that argc is
the number of arguments, including the call to the function itself. Thus, is we put
: stackoverrun Hello

ONLY FOR ARMIET STUDENTS……….
then argc is two and argv[0] is "stackoverrun" and argv[1] is "Hello". The main function
calls function foo. foo gets the second word from the commandline as its input.
As we look at foo, foo prints first the stack. This is done with a printf statement. The
arguments to printf are taken directly from the stack. The "%p" format means that the
argument is printed out as a pointer.
The call to strcpy is the one that is dangerous. strcpy will just copy character for character
until it finds a "0" character in the source string. Since the argument we give to the call can
be much longer, this can mess up the stack. Unfortunately, commercial-grade software is
full of these calls without checking for the length of the input.
When the stack is messed up, the return address from foo will be overwritten. With other
words, instead of going back to the next instruction after foo in main (that would be the
return statement), the next instruction executed after foo finishes will be whatever is in the
stack location.
In this program, there is another function, called bar. The program logic bars bar from
running ever. However, by giving it the right input to main, we can get bar to run.
CONCLUSION:- Hence we have studied and successfully implemented To Simulate the
Buffer overflow attack.
ONLY FOR ARMIET STUDENTS……….
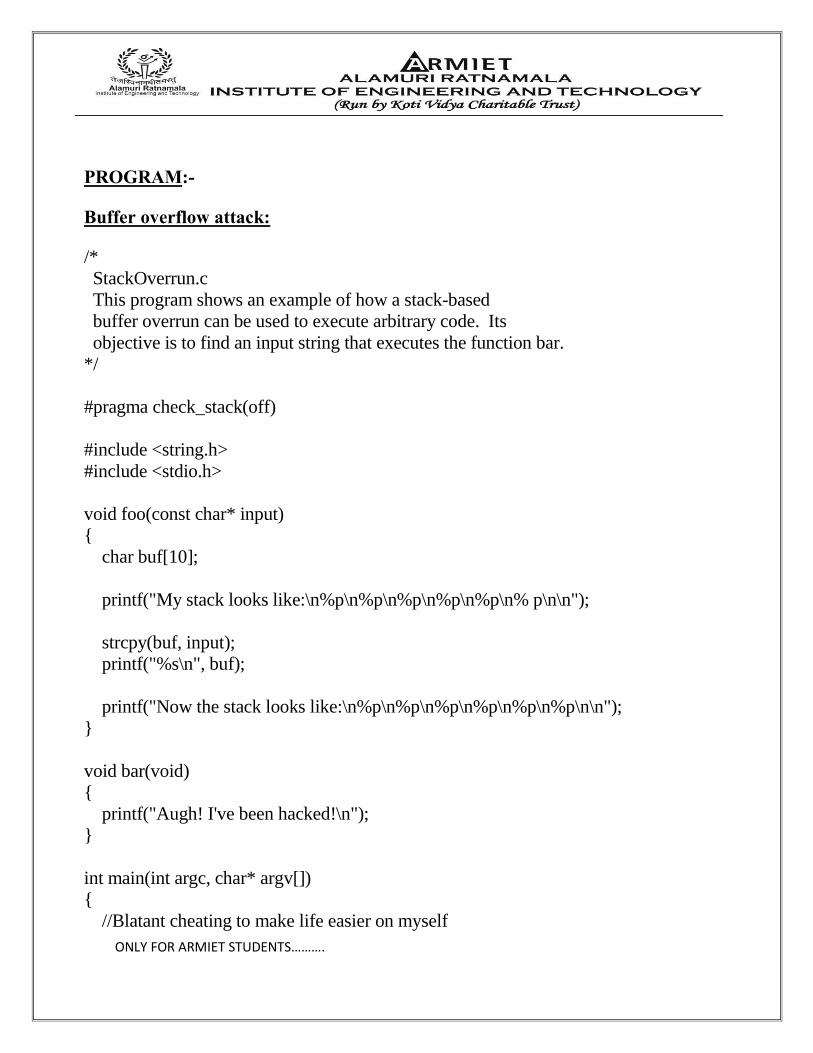
PROGRAM:-
Buffer overflow attack:
/*
StackOverrun.c
This program shows an example of how a stack-based
buffer overrun can be used to execute arbitrary code. Its
objective is to find an input string that executes the function bar.
*/
#pragma check_stack(off)
#include <string.h>
#include <stdio.h>
void foo(const char* input)
{
char buf[10];
printf("My stack looks like:\n%p\n%p\n%p\n%p\n%p\n% p\n\n");
strcpy(buf, input);
printf("%s\n", buf);
printf("Now the stack looks like:\n%p\n%p\n%p\n%p\n%p\n%p\n\n");
}
void bar(void)
{
printf("Augh! I've been hacked!\n");
}
int main(int argc, char* argv[])
{
//Blatant cheating to make life easier on myself

ONLY FOR ARMIET STUDENTS……….
printf("Address of foo = %p\n", foo);
printf("Address of bar = %p\n", bar);
if (argc != 2)
{
printf("Please supply a string as an argument!\n");
return -1;
}
foo(argv[1]);
return 0;
}

ONLY FOR ARMIET STUDENTS……….
Output:-

ONLY FOR ARMIET STUDENTS……….
EXPERIMENT NO 4
AIM :- To Simulate the Salami attack.
THEORY:- A salami technique is an automated form of abuse involving Trojan
horses or secret execution of an unauthorized program that causes the unnoticed
or immaterial debiting of small amounts of assets from a large number of
sources or accounts. The name of this technique comes from the fact that small
slices of assets are taken without noticeably reducing the whole. Other methods
must be used to remove the acquired assets from the system. For example, in a
banking system, the demand deposit accounting system of programs for
checking accounts could be changed (using the Trojan horse method) to
randomly reduce each of a few hundred accounts by 10 cents or 15 cents by
transferring the money to a favored account, where it can be withdrawn through
authorized methods. No controls are violated because the money is not removed
from the system of accounts. Instead, small fractions of the funds are merely
rearranged, which the affected customers rarely notice. Many variations are
possible. The assets may be an inventory of products or services as well as
money. Few cases have been reported.
Salami Technique in Electronic Banking
The most typical scheme portrayed by a salami attack is that which involves an
automated modification to financial systems and their data. For example, the digits
representing currency on a bank's computer(s) could be altered so that values to the
right of the pennies field ( < 0.01 ) are always rounded down (fair arithmetic routines

ONLY FOR ARMIET STUDENTS……….
will calculate in both directions equally). Since all this rounding down produces excess
fractions of cents, they must be transferred elsewhere, and, carefully, so that no net
loss to the system of accounts becomes apparent. This is done by merely rearranging
the funds into a balance owned by the perpetrator. The final rewards could be very
attractive, provided the "slices" are taken 1 at frequent intervals throughout an
extended period of time and from a large number of accounts.
The essence of this mechanism is its resistance to detection. Account owners rarely
calculate their balances to the thousandths or ten-thousandths of a cent, and,
consequentially remain oblivious. Even if the discrepancies are noticed, most
individuals have better things to do (like preserve their pride) than complain about an
erroneous digit in some far off decimal place. The following (alleged) scenarios will
demonstrate that "slices" need not always be tiny to evade detection. In fact, they can
be rather large, as long as unsuspecting and/or ignorant victims are plentiful.
A modified payroll program increased the federal withholding amounts by a few cents
per pay period for hundreds of employees. The excess payments were credited to the
perpetrator's withholding account, which, at income-tax time the following year,
yielded large refunds from the IRS.Over the course of 3 years, at least 47,000
customers were defrauded by a rental-car agency that overestimated (purposely) the
vehicles' gas tank capacity. Customers returning the cars without topping off the gas
were charged inflated amounts for the missing gasoline (which wasn't really missing).
Theft rates ranged from $2 to $15 per customer.

ONLY FOR ARMIET STUDENTS……….
A Taco Bell drive-up window cash register, modified to internally ring each $2.99 item
as 1 cent, allowed the perpetrator to pocket the excess $2.98 each time. Fraudulent
computer chips in gasoline pumps cheated customers by overstating the amounts
pumped.
CONCLUSION:- Hence we have studied and successfully implemented the Salami attack.

ONLY FOR ARMIET STUDENTS……….
EXPERIMENT NO 5
AIM :- To Design and implement a program for adding passwords to a file. The program
should be able to filter out weak passwords (based on dictionary words or variants) and
store the strong passwords by creating a hash of user ID and password.
THEORY:- Password strength is a measure of the effectiveness of a password in
resisting guessing and brute-force attacks. In its usual form, it estimates how many trials
an attacker who does not have direct access to the password would need, on average, to
guess it correctly. The strength of a password is a function of length, complexity, and
unpredictability.
Using strong passwords lowers overall risk of a security breach, but strong passwords do
not replace the need for other effective security controls. The effectiveness of a password
of a given strength is strongly determined by the design and implementation of
the factors (knowledge, ownership, inherence). The first factor is the main focus in this
article.
The rate at which an attacker can submit guessed passwords to the system is a key factor
in determining system security. Some systems impose a time-out of several seconds after
a small number (e.g. three) of failed password entry attempts. In the absence of other
vulnerabilities, such systems can be effectively secured with relatively simple passwords.
However the system must store information about the user passwords in some form and if
that information is stolen, say by breaching system security, the user passwords can be at
risk.
Password Creation

ONLY FOR ARMIET STUDENTS……….
Passwords are created either automatically (using randomizing equipment) or by a
human; the latter case is more common. While the strength of randomly chosen
passwords against a brute force attack can be calculated with precision, determining the
strength of human-generated passwords is challenging.
Typically, humans are asked to choose a password, sometimes guided by suggestions or
restricted by a set of rules, when creating a new account for a computer system or
Internet Web site. Only rough estimates of strength are possible, since humans tend to
follow patterns in such tasks, and those patterns can usually assist an attacker. In
addition, lists of commonly chosen passwords are widely available for use by password
guessing programs. Such lists include the numerous online dictionaries for various human
languages, along with other common passwords. All items in such lists are considered
weak, as are passwords that are simple modifications of them. For some decades,
investigations of passwords on multi-user computer systems have shown that 40% or
more are readily guessed using only computer programs, and more can be found when
information about a particular user is taken into account during the attack.
Examples of weak passwords
As with any security measure, passwords vary in effectiveness (i.e., strength); some are
weaker than others. For example, the difference in weakness between a dictionary word
and a word with obfuscation (i.e., letters in the password are substituted by, say, numbers
— a common approach) may cost a password cracking device a few more seconds; this
adds little strength. The examples below illustrate various ways weak passwords might be
constructed, all of which are based on simple patterns which result in extremely low
entropy, allowing them to be tested automatically at high speeds:

ONLY FOR ARMIET STUDENTS……….
Default passwords (as supplied by the system vendor and meant to be changed at
installation time): password, default, admin, guest, etc. Lists of default passwords are
widely available on the internet.
Dictionary words: chameleon, RedSox, sandbags, bunnyhop!, IntenseCrabtree, etc.,
including words in non-English dictionaries.
Words with numbers appended: password1, deer2000, john1234, etc., can be easily tested
automatically with little lost time.
Words with simple obfuscation: p@ssw0rd, l33th4x0r, g0ldf1sh, etc., can be tested
automatically with little additional effort. For example a domain administrator password
compromised in the DigiNotar attack was reportedly Pr0d@dm1n.
Doubled words: crabcrab, stopstop, treetree, passpass, etc.
Common sequences from a keyboard row: qwerty, 12345, asdfgh, fred, etc.
Numeric sequences based on well known numbers such as 911 314159... , or 27182...
etc.
Identifiers: jsmith123, 1/1/1970, 555–1234, one's username, etc.
Anything personally related to an individual: license plate number, Social Security
number, current or past telephone numbers, student ID, current address, previous
addresses, birthday, sports team, relative's or pet's names/nicknames/birthdays/initials,
etc., can easily be tested automatically after a simple investigation of person's details.
There are many other ways a password can be weak, corresponding to the strengths of
various attack schemes; the core principle is that a password should have high entropy
(usually taken to be equivalent to randomness) and not be readily derivable by any
"clever" pattern, nor should passwords be mixed with information identifying the user.

ONLY FOR ARMIET STUDENTS……….
On-line services often provide a restore password function that a hacker can figure out
and by doing so bypass a password. Choosing hard-to-guess restore password questions
can further secure the password.
CONCLUSION:- Hence we have studied and successfully implemented a program for
adding passwords to a file. The program should be able to filter out weak passwords
(based on dictionary words or variants) and store the strong passwords by creating a hash
of user ID and password.
.

ONLY FOR ARMIET STUDENTS……….
PROGRAM:-
<?php
$pwd = $_POST['pwd'];
if( strlen($pwd) < 8 ) {
$error .= "Password too short! ";
}
if( strlen($pwd) > 20 ) {
$error .= "Password too long! ";
}
if( strlen($pwd) < 8 ) {
$error .= "Password too short! ";
}
if( !preg_match("#[0-9]+#", $pwd) ) {
$error .= "Password must include at least one number! ";
}
if( !preg_match("#[a-z]+#", $pwd) ) {
$error .= "Password must include at least one letter! ";
}
if( !preg_match("#[A-Z]+#", $pwd) ) {
$error .= "Password must include at least one CAPS! ";
}
if( !preg_match("#\W+#", $pwd) ) {
$error .= "Password must include at least one symbol! ";
}
if($error){
echo "Password validation failure(your choise is weak): $error";
} else {
echo "Your password is strong.";
}

ONLY FOR ARMIET STUDENTS……….
EXPERIMENT NO 6
AIM :- To Study of a packet sniffer like wireshark, or tcpdump. Use this tool to capture
and analyze data in packets.
THEORY:- Wireshark is a free and open-source packet analyzer. It is used
for network troubleshooting,analysis,softwareand communications protocol development,
and education. Originally named Ethereal, in May 2006 the project was renamed
Wireshark due to trademark issues.
Wireshark is cross-platform, using the GTK+ widget toolkit in current releases, and Qt in
the development version, to implement its user interface, and using pcap to capture
packets; it runs on GNU/Linux, OS X, BSD, Solaris, some other Unix-like operating
systems, andMicrosoft Windows. There is also a terminal-based (non-GUI) version called
TShark. Wireshark, and the other programs distributed with it such as TShark, are free
software, released under the terms of the GNU General Public License.
Functionality
Wireshark is very similar to tcpdump, but has a graphical front-end, plus some integrated
sorting and filtering options.
Wireshark allows the user to put network interface controllers that support promiscuous
mode into that mode, in order to see all traffic visible on that interface, not just traffic
addressed to one of the interface's configured addresses and broadcast/multicast traffic.
However, when capturing with a packet analyzer in promiscuous mode on a port on
a network switch, not all of the traffic travelling through the switch will necessarily be
sent to the port on which the capture is being done, so capturing in promiscuous mode
will not necessarily be sufficient to see all traffic on the network. Port mirroring or
various network taps extend capture to any point on the network. Simple passive taps are
extremely resistant to tampering.
On Linux, BSD, and OS X, with libpcap 1.0.0 or later, Wireshark 1.4 and later can also
put wireless network interface controllers into monitor mode.

ONLY FOR ARMIET STUDENTS……….
If a remote machine captures packets and sends the captured packets to a machine
running Wireshark using the TZSP protocol or the protocol used by OmniPeek,
Wireshark will dissect those packets, thus allowing it to analyze packets captured on a
remote machine at the time that they're captured.
History
In the late 1990s, Gerald Combs, a computer science graduate of the University of
Missouri–Kansas City, was working for a small Internet service provider. The
commercial protocol analysis products at the time were priced around $1500 and did not
run on the company's primary platforms (Solaris and Linux), so Gerald began writing
Ethereal and released the first version around 1998. The Ethereal trademark is owned by
Network Integration Services.
In May 2006, Combs accepted a job with CACE Technologies. Combs still held
copyright on most of Ethereal's source code (and the rest was re-distributable under the
GNU GPL), so he used the contents of the Ethereal Subversion repository as the basis for
the Wireshark repository. However, he did not own the Ethereal trademark, so he
changed the name to Wireshark. In 2010 Riverbed Technology purchased CACE and
took over as the primary sponsor of Wireshark. Ethereal development has ceased, and an
Ethereal security advisory recommended switching to Wireshark.
Wireshark has won several industry awards over the
years,[ including eWeek, InfoWorld, and PC Magazine. It is also the top-rated packet
sniffer in the Insecure.Org network security tools survey and was
the SourceForge Project of the Month in August 2010.
Combs continues to maintain the overall code of Wireshark and issue releases of new
versions of the software. The product website lists over 600 additional contributing
authors.
Features
Wireshark is software that "understands" the structure (encapsulation) of different
networking protocols. It can parse and display the fields, along with their meanings as

ONLY FOR ARMIET STUDENTS……….
specified by different networking protocols. Wireshark uses pcap to capture packets, so it
can only capture packets on the types of networks that pcap supports.
Data can be captured "from the wire" from a live network connection or read from a file
of already-captured packets.
Live data can be read from a number of types of network, including Ethernet, IEEE
802.11, PPP, and loopback.
Captured network data can be browsed via a GUI, or via the terminal (command line)
version of the utility, TShark.
Captured files can be programmatically edited or converted via command-line switches
to the "editcap" program.
Data display can be refined using a display filter.
Plug-ins can be created for dissecting new protocols.
VoIP calls in the captured traffic can be detected. If encoded in a compatible encoding,
the media flow can even be played.
Raw USB traffic can be captured.
Wireshark's native network trace file format is the libpcap format supported by libpcap
and WinPcap, so it can exchange captured network traces with other applications that use
the same format, including tcpdump and CA NetMaster. It can also read captures from
other network analyzers, such as snoop, Network General's Sniffer, and Microsoft
Network Monitor.
Security
Capturing raw network traffic from an interface requires elevated privileges on some
platforms. For this reason, older versions of Ethereal/Wireshark and tethereal/TShark
often ran withsuperuser privileges. Taking into account the huge number of protocol
dissectors that are called when traffic is captured, this can pose a serious security risk
given the possibility of a bug in a dissector. Due to the rather large number of
vulnerabilities in the past (of which many have allowed remote code execution) and

ONLY FOR ARMIET STUDENTS……….
developers' doubts for better future development, OpenBSDremoved Ethereal from its
ports tree prior to OpenBSD 3.6.
Elevated privileges are not needed for all operations. For example, an alternative is to
run tcpdump or the dumpcap utility that comes with Wireshark with superuser privileges
to capture packets into a file, and later analyze the packets by running Wireshark with
restricted privileges. To emulate near realtime analysis, each captured file may be merged
by mergecap into growing file processed by Wireshark. On wireless networks, it is
possible to use the Aircrack wireless security tools to capture IEEE 802.11 frames and
read the resulting dump files with Wireshark.
As of Wireshark 0.99.7, Wireshark and TShark run dumpcap to perform traffic capture.
On platforms where special privileges are needed to capture traffic, only dumpcap needs
to be run with those special privileges: neither Wireshark nor TShark need to or should
be run with special privileges.
CONCLUSION:- Hence we have studied and successfully implemented of a packet
sniffer like wireshark, or tcpdump. Use this tool to capture and analyze data in packets.

ONLY FOR ARMIET STUDENTS……….
SNAPSHOTS:-

ONLY FOR ARMIET STUDENTS……….

ONLY FOR ARMIET STUDENTS……….
EXPERIMENT NO 7
AIM :- To Study and install nmap. Use it with different options to scan open ports,
perform OS fingerprinting, do a ping scan, tcp port scan, udp port scan, etc.
THEORY:- Nmap (Network Mapper) is a security scanner originally written by Gordon
Lyon (also known by his pseudonym Fyodor Vaskovich) used to
discover hosts and services on a computer network, thus creating a "map" of the network.
To accomplish its goal, Nmap sends specially craftedpackets to the target host and then
analyzes the responses.
The software provides a number of features for probing computer networks, including
host discovery and service and operating systemdetection. These features are extensible
by scripts that provide more advanced service detection, vulnerability detection, and
other features. Nmap is also capable of adapting to network conditions
including latency and congestion during a scan. Nmap is under development and
refinement by its user community.
Nmap was originally a Linux-only utility, but it was ported to Microsoft
Windows, Solaris, HP-UX, BSD variants (including Mac OS X), AmigaOS, and SGI
IRIX. Linux is the most popular platform, followed closely by Windows.
Graphical Interfaces
NmapFE, originally written by Zach Smith, was Nmap's official GUI for Nmap versions
2.2 to 4.22. For Nmap 4.50 (originally in the 4.22SOC development series) NmapFE was
replaced with Zenmap, a new official graphical user interface based on UMIT, developed
by Adriano Monteiro Marques.

ONLY FOR ARMIET STUDENTS……….
Various web-based interfaces allow controlling Nmap remotely from a web browser.
These include LOCALSCAN, nmap-web, and Nmap-CGI.
Microsoft Windows specific GUIs exist, including NMapWin, which has not been
updated since June 2003 (v1.4.0), and NMapW by Syhunt.
Zenmap, showing results for a port scan against Wikipedia

ONLY FOR ARMIET STUDENTS……….
NmapFE, showing results for a port scan against Wikipedia

ONLY FOR ARMIET STUDENTS……….
XNmap, a Mac OS X GUI

ONLY FOR ARMIET STUDENTS……….
Reporting Results
Nmap provides four possible output formats. All but the interactive output is saved to a
file. Nmap output can be manipulated by text processing software, enabling the user to
create customized reports.
Interactive
presented and updated real time when a user runs Nmap from the command line. Various
options can be entered during the scan to facilitate monitoring.
XML
a format that can be further processed by XML tools. It can be converted into
a HTML report using XSLT.
Grepable
output that is tailored to line-oriented processing tools such as grep, sed or awk.
Normal
the output as seen while running Nmap from the command line, but saved to a file.
Script kiddie
meant to be an amusing way to format the interactive output replacing letters with their
visually alike number representations. For example, Interesting ports becomes
Int3rest1ng p0rtz.
CONCLUSION:- Hence we have studied and successfully Used NMAP.
ONLY FOR ARMIET STUDENTS……….
EXPERIMENT NO 8
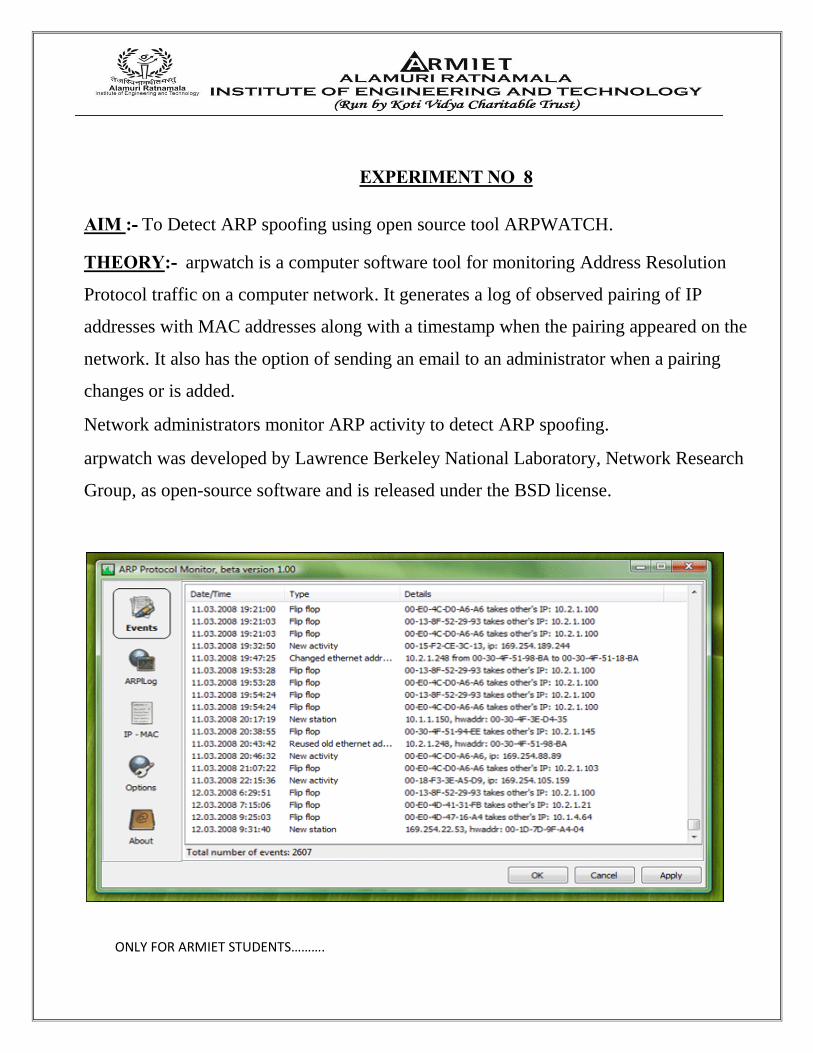
AIM :- To Detect ARP spoofing using open source tool ARPWATCH.
THEORY:- arpwatch is a computer software tool for monitoring Address Resolution
Protocol traffic on a computer network. It generates a log of observed pairing of IP
addresses with MAC addresses along with a timestamp when the pairing appeared on the
network. It also has the option of sending an email to an administrator when a pairing
changes or is added.
Network administrators monitor ARP activity to detect ARP spoofing.
arpwatch was developed by Lawrence Berkeley National Laboratory, Network Research
Group, as open-source software and is released under the BSD license.

ONLY FOR ARMIET STUDENTS……….
CONCLUSION:- Hence we have studied and successfully Used ARPWATCH.

ONLY FOR ARMIET STUDENTS……….
EXPERIMENT NO 9
AIM :- To Install an IDS (e.g. SNORT) and study the logs..
THEORY:- An intrusion detection system (IDS) is a device or software application that
monitors network or system activities for malicious activities or policy violations and
produces reports to a management station. IDS come in a variety of ―flavors‖ and
approach the goal of detecting suspicious traffic in different ways. There are network
based (NIDS) and host based (HIDS) intrusion detection systems. Some systems may
attempt to stop an intrusion attempt but this is neither required nor expected of a
monitoring system. Intrusion detection and prevention systems (IDPS) are primarily
focused on identifying possible incidents, logging information about them, and reporting
attempts. In addition, organizations use IDPSes for other purposes, such as identifying
problems with security policies, documenting existing threats and deterring individuals
from violating security policies. IDPSes have become a necessary addition to the security
infrastructure of nearly every organization.
IDPSes typically record information related to observed events, notify security
administrators of important observed events and produce reports. Many IDPSes can also
respond to a detected threat by attempting to prevent it from succeeding. They use several
response techniques, which involve the IDPS stopping the attack itself, changing the
security environment (e.g. reconfiguring a firewall) or changing the attack's content.
HIDS & NIDS
Intrusion detection systems are of two main types, network based (NIDS) and host based
(HIDS) intrusion detection systems.

ONLY FOR ARMIET STUDENTS……….
Network Intrusion Detection Systems
Network intrusion detection systems NIDS are placed at a strategic point or points within
the network to monitor traffic to and from all devices on the network. It performs an
analysis for a passing traffic on the entire subnet, works in a promiscuous mode, and
matches the traffic that is passed on the subnets to the library of known attacks. Once the
attack is identified, or abnormal behavior is sensed, the alert can be sent to the
administrator. Example of the NIDS would be installing it on the subnet where firewalls
are located in order to see if someone is trying to break into the firewall. Ideally one
would scan all inbound and outbound traffic, however doing so might create a bottleneck
that would impair the overall speed of the network.
Host Intrusion Detection Systems
Host intrusion detection systems run on individual hosts or devices on the network. A
HIDS monitors the inbound and outbound packets from the device only and will alert the
user or administrator if suspicious activity is detected. It takes a snapshot of existing
system files and matches it to the previous snapshot. If the critical system files were
modified or deleted, the alert is sent to the administrator to investigate. An example of
HIDS usage can be seen on mission critical machines, which are not expected to change
their configurations.
Intrusion detection systems can also be system-specific using custom tools
and honeypots.
Passive and active systems

ONLY FOR ARMIET STUDENTS……….
In a passive system, the intrusion detection system (IDS) sensor detects a potential
security breach, logs the information and signals an alert on the console or owner.[4] In
a reactive system, also known as an intrusion prevention system (IPS), the IPS auto-
responds to the suspicious activity by resetting the connection or by reprogramming the
firewall to block network traffic from the suspected malicious source. The term IDPS is
commonly used where this can happen automatically or at the command of an operator;
systems that both "detect (alert)" and "prevent".
Comparision with Firewalls
Though they both relate to network security, an intrusion detection system (IDS) differs
from a firewall in that a firewall looks outwardly for intrusions in order to stop them from
happening. Firewalls limit access between networks to prevent intrusion and do not
signal an attack from inside the network. An IDS evaluates a suspected intrusion once it
has taken place and signals an alarm. An IDS also watches for attacks that originate from
within a system. This is traditionally achieved by examining network communications,
identifying heuristics and patterns (often known as signatures) of common computer
attacks, and taking action to alert operators. A system that terminates connections is
called an intrusion prevention system, and is another form of an application layer
firewall.

ONLY FOR ARMIET STUDENTS……….

ONLY FOR ARMIET STUDENTS……….
Fig:-SNORT Alert Manager

ONLY FOR ARMIET STUDENTS……….
CONCLUSION:- Hence we have studied and successfully Worked on SNORT.

ONLY FOR ARMIET STUDENTS……….
EXPERIMENT NO 10
AIM :- To study Use of iptables in linux to create firewalls.
THEORY:- Setting up a good firewall is an essential step to take in securing any modern
operating system. Most Linux distributions ship with a few different firewall tools that
we can use to configure our firewalls. In this guide, we'll be covering the iptables
firewall.
Iptables is a standard firewall included in most Linux distributions by default (a modern
variant called nftables will begin to replace it). It is actually a front end to the kernel-level
netfilter hooks that can manipulate the Linux network stack. It works by matching each
packet that crosses the networking interface against a set of rules to decide what to do.
In the previous guide, we learned how iptables rules work to block unwanted traffic. In
this guide, we'll move on to a practical example to demonstrate how to create a basic rule
set for an Ubuntu 14.04 server.
Basic iptables Commands
Now that you have a good understanding of iptables concepts, we should cover the basic
commands that will be used to form complex rule sets and to manage the iptables
interface in general.
First, you should be aware that iptables commands must be run with root privileges. This
means you need to log in as root, use su or sudo -i to gain a root shell, or precede all
commands with sudo. We are going to use sudo in this guide since that is the preferred
method on an Ubuntu system.
A good starting point is to list the current rules that are configured for iptables. You can
do that with the -L flag:

ONLY FOR ARMIET STUDENTS……….
sudo iptables -L
Chain INPUT (policy ACCEPT)
target prot opt source destination
Chain FORWARD (policy ACCEPT)
target prot opt source destination
Chain OUTPUT (policy ACCEPT)
target prot opt source destination
As you can see, we have our three default chains (INPUT,OUTPUT, and FORWARD).
We also can see each chain's default policy (each chain has ACCEPT as its default
policy). We also see some column headers, but we don't see any actual rules. This is
because Ubuntu doesn't ship with a default rule set.
We can see the output in a format that reflects the commands necessary to enable each
rule and policy by instead using the -S flag:
sudo iptables -S
-P INPUT ACCEPT
-P FORWARD ACCEPT
-P OUTPUT ACCEPT
To replicate the configuration, we'd just need to type sudo iptables followed by each of
the lines in the output. (Depending on the configuration, it may actually slightly more
complicated if we are connected remotely so that we don't institute a default drop policy
before the rules are in place to catch and allow our current connection.)

ONLY FOR ARMIET STUDENTS……….
If you do have rules in place and wish to scrap them and start over, you can flush the
current rules by typing:
sudo iptables -F
Once again, the default policy is important here, because, while all of the rules are
deleted from your chains, the default policy will not change with this command. That
means that if you are connected remotely, you should ensure that the default policy on
your INPUT and OUTPUT chains are set to ACCEPT prior to flushing your rules. You
can do this by typing:
sudo iptables -P INPUT ACCEPT
sudo iptables -P OUTPUT ACCEPT
sudo iptables -F
You can then change the default drop policy back to DROP after you've established rules
that explicitly allow your connection. We'll go over how to do that in a moment.
Make your First Rule
We're going to start to build our firewall policies. As we said above, we're going to be
working with the INPUT chain since that is the funnel that incoming traffic will be sent
through. We are going to start with the rule that we've talked about a bit above: the rule
that explicitly accepts your current SSH connection.
The full rule we need is this:
sudo iptables -A INPUT -m conntrack --ctstate ESTABLISHED,RELATED -j ACCEPT
This may look incredibly complicated, but most of it will make sense when we go over
the components:
ONLY FOR ARMIET STUDENTS……….
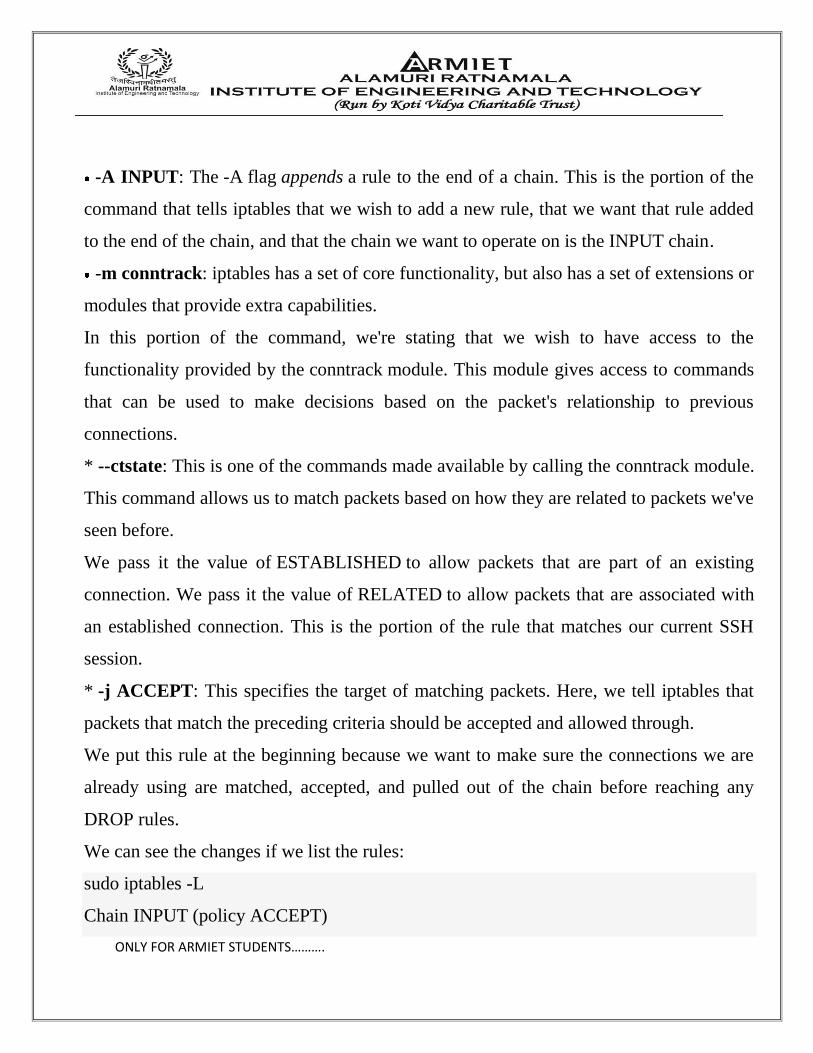
-A INPUT: The -A flag appends a rule to the end of a chain. This is the portion of the
command that tells iptables that we wish to add a new rule, that we want that rule added
to the end of the chain, and that the chain we want to operate on is the INPUT chain.
-m conntrack: iptables has a set of core functionality, but also has a set of extensions or
modules that provide extra capabilities.
In this portion of the command, we're stating that we wish to have access to the
functionality provided by the conntrack module. This module gives access to commands
that can be used to make decisions based on the packet's relationship to previous
connections.
* --ctstate: This is one of the commands made available by calling the conntrack module.
This command allows us to match packets based on how they are related to packets we've
seen before.
We pass it the value of ESTABLISHED to allow packets that are part of an existing
connection. We pass it the value of RELATED to allow packets that are associated with
an established connection. This is the portion of the rule that matches our current SSH
session.
* -j ACCEPT: This specifies the target of matching packets. Here, we tell iptables that
packets that match the preceding criteria should be accepted and allowed through.
We put this rule at the beginning because we want to make sure the connections we are
already using are matched, accepted, and pulled out of the chain before reaching any
DROP rules.
We can see the changes if we list the rules:
sudo iptables -L
Chain INPUT (policy ACCEPT)

ONLY FOR ARMIET STUDENTS……….
target prot opt source destination
ACCEPT all -- anywhere anywhere ctstate
RELATED,ESTABLISHED
Chain FORWARD (policy ACCEPT)
target prot opt source destination
Chain OUTPUT (policy ACCEPT)
target prot opt source destination
Now that you know the general syntax, let's continue by adding some more cases where
we want to accept the connection.
Accept Other Necessary Connections
We have told iptables to keep open any connections that are already open and to allow
new connections related to those connections. However, we need to create some rules to
establish when we want to accept new connections that don't meet those criteria.
We want to keep two ports open specifically. We want to keep our SSH port open (we're
going to assume in this guide that this is the default 22. If you've changed this in your
SSH configuration, modify your value here). We are also going to assume that this
computer is running a web server on the default port 80. If this is not the case for you,
you don't have to add that rule.
The two lines we're going to use to add these rules are:
sudo iptables -A INPUT -p tcp --dport 22 -j ACCEPT
sudo iptables -A INPUT -p tcp --dport 80 -j ACCEPT

ONLY FOR ARMIET STUDENTS……….
As you can see, these are very similar to our first rule, but perhaps more simple. The new
options are:
-p tcp: This option matches packets if the protocol being used is TCP. This is a
connection-based protocol that will be used by most applications because it allows for
reliable communication.
--dport: This option is available if the -p tcp flag is given. It gives a further requirement
of matching the destination port for the matching packet. The first rule matches for TCP
packets destined for port 22, while the second rule matches TCP traffic pointed towards
port 80.
There is one more accept rule that we need to ensure that our server can function
correctly. Often, services on the computer communicate with each other by sending
network packets to each other. They do this by utilizing a pseudo network interface called
the loopback device, which directs traffic back to itself rather than to other computers.
So if one service wants to communicate with another service that is listening for
connections on port 4555, it can send a packet to port 4555 of the loopback device. We
want this type of behavior to be allowed, because it is essential for the correct operation
of many programs.
The rule we need to add is this:
sudo iptables -I INPUT 1 -i lo -j ACCEPT
This looks a bit different than our other commands. Let's go over what it is doing:
-I INPUT 1: The -I flag tells iptables to insert a rule. This is different than the -A flag
which appends a rule to the end. The -I flag takes a chain and the rule position where you
want to insert the new rule.

ONLY FOR ARMIET STUDENTS……….
In this case, we're adding this rule as the very first rule of the INPUT chain. This will
bump the rest of the rules down. We want this at the top because it is fundamental and
should not be affected by subsequent rules.
* -i lo: This component of the rule matches if the interface that the packet is using is the
"lo" interface. The "lo" interface is another name for the loopback device. This means
that any packet using that interface to communicate (packets generated on our server, for
our server) should be accepted.
To see our current rules, we should use the -S flag. This is because the -L flag doesn't
include some information, like the interface that a rule is tied to, which is an important
part of the rule we just added:
sudo iptables -S
-P INPUT ACCEPT
-P FORWARD ACCEPT
-P OUTPUT ACCEPT
-A INPUT -i lo -j ACCEPT
-A INPUT -m conntrack --ctstate RELATED,ESTABLISHED -j ACCEPT
-A INPUT -p tcp -m tcp --dport 22 -j ACCEPT
-A INPUT -p tcp -m tcp --dport 80 -j ACCEPT
Implementing a Drop Rule
We now have four separate rules that explicitly accept packets based on certain criteria.
However, our firewall currently is not blocking anything.
If a packet enters the INPUT chain and doesn't match one of the four rules that we made,
it is being passed to our default policy, which is to accept the packet anyways. We need
to change this.

ONLY FOR ARMIET STUDENTS……….
There are two different ways that we can do this, with some pretty important differences.
The first way we could do this is to modify the default policy of our INPUT chain. We
can do this by typing:
sudo iptables -P INPUT DROP
This will catch any packets that fall through our INPUT chain, and drop them. This is
what we call a default drop policy. One of the implications of this type of a design is that
it falls back on dropping packets if the rules are flushed.
This may be more secure, but also can have serious consequences if you don't have
another way of accessing your server. With DigitalOcean, you can log in through our web
console to get access to your server if this happens. The web console acts as a virtual
local connection, so iptables rules will not affect it.
You may like your server to automatically drop all connections in the event that the rules
are dumped. This would prevent your server from being left wide open. This also means
that you can easily append rules to the bottom of the chain easily while still dropping
packets as you'd like.
The alternative approach is to keep the default policy for the chain as accept and add a
rule that drops every remaining packet to the bottom of the chain itself.
If you changed the default policy for the INPUT chain above, you can set it back to
follow along by typing:
sudo iptables -P INPUT ACCEPT
Now, you can add a rule to the bottom of the chain that will drop any remaining packets:
sudo iptables -A INPUT -j DROP

ONLY FOR ARMIET STUDENTS……….
The result under normal operating conditions is exactly the same as a default drop policy.
This rule works by matching every remaining packet that reaches it. This prevents a
packet from ever dropping all of the way through the chain to reach the default policy.
Basically, this is used to keep the default policy to accept traffic. That way, if there are
any problems and the rules are flushed, you will still be able to access the machine over
the network. This is a way of implementing a default action without altering the policy
that will be applied to an empty chain.
Of course, this also means that any rule that any additional rule that you wish to add to
the end of the chain will have to be added before the drop rule. You can do this either by
temporarily removing the drop rule:
sudo iptables -D INPUT -j DROP
sudo iptables -A INPUT new_rule_here
sudo iptables -A INPUT -j DROP
Or, you can insert rules that you need at the end of the chain (but prior to the drop) by
specifying the line number. To insert a rule at line number 4, you could type:
sudo iptables -I INPUT 4 new_rule_here
If you are having trouble knowing which line number each rule is, you can tell iptables to
number the rules by typing:
sudo iptables -L --line-numbers
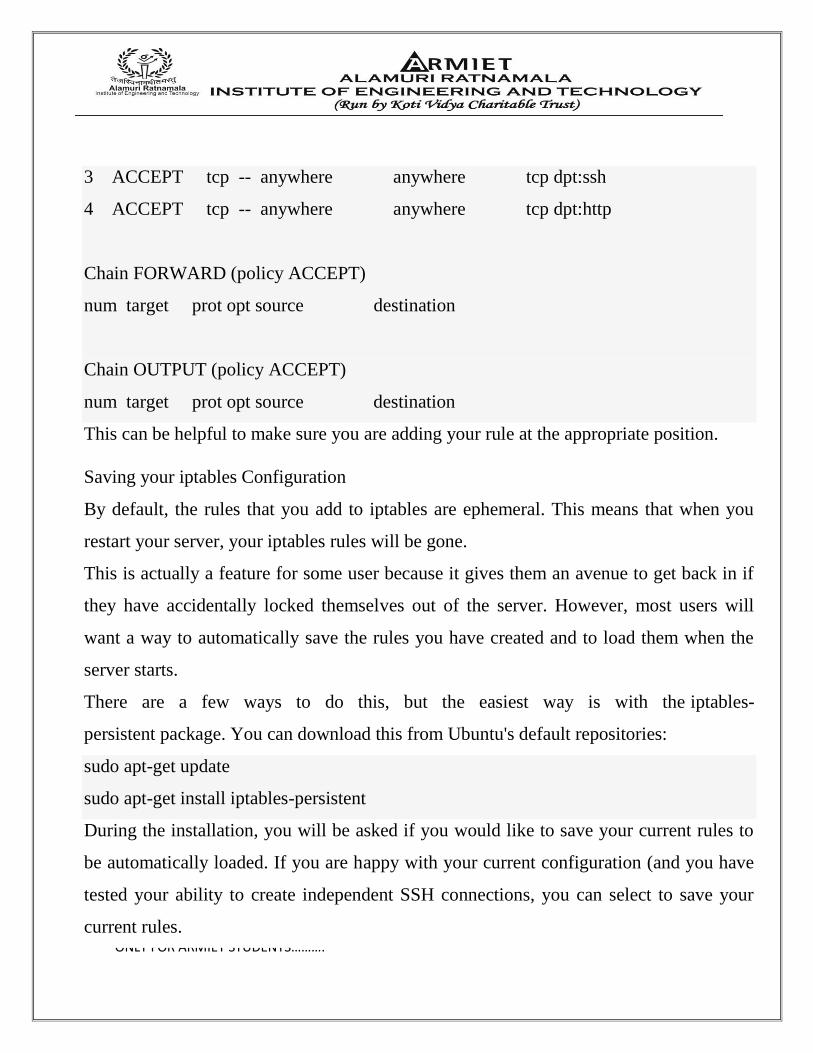
Chain INPUT (policy DROP)
num target prot opt source destination
1 ACCEPT all -- anywhere anywhere
2 ACCEPT all -- anywhere anywhere ctstate
RELATED,ESTABLISHED
ONLY FOR ARMIET STUDENTS……….
3 ACCEPT tcp -- anywhere anywhere tcp dpt:ssh
4 ACCEPT tcp -- anywhere anywhere tcp dpt:http
Chain FORWARD (policy ACCEPT)
num target prot opt source destination
Chain OUTPUT (policy ACCEPT)
num target prot opt source destination
This can be helpful to make sure you are adding your rule at the appropriate position.
Saving your iptables Configuration
By default, the rules that you add to iptables are ephemeral. This means that when you
restart your server, your iptables rules will be gone.
This is actually a feature for some user because it gives them an avenue to get back in if
they have accidentally locked themselves out of the server. However, most users will
want a way to automatically save the rules you have created and to load them when the
server starts.
There are a few ways to do this, but the easiest way is with the iptables-
persistent package. You can download this from Ubuntu's default repositories:
sudo apt-get update
sudo apt-get install iptables-persistent
During the installation, you will be asked if you would like to save your current rules to
be automatically loaded. If you are happy with your current configuration (and you have
tested your ability to create independent SSH connections, you can select to save your
current rules.

ONLY FOR ARMIET STUDENTS……….
It will also ask you if you want to save the IPv6 rules that you have configured. These are
configured through a separate utility called ip6tables which controls the flow of IPv6
packets in almost the same way.
Once the installation is complete, you will have a new service called iptables-
persistent that is configured to run at boot. This service will load in your rules and apply
them when the server is started.
CONCLUSION:- Hence we have studied and successfully Implemented Firewall With
the help of Iptables.
ONLY FOR ARMIET STUDENTS……….
EXPERIMENT NO 11
AIM :- To Implement a simple SQL injection attack.
THEORY:- SQL injection is a code injection technique, used to attack data-driven
applications, in which malicious SQL statements are inserted into an entry field for
execution (e.g. to dump the database contents to the attacker).SQL injection must exploit
a security vulnerability in an application's software, for example, when user input is
either incorrectly filtered for string literalescape characters embedded in SQL statements
or user input is not strongly typed and unexpectedly executed. SQL injection is mostly
known as an attack vector for websites but can be used to attack any type of SQL
database.
In a 2012 study, security company Imperva observed that the average web application
received 4 attack campaigns per month, and retailers received twice as many attacks as
other industries.

ONLY FOR ARMIET STUDENTS……….
A Classification of SQL injection attacking vector until 2010

ONLY FOR ARMIET STUDENTS……….
Incorrectly filtered escape characters
This form of SQL injection occurs when user input is not filtered for escape
characters and is then passed into a SQL statement. This results in the potential
manipulation of the statements performed on the database by the end-user of the
application.
The following line of code illustrates this vulnerability:
statement = "SELECT * FROM users WHERE name ='" + userName + "';"
This SQL code is designed to pull up the records of the specified username from its table
of users. However, if the "userName" variable is crafted in a specific way by a malicious
user, the SQL statement may do more than the code author intended. For example, setting
the "userName" variable as:
' or '1'='1
or using comments to even block the rest of the query (there are three types of SQL
comments[13]). All three lines have a space at the end:
' or '1'='1' --
' or '1'='1' ({
' or '1'='1' /*
renders one of the following SQL statements by the parent language:
SELECT * FROM users WHERE name = '' OR '1'='1';
SELECT * FROM users WHERE name = '' OR '1'='1' -- ';
ONLY FOR ARMIET STUDENTS……….
If this code were to be used in an authentication procedure then this example could be
used to force the selection of a valid username because the evaluation of '1'='1' is always
true.
The following value of "userName" in the statement below would cause the deletion of
the "users" table as well as the selection of all data from the "userinfo" table (in essence
revealing the information of every user), using an API that allows multiple statements:
a';DROP TABLE users; SELECT * FROM userinfo WHERE 't' = 't
This input renders the final SQL statement as follows and specified:
SELECT * FROM users WHERE name = 'a';DROP TABLE users; SELECT * FROM
userinfo WHERE 't' = 't';
While most SQL server implementations allow multiple statements to be executed with
one call in this way, some SQL APIs such as PHP's mysql_query() function do not allow
this for security reasons. This prevents attackers from injecting entirely separate queries,
but doesn't stop them from modifying queries.
CONCLUSION:- Hence we have studied and successfully Implement SQL Injection
Attack.