LAB 5 ANSWER KEY - mywiley.info
59
LAB 5 ANSWER KEY WORKING WITH FIREWALLS, ENCRYPTED FILE SYSTEMS (EFS) AND USER ACCOUNT CONTROL (UAC) This lab contains the following exercises: Exercise 5.1 Installing Internet Information Server Exercise 5.2 Testing IIS Connectivity Exercise 5.3 Allowing a Program through the Firewall Exercise 5.4 Creating Windows Firewall Rules Exercise 5.5 Using NTFS Compression Exercise 5.6 Using EFS Encryption Estimated lab time: 85 minutes Exercise 5.1 Installing Internet Information Server Overview Because this is only a test deployment, you will be using a Windows 7 computer to function as the web server. In Exercise 5.1 you install Internet Information Services on your workstation and configure it to host two web sites. Completion time 10 minutes 1. Click VM > Settings and change Network Adapter settings to bridged.
Transcript of LAB 5 ANSWER KEY - mywiley.info

LAB 5 ANSWER KEY WORKING WITH
FIREWALLS,
ENCRYPTED FILE
SYSTEMS (EFS) AND
USER ACCOUNT
CONTROL (UAC)
This lab contains the following exercises:
Exercise 5.1 Installing Internet Information Server
Exercise 5.2 Testing IIS Connectivity
Exercise 5.3 Allowing a Program through the Firewall
Exercise 5.4 Creating Windows Firewall Rules
Exercise 5.5 Using NTFS Compression
Exercise 5.6 Using EFS Encryption
Estimated lab time: 85 minutes
Exercise 5.1 Installing Internet Information Server
Overview
Because this is only a test deployment, you will be using a Windows 7
computer to function as the web server. In Exercise 5.1 you install Internet
Information Services on your workstation and configure it to host two web
sites.
Completion time 10 minutes
1. Click VM > Settings and change Network Adapter settings to bridged.

70-680 Configuring Windows 7
Working with Firewalls, Encrypted File Systems (EFS) and User Account Control (UAC)
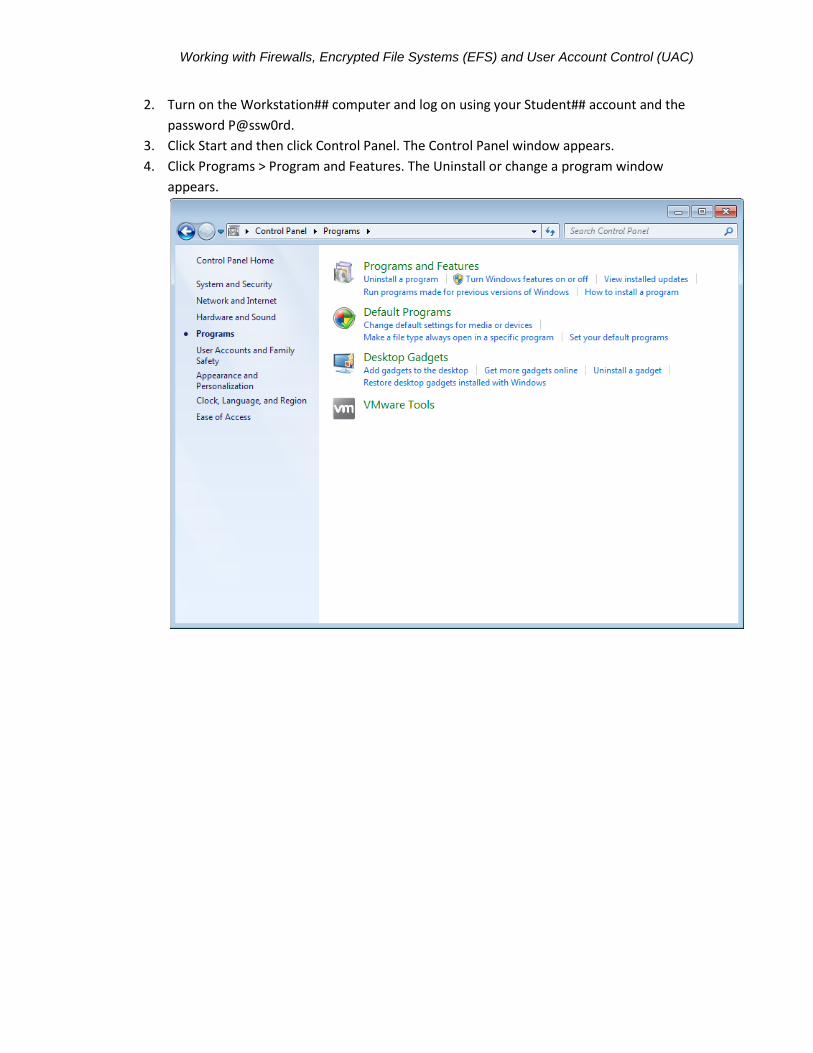
2. Turn on the Workstation## computer and log on using your Student## account and the
password P@ssw0rd.
3. Click Start and then click Control Panel. The Control Panel window appears.
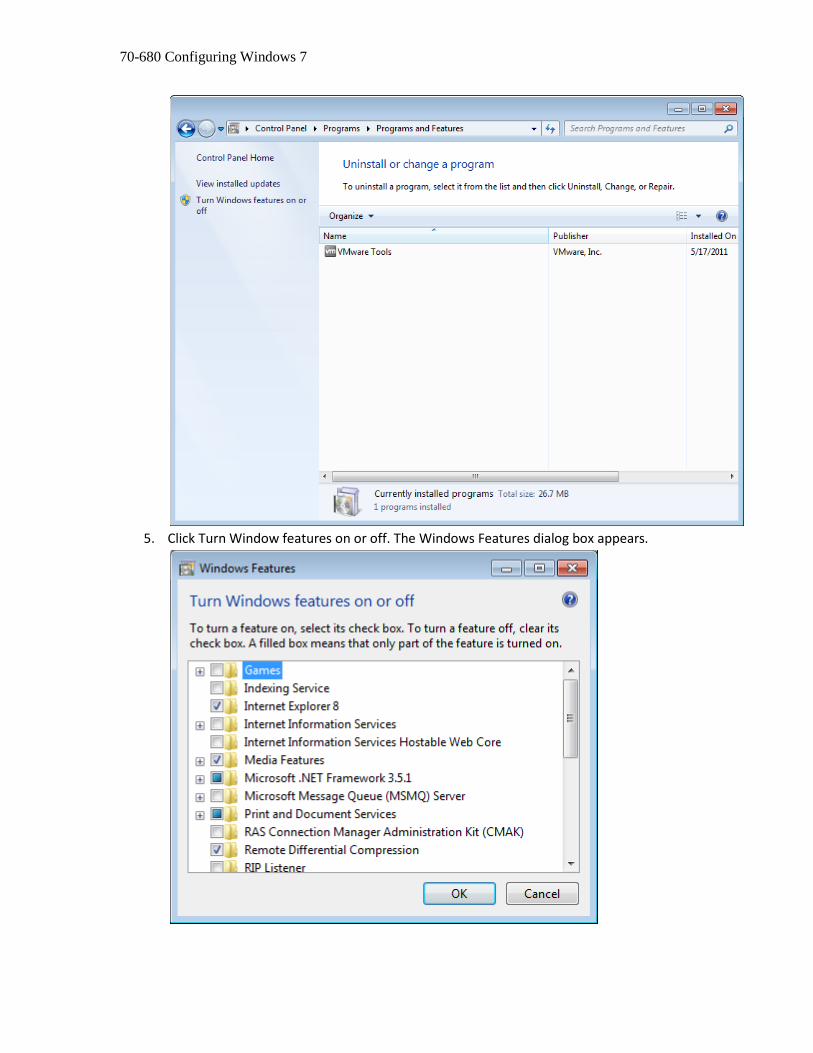
4. Click Programs > Program and Features. The Uninstall or change a program window
appears.
70-680 Configuring Windows 7
5. Click Turn Window features on or off. The Windows Features dialog box appears.

Working with Firewalls, Encrypted File Systems (EFS) and User Account Control (UAC)
6. Browse to the Internet Information Services\World Wide Web Services.
7. Select the Common HTTP Features, Health and Diagnostics, and Security check boxes.
8. Expand the Web Management Tools folder and select the IIS Management Console
check box. Then click OK. Windows 7 installs the selected components.

70-680 Configuring Windows 7
9. Close the Programs and Features control panel window.
10. Click Start, and click Control Panel. The Control Panel window appears.
11. Click System and Security > Administrative Tools. The Administrative Tools window
appears.
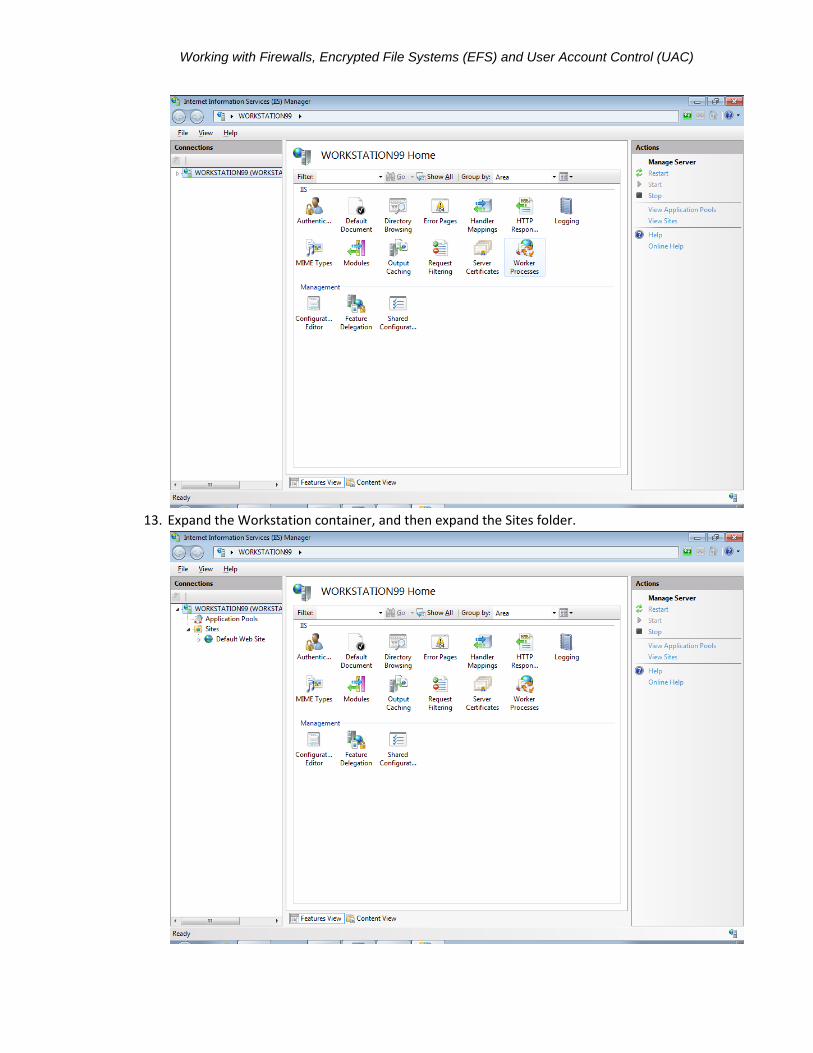
12. Double click Internet Information Services (IIS) Manager. The Internet Information
Services (IIS) Manager console appears.
Working with Firewalls, Encrypted File Systems (EFS) and User Account Control (UAC)
13. Expand the Workstation container, and then expand the Sites folder.

70-680 Configuring Windows 7
14. Right click the sites folder and, from the context menu, select Add Web Site. The Add
Web Site dialog box appears.
15. In the Site name text box, type Intranet.
16. In the Physical path text box, type c:\intepub\wwwroot.
17. Change the value in the Port text box to 4444.
18. Click OK. The new intranet Web site appears in the Sites folder.
19. Take a screen shot of the Internet Information Services (IIS) Manager console, showing
the new site you created, by pressing Alt+ Prt Scr, and then paste the resulting image
into the Lab05_worksheet file in the page provided by pressing Ctrl + V.
20. The URL for your new intranet Web site will be http://IP_Address:4444 (where IP
Address is the IP Address of your virtual machine).
21. Close the Internet Information Services (IIS) Manager console.
22. Leave the computer logged on for the next exercise.
Working with Firewalls, Encrypted File Systems (EFS) and User Account Control (UAC)
Exercise 5.2 Testing IIS Connectivity
Overview
In Exercise 5.2, you test the functionality of the web server you just
installed.
Completion time 20 minutes
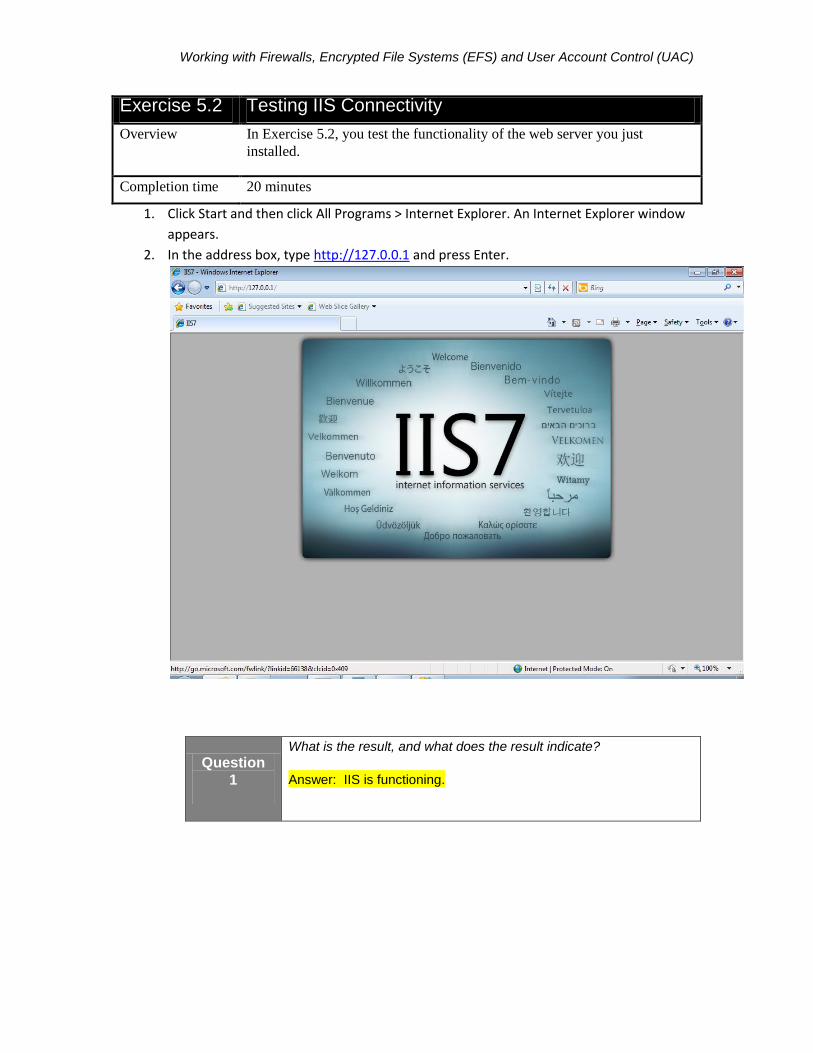
1. Click Start and then click All Programs > Internet Explorer. An Internet Explorer window
appears.
2. In the address box, type http://127.0.0.1 and press Enter.
Question
1
What is the result, and what does the result indicate?
Answer: IIS is functioning.

70-680 Configuring Windows 7
3. Next, test the intranet Web site by using the URL you specified in Exercise 5.1.
Question
2
What is the result, and what does it indicate?
Answer: The web site that was created is functioning.
4. On the host computer (NOT YOUR VIRTUAL MACHINE) open Internet Explorer and
attempt to access the IIS web server running on your workstation by typing
http://IP_Address (where IP Address is the IP Address of your virtual machine) and
pressing Enter.

Working with Firewalls, Encrypted File Systems (EFS) and User Account Control (UAC)
Question
3
What is the result?
Answer: Internet Explorer cannot display the webpage.

70-680 Configuring Windows 7
5. Now, try to connect to the intranet Web site from the host computer.
Question
4
What is the result?
Answer: Internet Explorer cannot display the webpage.
Question
5
List three possible reasons why you might be unable to
connect to your computers web server using a browser on
another computer.
Answer: Firewall, Antivirus, improperly configured network
connections, permissions etc.
Working with Firewalls, Encrypted File Systems (EFS) and User Account Control (UAC)
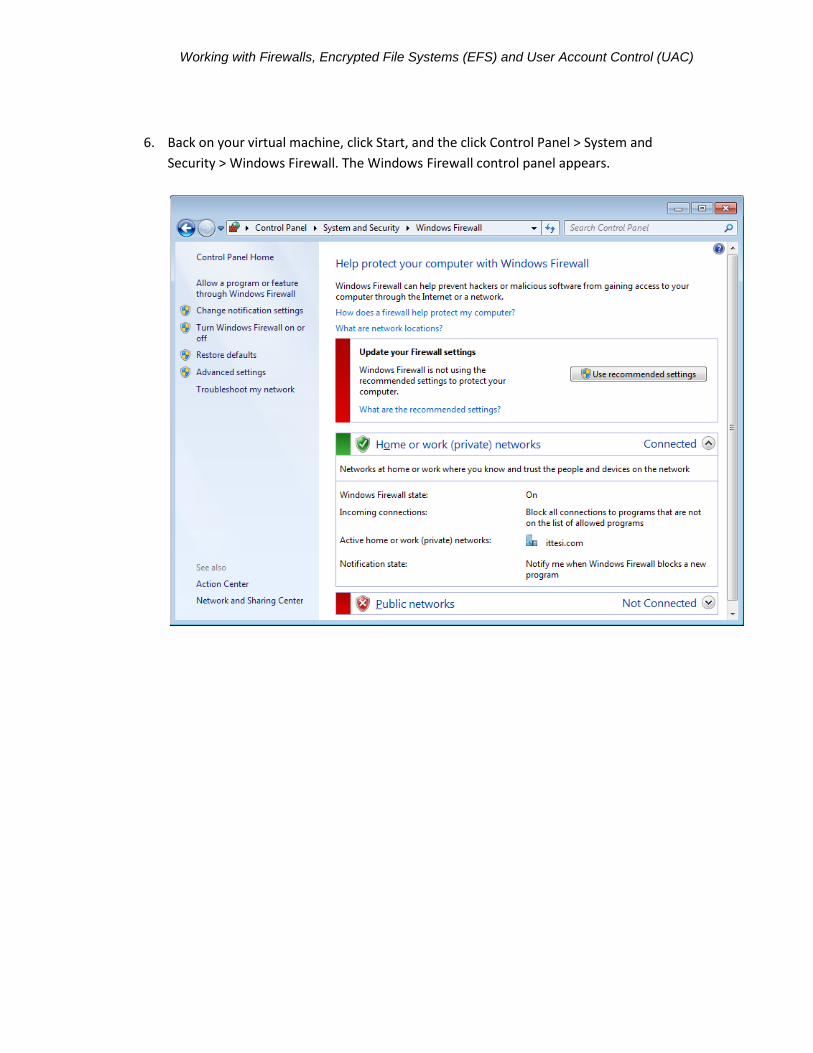
6. Back on your virtual machine, click Start, and the click Control Panel > System and
Security > Windows Firewall. The Windows Firewall control panel appears.

70-680 Configuring Windows 7
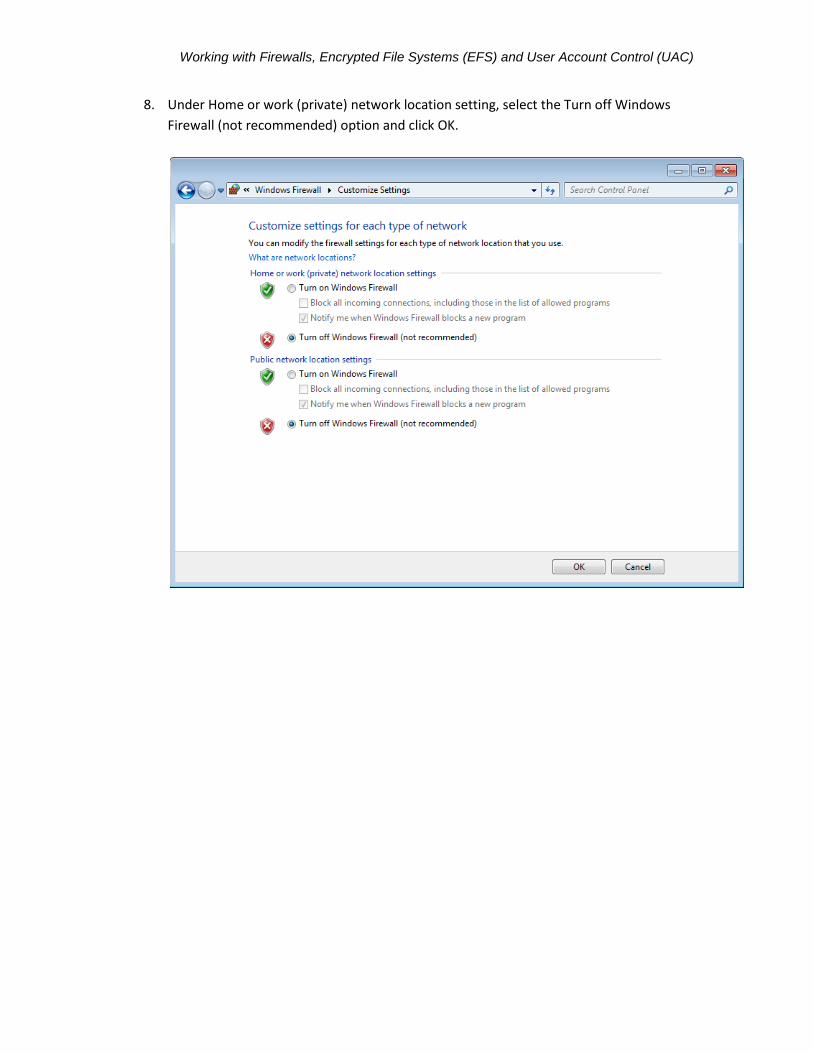
7. Click Turn Windows Firewall on or off. The Customize settings for each type of network
window appears.
Working with Firewalls, Encrypted File Systems (EFS) and User Account Control (UAC)
8. Under Home or work (private) network location setting, select the Turn off Windows
Firewall (not recommended) option and click OK.

70-680 Configuring Windows 7
9. Return to your host computer (NOT YOUR VIRTUAL MACHINE) and Clear the Internet
Explorer cache by clicking Tools >Internet Options. The Internet Options dialog box
appears.
10. Under Browsing History, click the Delete button. The Delete Browsing History dialog box
appears.

Working with Firewalls, Encrypted File Systems (EFS) and User Account Control (UAC)
11. Click Delete all. Then click OK to close the Internet Options dialog box.
Question
6
Why is it necessary to clear the cache before you retest the
web server connections?
Answer: Because the cache will point to the previous URL
that was not functioning correctly.
12. Attempt to access both of the sites on the web server using Internet Explorer.

70-680 Configuring Windows 7
Working with Firewalls, Encrypted File Systems (EFS) and User Account Control (UAC)
Question
7
What are the results, and what do the results indicate?
Answer: The web page is displayed.
Question
8
What other test could you perform to prove that it was your
computer’s firewall that was blocking the connection and not
the firewall on the computer you are using as a client?
Answer: Disabling the clients firewall, enabling the firewall on the
Virtual Machine and opening the port, use netstat to determine if the
port is open etc.
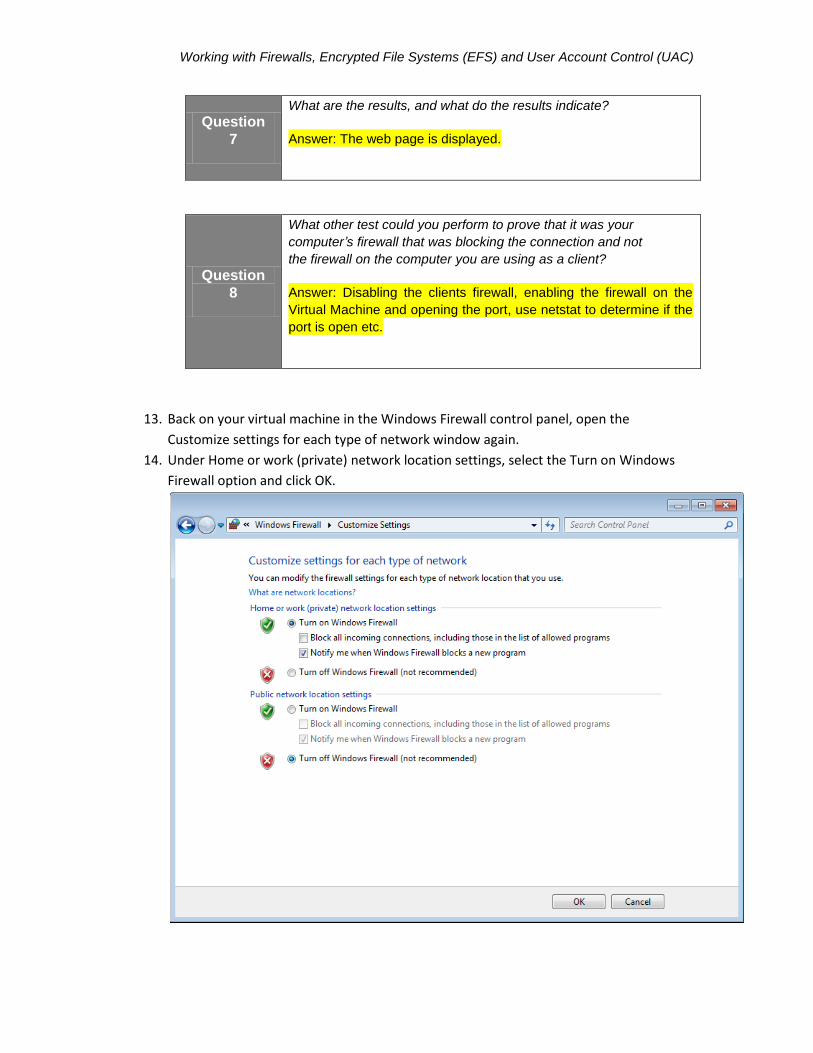
13. Back on your virtual machine in the Windows Firewall control panel, open the
Customize settings for each type of network window again.
14. Under Home or work (private) network location settings, select the Turn on Windows
Firewall option and click OK.
70-680 Configuring Windows 7
Question
9
Why can you not simply leave Windows Firewall turned off
when you deploy an actual web server?
Answer: Because the machine would be open to attack from external
sources
15. Leave the Windows Firewall control panel open and the workstation logged on for the
next exercise.
Exercise 5.3 Allowing a Program Through the Firewall
Overview
Windows Firewall is preventing clients from connecting to the web
server. In Exercise 5.3 to enable client access, you will use the
Windows Firewall control panel to allow access to the web server.
Completion time 10 minutes
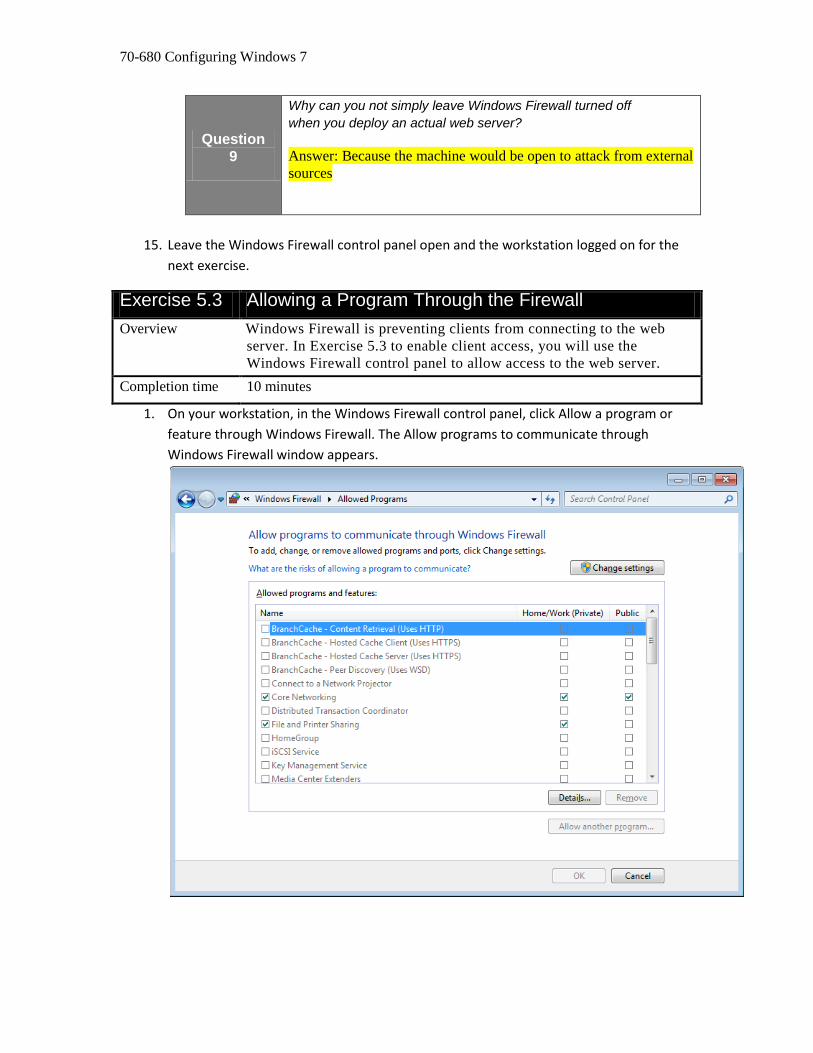
1. On your workstation, in the Windows Firewall control panel, click Allow a program or
feature through Windows Firewall. The Allow programs to communicate through
Windows Firewall window appears.
Working with Firewalls, Encrypted File Systems (EFS) and User Account Control (UAC)
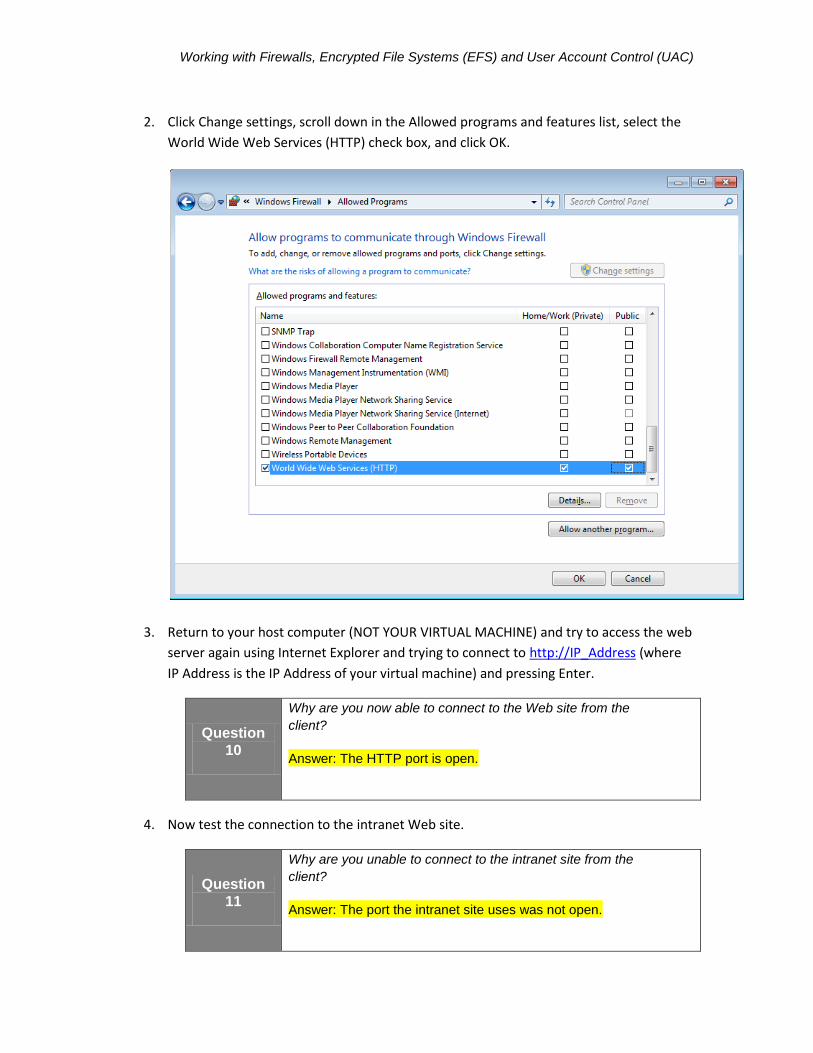
2. Click Change settings, scroll down in the Allowed programs and features list, select the
World Wide Web Services (HTTP) check box, and click OK.
3. Return to your host computer (NOT YOUR VIRTUAL MACHINE) and try to access the web
server again using Internet Explorer and trying to connect to http://IP_Address (where
IP Address is the IP Address of your virtual machine) and pressing Enter.
Question
10
Why are you now able to connect to the Web site from the
client?
Answer: The HTTP port is open.
4. Now test the connection to the intranet Web site.
Question
11
Why are you unable to connect to the intranet site from the
client?
Answer: The port the intranet site uses was not open.

70-680 Configuring Windows 7
5. Open the Allow programs to communicate through Windows Firewall window again and
clear the World Wide Web Services (HTTP) check box. Then, click OK.
6. Leave the remaining windows open and the workstations logged on for the next
exercise.
Working with Firewalls, Encrypted File Systems (EFS) and User Account Control (UAC)
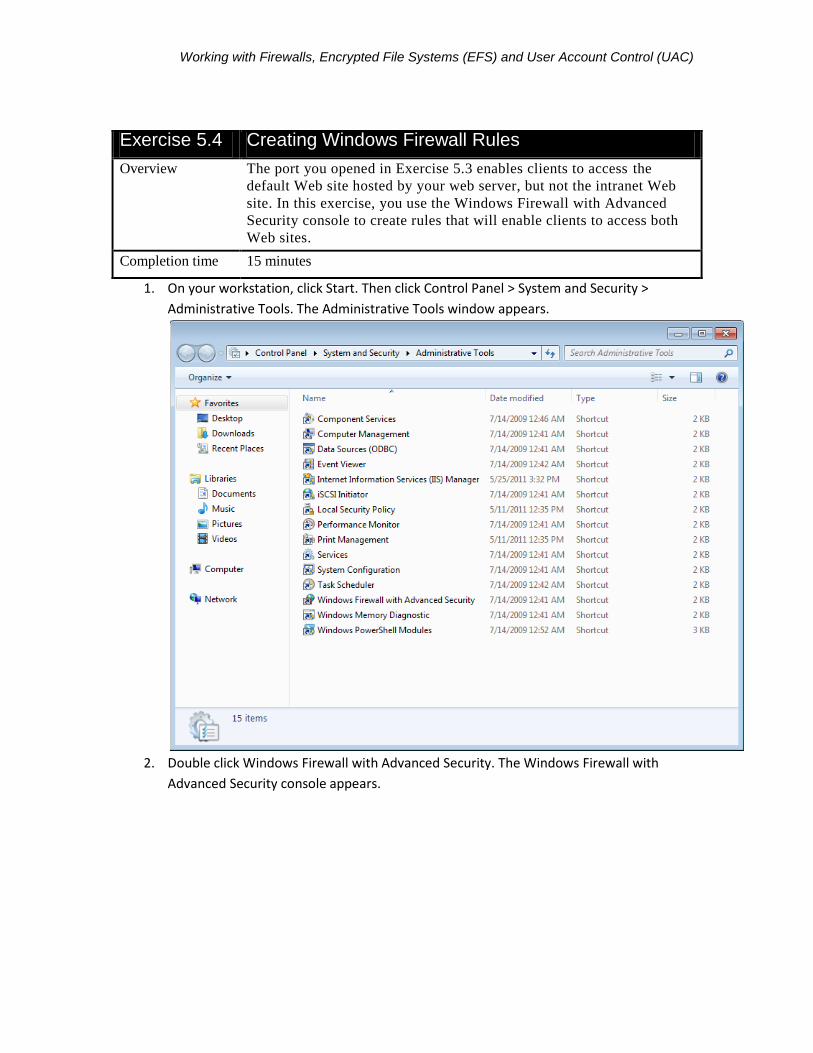
Exercise 5.4 Creating Windows Firewall Rules
Overview
The port you opened in Exercise 5.3 enables clients to access the
default Web site hosted by your web server, but not the intranet Web
site. In this exercise, you use the Windows Firewall with Advanced
Security console to create rules that will enable clients to access both
Web sites.
Completion time 15 minutes
1. On your workstation, click Start. Then click Control Panel > System and Security >
Administrative Tools. The Administrative Tools window appears.
2. Double click Windows Firewall with Advanced Security. The Windows Firewall with
Advanced Security console appears.
70-680 Configuring Windows 7
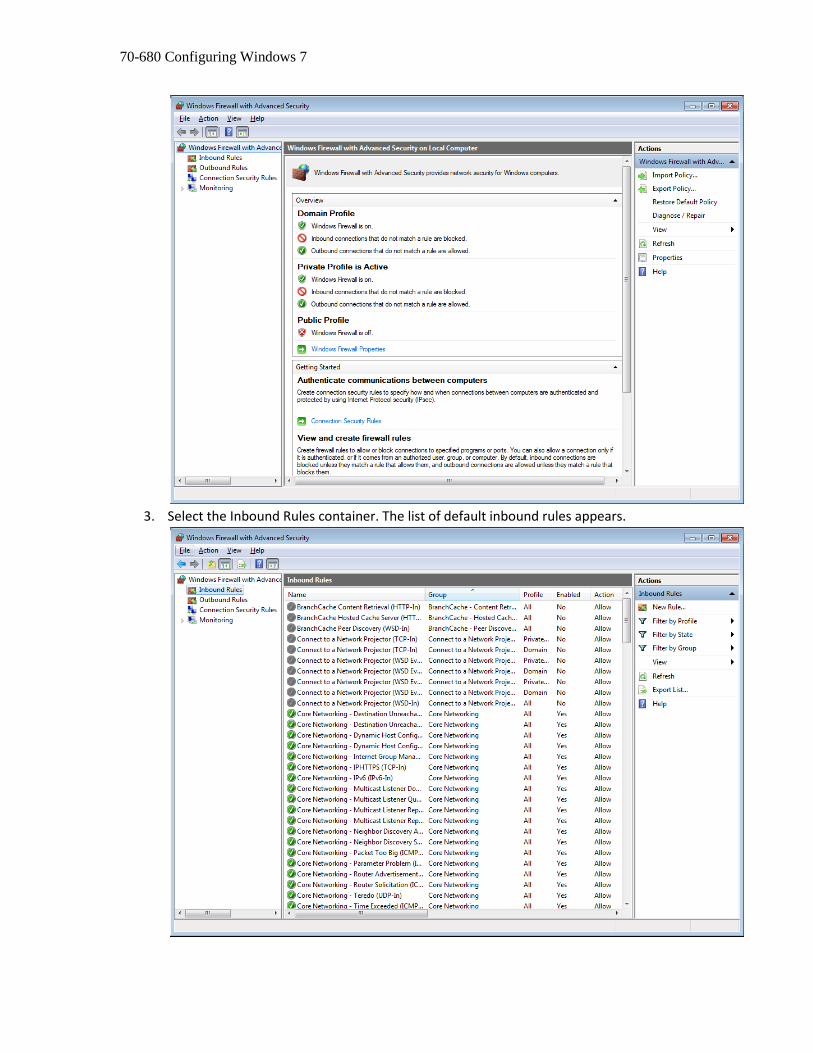
3. Select the Inbound Rules container. The list of default inbound rules appears.

Working with Firewalls, Encrypted File Systems (EFS) and User Account Control (UAC)
4. Scroll down to the bottom of the list and locate the rules for World Wide Web Services
(HTTP Traffic-In).
Question
12
Why are there two separate rules for the World Wide Web
Services?
Answer: One is for the Domain profile and one is for the Public and
Private profiles.
5. Double click each of the two rules and examine their properties.

70-680 Configuring Windows 7
Question
13
How do the properties of the two rules differ?
Answer: They are exactly the same except for the profile
assignments.
Question
14
How would the opening of the port you performed in Exercise
5.3 affect the World Wide Web Services (HTTP Traffic-In)
rules you just examined?
Answer: Opening the port activates the rule for the Domain profile,
causing its check mark to appear red in the console.
6. Select the Inbound Rules container and, from the Action menu, select Filter By Profile >
Filter By Private Profile.
Question
15
What happens to the list of rules?
Answer: It changes to display only the rules that apply to the Private
profile.
Working with Firewalls, Encrypted File Systems (EFS) and User Account Control (UAC)
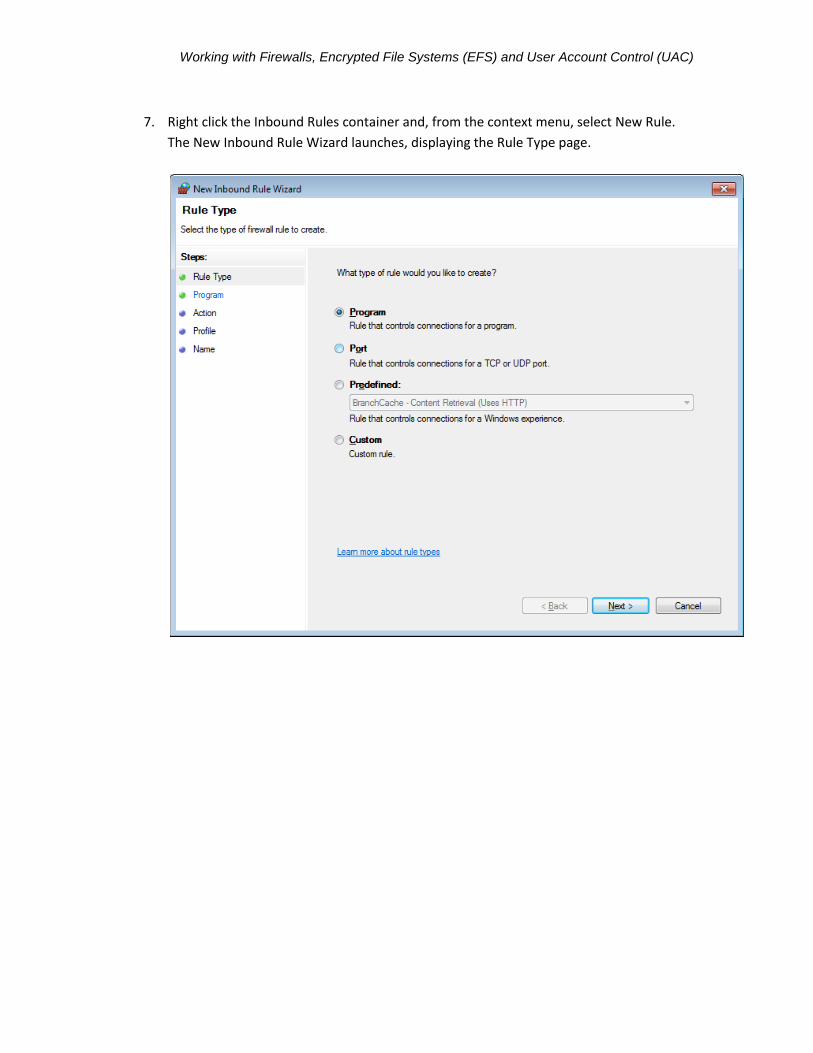
7. Right click the Inbound Rules container and, from the context menu, select New Rule.
The New Inbound Rule Wizard launches, displaying the Rule Type page.

70-680 Configuring Windows 7
8. Select the Port option and click Next. The Protocol and Ports page appears.
Working with Firewalls, Encrypted File Systems (EFS) and User Account Control (UAC)
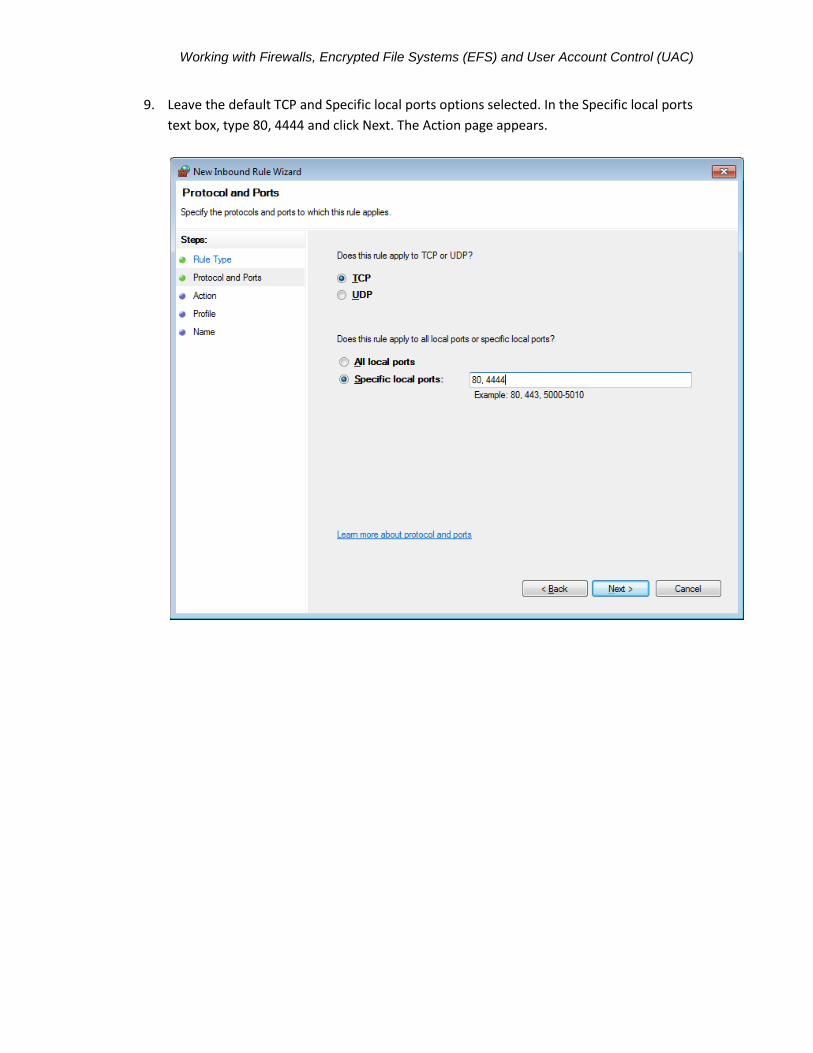
9. Leave the default TCP and Specific local ports options selected. In the Specific local ports
text box, type 80, 4444 and click Next. The Action page appears.

70-680 Configuring Windows 7
10. Leave the default Allow the connection option selected and click Next. The Profile page
appears.
Working with Firewalls, Encrypted File Systems (EFS) and User Account Control (UAC)
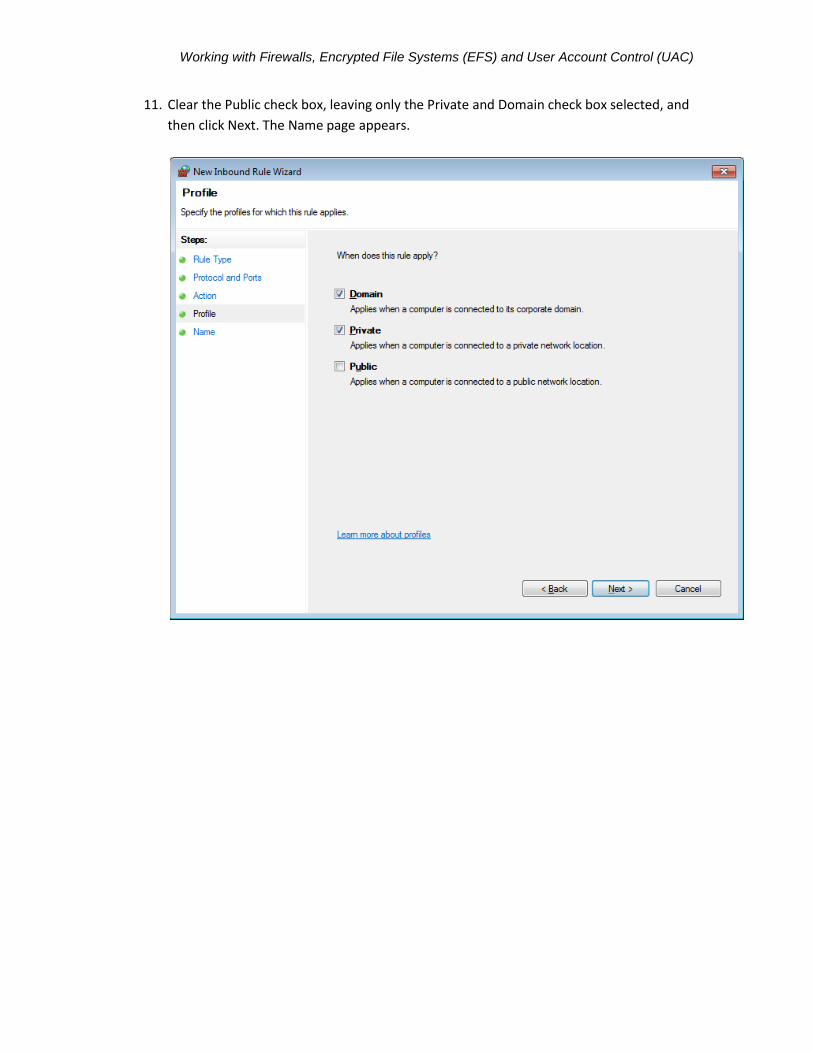
11. Clear the Public check box, leaving only the Private and Domain check box selected, and
then click Next. The Name page appears.
70-680 Configuring Windows 7
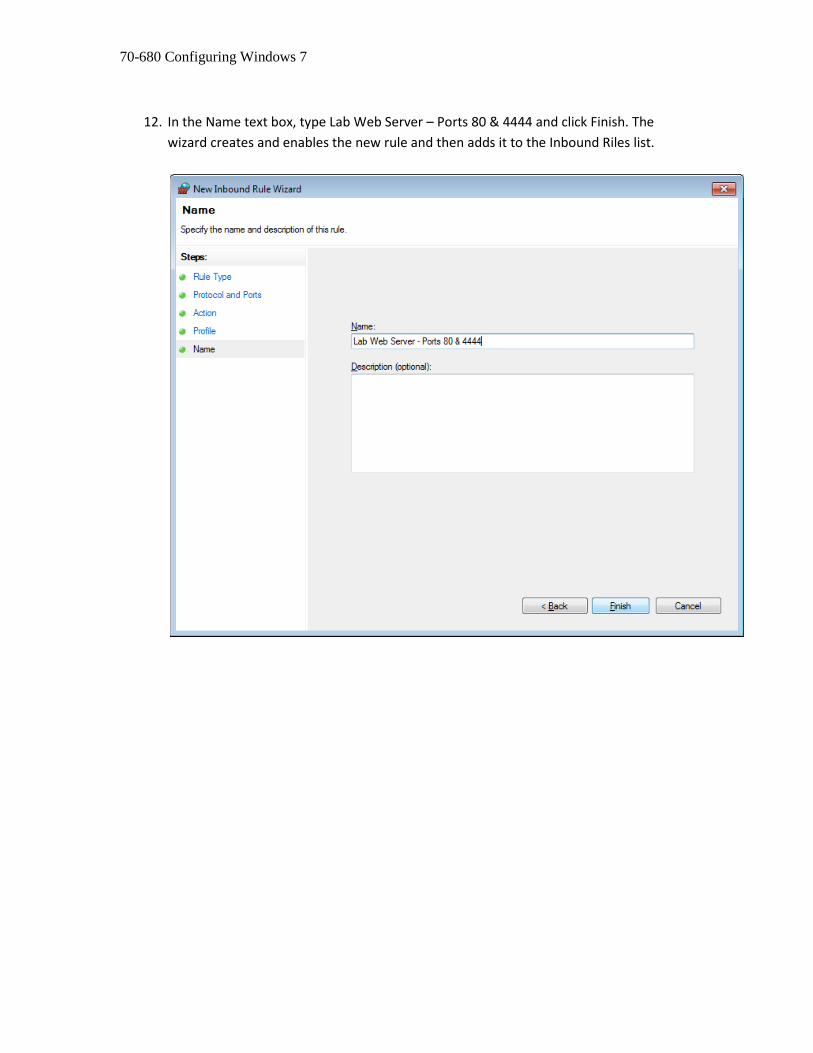
12. In the Name text box, type Lab Web Server – Ports 80 & 4444 and click Finish. The
wizard creates and enables the new rule and then adds it to the Inbound Riles list.
Working with Firewalls, Encrypted File Systems (EFS) and User Account Control (UAC)
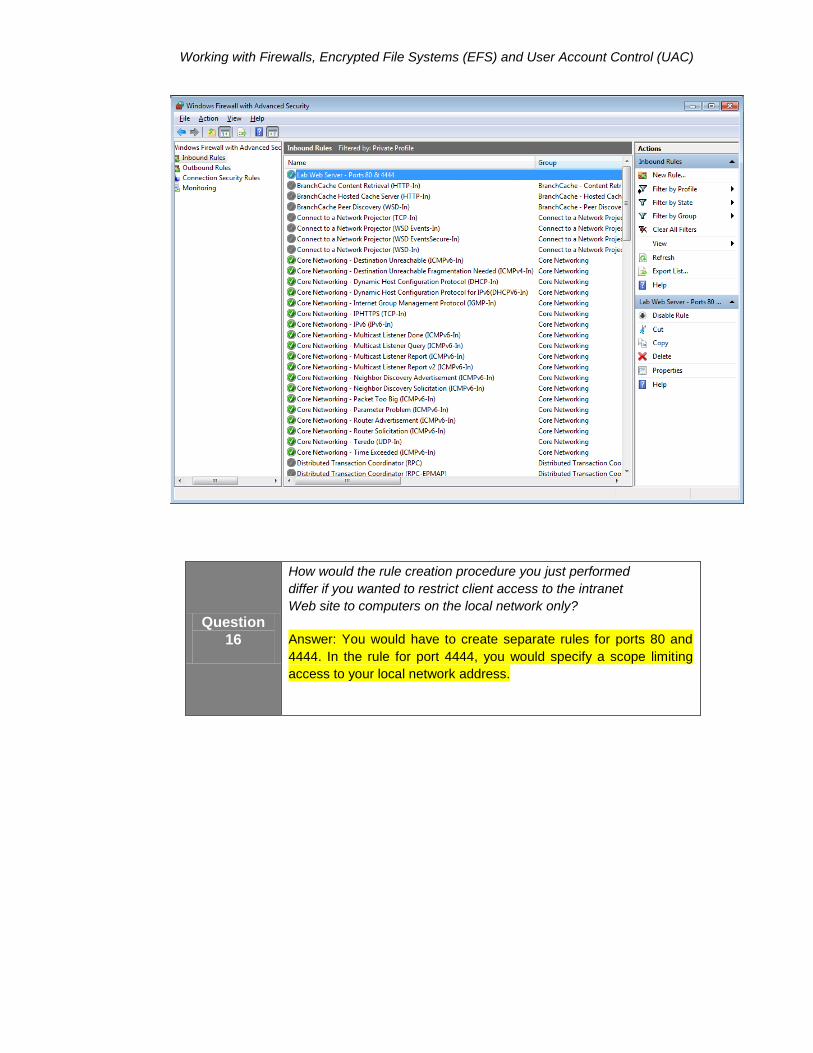
Question
16
How would the rule creation procedure you just performed
differ if you wanted to restrict client access to the intranet
Web site to computers on the local network only?
Answer: You would have to create separate rules for ports 80 and
4444. In the rule for port 4444, you would specify a scope limiting
access to your local network address.

70-680 Configuring Windows 7
13. Click Clear All Filters on the Action pain in order to view the new rule. Double click the
rule you just created. The Lab Web Server – Ports 80 & 4444 Properties sheet appears.
14. Take a screen shot of the Properties sheet for the new rule by pressing Alt+ Prt Scr, and
then paste the resulting image into the Lab05_worksheet file in the page provided by
pressing Ctrl + V.

Working with Firewalls, Encrypted File Systems (EFS) and User Account Control (UAC)
15. Return to your host computer (NOT YOUR VIRTUAL MACHINE) and Clear the Internet
Explorer cache by clicking Tools >Internet Options. The Internet Options dialog box
appears.
16. Under Browsing History, click the Delete button. The Delete Browsing History dialog box
appears.

70-680 Configuring Windows 7
17. Click Delete all. Then click OK to close the Internet Options dialog box.
18. Attempt to access both of the sites on the web server using Internet Explorer.
Question
17
What are the results, and why are they different from the
results you experienced with the program exception?
Answer: The client successfully connects to both websites. This
occurs because the rule you created opens up both port 80 and port
4444.
19. Click VM > Settings and change Network Adapter settings back to Host-only.
20. Close all windows and leave the computer logged on for the next exercise.
Working with Firewalls, Encrypted File Systems (EFS) and User Account Control (UAC)
Exercise 5.5 Using NTFS Compression
Overview
The graphic design department uses lots of image files, which are quite
large. To save room, they have been saving images as .jpg files, but
they are starting to notice degradation in the images when they are
printed. They have therefore decided to use Windows bitmap (.bmp)
files to store images, which are uncompressed. You need to implement
NTFS compression, to save space, on a folder in which they store the
.bmp images.
Completion time 15 minutes
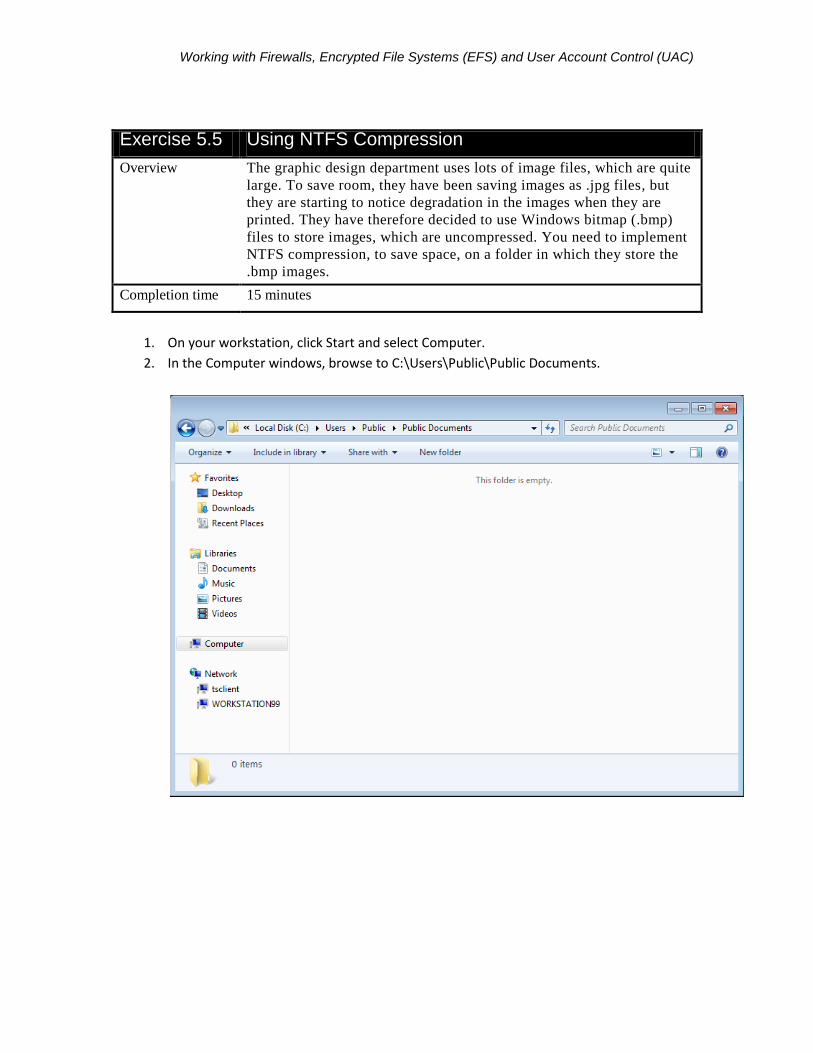
1. On your workstation, click Start and select Computer.
2. In the Computer windows, browse to C:\Users\Public\Public Documents.

70-680 Configuring Windows 7
3. In the Public Documents folder click New Folder in the toolbar.
4. Name the folder Brochure Images.
5. Right click the Brochure Images folder, and then select Properties.

Working with Firewalls, Encrypted File Systems (EFS) and User Account Control (UAC)
6. In the Brochure Images Properties dialog box, on the General tab, click Advanced.

70-680 Configuring Windows 7
7. In the Advanced Attributes dialog box, select the Compress contents to save disk space
check box and click OK.
8. In the Brochure Images Properties dialog box, click OK.
Question
18
What color is the font for the Brochure Images folder?
Answer: Blue
9. In the Public Documents folder, right click blank space, point to New > Bitmap Image.
10. Name the image Picture1.

Working with Firewalls, Encrypted File Systems (EFS) and User Account Control (UAC)
11. Right click Picture1, and then select Edit.

70-680 Configuring Windows 7
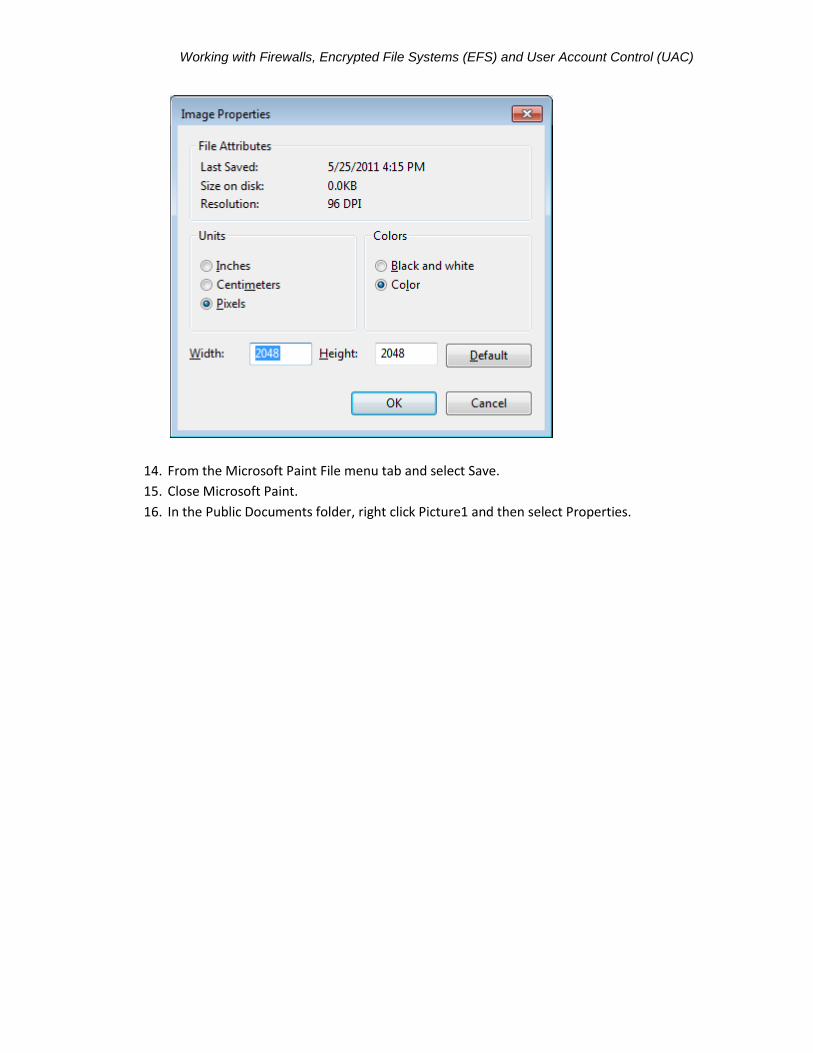
12. In Microsoft Paint click the Microsoft Paint File menu tab and select Properties.
13. In the Properties dialog box, in the Width and Height text boxes, type 2048, and then
click OK.
Working with Firewalls, Encrypted File Systems (EFS) and User Account Control (UAC)
14. From the Microsoft Paint File menu tab and select Save.
15. Close Microsoft Paint.
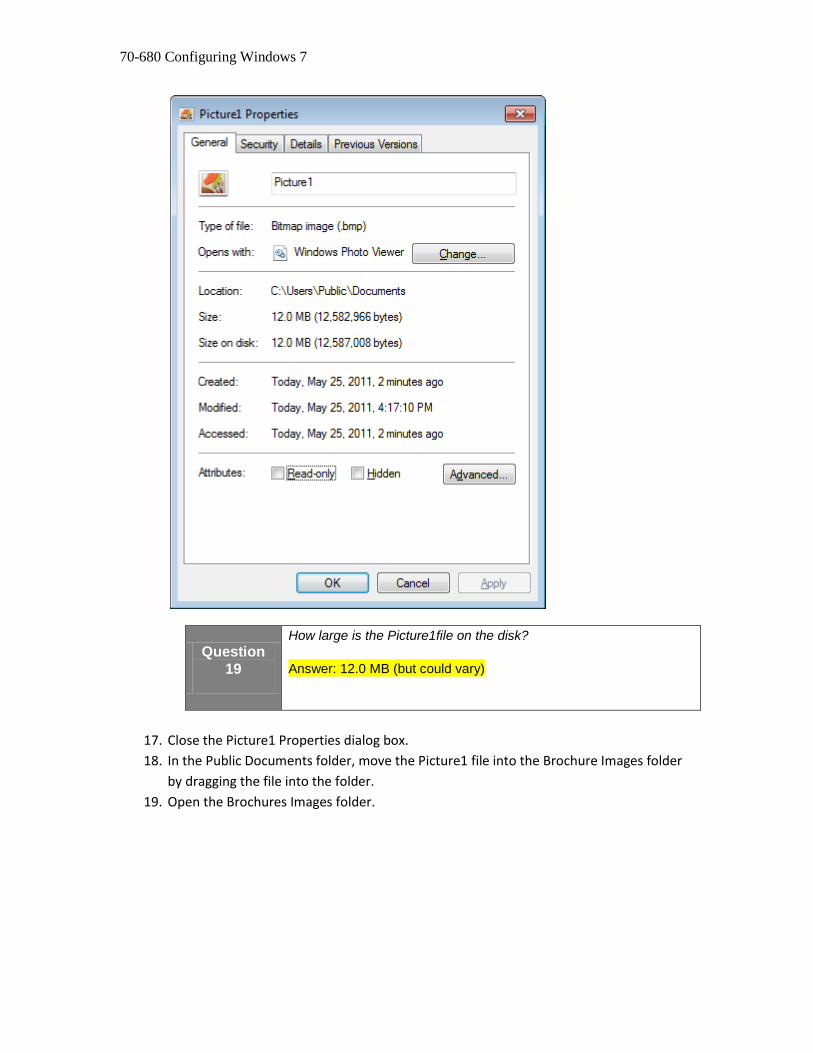
16. In the Public Documents folder, right click Picture1 and then select Properties.
70-680 Configuring Windows 7
Question
19
How large is the Picture1file on the disk?
Answer: 12.0 MB (but could vary)
17. Close the Picture1 Properties dialog box.
18. In the Public Documents folder, move the Picture1 file into the Brochure Images folder
by dragging the file into the folder.
19. Open the Brochures Images folder.

Working with Firewalls, Encrypted File Systems (EFS) and User Account Control (UAC)
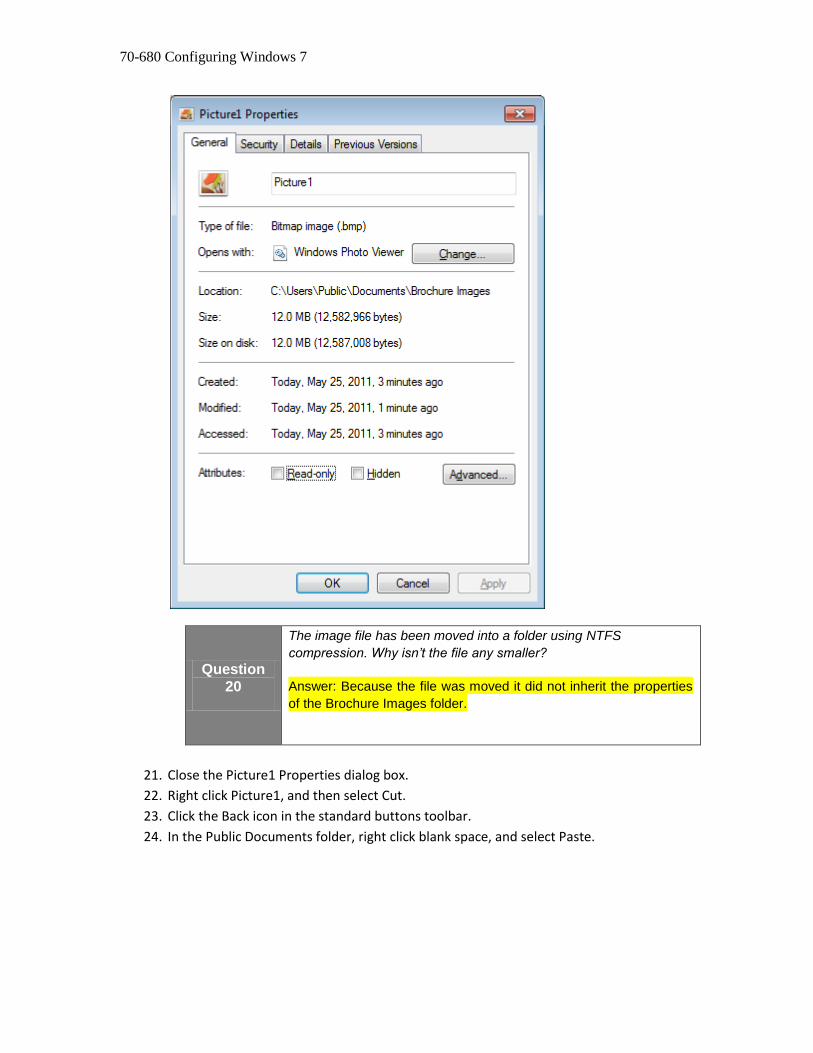
20. In the Brochure Images folder, right click Picture1 and then select Properties.
70-680 Configuring Windows 7
Question
20
The image file has been moved into a folder using NTFS
compression. Why isn’t the file any smaller?
Answer: Because the file was moved it did not inherit the properties
of the Brochure Images folder.
21. Close the Picture1 Properties dialog box.
22. Right click Picture1, and then select Cut.
23. Click the Back icon in the standard buttons toolbar.
24. In the Public Documents folder, right click blank space, and select Paste.
Working with Firewalls, Encrypted File Systems (EFS) and User Account Control (UAC)
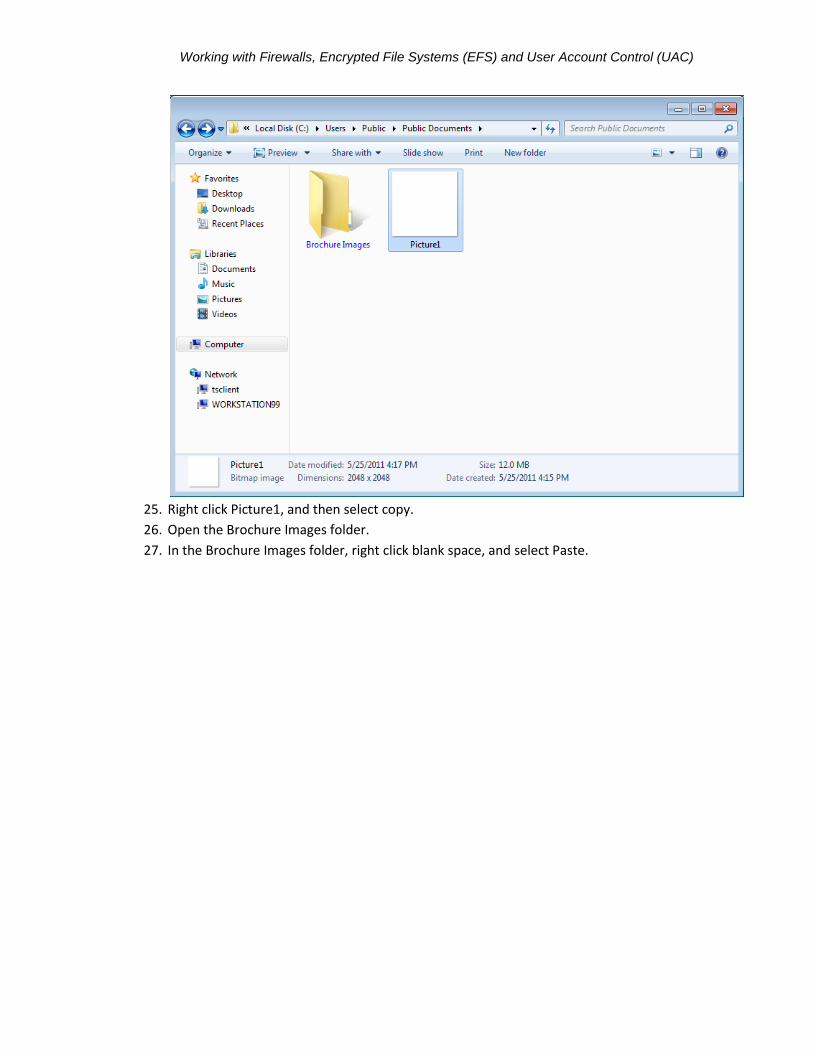
25. Right click Picture1, and then select copy.
26. Open the Brochure Images folder.
27. In the Brochure Images folder, right click blank space, and select Paste.

70-680 Configuring Windows 7
28. Right click Picture1, and then select Properties.

Working with Firewalls, Encrypted File Systems (EFS) and User Account Control (UAC)
Question
21
What is the size on disk of the Picture1 file now?
Answer: 1.75 MB (but could vary)
Question
22
Why did the file shrink, when it remained full size when it was
moved?
Answer: Because the file was copied, it inherited the properties of
the Brochure Images folder.
29. Close the Picture1 Properties dialog box.
70-680 Configuring Windows 7
30. Take a screen shot of the Brochure Images folder showing Picture1 by pressing Alt+ Prt
Scr, and then paste the resulting image into the Lab05_worksheet file in the page
provided by pressing Ctrl + V.
31. Click the Back icon in the standard buttons toolbar to return to the Public Documents
folder for the next exercise.
Exercise 5.6 Using EFS Encryption
Overview
The graphic design team is working on a brochure for proprietary
software that Contoso is going to use. The software is expected to give
the company an edge over other companies, and management is very
paranoid about keeping the new concepts secret. To help protect this
data, you need to create an encrypted data store using EFS on the
computers of all the members in the graphic design team who are
assigned to the project.
Completion time 15 minutes
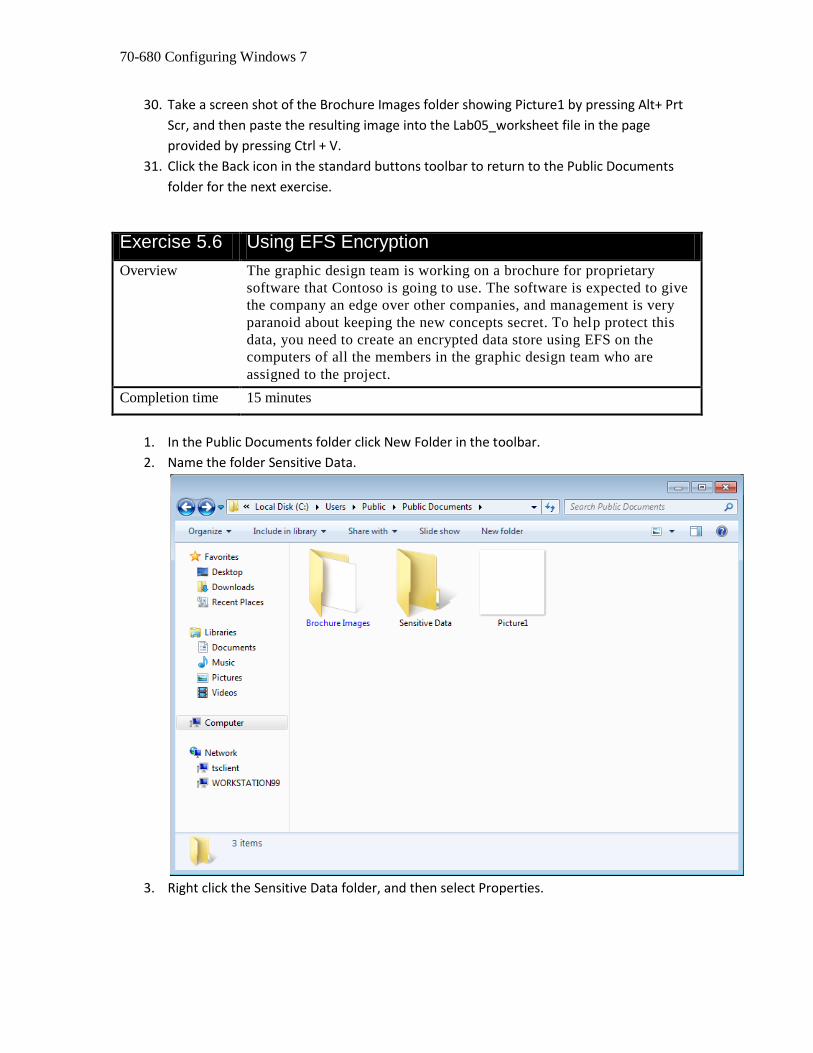
1. In the Public Documents folder click New Folder in the toolbar.
2. Name the folder Sensitive Data.
3. Right click the Sensitive Data folder, and then select Properties.
Working with Firewalls, Encrypted File Systems (EFS) and User Account Control (UAC)
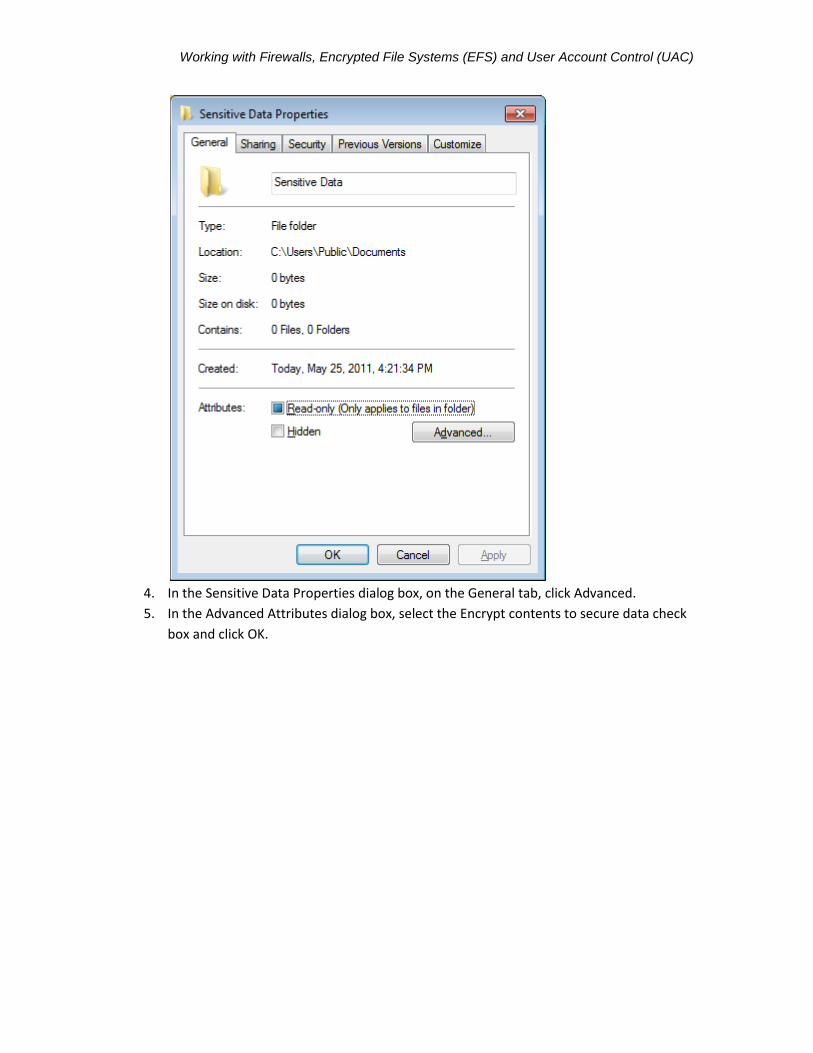
4. In the Sensitive Data Properties dialog box, on the General tab, click Advanced.
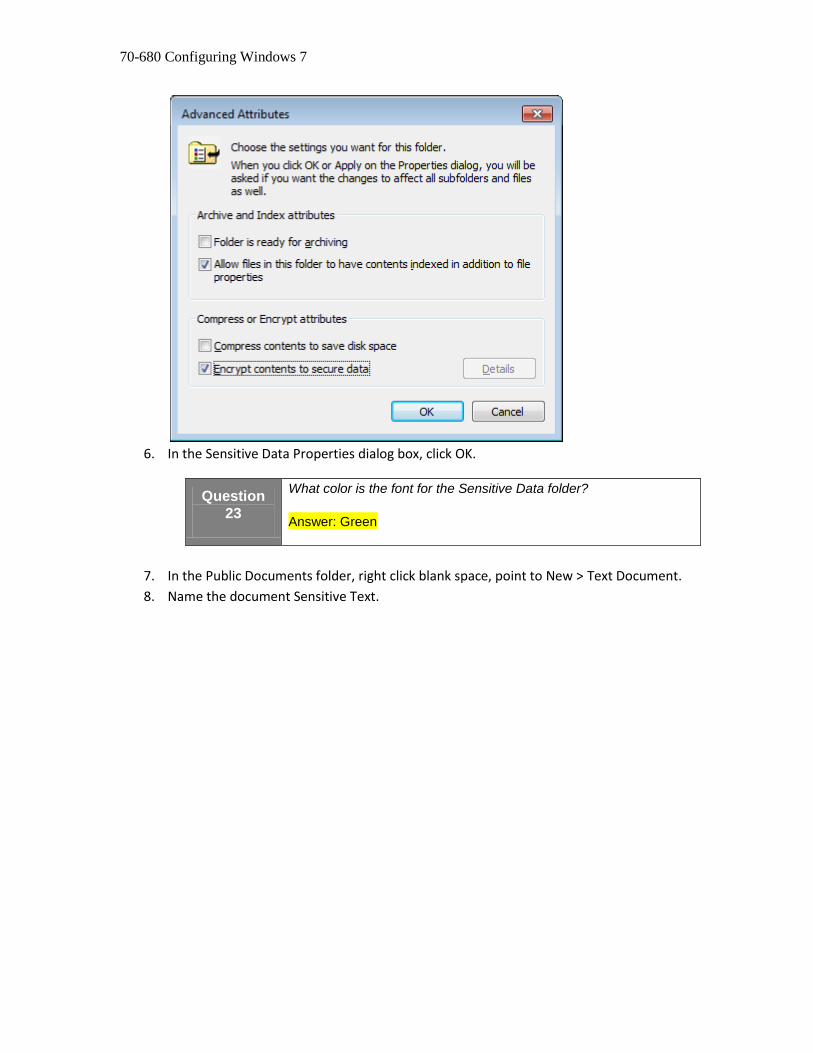
5. In the Advanced Attributes dialog box, select the Encrypt contents to secure data check
box and click OK.
70-680 Configuring Windows 7
6. In the Sensitive Data Properties dialog box, click OK.
Question
23
What color is the font for the Sensitive Data folder?
Answer: Green
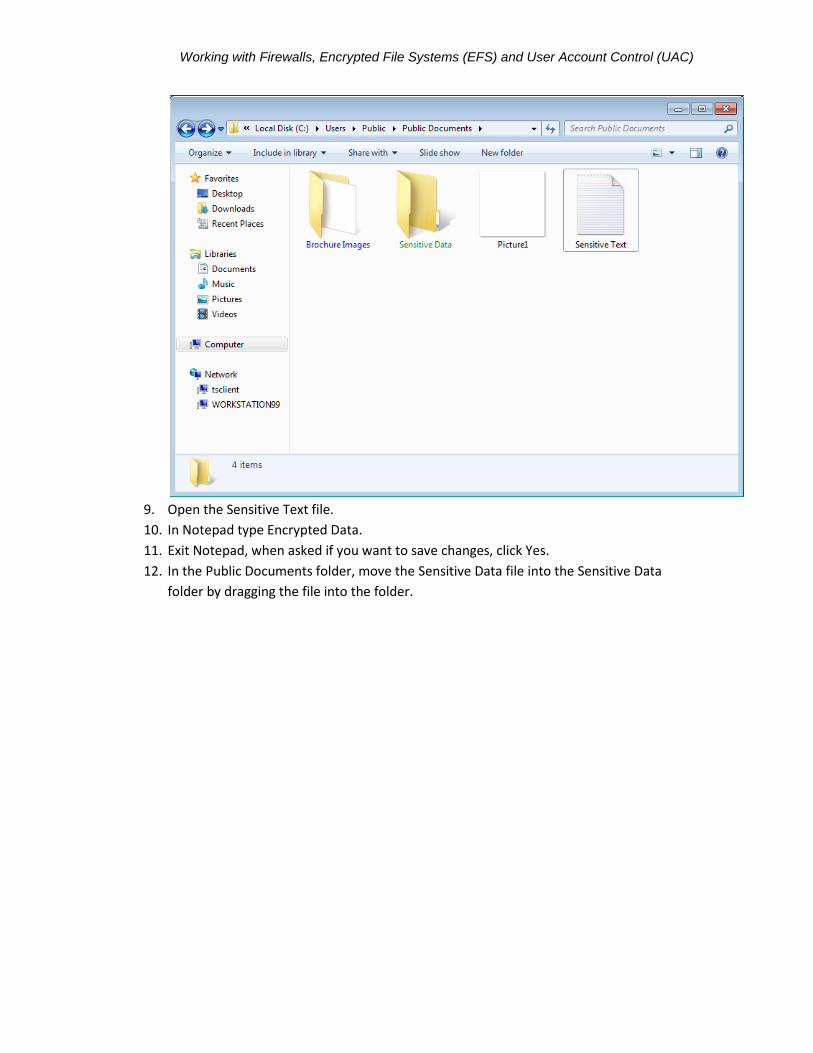
7. In the Public Documents folder, right click blank space, point to New > Text Document.
8. Name the document Sensitive Text.
Working with Firewalls, Encrypted File Systems (EFS) and User Account Control (UAC)
9. Open the Sensitive Text file.
10. In Notepad type Encrypted Data.
11. Exit Notepad, when asked if you want to save changes, click Yes.
12. In the Public Documents folder, move the Sensitive Data file into the Sensitive Data
folder by dragging the file into the folder.

70-680 Configuring Windows 7
13. Open the Sensitive Data folder.
14. Open the Sensitive Data text file.
Question
24
Can you read the Sensitive Text file?
Answer: Yes
15. Close Notepad.
16. Minimize the Sensitive Data folder.
17. Click Start, and in the Search programs and files box, type mmc and press Enter. A blank
Microsoft Management Console window appears.
Working with Firewalls, Encrypted File Systems (EFS) and User Account Control (UAC)
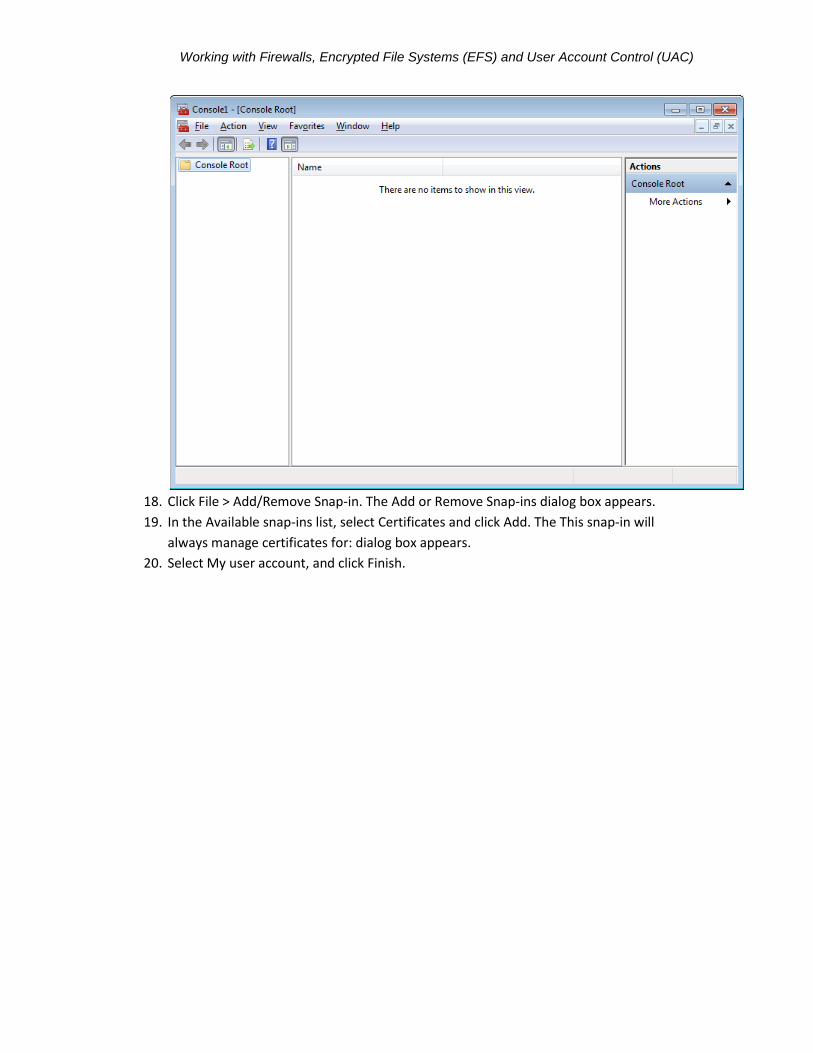
18. Click File > Add/Remove Snap-in. The Add or Remove Snap-ins dialog box appears.
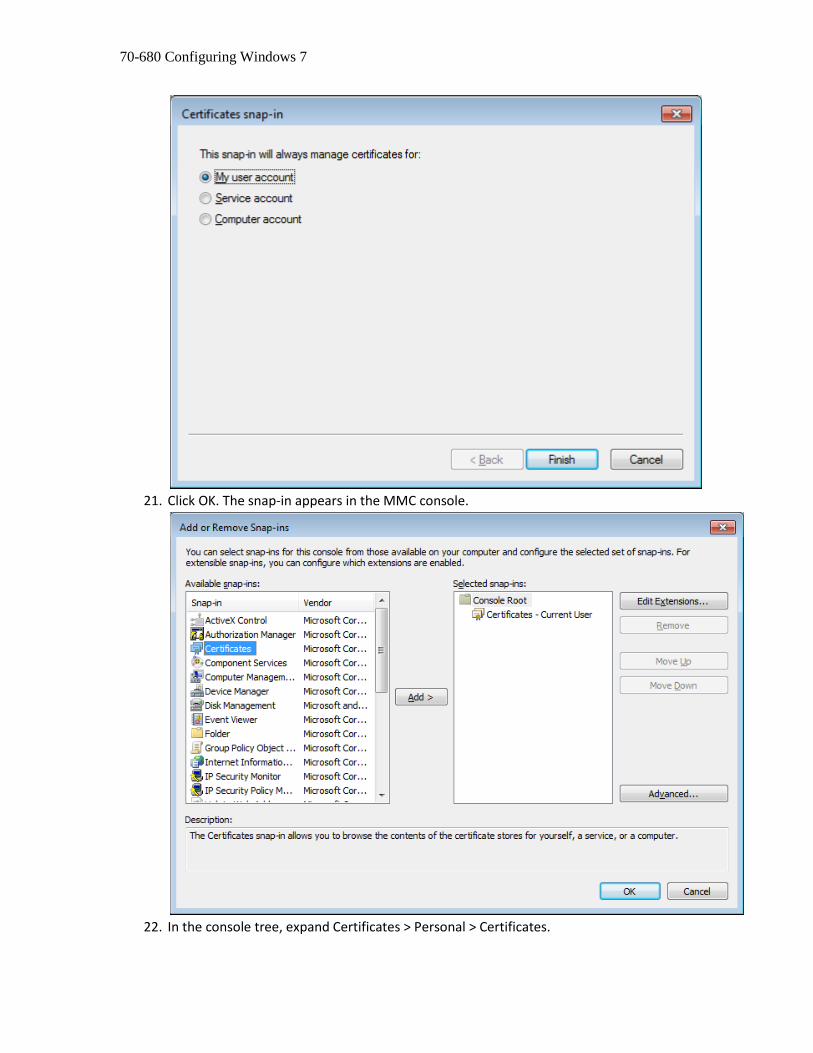
19. In the Available snap-ins list, select Certificates and click Add. The This snap-in will
always manage certificates for: dialog box appears.
20. Select My user account, and click Finish.
70-680 Configuring Windows 7
21. Click OK. The snap-in appears in the MMC console.
22. In the console tree, expand Certificates > Personal > Certificates.
Working with Firewalls, Encrypted File Systems (EFS) and User Account Control (UAC)
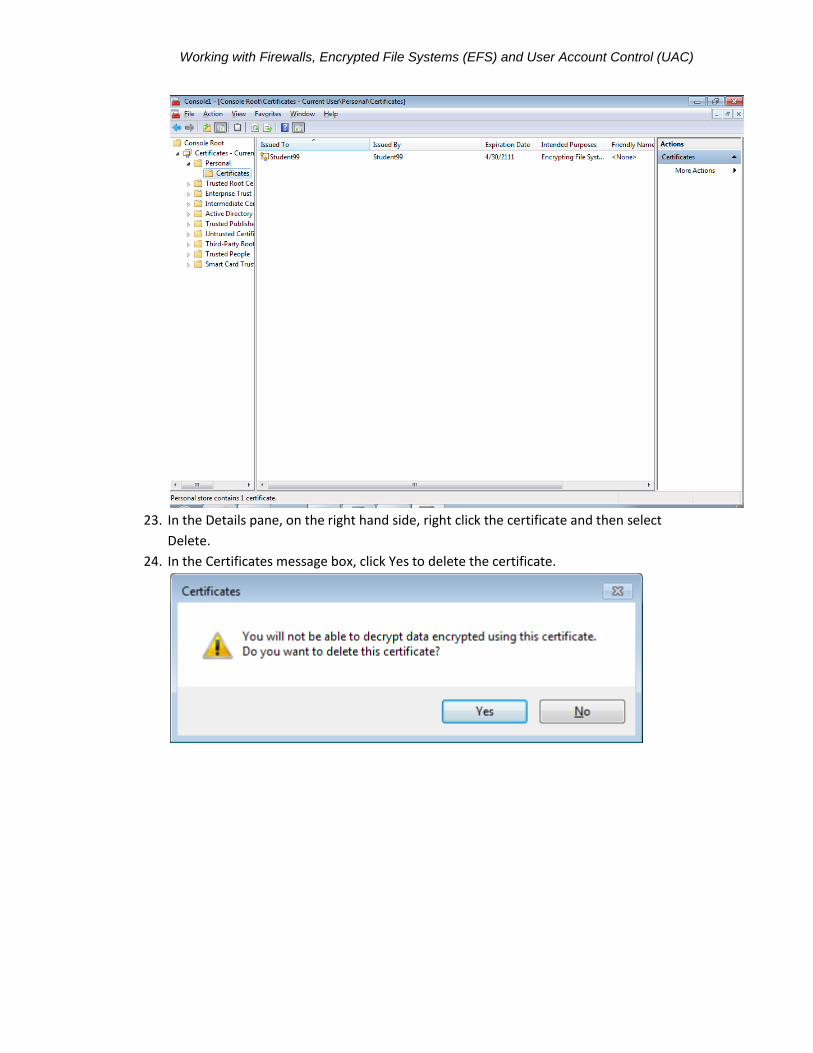
23. In the Details pane, on the right hand side, right click the certificate and then select
Delete.
24. In the Certificates message box, click Yes to delete the certificate.
70-680 Configuring Windows 7
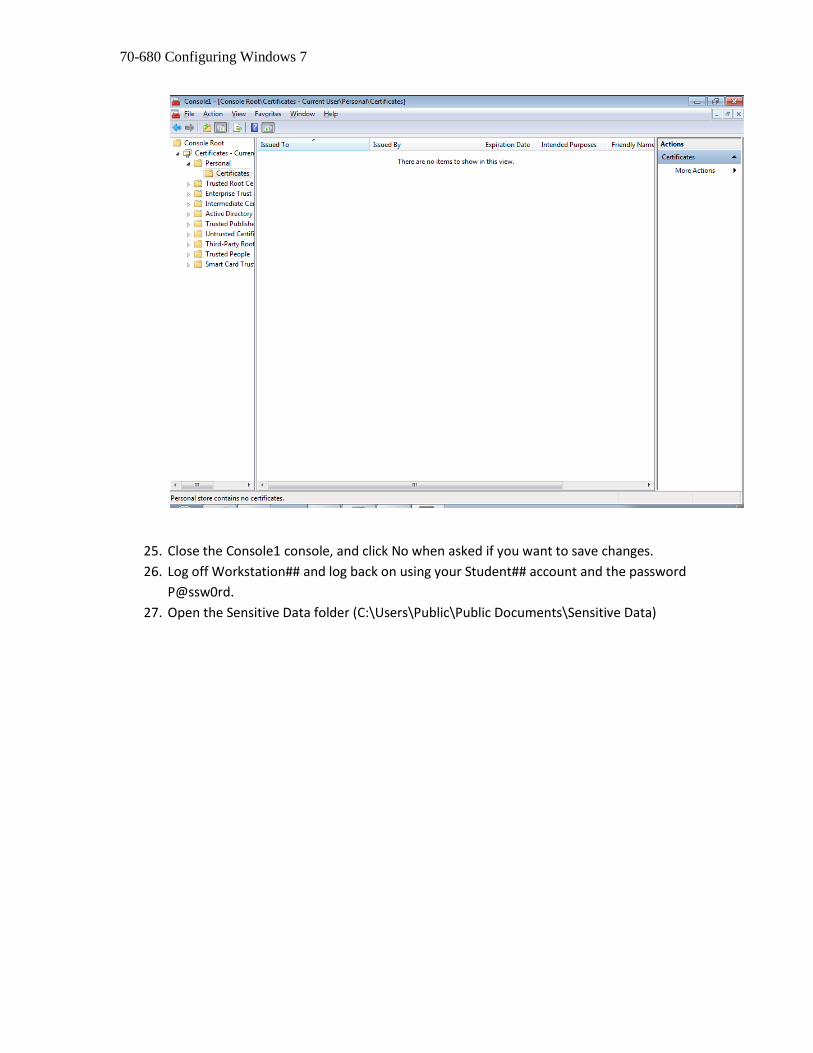
25. Close the Console1 console, and click No when asked if you want to save changes.
26. Log off Workstation## and log back on using your Student## account and the password
P@ssw0rd.
27. Open the Sensitive Data folder (C:\Users\Public\Public Documents\Sensitive Data)

Working with Firewalls, Encrypted File Systems (EFS) and User Account Control (UAC)
28. In the Sensitive Data folder, open Sensitive Text.
Question
25
What occurs when you try to open the Sensitive Text file?
Answer: Access is denied
29. Take a screen shot of the Sensitive Data folder showing the Sensitive Text document by
pressing Alt+ Prt Scr, and then paste the resulting image into the Lab05_worksheet file
in the page provided by pressing Ctrl + V.
30. Close all open windows and log off the computer.