Lab 3 Introduction to TinyOS and nesC How to debug programs at PC Examples –Blink Timer –Blink...
23
Lab 3 • Introduction to TinyOS and nesC • How to debug programs at PC • Examples – Blink Timer – Blink – Hellow World • Reference: www.tinyos.net/tinyo s-1.x/doc/tutorial/lesson1.html
-
Upload
tracy-thornton -
Category
Documents
-
view
221 -
download
1
Transcript of Lab 3 Introduction to TinyOS and nesC How to debug programs at PC Examples –Blink Timer –Blink...

Lab 3
• Introduction to TinyOS and nesC• How to debug programs at PC• Examples
– Blink Timer– Blink– Hellow World
• Reference: www.tinyos.net/tinyos-1.x/doc/tutorial/lesson1.html

TinyOS and nesC• The TinyOS system, libraries, and applications
are written in necC.• The nesC language is a new language for prog
ramming structured component-base application, and is intended for embedded systems.
• necC is a C-like syntax, but supports the TinyOS concurrency model, as well as mechanisms for structuring, naming, and linking together software components into robust network embedded systems.

nesC application
• Components– modules– configuration
• Interfaces– “provide” interfaces– “use” interfaces – commands– events
Components
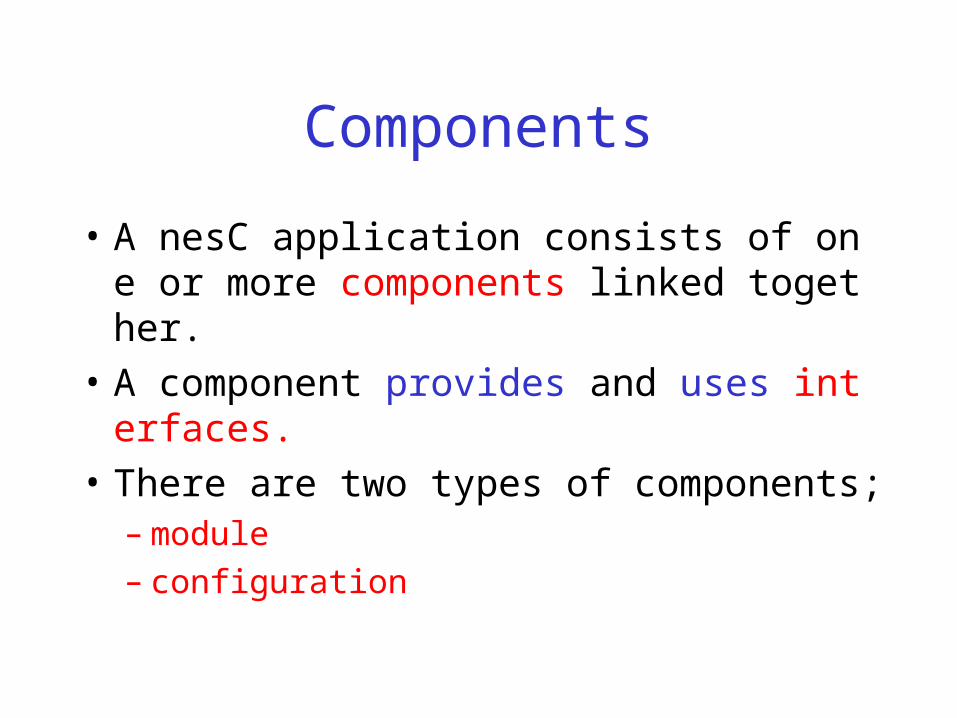
• A nesC application consists of one or more components linked together.
• A component provides and uses interfaces.
• There are two types of components;– module– configuration

module and configuration
• A module provides application code, implementing one or more interface.
• A configuration is used to assemble other components together, connecting interfaces used by components to interfaces provided by others, which is called wiring.
• Every nesC application is described by a top-level configuration that wires the components inside together.

Example application: Blink
• The application simply causes the red LED on the mote to turn and off at 1 Hz.
• …/apps/Blink• It consists of two components:
– a module: “BlinkM.nc”– a configuration: “Blink.nc” : top-level configu
ration

Blink.nc configuration• All application require a top-level
configuration, which is typically named after the application itself.Blink.nc configuration Blink {}implementation { components Main, BlinkM, SingleTimer, LedsC;
Main.StdControl -> BlinkM.StdControl; Main.StdControl -> SingleTimer.StdControl; BlinkM.Timer -> SingleTimer.Timer; BlinkM.Leds -> LedsC;}

Components and Interfaces of Blink Timer
Main
BlinkMLedsC
SingleTimer
StdControl
StdControl
Leds
Timer

Main component
• Main is a component that is executed first in an application. The Main.StdControl.init() command is the first command executed.
• StdControl is a common interface used to initialize and start components.
• tos/interfaces/StdControl.nc
StdControl.nc interface StdControl { command result_t init(); command result_t start(); command result_t stop();}
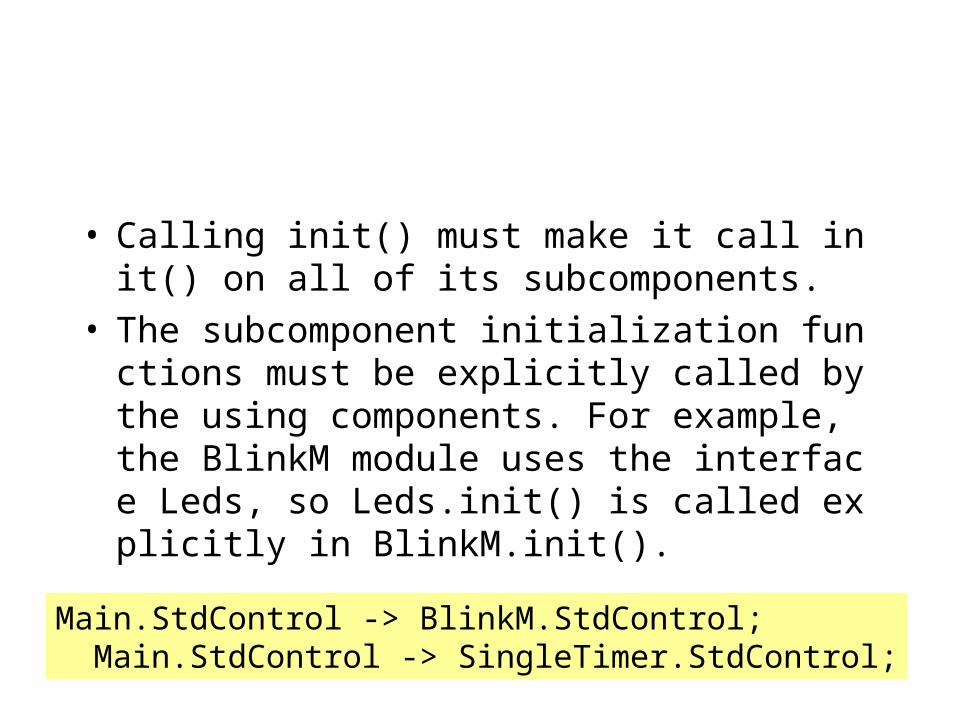
• Calling init() must make it call init() on all of its subcomponents.
• The subcomponent initialization functions must be explicitly called by the using components. For example, the BlinkM module uses the interface Leds, so Leds.init() is called explicitly in BlinkM.init().
Main.StdControl -> BlinkM.StdControl; Main.StdControl -> SingleTimer.StdControl;
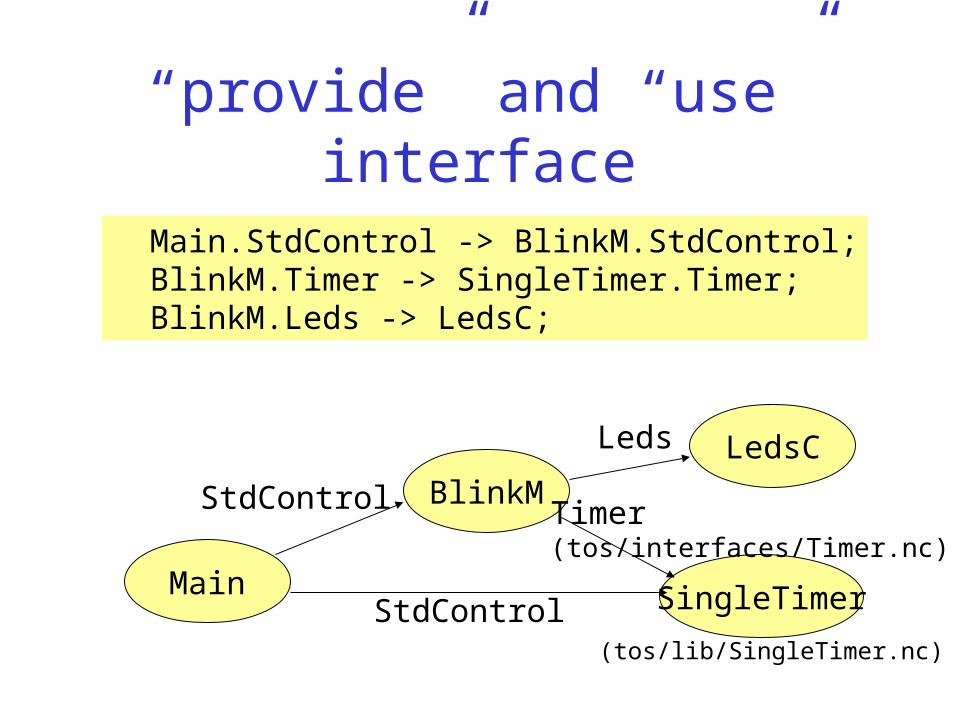
“provide” and “use” interface
Main
BlinkMLedsC
SingleTimer
StdControl
StdControl
Leds
Timer(tos/interfaces/Timer.nc)
Main.StdControl -> BlinkM.StdControl; BlinkM.Timer -> SingleTimer.Timer; BlinkM.Leds -> LedsC;
(tos/lib/SingleTimer.nc)

BlinkM interfaces
BlinkM
StdControl
Leds Timer
“BlinkM provides the Interface.”
“BlinkM uses the Interface.”

Blink module: BlinkM• BlinkM provides the interface StdControl.
– BlinkM implements the StdControl interface.• BlinkM uses the interfaces: Leds and Times.
– BlinkM may call any command declared in the interfaces it uses and must also implement any events declared in the interfaces.
BlinkM.nc module BlinkM { provides { interface StdControl; } uses { interface Timer; interface Leds; }}

implementation {
command result_t StdControl.init() { call Leds.init(); return SUCCESS; }
command result_t StdControl.start() { return call Timer.start(TIMER_REPEAT, 1000) ; }
command result_t StdControl.stop() { return call Timer.stop(); }
event result_t Timer.fired() { call Leds.redToggle(); return SUCCESS; }}

Leds interfaces• The Leds interface defines several commands:
– Leds.init()– Leds.redOn()– Leds.redOff()– Leds.redToggle()– Leds.greenOn()– Leds.greenOff()– Leds.greenToggle()– Leds.yellowOn()– Leds.yellowOff()– Leds.yellowToggle()
• Because BlinkM uses this inteface, it can invoke any of these commands.

Timer interface(1)
• Start() is used to specify the type of timer and the interval at which the timer is expired.– Type of timer: (TIMER_REPEAT,
TIMER_ONE_ONE_SHOT)
Timer.nc interface Timer { command result_t start(char type, uint32_t interval); command result_t stop(); event result_t fired();}
/tos/interfaces/Timer.nc

Timer interface(2)
• An event is a function that the implementation of an interface will signal when a certain event takes place.
• The fired() event is signaled when the specific interval has passed.
• A module that uses an interface must implement the events that this interface uses.
• An interface not only provides commands that can be called by users of the interface, but also signals events that call handlers in the user.

Program debugging: TOSSIM
• cd /opt/tinyos-1.x/tools/java/org/python
• make• cd ../apache• make

Program debugging
• Add the following line in the source code.– dbg(DBG_USR1, “data_event\n”);
• Compile the source code for PC.– make pc
• Execute on cygwin– export DBG=usr1– ./build/pc/main.exe 1

TOSSIM other options
• ./build/pc/main.exe –h

Tinyviz
• Simulate the execution of the application program on a graphic display.
• Type the following on cygwin– cd /opt/tinyos-1.x/apps/Oscilloscope– make clean– make pc– export DBG=led– $tinyviz –run $main 5

Example applications
• Blink– /opt/tinyos-1.x/contrib/zigbex/Blink.nc
• Helloworld– /opt/tinyos-1.x/contrib/zigbex/helloworld.n
c

Exercise
• Understand the code of the application Helloworld.
• Modify helloworldM.nc to display “hello world” only once.


![TinyOS: An Operating System for Sensor Networkspeople.eecs.berkeley.edu/~culler/papers/ai-tinyos.pdf · TinyOS is implemented in the NesC language [24], which sup-ports the TinyOS](https://static.fdocuments.us/doc/165x107/5fe140d691cb2f0f434188d7/tinyos-an-operating-system-for-sensor-cullerpapersai-tinyospdf-tinyos-is-implemented.jpg)