Lab 1: First Steps in C++ - Visual Studio - Swinburne · Lab 1: First Steps in C++ - Visual Studio...
16
Lab 1 Semester 1, 2011 Dr. Markus Lumpe 1 Lab 1: First Steps in C++ - Visual Studio First Step: The main function 1. We create a new Win32 Console Application named ‘FirstStep’: 2. We always visit the Application Settings! To keep things simple, we select Empty project. This way we create an empty project – we are in complete control!
Transcript of Lab 1: First Steps in C++ - Visual Studio - Swinburne · Lab 1: First Steps in C++ - Visual Studio...
Lab 1 Semester 1, 2011 Dr. Markus Lumpe
1
Lab 1: First Steps in C++ - Visual Studio
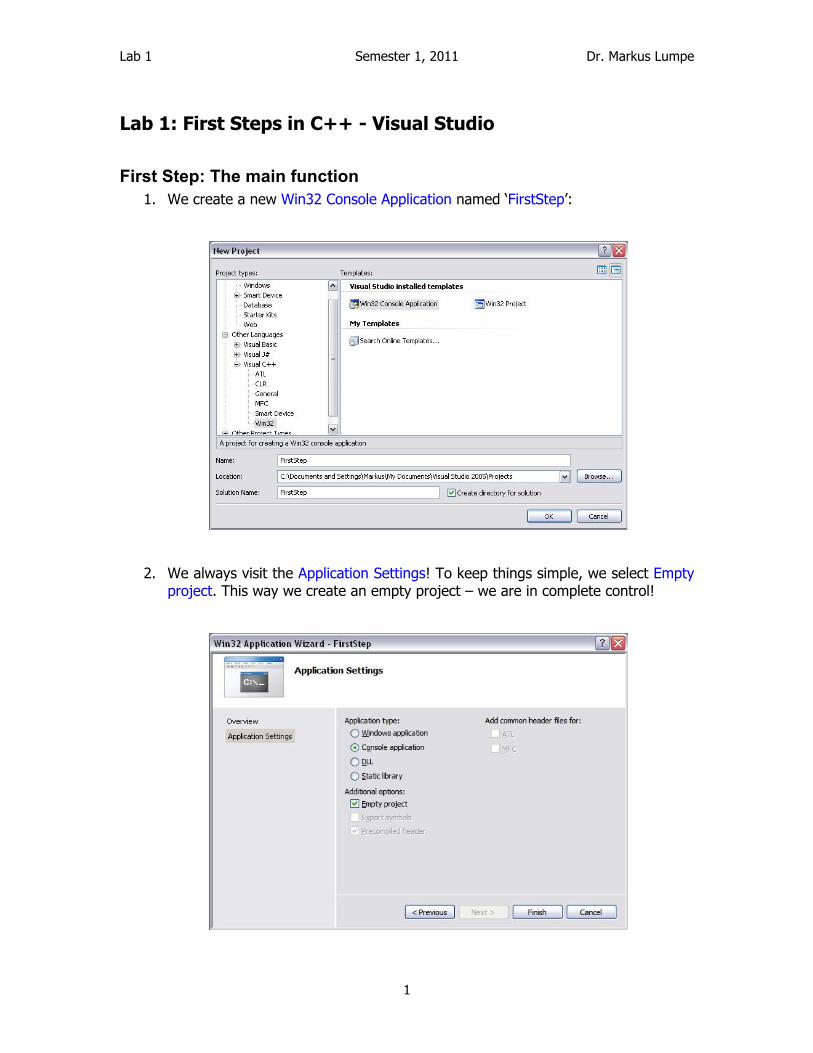
First Step: The main function 1. We create a new Win32 Console Application named ‘FirstStep’:
2. We always visit the Application Settings! To keep things simple, we select Empty project. This way we create an empty project – we are in complete control!
Lab 1 Semester 1, 2011 Dr. Markus Lumpe
2
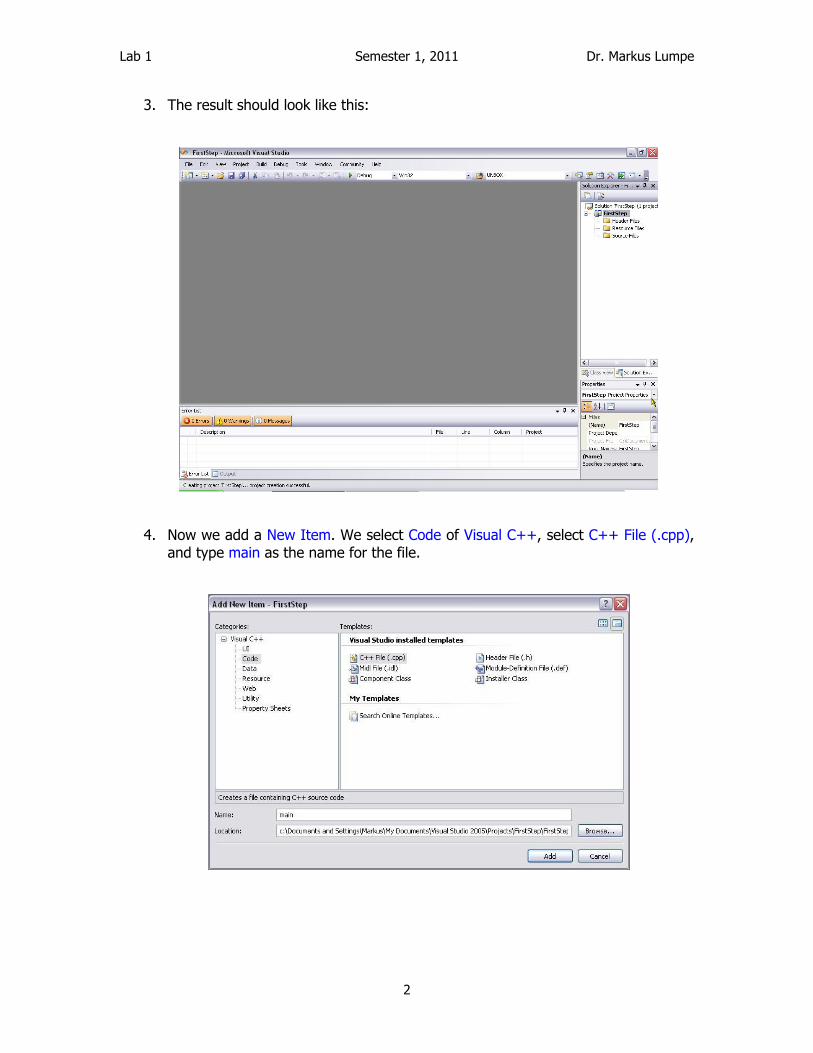
3. The result should look like this:
4. Now we add a New Item. We select Code of Visual C++, select C++ File (.cpp), and type main as the name for the file.

Lab 1 Semester 1, 2011 Dr. Markus Lumpe
3
5. Our first program:
We write:
#include <iostream> Include the definitions for console I/O. We are using two I/O values: cout (standard output) and endl (the environment-specific newline).
using namespace std; Tell C++ to look for all library names in namespace std.
int main()
{
cout << “Hello World!” << endl;
return 0;
}
Our program just prints the string “Hello World!” to the screen.
At the end of the main function we return the value 0 – success – to the operating system (i.e., Windows)

Lab 1 Semester 1, 2011 Dr. Markus Lumpe
4
6. We extend our main function to print the command line arguments to the screen. For this reason, we add int argc and char * argv[] as arguments to main. By convention, argc contains the number of arguments, that is the number of elements in argv. The parameter argv, on the other hand, contains an array of C-Strings (i.e., char arrays terminated with ‘\0’). The element at index 0 is always the name of the command. We use a simple for-loop to iterate over the argv-array and print each element in turn.

Lab 1 Semester 1, 2011 Dr. Markus Lumpe
5
7. We need to tell Visual Studio that we would like to attach some Command Arguments. In our example we write Hello World, that is, we define two arguments Hello and World. Application-specific setting can be applied in the Property Pages of the current project:
8. When we run FirstStep, then the result is as follows:
The program prints three lines, one for each argument. Remember, the first argument is always the command name. To see this screen in Visual Studio, you need to set a break point on the return statement. Otherwise, the program just runs and closes the console window immediately after the main functions terminates.
Lab 1 Semester 1, 2011 Dr. Markus Lumpe
6
Second Step: Hello World Console Application
Repeat 1-3 of First Step, but use ‘SecondStep’ as the project name.
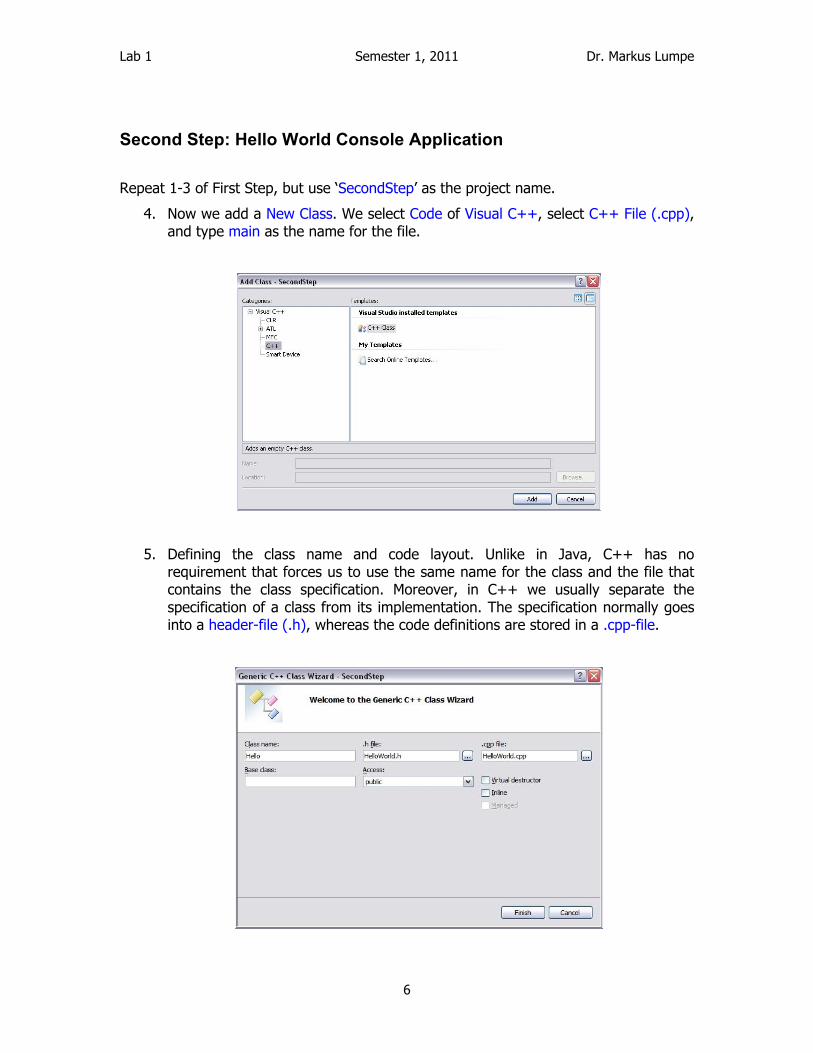
4. Now we add a New Class. We select Code of Visual C++, select C++ File (.cpp), and type main as the name for the file.
5. Defining the class name and code layout. Unlike in Java, C++ has no requirement that forces us to use the same name for the class and the file that contains the class specification. Moreover, in C++ we usually separate the specification of a class from its implementation. The specification normally goes into a header-file (.h), whereas the code definitions are stored in a .cpp-file.

Lab 1 Semester 1, 2011 Dr. Markus Lumpe
7
In this project we choose as class name “Hello” and as file name “HelloWorld” to signify the difference between Java and C++.
6. Class specification – HelloWorld.h:
Visual Studio generates the following skeleton for us:
#pragma once
class Hello
{
public:
Hello(void);
~Hello(void);
};
The first line tells the Visual Studio compiler to include the HelloWorld header-file only once. The include mechanism of C++ is based on source code inclusion, that is, the code is copied into the including compilation unit. To prevent that the same code is included twice, which would lead to a compilation error, the programmer is required to take the necessary steps. Visual Studio assists us in this matter by automatically generating the #pragma once statement at the start of each header file.
Visual Studio generates a default structure for classes that contains the specification of the default constructor (i.e., Hello(void);) and the object destructor (i.e., ~Hello(void);). We ignore the object destructor for the moment. Both the constructor and the destructor are public as they occur in the public region of the class specification. In C++, unlike in Java where visibility is an attribute of the declared member, visibility of declared members is arranged in regions. All public members follow the public: label. C++ supports private, protected, and public visibility.
To give our Hello class a specify function, we add the private instance variable fMessage of type std::string, change the constructor to accept a parameter aMessage of type std::string, and add a void Displyay() method. The type std::string is defined in the include file string. String is defined in namespace std. For this reason we write std::string. In header file we never use the using namespace declaration. Therefore, we need to refer to string by its fully qualified name std::string.
The result of our changes to HelloWorld.h is shown below:
Lab 1 Semester 1, 2011 Dr. Markus Lumpe
8
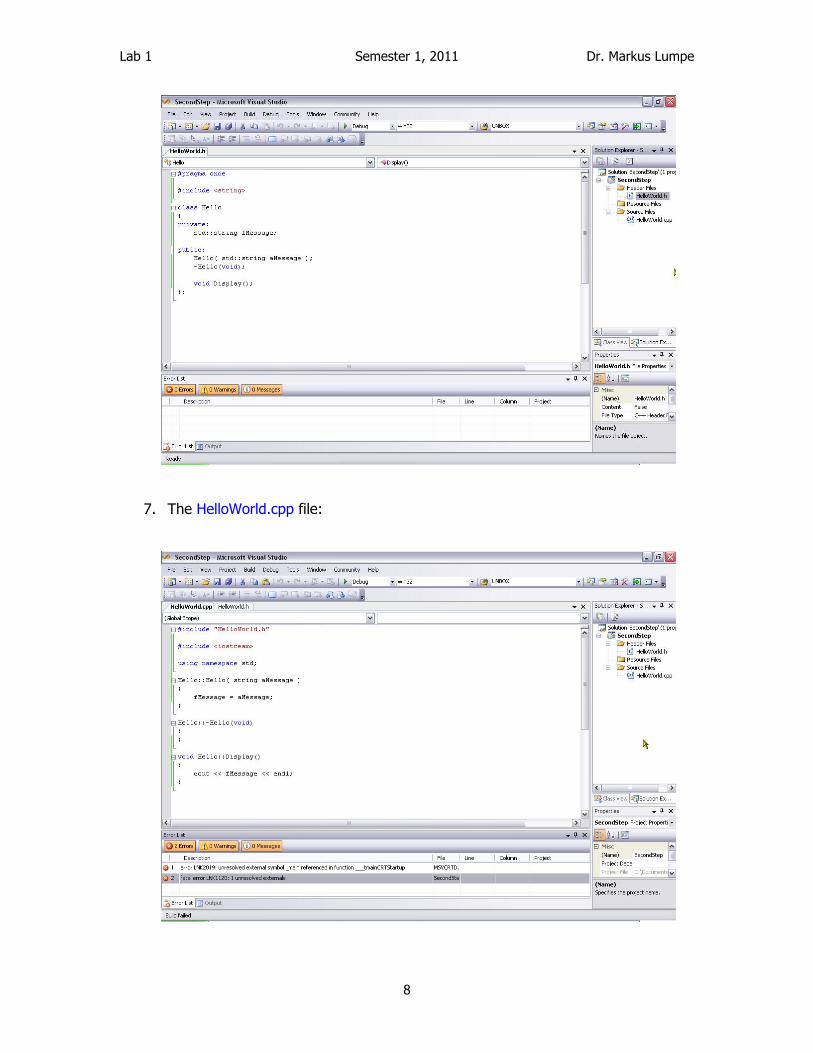
7. The HelloWorld.cpp file:
Lab 1 Semester 1, 2011 Dr. Markus Lumpe
9
In HelloWorld.cpp we define the behavior of class Hello, that is, we include “HelloWorld.h” and iostream, declare std as standard namespace for library lookup, and define the bodies of the constructor and the method Display. We do not change the destructor definition. When defining the member functions, the name of the member function always appears as fully qualified name. We write Hello::Hello for the constructor and Hello::Display for the Display method.
The program should compile, but since we have not yet defined a main function the compiler will report a linker error (unresolved externals).
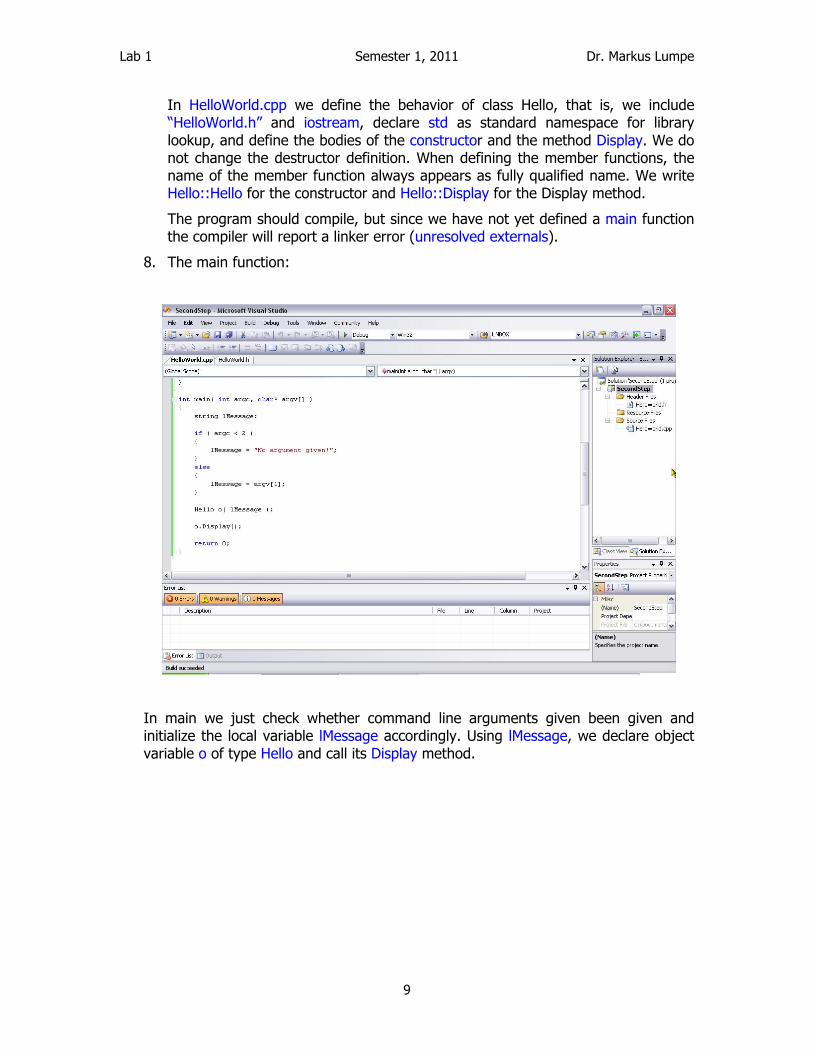
8. The main function:
In main we just check whether command line arguments given been given and initialize the local variable lMessage accordingly. Using lMessage, we declare object variable o of type Hello and call its Display method.

Lab 1 Semester 1, 2011 Dr. Markus Lumpe
10
Third Step: Hello World Class in Shared Library 1. We create a new Win32 Project named ‘ThirdStep’:
We cannot specify the project type yet. This is done in the next step.
2. Creating a DLL:
We select DLL as Application type and specify that we wish to start with an empty project as usual.
Lab 1 Semester 1, 2011 Dr. Markus Lumpe
11
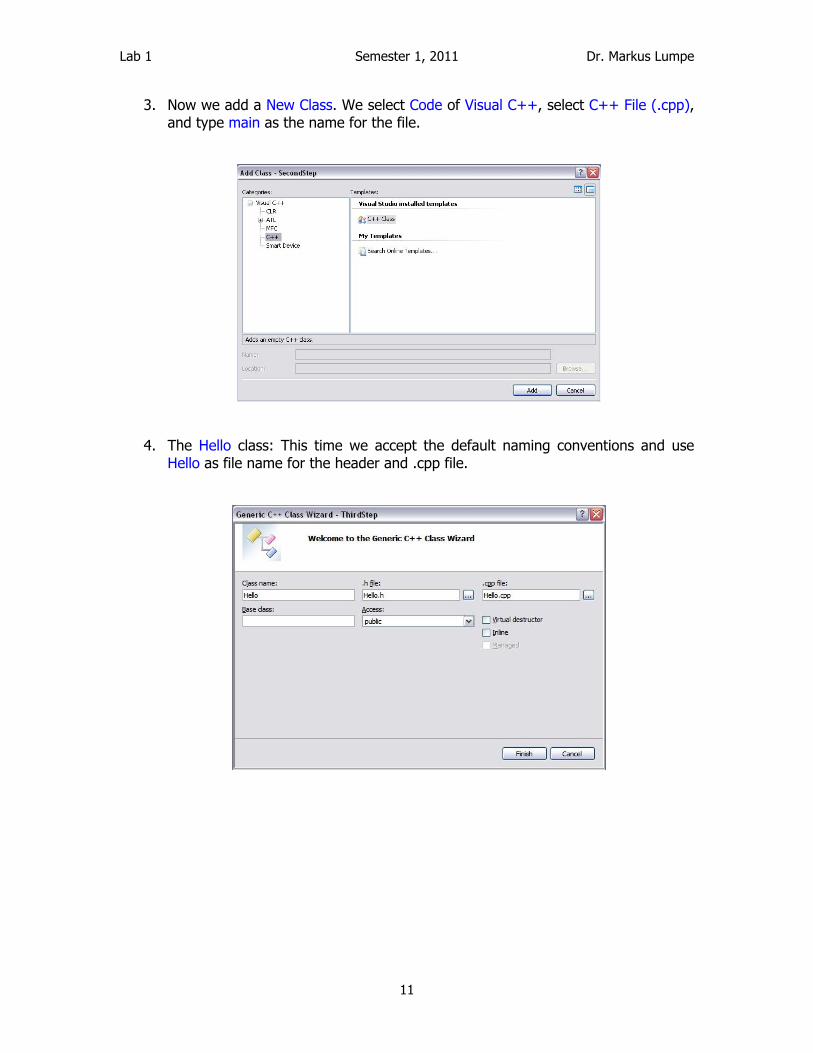
3. Now we add a New Class. We select Code of Visual C++, select C++ File (.cpp), and type main as the name for the file.
4. The Hello class: This time we accept the default naming conventions and use Hello as file name for the header and .cpp file.

Lab 1 Semester 1, 2011 Dr. Markus Lumpe
12
5. Changes to Hello.h:
We perform the same steps as in SecondStep/6. In addition, we need to add a Visual Studio-specific macro to the class definition of Hello that will enable us to export class Hello from a DLL and import its definitions in another program. This is a requirement of Visual Studio, not C++. The declaration _declspec(dllexport) tells the compiler to generate the appropriate code for a DLL export, whereas the declaration _declspec(dllimport) instructs the compiler to generate code to access DLL members. These declarations are enclosed in an #ifndef-#else-#endif proprocessor spefication. The name THIRDSTEP_EXPORTS is auto-generated by Visual Studio and enables us to distinguish between the construction of the DLL and the use of it. Note, Visual Studio uses syntax highlighting. So, within the DLL project _declspec(dllimport) appears gray telling us that this option is not active. The compiler substitutes the symbol HELLO_API with the corresponding DLL-specific declaration (i.e., _declspec(dllexport) in the DLL project).
6. Hello.cpp: We perform the same steps as in SecondStep/7.
The compilation of the DLL should succeed with no problems.

Lab 1 Semester 1, 2011 Dr. Markus Lumpe
13
7. A Console Application that uses the ThirdTest.dll.
We add a New Project to the current solution called main:
Again, we create an Empty project for a Console application:

Lab 1 Semester 1, 2011 Dr. Markus Lumpe
14
8. Now we add a New Item to the project main:
We select Visual C++/Code, C++ File (.cpp), and specify main as the name of the new item.
9. We define the main function as in SecondStep/8, but also add as first lines
#include “Hello.h”
#include <iostream>
using namespace std;
to include the definition for class Hello, import the definitions for cout and endl, and make std the default namespace for library lookup.
Unfortunately, the compilation of the main project will fail, as the compiler cannot find the Hello.h file. We need to tell Visual Studio where to local both the Hello.h and to which DLL we are referring.

Lab 1 Semester 1, 2011 Dr. Markus Lumpe
15
10. Additional Include Directories:
Lab 1 Semester 1, 2011 Dr. Markus Lumpe
16
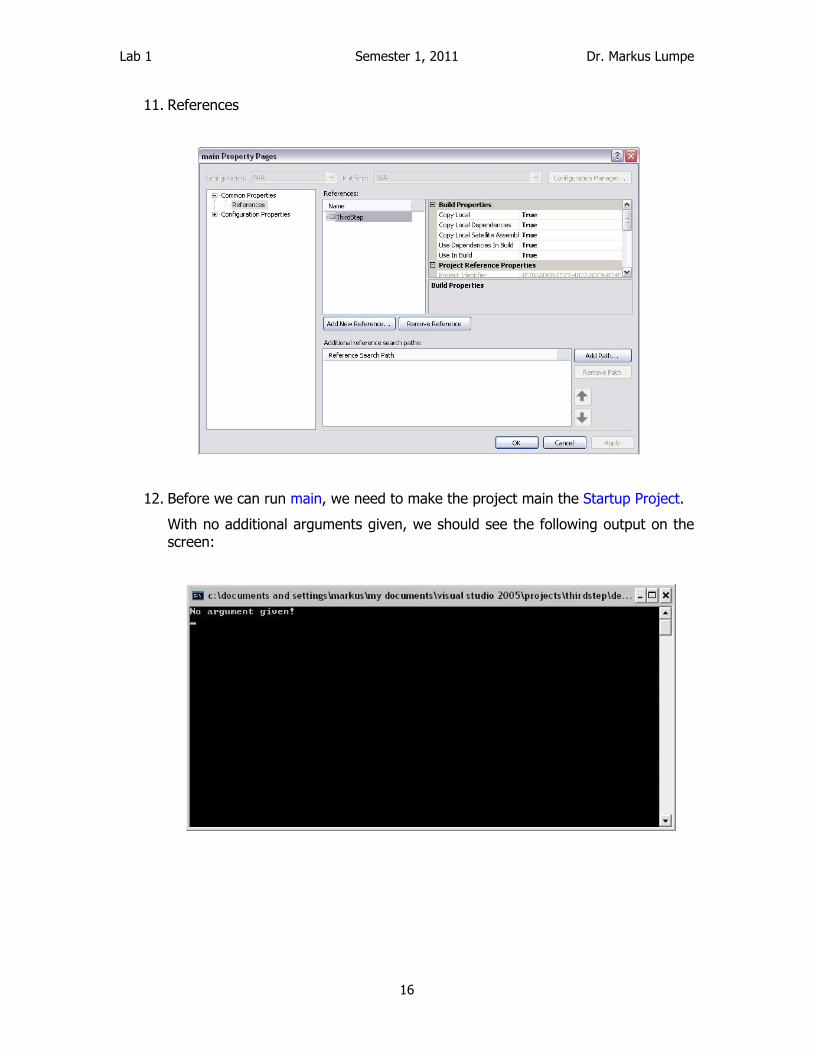
11. References
12. Before we can run main, we need to make the project main the Startup Project.
With no additional arguments given, we should see the following output on the screen: