LA FLEUR TILES QUILT IN BLUE/TAUPE · CX8602 ROYAL PROVENCIAL BLOOM 1/2 YARD BACKING OF YOUR CHOICE...
8
LA FLEUR TILES QUILT IN BLUE/TAUPE SIZE: 48”W x 48”H • LEVEL: CONFIDENT BEGINNER • PATTERN BY: DIANE NAGLE • PROVENCIAL FABRIC COLLECTION PATTERN AVAILABLE ON: MICHAELMILLERFABRICS.COM
Transcript of LA FLEUR TILES QUILT IN BLUE/TAUPE · CX8602 ROYAL PROVENCIAL BLOOM 1/2 YARD BACKING OF YOUR CHOICE...
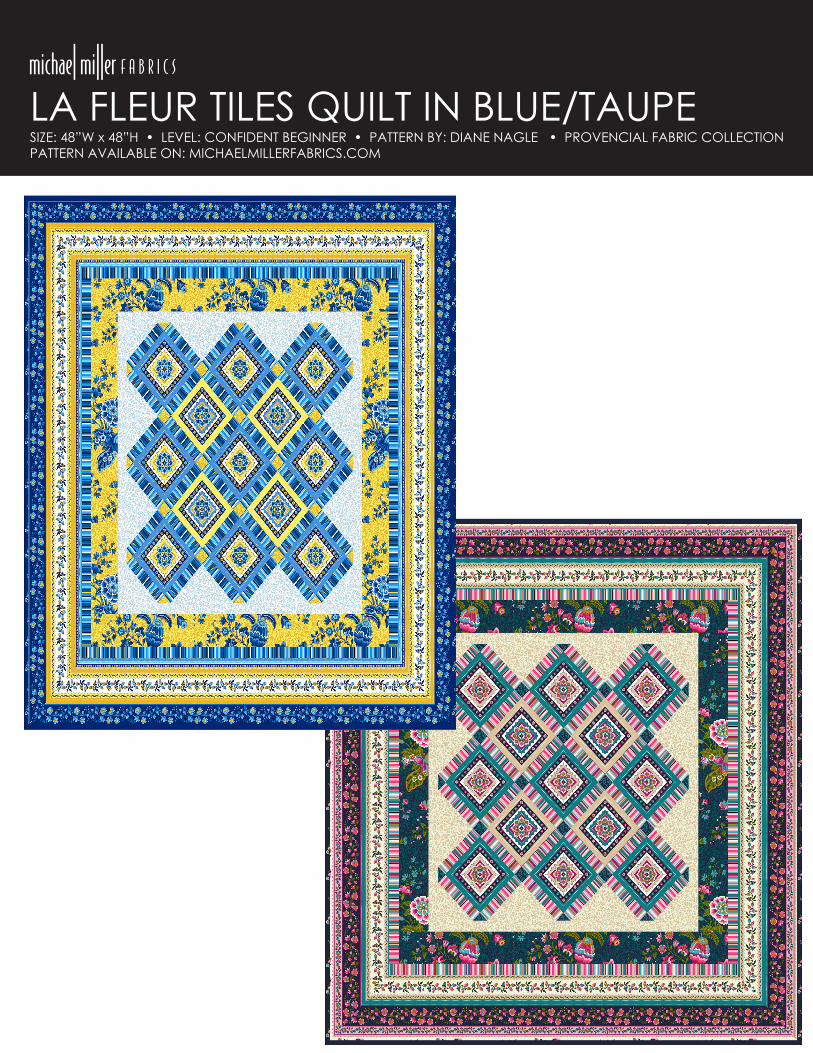
LA FLEUR TILES QUILT IN BLUE/TAUPESIZE: 48”W x 48”H • LEVEL: CONFIDENT BEGINNER • PATTERN BY: DIANE NAGLE • PROVENCIAL FABRIC COLLECTIONPATTERN AVAILABLE ON: MICHAELMILLERFABRICS.COM
LA FLEUR TILES QUILT
1
www.michaelmillerfabrics.com
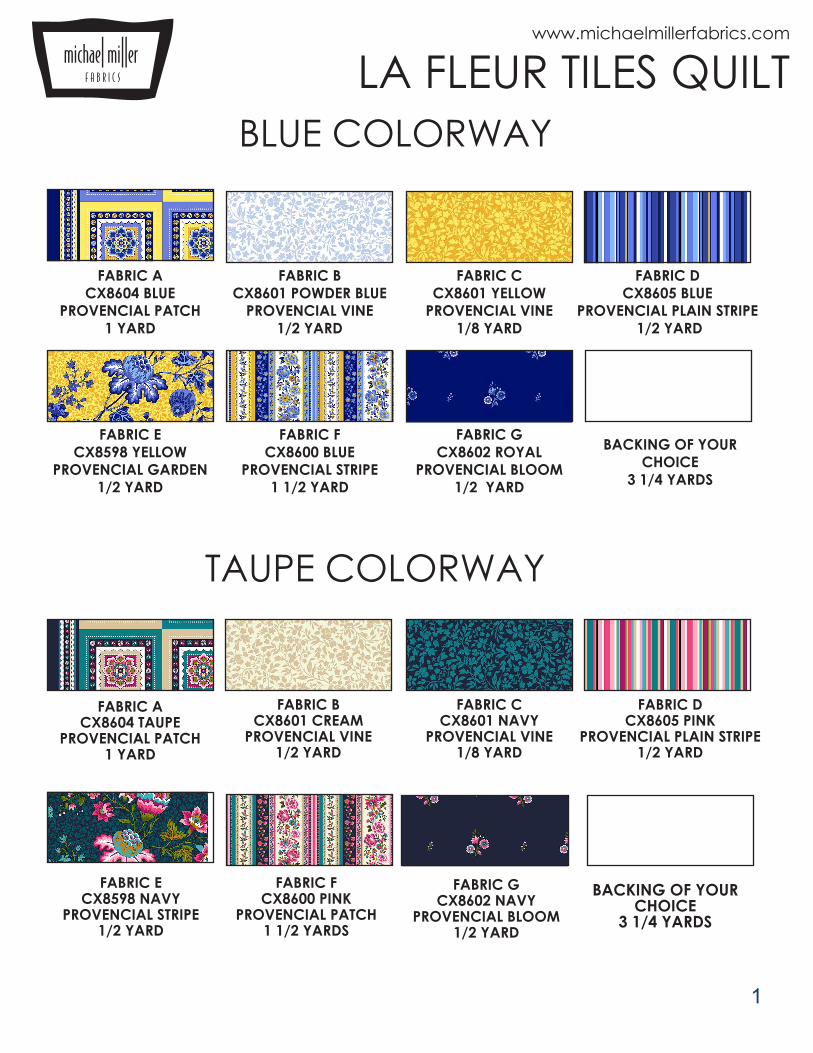
FABRIC ACX8604 BLUE
PROVENCIAL PATCH 1 YARD
FABRIC BCX8601 POWDER BLUE
PROVENCIAL VINE1/2 YARD
FABRIC CCX8601 YELLOW
PROVENCIAL VINE1/8 YARD
FABRIC DCX8605 BLUE
PROVENCIAL PLAIN STRIPE 1/2 YARD
FABRIC ECX8598 YELLOW
PROVENCIAL GARDEN1/2 YARD
FABRIC FCX8600 BLUE
PROVENCIAL STRIPE1 1/2 YARD
FABRIC GCX8602 ROYAL
PROVENCIAL BLOOM1/2 YARD
BACKING OF YOUR CHOICE
3 1/4 YARDS
BLUE COLORWAY
TAUPE COLORWAY
FABRIC ACX8604 TAUPE
PROVENCIAL PATCH 1 YARD
FABRIC CCX8601 NAVY
PROVENCIAL VINE 1/8 YARD
FABRIC BCX8601 CREAM
PROVENCIAL VINE 1/2 YARD
FABRIC DCX8605 PINK
PROVENCIAL PLAIN STRIPE 1/2 YARD
FABRIC ECX8598 NAVY
PROVENCIAL STRIPE 1/2 YARD
FABRIC FCX8600 PINK
PROVENCIAL PATCH1 1/2 YARDS
FABRIC GCX8602 NAVY
PROVENCIAL BLOOM1/2 YARD
BACKING OF YOUR CHOICE
3 1/4 YARDS

LA FLEUR TILES QUILT
2
www.michaelmillerfabrics.com
KEY CUTTING INSTRUCTIONS
A (4) Fussy cut 5 ½” squares of yellow panels(9) Fussy cut 5 ½” squares of blue panels (skip rows to allow for the seam allowance)
B(2) 8 ¼” squares, cut twice on diagonal.(4) strips 1 ½” x 42” subcut (2) 1 ½” x 26” strips and (2) 1 ½” x 28” strips.(2) 4 3/8” squares, cut once on diagonal.
C (3) 2 5/8” squares, cut twice on diagonal.(12) 1 ½” squares.
D (6) strips 1 ½” x 42”; subcut (36) 1 ½” x 5 ½” rectangles.(4) strips 1 ½” x 42”. Subcut (2) 1 ½” x 34” strips and (2) 1 ½” x 36” strips.
E (4) strips 3 ½” x 42” subcut (2) 3 ½” x 28” strips and (2) 3 ½” x 34” strips.
F Fussy cut (4) 6 ½” wide x 50” long on the lengthwise cream border (or other border sec-tion from this fabric if you prefer)
G (5) 2 ½” x 42” binding strips

LA FLEUR TILES QUILT
3
www.michaelmillerfabrics.com
Constructing Block AssemblyBlue Corner Block: 1. Sew the short side of a Fabric C 2 5/8” triangle to both short ends of a Fabric D 1 ½” x 5 ½” rectangle as shown to make Sashing Row 1. Make 2. Set aside.
Step 1 ->
2. Sew a Fabric D 1 ½ x 5 ½” strip to both sides of a Blue panel 5 ½” square. Square up to 7 ½” x 5 ½”. Make 9. Set aside.
Step 2 -> Make 9
3. Sew a Sashing Row 1 to the top of a block in Step 2 to complete a Corner Block. Square up to 7 ½” x 6 ½”. Make 2.
Step 3 -> Make 2
LA FLEUR TILES QUILT
4
www.michaelmillerfabrics.com
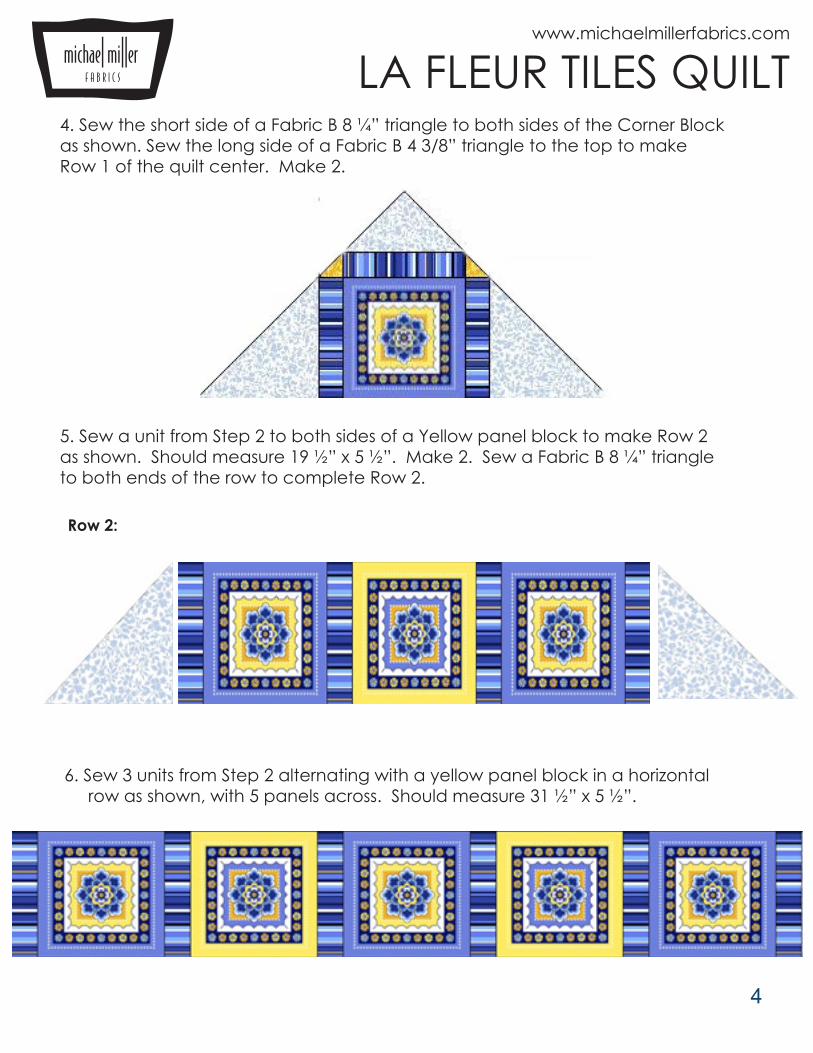
4. Sew the short side of a Fabric B 8 ¼” triangle to both sides of the Corner Block as shown. Sew the long side of a Fabric B 4 3/8” triangle to the top to make Row 1 of the quilt center. Make 2.
5. Sew a unit from Step 2 to both sides of a Yellow panel block to make Row 2 as shown. Should measure 19 ½” x 5 ½”. Make 2. Sew a Fabric B 8 ¼” triangle to both ends of the row to complete Row 2.
Row 2:
6. Sew 3 units from Step 2 alternating with a yellow panel block in a horizontal row as shown, with 5 panels across. Should measure 31 ½” x 5 ½”.
LA FLEUR TILES QUILT
5
www.michaelmillerfabrics.com
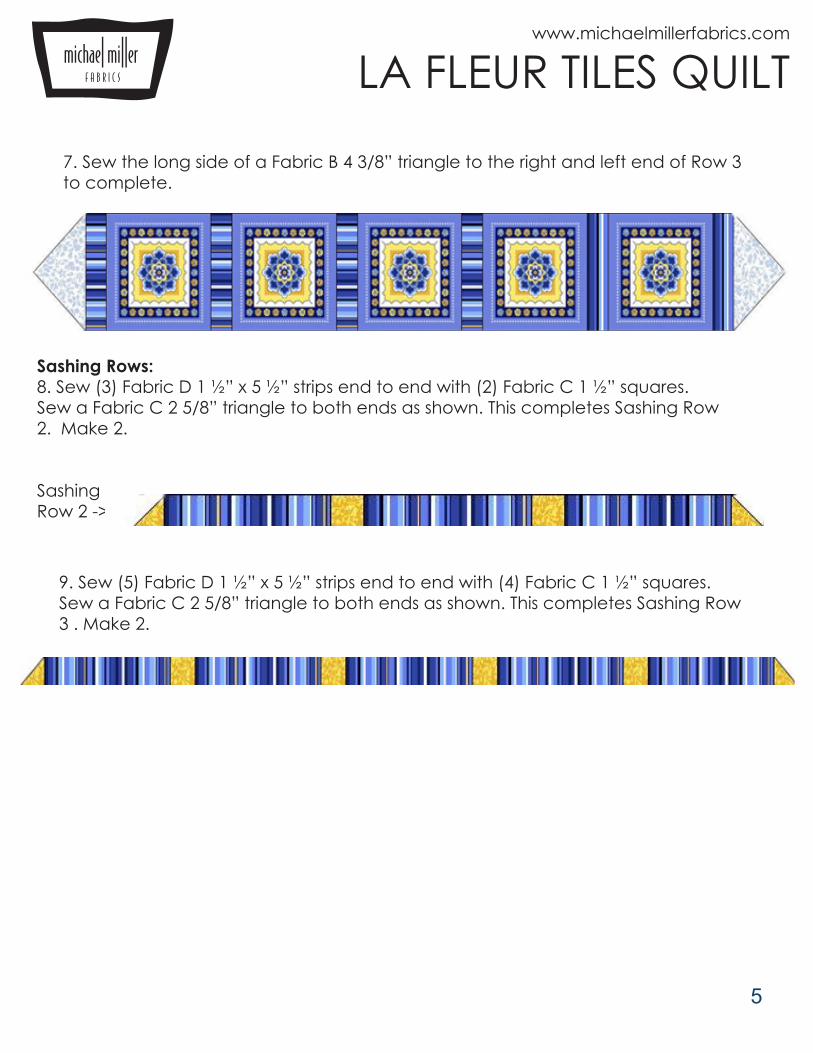
Sashing Rows: 8. Sew (3) Fabric D 1 ½” x 5 ½” strips end to end with (2) Fabric C 1 ½” squares. Sew a Fabric C 2 5/8” triangle to both ends as shown. This completes Sashing Row 2. Make 2.
Sashing Row 2 ->
7. Sew the long side of a Fabric B 4 3/8” triangle to the right and left end of Row 3 to complete.
9. Sew (5) Fabric D 1 ½” x 5 ½” strips end to end with (4) Fabric C 1 ½” squares. Sew a Fabric C 2 5/8” triangle to both ends as shown. This completes Sashing Row 3 . Make 2.

LA FLEUR TILES QUILT
6
www.michaelmillerfabrics.com
Assembly of Quilt Center 10. Working from top to bottom, sew the quilt rows and in between sashing rows as follows (Since the blocks are on point, your quilt center will take a diamond shape as we sew the rows together). 11. Sew a Sashing Row 2 to the bottom of Row 1 from Step 4.
12. Sew quilt Row 2 to the bottom of the Sashing Row 2.
13. Sew a Sashing Row 3 to the bottom of the quilt.
14. Sew Row 3 to the bottom of the quilt. 15. Rotate and sew the remaining Sashing Row 3 to the bottom of Row 3.
16. Rotate and sew the remaining Row 2 to the bottom of the quilt. 17. Rotate and sew the remaining Sashing Row 2 to the bottom of Row 2. 18. Sew the remaining Row 1 to the bottom of the quilt to complete the quilt center. See Diagram on page 7.
Inner border 19. Sew a Fabric B 1 ½” x 26” strip to both sides of the quilt center. Sew the Fabric B 1 ½” x 28” strips to the top and bottom of the quilt.
Border 2: 20. Sew a Fabric E 3 ½” x 28” strip to the sides of the quilt. Sew a Fabric E 3 ½” x 34” strip to the top and bottom of the quilt.
Border 3: 21. Sew a Fabric D 1 ½” x 34” strip to both sides of the quilt. Sew a Fabric D 1 ½” x 36” strip to the top and bottom of the quilt.
Outer Border: Fold each Fabric F border strip in half lengthwise and mark with a pin. Fold the sides of the quilt center in half and mark with a pin. Match up the pinned centers on all four sides and stitch to within ¼” from each corner. Miter the cornerstofinish. Binding: 1. Layer the quilt with backing and batting. Quilt as desired. Attach Fabric G 2½”bindingstripstofinish.

LA FLEUR TILES QUILT
7
www.michaelmillerfabrics.com
Quilt Center Row and Sashing Assembly Diagram. Steps 11-18.
Row 1→
← Row 2
Sashing Row 2 →
Row 2 → ←Row 1
SashingRow 3 →
Row 3 →
Sashing Row 3 ↑ Sashing Row 2 ↑