Knot Working No
9
Knotworking Making a Knot in Adobe Illustrator 7.0 Making intricate knotwork isn't too hard in a vector drawing package like Adobe Illustrator 7. On the other hand, it isn't the easiest thing to discover on one's own. Here's my method. Note: this method works in Illustrator 7.0 but not later versions. I don't have access to a later version, hence cannot update this tutorial or answer questions about creating knotwork using later versions of Illustrator. 1. Draw the knot Using the pen tool, draw the knot's lines. Don't worry about crossings yet. Just draw each line that makes up the knot. For this step, I usually have the grid turned on. This helps me keep each part properly aligned. 2. Set the line width Now set the width of your line(s) using the Stroke palette's weight box. This is a critical step, and it takes some practice to do properly. The width should be wider than the desired width of the lines of the finished
-
Upload
joana-pinheiro -
Category
Documents
-
view
219 -
download
0
Transcript of Knot Working No

8/7/2019 Knot Working No
http://slidepdf.com/reader/full/knot-working-no 1/9
Knotworking
Making a Knot in Adobe Illustrator 7.0
Making intricate knotwork isn't too hard in a vector drawing package like Adobe Illustrator 7. On the other hand, it isn't the easiest thing to discover on one's own. Here's my method.
Note: this method works in Illustrator 7.0 but not later versions. I don't have access to a later version, hence cannot update this tutorial or answer questions about creating knotwork using
later versions of Illustrator.
1. Draw the knot
Using the pen tool, draw the knot's lines. Don't worry about crossings yet. Just draw each line thatmakes up the knot.
For this step, I usually have the grid turned on. This helps me keep each part properly aligned.
2. Set the line width
Now set the width of your line(s) using the Stroke
palette's weight box. This is a critical step, and it takessome practice to do properly. The width should bewider than the desired width of the lines of the finished

8/7/2019 Knot Working No
http://slidepdf.com/reader/full/knot-working-no 2/9
knot. If you want a knot to have very obvious crossings, use a higher weight. If you're creating anoutlined knot, use a higher weight if you want a heavier outline.
(Precisely, the weight you should enter = the weight of the line you want in the finished knot + theweight of the outline.)
3. Outline the knot
Convert the line to an outline using Object/Path/Outline Path. This will create an outline of
what you've drawn. Note that where lines cross, the intersections are visible as diamonds.

8/7/2019 Knot Working No
http://slidepdf.com/reader/full/knot-working-no 3/9
4. Divide the outline
Right now, the outline is all one big object. We want to split it into its separate pieces. To do that,use the Object/Pathfinder/Divide command. After the command is done, the intersections
are now separate pieces and have their own control points.
After you divide, the resulting pieces are grouped. Ungroup them with Object/Ungroup.

8/7/2019 Knot Working No
http://slidepdf.com/reader/full/knot-working-no 4/9
At this point, set everything's stroke and fill to black outline, white fill. Selecteverything, click the little white & black squares on the toolbar (in the lower left corner of the image to the right), and set the stroke weight to some non-zero value.
5. Dealing with center pieces
When the outline was created, Illustrator also made pieces out of the all enclosed spaces (greenin the image below). You can do two things with them: get rid of them, or set them aside for uselater. I do the latter. You can come up with some nice gradient effects by using them. If you wantto keep them, you can select and hide them (Object/Hide Selection), lock them
(Object/Hide Selection), or move them (Object/Transform/Move). I usually group
them, then move them by a nice round number so I can easily move them back later.

8/7/2019 Knot Working No
http://slidepdf.com/reader/full/knot-working-no 5/9
6. Unite pieces
Now for the long part. To create the crossings, you have to join pieces together. There are twotechniques you'll need to learn. Which one you use depends on whether the line is directlycrossing itself, like in the bottom twist of the example knot. It may look simpler, but actuallyrequires a lot more work. The top part of the knot is easier to do, so we'll start with that.
1. Object/Pathfinder/Unite
Use this when a path doesn't cross itself directly. Select three consecutive pieces, thenunite them. (PC tip: Ctrl-4 repeats the last Pathfinder operation.) For most knots, you
can just pick a line and follow it. Alternate uniting the next three pieces along the line,then the three pieces that cross the line. (In the picture, I've filled the pieces to unite withdifferent colors so they'll stand out better. If you follow the line from the lower yellow endupward, note the row/crossing/row pattern of yellow, red, orange.)

8/7/2019 Knot Working No
http://slidepdf.com/reader/full/knot-working-no 6/9
2. Object/Group, then Object/Compound Paths/Make
When a path crosses itself (in a twist), the situation is more complex. If you try to unitethe pieces, the entire loop will become one piece since both ends of the loop abut thecrossing.
Oops - mistake!
This is not what we want. If it looks like the above, undo it immediately.

8/7/2019 Knot Working No
http://slidepdf.com/reader/full/knot-working-no 7/9
Instead of uniting the pieces, we're going to join them the hard way. The trick is to cut aline using the scissors, then to remove what's left. Here is how it looks before you start.
First, unite the two non-loop segments A and B. Now we have to remove the short linebetween B and C. Select either of the two pieces of the loop. Select the scissors tool,then click on the line. One of two things will happen: part will disappear, or a new point
will appear on it. The rest will be selected. Hit the delete key (or use Edit/Cut) toremove the selected bits. The line will look like it's still there, but it is gone. What you'renow seeing is the edge of the other piece we want to join.
8/7/2019 Knot Working No
http://slidepdf.com/reader/full/knot-working-no 8/9
Select the other piece and repeat the process. The pieces will now look like they'rejoined, but they're not really. Group them and make them into a compound path.
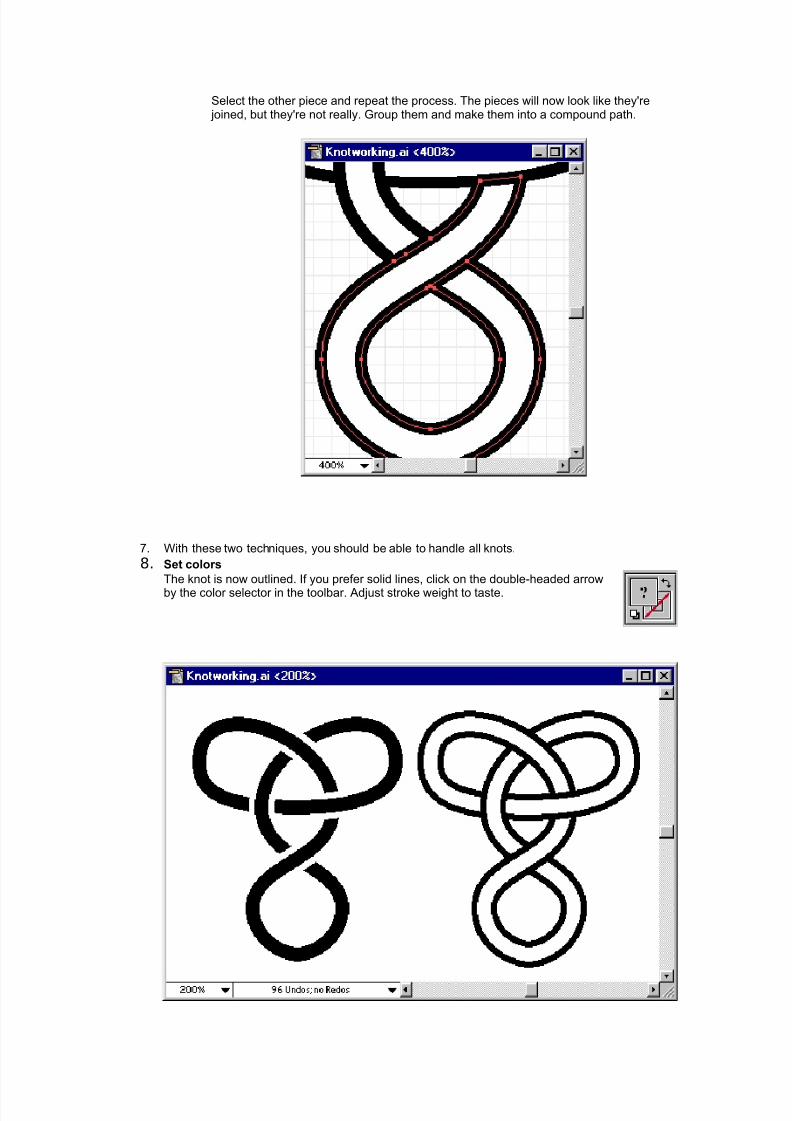
7. With these two techniques, you should be able to handle all knots.
8. Set colors
The knot is now outlined. If you prefer solid lines, click on the double-headed arrow
by the color selector in the toolbar. Adjust stroke weight to taste.

8/7/2019 Knot Working No
http://slidepdf.com/reader/full/knot-working-no 9/9
If the knot is made of multiple lines, try selecting all the segments of a line, grouping them, andthen setting a color.
Gradients can also create some nice effects. Try setting a line to a gradient fill. Then try making acompound path from the line's pieces and filling with a gradient again.
9. Group the result
Finally, select everything and group it. Now you have a knot that's one complete object.
Don't forget to save your work